canDash (Implicit)


The ability to use the dash button to gain run speed.
Dev note: This is ability is very simple, but it is useful to model since dashing may not be possible in some contexts, such as while carrying a blue suit.
Strats ()
From: 1
Top Left Door
To: 4
Top Junction (Right of Spikes)
Requires: "canUseIFrames"
"h_pauseAbuseMinimalReserveRefill"
{
"or": [
"canDash",
{
"and": [
"h_pauseAbuseMinimalReserveRefill",
{
"or": [
{
"and": [
{
"tech": "canHorizontalDamageBoost"
},
"h_complexToCarryFlashSuit"
]
},
"h_pauseAbuseMinimalReserveRefill"
]
}
]
}
]
} |
From: 1
Top Left Door
To: 4
Top Junction (Right of Spikes)
Run and jump into an airball, pressing pause just as Samus hits the ceiling, in order to unequip Spring Ball to reset fall speed. Entrance condition: {
"comeInRunning": {
"speedBooster": "yes",
"minTiles": 28
}
}Requires: "h_speedJump" "canTrickyJump" "canLateralMidAirMorph" "canSpringFling" Dev note: This can be done with 26 tiles of other-room runway, but it would probably require a higher movement tech. |
From: 1
Top Left Door
To: 4
Top Junction (Right of Spikes)

Requires: "canDash"
{
"spikeHits": 1
}
{
"or": [
"canUseIFrames",
{
"spikeHits": 1
}
]
} |
From: 1
Top Left Door
To: 4
Top Junction (Right of Spikes)
Requires: "h_storedSpark"
"canDash"
{
"shinespark": {
"frames": 41,
"excessFrames": 6
}
} |
From: 1
Top Left Door
To: 6
Right of Morph Tunnel with Temporary Blue

Use Springball on the spikes to cross the room with a Speedball. Then bounce into the Morph tunnel and use Springball to bounce all of the way through. It can help to unmorph before the Morph tunnel and use temporary blue to start the bounce into the tunnel. Entrance condition: {
"comeInGettingBlueSpeed": {
"length": 5,
"openEnd": 1,
"minExtraRunSpeed": "$2.0",
"maxExtraRunSpeed": "$3.F"
}
}Requires: "h_blueJump"
"canTrickySpringBallBounce"
{
"or": [
"canInsaneJump",
"canChainTemporaryBlue"
]
}
{
"spikeHits": 1
}Dev note: Higher and lower run speeds can also work but may need to jump earlier or take additional spike hits. |
|

Charge a Shinespark running left, then get blue speed by running back to the right to jump through the Boyons. Requires: "canCarefulJump"
"canShinechargeMovementComplex"
{
"getBlueSpeed": {
"usedTiles": 34,
"openEnd": 0
}
}
"h_blueJump"
{
"canShineCharge": {
"usedTiles": 34,
"openEnd": 0
}
}
{
"shinespark": {
"frames": 128,
"excessFrames": 6
}
}Dev note: The out-of-order requirements are to work around the tests' assumption that a getBlueSpeed would lose the shinecharge. |
|

Wall jump up 5 times, placing a Power Bomb precisely in the top right corner to overload PLMs with as few Power Bombs as possible. This only works in direct G-mode with the item still uncollected. Entrance condition: {
"comeInWithGMode": {
"mode": "direct",
"morphed": false
}
}Requires: "canPowerBombItemOverloadPLMs"
{
"notable": "G-Mode Up with Power Bombs"
}
{
"itemNotCollectedAtNode": 3
}
"canConsecutiveWallJump"
"Morph"
{
"or": [
"canRiskPermanentLossOfAccess",
{
"and": [
"canComplexGMode",
"canLongXRayClimb",
"canBeVeryPatient"
]
}
]
}
{
"ammo": {
"type": "PowerBomb",
"count": 5
}
}
"canBePatient"
{
"or": [
"Ice",
"canTrickyDodgeEnemies",
"ScrewAttack",
{
"and": [
"h_getBlueSpeedMaxRunway",
"h_blueJump"
]
},
{
"enemyKill": {
"enemies": [
[
"Boyon",
"Boyon",
"Boyon",
"Boyon"
]
],
"excludedWeapons": [
"Bombs"
]
}
},
{
"enemyDamage": {
"enemy": "Boyon",
"type": "contact",
"hits": 1
}
},
{
"and": [
"canBeVeryPatient",
"h_useMorphBombs"
]
}
]
}Dev note: Using this strat doesn't have canRiskPermanentLossOfAccess if the player could x-ray climb instead: this requires direct G-mode and Samus can freely doorstuck here, and there is no benefit to going to the item instead of the top left door, unless the item is there. FIXME: Placing the Power Bombs lower, on the magic tile, could overload PLMs with fewer, likely with as low as 2 Power Bombs. |
From: 2
Bottom Left Door
To: 5
Bottom Junction (Right of Boyons)
Shinespark up to the item, touch it, and return through the speed block that is now air. Exit G-mode below to collect the item. Entrance condition: {
"comeInWithGMode": {
"mode": "direct",
"morphed": false
}
}Requires: "canComplexGMode"
"canRemoteAcquire"
{
"or": [
{
"and": [
"canTrivialUseFrozenEnemies",
"h_shinechargeMaxRunway"
]
},
{
"and": [
"canShinechargeMovementComplex",
{
"getBlueSpeed": {
"usedTiles": 34,
"openEnd": 0
}
},
"h_blueJump",
{
"canShineCharge": {
"usedTiles": 34,
"openEnd": 0
}
}
]
},
{
"and": [
{
"canShineCharge": {
"usedTiles": 25,
"openEnd": 2
}
},
{
"enemyKill": {
"enemies": [
[
"Boyon",
"Boyon",
"Boyon",
"Boyon"
]
],
"excludedWeapons": [
"Bombs"
]
}
}
]
},
{
"blueSuitShinecharge": {}
},
{
"and": [
"canInsaneJump",
{
"canShineCharge": {
"usedTiles": 14,
"openEnd": 0
}
}
]
},
{
"and": [
"canInsaneJump",
{
"canShineCharge": {
"usedTiles": 14,
"openEnd": 1
}
},
{
"enemyKill": {
"enemies": [
[
"Boyon"
]
]
}
}
]
}
]
}
{
"shinespark": {
"frames": 121,
"excessFrames": 5
}
}Collects items: 3 Dev note: The shinespark frames could be reduced with more items or tech, but in direct G-mode, Samus will be at low Energy and need an energy free shinespark. The out-of-order requirements in the blue jump case are to work around the tests' assumption that a getBlueSpeed would lose the shinecharge. |
From: 2
Bottom Left Door
To: 5
Bottom Junction (Right of Boyons)
Jump at the last tile to make it through all of the Boyons. Requires: "canDash"
"ScrewAttack"
{
"or": [
"canCarefulJump",
"SpaceJump",
"h_speedJump"
]
} |
From: 4
Top Junction (Right of Spikes)
To: 1
Top Left Door


Requires: "canUseIFrames"
"h_pauseAbuseMinimalReserveRefill"
{
"or": [
"canDash",
{
"and": [
"h_pauseAbuseMinimalReserveRefill",
{
"or": [
{
"and": [
{
"tech": "canHorizontalDamageBoost"
},
"h_complexToCarryBlueSuit"
]
},
"h_pauseAbuseMinimalReserveRefill"
]
}
]
}
]
} |
From: 4
Top Junction (Right of Spikes)
To: 1
Top Left Door
Requires: "canDash"
{
"spikeHits": 1
}
{
"or": [
"canUseIFrames",
{
"spikeHits": 1
}
]
} |
From: 4
Top Junction (Right of Spikes)
To: 1
Top Left Door
Requires: "h_storedSpark"
"canDash"
{
"or": [
{
"shinespark": {
"frames": 44,
"excessFrames": 7
}
},
{
"and": [
"canShinechargeMovementTricky",
{
"shinespark": {
"frames": 38,
"excessFrames": 0
}
}
]
},
{
"and": [
"canShinechargeMovementTricky",
"canSpeedyJump",
{
"shinespark": {
"frames": 35,
"excessFrames": 0
}
}
]
}
]
} |
From: 5
Bottom Junction (Right of Boyons)
To: 2
Bottom Left Door
Jump at the last tile to make it through all of the Boyons. Requires: "canDash"
"ScrewAttack"
{
"or": [
"canCarefulJump",
"SpaceJump",
"h_speedJump"
]
} |
|

Leaving with upward momentum is possible in three ways: 1) Most easily, with a momentum-conserving morph against the ceiling through the transition, 2) With a momentum-conserving turnaround through the transition, or 3) Jumping specifically with a extra run speed $5.2 or $5.3 and aiming down through the transition. For the first two methods, back into the corner at the start of runway. Requires: "h_speedJump"
{
"or": [
"canMomentumConservingMorph",
"canInsaneJump"
]
}Exit condition: {
"leaveWithSidePlatform": {
"height": 3,
"runway": {
"length": 38,
"openEnd": 0
},
"obstruction": [
5,
2
]
}
}Dev note: Max extra run speed $6.5. Using the full runway, the momentum-conserving morph has a 4-frame window for the jump, and between a 2-frame and 5-frame window for the morph depending on the jump timing (with later jumps giving a bigger window for the morph); these windows can be more narrow depending on what is required in the next room. The momentum-conserving turnaround has a 2-frame window for the jump, and either a 3-frame or 5-frame for the turnaround (with the last-frame jump giving the larger window for the turnaround); again the windows can be more narrow depending on what is required in the next room. The aim-down method requires specific positioning to ensure Samus barely clears the door ledge with a frame-perfect jump. |
|

Leaving with upward momentum is possible in three ways: 1) Most easily, with a momentum-conserving morph against the ceiling through the transition, 2) With a momentum-conserving turnaround through the transition, or 3) Jumping specifically with a extra run speed $5.2 or $5.3 and aiming down through the transition. For the first two methods, avoid backing into the corner at the start of runway; instead press against it and turn around, to put Samus into a better position. An even better position is obtained by backing up an additional 8 to 12 pixels from the runway start (again, pressing forward into the corner, not backing into it), or equivalently, pressing and releasing an angle button 4 to 6 times to arm pump while running. Requires: "h_speedJump"
{
"or": [
"canMomentumConservingMorph",
"canInsaneJump"
]
}Exit condition: {
"leaveWithSidePlatform": {
"height": 3,
"runway": {
"length": 38,
"openEnd": 0
},
"obstruction": [
3,
0
]
}
}Dev note: Max extra run speed $6.1. Using the full runway (either backing into the corner or turning around from it), the momentum-conserving morph has a 5-frame window for the jump, and either a 2-frame window or 3-frame window for the morph depending on the jump timing; these windows can be more narrow depending on what is required in the next room. The momentum-conserving turnaround requires a frame-perfect (last-frame) jump and a frame-perfect turnaround. The aim-down method requires specific positioning to ensure Samus barely clears the door ledge with a frame-perfect jump. |
From: 1
Top Left Door
To: 1
Top Left Door
Overload the scroll PLMs which are one tile to the left of the bomb blocks, then pass through them. Refill at the ship, then return. Entrance condition: {
"comeInWithGMode": {
"mode": "any",
"morphed": false
}
}Requires: "canComplexGMode"
{
"refill": [
"Energy",
"Missile",
"Super",
"PowerBomb"
]
}
{
"or": [
"SpaceJump",
{
"and": [
"HiJump",
"canSpringBallJumpMidAir"
]
},
"canTrickyWallJump",
{
"and": [
"canSpeedyJump",
{
"or": [
"HiJump",
"canSpringBallJumpMidAir",
"canWallJump"
]
}
]
},
{
"and": [
"h_shinechargeMaxRunway",
"canMidairShinespark",
{
"or": [
{
"shinespark": {
"frames": 29,
"excessFrames": 1
}
},
{
"and": [
"canShinechargeMovementComplex",
"h_speedJump",
{
"shinespark": {
"frames": 22,
"excessFrames": 1
}
}
]
},
{
"and": [
"HiJump",
{
"shinespark": {
"frames": 17,
"excessFrames": 11
}
}
]
}
]
}
]
}
]
} |
From: 1
Top Left Door
To: 7
Junction (Left Ledge Below Bomb Blocks)

Entrance condition: {
"comeInGettingBlueSpeed": {
"length": 3,
"openEnd": 0
}
}Requires: {
"or": [
"canBlueSpaceJump",
{
"and": [
"canSpringBallBounce",
"canTrickyJump",
"h_blueJump"
]
},
"canLongChainTemporaryBlue"
]
}Clears obstacles: A |
|


Use the runway near the Power Bomb room door to jump to the left, morphing as Samus begins descending, to bounce through the Bomb blocks. Any time while bouncing, hold an angle button and unmorph to gain temporary blue; then chain it to reach the door with temporary blue. The jump can be set up by using the full runway with a one-tap shortcharge, with the tap being at the top of the lowest slope. Requires: {
"notable": "Big Jump with Blue Speed"
}
{
"notable": "Big Jump Leave With Temporary Blue"
}
"canTrickyJump"
"Morph"
"canLateralMidAirMorph"
{
"getBlueSpeed": {
"usedTiles": 30,
"openEnd": 2
}
}
"h_blueJump"
"canLongChainTemporaryBlue"Exit condition: {
"leaveWithTemporaryBlue": {}
}Unlocks doors: {"types":["ammo"],"requires":[]} |
|
Use the runway near the top right door to jump towards the top left bomb blocks and break them using the blue speed from SpeedBooster. This can be done using the full runway, with a one-tap shortcharge, where the tap is at the top of the lowest slope, and the jump is at the top of the last slope. Alternatively, a controlled release of the jump button works in place of the shortcharge, where the bottom of the thick dark line in the background at the top of the room works as a visual cue. Aiming down or morphing before hitting the wall can help make the jump slightly less precise. Note that it is possible to jump all the way to the ledge above the bomb blocks, place a Power Bomb, then drop down, but it isn't typically easier. Requires: {
"notable": "Big Jump with Blue Speed"
}
"canTrickyJump"
{
"or": [
{
"obstaclesCleared": [
"A"
]
},
"h_bombThings"
]
}
{
"getBlueSpeed": {
"usedTiles": 30,
"openEnd": 2
}
}
"h_blueJump"Clears obstacles: A |
|
Use the runway near the top right door to jump towards the top left bomb blocks and break them using the blue speed from SpeedBooster. This can be done using the full runway, with a one-tap shortcharge, where the tap is at the top of the lowest slope, and the jump is at the top of the last slope. Alternatively, a controlled release of the jump button works in place of the shortcharge, where the bottom of the thick dark line in the background at the top of the room works as a visual cue. While midair, morph once Samus begins descending to bounce through all of the Bomb blocks. Requires: {
"notable": "Big Jump with Blue Speed"
}
"canTrickyJump"
"Morph"
"canLateralMidAirMorph"
{
"getBlueSpeed": {
"usedTiles": 30,
"openEnd": 2
}
}
"h_blueJump"Clears obstacles: A |
From: 3
Top Right Door
To: 1
Top Left Door
Gain speed using the long runway at the top-right of room, do a big jump across the room into a mockball or speedball, then use controlled bounces to make it through the top-left door. Requires: {
"obstaclesCleared": [
"A",
"C"
]
}
"h_speedJump"
"canInsaneJump"Exit condition: {
"leaveWithSpringBallBounce": {
"remoteRunway": {
"length": 31,
"openEnd": 1,
"steepUpTiles": 9
},
"landingRunway": {
"length": 3,
"openEnd": 1
},
"minExtraRunSpeed": "$4.9",
"movementType": "controlled"
}
}Unlocks doors: {"types":["ammo"],"requires":[],"useImplicitRequires":false}Dev note: Unlocking doors would be done ahead-of-time when the door is opened, i.e. when obstacle 'C' is set. |
|
It is possible to save a small amount of energy by jumping from the upper right ledge, instead of from the plateau. Use the cues in the background to spark at a precise height. Requires: "canDash"
"canInsaneJump"
"canHorizontalMidairShinespark"
{
"useFlashSuit": {}
}
{
"or": [
{
"shinespark": {
"frames": 95,
"excessFrames": 34
}
},
{
"and": [
"HiJump",
{
"shinespark": {
"frames": 90,
"excessFrames": 34
}
}
]
}
]
}Clears obstacles: A Dev note: This is only useful without SpeedBooster and without a way to refill at the ship - i.e. without wall jump to get back up. |
|
Use the runway near the top right door to jump towards the top left bomb blocks and break them using the blue speed from SpeedBooster. This can be done using the full runway, with a one-tap shortcharge, where the tap is at the top of the lowest slope, and the jump is at the top of the last slope. Alternatively, a controlled release of the jump button works in place of the shortcharge, where the bottom of the thick dark line in the background at the top of the room works as a visual cue. Aiming down before hitting the wall can help make the jump slightly less precise. Use a flash suit to get through the remaining blocks. Requires: {
"notable": "Big Jump with Blue Speed"
}
{
"getBlueSpeed": {
"usedTiles": 30,
"openEnd": 2
}
}
"h_blueJump"
{
"useFlashSuit": {}
}
{
"shinespark": {
"frames": 52,
"excessFrames": 45
}
}Clears obstacles: A |
|
Store the spark on the right side of the ledge. Run left and do a big jump towards the top left door and then midair spark at the right time. Do not jump to max height or Samus will run out of shinecharge frames, instead short the jump a little. The lines in the background make for a good way to measure height. Requires: "canShinechargeMovementComplex"
{
"canShineCharge": {
"usedTiles": 19,
"steepUpTiles": 2,
"steepDownTiles": 1,
"openEnd": 2
}
}
{
"or": [
{
"and": [
"h_speedJump",
{
"shinespark": {
"frames": 95,
"excessFrames": 33
}
}
]
},
{
"and": [
"h_speedJump",
"canShinechargeMovementTricky",
{
"shinespark": {
"frames": 87,
"excessFrames": 33
}
}
]
},
{
"shinespark": {
"frames": 104,
"excessFrames": 33
}
},
{
"and": [
"canShinechargeMovementTricky",
{
"shinespark": {
"frames": 103,
"excessFrames": 33
}
}
]
}
]
}Clears obstacles: A |
From: 4
Bottom Right Door
To: 1
Top Left Door


Store the spark on the right side of the ledge. Run left and do a big jump towards the gauntlet door and then midair spark at the right time. Do not jump to max height or Samus will run out of shinecharge frames, instead short the jump a little. The lines in the background make for a good way to measure height. Requires: {
"obstaclesCleared": [
"C"
]
}
"canShinechargeMovementComplex"
{
"canShineCharge": {
"usedTiles": 19,
"steepUpTiles": 2,
"steepDownTiles": 1,
"openEnd": 2
}
}
{
"or": [
{
"and": [
"h_speedJump",
{
"shinespark": {
"frames": 96,
"excessFrames": 0
}
}
]
},
{
"and": [
"h_speedJump",
"canShinechargeMovementTricky",
{
"shinespark": {
"frames": 88,
"excessFrames": 0
}
}
]
},
{
"shinespark": {
"frames": 105,
"excessFrames": 0
}
}
]
}Exit condition: {
"leaveWithSpark": {
"position": "top"
}
}Unlocks doors: {"types":["ammo"],"requires":[],"useImplicitRequires":false}Dev note: Unlocking the door is free since the obstacle C cleared means that any lock was already taken care of. |
|

From the right door, run and jump while on the dirt mound directly right of the ship. Then SpringBall Jump to reach the Bomb blocks leading to the top left door. Requires: "HiJump" "h_getBlueSpeedMaxRunway" "h_blueJump" "canLateralMidAirMorph" "canTrickySpringBallJump" |
From: 4
Bottom Right Door
To: 1
Top Left Door
Requires: "h_storedSpark"
"canDash"
"canHorizontalMidairShinespark"
{
"or": [
{
"shinespark": {
"frames": 103,
"excessFrames": 34
}
},
{
"and": [
"HiJump",
{
"shinespark": {
"frames": 99,
"excessFrames": 34
}
}
]
}
]
}Clears obstacles: A |
|
Shinespark diagonally from the small hill left of the ship to break part way into the hidden bomb wall, then use Bombs or another means to continue to the left. Requires: "h_shinechargeMaxRunway"
{
"or": [
{
"shinespark": {
"frames": 39,
"excessFrames": 2
}
},
{
"and": [
"canMidairShinespark",
{
"or": [
{
"shinespark": {
"frames": 32,
"excessFrames": 3
}
},
{
"and": [
"HiJump",
{
"shinespark": {
"frames": 28,
"excessFrames": 2
}
}
]
},
{
"and": [
"h_speedJump",
"HiJump",
{
"shinespark": {
"frames": 24,
"excessFrames": 3
}
}
]
}
]
}
]
}
]
}
{
"or": [
"h_carefullyDestroyBombWalls",
{
"obstaclesCleared": [
"A"
]
}
]
}Clears obstacles: A |
|
Requires: "h_shinechargeMaxRunway"
{
"or": [
{
"shinespark": {
"frames": 78,
"excessFrames": 11
}
},
{
"and": [
"canShinechargeMovement",
{
"shinespark": {
"frames": 73,
"excessFrames": 15
}
}
]
},
{
"and": [
"canMidairShinespark",
{
"shinespark": {
"frames": 65,
"excessFrames": 15
}
}
]
},
{
"and": [
"canMidairShinespark",
"HiJump",
{
"shinespark": {
"frames": 61,
"excessFrames": 14
}
}
]
},
{
"and": [
"canShinechargeMovementComplex",
"HiJump",
"h_speedJump",
{
"shinespark": {
"frames": 55,
"excessFrames": 13
}
}
]
}
]
} |
From: 5
Alcatraz Door
To: 8
Central Junction
Wait 3 minutes for a global Geemer to waddle over, or shoot a Super 20 to 30 seconds after entering the room to knock it off the ceiling and save a lot of time. Freeze the Geemer as it turns onto the middle slope of the left wall to escape - it helps to freeze the Geemer from below. Alternatively, use a Super to knock it off the wall and freeze it mid-air. Requires: "h_ZebesIsAwake"
"canMidAirMorph"
"canTrickyUseFrozenEnemies"
{
"or": [
"canBeVeryPatient",
{
"ammo": {
"type": "Super",
"count": 1
}
}
]
}
{
"or": [
{
"and": [
"canTrickyDodgeEnemies",
{
"or": [
"canDash",
"h_crouchJumpDownGrab",
"canInsaneJump"
]
}
]
},
{
"and": [
"HiJump",
"canTrickyJump",
{
"ammo": {
"type": "Super",
"count": 1
}
}
]
}
]
} |
From: 8
Central Junction
To: 1
Top Left Door
After the Geemer is near, destroy the bomb wall using blue speed from the right. This opens a path for the Geemer to hit Samus through the transition. Requires: "h_ZebesIsAwake"
{
"or": [
{
"haveBlueSuit": {}
},
{
"and": [
{
"getBlueSpeed": {
"usedTiles": 25,
"steepUpTiles": 3,
"steepDownTiles": 3,
"openEnd": 1
}
},
"h_blueJump"
]
},
{
"and": [
{
"or": [
{
"canShineCharge": {
"usedTiles": 25,
"steepUpTiles": 3,
"steepDownTiles": 3,
"openEnd": 1
}
},
{
"useFlashSuit": {}
}
]
},
{
"shinespark": {
"frames": 2,
"excessFrames": 2
}
}
]
}
]
}Exit condition: {
"leaveWithGModeSetup": {}
}Unlocks doors: {"types":["ammo"],"requires":[]} |
From: 8
Central Junction
To: 1
Top Left Door
Requires: {
"or": [
{
"haveBlueSuit": {}
},
{
"and": [
{
"getBlueSpeed": {
"usedTiles": 25,
"steepUpTiles": 3,
"steepDownTiles": 3,
"openEnd": 1
}
},
"h_blueJump",
"canCarefulJump"
]
},
{
"and": [
{
"or": [
{
"canShineCharge": {
"usedTiles": 25,
"steepUpTiles": 3,
"steepDownTiles": 3,
"openEnd": 1
}
},
{
"useFlashSuit": {}
}
]
},
"canShinechargeMovement",
{
"shinespark": {
"frames": 2,
"excessFrames": 2
}
}
]
}
]
}Exit condition: {
"leaveWithRunway": {
"length": 22,
"openEnd": 0,
"steepUpTiles": 4,
"steepDownTiles": 2
}
}Unlocks doors: {"types":["ammo"],"requires":[]} |
|

Break the bomb wall while blue, or spark diagonally next to it. Requires: {
"or": [
{
"and": [
{
"getBlueSpeed": {
"usedTiles": 25,
"steepUpTiles": 3,
"steepDownTiles": 3,
"openEnd": 1
}
},
"canCarefulJump",
"h_blueJump"
]
},
{
"and": [
{
"canShineCharge": {
"usedTiles": 25,
"steepUpTiles": 3,
"steepDownTiles": 3,
"openEnd": 1
}
},
"canShinechargeMovement",
{
"shinespark": {
"frames": 2,
"excessFrames": 2
}
}
]
}
]
}Dev note: It is possible to come in the top right door, charge a spark, use a bounce ball, or blue space jump, but this is a bit easier anyway. |
From: 8
Central Junction
To: 1
Top Left Door
Break the bomb wall while blue, or spark diagonally next to it. Open the door then charge the spark again and spark through the wall and door. Requires: {
"or": [
{
"and": [
"h_getBlueSpeedMaxRunway",
"canCarefulJump",
"h_blueJump"
]
},
{
"and": [
"h_shinechargeMaxRunway",
{
"shinespark": {
"frames": 2,
"excessFrames": 0
}
}
]
}
]
}
{
"canShineCharge": {
"usedTiles": 25,
"steepUpTiles": 3,
"steepDownTiles": 3,
"openEnd": 1
}
}
{
"shinespark": {
"frames": 28,
"excessFrames": 0
}
}Exit condition: {
"leaveWithSpark": {
"position": "top",
"grounded": true
}
}Unlocks doors: {"types":["ammo"],"requires":[]}Dev note: The canCarefulJump or 2 spark frames could be reduced by having the door already open, but that's probably not worth modeling. FIXME: The extra long runway requirements are only included to satisfy speed state transition tests. |
|
Requires: "h_ZebesIsAwake"
{
"cycleFrames": 1860
}
{
"or": [
{
"resetRoom": {
"nodes": [
3,
4,
6,
7
]
}
},
{
"and": [
{
"resetRoom": {
"nodes": [
1
]
}
},
{
"cycleFrames": 420
},
{
"or": [
"ScrewAttack",
"h_useMorphBombs",
{
"and": [
{
"getBlueSpeed": {
"usedTiles": 25,
"steepUpTiles": 3,
"steepDownTiles": 3,
"openEnd": 1
}
},
"canCarefulJump",
"h_blueJump"
]
}
]
}
]
},
{
"and": [
{
"resetRoom": {
"nodes": [
2
]
}
},
{
"cycleFrames": 240
},
"Morph"
]
},
{
"and": [
"Morph",
{
"resetRoom": {
"nodes": [
5
]
}
},
{
"cycleFrames": 420
},
{
"or": [
"h_bombThings",
{
"and": [
"SpaceJump",
"canMidAirMorph",
"canCarefulJump"
]
},
{
"and": [
{
"notable": "Alcatraz Escape"
},
"canPreciseWallJump",
"canConsecutiveWallJump",
"canWallJumpInstantMorph"
]
},
{
"and": [
"canTrickySpringBallJump",
"canTrickyJump"
]
},
{
"and": [
"HiJump",
"canTrickyDashJump",
"canMidAirMorph"
]
}
]
}
]
}
]
}Resets obstacles: R-Mode Farm cycle drops: 11 Geemer (blue) Dev note: A two-way farming strat could be added, e.g. if it is possible to reset the room at both the top-right and the bottom. |
|
Requires: "Morph"
"Missile"
{
"resetRoom": {
"nodes": [
1
]
}
}
{
"resetRoom": {
"nodes": [
2
]
}
}
{
"cycleFrames": 930
}
{
"or": [
"canDash",
{
"cycleFrames": 270
}
]
}Resets obstacles: A Farm cycle drops: 8 Grey Space Pirate (standing), 2 Grey Space Pirate (wall) |
|
This strat is slower but only requires one of the two doors to be unlocked. Requires: "Morph"
"Missile"
{
"or": [
{
"resetRoom": {
"nodes": [
1
]
}
},
{
"resetRoom": {
"nodes": [
2
]
}
}
]
}
{
"cycleFrames": 930
}
{
"or": [
"canDash",
{
"cycleFrames": 160
}
]
}Resets obstacles: A Farm cycle drops: 4 Grey Space Pirate (standing), 1 Grey Space Pirate (wall) |
|


Requires: {
"or": [
{
"resetRoom": {
"nodes": [
1
]
}
},
{
"and": [
{
"resetRoom": {
"nodes": [
2
]
}
},
{
"cycleFrames": 60
}
]
}
]
}
{
"or": [
{
"and": [
"canDash",
{
"or": [
{
"and": [
"Plasma",
{
"cycleFrames": 330
}
]
},
{
"and": [
"Wave",
{
"cycleFrames": 355
}
]
},
{
"and": [
"ScrewAttack",
{
"cycleFrames": 355
}
]
},
{
"and": [
"Spazer",
{
"cycleFrames": 360
}
]
},
{
"cycleFrames": 390
}
]
}
]
},
{
"and": [
{
"haveBlueSuit": {}
},
{
"cycleFrames": 530
}
]
}
]
}Farm cycle drops: 1 Reo, 3 Mellow |
From: 1
Left Door
To: 2
Right Door
Requires: {
"obstaclesCleared": [
"B"
]
}
{
"getBlueSpeed": {
"usedTiles": 15,
"steepUpTiles": 1,
"steepDownTiles": 1,
"openEnd": 1
}
}
"h_blueJump"
"canInsaneJump"
"canTrickySpringBallBounce"
"canChainTemporaryBlue"Clears obstacles: A, E Dev note: This assumes getting blue speed using significantly less than the available runway, because at higher speed it would be more difficult to bounce across the room. |
From: 1
Left Door
To: 4
Middle Junction (Left of Morph Tunnel)
Requires: "canDash"
{
"or": [
"canCarefulJump",
{
"acidFrames": 35
}
]
}
{
"or": [
"h_avoidScrewStuck",
{
"obstaclesCleared": [
"A",
"B"
]
}
]
}Clears obstacles: A, B |
From: 1
Left Door
To: 4
Middle Junction (Left of Morph Tunnel)
When taking too much acid damage, it is always possible to return to the left and farm. Requires: "canDash"
{
"or": [
"canCarefulJump",
{
"acidFrames": 35
}
]
}
"h_useMorphBombs"Clears obstacles: A, B |
From: 1
Left Door
To: 4
Middle Junction (Left of Morph Tunnel)
When taking too much acid damage, it is always possible to return to the left and farm. Requires: "canDash"
{
"or": [
"canCarefulJump",
{
"acidFrames": 35
}
]
}
{
"or": [
{
"and": [
"Morph",
{
"ammo": {
"type": "PowerBomb",
"count": 2
}
}
]
},
{
"obstaclesCleared": [
"A"
]
}
]
}
{
"or": [
"h_usePowerBomb",
{
"obstaclesCleared": [
"B"
]
}
]
}Clears obstacles: A, B |
From: 1
Left Door
To: 4
Middle Junction (Left of Morph Tunnel)
Requires: "h_usePowerBomb"
"canDash"
{
"useFlashSuit": {}
}
{
"or": [
{
"shinespark": {
"frames": 29,
"excessFrames": 0
}
},
{
"and": [
"h_additionalBomb",
{
"shinespark": {
"frames": 1,
"excessFrames": 1
}
}
]
}
]
}Clears obstacles: A, B |
From: 4
Middle Junction (Left of Morph Tunnel)
To: 1
Left Door
Requires: "canDash"
{
"or": [
"canCarefulJump",
{
"acidFrames": 35
}
]
}
{
"or": [
"h_avoidScrewStuck",
{
"and": [
{
"obstaclesCleared": [
"A"
]
},
{
"obstaclesCleared": [
"B"
]
}
]
}
]
}Clears obstacles: A, B |
From: 4
Middle Junction (Left of Morph Tunnel)
To: 1
Left Door

After destroying a single bomb block, Samus can spin jump into its spot to quickly escape the acid. To avoid the acid completely, morph quickly at the right height and place a bomb. Requires: "canDash"
{
"or": [
"canCarefulJump",
{
"acidFrames": 35
}
]
}
"h_useMorphBombs"
{
"or": [
"canTrickyJump",
{
"and": [
"canCarefulJump",
"canBombHorizontally",
{
"acidFrames": 35
}
]
},
{
"acidFrames": 100
}
]
}
{
"or": [
{
"and": [
"canTrickyJump",
"canTrickyWallJump"
]
},
{
"and": [
"canCarefulJump",
{
"acidFrames": 35
}
]
},
{
"acidFrames": 100
}
]
}
"h_complexToCarryFlashSuit"Clears obstacles: A, B |
From: 4
Middle Junction (Left of Morph Tunnel)
To: 1
Left Door
Requires: "canDash"
{
"or": [
"canCarefulJump",
{
"acidFrames": 35
}
]
}
"Morph"
{
"ammo": {
"type": "PowerBomb",
"count": 3
}
}Clears obstacles: A, B |
From: 4
Middle Junction (Left of Morph Tunnel)
To: 1
Left Door
Requires: "h_usePowerBomb"
{
"useFlashSuit": {}
}
{
"or": [
{
"shinespark": {
"frames": 58,
"excessFrames": 21
}
},
{
"and": [
"h_additionalBomb",
"canDash",
{
"shinespark": {
"frames": 30,
"excessFrames": 27
}
}
]
}
]
}Clears obstacles: A, B |
From: 1
Left Door
To: 1
Left Door
Entrance condition: {
"comeInGettingBlueSpeed": {
"length": 6,
"openEnd": 1,
"steepUpTiles": 1,
"steepDownTiles": 1
}
}Requires: "h_blueJump" Exit condition: {
"leaveWithGModeSetup": {}
}Unlocks doors: {"types":["ammo"],"requires":[]}Dev note: Freeing the Waver with a shinespark is not reliable, and depends on when and where the shinespark starts. Most of these strats kill the Wavers or set up situations where they can't reach the door. |
|
Requires: {
"resetRoom": {
"nodes": [
1
]
}
}
{
"or": [
{
"and": [
"canDash",
"ScrewAttack",
"canDodgeWhileShooting",
{
"cycleFrames": 600
}
]
},
{
"and": [
"canDash",
"h_bombThings",
"canTrickyDodgeEnemies",
{
"cycleFrames": 850
}
]
},
{
"and": [
{
"haveBlueSuit": {}
},
{
"cycleFrames": 660
}
]
}
]
}Resets obstacles: A Farm cycle drops: 2 Waver Dev note: There is a third Waver on the right side of the room, but generally it would not be worthwhile to cross the room for it. |
From: 2
Right Door
To: 2
Right Door

Entrance condition: {
"comeInGettingBlueSpeed": {
"length": 6,
"openEnd": 1,
"steepUpTiles": 1,
"steepDownTiles": 1
}
}Requires: "h_blueJump" Exit condition: {
"leaveWithGModeSetup": {}
}Unlocks doors: {"types":["ammo"],"requires":[]}Dev note: Freeing the Waver with a shinespark is not reliable, and depends on when and where the shinespark starts. Most of these strats kill the Wavers or set up situations where they can't reach the door. |
|
Requires: {
"resetRoom": {
"nodes": [
2
]
}
}
"canDodgeWhileShooting"
{
"or": [
{
"and": [
"canDash",
"ScrewAttack",
{
"cycleFrames": 420
}
]
},
{
"and": [
"canDash",
"h_bombThings",
"canTrickyDodgeEnemies",
{
"cycleFrames": 630
}
]
},
{
"and": [
{
"haveBlueSuit": {}
},
{
"cycleFrames": 620
}
]
}
]
}Resets obstacles: A Farm cycle drops: 1 Waver |
From: 4
Bottom Right Door
To: 2
Middle Right Door
FIXME: This could use a ledge grab tech to avoid the 4th pirate hit. Requires: "canDash"
"canUseIFrames"
"canTrickyJump"
{
"enemyDamage": {
"enemy": "Green Space Pirate (standing)",
"type": "contact",
"hits": 3
}
}Dev note: A shinespark could be used to kill the bottom two pirates. |
|

Leaving with upward momentum is possible in three ways: 1) Most easily, with a momentum-conserving morph against the ceiling through the transition, 2) With a momentum-conserving turnaround through the transition, or 3) Jumping specifically with a extra run speed $5.2 or $5.3 and aiming down through the transition. For the first two methods, back into the corner to use the full runway; it helps to use an arm pump to advance a single pixel while running. This can be done by holding an angle button before starting to move forward, then releasing angle while running. Requires: "h_speedJump"
{
"or": [
"canMomentumConservingMorph",
"canInsaneJump"
]
}Exit condition: {
"leaveWithSidePlatform": {
"height": 2,
"runway": {
"length": 45,
"openEnd": 1
},
"obstruction": [
3,
0
]
}
}Dev note: Max extra run speed $7.0. Using the full runway with a single-pixel arm pump, the momentum-conserving morph has a 4-frame window for the jump, and between a 3-frame and 5-frame window for the morph depending on the jump timing (with later jumps giving a bigger window for the morph); these windows will be more narrow if the ceiling in the next room extends past the door shell. The momentum-conserving turnaround requires a frame-perfect jump, with a 4-frame window for the turnaround, again possibly less depending on what is required in the next room. The aim-down method requires specific positioning to ensure Samus barely clears the door ledge with a frame-perfect jump. |
|
Leaving with upward momentum is possible in three ways: 1) Most easily, with a momentum-conserving morph against the ceiling through the transition, 2) With a momentum-conserving turnaround through the transition, or 3) Jumping specifically with a extra run speed $5.2 or $5.3 and aiming down through the transition. For the first two methods, back into the corner to use the full runway. Requires: "h_speedJump"
{
"or": [
"canMomentumConservingMorph",
"canInsaneJump"
]
}Exit condition: {
"leaveWithSidePlatform": {
"height": 2,
"runway": {
"length": 45,
"openEnd": 1
},
"obstruction": [
3,
0
]
}
}Dev note: Max extra run speed $7.0. The momentum-conserving morph has a 4-frame window for the jump, and between a 2-frame and 5-frame window for the morph depending on the jump timing (with later jumps giving a bigger window for the morph); these windows will be more narrow if the ceiling in the next room extends past the door shell. The momentum-conserving turnaround requires a frame-perfect jump, with a 4-frame window for the turnaround, again possibly less depending on what is required in the next room. The aim-down method requires specific positioning to ensure Samus barely clears the door ledge with a frame-perfect jump. |
|
Requires: {
"or": [
{
"resetRoom": {
"nodes": [
1
]
}
},
{
"and": [
{
"resetRoom": {
"nodes": [
2
]
}
},
{
"cycleFrames": 60
}
]
}
]
}
{
"or": [
{
"and": [
{
"or": [
"Wave",
"Spazer",
"Plasma"
]
},
{
"cycleFrames": 960
}
]
},
{
"cycleFrames": 1110
}
]
}
{
"or": [
"canDash",
{
"cycleFrames": 400
}
]
}Farm cycle drops: 6 Geemer (blue), 3 Waver |
|
Requires: {
"resetRoom": {
"nodes": [
2
]
}
}
{
"cycleFrames": 270
}
{
"or": [
{
"and": [
"Gravity",
{
"or": [
"canDash",
{
"cycleFrames": 175
}
]
}
]
},
{
"cycleFrames": 270
}
]
}
{
"or": [
"Grapple",
{
"and": [
"Wave",
{
"cycleFrames": 50
}
]
},
{
"and": [
"Plasma",
{
"cycleFrames": 50
}
]
},
{
"and": [
"ScrewAttack",
{
"cycleFrames": 80
}
]
},
{
"and": [
"Spazer",
{
"cycleFrames": 150
}
]
},
{
"and": [
"canPseudoScrew",
{
"cycleFrames": 180
}
]
},
{
"and": [
"Ice",
{
"cycleFrames": 270
}
]
},
{
"cycleFrames": 420
}
]
}Farm cycle drops: 3 Sciser |
|
Requires: {
"or": [
{
"and": [
{
"resetRoom": {
"nodes": [
1,
2
]
}
},
"canCameraManip"
]
},
{
"resetRoom": {
"nodes": [
3
]
}
}
]
}
{
"or": [
{
"and": [
"canDash",
{
"or": [
{
"and": [
"ScrewAttack",
{
"cycleFrames": 720
}
]
},
{
"and": [
"Plasma",
{
"cycleFrames": 770
}
]
},
{
"and": [
"canPseudoScrew",
{
"cycleFrames": 1000
}
]
},
{
"and": [
"canUseGrapple",
{
"cycleFrames": 1020
}
]
},
{
"and": [
"Wave",
{
"cycleFrames": 1050
}
]
},
{
"and": [
"Spazer",
{
"cycleFrames": 1080
}
]
},
{
"and": [
"Ice",
{
"cycleFrames": 1170
}
]
},
{
"and": [
"canDodgeWhileShooting",
{
"cycleFrames": 1440
}
]
}
]
}
]
},
{
"and": [
{
"haveBlueSuit": {}
},
{
"cycleFrames": 1010
}
]
}
]
}Farm cycle drops: 2 Sciser, 2 Kihunter (green) |
|
Requires: "Gravity"
{
"or": [
{
"and": [
"canDash",
{
"or": [
{
"and": [
"Plasma",
{
"cycleFrames": 410
}
]
},
{
"and": [
"canUseGrapple",
{
"cycleFrames": 440
}
]
},
{
"and": [
"Wave",
{
"cycleFrames": 460
}
]
},
{
"and": [
"Spazer",
{
"cycleFrames": 540
}
]
},
{
"and": [
"canDodgeWhileShooting",
{
"cycleFrames": 730
}
]
}
]
}
]
},
{
"and": [
{
"haveBlueSuit": {}
},
{
"cycleFrames": 710
}
]
}
]
}Farm cycle drops: 4 Choot |
|
Requires: "canDodgeWhileShooting"
{
"cycleFrames": 215
}
{
"or": [
"canDash",
{
"and": [
{
"haveBlueSuit": {}
},
{
"cycleFrames": 40
}
]
}
]
}Farm cycle drops: 1 Choot |
|
Farm 3 Choots using Grapple to collect the drops, without dipping into the water. Requires: "canUseGrapple"
{
"cycleFrames": 330
}
{
"or": [
"canDash",
{
"cycleFrames": 90
}
]
}Farm cycle drops: 3 Choot |
|
Requires: "Gravity"
{
"cycleFrames": 270
}
{
"or": [
"canDash",
{
"cycleFrames": 90
}
]
}
{
"or": [
"HiJump",
{
"and": [
"canWallJump",
{
"cycleFrames": 45
}
]
}
]
}
{
"or": [
"Plasma",
{
"and": [
"canUseGrapple",
{
"cycleFrames": 15
}
]
},
{
"and": [
"ScrewAttack",
{
"cycleFrames": 15
}
]
},
{
"and": [
"Wave",
{
"cycleFrames": 35
}
]
},
{
"and": [
{
"haveBlueSuit": {}
},
{
"cycleFrames": 40
}
]
},
{
"and": [
"Spazer",
{
"cycleFrames": 55
}
]
},
{
"cycleFrames": 105
}
]
}Farm cycle drops: 1 Choot |
From: 1
Left Door
To: 1
Left Door
Requires: {
"resetRoom": {
"nodes": [
1
]
}
}
{
"resetRoom": {
"nodes": [
2
]
}
}
{
"or": [
{
"and": [
"canDash",
{
"or": [
{
"and": [
"ScrewAttack",
{
"cycleFrames": 990
}
]
},
{
"and": [
"Plasma",
{
"cycleFrames": 620
}
]
},
{
"and": [
"Wave",
{
"cycleFrames": 920
}
]
},
{
"and": [
"Spazer",
{
"cycleFrames": 1010
}
]
},
{
"and": [
{
"or": [
"canDodgeWhileShooting",
"Ice"
]
},
{
"cycleFrames": 1740
}
]
},
{
"and": [
"canUseGrapple",
{
"cycleFrames": 740
}
]
}
]
}
]
},
{
"and": [
{
"haveBlueSuit": {}
},
{
"cycleFrames": 1160
}
]
}
]
}Farm cycle drops: 6 Waver, 6 Choot |
From: 1
Left Door
To: 1
Left Door
Requires: {
"resetRoom": {
"nodes": [
1,
2
]
}
}
{
"cycleFrames": 100
}
{
"or": [
{
"and": [
"canDash",
{
"or": [
{
"and": [
"ScrewAttack",
{
"cycleFrames": 495
}
]
},
{
"and": [
"Plasma",
{
"cycleFrames": 310
}
]
},
{
"and": [
"Wave",
{
"cycleFrames": 460
}
]
},
{
"and": [
"Spazer",
{
"cycleFrames": 505
}
]
},
{
"and": [
{
"or": [
"canDodgeWhileShooting",
"Ice"
]
},
{
"cycleFrames": 870
}
]
},
{
"and": [
"canUseGrapple",
{
"cycleFrames": 370
}
]
}
]
}
]
},
{
"and": [
{
"haveBlueSuit": {}
},
{
"cycleFrames": 580
}
]
}
]
}Farm cycle drops: 3 Waver, 3 Choot Dev note: The 100 extra cycleFrames is an average extra time needed to return back to the entry door rather than continuing to the opposite door. For simplicity, the weapon-specific cycleFrames are exactly half those in the 'Both Doors' variant, even though technically some weapons may be affected slightly more than others by having to use a specific door. |
|

Entrance condition: {
"comeInRunning": {
"speedBooster": "yes",
"minTiles": 21
}
}Requires: "h_speedJump" "canInsaneJump" |
|
Entrance condition: {
"comeInRunning": {
"speedBooster": "yes",
"minTiles": 11
}
}Requires: "h_speedJump" "canInsaneJump" "canLateralMidAirMorph" "canMomentumConservingMorph" |
|


Entrance condition: {
"comeInRunning": {
"speedBooster": "yes",
"minTiles": 26
}
}Requires: "h_speedJump" "canTrickyJump" |
|


Entrance condition: {
"comeInRunning": {
"speedBooster": "yes",
"minTiles": 18
}
}Requires: "h_speedJump" "canTrickyJump" "canLateralMidAirMorph" |
|
This jump is much easier without HiJump or Speed Booster equipped. Requires: "canDash" "canDisableEquipment" Collects items: 3 |
|


Requires: {
"or": [
"Grapple",
"SpaceJump",
{
"and": [
"Gravity",
"canDash"
]
},
{
"and": [
"Gravity",
"canWallJump"
]
},
{
"and": [
"Gravity",
"HiJump"
]
},
"canGravityJump"
]
}Collects items: 3 |
|
Execution of this strat is non-trivial, and failing will lead to falling into the pit. Depending on item loadout, that could be a softlock. Requires: "canDash"
"canDisableEquipment"
"canCarefulJump"
{
"or": [
{
"doorUnlockedAtNode": 2
},
"canTrickyJump",
"canLateralMidAirMorph",
"h_speedJump"
]
}Collects items: 3 Dev note: Could use a failure definition? |
|

Requires: "Gravity"
{
"or": [
{
"and": [
"canTrickySpringBallJump",
{
"or": [
"canLateralMidAirMorph",
"canTrickyJump"
]
}
]
},
{
"and": [
"HiJump",
"canWallJump",
{
"or": [
"canDash",
"canTrickyJump"
]
}
]
},
{
"and": [
"HiJump",
"canSpringBallJumpMidAir"
]
},
{
"and": [
"HiJump",
"canSpeedyJump"
]
}
]
}
{
"obstaclesNotCleared": [
"A",
"B",
"C"
]
} |
From: 13
Bottom Junction
To: 5
Lower Section - Bottom Right Door
It may be best to have shorter, later jumps to prevent bonking the ceiling or hitting the Ripper. Requires: "canDash"
{
"or": [
"canCarefulJump",
"canConsecutiveWallJump"
]
}
{
"or": [
"canDisableEquipment",
"canTrickyJump"
]
} |
From: 13
Bottom Junction
To: 5
Lower Section - Bottom Right Door
Requires: "canHorizontalShinespark"
{
"or": [
{
"canShineCharge": {
"usedTiles": 23,
"steepUpTiles": 6,
"steepDownTiles": 1,
"openEnd": 1
}
},
{
"and": [
{
"canShineCharge": {
"usedTiles": 24,
"steepUpTiles": 6,
"steepDownTiles": 1,
"openEnd": 1
}
},
{
"doorUnlockedAtNode": 1
}
]
}
]
}
{
"or": [
{
"shinespark": {
"frames": 131,
"excessFrames": 36
}
},
{
"and": [
"canHorizontalMidairShinespark",
{
"shinespark": {
"frames": 109,
"excessFrames": 37
}
}
]
},
{
"and": [
"canHorizontalMidairShinespark",
"h_speedJump",
{
"shinespark": {
"frames": 102,
"excessFrames": 0
}
}
]
}
]
}Unlocks doors: {"nodeId":1,"types":["ammo"],"requires":[]} |
From: 13
Bottom Junction
To: 5
Lower Section - Bottom Right Door

Open the right door before sparking to spark out of it. Requires: {
"or": [
"canCarefulJump",
"Grapple",
"Wave",
"SpaceJump"
]
}
{
"or": [
{
"canShineCharge": {
"usedTiles": 23,
"steepUpTiles": 6,
"steepDownTiles": 1,
"openEnd": 1
}
},
{
"and": [
{
"canShineCharge": {
"usedTiles": 24,
"steepUpTiles": 6,
"steepDownTiles": 1,
"openEnd": 1
}
},
{
"doorUnlockedAtNode": 1
}
]
}
]
}
{
"or": [
{
"shinespark": {
"frames": 131,
"excessFrames": 0
}
},
{
"and": [
"canHorizontalMidairShinespark",
{
"shinespark": {
"frames": 109,
"excessFrames": 0
}
}
]
},
{
"and": [
"canHorizontalMidairShinespark",
"h_speedJump",
{
"shinespark": {
"frames": 102,
"excessFrames": 0
}
}
]
}
]
}Exit condition: {
"leaveWithSpark": {}
}Unlocks doors: {"nodeId":1,"types":["ammo"],"requires":[]}
{"nodeId":5,"types":["ammo"],"requires":[]}Dev note: The right door could be an obstacle, but with this shinecharge, a careful jump is probably fair to include. This room is already pretty complex, so adding an obstacle is fairly significant. |
|
Requires: {
"or": [
{
"and": [
{
"resetRoom": {
"nodes": [
1
]
}
},
{
"or": [
{
"and": [
"Gravity",
"canDash",
{
"cycleFrames": 790
}
]
},
{
"and": [
"canDash",
{
"cycleFrames": 1380
}
]
},
{
"and": [
"Gravity",
{
"cycleFrames": 1220
}
]
},
{
"cycleFrames": 1785
}
]
}
]
},
{
"and": [
{
"resetRoom": {
"nodes": [
4
]
}
},
{
"or": [
{
"and": [
"Gravity",
"SpaceJump",
{
"cycleFrames": 750
},
{
"or": [
"canDash",
{
"cycleFrames": 185
}
]
}
]
},
{
"and": [
"Gravity",
"canWallJump",
{
"cycleFrames": 650
},
{
"or": [
"canDash",
{
"and": [
"canGravityJump",
{
"cycleFrames": 150
},
"h_doubleEquipmentScreenCycleFrames"
]
}
]
}
]
},
{
"and": [
"SpaceJump",
{
"cycleFrames": 1390
},
{
"or": [
"canDash",
{
"cycleFrames": 530
}
]
}
]
},
{
"and": [
"canDash",
"canWallJump",
{
"cycleFrames": 1420
}
]
}
]
}
]
},
{
"and": [
{
"resetRoom": {
"nodes": [
5
]
}
},
{
"or": [
{
"and": [
"Gravity",
"SpaceJump",
{
"cycleFrames": 690
},
{
"or": [
"canDash",
{
"cycleFrames": 355
}
]
}
]
},
{
"and": [
"Gravity",
"canDash",
"canWallJump",
{
"cycleFrames": 820
}
]
},
{
"and": [
"Gravity",
"canDash",
{
"cycleFrames": 1110
}
]
},
{
"and": [
"canGravityJump",
{
"cycleFrames": 1120
}
]
},
{
"and": [
"canDash",
{
"cycleFrames": 1600
}
]
}
]
}
]
}
]
}
{
"or": [
{
"and": [
"ScrewAttack",
"Gravity"
]
},
{
"haveBlueSuit": {}
},
{
"and": [
"Plasma",
{
"cycleFrames": 50
}
]
},
{
"and": [
"Wave",
{
"cycleFrames": 160
}
]
},
{
"and": [
"Spazer",
{
"cycleFrames": 200
}
]
},
{
"and": [
"Ice",
{
"cycleFrames": 290
}
]
},
{
"and": [
"canPseudoScrew",
{
"cycleFrames": 290
}
]
},
{
"cycleFrames": 500
}
]
}Resets obstacles: A, B, R-Mode Farm cycle drops: 2 Skultera |
|


It's not necessary to jump through the door, the in-room doorsill gives enough running room to make it up. Requires: "canDash"
"canPreciseWallJump"
"canTrickyJump"
{
"or": [
{
"spikeHits": 1
},
"h_backIntoCorner"
]
} |
From: 1
Bottom Left Door
To: 1
Bottom Left Door
Requires: "h_ZebesIsAwake"
{
"resetRoom": {
"nodes": [
1
]
}
}
{
"cycleFrames": 400
}
{
"or": [
"canDash",
{
"and": [
{
"haveBlueSuit": {}
},
{
"cycleFrames": 80
}
]
}
]
}Resets obstacles: A, B, C Farm cycle drops: 2 Geemer (blue), 2 Skree, 1 Reo |
From: 1
Bottom Left Door
To: 1
Bottom Left Door
Leaving with upward momentum is possible in three ways: 1) Most easily, with a momentum-conserving morph against the ceiling through the transition, 2) With a momentum-conserving turnaround through the transition, or 3) Jumping specifically with a extra run speed between $5.2 and $5.4 and aiming down through the transition. For the first two methods, avoid backing into the corner; instead press against it and turn around, to put Samus into a better position. For the third method, use only the part of the runway in front of the Power Bomb blocks, or about a tile less. Requires: {
"obstaclesCleared": [
"C"
]
}
"h_speedJump"
{
  "or": [
    "canMomentumConservingMorph",
    "canInsaneJump"
  ]
}
Exit condition: {
"leaveWithSidePlatform": {
"height": 3,
"runway": {
"length": 42,
"openEnd": 0
},
"obstruction": [
3,
0
]
}
}Dev note: Max extra run speed $6.8. Using the full runway, the momentum-conserving morph has a 4-frame window for the jump, and between a 3-frame and 6-frame window for the morph depending on the jump timing (with later jumps giving a bigger window for the morph); The momentum-conserving turnaround has a 2-frame window for the jump, and either a 1-frame or 5-frame window for the turnaround depending on the jump (with the last-frame jump giving the larger window for the turnaround). |
From: 1
Bottom Left Door
To: 1
Bottom Left Door
Leaving with upward momentum is possible in three ways: 1) Most easily, with a momentum-conserving morph against the ceiling through the transition, 2) With a momentum-conserving turnaround through the transition, or 3) Jumping and aiming down through the transition. To maximize the lenience for the jump, back into the Power Bomb block corner, and while running perform a single-pixel arm pump (e.g. by firing a shot); this only matters in certain situations, but in all cases it won't hurt. Requires: "h_speedJump"
{
"or": [
"canMomentumConservingMorph",
"canInsaneJump"
]
}Exit condition: {
"leaveWithSidePlatform": {
"height": 3,
"runway": {
"length": 31,
"openEnd": 0
},
"obstruction": [
3,
0
]
}
}Dev note: Max extra run speed $5.4. The momentum-conserving morph has a 3-frame window for the jump, and between a 3-frame and 8-frame window for the morph depending on the jump timing (with later jumps giving a bigger window for the morph); these windows can be more narrow depending on what is required in the next room. The momentum-conserving turnaround has a 2-frame window for the jump: if jumping on the second-to-last possible frame, then there is a 4-frame window for the turnaround, while if jumping on the last frame, there is a 5-frame window for turning around before the transition or it can be buffered through the transition (or the turnaround could not be performed at all, to maintain forward and upward momentum by simply aiming down). |
From: 2
Top Left Door
To: 2
Top Left Door
Requires: {
"notable": "Return Through Crumble Blocks"
}
"h_ZebesIsAwake"
"Morph"
{
"or": [
"ScrewAttack",
{
"and": [
"h_useMorphBombs",
{
"cycleFrames": 80
}
]
},
{
"haveBlueSuit": {}
}
]
}
{
"or": [
"canConsecutiveWallJump",
{
"and": [
"SpaceJump",
{
"cycleFrames": 250
}
]
}
]
}
{
"resetRoom": {
"nodes": [
2
]
}
}
{
"cycleFrames": 1210
}
{
"or": [
"canDash",
{
"and": [
{
"haveBlueSuit": {}
},
{
"cycleFrames": 50
}
]
}
]
}Clears obstacles: A, B Resets obstacles: C Farm cycle drops: 2 Geemer (blue), 2 Skree, 1 Reo Dev note: Returning with an IBJ or frozen Geemer would also be possible, but these are probably too slow to model in a farm strat. |
|
Requires: {
"obstaclesCleared": [
"C"
]
}
"h_speedJump"
"canInsaneJump"
"canMomentumConservingMorph"Exit condition: {
"leaveWithSidePlatform": {
"height": 2,
"runway": {
"length": 25,
"openEnd": 0
},
"obstruction": [
4,
0
]
}
}Dev note: Max extra run speed $4.A. Using the full runway, this requires a last-frame jump, followed by a 2-frame window for the morph. |
|

Run then do a very small spin jump to clip into the left side of the first gate. While inside the gate, back up to get the maximum run distance using either Moonwalk or X-Ray Turnaround and repeat for the next gate. It is also possible to clip into the gates by aiming down while in the spin jump. A down-back is also possible for clipping into the first gate, but it is generally harder. Requires: {
"obstaclesNotCleared": [
"A"
]
}
"canDash"
"canCrouchGateClip"
{
"or": [
"canXRayTurnaround",
"canMoonwalk"
]
}Clears obstacles: A |
|


The only way the Wavers will get to the door is if the right crumble blocks are all broken. This assumes that Samus comes from the left with Speed, a mockball, or a crouch gate clip. After the crumbles are broken, shoot the ceiling block and wait by the door for the Waver to come. Note that if Samus takes more than 35 seconds after entering the room, before shooting the ceiling, the Waver will not come down. Requires: {
"obstaclesNotCleared": [
"A"
]
}
{
"or": [
"h_speedDash",
"canMockball",
{
"and": [
"canDash",
"canCrouchGateClip",
{
"or": [
"canXRayTurnaround",
"canMoonwalk"
]
}
]
},
{
"and": [
{
"notable": "Crouch Gate Clip Damage Boost"
},
"canHorizontalDamageBoost",
"canCrouchGateClip",
{
"enemyDamage": {
"enemy": "Zeb",
"type": "contact",
"hits": 2
}
},
{
"or": [
"canXRayWaitForIFrames",
{
"haveBlueSuit": {}
}
]
}
]
}
]
}Exit condition: {
"leaveWithGModeSetup": {}
}Unlocks doors: {"types":["ammo"],"requires":[]} |
|
Requires: {
"obstaclesNotCleared": [
"A"
]
}
"h_speedDash"Clears obstacles: A |
|
Run into the room and off the ledge with blue speed, killing any Beetoms in your path. Entrance condition: {
"comeInGettingBlueSpeed": {
"length": 2,
"openEnd": 1
}
}Requires: "h_blueJump" Dev note: This does not clear the obstacle since it does not kill all the Beetoms. |
|
Run into the room and off the ledge with blue speed, killing any Beetoms in your path. Entrance condition: {
"comeInGettingBlueSpeed": {
"length": 2,
"openEnd": 1
}
}Requires: "h_blueJump" Dev note: This does not clear the obstacle since it does not kill all the Beetoms. |
From: 10
Right Etecoon Shaft - Bottom Left Door
To: 14
Right Etecoon Shaft - Wall Jump Checkpoint
Spring ball jump then bounce on a Power Bomb in order to be able to midair spark. It is easiest to wait to turn around until after the bomb boost. With a blue suit, this requires using dash after shinecharging to be able to boost on the Power Bomb. Requires: {
"or": [
{
"useFlashSuit": {}
},
{
"and": [
"canInsaneJump",
{
"blueSuitShinecharge": {}
}
]
}
]
}
"canDash"
"canSpringBallJumpMidAir"
"canUnmorphBombBoost"
{
"shinespark": {
"frames": 18,
"excessFrames": 13
}
} |
|

Entrance condition: {
"comeInRunning": {
"speedBooster": "yes",
"minTiles": 15
}
}Requires: "h_speedJump" "canInsaneJump" "canMomentumConservingMorph" Dev note: This is technically possible with 14 tiles but it might require too much precision. |
|
Entrance condition: {
"comeInRunning": {
"speedBooster": "yes",
"minTiles": 17
}
}Requires: "h_speedJump" "canTrickyJump" "canLateralMidAirMorph" |
|
Requires: "h_speedJump" "canTrickyJump" "canLateralMidAirMorph" "can4HighMidAirMorph" |
|
Build up some run speed and then extend the Grapple Beam through the Blue Gate, while jumping, to open it from the wrong side. Requires: {
"notable": "Grapple Gate Glitch"
}
"canPreciseGrapple"
"h_speedJump"
"canTrickyJump"Clears obstacles: B |
|


Open the gate (Wave Beam or gate glitch) and clear the Small Sidehoppers for a runway. Use respawning Geegas for energy. Entrance condition: {
"comeInWithRMode": {}
}Requires: {
"or": [
"Wave",
"h_blueGateGlitch",
{
"and": [
{
"notable": "Grapple Gate Glitch"
},
"canPreciseGrapple",
"h_speedJump",
"canTrickyJump"
]
}
]
}
{
"refill": [
"Energy"
]
}
{
"canShineCharge": {
"usedTiles": 30,
"openEnd": 0
}
}
{
"autoReserveTrigger": {}
}
"canRModeSparkInterrupt"Clears obstacles: B |
|
Requires: {
"resetRoom": {
"nodes": [
1
]
}
}
{
"cycleFrames": 560
}
{
"or": [
"canDash",
{
"cycleFrames": 300
}
]
}
{
"or": [
"Plasma",
"Spazer",
"Wave",
"Grapple",
{
"and": [
"ScrewAttack",
{
"cycleFrames": 200
}
]
},
{
"and": [
{
"haveBlueSuit": {}
},
{
"cycleFrames": 200
}
]
},
{
"cycleFrames": 370
}
]
}Farm cycle drops: 4 Zeela, 3 Cacatac |
|
Requires: "canDash" |
|
Requires: "canDash"
{
"resetRoom": {
"nodes": [
2
]
}
}
{
"cycleFrames": 1000
}
{
"or": [
"Plasma",
"Spazer",
"Wave",
{
"and": [
"Grapple",
{
"cycleFrames": 60
}
]
},
{
"and": [
"ScrewAttack",
{
"cycleFrames": 200
}
]
},
{
"cycleFrames": 370
}
]
}Farm cycle drops: 4 Zeela, 4 Cacatac |
|
Requires: "h_speedJump" "canMomentumConservingMorph" Exit condition: {
"leaveWithSidePlatform": {
"height": 2,
"runway": {
"length": 20,
"openEnd": 0
},
"obstruction": [
3,
0
]
}
}Dev note: Max extra run speed $3.F. |
|
Requires: {
"or": [
{
"resetRoom": {
"nodes": [
1
]
}
},
{
"and": [
{
"resetRoom": {
"nodes": [
2
]
}
},
{
"cycleFrames": 90
}
]
}
]
}
{
"or": [
{
"and": [
"canDash",
{
"or": [
"Plasma",
"Spazer",
"Wave",
"ScrewAttack"
]
},
{
"cycleFrames": 500
}
]
},
{
"and": [
"canDodgeWhileShooting",
{
"cycleFrames": 660
}
]
}
]
}Farm cycle drops: 3 Kihunter (green) |
From: 1
Left Side - Top Door
To: 16
Direct G-Mode Morph (Top Item, Above Hopper Pit)
Roll directly through the bomb block on entry without rolling much in the morph tunnel to overload PLMs as little as possible. Entrance condition: {
"comeInWithGMode": {
"mode": "direct",
"morphed": false
}
}Requires: "h_blueSuitGMode"
"Morph"
{
"or": [
"SpaceJump",
"canWallJump",
{
"and": [
"HiJump",
"canSpeedyJump"
]
},
{
"and": [
"HiJump",
"canSpringBallJumpMidAir"
]
},
"canTrickyUseFrozenEnemies",
{
"and": [
"canDash",
"canTrickyJump",
"canHorizontalDamageBoost",
{
"enemyDamage": {
"enemy": "Zeb",
"type": "contact",
"hits": 1
}
}
]
},
{
"and": [
{
"or": [
{
"canShineCharge": {
"usedTiles": 24,
"openEnd": 1
}
},
{
"blueSuitShinecharge": {}
}
]
},
{
"shinespark": {
"frames": 9,
"excessFrames": 3
}
}
]
}
]
} |
From: 2
Right Side - Top Door
To: 16
Direct G-Mode Morph (Top Item, Above Hopper Pit)
Entrance condition: {
"comeInWithGMode": {
"mode": "direct",
"morphed": false
}
}Requires: "Morph"
{
"or": [
"SpaceJump",
"canWallJump",
"canPreciseGrapple",
{
"and": [
"HiJump",
"canSpeedyJump"
]
},
{
"and": [
"HiJump",
"canSpringBallJumpMidAir"
]
},
"canTrickyUseFrozenEnemies",
{
"and": [
"canDash",
"canTrickyJump",
"canHorizontalDamageBoost",
{
"enemyDamage": {
"enemy": "Zeb",
"type": "contact",
"hits": 1
}
}
]
},
{
"and": [
{
"or": [
{
"canShineCharge": {
"usedTiles": 24,
"openEnd": 1
}
},
{
"blueSuitShinecharge": {}
}
]
},
{
"shinespark": {
"frames": 9,
"excessFrames": 3
}
}
]
}
]
} |
From: 3
Left Side - Top Middle Door (Main Entrance)
To: 16
Direct G-Mode Morph (Top Item, Above Hopper Pit)
Entrance condition: {
"comeInWithGMode": {
"mode": "direct",
"morphed": false
}
}Requires: "Morph"
{
"or": [
"SpaceJump",
"canWallJump",
"canPreciseGrapple",
{
"and": [
"HiJump",
"canSpeedyJump"
]
},
{
"and": [
"HiJump",
"canSpringBallJumpMidAir"
]
},
"canTrickyUseFrozenEnemies",
{
"and": [
"canDash",
"canTrickyJump",
"canHorizontalDamageBoost",
{
"enemyDamage": {
"enemy": "Zeb",
"type": "contact",
"hits": 1
}
}
]
},
{
"and": [
{
"or": [
{
"canShineCharge": {
"usedTiles": 24,
"openEnd": 1
}
},
{
"blueSuitShinecharge": {}
}
]
},
{
"shinespark": {
"frames": 9,
"excessFrames": 3
}
}
]
}
]
} |
From: 6
Right Side - Top Middle Door
To: 16
Direct G-Mode Morph (Top Item, Above Hopper Pit)
Entrance condition: {
"comeInWithGMode": {
"mode": "direct",
"morphed": false
}
}Requires: "Morph"
{
"or": [
"SpaceJump",
"canWallJump",
"canPreciseGrapple",
{
"and": [
"HiJump",
"canSpeedyJump"
]
},
{
"and": [
"HiJump",
"canSpringBallJumpMidAir"
]
},
"canTrickyUseFrozenEnemies",
{
"and": [
"canDash",
"canTrickyJump",
"canHorizontalDamageBoost",
{
"enemyDamage": {
"enemy": "Zeb",
"type": "contact",
"hits": 1
}
}
]
},
{
"and": [
{
"or": [
{
"canShineCharge": {
"usedTiles": 24,
"openEnd": 1
}
},
{
"blueSuitShinecharge": {}
}
]
},
{
"shinespark": {
"frames": 9,
"excessFrames": 3
}
}
]
}
]
} |
From: 8
Right Side - Bottom Door
To: 16
Direct G-Mode Morph (Top Item, Above Hopper Pit)
Entrance condition: {
"comeInWithGMode": {
"mode": "direct",
"morphed": false
}
}Requires: "Morph"
{
"or": [
"SpaceJump",
"canWallJump",
"canPreciseGrapple",
{
"and": [
"HiJump",
"canSpeedyJump"
]
},
{
"and": [
"HiJump",
"canSpringBallJumpMidAir"
]
},
"canTrickyUseFrozenEnemies",
{
"and": [
"canDash",
"canTrickyJump",
"canHorizontalDamageBoost",
{
"enemyDamage": {
"enemy": "Zeb",
"type": "contact",
"hits": 1
}
}
]
},
{
"and": [
{
"or": [
{
"canShineCharge": {
"usedTiles": 24,
"openEnd": 1
}
},
{
"blueSuitShinecharge": {}
}
]
},
{
"shinespark": {
"frames": 9,
"excessFrames": 3
}
}
]
}
]
} |
From: 13
Central Junction
To: 4
Left Side - Door Behind Power Bomb Blocks
Freeze a Zeb inside the left wall of the room, below the Power Bomb block wall. Run into the wall to clip into it, then X-Ray climb. Walking into the wall is also possible but is more precise and may require several tries. Requires: {
"notable": "Wall Ice Clip X-Ray Climb"
}
"canWallIceClip"
{
"or": [
"canDash",
"canInsaneJump"
]
}
"canXRayClimb" |
From: 13
Central Junction
To: 5
Left Side - Door Blocked by Crumble Blocks

Freeze a Zeb inside the left wall of the room, and use it to clip into the wall and X-Ray climb. Note that jumping directly against the wall to clip into it will put Samus into a forced crouch, unable to use X-Ray. Samus may either 1) perform a Crystal Flash to stand up, 2) use neutral knockback from a Reo to put Samus standing inside the wall, or 3) use the frozen Reo as a platform to walk or run and clip into the wall. To manipulate the Reo into a suitable position, lure it to the left and crouch at the edge of the platform; jump as needed to bring it back on camera when it goes off; it should perform 4 big swoops down to the left, 2 small swoops (hitting the overhang above), then 5 more big swoops, after which it will enter a slow hover moving directly towards Samus. Freeze the Reo when its left side is approximately flush with the ledge, or up to about a tile to the right. After X-Ray climbing a little over half a screen, it is possible to aim up and shoot the door (if it is blue) and listen for if it opens, to test if you are high enough to safely jump up. Alternatively, the sound of the crumble blocks breaking will indicate when Samus' feet are level with the bottom of the door. Requires: {
"notable": "Wall Ice Clip X-Ray Climb"
}
"canWallIceClip"
{
"or": [
{
"and": [
"canDash",
"h_CrystalFlash"
]
},
{
"and": [
"canNeutralDamageBoost",
{
"enemyDamage": {
"enemy": "Reo",
"type": "contact",
"hits": 1
}
}
]
},
{
"and": [
{
"or": [
"canWallJump",
"SpaceJump",
"canInsaneJump"
]
},
"canTrickyDodgeEnemies",
"canTrickyUseFrozenEnemies"
]
}
]
}
"canXRayClimb"Dev note: The Zeb moves 2 pixels per frame, and there are 3 positions where it can be frozen inside the wall using Ice beam alone, namely 2 pixels, 4 pixels, or 6 pixels deep inside the wall. For the method that uses the frozen Reo as a platform, only the 2-pixel-deep position will work; by moonwalking back inside the 2-tile space, it will work 100% reliably as long as the Zeb is frozen in that exact spot. For the method that jumps directly into the wall (with a Crystal Flash), either 2 or 4 pixels can work, or 6 with SpeedBooster; it will work more reliably the less deeply the Zeb is frozen inside the wall. Likewise, with the Reo knockback method either 2 or 4 pixels can work, though it is more reliable in the 2-pixel position; it helps to take the knockback a few pixels away from the wall, as it takes a few frames for the horizontal speed of the knockback to reach its maximum. The trick can work with Samus facing either toward or away from the wall when taking knockback; facing away makes it easier to quickly kill the Reo afterward to avoid taking a second hit. |
From: 13
Central Junction
To: 10
Top Item (Above Hopper Pit)

Lead a Zeb through the room and damage boost off of it to reach the item to the left of the grapple blocks. The respawning Zeb can be used by carfeully luring it while remaining high enough that it does not start moving horizontally. Wait for it to respawn before attempting to guide it. If done properly, the Zeb will continue to move upwards as long as it does not go off screen horizontally. On the floating platform by the grapple blocks, jump and aim down to lower the camera, then run and jump into the Zeb once it is visible. Requires: {
"notable": "Zeb Damage Boost"
}
"canCameraManip"
"canDash"
"canTrickyJump"
"canHorizontalDamageBoost"
{
"enemyDamage": {
"enemy": "Zeb",
"type": "contact",
"hits": 1
}
} |
|
Requires: {
"or": [
{
"resetRoom": {
"nodes": [
1
]
}
},
{
"and": [
{
"resetRoom": {
"nodes": [
2
]
}
},
{
"or": [
{
"and": [
"h_getBlueSpeedMaxRunway",
"canCarefulJump",
{
"cycleFrames": 500
}
]
},
{
"and": [
"canDash",
"h_avoidScrewStuck",
{
"cycleFrames": 620
}
]
},
{
"and": [
"canDash",
"h_useMorphBombs",
{
"cycleFrames": 1100
}
]
},
{
"and": [
{
"haveBlueSuit": {}
},
{
"cycleFrames": 810
}
]
}
]
}
]
}
]
}
{
"or": [
{
"and": [
"canDash",
{
"or": [
{
"and": [
"Plasma",
{
"cycleFrames": 360
}
]
},
{
"and": [
"Wave",
{
"cycleFrames": 360
}
]
},
{
"and": [
"Spazer",
{
"cycleFrames": 400
}
]
},
{
"and": [
"ScrewAttack",
{
"cycleFrames": 490
}
]
},
{
"and": [
"canDodgeWhileShooting",
{
"cycleFrames": 540
}
]
}
]
}
]
},
{
"and": [
{
"haveBlueSuit": {}
},
{
"cycleFrames": 720
}
]
}
]
}Resets obstacles: A Farm cycle drops: 2 Zeela, 3 Reo |
|

Requires: {
"resetRoom": {
"nodes": [
1
]
}
}
{
"or": [
{
"and": [
"canDash",
{
"or": [
{
"and": [
"ScrewAttack",
{
"cycleFrames": 310
}
]
},
{
"and": [
"Plasma",
{
"cycleFrames": 440
}
]
},
{
"and": [
"Wave",
"Spazer",
"canDodgeWhileShooting",
{
"cycleFrames": 500
}
]
},
{
"and": [
{
"notable": "Doorway Sidehopper Kill"
},
{
"doorUnlockedAtNode": 1
},
"canTrickyDodgeEnemies",
{
"or": [
{
"and": [
"Wave",
{
"cycleFrames": 750
}
]
},
{
"and": [
"Spazer",
{
"cycleFrames": 840
}
]
},
{
"and": [
"Ice",
{
"cycleFrames": 1000
}
]
},
{
"cycleFrames": 1440
}
]
}
]
}
]
}
]
},
{
"and": [
{
"haveBlueSuit": {}
},
{
"cycleFrames": 440
}
]
}
]
}Clears obstacles: A Resets obstacles: B, R-Mode Farm cycle drops: 2 Sidehopper |
From: 1
Left Door
To: 1
Left Door

Entrance condition: {
"comeInGettingBlueSpeed": {
"length": 0,
"openEnd": 1
}
}Requires: "h_blueJump" "canPrepareForNextRoom" Clears obstacles: A |
|
Requires: "canPrepareForNextRoom"
{
"resetRoom": {
"nodes": [
1
]
}
}
{
"or": [
{
"and": [
"canDash",
"ScrewAttack",
{
"cycleFrames": 130
}
]
},
{
"and": [
{
"haveBlueSuit": {}
},
{
"cycleFrames": 140
}
]
},
{
"and": [
"h_PlasmaHitbox",
{
"cycleFrames": 170
}
]
}
]
}Clears obstacles: A Resets obstacles: B, C, R-Mode Farm cycle drops: 1 Sidehopper, 2 Sm. Sidehopper |
|
Requires: "canWallJump"
"canTrickyJump"
{
"resetRoom": {
"nodes": [
2
]
}
}
{
"or": [
{
"and": [
"canDash",
{
"or": [
{
"and": [
"ScrewAttack",
{
"cycleFrames": 600
}
]
},
{
"and": [
"Plasma",
{
"cycleFrames": 690
}
]
},
{
"and": [
"Wave",
{
"cycleFrames": 810
}
]
}
]
}
]
},
{
"and": [
{
"haveBlueSuit": {}
},
{
"cycleFrames": 630
}
]
}
]
}Clears obstacles: A Resets obstacles: C, B, R-Mode Farm cycle drops: 1 Sidehopper, 2 Sm. Sidehopper |
|
Requires: {
"obstaclesCleared": [
"B"
]
}
{
"or": [
"canWallJump",
"SpaceJump",
"Grapple",
{
"and": [
"canDash",
"canCarefulJump",
{
"disableEquipment": "HiJump"
}
]
},
{
"and": [
"canDash",
"canTrickyJump"
]
}
]
}Dev note: FIXME: There are other ways to avoid turning off HiJump, such as starting below with a Spring Ball jump or IBJ. |
|
Stand to the right of the right-most bug pipe, and run to the right to gain a shortcharge. Run back to the left, jump over the bug pipes, and shinespark through the left door. Requires: {
"canShineCharge": {
"usedTiles": 21,
"steepUpTiles": 2,
"openEnd": 0
}
}
{
"or": [
{
"shinespark": {
"frames": 29,
"excessFrames": 0
}
},
{
"and": [
"h_speedJump",
{
"shinespark": {
"frames": 15,
"excessFrames": 0
}
}
]
}
]
}Exit condition: {
"leaveWithSpark": {}
} |
|


Requires: {
"resetRoom": {
"nodes": [
1
]
}
}
{
"or": [
{
"and": [
"Gravity",
"canDash",
{
"or": [
{
"and": [
{
"or": [
"Wave",
"Spazer",
"Plasma"
]
},
{
"cycleFrames": 340
}
]
},
{
"and": [
"ScrewAttack",
{
"cycleFrames": 360
}
]
},
{
"and": [
"Grapple",
{
"cycleFrames": 360
}
]
},
{
"cycleFrames": 420
}
]
}
]
},
{
"and": [
"Gravity",
{
"haveBlueSuit": {}
},
{
"cycleFrames": 540
}
]
},
{
"and": [
{
"or": [
"Charge",
"Wave",
"Spazer",
"Plasma",
{
"haveBlueSuit": {}
}
]
},
{
"cycleFrames": 690
}
]
},
{
"cycleFrames": 780
}
]
}Resets obstacles: A Farm cycle drops: 2 Zero |
From: 3
Dry Platform Junction
To: 1
Right Door
Charge a spark going left, then build speed and jump far to the right into a mid-air spark across the room and through the door. Requires: {
"canShineCharge": {
"usedTiles": 32,
"openEnd": 1
}
}
"canCarefulJump"
"h_speedJump"
{
"shinespark": {
"frames": 62,
"excessFrames": 0
}
}Exit condition: {
"leaveWithSpark": {
"grounded": false
}
}Unlocks doors: {"types":["ammo"],"requires":[]} |
|


Entrance condition: {
"comeInGettingBlueSpeed": {
"length": 3,
"openEnd": 1
}
}Requires: "h_blueJump" "canCarefulJump" |
|
Requires: {
"or": [
{
"and": [
{
"resetRoom": {
"nodes": [
1
]
}
},
{
"cycleFrames": 300
}
]
},
{
"and": [
{
"resetRoom": {
"nodes": [
2
]
}
},
{
"cycleFrames": 240
}
]
}
]
}
{
"or": [
"canDash",
{
"cycleFrames": 80
}
]
}Farm cycle drops: 1 Cacatac |
|
Requires: {
"resetRoom": {
"nodes": [
1
]
}
}
{
"or": [
{
"and": [
"canDash",
{
"or": [
{
"and": [
"ScrewAttack",
{
"cycleFrames": 240
}
]
},
{
"and": [
"canDodgeWhileShooting",
"Plasma",
{
"cycleFrames": 380
}
]
}
]
}
]
},
{
"and": [
{
"haveBlueSuit": {}
},
{
"cycleFrames": 300
}
]
}
]
}Clears obstacles: A Resets obstacles: B Farm cycle drops: 2 Sidehopper |
From: 1
Left Door
To: 2
Right Door


If you wait long enough, a Waver will arrive. After it turns around to go back to the right, damage boost off of it, then follow it. Continue to hit it to get i-frames to avoid taking damage from any spikes. The amount of Waver hits can be reduced by running ahead on the spikes and taking damage from a second Waver instead of following the first Waver. Requires: {
"notable": "Damage Boost (Left to Right)"
}
"canDash"
"canHorizontalDamageBoost"
{
"enemyDamage": {
"enemy": "Waver",
"type": "contact",
"hits": 2
}
}
{
"or": [
{
"and": [
"canUseIFrames",
"canTrickyJump"
]
},
{
"enemyDamage": {
"enemy": "Waver",
"type": "contact",
"hits": 3
}
}
]
} |
|
Requires: "h_storedSpark"
"canDash"
"canHorizontalShinespark"
{
"shinespark": {
"frames": 132,
"excessFrames": 60
}
} |
From: 1
Left Door
To: 4
Small Ledge Below Left Door
Requires: "canTrickyJump"
{
"or": [
"canDash",
"canWallJump",
{
"and": [
"canFlatleyJump",
{
"disableEquipment": "HiJump"
}
]
},
{
"and": [
"h_useSpringBall",
"canResetFallSpeed"
]
}
]
} |
|


Use a Fireflea (or two) to quickly boost to the left, to be able to catch the Waver and boost off it on its first cycle, to cross the first gap. Take one or two more hits from the Wavers for i-frames; take the last hit close to the ground while holding forward. Then gain speed using Speed Booster to jump across the second gap. If the jump is slightly short, a wall jump can be used to get up. Using the second Waver cycle leads to a bad pattern at the end, where the path of the speedy jump will be blocked by a Waver, which can still be avoided but only with great difficulty. Requires: "canHorizontalDamageBoost"
"canTrickyJump"
"canUseIFrames"
"h_speedJump"
{
"or": [
"canInsaneJump",
{
"and": [
"canTrickyDodgeEnemies",
{
"enemyDamage": {
"enemy": "Fireflea",
"type": "contact",
"hits": 1
}
}
]
},
{
"enemyDamage": {
"enemy": "Fireflea",
"type": "contact",
"hits": 2
}
}
]
}
{
"or": [
{
"and": [
"canInsaneJump",
{
"enemyDamage": {
"enemy": "Waver",
"type": "contact",
"hits": 2
}
}
]
},
{
"enemyDamage": {
"enemy": "Waver",
"type": "contact",
"hits": 3
}
}
]
}
{
"or": [
"canWallJump",
"canTrickyDodgeEnemies"
]
}Dev note: FIXME: Patiently waiting for a different Waver cycle could be another way to avoid Fireflea damage. FIXME: gaining a shinecharge on the spikes (and hero shot sparking out the left door) is possible though extremely precise. |
From: 2
Right Door
To: 1
Left Door
A precise strat that involves crossing both gaps by damage boosting off Wavers. The Wavers are also used for i-frames to avoid taking damage from any spikes. It generally best to use a Fireflea (or two) to quickly boost to the left, in order to boost off the Waver during its first cycle. Waiting for the Waver to return is possible and does not take long, but it gives a different pattern at the left side of the room, making the final damage boost significantly more difficult. Requires: {
"notable": "Full Room Damage Boosts (Right to Left)"
}
"canDash"
"canHorizontalDamageBoost"
"canTrickyJump"
"canUseIFrames"
{
"or": [
{
"enemyDamage": {
"enemy": "Fireflea",
"type": "contact",
"hits": 2
}
},
{
"and": [
"canTrickyDodgeEnemies",
{
"enemyDamage": {
"enemy": "Fireflea",
"type": "contact",
"hits": 1
}
}
]
},
"canInsaneJump"
]
}
{
"enemyDamage": {
"enemy": "Waver",
"type": "contact",
"hits": 6
}
} |
|
Requires: "h_storedSpark"
"canDash"
"canHorizontalMidairShinespark"
{
"shinespark": {
"frames": 99,
"excessFrames": 5
}
} |
From: 2
Right Door
To: 3
Safe Block in the Middle of the Room
Freeze a Waver and Fireflea to cross the gap. It is possible to avoid a spike hit by damage boosting off the Fireflea after it thaws. Requires: "canDash"
"canTrickyUseFrozenEnemies"
"canTrickyDodgeEnemies"
{
"or": [
{
"spikeHits": 1
},
{
"and": [
"canHorizontalDamageBoost",
{
"enemyDamage": {
"enemy": "Fireflea",
"type": "contact",
"hits": 1
}
}
]
}
]
} |
From: 2
Right Door
To: 3
Safe Block in the Middle of the Room
Use the Fireflea when it moves to the right to cross the first gap. Requires: "canTrickyUseFrozenEnemies"
"HiJump"
"canCarefulJump"
{
"or": [
"canTrickyJump",
{
"and": [
"canDash",
"canWallJump"
]
}
]
}
{
"or": [
{
"spikeHits": 1
},
{
"and": [
"canHorizontalDamageBoost",
{
"enemyDamage": {
"enemy": "Fireflea",
"type": "contact",
"hits": 1
}
}
]
}
]
}
{
"or": [
{
"noBlueSuit": {}
},
"canBlueSuitSpikeJump"
]
} |
From: 2
Right Door
To: 3
Safe Block in the Middle of the Room


Damage boost off of a Waver in order to get onto the upper spikes. It is possible to quickly get into position to use the Waver or to wait for it to return. Requires: "canDash"
"canTrickyJump"
{
"enemyDamage": {
"enemy": "Waver",
"type": "contact",
"hits": 1
}
}
"canHorizontalDamageBoost"
{
"or": [
"canUseIFrames",
{
"spikeHits": 1
}
]
} |
From: 3
Safe Block in the Middle of the Room
To: 2
Right Door
Requires: "canTrickyUseFrozenEnemies"
{
"or": [
"canDash",
"canInsaneJump"
]
} |
From: 3
Safe Block in the Middle of the Room
To: 4
Small Ledge Below Left Door
Repeatedly take damage from a Waver, using the i-frames to avoid taking any spike hits. There are several possible ways to ensure Samus lands on the safe platform: 1) align with the right-most vine of the group of 3 vines in the background; 2) position so that one tile of the doorway ledge is visible on camera; or 3) take an extra Waver hit, to have i-frames while descending the spike stairs. Requires: "canDash"
"canUseIFrames"
"canTrickyJump"
{
"or": [
{
"enemyDamage": {
"enemy": "Waver",
"type": "contact",
"hits": 5
}
},
{
"and": [
"canTrickyDodgeEnemies",
{
"enemyDamage": {
"enemy": "Waver",
"type": "contact",
"hits": 3
}
}
]
},
{
"and": [
"canInsaneJump",
{
"enemyDamage": {
"enemy": "Waver",
"type": "contact",
"hits": 2
}
}
]
}
]
}Dev note: FIXME: account for the possibility of farming the Waver (or all 3) at the end, compensating for some of the damage. |
From: 4
Small Ledge Below Left Door
To: 1
Left Door


Jump up to the left door either by jumping from spikes or with a very precise jump. Cross the room by Jumping atop the spikes. Taking enemy damage can be used to reduce some spike damage. The final jump can either be made by jumping from the bottommost spike stair or from the safe stair. Setup run speed atop the spike stair by holding forward to be pushed backward. The safe stair jump is much harder, but can be made without every pixel of runway. Requires: {
"notable": "Spike Jumps with HiJump"
}
"HiJump"
"canDash"
"canTrickyJump"
{
"or": [
{
"and": [
"canInsaneWallJump",
"canInsaneJump",
"h_backIntoCorner"
]
},
{
"and": [
{
"spikeHits": 1
},
"canHorizontalDamageBoost",
"canPreciseWallJump",
"canUseIFrames"
]
}
]
} |
From: 4
Small Ledge Below Left Door
To: 1
Left Door
Requires: "h_SpringwallOverSpikes"
{
"or": [
{
"spikeHits": 1
},
{
"and": [
"canDash",
"canInsaneJump"
]
}
]
}
{
"or": [
{
"noBlueSuit": {}
},
"canBlueSuitSpikeJump"
]
} |
From: 4
Small Ledge Below Left Door
To: 2
Right Door
This strat is simply running and jumping across the spikes. Requires: "canDash"
{
"spikeHits": 3
}
{
"or": [
"canUseIFrames",
{
"spikeHits": 3
}
]
}
{
"or": [
"canInsaneJump",
{
"spikeHits": 1
}
]
} |
|
Requires: {
"or": [
"canDash",
{
"disableEquipment": "HiJump"
},
{
"and": [
"HiJump",
"h_underwaterCrouchJumpDownGrab"
]
},
"canWallJump",
"Gravity",
"SpaceJump",
{
"and": [
"canSpringBallBombJump",
"canResetFallSpeed"
]
},
"canBombJumpWaterEscape"
]
} |
|


Leaving with upward momentum is possible in three ways: 1) Most easily, with a momentum-conserving morph against the ceiling through the transition, 2) With a momentum-conserving turnaround through the transition, or 3) Jumping specifically with a extra run speed $5.2 or $5.3 and aiming down through the transition. For the first two methods, avoid backing into the corner at the start of runway; instead press against it and turn around, to put Samus into a better position. Requires: {
"obstaclesCleared": [
"A"
]
}
"h_speedJump"
{
  "or": [
    "canMomentumConservingMorph",
    "canInsaneJump"
  ]
}
Exit condition: {
"leaveWithSidePlatform": {
"height": 2,
"runway": {
"length": 45,
"openEnd": 1
},
"obstruction": [
3,
0
]
}
}Dev note: Max extra run speed $7.0. Using the full runway, there is a 4-frame window for the jump, then between a 1-frame and 4-frame window for the morph depending on the jump (with later jumps giving more frames for the morph). If there is a solid tile on the ceiling in the next room past the door frame, then the windows for the jump and morph are tighter. The momentum-conserving turnaround has a 3-frame window for the jump, and between a 1-frame or 4-frame for the turnaround (with later jumps giving a larger window for the turnaround); again the windows can be more narrow depending on what is required in the next room. |
|
Requires: {
"resetRoom": {
"nodes": [
1
]
}
}
{
"or": [
{
"and": [
"canDash",
{
"or": [
{
"and": [
"Plasma",
{
"cycleFrames": 255
}
]
},
{
"and": [
"Wave",
{
"cycleFrames": 280
}
]
},
{
"and": [
"ScrewAttack",
{
"cycleFrames": 300
}
]
},
{
"and": [
"Spazer",
{
"cycleFrames": 315
}
]
},
{
"and": [
"Ice",
{
"cycleFrames": 400
}
]
},
{
"and": [
"canPseudoScrew",
{
"cycleFrames": 450
}
]
},
{
"and": [
"Charge",
"canDodgeWhileShooting",
{
"cycleFrames": 600
}
]
},
{
"and": [
"h_useMorphBombs",
"canTrickyDodgeEnemies",
{
"cycleFrames": 620
}
]
}
]
}
]
},
{
"and": [
{
"haveBlueSuit": {}
},
{
"cycleFrames": 400
}
]
}
]
}Resets obstacles: A Farm cycle drops: 3 Green Space Pirate (standing) |
|
Requires: "canDash"
{
"enemyKill": {
"enemies": [
[
"Green Space Pirate (standing)",
"Green Space Pirate (standing)",
"Green Space Pirate (standing)"
]
],
"excludedWeapons": [
"Bombs"
]
}
}
{
"or": [
"canDodgeWhileShooting",
"ScrewAttack",
{
"enemyDamage": {
"enemy": "Mini-Kraid",
"type": "spike",
"hits": 1
}
}
]
}
{
"or": [
{
"enemyKill": {
"enemies": [
[
"Mini-Kraid"
]
],
"excludedWeapons": [
"PowerBeam",
"Bombs",
"Charge",
"Ice",
"Wave",
"Spazer"
]
}
},
{
"enemyDamage": {
"enemy": "Mini-Kraid",
"type": "spike",
"hits": 3
}
},
{
"and": [
{
"enemyKill": {
"enemies": [
[
"Mini-Kraid"
]
],
"explicitWeapons": [
"Wave",
"Spazer"
]
}
},
{
"enemyDamage": {
"enemy": "Mini-Kraid",
"type": "spike",
"hits": 2
}
}
]
},
"canInsaneJump"
]
}
{
"or": [
"h_complexToCarryFlashSuit",
{
"enemyDamage": {
"enemy": "Mini-Kraid",
"type": "spike",
"hits": 3
}
}
]
}Clears obstacles: A Dev note: FIXME: Collecting the drops from the pirates could make the Mini-Kraid spike hits not matter much. |
|
Kill the pirates by placing Bombs next to them without touching them. With low Energy, it is possible to jump over the pirates and kill Mini-Kraid first, but it is difficult to do so damageless. Requires: "canDash"
"canDodgeWhileShooting"
{
"enemyKill": {
"enemies": [
[
"Green Space Pirate (standing)",
"Green Space Pirate (standing)",
"Green Space Pirate (standing)"
]
],
"explicitWeapons": [
"Bombs"
]
}
}
{
"or": [
"canTrickyJump",
{
"enemyDamage": {
"enemy": "Green Space Pirate (standing)",
"type": "contact",
"hits": 1
}
}
]
}
{
"or": [
"canInsaneJump",
{
"enemyDamage": {
"enemy": "Mini-Kraid",
"type": "spike",
"hits": 4
}
}
]
}
{
"or": [
"h_complexToCarryFlashSuit",
{
"enemyDamage": {
"enemy": "Mini-Kraid",
"type": "spike",
"hits": 3
}
}
]
}Clears obstacles: A Dev note: FIXME: Collecting the drops from the pirates could make the Mini-Kraid spike hits not matter much. |
|
Requires: "canDash"
"SpaceJump"
{
"or": [
"canDodgeWhileShooting",
{
"enemyDamage": {
"enemy": "Mini-Kraid",
"type": "spike",
"hits": 1
}
}
]
} |
|
Quickly run through to tank the Pirate (or its laser) and one of Mini-Kraid's spikes. Requires: "canDash"
{
"enemyDamage": {
"enemy": "Green Space Pirate (standing)",
"type": "contact",
"hits": 1
}
}
{
"enemyDamage": {
"enemy": "Mini-Kraid",
"type": "spike",
"hits": 1
}
} |
|
Kill the pirates by placing Bombs next to them without touching them. Fight Mini-Kraid from the doorway in order to be somewhat protected from the stone projectiles, which do the most damage. Requires: "canDash"
"canDodgeWhileShooting"
{
"enemyKill": {
"enemies": [
[
"Green Space Pirate (standing)",
"Green Space Pirate (standing)",
"Green Space Pirate (standing)"
]
],
"explicitWeapons": [
"Bombs"
]
}
}Clears obstacles: A |
|
Wait to hit one of Mini-Kraid's spikes, then run through. Requires: "canDash"
{
"or": [
"canCarefulJump",
{
"enemyDamage": {
"enemy": "Green Space Pirate (standing)",
"type": "contact",
"hits": 1
}
}
]
}
{
"or": [
"canTrickyJump",
{
"enemyDamage": {
"enemy": "Mini-Kraid",
"type": "spike",
"hits": 1
}
}
]
} |
|


Requires: {
"obstaclesCleared": [
"A"
]
}
"h_speedJump"
"canInsaneJump"
"canMomentumConservingMorph"Exit condition: {
"leaveWithSidePlatform": {
"height": 2,
"runway": {
"length": 45,
"openEnd": 1
},
"obstruction": [
4,
0
]
}
}Dev note: Max extra run speed $7.0. Press against the overhang left of the ceiling spikes, then perform 4 arm pumps to advance 8 pixels while running. There is a 2-frame window for the jump and a 2-frame window for the morph. These windows can be more narrow depending on what is required in the next room. |
|
Requires: {
"resetRoom": {
"nodes": [
2
]
}
}
{
"or": [
{
"and": [
"canDash",
{
"or": [
{
"and": [
{
"or": [
"Plasma",
"ScrewAttack",
{
"ammo": {
"type": "Super",
"count": 1
}
}
]
},
{
"cycleFrames": 225
}
]
},
{
"and": [
"Wave",
{
"cycleFrames": 310
}
]
},
{
"and": [
"Spazer",
{
"cycleFrames": 330
}
]
},
{
"and": [
"Ice",
{
"cycleFrames": 440
}
]
},
{
"cycleFrames": 600
}
]
}
]
},
{
"and": [
{
"haveBlueSuit": {}
},
{
"cycleFrames": 275
}
]
}
]
}
{
"or": [
{
"enemyDamage": {
"enemy": "Mini-Kraid",
"type": "stone",
"hits": 1
}
},
"Plasma",
"ScrewAttack",
{
"haveBlueSuit": {}
},
{
"and": [
"Ice",
"Wave",
"Spazer"
]
},
{
"and": [
"canDodgeWhileShooting",
{
"or": [
"Ice",
"Wave",
"Spazer"
]
}
]
},
"canTrickyDodgeEnemies"
]
}Resets obstacles: A Farm cycle drops: 1 Mini-Kraid |
|


Requires: {
"or": [
"f_DefeatedKraid",
{
"obstaclesCleared": [
"f_DefeatedKraid"
]
}
]
}
"h_speedJump"
"canInsaneJump"
"canMomentumConservingMorph"Exit condition: {
"leaveWithSidePlatform": {
"height": 2,
"runway": {
"length": 24,
"openEnd": 0
},
"obstruction": [
4,
0
]
}
}Dev note: Max extra run speed $4.4. Using the full runway, there is a 2-frame window for the jump, then a 1-frame or 2-frame window for the morph depending on the jump (with a last-frame jump giving a 2-frame morph window). |
|
Kill the Beetoms with Screw Attack or using Bombs or Power Bombs, either freezing them or carefully avoiding them to minimize damage. Requires: {
"resetRoom": {
"nodes": [
1
]
}
}
{
"or": [
{
"and": [
"canDash",
{
"or": [
{
"and": [
"ScrewAttack",
{
"cycleFrames": 130
}
]
},
{
"and": [
{
"or": [
"Ice",
"canTrickyDodgeEnemies",
{
"enemyDamage": {
"enemy": "Beetom",
"type": "contact",
"hits": 1
}
}
]
},
{
"or": [
{
"resourceAvailable": [
{
"type": "Energy",
"count": 50
}
]
},
{
"resourceAvailable": [
{
"type": "PowerBomb",
"count": 4
}
]
}
]
},
"h_usePowerBomb",
{
"cycleFrames": 290
}
]
},
{
"and": [
"h_useMorphBombs",
"canTrickyDodgeEnemies",
"canInsaneJump",
{
"cycleFrames": 425
}
]
},
{
"and": [
"Ice",
"canDodgeWhileShooting",
"h_useMorphBombs",
{
"cycleFrames": 720
}
]
}
]
}
]
},
{
"and": [
{
"haveBlueSuit": {}
},
{
"cycleFrames": 210
}
]
}
]
}Clears obstacles: A Farm cycle drops: 4 Beetom Dev note: Health Bomb ends at 50 energy. FIXME: One Missile or Super can be used to gain a power bomb and then power bombs can be used to farm more power bombs. |
|
Requires: "canDash"
{
"enemyDamage": {
"enemy": "Beetom",
"type": "contact",
"hits": 4
}
} |
|
Wait by the door briefly before spin jumping over and grabbing the item. It is also possible to do this instead by entering with run speed and quickly grabbing the item. Entrance condition: {
"comeInNormally": {}
}Requires: {
"doorUnlockedAtNode": 1
}
"canDash"
"canTrickyJump"
{
"enemyDamage": {
"enemy": "Beetom",
"type": "contact",
"hits": 1
}
}
"h_complexToCarryFlashSuit"Unlocks doors: {"nodeId":1,"types":["super"],"requires":[]}
{"nodeId":1,"types":["missiles","powerbomb"],"requires":["never"]} |
|
Carefully manipulate the Beetoms to avoid all damage. Entrance condition: {
"comeInNormally": {}
}Requires: {
"doorUnlockedAtNode": 1
}
"canDash"
"canTrickyDodgeEnemies"
"canInsaneJump"
"h_complexToCarryFlashSuit"Unlocks doors: {"nodeId":1,"types":["super"],"requires":[]}
{"nodeId":1,"types":["missiles","powerbomb"],"requires":["never"]} |
|
Requires: "canDash"
{
"enemyDamage": {
"enemy": "Beetom",
"type": "contact",
"hits": 6
}
} |
|
Carefully manipulate the Beetoms to avoid all damage. Requires: "canDash" "canTrickyDodgeEnemies" "canInsaneJump" "h_complexToCarryFlashSuit" |
|
Use 2 supers, then squeeze through with a spin jump or down-aim jump. Requires: {
"ammo": {
"type": "Super",
"count": 2
}
}
"canDash"
"canTwoTileSqueeze" |
|
Use 2 supers, then squeeze through with a spin jump or down-aim jump. Requires: {
"ammo": {
"type": "Super",
"count": 2
}
}
"canDash"
"canTwoTileSqueeze" |
|

Back up against the wall of the single-tile ledge. Run forward, perform a single arm pump, and jump on the last possible frame. Aim down just before reaching the platform. The arm pump can be performed by pressing shot, or by pressing an angle button (but not releasing it until after the jump). Requires: {
"notable": "Arm Pump Jump"
}
"h_backIntoCorner"
"canDash"
"canInsaneJump"
"canDownGrab" |
|
Break all 3 super blocks to build enough run speed to jump over the pit. Requires: {
"obstaclesCleared": [
"A"
]
}
"canDash"
"canCarefulJump" |
|
To save energy, jump from the runway by the Super blocks. This is doable with less than 29 Energy. Requires: "h_storedSpark"
"canDash"
{
"shinespark": {
"frames": 2,
"excessFrames": 2
}
} |
|
It's much easier without Speed Booster equipped. Requires: "canDash"
"canPreciseWallJump"
{
"disableEquipment": "SpeedBooster"
}Dev note: With Speed Booster and without canDisableEquipment, the player would use the canTrickyDashJump strat. |
|
Requires: {
"resetRoom": {
"nodes": [
1
]
}
}
{
"or": [
{
"and": [
"canDash",
{
"or": [
{
"and": [
"ScrewAttack",
{
"cycleFrames": 360
}
]
},
{
"and": [
"Plasma",
{
"cycleFrames": 360
}
]
},
{
"and": [
"Wave",
{
"cycleFrames": 390
}
]
},
{
"and": [
"Spazer",
{
"cycleFrames": 390
}
]
},
{
"and": [
"Ice",
"canDodgeWhileShooting",
{
"cycleFrames": 600
}
]
},
{
"and": [
"canPseudoScrew",
"canTrickyDodgeEnemies",
{
"cycleFrames": 600
}
]
},
{
"and": [
"canTrickyDodgeEnemies",
{
"cycleFrames": 1000
}
]
}
]
}
]
},
{
"and": [
{
"haveBlueSuit": {}
},
{
"cycleFrames": 360
}
]
}
]
}Clears obstacles: C Resets obstacles: A, B, D Farm cycle drops: 4 Kihunter (green) |
|
If Samus runs into the room and quickly destroys the shot block, a Kihunter will immediately fall down. To avoid this, either spin jump into the room, or wait a moment before shooting the block. Requires: {
"resetRoom": {
"nodes": [
2
]
}
}
"canDodgeWhileShooting"
{
"or": [
"HiJump",
"canWallJump",
"h_crouchJumpDownGrab",
"SpaceJump"
]
}
{
"or": [
{
"and": [
"canDash",
{
"or": [
{
"and": [
"Plasma",
{
"cycleFrames": 480
}
]
},
{
"and": [
"ScrewAttack",
{
"cycleFrames": 570
}
]
},
{
"and": [
"Wave",
{
"cycleFrames": 660
}
]
},
{
"and": [
"Spazer",
{
"cycleFrames": 660
}
]
},
{
"and": [
"Charge",
{
"cycleFrames": 780
}
]
},
{
"and": [
"Ice",
{
"cycleFrames": 840
}
]
},
{
"and": [
"canTrickyDodgeEnemies",
{
"cycleFrames": 1200
}
]
}
]
}
]
},
{
"and": [
{
"haveBlueSuit": {}
},
{
"cycleFrames": 600
}
]
}
]
}Clears obstacles: C, D Resets obstacles: A, B Farm cycle drops: 4 Kihunter (green) |
|
Requires: {
"resetRoom": {
"nodes": [
3
]
}
}
"Morph"
{
"or": [
"h_useMorphBombs",
{
"haveBlueSuit": {}
}
]
}
{
"or": [
{
"and": [
"canDash",
{
"or": [
{
"and": [
"Plasma",
{
"cycleFrames": 750
}
]
},
{
"and": [
"ScrewAttack",
{
"cycleFrames": 810
}
]
},
{
"and": [
"Wave",
{
"cycleFrames": 870
}
]
},
{
"and": [
"Spazer",
{
"cycleFrames": 840
}
]
},
{
"and": [
"Charge",
{
"cycleFrames": 945
}
]
},
{
"and": [
"Ice",
{
"cycleFrames": 1005
}
]
},
{
"and": [
"canDodgeWhileShooting",
{
"cycleFrames": 1125
}
]
}
]
}
]
},
{
"and": [
{
"haveBlueSuit": {}
},
{
"cycleFrames": 760
}
]
}
]
}Clears obstacles: B, C Resets obstacles: A, D Farm cycle drops: 4 Kihunter (green) |
|
Requires: "h_heatProof"
{
"resetRoom": {
"nodes": [
1
]
}
}
{
"or": [
{
"and": [
"canDash",
{
"cycleFrames": 300
}
]
},
{
"and": [
{
"haveBlueSuit": {}
},
{
"cycleFrames": 260
}
]
}
]
}Resets obstacles: A Farm cycle drops: 3 Skree |
|
Enter the room with a Missile selected on auto-cancel, holding angle-up. Fire a Missile shot to kill the first Skree, then run right and immediately fire a beam shot to destroy the shot block. Run off the edge and down-grab onto the next platform. Run and jump directly up where the shot block used to be, moving quickly enough to dodge the Skree projectiles by going under them. Use a wall jump, HiJump, or a mid-air spring ball jump to make it up. Requires: "canDash"
"canAutoCancelWeapon"
{
"ammo": {
"type": "Missile",
"count": 1
}
}
"canTrickyDodgeEnemies"
"canInsaneJump"
{
"or": [
{
"and": [
"HiJump",
{
"heatFrames": 160
}
]
},
{
"and": [
"canWallJump",
{
"heatFrames": 180
}
]
},
{
"and": [
"canTrickySpringBallJump",
{
"heatFrames": 195
}
]
}
]
}Dev note: FIXME: this can be done without a Missile (only Power Beam) with only about 5 more heat frames. |
|
Requires: "canDash"
{
"or": [
"canWallJump",
"HiJump",
"SpaceJump",
"canSpringBallJumpMidAir"
]
}
{
"heatFrames": 350
} |
|

Freeze the middle Skree mid-air to use it as a platform. Requires: {
"or": [
"canDash",
{
"haveBlueSuit": {}
}
]
}
"canTrickyUseFrozenEnemies"
{
"heatFrames": 260
}
"h_complexToCarryFlashSuit" |
|

Shoot the Skree and shotblock from the door. While avoiding Skree projectiles, jump to the next bubble platform followed by jumping directly up where the shot block used to be. Requires: "canDash"
"canPreciseWallJump"
"canTrickyJump"
{
"heatFrames": 220
} |
|

Shoot the Skree and shotblock from the door. While avoiding Skree projectiles, jump to the next bubble platform followed by jumping directly up where the shot block used to be. Requires: "canDash"
"HiJump"
"canTrickyJump"
{
"heatFrames": 200
} |
|

Shoot the Skree and shotblock from the door. While avoiding Skree projectiles, jump to the next bubble platform followed by jumping directly up where the shot block used to be, performing a mid-air spring ball jump to make it up to the ledge. Requires: "canDash"
"canTrickySpringBallJump"
"canTrickyJump"
{
"heatFrames": 240
} |
|
Requires: {
"heatFrames": 50
}
{
"or": [
"canDash",
{
"heatFrames": 10
}
]
} |
|


Kill King Cac by scrolling the camera, before attempting the jump. Requires: {
"doorUnlockedAtNode": 1
}
"canDash"
"canTrickyJump"
"canCameraManip" |
|


King Cac can be killed by scrolling the camera before jumping across. Requires: "h_speedJump"
"canCarefulJump"
{
"or": [
{
"doorUnlockedAtNode": 1
},
"canTrickyJump"
]
}
{
"or": [
"canCameraManip",
{
"and": [
"canNeutralDamageBoost",
{
"enemyDamage": {
"enemy": "Cacatac",
"type": "contact",
"hits": 1
}
}
]
}
]
} |
|


King Cac can be killed by scrolling the camera before jumping across. Requires: "canDash"
"canWallJump"
"canCarefulJump"
{
"or": [
"canCameraManip",
"canTrickyWallJump",
{
"and": [
"canNeutralDamageBoost",
{
"enemyDamage": {
"enemy": "Cacatac",
"type": "contact",
"hits": 1
}
}
]
}
]
} |
From: 4
Left Side - Bottom Door
To: 4
Left Side - Bottom Door
Requires: {
"or": [
{
"and": [
{
"resetRoom": {
"nodes": [
4
]
}
},
{
"cycleFrames": 155
},
{
"or": [
"canDash",
{
"cycleFrames": 15
}
]
}
]
},
{
"and": [
{
"resetRoom": {
"nodes": [
5
]
}
},
{
"cycleFrames": 220
}
]
}
]
}Resets obstacles: A Farm cycle drops: 1 Sova |
|
Requires: {
"or": [
{
"and": [
{
"resetRoom": {
"nodes": [
1
]
}
},
{
"or": [
{
"and": [
"Grapple",
{
"cycleFrames": 300
}
]
},
{
"and": [
"SpaceJump",
{
"cycleFrames": 390
}
]
},
{
"and": [
"canDash",
"HiJump",
"canTrickyWallJump",
{
"cycleFrames": 690
}
]
}
]
}
]
},
{
"and": [
{
"resetRoom": {
"nodes": [
6
]
}
},
{
"cycleFrames": 370
}
]
},
{
"and": [
{
"resetRoom": {
"nodes": [
7
]
}
},
{
"cycleFrames": 360
}
]
}
]
}
{
"or": [
"canDash",
{
"cycleFrames": 20
}
]
}Resets obstacles: A Farm cycle drops: 1 Cacatac, 1 Waver |
|
Starting from the platform near the door to the left, run and jump to the right wall and wall jump twice to get to the top. Requires: "canDash" "HiJump" "canCarefulJump" "canWallJump" |
|
Requires: {
"or": [
{
"resetRoom": {
"nodes": [
2
]
}
},
{
"and": [
{
"resetRoom": {
"nodes": [
3
]
}
},
{
"cycleFrames": 60
}
]
}
]
}
{
"or": [
{
"and": [
"SpaceJump",
{
"cycleFrames": 600
}
]
},
{
"and": [
"canDash",
"HiJump",
"canTrickyWallJump",
{
"cycleFrames": 660
}
]
}
]
}Resets obstacles: A Farm cycle drops: 1 Cacatac, 2 Waver |
|
Requires: {
"noBlueSuit": {}
}
"ScrewAttack"
{
"or": [
"canWallJump",
"HiJump",
"SpaceJump",
{
"and": [
"canSpringBallJumpMidAir",
"h_doubleEquipmentScreenCycleFrames",
{
"cycleFrames": 20
}
]
},
{
"and": [
"canIBJ",
{
"cycleFrames": 600
}
]
}
]
}
{
"or": [
{
"and": [
{
"resetRoom": {
"nodes": [
1
]
}
},
{
"or": [
{
"and": [
"SpaceJump",
{
"cycleFrames": 1050
}
]
},
{
"and": [
"canDash",
"HiJump",
"canTrickyWallJump",
{
"cycleFrames": 970
}
]
},
{
"and": [
"HiJump",
"canSpringBallJumpMidAir",
{
"cycleFrames": 970
},
"h_doubleEquipmentScreenCycleFrames"
]
}
]
}
]
},
{
"and": [
{
"resetRoom": {
"nodes": [
2
]
}
},
{
"cycleFrames": 840
}
]
},
{
"and": [
{
"resetRoom": {
"nodes": [
3
]
}
},
{
"cycleFrames": 960
}
]
},
{
"and": [
{
"resetRoom": {
"nodes": [
4
]
}
},
{
"cycleFrames": 1800
},
"h_useMorphBombs"
]
},
{
"and": [
{
"resetRoom": {
"nodes": [
5
]
}
},
{
"cycleFrames": 1800
},
"h_useMorphBombs"
]
}
]
}Resets obstacles: A Farm cycle drops: 1 Ripper 2 (red), 1 Waver |
|
Requires: {
"or": [
{
"and": [
{
"resetRoom": {
"nodes": [
1
]
}
},
{
"or": [
{
"and": [
"SpaceJump",
{
"cycleFrames": 1500
}
]
},
{
"and": [
"canDash",
"HiJump",
"canTrickyWallJump",
{
"cycleFrames": 1320
}
]
},
{
"and": [
"HiJump",
"canSpringBallJumpMidAir",
{
"cycleFrames": 1320
},
"h_doubleEquipmentScreenCycleFrames"
]
}
]
}
]
},
{
"and": [
{
"resetRoom": {
"nodes": [
2
]
}
},
{
"cycleFrames": 1140
}
]
},
{
"and": [
{
"resetRoom": {
"nodes": [
3
]
}
},
{
"cycleFrames": 1140
}
]
},
{
"and": [
{
"resetRoom": {
"nodes": [
4
]
}
},
{
"cycleFrames": 720
}
]
},
{
"and": [
{
"resetRoom": {
"nodes": [
5
]
}
},
{
"cycleFrames": 730
}
]
},
{
"and": [
{
"resetRoom": {
"nodes": [
6
]
}
},
{
"cycleFrames": 1770
},
{
"or": [
"SpaceJump",
{
"and": [
"canDash",
"HiJump",
"canTrickyWallJump"
]
}
]
}
]
},
{
"and": [
{
"resetRoom": {
"nodes": [
7
]
}
},
{
"cycleFrames": 1740
},
{
"or": [
"SpaceJump",
{
"and": [
"canDash",
"HiJump",
"canTrickyWallJump"
]
}
]
}
]
}
]
}
"h_useMorphBombs"Resets obstacles: A Farm cycle drops: 3 Sova |
|
Requires: {
"or": [
{
"and": [
{
"resetRoom": {
"nodes": [
2
]
}
},
{
"cycleFrames": 660
}
]
},
{
"and": [
{
"resetRoom": {
"nodes": [
3
]
}
},
{
"cycleFrames": 720
}
]
}
]
}
{
"or": [
"canDash",
{
"cycleFrames": 60
}
]
}Resets obstacles: A Farm cycle drops: 2 Waver |
|


Cross the room while killing Sovas and a Geruta and then jumping through their drops. Killing a Geruta with a PowerBomb will leave 2 drops. Requires: "canDash"
"canFarmWhileShooting"
"canTrickyJump"
{
"or": [
"h_usePowerBomb",
"Spazer",
"Plasma",
"Wave"
]
}
{
"resourceMissingAtMost": [
{
"type": "Missile",
"count": 0
},
{
"type": "Super",
"count": 0
}
]
}
{
"heatFramesWithEnergyDrops": {
"frames": 240,
"drops": [
{
"enemy": "Geruta",
"count": 1
},
{
"enemy": "Sova",
"count": 1
}
]
}
}
{
"heatFrames": 160
}Dev note: The PowerBomb farm treats a Geruta drop as similar to a Sova drop. |
|
Requires: {
"heatFrames": 300
}
{
"or": [
"canDash",
{
"heatFrames": 40
}
]
} |
|
Requires: "canDash"
"SpaceJump"
{
"heatFrames": 180
} |
|


Requires: "canDash"
"canTrickyJump"
{
"heatFrames": 200
} |
|


Cross the room while killing Sovas and a Geruta and then jumping through their drops. Killing a Geruta with a PowerBomb will leave 2 drops and it may be better to detour to the second Geruta for more drops. Requires: "canDash"
"canFarmWhileShooting"
"canTrickyJump"
{
"or": [
{
"and": [
"h_usePowerBomb",
{
"heatFrames": 60
}
]
},
"Spazer",
"Plasma",
"Wave"
]
}
{
"resourceMissingAtMost": [
{
"type": "Missile",
"count": 0
},
{
"type": "Super",
"count": 0
}
]
}
{
"heatFramesWithEnergyDrops": {
"frames": 315,
"drops": [
{
"enemy": "Geruta",
"count": 1
},
{
"enemy": "Sova",
"count": 1
}
]
}
}
{
"heatFrames": 85
}Dev note: This is an approximation. PBs can collect 4 geruta drops with a detour. Beams may prefer 2 Sovas. |
|
Requires: "canDash"
"canTrickyJump"
{
"or": [
"ScrewAttack",
{
"and": [
"canDodgeWhileShooting",
{
"or": [
"Wave",
"Spazer",
"Plasma",
"canPseudoScrew",
{
"ammo": {
"type": "Missile",
"count": 1
}
},
{
"ammo": {
"type": "Super",
"count": 1
}
}
]
}
]
},
{
"heatFrames": 5
}
]
}
{
"heatFrames": 190
} |
|
Place a Power Bomb near below the Sova to kill both Gerutas, resulting in 4 drops. Requires: "canDash"
"canFarmWhileShooting"
"canTrickyJump"
"h_usePowerBomb"
{
"resourceMissingAtMost": [
{
"type": "Missile",
"count": 0
},
{
"type": "Super",
"count": 0
}
]
}
{
"heatFramesWithEnergyDrops": {
"frames": 270,
"drops": [
{
"enemy": "Geruta",
"count": 4
}
]
}
}
{
"or": [
"canInsaneJump",
{
"heatFrames": 30
}
]
} |
|
Requires: "canDash"
{
"or": [
{
"and": [
{
"or": [
"Plasma",
"ScrewAttack",
"canPseudoScrew",
{
"ammo": {
"type": "Super",
"count": 1
}
}
]
},
{
"heatFrames": 270
}
]
},
{
"and": [
{
"or": [
"h_usePowerBomb",
"Ice",
"Wave",
"Spazer",
{
"ammo": {
"type": "Missile",
"count": 2
}
}
]
},
{
"heatFrames": 300
}
]
},
{
"and": [
{
"or": [
"canDodgeWhileShooting",
{
"enemyDamage": {
"enemy": "Geruta",
"type": "contact",
"hits": 1
}
}
]
},
{
"heatFrames": 390
}
]
}
]
}Unlocks doors: {"types":["powerbomb"],"requires":[{"heatFrames":50}]}Dev note: FIXME: Powerbomb kill would also unlock the door. |
|


Build speed on the central platform and jump to the door. Requires: "canDash"
"canCarefulJump"
"canDodgeWhileShooting"
{
"heatFrames": 200
}Unlocks doors: {"types":["missiles"],"requires":[{"heatFrames":25}]} |
|
Requires: "canDash"
{
"heatFrames": 250
}Unlocks doors: {"types":["missiles"],"requires":[{"heatFrames":60}]}
{"types":["super"],"requires":[]}
{"types":["powerbomb"],"requires":[{"heatFrames":60}]} |
|
Requires: "canDash"
{
"heatFrames": 240
}Exit condition: {
"leaveWithRunway": {
"length": 6,
"openEnd": 0,
"gentleDownTiles": 2,
"startingGentleDownTiles": 2
}
}Unlocks doors: {"types":["missiles"],"requires":[{"heatFrames":60}]}
{"types":["super"],"requires":[]}
{"types":["powerbomb"],"requires":[{"heatFrames":60}]} |
|
Requires: "canDash"
"canTrickyJump"
{
"heatFrames": 160
}Unlocks doors: {"types":["missiles"],"requires":[{"heatFrames":60}]}
{"types":["super"],"requires":[]}
{"types":["powerbomb"],"requires":[{"heatFrames":60}]} |
From: 4
Junction Above Item
To: 2
Right Door
Requires: "canDash"
"canTrickyJump"
{
"heatFrames": 150
}Exit condition: {
"leaveWithRunway": {
"length": 6,
"openEnd": 0,
"gentleDownTiles": 2,
"startingGentleDownTiles": 2
}
}Unlocks doors: {"types":["missiles"],"requires":[{"heatFrames":60}]}
{"types":["super"],"requires":[]}
{"types":["powerbomb"],"requires":[{"heatFrames":60}]} |
|
Requires: "canDash"
"Morph"
{
"heatFrames": 210
}
{
"or": [
{
"enemyKill": {
"enemies": [
[
"Geruta"
]
],
"explicitWeapons": [
"Super",
"Missile",
"PowerBomb",
"ScrewAttack",
"Plasma",
"Spazer",
"Wave",
"PseudoScrew"
]
}
},
{
"and": [
"canDodgeWhileShooting",
{
"heatFrames": 100
}
]
},
{
"and": [
{
"enemyDamage": {
"enemy": "Geruta",
"type": "contact",
"hits": 1
}
},
{
"heatFrames": 200
}
]
}
]
}
{
"or": [
{
"and": [
"canInsaneJump",
{
"lavaFrames": 20
}
]
},
{
"and": [
{
"lavaFrames": 70
},
{
"heatFrames": 50
}
]
},
{
"and": [
"Gravity",
{
"lavaFrames": 40
},
{
"heatFrames": 20
}
]
}
]
} |
|
Requires: "h_heatProof"
{
"or": [
{
"and": [
{
"resetRoom": {
"nodes": [
1
]
}
},
{
"cycleFrames": 1080
}
]
},
{
"and": [
{
"resetRoom": {
"nodes": [
2
]
}
},
{
"cycleFrames": 1230
}
]
}
]
}
{
"or": [
{
"and": [
"canDash",
{
"or": [
"Plasma",
"Wave",
{
"and": [
"ScrewAttack",
{
"cycleFrames": 150
}
]
},
{
"and": [
"Spazer",
{
"cycleFrames": 60
}
]
},
{
"cycleFrames": 700
}
]
}
]
},
{
"and": [
{
"haveBlueSuit": {}
},
{
"cycleFrames": 540
}
]
}
]
}Farm cycle drops: 4 Sova, 3 Geruta |
|
Requires: "h_heatProof"
{
"resetRoom": {
"nodes": [
1
]
}
}
{
"or": [
{
"and": [
"HiJump",
"canWallJump",
{
"cycleFrames": 450
}
]
},
{
"and": [
"canPreciseWallJump",
{
"cycleFrames": 600
}
]
},
{
"and": [
"SpaceJump",
{
"cycleFrames": 660
}
]
},
{
"and": [
"h_useSpringBall",
{
"cycleFrames": 650
}
]
},
{
"and": [
"h_useMorphBombs",
{
"cycleFrames": 720
}
]
}
]
}
{
"or": [
{
"and": [
"canDash",
{
"or": [
"Plasma",
"Spazer",
"Wave",
{
"and": [
"Ice",
{
"cycleFrames": 130
}
]
},
{
"and": [
"ScrewAttack",
{
"cycleFrames": 100
}
]
},
{
"and": [
"canPseudoScrew",
{
"cycleFrames": 130
}
]
},
{
"and": [
"canTrickyJump",
{
"cycleFrames": 160
}
]
}
]
}
]
},
{
"and": [
{
"haveBlueSuit": {}
},
{
"cycleFrames": 260
}
]
}
]
}Resets obstacles: R-Mode Farm cycle drops: 2 Sova, 2 Sm. Dessgeega |
|
Requires: "h_heatProof"
{
"resetRoom": {
"nodes": [
2
]
}
}
{
"or": [
{
"and": [
"HiJump",
{
"cycleFrames": 550
}
]
},
{
"and": [
"SpaceJump",
{
"cycleFrames": 610
}
]
},
{
"and": [
"h_useSpringBall",
"h_doubleEquipmentScreenCycleFrames",
{
"cycleFrames": 600
}
]
},
{
"and": [
"canIBJ",
{
"cycleFrames": 1220
}
]
},
{
"and": [
"canJumpIntoIBJ",
{
"cycleFrames": 830
}
]
}
]
}
{
"or": [
{
"and": [
"canDash",
{
"or": [
"Plasma",
{
"and": [
"Spazer",
{
"cycleFrames": 50
}
]
},
{
"and": [
"Wave",
{
"cycleFrames": 50
}
]
},
{
"and": [
"Ice",
{
"cycleFrames": 260
}
]
},
{
"and": [
"ScrewAttack",
{
"cycleFrames": 80
}
]
},
{
"and": [
"canPseudoScrew",
{
"cycleFrames": 160
}
]
},
{
"and": [
"canTrickyJump",
{
"cycleFrames": 540
}
]
}
]
}
]
},
{
"and": [
{
"haveBlueSuit": {}
},
{
"cycleFrames": 260
}
]
}
]
}Resets obstacles: R-Mode Farm cycle drops: 2 Sova, 2 Sm. Dessgeega |
|


Manipulate the movement of the Sm. Dessgeegas by entering the room in a specific way. Multiple setups are possible: A relatively safe method is to walk into the room (with no dash speed, and any amount of base speed or none at all), walk off the ledge, and press against the opposite ledge to align with it. After landing, wait a moment, then run off the edge and across the room. If successful, the first Sm. Dessgeega should have hopped to the right, out of Samus' way, and the second Sm. Dessgeega should do a big hop while Samus runs under it. A more aggressive method involves walking into the room, and holding dash starting when Samus is about 1 tile from falling off the ledge; start holding forward again slightly before landing on the small floating platform, while continuing to hold dash. Rooms containing hopper-type enemies (including Sm. Dessgeegas) reset RNG on entry, which makes it possible to manipulate their movement in a deterministic way. It also means the Sova drop can be manipulated by killing it on specific frames relative to room entry. Because the Sova is global, its position can be used as a cue for when to kill it. If Samus is full on Missiles, there are several 3-frame windows of where it can be killed to obtain a big energy. The exact timing required for the shot will depend on the weapon used. Requires: "canDash"
{
"notable": "Dessgeega Dodge (Right-to-Left)"
}
"canTrickyDodgeEnemies"
"canInsaneJump"
{
"heatFramesWithEnergyDrops": {
"frames": 295,
"drops": [
{
"enemy": "Sova",
"count": 1
}
]
}
}Dev note: Manipulating the second Sm. Dessgeega is much more precise than manipulating the first. The way the strat is written, manipulating the Sova drop isn't technically expected, though in practice getting a big energy is required to make it through the room tankless. |
|
Requires: {
"heatFrames": 100
}
{
"or": [
"canDash",
{
"heatFrames": 10
}
]
} |
|
Requires: {
"or": [
{
"and": [
"canPreciseWallJump",
{
"heatFrames": 150
}
]
},
{
"and": [
"SpaceJump",
{
"heatFrames": 210
}
]
},
{
"and": [
"HiJump",
"canWallJump",
{
"heatFrames": 180
}
]
},
{
"and": [
"HiJump",
"canSpeedyJump",
"canCarefulJump",
{
"heatFrames": 100
}
]
}
]
}
{
"or": [
"canHeroShot",
{
"and": [
{
"heatFrames": 100
},
"h_midAirShootUp"
]
}
]
}
{
"or": [
"canDash",
{
"heatFrames": 20
}
]
} |
From: 3
Bottom Left Junction
To: 4
Bottom Junction (Cleared Runway)
Requires: "canDash"
{
"enemyKill": {
"enemies": [
[
"Sm. Dessgeega",
"Sm. Dessgeega"
]
],
"explicitWeapons": [
"Missile",
"Super"
]
}
}
{
"heatFrames": 95
} |
From: 3
Bottom Left Junction
To: 4
Bottom Junction (Cleared Runway)
Requires: "canDash"
{
"or": [
"Wave",
"Spazer"
]
}
{
"heatFrames": 95
}
{
"or": [
"canTrickyDodgeEnemies",
{
"and": [
"canDodgeWhileShooting",
{
"heatFrames": 75
}
]
},
{
"enemyDamage": {
"enemy": "Sm. Dessgeega",
"type": "contact",
"hits": 1
}
}
]
} |
From: 3
Bottom Left Junction
To: 4
Bottom Junction (Cleared Runway)
Requires: "canDash"
"Plasma"
{
"heatFrames": 95
} |
From: 3
Bottom Left Junction
To: 4
Bottom Junction (Cleared Runway)
Requires: "canDash"
{
"heatFrames": 350
}
{
"or": [
"canTrickyDodgeEnemies",
{
"and": [
"canDodgeWhileShooting",
{
"enemyDamage": {
"enemy": "Sm. Dessgeega",
"type": "contact",
"hits": 1
}
}
]
},
{
"enemyDamage": {
"enemy": "Sm. Dessgeega",
"type": "contact",
"hits": 2
}
}
]
} |
From: 3
Bottom Left Junction
To: 4
Bottom Junction (Cleared Runway)
Requires: "canDash"
"ScrewAttack"
{
"heatFrames": 135
} |
|
Requires: "canDash"
{
"heatFrames": 115
}
{
"enemyDamage": {
"enemy": "Sm. Dessgeega",
"type": "contact",
"hits": 1
}
} |
|
Requires: "canDash"
{
"heatFrames": 100
} |
|
Requires: {
"or": [
{
"and": [
"HiJump",
{
"heatFrames": 110
}
]
},
{
"and": [
"SpaceJump",
{
"heatFrames": 150
}
]
}
]
}
{
"or": [
"canDash",
{
"heatFrames": 10
}
]
} |
From: 5
Bottom Right Junction
To: 2
Right Door
Requires: "canDash"
{
"or": [
{
"and": [
"HiJump",
{
"heatFrames": 90
}
]
},
{
"and": [
"SpaceJump",
{
"heatFrames": 130
}
]
}
]
}Exit condition: {
"leaveWithRunway": {
"length": 5,
"openEnd": 0
}
}Unlocks doors: {"types":["missiles"],"requires":[{"heatFrames":50}]}
{"types":["super"],"requires":[]}
{"types":["powerbomb"],"requires":[{"heatFrames":110}]} |
|
Requires: "canDash"
"canDodgeWhileShooting"
{
"heatFrames": 350
} |
|
Requires: "canDash"
{
"heatFrames": 160
}
{
"enemyDamage": {
"enemy": "Sm. Dessgeega",
"type": "contact",
"hits": 1
}
} |
From: 5
Bottom Right Junction
To: 4
Bottom Junction (Cleared Runway)
Requires: "canDash"
{
"enemyKill": {
"enemies": [
[
"Sm. Dessgeega",
"Sm. Dessgeega"
]
],
"explicitWeapons": [
"Missile",
"Super"
]
}
}
{
"heatFrames": 100
} |
From: 5
Bottom Right Junction
To: 4
Bottom Junction (Cleared Runway)
Requires: "canDash"
{
"or": [
"Wave",
"Spazer"
]
}
{
"heatFrames": 140
}
{
"or": [
"canTrickyDodgeEnemies",
{
"and": [
"canDodgeWhileShooting",
{
"heatFrames": 60
}
]
},
{
"enemyDamage": {
"enemy": "Sm. Dessgeega",
"type": "contact",
"hits": 1
}
}
]
} |
From: 5
Bottom Right Junction
To: 4
Bottom Junction (Cleared Runway)
Requires: "canDash"
"Plasma"
{
"heatFrames": 100
} |
From: 5
Bottom Right Junction
To: 4
Bottom Junction (Cleared Runway)
Requires: "canDash"
{
"heatFrames": 350
}
{
"or": [
"canTrickyDodgeEnemies",
{
"and": [
"canDodgeWhileShooting",
{
"enemyDamage": {
"enemy": "Sm. Dessgeega",
"type": "contact",
"hits": 1
}
}
]
},
{
"enemyDamage": {
"enemy": "Sm. Dessgeega",
"type": "contact",
"hits": 2
}
}
]
} |
From: 5
Bottom Right Junction
To: 4
Bottom Junction (Cleared Runway)
Requires: "canDash"
"ScrewAttack"
{
"heatFrames": 140
} |
|
Overload PLMs by shooting the gate, then go through the crumble blocks below and get to the door. Entrance condition: {
"comeInWithGMode": {
"mode": "direct",
"morphed": false
}
}Requires: "Morph"
{
"or": [
"SpaceJump",
{
"and": [
"canPreciseGrapple",
"canUseEnemies"
]
},
{
"and": [
"HiJump",
"canSpringBallJumpMidAir"
]
},
{
"and": [
"canDash",
"HiJump",
"canWallJump",
"canTrickyJump"
]
},
{
"and": [
"canWallJump",
"canUseIFrames",
{
"spikeHits": 1
},
"h_spikeJumpWithActiveEnemies"
]
},
{
"and": [
"h_IBJFromSpikes",
"h_spikeJumpWithActiveEnemies"
]
}
]
}
"h_heatedGModeOpenDifferentDoor" |
|
With Grapple, a running jump then single Grapple swing can be used before PLMs are overloaded, alternatively jump on the crumble blocks and Grapple the Ripper. Entrance condition: {
"comeInWithGMode": {
"mode": "indirect",
"morphed": false
}
}Requires: {
"or": [
"SpaceJump",
"canTrickySpringBallJump",
{
"and": [
"canWallJump",
{
"or": [
"canDash",
"HiJump",
{
"and": [
"canBlueSuitSpikeJump",
{
"spikeHits": 1
}
]
}
]
}
]
},
{
"and": [
"HiJump",
"canSpeedyJump"
]
},
{
"and": [
"canPreciseGrapple",
{
"or": [
"canDash",
"canUseEnemies",
"canInsaneJump"
]
}
]
}
]
}
"h_heatedGModeOpenDifferentDoor" |
|
Requires: {
"heatFrames": 220
}
{
"or": [
{
"noFlashSuit": {}
},
"canComplexCarryFlashSuit",
"Ice",
"Wave",
"Spazer",
"Plasma",
{
"heatFrames": 300
}
]
}
{
"or": [
"canDash",
{
"heatFrames": 90
}
]
}Clears obstacles: A |
|
Wall jump up the left wall, perform a delayed wall jump on the Fune to reach the door. Entrance condition: {
"comeInJumping": {
"speedBooster": "any",
"minTiles": 0
}
}Requires: "canPrepareForNextRoom"
"canTrickyWallJump"
"canConsecutiveWallJump"
"canTrickyJump"
"canFastWallJumpClimb"
"canUseEnemies"
{
"heatFrames": 120
}
{
"or": [
"canDash",
{
"heatFrames": 5
}
]
}Dev note: This differs from the canPrepareForNextRoom option of the previous strat only in requiring an air entry. FIXME: canFastWallJumpClimb is for difficulty placement. |
From: 2
Bottom Left Door
To: 1
Top Left Door
Entrance condition: {
"comeInJumping": {
"speedBooster": "any",
"minTiles": 0
}
}Requires: "canPrepareForNextRoom"
"HiJump"
"SpaceJump"
{
"heatFrames": 120
}
{
"or": [
"canDash",
{
"heatFrames": 5
}
]
}Dev note: This differs from the canPrepareForNextRoom option of the previous strat only in requiring an air entry. |
From: 2
Bottom Left Door
To: 1
Top Left Door

Spin jump into the room with at least 1 tile of run speed. Then perform a mid-air Spring Ball jump to reach the ledge above. Entrance condition: {
"comeInJumping": {
"speedBooster": "any",
"minTiles": 0
}
}Requires: "HiJump"
"canPrepareForNextRoom"
"canSpringBallJumpMidAir"
{
"heatFrames": 110
}
{
"or": [
"canDash",
{
"heatFrames": 10
}
]
} |
|
Entrance condition: {
"comeInJumping": {
"speedBooster": "any",
"minTiles": 0
}
}Requires: "canPrepareForNextRoom"
"SpaceJump"
{
"heatFrames": 200
}
{
"or": [
"canDash",
{
"heatFrames": 15
}
]
}Dev note: This differs from the canPrepareForNextRoom option of the previous strat only in requiring an air entry. |
|
Wall jump up the left wall, perform a delayed wall jump on the Fune to reach the door. Requires: "canTrickyWallJump"
"canConsecutiveWallJump"
"canTrickyJump"
"canUseEnemies"
{
"or": [
{
"heatFrames": 190
},
{
"and": [
"canPrepareForNextRoom",
{
"heatFrames": 135
}
]
}
]
}
{
"or": [
"canDash",
{
"heatFrames": 5
}
]
} |
|
Requires: "HiJump"
"SpaceJump"
{
"heatFrames": 150
}
{
"or": [
"canPrepareForNextRoom",
{
"heatFrames": 70
}
]
}
{
"or": [
"canDash",
{
"heatFrames": 5
}
]
} |
|
Requires: "HiJump"
"canSpringBallJumpMidAir"
{
"heatFrames": 160
}
{
"or": [
"canDash",
{
"heatFrames": 5
}
]
} |
|


Requires: {
"or": [
{
"and": [
"canLongIBJ",
{
"heatFrames": 1450
}
]
},
{
"and": [
"canJumpIntoIBJ",
{
"heatFrames": 960
}
]
},
{
"and": [
"HiJump",
"canJumpIntoIBJ",
{
"heatFrames": 620
}
]
},
{
"and": [
"canDoubleBombJump",
{
"heatFrames": 560
}
]
},
{
"and": [
"HiJump",
"canDoubleBombJump",
{
"heatFrames": 490
}
]
}
]
}
{
"or": [
"canDash",
{
"heatFrames": 30
}
]
} |
|
Requires: "SpaceJump"
{
"heatFrames": 220
}
{
"or": [
"canPrepareForNextRoom",
{
"heatFrames": 100
}
]
}
{
"or": [
"canDash",
{
"heatFrames": 15
}
]
} |
|
Wall jump up the left wall and then on the moving platform (Kamer) while avoiding the Fune's fireball. The Kamers will temporarily move down if Samus is below them, so it is best to walk under the first Kamer before climbing the wall. It is possible to freeze or kill the Fune with a Super or Power Bomb to make things easier. Requires: {
"notable": "Walljump Climb Using the Kamer"
}
"canTrickyWallJump"
"canConsecutiveWallJump"
"canUseEnemies"
{
"or": [
{
"and": [
"canDodgeWhileShooting",
{
"heatFrames": 360
}
]
},
{
"and": [
"canTrickyJump",
{
"heatFrames": 240
}
]
},
{
"and": [
{
"or": [
"canUseFrozenEnemies",
{
"ammo": {
"type": "Super",
"count": 1
}
}
]
},
{
"heatFrames": 432
}
]
},
{
"and": [
{
"ammo": {
"type": "PowerBomb",
"count": 1
}
},
{
"heatFrames": 456
}
]
}
]
}
{
"or": [
"canDash",
{
"heatFrames": 20
}
]
} |
From: 2
Bottom Left Door
To: 1
Top Left Door
Wall jump up the left wall and then on the moving platform (Kamer) while avoiding the Fune's fireball. The Kamers will temporarily move down if Samus is below them, so it is best to walk under the first Kamer before climbing the wall. Requires: {
"notable": "Walljump Climb Using the Kamer"
}
"HiJump"
"canUseEnemies"
"canPreciseWallJump"
{
"or": [
{
"heatFrames": 360
},
{
"and": [
"canTrickyJump",
{
"heatFrames": 230
}
]
}
]
}
{
"or": [
"canDodgeWhileShooting",
{
"enemyDamage": {
"enemy": "Fune",
"type": "fireball",
"hits": 1
}
},
{
"and": [
"canUseFrozenEnemies",
{
"heatFrames": 70
}
]
},
{
"and": [
{
"ammo": {
"type": "Super",
"count": 1
}
},
{
"heatFrames": 70
}
]
},
{
"and": [
{
"ammo": {
"type": "PowerBomb",
"count": 1
}
},
{
"heatFrames": 90
}
]
}
]
}
{
"or": [
"canDash",
{
"heatFrames": 20
}
]
} |
From: 2
Bottom Left Door
To: 3
Right Door
Overload PLMs by shooting the gate, then go through the crumble blocks below and get to the door. The gate can be shot while precisely positioned from below without requiring any items. The positioning is precise and off camera; while facing left, position Samus front foot barely on the flat part after the slope. Entrance condition: {
"comeInWithGMode": {
"mode": "direct",
"morphed": false
}
}Requires: "Morph"
{
"or": [
"SpaceJump",
{
"and": [
"canPreciseGrapple",
{
"or": [
"canDash",
"canUseEnemies",
"canInsaneJump"
]
}
]
},
{
"and": [
"HiJump",
"canSpringBallJumpMidAir"
]
},
{
"and": [
"canDash",
"HiJump",
"canWallJump",
"canTrickyJump"
]
},
{
"and": [
"canWallJump",
"canUseIFrames",
{
"spikeHits": 1
},
"h_spikeJumpWithActiveEnemies"
]
},
{
"and": [
"h_IBJFromSpikes",
"h_spikeJumpWithActiveEnemies"
]
}
]
}
"h_heatedGModeOpenDifferentDoor" |
|
It is possible to climb the left side of the room with SpeedBooster alone, with either a tricky dash jump or a vertical shinespark, then Grapple the Ripper or ceiling blocks. With Grapple, a running jump then single Grapple swing can be used before PLMs are overloaded, alternatively jump on the crumble blocks and Grapple the Ripper. Entrance condition: {
"comeInWithGMode": {
"mode": "indirect",
"morphed": false
}
}Requires: {
"or": [
"SpaceJump",
"canTrickySpringBallJump",
{
"and": [
"canWallJump",
{
"or": [
"canDash",
"HiJump",
{
"and": [
"canBlueSuitSpikeJump",
{
"spikeHits": 1
}
]
}
]
}
]
},
{
"and": [
"HiJump",
"canSpeedyJump"
]
},
{
"and": [
"canTrickyDashJump",
"canPreciseGrapple"
]
},
{
"and": [
"canPreciseGrapple",
{
"canShineCharge": {
"usedTiles": 28,
"gentleUpTiles": 3,
"gentleDownTiles": 3,
"openEnd": 0
}
},
{
"or": [
{
"shinespark": {
"frames": 18,
"excessFrames": 8
}
},
{
"and": [
"canSpeedyJump",
{
"shinespark": {
"frames": 16,
"excessFrames": 10
}
}
]
}
]
}
]
}
]
}
"h_heatedGModeOpenDifferentDoor" |
|
Wall jump up the left wall, perform a delayed wall jump on the Fune. Entrance condition: {
"comeInJumping": {
"speedBooster": "any",
"minTiles": 0
}
}Requires: "canPrepareForNextRoom"
"canTrickyWallJump"
"canConsecutiveWallJump"
"canTrickyJump"
"canUseEnemies"
"canPrepareForNextRoom"
{
"heatFrames": 300
}
{
"or": [
{
"noFlashSuit": {}
},
"canComplexCarryFlashSuit",
"Ice",
"Wave",
"Spazer",
"Plasma",
{
"heatFrames": 300
}
]
}
{
"or": [
"canDash",
{
"heatFrames": 50
}
]
}Dev note: This differs from the canPrepareForNextRoom option of the previous strat only in requiring an air entry. |
|
Wall jump up the left wall, perform a delayed wall jump on the Fune. Requires: "canTrickyWallJump"
"canConsecutiveWallJump"
"canTrickyJump"
"canUseEnemies"
"canPrepareForNextRoom"
{
"heatFrames": 315
}
{
"or": [
{
"noFlashSuit": {}
},
"canComplexCarryFlashSuit",
"Ice",
"Wave",
"Spazer",
"Plasma",
{
"heatFrames": 300
}
]
}
{
"or": [
"canDash",
{
"heatFrames": 50
}
]
} |
|
Requires: "HiJump"
"SpaceJump"
{
"heatFrames": 250
}
{
"or": [
{
"noFlashSuit": {}
},
{
"and": [
{
"heatFrames": 30
},
{
"or": [
"canComplexCarryFlashSuit",
"Ice",
"Wave",
"Spazer",
"Plasma"
]
}
]
},
{
"heatFrames": 300
}
]
}
{
"or": [
"canDash",
{
"heatFrames": 50
}
]
}Clears obstacles: A |
|


Requires: "HiJump"
"canSpringBallJumpMidAir"
{
"heatFrames": 250
}
{
"or": [
"canDash",
{
"heatFrames": 40
}
]
}Clears obstacles: A |
|

Run to the right, wait a moment for the platforms to come down, then wall jump off the second platform from the right. Alternatively, wall jump off the wall to the right to reach the platform sooner, to wall jump off of it. Requires: "HiJump"
"canWallJump"
"canTrickyJump"
{
"or": [
{
"and": [
"canHeroShot",
{
"heatFrames": 270
},
"canInsaneWallJump",
"h_trickyToCarryFlashSuit",
"canBeVeryPatient"
]
},
{
"and": [
{
"heatFrames": 360
},
{
"or": [
"h_complexToCarryFlashSuit",
"Ice",
"Wave",
"Spazer",
"Plasma",
{
"heatFrames": 300
}
]
}
]
}
]
}
{
"or": [
"canDash",
{
"heatFrames": 120
}
]
}Clears obstacles: A |
|
Requires: "SpaceJump"
{
"heatFrames": 310
}
{
"or": [
{
"noFlashSuit": {}
},
{
"and": [
{
"heatFrames": 60
},
{
"or": [
"canComplexCarryFlashSuit",
"Ice",
"Wave",
"Spazer",
"Plasma"
]
}
]
},
{
"heatFrames": 300
}
]
}
{
"or": [
"canDash",
{
"heatFrames": 20
}
]
}Clears obstacles: A |
|

Jump onto the crumble blocks to make them solid, then use them as a platform to cross the room. With Grapple, a running jump then single Grapple swing can be used before PLMs are overloaded, alternatively jump on the crumble blocks and Grapple the Ripper. Entrance condition: {
"comeInWithGMode": {
"mode": "indirect",
"morphed": false
}
}Requires: {
"or": [
"SpaceJump",
{
"and": [
"canPreciseGrapple",
{
"or": [
"canDash",
"canUseEnemies",
"canInsaneJump"
]
}
]
},
"canInsaneWallJump",
{
"and": [
"HiJump",
"canWallJump"
]
},
{
"and": [
"HiJump",
"canSpeedyJump"
]
}
]
}
"h_heatedGModeOpenDifferentDoor"Dev note: This is only for strats that can't go to 7 - variants without Morph, or without a way to get back up after going down. |
From: 3
Right Door
To: 2
Bottom Left Door
Jump onto the crumble blocks to make them solid, then use them as a platform to cross the room. With Grapple, a running jump then single Grapple swing can be used before PLMs are overloaded, alternatively jump on the crumble blocks and Grapple the Ripper. Entrance condition: {
"comeInWithGMode": {
"mode": "indirect",
"morphed": false
}
}Requires: {
"or": [
"SpaceJump",
{
"and": [
"canPreciseGrapple",
{
"or": [
"canDash",
"canUseEnemies",
"canInsaneJump"
]
}
]
},
"canInsaneWallJump",
{
"and": [
"HiJump",
"canWallJump"
]
},
{
"and": [
"HiJump",
"canSpeedyJump"
]
}
]
}
"h_heatedGModeOpenDifferentDoor"Dev note: This is only for strats that can't go to 7 - variants without Morph. |
|


Requires: "canDash"
"HiJump"
"canInsaneJump"
"canCrumbleJump"
"canWallJump"
{
"heatFrames": 340
} |
|


Pause while crumble jumping, and quickly mid-air morph and equip Spring Ball, to obtain a boost in horizontal speed before mid-air Spring Ball jumping. Requires: "canCrumbleJump"
"canTrickySpringBallJump"
"canSpringFling"
"h_trickyToCarryFlashSuit"
{
"heatFrames": 270
}
{
"or": [
"canDash",
{
"and": [
{
"haveBlueSuit": {}
},
"canInsaneJump",
{
"heatFrames": 190
}
]
}
]
} |
|
Jump onto the crumble blocks to make them solid, then use them as a platform to cross the room. With Grapple, a running jump then single Grapple swing can be used before PLMs are overloaded, alternatively jump on the crumble blocks and Grapple the Ripper. Entrance condition: {
"comeInWithGMode": {
"mode": "any",
"morphed": false
}
}Requires: {
"or": [
"SpaceJump",
{
"and": [
"canStaggeredIBJ",
"canDoubleBombJump",
"canBombHorizontally"
]
},
{
"and": [
"canDash",
{
"or": [
"canTrickySpringBallJump",
"canInsaneWallJump",
{
"and": [
"HiJump",
"canWallJump"
]
},
{
"and": [
"HiJump",
"canSpeedyJump"
]
},
"h_IBJFromSpikes"
]
}
]
},
{
"and": [
"canPreciseGrapple",
{
"or": [
"canDash",
"canUseEnemies",
"canInsaneJump"
]
}
]
}
]
}
{
"heatFrames": 0
}Dev note: FIXME: some more of these options may be possible with a blue suit, with greater difficulty. |
|

Jump onto the crumble blocks to make them solid, then use them as a platform to cross the room. With Grapple, a running jump then single Grapple swing can be used before PLMs are overloaded, alternatively jump on the crumble blocks and Grapple the Ripper. In indirect G-mode, stand where the gate will spawn and exit G-mode to open the gate. In direct G-mode, overload PLMs by shooting the gate then position Samus a few pixels away from the gate to where upward diagonal shots go through it. Crouch then shoot diagonally and quickly exit G-mode (3-7 frames later) to open the gate on G-mode exit. Entrance condition: {
"comeInWithGMode": {
"mode": "any",
"morphed": false
}
}Requires: "canComplexGMode"
"h_heatedGMode"
{
"or": [
"SpaceJump",
{
"and": [
"canStaggeredIBJ",
"canDoubleBombJump",
"canBombHorizontally"
]
},
{
"and": [
"canDash",
{
"or": [
"canTrickySpringBallJump",
"canInsaneWallJump",
{
"and": [
"HiJump",
"canWallJump"
]
},
{
"and": [
"HiJump",
"canSpeedyJump"
]
},
"h_IBJFromSpikes"
]
}
]
},
{
"and": [
"canPreciseGrapple",
{
"or": [
"canDash",
"canUseEnemies",
"canInsaneJump"
]
}
]
}
]
}
{
"heatFrames": 35
}Clears obstacles: A Dev note: The canComplexGMode is only used here to describe opening the gate in direct G-mode without gate glitching. However, the indirect variant still requires canHeatedGMode or Varia - with Varia, indirect strats can instead be used to go to the top left door and return. FIXME: some more of these options may be possible with a blue suit, with greater difficulty. |
|
Requires: "Grapple"
{
"heatFrames": 155
}
{
"or": [
{
"noFlashSuit": {}
},
{
"and": [
"canMidAirMorph",
{
"heatFrames": 35
}
]
},
{
"heatFrames": 80
}
]
}
{
"or": [
"canDash",
{
"heatFrames": 15
}
]
} |
|
Requires: "canDash"
"canUseIFrames"
{
"or": [
{
"spikeHits": 1
},
{
"and": [
"canTrickyJump",
{
"enemyDamage": {
"enemy": "Ripper 2 (green)",
"type": "contact",
"hits": 1
}
},
{
"heatFrames": 20
}
]
}
]
}
"canWallJump"
"HiJump"
{
"heatFrames": 230
} |
|
Jump into the spike pit, hitting the Ripper to avoid spike damage. Climb the left wall while avoiding falling onto the spikes or through the crumble blocks. The ledge is the same size of that in writg. Requires: "canDash"
{
"notable": "HiJumpless Wall Jump"
}
"h_heatProof"
"canInsaneWallJump"
"canHorizontalDamageBoost"
{
"or": [
"canUseIFrames",
"canCrumbleJump"
]
}
{
"enemyDamage": {
"enemy": "Ripper 2 (green)",
"type": "contact",
"hits": 1
}
}Dev note: FIXME: a blue suit version of this could be possible, but would probably need to take spike hits. |
|
Requires: "SpaceJump"
{
"heatFrames": 160
}
{
"or": [
"canDash",
{
"heatFrames": 135
}
]
} |
|
Requires: "canDash"
"h_heatedIBJFromSpikes"
{
"or": [
{
"heatFrames": 730
},
{
"and": [
"canDoubleBombJump",
{
"heatFrames": 550
}
]
}
]
}Dev note: FIXME: A crumble jump into IBJ is also possible. |
|
Requires: "canDash"
"canUseIFrames"
{
"or": [
{
"spikeHits": 1
},
{
"and": [
"canTrickyJump",
{
"enemyDamage": {
"enemy": "Ripper 2 (green)",
"type": "contact",
"hits": 1
}
},
{
"heatFrames": 20
}
]
}
]
}
"canSpringBallJumpMidAir"
{
"heatFrames": 240
} |
|

Entrance condition: {
"comeInRunning": {
"speedBooster": "yes",
"minTiles": 3
}
}Requires: "h_speedJump"
"canMomentumConservingMorph"
"canSpringFling"
"h_unpauseKeepMomentum"
{
"heatFrames": 140
}Dev note: The momentum-conserving morph is not strictly required (particularly with longer runways) but makes it easier. |
|
Requires: {
"heatFrames": 180
}
{
"or": [
"canDash",
{
"heatFrames": 100
}
]
}
{
"or": [
{
"spikeHits": 1
},
{
"and": [
"canTrickyJump",
{
"or": [
"canDash",
{
"disableEquipment": "HiJump"
}
]
}
]
},
"canInsaneJump"
]
} |
From: 3
Right Door
To: 6
G-Mode, Remote Acquire Junction (Bottom Right)
Jump onto the crumble blocks to make them solid, then use them as a platform to get to the item. With Grapple, a running jump then single Grapple swing can be used before PLMs are overloaded, alternatively jump on the crumble blocks and Grapple the Ripper. Avoid touching all 6 crumbles, so Samus can use the item to overload PLMs and go through one of the crumbles to get to the left side of the room. If the item has already been obtained, Samus can shoot the gate many times to overload PLMs. Entrance condition: {
"comeInWithGMode": {
"mode": "direct",
"morphed": false
}
}Requires: "canRemoteAcquire"
{
"or": [
"SpaceJump",
"canCeilingBombJump",
{
"and": [
"canBombHorizontally",
"canIBJ",
"h_usePowerBomb"
]
},
{
"and": [
"canStaggeredIBJ",
"canDoubleBombJump",
"canBombHorizontally"
]
},
{
"and": [
"canPreciseGrapple",
"canUseEnemies"
]
},
{
"and": [
"canDash",
{
"or": [
"canTrickySpringBallJump",
"canInsaneWallJump",
{
"and": [
"HiJump",
"canWallJump"
]
},
{
"and": [
"HiJump",
"canSpeedyJump"
]
},
"h_IBJFromSpikes"
]
}
]
}
]
}
{
"heatFrames": 0
} |
From: 3
Right Door
To: 7
G-Mode Junction (Bottom Right)
Jump onto the crumble blocks to make them solid, then use them as a platform to cross the room. With Grapple, a running jump then single Grapple swing can be used before PLMs are overloaded, alternatively jump on the crumble blocks and Grapple the Ripper. Entrance condition: {
"comeInWithGMode": {
"mode": "indirect",
"morphed": false
}
}Requires: "Morph"
{
"or": [
"SpaceJump",
"canCeilingBombJump",
{
"and": [
"canStaggeredIBJ",
"canDoubleBombJump",
"canBombHorizontally"
]
},
{
"and": [
"canBombHorizontally",
"canIBJ",
"h_usePowerBomb"
]
},
{
"and": [
"canDash",
{
"or": [
"canTrickySpringBallJump",
"canInsaneWallJump",
{
"and": [
"HiJump",
"canWallJump"
]
},
{
"and": [
"HiJump",
"canSpeedyJump"
]
},
"h_IBJFromSpikes"
]
}
]
},
{
"and": [
"canPreciseGrapple",
{
"or": [
"canDash",
"canUseEnemies",
"canInsaneJump"
]
}
]
}
]
}
{
"heatFrames": 0
}Dev note: With Grapple, Morph isn't needed, but there's no reason to go there without Morph. |
|


Requires: {
"heatFrames": 215
}
{
"or": [
{
"and": [
"Wave",
{
"heatFrames": 35
}
]
},
{
"obstaclesCleared": [
"A"
]
}
]
}
{
"or": [
"canDash",
{
"heatFrames": 85
}
]
}Clears obstacles: A |
|
Requires: {
"heatFrames": 250
}
"h_heatedBlueGateGlitch"
{
"or": [
"canDash",
{
"heatFrames": 85
}
]
}Clears obstacles: A |
|
Requires: {
"heatFrames": 155
}
{
"or": [
{
"and": [
"Wave",
{
"heatFrames": 60
}
]
},
{
"obstaclesCleared": [
"A"
]
}
]
}
{
"or": [
"canDash",
{
"heatFrames": 100
}
]
}Clears obstacles: A |
|


Pause while crumble jumping, and quickly mid-air morph and equip Spring Ball, to obtain a boost in horizontal speed before mid-air Spring Ball jumping. Requires: "canCrumbleJump"
"canTrickySpringBallJump"
"canSpringFling"
"canInsaneJump"
"h_trickyToCarryFlashSuit"
{
"heatFrames": 280
}
{
"or": [
"canDash",
{
"heatFrames": 80
}
]
}Dev note: Compared to the other direction, this direction requires traveling one more tile horizontally, which makes it more difficult. |
|


Requires: "Grapple"
{
"heatFrames": 165
}
{
"or": [
{
"noFlashSuit": {}
},
{
"and": [
"canMidAirMorph",
{
"heatFrames": 20
}
]
},
{
"heatFrames": 90
}
]
}
{
"or": [
"canDash",
{
"heatFrames": 20
}
]
} |
|
Requires: "canDash"
"Grapple"
{
"heatFrames": 145
}
{
"or": [
{
"noFlashSuit": {}
},
{
"and": [
"canMidAirMorph",
{
"heatFrames": 20
}
]
},
{
"heatFrames": 90
}
]
}Exit condition: {
"leaveWithRunway": {
"length": 6,
"openEnd": 1
}
}Unlocks doors: {"types":["missiles"],"requires":[{"heatFrames":50}]}
{"types":["super"],"requires":[]}
{"types":["powerbomb"],"requires":[{"heatFrames":110}]} |
|
Requires: "SpaceJump"
{
"heatFrames": 160
}
{
"or": [
"canDash",
{
"heatFrames": 140
}
]
} |
|
Requires: "canDash"
"SpaceJump"
{
"heatFrames": 140
}Exit condition: {
"leaveWithRunway": {
"length": 6,
"openEnd": 1
}
}Unlocks doors: {"types":["missiles"],"requires":[{"heatFrames":50}]}
{"types":["super"],"requires":[]}
{"types":["powerbomb"],"requires":[{"heatFrames":110}]} |
|


Requires: "h_speedJump"
"canMomentumConservingMorph"
"canSpringFling"
{
"heatFrames": 190
} |
|


Requires: "canDash"
"h_heatedIBJFromSpikes"
{
"or": [
{
"heatFrames": 730
},
{
"and": [
"canDoubleBombJump",
{
"heatFrames": 550
}
]
}
]
}Dev note: FIXME: A crumble jump into IBJ is also possible. |
|
Requires: "canDash"
"canUseIFrames"
{
"or": [
{
"spikeHits": 1
},
{
"and": [
"canTrickyJump",
{
"enemyDamage": {
"enemy": "Ripper 2 (green)",
"type": "contact",
"hits": 1
}
},
{
"heatFrames": 10
}
]
}
]
}
"canSpringBallJumpMidAir"
{
"heatFrames": 260
} |
|
Requires: "canDash"
"canWallJump"
{
"heatFrames": 205
}Exit condition: {
"leaveWithRunway": {
"length": 6,
"openEnd": 1
}
}Collects items: 4 Unlocks doors: {"types":["missiles"],"requires":[{"heatFrames":50}]}
{"types":["super"],"requires":[]}
{"types":["powerbomb"],"requires":[{"heatFrames":110}]} |
|
Requires: "canDash"
"canWallJump"
{
"heatFrames": 225
}Collects items: 4 |
|
Requires: {
"heatFrames": 135
}
{
"or": [
"canDash",
{
"heatFrames": 20
}
]
}
{
"or": [
"canCarefulJump",
{
"spikeHits": 1
}
]
} |
|
Requires: "Morph"
{
"heatFrames": 170
}
{
"or": [
"canDash",
{
"heatFrames": 45
}
]
} |
|
Requires: "h_heatProof"
"Morph"
{
"or": [
{
"and": [
{
"resetRoom": {
"nodes": [
1
]
}
},
{
"or": [
{
"and": [
"SpaceJump",
{
"cycleFrames": 1060
}
]
},
{
"and": [
"HiJump",
"canSpeedyJump",
{
"cycleFrames": 940
}
]
}
]
}
]
},
{
"and": [
{
"resetRoom": {
"nodes": [
2
]
}
},
{
"cycleFrames": 830
}
]
},
{
"and": [
{
"resetRoom": {
"nodes": [
3
]
}
},
{
"or": [
{
"and": [
"SpaceJump",
{
"cycleFrames": 1160
}
]
},
{
"and": [
"HiJump",
"canSpeedyJump",
{
"or": [
"Grapple",
"canWallJump"
]
},
{
"cycleFrames": 1190
}
]
}
]
}
]
}
]
}
{
"or": [
"canDash",
{
"cycleFrames": 120
}
]
}Resets obstacles: A, R-Mode Farm cycle drops: 1 Kago Dev note: FIXME: There are more possible item combinations. |
From: 7
G-Mode Junction (Bottom Right)
To: 1
Top Left Door
With Plasma and a pause abuse, it is possible to kill the Kago and exit G-mode while killing the Kago bugs and make it to the door with a small amount of Energy remaining. Shoot Plasma and quickly exit G-Mode, so that the bugs die immediately. Avoid having spent much time on the left side of the room, as the Fune fireballs will reduce the number of drops obtained. Note that it is possible to climb the left side of the room with SpeedBooster alone, with either a tricky dash jump or a vertical shinespark. Requires: "Morph"
{
"or": [
"SpaceJump",
"canSpringBallJumpMidAir",
"canWallJump",
{
"and": [
"HiJump",
"canSpeedyJump"
]
},
"canTrickyDashJump",
{
"and": [
{
"canShineCharge": {
"usedTiles": 28,
"gentleUpTiles": 3,
"gentleDownTiles": 3,
"openEnd": 0
}
},
{
"or": [
{
"shinespark": {
"frames": 18,
"excessFrames": 8
}
},
{
"and": [
"canSpeedyJump",
{
"shinespark": {
"frames": 16,
"excessFrames": 10
}
}
]
}
]
}
]
}
]
}
"Plasma"
"h_heatedGModePauseAbuse"
"canInsaneJump"
"canDash"Dev note: All of these methods are fast enough to be able to escape after obtaining the drops. The shinespark is longer than 1 frame, but is modeled this way because the drops aren't properly modeled. |
|
Kill the Beetoms with Screw Attack or by freezing and using Bombs or Power Bombs. Requires: {
"resetRoom": {
"nodes": [
1
]
}
}
{
"or": [
{
"and": [
"canDash",
{
"or": [
{
"and": [
"ScrewAttack",
{
"cycleFrames": 370
}
]
},
{
"and": [
"Ice",
"h_useMorphBombs",
{
"cycleFrames": 480
}
]
},
{
"and": [
"Morph",
{
"resourceAvailable": [
{
"type": "Energy",
"count": 50
}
]
},
"h_usePowerBomb",
{
"cycleFrames": 460
}
]
}
]
}
]
},
{
"and": [
{
"haveBlueSuit": {}
},
{
"cycleFrames": 570
}
]
}
]
}Farm cycle drops: 3 Beetom Dev note: Health Bomb ends at 50 energy. One ammo can be used to gain a power bomb and then power bombs can be used to farm more power bombs. |
|
Requires: "h_heatProof"
"Grapple"
{
"resetRoom": {
"nodes": [
1
]
}
}
{
"cycleFrames": 300
}
{
"or": [
"Plasma",
"Spazer",
"Ice",
"Wave",
{
"cycleFrames": 90
}
]
}
{
"or": [
"canDash",
{
"cycleFrames": 20
}
]
}Farm cycle drops: 1 Geruta |
|
Requires: "h_heatProof"
"canMidAirMorph"
{
"resetRoom": {
"nodes": [
1
]
}
}
{
"cycleFrames": 320
}
{
"or": [
{
"and": [
"canDash",
{
"or": [
"Plasma",
{
"and": [
"Spazer",
{
"cycleFrames": 20
}
]
},
{
"and": [
"Ice",
{
"cycleFrames": 40
}
]
},
{
"and": [
"Wave",
{
"cycleFrames": 15
}
]
},
{
"and": [
"ScrewAttack",
{
"cycleFrames": 30
}
]
},
{
"cycleFrames": 200
}
]
}
]
},
{
"and": [
{
"haveBlueSuit": {}
},
{
"cycleFrames": 50
}
]
}
]
}Collects items: 3 Farm cycle drops: 1 Geruta |
|


Requires: "canDash"
"Morph"
{
"heatFrames": 170
}
{
"enemyKill": {
"enemies": [
[
"Geruta"
]
],
"explicitWeapons": [
"Super",
"Missile",
"Plasma"
]
}
} |
|
Requires: "canDash"
"Morph"
{
"heatFrames": 300
} |
|
Requires: "h_heatProof"
{
"resetRoom": {
"nodes": [
2
]
}
}
{
"or": [
{
"and": [
"canDash",
{
"or": [
{
"and": [
{
"or": [
"ScrewAttack",
"Plasma"
]
},
{
"cycleFrames": 90
}
]
},
{
"and": [
{
"or": [
"Ice",
"Spazer",
"Wave",
"canPseudoScrew"
]
},
{
"cycleFrames": 110
}
]
},
{
"and": [
"h_lavaProof",
{
"cycleFrames": 210
}
]
},
{
"and": [
"canTrickyJump",
{
"cycleFrames": 270
}
]
}
]
}
]
},
{
"and": [
{
"haveBlueSuit": {}
},
{
"cycleFrames": 110
}
]
}
]
}Farm cycle drops: 1 Geruta |
|
Requires: "canDash"
{
"heatFrames": 130
} |
|
Requires: "canDash"
"canPrepareForNextRoom"
{
"enemyKill": {
"enemies": [
[
"Geruta"
]
],
"explicitWeapons": [
"Super",
"Missile",
"Plasma",
"ScrewAttack"
]
}
}
{
"heatFrames": 80
} |
|


Requires: {
"or": [
"canTrivialMidAirMorph",
"h_useSpringBall",
{
"and": [
"h_usePowerBomb",
{
"heatFrames": 260
}
]
},
{
"and": [
"Morph",
"Wave",
{
"heatFrames": 180
}
]
}
]
}
{
"heatFrames": 175
}
{
"or": [
"canDash",
{
"heatFrames": 10
}
]
}Collects items: 3 Dev note: The Wave and Power Bomb options ride the rising tower, to avoid a mid-air morph. |
|
Requires: {
"heatFrames": 105
}
{
"or": [
"canDash",
{
"heatFrames": 10
}
]
}Collects items: 3 Unlocks doors: {"types":["missiles"],"requires":[{"heatFrames":20}]}
{"types":["super"],"requires":[]}
{"types":["powerbomb"],"requires":[{"heatFrames":80}]} |
|
Requires: "canDash"
{
"heatFrames": 90
}Exit condition: {
"leaveWithRunway": {
"length": 3,
"openEnd": 1
}
}Collects items: 3 Unlocks doors: {"types":["missiles"],"requires":[{"heatFrames":30}]}
{"types":["super"],"requires":[]}
{"types":["powerbomb"],"requires":[{"heatFrames":80}]} |
|
Requires: {
"heatFrames": 85
}
{
"or": [
"canDash",
{
"heatFrames": 30
}
]
}Unlocks doors: {"types":["missiles"],"requires":[{"heatFrames":20}]} |
From: 1
Top Left Door
To: 5
Middle Junction (Ledge Right of Morph Tunnel)
Requires: {
"heatFrames": 100
}
{
"or": [
"canDash",
{
"heatFrames": 35
}
]
} |
|
Requires: "h_heatProof"
"Morph"
{
"resetRoom": {
"nodes": [
2
]
}
}
{
"or": [
{
"and": [
"canDash",
{
"or": [
{
"and": [
{
"or": [
"Plasma",
"Wave",
"Spazer"
]
},
{
"cycleFrames": 630
}
]
},
{
"and": [
"Grapple",
{
"cycleFrames": 680
}
]
},
{
"cycleFrames": 770
}
]
}
]
},
{
"and": [
{
"haveBlueSuit": {}
},
{
"cycleFrames": 810
}
]
}
]
}Resets obstacles: A, R-Mode Farm cycle drops: 4 Viola |
|
Requires: "Morph"
{
"heatFrames": 225
}
{
"or": [
{
"and": [
"canDash",
{
"or": [
{
"heatFrames": 10
},
"canMockball",
{
"obstaclesCleared": [
"A"
]
}
]
}
]
},
{
"heatFrames": 15
}
]
}Clears obstacles: A Unlocks doors: {"types":["powerbomb"],"requires":[{"heatFrames":60}]} |
From: 2
Middle Left Door
To: 5
Middle Junction (Ledge Right of Morph Tunnel)
Requires: "Morph"
{
"heatFrames": 165
}
{
"or": [
{
"and": [
"canDash",
{
"or": [
{
"heatFrames": 10
},
"canMockball",
{
"obstaclesCleared": [
"A"
]
}
]
}
]
},
{
"heatFrames": 25
}
]
}Clears obstacles: A |
|
Requires: "h_heatProof"
{
"or": [
{
"and": [
{
"resetRoom": {
"nodes": [
1,
4
]
}
},
{
"or": [
{
"and": [
"canDash",
{
"or": [
{
"and": [
{
"or": [
"Plasma",
"Wave",
"Spazer"
]
},
{
"cycleFrames": 450
}
]
},
{
"and": [
"Grapple",
{
"cycleFrames": 530
}
]
},
{
"cycleFrames": 660
}
]
}
]
},
{
"and": [
{
"haveBlueSuit": {}
},
{
"cycleFrames": 565
}
]
}
]
}
]
},
{
"and": [
{
"resetRoom": {
"nodes": [
3
]
}
},
{
"or": [
{
"and": [
"canDash",
{
"or": [
{
"and": [
{
"or": [
"Plasma",
"Wave",
"Spazer"
]
},
{
"cycleFrames": 450
}
]
},
{
"cycleFrames": 500
}
]
}
]
},
{
"and": [
{
"haveBlueSuit": {}
},
{
"cycleFrames": 570
}
]
}
]
}
]
}
]
}Resets obstacles: A, R-Mode Farm cycle drops: 4 Viola |
From: 3
Bottom Left Door
To: 5
Middle Junction (Ledge Right of Morph Tunnel)
Requires: {
"heatFrames": 120
}
{
"or": [
"canDash",
{
"heatFrames": 10
}
]
} |
|
Requires: {
"heatFrames": 85
}
{
"or": [
"canDash",
{
"heatFrames": 30
}
]
}Unlocks doors: {"types":["missiles"],"requires":[{"heatFrames":20}]} |
From: 4
Top Right Door
To: 5
Middle Junction (Ledge Right of Morph Tunnel)
Requires: {
"heatFrames": 85
}
{
"or": [
"canDash",
{
"heatFrames": 10
}
]
} |
From: 5
Middle Junction (Ledge Right of Morph Tunnel)
To: 1
Top Left Door
Requires: {
"heatFrames": 140
}
{
"or": [
"canDash",
{
"heatFrames": 20
}
]
} |
From: 5
Middle Junction (Ledge Right of Morph Tunnel)
To: 2
Middle Left Door
Requires: "Morph"
{
"heatFrames": 150
}
{
"or": [
{
"and": [
"Wave",
{
"heatFrames": 30
}
]
},
{
"obstaclesCleared": [
"A"
]
}
]
}
{
"or": [
"canDash",
{
"heatFrames": 40
}
]
}Clears obstacles: A |
From: 5
Middle Junction (Ledge Right of Morph Tunnel)
To: 2
Middle Left Door
Requires: "Morph"
{
"heatFrames": 150
}
"h_heatedBlueGateGlitch"
{
"or": [
"canDash",
{
"heatFrames": 65
}
]
}Clears obstacles: A |
From: 5
Middle Junction (Ledge Right of Morph Tunnel)
To: 2
Middle Left Door
Requires: "canDash"
"Morph"
{
"heatFrames": 150
}
{
"or": [
{
"and": [
"Wave",
{
"heatFrames": 30
}
]
},
{
"obstaclesCleared": [
"A"
]
}
]
}Exit condition: {
"leaveWithRunway": {
"length": 11,
"openEnd": 0,
"gentleDownTiles": 4
}
}Unlocks doors: {"types":["missiles"],"requires":[{"heatFrames":70}]}
{"types":["super"],"requires":[]}
{"types":["powerbomb"],"requires":[{"heatFrames":110}]} |
From: 5
Middle Junction (Ledge Right of Morph Tunnel)
To: 2
Middle Left Door
Requires: "canDash"
"Morph"
{
"heatFrames": 150
}
"h_heatedBlueGateGlitch"Exit condition: {
"leaveWithRunway": {
"length": 11,
"openEnd": 0,
"gentleDownTiles": 4
}
}Unlocks doors: {"types":["missiles"],"requires":[{"heatFrames":90}]}
{"types":["super"],"requires":[]}
{"types":["powerbomb"],"requires":[{"heatFrames":110}]} |
From: 5
Middle Junction (Ledge Right of Morph Tunnel)
To: 3
Bottom Left Door
Requires: {
"heatFrames": 115
}
{
"or": [
"canDash",
{
"heatFrames": 15
}
]
}Unlocks doors: {"types":["missiles"],"requires":[{"heatFrames":50}]}
{"types":["super"],"requires":[]}
{"types":["powerbomb"],"requires":[{"heatFrames":60}]} |
From: 5
Middle Junction (Ledge Right of Morph Tunnel)
To: 3
Bottom Left Door
Requires: "canDash"
{
"heatFrames": 160
}Exit condition: {
"leaveWithRunway": {
"length": 14,
"openEnd": 0
}
}Unlocks doors: {"types":["missiles"],"requires":[{"heatFrames":50}]}
{"types":["super"],"requires":[]}
{"types":["powerbomb"],"requires":[{"heatFrames":60}]} |
|
Entrance condition: {
"comeInWithGMode": {
"mode": "any",
"morphed": false
}
}Requires: "Gravity"
{
"or": [
{
"lavaFrames": 280
},
{
"and": [
"SpaceJump",
{
"lavaFrames": 240
}
]
}
]
}
{
"or": [
{
"and": [
"canDash",
{
"disableEquipment": "SpeedBooster"
},
{
"or": [
{
"notable": "Thread the Needle Entry"
},
{
"heatFrames": 20
}
]
}
]
},
{
"lavaFrames": 100
}
]
}
"h_heatedGModeOpenDifferentDoor" |
|


Perform a Crystal Flash in order to refill reserves. Position Samus below the 2-tile space of the ceiling Morph tunnel. Jump as Samus reaches 4 Energy, and mid-air morph, timed so that reserves trigger while Samus still has upward momentum just before Samus would hit the ceiling. If done properly, the R-mode standup will cause Samus to clip into the ceiling Morph tunnel. If successful, Samus will end up crouched in the tunnel; press down to morph, then roll out to the right to exit the room. With a mid-air morph, this has a 4-frame window for the jump. It is also an option to pause abuse: instead of jumping at a precise Energy value, set reserves to manual, wait until Samus is close to zero Energy, then press pause and wait a moment before jumping (firing a shot when pausing may help create a visual cue), so that Samus is at 0 Energy and in position just below the ceiling when the pause hits. Then set reserves to auto (and re-equip Varia if available) and unpause. Entrance condition: {
"comeInWithRMode": {}
}Requires: "h_heatedCrystalFlash"
"canRModeStandupClip"
"canInsaneJump"
{
"heatFrames": 140
}
{
"disableEquipment": "Varia"
}
{
"autoReserveTrigger": {}
}
{
"heatFrames": 275
}
{
"or": [
"canDash",
{
"heatFrames": 15
}
]
}Dev note: Jumping using Spring Ball is also possible, which simplifies the movement by avoiding the need for a mid-air morph; it still has a 4-frame window for the jump timing. Jumping and aiming down is also possible but only gives a 2-frame window for the jump. |
|
Requires: {
"heatFrames": 90
}
{
"or": [
"canDash",
{
"heatFrames": 50
}
]
} |
|
Gain a specifc amount of speed by running from a standstill, starting slightly more than 3 tiles from the edge of the Ridley statue jaw. Jump on the last possible frame (second-to-last frame may also work, depending on subpixels). If successful, Samus will avoid bonking the wall and will land directly in front of the Namihe. Requires: {
"notable": "Thread the Needle Entry"
}
{
"or": [
"canSuitlessLavaDive",
"Gravity"
]
}
"canDash"
"canInsaneJump"
{
"heatFrames": 200
}
{
"lavaFrames": 60
}Dev note: Starting horizontal positions between $F2 and $FB will work consistently with a last-frame jump. Positions further left can also work but may require an earlier jump. Gravity only makes about 1 or 2 frames of difference here, which we ignore. |
|


Entrance condition: {
"comeInWithGMode": {
"mode": "any",
"morphed": false
}
}Requires: {
"lavaFrames": 210
}
{
"or": [
{
"and": [
"canDash",
{
"disableEquipment": "SpeedBooster"
}
]
},
{
"lavaFrames": 60
}
]
}
"canSuitlessLavaDive"
"canGravityJump"
{
"or": [
{
"and": [
"HiJump",
{
"gravitylessLavaFrames": 115
}
]
},
{
"and": [
"canTrickyWallJump",
"canTrickyJump",
{
"gravitylessLavaFrames": 175
}
]
}
]
}
"h_heatedGModeOpenDifferentDoor"Dev note: FIXME: Many strats without Gravity have been skipped for now. |
|


Entrance condition: {
"comeInWithGMode": {
"mode": "any",
"morphed": false
}
}Requires: "Gravity"
"SpaceJump"
{
"lavaFrames": 280
}
{
"or": [
{
"and": [
{
"disableEquipment": "SpeedBooster"
},
"canDash"
]
},
{
"lavaFrames": 80
}
]
}
"h_heatedGModeOpenDifferentDoor"Dev note: FIXME: GT Max Suitless climb could be added, but is likely not reasonable. |
|


Wall jump off of the Upper-Left Namihe and then Spring Ball jump up and out of the Lava. Pausing early in order to get more horizontal distance by equiping Spring Ball may help. Entrance condition: {
"comeInWithGMode": {
"mode": "any",
"morphed": false
}
}Requires: {
"notable": "HiJump"
}
"Gravity"
"canSpringwall"
"HiJump"
"canUseEnemies"
{
"lavaFrames": 390
}
{
"or": [
{
"and": [
"canDash",
{
"disableEquipment": "SpeedBooster"
}
]
},
{
"lavaFrames": 150
}
]
}
"h_heatedGModeOpenDifferentDoor"Dev note: This strat is not useful unless Samus has lava proof but not heat proof. Otherwise, the non-G-mode variant can be used. FIXME: These lava frames are lenient, they are what it would take without Gravity (the non-G-mode variant also doesnt account for Gravity). |
|
Samus will be slowed by lava if Speed Booster is equipped, even with Gravity. Requires: {
"or": [
"h_lavaProof",
"canSuitlessLavaDive"
]
}
"Gravity"
"SpaceJump"
{
"heatFrames": 340
}
{
"lavaFrames": 280
}
{
"or": [
{
"and": [
{
"disableEquipment": "SpeedBooster"
},
"canDash"
]
},
{
"and": [
{
"heatFrames": 120
},
{
"lavaFrames": 120
}
]
}
]
} |
|


Use the platform above the third Namihe to run and jump into a diagonal spark. Requires: "Gravity"
{
"or": [
"h_lavaProof",
"canSuitlessLavaDive"
]
}
"canDash"
{
"disableEquipment": "SpeedBooster"
}
{
"useFlashSuit": {}
}
{
"shinespark": {
"frames": 23
}
}
{
"heatFrames": 425
}
{
"lavaFrames": 275
}Dev note: FIXME: a version with SpeedBooster equipped is possible, with more energy usage. |
From: 2
Right Door
To: 3
Above Lava Junction


Use a flash suit to shinespark out of the lava. A diagonal spark is slightly better though Samus will barely move horizontally. Requires: "canSuitlessLavaDive"
"canDash"
{
"disableEquipment": "SpeedBooster"
}
{
"useFlashSuit": {}
}
{
"or": [
{
"and": [
"canBounceBall",
{
"lavaFrames": 270
},
{
"shinespark": {
"frames": 32
}
},
{
"heatFrames": 420
}
]
},
{
"and": [
{
"lavaFrames": 375
},
{
"shinespark": {
"frames": 27
}
},
{
"heatFrames": 525
}
]
}
]
} |
|
Samus will be slowed by lava if Speed Booster is equipped, even with Gravity. Requires: {
"or": [
"h_lavaProof",
"canSuitlessLavaDive"
]
}
"Gravity"
{
"heatFrames": 250
}
{
"lavaFrames": 190
}
{
"or": [
{
"and": [
{
"disableEquipment": "SpeedBooster"
},
"canDash"
]
},
{
"and": [
{
"heatFrames": 50
},
{
"lavaFrames": 50
}
]
}
]
} |
|
Requires: {
"heatFrames": 104
}
{
"or": [
"canDash",
{
"heatFrames": 50
}
]
}Unlocks doors: {"types":["missiles"],"requires":[{"heatFrames":10}]} |
|
Samus will be slowed by lava if SpeedBooster is equipped, even with Gravity. Requires: {
"or": [
{
"and": [
"Gravity",
{
"heatFrames": 180
},
{
"lavaFrames": 180
}
]
},
{
"and": [
"Gravity",
{
"disableEquipment": "SpeedBooster"
},
"canDash",
{
"heatFrames": 140
},
{
"lavaFrames": 140
}
]
},
{
"and": [
{
"heatFrames": 210
},
{
"lavaFrames": 210
}
]
}
]
} |
|
Samus will be slowed by lava if SpeedBooster is equipped, even with Gravity. Requires: "Gravity"
{
"or": [
"h_lavaProof",
"canSuitlessLavaDive"
]
}
{
"or": [
{
"and": [
"canDash",
{
"disableEquipment": "SpeedBooster"
},
{
"heatFrames": 270
},
{
"lavaFrames": 220
}
]
},
{
"and": [
"canDash",
{
"disableEquipment": "SpeedBooster"
},
"SpaceJump",
"canCarefulJump",
{
"heatFrames": 225
},
{
"lavaFrames": 180
}
]
},
{
"and": [
{
"heatFrames": 330
},
{
"lavaFrames": 300
}
]
}
]
} |
|
Samus will be slowed by lava if SpeedBooster is equipped, even with Gravity. Requires: {
"or": [
{
"and": [
"Gravity",
{
"heatFrames": 195
},
{
"lavaFrames": 195
}
]
},
{
"and": [
"Gravity",
"canDash",
{
"disableEquipment": "SpeedBooster"
},
{
"heatFrames": 150
},
{
"lavaFrames": 150
}
]
},
{
"and": [
{
"heatFrames": 200
},
{
"lavaFrames": 200
}
]
}
]
} |
|
Requires: {
"heatFrames": 50
}
{
"or": [
"canDash",
{
"heatFrames": 25
}
]
} |
|
Requires: {
"heatFrames": 180
}
{
"or": [
"canDash",
{
"heatFrames": 120
}
]
} |
|
Requires: {
"heatFrames": 40
}
{
"or": [
"canDash",
{
"heatFrames": 5
}
]
} |
|
Requires: {
"heatFrames": 175
}
{
"or": [
"canDash",
{
"heatFrames": 105
}
]
} |
|
Requires: {
"heatFrames": 75
}
{
"or": [
"canDash",
{
"heatFrames": 25
}
]
} |
|
Requires: "canDash"
{
"heatFrames": 10
}Exit condition: {
"leaveWithRunway": {
"length": 14,
"openEnd": 1
}
}Unlocks doors: {"types":["ammo"],"requires":[]} |
|
Requires: {
"heatFrames": 205
}
{
"or": [
"canDash",
{
"heatFrames": 135
}
]
}Unlocks doors: {"types":["missiles"],"requires":[]} |
From: 4
Gamet Farm Junction
To: 2
Right Door

Requires: "canDash"
{
"heatFrames": 440
}Exit condition: {
"leaveWithGModeSetup": {}
}Unlocks doors: {"types":["missiles","powerbomb"],"requires":["never"]}
{"types":["super"],"requires":[]}Dev note: FIXME: with Ice, this could be done dashless. |
|
Requires: "canDash"
{
"heatFrames": 155
}Exit condition: {
"leaveWithRunway": {
"length": 14,
"openEnd": 1
}
}Unlocks doors: {"types":["missiles"],"requires":[{"heatFrames":40}]}
{"types":["super"],"requires":[]}
{"types":["powerbomb"],"requires":[{"heatFrames":110}]} |
|
Requires: {
"heatFrames": 210
}
{
"or": [
"h_trickyToCarryFlashSuit",
{
"heatFrames": 40
}
]
}
{
"or": [
"canDash",
{
"heatFrames": 110
}
]
} |
|
Bring a Gamet from the farm and freeze it at a precise distance below the door in order to crouch-jump up and clip through the door shell. The pixel window is larger and higher with Morph and an X-Ray stand-up, in which case a standing jump is used. Requires: {
"or": [
"canDash",
"h_heatProof"
]
}
{
"heatFrames": 560
}
"h_iceClip"Bypasses door shell: true Dev note: FIXME: This could be done dashless without heat protection. |
|
Requires: {
"heatFrames": 220
}
{
"or": [
"canDash",
{
"heatFrames": 110
}
]
}Exit condition: {
"leaveWithDoorFrameBelow": {
"height": 2
}
}Unlocks doors: {"types":["missiles"],"requires":[{"heatFrames":50}]}
{"types":["super"],"requires":[]}
{"types":["powerbomb"],"requires":[{"heatFrames":110}]} |
|
Requires: {
"heatFrames": 220
}
{
"or": [
"canDash",
{
"heatFrames": 110
}
]
}Exit condition: {
"leaveWithPlatformBelow": {
"height": 9,
"leftPosition": -7.5,
"rightPosition": 2
}
}Unlocks doors: {"types":["missiles"],"requires":[{"heatFrames":50}]}
{"types":["super"],"requires":[]}
{"types":["powerbomb"],"requires":[{"heatFrames":110}]} |
From: 4
Gamet Farm Junction
To: 3
Top Door

Position below the door, jump when Samus reaches 7 Energy, and mid-air morph, timed so that reserves trigger while Samus still has upward momentum just before Samus would hit the door. If done properly, the R-mode standup will cause Samus to clip past the door shell. With a mid-air morph, this has a 5-frame window for the jump. Otherwise, with a jump aim-down it has a 3-frame window. If Spring Ball is available, jumping in Spring Ball increases the window to 6 frames. In any case, it may help to pause abuse: instead of jumping at a precise Energy value, set reserves to manual, wait until Samus is close to zero Energy, and press pause a moment before jumping, so that Samus is at 0 energy and in position just below the door when the pause hits. Then set reserves to auto (and re-equip Varia if available), and unpause. Requires: {
"obstaclesCleared": [
"R-Mode"
]
}
"canDash"
"canRModeStandupClip"
"canInsaneJump"
{
"or": [
"canMidAirMorph",
"canBeVeryPatient"
]
}
{
"heatFrames": 210
}
{
"disableEquipment": "Varia"
}
{
"autoReserveTrigger": {}
}
{
"heatFrames": 5
}Bypasses door shell: true |
From: 1
Left Door
To: 2
Right Door
While crossing the Spiky Lava, land on frozen Yapping Maws to reduce the number of spike hits needed. Damage boost towards then freeze the Leftmost enemy as it extends. Morph and unmorph while above the middle Yapping Maw to land on it just above the lava line. Ignore the rightmost Yapping Maw. Delay the damage boost from the spikes slightly in order to rise above the lava before moving. Requires: {
"notable": "Frozen Maw Platforms"
}
"canDash"
"canResetFallSpeed"
"canTrickyUseFrozenEnemies"
"canTrickyJump"
{
"or": [
{
"and": [
{
"notable": "Suitless Damage Boosts"
},
"canHorizontalDamageBoost"
]
},
{
"and": [
{
"spikeHits": 2
},
{
"lavaFrames": 30
},
{
"heatFrames": 240
}
]
}
]
}
"canUseIFrames"
{
"spikeHits": 2
}
{
"lavaFrames": 35
}
{
"heatFrames": 520
}
"h_complexToCarryFlashSuit" |
|
Entrance condition: {
"comeInWithGMode": {
"mode": "any",
"morphed": false
}
}Requires: "canDash"
{
"or": [
{
"and": [
{
"lavaFrames": 150
},
{
"spikeHits": 7
}
]
},
{
"and": [
{
"notable": "Suitless Damage Boosts"
},
{
"lavaFrames": 80
},
{
"spikeHits": 3
},
"canUseIFrames",
"canHorizontalDamageBoost"
]
},
{
"and": [
"Gravity",
{
"disableEquipment": "SpeedBooster"
},
{
"lavaFrames": 100
},
{
"spikeHits": 2
},
{
"or": [
"canUseIFrames",
"canHorizontalDamageBoost"
]
}
]
},
{
"and": [
{
"notable": "Frozen Maw Platforms"
},
"canResetFallSpeed",
"canTrickyUseFrozenEnemies",
"canTrickyJump",
"canHorizontalDamageBoost",
"canUseIFrames",
{
"spikeHits": 2
},
{
"lavaFrames": 15
}
]
}
]
}
"h_heatedGModeOpenDifferentDoor"Dev note: FIXME: Grapple could maybe be used to skip some damage by partially swinging across the room. Blue suit damage boost options could also be added. |
From: 1
Left Door
To: 2
Right Door
Uses a runway of at least 14 tiles in the adjacent room. Disable SpeedBooster after jumping so that the lava will not take away all of Samus' momentum. Entrance condition: {
"comeInRunning": {
"speedBooster": "yes",
"minTiles": 14
}
}Requires: "Gravity"
"h_speedJump"
{
"disableEquipment": "SpeedBooster"
}
"canSpringBallBounce"
"canTrickyJump"
{
"spikeHits": 1
}
{
"heatFrames": 240
}
{
"lavaFrames": 10
} |
|
Pause abuse the spike and lava damage to cross the room while losing minimal Energy. Requires: "canDash"
{
"noFlashSuit": {}
}
{
"notable": "Pause Abuse Damage Boosts"
}
{
"or": [
{
"and": [
{
"disableEquipment": "SpeedBooster"
},
"Gravity"
]
},
{
"and": [
"canInsaneJump",
{
"notable": "Suitless Damage Boosts"
}
]
}
]
}
"canHorizontalDamageBoost"
"canPauseAbuse"
{
"resourceAvailable": [
{
"type": "RegularEnergy",
"count": 99
},
{
"type": "ReserveEnergy",
"count": 100
}
]
}
{
"resourceAtMost": [
{
"type": "RegularEnergy",
"count": 1
}
]
}
{
"lavaFrames": 30
}
{
"heatFrames": 340
}Dev note: Energy ineffeciency is necessary and is represented by extra heatFrames. |
|

Requires: "SpaceJump"
{
"heatFrames": 390
}
{
"or": [
"canDash",
{
"heatFrames": 300
}
]
} |
From: 1
Left Door
To: 2
Right Door
Entrance condition: {
"comeInRunning": {
"speedBooster": "yes",
"minTiles": 12.4375
}
}Requires: "h_speedJump"
"SpaceJump"
{
"heatFrames": 195
} |
From: 1
Left Door
To: 2
Right Door
Entrance condition: {
"comeInRunning": {
"speedBooster": "yes",
"minTiles": 17
}
}Requires: "h_speedJump"
"SpaceJump"
{
"heatFrames": 175
} |
From: 1
Left Door
To: 2
Right Door
Entrance condition: {
"comeInRunning": {
"speedBooster": "yes",
"minTiles": 26
}
}Requires: "h_speedJump"
"SpaceJump"
{
"heatFrames": 145
} |
From: 1
Left Door
To: 2
Right Door

Entrance condition: {
"comeInRunning": {
"speedBooster": "yes",
"minTiles": 6
}
}Requires: "h_speedJump"
"SpaceJump"
{
"heatFrames": 250
} |
From: 1
Left Door
To: 2
Right Door

Entrance condition: {
"comeInRunning": {
"speedBooster": "yes",
"minTiles": 9
}
}Requires: "h_speedJump"
"SpaceJump"
{
"heatFrames": 225
} |
From: 1
Left Door
To: 2
Right Door

Entrance condition: {
"comeInRunning": {
"speedBooster": "yes",
"minTiles": 45
}
}Requires: "h_speedJump"
"SpaceJump"
{
"heatFrames": 120
} |
|

Damage boosts can be used to save energy - delay the damage boost from the spikes slightly in order to rise above the lava before moving. Requires: "canDash"
{
"notable": "Suitless Damage Boosts"
}
{
"heatFrames": 460
}
{
"lavaFrames": 60
}
{
"spikeHits": 3
}
"canUseIFrames"
"canHorizontalDamageBoost" |
From: 1
Left Door
To: 2
Right Door


Uses a runway of at least 21 tiles in the adjacent room. It will help to perform the first jump with HiJump disabled. Disable SpeedBooster before Samus reaches the lava. Entrance condition: {
"comeInRunning": {
"speedBooster": "yes",
"minTiles": 21
}
}Requires: "h_speedJump"
"HiJump"
{
"disableEquipment": "HiJump"
}
{
"disableEquipment": "SpeedBooster"
}
"canSpringBallBounce"
"canTrickyJump"
{
"spikeHits": 1
}
{
"heatFrames": 200
}
{
"lavaFrames": 11
}Dev note: SpringFling can be used to extend the last SpringBall bounce so that runway can be shortened, but it mostly inflates the number of strats. |
From: 1
Left Door
To: 2
Right Door


Uses a runway of at least 8 tiles in the adjacent room. It will help to perform the first jump with HiJump disabled. Disable SpeedBooster before Samus reaches the lava. Entrance condition: {
"comeInRunning": {
"speedBooster": "yes",
"minTiles": 8
}
}Requires: "canTrickyJump"
"h_speedJump"
"HiJump"
{
"disableEquipment": "HiJump"
}
{
"disableEquipment": "SpeedBooster"
}
"canSpringBallBounce"
{
"spikeHits": 2
}
{
"heatFrames": 311
}
{
"lavaFrames": 22
} |
|
Requires: "canDash"
{
"heatFrames": 820
}
{
"lavaFrames": 150
}
{
"spikeHits": 7
} |
|
Speedbooster significantly reduces your jump speed in lava and should be turned off. Requires: "canDash"
"Gravity"
{
"disableEquipment": "SpeedBooster"
}
{
"heatFrames": 330
}
{
"lavaFrames": 90
}
{
"spikeHits": 2
}
{
"or": [
"canUseIFrames",
{
"and": [
{
"spikeHits": 2
},
{
"heatFrames": 50
}
]
}
]
}
{
"or": [
"canHorizontalDamageBoost",
{
"and": [
{
"heatFrames": 20
},
{
"lavaFrames": 20
}
]
}
]
} |
From: 2
Right Door
To: 1
Left Door
While crossing the Spiky Lava, land on frozen Yapping Maws to reduce the number of spike hits needed. Morph and unmorph while above the rightmost Yapping Maw to land on it just above the lava line. Ignore the second Yapping Maw. Freeze the Leftmost enemy as it extends. Delay the damage boost from the spikes slightly in order to rise above the lava before moving. Requires: "canDash"
{
"notable": "Frozen Maw Platforms"
}
"canResetFallSpeed"
"canTrickyUseFrozenEnemies"
"canTrickyJump"
{
"or": [
{
"and": [
{
"notable": "Suitless Damage Boosts"
},
"canHorizontalDamageBoost"
]
},
{
"and": [
{
"spikeHits": 1
},
{
"lavaFrames": 20
},
{
"heatFrames": 240
}
]
}
]
}
"canUseIFrames"
{
"spikeHits": 2
}
{
"lavaFrames": 35
}
{
"heatFrames": 520
}
"h_complexToCarryFlashSuit" |
|
Entrance condition: {
"comeInWithGMode": {
"mode": "any",
"morphed": false
}
}Requires: "canDash"
{
"or": [
{
"and": [
{
"lavaFrames": 150
},
{
"spikeHits": 7
}
]
},
{
"and": [
{
"notable": "Suitless Damage Boosts"
},
{
"lavaFrames": 80
},
{
"spikeHits": 3
},
"canUseIFrames",
"canHorizontalDamageBoost"
]
},
{
"and": [
"Gravity",
{
"disableEquipment": "SpeedBooster"
},
{
"lavaFrames": 100
},
{
"spikeHits": 2
},
{
"or": [
"canUseIFrames",
"canHorizontalDamageBoost"
]
}
]
},
{
"and": [
{
"notable": "Frozen Maw Platforms"
},
"canResetFallSpeed",
"canTrickyUseFrozenEnemies",
"canTrickyJump",
"canHorizontalDamageBoost",
"canUseIFrames",
{
"spikeHits": 2
},
{
"lavaFrames": 15
}
]
}
]
}
"h_heatedGModeOpenDifferentDoor"Dev note: FIXME: Grapple could maybe be used to skip some damage by partially swinging across the room. |
From: 2
Right Door
To: 1
Left Door
Uses a runway of at least 14 tiles in the adjacent room. Disable SpeedBooster after jumping so that the lava will not take away all of Samus' momentum. Entrance condition: {
"comeInRunning": {
"speedBooster": "yes",
"minTiles": 14
}
}Requires: "Gravity"
"h_speedJump"
{
"disableEquipment": "SpeedBooster"
}
"canSpringBallBounce"
"canTrickyJump"
{
"spikeHits": 1
}
{
"heatFrames": 240
}
{
"lavaFrames": 10
} |
|
Pause abuse the spike and lava damage to cross the room while losing minimal Energy. Requires: "canDash"
{
"noFlashSuit": {}
}
{
"notable": "Pause Abuse Damage Boosts"
}
{
"or": [
{
"and": [
{
"disableEquipment": "SpeedBooster"
},
"Gravity"
]
},
{
"and": [
"canInsaneJump",
{
"notable": "Suitless Damage Boosts"
}
]
}
]
}
"canHorizontalDamageBoost"
"canPauseAbuse"
{
"resourceAvailable": [
{
"type": "RegularEnergy",
"count": 99
},
{
"type": "ReserveEnergy",
"count": 100
}
]
}
{
"resourceAtMost": [
{
"type": "RegularEnergy",
"count": 1
}
]
}
{
"lavaFrames": 30
}
{
"heatFrames": 340
}Dev note: Energy ineffeciency is necessary and is represented by extra heatFrames. |
|

Requires: "SpaceJump"
{
"heatFrames": 390
}
{
"or": [
"canDash",
{
"heatFrames": 300
}
]
} |
From: 2
Right Door
To: 1
Left Door
Entrance condition: {
"comeInRunning": {
"speedBooster": "yes",
"minTiles": 12.4375
}
}Requires: "h_speedJump"
"SpaceJump"
{
"heatFrames": 195
} |
From: 2
Right Door
To: 1
Left Door
Entrance condition: {
"comeInRunning": {
"speedBooster": "yes",
"minTiles": 17
}
}Requires: "h_speedJump"
"SpaceJump"
{
"heatFrames": 175
} |
From: 2
Right Door
To: 1
Left Door
Entrance condition: {
"comeInRunning": {
"speedBooster": "yes",
"minTiles": 26
}
}Requires: "h_speedJump"
"SpaceJump"
{
"heatFrames": 145
} |
From: 2
Right Door
To: 1
Left Door
Entrance condition: {
"comeInRunning": {
"speedBooster": "yes",
"minTiles": 6
}
}Requires: "h_speedJump"
"SpaceJump"
{
"heatFrames": 250
} |
From: 2
Right Door
To: 1
Left Door
Entrance condition: {
"comeInRunning": {
"speedBooster": "yes",
"minTiles": 9
}
}Requires: "h_speedJump"
"SpaceJump"
{
"heatFrames": 225
} |
From: 2
Right Door
To: 1
Left Door
Entrance condition: {
"comeInRunning": {
"speedBooster": "yes",
"minTiles": 45
}
}Requires: "h_speedJump"
"SpaceJump"
{
"heatFrames": 120
} |
From: 2
Right Door
To: 1
Left Door
Damage boosts can be used to save energy - delay the damage boost from the spikes slightly in order to rise above the lava before moving. Requires: "canDash"
{
"notable": "Suitless Damage Boosts"
}
{
"heatFrames": 460
}
{
"lavaFrames": 60
}
{
"spikeHits": 3
}
"canUseIFrames"
"canHorizontalDamageBoost" |
From: 2
Right Door
To: 1
Left Door


Uses a runway of at least 21 tiles in the adjacent room. It will help to perform the first jump with HiJump disabled. Disable SpeedBooster before Samus reaches the lava. Entrance condition: {
"comeInRunning": {
"speedBooster": "yes",
"minTiles": 21
}
}Requires: "h_speedJump"
"HiJump"
{
"disableEquipment": "HiJump"
}
{
"disableEquipment": "SpeedBooster"
}
"canSpringBallBounce"
"canTrickyJump"
{
"spikeHits": 1
}
{
"heatFrames": 200
}
{
"lavaFrames": 11
}Dev note: SpringFling can be used to extend the last SpringBall bounce so that runway can be shortened, but it mostly inflates the number of strats. |
From: 2
Right Door
To: 1
Left Door


Uses a runway of at least 8 tiles in the adjacent room. It will help to perform the first jump with HiJump disabled. Disable SpeedBooster before Samus reaches the lava. Entrance condition: {
"comeInRunning": {
"speedBooster": "yes",
"minTiles": 8
}
}Requires: "h_speedJump"
"canTrickyJump"
"HiJump"
{
"disableEquipment": "HiJump"
}
{
"disableEquipment": "SpeedBooster"
}
"canSpringBallBounce"
{
"spikeHits": 2
}
{
"heatFrames": 311
}
{
"lavaFrames": 22
} |
|
Requires: "canDash"
{
"heatFrames": 820
}
{
"lavaFrames": 150
}
{
"spikeHits": 7
} |
|
Speedbooster significantly reduces your jump speed in lava and should be turned off. Requires: "canDash"
"Gravity"
{
"disableEquipment": "SpeedBooster"
}
{
"heatFrames": 330
}
{
"lavaFrames": 90
}
{
"spikeHits": 2
}
{
"or": [
"canUseIFrames",
{
"and": [
{
"spikeHits": 2
},
{
"heatFrames": 50
}
]
}
]
}
{
"or": [
"canHorizontalDamageBoost",
{
"and": [
{
"heatFrames": 20
},
{
"lavaFrames": 20
}
]
}
]
} |
|
Requires: {
"heatFrames": 55
}
{
"or": [
"canDash",
{
"heatFrames": 20
}
]
} |
|
Requires: "canDash"
{
"heatFrames": 10
}Exit condition: {
"leaveWithRunway": {
"length": 13,
"openEnd": 0
}
}Unlocks doors: {"types":["missiles"],"requires":[{"heatFrames":50}]}
{"types":["super"],"requires":[]}
{"types":["powerbomb"],"requires":[{"heatFrames":110}]}Dev note: The 10 heat frames are for moonwalking back against the door on entry. FIXME: heat frames to unlock the door could be reduced. |
|
Requires: "canDash"
{
"doorUnlockedAtNode": 1
}
{
"heatFrames": 65
}Exit condition: {
"leaveWithRunway": {
"length": 14,
"openEnd": 0
}
}Unlocks doors: {"nodeId":2,"types":["missiles"],"requires":[{"heatFrames":50}]}
{"nodeId":2,"types":["super"],"requires":[]}
{"nodeId":2,"types":["powerbomb"],"requires":[{"heatFrames":110}]}Dev note: The 65 heat frames are for shooting open the door and moonwalking back into the doorway. FIXME: heat frames to unlock the door could be reduced. |
From: 1
Left Door
To: 2
Right Door
Entrance condition: {
"comeInWithStoredFallSpeed": {
"fallSpeedInTiles": 1
}
}Requires: {
"heatFrames": 55
}
{
"or": [
"canDash",
{
"heatFrames": 20
}
]
}Exit condition: {
"leaveWithStoredFallSpeed": {
"fallSpeedInTiles": 1
}
}Unlocks doors: {"types":["missiles","super"],"requires":[]}
{"types":["powerbomb"],"requires":["never"]} |
From: 1
Left Door
To: 2
Right Door
Entrance condition: {
"comeInWithStoredFallSpeed": {
"fallSpeedInTiles": 2
}
}Requires: {
"heatFrames": 55
}
{
"or": [
"canDash",
{
"heatFrames": 20
}
]
}Exit condition: {
"leaveWithStoredFallSpeed": {
"fallSpeedInTiles": 2
}
}Unlocks doors: {"types":["missiles","super"],"requires":[]}
{"types":["powerbomb"],"requires":["never"]} |
|
Requires: {
"heatFrames": 30
}
{
"or": [
"canDash",
{
"heatFrames": 10
}
]
} |
|
Requires: {
"heatFrames": 55
}
{
"or": [
"canDash",
{
"heatFrames": 20
}
]
} |
|
Requires: "canDash"
{
"heatFrames": 10
}Exit condition: {
"leaveWithRunway": {
"length": 13,
"openEnd": 0
}
}Unlocks doors: {"types":["missiles"],"requires":[{"heatFrames":50}]}
{"types":["super"],"requires":[]}
{"types":["powerbomb"],"requires":[{"heatFrames":110}]}Dev note: The 10 heat frames are for moonwalking back against the door on entry. FIXME: heat frames to unlock the door could be reduced. |
|
Requires: "canDash"
{
"doorUnlockedAtNode": 2
}
{
"heatFrames": 65
}Exit condition: {
"leaveWithRunway": {
"length": 14,
"openEnd": 0
}
}Unlocks doors: {"nodeId":1,"types":["missiles"],"requires":[{"heatFrames":50}]}
{"nodeId":1,"types":["super"],"requires":[]}
{"nodeId":1,"types":["powerbomb"],"requires":[{"heatFrames":110}]}Dev note: The 65 heat frames are for shooting open the door and moonwalking back into the doorway. FIXME: heat frames to unlock the door could be reduced. |
From: 2
Right Door
To: 1
Left Door
Entrance condition: {
"comeInWithStoredFallSpeed": {
"fallSpeedInTiles": 1
}
}Requires: {
"heatFrames": 55
}
{
"or": [
"canDash",
{
"heatFrames": 20
}
]
}Exit condition: {
"leaveWithStoredFallSpeed": {
"fallSpeedInTiles": 1
}
}Unlocks doors: {"types":["missiles","super"],"requires":[]}
{"types":["powerbomb"],"requires":["never"]} |
From: 2
Right Door
To: 1
Left Door
Entrance condition: {
"comeInWithStoredFallSpeed": {
"fallSpeedInTiles": 2
}
}Requires: {
"heatFrames": 55
}
{
"or": [
"canDash",
{
"heatFrames": 20
}
]
}Exit condition: {
"leaveWithStoredFallSpeed": {
"fallSpeedInTiles": 2
}
}Unlocks doors: {"types":["missiles","super"],"requires":[]}
{"types":["powerbomb"],"requires":["never"]} |
|
Requires: {
"heatFrames": 30
}
{
"or": [
"canDash",
{
"heatFrames": 10
}
]
} |
|
Requires: {
"heatFrames": 45
}
{
"or": [
"canDash",
{
"heatFrames": 5
}
]
}Unlocks doors: {"types":["missiles"],"requires":[{"heatFrames":30}]} |
|
Requires: {
"or": [
{
"heatFrames": 440
},
{
"and": [
{
"heatFrames": 340
},
{
"or": [
"canTrickyJump",
{
"and": [
{
"heatFrames": 50
},
"canDodgeWhileShooting",
{
"or": [
"Plasma",
"Wave",
"Spazer",
"ScrewAttack",
"canPseudoScrew",
{
"ammo": {
"type": "Missile",
"count": 1
}
},
{
"ammo": {
"type": "Super",
"count": 1
}
}
]
}
]
}
]
}
]
}
]
}
{
"or": [
"canDash",
{
"and": [
{
"haveBlueSuit": {}
},
{
"heatFrames": 130
}
]
}
]
} |
|


The Magdollite flames can be killed for drops. The left Multiviola will be in the way and should be killed too. Requires: "canDash"
"canFarmWhileShooting"
{
"heatFramesWithEnergyDrops": {
"frames": 240,
"drops": [
{
"enemy": "Multiviola",
"count": 1
},
{
"enemy": "Magdollite",
"count": 3
}
]
}
}
{
"heatFramesWithEnergyDrops": {
"frames": 180,
"drops": [
{
"enemy": "Magdollite",
"count": 5
}
]
}
}
{
"heatFrames": 110
} |
|
Requires: "canDash"
"SpaceJump"
{
"or": [
"ScrewAttack",
{
"and": [
"canPrepareForNextRoom",
"canPseudoScrew"
]
}
]
}
{
"heatFrames": 300
} |
|
Requires: {
"or": [
{
"heatFrames": 420
},
{
"and": [
{
"heatFrames": 325
},
{
"or": [
"canInsaneJump",
{
"and": [
"canDodgeWhileShooting",
{
"or": [
"Plasma",
"Wave",
"Spazer",
"ScrewAttack",
"canPseudoScrew",
{
"ammo": {
"type": "Missile",
"count": 1
}
},
{
"ammo": {
"type": "Super",
"count": 1
}
}
]
}
]
}
]
}
]
},
{
"and": [
{
"heatFrames": 360
},
"canTrickyJump"
]
}
]
}
{
"or": [
"canDash",
{
"and": [
{
"haveBlueSuit": {}
},
{
"heatFrames": 175
}
]
}
]
} |
|
The Magdollite flames can be killed for drops. Requires: "canDash"
"canFarmWhileShooting"
{
"heatFramesWithEnergyDrops": {
"frames": 150,
"drops": [
{
"enemy": "Magdollite",
"count": 5
}
]
}
}
{
"heatFramesWithEnergyDrops": {
"frames": 280,
"drops": [
{
"enemy": "Magdollite",
"count": 3
}
]
}
}
{
"heatFrames": 80
} |
|
Without Screw or pseudo screw, it is possible to carefully space jump over the left Multiviola. Requires: "canDash"
"SpaceJump"
{
"or": [
"ScrewAttack",
{
"and": [
"canPrepareForNextRoom",
"canPseudoScrew"
]
},
"canPreciseSpaceJump"
]
}
{
"heatFrames": 310
} |
From: 2
Right Door
To: 2
Right Door

Follow the right Multiviola to the left and back. Requires: {
"heatFrames": 570
}
{
"or": [
"canTrickyDodgeEnemies",
{
"enemyDamage": {
"enemy": "Multiviola",
"type": "contact",
"hits": 1
}
}
]
}
{
"or": [
"canDash",
{
"heatFrames": 30
}
]
}Exit condition: {
"leaveWithGModeSetup": {}
}Dev note: Could save some heat frames by setting this up while crossing the room. |
From: 1
Right Door
To: 1
Right Door
Very quickly cross the room, collecting both items without falling into the lava. A Power Bomb in the middle of the room sets up the Sova drops and adds lag which makes the block item easier to collect with a Flatley jump. Farming the left sova and middle dragon increases the chances of getting enough health drops, but it may still not be possible with poor drop luck. Pause abuse can be useful for reaching the right side drops if the left side's luck was bad. Entrance condition: {
"comeInRunning": {
"speedBooster": "any",
"minTiles": 2
}
}Requires: "canDash"
{
"or": [
"Wave",
"Plasma",
"Spazer",
"canBeVeryPatient"
]
}
{
"enemyKill": {
"enemies": [
[
"Sova",
"Sova",
"Sova",
"Dragon",
"Dragon"
]
],
"explicitWeapons": [
"PowerBomb"
]
}
}
"canMockball"
"canPreciseWallJump"
"canInsaneJump"
"canPauseAbuse"
"canFarmWhileShooting"
"canBePatient"
{
"resourceMissingAtMost": [
{
"type": "Missile",
"count": 0
},
{
"type": "Super",
"count": 0
}
]
}
{
"heatFrames": 392
}
{
"resourceAtMost": [
{
"type": "RegularEnergy",
"count": 1
}
]
}Collects items: 2, 3 Dev note: Not notable because it is safer to collect the items in separate trips. The first OR block is for farming the left sova for more consistency, or resetting to retry the strat multiple times. canBePatient indicates a chance of failure even if everything is performed correctly. |
|
Requires: "h_heatProof"
"h_lavaProof"
{
"resetRoom": {
"nodes": [
1
]
}
}
{
"or": [
{
"and": [
"canDash",
{
"cycleFrames": 300
},
{
"or": [
"ScrewAttack",
"Plasma",
{
"and": [
"canPseudoScrew",
{
"or": [
"Wave",
"Spazer",
{
"cycleFrames": 420
}
]
},
{
"cycleFrames": 390
}
]
}
]
}
]
},
{
"and": [
{
"haveBlueSuit": {}
},
{
"cycleFrames": 410
}
]
}
]
}Clears obstacles: A Farm cycle drops: 3 Sova, 3 Dragon |
From: 1
Right Door
To: 1
Right Door
Requires: "canDash"
{
"notable": "Power Bomb with Damage Boost"
}
{
"enemyKill": {
"enemies": [
[
"Dragon"
],
[
"Dragon",
"Dragon"
]
],
"explicitWeapons": [
"PowerBomb"
]
}
}
"canHorizontalDamageBoost"
{
"enemyDamage": {
"enemy": "Dragon",
"type": "fireball",
"hits": 2
}
}
"canFlatleyJump"
"canTrickyJump"
{
"or": [
{
"tech": "canUsePowerBombLag"
},
"canInsaneJump"
]
}
{
"heatFrames": 400
}
"h_trickyToCarryFlashSuit"Collects items: 3 |
|
Requires: "h_heatProof"
"canCarefulJump"
{
"or": [
{
"and": [
"canDash",
{
"cycleFrames": 110
},
{
"or": [
"Wave",
"Spazer",
"Plasma",
"Grapple",
{
"and": [
"canTrickyJump",
{
"cycleFrames": 50
}
]
}
]
}
]
},
{
"and": [
{
"haveBlueSuit": {}
},
{
"cycleFrames": 190
}
]
}
]
}Resets obstacles: A Farm cycle drops: 1 Sova |
|
Requires: "h_heatProof"
{
"or": [
"h_lavaProof",
"canInsaneJump",
{
"and": [
"canDodgeWhileShooting",
"Plasma"
]
}
]
}
{
"or": [
{
"and": [
"canDash",
{
"or": [
"Wave",
"Spazer",
"Plasma"
]
},
{
"cycleFrames": 470
}
]
},
{
"and": [
{
"haveBlueSuit": {}
},
{
"cycleFrames": 650
}
]
}
]
}Resets obstacles: A Farm cycle drops: 3 Sova Dev note: Heat scaling makes up the difference in platforming ability. |
From: 1
Right Door
To: 2
Chozo Ball Item


Place a Power Bomb while waiting for the middle Dragon to shoot a fireball, to clear the Sovas for later. While the item block is breaking, turn around to perform a Flatley jump to collect the item and jump to the ledge item in one motion. Place a second Power Bomb while jumping up from the lower item block to clear the remaining enemies for the return trip. Requires: "canDash"
{
"notable": "Power Bomb with Damage Boost"
}
"canFlatleyJump"
"canTrickyDodgeEnemies"
"canMidAirMorph"
"canHorizontalDamageBoost"
{
"enemyDamage": {
"enemy": "Dragon",
"type": "fireball",
"hits": 1
}
}
{
"enemyKill": {
"enemies": [
[
"Dragon"
],
[
"Dragon",
"Dragon"
]
],
"explicitWeapons": [
"PowerBomb"
]
}
}
{
"heatFrames": 260
}
"h_trickyToCarryFlashSuit"Clears obstacles: A Collects items: 3 |
From: 1
Right Door
To: 2
Chozo Ball Item
Place a Power Bomb while waiting for the middle Dragon to shoot a fireball, to clear the Sovas for later. Place a second Power Bomb while jumping up from the lower item block to clear the remaining enemies for the return trip. Requires: "canDash"
{
"notable": "Power Bomb with Damage Boost"
}
"canTrickyJump"
"canMidAirMorph"
"canHorizontalDamageBoost"
{
"enemyDamage": {
"enemy": "Dragon",
"type": "fireball",
"hits": 1
}
}
{
"enemyKill": {
"enemies": [
[
"Dragon"
],
[
"Dragon",
"Dragon"
]
],
"explicitWeapons": [
"PowerBomb"
]
}
}
{
"heatFrames": 270
}
"h_trickyToCarryFlashSuit"Clears obstacles: A |
|
Requires: "SpaceJump"
{
"heatFrames": 180
}
{
"or": [
"canDash",
{
"heatFrames": 130
}
]
} |
From: 1
Right Door
To: 2
Chozo Ball Item
Clear the Dragons while moving towards the items with Space Jump and Screw Attack to make for a faster exit later. Requires: "canDash"
"SpaceJump"
"ScrewAttack"
"canTrickyJump"
{
"heatFrames": 180
}Clears obstacles: A |
|
Requires: "canDash"
"h_lavaProof"
{
"or": [
"h_heatProof",
{
"and": [
{
"obstaclesCleared": [
"A"
]
},
{
"heatFrames": 100
}
]
}
]
} |
|
Requires: "canDash"
{
"or": [
{
"and": [
"canTrickyDodgeEnemies",
{
"heatFrames": 35
}
]
},
"canInsaneJump",
{
"and": [
{
"obstaclesCleared": [
"A"
]
},
{
"heatFrames": 60
}
]
}
]
}
{
"heatFrames": 195
} |
From: 1
Right Door
To: 4
Junction Above Hidden Platform Item
Requires: "canDash"
"canDodgeWhileShooting"
"canTrickyJump"
{
"or": [
"Spazer",
"Wave",
"Plasma",
"ScrewAttack"
]
}
{
"heatFrames": 210
} |
From: 1
Right Door
To: 4
Junction Above Hidden Platform Item
Place a Power Bomb while waiting for the middle Dragon to shoot a fireball, to clear the Sovas for later. A second Power Bomb will be needed to clear the remaining Dragons for the return trip. Requires: "canDash"
{
"notable": "Power Bomb with Damage Boost"
}
"canTrickyJump"
"canMidAirMorph"
"canHorizontalDamageBoost"
{
"enemyDamage": {
"enemy": "Dragon",
"type": "fireball",
"hits": 1
}
}
{
"enemyKill": {
"enemies": [
[
"Dragon"
]
],
"explicitWeapons": [
"PowerBomb"
]
}
}
{
"heatFrames": 180
}
"h_trickyToCarryFlashSuit"Dev note: Would be better if we could model 1 PB consumed + dragons half-dead. |
From: 1
Right Door
To: 4
Junction Above Hidden Platform Item
Requires: "SpaceJump"
{
"heatFrames": 160
}
{
"or": [
"canDash",
{
"heatFrames": 150
}
]
} |
|
Return while collecting Sova drops. Requires: "canDash"
"canFarmWhileShooting"
"canTrickyJump"
{
"or": [
"Wave",
"Plasma",
"Spazer"
]
}
{
"resourceMissingAtMost": [
{
"type": "Missile",
"count": 0
},
{
"type": "Super",
"count": 0
}
]
}
{
"heatFramesWithEnergyDrops": {
"frames": 130,
"drops": [
{
"enemy": "Sova",
"count": 3
}
]
}
}
{
"heatFrames": 80
} |
|
Requires: "SpaceJump"
{
"heatFrames": 210
}
{
"or": [
"canDash",
{
"heatFrames": 110
}
]
} |
|
Requires: "h_lavaProof"
{
"or": [
"h_heatProof",
{
"and": [
{
"obstaclesCleared": [
"A"
]
},
{
"heatFrames": 130
},
"canDash",
{
"disableEquipment": "SpeedBooster"
}
]
},
{
"and": [
{
"or": [
{
"haveBlueSuit": {}
},
{
"obstaclesCleared": [
"A"
]
}
]
},
{
"heatFrames": 180
}
]
}
]
} |
|
Requires: "canDash"
{
"or": [
"canTrickyJump",
"SpaceJump",
{
"and": [
{
"obstaclesCleared": [
"A"
]
},
{
"or": [
"canCarefulJump",
{
"heatFrames": 90
}
]
}
]
}
]
}
{
"heatFrames": 210
} |
From: 4
Junction Above Hidden Platform Item
To: 1
Right Door


Return while collecting Sova drops. Requires: "canDash"
"canFarmWhileShooting"
{
"or": [
"Wave",
"Plasma",
"Spazer"
]
}
{
"resourceMissingAtMost": [
{
"type": "Missile",
"count": 0
},
{
"type": "Super",
"count": 0
}
]
}
{
"heatFramesWithEnergyDrops": {
"frames": 120,
"drops": [
{
"enemy": "Sova",
"count": 2
}
]
}
}
{
"heatFrames": 40
} |
From: 4
Junction Above Hidden Platform Item
To: 2
Chozo Ball Item
Requires: {
"heatFrames": 60
}
{
"or": [
"canDash",
{
"heatFrames": 10
}
]
} |
|
Requires: {
"heatFrames": 10
}
{
"or": [
"canDash",
{
"heatFrames": 5
}
]
} |
|
Requires: {
"heatFrames": 30
}
{
"or": [
"canDash",
{
"heatFrames": 20
}
]
} |
|
Involves leaving some drops hanging after killing the Gamets so they don't respawn. Requires: "canDash"
"h_runOverRespawningEnemies"
{
"heatFrames": 0
}Exit condition: {
"leaveWithRunway": {
"length": 13,
"openEnd": 0,
"gentleUpTiles": 1,
"gentleDownTiles": 3,
"startingGentleDownTiles": 2
}
}Unlocks doors: {"types":["ammo"],"requires":[]}Dev note: Health drops are collected while using this runway, offsetting any heat frames used to get into position. |
|
Requires: {
"heatFrames": 115
}
{
"or": [
"canDash",
{
"heatFrames": 5
}
]
}Unlocks doors: {"types":["powerbomb"],"requires":[{"heatFrames":60}]} |
|
Requires: "canDash"
{
"heatFrames": 105
}Exit condition: {
"leaveWithRunway": {
"length": 4,
"openEnd": 1
}
}Unlocks doors: {"types":["missiles"],"requires":[{"heatFrames":50}]}
{"types":["super"],"requires":[]}
{"types":["powerbomb"],"requires":[{"heatFrames":60}]} |
|
Requires: {
"heatFrames": 160
}
{
"or": [
"canDash",
{
"heatFrames": 10
}
]
} |
|
Requires: {
"heatFrames": 135
}
"HiJump"
{
"or": [
"canDash",
{
"heatFrames": 5
}
]
} |
|
Requires: {
"heatFrames": 160
}
{
"or": [
"canDash",
{
"heatFrames": 10
}
]
}Exit condition: {
"leaveWithDoorFrameBelow": {
"height": 3
}
}Unlocks doors: {"types":["missiles"],"requires":[{"heatFrames":50}]}
{"types":["super"],"requires":[]}
{"types":["powerbomb"],"requires":[{"heatFrames":110}]} |
|
Requires: {
"heatFrames": 160
}
{
"or": [
"canDash",
{
"heatFrames": 10
}
]
}Exit condition: {
"leaveWithPlatformBelow": {
"height": 9,
"leftPosition": 0,
"rightPosition": 2
}
}Unlocks doors: {"types":["missiles"],"requires":[{"heatFrames":50}]}
{"types":["super"],"requires":[]}
{"types":["powerbomb"],"requires":[{"heatFrames":110}]} |
|
Requires: {
"heatFrames": 135
}
"HiJump"
{
"or": [
"canDash",
{
"heatFrames": 5
}
]
}Exit condition: {
"leaveWithPlatformBelow": {
"height": 9,
"leftPosition": 0,
"rightPosition": 2
}
}Unlocks doors: {"types":["missiles"],"requires":[{"heatFrames":50}]}
{"types":["super"],"requires":[]}
{"types":["powerbomb"],"requires":[{"heatFrames":110}]} |
|
Requires: {
"heatFrames": 115
}
{
"or": [
"canDash",
{
"heatFrames": 10
}
]
}Unlocks doors: {"types":["powerbomb"],"requires":[{"heatFrames":60}]} |
|
Requires: "canDash"
{
"heatFrames": 125
}Exit condition: {
"leaveWithRunway": {
"length": 13,
"openEnd": 0
}
}Unlocks doors: {"types":["missiles"],"requires":[{"heatFrames":50}]}
{"types":["super"],"requires":[]}
{"types":["powerbomb"],"requires":[{"heatFrames":60}]} |
|
Requires: {
"or": [
{
"heatFrames": 280
},
{
"and": [
"HiJump",
{
"heatFrames": 220
}
]
}
]
}
{
"or": [
"canDash",
{
"heatFrames": 5
}
]
} |
|
Requires: {
"heatFrames": 135
}
{
"or": [
"canDash",
{
"heatFrames": 5
}
]
}Unlocks doors: {"types":["powerbomb"],"requires":[{"heatFrames":60}]} |
|
Requires: "HiJump"
{
"heatFrames": 115
}
{
"or": [
"canDash",
{
"heatFrames": 5
}
]
}Unlocks doors: {"types":["powerbomb"],"requires":[{"heatFrames":60}]} |
|
Requires: "canDash"
{
"heatFrames": 120
}Exit condition: {
"leaveWithRunway": {
"length": 4,
"openEnd": 1
}
}Unlocks doors: {"types":["missiles"],"requires":[{"heatFrames":50}]}
{"types":["super"],"requires":[]}
{"types":["powerbomb"],"requires":[{"heatFrames":60}]} |
|
Requires: "canDash"
{
"resetRoom": {
"nodes": [
1
]
}
}
"h_heatProof"
"Plasma"
{
"or": [
{
"and": [
"h_lavaProof",
{
"or": [
{
"and": [
"Morph",
{
"cycleFrames": 1170
}
]
},
{
"cycleFrames": 1500
}
]
}
]
},
{
"and": [
"SpaceJump",
{
"cycleFrames": 1440
}
]
},
{
"and": [
"Grapple",
{
"cycleFrames": 1800
}
]
}
]
}Farm cycle drops: 5 Sova, 4 Dragon |
|
Partially cross the room until a Sova falls from the ceiling, follow it back and forth across the room. Alternatively, to save a lot of Energy, use a Super to knock off the first Sova after the one that falls, while it is on the right side of it's platform. Requires: {
"or": [
"canDash",
{
"heatFrames": 60
}
]
}
{
"heatFrames": 1500
}
{
"or": [
{
"ammo": {
"type": "Super",
"count": 1
}
},
{
"heatFrames": 2000
}
]
}Exit condition: {
"leaveWithGModeSetup": {}
} |
|
Requires: "canDash"
"h_heatProof"
{
"resetRoom": {
"nodes": [
1
]
}
}
{
"cycleFrames": 680
}
{
"or": [
"SpaceJump",
{
"cycleFrames": 40
}
]
}
{
"or": [
"Wave",
"Spazer",
"Plasma",
{
"cycleFrames": 360
}
]
}Farm cycle drops: 4 Sova |
|
Requires: "canDash"
"h_heatProof"
"ScrewAttack"
{
"or": [
{
"and": [
{
"resetRoom": {
"nodes": [
1
]
}
},
{
"cycleFrames": 340
}
]
},
{
"and": [
{
"resetRoom": {
"nodes": [
2
]
}
},
{
"cycleFrames": 900
},
{
"or": [
"SpaceJump",
{
"cycleFrames": 320
}
]
}
]
}
]
}Farm cycle drops: 2 Squeept Dev note: With a blue suit, Screw Attack does not work against the Squeepts. |
|
Cross the room while following the Sova that falls from the ceiling to the right door. Requires: {
"or": [
"canDash",
{
"heatFrames": 60
}
]
}
{
"heatFrames": 1390
}Exit condition: {
"leaveWithGModeSetup": {}
}Unlocks doors: {"types":["missiles","super"],"requires":[]}
{"types":["powerbomb"],"requires":["never"]} |
|
Requires: "canDash"
{
"or": [
{
"and": [
"canTrickyJump",
{
"heatFrames": 540
}
]
},
{
"heatFrames": 660
}
]
}
{
"or": [
"canDodgeWhileShooting",
"Ice",
"Plasma",
{
"and": [
"canCarefulJump",
{
"enemyDamage": {
"enemy": "Dragon",
"type": "fireball",
"hits": 1
}
}
]
},
{
"and": [
{
"lavaFrames": 40
},
{
"enemyDamage": {
"enemy": "Dragon",
"type": "fireball",
"hits": 3
}
}
]
}
]
} |
|
Entrance condition: {
"comeInNormally": {}
}Requires: "canDash"
"Morph"
{
"enemyDamage": {
"enemy": "Sova",
"type": "contact",
"hits": 1
}
}
{
"enemyDamage": {
"enemy": "Dragon",
"type": "contact",
"hits": 1
}
}
{
"heatFrames": 480
} |
|
Building run speed can speed up the room a noticable amount. Requires: "canDash"
"SpaceJump"
{
"heatFrames": 460
} |
|
Cross more than half way across the room until a Sova falls from the ceiling then follow it back and forth across the room. Alternatively, to save a lot of Energy, use a Super to knock off the Sova just before that, while it is on the right side of it's thin platform. Requires: {
"or": [
"canDash",
{
"heatFrames": 140
}
]
}
{
"heatFrames": 1780
}
{
"or": [
{
"ammo": {
"type": "Super",
"count": 1
}
},
{
"heatFrames": 2050
}
]
}Exit condition: {
"leaveWithGModeSetup": {}
}Unlocks doors: {"types":["missiles","super"],"requires":[]}
{"types":["powerbomb"],"requires":["never"]} |
|


Build up run speed to travel farther when jumping. Requires: "canDash"
{
"heatFrames": 540
}
{
"or": [
"canTrickyJump",
{
"heatFrames": 160
}
]
}
{
"or": [
"canDodgeWhileShooting",
"Ice",
"Plasma",
{
"and": [
"canCarefulJump",
{
"enemyDamage": {
"enemy": "Dragon",
"type": "fireball",
"hits": 1
}
}
]
},
{
"and": [
{
"lavaFrames": 40
},
{
"enemyDamage": {
"enemy": "Dragon",
"type": "fireball",
"hits": 3
}
}
]
}
]
} |
|
Entrance condition: {
"comeInNormally": {}
}Requires: "canDash"
"Gravity"
{
"enemyDamage": {
"enemy": "Dragon",
"type": "contact",
"hits": 1
}
}
{
"enemyDamage": {
"enemy": "Sova",
"type": "contact",
"hits": 1
}
}
{
"heatFrames": 500
}
{
"lavaFrames": 360
} |
|
Requires: "canDash"
"SpaceJump"
{
"heatFrames": 450
} |
|
Requires: "canDash"
{
"resetRoom": {
"nodes": [
2
]
}
}
"h_heatProof"
"Plasma"
{
"or": [
{
"and": [
"h_lavaProof",
{
"or": [
{
"and": [
"Morph",
{
"cycleFrames": 930
}
]
},
{
"and": [
"SpaceJump",
{
"cycleFrames": 1100
}
]
},
{
"cycleFrames": 1290
}
]
}
]
},
{
"and": [
"SpaceJump",
{
"cycleFrames": 1230
}
]
},
{
"and": [
"Grapple",
{
"cycleFrames": 1680
}
]
}
]
}Farm cycle drops: 5 Sova, 4 Dragon |
|

Cross more than half way across the room until a Sova falls from the ceiling. Alternatively, to save Energy, use a Super to knock off the second Sova from the right, while it is on the left side of it's platform. Requires: {
"or": [
"canDash",
{
"heatFrames": 140
}
]
}
{
"heatFrames": 1500
}
{
"or": [
{
"ammo": {
"type": "Super",
"count": 1
}
},
{
"heatFrames": 320
}
]
}Exit condition: {
"leaveWithGModeSetup": {}
} |
|
Requires: "canDash"
"h_heatProof"
{
"resetRoom": {
"nodes": [
2
]
}
}
{
"cycleFrames": 720
}
{
"or": [
"SpaceJump",
{
"cycleFrames": 30
}
]
}
{
"or": [
"Wave",
"Spazer",
"Plasma",
{
"and": [
"canFarmWhileShooting",
{
"cycleFrames": 30
}
]
}
]
}
{
"or": [
"canTrickyJump",
{
"cycleFrames": 60
}
]
}Farm cycle drops: 4 Sova Dev note: Add canTrickyJump for catching the Sovas on their first cycles. |
From: 1
Left Shaft - Top Left Door
To: 1
Left Shaft - Top Left Door
Requires: "h_heatProof"
{
"resetRoom": {
"nodes": [
1
]
}
}
{
"or": [
{
"and": [
"canDash",
{
"cycleFrames": 285
},
{
"or": [
"Plasma",
"ScrewAttack",
{
"and": [
"Wave",
{
"cycleFrames": 90
}
]
},
{
"and": [
"Spazer",
{
"cycleFrames": 205
}
]
},
{
"and": [
"canDodgeWhileShooting",
{
"cycleFrames": 315
}
]
}
]
}
]
},
{
"and": [
{
"haveBlueSuit": {}
},
{
"cycleFrames": 340
}
]
}
]
}
{
"or": [
"canWallJump",
"HiJump",
"h_crouchJumpDownGrab",
{
"and": [
"SpaceJump",
{
"cycleFrames": 20
}
]
}
]
}Resets obstacles: R-Mode Farm cycle drops: 1 Multiviola, 2 Alcoon |
From: 1
Left Shaft - Top Left Door
To: 1
Left Shaft - Top Left Door
Requires: "h_heatProof"
{
"resetRoom": {
"nodes": [
1
]
}
}
{
"or": [
{
"and": [
"canDash",
{
"cycleFrames": 130
},
{
"or": [
"Plasma",
"Wave",
"Spazer",
{
"cycleFrames": 30
}
]
}
]
},
{
"and": [
{
"haveBlueSuit": {}
},
{
"cycleFrames": 140
}
]
}
]
}Resets obstacles: R-Mode Farm cycle drops: 1 Multiviola |
|
Requires: {
"heatFrames": 80
}
{
"or": [
"canDash",
{
"heatFrames": 15
}
]
} |
From: 2
Left Shaft - Bottom Right Door
To: 2
Left Shaft - Bottom Right Door
Requires: "h_heatProof"
{
"resetRoom": {
"nodes": [
2
]
}
}
{
"or": [
{
"and": [
"canDash",
{
"cycleFrames": 245
},
{
"or": [
"ScrewAttack",
{
"and": [
"Plasma",
{
"cycleFrames": 25
}
]
},
{
"and": [
"Wave",
{
"cycleFrames": 40
}
]
},
{
"and": [
"Spazer",
{
"cycleFrames": 100
}
]
},
{
"and": [
"canDodgeWhileShooting",
{
"cycleFrames": 220
}
]
}
]
}
]
},
{
"and": [
{
"haveBlueSuit": {}
},
{
"cycleFrames": 360
}
]
}
]
}Resets obstacles: R-Mode Farm cycle drops: 1 Multiviola, 1 Alcoon |
From: 2
Left Shaft - Bottom Right Door
To: 8
Left Shaft - Bottom Junction
Requires: {
"or": [
{
"heatFrames": 100
},
{
"and": [
"HiJump",
{
"heatFrames": 95
}
]
}
]
}
{
"or": [
"canDash",
{
"and": [
{
"haveBlueSuit": {}
},
{
"heatFrames": 30
}
]
}
]
} |
From: 3
Left Shaft - Middle Right Door
To: 3
Left Shaft - Middle Right Door
Requires: "h_heatProof"
{
"resetRoom": {
"nodes": [
3
]
}
}
{
"or": [
{
"and": [
"canDash",
{
"or": [
"Plasma",
"ScrewAttack",
{
"and": [
"Wave",
{
"cycleFrames": 90
}
]
},
{
"and": [
"Spazer",
{
"cycleFrames": 90
}
]
},
{
"and": [
"canDodgeWhileShooting",
{
"cycleFrames": 285
}
]
}
]
}
]
},
{
"haveBlueSuit": {}
}
]
}
{
"or": [
"canWallJump",
"HiJump",
"h_crouchJumpDownGrab",
"SpaceJump"
]
}
{
"cycleFrames": 210
}Resets obstacles: R-Mode Farm cycle drops: 1 Multiviola, 1 Alcoon |
From: 3
Left Shaft - Middle Right Door
To: 4
Left Shaft - Top Right Door
Wait for the Alcoon to walk off the edge. Use it and the Multiviola as platforms. Spawn the Alcoon, then run back to the right so it will not stop and fire projectiles. Requires: "canTrickyUseFrozenEnemies"
{
"heatFrames": 1250
}
{
"or": [
"canDash",
{
"heatFrames": 30
}
]
}Dev note: FIXME: split this into 3->7 and 7->4 strats. |
From: 3
Left Shaft - Middle Right Door
To: 7
Left Shaft - Middle Junction
Requires: {
"or": [
{
"and": [
"canWallJump",
{
"heatFrames": 120
}
]
},
{
"and": [
"HiJump",
{
"heatFrames": 110
}
]
},
{
"and": [
"h_heatedCrouchJumpDownGrab",
{
"heatFrames": 150
}
]
},
{
"and": [
"SpaceJump",
{
"heatFrames": 155
}
]
},
{
"and": [
"canSpringBallJumpMidAir",
{
"heatFrames": 180
}
]
}
]
}
{
"or": [
"canDash",
{
"and": [
{
"haveBlueSuit": {}
},
{
"heatFrames": 45
}
]
}
]
} |
From: 3
Left Shaft - Middle Right Door
To: 8
Left Shaft - Bottom Junction
Requires: {
"heatFrames": 65
}
{
"or": [
"canDash",
{
"heatFrames": 5
}
]
} |
From: 4
Left Shaft - Top Right Door
To: 4
Left Shaft - Top Right Door
Requires: "h_heatProof"
{
"resetRoom": {
"nodes": [
4
]
}
}
{
"or": [
{
"and": [
"canDash",
{
"or": [
"Plasma",
"ScrewAttack",
{
"and": [
"Wave",
{
"cycleFrames": 20
}
]
},
{
"and": [
"Spazer",
{
"cycleFrames": 90
}
]
},
{
"and": [
"canDodgeWhileShooting",
{
"cycleFrames": 260
},
{
"or": [
"canFarmWhileShooting",
{
"cycleFrames": 90
}
]
}
]
}
]
}
]
},
{
"and": [
{
"haveBlueSuit": {}
},
{
"cycleFrames": 90
}
]
}
]
}
{
"or": [
"canWallJump",
"HiJump",
"h_crouchJumpDownGrab",
"SpaceJump"
]
}
{
"cycleFrames": 450
}Resets obstacles: R-Mode Farm cycle drops: 1 Multiviola, 2 Alcoon |
From: 4
Left Shaft - Top Right Door
To: 4
Left Shaft - Top Right Door
Jump and aim down two to three times to activate the Multiviola. Requires: "h_heatProof"
{
"resetRoom": {
"nodes": [
4
]
}
}
{
"cycleFrames": 200
}
"canCameraManip"
{
"or": [
{
"and": [
"canDash",
{
"or": [
"Plasma",
"Wave",
"Spazer",
{
"cycleFrames": 30
}
]
}
]
},
{
"haveBlueSuit": {}
}
]
}Resets obstacles: R-Mode Farm cycle drops: 1 Multiviola |
|
Requires: {
"or": [
{
"and": [
"canWallJump",
{
"heatFrames": 130
}
]
},
{
"and": [
"HiJump",
{
"heatFrames": 115
}
]
},
{
"and": [
"h_heatedCrouchJumpDownGrab",
{
"heatFrames": 150
}
]
},
{
"and": [
"SpaceJump",
{
"heatFrames": 155
}
]
},
{
"and": [
"canSpringBallJumpMidAir",
{
"heatFrames": 180
}
]
}
]
}
{
"or": [
"canDash",
{
"and": [
{
"haveBlueSuit": {}
},
{
"heatFrames": 40
}
]
}
]
} |
From: 4
Left Shaft - Top Right Door
To: 6
Left Shaft - Top Junction
Spawn the Alcoon, then run back to the right so it will not stop and fire projectiles. Then wait for it to walk off the ledge. Requires: "canCameraManip"
"canTrickyUseFrozenEnemies"
{
"heatFrames": 750
}
{
"or": [
"canDash",
{
"heatFrames": 40
}
]
} |
|
Kill the enemies, then IBJ. Requires: "canIBJ"
{
"or": [
{
"heatFrames": 735
},
{
"and": [
"canJumpIntoIBJ",
{
"heatFrames": 285
}
]
},
{
"and": [
"canDoubleBombJump",
{
"heatFrames": 240
}
]
}
]
}
{
"or": [
"canTrickyDodgeEnemies",
{
"heatFrames": 100
}
]
}
{
"or": [
"canDash",
{
"and": [
{
"haveBlueSuit": {}
},
{
"heatFrames": 40
}
]
}
]
} |
|
Requires: {
"heatFrames": 65
}
{
"or": [
"canDash",
{
"heatFrames": 5
}
]
} |
|
Requires: "canDash"
"h_useMorphBombs"
{
"heatFrames": 730
} |
From: 5
Far Right Door
To: 6
Left Shaft - Top Junction


Requires: "canDash"
{
"heatFrames": 250
}
"h_heatedCrystalFlash"
{
"heatFrames": 380
}Dev note: FIXME: a dashless option could be added here. |
From: 5
Far Right Door
To: 6
Left Shaft - Top Junction


Requires: "canDash"
{
"heatFrames": 450
}
{
"or": [
"ScrewAttack",
{
"and": [
"h_usePowerBomb",
{
"heatFrames": 40
}
]
},
{
"and": [
"h_useMorphBombs",
{
"heatFrames": 80
}
]
}
]
}
"h_heatedCrystalFlash"
{
"heatFrames": 250
}Dev note: FIXME: a dashless option could be added here. |
|
Requires: "canDash"
"h_usePowerBomb"
{
"heatFrames": 660
} |
|
Requires: "canDash"
"Morph"
"ScrewAttack"
{
"heatFrames": 600
} |
|
Requires: {
"or": [
{
"and": [
"canWallJump",
{
"heatFrames": 100
}
]
},
{
"and": [
"canWallJump",
"ScrewAttack",
{
"heatFrames": 85
}
]
},
{
"and": [
"HiJump",
{
"heatFrames": 95
}
]
},
{
"and": [
"HiJump",
"ScrewAttack",
{
"heatFrames": 75
}
]
},
{
"and": [
"HiJump",
"Plasma",
{
"heatFrames": 70
}
]
},
{
"and": [
"h_heatedCrouchJumpDownGrab",
{
"heatFrames": 100
}
]
},
{
"and": [
"SpaceJump",
{
"heatFrames": 115
}
]
},
{
"and": [
"canSpringBallJumpMidAir",
{
"heatFrames": 120
}
]
}
]
}
{
"or": [
"canDash",
{
"heatFrames": 30
}
]
}Unlocks doors: {"types":["missiles"],"requires":[{"heatFrames":30}]}
{"types":["powerbomb"],"requires":[{"heatFrames":70}]}Dev note: The heat frames account for bad scenarios of where the Multiviola may be (entering from node 4), which is why Screw Attack can be helpful. |
From: 6
Left Shaft - Top Junction
To: 1
Left Shaft - Top Left Door
Requires: "canUseFrozenEnemies"
{
"heatFrames": 285
}
{
"or": [
"canDash",
{
"heatFrames": 15
}
]
}Dev note: FIXME: this represents a worst case Multiviola cycle. Typically freezing the Multiviola is faster but the Alcoon is also an option. |
From: 6
Left Shaft - Top Junction
To: 1
Left Shaft - Top Left Door
Requires: "canDash"
{
"or": [
{
"and": [
"canWallJump",
{
"heatFrames": 80
}
]
},
{
"and": [
"canWallJump",
"ScrewAttack",
{
"heatFrames": 60
}
]
},
{
"and": [
"HiJump",
{
"heatFrames": 80
}
]
},
{
"and": [
"HiJump",
"ScrewAttack",
{
"heatFrames": 60
}
]
},
{
"and": [
"h_heatedCrouchJumpDownGrab",
{
"heatFrames": 80
}
]
},
{
"and": [
"SpaceJump",
{
"heatFrames": 80
}
]
},
{
"and": [
"canSpringBallJumpMidAir",
{
"heatFrames": 90
}
]
}
]
}Exit condition: {
"leaveWithRunway": {
"length": 8,
"openEnd": 1
}
}Unlocks doors: {"types":["missiles"],"requires":[{"heatFrames":50}]}
{"types":["super"],"requires":[]}
{"types":["powerbomb"],"requires":[{"heatFrames":70}]} |
|
Requires: "canDash"
{
"or": [
{
"heatFrames": 130
},
{
"and": [
{
"enemyKill": {
"enemies": [
[
"Alcoon"
]
],
"explicitWeapons": [
"ScrewAttack",
"Missile",
"Super",
"Wave+Plasma"
]
}
},
{
"heatFrames": 125
}
]
},
{
"and": [
"h_PlasmaHitbox",
{
"heatFrames": 125
}
]
}
]
}Unlocks doors: {"types":["missiles"],"requires":[{"heatFrames":20}]}
{"types":["powerbomb"],"requires":[{"heatFrames":20}]} |
From: 6
Left Shaft - Top Junction
To: 4
Left Shaft - Top Right Door
Requires: "canDash"
{
"or": [
{
"heatFrames": 115
},
{
"and": [
{
"enemyKill": {
"enemies": [
[
"Alcoon"
]
],
"explicitWeapons": [
"ScrewAttack",
"Missile",
"Super",
"Wave+Plasma"
]
}
},
{
"heatFrames": 110
}
]
},
{
"and": [
"h_PlasmaHitbox",
{
"heatFrames": 110
}
]
}
]
}Exit condition: {
"leaveWithRunway": {
"length": 4,
"openEnd": 1
}
}Unlocks doors: {"types":["missiles"],"requires":[{"heatFrames":20}]}
{"types":["super"],"requires":[]}
{"types":["powerbomb"],"requires":[{"heatFrames":20}]} |
|
Requires: "canDash"
{
"or": [
{
"heatFrames": 145
},
{
"and": [
{
"enemyKill": {
"enemies": [
[
"Alcoon"
]
],
"explicitWeapons": [
"ScrewAttack",
"Missile",
"Super",
"Wave+Plasma"
]
}
},
{
"heatFrames": 140
}
]
},
{
"and": [
"h_PlasmaHitbox",
{
"heatFrames": 140
}
]
}
]
} |
From: 7
Left Shaft - Middle Junction
To: 3
Left Shaft - Middle Right Door
Requires: "canDash"
{
"or": [
"canCarefulJump",
{
"enemyDamage": {
"enemy": "Multiviola",
"type": "contact",
"hits": 1
}
}
]
}
{
"or": [
"canDodgeWhileShooting",
"Wave",
"Spazer",
"Plasma",
"ScrewAttack",
{
"ammo": {
"type": "Missile",
"count": 1
}
},
{
"ammo": {
"type": "Super",
"count": 1
}
},
{
"enemyDamage": {
"enemy": "Alcoon",
"type": "fireball",
"hits": 1
}
}
]
}
{
"or": [
{
"heatFrames": 130
},
{
"and": [
{
"enemyKill": {
"enemies": [
[
"Alcoon"
]
],
"explicitWeapons": [
"ScrewAttack",
"Missile",
"Super",
"Wave+Plasma"
]
}
},
{
"heatFrames": 125
}
]
},
{
"and": [
"h_PlasmaHitbox",
{
"heatFrames": 125
}
]
}
]
}Unlocks doors: {"types":["missiles"],"requires":[{"heatFrames":20}]}
{"types":["powerbomb"],"requires":[{"heatFrames":10}]} |
From: 7
Left Shaft - Middle Junction
To: 3
Left Shaft - Middle Right Door
Requires: "canDash"
{
"or": [
"canCarefulJump",
{
"enemyDamage": {
"enemy": "Multiviola",
"type": "contact",
"hits": 1
}
}
]
}
{
"or": [
"canDodgeWhileShooting",
"Wave",
"Spazer",
"Plasma",
"ScrewAttack",
{
"ammo": {
"type": "Missile",
"count": 1
}
},
{
"ammo": {
"type": "Super",
"count": 1
}
},
{
"enemyDamage": {
"enemy": "Alcoon",
"type": "fireball",
"hits": 1
}
}
]
}
{
"or": [
{
"heatFrames": 110
},
{
"and": [
{
"enemyKill": {
"enemies": [
[
"Alcoon"
]
],
"explicitWeapons": [
"ScrewAttack",
"Missile",
"Super",
"Wave+Plasma"
]
}
},
{
"heatFrames": 100
}
]
},
{
"and": [
"h_PlasmaHitbox",
{
"heatFrames": 100
}
]
}
]
}Exit condition: {
"leaveWithRunway": {
"length": 4,
"openEnd": 1
}
}Unlocks doors: {"types":["missiles"],"requires":[{"heatFrames":65}]}
{"types":["super"],"requires":[]}
{"types":["powerbomb"],"requires":[{"heatFrames":30}]} |
From: 7
Left Shaft - Middle Junction
To: 4
Left Shaft - Top Right Door
Requires: "canDash"
{
"or": [
{
"and": [
"canWallJump",
{
"heatFrames": 55
}
]
},
{
"and": [
"HiJump",
{
"heatFrames": 40
}
]
},
{
"and": [
"h_heatedCrouchJumpDownGrab",
{
"heatFrames": 90
}
]
},
{
"and": [
"SpaceJump",
{
"heatFrames": 75
}
]
},
{
"and": [
"canSpringBallJumpMidAir",
{
"heatFrames": 100
}
]
}
]
}Exit condition: {
"leaveWithRunway": {
"length": 4,
"openEnd": 1
}
}Unlocks doors: {"types":["missiles"],"requires":[{"heatFrames":50}]}
{"types":["super"],"requires":[]}
{"types":["powerbomb"],"requires":[{"heatFrames":110}]} |
|
Requires: {
"or": [
{
"and": [
"canWallJump",
{
"heatFrames": 150
}
]
},
{
"and": [
"HiJump",
{
"heatFrames": 110
}
]
},
{
"and": [
"h_heatedCrouchJumpDownGrab",
"h_heatedCrouchJumpDownGrab",
{
"heatFrames": 270
}
]
},
{
"and": [
"h_heatedCrouchJumpDownGrab",
"h_heatedCrouchJumpDownGrab",
{
"enemyKill": {
"enemies": [
[
"Multiviola"
]
],
"explicitWeapons": [
"Missile",
"Super",
"Wave",
"Plasma"
]
}
},
{
"heatFrames": 200
}
]
},
{
"and": [
"SpaceJump",
{
"heatFrames": 205
}
]
}
]
}
{
"or": [
"canDash",
{
"and": [
{
"haveBlueSuit": {}
},
{
"heatFrames": 40
}
]
}
]
} |
|
Requires: "canDash"
{
"or": [
{
"heatFrames": 160
},
{
"and": [
{
"enemyKill": {
"enemies": [
[
"Multiviola",
"Alcoon"
]
],
"explicitWeapons": [
"ScrewAttack",
"Wave+Plasma"
]
}
},
{
"heatFrames": 145
}
]
},
{
"and": [
{
"enemyKill": {
"enemies": [
[
"Multiviola"
]
],
"explicitWeapons": [
"Missile",
"Super",
"Plasma"
]
}
},
{
"heatFrames": 150
}
]
},
{
"and": [
"h_PlasmaHitbox",
{
"heatFrames": 145
}
]
}
]
}Dev note: This includes time to wait for the Multiviola to move out of the way (if it can't be quickly killed), as will normally be a problem when entering through the upper doors (node 1 or 4). |
From: 8
Left Shaft - Bottom Junction
To: 2
Left Shaft - Bottom Right Door
Requires: "canDash"
{
"or": [
"canDodgeWhileShooting",
"Wave",
"Spazer",
"Plasma",
"ScrewAttack",
{
"ammo": {
"type": "Missile",
"count": 1
}
},
{
"ammo": {
"type": "Super",
"count": 1
}
},
{
"enemyDamage": {
"enemy": "Alcoon",
"type": "fireball",
"hits": 1
}
}
]
}
{
"or": [
{
"heatFrames": 115
},
{
"and": [
{
"enemyKill": {
"enemies": [
[
"Alcoon"
]
],
"explicitWeapons": [
"ScrewAttack",
"Missile",
"Super",
"Wave+Plasma"
]
}
},
{
"heatFrames": 110
}
]
},
{
"and": [
"h_PlasmaHitbox",
{
"heatFrames": 110
}
]
}
]
}Unlocks doors: {"types":["missiles"],"requires":[{"heatFrames":30}]}
{"types":["powerbomb"],"requires":[{"heatFrames":10}]} |
From: 8
Left Shaft - Bottom Junction
To: 2
Left Shaft - Bottom Right Door
Requires: {
"or": [
"canDodgeWhileShooting",
"Wave",
"Spazer",
"Plasma",
"ScrewAttack",
{
"ammo": {
"type": "Missile",
"count": 1
}
},
{
"ammo": {
"type": "Super",
"count": 1
}
},
{
"enemyDamage": {
"enemy": "Alcoon",
"type": "fireball",
"hits": 1
}
}
]
}
"canDash"
{
"heatFrames": 70
}Exit condition: {
"leaveWithRunway": {
"length": 13,
"openEnd": 0,
"gentleDownTiles": 4
}
}Unlocks doors: {"types":["missiles"],"requires":[{"heatFrames":50}]}
{"types":["super"],"requires":[]}
{"types":["powerbomb"],"requires":[{"heatFrames":30}]} |
From: 8
Left Shaft - Bottom Junction
To: 3
Left Shaft - Middle Right Door
Requires: "canDash"
{
"or": [
{
"and": [
"canWallJump",
{
"heatFrames": 65
}
]
},
{
"and": [
"canWallJump",
"ScrewAttack",
{
"heatFrames": 45
}
]
},
{
"and": [
"HiJump",
{
"heatFrames": 55
}
]
},
{
"and": [
"HiJump",
"ScrewAttack",
{
"heatFrames": 35
}
]
},
{
"and": [
"h_heatedCrouchJumpDownGrab",
{
"heatFrames": 60
}
]
},
{
"and": [
"SpaceJump",
{
"heatFrames": 80
}
]
},
{
"and": [
"canSpringBallJumpMidAir",
{
"heatFrames": 75
}
]
}
]
}Exit condition: {
"leaveWithRunway": {
"length": 4,
"openEnd": 1
}
}Unlocks doors: {"types":["missiles"],"requires":[{"heatFrames":50}]}
{"types":["super"],"requires":[]}
{"types":["powerbomb"],"requires":[{"heatFrames":110}]} |
|
Requires: {
"or": [
{
"and": [
"canWallJump",
{
"heatFrames": 160
}
]
},
{
"and": [
"canWallJump",
"ScrewAttack",
{
"heatFrames": 140
}
]
},
{
"and": [
"HiJump",
{
"heatFrames": 135
}
]
},
{
"and": [
"HiJump",
"ScrewAttack",
{
"heatFrames": 105
}
]
},
{
"and": [
"h_heatedCrouchJumpDownGrab",
"h_heatedCrouchJumpDownGrab",
{
"heatFrames": 195
},
{
"or": [
{
"noBlueSuit": {}
},
"canXRayCancelShinecharge",
"canMidAirMorph",
{
"heatFrames": 60
}
]
}
]
},
{
"and": [
"SpaceJump",
{
"heatFrames": 210
}
]
},
{
"and": [
"canSpringBallJumpMidAir",
{
"heatFrames": 280
}
]
}
]
}
{
"or": [
"canDash",
{
"and": [
{
"haveBlueSuit": {}
},
{
"heatFrames": 40
}
]
}
]
} |
|
Free the Geruta and lure it to this door. To speed it up, it helps to prevent breaking most of the crumbles (no more than two consecutive) so the Geruta doesn't get stuck. Requires: "canComplexGMode"
{
"heatFrames": 2100
}
{
"or": [
"h_heatProof",
"canCrumbleJump"
]
}
{
"or": [
"canDash",
{
"and": [
{
"haveBlueSuit": {}
},
{
"heatFrames": 150
}
]
}
]
}Exit condition: {
"leaveWithGModeSetup": {}
} |
|
Requires: "h_heatProof"
{
"resetRoom": {
"nodes": [
1
]
}
}
{
"or": [
{
"and": [
"canDash",
{
"or": [
"h_speedDash",
{
"cycleFrames": 225
}
]
},
{
"or": [
{
"and": [
"Plasma",
{
"cycleFrames": 790
}
]
},
{
"and": [
"Spazer",
{
"cycleFrames": 1020
}
]
},
{
"and": [
"Wave",
{
"cycleFrames": 960
}
]
},
{
"and": [
"Ice",
{
"cycleFrames": 930
}
]
},
{
"and": [
"canPseudoScrew",
{
"cycleFrames": 930
}
]
},
{
"and": [
"canDodgeWhileShooting",
{
"cycleFrames": 1350
}
]
}
]
}
]
},
{
"and": [
{
"haveBlueSuit": {}
},
"canCrumbleJump",
{
"cycleFrames": 2160
}
]
}
]
}Resets obstacles: A Farm cycle drops: 3 Geruta |
|
Requires: "canDash"
"h_heatProof"
{
"resetRoom": {
"nodes": [
1
]
}
}
"ScrewAttack"
{
"cycleFrames": 1140
}Resets obstacles: A Farm cycle drops: 2 Metaree, 3 Geruta |
|


Requires: "canDash"
{
"obstaclesNotCleared": [
"A"
]
}
{
"simpleHeatFrames": 560
}
{
"heatFrames": 60
}Clears obstacles: A Unlocks doors: {"types":["missiles"],"requires":[{"heatFrames":20}]} |
|


Use a Crystal Flash after crossing 3 crumble block bridges, and a second Crystal Flash after crossing 3 more. In order to cross without tanks or Speed Booster, some arm pumping is helpful but not required. Requires: "canDash"
{
"simpleHeatFrames": 160
}
{
"heatFrames": 40
}
"h_heatedCrystalFlash"
{
"simpleHeatFrames": 140
}
{
"heatFrames": 40
}
"h_heatedCrystalFlash"
{
"simpleHeatFrames": 240
}
{
"heatFrames": 30
}Dev note: FIXME: A dashless variant could be possible. |
|

Free the Geruta and lure it to this door. To speed it up, it helps to prevent breaking most of the crumbles (no more than two consecutive) so the Geruta doesn't get stuck. Requires: "canComplexGMode"
{
"heatFrames": 2200
}
{
"or": [
"h_heatProof",
"canCrumbleJump"
]
}
{
"or": [
"canDash",
{
"and": [
{
"haveBlueSuit": {}
},
{
"heatFrames": 750
}
]
}
]
}Exit condition: {
"leaveWithGModeSetup": {}
}Unlocks doors: {"types":["missiles","super"],"requires":[]}
{"types":["powerbomb"],"requires":["h_heatProof"]} |
|
Requires: "canDash"
{
"obstaclesNotCleared": [
"A"
]
}
{
"simpleHeatFrames": 535
}
{
"heatFrames": 60
}Exit condition: {
"leaveWithRunway": {
"length": 8,
"openEnd": 1
}
}Unlocks doors: {"types":["missiles"],"requires":[{"heatFrames":50}]}
{"types":["super"],"requires":[]}
{"types":["powerbomb"],"requires":[{"heatFrames":110}]} |
|


Farm the Metarees if able. Farm the Geruta while they are trapped. After the third Geruta, run toward the right door to shinecharge and use heat damage to interrupt. Entrance condition: {
"comeInWithRMode": {}
}Requires: {
"or": [
"h_heatedCrystalFlashForReserveEnergy",
{
"and": [
"h_RModeCanRefillReserves",
"h_heatProof",
{
"or": [
{
"enemyKill": {
"enemies": [
[
"Metaree",
"Metaree"
]
]
}
},
{
"resourceMissingAtMost": [
{
"type": "Missile",
"count": 0
}
]
}
]
},
{
"or": [
{
"resourceMissingAtMost": [
{
"type": "Missile",
"count": 0
}
]
},
{
"resourceMissingAtMost": [
{
"type": "Super",
"count": 0
}
]
}
]
},
{
"partialRefill": {
"type": "ReserveEnergy",
"limit": 20
}
}
]
}
]
}
{
"or": [
{
"and": [
"h_speedButSlow",
{
"simpleHeatFrames": 560
},
{
"heatFrames": 60
}
]
},
{
"and": [
"h_speedDash",
{
"simpleHeatFrames": 310
},
{
"heatFrames": 40
}
]
}
]
}
"h_shinechargeMaxRunway"
"h_heatTriggerRModeSparkInterrupt"Clears obstacles: A |
|
Requires: {
"obstaclesNotCleared": [
"A"
]
}
"h_speedDash"
{
"simpleHeatFrames": 310
}
{
"heatFrames": 40
}Clears obstacles: A |
|
Requires: {
"obstaclesNotCleared": [
"A"
]
}
"h_shinechargeMaxRunway"
{
"or": [
{
"and": [
"h_speedDash",
{
"simpleHeatFrames": 310
},
{
"heatFrames": 40
}
]
},
{
"and": [
"h_speedButSlow",
{
"simpleHeatFrames": 560
},
{
"heatFrames": 60
}
]
}
]
}
{
"shineChargeFrames": 35
}Exit condition: {
"leaveShinecharged": {}
}Unlocks doors: {"types":["super"],"requires":[]}
{"types":["missiles","powerbomb"],"requires":["never"]} |
|


Shoot from the middle of the second set of crumble blocks from the left. Requires: {
"obstaclesNotCleared": [
"A"
]
}
"canHeroShot"
"h_speedDash"
{
"simpleHeatFrames": 250
}
{
"heatFrames": 40
}Exit condition: {
"leaveWithRunway": {
"length": 45,
"openEnd": 1
}
}Unlocks doors: {"types":["super"],"requires":[]}
{"types":["missiles","powerbomb"],"requires":["never"]} |
|
Entrance condition: {
"comeInWithStoredFallSpeed": {
"fallSpeedInTiles": 1
}
}Requires: "canDash"
{
"or": [
{
"and": [
{
"simpleHeatFrames": 560
},
{
"heatFrames": 60
}
]
},
{
"and": [
"h_speedDash",
{
"simpleHeatFrames": 310
},
{
"heatFrames": 40
}
]
}
]
}Exit condition: {
"leaveWithStoredFallSpeed": {
"fallSpeedInTiles": 1
}
}Unlocks doors: {"types":["missiles","super"],"requires":[]}
{"types":["powerbomb"],"requires":["never"]} |
From: 1
Left Door
To: 2
Right Door
Entrance condition: {
"comeInWithStoredFallSpeed": {
"fallSpeedInTiles": 2
}
}Requires: "canDash"
{
"or": [
{
"and": [
{
"simpleHeatFrames": 560
},
{
"heatFrames": 60
}
]
},
{
"and": [
"h_speedDash",
{
"simpleHeatFrames": 310
},
{
"heatFrames": 40
}
]
}
]
}Exit condition: {
"leaveWithStoredFallSpeed": {
"fallSpeedInTiles": 2
}
}Unlocks doors: {"types":["missiles","super"],"requires":[]}
{"types":["powerbomb"],"requires":["never"]} |
|
Requires: "canDash"
{
"obstaclesNotCleared": [
"A"
]
}
{
"simpleHeatFrames": 560
}
{
"heatFrames": 60
}Clears obstacles: A Unlocks doors: {"types":["missiles"],"requires":[{"heatFrames":20}]} |
|
Requires: "canDash"
{
"obstaclesCleared": [
"A"
]
}
{
"or": [
"h_heatProof",
{
"and": [
{
"heatFrames": 690
},
{
"or": [
{
"ammo": {
"type": "Super",
"count": 3
}
},
{
"ammo": {
"type": "Missile",
"count": 6
}
},
"ScrewAttack",
"Plasma",
"Spazer",
"Wave"
]
}
]
}
]
}
{
"or": [
{
"and": [
"canCarefulJump",
{
"heatFrames": 420
}
]
},
{
"and": [
{
"heatFrames": 720
},
{
"lavaFrames": 60
}
]
}
]
}Unlocks doors: {"types":["missiles"],"requires":[{"heatFrames":20}]}Dev note: This can be used for collecting the item without needing to reset the room. |
|


Use a Crystal Flash after crossing 4 crumble block bridges, and a second Crystal Flash in the middle of the large ramp in the center of the room. This allows crossing the room without tanks or Speed Booster. Requires: "h_SpeedBoosterHallNoRisingLava"
"canDash"
{
"obstaclesNotCleared": [
"A"
]
}
{
"simpleHeatFrames": 135
}
{
"heatFrames": 40
}
"h_heatedCrystalFlash"
{
"simpleHeatFrames": 130
}
{
"heatFrames": 40
}
"h_heatedCrystalFlash"
{
"simpleHeatFrames": 280
}
{
"heatFrames": 30
} |
|
Free the Geruta and lure it to this door. To speed it up, it helps to prevent breaking most of the crumbles (no more than two consecutive) so the Geruta doesn't get stuck. Requires: "canDash"
"h_SpeedBoosterHallNoRisingLava"
"canComplexGMode"
{
"heatFrames": 2250
}
{
"or": [
"h_heatProof",
"canCrumbleJump"
]
}Exit condition: {
"leaveWithGModeSetup": {}
}Unlocks doors: {"types":["missiles","super"],"requires":[]}
{"types":["powerbomb"],"requires":["h_heatProof"]}Dev note: FIXME: A dashless variant could be possible, either with very careful crumble block breaking, or with dipping in the lava. |
|
Requires: "canDash"
{
"obstaclesNotCleared": [
"A"
]
}
{
"simpleHeatFrames": 535
}
{
"heatFrames": 60
}Exit condition: {
"leaveWithRunway": {
"length": 8,
"openEnd": 1
}
}Unlocks doors: {"types":["missiles"],"requires":[{"heatFrames":50}]}
{"types":["super"],"requires":[]}
{"types":["powerbomb"],"requires":[{"heatFrames":110}]} |
|
The three Gerutas can be farmed while trapped. Run the rest of the way to the left door and use heat damage to interrupt. Entrance condition: {
"comeInWithRMode": {}
}Requires: "f_ClearedSpeedBoosterLavaTrap"
{
"or": [
"h_CrystalFlashForReserveEnergy",
{
"and": [
"h_heatProof",
"h_RModeCanRefillReserves",
{
"resourceMissingAtMost": [
{
"type": "Missile",
"count": 0
}
]
},
{
"partialRefill": {
"type": "ReserveEnergy",
"limit": 20
}
}
]
}
]
}
{
"or": [
{
"and": [
"h_speedButSlow",
{
"simpleHeatFrames": 560
},
{
"heatFrames": 60
}
]
},
{
"and": [
"h_speedDash",
{
"simpleHeatFrames": 310
},
{
"heatFrames": 40
}
]
}
]
}
"h_shinechargeMaxRunway"
"h_heatTriggerRModeSparkInterrupt"Clears obstacles: A |
|
Entrance condition: {
"comeInNormally": {}
}Requires: {
"not": "f_ClearedSpeedBoosterLavaTrap"
}
{
"doorUnlockedAtNode": 1
}
{
"simpleHeatFrames": 310
}
{
"heatFrames": 40
}
"h_speedDash"Exit condition: {
"leaveNormally": {}
}Sets flags: f_ClearedSpeedBoosterLavaTrap Unlocks doors: {"nodeId":1,"types":["missiles","super"],"requires":[]}
{"nodeId":1,"types":["powerbomb"],"requires":[{"heatFrames":120}]} |
|
Requires: {
"obstaclesNotCleared": [
"A"
]
}
"h_speedDash"
{
"simpleHeatFrames": 310
}
{
"heatFrames": 40
}Clears obstacles: A |
|
Requires: {
"obstaclesNotCleared": [
"A"
]
}
"h_shinechargeMaxRunway"
{
"or": [
{
"and": [
"h_speedButSlow",
{
"simpleHeatFrames": 560
},
{
"heatFrames": 60
}
]
},
{
"and": [
"h_speedDash",
{
"simpleHeatFrames": 310
},
{
"heatFrames": 40
}
]
}
]
}
{
"shineChargeFrames": 35
}Exit condition: {
"leaveShinecharged": {}
}Unlocks doors: {"types":["super"],"requires":[]}
{"types":["missiles","powerbomb"],"requires":["never"]}Dev note: This assumes that in the h_speedButSlow case the lava will not be rising. |
|
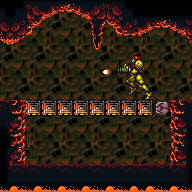
Shoot while climbing the highest ramp for the shot to open the door. Requires: {
"obstaclesNotCleared": [
"A"
]
}
"h_speedDash"
"canHeroShot"
{
"simpleHeatFrames": 250
}
{
"heatFrames": 40
}Exit condition: {
"leaveWithRunway": {
"length": 45,
"openEnd": 1
}
}Unlocks doors: {"types":["super"],"requires":[]}
{"types":["missiles","powerbomb"],"requires":["never"]} |
|
Entrance condition: {
"comeInWithStoredFallSpeed": {
"fallSpeedInTiles": 1
}
}Requires: "canDash"
{
"or": [
{
"heatFrames": 650
},
{
"and": [
"h_speedDash",
{
"heatFrames": 360
}
]
}
]
}Exit condition: {
"leaveWithStoredFallSpeed": {
"fallSpeedInTiles": 1
}
}Unlocks doors: {"types":["missiles","super"],"requires":[]}
{"types":["powerbomb"],"requires":["never"]} |
From: 2
Right Door
To: 1
Left Door
Entrance condition: {
"comeInWithStoredFallSpeed": {
"fallSpeedInTiles": 2
}
}Requires: "canDash"
{
"or": [
{
"heatFrames": 650
},
{
"and": [
"h_speedDash",
{
"heatFrames": 360
}
]
}
]
}Exit condition: {
"leaveWithStoredFallSpeed": {
"fallSpeedInTiles": 2
}
}Unlocks doors: {"types":["missiles","super"],"requires":[]}
{"types":["powerbomb"],"requires":["never"]} |
|
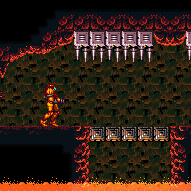
Free the Geruta and lure it to this door. To speed it up, it helps to prevent breaking most of the crumbles (no more than two consecutive) so the Geruta doesn't get stuck. Requires: {
"or": [
"h_SpeedBoosterHallNoRisingLava",
"h_lavaProof"
]
}
"canComplexGMode"
{
"heatFrames": 2500
}
{
"or": [
"h_heatProof",
"canCrumbleJump"
]
}
{
"or": [
"canDash",
{
"and": [
"h_lavaProof",
{
"heatFrames": 1150
}
]
}
]
}Exit condition: {
"leaveWithGModeSetup": {}
}Dev note: FIXME: A dashless variant without lava proof could be possible. |
|
Requires: "h_SpeedBoosterHallNoRisingLava"
"canDash"
"h_heatProof"
{
"resetRoom": {
"nodes": [
2
]
}
}
{
"or": [
"h_speedDash",
{
"cycleFrames": 170
}
]
}
{
"or": [
{
"and": [
"Plasma",
{
"cycleFrames": 790
}
]
},
{
"and": [
"Spazer",
{
"cycleFrames": 1290
}
]
},
{
"and": [
"Wave",
{
"cycleFrames": 1140
}
]
},
{
"and": [
"Ice",
{
"cycleFrames": 1320
}
]
},
{
"and": [
"ScrewAttack",
{
"cycleFrames": 1140
}
]
},
{
"and": [
"canPseudoScrew",
{
"cycleFrames": 1200
}
]
},
{
"and": [
"canDodgeWhileShooting",
{
"cycleFrames": 1500
}
]
}
]
}
{
"or": [
"canInsaneJump",
{
"and": [
"canTrickyJump",
"canWallJump",
{
"cycleFrames": 60
}
]
},
{
"and": [
"h_lavaProof",
{
"cycleFrames": 180
}
]
}
]
}Resets obstacles: A Farm cycle drops: 3 Geruta Dev note: FIXME: Variants could be added for dashless and/or rising lava. |
|
Requires: {
"heatFrames": 65
}
{
"or": [
"canDash",
{
"heatFrames": 15
}
]
}Dev note: There is no G-Mode strat added here, as it would require immobile and indirect to have enough energy and would only save a few frames. |
|
Requires: {
"heatFrames": 80
}
{
"or": [
"canDash",
{
"heatFrames": 25
}
]
}Unlocks doors: {"types":["missiles"],"requires":[{"heatFrames":20}]}
{"types":["super"],"requires":[]}
{"types":["powerbomb"],"requires":[{"heatFrames":50}]} |
|
Requires: "canDash"
{
"heatFrames": 60
}Exit condition: {
"leaveWithRunway": {
"length": 3.5,
"openEnd": 1
}
}Unlocks doors: {"types":["missiles"],"requires":[{"heatFrames":30}]}
{"types":["super"],"requires":[]}
{"types":["powerbomb"],"requires":[{"heatFrames":60}]} |
|


Ride the first Tripper, using Morph to avoid spike damage, then perform a Crystal Flash. The second Tripper will likely either be destroyed or in a bad pattern, making it necessary to jump through the lava to cross the rest of the room. It may help to use the Tripper to do a big jump past the shutter before doing the Crystal Flash; otherwise the shutter might end up closed and get in the way. Requires: "canDash"
"canSuitlessLavaDive"
{
"heatFrames": 425
}
"h_heatedCrystalFlash"
{
"heatFrames": 300
}
{
"lavaFrames": 70
}Dev note: FIXME: A dashless variant of this could be added. |
|
Spin-jump across both sets of lava, trying to minimize the time spent in lava. To get onto the first pillar, either use a wall jump off the pillar, or use the Tripper briefly as a platform by crouch jumping or down grabbing onto it. Requires: "canSuitlessLavaDive"
{
"heatFrames": 710
}
{
"lavaFrames": 120
}
{
"or": [
"canWallJump",
{
"and": [
{
"or": [
"h_underwaterCrouchJump",
"canDownGrab"
]
},
{
"heatFrames": 110
},
{
"lavaFrames": 20
}
]
}
]
}
{
"or": [
"canDash",
{
"and": [
{
"heatFrames": 70
},
{
"lavaFrames": 10
}
]
}
]
} |
|


If you have Speed Booster, unequip it to be able to run faster in the lava. Requires: "Gravity"
{
"heatFrames": 360
}
{
"lavaFrames": 130
}
{
"or": [
"canCarefulJump",
{
"and": [
{
"spikeHits": 1
},
{
"heatFrames": 40
}
]
}
]
}
{
"or": [
{
"and": [
"canDash",
{
"disableEquipment": "SpeedBooster"
}
]
},
{
"and": [
{
"heatFrames": 170
},
{
"lavaFrames": 60
}
]
}
]
} |
|


Use the Tripper to cross the first lava pit while avoiding all damage from the spikes and lava. If you do not have Morph, this is tricky but can be done by carefully timing a jump against the pillar and releasing the d-pad inputs, to land on the Tripper as early as possible. This allows the Tripper to sink low enough that crouching on the Tripper is enough to avoid spike damage. From the Tripper, run and jump directly onto the first pillar past the shutter; it can help to moonwalk back left on the Tripper to maximize run speed for the jump. From the pillar, run and jump directly into the lava rather than waiting for the second Tripper. Perform quick spin jumps to minimize lava damage. Requires: {
"or": [
"canTrickyJump",
"Morph"
]
}
"canSuitlessLavaDive"
{
"heatFrames": 760
}
{
"lavaFrames": 60
}
{
"or": [
"canDash",
{
"heatFrames": 90
}
]
}Dev note: Wall jumps are not needed for this strat and would not be helpful. |
|
Requires: "Morph"
{
"heatFrames": 1010
}
{
"or": [
"canDash",
{
"heatFrames": 10
}
]
}
{
"or": [
"canCarefulJump",
{
"spikeHits": 1
}
]
} |
|


Ride the first Tripper, using Morph to avoid spike damage, then perform a Crystal Flash. The second Tripper will likely either be destroyed or in a bad pattern, making it necessary to jump through the lava to cross the rest of the room. It may help to use the Tripper to do a big jump past the shutter before doing the Crystal Flash; otherwise the shutter might end up closed and get in the way. Requires: "canDash"
"canSuitlessLavaDive"
{
"heatFrames": 425
}
"h_heatedCrystalFlash"
{
"heatFrames": 300
}
{
"lavaFrames": 70
}Dev note: FIXME: A dashless variant of this could be added. |
|
Spin-jump across both sets of lava, trying to minimize the time spent in lava. To get onto the first pillar, either use a wall jump off the pillar, or use the Tripper briefly as a platform by crouch jumping or down grabbing onto it. Requires: "canSuitlessLavaDive"
{
"heatFrames": 710
}
{
"lavaFrames": 120
}
{
"or": [
"canWallJump",
{
"and": [
{
"or": [
"h_underwaterCrouchJump",
"canDownGrab"
]
},
{
"heatFrames": 220
},
{
"lavaFrames": 70
}
]
}
]
}
{
"or": [
"canDash",
{
"and": [
{
"heatFrames": 70
},
{
"lavaFrames": 10
}
]
}
]
} |
|


If you have Speed Booster, unequip it to be able to run faster in the lava. Requires: "Gravity"
{
"heatFrames": 360
}
{
"lavaFrames": 130
}
{
"or": [
"canCarefulJump",
{
"and": [
{
"spikeHits": 1
},
{
"heatFrames": 40
}
]
}
]
}
{
"or": [
{
"and": [
"canDash",
{
"disableEquipment": "SpeedBooster"
}
]
},
{
"and": [
{
"heatFrames": 170
},
{
"lavaFrames": 60
}
]
}
]
} |
|
Wait for the Tripper to approach the right platform, then run onto and off its left side. Spin jump to the left one time, then jump up onto the right side of the Tripper. Run to the left and jump directly onto the first pillar after the shutter. Spin jump across the remaining lava, trying to minimize the time spent in lava. Requires: "canDash"
"canSuitlessLavaDive"
"canTrickyJump"
{
"heatFrames": 780
}
{
"lavaFrames": 100
}Dev note: Wall jumps are not needed for this strat. |
|
Ride the first Tripper, using Morph to avoid spike damage. From the Tripper, run and jump directly onto the first pillar after the shutter. Spin jump across the remaining lava, trying to minimize the time spent in lava. Requires: "canSuitlessLavaDive"
"Morph"
{
"heatFrames": 780
}
{
"lavaFrames": 60
}
{
"or": [
"canDash",
{
"heatFrames": 70
}
]
}Dev note: Wall jumps are not needed for this strat. |
|
Requires: "Morph"
{
"heatFrames": 1010
}
{
"or": [
"canDash",
{
"heatFrames": 15
}
]
}
{
"or": [
"canCarefulJump",
{
"spikeHits": 1
}
]
} |
|
Requires: "canDash"
{
"heatFrames": 125
} |
|
Requires: {
"heatFrames": 75
}
{
"or": [
"canDash",
{
"heatFrames": 25
}
]
} |
From: 2
Bottom Left Door
To: 2
Bottom Left Door
Requires: "canDash"
{
"or": [
{
"obstaclesCleared": [
"A"
]
},
{
"heatFrames": 60
}
]
}Exit condition: {
"leaveWithRunway": {
"length": 11,
"openEnd": 1
}
} |
From: 2
Bottom Left Door
To: 5
Bottom Floating Platform Junction
Requires: {
"heatFrames": 70
}
{
"or": [
{
"heatFrames": 30
},
{
"obstaclesCleared": [
"A"
]
}
]
}
{
"or": [
"canDash",
{
"heatFrames": 30
}
]
}Clears obstacles: A |
|
Requires: "canDash"
{
"heatFrames": 125
} |
|
Requires: {
"heatFrames": 75
}
{
"or": [
"canDash",
{
"heatFrames": 25
}
]
} |
|
Requires: {
"heatFrames": 75
}
{
"or": [
"canDash",
{
"heatFrames": 25
}
]
}Unlocks doors: {"types":["missiles"],"requires":[{"heatFrames":10}]} |
From: 4
Top Floating Platform Junction
To: 1
Top Left Door
Requires: "canDash"
{
"heatFrames": 30
}Exit condition: {
"leaveWithRunway": {
"length": 12,
"openEnd": 1
}
}Unlocks doors: {"types":["missiles"],"requires":[{"heatFrames":50}]}
{"types":["super"],"requires":[]}
{"types":["powerbomb"],"requires":[{"heatFrames":110}]} |
|
Requires: {
"heatFrames": 75
}
{
"or": [
"canDash",
{
"heatFrames": 25
}
]
}Unlocks doors: {"types":["missiles"],"requires":[{"heatFrames":10}]} |
From: 4
Top Floating Platform Junction
To: 3
Top Right Door
Requires: "canDash"
{
"heatFrames": 30
}Exit condition: {
"leaveWithRunway": {
"length": 12,
"openEnd": 1
}
}Unlocks doors: {"types":["missiles"],"requires":[{"heatFrames":50}]}
{"types":["super"],"requires":[]}
{"types":["powerbomb"],"requires":[{"heatFrames":110}]} |
From: 5
Bottom Floating Platform Junction
To: 1
Top Left Door
Requires: "canComplexGMode"
{
"heatFrames": 480
}
{
"or": [
"canWallJump",
"HiJump",
"SpaceJump",
"h_crouchJumpDownGrab"
]
}
{
"or": [
"canTrickyUseFrozenEnemies",
"canMoonwalk",
"canInsaneJump"
]
}
{
"or": [
"canDash",
"canTrickyGMode"
]
}Exit condition: {
"leaveWithGModeSetup": {}
}Unlocks doors: {"types":["super"],"requires":[]}
{"types":["missiles","powerbomb"],"requires":["never"]}Dev note: FIXME: the frozen enemy option should use extra heat frames (e.g. with pausing to turn off ice). |
From: 5
Bottom Floating Platform Junction
To: 2
Bottom Left Door
Requires: {
"heatFrames": 85
}
{
"obstaclesCleared": [
"A"
]
}
{
"or": [
"canDash",
{
"heatFrames": 35
}
]
}Unlocks doors: {"types":["ammo"],"requires":[]}Dev note: The unlocksDoors has no heatFrames since you could farm back up after unlocking. |
From: 5
Bottom Floating Platform Junction
To: 2
Bottom Left Door
Requires: "canDash"
{
"heatFrames": 45
}
{
"obstaclesCleared": [
"A"
]
}Exit condition: {
"leaveWithRunway": {
"length": 11,
"openEnd": 1
}
}Unlocks doors: {"types":["ammo"],"requires":[]}Dev note: The unlocksDoors has no heatFrames since you could farm back up after unlocking. |
|
Requires: "Gravity"
"Morph"
{
"or": [
{
"and": [
"canMockball",
{
"disableEquipment": "SpeedBooster"
},
"canTrickyJump",
{
"lavaFrames": 80
}
]
},
{
"lavaFrames": 100
}
]
}
{
"or": [
{
"lavaFrames": 140
},
{
"and": [
"canDash",
{
"disableEquipment": "SpeedBooster"
},
{
"lavaFrames": 110
}
]
},
{
"and": [
"SpaceJump",
{
"lavaFrames": 40
}
]
}
]
}Exit condition: {
"leaveNormally": {}
}Unlocks doors: {"types":["missiles"],"requires":[{"lavaFrames":80}]}
{"types":["super"],"requires":[]}
{"types":["powerbomb"],"requires":[{"lavaFrames":60}]}Dev note: FIXME: A leaveWithRunway variation could be added, but it would require Speed Booster to be disabled, which would need new schema support in order to properly match entrance conditions in the next room. |
|
Requires: "Morph"
{
"or": [
"canMockball",
{
"and": [
"canDash",
{
"heatFrames": 35
}
]
},
{
"heatFrames": 200
}
]
}
{
"heatFrames": 420
}Exit condition: {
"leaveNormally": {}
}Unlocks doors: {"types":["missiles"],"requires":[{"heatFrames":20}]}
{"types":["super"],"requires":[]}
{"types":["powerbomb"],"requires":[{"heatFrames":60}]} |
|
Requires: "canDash"
"Morph"
{
"or": [
"canMockball",
{
"heatFrames": 35
}
]
}
{
"heatFrames": 380
}Exit condition: {
"leaveWithRunway": {
"length": 8,
"openEnd": 1,
"heated": true
}
}Unlocks doors: {"types":["missiles"],"requires":[{"heatFrames":50}]}
{"types":["super"],"requires":[]}
{"types":["powerbomb"],"requires":[{"heatFrames":60}]} |
|
Requires: "canDash"
"Morph"
"SpaceJump"
{
"or": [
"canMockball",
{
"heatFrames": 35
}
]
}
{
"heatFrames": 405
}Exit condition: {
"leaveNormally": {}
}Unlocks doors: {"types":["missiles"],"requires":[{"heatFrames":20}]}
{"types":["super"],"requires":[]}
{"types":["powerbomb"],"requires":[{"heatFrames":60}]} |
|
Requires: {
"or": [
{
"and": [
{
"resetRoom": {
"nodes": [
1,
6
]
}
},
{
"cycleFrames": 660
}
]
},
{
"and": [
{
"resetRoom": {
"nodes": [
2
]
}
},
{
"cycleFrames": 670
}
]
},
{
"and": [
{
"resetRoom": {
"nodes": [
3,
5
]
}
},
{
"cycleFrames": 630
}
]
},
{
"and": [
{
"resetRoom": {
"nodes": [
4
]
}
},
{
"cycleFrames": 750
}
]
},
{
"and": [
{
"resetRoom": {
"nodes": [
7
]
}
},
{
"cycleFrames": 1700
}
]
}
]
}
{
"or": [
{
"and": [
"canDash",
{
"or": [
"Spazer",
"Wave",
"Plasma",
{
"and": [
"Grapple",
{
"cycleFrames": 120
}
]
},
{
"cycleFrames": 150
}
]
}
]
},
{
"and": [
{
"haveBlueSuit": {}
},
{
"cycleFrames": 120
}
]
}
]
}Farm cycle drops: 6 Sova |
|
Requires: {
"obstaclesCleared": [
"A"
]
}
{
"heatFrames": 50
}
{
"or": [
"canDash",
{
"heatFrames": 10
}
]
} |
|


Build up 34 tiles worth of run speed and jump into the door on the last frame. Hold angle up through the transition but also aim down to duck below the ceiling until Samus is past it. Fire the Super Missile frame perfectly to open the gate. Entrance condition: {
"comeInRunning": {
"speedBooster": "yes",
"minTiles": 34
}
}Requires: {
"notable": "High Speed Gate Glitch"
}
"h_speedJump"
"h_heatedGreenGateGlitch"
{
"ammo": {
"type": "Super",
"count": 1
}
}
"canInsaneJump"
{
"noFlashSuit": {}
}Clears obstacles: A Dev note: 1 extra tile is added so that you can jump into the door, simplifying the inputs a bit. |
From: 2
Right Door
To: 1
Left Door

Entrance condition: {
"comeInWithGMode": {
"mode": "indirect",
"morphed": false
}
}Requires: {
"or": [
"SpaceJump",
{
"and": [
"HiJump",
"canSpeedyJump",
"canWallJump"
]
},
{
"and": [
"HiJump",
"canSpringBallJumpMidAir",
{
"or": [
{
"noBlueSuit": {}
},
{
"and": [
"Gravity",
{
"lavaFrames": 25
}
]
}
]
}
]
},
{
"and": [
{
"notable": "Spring Ball Bomb Boost"
},
{
"noBlueSuit": {}
},
"canSpringBallJumpMidAir",
"canUnmorphBombBoost",
"h_crouchJumpDownGrab",
{
"or": [
"canInsaneJump",
"h_additionalBomb"
]
}
]
},
{
"and": [
{
"or": [
{
"canShineCharge": {
"usedTiles": 15,
"openEnd": 2
}
},
"h_storedSpark"
]
},
"canShinechargeMovementComplex",
{
"or": [
{
"shinespark": {
"frames": 12,
"excessFrames": 2
}
},
{
"and": [
"h_speedJump",
{
"shinespark": {
"frames": 9,
"excessFrames": 3
}
}
]
}
]
}
]
},
{
"and": [
{
"notable": "Ceiling Mockball Spring Fling"
},
"h_speedJump",
"canInsaneJump",
"canMomentumConservingMorph",
"canSpringFling"
]
}
]
}
"h_heatedGModeOpenDifferentDoor" |
|
Requires: {
"resetRoom": {
"nodes": [
2
]
}
}
"h_heatProof"
"h_lavaProof"
"Gravity"
{
"cycleFrames": 500
}
{
"or": [
{
"and": [
"canDash",
{
"or": [
"ScrewAttack",
{
"and": [
"Plasma",
{
"cycleFrames": 60
}
]
},
{
"and": [
"h_useMorphBombs",
"canFarmWhileShooting",
{
"cycleFrames": 1700
}
]
}
]
}
]
},
{
"and": [
{
"haveBlueSuit": {}
},
{
"cycleFrames": 690
}
]
}
]
}Resets obstacles: A Farm cycle drops: 5 Dragon |
From: 2
Right Door
To: 2
Right Door


Touch the item as little as possible in order to prevent PLMs from being overloaded, so the platforms below remain solid. Entrance condition: {
"comeInWithGMode": {
"mode": "direct",
"morphed": false
}
}Requires: "canRemoteAcquire"
{
"or": [
"SpaceJump",
{
"and": [
"HiJump",
"canSpeedyJump",
"canWallJump"
]
},
{
"and": [
"HiJump",
"canSpringBallJumpMidAir",
{
"or": [
{
"noBlueSuit": {}
},
{
"and": [
"Gravity",
{
"lavaFrames": 25
}
]
}
]
}
]
},
{
"and": [
{
"notable": "Spring Ball Bomb Boost"
},
{
"noBlueSuit": {}
},
"canSpringBallJumpMidAir",
"canUnmorphBombBoost",
"h_crouchJumpDownGrab",
"canInsaneJump"
]
},
{
"and": [
{
"or": [
{
"canShineCharge": {
"usedTiles": 15,
"openEnd": 2
}
},
"h_storedSpark"
]
},
"canShinechargeMovementComplex",
{
"or": [
{
"shinespark": {
"frames": 12,
"excessFrames": 2
}
},
{
"and": [
"h_speedJump",
{
"shinespark": {
"frames": 9,
"excessFrames": 3
}
}
]
}
]
}
]
},
{
"and": [
{
"notable": "Ceiling Mockball Spring Fling"
},
"h_speedJump",
"canInsaneJump",
"canMomentumConservingMorph",
"canSpringFling"
]
}
]
}
"h_heatedDirectGModeLeaveSameDoor"Collects items: 3 Dev note: There is no leniency option for using an extra Power Bomb, because it will contribute to PLM overload. (2 PBs is technically barely possible) |
|
Position at the end of the runway (or up to 4 pixels away) at the top-right of the room, gain run speed, perform a last-frame jump and ceiling mockball, then equip or unequip Spring Ball in order to reset Samus' vertical speed and just barely make it onto the ledge with the item. Requires: {
"notable": "Ceiling Mockball Spring Fling"
}
"h_speedJump"
"canInsaneJump"
{
"heatFrames": 500
}
"canMomentumConservingMorph"
"canSpringFling"
{
"or": [
"h_heatProof",
"canBeVeryPatient"
]
} |
From: 2
Right Door
To: 3
Item
Enter from the right door and spin jump onto the first ledge while barely landing on the ledge in order to prevent getting the Geruta on camera. Walk against the left wall and jump to trigger the Geruta. It should now be moving leftwards. Stand on the next platform against the right wall and shoot the Geruta to get it one shot away from being frozen. After a few swoops, it will come down; either freeze it or tank a hit. Then go up and stand on the corner and freeze it when it is in position. The Geruta will be stuck below and keep swooping, so if Energy permits, Samus will have several attempts. With full heat protection, Samus can quickly shinecharge left to right then run and spark midair to the left to save Energy. Entrance condition: {
"comeInNormally": {}
}Requires: {
"notable": "Frozen Geruta Shinecharge"
}
"h_trickyFrozenEnemyRunway"
"canCarefulJump"
"canHorizontalShinespark"
{
"canShineCharge": {
"usedTiles": 17,
"openEnd": 1
}
}
{
"heatFrames": 1050
}
{
"or": [
{
"and": [
"canHorizontalShinespark",
{
"shinespark": {
"frames": 54,
"excessFrames": 15
}
}
]
},
{
"and": [
"h_heatProof",
"canShinechargeMovementComplex",
{
"shinespark": {
"frames": 12,
"excessFrames": 2
}
}
]
},
{
"and": [
"h_heatProof",
"canShinechargeMovementComplex",
"h_speedJump",
{
"shinespark": {
"frames": 9,
"excessFrames": 3
}
}
]
}
]
} |
|
Entrance condition: {
"comeInWithGMode": {
"mode": "indirect",
"morphed": false
}
}Requires: "h_heatedGMode"
{
"or": [
"SpaceJump",
{
"and": [
"HiJump",
"canSpeedyJump",
"canWallJump"
]
},
{
"and": [
"HiJump",
"canSpringBallJumpMidAir",
{
"or": [
{
"noBlueSuit": {}
},
{
"and": [
"Gravity",
{
"lavaFrames": 25
}
]
}
]
}
]
},
{
"and": [
{
"notable": "Spring Ball Bomb Boost"
},
{
"noBlueSuit": {}
},
"canSpringBallJumpMidAir",
"canUnmorphBombBoost",
"h_crouchJumpDownGrab",
{
"or": [
"canInsaneJump",
"h_additionalBomb"
]
}
]
},
{
"and": [
{
"or": [
{
"canShineCharge": {
"usedTiles": 15,
"openEnd": 2
}
},
"h_storedSpark"
]
},
"canShinechargeMovementComplex",
{
"or": [
{
"shinespark": {
"frames": 12,
"excessFrames": 2
}
},
{
"and": [
"h_speedJump",
{
"shinespark": {
"frames": 9,
"excessFrames": 3
}
}
]
}
]
}
]
},
{
"and": [
{
"notable": "Ceiling Mockball Spring Fling"
},
"h_speedJump",
"canInsaneJump",
"canMomentumConservingMorph",
"canSpringFling"
]
}
]
}
{
"heatFrames": 90
}Clears obstacles: A Dev note: Goes to 3 because opening the gate mostly only makes sense when going back to the right for a longer runway or obtaining the item. FIXME: Variants with shinesparking or Geruta damage boost can be added. (Energy from immobile, CF, or energy free sparks) |
From: 2
Right Door
To: 3
Item
Entrance condition: {
"comeInWithGMode": {
"mode": "indirect",
"morphed": false
}
}Requires: "h_heatedGMode"
"canTrickyUseFrozenEnemies"
"canTrickyDodgeEnemies"
"canDash"
{
"or": [
"HiJump",
"canSpringBallJumpMidAir"
]
}
{
"heatFrames": 90
}Clears obstacles: A Dev note: Goes to 3 because opening the gate mostly only makes sense when going back to the right for a longer runway or obtaining the item. FIXME: A variant with only ice and reset fall speed could be added (possibly while carrying blue suit). |
|
Entrance condition: {
"comeInWithGMode": {
"mode": "any",
"morphed": false
}
}Requires: "h_heatedGMode"
{
"or": [
"SpaceJump",
{
"and": [
"HiJump",
"canSpeedyJump",
"canWallJump"
]
},
{
"and": [
"HiJump",
"canSpringBallJumpMidAir",
{
"or": [
"canDash",
{
"and": [
{
"haveBlueSuit": {}
},
"Gravity"
]
}
]
}
]
},
{
"and": [
"canDash",
{
"notable": "Spring Ball Bomb Boost"
},
"canSpringBallJumpMidAir",
"canUnmorphBombBoost",
"h_crouchJumpDownGrab",
{
"or": [
"canInsaneJump",
"h_additionalBomb"
]
}
]
},
{
"and": [
{
"canShineCharge": {
"usedTiles": 15,
"openEnd": 2
}
},
"canShinechargeMovementComplex",
{
"or": [
{
"shinespark": {
"frames": 12,
"excessFrames": 2
}
},
{
"and": [
"h_speedJump",
{
"shinespark": {
"frames": 9,
"excessFrames": 3
}
}
]
}
]
}
]
},
{
"and": [
{
"notable": "Ceiling Mockball Spring Fling"
},
"h_speedJump",
"canInsaneJump",
"canMomentumConservingMorph",
"canSpringFling"
]
}
]
}
{
"heatFrames": 0
}Dev note: FIXME: Variants with Geruta damage boost can be added. (Energy from immobile or CF) |
|
Entrance condition: {
"comeInWithGMode": {
"mode": "any",
"morphed": false
}
}Requires: "canDash"
"h_heatedGMode"
"canTrickyUseFrozenEnemies"
"canTrickyDodgeEnemies"
{
"or": [
"HiJump",
"canSpringBallJumpMidAir"
]
}
{
"heatFrames": 0
}Dev note: FIXME: A variant with only ice and reset fall speed could be added (possibly while carrying blue suit). |
|
Requires: "Grapple"
{
"heatFrames": 320
}
{
"or": [
"canInsaneJump",
{
"and": [
"canTrickyDodgeEnemies",
{
"heatFrames": 60
}
]
},
{
"and": [
{
"enemyKill": {
"enemies": [
[
"Geruta"
]
],
"explicitWeapons": [
"Missile",
"Super",
"Wave",
"Spazer",
"Plasma"
]
}
},
{
"heatFrames": 50
}
]
},
{
"heatFrames": 160
}
]
}
{
"or": [
{
"noFlashSuit": {}
},
{
"and": [
"canMidAirMorph",
{
"heatFrames": 20
}
]
}
]
}
{
"or": [
"canDash",
{
"heatFrames": 80
}
]
} |
|
Either freeze the Geruta and turn off and on Ice to quickly thaw it and save Energy, or carefully jump over it without freezing it or getting hit. Then lure it left by jumping towards it from below. Freeze it when it performs a larger swoop and use it as a platform to get to the item. Requires: "canDash"
"canTrickyUseFrozenEnemies"
"HiJump"
{
"heatFrames": 1050
}
{
"or": [
"canTrickyDodgeEnemies",
{
"heatFrames": 110
}
]
}
{
"or": [
"canInsaneJump",
{
"heatFrames": 500
}
]
}
{
"or": [
"h_midAirShootUp",
{
"heatFrames": 1000
}
]
}Dev note: The canInsaneJump option is to represent the difference between good and bad Geruta RNG. |
|

Requires: "canDash"
"canJumpIntoIBJ"
"canBombHorizontally"
{
"heatFrames": 810
}
{
"or": [
"canDoubleBombJump",
{
"and": [
"canJumpIntoIBJ",
{
"heatFrames": 330
}
]
}
]
} |
|
Requires: {
"canShineCharge": {
"usedTiles": 15,
"openEnd": 2
}
}
{
"or": [
{
"and": [
"canHorizontalShinespark",
{
"shinespark": {
"frames": 54,
"excessFrames": 15
}
}
]
},
{
"and": [
"h_heatProof",
"canShinechargeMovementComplex",
{
"shinespark": {
"frames": 12,
"excessFrames": 2
}
}
]
},
{
"and": [
"h_heatProof",
"canShinechargeMovementComplex",
"h_speedJump",
{
"shinespark": {
"frames": 9,
"excessFrames": 3
}
}
]
}
]
}
{
"heatFrames": 600
} |
|
Requires: "SpaceJump"
{
"or": [
{
"and": [
"canDash",
{
"heatFrames": 300
},
{
"or": [
"canInsaneJump",
{
"and": [
"canTrickyDodgeEnemies",
{
"heatFrames": 60
}
]
},
{
"and": [
{
"enemyKill": {
"enemies": [
[
"Geruta"
]
],
"explicitWeapons": [
"Missile",
"Super",
"Wave",
"Spazer",
"Plasma"
]
}
},
{
"heatFrames": 50
}
]
},
{
"heatFrames": 160
}
]
}
]
},
{
"and": [
{
"haveBlueSuit": {}
},
{
"heatFrames": 530
}
]
}
]
} |
|
Uses a bomb boost at the end of a mid-air SpringBall jump. Also requires a crouch jump and down-grab to complete the maneuver. Requires: "canDash"
{
"notable": "Spring Ball Bomb Boost"
}
"canSpringBallJumpMidAir"
"canUnmorphBombBoost"
"h_crouchJumpDownGrab"
{
"heatFrames": 800
}
{
"or": [
"canInsaneJump",
{
"and": [
{
"heatFrames": 250
},
"h_additionalBomb"
]
}
]
} |
|
Either freeze the Geruta and turn off and on Ice to quickly thaw it and save Energy, or carefully jump over it without freezing it or getting hit. Then lure it left by jumping towards it from below with a series of mid-air Spring Ball jumps. Freeze it when it performs a larger swoop and use it as a platform to get to the item. Be careful not to jump into the Geruta's path to avoid hitting it. Requires: "canDash"
{
"notable": "Spring Ball Freeze"
}
"canTrickyUseFrozenEnemies"
"canSpringBallJumpMidAir"
{
"heatFrames": 1600
}
{
"or": [
"canTrickyDodgeEnemies",
{
"and": [
{
"heatFrames": 110
},
{
"enemyDamage": {
"enemy": "Geruta",
"type": "contact",
"hits": 1
}
}
]
}
]
}
{
"or": [
"canInsaneJump",
{
"heatFrames": 700
}
]
}Dev note: The canInsaneJump option is to represent the difference between good and bad Geruta RNG. |
|
Requires: "HiJump"
"canSpringBallJumpMidAir"
{
"or": [
{
"and": [
"canDash",
{
"heatFrames": 440
}
]
},
{
"and": [
{
"haveBlueSuit": {}
},
"Gravity",
{
"heatFrames": 520
},
{
"lavaFrames": 60
}
]
}
]
} |
|
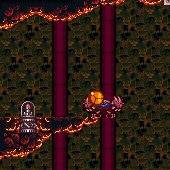
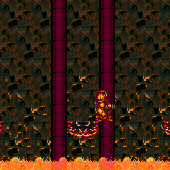
Use mid-air Spring Ball jumps to manipulate the Geruta into position near the ledge. Then do a Spring Ball jump into a neutral damage boost (while still morphed) to reach the ledge. Requires: "canDash"
{
"notable": "Spring Ball Jump into Damage Boost"
}
{
"heatFrames": 1920
}
"canTrickyDodgeEnemies"
"canTrickySpringBallJump"
"canNeutralDamageBoost"
{
"enemyDamage": {
"enemy": "Geruta",
"type": "contact",
"hits": 1
}
} |
|
Requires: {
"or": [
{
"and": [
{
"ammo": {
"type": "Super",
"count": 1
}
},
{
"heatFrames": 110
}
]
},
{
"and": [
{
"obstaclesCleared": [
"A"
]
},
{
"heatFrames": 50
}
]
}
]
}
{
"or": [
"canDash",
{
"heatFrames": 10
}
]
}Clears obstacles: A |
|
Requires: "canDash"
{
"or": [
{
"and": [
{
"ammo": {
"type": "Super",
"count": 1
}
},
{
"heatFrames": 160
}
]
},
{
"and": [
{
"obstaclesCleared": [
"A"
]
},
{
"heatFrames": 50
}
]
}
]
}Exit condition: {
"leaveWithRunway": {
"length": 17,
"openEnd": 1
}
}Collects items: 3 Unlocks doors: {"types":["missiles"],"requires":[{"heatFrames":70}]}
{"types":["super"],"requires":[]}
{"types":["powerbomb"],"requires":[{"heatFrames":120}]} |
|
Requires: "canDash"
{
"or": [
{
"and": [
{
"ammo": {
"type": "Super",
"count": 1
}
},
{
"heatFrames": 160
}
]
},
{
"and": [
{
"obstaclesCleared": [
"A"
]
},
{
"heatFrames": 50
}
]
}
]
}Exit condition: {
"leaveWithRunway": {
"length": 12,
"openEnd": 0
}
}Unlocks doors: {"types":["missiles"],"requires":[{"heatFrames":70}]}
{"types":["super"],"requires":[]}
{"types":["powerbomb"],"requires":[{"heatFrames":120}]} |
|
Requires: "Grapple"
{
"heatFrames": 420
}
{
"noFlashSuit": {}
}
{
"or": [
"canDash",
{
"heatFrames": 30
}
]
}Dev note: With a flash suit, swinging across with Grapple would require morphing/unmorphing; but if Morph is available, it's faster to just go through the morph tunnel. |
|
This can be done from the top right, single tile block. Requires: "HiJump"
"canWallJump"
{
"heatFrames": 550
}
{
"or": [
"canDash",
{
"and": [
{
"haveBlueSuit": {}
},
{
"heatFrames": 210
},
{
"lavaFrames": 60
}
]
}
]
} |
|
Requires: "Morph"
{
"heatFrames": 360
}
{
"or": [
"canDash",
{
"and": [
{
"haveBlueSuit": {}
},
"Gravity",
{
"heatFrames": 200
},
{
"lavaFrames": 40
}
]
}
]
} |
|


Requires: "canDash"
{
"heatFrames": 350
}
{
"or": [
{
"lavaFrames": 70
},
{
"and": [
"Gravity",
{
"lavaFrames": 30
}
]
}
]
}
{
"or": [
{
"and": [
"canTrickyDodgeEnemies",
"Gravity"
]
},
{
"enemyDamage": {
"enemy": "Dragon",
"type": "contact",
"hits": 1
}
},
{
"enemyKill": {
"enemies": [
[
"Dragon"
]
],
"explicitWeapons": [
"Super",
"Missile",
"Plasma",
"ScrewAttack"
]
}
}
]
} |
|


Requires: {
"or": [
{
"and": [
{
"ammo": {
"type": "Super",
"count": 1
}
},
{
"heatFrames": 90
}
]
},
{
"obstaclesCleared": [
"A"
]
}
]
}
{
"or": [
{
"and": [
{
"doorUnlockedAtNode": 1
},
{
"heatFrames": 30
},
{
"canShineCharge": {
"usedTiles": 17,
"openEnd": 0
}
}
]
},
{
"canShineCharge": {
"usedTiles": 16,
"openEnd": 0
}
}
]
}
{
"or": [
{
"and": [
"canHorizontalShinespark",
{
"shinespark": {
"frames": 62,
"excessFrames": 20
}
}
]
},
{
"and": [
"h_heatProof",
"canShinechargeMovementComplex",
{
"shinespark": {
"frames": 12,
"excessFrames": 2
}
}
]
},
{
"and": [
"h_heatProof",
"canShinechargeMovementComplex",
"h_speedJump",
{
"shinespark": {
"frames": 10,
"excessFrames": 4
}
}
]
}
]
}
{
"heatFrames": 450
}Clears obstacles: A Collects items: 3 Unlocks doors: {"nodeId":1,"types":["missiles"],"requires":[{"heatFrames":30}]}
{"nodeId":1,"types":["super"],"requires":[]}
{"nodeId":1,"types":["powerbomb"],"requires":[{"heatFrames":60}]} |
|
Requires: "SpaceJump"
{
"heatFrames": 410
}
{
"or": [
"canDash",
{
"heatFrames": 190
}
]
} |
|
Requires: {
"heatFrames": 125
}
{
"or": [
"canDash",
{
"heatFrames": 25
}
]
} |
|
Requires: "h_heatProof"
"h_speedDash"
"h_getBlueSpeedMaxRunway"
{
"resetRoom": {
"nodes": [
2
]
}
}
{
"cycleFrames": 350
}
{
"simpleCycleFrames": 800
}
{
"or": [
"Plasma",
{
"and": [
"Wave",
{
"cycleFrames": 30
}
]
},
{
"and": [
"Spazer",
{
"cycleFrames": 30
}
]
},
{
"and": [
"Grapple",
{
"cycleFrames": 45
}
]
},
{
"cycleFrames": 120
}
]
}Clears obstacles: A Farm cycle drops: 2 Cacatac Dev note: Some frames added to account for spike RNG. |
From: 2
Far Left Door
To: 2
Far Left Door
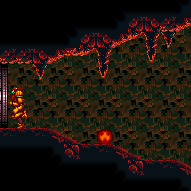
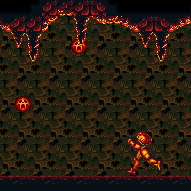
Lure the second Multiviola to the left door. The first one will require more time and heat damage. Jump over the pirates and under the first Multiviola, then return fast enough to avoid pirate lasers and contact with the second Multiviola. Requires: "canDash"
{
"heatFrames": 765
}
"canTrickyDodgeEnemies"Exit condition: {
"leaveWithGModeSetup": {}
} |
From: 2
Far Left Door
To: 2
Far Left Door


Lure the second Multiviola to the left door. The first one will require more time and heat damage. Requires: {
"heatFrames": 600
}
{
"or": [
"h_speedDash",
{
"and": [
"canDash",
{
"heatFrames": 65
}
]
},
{
"heatFrames": 200
}
]
}
{
"or": [
{
"haveBlueSuit": {}
},
"h_speedDash",
"Plasma",
"ScrewAttack",
{
"ammo": {
"type": "Missile",
"count": 2
}
},
{
"ammo": {
"type": "Super",
"count": 2
}
},
{
"and": [
"Ice",
"Wave",
"Spazer"
]
},
{
"and": [
"canDodgeWhileShooting",
{
"or": [
{
"and": [
"Ice",
"Wave"
]
},
{
"and": [
"Ice",
"Spazer"
]
},
{
"and": [
"Wave",
"Spazer"
]
}
]
}
]
}
]
}Exit condition: {
"leaveWithGModeSetup": {}
} |
From: 2
Far Left Door
To: 2
Far Left Door


Lure the second Multiviola to the left door. The first one will require more time and heat damage. Jump over the first pirate and into the second, then jump over the again on the return. Requires: "canDash"
{
"heatFrames": 720
}
{
"enemyDamage": {
"enemy": "Red Space Pirate (standing)",
"type": "contact",
"hits": 1
}
}Exit condition: {
"leaveWithGModeSetup": {}
} |
From: 2
Far Left Door
To: 2
Far Left Door
Drops do not linger long enough to kill every single Pirate. Requires: "h_heatProof"
{
"resetRoom": {
"nodes": [
2
]
}
}
{
"cycleFrames": 60
}
{
"simpleCycleFrames": 560
}
"h_speedDash"
"h_getBlueSpeedMaxRunway"Resets obstacles: A Farm cycle drops: 1 Multiviola, 4 Red Space Pirate (standing) |
|
Requires: "h_heatProof"
{
"resetRoom": {
"nodes": [
2
]
}
}
{
"or": [
{
"and": [
"canDash",
{
"cycleFrames": 1200
},
{
"or": [
"Plasma",
{
"and": [
"Wave",
{
"cycleFrames": 120
}
]
},
{
"and": [
"Spazer",
{
"cycleFrames": 300
}
]
},
{
"and": [
"canPseudoScrew",
{
"cycleFrames": 220
}
]
}
]
}
]
},
{
"and": [
{
"haveBlueSuit": {}
},
{
"cycleFrames": 1620
}
]
}
]
}Resets obstacles: A Farm cycle drops: 4 Multiviola, 3 Red Space Pirate (standing) |
|
Requires: "h_getBlueSpeedMaxRunway"
{
"simpleHeatFrames": 300
}
{
"heatFrames": 90
}
{
"or": [
"h_speedDash",
{
"and": [
"h_speedButSlow",
{
"simpleHeatFrames": 325
}
]
}
]
}
{
"or": [
"Wave",
{
"heatFrames": 30
}
]
}Clears obstacles: A |
|
Run through Pirates and Multiviolas to farm. Then run through to the end and shinecharge at the speed blocks. Use heat damage to interrupt. Entrance condition: {
"comeInWithRMode": {}
}Requires: {
"or": [
{
"and": [
"h_heatedCrystalFlashForReserveEnergy",
{
"simpleHeatFrames": 300
},
{
"heatFrames": 90
},
{
"or": [
"h_speedDash",
{
"and": [
"h_speedButSlow",
{
"simpleHeatFrames": 325
}
]
}
]
}
]
},
{
"and": [
"h_heatProof",
"h_RModeCanRefillReserves",
{
"resourceMissingAtMost": [
{
"type": "Missile",
"count": 0
}
]
},
{
"partialRefill": {
"type": "ReserveEnergy",
"limit": 20
}
}
]
}
]
}
"h_shinechargeMaxRunway"
"h_heatTriggerRModeSparkInterrupt"Clears obstacles: A |
|
Requires: "h_getBlueSpeedMaxRunway"
{
"simpleHeatFrames": 300
}
{
"heatFrames": 80
}
{
"or": [
"h_speedDash",
{
"and": [
"h_speedButSlow",
{
"simpleHeatFrames": 380
}
]
}
]
}
{
"or": [
"Wave",
{
"heatFrames": 20
}
]
}Clears obstacles: A Dev note: FIXME: it can be possible to get through tankless without Wave, with enough arm pumping, or a cross-room runway. |
From: 2
Far Left Door
To: 4
Bottom Right Door


Press against the leftmost Speed block before using a flash suit to shinespark. Requires: "canDash"
"canTrickyJump"
{
"heatFrames": 605
}
{
"useFlashSuit": {}
}
{
"or": [
{
"and": [
"h_heatProof",
{
"shinespark": {
"frames": 114,
"excessFrames": 15
}
}
]
},
{
"shinespark": {
"frames": 114,
"excessFrames": 5
}
}
]
}
{
"heatFrames": 105
} |
|
Requires: "h_getBlueSpeedMaxRunway"
{
"simpleHeatFrames": 300
}
{
"heatFrames": 80
}
{
"or": [
"h_speedDash",
{
"and": [
"h_speedButSlow",
{
"simpleHeatFrames": 330
}
]
}
]
}Clears obstacles: A |
From: 2
Far Left Door
To: 8
G-Mode, Bottom Right (Started at Left)
While artificially morphed, carefully dodge or kill the enemies in the first half of the room. Go over the first set of Speed Blocks, then kill the first Red Pirate with a Power Bomb or after unmorphing. It is possible to kill or jump over the second pirate, but be careful to prevent it from shooting invisible lasers. Without any Power Bombs, this requires precise movement with Spring Ball or very precise movement with just Bombs. Entrance condition: {
"comeInWithGMode": {
"mode": "any",
"morphed": true
}
}Requires: "canDash"
"canTrickyDodgeEnemies"
{
"or": [
{
"ammo": {
"type": "PowerBomb",
"count": 6
}
},
{
"and": [
"h_artificialMorphMovement",
{
"or": [
"canInsaneJump",
"h_artificialMorphPowerBomb"
]
},
{
"or": [
"h_artificialMorphPowerBomb",
"h_hasBeamUpgrade",
{
"enemyKill": {
"enemies": [
[
"Red Space Pirate (standing)"
]
],
"explicitWeapons": [
"Missile",
"Super",
"ScrewAttack"
]
}
},
{
"enemyDamage": {
"enemy": "Red Space Pirate (standing)",
"type": "contact",
"hits": 1
}
}
]
}
]
}
]
}
{
"heatFrames": 0
}Dev note: It is possible to jump over the left bridge pirate, but it is incredibly precise and not expected. |
From: 2
Far Left Door
To: 8
G-Mode, Bottom Right (Started at Left)
Run through the speed blocks then carefully cross the crumble bridge, as it will mostly be air. Alternatively, a speedball will prevent PLMs from overloading and Samus can roll over the bridge. Kill the pirate after the bridge before it places its invisible lasers, preventing Samus from getting through damageless. Samus can simply run to the right and fall through the bridge to safety below the pirate and kill it from below. It is also possible to perform one precise jump to cross most of the bridge and kill the pirate while blue. Entrance condition: {
"comeInWithGMode": {
"mode": "any",
"morphed": false
}
}Requires: "h_getBlueSpeedMaxRunway"
{
"or": [
"canSpeedball",
{
"and": [
"h_blueJump",
"canInsaneJump"
]
},
"h_hasBeamUpgrade",
{
"enemyKill": {
"enemies": [
[
"Red Space Pirate (standing)"
]
],
"explicitWeapons": [
"Missile",
"Super",
"ScrewAttack"
]
}
},
{
"enemyDamage": {
"enemy": "Red Space Pirate (standing)",
"type": "contact",
"hits": 1
}
}
]
}
{
"heatFrames": 0
}Dev note: It is possible to shinecharge before the bridge and spark vertically above it, then move the camera to kill the pirate with speed echoes, but this isn't really easier. |
From: 2
Far Left Door
To: 8
G-Mode, Bottom Right (Started at Left)
Carefully dodge or kill the enemies in the first half of the room. With Morph, go over the first set of Speed Blocks, then kill the first Red Pirate or air ball over it. It is also possible to kill or jump over the second pirate, but be careful to prevent it from shooting invisible lasers. Entrance condition: {
"comeInWithGMode": {
"mode": "any",
"morphed": false
}
}Requires: "canDash"
{
"or": [
"canTrickyDodgeEnemies",
"h_usePowerBomb",
"ScrewAttack",
"h_hasBeamUpgrade",
{
"ammo": {
"type": "Missile",
"count": 2
}
},
{
"ammo": {
"type": "Super",
"count": 2
}
},
{
"enemyDamage": {
"enemy": "Red Space Pirate (standing)",
"type": "contact",
"hits": 1
}
}
]
}
{
"or": [
"canTrickyJump",
{
"enemyDamage": {
"enemy": "Multiviola",
"type": "contact",
"hits": 1
}
}
]
}
"Morph"
{
"or": [
"h_usePowerBomb",
{
"and": [
{
"or": [
"h_useSpringBall",
"h_useMorphBombs"
]
},
{
"or": [
"canLateralMidAirMorph",
"h_hasBeamUpgrade",
{
"enemyKill": {
"enemies": [
[
"Red Space Pirate (standing)"
]
],
"explicitWeapons": [
"Missile",
"Super",
"ScrewAttack"
]
}
},
{
"enemyDamage": {
"enemy": "Red Space Pirate (standing)",
"type": "contact",
"hits": 1
}
}
]
}
]
}
]
}
{
"heatFrames": 0
} |
From: 2
Far Left Door
To: 9
Right of Crumble Bridge, Left of Main Shaft Speed Blocks
Requires: "h_getBlueSpeedMaxRunway"
{
"simpleHeatFrames": 330
}
{
"or": [
"h_speedDash",
{
"and": [
"h_speedButSlow",
{
"simpleHeatFrames": 250
}
]
}
]
} |
|
Spark left through the speed blocks, then run to the right and back to get speed to go through the rest. If performing the spark with low energy, there is a risk of ending the spark above the spikes or in front of the Pirate; to be safe, assuming Samus has heat protection and begins sparking about 3 tiles from the Speed blocks, start with between 72 and 87 energy or at least 105 energy; with a buffered crumble jump to the right, up to 93 energy can work. Entrance condition: {
"comeInShinecharged": {},
"comesThroughToilet": "any"
}Requires: {
"shineChargeFrames": 35
}
{
"notable": "Reverse Spark"
}
"canShinechargeMovement"
"canHorizontalShinespark"
{
"or": [
{
"shinespark": {
"frames": 87,
"excessFrames": 10
}
},
{
"and": [
"h_heatProof",
"canControlShinesparkEnd",
{
"shinespark": {
"frames": 87,
"excessFrames": 44
}
}
]
}
]
}
{
"heatFrames": 675
}
{
"or": [
"h_speedDash",
{
"and": [
"h_speedButSlow",
{
"heatFrames": 270
}
]
}
]
}
"h_getBlueSpeedMaxRunway"
{
"or": [
"canSpeedball",
{
"heatFrames": 15
}
]
}Clears obstacles: A Dev note: FIXME: This should be split into 3->9 and 9->2 strats. |
|


Enter the room with between 93 and 102 energy and quickly mid-air spark to the left through the Speed blocks. After the shinespark ends, run left and press pause before reaching zero energy, tanking the Pirate hit while at zero energy. Refill some energy (at least 11), and continue running to the left, using i-frames to pass through the next Pirate. Continue to pause abuse several more times. Arm pumping may be used but is not required and has little benefit; in any case, arm pumping should not be used until beginning to run through the Speed blocks, otherwise Samus will not obtain blue speed in time and will bonk into them. Entrance condition: {
"comeInShinecharged": {},
"comesThroughToilet": "any"
}Requires: {
"shineChargeFrames": 35
}
{
"notable": "Reverse Spark With Pause Abuse"
}
"canShinechargeMovementTricky"
"canTrickyJump"
"canControlShinesparkEnd"
"canPauseAbuse"
{
"resourceAvailable": [
{
"type": "RegularEnergy",
"count": 93
}
]
}
{
"shinespark": {
"frames": 0,
"excessFrames": 0
}
}
{
"resourceConsumed": [
{
"type": "ReserveEnergy",
"count": 61
}
]
}
"h_speedDash"
"h_getBlueSpeedMaxRunway"
{
"or": [
"canPreciseReserveRefill",
{
"resourceConsumed": [
{
"type": "ReserveEnergy",
"count": 15
}
]
}
]
}
{
"resourceAtMost": [
{
"type": "RegularEnergy",
"count": 1
}
]
}
{
"heatFrames": 0
}Clears obstacles: A Dev note: The zero shinespark requirement is to satisfy the tests, by marking that the shinecharge is used; the actual shinespark energy usage is accounted for in the resourceConsumed. This could possibly be rewritten to express the energy usage in the normal way. We don't include a `h_ShinesparksCostEnergy` requirement here, because even if shinesparks don't cost energy, it is still possible to use heat damage to make the shinespark stop in the correct place. FIXME: the regular energy required could be reduced in that case. FIXME: This should be split into 3->9 and 9->2 strats. FIXME: A h_speedButSlow variant could be added. |
From: 4
Bottom Right Door
To: 2
Far Left Door

Spark left through the speed blocks, then run to the right and back to get speed to go through the rest. If performing the spark with low energy, there is a risk of ending the spark above the spikes or in front of the Pirate; to be safe, assuming Samus has heat protection, begin the shinespark at the Speed blocks with between 68 and 84 energy, or at least 101 energy; with a buffered crumble jump to the right, up to 89 energy can work. Entrance condition: {
"comeInShinecharged": {}
}Requires: {
"shineChargeFrames": 85
}
{
"notable": "Reverse Spark"
}
"canShinechargeMovement"
"canHorizontalShinespark"
{
"or": [
{
"shinespark": {
"frames": 84,
"excessFrames": 10
}
},
{
"and": [
"h_heatProof",
"canControlShinesparkEnd",
{
"shinespark": {
"frames": 84,
"excessFrames": 45
}
}
]
}
]
}
{
"heatFrames": 715
}
{
"or": [
"h_speedDash",
{
"and": [
"h_speedButSlow",
{
"heatFrames": 270
}
]
}
]
}
"h_getBlueSpeedMaxRunway"
{
"or": [
"canSpeedball",
{
"heatFrames": 15
}
]
}Clears obstacles: A |
|


Spark left through the speed blocks, then run to the right and back to get speed to go through the rest. If performing the spark with low energy, there is a risk of ending the spark above the spikes or in front of the Pirate; to be safe, assuming Samus has heat protection, begin the shinespark at the door (in either this or the other room) with between 81 and 96 energy, or at least 113 energy; with a buffered crumble jump to the right, up to 102 energy can work. Entrance condition: {
"comeInWithSpark": {
"position": "bottom"
}
}Requires: {
"notable": "Reverse Spark"
}
{
"or": [
{
"shinespark": {
"frames": 94,
"excessFrames": 10
}
},
{
"and": [
"h_heatProof",
"canControlShinesparkEnd",
{
"shinespark": {
"frames": 94,
"excessFrames": 42
}
}
]
}
]
}
"h_getBlueSpeedMaxRunway"
{
"heatFrames": 650
}
{
"or": [
"h_speedDash",
{
"and": [
"h_speedButSlow",
{
"heatFrames": 270
}
]
}
]
}Clears obstacles: A Dev note: FIXME: This should be split into 4->9 and 9->2 strats. |
From: 4
Bottom Right Door
To: 2
Far Left Door
Start a shinespark on the other side of the door with between 94 and 103 energy. After the shinespark ends, run left and press pause before reaching zero energy, tanking the Pirate hit while at zero energy. Refill some energy (at least 11), and continue running to the left, using i-frames to pass through the next Pirate. Continue to pause abuse several more times. Arm pumping may be used but is not required and has little benefit; in any case, arm pumping should not be used until beginning to run through the Speed blocks, otherwise Samus will not obtain blue speed in time and will bonk into them. Entrance condition: {
"comeInWithSpark": {
"position": "bottom"
}
}Requires: {
"notable": "Reverse Spark With Pause Abuse"
}
"canShinechargeMovementTricky"
"canTrickyJump"
"canControlShinesparkEnd"
"canPauseAbuse"
{
"resourceAvailable": [
{
"type": "RegularEnergy",
"count": 94
}
]
}
{
"shinespark": {
"frames": 0,
"excessFrames": 0
}
}
{
"resourceConsumed": [
{
"type": "ReserveEnergy",
"count": 61
}
]
}
"h_speedDash"
"h_getBlueSpeedMaxRunway"
{
"or": [
"canPreciseReserveRefill",
{
"resourceConsumed": [
{
"type": "ReserveEnergy",
"count": 15
}
]
}
]
}
{
"resourceAtMost": [
{
"type": "RegularEnergy",
"count": 1
}
]
}
{
"heatFrames": 0
}Clears obstacles: A Dev note: The zero shinespark requirement is to satisfy the tests, by marking that the shinecharge is used; the actual shinespark energy usage is accounted for in the resourceConsumed. This could possibly be rewritten to express the energy usage in the normal way. We don't include a `h_ShinesparksCostEnergy` requirement here, because even if shinesparks don't cost energy, it is still possible to use heat damage to make the shinespark stop in the correct place. FIXME: the regular energy required could be reduced in that case. FIXME: This should be split into 4->9 and 9->2 strats. FIXME: A h_speedButSlow variant could be added. |
|


Use a stored spark (flash suit or blue suit) to spark left through the Speed blocks. If Speed Booster is available, run to the right and back to get blue speed to go through the rest of the Speed blocks. Otherwise use Morph with either Spring Ball, Bombs, or Power Bombs to navigate above them. If performing the spark with low energy, there is a risk of ending the spark above the spikes or in front of the Pirate; to be safe, assuming Samus has heat protection, begin the shinespark at the door (in either this or the other room) with between 81 and 96 energy, or at least 113 energy; with a buffered crumble jump to the right, up to 102 energy can work. Requires: {
"notable": "Reverse Spark"
}
"h_storedSpark"
{
"or": [
{
"shinespark": {
"frames": 94,
"excessFrames": 10
}
},
{
"and": [
"h_heatProof",
"canControlShinesparkEnd",
{
"shinespark": {
"frames": 84,
"excessFrames": 45
}
}
]
}
]
}
{
"or": [
{
"and": [
"h_getBlueSpeedMaxRunway",
{
"heatFrames": 650
},
{
"or": [
"h_speedDash",
{
"and": [
"h_speedButSlow",
{
"heatFrames": 270
}
]
}
]
}
]
},
{
"and": [
"h_useSpringBall",
"canTrickyDodgeEnemies",
{
"heatFrames": 1120
}
]
},
{
"and": [
"h_bombThings",
"canTrickyDodgeEnemies",
{
"heatFrames": 1140
}
]
}
]
}Clears obstacles: A Dev note: FIXME: This should be split into 4->9 and 9->2 strats. |
|
Requires: {
"heatFrames": 145
}
{
"or": [
"canDash",
{
"heatFrames": 25
}
]
}Unlocks doors: {"types":["missiles"],"requires":[{"heatFrames":30}]}
{"types":["super"],"requires":[]}
{"types":["powerbomb"],"requires":[{"heatFrames":70}]} |
From: 5
Top Right Door
To: 1
Top of the Shaft Left Door
Requires: "canDash"
{
"heatFrames": 130
}Exit condition: {
"leaveWithRunway": {
"length": 8,
"openEnd": 1,
"gentleUpTiles": 4
}
}Unlocks doors: {"types":["missiles"],"requires":[{"heatFrames":50}]}
{"types":["super"],"requires":[]}
{"types":["powerbomb"],"requires":[{"heatFrames":70}]} |
From: 5
Top Right Door
To: 1
Top of the Shaft Left Door


Requires: "canTrickyJump"
{
"or": [
{
"and": [
"HiJump",
{
"heatFrames": 120
}
]
},
{
"and": [
"canPreciseWallJump",
{
"heatFrames": 130
}
]
}
]
}
{
"or": [
"canDash",
{
"heatFrames": 15
}
]
}Unlocks doors: {"types":["missiles"],"requires":[{"heatFrames":30}]}
{"types":["super"],"requires":[]}
{"types":["powerbomb"],"requires":[{"heatFrames":70}]} |
|


Either jump over a Cacatac or tank a spike hit. Perform a mid-air spark through the speed blocks. Then run to the right and back to get speed to go through the rest. If performing the spark with low energy, there is a risk of ending the spark above the spikes or in front of the Pirate; to be safe, assuming Samus has heat protection, begin the shinespark with between 73 and 88 energy, or at least 106 energy; with a buffered crumble jump to the right, up to 94 energy can work. Entrance condition: {
"comeInShinecharging": {
"length": 5,
"openEnd": 1
}
}Requires: {
"notable": "Reverse Spark"
}
"canShinechargeMovementTricky"
"canTrickyJump"
{
"or": [
{
"enemyDamage": {
"enemy": "Cacatac",
"type": "spike",
"hits": 1
}
},
"canBePatient"
]
}
{
"or": [
{
"shinespark": {
"frames": 88,
"excessFrames": 11
}
},
{
"and": [
"h_heatProof",
"canControlShinesparkEnd",
{
"shinespark": {
"frames": 88,
"excessFrames": 44
}
}
]
}
]
}
{
"heatFrames": 825
}
{
"or": [
"h_speedDash",
{
"and": [
"h_speedButSlow",
{
"heatFrames": 270
}
]
}
]
}
"h_getBlueSpeedMaxRunway"
{
"or": [
"canSpeedball",
{
"heatFrames": 15
}
]
}Clears obstacles: A Dev note: The canBePatient represents retrying until RNG works out to be able to jump over one of the Cacatacs without taking a hit. There is a possibility of getting a lucky drop from one of the two Pirates; but since it is low probability, we don't model it. The speedball exit is technically not a valid way to leave normally (e.g. in case the next room is heated and Samus needs to jump); but if necessary, it is possible to unmorph near the transition. FIXME: This should be split into 5->9 and 9->2 strats. |
From: 5
Top Right Door
To: 2
Far Left Door
Either jump over a Cacatac, tank a spike hit, or farm it if possible. While preparing to spark left through the speed blocks, press pause so that the pause hits during the shinespark wind-up Using reserves, try to refill to exactly 84 energy, the minimum amount needed to reliably break through the Speed blocks (assuming no heat protection). Hold jump and left while unpausing, to buffer activating the horizontal shinespark. After the shinespark ends, run left and press pause before reaching zero energy, tanking the Pirate hit while at zero energy. Refill to between about 11 and 13 energy, and continue running to the left, using i-frames to pass through the next Pirate. Continue to pause abuse 4 more times, trying to refill to between 11 and 13 energy each time except for the last. Arm pumping may be used but is not required and has little benefit; in any case, arm pumping should not be used until beginning to run through the Speed blocks, otherwise Samus will not obtain blue speed in time and will bonk into them. Entrance condition: {
"comeInShinecharging": {
"length": 5,
"openEnd": 1
}
}Requires: {
"notable": "Reverse Spark With Pause Abuse"
}
"canShinechargeMovementTricky"
"canTrickyJump"
"canControlShinesparkEnd"
"canPauseAbuse"
{
"resourceAvailable": [
{
"type": "RegularEnergy",
"count": 99
}
]
}
{
"shinespark": {
"frames": 0,
"excessFrames": 0
}
}
{
"resourceConsumed": [
{
"type": "ReserveEnergy",
"count": 80
}
]
}
"h_speedDash"
"h_getBlueSpeedMaxRunway"
{
"or": [
{
"resourceConsumed": [
{
"type": "ReserveEnergy",
"count": 20
}
]
},
{
"and": [
{
"resourceMissingAtMost": [
{
"type": "Super",
"count": 0
}
]
},
{
"or": [
{
"ammo": {
"type": "Missile",
"count": 1
}
},
"Grapple",
"Plasma",
{
"and": [
"Wave",
"Spazer"
]
}
]
}
]
}
]
}
{
"or": [
"canPreciseReserveRefill",
{
"resourceConsumed": [
{
"type": "ReserveEnergy",
"count": 15
}
]
}
]
}
{
"resourceAtMost": [
{
"type": "RegularEnergy",
"count": 1
}
]
}
{
"heatFrames": 0
}Clears obstacles: A Dev note: The zero shinespark requirement is to satisfy the tests, by marking that the shinecharge is used; the actual shinespark energy usage is accounted for in the resourceConsumed. This could possibly be rewritten to express the energy usage in the normal way. We don't include a `h_ShinesparksCostEnergy` requirement here, because even if shinesparks don't cost energy, it is still possible to use heat damage to make the shinespark stop in the correct place. FIXME: the regular energy required could be reduced in that case. FIXME: This should be split into 5->9 and 9->2 strats. FIXME: A h_speedButSlow variant could be added. |
|
Requires: "h_heatProof"
{
"or": [
{
"and": [
{
"resetRoom": {
"nodes": [
1
]
}
},
{
"cycleFrames": 450
}
]
},
{
"and": [
{
"resetRoom": {
"nodes": [
3
]
}
},
{
"cycleFrames": 300
}
]
},
{
"and": [
{
"resetRoom": {
"nodes": [
4
]
}
},
{
"cycleFrames": 360
}
]
},
{
"and": [
{
"resetRoom": {
"nodes": [
5
]
}
},
{
"cycleFrames": 200
}
]
}
]
}
{
"or": [
{
"and": [
"canDash",
{
"or": [
"Plasma",
{
"and": [
"Wave",
{
"cycleFrames": 30
}
]
},
{
"and": [
"Spazer",
{
"cycleFrames": 30
}
]
},
{
"and": [
"Grapple",
{
"cycleFrames": 45
}
]
},
{
"cycleFrames": 120
}
]
}
]
},
{
"and": [
{
"haveBlueSuit": {}
},
{
"cycleFrames": 40
}
]
}
]
}Resets obstacles: A Farm cycle drops: 2 Cacatac Dev note: Some frames added to account for spike RNG. |
From: 5
Top Right Door
To: 6
Bottom Right Junction
Kill a Cacatac and collect its drop along the way. There will be a risk of a spike hit unless the Cacatac is safely killed from above. Requires: "canDash"
{
"or": [
"canInsaneJump",
{
"and": [
{
"enemyDamage": {
"enemy": "Cacatac",
"type": "spike",
"hits": 1
}
},
{
"heatFrames": 20
}
]
},
{
"and": [
"canDodgeWhileShooting",
{
"heatFrames": 40
}
]
}
]
}
{
"or": [
{
"and": [
"Wave",
{
"heatFramesWithEnergyDrops": {
"frames": 85,
"drops": [
{
"enemy": "Cacatac",
"count": 1
}
]
}
}
]
},
{
"and": [
{
"ammo": {
"type": "Missile",
"count": 1
}
},
{
"heatFramesWithEnergyDrops": {
"frames": 90,
"drops": [
{
"enemy": "Cacatac",
"count": 1
}
]
}
}
]
},
{
"and": [
{
"resourceAvailable": [
{
"type": "Super",
"count": 1
}
]
},
{
"heatFrames": 90
}
]
},
{
"and": [
"Plasma",
{
"heatFramesWithEnergyDrops": {
"frames": 90,
"drops": [
{
"enemy": "Cacatac",
"count": 1
}
]
}
}
]
},
{
"and": [
"Spazer",
{
"heatFramesWithEnergyDrops": {
"frames": 95,
"drops": [
{
"enemy": "Cacatac",
"count": 1
}
]
}
}
]
},
{
"and": [
"Grapple",
{
"heatFramesWithEnergyDrops": {
"frames": 100,
"drops": [
{
"enemy": "Cacatac",
"count": 1
}
]
}
}
]
},
{
"and": [
"ScrewAttack",
{
"heatFramesWithEnergyDrops": {
"frames": 100,
"drops": [
{
"enemy": "Cacatac",
"count": 1
}
]
}
}
]
},
{
"heatFramesWithEnergyDrops": {
"frames": 135,
"drops": [
{
"enemy": "Cacatac",
"count": 1
}
]
}
}
]
}
{
"heatFrames": 95
} |
From: 5
Top Right Door
To: 6
Bottom Right Junction
Kill both Cacatacs and collect their drops along the way. There will be a risk of a spike hit unless the first Cacatac is safely killed from above. Requires: "canDash"
{
"or": [
"canInsaneJump",
{
"and": [
{
"enemyDamage": {
"enemy": "Cacatac",
"type": "spike",
"hits": 1
}
},
{
"heatFrames": 20
}
]
},
{
"and": [
"canDodgeWhileShooting",
{
"heatFrames": 40
}
]
}
]
}
{
"or": [
{
"and": [
"Wave",
{
"or": [
"Spazer",
"Plasma"
]
},
{
"heatFramesWithEnergyDrops": {
"frames": 105,
"drops": [
{
"enemy": "Cacatac",
"count": 2
}
]
}
}
]
},
{
"and": [
"Plasma",
{
"heatFramesWithEnergyDrops": {
"frames": 115,
"drops": [
{
"enemy": "Cacatac",
"count": 2
}
]
}
}
]
},
{
"and": [
"canUseGrapple",
{
"heatFramesWithEnergyDrops": {
"frames": 125,
"drops": [
{
"enemy": "Cacatac",
"count": 2
}
]
}
}
]
},
{
"and": [
"Wave",
{
"heatFramesWithEnergyDrops": {
"frames": 135,
"drops": [
{
"enemy": "Cacatac",
"count": 2
}
]
}
}
]
},
{
"and": [
{
"ammo": {
"type": "Missile",
"count": 2
}
},
{
"heatFramesWithEnergyDrops": {
"frames": 135,
"drops": [
{
"enemy": "Cacatac",
"count": 2
}
]
}
}
]
},
{
"and": [
"Spazer",
{
"heatFramesWithEnergyDrops": {
"frames": 145,
"drops": [
{
"enemy": "Cacatac",
"count": 2
}
]
}
}
]
},
{
"and": [
"ScrewAttack",
{
"heatFramesWithEnergyDrops": {
"frames": 175,
"drops": [
{
"enemy": "Cacatac",
"count": 2
}
]
}
}
]
},
{
"heatFramesWithEnergyDrops": {
"frames": 205,
"drops": [
{
"enemy": "Cacatac",
"count": 2
}
]
}
}
]
}
{
"heatFrames": 95
} |
From: 5
Top Right Door
To: 6
Bottom Right Junction
Use a Power Bomb to safely kill both Cacatacs, and collect their drops along the way. Requires: "canDash"
"h_usePowerBomb"
{
"heatFramesWithEnergyDrops": {
"frames": 180,
"drops": [
{
"enemy": "Cacatac",
"count": 2
}
]
}
}
{
"heatFrames": 95
} |
From: 5
Top Right Door
To: 6
Bottom Right Junction
Try to jump over the Cacatacs without taking damage. With unlucky RNG, a spike hit may be unavoidable. Requires: {
"heatFrames": 180
}
{
"or": [
"canInsaneJump",
{
"and": [
{
"enemyDamage": {
"enemy": "Cacatac",
"type": "spike",
"hits": 1
}
},
{
"heatFrames": 20
}
]
},
{
"and": [
"h_heatProof",
{
"or": [
"Wave",
"canDodgeWhileShooting",
"h_usePowerBomb"
]
}
]
}
]
}
{
"or": [
"canDash",
{
"heatFrames": 20
}
]
} |
|
Requires: {
"obstaclesCleared": [
"A"
]
}
"h_getBlueSpeedMaxRunway"
{
"heatFrames": 500
}
{
"or": [
"h_speedDash",
{
"and": [
"h_speedButSlow",
{
"heatFrames": 330
}
]
}
]
}Dev note: The blocks will already be broken, the blue speed is to kill the enemies. |
From: 6
Bottom Right Junction
To: 5
Top Right Door
Kill a Cacatac and collect its drop along the way. There will be a risk of a spike hit unless the first Cacatac is safely killed from below. Requires: "canDash"
{
"or": [
"canInsaneJump",
{
"and": [
{
"enemyDamage": {
"enemy": "Cacatac",
"type": "spike",
"hits": 1
}
},
{
"heatFrames": 20
}
]
},
{
"and": [
"canDodgeWhileShooting",
{
"heatFrames": 40
}
]
}
]
}
{
"or": [
{
"and": [
{
"ammo": {
"type": "Missile",
"count": 1
}
},
{
"heatFramesWithEnergyDrops": {
"frames": 90,
"drops": [
{
"enemy": "Cacatac",
"count": 1
}
]
}
}
]
},
{
"and": [
{
"resourceAvailable": [
{
"type": "Super",
"count": 1
}
]
},
{
"heatFrames": 90
}
]
},
{
"and": [
"Plasma",
{
"heatFramesWithEnergyDrops": {
"frames": 90,
"drops": [
{
"enemy": "Cacatac",
"count": 1
}
]
}
}
]
},
{
"and": [
"Grapple",
{
"heatFramesWithEnergyDrops": {
"frames": 105,
"drops": [
{
"enemy": "Cacatac",
"count": 1
}
]
}
}
]
},
{
"and": [
"ScrewAttack",
{
"heatFramesWithEnergyDrops": {
"frames": 105,
"drops": [
{
"enemy": "Cacatac",
"count": 1
}
]
}
}
]
},
{
"and": [
"Wave",
{
"heatFramesWithEnergyDrops": {
"frames": 105,
"drops": [
{
"enemy": "Cacatac",
"count": 1
}
]
}
}
]
},
{
"and": [
"Spazer",
{
"heatFramesWithEnergyDrops": {
"frames": 105,
"drops": [
{
"enemy": "Cacatac",
"count": 1
}
]
}
}
]
},
{
"heatFramesWithEnergyDrops": {
"frames": 120,
"drops": [
{
"enemy": "Cacatac",
"count": 1
}
]
}
}
]
}
{
"heatFrames": 60
} |
From: 6
Bottom Right Junction
To: 5
Top Right Door
Kill both Cacatacs and collect their drops along the way. There will be a risk of a spike hit unless the first Cacatac is safely killed from below. Requires: "canDash"
{
"or": [
"canInsaneJump",
{
"and": [
{
"enemyDamage": {
"enemy": "Cacatac",
"type": "spike",
"hits": 1
}
},
{
"heatFrames": 20
}
]
},
{
"and": [
"canDodgeWhileShooting",
{
"heatFrames": 40
}
]
}
]
}
{
"or": [
{
"and": [
"Plasma",
{
"heatFramesWithEnergyDrops": {
"frames": 115,
"drops": [
{
"enemy": "Cacatac",
"count": 2
}
]
}
}
]
},
{
"and": [
{
"ammo": {
"type": "Missile",
"count": 1
}
},
{
"heatFramesWithEnergyDrops": {
"frames": 135,
"drops": [
{
"enemy": "Cacatac",
"count": 2
}
]
}
}
]
},
{
"and": [
"Grapple",
{
"heatFramesWithEnergyDrops": {
"frames": 135,
"drops": [
{
"enemy": "Cacatac",
"count": 2
}
]
}
}
]
},
{
"and": [
"Wave",
{
"heatFramesWithEnergyDrops": {
"frames": 145,
"drops": [
{
"enemy": "Cacatac",
"count": 2
}
]
}
}
]
},
{
"and": [
"Spazer",
{
"heatFramesWithEnergyDrops": {
"frames": 145,
"drops": [
{
"enemy": "Cacatac",
"count": 2
}
]
}
}
]
},
{
"and": [
"ScrewAttack",
{
"heatFramesWithEnergyDrops": {
"frames": 165,
"drops": [
{
"enemy": "Cacatac",
"count": 2
}
]
}
}
]
},
{
"and": [
{
"heatFramesWithEnergyDrops": {
"frames": 195,
"drops": [
{
"enemy": "Cacatac",
"count": 2
}
]
}
},
{
"or": [
"canBeVeryPatient",
{
"enemyDamage": {
"enemy": "Cacatac",
"type": "spike",
"hits": 1
}
},
{
"heatFrames": 30
}
]
}
]
}
]
}
{
"heatFrames": 65
} |
From: 6
Bottom Right Junction
To: 5
Top Right Door
Use a Power Bomb to safely kill both Cacatacs from below, and collect their drops along the way. Requires: "canDash"
"h_usePowerBomb"
{
"heatFramesWithEnergyDrops": {
"frames": 170,
"drops": [
{
"enemy": "Cacatac",
"count": 2
}
]
}
}
{
"heatFrames": 65
} |
From: 6
Bottom Right Junction
To: 5
Top Right Door
Try to jump over the Cacatacs without taking damage. With unlucky RNG, a spike hit may be unavoidable. Requires: "canDash"
{
"or": [
"canInsaneJump",
{
"and": [
"canTrickyJump",
{
"enemyDamage": {
"enemy": "Cacatac",
"type": "spike",
"hits": 1
}
},
{
"heatFrames": 20
}
]
},
{
"and": [
{
"enemyDamage": {
"enemy": "Cacatac",
"type": "contact",
"hits": 1
}
},
{
"heatFrames": 20
}
]
}
]
}
{
"heatFrames": 170
} |
From: 6
Bottom Right Junction
To: 9
Right of Crumble Bridge, Left of Main Shaft Speed Blocks
Requires: {
"obstaclesCleared": [
"A"
]
}
{
"heatFrames": 150
}
{
"or": [
"h_speedDash",
{
"heatFrames": 20
}
]
} |
From: 7
G-Mode, Bottom Right (Started at Right)
To: 2
Far Left Door
Exit G-mode before the crumble bridge, this is when the floor starts sloping up slightly. Without a way to kill the pirates, touch the camera scroll block briefly before the bridge, then run over the bridge and through the pirates before fixing the camera, to not have to deal with the pirates. Otherwise, it may be worth killing the pirates for some Energy to be able to tank a hit later. Use a Bomb, Power Bomb, or Spring Ball to get over the Speed blocks. Then carefully avoid or kill the remaining enemies. Requires: "canGMode"
"h_heatProof"
"canDash"
{
"or": [
"h_bombThings",
"h_useSpringBall"
]
}
{
"or": [
"h_usePowerBomb",
"h_hasBeamUpgrade",
"ScrewAttack",
{
"ammo": {
"type": "Missile",
"count": 3
}
},
{
"ammo": {
"type": "Super",
"count": 3
}
},
"canComplexGMode"
]
} |
From: 7
G-Mode, Bottom Right (Started at Right)
To: 2
Far Left Door
The crumble bridge will be air. Either tank a spike hit, carefully Space Jump over it, or with SpeedBooster, use the full runway to run over the pit. Note that there is a slight incline just before the bridge, which can be used as an indicator for where to Space Jump. Requires: {
"or": [
{
"and": [
"canTrickyJump",
"SpaceJump"
]
},
"h_speedJump",
{
"spikeHits": 1
}
]
}
"h_heatedGModeOffCameraDoor"Exit condition: {
"leaveNormally": {}
}Unlocks doors: {"types":["missiles"],"requires":[{"heatFrames":50}]}
{"types":["super"],"requires":[]}
{"types":["powerbomb"],"requires":[{"heatFrames":110}]}Dev note: Requires leaving the room, as Samus is off camera and shouldn't be expected to do more in-room. |
From: 9
Right of Crumble Bridge, Left of Main Shaft Speed Blocks
To: 2
Far Left Door
Run right and back to kill the pirates while blue. Requires: {
"obstaclesCleared": [
"A"
]
}
"h_getBlueSpeedMaxRunway"
{
"heatFrames": 480
}
{
"or": [
"h_speedDash",
{
"and": [
"h_speedButSlow",
{
"simpleHeatFrames": 320
}
]
}
]
} |
From: 9
Right of Crumble Bridge, Left of Main Shaft Speed Blocks
To: 2
Far Left Door
Run left and press pause before reaching zero energy, tanking the Pirate hit while at zero energy. Refill, and continue running to the left, using i-frames to pass through the next Pirate. Requires: "canPauseAbuse"
{
"resourceAtMost": [
{
"type": "RegularEnergy",
"count": 1
}
]
}
{
"resourceConsumed": [
{
"type": "ReserveEnergy",
"count": 1
}
]
}
"h_getBlueSpeedMaxRunway"
"h_speedDash"
{
"heatFrames": 335
}Dev note: FIXME: A h_speedButSlow variant could be added. |
From: 9
Right of Crumble Bridge, Left of Main Shaft Speed Blocks
To: 2
Far Left Door
Kill the pirates while running left and gaining blue speed. Requires: "h_getBlueSpeedMaxRunway"
{
"or": [
"Plasma",
{
"ammo": {
"type": "Missile",
"count": 2
}
},
{
"ammo": {
"type": "Super",
"count": 2
}
},
{
"and": [
"Ice",
"Wave",
"Spazer"
]
},
{
"and": [
"Ice",
"Spazer",
{
"heatFrames": 30
}
]
},
{
"and": [
"Ice",
"Wave",
{
"heatFrames": 30
}
]
},
{
"and": [
"Wave",
"Spazer",
{
"heatFrames": 30
}
]
},
{
"and": [
"Wave",
{
"heatFrames": 50
}
]
}
]
}
{
"heatFrames": 350
}
{
"or": [
"h_speedDash",
{
"and": [
"h_speedButSlow",
{
"simpleHeatFrames": 260
}
]
}
]
} |
From: 9
Right of Crumble Bridge, Left of Main Shaft Speed Blocks
To: 2
Far Left Door
Kill the two pirates while in health bomb range, to force Energy drops. It is possible to jump over the second pirate to then fight it on solid ground. Samus needs a large Energy drop with 75% damage reduction, or both large Energy drops otherwise. Cross the speed blocks by tanking a pirate laser hit and boosting up. Requires: "canDash"
"h_heatProof"
{
"or": [
"h_hasBeamUpgrade",
{
"ammo": {
"type": "Missile",
"count": 2
}
},
{
"ammo": {
"type": "Super",
"count": 2
}
},
"ScrewAttack"
]
}
{
"resourceAtMost": [
{
"type": "Energy",
"count": 29
}
]
}
"h_partialEnemyDamageReduction"
{
"or": [
"h_fullEnemyDamageReduction",
"canBeVeryLucky"
]
}
"canMidAirMorph"
"canNeutralDamageBoost" |
From: 9
Right of Crumble Bridge, Left of Main Shaft Speed Blocks
To: 2
Far Left Door
Kill the first pirate, then jump over or kill the second. It is possible to jump straight into the first morph tunnel. Without a way to kill the pirates, it is instead possible to tank or pause abuse a hit and then Samus will have i-frames when running through the second one. Cross the speed blocks with Bombs, a Power Bomb, Spring Ball, or by tanking a pirate laser hit and boosting up. The rest of the room can be tricky to cross damageless, particularly if Samus has no way to kill the enemies. Carefully avoid the Multiviola in the middle of the sloped section by slowing down, and kill the last Multiviola to prevent it hitting Samus in the transition. Requires: "canDash"
"canMidAirMorph"
"canTrickyJump"
{
"or": [
{
"enemyDamage": {
"enemy": "Red Space Pirate (standing)",
"type": "contact",
"hits": 1
}
},
"Plasma",
{
"ammo": {
"type": "Missile",
"count": 1
}
},
{
"ammo": {
"type": "Super",
"count": 1
}
},
{
"and": [
"Ice",
"Wave",
"Spazer"
]
},
{
"and": [
"Ice",
"Spazer",
{
"heatFrames": 30
}
]
},
{
"and": [
"Ice",
"Wave",
{
"heatFrames": 30
}
]
},
{
"and": [
"Wave",
"Spazer",
{
"heatFrames": 30
}
]
},
{
"and": [
{
"or": [
"Ice",
"Wave",
"Spazer",
"ScrewAttack"
]
},
{
"heatFrames": 50
}
]
},
{
"and": [
"canPseudoScrew",
{
"heatFrames": 85
}
]
},
{
"and": [
"canPauseAbuse",
{
"resourceAtMost": [
{
"type": "RegularEnergy",
"count": 1
}
]
},
{
"resourceConsumed": [
{
"type": "ReserveEnergy",
"count": 1
}
]
}
]
}
]
}
{
"or": [
"h_useSpringBall",
{
"and": [
"h_bombThings",
{
"heatFrames": 60
}
]
},
{
"and": [
"canNeutralDamageBoost",
{
"enemyDamage": {
"enemy": "Red Space Pirate (standing)",
"type": "laser",
"hits": 1
}
},
{
"heatFrames": 120
}
]
}
]
}
{
"or": [
"h_heatProof",
"canTrickyDodgeEnemies",
{
"enemyDamage": {
"enemy": "Multiviola",
"type": "contact",
"hits": 1
}
}
]
}
{
"or": [
"Plasma",
"ScrewAttack",
{
"ammo": {
"type": "Missile",
"count": 5
}
},
{
"ammo": {
"type": "Super",
"count": 5
}
},
{
"heatFrames": 150
}
]
}
{
"heatFrames": 970
}Dev note: canTrickyJump is used to simplify the logic, as there is no feasible way to get to this node without SpeedBooster without this skill level. |
From: 9
Right of Crumble Bridge, Left of Main Shaft Speed Blocks
To: 6
Bottom Right Junction
Requires: "canDash"
{
"obstaclesCleared": [
"A"
]
}
{
"heatFrames": 120
}
{
"or": [
"h_speedDash",
{
"heatFrames": 30
}
]
}Dev note: FIXME: Could have separate strats with tighter heat frames for going down or right. |
|
Break each of the crumble platforms to group the Sovas at the bottom of the room. Requires: "h_heatProof"
"canDodgeWhileShooting"
{
"or": [
{
"and": [
"canConsecutiveWallJump",
{
"or": [
"canCrumbleJump",
"SpaceJump",
"canPreciseWallJump"
]
},
{
"cycleFrames": 930
}
]
},
{
"and": [
"h_useSpringBall",
{
"cycleFrames": 1200
}
]
},
{
"and": [
"SpaceJump",
{
"cycleFrames": 1320
}
]
},
{
"and": [
"canDoubleBombJump",
"canLongIBJ",
{
"cycleFrames": 2340
}
]
},
{
"and": [
"canJumpIntoIBJ",
"canLongIBJ",
"canBePatient",
{
"cycleFrames": 4640
}
]
}
]
}
{
"or": [
"canCrumbleJump",
{
"cycleFrames": 300
}
]
}
{
"resetRoom": {
"nodes": [
1,
2
]
}
}
{
"or": [
{
"haveBlueSuit": {}
},
"Wave",
"Spazer",
"Plasma",
"Grapple",
{
"cycleFrames": 120
}
]
}
{
"or": [
"canDash",
{
"cycleFrames": 90
}
]
}Resets obstacles: A Farm cycle drops: 6 Sova Dev note: Climb from 2 to 1 if resetting with 2. |
|


Requires: "SpaceJump"
{
"heatFrames": 100
}
{
"or": [
"canDash",
{
"heatFrames": 30
}
]
}Clears obstacles: A |
|
Shoot the shot block, then crumble jump on the middle platform. Requires: "canCrumbleJump"
{
"heatFrames": 130
}
{
"or": [
"canDash",
{
"heatFrames": 20
}
]
} |
|
Shoot the shot block, then crumble spin jump on the middle platform. Requires: "canCrumbleJump"
"canTrickyJump"
{
"heatFrames": 115
}
{
"or": [
"canDash",
{
"heatFrames": 20
}
]
}Clears obstacles: A |
|
Jump and aim down to lower the camera so the middle platform Sova starts moving. Then freeze it by aiming down, shoot the shot block, and use the Sova as a stable platform. Requires: "canDash"
{
"notable": "Top Item Frozen Sova"
}
"canTrickyUseFrozenEnemies"
"canCarefulJump"
"canCameraManip"
{
"heatFrames": 220
}Clears obstacles: A Dev note: Wall jumping and using the same frozen Sova, or falling onto the Sova just below the item and then jumping to the top Sova could be added, but this would require an obstacle to ensure they haven't fallen or died, and is not really easier than a crumble jump. |
|

Jump and aim down to lower the camera so the middle platform Sova starts moving. Then shoot the shot block and walljump off the left side of the middle platform to reach the item. Requires: "canDash"
"canTrickyWallJump"
"canTrickyJump"
"canCameraManip"
{
"heatFrames": 230
}Clears obstacles: A |
|
If entering from the bottom door, a Sova will be in the way in the top left: either wall jump in place while waiting for it, or wall jump around it using two crumble platforms to the right. Requires: "canConsecutiveWallJump"
{
"or": [
"canDash",
{
"heatFrames": 30
}
]
}
{
"or": [
{
"and": [
"HiJump",
{
"heatFrames": 290
},
{
"or": [
"canCrumbleJump",
{
"heatFrames": 30
}
]
}
]
},
{
"heatFrames": 360
}
]
}
{
"or": [
"ScrewAttack",
{
"haveBlueSuit": {}
},
{
"and": [
"canPreciseWallJump",
"canTrickyJump",
{
"heatFrames": 30
}
]
},
{
"and": [
"canTrickyWallJump",
{
"heatFrames": 80
}
]
},
{
"heatFrames": 330
}
]
}
{
"or": [
"canDodgeWhileShooting",
{
"heatFrames": 300
}
]
} |
|
Requires: {
"resetRoom": {
"nodes": [
2
]
}
}
{
"or": [
"canQuickDrop",
{
"cycleFrames": 30
}
]
}
{
"or": [
{
"and": [
"Wave",
{
"cycleFrames": 120
}
]
},
{
"and": [
"Grapple",
"canDodgeWhileShooting",
{
"cycleFrames": 240
}
]
},
{
"and": [
"Morph",
"canTrickyJump",
{
"cycleFrames": 300
}
]
},
{
"and": [
"canTrivialMidAirMorph",
"Bombs",
{
"cycleFrames": 1100
}
]
},
{
"and": [
"Morph",
{
"or": [
{
"notable": "Return Through Crumble Blocks"
},
"Bombs"
]
},
{
"or": [
"canWallJump",
{
"and": [
"HiJump",
"canSpringBallJumpMidAir",
"h_doubleEquipmentScreenCycleFrames"
]
},
"SpaceJump"
]
},
{
"cycleFrames": 510
}
]
},
{
"cycleFrames": 2160
}
]
}
{
"or": [
"canDash",
{
"cycleFrames": 90
}
]
}Resets obstacles: A, B, C, D Farm cycle drops: 1 Sova |
From: 2
Middle Left Door
To: 2
Middle Left Door
Requires: "h_usePowerBomb"
{
"or": [
{
"resetRoom": {
"nodes": [
2
]
}
},
{
"and": [
{
"resetRoom": {
"nodes": [
4
]
}
},
{
"or": [
{
"and": [
{
"getBlueSpeed": {
"usedTiles": 18,
"gentleUpTiles": 2,
"gentleDownTiles": 3,
"openEnd": 0
}
},
{
"cycleFrames": 420
}
]
},
{
"and": [
"canMockball",
{
"cycleFrames": 60
}
]
}
]
}
]
}
]
}
{
"or": [
"canWallJump",
"HiJump",
"SpaceJump",
{
"and": [
"canSpringBallJumpMidAir",
"h_doubleEquipmentScreenCycleFrames",
{
"cycleFrames": 30
}
]
}
]
}
{
"or": [
{
"and": [
"canDash",
{
"or": [
{
"and": [
"ScrewAttack",
{
"cycleFrames": 1080
}
]
},
{
"and": [
"Wave",
{
"cycleFrames": 1140
}
]
},
{
"and": [
"Spazer",
{
"cycleFrames": 990
}
]
},
{
"and": [
"Plasma",
{
"cycleFrames": 850
}
]
},
{
"and": [
"canMockball",
{
"ammo": {
"type": "PowerBomb",
"count": 1
}
},
{
"cycleFrames": 900
}
]
}
]
}
]
},
{
"and": [
{
"haveBlueSuit": {}
},
{
"cycleFrames": 1200
}
]
}
]
}Clears obstacles: A, B, C, D Farm cycle drops: 6 Mella, 3 Sm. Dessgeega Dev note: FIXME: The cycleFrame numbers for resetting at node 4 don't make sense. |
From: 2
Middle Left Door
To: 8
Right of Left Shutter, Raised Right Shutter
Run into the room, and perform a very low short-hop mockball, delaying it so that Samus morphs right before the gate. Entrance condition: {
"comeInRunning": {
"speedBooster": "yes",
"minTiles": 5
}
}Requires: "h_speedJump" "canInsaneJump" "canMockball" Dev note: Theoretically this can be done with 4 tiles (technically even 3.4375 tiles) but would require higher movement tech. |
From: 2
Middle Left Door
To: 8
Right of Left Shutter, Raised Right Shutter


Run into the room with sufficient speed, perform a very low spin jump, and aim down to clip inside the gate. This requires entering with extra run speed of at least $2.D. Ideally the spin jump should be performed by tapping jump for exactly one frame. If entering with near-minimal speed, a frame-perfect jump is required. Entrance condition: {
"comeInRunning": {
"speedBooster": "yes",
"minTiles": 11
}
}Requires: {
"notable": "Speedy Crouch Gate Clip"
}
"h_speedJump"
"canCrouchGateClip" |
From: 3
Bottom Left Door
To: 3
Bottom Left Door
Requires: {
"resetRoom": {
"nodes": [
3
]
}
}
{
"or": [
{
"and": [
"canDash",
{
"or": [
{
"and": [
"ScrewAttack",
{
"cycleFrames": 600
}
]
},
{
"and": [
"Wave",
{
"cycleFrames": 630
}
]
},
{
"and": [
"Spazer",
{
"cycleFrames": 600
}
]
},
{
"and": [
"Plasma",
{
"cycleFrames": 510
}
]
}
]
}
]
},
{
"and": [
{
"haveBlueSuit": {}
},
{
"cycleFrames": 650
}
]
}
]
}Clears obstacles: D Resets obstacles: A, B, C Farm cycle drops: 6 Mella, 3 Sm. Dessgeega |
From: 3
Bottom Left Door
To: 3
Bottom Left Door
Requires: "canDash"
{
"resetRoom": {
"nodes": [
3
]
}
}
"h_usePowerBomb"
"canTrickyJump"
"canLateralMidAirMorph"
{
"cycleFrames": 450
}Clears obstacles: D Resets obstacles: A, B, C Farm cycle drops: 4 Mella, 3 Sm. Dessgeega |
|
Avoid the first two magic frames by briefly releasing dash, to avoid gaining blue speed until after Samus has run over the bomb blocks. Fire a shot while running, to open the door and run through. Entrance condition: {
"comeInNormally": {}
}Requires: {
"notable": "Anti-Short Charge Hero Shot"
}
"h_speedDash"
"canHeroShot"Exit condition: {
"leaveWithRunway": {
"length": 45,
"openEnd": 1,
"minExtraRunSpeed": "$5.9"
}
}Unlocks doors: {"types":["super"],"requires":[]}
{"types":["missiles","powerbomb"],"requires":["never"]} |
|


Arm pump while approaching the left gate from the right, perform a very low spin jump, and aim down to clip inside the gate. Failure results in a soft-lock. Samus must use arm pumping to advance a minimum of about 6 pixels, to have an opportunity for a frame-perfect jump, with a single-frame tap of jump. If advancing by about 12 pixels or more, then tapping jump for 2 frames becomes possible (still frame-perfect). If advancing by about 16 pixels or more, then a 2-frame window for the jump becomes possible. Entrance condition: {
"comeInNormally": {}
}Requires: "canDash"
{
"notable": "Arm Pump Crouch Gate Clip"
}
"canCrouchGateClip" |
|
Entrance condition: {
"comeInNormally": {}
}Requires: "h_speedDash" |
From: 4
Right Door
To: 2
Middle Left Door
Entrance condition: {
"comeInWithStoredFallSpeed": {
"fallSpeedInTiles": 1
}
}Requires: "h_speedDash" Exit condition: {
"leaveWithStoredFallSpeed": {
"fallSpeedInTiles": 1
}
}Unlocks doors: {"types":["missiles","super"],"requires":[]}
{"types":["powerbomb"],"requires":["never"]} |
From: 4
Right Door
To: 2
Middle Left Door
Entrance condition: {
"comeInWithStoredFallSpeed": {
"fallSpeedInTiles": 2
}
}Requires: "h_speedDash" Exit condition: {
"leaveWithStoredFallSpeed": {
"fallSpeedInTiles": 2
}
}Unlocks doors: {"types":["missiles","super"],"requires":[]}
{"types":["powerbomb"],"requires":["never"]} |
|
Requires: {
"resetRoom": {
"nodes": [
4
]
}
}
"h_useMorphBombs"
{
"cycleFrames": 630
}
{
"or": [
"h_speedDash",
{
"and": [
"canMockball",
{
"cycleFrames": 50
}
]
}
]
}
{
"or": [
"ScrewAttack",
{
"and": [
{
"or": [
"canMidAirMorph",
"SpringBall"
]
},
{
"cycleFrames": 120
}
]
}
]
}Clears obstacles: A, B Resets obstacles: C, D Farm cycle drops: 1 Sova |
From: 4
Right Door
To: 7
Junction Below Power Bomb Blocks
Farm the enemies on the bottom - the first Sm. Dessgeega will give back the Power Bomb used to get down. Shinecharge and use any enemy at the bottom to interrupt. Entrance condition: {
"comeInWithRMode": {}
}Requires: "h_speedDash"
{
"or": [
"h_CrystalFlashForReserveEnergy",
{
"and": [
"h_usePowerBomb",
"h_RModeCanRefillReserves",
{
"or": [
{
"resourceMissingAtMost": [
{
"type": "Missile",
"count": 0
}
]
},
{
"resourceMissingAtMost": [
{
"type": "PowerBomb",
"count": 1
}
]
}
]
},
{
"partialRefill": {
"type": "ReserveEnergy",
"limit": 20
}
}
]
}
]
}
"h_shinechargeMaxRunway"
{
"autoReserveTrigger": {
"maxReserveEnergy": 95
}
}
"canRModeSparkInterrupt"Clears obstacles: C, D |
From: 4
Right Door
To: 7
Junction Below Power Bomb Blocks
Run under the gates with Speed Booster but do not break the Bomb Blocks. Moonfall twice to clip through the Power Bomb blocks. Entrance condition: {
"comeInWithStoredFallSpeed": {
"fallSpeedInTiles": 2
}
}Requires: "h_speedDash" "canMoonfall" |
From: 8
Right of Left Shutter, Raised Right Shutter
To: 4
Right Door
Requires: {
"or": [
"canDash",
"Morph"
]
} |
From: 8
Right of Left Shutter, Raised Right Shutter
To: 4
Right Door
Requires: "canDash" "canHeroShot" Exit condition: {
"leaveWithRunway": {
"length": 45,
"openEnd": 1
}
}Unlocks doors: {"types":["super"],"requires":[]}
{"types":["missiles","powerbomb"],"requires":["never"]} |
|
Requires: "canDash"
{
"heatFrames": 680
}
{
"or": [
"canDodgeWhileShooting",
{
"enemyDamage": {
"enemy": "Fune",
"type": "fireball",
"hits": 2
}
}
]
}Unlocks doors: {"types":["powerbomb"],"requires":[]} |
|


Requires: "canDash"
"Wave"
"Ice"
{
"heatFrames": 530
}Unlocks doors: {"types":["powerbomb"],"requires":[]} |
From: 1
Top Right Door
To: 3
Bottom Right Door
Requires: "canDash"
"Wave"
"Ice"
{
"heatFrames": 525
}Exit condition: {
"leaveWithRunway": {
"length": 12,
"openEnd": 0
}
}Unlocks doors: {"types":["missiles"],"requires":[{"heatFrames":50}]}
{"types":["super"],"requires":[]}
{"types":["powerbomb"],"requires":["never"]} |
From: 1
Top Right Door
To: 3
Bottom Right Door
Requires: "canDash"
"Wave"
"Ice"
{
"ammo": {
"type": "Super",
"count": 1
}
}
{
"heatFrames": 545
}Exit condition: {
"leaveWithRunway": {
"length": 13,
"openEnd": 0
}
}Unlocks doors: {"types":["missiles"],"requires":[{"heatFrames":50}]}
{"types":["super","powerbomb"],"requires":[]} |
|


Requires: "canDash"
"canPseudoScrew"
{
"heatFrames": 540
}Unlocks doors: {"types":["powerbomb"],"requires":[]} |
|


Requires: "canDash"
"ScrewAttack"
{
"heatFrames": 525
}Unlocks doors: {"types":["powerbomb"],"requires":[]}Dev note: The bottom Fune shoots a fireball which wastes all of the time save of a Leave with Runway strat. |
|

To minimize heat damage, immediately after landing use Grapple to open the door while running towards it, then jump over the gap and through the door. If the door is grappled too late, it may interfere with the jump. Entrance condition: {
"comeInWithGrappleTeleport": {
"blockPositions": [
[
5,
3
],
[
7,
2
]
]
}
}Requires: {
"heatFrames": 75
}
{
"or": [
"canDash",
{
"heatFrames": 35
}
]
} |
|
Requires: "h_heatProof"
{
"resetRoom": {
"nodes": [
2
]
}
}
{
"cycleFrames": 120
}
{
"or": [
{
"and": [
"canDash",
{
"or": [
"Wave",
"Spazer",
"Plasma",
{
"and": [
"ScrewAttack",
{
"cycleFrames": 35
}
]
},
{
"and": [
"Grapple",
{
"cycleFrames": 25
}
]
},
{
"cycleFrames": 60
}
]
}
]
},
{
"and": [
{
"haveBlueSuit": {}
},
{
"cycleFrames": 180
}
]
}
]
}Farm cycle drops: 3 Sova |
|
Requires: "Morph"
{
"heatFrames": 180
}
{
"or": [
"canDash",
{
"heatFrames": 20
}
]
} |
|
Requires: {
"heatFrames": 390
}
{
"or": [
"canDash",
{
"heatFrames": 100
}
]
}Unlocks doors: {"types":["missiles"],"requires":[{"heatFrames":25}]}
{"types":["super"],"requires":[]}
{"types":["powerbomb"],"requires":[{"heatFrames":40}]} |
|


To minimize heat damage, immediately after landing use Grapple to open the door while running towards it, then jump over the gap and through the door. If the door is grappled too late, it may interfere with the jump. Entrance condition: {
"comeInWithGrappleTeleport": {
"blockPositions": [
[
5,
3
],
[
7,
2
]
]
}
}Requires: {
"heatFrames": 75
}
{
"or": [
"canDash",
{
"heatFrames": 35
}
]
} |
|


Wait for the Sova to leave the tunnel and jump morph into them to bounce up into the hole. Requires: "canCrouchJump"
"canMidAirMorph"
{
"tech": "canNeutralDamageBoost"
}
{
"enemyDamage": {
"enemy": "Sova",
"type": "contact",
"hits": 1
}
}
{
"heatFrames": 470
}
{
"or": [
"canDash",
{
"heatFrames": 20
}
]
} |
|


Either use a Power Bomb or Wave + Plasma to kill all the Sovas off-camera, or if heat protection is available, wait for all the Sovas to come out of the tunnel. Requires: {
"or": [
{
"and": [
"HiJump",
{
"or": [
"canTrivialMidAirMorph",
"h_useSpringBall"
]
}
]
},
{
"and": [
"SpaceJump",
"canTrivialMidAirMorph",
{
"heatFrames": 40
}
]
},
{
"and": [
"canWallJump",
"canTrivialMidAirMorph"
]
},
"canSpringBallJumpMidAir",
{
"and": [
"canIBJ",
{
"heatFrames": 900
}
]
},
{
"and": [
"canJumpIntoIBJ",
{
"heatFrames": 520
}
]
},
{
"and": [
"canJumpIntoIBJ",
"canDoubleBombJump",
{
"heatFrames": 400
}
]
}
]
}
{
"or": [
"h_heatProof",
{
"and": [
"canDash",
{
"or": [
"h_usePowerBomb",
{
"and": [
"Wave",
"Plasma",
"canTrickyJump",
{
"heatFrames": 80
}
]
}
]
}
]
},
{
"and": [
{
"haveBlueSuit": {}
},
{
"heatFrames": 40
}
]
}
]
}
{
"or": [
{
"heatFrames": 180
},
{
"and": [
"canFarmWhileShooting",
{
"heatFramesWithEnergyDrops": {
"frames": 115,
"drops": [
{
"enemy": "Sova",
"count": 3
}
]
}
},
{
"heatFrames": 65
}
]
}
]
} |
|
Freeze a Sova once it enters one of the slots on the wall and then use it as a platform. Requires: "canMidAirMorph"
"canTrickyUseFrozenEnemies"
{
"or": [
{
"heatFrames": 780
},
{
"and": [
"canFarmWhileShooting",
{
"heatFramesWithEnergyDrops": {
"frames": 680,
"drops": [
{
"enemy": "Sova",
"count": 3
}
]
}
},
{
"heatFrames": 100
}
]
}
]
}
{
"or": [
"canDash",
{
"heatFrames": 20
}
]
} |
From: 4
Junction Below Morph Tunnel
To: 2
Middle Right Door
Smoothly jump into the morph tunnel while shooting the first Sova. Unmorph at the end of the tunnel to clear more Sovas as needed. Requires: "canMidAirMorph"
"canTrickyDodgeEnemies"
{
"or": [
"canPreciseWallJump",
"HiJump"
]
}
{
"enemyKill": {
"enemies": [
[
"Sova"
]
],
"explicitWeapons": [
"Wave",
"Spazer",
"Plasma"
]
}
}
"canFarmWhileShooting"
{
"heatFramesWithEnergyDrops": {
"frames": 100,
"drops": [
{
"enemy": "Sova",
"count": 3
}
]
}
}
"canDash"
{
"heatFrames": 120
} |
|
Requires: "canDash"
{
"or": [
{
"and": [
"HiJump",
{
"or": [
"canTrivialMidAirMorph",
"h_useSpringBall"
]
}
]
},
{
"and": [
"SpaceJump",
"canTrivialMidAirMorph",
{
"heatFrames": 40
}
]
},
{
"and": [
"canWallJump",
"canTrivialMidAirMorph"
]
},
"canSpringBallJumpMidAir",
{
"and": [
"canJumpIntoIBJ",
{
"heatFrames": 240
}
]
},
{
"and": [
"canJumpIntoIBJ",
"canDoubleBombJump",
{
"heatFrames": 120
}
]
},
{
"and": [
"canDoubleBombJump",
{
"heatFrames": 300
}
]
}
]
}
{
"heatFrames": 180
}
{
"enemyDamage": {
"enemy": "Sova",
"type": "contact",
"hits": 1
}
}Dev note: Base IBJ should kill the Sovas or go around. |
From: 4
Junction Below Morph Tunnel
To: 3
Bottom Right Door
Requires: "canDash"
"Morph"
{
"heatFrames": 140
}Exit condition: {
"leaveWithRunway": {
"length": 12,
"openEnd": 0
}
}Unlocks doors: {"types":["missiles"],"requires":[{"heatFrames":50}]}
{"types":["super"],"requires":[]}
{"types":["powerbomb"],"requires":[{"heatFrames":30}]} |
From: 4
Junction Below Morph Tunnel
To: 3
Bottom Right Door
Requires: "canDash"
"Morph"
{
"or": [
{
"and": [
{
"ammo": {
"type": "Super",
"count": 1
}
},
{
"heatFrames": 145
}
]
},
{
"and": [
{
"ammo": {
"type": "PowerBomb",
"count": 1
}
},
{
"heatFrames": 180
}
]
}
]
}Exit condition: {
"leaveWithRunway": {
"length": 13,
"openEnd": 0
}
}Unlocks doors: {"types":["missiles"],"requires":[{"heatFrames":50}]}
{"types":["super"],"requires":[]}
{"types":["powerbomb"],"requires":[]}Dev note: FIXME: unlocksDoors: powerbomb would not have an ammo cost as one is used as part of the strat. |
|
Requires: "h_usePowerBomb"
{
"heatFrames": 215
}
{
"or": [
"canDash",
{
"heatFrames": 20
}
]
} |
From: 5
Junction Above Morph Tunnel
To: 2
Middle Right Door


Requires: "h_usePowerBomb"
"canFarmWhileShooting"
{
"heatFramesWithEnergyDrops": {
"frames": 150,
"drops": [
{
"enemy": "Sova",
"count": 3
}
]
}
}
{
"heatFrames": 65
}
{
"or": [
"canDash",
{
"heatFrames": 20
}
]
} |
|


Requires: {
"heatFrames": 185
}
{
"or": [
"canDash",
{
"heatFrames": 125
}
]
} |
From: 1
Left Door
To: 2
Right Door
Requires: "canDash"
"canTrickyUseFrozenEnemies"
{
"heatFrames": 240
}Exit condition: {
"leaveWithRunway": {
"length": 5,
"openEnd": 1
}
}Unlocks doors: {"types":["missiles"],"requires":[{"heatFrames":50}]}
{"types":["super"],"requires":[]}
{"types":["powerbomb"],"requires":["never"]} |
|
Requires: "canDash"
{
"heatFrames": 170
}Exit condition: {
"leaveWithRunway": {
"length": 3,
"openEnd": 1
}
}Unlocks doors: {"types":["missiles"],"requires":[{"heatFrames":30}]}
{"types":["super"],"requires":[]}
{"types":["powerbomb"],"requires":[{"heatFrames":60}]} |
|
Entrance condition: {
"comeInRunning": {
"speedBooster": "any",
"minTiles": 3
}
}Requires: "canDash"
"SpaceJump"
"canCarefulJump"
{
"heatFrames": 135
} |
|

Requires: {
"heatFrames": 195
}
{
"or": [
"canDash",
{
"heatFrames": 125
}
]
} |
From: 2
Right Door
To: 1
Left Door
Requires: "canDash"
"canTrickyUseFrozenEnemies"
{
"heatFrames": 330
}Exit condition: {
"leaveWithRunway": {
"length": 5,
"openEnd": 1
}
}Unlocks doors: {"types":["missiles"],"requires":[{"heatFrames":50}]}
{"types":["super"],"requires":[]}
{"types":["powerbomb"],"requires":["never"]} |
|
Requires: "canDash"
{
"heatFrames": 190
}Exit condition: {
"leaveWithRunway": {
"length": 3,
"openEnd": 1
}
}Unlocks doors: {"types":["missiles"],"requires":[{"heatFrames":30}]}
{"types":["super"],"requires":[]}
{"types":["powerbomb"],"requires":[{"heatFrames":60}]} |
|
Entrance condition: {
"comeInRunning": {
"speedBooster": "any",
"minTiles": 3
}
}Requires: "canDash"
"SpaceJump"
"canCarefulJump"
{
"heatFrames": 135
} |
|
Requires laying PBs on the very edge of the platform by the doorway, mostly hanging over the lava, in order to double hit the rightmost Boyon. Requires: "canDash"
"canMidAirMorph"
"canWallJump"
"canCarefulJump"
{
"enemyKill": {
"enemies": [
[
"Boyon",
"Boyon",
"Boyon"
]
],
"explicitWeapons": [
"PowerBomb"
]
}
}
{
"heatFrames": 780
} |
|
Jump and shoot supers diagonally down at the rightmost Boyon. Jump at the edge of the platform and shoot just before hitting the ceiling, or start one tile left and shoot while at the ceiling. Requires: "canDash"
"canMidAirMorph"
"canWallJump"
"canCarefulJump"
{
"enemyKill": {
"enemies": [
[
"Boyon"
]
],
"explicitWeapons": [
"Super"
]
}
}
{
"heatFrames": 540
} |
|
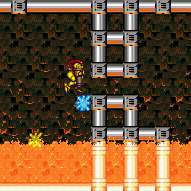
Requires: "Morph"
"canTrivialUseFrozenEnemies"
{
"or": [
{
"and": [
"canDash",
{
"heatFrames": 240
}
]
},
{
"heatFrames": 350
}
]
} |
|


Requires: "Gravity"
{
"or": [
"canTrivialMidAirMorph",
"h_useSpringBall"
]
}
{
"or": [
{
"and": [
"canDash",
{
"heatFrames": 290
},
{
"lavaFrames": 25
}
]
},
{
"and": [
{
"haveBlueSuit": {}
},
{
"heatFrames": 335
},
{
"lavaFrames": 40
}
]
}
]
}Dev note: FIXME: Add a lava dip + spring ball midair strat, and a HiJump + damage boost strat. |
|
Requires: "SpaceJump"
"canMidAirMorph"
{
"or": [
{
"and": [
"canDash",
{
"heatFrames": 240
}
]
},
{
"heatFrames": 340
}
]
} |
|
Requires: "canMidAirMorph"
"canWallJump"
{
"or": [
{
"and": [
"canDash",
"canUseIFrames",
{
"heatFrames": 330
},
{
"lavaFrames": 50
},
{
"enemyDamage": {
"enemy": "Boyon",
"type": "contact",
"hits": 1
}
}
]
},
{
"and": [
{
"haveBlueSuit": {}
},
{
"heatFrames": 370
},
{
"lavaFrames": 50
}
]
}
]
} |
|
Requires: {
"or": [
"canTrivialMidAirMorph",
"h_useSpringBall",
{
"and": [
"h_bombThings",
{
"heatFrames": 80
}
]
}
]
}
{
"heatFrames": 270
}
{
"or": [
{
"lavaFrames": 70
},
{
"and": [
"Gravity",
"canDash",
{
"disableEquipment": "SpeedBooster"
},
{
"lavaFrames": 25
}
]
}
]
}
{
"or": [
{
"haveBlueSuit": {}
},
{
"enemyDamage": {
"enemy": "Boyon",
"type": "contact",
"hits": 1
}
},
{
"heatFrames": 30
}
]
}
{
"or": [
"canDash",
{
"heatFrames": 70
}
]
} |
|
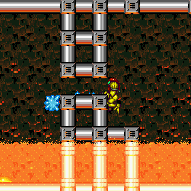
An ice shot can shoot through the wall below the Morph tunnel and can freeze the Boyon even without Wave. Requires: {
"or": [
"canTrivialMidAirMorph",
"h_useSpringBall",
{
"and": [
"h_bombThings",
{
"heatFrames": 80
}
]
}
]
}
{
"or": [
"canTrickyUseFrozenEnemies",
{
"and": [
"canUseFrozenEnemies",
"Wave"
]
}
]
}
{
"heatFrames": 280
}
{
"or": [
"canDash",
{
"heatFrames": 100
}
]
} |
|
Requires: {
"acidFrames": 100
}
{
"or": [
"canWallJump",
{
"and": [
"canDash",
{
"acidFrames": 15
}
]
},
{
"acidFrames": 25
}
]
} |
|
Jump in the acid multiple times and spark diagonally during the last jump. Requires: {
"acidFrames": 55
}
"canDash"
{
"useFlashSuit": {}
}
{
"shinespark": {
"frames": 9,
"excessFrames": 0
}
} |
|
Requires: "Gravity"
{
"acidFrames": 40
}
{
"or": [
"canDash",
{
"acidFrames": 20
}
]
} |
|
Requires: "HiJump"
{
"acidFrames": 75
}
{
"or": [
"canDash",
"canWallJump",
{
"acidFrames": 25
}
]
} |
From: 3
Item
To: 4
Central Junction
Jump and spark horizontally across the room at a precise height just above the acid in order to crash into then down grab the floor. Requires: "canInsaneJump"
"canDownGrab"
"h_storedSpark"
"canDash"
{
"shinespark": {
"frames": 32,
"excessFrames": 0
}
} |
|
Requires: {
"or": [
"f_DefeatedCrocomire",
{
"obstaclesCleared": [
"f_DefeatedCrocomire"
]
}
]
}
"canWallJump"
{
"or": [
{
"and": [
"canDash",
{
"acidFrames": 45
}
]
},
{
"and": [
"HiJump",
{
"acidFrames": 75
}
]
},
{
"acidFrames": 115
}
]
} |
|


Requires: {
"or": [
"f_DefeatedCrocomire",
{
"obstaclesCleared": [
"f_DefeatedCrocomire"
]
}
]
}
"Gravity"
{
"or": [
{
"and": [
"canDash",
"canWallJump",
{
"acidFrames": 20
}
]
},
{
"and": [
"canDash",
{
"acidFrames": 30
}
]
},
{
"acidFrames": 60
}
]
} |
|


Use a Bomb or Power Bomb to boost Samus up onto the ledge. It helps to time the acid cycle to be high when making the final jump. Requires: "HiJump"
{
"or": [
{
"and": [
"canDash",
{
"acidFrames": 75
}
]
},
{
"acidFrames": 130
}
]
}
"canBombJumpWaterEscape"
"canInsaneJump"Dev note: FIXME: Use a numeric variable to model retries instead of requiring canInsaneJump. |
|

With a precise enough jump and a quick airball, it's possible to avoid acid damage without a shinespark or wall jump. Requires: {
"or": [
"f_DefeatedCrocomire",
{
"obstaclesCleared": [
"f_DefeatedCrocomire"
]
}
]
}
"h_speedJump"
"canInsaneJump"
"canLateralMidAirMorph" |
|


Requires: {
"or": [
"f_DefeatedCrocomire",
{
"obstaclesCleared": [
"f_DefeatedCrocomire"
]
}
]
}
"canHorizontalMidairShinespark"
"h_shinechargeMaxRunway"
{
"or": [
{
"shinespark": {
"frames": 45,
"excessFrames": 5
}
},
{
"and": [
"canShinechargeMovementComplex",
{
"shinespark": {
"frames": 25,
"excessFrames": 1
}
}
]
},
{
"and": [
"canShinechargeMovementComplex",
"h_speedJump",
"canTrickyJump",
{
"shinespark": {
"frames": 6,
"excessFrames": 4
}
}
]
}
]
} |
|


With a precise enough jump, it's possible to avoid acid damage without a shinespark. Requires: {
"or": [
"f_DefeatedCrocomire",
{
"obstaclesCleared": [
"f_DefeatedCrocomire"
]
}
]
}
"h_speedJump"
"canTrickyJump"
"canWallJump" |
|
Jump and spark horizontally, or with a big speed jump, spark diagonally to the item. Requires: "h_storedSpark"
{
"or": [
{
"and": [
"canDash",
{
"shinespark": {
"frames": 27,
"excessFrames": 7
}
}
]
},
{
"and": [
"h_speedJump",
{
"shinespark": {
"frames": 6,
"excessFrames": 4
}
}
]
}
]
} |
|


Run and jump from the second-highest platform on the left. Requires: "HiJump" "canCarefulJump" "canDash" |
|
Requires: "h_storedSpark"
"canDash"
{
"shinespark": {
"frames": 3,
"excessFrames": 3
}
} |
|
Requires: {
"or": [
"canDash",
"Grapple",
"canWallJump",
"SpaceJump",
"canSpringBallJumpMidAir",
"canBombJumpWaterEscape",
{
"and": [
"HiJump",
"canDownGrab"
]
},
"canSpringBallBombJump"
]
} |
From: 1
Left Door
To: 2
Right Door
Carefully and quickly lure the Gamets to the right door without letting them go off camera. It may help to kill any extra Gamets once they spread apart. Requires: "h_navigateUnderwater"
{
"or": [
{
"resourceCapacity": [
{
"type": "Super",
"count": 1
}
]
},
{
"obstaclesCleared": [
"A"
]
}
]
}
"canComplexGMode"
{
"or": [
{
"and": [
"canDash",
"Gravity",
"SpaceJump"
]
},
{
"and": [
"canDash",
"HiJump",
"canSpaceJumpWaterBounce"
]
},
{
"and": [
"canTrickyUseFrozenEnemies",
{
"or": [
"canDash",
"canTrickyDodgeEnemies"
]
}
]
}
]
}Exit condition: {
"leaveWithGModeSetup": {}
}Unlocks doors: {"types":["ammo"],"requires":[]} |
From: 1
Left Door
To: 2
Right Door

Carefully and quickly lure the Gamets to the right door without letting them go off camera. It may help to kill any extra Gamets once they spread apart. With Grapple, it can help to immediately press down after connecting to the block in order to get a quicker swing to the right. Requires: "h_navigateUnderwater"
"canDash"
{
"or": [
{
"resourceCapacity": [
{
"type": "Super",
"count": 1
}
]
},
{
"obstaclesCleared": [
"A"
]
}
]
}
"canTrickyGMode"
{
"or": [
{
"and": [
"Gravity",
"canPreciseGrapple"
]
},
{
"and": [
"Gravity",
"canTrickyWallJump"
]
},
{
"and": [
"HiJump",
"canPreciseGrapple"
]
}
]
}Exit condition: {
"leaveWithGModeSetup": {}
}Unlocks doors: {"types":["ammo"],"requires":[]}Dev note: In theory this could be done dashless with a blue suit, but it seems unreasonable. |
From: 1
Left Door
To: 2
Right Door


Lure the Geemers up out of the water. It may be helpful to freeze them on the ascent to prevent them from separating and moving horizontally. At the top, position a Gamet flush with the central runway. Positioning is much easier with Morph; simply morph on the runway before they start separating. Freeze the Gamet before it begins moving horizontally, and it will be able to turn to the right. Use it as a frozen platform to cross both bodies of water. Lure the Gamet to the right and freeze it while there is a half-tile gap between it and the runway in order to extend it as much as possible. Requires: "h_navigateUnderwater"
"canTrickyJump"
{
"or": [
"h_trickyFrozenEnemyRunway",
{
"and": [
"h_frozenEnemyRunway",
"Morph"
]
}
]
}
{
"or": [
"canDash",
"canTrickyDodgeEnemies"
]
}
{
"or": [
{
"ammo": {
"type": "Super",
"count": 1
}
},
{
"obstaclesCleared": [
"A"
]
}
]
}Exit condition: {
"leaveWithRunway": {
"length": 9,
"openEnd": 0
}
}Unlocks doors: {"types":["ammo"],"requires":[]} |
From: 1
Left Door
To: 3
Junction Left of Green Gate


1- Stand near the farm point, on the edge of where you make Gamets spawn. 2- Wait for the water position to be high. 3- Move to make the Gamets spawn. Moonwalk is useful here. 4- Quickly climb up to the last ledge before the door. 5- Run, jump, dboost off a Gamet. 6- Dboost a second time off the Gamet to cross the second moat. Requires: {
"notable": "Double Gamet Boost"
}
"h_navigateUnderwater"
"canDash"
"canTrickyJump"
"canHorizontalDamageBoost"
{
"enemyDamage": {
"enemy": "Gamet",
"type": "contact",
"hits": 2
}
}Dev note: FIXME: A ceiling bomb jump could be added if Samus could not take an enemy hit. |
From: 4
Center Platform Junction
To: 3
Junction Left of Green Gate

Requires: "canCarefulJump" "canLateralMidAirMorph" "canSpringFling" "h_speedJump" |
From: 4
Center Platform Junction
To: 3
Junction Left of Green Gate

Run and jump at the very edge of the center platform. Wait for the water level to begin lowering to walljump on the far edge. An airball may be a little easier. Requires: "canDash"
"canTrickyJump"
{
"or": [
"canLateralMidAirMorph",
"canInsaneWallJump",
{
"and": [
"h_speedJump",
"canPreciseWallJump"
]
}
]
} |
From: 4
Center Platform Junction
To: 3
Junction Left of Green Gate
Requires: "h_storedSpark"
"canDash"
{
"shinespark": {
"frames": 6,
"excessFrames": 3
}
} |
From: 4
Center Platform Junction
To: 4
Center Platform Junction
It is possible to open the Gate and the door even without dashing. Kill the Puyos below beforehand. Requires: {
"ammo": {
"type": "Super",
"count": 1
}
}
{
"or": [
"canDash",
"canHeroShot"
]
}Clears obstacles: A Dev note: This is only useful if you are using a stored spark to spark out the door. |
|
Store a shinespark near the left door and use the remaining runway to jump as far as possible to the right. Once near the acid platforms, Shinespark diagonally to reach the item location. Entrance condition: {
"comeInShinecharged": {}
}Requires: {
"shineChargeFrames": 155
}
{
"notable": "Left Side Diagonal Shinespark"
}
"h_speedJump"
"canTrickyJump"
"canShinechargeMovementTricky"
{
"shinespark": {
"frames": 40
}
} |
From: 2
Right Vertical Door
To: 1
Left Door


Charge a spark to the right a specific distance of about 6 tiles past the broken Speed blocks. Then turn around, run and jump, and diagonal spark as late as possible. By shortening the jump it is easier but uses more Energy. With a shortened jump, it is possible but not expected to kill a Ripper and collect its drop while falling. Alternatively, it is possible to shinecharge right to left, then run and jump and then shinespark just before hitting the acid; This is a bit tighter and uses more Energy, but doesn't rely on the larger jump from Speed Booster. Requires: {
"notable": "Big Jump Shinespark"
}
"canShinechargeMovementTricky"
{
"obstaclesCleared": [
"B"
]
}
{
"canShineCharge": {
"usedTiles": 23,
"gentleDownTiles": 6,
"openEnd": 1
}
}
{
"or": [
{
"and": [
"h_speedJump",
{
"shinespark": {
"frames": 30,
"excessFrames": 2
}
}
]
},
{
"shinespark": {
"frames": 46,
"excessFrames": 2
}
}
]
}Dev note: There is a large variance in the number of shinespark frames based on the runway used and how long jump is held. The frames included are a reasonable approximation, although a tighter set of frames could be included with more specific details. |
From: 2
Right Vertical Door
To: 1
Left Door
Charge a spark to the right, then come back, run and jump, and do a horizontal spark at the apex. If needed, down-grab onto the ledge. Requires: {
"notable": "Big Jump Shinespark"
}
"h_speedJump"
"canShinechargeMovementComplex"
{
"obstaclesCleared": [
"B"
]
}
{
"canShineCharge": {
"usedTiles": 32,
"gentleDownTiles": 6,
"openEnd": 1
}
}
{
"shinespark": {
"frames": 52
}
}
"canDownGrab" |
|
Requires: {
"or": [
{
"and": [
"canSpeedyJump",
"canCarefulJump"
]
},
{
"and": [
"h_speedJump",
"HiJump"
]
}
]
}
{
"obstaclesCleared": [
"A",
"B"
]
}Dev note: With HiJump we don't require canSpeedyJump tech here because the jump is 'trivial': it is intended in the vanilla game, telegraphed by the ramp, and is very lenient. |
|
Shoot the Mellas when they first begin to come on screen, and they will not move. Requires: {
"or": [
{
"and": [
{
"resetRoom": {
"nodes": [
1
]
}
},
{
"cycleFrames": 1020
},
"Morph",
{
"or": [
"SpaceJump",
{
"and": [
"HiJump",
"canSpeedyJump",
"canWallJump",
{
"cycleFrames": 120
}
]
},
{
"and": [
"HiJump",
"canSpringBallJumpMidAir",
"h_doubleEquipmentScreenCycleFrames",
{
"cycleFrames": 540
}
]
},
{
"and": [
"canJumpIntoIBJ",
{
"cycleFrames": 1400
}
]
}
]
}
]
},
{
"and": [
{
"resetRoom": {
"nodes": [
2
]
}
},
{
"cycleFrames": 240
}
]
}
]
}
{
"or": [
{
"and": [
"canDash",
{
"or": [
"Grapple",
"Wave",
"Spazer",
"Plasma",
{
"and": [
"ScrewAttack",
{
"cycleFrames": 60
}
]
},
{
"and": [
"canDodgeWhileShooting",
{
"cycleFrames": 300
}
]
},
{
"and": [
"canFarmWhileShooting",
{
"cycleFrames": 120
}
]
}
]
}
]
},
{
"and": [
{
"haveBlueSuit": {}
},
{
"cycleFrames": 60
}
]
}
]
}Resets obstacles: A, B, E Farm cycle drops: 5 Mella |
From: 3
Bottom Right Door
To: 1
Top Left Door


Run on the moving platform (Kamer). Requires: "HiJump" "canDash" "canCarefulJump" |
From: 3
Bottom Right Door
To: 1
Top Left Door
Run on the the moving platform into a midair spring ball jump as far horizontal as possible. Unmorph or spring fling to reset fall speed can help. Requires: "canTrickyJump"
"canTrickySpringBallJump"
{
"or": [
"canDash",
"canSpringFling"
]
} |
|

Use the moving platform (Kamer) to elevate the Gamets and then freeze them. Requires: "canTrickyUseFrozenEnemies"
{
"or": [
{
"and": [
"canWallJump",
"canDash"
]
},
"canTrickyJump"
]
} |
From: 4
Top Right Door
To: 1
Top Left Door
Damage boost off the Ripper to reach the top-left of the room. This is a faster but likely more difficult alternative to using a Gamet to damage boost. Requires: {
"notable": "Damage Boost"
}
"canInsaneJump"
{
"or": [
"canTrickyWallJump",
"canDash"
]
}
"canHorizontalDamageBoost"
{
"enemyDamage": {
"enemy": "Ripper 2 (green)",
"type": "contact",
"hits": 1
}
}Dev note: This can be uniquely useful if carrying a flash suit, if wall jump cannot be used, since damage boosting off a Gamet would not be possible in that scenario. |
|
Requires: {
"heatFrames": 40
}
{
"or": [
"canDash",
{
"heatFrames": 20
}
]
} |
|
Requires: {
"heatFrames": 70
}
{
"or": [
"canDash",
{
"heatFrames": 10
}
]
} |
|
Requires: "canDash"
{
"heatFrames": 55
}Exit condition: {
"leaveWithRunway": {
"length": 5,
"openEnd": 0
}
}Unlocks doors: {"types":["missiles"],"requires":[{"heatFrames":50}]}
{"types":["super"],"requires":[]}
{"types":["powerbomb"],"requires":[{"heatFrames":60}]} |
|


Requires: "SpaceJump"
{
"or": [
{
"and": [
"canDash",
{
"heatFrames": 180
}
]
},
{
"heatFrames": 260
}
]
} |
|
Requires: "canSuitlessLavaDive"
"Gravity"
{
"or": [
"canDash",
{
"and": [
{
"acidFrames": 70
},
{
"heatFrames": 100
}
]
}
]
}
{
"or": [
{
"and": [
{
"disableEquipment": "HiJump"
},
"HiJump",
{
"acidFrames": 75
},
{
"heatFrames": 230
}
]
},
{
"and": [
"canWallJump",
{
"acidFrames": 90
},
{
"heatFrames": 245
}
]
},
{
"and": [
"canSpringBallJumpMidAir",
{
"acidFrames": 75
},
{
"heatFrames": 230
}
]
},
{
"and": [
"canGravityJump",
{
"heatFrames": 190
},
{
"acidFrames": 40
},
{
"gravitylessAcidFrames": 35
},
{
"gravitylessHeatFrames": 45
}
]
}
]
}Dev note: FIXME: An IBJ option can be added back here. |
|

Try to jump to the far left side raised ledges to reduce the time spent in acid. This could mean turning off HiJump, or airballing to jump farther. Requires: "canSuitlessLavaDive"
{
"or": [
"HiJump",
"canWallJump",
"canSpringBallJumpMidAir"
]
}
{
"acidFrames": 110
}
{
"heatFrames": 285
}
{
"or": [
"canDash",
{
"and": [
{
"acidFrames": 100
},
{
"heatFrames": 90
}
]
}
]
} |
|
There is a hole in the left side wall that Samus can fit into by shrinking her hitbox. Once in the wall, stand up if crouched then turnaround into a buffered spinjump to jump out of the acid. Requires: {
"tech": "canPartialFloorClip"
}
"canSuitlessLavaDive"
{
"or": [
{
"and": [
"canLateralMidAirMorph",
"canDownBack",
"canTrickyJump",
{
"acidFrames": 110
},
{
"heatFrames": 285
}
]
},
{
"and": [
"canDash",
"canTrickyJump",
{
"acidFrames": 140
},
{
"heatFrames": 300
}
]
},
{
"and": [
{
"acidFrames": 230
},
{
"heatFrames": 390
}
]
}
]
} |
|
Requires: {
"or": [
"f_UsedAcidChozoStatue",
{
"obstaclesCleared": [
"f_UsedAcidChozoStatue"
]
}
]
}
{
"or": [
{
"and": [
"canDash",
{
"heatFrames": 130
}
]
},
{
"heatFrames": 190
}
]
} |
From: 2
Bottom Right Door
To: 5
Bottom Junction Right of Morph Tunnel
Wait for the first Holtz to attack then either use the Magdollite for i-frames, or avoid the projectiles and continue dodging bats. Requires: "canDash"
{
"or": [
"canTrickyJump",
{
"and": [
"canHorizontalDamageBoost",
"canUseIFrames",
{
"enemyDamage": {
"enemy": "Magdollite",
"type": "flame",
"hits": 1
}
}
]
}
]
}
{
"heatFrames": 290
} |
|
Requires: "canDash"
"ScrewAttack"
{
"heatFrames": 210
}Clears obstacles: A |
From: 2
Bottom Right Door
To: 5
Bottom Junction Right of Morph Tunnel
Requires: "canDash"
"canFarmWhileShooting"
{
"heatFramesWithEnergyDrops": {
"frames": 170,
"drops": [
{
"enemy": "Magdollite",
"count": 3
}
]
}
}
{
"heatFrames": 130
} |
From: 2
Bottom Right Door
To: 5
Bottom Junction Right of Morph Tunnel
Requires: "canDash"
"canDodgeWhileShooting"
{
"or": [
{
"and": [
"Spazer",
"Wave",
"Ice",
{
"heatFrames": 480
}
]
},
{
"and": [
"Plasma",
{
"heatFrames": 510
}
]
},
{
"and": [
"Ice",
{
"or": [
"Wave",
"Spazer"
]
},
{
"heatFrames": 750
}
]
},
{
"and": [
"canTrickyDodgeEnemies",
"Morph",
{
"ammo": {
"type": "PowerBomb",
"count": 3
}
},
{
"heatFrames": 850
}
]
}
]
}Clears obstacles: A |
From: 2
Bottom Right Door
To: 5
Bottom Junction Right of Morph Tunnel
Requires: "canDash"
"canTrickyDodgeEnemies"
{
"or": [
{
"and": [
"Spazer",
"Wave",
{
"heatFrames": 1280
}
]
},
{
"and": [
"Spazer",
{
"heatFrames": 2060
}
]
},
{
"and": [
"Wave",
{
"heatFrames": 1640
}
]
},
{
"and": [
"Ice",
{
"heatFrames": 1560
}
]
},
{
"and": [
"Morph",
{
"ammo": {
"type": "PowerBomb",
"count": 10
}
},
{
"heatFrames": 2160
}
]
}
]
}Clears obstacles: A Dev note: FIXME: This could probably be done with just Power Beam, but dodging the Holtzes becomes very tricky. |
From: 2
Bottom Right Door
To: 5
Bottom Junction Right of Morph Tunnel
Requires: "canDash"
{
"or": [
{
"and": [
"Plasma",
"Wave",
"Ice",
{
"heatFrames": 300
}
]
},
{
"and": [
"Plasma",
{
"or": [
"Wave",
"Ice"
]
},
{
"heatFrames": 390
}
]
},
{
"and": [
{
"ammo": {
"type": "Super",
"count": 9
}
},
{
"heatFrames": 420
}
]
}
]
}Clears obstacles: A |
From: 2
Bottom Right Door
To: 5
Bottom Junction Right of Morph Tunnel
Wait for the first Holtz before trying to cross. Requires: "canDash"
{
"enemyDamage": {
"enemy": "Holtz",
"type": "contact",
"hits": 1
}
}
{
"or": [
"canCarefulJump",
{
"and": [
"Gravity",
{
"enemyDamage": {
"enemy": "Holtz",
"type": "contact",
"hits": 1
}
},
{
"acidFrames": 60
}
]
}
]
}
{
"heatFrames": 375
} |
|
Requires: "SpaceJump"
{
"or": [
{
"and": [
"canDash",
{
"heatFrames": 200
}
]
},
{
"heatFrames": 275
}
]
} |
|
Requires: {
"or": [
"f_UsedAcidChozoStatue",
{
"obstaclesCleared": [
"f_UsedAcidChozoStatue"
]
}
]
}
{
"or": [
{
"and": [
"canDash",
{
"heatFrames": 270
}
]
},
{
"heatFrames": 295
}
]
} |
|
Requires: {
"or": [
{
"and": [
"canDash",
{
"heatFrames": 195
}
]
},
{
"heatFrames": 215
}
]
}Dev note: 4 requires that the acid is gone. |
|
Requires: "canDash"
"ScrewAttack"
{
"heatFrames": 210
}
{
"or": [
"canTrickyJump",
{
"heatFrames": 30
}
]
}Clears obstacles: A |
From: 5
Bottom Junction Right of Morph Tunnel
To: 2
Bottom Right Door
Requires: "canDash"
"canFarmWhileShooting"
{
"heatFramesWithEnergyDrops": {
"frames": 240,
"drops": [
{
"enemy": "Magdollite",
"count": 3
}
]
}
}
{
"heatFrames": 40
}
{
"or": [
"canInsaneJump",
{
"heatFrames": 110
}
]
} |
From: 5
Bottom Junction Right of Morph Tunnel
To: 2
Bottom Right Door
Requires: {
"or": [
{
"and": [
"canDash",
"canTrickyJump",
{
"heatFrames": 820
}
]
},
{
"and": [
"canDash",
"ScrewAttack",
{
"heatFrames": 660
}
]
},
{
"and": [
"canDash",
"canHorizontalDamageBoost",
"canUseIFrames",
{
"enemyDamage": {
"enemy": "Magdollite",
"type": "flame",
"hits": 1
}
},
{
"heatFrames": 660
}
]
},
{
"and": [
{
"haveBlueSuit": {}
},
{
"heatFrames": 725
}
]
}
]
}Exit condition: {
"leaveWithGModeSetup": {}
}Unlocks doors: {"types":["ammo"],"requires":[]} |
From: 5
Bottom Junction Right of Morph Tunnel
To: 2
Bottom Right Door
Wait for the Magdollite to attack then use it for i-frames. Requires: "canDash"
{
"enemyDamage": {
"enemy": "Magdollite",
"type": "flame",
"hits": 1
}
}
"canHorizontalDamageBoost"
"canUseIFrames"
{
"heatFrames": 290
} |
From: 5
Bottom Junction Right of Morph Tunnel
To: 2
Bottom Right Door


Requires: "canDash"
"h_PlasmaHitbox"
"canInsaneJump"
{
"heatFrames": 190
} |
From: 5
Bottom Junction Right of Morph Tunnel
To: 2
Bottom Right Door
Requires: "canDash"
"Ice"
"Wave"
"Plasma"
{
"heatFrames": 330
} |
From: 5
Bottom Junction Right of Morph Tunnel
To: 2
Bottom Right Door
Requires: "canDash"
{
"enemyDamage": {
"enemy": "Holtz",
"type": "contact",
"hits": 1
}
}
{
"or": [
"canCarefulJump",
{
"and": [
"Gravity",
{
"enemyDamage": {
"enemy": "Holtz",
"type": "contact",
"hits": 1
}
},
{
"acidFrames": 60
}
]
}
]
}
{
"heatFrames": 330
} |
From: 5
Bottom Junction Right of Morph Tunnel
To: 2
Bottom Right Door


Requires: "canDash"
"canTrickyDodgeEnemies"
{
"heatFrames": 280
}
{
"or": [
"canInsaneJump",
{
"heatFrames": 20
}
]
} |
From: 1
Left Door
To: 1
Left Door


Use Supers to kill all the Rippers and open the green gate. From the right door, run right-to-left to gain a shinecharge; use the remaining runway (at least about 10 tiles) to gain speed to jump to the left and cross the room quickly. Entrance condition: {
"comeInNormally": {}
}Requires: {
"ammo": {
"type": "Super",
"count": 2
}
}
{
"canShineCharge": {
"usedTiles": 17,
"openEnd": 1
}
}
"canShinechargeMovementTricky"
"h_speedJump"
{
"heatFrames": 870
}
{
"shineChargeFrames": 175
}
{
"shinespark": {
"frames": 15,
"excessFrames": 0
}
}Exit condition: {
"leaveWithSpark": {}
}Unlocks doors: {"types":["ammo"],"requires":[]} |
From: 1
Left Door
To: 3
Junction Left of Green Gate


Requires: "canDash"
"canFarmWhileShooting"
{
"resourceMissingAtMost": [
{
"type": "Super",
"count": 0
}
]
}
{
"enemyDamage": {
"enemy": "Ripper 2 (red)",
"type": "contact",
"hits": 1
}
}
"canHorizontalDamageBoost"
"h_usePowerBomb"
{
"heatFramesWithEnergyDrops": {
"frames": 400,
"drops": [
{
"enemy": "Ripper 2 (red)",
"count": 5
}
]
}
}
{
"heatFrames": 85
}Clears obstacles: B |
From: 1
Left Door
To: 3
Junction Left of Green Gate
Requires: "canDash"
"canFarmWhileShooting"
{
"resourceAtMost": [
{
"type": "Energy",
"count": 99
}
]
}
{
"enemyDamage": {
"enemy": "Ripper 2 (red)",
"type": "contact",
"hits": 1
}
}
"canHorizontalDamageBoost"
"h_usePowerBomb"
{
"heatFramesWithEnergyDrops": {
"frames": 390,
"drops": [
{
"enemy": "Ripper 2 (red)",
"count": 5
}
]
}
}
{
"heatFrames": 25
}Clears obstacles: B |
From: 1
Left Door
To: 3
Junction Left of Green Gate


Requires: "canDash"
"canFarmWhileShooting"
{
"resourceMissingAtMost": [
{
"type": "Super",
"count": 0
}
]
}
{
"enemyDamage": {
"enemy": "Ripper 2 (red)",
"type": "contact",
"hits": 1
}
}
"canHorizontalDamageBoost"
"ScrewAttack"
{
"heatFramesWithEnergyDrops": {
"frames": 300,
"drops": [
{
"enemy": "Ripper 2 (red)",
"count": 5
}
]
}
}
{
"ammo": {
"type": "Super",
"count": 1
}
}
{
"heatFrames": 100
}Clears obstacles: A, B Dev note: FIXME: A variation of this may be possible with a blue suit. |
From: 1
Left Door
To: 3
Junction Left of Green Gate
This strat just saves one Ripper hit when tanking the Rippers because of the i-frames when taking the hit to regain mobility. Entrance condition: {
"comeInWithGMode": {
"mode": "direct",
"morphed": false,
"mobility": "immobile"
}
}Requires: "h_heatedGMode"
"canDash"
{
"enemyDamage": {
"enemy": "Ripper 2 (red)",
"type": "contact",
"hits": 1
}
}
{
"heatFrames": 0
} |
From: 1
Left Door
To: 3
Junction Left of Green Gate

Requires: "canDash"
"canFarmWhileShooting"
{
"resourceMissingAtMost": [
{
"type": "Super",
"count": 0
}
]
}
{
"enemyKill": {
"enemies": [
[
"Ripper 2 (red)",
"Ripper 2 (red)"
]
],
"explicitWeapons": [
"PowerBomb",
"ScrewAttack"
]
}
}
{
"heatFramesWithEnergyDrops": {
"frames": 280,
"drops": [
{
"enemy": "Ripper 2 (red)",
"count": 5
}
]
}
}
{
"heatFrames": 170
}Clears obstacles: B |
From: 1
Left Door
To: 3
Junction Left of Green Gate
Requires: "canDash"
{
"heatFrames": 400
}
"h_usePowerBomb"Clears obstacles: B |
|


Requires: "canDash"
{
"or": [
"canTrickyDodgeEnemies",
{
"and": [
"canDodgeWhileShooting",
{
"enemyDamage": {
"enemy": "Ripper 2 (red)",
"type": "contact",
"hits": 2
}
}
]
},
{
"enemyDamage": {
"enemy": "Ripper 2 (red)",
"type": "contact",
"hits": 4
}
}
]
}
{
"resourceAvailable": [
{
"type": "Energy",
"count": 50
},
{
"type": "Super",
"count": 3
}
]
}
{
"heatFrames": 340
}
{
"or": [
{
"ammo": {
"type": "Super",
"count": 1
}
},
{
"heatFrames": 10
}
]
}Clears obstacles: B Dev note: This accounts for collecting Super drops while crossing, with an assumption that one of the drops may be abandoned to save time/energy. |
From: 1
Left Door
To: 3
Junction Left of Green Gate
Requires: "canDash"
"canTrickyDodgeEnemies"
{
"resourceAvailable": [
{
"type": "Super",
"count": 2
}
]
}
{
"heatFrames": 265
}Dev note: This accounts for collecting Super drops while crossing and killing two of the Rippers. |
From: 1
Left Door
To: 3
Junction Left of Green Gate


Entrance condition: {
"comeInNormally": {}
}Requires: "canDash"
{
"enemyDamage": {
"enemy": "Ripper 2 (red)",
"type": "contact",
"hits": 1
}
}
"canHorizontalDamageBoost"
{
"heatFrames": 250
}
{
"or": [
"canTrickyDodgeEnemies",
{
"and": [
{
"enemyDamage": {
"enemy": "Ripper 2 (red)",
"type": "contact",
"hits": 1
}
},
{
"heatFrames": 20
}
]
}
]
} |
|
Requires: "canDash"
{
"heatFrames": 270
}
"ScrewAttack"Clears obstacles: B |
|
Requires: "canDash"
{
"heatFrames": 450
}
{
"enemyDamage": {
"enemy": "Ripper 2 (red)",
"type": "contact",
"hits": 3
}
} |
|
Despawn the gate in indirect G-mode then cross the room by either rolling under the Rippers then unmorphing and dodging them while while crossing the room, or place a Power Bomb to kill all or most of them and cross the room. It is possible to kill a Ripper near the left door and pause abuse to collect its drop on G-mode exit. Entrance condition: {
"comeInWithGMode": {
"mode": "indirect",
"morphed": true
}
}Requires: {
"or": [
{
"and": [
"canDash",
"canInsaneJump"
]
},
"h_artificialMorphPowerBomb"
]
}
{
"or": [
"h_heatedGModeOpenDifferentDoor",
{
"and": [
"h_heatedGModePauseAbuse",
{
"ammo": {
"type": "Super",
"count": 1
}
}
]
}
]
} |
|
Despawn the gate in indirect G-mode then cross the room while killing, freezing, or tanking the Rippers. Without Morph, killing the lowest Ripper with a Super will make it possible but difficult to cross the room damageless. It is possible to kill a Ripper near the left door and pause abuse to collect its drop on G-mode exit. Entrance condition: {
"comeInWithGMode": {
"mode": "indirect",
"morphed": false
}
}Requires: {
"or": [
"ScrewAttack",
{
"haveBlueSuit": {}
},
"canUseFrozenEnemies",
{
"and": [
"canDash",
"canInsaneJump",
{
"ammo": {
"type": "Super",
"count": 1
}
}
]
},
{
"ammo": {
"type": "Super",
"count": 3
}
},
{
"enemyDamage": {
"enemy": "Ripper 2 (red)",
"type": "contact",
"hits": 2
}
}
]
}
{
"or": [
"h_heatedGModeOpenDifferentDoor",
{
"and": [
"h_heatedGModePauseAbuse",
"ScrewAttack"
]
},
{
"and": [
"h_heatedGModePauseAbuse",
{
"ammo": {
"type": "Super",
"count": 1
}
}
]
}
]
} |
From: 2
Right Door
To: 1
Left Door
Despawn the gate in indirect G-mode then cross the room while dodging the Rippers. It is possible to cross the room damageless without any items. Crouch under the first Rippers then jump with a precise timing to go over the next without hitting the highest ones. With two small forward spin jumps, jump over the three Rippers that come from behind. Move to the first platform and jump over them again. Cross the rest of the room while weaving through the Rippers to get to the left side. It is possible to kill a Ripper near the left door and pause abuse to collect its drop on G-mode exit. Entrance condition: {
"comeInWithGMode": {
"mode": "indirect",
"morphed": false
}
}Requires: "canDash"
"canTrickyGMode"
{
"or": [
"h_heatedGModeOpenDifferentDoor",
{
"and": [
"h_heatedGModePauseAbuse",
{
"ammo": {
"type": "Super",
"count": 1
}
}
]
}
]
} |
|
Requires: {
"obstaclesCleared": [
"A",
"B",
"C"
]
}
"canDash"
"h_heatedRemoteRunwayPreciseSpaceJump"
{
"heatFrames": 200
}Exit condition: {
"leaveSpaceJumping": {
"remoteRunway": {
"length": 28,
"openEnd": 1
},
"minExtraRunSpeed": "$4.0"
}
}Unlocks doors: {"types":["ammo"],"requires":[],"useImplicitRequires":false} |
From: 2
Right Door
To: 1
Left Door
Requires: {
"obstaclesCleared": [
"A",
"B",
"C"
]
}
"canDash"
"h_heatedRemoteRunwaySpaceJump"
{
"heatFrames": 200
}Exit condition: {
"leaveSpinning": {
"remoteRunway": {
"length": 28,
"openEnd": 1
},
"minExtraRunSpeed": "$4.0"
}
}Unlocks doors: {"types":["ammo"],"requires":[],"useImplicitRequires":false} |
From: 2
Right Door
To: 1
Left Door
Requires: {
"obstaclesCleared": [
"A",
"B",
"C"
]
}
"canDash"
"h_heatedRemoteRunwayTrickySpringBall"
{
"heatFrames": 205
}Exit condition: {
"leaveWithSpringBallBounce": {
"remoteRunway": {
"length": 18,
"openEnd": 1
},
"landingRunway": {
"length": 5,
"openEnd": 1
},
"minExtraRunSpeed": "$4.0",
"movementType": "controlled"
}
}Unlocks doors: {"types":["ammo"],"requires":[],"useImplicitRequires":false} |
From: 2
Right Door
To: 1
Left Door
Requires: {
"obstaclesCleared": [
"A",
"B"
]
}
"canDash"
"h_heatedRemoteRunwaySpaceJump"
{
"heatFrames": 200
}Exit condition: {
"leaveWithMockball": {
"remoteRunway": {
"length": 28,
"openEnd": 1
},
"landingRunway": {
"length": 5,
"openEnd": 1
},
"minExtraRunSpeed": "$4.0"
}
}Unlocks doors: {"types":["super"],"requires":[]}
{"types":["missiles","powerbomb"],"requires":[]}Dev note: If coming from the right, the Ripper on the left may still be alive, but it is not too hard to avoid. |
From: 2
Right Door
To: 1
Left Door
Requires: {
"obstaclesCleared": [
"A",
"B"
]
}
"canDash"
"h_heatedRemoteRunwaySpaceJump"
{
"heatFrames": 200
}Exit condition: {
"leaveWithSpringBallBounce": {
"remoteRunway": {
"length": 28,
"openEnd": 1
},
"landingRunway": {
"length": 5,
"openEnd": 1
},
"minExtraRunSpeed": "$4.0",
"movementType": "uncontrolled"
}
}Unlocks doors: {"types":["super"],"requires":[]}
{"types":["missiles","powerbomb"],"requires":[]}Dev note: If coming from the right, the Ripper on the left may still be alive, but it is not too hard to avoid. |
From: 2
Right Door
To: 2
Right Door
Despawn the gate in indirect G-mode then exit G-mode while under it to open the gate without a Super. This requires killing, freezing, dodging, or tanking the Rippers. Dodging the Rippers without Morph, requires exiting G-mode while on the right side of the gate tile as the first Ripper approaches, so it hits the gate while it's opening. Then run towards the door and jump and aim down over the Ripper that makes it through, before quickly using the runway. Entrance condition: {
"comeInWithGMode": {
"mode": "indirect",
"morphed": false
}
}Requires: {
"or": [
{
"and": [
"canDash",
"canInsaneJump"
]
},
{
"haveBlueSuit": {}
},
"ScrewAttack",
"canUseFrozenEnemies",
"Morph",
{
"enemyDamage": {
"enemy": "Ripper 2 (red)",
"type": "contact",
"hits": 1
}
}
]
}
{
"heatFrames": 110
}Clears obstacles: A |
|
Requires: {
"or": [
"h_heatedGreenGateGlitch",
{
"obstaclesCleared": [
"A"
]
}
]
}
{
"heatFrames": 50
}
{
"or": [
"canDash",
{
"heatFrames": 15
}
]
}Clears obstacles: A Dev note: FIXME: A strat could be added that runs into the room and shoots directly at the gate, instead of stopping in front of it. |
From: 3
Junction Left of Green Gate
To: 1
Left Door


Requires: "canDash"
"canTrickyDodgeEnemies"
{
"or": [
{
"heatFrames": 270
},
{
"and": [
"h_speedJump",
"canWallJump",
{
"heatFrames": 225
}
]
}
]
}
{
"ammo": {
"type": "Super",
"count": 1
}
}
{
"or": [
{
"notable": "First-Try Gate Glitch"
},
{
"ammo": {
"type": "Super",
"count": 2
}
}
]
}Dev note: This is chaotic because the gate glitch's unreliability makes the room more variable: with a first-try gate glitch a single Super is enough, but otherwise, you would likely want to have three. |
From: 3
Junction Left of Green Gate
To: 1
Left Door
Requires: {
"obstaclesCleared": [
"B",
"C"
]
}
"canDash"
"h_heatedRemoteRunwayPreciseSpaceJump"
{
"heatFrames": 230
}Exit condition: {
"leaveSpaceJumping": {
"remoteRunway": {
"length": 18,
"openEnd": 1
},
"minExtraRunSpeed": "$2.0"
}
}Unlocks doors: {"types":["ammo"],"requires":[],"useImplicitRequires":false} |
From: 3
Junction Left of Green Gate
To: 1
Left Door
Requires: {
"obstaclesCleared": [
"B",
"C"
]
}
"canDash"
"h_heatedRemoteRunwaySpaceJump"
{
"heatFrames": 230
}Exit condition: {
"leaveSpinning": {
"remoteRunway": {
"length": 18,
"openEnd": 1
},
"minExtraRunSpeed": "$2.0"
}
}Unlocks doors: {"types":["ammo"],"requires":[],"useImplicitRequires":false} |
From: 3
Junction Left of Green Gate
To: 1
Left Door
Requires: {
"obstaclesCleared": [
"B",
"C"
]
}
"canDash"
"h_heatedRemoteRunwayTrickySpringBall"
{
"heatFrames": 240
}Exit condition: {
"leaveWithSpringBallBounce": {
"remoteRunway": {
"length": 18,
"openEnd": 1
},
"landingRunway": {
"length": 5,
"openEnd": 1
},
"minExtraRunSpeed": "$2.0",
"movementType": "controlled"
}
}Unlocks doors: {"types":["ammo"],"requires":[],"useImplicitRequires":false} |
From: 3
Junction Left of Green Gate
To: 1
Left Door
Requires: {
"obstaclesCleared": [
"B"
]
}
"canDash"
"h_heatedRemoteRunwaySpaceJump"
{
"heatFrames": 230
}Exit condition: {
"leaveWithMockball": {
"remoteRunway": {
"length": 18,
"openEnd": 1
},
"landingRunway": {
"length": 5,
"openEnd": 1
},
"minExtraRunSpeed": "$2.0"
}
}Unlocks doors: {"types":["super"],"requires":[]}
{"types":["missiles","powerbomb"],"requires":[]}Dev note: If coming from the right, the Ripper on the left may still be alive, but it is not too hard to avoid. |
From: 3
Junction Left of Green Gate
To: 1
Left Door
Requires: {
"obstaclesCleared": [
"B"
]
}
"canDash"
"h_heatedRemoteRunwaySpaceJump"
{
"heatFrames": 230
}Exit condition: {
"leaveWithSpringBallBounce": {
"remoteRunway": {
"length": 18,
"openEnd": 1
},
"landingRunway": {
"length": 5,
"openEnd": 1
},
"minExtraRunSpeed": "$2.0",
"movementType": "uncontrolled"
}
}Unlocks doors: {"types":["super"],"requires":[]}
{"types":["missiles","powerbomb"],"requires":[]}Dev note: If coming from the right, the Ripper on the left may still be alive, but it is not too hard to avoid. |
|


Requires: {
"notable": "First-Try Gate Glitch"
}
"canDash"
{
"enemyDamage": {
"enemy": "Ripper 2 (red)",
"type": "contact",
"hits": 1
}
}
"canHorizontalDamageBoost"
{
"heatFrames": 280
}Dev note: The First-Try Gate Glitch is to ensure that the Rippers are in a consistent state. |
|
Requires: {
"obstaclesCleared": [
"B"
]
}
"canDash"
{
"or": [
{
"heatFrames": 270
},
{
"and": [
"h_speedJump",
"canWallJump",
{
"heatFrames": 225
}
]
}
]
} |
|


Requires: {
"notable": "First-Try Gate Glitch"
}
"canDash"
"ScrewAttack"
{
"or": [
{
"heatFrames": 300
},
{
"and": [
"h_speedJump",
"canWallJump",
{
"heatFrames": 225
}
]
}
]
}Dev note: FIXME: A variant that farms the Rippers using Screw Attack should be added. |
|
Requires: "canDash"
{
"heatFrames": 330
}
{
"enemyDamage": {
"enemy": "Ripper 2 (red)",
"type": "contact",
"hits": 2
}
}
{
"or": [
"canTrickyDodgeEnemies",
{
"and": [
{
"enemyDamage": {
"enemy": "Ripper 2 (red)",
"type": "contact",
"hits": 1
}
},
{
"heatFrames": 100
}
]
}
]
} |
|
Requires: {
"or": [
{
"and": [
{
"heatFrames": 120
},
{
"ammo": {
"type": "Super",
"count": 1
}
}
]
},
{
"and": [
{
"heatFrames": 50
},
{
"ammo": {
"type": "Super",
"count": 1
}
},
"canHeroShot"
]
},
{
"and": [
{
"obstaclesCleared": [
"A"
]
},
{
"heatFrames": 40
}
]
}
]
}
{
"or": [
"canDash",
{
"heatFrames": 25
}
]
}Clears obstacles: A Unlocks doors: {"types":["missiles"],"requires":[{"heatFrames":20}]}
{"types":["super"],"requires":[]}
{"types":["powerbomb"],"requires":[{"heatFrames":40}]}Dev note: This includes an option to open the gate from a distance while approaching from the left. In this case (as well as in the case where the gate is already open), it is assumed you have momentum running through this junction. |
|
Requires: {
"heatFrames": 170
}
{
"or": [
"canDash",
{
"heatFrames": 45
}
]
} |
|
Requires: "canDash"
{
"heatFrames": 120
}Exit condition: {
"leaveWithRunway": {
"length": 29,
"openEnd": 0
}
}Unlocks doors: {"types":["gray","super"],"requires":[]}
{"types":["missiles","powerbomb"],"requires":["never"]} |
|

Jump on the crumble blocks before they break to reach the item, at the risk on falling through. Requires: {
"notable": "Crumble Jump"
}
"canCrumbleJump"
{
"heatFrames": 80
}
{
"or": [
"canDash",
{
"heatFrames": 30
}
]
} |
|
Requires: "SpaceJump"
{
"heatFrames": 70
}
{
"or": [
"canDash",
{
"heatFrames": 40
}
]
} |
From: 2
Right Door
To: 4
Hidden Right Item


Perform a momentum conserving morph through the transition. After the transition, quickly unmorph and continue holding up to retain temporary blue and break the bomb blocks. It may help (but is not required) to pause buffer the morph input. Entrance condition: {
"comeInWithSidePlatform": {
"platforms": [
{
"minHeight": 2,
"maxHeight": 2,
"minTiles": 27.4375,
"speedBooster": "yes",
"obstructions": [
[
1,
0
]
],
"note": [
"This applies to Dust Torizo Room and Noob Bridge."
]
},
{
"minHeight": 3,
"maxHeight": 3,
"minTiles": 28.2472,
"speedBooster": "yes",
"obstructions": [
[
1,
0
]
],
"note": [
"This applies to Double Chamber."
]
},
{
"minHeight": 1,
"maxHeight": 1,
"minTiles": 28.2472,
"speedBooster": "yes",
"obstructions": [
[
3,
0
]
],
"environment": "water",
"requires": [
"canGravityJump"
],
"note": [
"This applies to Below Botwoon Energy Tank and Botwoon Energy Tank Room."
]
},
{
"minHeight": 2,
"maxHeight": 2,
"minTiles": 31,
"speedBooster": "yes",
"obstructions": [
[
3,
0
]
],
"requires": [
"canInsaneMidAirMorph"
],
"note": [
"This applies to Metroid Room 1, Statues Hallway, and Baby Kraid Room."
]
},
{
"minHeight": 3,
"maxHeight": 3,
"minTiles": 41.4375,
"speedBooster": "yes",
"obstructions": [
[
3,
0
]
],
"requires": [
"canInsaneMidAirMorph"
],
"note": [
"This applies to Blue Brinstar Energy Tank Room (Power Bomb blocks broken), Bowling Alley (middle, power off), and Basement (power on)."
]
},
{
"minHeight": 3,
"maxHeight": 3,
"minTiles": 39.4375,
"speedBooster": "yes",
"obstructions": [
[
3,
2
]
],
"note": [
"This applies to Metal Pirates Room."
]
},
{
"minHeight": 3,
"maxHeight": 3,
"minTiles": 37.4375,
"speedBooster": "yes",
"obstructions": [
[
5,
2
]
],
"requires": [
"canInsaneMidAirMorph"
],
"note": [
"This applies to Flyway."
]
}
]
}
}Requires: {
"or": [
"f_DefeatedGoldenTorizo",
{
"obstaclesCleared": [
"f_DefeatedGoldenTorizo"
]
}
]
}
"HiJump"
{
"getBlueSpeed": {
"usedTiles": 24,
"openEnd": 1
}
}
"h_blueJump"
"canMomentumConservingMorph"
"canInsaneJump"
{
"heatFrames": 120
}Clears obstacles: door_2 Dev note: FIXME: This could maybe be possible without HiJump? If so, it would be significantly more difficult. The getBlueSpeed requirement could be refined to vary by platform geometry. |
|
It takes a short hop to avoid hitting the ceiling to do this with only one crumble jump. Requires: {
"notable": "Crumble Jump"
}
"canCrumbleJump"
{
"heatFrames": 100
}
{
"or": [
"canDash",
{
"heatFrames": 30
}
]
} |
|
Requires: "SpaceJump"
{
"heatFrames": 90
}
{
"or": [
"canDash",
{
"heatFrames": 30
}
]
} |
|
Requires: {
"heatFrames": 170
}
{
"or": [
"canDash",
{
"heatFrames": 30
}
]
} |
|
Requires: "canDash"
{
"heatFrames": 140
}Exit condition: {
"leaveWithRunway": {
"length": 29,
"openEnd": 0
}
}Unlocks doors: {"types":["gray","super"],"requires":[]}
{"types":["missiles","powerbomb"],"requires":["never"]} |
From: 1
Bottom Left Door
To: 2
Middle Right Door
Jump through the lowest part of the door to enter with enough momentum to break the bomb blocks using SpeedBooster. Entrance condition: {
"comeInGettingBlueSpeed": {
"length": 0,
"openEnd": 1,
"minExtraRunSpeed": "$2.A"
}
}Requires: "h_blueJump"
"HiJump"
"canTrickyJump"
{
"heatFrames": 80
} |
|
Requires: {
"heatFrames": 55
}
{
"or": [
"canDash",
{
"heatFrames": 10
}
]
} |
From: 1
Bottom Left Door
To: 5
Junction Above Bottom Blocks
Jump through the lowest part of the door to enter with enough momentum to break the bomb blocks using SpeedBooster. Entrance condition: {
"comeInGettingBlueSpeed": {
"length": 0,
"openEnd": 0,
"minExtraRunSpeed": "$2.A"
}
}Requires: "h_blueJump"
"canTrickyJump"
{
"heatFrames": 50
} |
From: 2
Middle Right Door
To: 3
Top Right Door
Jump into the room with blue speed and a specific amount of horizontal momentum, morphing through the transition. Unmorph to clear Samus' horizontal momentum while retaining blue, to break the right-most bomb blocks above and reach the top of the room. It can help to pause buffer the morph: time a pause to hit just after Samus jumps and aims down, then hold down during the unpause black screen to buffer the morph. Entrance condition: {
"comeInGettingBlueSpeed": {
"length": 0,
"openEnd": 1,
"minExtraRunSpeed": "$6.0",
"maxExtraRunSpeed": "$6.1"
}
}Requires: "h_blueJump"
"canTrickyDashJump"
"canInsaneJump"
"canLateralMidAirMorph"
{
"heatFrames": 120
}Clears obstacles: A Dev note: Higher run speeds could also work, but with greater difficulty. |
From: 2
Middle Right Door
To: 3
Top Right Door

Jump into the room with blue speed. Morph and unmorph to clear Samus' horizontal momentum while retaining blue, to break the right-most bomb blocks above and reach the top of the room. Entrance condition: {
"comeInGettingBlueSpeed": {
"length": 0,
"openEnd": 1,
"minExtraRunSpeed": "$2.5",
"maxExtraRunSpeed": "$2.F"
}
}Requires: "h_blueJump"
"HiJump"
"canLateralMidAirMorph"
"canTrickyJump"
{
"heatFrames": 150
}Clears obstacles: A Dev note: Higher run speeds can also work, but with greater difficulty. |
From: 2
Middle Right Door
To: 3
Top Right Door
Jump into the room with blue speed and very low horizontal momentum, to break the left-most bomb block above and wall jump up. Entrance condition: {
"comeInGettingBlueSpeed": {
"length": 0,
"openEnd": 1,
"minExtraRunSpeed": "$0.C",
"maxExtraRunSpeed": "$0.F"
}
}Requires: "h_blueJump"
"HiJump"
"canInsaneJump"
"canWallJump"
{
"heatFrames": 130
}Clears obstacles: A |
|

Entrance condition: {
"comeInWithGrappleTeleport": {
"blockPositions": [
[
5,
3
],
[
7,
2
]
]
}
}Requires: {
"heatFrames": 65
}
{
"or": [
"canDash",
{
"heatFrames": 20
}
]
} |
From: 2
Middle Right Door
To: 3
Top Right Door

After teleporting, Samus should be standing inside the wall. Retract Grapple by pressing up, which will pull Samus down and right. Hold right, and release Grapple while still holding right. Perform a turn-around spin jump (to the left). Then morph and roll out to the right. Entrance condition: {
"comeInWithGrappleTeleport": {
"blockPositions": [
[
3,
12
]
]
}
}Requires: "h_heatedGrappleTeleportWallEscape"
"canOffScreenMovement"
{
"heatFrames": 60
}
{
"or": [
"canDash",
{
"heatFrames": 30
}
]
} |
From: 2
Middle Right Door
To: 3
Top Right Door
Jump into the room morphing with blue speed, then unmorph and continue holding up to retain blue speed and break the bomb blocks. A momentum-conserving morph through the transition is not always required but usually makes the strat easier. In many cases, pause buffering the morph can also be helpful. Entrance condition: {
"comeInWithSidePlatform": {
"platforms": [
{
"minHeight": 2,
"maxHeight": 2,
"minTiles": 27.4375,
"speedBooster": "yes",
"obstructions": [
[
1,
0
]
],
"requires": [
"HiJump",
{
"heatFrames": 110
}
],
"note": [
"This applies to Dust Torizo Room and Noob Bridge."
]
},
{
"minHeight": 2,
"maxHeight": 2,
"minTiles": 45,
"speedBooster": "yes",
"obstructions": [
[
1,
0
]
],
"requires": [
"canTrickyDashJump",
"canInsaneJump",
{
"heatFrames": 150
}
],
"note": [
"This applies to Noob Bridge."
]
},
{
"minHeight": 3,
"maxHeight": 3,
"minTiles": 28.2472,
"speedBooster": "yes",
"obstructions": [
[
1,
0
]
],
"requires": [
"HiJump",
{
"heatFrames": 110
}
],
"note": [
"This applies to Double Chamber."
]
},
{
"minHeight": 1,
"maxHeight": 1,
"minTiles": 23.8731,
"speedBooster": "yes",
"obstructions": [
[
3,
0
]
],
"environment": "water",
"requires": [
"HiJump",
"canGravityJump",
{
"heatFrames": 110
}
],
"note": [
"This applies to Below Botwoon Energy Tank and Botwoon Energy Tank Room."
],
"detailNote": [
"Gain run speed, and time a pause to hit after Samus jumps and aims down;",
"then unequip Gravity and buffer the morph while unpausing."
]
},
{
"minHeight": 1,
"maxHeight": 1,
"minTiles": 36.3703,
"speedBooster": "yes",
"obstructions": [
[
3,
0
]
],
"environment": "water",
"requires": [
"canTrickyDashJump",
"canInsaneJump",
"canGravityJump",
{
"heatFrames": 110
}
],
"note": [
"This applies to Botwoon Energy Tank Room."
],
"detailNote": [
"Gain run speed, and time a pause to hit after Samus jumps and aims down;",
"then unequip Gravity and buffer the morph while unpausing."
]
},
{
"minHeight": 2,
"maxHeight": 2,
"minTiles": 31,
"speedBooster": "yes",
"obstructions": [
[
3,
0
]
],
"requires": [
"HiJump",
"canInsaneJump",
{
"heatFrames": 110
}
],
"note": [
"This applies to Metroid Room 1, Statues Hallway, and Baby Kraid Room."
]
},
{
"minHeight": 3,
"maxHeight": 3,
"minTiles": 30.4375,
"speedBooster": "yes",
"obstructions": [
[
3,
0
]
],
"requires": [
"HiJump",
"canInsaneJump",
{
"heatFrames": 110
}
],
"note": [
"This applies to Blue Brinstar Energy Tank Room, Bowling Alley (middle, power off), and Basement (power on)."
]
},
{
"minHeight": 3,
"maxHeight": 3,
"minTiles": 32.4375,
"speedBooster": "yes",
"obstructions": [
[
3,
2
]
],
"requires": [
"HiJump",
{
"heatFrames": 110
}
],
"note": [
"This applies to Metal Pirates Room."
]
},
{
"minHeight": 3,
"maxHeight": 3,
"minTiles": 31.4375,
"speedBooster": "yes",
"obstructions": [
[
5,
2
]
],
"requires": [
"HiJump",
"canInsaneJump",
{
"heatFrames": 110
}
],
"note": [
"This applies to Flyway."
]
}
]
}
}Requires: {
"getBlueSpeed": {
"usedTiles": 20,
"openEnd": 1
}
}
"h_blueJump"
"canMomentumConservingMorph"Clears obstacles: A Dev note: FIXME: Add side platform Screw Attack jumps (without blue speed); also add blue speed strats (side platform and otherwise) that break both sets of bomb blocks, falling down to the item. FIXME: The getBlueSpeed requirement could be refined for each platform. |
From: 2
Middle Right Door
To: 3
Top Right Door
Jump into the room and use either Screw Attack or a blue suit to break the bomb blocks above. Entrance condition: {
"comeInJumping": {
"speedBooster": "any",
"minTiles": 0
}
}Requires: "canPrepareForNextRoom"
"SpaceJump"
{
"or": [
"ScrewAttack",
{
"haveBlueSuit": {}
}
]
}
{
"or": [
{
"heatFrames": 180
},
{
"and": [
"canWallJump",
{
"heatFrames": 150
}
]
},
{
"and": [
"HiJump",
{
"heatFrames": 125
}
]
}
]
}
{
"or": [
"canDash",
{
"heatFrames": 5
}
]
}Clears obstacles: A |
From: 2
Middle Right Door
To: 5
Junction Above Bottom Blocks
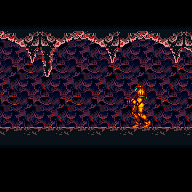
Jump into the room with blue speed, morphing and unmorphing to clear Samus' horizontal momentum while retaining blue. Use the blue to break the right-most bomb blocks above, then fall down. Entrance condition: {
"comeInGettingBlueSpeed": {
"length": 0,
"openEnd": 1,
"minExtraRunSpeed": "$1.D",
"maxExtraRunSpeed": "$2.F"
}
}Requires: "h_blueJump"
"HiJump"
"canLateralMidAirMorph"
"canTrickyJump"
{
"heatFrames": 155
}Clears obstacles: A |
|
Requires: "canDash"
{
"heatFrames": 120
}
{
"or": [
"ScrewAttack",
{
"obstaclesCleared": [
"A"
]
}
]
}Clears obstacles: A |
|
Requires: {
"heatFrames": 60
}
{
"or": [
"canDash",
{
"heatFrames": 20
}
]
} |
|
Requires: "SpaceJump"
{
"or": [
{
"obstaclesCleared": [
"A"
]
},
{
"haveBlueSuit": {}
},
"ScrewAttack"
]
}
{
"or": [
{
"heatFrames": 300
},
{
"and": [
"HiJump",
{
"heatFrames": 200
}
]
}
]
}
{
"or": [
"canDash",
{
"heatFrames": 5
}
]
} |
|
Cross the room while avoiding the pirate's stationary invisible lasers. On entry, fall to the right to land past the first pirate, then run and jump over the next pirate and continue to the top door. It is possible but precise to cross the room without any items or a wall jump by jumping from the slightly raised platform on the right. Entrance condition: {
"comeInWithGMode": {
"mode": "any",
"morphed": false
}
}Requires: "canDash"
{
"or": [
"canWallJump",
"HiJump",
"SpaceJump",
"canSpringBallJumpMidAir",
"canInsaneJump",
{
"and": [
"Charge",
"canTrickyUseFrozenEnemies",
"Plasma",
"canTrickyJump"
]
}
]
}
"h_heatedGModeOpenDifferentDoor"Dev note: FIXME: Some dashless options can be possible here. |
From: 1
Left Door
To: 2
Right Door
Cross the room while avoiding the pirate's stationary invisible lasers. On entry, fall to the right to land past the first pirate, then run and jump over the next pirate and continue to the top door. It is possible but precise to cross the room without any items or a wall jump by jumping from the slightly raised platform on the right. At the top, wait on the left platform to the pirate's right side - shoot to make it face Samus - and let it spawn invisible lasers to overload them. This will prevent the runway pirate from being able to create any, making it easy to kill while keeping the runway clear. Crystal Flash, drain in the acid if needed, then shinecharge. Stand in the acid, at the shallowest point. Crouch and jump into windup at low energy to interrupt. Buffer X-Ray and hold right during reserve refill and then leave the room. Entrance condition: {
"comeInWithGMode": {
"mode": "direct",
"morphed": false
}
}Requires: "canDash"
{
"or": [
"canWallJump",
"HiJump",
"SpaceJump",
"canTrickySpringBallJump",
"canInsaneJump",
{
"and": [
"Charge",
"canTrickyUseFrozenEnemies",
"Plasma",
"canTrickyJump"
]
}
]
}
{
"disableEquipment": "ETank"
}
"h_CrystalFlashForReserveEnergy"
{
"or": [
{
"enemyKill": {
"enemies": [
[
"Yellow Space Pirate (standing)"
]
]
}
},
{
"getBlueSpeed": {
"usedTiles": 17,
"gentleDownTiles": 6,
"openEnd": 0
}
}
]
}
{
"canShineCharge": {
"usedTiles": 19,
"gentleDownTiles": 6,
"openEnd": 1
}
}
{
"acidFrames": 4
}
{
"or": [
{
"and": [
"canReserveTriggerBufferXRay",
{
"autoReserveTrigger": {
"implicitHeatFrames": "no"
}
}
]
},
{
"autoReserveTrigger": {}
}
]
}
"canRModeSparkInterrupt"
{
"heatFrames": 116
} |
|
Falling into the room while holding right is safe at low horizontal speed. Pirates can be shot with any weapon to prevent them from firing. Entrance condition: {
"comeInNormally": {}
}Requires: {
"or": [
{
"and": [
"canDash",
{
"heatFrames": 270
}
]
},
{
"heatFrames": 355
}
]
}Clears obstacles: A |
|
Entrance condition: {
"comeInWithRMode": {}
}Requires: "canDash"
{
"heatFrames": 270
}Clears obstacles: R-Mode, A |
From: 1
Left Door
To: 4
Center Floating Platforms Junction


Spark diagonally to bonk the underside of the top floating platform, far enough right to be able to land on the next platform over. Entrance condition: {
"comeInShinecharged": {}
}Requires: "canShinechargeMovementTricky"
"canInsaneJump"
{
"shineChargeFrames": 145
}
{
"shinespark": {
"frames": 37,
"excessFrames": 0
}
}
"canDash"
{
"heatFrames": 280
}Dev note: This assumes a worst-case entry, e.g. from water physics. FIXME: add other variants with different amounts of momentum, once this is able to be represented. |
|


Dive into the acid to the left of the first floating platform to quickly drop down the room, holding left. Use a flash suit to activate a diagonal shinespark after falling just far enough to clear the large stalactite. Requires: "canDash"
{
"notable": "Reverse Acid Dive"
}
{
"obstaclesNotCleared": [
"A"
]
}
"Gravity"
{
"heatFrames": 405
}
{
"acidFrames": 280
}
{
"useFlashSuit": {}
}
{
"shinespark": {
"frames": 38,
"excessFrames": 0
}
}Unlocks doors: {"types":["super"],"requires":[]}
{"types":["missiles","powerbomb"],"requires":["never"]} |
|


Dive into the acid to the left of the first floating platform to quickly drop down the room, holding left. Breaking spin may make the entry a bit easier to control; maintaining spin allows taking slightly less damage, because Samus reaches higher horizontal base speed when spinning. Use a flash suit to activate a diagonal shinespark after falling almost a screen below the large stalactite; Samus must spark relatively low because the acid physics makes the spark happens at a steeper angle. Requires: "canDash"
{
"notable": "Reverse Acid Dive"
}
{
"obstaclesNotCleared": [
"A"
]
}
"canSuitlessLavaDive"
{
"heatFrames": 415
}
{
"acidFrames": 290
}
{
"useFlashSuit": {}
}
{
"shinespark": {
"frames": 41,
"excessFrames": 0
}
}Unlocks doors: {"types":["super"],"requires":[]}
{"types":["missiles","powerbomb"],"requires":["never"]} |
|


Dive into the acid to the left of the first floating platform to quickly sink to the bottom of the room. It is possible to jump directly over the pirate at the bottom of the ramp directly to the gap between platforms. Falling in this way will land between the platforms at the bottom of the room. Requires: {
"notable": "Reverse Acid Dive"
}
{
"obstaclesNotCleared": [
"A"
]
}
"canSuitlessLavaDive"
{
"or": [
"SpaceJump",
"canTrickyJump",
{
"and": [
"canLateralMidAirMorph",
"canCarefulJump"
]
},
{
"and": [
"ScrewAttack",
"canCarefulJump"
]
},
{
"and": [
"h_heatProof",
{
"enemyKill": {
"enemies": [
[
"Yellow Space Pirate (standing)"
]
]
}
},
"canCarefulJump"
]
}
]
}
{
"or": [
{
"and": [
"canDash",
{
"heatFrames": 320
},
{
"acidFrames": 195
}
]
},
{
"and": [
"canPreciseWallJump",
{
"heatFrames": 480
},
{
"acidFrames": 250
}
]
},
{
"and": [
"SpaceJump",
{
"heatFrames": 470
},
{
"acidFrames": 210
}
]
},
{
"and": [
{
"heatFrames": 460
},
{
"acidFrames": 315
}
]
}
]
}Dev note: It is faster to fall all the way to the bottom and then jump onto the platform to the left, than to morph/unmorph to reset fall speed to reach it directly. |
From: 2
Right Door
To: 4
Center Floating Platforms Junction


Jump over the pirate and fall straight down to land on an upper-middle floating platform. Requires: {
"notable": "Reverse Acid Dive"
}
{
"obstaclesNotCleared": [
"A"
]
}
"canSuitlessLavaDive"
{
"or": [
{
"and": [
"canDash",
{
"heatFrames": 180
},
{
"acidFrames": 80
}
]
},
{
"and": [
{
"heatFrames": 210
},
{
"acidFrames": 110
}
]
}
]
} |
From: 2
Right Door
To: 5
Below Left Door Junction


Enter the room blue with very low run speed (e.g. with a 4-tap). Use a precisely timed jump to bonk the large stalagtite in the ceiling and fall through both pirates, killing them with the blue speed. Enter the acid while aiming down to shrink Samus' hitbox. This strat works with all combinations of movement items and suits. Entrance condition: {
"comeInGettingBlueSpeed": {
"length": 9,
"openEnd": 1,
"gentleDownTiles": 4
}
}Requires: {
"notable": "Reverse Acid Dive"
}
{
"notable": "Reverse Thread the Needle"
}
{
"obstaclesNotCleared": [
"A"
]
}
"h_blueJump"
"canInsaneJump"
"canSuitlessLavaDive"
"canSlowShortCharge"
{
"heatFrames": 330
}
{
"acidFrames": 210
} |
From: 2
Right Door
To: 5
Below Left Door Junction
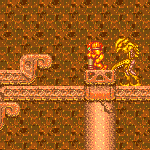

Begin running from the top of the second slope and jump at the bottom of the third slope, bonking the large stalagtite in the ceiling. Kill the first pirate with Screw Attack (or ahead of time with Charge+Plasma), and pass through the second pirate using a charged plasma shot. Enter the acid while aiming down to shrink Samus' hitbox. This strat works with all combinations of movement items and suits. Requires: "canDash"
{
"notable": "Reverse Acid Dive"
}
{
"notable": "Reverse Thread the Needle"
}
{
"obstaclesNotCleared": [
"A"
]
}
"canInsaneJump"
"canSuitlessLavaDive"
"Charge"
"Plasma"
"canHitbox"
{
"or": [
"ScrewAttack",
{
"heatFrames": 210
}
]
}
{
"heatFrames": 330
}
{
"acidFrames": 210
} |
|
SpaceJump diagonally towards the door through the acid. Requires: {
"notable": "Reverse Acid Dive"
}
{
"obstaclesNotCleared": [
"A"
]
}
"canSuitlessLavaDive"
"Gravity"
"SpaceJump"
{
"or": [
{
"and": [
{
"heatFrames": 280
},
{
"acidFrames": 280
}
]
},
{
"and": [
"HiJump",
{
"heatFrames": 250
},
{
"acidFrames": 250
}
]
},
{
"and": [
"HiJump",
"canDash",
{
"heatFrames": 220
},
{
"acidFrames": 220
}
]
}
]
}Unlocks doors: {"types":["super"],"requires":[]}
{"types":["missiles","powerbomb"],"requires":["never"]}Dev note: FIXME: Add requirements to unlock the door with Missiles and Power Bombs. |
|
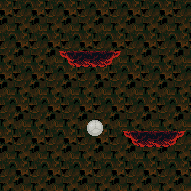
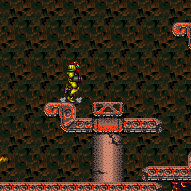
Requires: "canDash"
{
"obstaclesCleared": [
"A"
]
}
{
"or": [
"canDodgeWhileShooting",
"ScrewAttack",
{
"enemyDamage": {
"enemy": "Yellow Space Pirate (standing)",
"type": "laser",
"hits": 1
}
}
]
}
{
"or": [
{
"and": [
"canWallJump",
{
"heatFrames": 345
}
]
},
{
"and": [
"HiJump",
{
"heatFrames": 345
}
]
},
{
"and": [
"canWallJump",
"HiJump",
{
"heatFrames": 300
}
]
},
{
"and": [
"canTrickySpringBallJump",
{
"heatFrames": 345
}
]
},
{
"and": [
"canJumpIntoIBJ",
"canTrickyJump",
{
"heatFrames": 500
}
]
}
]
} |
From: 3
Bottom Platform Junction
To: 4
Center Floating Platforms Junction
Freeze a pirate to use as a platform. A very strong beam is required to stay out of the acid. Shooting the Pirate with two diagonal shots can help prevent it from being killed as it is frozen. Requires: "canDash"
{
"obstaclesCleared": [
"A"
]
}
"Charge"
"canTrickyUseFrozenEnemies"
"Plasma"
"canTrickyJump"
{
"heatFrames": 440
} |
From: 3
Bottom Platform Junction
To: 4
Center Floating Platforms Junction


Between the two pirates there is a short runway that can be used to jump to the higher platform. Requires: "canDash"
{
"obstaclesCleared": [
"A"
]
}
"canInsaneJump"
{
"heatFrames": 480
} |
|


Avoid the pirate while moving through the acid to get closer to the wall. Requires: {
"notable": "Reverse Acid Dive"
}
{
"obstaclesNotCleared": [
"A"
]
}
"canSuitlessLavaDive"
{
"or": [
{
"and": [
"Gravity",
"canDash",
{
"heatFrames": 105
},
{
"acidFrames": 105
}
]
},
{
"and": [
{
"heatFrames": 170
},
{
"acidFrames": 170
}
]
}
]
} |
From: 3
Bottom Platform Junction
To: 5
Below Left Door Junction


Kill the Pirate and perform a Crystal Flash. Requires: {
"notable": "Reverse Acid Dive"
}
{
"obstaclesNotCleared": [
"A"
]
}
{
"obstaclesNotCleared": [
"R-Mode"
]
}
"canSuitlessLavaDive"
{
"or": [
{
"and": [
"canTrickyDodgeEnemies",
{
"enemyKill": {
"enemies": [
[
"Yellow Space Pirate (standing)"
]
],
"explicitWeapons": [
"Super",
"Charge+Plasma"
]
}
}
]
},
{
"enemyKill": {
"enemies": [
[
"Yellow Space Pirate (standing)"
]
],
"explicitWeapons": [
"Charge+Ice+Wave+Plasma"
]
}
},
{
"and": [
"Gravity",
{
"enemyKill": {
"enemies": [
[
"Yellow Space Pirate (standing)"
]
],
"explicitWeapons": [
"ScrewAttack"
]
}
}
]
}
]
}
{
"or": [
{
"and": [
"Gravity",
"canDash",
{
"heatFrames": 80
},
{
"acidFrames": 80
}
]
},
{
"and": [
{
"heatFrames": 130
},
{
"acidFrames": 130
}
]
}
]
}
"h_heatedAcidCrystalFlash"
{
"heatFrames": 35
}
{
"acidFrames": 35
} |
From: 4
Center Floating Platforms Junction
To: 1
Left Door
Land on the fourth platform from the top and build some speed to spacejump across straight to the door. The optimal platform can be hit by simpily holding right when entering the acid. Requires: {
"notable": "Reverse Acid Dive"
}
{
"obstaclesNotCleared": [
"A"
]
}
"Gravity"
"SpaceJump"
{
"or": [
{
"and": [
"canDash",
{
"heatFrames": 360
},
{
"acidFrames": 360
}
]
},
{
"and": [
{
"heatFrames": 460
},
{
"acidFrames": 460
}
]
}
]
}Unlocks doors: {"types":["super"],"requires":[]}
{"types":["missiles","powerbomb"],"requires":["never"]}Dev note: Includes a little bit extra frame count to drop down two platforms first. FIXME: this lower platform could be modeled more cleanly as a separate junction node; it would be useful as another place to Crystal Flash when traversing the room left-to-right. |
|
Jump over or kill the final pirate in front of the door. Requires: "canDash"
{
"obstaclesCleared": [
"A"
]
}
{
"or": [
"canCarefulJump",
"canPreciseWallJump",
"ScrewAttack",
"canSpringBallJumpMidAir",
"SpaceJump",
{
"enemyDamage": {
"enemy": "Yellow Space Pirate (standing)",
"type": "contact",
"hits": 2
}
}
]
}
{
"heatFrames": 420
} |
|
Requires: "canDash"
{
"obstaclesCleared": [
"A"
]
}
"HiJump"
{
"or": [
"canSpeedyJump",
{
"heatFrames": 90
}
]
}
{
"heatFrames": 270
}
{
"or": [
"canCarefulJump",
"canLateralMidAirMorph",
"ScrewAttack",
{
"and": [
{
"enemyKill": {
"enemies": [
[
"Yellow Space Pirate (standing)"
]
],
"explicitWeapons": [
"Charge+Ice+Wave+Spazer"
]
}
},
{
"heatFrames": 240
}
]
},
{
"and": [
{
"enemyKill": {
"enemies": [
[
"Yellow Space Pirate (standing)"
]
],
"explicitWeapons": [
"Missile",
"Charge+Plasma"
]
}
},
{
"heatFrames": 120
}
]
},
{
"and": [
{
"enemyKill": {
"enemies": [
[
"Yellow Space Pirate (standing)"
]
],
"explicitWeapons": [
"Super"
]
}
},
{
"heatFrames": 60
}
]
}
]
} |
|
Requires: "canDash"
{
"obstaclesCleared": [
"A"
]
}
{
"or": [
{
"and": [
{
"enemyKill": {
"enemies": [
[
"Yellow Space Pirate (standing)",
"Yellow Space Pirate (standing)"
],
[
"Yellow Space Pirate (standing)"
]
],
"explicitWeapons": [
"Charge+Ice+Wave+Spazer",
"Missile"
]
}
},
{
"heatFrames": 900
}
]
},
{
"and": [
{
"enemyKill": {
"enemies": [
[
"Yellow Space Pirate (standing)",
"Yellow Space Pirate (standing)"
],
[
"Yellow Space Pirate (standing)"
]
],
"explicitWeapons": [
"Super",
"Charge+Plasma"
]
}
},
{
"heatFrames": 660
}
]
}
]
} |
From: 4
Center Floating Platforms Junction
To: 3
Bottom Platform Junction
Jump off the platform to the left with low horizontal speed and hold left to avoid landing on any pirates. Requires: {
"notable": "Reverse Acid Dive"
}
{
"obstaclesNotCleared": [
"A"
]
}
{
"or": [
{
"and": [
"Gravity",
"canDash",
{
"heatFrames": 180
},
{
"acidFrames": 180
}
]
},
{
"and": [
{
"heatFrames": 240
},
{
"acidFrames": 240
}
]
}
]
} |
From: 1
Top Left Door
To: 1
Top Left Door
Requires: "canDash"
{
"obstaclesNotCleared": [
"A"
]
}
"ScrewAttack"
{
"heatFrames": 80
}Exit condition: {
"leaveWithRunway": {
"length": 13,
"openEnd": 0
}
} |
|
Requires: "ScrewAttack"
{
"or": [
{
"and": [
"SpaceJump",
{
"heatFrames": 155
}
]
},
{
"and": [
"canWallJump",
{
"heatFrames": 135
}
]
}
]
}
{
"or": [
"canDash",
{
"and": [
{
"haveBlueSuit": {}
},
{
"heatFrames": 20
}
]
}
]
} |
|
Requires: "HiJump"
{
"or": [
"canDodgeWhileShooting",
"ScrewAttack",
{
"enemyDamage": {
"enemy": "Yellow Space Pirate (wall)",
"type": "contact",
"hits": 1
}
}
]
}
{
"heatFrames": 120
}
{
"or": [
"canDash",
{
"heatFrames": 20
}
]
} |
|
Kill the pirates to free up the full runway for a speedy jump, or to start an IBJ. If the wall pirate jumps over a Samus who is not crouched, it will climb offscreen on its own. But may still need to be killed after. Requires: {
"or": [
{
"and": [
"canTrickyDodgeEnemies",
{
"enemyKill": {
"enemies": [
[
"Yellow Space Pirate (standing)"
],
[
"Yellow Space Pirate (wall)"
]
],
"explicitWeapons": [
"Charge"
]
}
},
{
"heatFrames": 2100
}
]
},
{
"and": [
"canDodgeWhileShooting",
{
"enemyKill": {
"enemies": [
[
"Yellow Space Pirate (standing)"
],
[
"Yellow Space Pirate (wall)"
]
],
"explicitWeapons": [
"Charge+Plasma"
]
}
},
{
"heatFrames": 240
}
]
},
{
"and": [
"canDodgeWhileShooting",
{
"enemyKill": {
"enemies": [
[
"Yellow Space Pirate (standing)"
],
[
"Yellow Space Pirate (wall)"
]
],
"explicitWeapons": [
"Charge+Ice+Wave+Spazer"
]
}
},
{
"heatFrames": 660
}
]
},
{
"and": [
{
"enemyKill": {
"enemies": [
[
"Yellow Space Pirate (standing)"
],
[
"Yellow Space Pirate (wall)"
]
],
"explicitWeapons": [
"Missile",
"Super"
]
}
},
{
"heatFrames": 330
}
]
},
{
"and": [
"canDash",
"ScrewAttack",
"canDodgeWhileShooting",
{
"heatFrames": 80
}
]
},
{
"and": [
{
"haveBlueSuit": {}
},
"canDodgeWhileShooting",
{
"heatFrames": 100
}
]
}
]
}
{
"or": [
{
"and": [
"canTrickyDashJump",
{
"heatFrames": 150
}
]
},
{
"and": [
"canIBJ",
{
"heatFrames": 1320
}
]
},
{
"and": [
"canJumpIntoIBJ",
{
"heatFrames": 540
}
]
},
{
"and": [
"canDoubleBombJump",
{
"heatFrames": 310
}
]
}
]
} |
From: 1
Top Left Door
To: 4
Top Right Door
Release jump before unmorphing, to avoid uncontrolled upward momentum. Requires: "canTrickyJump"
"canSpringBallJumpMidAir"
{
"or": [
{
"and": [
"canDash",
{
"heatFrames": 140
}
]
},
{
"heatFrames": 190
}
]
} |
|
Walljump from directly above the door to avoid the left wall pirate. Requires: "canPreciseWallJump"
"canDash"
{
"or": [
"canTrickyJump",
"ScrewAttack",
{
"enemyDamage": {
"enemy": "Yellow Space Pirate (wall)",
"type": "contact",
"hits": 1
}
}
]
}
{
"heatFrames": 120
} |
|

Shoot at the Standing Pirate to prevent it from attacking. Then clip through the Power Bomb blocks with a moonfall. Entrance condition: {
"comeInWithStoredFallSpeed": {
"fallSpeedInTiles": 1
}
}Requires: "canMoonfall"
{
"heatFrames": 180
}
{
"or": [
"canDash",
{
"haveBlueSuit": {}
}
]
} |
From: 2
Bottom Left Door
To: 3
Bottom Right Door
Entrance condition: {
"comeInWithStoredFallSpeed": {
"fallSpeedInTiles": 1
}
}Requires: {
"heatFrames": 50
}
{
"or": [
"canDash",
{
"heatFrames": 25
}
]
}Exit condition: {
"leaveWithStoredFallSpeed": {
"fallSpeedInTiles": 1
}
}Unlocks doors: {"types":["missiles","super"],"requires":[]}
{"types":["powerbomb"],"requires":["never"]} |
From: 2
Bottom Left Door
To: 3
Bottom Right Door
Entrance condition: {
"comeInWithStoredFallSpeed": {
"fallSpeedInTiles": 2
}
}Requires: {
"heatFrames": 50
}
{
"or": [
"canDash",
{
"heatFrames": 25
}
]
}Exit condition: {
"leaveWithStoredFallSpeed": {
"fallSpeedInTiles": 2
}
}Unlocks doors: {"types":["missiles","super"],"requires":[]}
{"types":["powerbomb"],"requires":["never"]} |
|
Requires: {
"heatFrames": 25
}
{
"or": [
"canDash",
{
"heatFrames": 10
}
]
} |
From: 3
Bottom Right Door
To: 2
Bottom Left Door
Entrance condition: {
"comeInWithStoredFallSpeed": {
"fallSpeedInTiles": 1
}
}Requires: {
"heatFrames": 50
}
{
"or": [
"canDash",
{
"heatFrames": 25
}
]
}Exit condition: {
"leaveWithStoredFallSpeed": {
"fallSpeedInTiles": 1
}
}Unlocks doors: {"types":["missiles","super"],"requires":[]}
{"types":["powerbomb"],"requires":["never"]} |
From: 3
Bottom Right Door
To: 2
Bottom Left Door
Entrance condition: {
"comeInWithStoredFallSpeed": {
"fallSpeedInTiles": 2
}
}Requires: {
"heatFrames": 50
}
{
"or": [
"canDash",
{
"heatFrames": 25
}
]
}Exit condition: {
"leaveWithStoredFallSpeed": {
"fallSpeedInTiles": 2
}
}Unlocks doors: {"types":["missiles","super"],"requires":[]}
{"types":["powerbomb"],"requires":["never"]} |
|
Requires: {
"heatFrames": 35
}
{
"or": [
"canDash",
{
"heatFrames": 10
}
]
} |
|


Falling to the right of the floating platform is faster. Entrance condition: {
"comeInNormally": {}
}Requires: {
"or": [
"canCarefulJump",
{
"enemyDamage": {
"enemy": "Yellow Space Pirate (wall)",
"type": "contact",
"hits": 1
}
}
]
}
{
"heatFrames": 115
}
{
"or": [
"canDash",
{
"heatFrames": 10
}
]
} |
From: 5
Bottom Junction
To: 1
Top Left Door
Run from the right door and jump at the very end of the raised flat ground. Aim down any time before the peak of the jump in order to not fall out of the block. Note that Samus can destroy the Power Bomb blocks above while waiting for the block to respawn. Requires: "canDash"
"canJumpIntoRespawningBlock"
"canTrickyJump"
{
"or": [
"canInsaneJump",
"h_heatProof"
]
}
{
"heatFrames": 550
}
{
"or": [
"h_usePowerBomb",
{
"obstaclesCleared": [
"A"
]
}
]
}Clears obstacles: A Unlocks doors: {"types":["missiles"],"requires":[{"heatFrames":30}]}
{"types":["powerbomb"],"requires":[],"useImplicitRequires":false} |
|
Requires: {
"heatFrames": 30
}
{
"or": [
"canDash",
{
"heatFrames": 5
}
]
}Unlocks doors: {"types":["missiles"],"requires":[{"heatFrames":30}]} |
|
Requires: {
"heatFrames": 25
}
{
"or": [
"canDash",
{
"heatFrames": 5
}
]
}Unlocks doors: {"types":["missiles"],"requires":[{"heatFrames":30}]} |
|
Requires: "canDash"
"SpaceJump"
{
"heatFrames": 360
} |
|
Requires: {
"heatFrames": 135
}
{
"or": [
"canDash",
{
"heatFrames": 45
}
]
} |
|
Requires: "canDash"
"SpaceJump"
{
"heatFrames": 300
} |
From: 2
Right Door
To: 2
Right Door
Entrance condition: {
"comeInNormally": {}
}Requires: {
"heatFrames": 150
}
{
"or": [
"canDash",
{
"heatFrames": 40
}
]
}Exit condition: {
"leaveWithGModeSetup": {}
}Unlocks doors: {"types":["super"],"requires":[]}
{"types":["missiles"],"requires":[{"heatFrames":70}]}
{"types":["powerbomb"],"requires":[{"heatFrames":250}]}Dev note: FIXME: Could maybe reduce the heat frames if coming from the farm or the left. |
|
Use the wider platforms to build run speed for jumping farther, faster. Requires: "canDash"
"canTrickyJump"
{
"heatFrames": 200
} |
|
Requires: {
"heatFrames": 45
}
{
"or": [
"canDash",
{
"heatFrames": 20
}
]
} |
|
Requires: {
"heatFrames": 145
}
{
"or": [
"canDash",
{
"heatFrames": 70
}
]
} |
From: 3
Left Farm Junction
To: 1
Left Door

Requires: {
"heatFrames": 280
}
{
"or": [
"canDash",
"canComplexGMode"
]
}Exit condition: {
"leaveWithGModeSetup": {}
}Unlocks doors: {"types":["super"],"requires":[]}
{"types":["missiles"],"requires":[{"heatFrames":130}]}
{"types":["powerbomb"],"requires":[{"heatFrames":350}]}Dev note: FIXME: Add a dashless setup with Ice. |
From: 3
Left Farm Junction
To: 1
Left Door


The Zebbo needs to be 2 pixels higher than where it would be if Samus was standing. One setup is to peform a tiny hop just before the right Zebbo starts moving to the left then freeze it after it starts moving left. Lure the Zebbo to the left and freeze it again to extend the runway while maintaining a half-tile gap between it and the runway to extend the runway as much as possible. With more Energy, it is possible to morph on one of the medium-height pillars to align the Zebbo. Requires: "canDash"
"h_frozenEnemyRunway"
{
"heatFrames": 1000
}Exit condition: {
"leaveWithRunway": {
"length": 3,
"openEnd": 0
}
}Unlocks doors: {"types":["ammo"],"requires":[]} |
|

Requires: {
"or": [
"canTrickyJump",
{
"heatFrames": 30
}
]
}
{
"heatFrames": 190
}
{
"or": [
"canDash",
{
"heatFrames": 90
}
]
} |
|
Requires: {
"heatFrames": 60
}
{
"or": [
"canDash",
{
"heatFrames": 20
}
]
} |
From: 4
Right Farm Junction
To: 2
Right Door


The Zebbo needs to be 2 pixels higher than where it would be if Samus was standing. One setup is to peform a tiny hop just before the left Zebbo starts moving to the right then freeze it after it starts moving right. Get onto the runway and freeze the Zebbo again while maintaining a half-tile gap between it and the runway to extend it as much as possible. With more Energy, it is possible to morph on one of the medium-height pillars to align the Zebbo. With less Energy, it is possible to get the Zebbo into position by only freezing it once - after the small hop, jump towards the door and shoot downwards to freeze it in place. Requires: "canDash"
"h_frozenEnemyRunway"
{
"heatFrames": 300
}
{
"or": [
"canInsaneJump",
{
"heatFrames": 300
}
]
}Exit condition: {
"leaveWithRunway": {
"length": 6,
"openEnd": 0
}
}Unlocks doors: {"types":["ammo"],"requires":[]} |
|
Requires: {
"heatFrames": 180
}
{
"or": [
"canDash",
{
"heatFrames": 80
}
]
} |
From: 2
Bottom Left Door
To: 2
Bottom Left Door
Requires: {
"or": [
{
"and": [
"canTrickyDodgeEnemies",
{
"resetRoom": {
"nodes": [
1
]
}
},
{
"cycleFrames": 2900
}
]
},
{
"and": [
{
"resetRoom": {
"nodes": [
2
]
}
},
{
"cycleFrames": 1560
}
]
},
{
"and": [
"canTrickyDodgeEnemies",
{
"resetRoom": {
"nodes": [
3
]
}
},
{
"cycleFrames": 2780
}
]
}
]
}
"Morph"
{
"or": [
{
"ammo": {
"type": "PowerBomb",
"count": 1
}
},
"SpringBall",
{
"and": [
"Bombs",
{
"cycleFrames": 60
},
{
"or": [
"canTrickyJump",
{
"and": [
"Ice",
"canDodgeWhileShooting"
]
}
]
}
]
}
]
}
{
"or": [
"SpaceJump",
{
"and": [
"canDash",
"canFarmWhileShooting",
"canHorizontalDamageBoost",
{
"enemyDamage": {
"enemy": "Fireflea",
"type": "contact",
"hits": 2
}
},
{
"or": [
"canPreciseWallJump",
{
"and": [
"HiJump",
"canSpeedyJump"
]
},
{
"and": [
"canJumpIntoIBJ",
{
"cycleFrames": 1000
}
]
}
]
}
]
}
]
}
{
"or": [
"SpaceJump",
"canPreciseWallJump",
{
"and": [
"HiJump",
"canSpeedyJump"
]
}
]
}
{
"or": [
"canDash",
{
"cycleFrames": 500
}
]
}Resets obstacles: A Farm cycle drops: 5 Fireflea |
|
Requires: {
"or": [
{
"and": [
{
"resetRoom": {
"nodes": [
1
]
}
},
"canDodgeWhileShooting",
{
"cycleFrames": 2370
}
]
},
{
"and": [
{
"resetRoom": {
"nodes": [
2
]
}
},
"canMidAirMorph",
{
"or": [
{
"and": [
"canTrickyJump",
{
"cycleFrames": 2000
}
]
},
{
"and": [
{
"or": [
"Grapple",
"SpaceJump"
]
},
{
"cycleFrames": 2200
}
]
}
]
}
]
},
{
"and": [
{
"resetRoom": {
"nodes": [
3
]
}
},
"canDodgeWhileShooting",
{
"cycleFrames": 2250
}
]
}
]
}
"h_usePowerBomb"
"h_usePowerBomb"
{
"or": [
"SpaceJump",
"canPreciseWallJump",
{
"and": [
"HiJump",
"canSpeedyJump"
]
}
]
}
{
"or": [
"canDash",
{
"cycleFrames": 500
}
]
}Clears obstacles: A Farm cycle drops: 2 Fireflea, 5 Fune Dev note: An extra Power Bomb can be used but an extra Fireflea farm is included in that case. |
From: 2
Bottom Left Door
To: 2
Bottom Left Door
Requires: {
"or": [
{
"and": [
"canTrickyDodgeEnemies",
{
"resetRoom": {
"nodes": [
1
]
}
},
{
"cycleFrames": 2480
}
]
},
{
"and": [
{
"resetRoom": {
"nodes": [
2
]
}
},
{
"cycleFrames": 1140
}
]
},
{
"and": [
"canTrickyDodgeEnemies",
{
"resetRoom": {
"nodes": [
3
]
}
},
{
"cycleFrames": 2360
}
]
}
]
}
"Morph"
{
"or": [
{
"ammo": {
"type": "PowerBomb",
"count": 1
}
},
"SpringBall",
{
"and": [
"Bombs",
{
"cycleFrames": 60
},
{
"or": [
"canTrickyJump",
{
"and": [
"Ice",
"canDodgeWhileShooting"
]
}
]
}
]
}
]
}
{
"or": [
"SpaceJump",
"canPreciseWallJump",
{
"and": [
"HiJump",
"canSpeedyJump"
]
}
]
}
{
"or": [
"canDash",
{
"cycleFrames": 500
}
]
}Resets obstacles: A Farm cycle drops: 2 Fireflea |
From: 4
Firefleas Item
To: 5
Firefleas Bottom Left Platform Junction
Avoid killing the Firefleas and instead freeze them as a way accross the spikes. It helps to freeze them low, closer to the spikes. Requires: "canTrickyUseFrozenEnemies"
"canTrickyJump"
{
"or": [
"canDash",
"canInsaneJump"
]
} |
From: 4
Firefleas Item
To: 5
Firefleas Bottom Left Platform Junction
Requires: {
"enemyDamage": {
"enemy": "Fireflea",
"type": "contact",
"hits": 1
}
}
"canUseEnemies"
"canDash"
"canUseIFrames" |
From: 5
Firefleas Bottom Left Platform Junction
To: 4
Firefleas Item

Avoid killing the Firefleas and instead freeze them as a way accross the spikes. It helps to freeze them low, closer to the spikes. Requires: "canTrickyUseFrozenEnemies"
"canTrickyJump"
{
"or": [
"canDash",
"canInsaneJump"
]
} |
From: 5
Firefleas Bottom Left Platform Junction
To: 4
Firefleas Item
Requires: {
"enemyDamage": {
"enemy": "Fireflea",
"type": "contact",
"hits": 1
}
}
"canUseEnemies"
"canDash"
"canUseIFrames" |
|
Requires: {
"or": [
{
"and": [
"Plasma",
{
"heatFrames": 245
},
{
"or": [
"Wave",
"Charge"
]
}
]
},
{
"and": [
{
"haveBlueSuit": {}
},
{
"heatFrames": 245
}
]
},
{
"and": [
{
"or": [
"Plasma",
"Wave",
"ScrewAttack",
"Spazer",
"canPseudoScrew"
]
},
{
"heatFrames": 285
}
]
},
{
"and": [
"canDodgeWhileShooting",
{
"heatFrames": 420
}
]
}
]
}
{
"or": [
"canDash",
{
"heatFrames": 160
}
]
}
{
"resourceAvailable": [
{
"type": "Energy",
"count": 50
}
]
}
{
"partialRefill": {
"type": "PowerBomb",
"limit": 1
}
}Clears obstacles: A |
|
Requires: "h_heatProof"
{
"resetRoom": {
"nodes": [
1
]
}
}
{
"or": [
"canDash",
{
"cycleFrames": 160
}
]
}
{
"or": [
{
"and": [
"Plasma",
{
"cycleFrames": 245
},
{
"or": [
"Wave",
"Charge"
]
}
]
},
{
"and": [
{
"haveBlueSuit": {}
},
{
"cycleFrames": 245
}
]
},
{
"and": [
{
"or": [
"Plasma",
"Wave",
"ScrewAttack",
"Spazer",
"canPseudoScrew"
]
},
{
"cycleFrames": 285
}
]
},
{
"and": [
"canDodgeWhileShooting",
{
"cycleFrames": 420
}
]
}
]
}Clears obstacles: A Resets obstacles: B, C Farm cycle drops: 1 Alcoon |
From: 1
Left Door
To: 6
Junction By Left Door (Right of Pit)
Requires: {
"or": [
{
"and": [
"canDash",
{
"heatFrames": 50
}
]
},
{
"heatFrames": 100
}
]
} |
From: 1
Left Door
To: 7
Junction By Lower Alcoons (Left of Spike Pits)
Requires: {
"heatFrames": 160
}
{
"or": [
"canDash",
{
"heatFrames": 10
}
]
} |
From: 1
Left Door
To: 7
Junction By Lower Alcoons (Left of Spike Pits)

Requires: {
"or": [
"canDownBack",
"canTrickyJump"
]
}
{
"heatFrames": 110
}
{
"or": [
"canDash",
{
"heatFrames": 10
}
]
} |
From: 3
Bottom Horizontal Door
To: 3
Bottom Horizontal Door
Requires: "h_heatProof"
{
"or": [
{
"and": [
{
"resetRoom": {
"nodes": [
1
]
}
},
{
"or": [
"canWallJump",
"HiJump",
"SpaceJump"
]
},
{
"cycleFrames": 150
}
]
},
{
"resetRoom": {
"nodes": [
3
]
}
}
]
}
{
"or": [
"canDash",
{
"cycleFrames": 120
}
]
}
{
"or": [
{
"and": [
"Plasma",
{
"cycleFrames": 400
}
]
},
{
"and": [
"ScrewAttack",
{
"cycleFrames": 360
}
]
},
{
"and": [
{
"haveBlueSuit": {}
},
{
"cycleFrames": 360
}
]
},
{
"and": [
"canPseudoScrew",
{
"cycleFrames": 440
}
]
},
{
"and": [
"Spazer",
"Wave",
{
"cycleFrames": 560
}
]
},
{
"and": [
"canDodgeWhileShooting",
{
"cycleFrames": 910
}
]
}
]
}Resets obstacles: A, B, C Farm cycle drops: 3 Alcoon |
From: 3
Bottom Horizontal Door
To: 3
Bottom Horizontal Door
It is tricky to climb the room without fully overloading PLMs. Freeze the left Alcoon to the right of where it jumps out of the ground. With HiJump, spin jump off of it and land directly on the middle stair platform. With Spring Ball, morph on top of the Alcoon, jump to barely land on the lowest platform while avoiding the camera scroll blocks one tile above, then use Spring Ball again to jump to the next platform. Up above, get onto the edge of the runway leading right, then run through the camera scroll blocks to reach the item. Wait at least 35 seconds for the Alcoon to jump back down before returning to the door, or kill it with a Power Bomb or SBA. Stand close to the transition and use X-Ray then hold right to leave the room before the door closes. Note that spending any extra frames in the camera scroll blocks will overload PLMs before reaching the item and prevent remote acquiring it. There is a row of camera scroll blocks two-tiles above the bottom left platform, and a column two-tiles away from the right of the gap in front of the left door. Entrance condition: {
"comeInWithGMode": {
"mode": "direct",
"morphed": false
}
}Requires: "canRemoteAcquire"
"canTrickyGMode"
"canTrickyUseFrozenEnemies"
{
"or": [
"HiJump",
"h_useSpringBall"
]
}
{
"or": [
"canDash",
"Morph"
]
}
"h_heatedDirectGModeLeaveSameDoor"Collects items: 4 |
From: 3
Bottom Horizontal Door
To: 3
Bottom Horizontal Door
Requires: {
"or": [
"canDash",
{
"heatFrames": 120
}
]
}
{
"or": [
{
"and": [
"Plasma",
{
"heatFrames": 400
}
]
},
{
"and": [
"ScrewAttack",
{
"heatFrames": 360
}
]
},
{
"and": [
{
"haveBlueSuit": {}
},
{
"heatFrames": 360
}
]
},
{
"and": [
"canPseudoScrew",
{
"heatFrames": 440
}
]
},
{
"and": [
"Spazer",
"Wave",
{
"heatFrames": 560
}
]
},
{
"and": [
"canDodgeWhileShooting",
{
"heatFrames": 910
}
]
}
]
}
{
"resourceAvailable": [
{
"type": "Energy",
"count": 50
}
]
}
{
"partialRefill": {
"type": "PowerBomb",
"limit": 3
}
} |
From: 3
Bottom Horizontal Door
To: 7
Junction By Lower Alcoons (Left of Spike Pits)
Requires: "canDash"
"ScrewAttack"
{
"or": [
"canCarefulJump",
{
"heatFrames": 55
}
]
}
{
"heatFrames": 85
} |
From: 3
Bottom Horizontal Door
To: 7
Junction By Lower Alcoons (Left of Spike Pits)
Use blue speed to kill the Alcoons without stopping. Entrance condition: {
"comeInGettingBlueSpeed": {
"length": 7,
"openEnd": 1,
"gentleDownTiles": 4,
"minExtraRunSpeed": "$1.8"
}
}Requires: "h_blueJump"
{
"heatFrames": 60
} |
From: 3
Bottom Horizontal Door
To: 7
Junction By Lower Alcoons (Left of Spike Pits)
Run and aim down mid-air to gap skip under the first Alcoon as it ascends. Then wait to jump over the second one. Requires: "canDash"
"canTrickyJump"
{
"heatFrames": 130
} |
From: 3
Bottom Horizontal Door
To: 7
Junction By Lower Alcoons (Left of Spike Pits)


Requires: "canDash"
"canCarefulJump"
{
"heatFrames": 200
} |
From: 3
Bottom Horizontal Door
To: 7
Junction By Lower Alcoons (Left of Spike Pits)
Run and jump under the first Alcoon as it ascends. Fire a shot to stun the second Alcoon while running and jumping under it as well. Requires: "canDash"
"canInsaneJump"
{
"heatFrames": 105
} |
From: 3
Bottom Horizontal Door
To: 7
Junction By Lower Alcoons (Left of Spike Pits)


Kill the Alcoon without stopping. Requires: "canDash"
"canDodgeWhileShooting"
{
"or": [
{
"enemyKill": {
"enemies": [
[
"Alcoon"
]
],
"explicitWeapons": [
"Missile",
"Super",
"Wave+Plasma"
]
}
},
{
"and": [
"canPrepareForNextRoom",
"Charge",
"Wave",
"Spazer"
]
},
{
"and": [
"canPseudoScrew",
{
"heatFrames": 30
}
]
}
]
}
{
"or": [
"canTrickyJump",
{
"heatFrames": 10
}
]
}
{
"heatFrames": 85
} |
From: 3
Bottom Horizontal Door
To: 7
Junction By Lower Alcoons (Left of Spike Pits)
Requires: "canDash"
{
"enemyDamage": {
"enemy": "Alcoon",
"type": "contact",
"hits": 1
}
}
{
"heatFrames": 180
} |
|
Requires: "canDash"
{
"obstaclesCleared": [
"A"
]
}
{
"heatFrames": 150
} |
From: 4
Item
To: 6
Junction By Left Door (Right of Pit)
Jump over the Alcoon's fireball and kill it and run through. Requires: "canDash"
{
"enemyKill": {
"enemies": [
[
"Alcoon"
]
],
"explicitWeapons": [
"Missile",
"Super",
"Plasma",
"ScrewAttack",
"PseudoScrew"
]
}
}
{
"heatFrames": 190
}Clears obstacles: A Dev note: Beams that take more than two shots are generally not quick enough to justify. |
From: 4
Item
To: 6
Junction By Left Door (Right of Pit)
Requires: "canDash"
{
"or": [
{
"and": [
"canDodgeWhileShooting",
{
"heatFrames": 200
}
]
},
{
"and": [
"Morph",
{
"heatFrames": 200
}
]
},
{
"and": [
{
"enemyDamage": {
"enemy": "Alcoon",
"type": "fireball",
"hits": 1
}
},
{
"heatFrames": 160
}
]
}
]
}Clears obstacles: A |
From: 4
Item
To: 6
Junction By Left Door (Right of Pit)
Requires: "canDash"
{
"enemyDamage": {
"enemy": "Alcoon",
"type": "fireball",
"hits": 1
}
}
{
"heatFrames": 170
} |
From: 6
Junction By Left Door (Right of Pit)
To: 1
Left Door
Requires: {
"or": [
{
"and": [
"canDash",
{
"heatFrames": 45
}
]
},
{
"heatFrames": 110
}
]
}Unlocks doors: {"types":["missiles"],"requires":[{"heatFrames":20}]}Dev note: The heat frames assume coming from the right with full dash speed ($2.0). |
|
Run under the Alcoon as it spawns Requires: "canDodgeWhileShooting"
{
"heatFrames": 130
}
{
"or": [
"canDash",
{
"heatFrames": 70
}
]
}Dev note: canDodgeWhileShooting represents the knowledge of how this Alcoon spawns and that you can run under it. |
|
Requires: {
"obstaclesCleared": [
"A"
]
}
{
"heatFrames": 130
}
{
"or": [
"canDash",
{
"heatFrames": 70
}
]
} |
From: 6
Junction By Left Door (Right of Pit)
To: 4
Item
Kill the Alcoon in one hit as it spawns. Requires: "canDodgeWhileShooting"
{
"enemyKill": {
"enemies": [
[
"Alcoon"
]
],
"explicitWeapons": [
"Missile",
"Super",
"Charge+Plasma"
]
}
}
{
"heatFrames": 130
}
{
"or": [
"canDash",
{
"heatFrames": 70
}
]
}Clears obstacles: A |
From: 6
Junction By Left Door (Right of Pit)
To: 4
Item
Requires: "canDash"
{
"or": [
{
"and": [
"canDodgeWhileShooting",
{
"heatFrames": 200
}
]
},
{
"and": [
"Morph",
{
"heatFrames": 200
}
]
},
{
"and": [
{
"enemyDamage": {
"enemy": "Alcoon",
"type": "fireball",
"hits": 1
}
},
{
"heatFrames": 160
}
]
}
]
}Clears obstacles: A |
From: 6
Junction By Left Door (Right of Pit)
To: 4
Item
Let the Alcoon spawn and then defeat it. Requires: "canDash"
{
"enemyKill": {
"enemies": [
[
"Alcoon"
]
],
"explicitWeapons": [
"Missile",
"Super",
"Wave",
"Ice+Spazer",
"Plasma",
"ScrewAttack",
"PseudoScrew",
"PowerBomb"
]
}
}
{
"heatFrames": 180
}Clears obstacles: A |
From: 6
Junction By Left Door (Right of Pit)
To: 7
Junction By Lower Alcoons (Left of Spike Pits)
Requires: {
"heatFrames": 160
}
{
"or": [
"canDash",
{
"heatFrames": 50
}
]
} |
From: 6
Junction By Left Door (Right of Pit)
To: 7
Junction By Lower Alcoons (Left of Spike Pits)
Requires: {
"or": [
"canDownBack",
"canTrickyJump"
]
}
{
"or": [
{
"and": [
"canDash",
{
"heatFrames": 75
}
]
},
{
"heatFrames": 125
}
]
} |
From: 7
Junction By Lower Alcoons (Left of Spike Pits)
To: 1
Left Door
Requires: "canIBJ"
{
"or": [
{
"and": [
"canBombHorizontally",
{
"heatFrames": 840
}
]
},
{
"and": [
"canJumpIntoIBJ",
"canDoubleBombJump",
{
"heatFrames": 275
}
]
},
{
"and": [
"canJumpIntoIBJ",
{
"heatFrames": 420
}
]
}
]
}
{
"or": [
"canDash",
{
"heatFrames": 20
}
]
}Unlocks doors: {"types":["powerbomb"],"requires":[{"heatFrames":60}]} |
From: 7
Junction By Lower Alcoons (Left of Spike Pits)
To: 1
Left Door


Requires: {
"or": [
{
"and": [
"HiJump",
{
"heatFrames": 140
}
]
},
{
"and": [
"canWallJump",
{
"heatFrames": 170
}
]
},
{
"and": [
"canSpringBallJumpMidAir",
{
"heatFrames": 170
}
]
},
{
"and": [
"SpaceJump",
{
"heatFrames": 180
}
]
}
]
}
{
"or": [
"canDash",
{
"heatFrames": 20
}
]
}Unlocks doors: {"types":["powerbomb"],"requires":[{"heatFrames":60}]} |
From: 7
Junction By Lower Alcoons (Left of Spike Pits)
To: 1
Left Door
Requires: "canUseFrozenEnemies"
{
"heatFrames": 330
}
{
"or": [
"canDash",
{
"heatFrames": 20
}
]
}Unlocks doors: {"types":["powerbomb"],"requires":[{"heatFrames":60}]} |
From: 7
Junction By Lower Alcoons (Left of Spike Pits)
To: 3
Bottom Horizontal Door
Run and jump under the first Alcoon as it ascends. Fire a shot to stun the second Alcoon while running and jumping under it as well. Requires: "canDash"
"canInsaneJump"
{
"heatFrames": 120
} |
From: 7
Junction By Lower Alcoons (Left of Spike Pits)
To: 3
Bottom Horizontal Door


Jump over the Alcoons one at a time. Requires: "canDash"
"canCarefulJump"
{
"heatFrames": 240
} |
From: 7
Junction By Lower Alcoons (Left of Spike Pits)
To: 3
Bottom Horizontal Door
Kill the Alcoon without stopping. Requires: "canDash"
"canDodgeWhileShooting"
{
"or": [
{
"enemyKill": {
"enemies": [
[
"Alcoon"
]
],
"explicitWeapons": [
"Missile",
"Super",
"Wave+Plasma",
"PseudoScrew",
"ScrewAttack",
"Charge+Wave+Spazer",
"Shinespark"
]
}
},
{
"and": [
"Plasma",
"canHitbox"
]
}
]
}
{
"heatFrames": 110
} |
From: 7
Junction By Lower Alcoons (Left of Spike Pits)
To: 3
Bottom Horizontal Door
Requires: "canDash"
{
"enemyDamage": {
"enemy": "Alcoon",
"type": "contact",
"hits": 1
}
}
{
"heatFrames": 180
}Unlocks doors: {"types":["missiles"],"requires":[{"heatFrames":30}]} |
From: 7
Junction By Lower Alcoons (Left of Spike Pits)
To: 3
Bottom Horizontal Door
Jump under the first Alcoon as it emerges from the spikes; then jump over the second. Alternatively, trigger the first Alcoon to spawn, wait for it to descend, then run and do a big jump over both Alcoons. Requires: "canDash"
"canTrickyJump"
{
"heatFrames": 150
} |
From: 7
Junction By Lower Alcoons (Left of Spike Pits)
To: 6
Junction By Left Door (Right of Pit)
Requires: "canIBJ"
{
"or": [
{
"and": [
"canBombHorizontally",
{
"heatFrames": 820
}
]
},
{
"and": [
"canJumpIntoIBJ",
"canDoubleBombJump",
{
"heatFrames": 255
}
]
},
{
"and": [
"canJumpIntoIBJ",
{
"heatFrames": 400
}
]
}
]
}
{
"or": [
"canDash",
{
"heatFrames": 25
}
]
} |
From: 7
Junction By Lower Alcoons (Left of Spike Pits)
To: 6
Junction By Left Door (Right of Pit)
Requires: {
"or": [
{
"and": [
"HiJump",
{
"heatFrames": 120
}
]
},
{
"and": [
"canWallJump",
{
"heatFrames": 150
}
]
},
{
"and": [
"canSpringBallJumpMidAir",
{
"heatFrames": 150
}
]
},
{
"and": [
"SpaceJump",
{
"heatFrames": 160
}
]
}
]
}
{
"or": [
"canDash",
{
"heatFrames": 25
}
]
} |
From: 7
Junction By Lower Alcoons (Left of Spike Pits)
To: 6
Junction By Left Door (Right of Pit)
Requires: "h_navigateHeatRooms"
"canUseFrozenEnemies"
{
"heatFrames": 310
}
{
"or": [
"canDash",
{
"heatFrames": 25
}
]
} |
|
Take the platforms one at a time. Requires: "canDash"
"canDodgeWhileShooting"
{
"or": [
{
"enemyDamage": {
"enemy": "Dragon",
"type": "fireball",
"hits": 2
}
},
"Ice",
{
"enemyKill": {
"enemies": [
[
"Dragon",
"Dragon"
]
],
"explicitWeapons": [
"Super",
"Plasma"
]
}
}
]
}
{
"heatFrames": 700
} |
|


Requires: "canDash"
"SpaceJump"
"canTrickyDodgeEnemies"
{
"heatFrames": 205
}
"h_heatedCrystalFlash"
{
"heatFrames": 180
}
"h_heatedCrystalFlash"
{
"heatFrames": 120
} |
|
Perform full height jumps for more control when landing. Kill or freeze the Dragons with diagonal shots. Avoid falling into the acid while platforming or when taking a fireball hit. Requires: "canDash"
"Wave"
{
"or": [
"Ice",
"Plasma"
]
}
{
"or": [
"canCarefulJump",
{
"enemyDamage": {
"enemy": "Dragon",
"type": "fireball",
"hits": 3
}
}
]
}
{
"heatFrames": 900
} |
|
Take the platforms two at a time by building some run speed for each jump on a one tile runway. Requires: "canDash"
"canTrickyJump"
{
"heatFrames": 570
} |
|
The flames are still active until they fully disperse. Requires: "canDash"
"SpaceJump"
{
"heatFrames": 480
} |
|
Perform full height jumps for more control when landing. Requires: "canDash"
{
"enemyDamage": {
"enemy": "Dragon",
"type": "fireball",
"hits": 3
}
}
{
"acidFrames": 20
}
{
"or": [
"canCarefulJump",
{
"and": [
{
"acidFrames": 20
},
{
"heatFrames": 90
}
]
}
]
}
{
"heatFrames": 1000
}Dev note: Expects a fall into the acid. A second fall is expected without canCarefulJump. |
|


The Crystal Flash can be done on any of the floating blocks or single-tile-wide pillars that don't have a Hibashi. The safest place to do it is on the last single-tile-wide pillar. Requires: "canDash"
"canTrickyJump"
{
"or": [
{
"and": [
{
"heatFrames": 95
},
"h_heatedCrystalFlash",
"canTrickyDodgeEnemies",
{
"heatFrames": 475
}
]
},
{
"and": [
{
"heatFrames": 175
},
"h_heatedCrystalFlash",
"canTrickyDodgeEnemies",
{
"heatFrames": 395
}
]
},
{
"and": [
{
"heatFrames": 240
},
"h_heatedCrystalFlash",
"canTrickyDodgeEnemies",
{
"heatFrames": 330
}
]
},
{
"and": [
{
"heatFrames": 310
},
"h_heatedCrystalFlash",
{
"heatFrames": 260
}
]
}
]
} |
|


Requires: "canDash"
"canTrickyDodgeEnemies"
{
"heatFrames": 175
}
"h_heatedCrystalFlash"
{
"heatFrames": 180
}
"h_heatedCrystalFlash"
{
"heatFrames": 175
}
"h_heatedCrystalFlash"
{
"heatFrames": 65
} |
|
Requires: {
"or": [
{
"and": [
"canDash",
{
"heatFrames": 340
}
]
},
{
"heatFrames": 520
}
]
} |
|


Requires: "canDash"
{
"heatFrames": 180
}
"h_heatedCrystalFlash"
{
"heatFrames": 180
} |
|
Requires: "canDash"
"SpaceJump"
{
"heatFrames": 300
} |
|
Taking the platforms one at a time is not fast enough to avoid the room hazards. Requires: "canDash"
"canDodgeWhileShooting"
{
"or": [
{
"enemyDamage": {
"enemy": "Dragon",
"type": "fireball",
"hits": 2
}
},
{
"enemyKill": {
"enemies": [
[
"Dragon",
"Dragon"
]
],
"explicitWeapons": [
"Super",
"Plasma"
]
}
},
"Ice"
]
}
{
"heatFrames": 700
} |
|

Requires: "SpaceJump"
"canDash"
{
"or": [
{
"and": [
"ScrewAttack",
{
"heatFrames": 350
}
]
},
{
"and": [
"ScrewAttack",
"h_speedDash",
{
"heatFrames": 305
}
]
},
{
"and": [
{
"getBlueSpeed": {
"usedTiles": 23,
"openEnd": 2
}
},
"canBlueSpaceJump",
{
"heatFrames": 350
}
]
}
]
} |
|

Take the platforms two at a time by building some run speed for each jump on a one tile runway. Requires: "canDash"
"canTrickyJump"
{
"heatFrames": 500
} |
|
The flames are still active until they fully disperse Use a two tile wide platform to get a good amount of running speed to avoid the room hazards. Requires: "canDash"
"SpaceJump"
{
"heatFrames": 450
} |
|
Perform full height jumps for more control when landing. Even with a strong weapon, the Dragons may or may not be worth dealing with at this difficulty. Requires: "canDash"
{
"enemyDamage": {
"enemy": "Dragon",
"type": "fireball",
"hits": 3
}
}
{
"acidFrames": 20
}
{
"or": [
"canCarefulJump",
{
"and": [
{
"acidFrames": 20
},
{
"heatFrames": 90
},
{
"or": [
"Gravity",
"canWallJump",
{
"and": [
"HiJump",
{
"acidFrames": 20
},
{
"heatFrames": 90
}
]
}
]
}
]
}
]
}
{
"heatFrames": 1200
}Dev note: Expects a fall into the acid near the right. A second fall is expected without canCarefulJump. |
|


The Crystal Flash can be done safely on the leftmost 2-tile-wide platform. Requires: "canDash"
"canTrickyJump"
{
"heatFrames": 135
}
"h_heatedCrystalFlash"
{
"heatFrames": 350
} |
|
Requires: {
"or": [
{
"and": [
"canDash",
{
"heatFrames": 325
}
]
},
{
"heatFrames": 525
}
]
} |
|
Requires: "canDash"
"SpaceJump"
{
"or": [
{
"and": [
"h_speedDash",
{
"heatFrames": 220
}
]
},
{
"heatFrames": 265
}
]
} |
|
Requires: "canDash"
{
"heatFrames": 200
}
{
"obstaclesCleared": [
"A"
]
} |
|
Requires: "canDash"
"canHitbox"
{
"heatFrames": 200
} |
|
Requires: {
"heatFrames": 125
}
{
"or": [
"canDash",
{
"heatFrames": 20
}
]
} |
From: 1
Left Door
To: 3
Metal Pirates Junction
Shoot the Pirate twice to force it to block instead of kicking or shooting towards the door. Requires: "canDash"
"canHitbox"
"canInsaneJump"
{
"heatFrames": 100
} |
|
Requires: "canDash"
{
"heatFrames": 200
}
{
"obstaclesCleared": [
"A"
]
} |
|
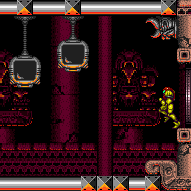
Requires: "canDash"
"canHitbox"
{
"heatFrames": 200
} |
|
Requires: {
"heatFrames": 125
}
{
"or": [
"canDash",
{
"heatFrames": 20
}
]
} |
From: 2
Right Door
To: 3
Metal Pirates Junction
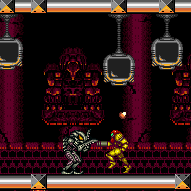
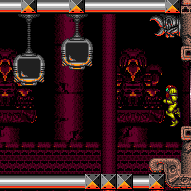
Shoot the Pirate twice to force it to block instead of kicking or shooting towards the door. Requires: "canDash"
"canHitbox"
"canInsaneJump"
{
"heatFrames": 100
} |
|
Requires: {
"heatFrames": 125
}
{
"or": [
"canDash",
{
"heatFrames": 20
}
]
}Dev note: Timed from drop collection. FIXME: Samus will be closer to one door than the other. Drops will also spawn closer to a door which may or may not be the desired one. |
|
Requires: {
"heatFrames": 125
}
{
"or": [
"canDash",
{
"heatFrames": 20
}
]
}Dev note: Timed from drop collection. FIXME: Samus will be closer to one door than the other. Drops will also spawn closer to a door which may or may not be the desired one. |
From: 3
Metal Pirates Junction
To: 3
Metal Pirates Junction
Requires: "h_heatProof"
"canDodgeWhileShooting"
{
"resetRoom": {
"nodes": [
1,
2
]
}
}
{
"or": [
{
"and": [
"Plasma",
"Charge",
"Wave",
"Ice",
{
"cycleFrames": 720
}
]
},
{
"and": [
"Plasma",
{
"or": [
"Charge",
"Wave",
"Ice"
]
},
{
"cycleFrames": 1110
}
]
},
{
"and": [
"Plasma",
{
"cycleFrames": 1320
}
]
},
{
"and": [
"Charge",
"Ice",
"Wave",
"Spazer",
{
"cycleFrames": 1800
}
]
},
{
"and": [
"Ice",
"Wave",
"Spazer",
{
"cycleFrames": 2700
}
]
}
]
}
{
"or": [
"canDash",
{
"cycleFrames": 40
}
]
}Clears obstacles: A Farm cycle drops: 2 Space Pirate (fighting) Dev note: FIXME: There are many more beam combinations that could be used. |
From: 1
Bottom Left Door
To: 7
Junction Left of Two Rightmost Dessgeegas
Requires: "canDash"
{
"obstaclesCleared": [
"C",
"E"
]
}
{
"heatFrames": 180
} |
From: 1
Bottom Left Door
To: 7
Junction Left of Two Rightmost Dessgeegas
Requires: "canDash"
"canDodgeWhileShooting"
"Charge"
"Ice"
"Wave"
"Spazer"
{
"heatFrames": 1080
}Clears obstacles: C Dev note: Without canDodgeWhileShooting, tanking the damage and running through is best. |
From: 1
Bottom Left Door
To: 7
Junction Left of Two Rightmost Dessgeegas
Requires: "canDash"
{
"enemyKill": {
"enemies": [
[
"Dessgeega",
"Dessgeega",
"Dessgeega",
"Multiviola",
"Multiviola"
]
],
"explicitWeapons": [
"Missile"
]
}
}
{
"heatFrames": 480
}Clears obstacles: C, E |
From: 1
Bottom Left Door
To: 7
Junction Left of Two Rightmost Dessgeegas
Sparing the Multiviolas is required to perform an ice clip further in. However, it requires going slower. Requires: "canDash"
"canDodgeWhileShooting"
{
"enemyKill": {
"enemies": [
[
"Dessgeega",
"Dessgeega",
"Dessgeega"
]
],
"explicitWeapons": [
"Missile"
]
}
}
{
"heatFrames": 540
}Clears obstacles: C |
From: 1
Bottom Left Door
To: 7
Junction Left of Two Rightmost Dessgeegas
Requires: "canDash"
"Plasma"
{
"heatFrames": 380
}Clears obstacles: C, E |
From: 1
Bottom Left Door
To: 7
Junction Left of Two Rightmost Dessgeegas
Sparing the Multiviolas is required to perform an ice clip further in. However, it requires going slower. Requires: "canDash"
"Plasma"
"canDodgeWhileShooting"
{
"heatFrames": 480
}Clears obstacles: C |
From: 1
Bottom Left Door
To: 7
Junction Left of Two Rightmost Dessgeegas
Requires: "canDash"
"ScrewAttack"
{
"heatFrames": 230
}Clears obstacles: C Dev note: You can't catch the Multiviolas to kill them with Screw without reaching node 6. |
From: 1
Bottom Left Door
To: 7
Junction Left of Two Rightmost Dessgeegas
Requires: "canDash"
{
"enemyKill": {
"enemies": [
[
"Dessgeega",
"Dessgeega",
"Dessgeega",
"Multiviola",
"Multiviola"
]
],
"explicitWeapons": [
"Super"
]
}
}
{
"heatFrames": 380
}Clears obstacles: C, E |
From: 1
Bottom Left Door
To: 7
Junction Left of Two Rightmost Dessgeegas
Sparing the Multiviolas is required to perform an ice clip further in. However, it requires going slower. Requires: "canDash"
"canDodgeWhileShooting"
{
"enemyKill": {
"enemies": [
[
"Dessgeega",
"Dessgeega",
"Dessgeega"
]
],
"explicitWeapons": [
"Super"
]
}
}
{
"heatFrames": 380
}Clears obstacles: C |
From: 1
Bottom Left Door
To: 7
Junction Left of Two Rightmost Dessgeegas
Requires: "canDash"
{
"heatFrames": 200
}
{
"enemyDamage": {
"enemy": "Dessgeega",
"type": "contact",
"hits": 2
}
} |
From: 1
Bottom Left Door
To: 7
Junction Left of Two Rightmost Dessgeegas
Entrance condition: {
"comeInNormally": {}
}Requires: "canDash"
{
"heatFrames": 240
}
{
"enemyDamage": {
"enemy": "Multiviola",
"type": "contact",
"hits": 1
}
}
{
"enemyDamage": {
"enemy": "Dessgeega",
"type": "contact",
"hits": 1
}
} |
|
Requires: "Morph"
{
"heatFrames": 110
}
{
"or": [
"canDash",
{
"heatFrames": 10
}
]
} |
From: 4
Junction Below Bomb Blocks
To: 2
Top Right Door

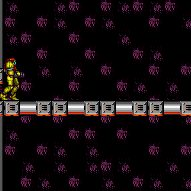
This is possible by jumping on the crumble blocks into a mid-air spring ball jump, or by avoiding them. The crumbles can be avoided by starting with either an air ball, a 3 tile high mid-air morph, or a low spring wall. These are generally safer, as bouncing on the crumble blocks with Spring Ball is trivial. Requires: {
"obstaclesCleared": [
"B"
]
}
"canDash"
"canTrickySpringBallJump"
{
"heatFrames": 250
}
{
"or": [
{
"and": [
"can4HighMidAirMorph",
"canSpringFling"
]
},
{
"and": [
"canLateralMidAirMorph",
"canTrickyJump"
]
},
"canCrumbleJump",
{
"and": [
"h_trickySpringwall",
"canPreciseWallJump"
]
}
]
} |
|


Requires: {
"obstaclesCleared": [
"B"
]
}
"SpaceJump"
{
"heatFrames": 180
}
{
"or": [
"canDash",
{
"heatFrames": 10
}
]
} |
From: 4
Junction Below Bomb Blocks
To: 6
Bottom Right Corner Junction
Requires: {
"obstaclesCleared": [
"D"
]
}
"canDash"
{
"heatFrames": 350
} |
From: 6
Bottom Right Corner Junction
To: 7
Junction Left of Two Rightmost Dessgeegas
Requires: "canDash"
{
"obstaclesCleared": [
"F"
]
}
{
"heatFrames": 150
} |
From: 6
Bottom Right Corner Junction
To: 7
Junction Left of Two Rightmost Dessgeegas
Requires: "canDash"
{
"or": [
{
"and": [
{
"enemyKill": {
"enemies": [
[
"Dessgeega",
"Dessgeega"
]
],
"explicitWeapons": [
"Missile"
]
}
},
{
"heatFrames": 420
}
]
},
{
"and": [
{
"enemyKill": {
"enemies": [
[
"Dessgeega",
"Dessgeega"
]
],
"explicitWeapons": [
"Super"
]
}
},
{
"heatFrames": 250
}
]
},
{
"and": [
{
"enemyKill": {
"enemies": [
[
"Dessgeega",
"Dessgeega"
]
],
"explicitWeapons": [
"PowerBomb"
]
}
},
{
"heatFrames": 350
}
]
}
]
}
{
"heatFrames": 150
}Clears obstacles: F |
From: 6
Bottom Right Corner Junction
To: 7
Junction Left of Two Rightmost Dessgeegas
Requires: "canDash"
{
"or": [
{
"and": [
"Plasma",
{
"heatFrames": 250
}
]
},
{
"and": [
"Ice",
"Wave",
"Spazer",
{
"heatFrames": 600
}
]
}
]
}
{
"heatFrames": 150
}Clears obstacles: F |
From: 6
Bottom Right Corner Junction
To: 7
Junction Left of Two Rightmost Dessgeegas
Requires: "canDash"
"ScrewAttack"
{
"heatFrames": 200
}Clears obstacles: F |
From: 6
Bottom Right Corner Junction
To: 7
Junction Left of Two Rightmost Dessgeegas
Requires: "canDash"
{
"heatFrames": 150
}
{
"enemyDamage": {
"enemy": "Dessgeega",
"type": "contact",
"hits": 1
}
} |
From: 7
Junction Left of Two Rightmost Dessgeegas
To: 1
Bottom Left Door
Requires: "canDash"
{
"obstaclesCleared": [
"C"
]
}
{
"heatFrames": 200
}Unlocks doors: {"types":["missiles"],"requires":[{"heatFrames":30}]} |
From: 7
Junction Left of Two Rightmost Dessgeegas
To: 1
Bottom Left Door
Requires: "canDash"
{
"obstaclesCleared": [
"F"
]
}
{
"heatFrames": 200
}
{
"or": [
{
"and": [
{
"enemyKill": {
"enemies": [
[
"Dessgeega",
"Dessgeega",
"Dessgeega"
]
],
"explicitWeapons": [
"Missile"
]
}
},
{
"heatFrames": 300
}
]
},
{
"obstaclesCleared": [
"C"
]
}
]
}
{
"or": [
{
"enemyKill": {
"enemies": [
[
"Multiviola",
"Multiviola"
]
],
"explicitWeapons": [
"Missile"
]
}
},
{
"obstaclesCleared": [
"E"
]
}
]
}Clears obstacles: C, E Unlocks doors: {"types":["missiles"],"requires":[{"heatFrames":30}]} |
From: 7
Junction Left of Two Rightmost Dessgeegas
To: 1
Bottom Left Door
Requires: "canDash"
{
"obstaclesCleared": [
"F"
]
}
"Plasma"
{
"heatFrames": 500
}Clears obstacles: C, E Unlocks doors: {"types":["missiles"],"requires":[{"heatFrames":30}]} |
From: 7
Junction Left of Two Rightmost Dessgeegas
To: 1
Bottom Left Door
Requires: "canDash"
"ScrewAttack"
{
"heatFrames": 320
}Clears obstacles: C, E Unlocks doors: {"types":["missiles"],"requires":[{"heatFrames":30}]} |
From: 7
Junction Left of Two Rightmost Dessgeegas
To: 1
Bottom Left Door
Requires: "canDash"
{
"obstaclesCleared": [
"F"
]
}
{
"heatFrames": 200
}
{
"or": [
{
"and": [
{
"enemyKill": {
"enemies": [
[
"Dessgeega",
"Dessgeega",
"Dessgeega"
]
],
"explicitWeapons": [
"Super"
]
}
},
{
"heatFrames": 200
}
]
},
{
"obstaclesCleared": [
"C"
]
}
]
}
{
"or": [
{
"enemyKill": {
"enemies": [
[
"Multiviola",
"Multiviola"
]
],
"explicitWeapons": [
"Super"
]
}
},
{
"obstaclesCleared": [
"E"
]
}
]
}Clears obstacles: C, E Unlocks doors: {"types":["missiles"],"requires":[{"heatFrames":30}]} |
From: 7
Junction Left of Two Rightmost Dessgeegas
To: 1
Bottom Left Door
Requires: "canDash"
{
"heatFrames": 250
}
{
"enemyDamage": {
"enemy": "Dessgeega",
"type": "contact",
"hits": 2
}
}Unlocks doors: {"types":["missiles"],"requires":[{"heatFrames":30}]} |
From: 7
Junction Left of Two Rightmost Dessgeegas
To: 1
Bottom Left Door
Requires: "canDash"
{
"obstaclesCleared": [
"F"
]
}
"Plasma"
"Wave"
{
"heatFrames": 400
}Clears obstacles: C, E Unlocks doors: {"types":["missiles"],"requires":[{"heatFrames":30}]} |
From: 7
Junction Left of Two Rightmost Dessgeegas
To: 6
Bottom Right Corner Junction
Requires: "canDash"
{
"obstaclesCleared": [
"F"
]
}
{
"heatFrames": 100
} |
From: 7
Junction Left of Two Rightmost Dessgeegas
To: 6
Bottom Right Corner Junction
Requires: "canDash"
{
"obstaclesCleared": [
"C"
]
}
"canDodgeWhileShooting"
"Charge"
"Ice"
"Wave"
"Spazer"
{
"heatFrames": 550
}Clears obstacles: F Dev note: Without canDodgeWhileShooting, tanking the damage and running through is best. |
From: 7
Junction Left of Two Rightmost Dessgeegas
To: 6
Bottom Right Corner Junction
Requires: "canDash"
{
"obstaclesCleared": [
"C"
]
}
{
"enemyKill": {
"enemies": [
[
"Dessgeega",
"Dessgeega"
]
],
"explicitWeapons": [
"Missile"
]
}
}
{
"heatFrames": 400
}Clears obstacles: F |
From: 7
Junction Left of Two Rightmost Dessgeegas
To: 6
Bottom Right Corner Junction
Requires: "canDash"
{
"obstaclesCleared": [
"C"
]
}
"Plasma"
{
"heatFrames": 400
}Clears obstacles: F |
From: 7
Junction Left of Two Rightmost Dessgeegas
To: 6
Bottom Right Corner Junction
Requires: "canDash"
"ScrewAttack"
{
"heatFrames": 160
}Clears obstacles: F |
From: 7
Junction Left of Two Rightmost Dessgeegas
To: 6
Bottom Right Corner Junction
Requires: "canDash"
{
"obstaclesCleared": [
"C"
]
}
{
"enemyKill": {
"enemies": [
[
"Dessgeega",
"Dessgeega"
]
],
"explicitWeapons": [
"Super"
]
}
}
{
"heatFrames": 200
}Clears obstacles: F |
From: 7
Junction Left of Two Rightmost Dessgeegas
To: 6
Bottom Right Corner Junction
Requires: "canDash"
{
"heatFrames": 150
}
{
"enemyDamage": {
"enemy": "Dessgeega",
"type": "contact",
"hits": 1
}
} |
|
Entrance condition: {
"comeInNormally": {}
}Requires: "canDash"
"ScrewAttack"
{
"or": [
"canCarefulJump",
{
"and": [
"Morph",
"Gravity",
{
"acidFrames": 20
},
{
"heatFrames": 60
}
]
}
]
}
{
"heatFrames": 480
}Unlocks doors: {"types":["missiles"],"requires":[{"heatFrames":30}]}
{"types":["super"],"requires":[]}
{"types":["powerbomb"],"requires":[{"heatFrames":60}]} |
|
Entrance condition: {
"comeInNormally": {}
}Requires: "canDash"
"ScrewAttack"
"SpaceJump"
{
"heatFrames": 360
}Unlocks doors: {"types":["missiles"],"requires":[{"heatFrames":30}]}
{"types":["super"],"requires":[]}
{"types":["powerbomb"],"requires":[{"heatFrames":60}]} |
|

The power bombs can be placed pretty far from the next pillar in line. PB1 - Above the mound of dirt on the ground. PB2 - On pillar 2 (not on the Puromi Fire Snake). PB3 - Near pillar 5. Entrance condition: {
"comeInNormally": {}
}Requires: "canDash"
"canCarefulJump"
"Morph"
{
"ammo": {
"type": "PowerBomb",
"count": 3
}
}
{
"or": [
"canTrickyJump",
{
"enemyDamage": {
"enemy": "Puromi",
"type": "contact",
"hits": 1
}
}
]
}
{
"heatFrames": 670
}
{
"or": [
"canTrickyJump",
{
"and": [
"Gravity",
{
"heatFrames": 180
},
{
"acidFrames": 56
}
]
},
{
"and": [
"canSuitlessLavaDive",
{
"heatFrames": 240
},
{
"acidFrames": 96
}
]
}
]
}
{
"or": [
"h_heatResistant",
"canPauseAbuse",
{
"resourceCapacity": [
{
"type": "RegularEnergy",
"count": 149
}
]
}
]
}Unlocks doors: {"types":["missiles"],"requires":[{"heatFrames":15},{"acidFrames":15}]}
{"types":["super"],"requires":[]}
{"types":["powerbomb"],"requires":[{"heatFrames":30},{"acidFrames":30}]}Dev note: With Reserves only, canPauseAbuse is used as a proxy for pause abuse or optimal reserve management and character movement. |
|


Place the PBs next to the pillars in order to only use 2. Minimize acid by unmorphing high to land back on the jump spot or walljumping before placing the bomb. Entrance condition: {
"comeInNormally": {}
}Requires: {
"notable": "Two Power Bombs"
}
"canDash"
"canMidAirMorph"
"canCarefulJump"
{
"ammo": {
"type": "PowerBomb",
"count": 2
}
}
{
"or": [
{
"and": [
"canCarefulJump",
"canResetFallSpeed",
{
"heatFrames": 660
}
]
},
{
"and": [
"canWallJump",
{
"heatFrames": 660
},
{
"or": [
"canWallJumpInstantMorph",
{
"acidFrames": 30
}
]
}
]
},
{
"and": [
"Gravity",
{
"heatFrames": 660
},
{
"acidFrames": 30
}
]
},
{
"and": [
"canTrickyJump",
"canSuitlessLavaDive",
{
"heatFrames": 720
},
{
"acidFrames": 52
}
]
}
]
}
{
"or": [
"canTrickyJump",
{
"and": [
"Gravity",
{
"heatFrames": 180
},
{
"acidFrames": 56
}
]
},
{
"and": [
"canSuitlessLavaDive",
{
"heatFrames": 240
},
{
"acidFrames": 96
}
]
}
]
}
{
"or": [
"h_heatResistant",
"canPauseAbuse",
{
"resourceCapacity": [
{
"type": "RegularEnergy",
"count": 149
}
]
}
]
}Unlocks doors: {"types":["missiles"],"requires":[{"heatFrames":15},{"acidFrames":15}]}
{"types":["super"],"requires":[]}
{"types":["powerbomb"],"requires":[{"heatFrames":30},{"acidFrames":30}]}Dev note: With Reserves only, canPauseAbuse is used as a proxy for pause abuse or optimal reserve management and character movement. |
|
Entrance condition: {
"comeInWithGMode": {
"mode": "any",
"morphed": false
}
}Requires: "canDash"
"ScrewAttack"
{
"or": [
"SpaceJump",
"canTrickyGMode",
{
"and": [
"canTrickyJump",
"canPreciseWallJump",
{
"acidFrames": 10
}
]
},
{
"and": [
"canTrickyJump",
{
"acidFrames": 24
}
]
}
]
}
"h_heatedGModeOpenDifferentDoor"Exit condition: {
"leaveNormally": {}
}Unlocks doors: {"types":["missiles"],"requires":[{"heatFrames":50},{"acidFrames":50}]}
{"types":["super"],"requires":[]}
{"types":["powerbomb"],"requires":[{"heatFrames":110},{"acidFrames":110}]} |
|
Wait for the Puromis to pass so that Samus does not land on them. Entrance condition: {
"comeInNormally": {}
}Requires: "canDash"
"canCarefulJump"
"ScrewAttack"
{
"or": [
{
"and": [
"canSuitlessLavaDive",
{
"heatFrames": 1800
},
{
"acidFrames": 116
}
]
},
{
"and": [
"Gravity",
{
"heatFrames": 1800
},
{
"acidFrames": 48
}
]
}
]
}Unlocks doors: {"types":["missiles"],"requires":[{"heatFrames":30}]}
{"types":["super"],"requires":[]}
{"types":["powerbomb"],"requires":[{"heatFrames":60}]} |
|
Break the half pillar near the entrance, then run back to use the longer runway that this opens up. Entrance condition: {
"comeInNormally": {}
}Requires: "canDash"
"ScrewAttack"
"SpaceJump"
{
"heatFrames": 350
}Unlocks doors: {"types":["missiles"],"requires":[{"heatFrames":40}]}
{"types":["super"],"requires":[]}
{"types":["powerbomb"],"requires":[{"heatFrames":100}]} |
|

The power bombs can be placed far from the next pillar in line. PB1 - Near the broken pillar. PB2 - On the 2nd full pillar. PB3 - On the 4th full pillar. Wait for the Puromis to avoid damage but wait too long and the acid will cover the door. Entrance condition: {
"comeInNormally": {}
}Requires: "canDash"
"Morph"
"canCarefulJump"
{
"ammo": {
"type": "PowerBomb",
"count": 3
}
}
{
"or": [
{
"and": [
"canSuitlessLavaDive",
{
"heatFrames": 840
},
{
"acidFrames": 206
}
]
},
{
"and": [
"Gravity",
{
"heatFrames": 810
},
{
"acidFrames": 55
}
]
},
{
"and": [
"canSuitlessLavaDive",
"canTrickyJump",
{
"heatFrames": 705
},
{
"acidFrames": 45
}
]
},
{
"and": [
"canInsaneJump",
{
"heatFrames": 620
}
]
}
]
}
{
"or": [
"h_heatResistant",
"canPauseAbuse",
{
"resourceCapacity": [
{
"type": "RegularEnergy",
"count": 149
}
]
}
]
}Unlocks doors: {"types":["missiles"],"requires":[{"heatFrames":30},{"acidFrames":20}]}
{"types":["super"],"requires":[]}
{"types":["powerbomb"],"requires":[{"heatFrames":75},{"acidFrames":58}]}Dev note: With Reserves only, canPauseAbuse is used as a proxy for pause abuse or optimal reserve management and character movement. |
|
Break spin to leave some blocks intact in order to avoid damage from Puromis. Avoiding acid damage at the last jump is tricky but possible. Entrance condition: {
"comeInNormally": {}
}Requires: "canDash"
"canTrickyJump"
"ScrewAttack"
{
"heatFrames": 530
}
{
"or": [
"canLateralMidAirMorph",
{
"and": [
"canPreciseWallJump",
{
"heatFrames": 20
},
{
"acidFrames": 10
}
]
},
{
"and": [
{
"heatFrames": 20
},
{
"acidFrames": 24
}
]
}
]
}Unlocks doors: {"types":["missiles"],"requires":[{"heatFrames":50}]}
{"types":["super"],"requires":[]}
{"types":["powerbomb"],"requires":[{"heatFrames":110}]} |
|
Place the PBs next to the pillars in order to only use 2. Avoid acid during the first Power Bomb by walljumping before placing the bomb. Avoiding acid damage at the last jump is tricky but possible. Entrance condition: {
"comeInNormally": {}
}Requires: {
"notable": "Two Power Bombs"
}
"canDash"
"canMidAirMorph"
{
"ammo": {
"type": "PowerBomb",
"count": 2
}
}
"canCarefulJump"
{
"or": [
{
"and": [
"canWallJumpInstantMorph",
{
"heatFrames": 690
}
]
},
{
"and": [
"canWallJump",
{
"heatFrames": 660
},
{
"acidFrames": 36
}
]
},
{
"and": [
"canSuitlessLavaDive",
{
"heatFrames": 840
},
{
"acidFrames": 84
}
]
},
{
"and": [
"Gravity",
{
"heatFrames": 660
},
{
"acidFrames": 24
}
]
}
]
}
{
"or": [
"canInsaneJump",
{
"and": [
"canTrickyJump",
"canLateralMidAirMorph",
{
"heatFrames": 10
},
{
"acidFrames": 10
}
]
},
{
"and": [
"canPreciseWallJump",
{
"heatFrames": 50
},
{
"acidFrames": 32
}
]
},
{
"and": [
"Gravity",
{
"heatFrames": 20
},
{
"acidFrames": 20
}
]
},
{
"and": [
"canSuitlessLavaDive",
{
"heatFrames": 50
},
{
"acidFrames": 50
}
]
}
]
}
{
"or": [
"h_heatResistant",
"canPauseAbuse",
{
"resourceCapacity": [
{
"type": "RegularEnergy",
"count": 149
}
]
}
]
}Unlocks doors: {"types":["missiles"],"requires":[{"heatFrames":30},{"acidFrames":20}]}
{"types":["super"],"requires":[]}
{"types":["powerbomb"],"requires":[{"heatFrames":75},{"acidFrames":58}]}Dev note: With Reserves only, canPauseAbuse is used as a proxy for pause abuse or optimal reserve management and character movement. |
|
Break spin to leave some blocks intact in order to avoid damage from Puromis. Avoiding acid damage at the last jump is tricky but possible. Entrance condition: {
"comeInNormally": {}
}Requires: "canDash"
"canInsaneJump"
"ScrewAttack"
{
"heatFrames": 500
}Unlocks doors: {"types":["missiles"],"requires":[{"heatFrames":50}]}
{"types":["super"],"requires":[]}
{"types":["powerbomb"],"requires":[{"heatFrames":110}]} |
|
Requires: "canDash"
{
"or": [
{
"and": [
"h_speedDash",
{
"heatFrames": 265
},
{
"acidFrames": 112
}
]
},
{
"and": [
{
"heatFrames": 300
},
{
"acidFrames": 145
}
]
}
]
}
"Gravity"
"canSuitlessLavaDive" |
|
Requires: "canDash"
{
"heatFrames": 500
}
{
"enemyDamage": {
"enemy": "Holtz",
"type": "contact",
"hits": 2
}
}
{
"enemyDamage": {
"enemy": "Zebbo",
"type": "contact",
"hits": 1
}
} |
|
Requires: "canDash"
"canFarmWhileShooting"
{
"or": [
{
"and": [
{
"heatFramesWithEnergyDrops": {
"frames": 120,
"drops": [
{
"enemy": "Zebbo",
"count": 1
}
]
}
},
{
"heatFramesWithEnergyDrops": {
"frames": 130,
"drops": [
{
"enemy": "Zebbo",
"count": 1
}
]
}
},
{
"heatFramesWithEnergyDrops": {
"frames": 140,
"drops": [
{
"enemy": "Zebbo",
"count": 1
}
]
}
},
{
"heatFrames": 100
}
]
},
{
"and": [
{
"or": [
"Spazer",
"Wave",
"Plasma"
]
},
{
"heatFramesWithEnergyDrops": {
"frames": 100,
"drops": [
{
"enemy": "Zebbo",
"count": 1
}
]
}
},
{
"heatFramesWithEnergyDrops": {
"frames": 100,
"drops": [
{
"enemy": "Zebbo",
"count": 1
}
]
}
},
{
"heatFramesWithEnergyDrops": {
"frames": 130,
"drops": [
{
"enemy": "Zebbo",
"count": 1
}
]
}
},
{
"heatFrames": 100
}
]
}
]
} |
|
Requires: "canDash"
"ScrewAttack"
"canFarmWhileShooting"
{
"heatFramesWithEnergyDrops": {
"frames": 80,
"drops": [
{
"enemy": "Holtz",
"count": 1
}
]
}
}
{
"heatFramesWithEnergyDrops": {
"frames": 45,
"drops": [
{
"enemy": "Zebbo",
"count": 1
}
]
}
}
{
"heatFramesWithEnergyDrops": {
"frames": 60,
"drops": [
{
"enemy": "Holtz",
"count": 1
}
]
}
}
{
"heatFramesWithEnergyDrops": {
"frames": 100,
"drops": [
{
"enemy": "Zebbo",
"count": 1
}
]
}
}
{
"heatFramesWithEnergyDrops": {
"frames": 60,
"drops": [
{
"enemy": "Holtz",
"count": 1
}
]
}
}
{
"heatFramesWithEnergyDrops": {
"frames": 100,
"drops": [
{
"enemy": "Zebbo",
"count": 1
},
{
"enemy": "Holtz",
"count": 1
}
]
}
}
{
"heatFramesWithEnergyDrops": {
"frames": 45,
"drops": [
{
"enemy": "Holtz",
"count": 1
}
]
}
}
{
"heatFrames": 60
} |
|
Requires: "canDash"
"SpaceJump"
"ScrewAttack"
{
"heatFrames": 320
} |
|
Entrance condition: {
"comeInGettingBlueSpeed": {
"length": 3,
"openEnd": 1,
"minExtraRunSpeed": "$1.C"
}
}Requires: "h_blueJump"
"SpaceJump"
"canCarefulJump"
{
"heatFrames": 220
} |
|
Turn back to the left after entering the room then run under the Holtzes. Damage from a Zebbo from the right farm to gain invulnerability frames, then jump through the last two Holtzes. Requires: "canDash"
"canTrickyJump"
"canHorizontalDamageBoost"
{
"enemyDamage": {
"enemy": "Zebbo",
"type": "contact",
"hits": 1
}
}
{
"heatFrames": 390
} |
From: 1
Left Door
To: 3
Farm Junction Free of Holtzes
Place a power bomb near the door, then move right and jump under the Holtzes to the first platform. Continue placing power bombs while avoiding the Holtzes and avoiding luring the third one to the right. Requires: "canDash"
"canTrickyJump"
{
"enemyKill": {
"enemies": [
[
"Holtz",
"Holtz"
]
],
"explicitWeapons": [
"PowerBomb"
]
}
}
{
"heatFrames": 600
} |
|
Requires: "canDash"
{
"enemyKill": {
"enemies": [
[
"Holtz",
"Holtz"
]
],
"explicitWeapons": [
"PowerBomb"
]
}
}
{
"enemyDamage": {
"enemy": "Holtz",
"type": "contact",
"hits": 2
}
}
{
"heatFrames": 450
} |
|
Requires: {
"or": [
"ScrewAttack",
{
"and": [
"Plasma",
"Ice",
"Wave"
]
},
{
"haveBlueSuit": {}
}
]
}
{
"heatFrames": 100
}
{
"or": [
"canDash",
{
"heatFrames": 20
}
]
} |
From: 1
Left Door
To: 3
Farm Junction Free of Holtzes
Turn back to the left after entering the room then run under the Holtzes. Avoid the third Holtz, then kill the fourth to clear the middle Zebbo farm. Requires: "canDash"
"canDodgeWhileShooting"
{
"or": [
"Plasma",
{
"and": [
"Ice",
"Wave",
"Spazer"
]
}
]
}
{
"heatFrames": 550
} |
|
Requires: "canDash"
{
"or": [
"Plasma",
{
"and": [
"Ice",
"Wave",
"Spazer"
]
}
]
}
{
"enemyDamage": {
"enemy": "Holtz",
"type": "contact",
"hits": 1
}
}
{
"heatFrames": 350
} |
|
Requires: "canDash"
{
"or": [
"canDodgeWhileShooting",
{
"enemyDamage": {
"enemy": "Holtz",
"type": "contact",
"hits": 1
}
}
]
}
{
"enemyKill": {
"enemies": [
[
"Holtz",
"Holtz"
]
],
"explicitWeapons": [
"Super"
]
}
}
{
"heatFrames": 300
} |
|
Requires: "canDash"
{
"enemyDamage": {
"enemy": "Holtz",
"type": "contact",
"hits": 2
}
}
{
"heatFrames": 420
} |
|

Requires: "canDash"
"canFarmWhileShooting"
{
"heatFramesWithEnergyDrops": {
"frames": 100,
"drops": [
{
"enemy": "Zebbo",
"count": 1
}
]
}
}
{
"heatFramesWithEnergyDrops": {
"frames": 125,
"drops": [
{
"enemy": "Zebbo",
"count": 1
}
]
}
}
{
"heatFramesWithEnergyDrops": {
"frames": 125,
"drops": [
{
"enemy": "Zebbo",
"count": 1
}
]
}
}
{
"heatFrames": 130
} |
|
Requires: "canDash"
"ScrewAttack"
"canFarmWhileShooting"
{
"heatFramesWithEnergyDrops": {
"frames": 80,
"drops": [
{
"enemy": "Holtz",
"count": 1
}
]
}
}
{
"heatFramesWithEnergyDrops": {
"frames": 20,
"drops": [
{
"enemy": "Zebbo",
"count": 1
}
]
}
}
{
"heatFramesWithEnergyDrops": {
"frames": 150,
"drops": [
{
"enemy": "Zebbo",
"count": 1
}
]
}
}
{
"heatFramesWithEnergyDrops": {
"frames": 200,
"drops": [
{
"enemy": "Zebbo",
"count": 1
},
{
"enemy": "Holtz",
"count": 2
}
]
}
}
{
"heatFrames": 60
} |
|
Requires: "canDash"
"SpaceJump"
"ScrewAttack"
{
"heatFrames": 295
} |
|
Entrance condition: {
"comeInGettingBlueSpeed": {
"length": 3,
"openEnd": 1,
"minExtraRunSpeed": "$1.C"
}
}Requires: "h_blueJump"
"SpaceJump"
"canCarefulJump"
{
"heatFrames": 220
} |
|

Requires: "canDash"
"canTrickyDodgeEnemies"
{
"or": [
"canInsaneJump",
"canPreciseWallJump"
]
}
{
"heatFrames": 310
} |
|

Requires: "canDash"
"canTrickyJump"
"canHorizontalDamageBoost"
{
"enemyDamage": {
"enemy": "Zebbo",
"type": "contact",
"hits": 1
}
}
{
"heatFrames": 315
} |
|
Immeidately jump over both Holtz and get back to the door quickly. Alternatively it is possible to wait by the door then time the lure of the second Holtz to sync the two together. Entrance condition: {
"comeInNormally": {}
}Requires: {
"heatFrames": 150
}
"canTrickyJump"
{
"or": [
"canDash",
{
"and": [
{
"haveBlueSuit": {}
},
{
"heatFrames": 40
}
]
}
]
}Exit condition: {
"leaveWithGModeSetup": {}
}Unlocks doors: {"types":["super"],"requires":[]}
{"types":["missiles"],"requires":[{"heatFrames":225}]}
{"types":["powerbomb"],"requires":[{"heatFrames":650}]}Dev note: FIXME: Could probably reduce the heat frames if coming from the farm or the left. |
|
Requires: "canDash"
{
"enemyKill": {
"enemies": [
[
"Holtz",
"Holtz"
]
],
"explicitWeapons": [
"Super",
"PowerBomb"
]
}
}
{
"heatFrames": 550
} |
From: 2
Right Door
To: 3
Farm Junction Free of Holtzes
Requires: "canDash"
{
"or": [
"Wave",
"Spazer"
]
}
{
"heatFrames": 950
} |
|
Requires: "canDash"
{
"or": [
"canBePatient",
"canDodgeWhileShooting"
]
}
{
"heatFrames": 2400
}Dev note: This strat is below the normal threshold for canBePatient, but it is particularly tedious. |
|
Requires: {
"or": [
"ScrewAttack",
{
"and": [
"Plasma",
"Ice",
"Wave"
]
},
{
"haveBlueSuit": {}
}
]
}
{
"heatFrames": 100
}
{
"or": [
"canDash",
{
"heatFrames": 20
}
]
} |
|
Requires: "canDash"
{
"or": [
"Plasma",
{
"and": [
"Ice",
"Wave",
"Spazer"
]
}
]
}
{
"heatFrames": 500
} |
From: 2
Right Door
To: 3
Farm Junction Free of Holtzes

One easy way to do this is by waiting for the first Holtz to go under the first platform. Immediately when it hits the platform, move forward to lure the second Holtz. When they start going down, jump over them and quickly get to the left side of the first Zebbo farm, trapping 3 Holtzes underneath. Requires: "canDash"
"canTrickyJump"
{
"heatFrames": 400
} |
From: 3
Farm Junction Free of Holtzes
To: 1
Left Door


Assumes killing all the Holtzes except for one that can be frozen to extend the runway. Get the Holtz stuck under the platform then farming to full before freezing it to extend the runway. Gaining Energy from the farm requires some sort of heat reduction. Requires: "canDash"
"h_heatResistant"
"h_trickyFrozenEnemyRunway"
{
"heatFrames": 300
}Exit condition: {
"leaveWithRunway": {
"length": 7,
"openEnd": 0
}
}Unlocks doors: {"types":["ammo"],"requires":[]}Dev note: FIXME: Another strat could be added without the farm or heat resistance. |
From: 3
Farm Junction Free of Holtzes
To: 1
Left Door


Assumes killing all the Holtzes then farming to full. Morph on the ground near the Zebbo spawner then quickly unmorph and shoot as it starts to move horizontally. While on the runway near the door, freeze the Zebbo again while maintaining a half-tile gap between it and the runway to extend it as much as possible. Gaining Energy from the farm requires some sort of heat reduction. Requires: "canDash"
"h_heatResistant"
"h_frozenEnemyRunway"
"Morph"
{
"heatFrames": 500
}Exit condition: {
"leaveWithRunway": {
"length": 6,
"openEnd": 0
}
}Unlocks doors: {"types":["ammo"],"requires":[]}Dev note: FIXME: Another strat could be added without the farm or heat resistance. |
From: 3
Farm Junction Free of Holtzes
To: 1
Left Door
Requires: "canDash"
"h_heatResistant"
{
"heatFrames": 100
}Exit condition: {
"leaveWithRunway": {
"length": 4,
"openEnd": 1
}
}Unlocks doors: {"types":["missiles"],"requires":[{"heatFrames":50}]}
{"types":["super"],"requires":[]}
{"types":["powerbomb"],"requires":[{"heatFrames":60}]}Dev note: FIXME: Add way to use the full runway without heat resistance. |
From: 3
Farm Junction Free of Holtzes
To: 2
Right Door
Assumes killing all the Holtzes except for one that can be frozen to extend the runway. Get the Holtz stuck under the platform then farming to full before freezing it to extend the runway. Gaining Energy from the farm requires some sort of heat reduction. Requires: "canDash"
"h_heatResistant"
"h_trickyFrozenEnemyRunway"
{
"heatFrames": 300
}Exit condition: {
"leaveWithRunway": {
"length": 7,
"openEnd": 0
}
}Unlocks doors: {"types":["ammo"],"requires":[]}Dev note: FIXME: Another strat could be added without the farm or heat resistance. |
From: 3
Farm Junction Free of Holtzes
To: 2
Right Door


Assumes killing all the Holtzes then farming to full. Morph on the ground near the Zebbo spawner then quickly unmorph and shoot as it starts to move horizontally. While on the runway near the door, freeze the Zebbo again while maintaining a half-tile gap between it and the runway to extend it as much as possible. Gaining Energy from the farm requires some sort of heat reduction. Requires: "canDash"
"h_heatResistant"
"h_frozenEnemyRunway"
"Morph"
{
"heatFrames": 500
}Exit condition: {
"leaveWithRunway": {
"length": 6,
"openEnd": 0
}
}Unlocks doors: {"types":["ammo"],"requires":[]}Dev note: FIXME: Another strat could be added without the farm or heat resistance. |
|
Requires: {
"heatFrames": 65
}
{
"or": [
"canDash",
{
"heatFrames": 20
}
]
} |
From: 1
Top Left Door
To: 4
Top Right Door
Entrance condition: {
"comeInWithStoredFallSpeed": {
"fallSpeedInTiles": 1
}
}Requires: "canDisableEquipment"
{
"heatFrames": 70
}
{
"or": [
"canDash",
{
"heatFrames": 20
}
]
}Exit condition: {
"leaveWithStoredFallSpeed": {
"fallSpeedInTiles": 1
}
}Unlocks doors: {"types":["missiles","super"],"requires":[]}
{"types":["powerbomb"],"requires":["never"]} |
From: 1
Top Left Door
To: 4
Top Right Door
Entrance condition: {
"comeInWithStoredFallSpeed": {
"fallSpeedInTiles": 2
}
}Requires: "canDisableEquipment"
{
"heatFrames": 70
}
{
"or": [
"canDash",
{
"heatFrames": 20
}
]
}Exit condition: {
"leaveWithStoredFallSpeed": {
"fallSpeedInTiles": 2
}
}Unlocks doors: {"types":["missiles","super"],"requires":[]}
{"types":["powerbomb"],"requires":["never"]} |
|
Requires: {
"heatFrames": 40
}
{
"or": [
"canDash",
{
"heatFrames": 5
}
]
} |
From: 1
Top Left Door
To: 7
Middle Right Door With Bottom Kihunter Cleared
Break both shot blocks simultaneously with a single shot to descend quickly; this is easier with a beam upgrade. It helps to use a down-back to clear the ledge below. By maneuvering through the room efficiently, Samus will not have to spend much time waiting on Kihunters. Requires: "canDodgeWhileShooting"
"canTrickyJump"
{
"or": [
"h_hasBeamUpgrade",
"canInsaneJump"
]
}
{
"or": [
{
"and": [
"canDash",
{
"heatFrames": 520
}
]
},
{
"and": [
"canDash",
"ScrewAttack",
{
"heatFrames": 460
}
]
},
{
"and": [
{
"haveBlueSuit": {}
},
{
"heatFrames": 510
}
]
},
{
"heatFrames": 540
}
]
} |
|
Requires: "h_heatProof"
{
"or": [
{
"and": [
{
"resetRoom": {
"nodes": [
1,
4
]
}
},
{
"cycleFrames": 840
}
]
},
{
"and": [
{
"resetRoom": {
"nodes": [
3
]
}
},
"canDodgeWhileShooting",
{
"cycleFrames": 540
}
]
}
]
}
{
"or": [
"canDash",
{
"cycleFrames": 120
}
]
}
{
"or": [
"ScrewAttack",
{
"haveBlueSuit": {}
},
{
"and": [
"Plasma",
"Wave",
"Ice",
{
"cycleFrames": 300
}
]
},
{
"and": [
"Plasma",
{
"cycleFrames": 1960
}
]
}
]
}Resets obstacles: A Farm cycle drops: 3 Kihunter (red) Dev note: FIXME: More beam combinations would be possible. There is some randomness in the Kihunter positioning. |
From: 3
Middle Right Door
To: 5
Top Junction Between Doors
The grapple teleport skips past the Kihunters. With good semi-blind movement, this makes it possible to reach the top with minimal heat damage. Entrance condition: {
"comeInWithGrappleTeleport": {
"blockPositions": [
[
2,
18
],
[
2,
19
],
[
2,
29
]
]
}
}Requires: {
"notable": "Grapple Teleport Semi-Blind Movement"
}
"canOffScreenMovement"
{
"heatFrames": 330
}
{
"or": [
"canDash",
{
"heatFrames": 20
}
]
} |
From: 3
Middle Right Door
To: 5
Top Junction Between Doors

Manipulate the Three Kihunters to avoid all of them when entering the room from the middle door. Stop on a dime on entry for positioning, because it is precise. Wait 1 second then run or Morph and roll left, past the swooping kihunter. Quickly jump to the higher level and run into the left wall. Wait there for half a second; it helps to jump into the wall. The 2 Kihunters should be grouped above Samus and out of the way. Entrance condition: {
"comeInNormally": {}
}Requires: {
"notable": "Kihunter Manipulation from Middle Door"
}
"canDash"
"canStopOnADime"
"canTrickyDodgeEnemies"
{
"or": [
"HiJump",
"canWallJump"
]
}
{
"heatFrames": 570
} |
From: 3
Middle Right Door
To: 6
Inside Morph Tunnel (Right of Left Bomb Blocks)
Requires: "canDash"
"h_useMorphBombs"
{
"heatFrames": 410
} |
From: 3
Middle Right Door
To: 6
Inside Morph Tunnel (Right of Left Bomb Blocks)
Requires: "canDash"
"h_usePowerBomb"
{
"heatFrames": 250
} |
|
Requires: {
"heatFrames": 65
}
{
"or": [
"canDash",
{
"heatFrames": 20
}
]
} |
From: 4
Top Right Door
To: 1
Top Left Door
Entrance condition: {
"comeInWithStoredFallSpeed": {
"fallSpeedInTiles": 1
}
}Requires: "canDisableEquipment"
{
"heatFrames": 70
}
{
"or": [
"canDash",
{
"heatFrames": 20
}
]
}Exit condition: {
"leaveWithStoredFallSpeed": {
"fallSpeedInTiles": 1
}
}Unlocks doors: {"types":["missiles","super"],"requires":[]}
{"types":["powerbomb"],"requires":["never"]} |
From: 4
Top Right Door
To: 1
Top Left Door
Entrance condition: {
"comeInWithStoredFallSpeed": {
"fallSpeedInTiles": 2
}
}Requires: "canDisableEquipment"
{
"heatFrames": 70
}
{
"or": [
"canDash",
{
"heatFrames": 20
}
]
}Exit condition: {
"leaveWithStoredFallSpeed": {
"fallSpeedInTiles": 2
}
}Unlocks doors: {"types":["missiles","super"],"requires":[]}
{"types":["powerbomb"],"requires":["never"]} |
From: 4
Top Right Door
To: 7
Middle Right Door With Bottom Kihunter Cleared
Break both shot blocks simultaneously with a single shot to descend quickly; this is easier with a beam upgrade. It helps to use a down-back to clear the ledge below. By maneuvering through the room efficiently, Samus will not have to spend much time waiting on Kihunters. Requires: "canDodgeWhileShooting"
"canTrickyJump"
{
"or": [
"h_hasBeamUpgrade",
"canInsaneJump"
]
}
{
"or": [
{
"and": [
"canDash",
{
"heatFrames": 520
}
]
},
{
"and": [
"canDash",
"ScrewAttack",
{
"heatFrames": 480
}
]
},
{
"and": [
{
"haveBlueSuit": {}
},
{
"heatFrames": 510
}
]
},
{
"heatFrames": 540
}
]
} |
|
Requires: {
"heatFrames": 40
}
{
"or": [
"canDash",
{
"heatFrames": 5
}
]
} |
|
Requires: {
"heatFrames": 40
}
{
"or": [
"canDash",
{
"heatFrames": 5
}
]
} |
From: 5
Top Junction Between Doors
To: 7
Middle Right Door With Bottom Kihunter Cleared
Requires: "canDash"
{
"or": [
{
"and": [
"ScrewAttack",
{
"heatFrames": 510
}
]
},
{
"and": [
"Charge",
"Wave",
"Ice",
"Plasma",
{
"heatFrames": 570
}
]
}
]
} |
From: 5
Top Junction Between Doors
To: 7
Middle Right Door With Bottom Kihunter Cleared


Very quickly move through the room to meet the bottom Kihunter in a position where it is possible to jump over it. Down back through the shot blocks. If coming through the right door, Morphing may be easier. Jump over the Kihunter where it dips while moving left. Additionally, build full run speed before jumping to land all the way next to the door. Requires: "canDash"
"canPrepareForNextRoom"
"canTrickyDodgeEnemies"
"canInsaneJump"
"canBeVeryPatient"
"canDownBack"
{
"heatFrames": 420
} |
From: 5
Top Junction Between Doors
To: 7
Middle Right Door With Bottom Kihunter Cleared
Use Plasma to run through Kihunters instead of waiting. Requires: "canDash"
"canHitbox"
"Plasma"
{
"or": [
"canDownBack",
{
"and": [
"canCarefulJump",
{
"heatFrames": 50
}
]
},
{
"heatFrames": 130
}
]
}
{
"heatFrames": 410
} |
From: 6
Inside Morph Tunnel (Right of Left Bomb Blocks)
To: 7
Middle Right Door With Bottom Kihunter Cleared
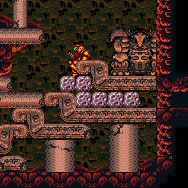

Wait for the bomb blocks to reappear. Two crouches worth of height are needed before jumping through the rest of the blocks. Watch for the Kihunter to move right before jumping up to get a safe predictable swoop. Requires: "h_usePowerBomb"
"canXRayClimb"
"canCeilingClip"
"canDash"
{
"or": [
"ScrewAttack",
{
"and": [
"canTrickyJump",
{
"heatFrames": 90
}
]
},
{
"enemyDamage": {
"enemy": "Kihunter (red)",
"type": "contact",
"hits": 1
}
}
]
}
{
"heatFrames": 810
}Dev note: This requires Power Bombs because it saves neither energy nor ammo using Bombs. |
From: 6
Inside Morph Tunnel (Right of Left Bomb Blocks)
To: 7
Middle Right Door With Bottom Kihunter Cleared
Watch for the Kihunter to move right before jumping up, to get a safe predictable swoop. While waiting for the Bombs to explode, roll to the right to manipulate the Kihunter into a better position. Requires: "h_useMorphBombs"
"canDash"
{
"or": [
"ScrewAttack",
{
"and": [
"canTrickyJump",
{
"heatFrames": 130
}
]
},
"canInsaneJump",
{
"enemyDamage": {
"enemy": "Kihunter (red)",
"type": "contact",
"hits": 1
}
}
]
}
{
"heatFrames": 460
} |
From: 6
Inside Morph Tunnel (Right of Left Bomb Blocks)
To: 7
Middle Right Door With Bottom Kihunter Cleared
Watch for the Kihunter to move right before jumping up to get a safe predictable swoop. While waiting for the first Power Bomb to explode, stay to the right to manipulate the Kihunter into a better position. Requires: "Morph"
{
"ammo": {
"type": "PowerBomb",
"count": 2
}
}
"canDash"
{
"or": [
"ScrewAttack",
{
"and": [
"canTrickyJump",
{
"heatFrames": 90
}
]
},
"canInsaneJump",
{
"enemyDamage": {
"enemy": "Kihunter (red)",
"type": "contact",
"hits": 1
}
}
]
}
{
"heatFrames": 400
} |
From: 6
Inside Morph Tunnel (Right of Left Bomb Blocks)
To: 7
Middle Right Door With Bottom Kihunter Cleared
Watch for the Kihunter to move right before jumping up to get a safe predictable swoop. While waiting for the Power Bomb to explode, stay to the right to manipulate the Kihunter into a better position. Requires: "h_usePowerBomb"
"h_useSpringBall"
"canDash"
{
"or": [
"ScrewAttack",
{
"and": [
"canTrickyJump",
{
"heatFrames": 90
}
]
},
"canInsaneJump",
{
"enemyDamage": {
"enemy": "Kihunter (red)",
"type": "contact",
"hits": 1
}
}
]
}
{
"heatFrames": 320
} |
From: 6
Inside Morph Tunnel (Right of Left Bomb Blocks)
To: 7
Middle Right Door With Bottom Kihunter Cleared
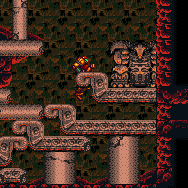
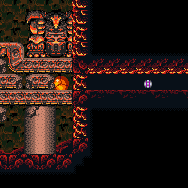
Use X-Ray to stand up. Jump to clip into the floor. Then another jump to clip through the ceiling block. Watch for the Kihunter to move right before jumping up to get a safe predictable swoop. Requires: "h_usePowerBomb"
"canXRayStandUp"
"canPartialFloorClip"
"canCeilingClip"
"canDash"
{
"or": [
"ScrewAttack",
{
"and": [
"canTrickyJump",
{
"heatFrames": 90
}
]
},
"canInsaneJump",
{
"enemyDamage": {
"enemy": "Kihunter (red)",
"type": "contact",
"hits": 1
}
}
]
}
{
"heatFrames": 380
}Dev note: This requires Power Bombs because it saves neither energy nor ammo using Bombs. It's slower than Spring Ball mainly because X-Ray scope won't activate during the Power Bomb explosion. |
From: 7
Middle Right Door With Bottom Kihunter Cleared
To: 5
Top Junction Between Doors
Requires: "canDash"
"Wave"
"Ice"
"Spazer"
{
"heatFrames": 1160
} |
From: 7
Middle Right Door With Bottom Kihunter Cleared
To: 5
Top Junction Between Doors

Wait near the left wall for a brief time for the middle area to be clear of Kihunters. If the top Kihunter is above, wait for it to exit the corridor and avoid its lunge and jump past. Requires: {
"notable": "Kihunter Dodge"
}
"canDash"
"canTrickyDodgeEnemies"
{
"heatFrames": 610
} |
From: 7
Middle Right Door With Bottom Kihunter Cleared
To: 5
Top Junction Between Doors
The top Kihunter can be safely killed without Wave by firing shots up through the edge of the upper platform. It's faster if the top Kihunter descends, because some shots will hit both enemies. Requires: "canDash"
{
"or": [
"Wave",
{
"and": [
"canDodgeWhileShooting",
{
"heatFrames": 160
}
]
}
]
}
"Plasma"
{
"heatFrames": 840
} |
From: 7
Middle Right Door With Bottom Kihunter Cleared
To: 5
Top Junction Between Doors
Be careful when wall jumping because Screw Attack does not provide protection at that time. Requires: "canDash"
"ScrewAttack"
{
"heatFrames": 450
} |
From: 7
Middle Right Door With Bottom Kihunter Cleared
To: 5
Top Junction Between Doors
Requires: "canDash"
{
"enemyKill": {
"enemies": [
[
"Kihunter (red)",
"Kihunter (red)"
]
],
"explicitWeapons": [
"Super"
]
}
}
{
"heatFrames": 840
} |
From: 7
Middle Right Door With Bottom Kihunter Cleared
To: 5
Top Junction Between Doors
Most RNG patterns group the top 2 Kihunters allowing for 0 or 1 hits but sometimes 2 hits are required. Requires: "canDash"
{
"enemyDamage": {
"enemy": "Kihunter (red)",
"type": "contact",
"hits": 2
}
}
{
"heatFrames": 480
} |
|
Requires: {
"heatFrames": 35
}
{
"or": [
"canDash",
{
"heatFrames": 15
}
]
} |
|


Requires: {
"heatFrames": 25
}
{
"or": [
"canDash",
{
"heatFrames": 10
}
]
}
{
"or": [
{
"and": [
"canDoubleBombJump",
{
"heatFrames": 560
}
]
},
{
"and": [
"canDoubleBombJump",
"HiJump",
{
"heatFrames": 420
}
]
},
{
"and": [
{
"or": [
"f_DefeatedRidley",
{
"obstaclesCleared": [
"f_DefeatedRidley"
]
}
]
},
"canJumpIntoIBJ",
{
"or": [
"canLongIBJ",
"HiJump"
]
},
{
"heatFrames": 1000
}
]
}
]
} |
|


Requires: "canWallJump"
{
"or": [
{
"and": [
"HiJump",
{
"heatFrames": 110
}
]
},
{
"heatFrames": 140
}
]
}
{
"or": [
"canDash",
{
"heatFrames": 20
}
]
} |
|
Requires: {
"heatFrames": 105
}
{
"or": [
"canQuickDrop",
{
"heatFrames": 30
}
]
}
{
"or": [
"canDash",
{
"heatFrames": 5
}
]
} |
|
Requires: "canDash"
{
"heatFrames": 210
}
{
"or": [
"canQuickDrop",
{
"heatFrames": 60
}
]
}Exit condition: {
"leaveWithRunway": {
"length": 11,
"openEnd": 0
}
}Unlocks doors: {"types":["missiles"],"requires":[{"heatFrames":50}]}
{"types":["super"],"requires":[]}
{"types":["powerbomb"],"requires":[{"heatFrames":50}]} |
|
Requires: "canDash"
{
"heatFrames": 135
}
{
"or": [
"canQuickDrop",
{
"heatFrames": 30
}
]
}Exit condition: {
"leaveWithRunway": {
"length": 9,
"openEnd": 0
}
}Unlocks doors: {"types":["missiles"],"requires":[{"heatFrames":50}]}
{"types":["super"],"requires":[]}
{"types":["powerbomb"],"requires":[{"heatFrames":50}]} |
|
Requires: "canDash"
{
"heatFrames": 90
}
{
"or": [
"canQuickDrop",
{
"heatFrames": 30
}
]
}Exit condition: {
"leaveWithRunway": {
"length": 5,
"openEnd": 0
}
}Unlocks doors: {"types":["missiles"],"requires":[{"heatFrames":50}]}
{"types":["super"],"requires":[]}
{"types":["powerbomb"],"requires":[{"heatFrames":50}]} |
|
Requires: {
"or": [
{
"and": [
"canTrickyJump",
"canDash",
{
"heatFrames": 130
}
]
},
{
"heatFrames": 175
}
]
} |
From: 1
Top Left Door
To: 5
Junction Below Top Pirate
It is possible to get past the pirate without waiting by moving fast enough, or by making it turn around. Landing on the floating platform will make the fall simpler without scrolling the camera enough to activate the pirate. Requires: "canTrickyJump"
{
"heatFrames": 115
}
{
"or": [
"canDash",
{
"heatFrames": 5
}
]
}
{
"or": [
{
"and": [
"canInsaneJump",
"canTrickyDodgeEnemies"
]
},
{
"heatFrames": 35
}
]
}
{
"or": [
"canDownBack",
"Morph",
{
"heatFrames": 40
}
]
} |
From: 2
Bottom Left Door
To: 4
Junction Above Bomb Blocks
Avoid the bottom Pirates and jump high enough to break the bomb blocks with a power bomb. During the explosion, climb the right wall passing through any Pirates and use a movement item to reach the top. Requires: {
"notable": "Power Bombs and a Jump Assist"
}
"canDash"
"canHitbox"
"h_usePowerBomb"
"canTrivialMidAirMorph"
{
"or": [
{
"and": [
"SpaceJump",
"canPreciseWallJump",
{
"heatFrames": 490
}
]
},
{
"and": [
"HiJump",
"canSpeedyJump",
"SpaceJump",
{
"heatFrames": 420
}
]
},
{
"and": [
"canSpringwall",
{
"heatFrames": 490
}
]
},
{
"and": [
"HiJump",
"canPreciseWallJump",
"canInsaneJump",
{
"heatFrames": 470
}
]
},
{
"and": [
"HiJump",
"canSpeedyJump",
"canTrickySpringBallJump",
"canInsaneJump",
{
"heatFrames": 410
}
]
},
{
"and": [
"HiJump",
"SpaceJump",
"canInsaneJump",
{
"heatFrames": 600
}
]
}
]
}
{
"or": [
"h_heatResistant",
"canPauseAbuse",
{
"resourceCapacity": [
{
"type": "RegularEnergy",
"count": 149
}
]
}
]
}Clears obstacles: A Dev note: With Reserves only, canPauseAbuse is used as a proxy for pause abuse or optimal reserve management and character movement. |
From: 2
Bottom Left Door
To: 6
Bottom Platform Junction With Pirates Killed
Requires: "canDash"
"ScrewAttack"
{
"or": [
{
"and": [
"canWallJump",
{
"heatFrames": 265
}
]
},
{
"and": [
"HiJump",
{
"heatFrames": 210
}
]
},
{
"heatFrames": 460
}
]
} |
|
Safely clear the shot blocks from the ground to avoid drawing fire from the space pirate. Diagonal shots from the door effectively clear a path through the shot blocks, or firing vertically from below can work too. Requires: "canDash"
"canDodgeWhileShooting"
{
"or": [
{
"and": [
"canTrickyJump",
"canWallJump",
{
"heatFrames": 165
}
]
},
{
"and": [
"canTrickyJump",
{
"heatFrames": 175
}
]
},
{
"and": [
"HiJump",
"canTrickyDodgeEnemies",
{
"heatFrames": 145
}
]
},
{
"heatFrames": 225
}
]
}Dev note: This strat requires entering on the ground. |
|
Requires: "canDash"
{
"or": [
"ScrewAttack",
{
"and": [
{
"heatFrames": 60
},
{
"enemyKill": {
"enemies": [
[
"Yellow Space Pirate (standing)"
]
],
"explicitWeapons": [
"Missile",
"Super",
"Charge+Plasma"
]
}
}
]
}
]
}
{
"heatFrames": 300
} |
|
Requires: "canDash"
{
"enemyDamage": {
"enemy": "Yellow Space Pirate (standing)",
"type": "contact",
"hits": 1
}
}
{
"heatFrames": 300
} |
From: 3
Top Right Door
To: 2
Bottom Left Door
Requires: "canMoonfall"
"canInsaneJump"
{
"or": [
{
"and": [
"canDash",
"ScrewAttack",
{
"heatFrames": 240
}
]
},
{
"and": [
{
"haveBlueSuit": {}
},
{
"heatFrames": 260
}
]
}
]
} |
From: 3
Top Right Door
To: 2
Bottom Left Door
Requires: "canTrickyJump"
{
"or": [
{
"and": [
"canDash",
"ScrewAttack",
{
"heatFrames": 275
}
]
},
{
"and": [
{
"haveBlueSuit": {}
},
{
"heatFrames": 305
}
]
}
]
} |
From: 3
Top Right Door
To: 4
Junction Above Bomb Blocks


Spin jump over the pirate; aiming down mid jump can help. Then weave between the platforms below. Requires: "canDash"
"canTrickyJump"
{
"heatFrames": 175
} |
From: 3
Top Right Door
To: 5
Junction Below Top Pirate
Press against the ledge and fire up to clear out some of the shot blocks. Wait for the Pirate to reach its far left position when it begins looking around. Jump up onto the remaining shot blocks to get past the Pirate, then shoot the shot blocks below to go down. Requires: "canDash"
"canDodgeWhileShooting"
{
"heatFrames": 330
} |
From: 3
Top Right Door
To: 5
Junction Below Top Pirate
Requires: "canDash"
"canHitbox"
{
"or": [
{
"and": [
"h_usePowerBomb",
{
"heatFrames": 175
}
]
},
{
"and": [
"canDodgeWhileShooting",
"Charge",
"Plasma",
{
"heatFrames": 125
}
]
}
]
} |
From: 3
Top Right Door
To: 5
Junction Below Top Pirate
Requires: "canDash"
{
"or": [
{
"and": [
{
"enemyKill": {
"enemies": [
[
"Yellow Space Pirate (standing)"
]
],
"explicitWeapons": [
"ScrewAttack"
]
}
},
{
"heatFrames": 100
}
]
},
{
"and": [
{
"enemyKill": {
"enemies": [
[
"Yellow Space Pirate (standing)"
]
],
"explicitWeapons": [
"Super"
]
}
},
{
"heatFrames": 150
}
]
},
{
"and": [
"Charge",
"Plasma",
"Wave",
{
"heatFrames": 200
}
]
}
]
} |
From: 3
Top Right Door
To: 5
Junction Below Top Pirate
Requires: "canDash"
{
"heatFrames": 80
}
"h_pauseAbuseMinimalReserveRefill"
{
"heatFrames": 50
} |
From: 3
Top Right Door
To: 5
Junction Below Top Pirate
Requires: "canDash"
{
"enemyDamage": {
"enemy": "Yellow Space Pirate (standing)",
"type": "contact",
"hits": 1
}
}
{
"heatFrames": 120
} |
From: 3
Top Right Door
To: 5
Junction Below Top Pirate
Spin jump over the pirate. Aiming down mid-jump can help. Clearing shot blocks first for more space will be slower. Requires: "canDash"
"canTrickyJump"
{
"heatFrames": 100
} |
From: 1
Top Left Door
To: 4
Junction Above Bomb Block


Wait for the top one to pass by. Jump down when the lower two are by the left wall and jump over them when they swoop. Requires: {
"notable": "Dodge Going Down"
}
"canDash"
"canTrickyJump"
{
"heatFrames": 500
} |
From: 1
Top Left Door
To: 4
Junction Above Bomb Block

Requires: "h_PlasmaHitbox"
"canDash"
{
"heatFrames": 480
}Dev note: FIXME: this includes waiting for the acid cycle (in case of needing to go right). Otherwise it could be done with 320 heat frames. |
From: 1
Top Left Door
To: 4
Junction Above Bomb Block
Requires: "canDash"
{
"heatFrames": 480
}
{
"obstaclesCleared": [
"A"
]
}Dev note: FIXME: this includes waiting for the acid cycle (in case of needing to go right). Otherwise it could be done with 310 heat frames. |
|
By moving quickly, the Kihunters will be in favourable positions. Otherwise wait until it is safe to continue. Requires: "canDash"
"ScrewAttack"
{
"or": [
{
"heatFrames": 100
},
{
"and": [
"canCarefulJump",
{
"heatFrames": 50
}
]
},
"canTrickyJump"
]
}
{
"heatFrames": 480
}Clears obstacles: A Dev note: FIXME: this includes waiting for the acid cycle (in case of needing to go right). Otherwise it could be done with 330 heat frames. |
From: 1
Top Left Door
To: 4
Junction Above Bomb Block
Wait for the first Kihunter to pass and then run through the remaining two. A second hit can be avoided by moving quickly and using i-frames from the first hit. Requires: {
"heatFrames": 480
}
"canDash"
{
"or": [
{
"enemyDamage": {
"enemy": "Kihunter (red)",
"type": "contact",
"hits": 2
}
},
{
"and": [
{
"enemyDamage": {
"enemy": "Kihunter (red)",
"type": "contact",
"hits": 1
}
},
"canUseIFrames"
]
}
]
}Dev note: FIXME: this includes waiting for the acid cycle (in case of needing to go right). Otherwise it could be done with 380 heat frames. |
|
Use the ledge to the right of the morph tunnel to safely wait for the acid to go down. Requires: "Morph"
"canDash"
{
"heatFrames": 660
}
{
"or": [
"canDodgeWhileShooting",
{
"acidFrames": 20
}
]
}Clears obstacles: B |
From: 2
Right Door
To: 5
G-Mode Morph Junction (Above Bomb Block)
Entrance condition: {
"comeInWithGMode": {
"mode": "any",
"morphed": false
}
}Requires: "Morph"
{
"or": [
"SpaceJump",
"canTrickyWallJump",
{
"and": [
"canDash",
"HiJump"
]
},
{
"and": [
"canDash",
"canInsaneJump",
{
"disableEquipment": "SpeedBooster"
}
]
}
]
}
{
"heatFrames": 0
} |
From: 4
Junction Above Bomb Block
To: 1
Top Left Door

Read the movements of the Kihunters and jump over or roll under them as appropriate. Changing platforms is the hardest part: jumping extra high and morphing works sometimes, other times jump short and roll under. Requires: {
"notable": "Dodge Going Up"
}
"canDash"
"canInsaneJump"
{
"or": [
{
"and": [
"canWallJumpInstantMorph",
"canPreciseWallJump"
]
},
{
"and": [
"canSpeedyJump",
"HiJump",
"canMidAirMorph"
]
}
]
}
{
"heatFrames": 540
}Clears obstacles: A, B |
From: 4
Junction Above Bomb Block
To: 1
Top Left Door

Wait for the Kihunters to move away from where Samus will jump up. This may mean Hitboxing through the middle Kihunter multiple times. Requires: "canDash"
"h_PlasmaHitbox"
"canTrickyDodgeEnemies"
{
"or": [
"canInsaneJump",
{
"enemyDamage": {
"enemy": "Kihunter (red)",
"type": "contact",
"hits": 1
}
}
]
}
{
"or": [
{
"and": [
"canWallJump",
{
"heatFrames": 410
}
]
},
{
"and": [
"h_crouchJumpDownGrab",
{
"heatFrames": 460
}
]
},
{
"and": [
"HiJump",
{
"heatFrames": 360
}
]
},
{
"and": [
"SpaceJump",
"canInsaneJump",
{
"heatFrames": 490
}
]
}
]
}
{
"or": [
"canBeLucky",
{
"heatFrames": 130
}
]
}
{
"or": [
"Wave",
{
"heatFrames": 40
}
]
}Clears obstacles: A, B |
From: 4
Junction Above Bomb Block
To: 1
Top Left Door
Firing upwards has a good chance of hitting multiple Kihunters. And charge shot double hits will instantly kill a Kihunter. Requires: "canDash"
"Ice"
"Wave"
"Plasma"
{
"or": [
"Charge",
{
"heatFrames": 240
}
]
}
{
"or": [
"h_crouchJumpDownGrab",
"canWallJump",
"HiJump",
{
"and": [
"canSpringBallJumpMidAir",
{
"heatFrames": 120
}
]
},
"SpaceJump",
{
"and": [
"canIBJ",
"h_heatProof"
]
},
{
"and": [
"canSpringBallBombJump",
"h_additionalBomb",
"h_additionalBomb",
{
"heatFrames": 250
}
]
}
]
}
{
"heatFrames": 550
}Clears obstacles: A, B |
From: 4
Junction Above Bomb Block
To: 1
Top Left Door
Fire up from below and try not to jump too high as that will out the camera in a bad position. Requires: "canDash"
"Ice"
"Wave"
"Spazer"
{
"or": [
"Charge",
"canCarefulJump",
"h_heatProof"
]
}
{
"or": [
"h_crouchJumpDownGrab",
"canWallJump",
"HiJump",
{
"and": [
"canSpringBallJumpMidAir",
{
"heatFrames": 120
}
]
},
"SpaceJump",
{
"and": [
"canIBJ",
"h_heatProof"
]
},
{
"and": [
"canSpringBallBombJump",
"h_additionalBomb",
"h_additionalBomb",
{
"heatFrames": 250
}
]
}
]
}
{
"heatFrames": 1520
}Clears obstacles: A, B Dev note: FIXME IBJ strats could be added with heat frames. |
From: 4
Junction Above Bomb Block
To: 1
Top Left Door
Requires: {
"or": [
"canDash",
{
"heatFrames": 40
}
]
}
{
"or": [
{
"obstaclesCleared": [
"A"
]
},
{
"and": [
{
"haveBlueSuit": {}
},
{
"heatFrames": 10
},
{
"or": [
"Wave",
{
"heatFrames": 30
}
]
}
]
}
]
}
{
"or": [
{
"and": [
"h_heatedCrouchJumpDownGrab",
{
"heatFrames": 340
}
]
},
{
"and": [
"canWallJump",
{
"heatFrames": 290
}
]
},
{
"and": [
"HiJump",
{
"heatFrames": 240
}
]
},
{
"and": [
"canSpringBallJumpMidAir",
{
"heatFrames": 450
}
]
},
{
"and": [
"SpaceJump",
{
"heatFrames": 380
}
]
},
{
"and": [
"canIBJ",
"h_heatProof"
]
},
{
"and": [
"canJumpIntoIBJ",
{
"heatFrames": 660
},
{
"or": [
{
"obstaclesCleared": [
"A"
]
},
{
"heatFrames": 380
}
]
}
]
},
{
"and": [
"canSpringBallBombJump",
"h_additionalBomb",
"h_additionalBomb",
{
"heatFrames": 560
}
]
}
]
}Clears obstacles: B |
From: 4
Junction Above Bomb Block
To: 1
Top Left Door


Jump over the first Kihunter and attempt to either use i-frames to pass through the top Kihunter, or dodge it if possible. Requires: "canDash"
{
"or": [
"canWallJump",
"HiJump"
]
}
"canTrickyJump"
{
"or": [
{
"and": [
"canInsaneJump",
"canUseIFrames",
{
"enemyDamage": {
"enemy": "Kihunter (red)",
"type": "contact",
"hits": 1
}
}
]
},
{
"and": [
{
"enemyDamage": {
"enemy": "Kihunter (red)",
"type": "contact",
"hits": 2
}
},
{
"heatFrames": 30
}
]
}
]
}
{
"heatFrames": 470
}Clears obstacles: A, B |
From: 4
Junction Above Bomb Block
To: 1
Top Left Door
Watch the Kihunter above to prevent getting knocked off when jumping to the next platform. Requires: "canDash"
"canTrickyDodgeEnemies"
{
"heatFrames": 90
}
"h_pauseAbuseMinimalReserveRefill"
{
"heatFrames": 120
}
"h_pauseAbuseMinimalReserveRefill"
{
"heatFrames": 100
}
"h_pauseAbuseMinimalReserveRefill"
{
"heatFrames": 180
}
{
"or": [
"Wave",
{
"heatFrames": 40
}
]
}
{
"or": [
"HiJump",
"canWallJump"
]
}Clears obstacles: A, B |
|
Fire up from below and try not to jump too high as that will put the camera in a bad position. Requires: "canDash"
"Plasma"
{
"or": [
"canCarefulJump",
{
"heatFrames": 100
}
]
}
{
"or": [
"h_crouchJumpDownGrab",
"canWallJump",
"HiJump",
{
"and": [
"canSpringBallJumpMidAir",
{
"heatFrames": 120
}
]
},
"SpaceJump",
{
"and": [
"canIBJ",
"h_heatProof"
]
},
{
"and": [
"canSpringBallBombJump",
"h_additionalBomb",
"h_additionalBomb",
{
"heatFrames": 250
}
]
}
]
}
{
"heatFrames": 1360
}Clears obstacles: A, B Dev note: FIXME IBJ strats could be added with heat frames. |
|


Depending on which movement items are available, it is often safest to carefully kill each Kihunter from below before attempting to get onto its platform: lure the Kihunter over to the opening and spin jump directly up into it. If wall jumping up, do so from low enough that Samus bonks the opposite wall before touching the Kihunter: otherwise the wall jumping movement may prevent Screw Attack from taking effect. Requires: "canDash"
"ScrewAttack"
{
"or": [
"HiJump",
"SpaceJump",
"canCarefulJump"
]
}
{
"or": [
{
"and": [
"canWallJump",
{
"heatFrames": 360
}
]
},
{
"and": [
"h_crouchJumpDownGrab",
{
"heatFrames": 520
}
]
},
{
"and": [
"HiJump",
{
"heatFrames": 310
}
]
},
{
"and": [
"canSpringBallJumpMidAir",
{
"heatFrames": 720
}
]
},
{
"and": [
"SpaceJump",
{
"heatFrames": 440
}
]
},
{
"and": [
"canIBJ",
"h_heatProof"
]
},
{
"and": [
"canJumpIntoIBJ",
{
"heatFrames": 1060
}
]
}
]
}
{
"or": [
"Wave",
{
"heatFrames": 40
}
]
}Clears obstacles: A, B |
|
Fire up from below and try not to jump too high as that will put the camera in a bad position. Requires: "canDash"
{
"enemyKill": {
"enemies": [
[
"Kihunter (red)",
"Kihunter (red)",
"Kihunter (red)"
]
],
"explicitWeapons": [
"Super"
]
}
}
{
"or": [
"canCarefulJump",
{
"heatFrames": 210
}
]
}
{
"or": [
"h_crouchJumpDownGrab",
"canWallJump",
"HiJump",
{
"and": [
"canSpringBallJumpMidAir",
{
"heatFrames": 120
}
]
},
"SpaceJump",
{
"and": [
"canIBJ",
"h_heatProof"
]
},
{
"and": [
"canSpringBallBombJump",
"h_additionalBomb",
"h_additionalBomb",
{
"heatFrames": 250
}
]
}
]
}
{
"heatFrames": 1300
}Clears obstacles: A, B |
From: 4
Junction Above Bomb Block
To: 1
Top Left Door
Requires: "canDash"
{
"or": [
{
"and": [
"canUseIFrames",
"h_crouchJumpDownGrab"
]
},
{
"and": [
"canUseIFrames",
"canWallJump"
]
},
{
"and": [
"canUseIFrames",
"SpaceJump"
]
},
"HiJump",
{
"and": [
"canSpringBallJumpMidAir",
{
"heatFrames": 300
},
{
"enemyDamage": {
"enemy": "Kihunter (red)",
"type": "contact",
"hits": 1
}
}
]
},
{
"and": [
"canJumpIntoIBJ",
"canTrickyJump",
{
"heatFrames": 300
}
]
}
]
}
{
"or": [
"canTrickyJump",
{
"and": [
{
"enemyDamage": {
"enemy": "Kihunter (red)",
"type": "contact",
"hits": 1
}
},
{
"heatFrames": 60
}
]
}
]
}
{
"heatFrames": 570
}
{
"enemyDamage": {
"enemy": "Kihunter (red)",
"type": "contact",
"hits": 3
}
}Clears obstacles: A, B |
From: 4
Junction Above Bomb Block
To: 1
Top Left Door
Requires: "canDash"
"Wave"
"Plasma"
{
"or": [
"h_crouchJumpDownGrab",
"canWallJump",
"HiJump",
{
"and": [
"canSpringBallJumpMidAir",
{
"heatFrames": 120
}
]
},
"SpaceJump",
{
"and": [
"canIBJ",
"h_heatProof"
]
},
{
"and": [
"canSpringBallBombJump",
"h_additionalBomb",
"h_additionalBomb",
{
"heatFrames": 250
}
]
}
]
}
{
"heatFrames": 940
}Clears obstacles: A, B |
|
Wait for the acid to go down before entering the Morph tunnel, and again once reaching the other side. Requires: {
"obstaclesNotCleared": [
"B"
]
}
"Morph"
"canSuitlessLavaDive"
"canCarefulJump"
{
"heatFrames": 700
}
{
"acidFrames": 15
}
{
"or": [
"canDash",
{
"heatFrames": 50
}
]
} |
|
Requires: {
"obstaclesNotCleared": [
"B"
]
}
"Morph"
"Gravity"
{
"acidFrames": 30
}
{
"heatFrames": 370
}
{
"or": [
"canDash",
{
"and": [
{
"haveBlueSuit": {}
},
{
"heatFrames": 140
},
{
"acidFrames": 5
}
]
}
]
} |
From: 4
Junction Above Bomb Block
To: 2
Right Door
Precisely weave between the pillars to avoid needing to wait for the acid. Requires: {
"obstaclesNotCleared": [
"B"
]
}
"Morph"
"canPreciseSpaceJump"
{
"heatFrames": 355
}
{
"or": [
"canDash",
{
"and": [
{
"haveBlueSuit": {}
},
{
"heatFrames": 65
}
]
}
]
} |
From: 4
Junction Above Bomb Block
To: 2
Right Door
Wall jump in place while the acid goes away. Requires: {
"obstaclesNotCleared": [
"B"
]
}
"Morph"
"canTrickyWallJump"
{
"heatFrames": 600
}
{
"or": [
"canDash",
{
"heatFrames": 40
}
]
} |
|
From the safe ledge to the right of the morph tunnel, run and jump directly onto the Hibashi when it is not firing. Requires: {
"obstaclesNotCleared": [
"B"
]
}
"Morph"
"canDash"
"canTrickyJump"
{
"heatFrames": 600
} |
|
Requires: "Morph"
{
"obstaclesCleared": [
"B"
]
}
{
"heatFrames": 90
}
{
"or": [
"canDash",
{
"heatFrames": 10
}
]
} |
|
Requires: "h_useMorphBombs"
{
"heatFrames": 160
}
{
"or": [
"canDash",
{
"heatFrames": 10
}
]
}Clears obstacles: B |
From: 4
Junction Right of Power Bomb Blocks
To: 6
Junction Left of Power Bomb Blocks
Requires: {
"or": [
{
"obstaclesCleared": [
"C"
]
},
{
"enemyDamage": {
"enemy": "Dessgeega",
"type": "contact",
"hits": 1
}
}
]
}
{
"heatFrames": 180
}
{
"or": [
"canDash",
{
"heatFrames": 40
}
]
} |
From: 4
Junction Right of Power Bomb Blocks
To: 6
Junction Left of Power Bomb Blocks
Requires: "canDash"
{
"enemyKill": {
"enemies": [
[
"Dessgeega"
]
],
"explicitWeapons": [
"Wave+Plasma",
"Ice+Plasma",
"Super",
"Missile"
]
}
}
{
"heatFrames": 210
}Clears obstacles: C |
From: 4
Junction Right of Power Bomb Blocks
To: 6
Junction Left of Power Bomb Blocks
Requires: {
"obstaclesCleared": [
"D"
]
}
"canDash"
"canDodgeWhileShooting"
{
"enemyKill": {
"enemies": [
[
"Dessgeega"
]
],
"explicitWeapons": [
"Ice+Wave+Spazer",
"Plasma"
]
}
}
{
"heatFrames": 270
}Clears obstacles: C |
From: 4
Junction Right of Power Bomb Blocks
To: 6
Junction Left of Power Bomb Blocks
Requires: {
"obstaclesCleared": [
"D"
]
}
"canDash"
"canDodgeWhileShooting"
"Morph"
{
"ammo": {
"type": "PowerBomb",
"count": 2
}
}
{
"or": [
"canHitbox",
{
"ammo": {
"type": "PowerBomb",
"count": 1
}
}
]
}
{
"heatFrames": 420
}Clears obstacles: A, B, C |
From: 4
Junction Right of Power Bomb Blocks
To: 6
Junction Left of Power Bomb Blocks
Requires: {
"obstaclesCleared": [
"D"
]
}
"canDash"
"canDodgeWhileShooting"
{
"or": [
"Charge",
"Spazer"
]
}
{
"heatFrames": 12000
}Clears obstacles: C |
From: 4
Junction Right of Power Bomb Blocks
To: 6
Junction Left of Power Bomb Blocks
Requires: "ScrewAttack"
{
"heatFrames": 180
}
{
"or": [
"canDash",
{
"heatFrames": 40
}
]
}Clears obstacles: B, C |
From: 4
Junction Right of Power Bomb Blocks
To: 7
Junction Left of Morph Tunnel
Requires: {
"obstaclesCleared": [
"D"
]
}
{
"heatFrames": 110
}
{
"or": [
"canDash",
{
"heatFrames": 50
}
]
} |
From: 4
Junction Right of Power Bomb Blocks
To: 7
Junction Left of Morph Tunnel
Requires: "canDash"
{
"heatFrames": 120
}
"canHitbox"
"Plasma" |
From: 4
Junction Right of Power Bomb Blocks
To: 7
Junction Left of Morph Tunnel
Requires: "canDash"
{
"heatFrames": 150
}
"canHitbox"
"h_usePowerBomb"Clears obstacles: A, B |
From: 4
Junction Right of Power Bomb Blocks
To: 7
Junction Left of Morph Tunnel
Requires: "canDash"
{
"heatFrames": 140
}
{
"enemyDamage": {
"enemy": "Dessgeega",
"type": "contact",
"hits": 1
}
} |
|
Requires: "canDash"
"canUseEnemies"
{
"heatFrames": 430
}Exit condition: {
"leaveWithRunway": {
"length": 8,
"openEnd": 0
}
}Unlocks doors: {"types":["super","powerbomb"],"requires":[]}
{"types":["missiles"],"requires":["never"]}Dev note: FIXME: Assumes the Kzans are in their default positions |
From: 5
Junction Below Shot Block
To: 1
Bottom Left Door
Walk into a Spike and then Morph-Kago through the top Spike-Platform. Requires: "canKago"
"Morph"
"canUseEnemies"
{
"spikeHits": 1
}
{
"heatFrames": 250
}
"canDash"Exit condition: {
"leaveWithRunway": {
"length": 8,
"openEnd": 0
}
}Unlocks doors: {"types":["missiles"],"requires":[{"heatFrames":50}]}
{"types":["super"],"requires":[]}
{"types":["powerbomb"],"requires":[{"heatFrames":110}]}Dev note: About equivalent to waiting, if there is no form of damage reduction. |
From: 5
Junction Below Shot Block
To: 4
Junction Right of Power Bomb Blocks
Requires: {
"obstaclesCleared": [
"A",
"C",
"D"
]
}
{
"heatFrames": 150
}
{
"or": [
"canDash",
{
"heatFrames": 10
}
]
} |
From: 6
Junction Left of Power Bomb Blocks
To: 4
Junction Right of Power Bomb Blocks
Requires: {
"obstaclesCleared": [
"C",
"D"
]
}
{
"heatFrames": 150
}
{
"or": [
"canDash",
{
"heatFrames": 50
}
]
} |
From: 6
Junction Left of Power Bomb Blocks
To: 4
Junction Right of Power Bomb Blocks
Requires: "canDash"
{
"or": [
{
"obstaclesCleared": [
"C"
]
},
{
"and": [
{
"enemyKill": {
"enemies": [
[
"Dessgeega"
]
],
"explicitWeapons": [
"Super",
"Missile",
"Plasma",
"Ice+Wave+Spazer"
]
}
},
{
"heatFrames": 75
}
]
}
]
}
{
"or": [
{
"obstaclesCleared": [
"D"
]
},
{
"and": [
{
"enemyKill": {
"enemies": [
[
"Dessgeega",
"Dessgeega",
"Dessgeega"
]
],
"explicitWeapons": [
"Super",
"Missile",
"Plasma",
"Ice+Wave+Spazer"
]
}
},
{
"heatFrames": 315
}
]
}
]
}
{
"heatFrames": 150
}Clears obstacles: C, D |
From: 6
Junction Left of Power Bomb Blocks
To: 4
Junction Right of Power Bomb Blocks
Requires: "canDash"
"ScrewAttack"
{
"heatFrames": 270
}Clears obstacles: C, D |
From: 6
Junction Left of Power Bomb Blocks
To: 4
Junction Right of Power Bomb Blocks
Requires: "canDash"
{
"heatFrames": 170
}
{
"enemyDamage": {
"enemy": "Dessgeega",
"type": "contact",
"hits": 1
}
}
{
"or": [
{
"obstaclesNotCleared": [
"A"
]
},
{
"enemyDamage": {
"enemy": "Dessgeega",
"type": "contact",
"hits": 1
}
}
]
} |
From: 7
Junction Left of Morph Tunnel
To: 4
Junction Right of Power Bomb Blocks
Requires: {
"heatFrames": 110
}
{
"obstaclesCleared": [
"D"
]
}
{
"or": [
"canDash",
{
"heatFrames": 50
}
]
} |
From: 7
Junction Left of Morph Tunnel
To: 4
Junction Right of Power Bomb Blocks
Requires: "canDash"
"ScrewAttack"
{
"heatFrames": 150
}Clears obstacles: D |
From: 7
Junction Left of Morph Tunnel
To: 4
Junction Right of Power Bomb Blocks
Requires: "canDash"
{
"heatFrames": 150
}
{
"enemyDamage": {
"enemy": "Dessgeega",
"type": "contact",
"hits": 1
}
} |
From: 7
Junction Left of Morph Tunnel
To: 6
Junction Left of Power Bomb Blocks
Requires: {
"obstaclesCleared": [
"D"
]
}
{
"getBlueSpeed": {
"usedTiles": 20,
"steepDownTiles": 4,
"openEnd": 1
}
}
"canCarefulJump"
"h_blueJump"
{
"heatFrames": 200
}Clears obstacles: C |
From: 7
Junction Left of Morph Tunnel
To: 6
Junction Left of Power Bomb Blocks
Requires: {
"obstaclesCleared": [
"C",
"D"
]
}
{
"getBlueSpeed": {
"usedTiles": 20,
"steepDownTiles": 4,
"openEnd": 1
}
}
"canCarefulJump"
"h_blueJump"
{
"tech": "canChainTemporaryBlue"
}
{
"or": [
"canTrickyJump",
{
"noFlashSuit": {}
}
]
}
{
"heatFrames": 240
}Clears obstacles: B Dev note: It is easier to chainTemporaryBlue than to unmorph at the correct timing. |
|
Requires: {
"not": "f_DefeatedPhantoon"
}
"canRiskPermanentLossOfAccess"
{
"resetRoom": {
"nodes": [
1,
2,
3
]
}
}
"h_useMorphBombs"
{
"cycleFrames": 2300
}
{
"or": [
"canDash",
{
"cycleFrames": 380
}
]
}Resets obstacles: A Farm cycle drops: 4 Trapped Atomic |
|
Requires: "f_DefeatedPhantoon"
{
"resetRoom": {
"nodes": [
1
]
}
}
{
"or": [
{
"and": [
"canDash",
{
"or": [
{
"and": [
"ScrewAttack",
{
"cycleFrames": 420
}
]
},
{
"and": [
"Plasma",
{
"cycleFrames": 440
}
]
},
{
"and": [
"canDodgeWhileShooting",
{
"or": [
"Wave",
"Spazer"
]
},
{
"cycleFrames": 840
}
]
},
{
"and": [
"canTrickyDodgeEnemies",
"Ice",
{
"cycleFrames": 1200
}
]
},
{
"and": [
"canTrickyDodgeEnemies",
{
"cycleFrames": 1740
}
]
}
]
}
]
},
{
"and": [
{
"haveBlueSuit": {}
},
{
"cycleFrames": 630
}
]
}
]
}Resets obstacles: A Farm cycle drops: 1 Kihunter (yellow), 2 Atomic |
|
Requires: {
"not": "f_DefeatedPhantoon"
}
{
"resetRoom": {
"nodes": [
1
]
}
}
{
"or": [
{
"and": [
"Plasma",
{
"cycleFrames": 930
}
]
},
{
"and": [
{
"or": [
"canDodgeWhileShooting",
"canRiskPermanentLossOfAccess"
]
},
"Wave",
{
"cycleFrames": 1010
}
]
},
{
"and": [
{
"or": [
"canDodgeWhileShooting",
"canRiskPermanentLossOfAccess"
]
},
"Spazer",
{
"cycleFrames": 1140
}
]
},
{
"and": [
{
"or": [
"canFarmWhileShooting",
"canRiskPermanentLossOfAccess"
]
},
"Ice",
{
"cycleFrames": 1300
}
]
},
{
"and": [
"canFarmWhileShooting",
{
"cycleFrames": 1980
}
]
}
]
}
{
"or": [
"canDash",
{
"cycleFrames": 380
}
]
}Resets obstacles: A Farm cycle drops: 3 Trapped Atomic |
|


Run from the ledge into the open doorway while hitting the frozen Atomic and the door transition simultaneously, just as the Atomic thaws and touches Samus during the transition. Note that this requires a precise freeze (3 pixel window), precise thaw timing, and a 50% success rate due to collision oscillation. The starting position of Samus is a bit more lenient than other downward G-mode setups, as Samus can have higher run speed when hitting the Atomic than in most other rooms. One normalized setup to get into a usable position is to run into the right pillar, turn around, then run back. Requires: "f_DefeatedPhantoon" "canDash" "canWallIceClip" "canDownwardGModeSetup" Exit condition: {
"leaveWithGModeSetup": {}
}Dev note: This can not work with a Covern, as it only moves vertically and can't hit Samus in the transition. |
|
Requires: "f_DefeatedPhantoon"
{
"resetRoom": {
"nodes": [
2
]
}
}
{
"or": [
{
"and": [
"canDash",
{
"or": [
{
"and": [
"ScrewAttack",
{
"cycleFrames": 520
}
]
},
{
"and": [
"canDodgeWhileShooting",
"Plasma",
{
"cycleFrames": 800
}
]
},
{
"and": [
"canDodgeWhileShooting",
"Wave",
"Spazer",
"Ice",
{
"cycleFrames": 930
}
]
},
{
"and": [
"canTrickyDodgeEnemies",
{
"or": [
"Wave",
"Spazer",
"Ice"
]
},
"h_complexToCarryFlashSuit",
{
"cycleFrames": 1400
}
]
},
{
"and": [
"canInsaneJump",
"h_trickyToCarryFlashSuit",
{
"cycleFrames": 2600
}
]
}
]
}
]
},
{
"and": [
{
"haveBlueSuit": {}
},
{
"cycleFrames": 520
}
]
}
]
}Clears obstacles: A Farm cycle drops: 3 Kihunter (yellow), 2 Atomic |
|
Requires: {
"not": "f_DefeatedPhantoon"
}
{
"resetRoom": {
"nodes": [
2
]
}
}
{
"or": [
{
"and": [
{
"or": [
"canDodgeWhileShooting",
"canRiskPermanentLossOfAccess"
]
},
"Plasma",
{
"cycleFrames": 930
}
]
},
{
"and": [
{
"or": [
"canTrickyDodgeEnemies",
"canRiskPermanentLossOfAccess"
]
},
"Wave",
{
"cycleFrames": 1010
}
]
},
{
"and": [
{
"or": [
"canTrickyDodgeEnemies",
"canRiskPermanentLossOfAccess"
]
},
"Spazer",
{
"cycleFrames": 1140
}
]
},
{
"and": [
{
"or": [
"canTrickyDodgeEnemies",
"canRiskPermanentLossOfAccess"
]
},
"Ice",
{
"cycleFrames": 1300
}
]
},
{
"and": [
{
"or": [
"canInsaneJump",
"canRiskPermanentLossOfAccess"
]
},
"canFarmWhileShooting",
{
"cycleFrames": 1980
}
]
}
]
}
{
"or": [
"canDash",
{
"cycleFrames": 200
}
]
}Resets obstacles: A Farm cycle drops: 3 Trapped Atomic |
|
Requires: "f_DefeatedPhantoon"
{
"resetRoom": {
"nodes": [
3
]
}
}
{
"or": [
{
"and": [
"canDash",
{
"or": [
{
"and": [
"ScrewAttack",
{
"cycleFrames": 400
}
]
},
{
"and": [
"Plasma",
{
"cycleFrames": 520
}
]
},
{
"and": [
"canDodgeWhileShooting",
{
"or": [
"Wave",
"Spazer"
]
},
{
"cycleFrames": 840
}
]
},
{
"and": [
"canTrickyDodgeEnemies",
"Ice",
{
"cycleFrames": 1500
}
]
}
]
}
]
},
{
"and": [
{
"haveBlueSuit": {}
},
{
"cycleFrames": 600
}
]
}
]
}Resets obstacles: A Farm cycle drops: 3 Kihunter (yellow), 1 Atomic |
|
Requires: {
"not": "f_DefeatedPhantoon"
}
{
"resetRoom": {
"nodes": [
3
]
}
}
{
"or": [
{
"and": [
"Plasma",
{
"cycleFrames": 930
}
]
},
{
"and": [
{
"or": [
"canDodgeWhileShooting",
"canRiskPermanentLossOfAccess"
]
},
"Wave",
{
"cycleFrames": 1010
}
]
},
{
"and": [
{
"or": [
"canDodgeWhileShooting",
"canRiskPermanentLossOfAccess"
]
},
"Spazer",
{
"cycleFrames": 1140
}
]
},
{
"and": [
{
"or": [
"canInsaneJump",
"canRiskPermanentLossOfAccess"
]
},
"Ice",
{
"cycleFrames": 1300
}
]
}
]
}
{
"or": [
"canDash",
{
"cycleFrames": 380
}
]
}Resets obstacles: A Farm cycle drops: 3 Trapped Atomic |
|

Requires: {
"not": "f_DefeatedPhantoon"
}
"h_speedJump"
"canInsaneJump"
"canMomentumConservingMorph"
"canInsaneMidAirMorph"Exit condition: {
"leaveWithSidePlatform": {
"height": 3,
"runway": {
"length": 45,
"openEnd": 1
},
"obstruction": [
5,
0
]
}
}Dev note: Max extra run speed $7.0. The obstruction (from the Workrobot) actually extends between 4 and 5 tiles. |
|
Requires: "f_DefeatedPhantoon"
"h_speedJump"
{
"or": [
"canMomentumConservingMorph",
{
"and": [
"canMomentumConservingTurnaround",
"canInsaneJump"
]
}
]
}Exit condition: {
"leaveWithSidePlatform": {
"height": 3,
"runway": {
"length": 45,
"openEnd": 1
},
"obstruction": [
3,
0
]
}
}Dev note: Max extra run speed $7.0. |
|
Requires: "f_DefeatedPhantoon"
{
"or": [
{
"and": [
{
"resetRoom": {
"nodes": [
1
]
}
},
{
"cycleFrames": 510
}
]
},
{
"and": [
{
"resetRoom": {
"nodes": [
2
]
}
},
{
"cycleFrames": 555
}
]
},
{
"and": [
"h_useMorphBombs",
{
"resetRoom": {
"nodes": [
3
]
}
},
{
"cycleFrames": 800
}
]
}
]
}
{
"or": [
"ScrewAttack",
{
"haveBlueSuit": {}
},
"Plasma",
{
"and": [
{
"or": [
"Spazer",
"Wave"
]
},
{
"cycleFrames": 240
}
]
},
{
"cycleFrames": 515
}
]
}
{
"or": [
"canDash",
{
"cycleFrames": 200
}
]
}Resets obstacles: A Farm cycle drops: 3 Atomic |
|
Requires: "h_speedJump" Exit condition: {
"leaveWithSidePlatform": {
"height": 3,
"runway": {
"length": 5,
"openEnd": 0
},
"obstruction": [
4,
2
]
}
}Dev note: Max extra run speed $1.3. This strat is included for completeness, though it apparently doesn't have any applications. |
From: 2
Middle Left Door
To: 1
Top Left Door


Jump close to ceiling, and activate a shinespark to the right. If successful, Samus will clip into the wall behind the Chozo statue and be able to X-Ray climb up. Only certain horizontal positions will cause Samus to clip into the wall. It will work to activate the spark while Samus is centered under the second Grapple block or slightly to the left. Requires: "h_storedSpark"
"canDash"
"canShinechargeMovementTricky"
{
"shinespark": {
"frames": 88,
"excessFrames": 0
}
}
"canShinesparkSlopeClip"
"canXRayClimb"
{
"or": [
{
"getBlueSpeed": {
"usedTiles": 16,
"steepDownTiles": 4,
"openEnd": 0
}
},
"can4HighMidAirMorph"
]
}Exit condition: {
"leaveNormally": {}
}Unlocks doors: {"types":["ammo"],"requires":[]}Dev note: The leaveNormally is to ensure it won't be required to do the Speed block moondance blind up there. |
From: 2
Middle Left Door
To: 3
Bottom Left Door


Samus's shinecharge frames are paused while riding the Bowling Chozo. Entrance condition: {
"comeInRunning": {
"speedBooster": "yes",
"minTiles": 19
}
}Requires: "f_DefeatedPhantoon"
"h_speedJump"
"canSpeedKeep"
"h_shinechargeMaxRunway"
{
"spikeHits": {
"mul": [
3,
"n_speedKeepAttempts"
]
}
}
{
"shineChargeFrames": 145
}Exit condition: {
"leaveShinecharged": {}
}Sets flags: f_UsedBowlingStatue Unlocks doors: {"types":["super"],"requires":[]}
{"types":["missiles","powerbomb"],"requires":["never"]} |
|
This is doable even without any momentum from a previous room, but pretty tight. Requires: "canDash"
"canTrickyJump"
"canUseIFrames"
{
"or": [
"canHorizontalDamageBoost",
"canInsaneJump"
]
}
{
"spikeHits": 2
} |
|
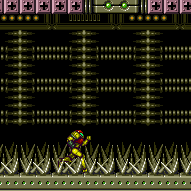
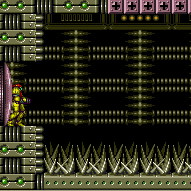
A bit easier than 2-hit bowling Requires: "canUseIFrames"
"h_speedJump"
{
"spikeHits": 2
} |
|
Requires: "canDash"
"canUseIFrames"
{
"spikeHits": 3
} |
From: 2
Middle Left Door
To: 6
Bowling Chozo Statue


Jump into the room and morph along the ceiling to maximize distance. Unmorph while entering the spikes to minimize knockback Then build up speed and airball again to cross the spikes. Entrance condition: {
"comeInRunning": {
"speedBooster": "yes",
"minTiles": 28
}
}Requires: "h_speedJump"
"canInsaneJump"
"canMomentumConservingMorph"
"canUseIFrames"
{
"spikeHits": 1
} |
|
Requires: "canDash"
{
"spikeHits": 6
} |
From: 2
Middle Left Door
To: 6
Bowling Chozo Statue

Start with Spring Ball disabled. Jump over the spikes and mid-air morph. Spring fling on the way down, Spring Ball bounce through the spikes, then spring fling again to reach the statue taking only one spike hit. Entrance condition: {
"comeInRunning": {
"speedBooster": "yes",
"minTiles": 12
}
}Requires: "h_speedJump"
"canTrickyJump"
"canSpringFling"
"h_unpauseKeepMomentum"
"canLateralMidAirMorph"
"canUseIFrames"
{
"spikeHits": 1
} |
From: 2
Middle Left Door
To: 6
Bowling Chozo Statue


Jump into the room and morph along the ceiling to maximize distance. Unmorph while entering the spikes to minimize knockback Then build up speed and airball again to cross the spikes. With only a short runway available, high precision is required. Entrance condition: {
"comeInRunning": {
"speedBooster": "yes",
"minTiles": 25
}
}Requires: "h_speedJump"
"canInsaneJump"
"canMomentumConservingMorph"
"canInsaneMidAirMorph"
"canUseIFrames"
{
"spikeHits": 1
} |
|


Requires: "canHorizontalMidairShinespark"
"h_storedSpark"
"canDash"
{
"shinespark": {
"frames": 82,
"excessFrames": 8
}
} |
From: 2
Middle Left Door
To: 7
Bowling In G-Mode


Spring fling many times to cross the spikeway with as few hits as possible. Ride the statue, which will not take Samus down, and will instead drop her off in the spike pit somewhat near the door. Entrance condition: {
"comeInWithGMode": {
"mode": "any",
"morphed": true
}
}Requires: "canComplexGMode"
"f_DefeatedPhantoon"
"h_artificialMorphSpringFling"
"canDash"
"canInsaneJump"
{
"spikeHits": 4
} |
|
Ride the statue, which will not take Samus down, and will instead drop her off in the spike pit somewhat near the door. Entrance condition: {
"comeInWithGMode": {
"mode": "any",
"morphed": false
}
}Requires: "canComplexGMode"
"f_DefeatedPhantoon"
"Morph"
{
"or": [
"SpaceJump",
{
"and": [
"canDash",
"canUseIFrames",
{
"spikeHits": 2
},
{
"or": [
"canHorizontalDamageBoost",
"canInsaneJump",
"h_speedJump",
{
"spikeHits": 1
}
]
}
]
},
{
"and": [
{
"haveBlueSuit": {}
},
{
"tech": "canHorizontalDamageBoost"
},
"canBlueSuitSpikeJump",
{
"spikeHits": 6
}
]
},
{
"and": [
{
"blueSuitShinecharge": {}
},
"canDash",
{
"shinespark": {
"frames": 80,
"excessFrames": 7
}
}
]
}
]
} |
From: 2
Middle Left Door
To: 7
Bowling In G-Mode
Crystal Flash then pause abuse to cross the spikeway with minimal Energy loss. Ride the statue, which will not take Samus down, and will instead drop her off in the spike pit somewhat near the door. Entrance condition: {
"comeInWithGMode": {
"mode": "any",
"morphed": false
}
}Requires: "canComplexGMode"
"f_DefeatedPhantoon"
"h_CrystalFlash"
{
"or": [
"SpaceJump",
{
"and": [
"canDash",
"canUseIFrames",
"h_pauseAbuseMinimalReserveRefill",
"h_pauseAbuseMinimalReserveRefill",
"h_pauseAbuseMinimalReserveRefill"
]
},
{
"and": [
"canUseIFrames",
"h_speedJump",
"h_pauseAbuseMinimalReserveRefill",
"h_pauseAbuseMinimalReserveRefill"
]
},
{
"and": [
{
"blueSuitShinecharge": {}
},
"canDash",
{
"shinespark": {
"frames": 80,
"excessFrames": 7
}
}
]
}
]
} |
|
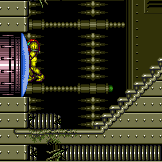
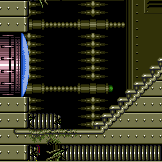
Climb up about half a screen. If Phantoon is dead, the last part of the climb should be done carefully to avoid triggering collision with the spikes: Do not press forward or turn-around except while X-Ray is active. For each X-ray stand-up, release the turn-around input quickly to make sure that it is not still held after X-Ray deactivates; alternatively, hold both angle up and angle down to prevent Samus from touching the spikes (though this no longer gives protection if climbing so high that the bottom of Samus' hitbox reaches the spikes). Once Samus is high enough, unequip X-Ray, jump up (from either standing or crouch) to clip past the spikes, and land, taking a single spike hit. Then use the i-frames from the spike hit to run and jump to the left to make it to the door. Samus is high enough after the top of her arm cannon first becomes visible at the bottom of the screen; or up to 3 additional climbs can be performed after that point. In case of an accidental spike collision, it is possible to recover: Unless Samus climbed higher than needed, she will still be stuck in the wall, will take a single spike hit, and be able to continue climbing. With Grapple it is possible to swing on the Grapple blocks, avoiding all spike damage. Spike damage can also be avoided with Space Jump, by doing a stationary turn-around spin jump, which is very precise. With a blue suit, Samus will instantly lose i-frames, making the spikes very dangerous. Entrance condition: {
"comeInWithDoorStuckSetup": {}
}Requires: {
"notable": "X-Ray Climb"
}
"canXRayClimb"
{
"or": [
{
"and": [
{
"spikeHits": 3
},
{
"resourceCapacity": [
{
"type": "RegularEnergy",
"count": 199
}
]
}
]
},
{
"and": [
{
"not": "f_DefeatedPhantoon"
},
"canRiskPermanentLossOfAccess"
]
},
{
"and": [
"canOffScreenMovement",
{
"or": [
{
"and": [
"canDash",
{
"spikeHits": 1
},
"canUseIFrames"
]
},
{
"and": [
"canBlueSuitSpikeJump",
{
"spikeHits": 2
}
]
},
{
"and": [
"canBlueSuitSpikeJump",
"canWallJump",
"canBeVeryPatient",
{
"spikeHits": 1
}
]
},
"Grapple",
{
"and": [
"SpaceJump",
"canInsaneJump",
"canBeVeryPatient"
]
}
]
}
]
}
]
}Exit condition: {
"leaveNormally": {}
}Unlocks doors: {"types":["ammo"],"requires":[]}Dev note: FIXME: The canBeVeryPatient is for difficulty placement, as the damageless Space Jump version would likely require many attempts. The resourceCapacity requirement is to ensure that reserve energy management will not be needed for the lower-difficulty version of the strat; this could be refined since suits can affect spike damage, but we don't yet have a good way to represent that cleanly, given that randomizers are likely to modify suit damage protection. The leaveNormally is because the camera will be broken and we don't want to require unreasonable things without being able to reset it. |
|
Requires: "h_navigateUnderwater"
{
"or": [
{
"and": [
"canDash",
{
"spikeHits": 3
},
{
"enemyDamage": {
"enemy": "Kzan",
"type": "contact",
"hits": 1
}
}
]
},
{
"and": [
"canDash",
"canCarefulJump",
{
"spikeHits": 2
},
{
"or": [
"Gravity",
"Morph",
{
"spikeHits": 1
}
]
}
]
},
{
"and": [
"canDodgeWhileShooting",
{
"or": [
"Gravity",
"Morph",
{
"and": [
{
"noBlueSuit": {}
},
{
"spikeHits": 2
}
]
}
]
}
]
}
]
} |
|

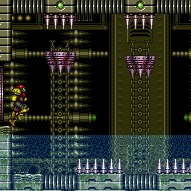
Requires: "canSuitlessMaridia"
"canTrickyJump"
{
"or": [
"canDash",
"canInsaneJump"
]
} |
|
Requires: "h_navigateUnderwater"
{
"or": [
{
"and": [
"canDash",
{
"spikeHits": 3
},
{
"enemyDamage": {
"enemy": "Kzan",
"type": "contact",
"hits": 1
}
}
]
},
{
"and": [
"canDash",
"canCarefulJump",
{
"spikeHits": 2
},
{
"or": [
"Gravity",
"Morph",
{
"spikeHits": 1
}
]
}
]
},
{
"and": [
"canDodgeWhileShooting",
{
"or": [
"Gravity",
"Morph",
{
"and": [
{
"noBlueSuit": {}
},
{
"spikeHits": 2
}
]
}
]
}
]
}
]
} |
|
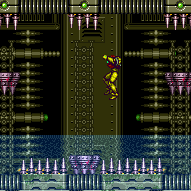
Requires: "canSuitlessMaridia"
"canTrickyJump"
{
"or": [
"canDash",
"canInsaneJump"
]
} |
From: 1
Left Door
To: 2
Item (Behind the Bomb Wall)

Run on the conveyor to build Speed for breaking the bomb block. Push the right side Worker Robot onto the conveyor Jump low into the wall so Samus' head touches the block. Speed can be used to clear the Bulls. Requires: "f_DefeatedPhantoon"
"canCarefulJump"
{
"or": [
"canDodgeWhileShooting",
{
"enemyKill": {
"enemies": [
[
"Bull",
"Bull"
]
]
}
},
{
"enemyDamage": {
"enemy": "Bull",
"type": "contact",
"hits": 1
}
}
]
}
{
"getBlueSpeed": {
"usedTiles": 18,
"openEnd": 1
}
}
"h_blueJump"
{
"or": [
"canTrivialMidAirMorph",
"h_useSpringBall",
"h_bombThings"
]
}Dev note: Space Jumping from left conveyor feels a little harder. |
|
The sinking platforms can be used to collect drops if the fish gets away. Without movement items, hold down while jumping to ascend while on the platform. Requires: "f_DefeatedPhantoon"
{
"resetRoom": {
"nodes": [
1
]
}
}
"canDash"
"canDodgeWhileShooting"
{
"or": [
"Gravity",
{
"and": [
"canSuitlessMaridia",
{
"cycleFrames": 150
}
]
}
]
}
{
"or": [
{
"and": [
"Plasma",
{
"or": [
"canTrickyJump",
"Grapple"
]
}
]
},
{
"and": [
"Spazer",
"Wave",
{
"or": [
"canTrickyJump",
"canInsaneJump",
"Grapple"
]
},
{
"cycleFrames": 80
}
]
},
{
"and": [
"canTrickyJump",
"Wave",
{
"or": [
"canInsaneJump",
"Grapple",
{
"cycleFrames": 150
}
]
},
{
"cycleFrames": 180
}
]
}
]
}
{
"cycleFrames": 220
}Resets obstacles: A Farm cycle drops: 1 Skultera |
From: 1
Right Door
To: 1
Right Door
Requires: "f_DefeatedPhantoon"
{
"resetRoom": {
"nodes": [
1
]
}
}
"canDash"
"Gravity"
"SpaceJump"
{
"or": [
"ScrewAttack",
{
"and": [
"canDodgeWhileShooting",
{
"or": [
"Plasma",
{
"and": [
"Spazer",
"canFarmWhileShooting",
{
"cycleFrames": 200
}
]
},
{
"and": [
"Wave",
{
"cycleFrames": 130
}
]
},
{
"cycleFrames": 1000
}
]
}
]
}
]
}
{
"cycleFrames": 230
}Resets obstacles: A Farm cycle drops: 1 Skultera |
|


Run from the adjacent room and jump at the end of the platform. Aim down just before bonking the ceiling. This requires a last-frame jump and has a 2-frame window for the aim-down. Entrance condition: {
"comeInRunning": {
"speedBooster": "yes",
"minTiles": 36
}
}Requires: "h_speedJump"
"canInsaneJump"
{
"or": [
"canBeVeryPatient",
{
"thornHits": 5
}
]
}
{
"not": "f_DefeatedPhantoon"
}Dev note: The 5 thornHits are for lenience since it is very difficult to get this first try. |
From: 1
Right Door
To: 2
Item


Run from the adjacent room and jump at the end of the platform. From the top right platform, jump to the left and wall jump just above the spikes and climb the left wall. With minimal runway length (2 tiles), this has a 2-frame window for the jump. With a last-frame jump it has a 3-frame window for wall jump, otherwise the wall jump is frame-perfect. Entrance condition: {
"comeInRunning": {
"speedBooster": "yes",
"minTiles": 2
}
}Requires: "h_speedJump"
"canInsaneJump"
"canConsecutiveWallJump"
{
"not": "f_DefeatedPhantoon"
} |
From: 1
Right Door
To: 2
Item
Requires: {
"thornHits": 1
}
"HiJump"
"canSpringBallJumpMidAir"
{
"not": "f_DefeatedPhantoon"
}
{
"or": [
"canRiskPermanentLossOfAccess",
{
"and": [
"canDash",
"canCarefulJump",
{
"disableEquipment": "HiJump"
},
{
"or": [
"canMoonwalk",
"canTrickyJump"
]
}
]
},
{
"and": [
"canJumpIntoIBJ",
"canBombHorizontally",
"canTrickyJump"
]
},
"Gravity",
"canSpringFling"
]
} |
|


Jump onto the first platform, which is easiest when the water is low. Continue jumping on the platforms to prevent them from going into the water. Get a bit of run speed on the final platform, which is easiest while the water is low, then jump to the solid ground. Requires: "canDash"
"canCarefulJump"
{
"disableEquipment": "HiJump"
}
{
"or": [
"canMoonwalk",
"canTrickyJump"
]
}
"f_DefeatedPhantoon" |
From: 1
Right Door
To: 2
Item

Using speed from the adjacent room, perform a ceiling mockball to make it across the gap. Entrance condition: {
"comeInRunning": {
"speedBooster": "yes",
"minTiles": 23
}
}Requires: "h_speedJump"
"canTrickyJump"
"canMomentumConservingMorph"
{
"or": [
"canInsaneJump",
{
"thornHits": 5
}
]
}
{
"not": "f_DefeatedPhantoon"
}Dev note: The 5 thornHits are for lenience since it is very difficult to get this first try. |
From: 1
Right Door
To: 2
Item
Using speed from the adjacent room, perform a ceiling mockball and equip or unequip Spring Ball to make it across the gap. Entrance condition: {
"comeInRunning": {
"speedBooster": "yes",
"minTiles": 12
}
}Requires: "h_speedJump"
"canTrickyJump"
"canMomentumConservingMorph"
"canSpringFling"
"h_unpauseKeepMomentum"
{
"or": [
"canInsaneJump",
{
"thornHits": 5
}
]
}
{
"not": "f_DefeatedPhantoon"
}Dev note: The 5 thornHits are for lenience since it is very difficult to get this first try. |
|
Run from the adjacent room and jump at the end of the platform. From the top right platform, jump to the left and wall jump just above the spikes and climb the left wall. Entrance condition: {
"comeInRunning": {
"speedBooster": "yes",
"minTiles": 5
}
}Requires: "h_speedJump"
"canCarefulJump"
"canConsecutiveWallJump"
{
"not": "f_DefeatedPhantoon"
}
{
"or": [
"canRiskPermanentLossOfAccess",
"canTrickyJump",
{
"and": [
{
"disableEquipment": "HiJump"
},
"canMoonwalk"
]
}
]
}Dev note: This variant of the strat includes an extra couple of tiles of runway for lenience. |
From: 1
Right Door
To: 2
Item
Run from the adjacent room and jump at the end of the platform. From the top right platform, jump to the left and wall jump just above the spikes and climb the left wall. Entrance condition: {
"comeInRunning": {
"speedBooster": "yes",
"minTiles": 3
}
}Requires: "h_speedJump"
"canTrickyJump"
"canConsecutiveWallJump"
{
"not": "f_DefeatedPhantoon"
} |
|


Requires: "h_storedSpark"
"canDash"
{
"shinespark": {
"frames": 13,
"excessFrames": 2
}
} |
|
From the top right platform, jump to the left into the thorns, then climb the left wall. Requires: {
"thornHits": 1
}
{
"or": [
{
"and": [
"canUseIFrames",
"canDash"
]
},
{
"and": [
{
"tech": "canHorizontalDamageBoost"
},
"h_complexToCarryFlashSuit"
]
},
{
"thornHits": 1
}
]
}
"canWallJump"
{
"not": "f_DefeatedPhantoon"
}
{
"or": [
"canRiskPermanentLossOfAccess",
{
"and": [
"canDash",
"canCarefulJump",
{
"disableEquipment": "HiJump"
},
{
"or": [
"canMoonwalk",
"canTrickyJump"
]
}
]
},
{
"and": [
"Gravity",
"canDash"
]
},
{
"and": [
"canJumpIntoIBJ",
"canBombHorizontally",
"canTrickyJump"
]
},
{
"and": [
"Gravity",
"canSpringBallJumpMidAir"
]
},
"canSpringFling",
{
"and": [
"HiJump",
"Gravity",
"canInsaneJump"
]
}
]
}Dev note: The canCarefulJump and Gravity are here, as with either of those, there is access across with or without f_DefeatedPhantoon. |
|
Requires: {
"or": [
{
"and": [
"f_DefeatedPhantoon",
"canDash"
]
},
"SpaceJump"
]
} |
|
Requires: {
"or": [
{
"and": [
{
"not": "f_DefeatedPhantoon"
},
"canRiskPermanentLossOfAccess"
]
},
"canDash"
]
}
{
"thornHits": 1
}
{
"or": [
"HiJump",
"canWallJump",
"canUseIFrames",
"Grapple",
"canHorizontalDamageBoost",
{
"thornHits": 1
}
]
}Dev note: When the power is off, the floor has thorns. if power is on and dash is available, then the floating platforms could be used instead to avoid all damage. |
|
Requires: "h_storedSpark"
"canDash"
{
"shinespark": {
"frames": 14,
"excessFrames": 4
}
} |
|
Damage a Covern to prepare it to be frozen. Stand a few tiles away from the bomb block, and walk toward it as the Covern is about to reappear. If successful, the Covern will spawn inside the wall but close enough that Samus can clip into it. Freeze the Covern by pressing against the wall, then jumping and shooting down. Run into the wall with as much speed as possible to clip into it. Once Samus is clipped into the wall, perform a low turnaround spin jump to the right and immediately turn back to the left while still spinning, using Screw Attack to break the bomb block. If Phantoon is already dead, a moonfall with two frozen Atomics can instead be used to clip into the floor to be able to break the bomb block. Requires: {
"notable": "Covern Wall Ice Screw Clip"
}
{
"not": "f_DefeatedPhantoon"
}
{
"or": [
"canRiskPermanentLossOfAccess",
{
"and": [
{
"notable": "Atomic Ice Moonfall Screw Clip"
},
{
"enemyDamage": {
"enemy": "Atomic",
"type": "contact",
"hits": 1
}
}
]
}
]
}
"canDash"
"canMidairWiggle"
"canWallIceClip"
"ScrewAttack"
"Morph"Clears obstacles: C Dev note: FIXME: Dashing is probably not required, even if it makes it easier. |
|
Requires: "f_DefeatedPhantoon"
{
"or": [
{
"and": [
{
"resetRoom": {
"nodes": [
1
]
}
},
{
"cycleFrames": 1740
}
]
},
{
"and": [
{
"resetRoom": {
"nodes": [
2
]
}
},
{
"cycleFrames": 1200
}
]
},
{
"and": [
{
"resetRoom": {
"nodes": [
3
]
}
},
{
"cycleFrames": 1400
}
]
},
{
"and": [
{
"resetRoom": {
"nodes": [
4
]
}
},
{
"cycleFrames": 1050
}
]
},
{
"and": [
{
"resetRoom": {
"nodes": [
5
]
}
},
{
"cycleFrames": 1050
}
]
},
{
"and": [
{
"resetRoom": {
"nodes": [
6
]
}
},
{
"cycleFrames": 1830
},
"h_useMorphBombs"
]
},
{
"and": [
{
"resetRoom": {
"nodes": [
7
]
}
},
{
"cycleFrames": 2000
},
"Morph",
{
"or": [
"Wave",
"Bombs",
"Spazer"
]
},
{
"or": [
"Bombs",
"SpringBall",
{
"and": [
"canMidAirMorph",
"canCrouchJump"
]
}
]
}
]
}
]
}
{
"or": [
"ScrewAttack",
{
"haveBlueSuit": {}
},
"Plasma",
{
"and": [
"Wave",
{
"cycleFrames": 60
}
]
},
{
"and": [
"Spazer",
{
"cycleFrames": 330
}
]
},
{
"and": [
"canDodgeWhileShooting",
{
"cycleFrames": 900
}
]
}
]
}
{
"or": [
"canDash",
{
"cycleFrames": 200
}
]
}
{
"or": [
"canWallJump",
"h_crouchJumpDownGrabCycleFrames",
"HiJump",
"SpaceJump",
{
"and": [
"canIBJ",
{
"cycleFrames": 750
}
]
},
{
"and": [
"canSpringBallJumpMidAir",
{
"cycleFrames": 30
},
"h_doubleEquipmentScreenCycleFrames"
]
}
]
}Resets obstacles: A, B, C, R-Mode Farm cycle drops: 4 Atomic |
From: 4
Top Right Door
To: 4
Top Right Door
There is additional movement expected to represent reaching the Atomics who appear when the power is on. Requires: {
"not": "f_DefeatedPhantoon"
}
{
"or": [
{
"and": [
{
"resetRoom": {
"nodes": [
1,
2,
3,
4,
5
]
}
},
{
"cycleFrames": 2000
}
]
},
{
"and": [
{
"resetRoom": {
"nodes": [
6
]
}
},
{
"cycleFrames": 2000
},
"h_useMorphBombs"
]
},
{
"and": [
{
"resetRoom": {
"nodes": [
7
]
}
},
{
"cycleFrames": 2000
},
"Morph",
{
"or": [
"Wave",
"Bombs",
"Spazer"
]
},
{
"or": [
"Bombs",
"SpringBall",
{
"and": [
"canMidAirMorph",
"canCrouchJump"
]
}
]
}
]
}
]
}
{
"or": [
"ScrewAttack",
{
"haveBlueSuit": {}
},
"Plasma",
{
"and": [
"Wave",
{
"cycleFrames": 60
}
]
},
{
"and": [
"Spazer",
{
"cycleFrames": 150
}
]
},
{
"and": [
"Ice",
"canDodgeWhileShooting",
{
"cycleFrames": 240
}
]
}
]
}
{
"or": [
"canDash",
{
"cycleFrames": 200
}
]
}
{
"or": [
"canWallJump",
"h_crouchJumpDownGrabCycleFrames",
"HiJump",
"SpaceJump",
{
"and": [
"canIBJ",
{
"cycleFrames": 750
}
]
},
{
"and": [
"canSpringBallJumpMidAir",
{
"cycleFrames": 30
},
"h_doubleEquipmentScreenCycleFrames"
]
}
]
}Resets obstacles: A, B, C, R-Mode Farm cycle drops: 4 Custom Covern (Atomic) Dev note: This is Covern farm with a reduced drop chance so as to be applicable while powered off without breaking the powered on state. Cycle frames represent the slower of killing 4 atomics or killing 4 coverns. These Coverns have reduced Power Bomb and Super drop chance. |
|

Gain a shinecharge running right to left through the open gate. Requires: {
"obstaclesCleared": [
"A"
]
}
{
"canShineCharge": {
"usedTiles": 15,
"openEnd": 1
}
}
"h_speedJump"
"canShinechargeMovementTricky"
{
"shineChargeFrames": 175
}
{
"shinespark": {
"frames": 22,
"excessFrames": 0
}
}Exit condition: {
"leaveWithSpark": {}
} |
From: 4
Farm Junction Left of Gate
To: 1
Bottom Left Door
Gain a shinecharge running left to right through the open gate. Then turn back and quickly jump directly into the hidden passage to the bottom of the room, to spark out. Requires: {
"obstaclesCleared": [
"A"
]
}
{
"canShineCharge": {
"usedTiles": 15,
"openEnd": 1
}
}
"h_speedJump"
"canShinechargeMovementTricky"
"canInsaneJump"
{
"shinespark": {
"frames": 8,
"excessFrames": 0
}
}Exit condition: {
"leaveWithSpark": {}
}Unlocks doors: {"types":["super"],"requires":[]}
{"types":["missiles","powerbomb"],"requires":["never"]} |
From: 4
Farm Junction Left of Gate
To: 2
Bottom Right Door

Gain a shinecharge running left to right through the open gate. Then turn back and quickly jump directly into the hidden passage to the bottom of the room, to spark out. Requires: {
"obstaclesCleared": [
"A"
]
}
{
"canShineCharge": {
"usedTiles": 15,
"openEnd": 1
}
}
"h_speedJump"
"canShinechargeMovementTricky"
"canInsaneJump"
{
"shinespark": {
"frames": 17,
"excessFrames": 0
}
}Exit condition: {
"leaveWithSpark": {}
}Unlocks doors: {"types":["super"],"requires":[]}
{"types":["missiles","powerbomb"],"requires":["never"]} |
|


Requires: "Gravity"
{
"or": [
"HiJump",
"canWallJump",
"SpaceJump",
"canIBJ",
{
"and": [
"canDash",
"canCarefulJump"
]
},
"canSpringBallJumpMidAir",
"canGravityJump",
{
"enemyDamage": {
"enemy": "Pink Space Pirate (standing)",
"type": "contact",
"hits": 1
}
},
{
"enemyKill": {
"enemies": [
[
"Pink Space Pirate (standing)"
]
],
"explicitWeapons": [
"Plasma",
"ScrewAttack"
]
}
}
]
} |
From: 5
Platform Junction Near Top Left Door
To: 4
Top Left Door
Build up run speed and jump at the last moment to reach the door. Requires: {
"notable": "Top Left Direct Jump"
}
"canDash"
"Gravity"
"canTrickyJump" |
From: 6
Middle Junction Near Top Left Pirate
To: 7
Platform Below Top Right Door
Requires: "Gravity"
{
"or": [
"HiJump",
"canWallJump",
"SpaceJump",
"canIBJ",
"canGravityJump",
{
"and": [
"canDash",
"canCarefulJump"
]
},
"canSpringBallJumpMidAir",
{
"enemyDamage": {
"enemy": "Pink Space Pirate (standing)",
"type": "contact",
"hits": 1
}
},
{
"enemyKill": {
"enemies": [
[
"Pink Space Pirate (standing)"
]
],
"explicitWeapons": [
"Plasma",
"ScrewAttack"
]
}
},
{
"haveBlueSuit": {}
}
]
} |
From: 1
Bottom Door
To: 3
Middle Right Door


Run and spin jump to the left through the transition with as much horiziontal speed as possible, without bonking the door frame. Hold left through the transition to avoid the fish and land on the platform to the left. With limited runway, this may require a very precise jump. Then reach the platform above either using a crouch-jump down-grab or by freezing the fish. Entrance condition: {
"comeInWithPlatformBelow": {
"maxHeight": 6,
"maxLeftPosition": -0.5,
"minRightPosition": 2.5
},
"comesThroughToilet": "yes"
}Requires: "canDash"
"canCrossRoomJumpIntoWater"
"canInsaneJump"
{
"or": [
"h_underwaterCrouchJumpDownGrab",
"canUseFrozenEnemies"
]
}Dev note: This applies to Crab Maze, Forgotten Highway Elevator, and Red Brinstar Elevator Room. |
From: 1
Bottom Door
To: 3
Middle Right Door


Run and spin jump to the left through the transition with as much horiziontal speed as possible, without bonking the door frame. Hold left through the transition to avoid the fish and land on the platform to the left. Then reach the platform above either using a crouch-jump down-grab or by freezing the fish. Entrance condition: {
"comeInWithPlatformBelow": {
"maxHeight": 6,
"maxLeftPosition": -0.5,
"minRightPosition": 4.5
},
"comesThroughToilet": "yes"
}Requires: "canDash"
"canCrossRoomJumpIntoWater"
"canTrickyJump"
{
"or": [
"h_underwaterCrouchJumpDownGrab",
"canUseFrozenEnemies"
]
}Dev note: This applies to Basement and Wrecked Ship Main Shaft. |
|


Requires: "Gravity" "h_speedJump" "canInsaneJump" "canMomentumConservingMorph" "canInsaneMidAirMorph" Exit condition: {
"leaveWithSidePlatform": {
"height": 3,
"runway": {
"length": 17,
"openEnd": 0,
"steepDownTiles": 2,
"startingSteepDownTiles": 1
},
"obstruction": [
4,
0
]
}
}Dev note: Max extra run speed $3.9. This strat is included for completeness, though it apparently doesn't have any applications. |
|
Requires: {
"resetRoom": {
"nodes": [
3
]
}
}
{
"or": [
"Gravity",
{
"cycleFrames": 300
}
]
}
{
"or": [
{
"and": [
"canDash",
{
"or": [
{
"and": [
"Gravity",
"ScrewAttack",
{
"cycleFrames": 280
}
]
},
{
"and": [
"Gravity",
"canPseudoScrew",
{
"cycleFrames": 280
}
]
},
{
"and": [
"Plasma",
{
"cycleFrames": 285
}
]
},
{
"and": [
"Wave",
{
"cycleFrames": 320
}
]
},
{
"and": [
"Spazer",
{
"cycleFrames": 335
}
]
},
{
"and": [
"Ice",
{
"cycleFrames": 400
}
]
},
{
"and": [
"canFarmWhileShooting",
{
"cycleFrames": 430
}
]
},
{
"cycleFrames": 550
}
]
}
]
},
{
"and": [
{
"haveBlueSuit": {}
},
{
"cycleFrames": 420
}
]
}
]
}Resets obstacles: A, B, C, R-Mode Farm cycle drops: 1 Sciser |
From: 3
Middle Right Door
To: 3
Middle Right Door
Requires: {
"resetRoom": {
"nodes": [
3
]
}
}
{
"or": [
{
"and": [
"Gravity",
"canDash",
{
"or": [
"HiJump",
"canWallJump",
"SpaceJump"
]
},
{
"or": [
{
"and": [
"Plasma",
{
"cycleFrames": 590
}
]
},
{
"and": [
"ScrewAttack",
{
"cycleFrames": 590
}
]
},
{
"and": [
"Wave",
{
"cycleFrames": 615
}
]
},
{
"and": [
"Spazer",
{
"cycleFrames": 640
}
]
},
{
"and": [
"Ice",
{
"cycleFrames": 690
}
]
},
{
"cycleFrames": 920
}
]
}
]
},
{
"and": [
"canCameraManip",
"canFarmWhileShooting",
{
"or": [
{
"and": [
"Gravity",
"canDash",
{
"cycleFrames": 770
}
]
},
{
"cycleFrames": 1155
}
]
}
]
}
]
}Resets obstacles: A, B, C, R-Mode Farm cycle drops: 1 Skultera |
|
Requires: {
"resetRoom": {
"nodes": [
4
]
}
}
"Gravity"
{
"or": [
{
"and": [
"canDash",
{
"or": [
{
"and": [
"Grapple",
{
"cycleFrames": 250
}
]
},
{
"and": [
"Plasma",
{
"cycleFrames": 310
}
]
},
{
"and": [
"ScrewAttack",
{
"cycleFrames": 310
}
]
},
{
"and": [
"canPseudoScrew",
{
"cycleFrames": 330
}
]
},
{
"and": [
"Wave",
{
"cycleFrames": 360
}
]
},
{
"and": [
"Spazer",
{
"cycleFrames": 420
}
]
},
{
"and": [
"Ice",
{
"cycleFrames": 550
}
]
},
{
"cycleFrames": 710
}
]
}
]
},
{
"and": [
{
"haveBlueSuit": {}
},
{
"cycleFrames": 380
}
]
}
]
}Resets obstacles: A, B, C, R-Mode Farm cycle drops: 2 Sciser Dev note: This strat only considers having Gravity. Without Gravity, it can still be possible to farm two Scisers, but it usually would be better to just farm one. |
|
Requires: {
"resetRoom": {
"nodes": [
4
]
}
}
{
"or": [
{
"and": [
"Gravity",
"ScrewAttack",
{
"cycleFrames": 335
}
]
},
{
"and": [
{
"haveBlueSuit": {}
},
{
"cycleFrames": 335
}
]
},
{
"and": [
"Plasma",
{
"cycleFrames": 360
}
]
},
{
"and": [
"Wave",
{
"cycleFrames": 420
}
]
},
{
"and": [
"Spazer",
{
"cycleFrames": 460
}
]
},
{
"and": [
"Ice",
{
"cycleFrames": 510
}
]
},
{
"cycleFrames": 600
}
]
}
{
"or": [
{
"and": [
"Gravity",
{
"or": [
"canDash",
{
"cycleFrames": 45
}
]
}
]
},
{
"and": [
"HiJump",
{
"cycleFrames": 320
}
]
},
{
"and": [
"canSpringBallJumpMidAir",
{
"cycleFrames": 700
},
"h_doubleEquipmentScreenCycleFrames",
"h_doubleEquipmentScreenCycleFrames"
]
}
]
}Resets obstacles: A, B, C, R-Mode Farm cycle drops: 1 Skultera |
|
Requires: {
"or": [
{
"resetRoom": {
"nodes": [
1
]
}
},
{
"and": [
{
"resetRoom": {
"nodes": [
2
]
}
},
{
"or": [
{
"and": [
"Gravity",
{
"cycleFrames": 40
}
]
},
{
"cycleFrames": 100
}
]
}
]
}
]
}
{
"or": [
{
"and": [
"Gravity",
{
"or": [
"canDash",
{
"cycleFrames": 30
}
]
},
{
"or": [
{
"and": [
"Grapple",
{
"cycleFrames": 165
}
]
},
{
"and": [
"Plasma",
{
"cycleFrames": 170
}
]
},
{
"and": [
"ScrewAttack",
{
"cycleFrames": 170
}
]
},
{
"and": [
{
"haveBlueSuit": {}
},
{
"cycleFrames": 170
}
]
},
{
"and": [
"Wave",
{
"cycleFrames": 180
}
]
},
{
"and": [
"Spazer",
{
"cycleFrames": 190
}
]
},
{
"and": [
"canPseudoScrew",
{
"cycleFrames": 190
}
]
},
{
"and": [
"Ice",
{
"cycleFrames": 270
}
]
},
{
"cycleFrames": 300
}
]
}
]
},
{
"and": [
"Grapple",
{
"cycleFrames": 240
}
]
},
{
"and": [
"Plasma",
{
"cycleFrames": 290
}
]
},
{
"and": [
"Wave",
{
"cycleFrames": 300
}
]
},
{
"and": [
"Spazer",
{
"cycleFrames": 300
}
]
},
{
"and": [
"Ice",
{
"cycleFrames": 350
}
]
},
{
"cycleFrames": 380
}
]
}Resets obstacles: A, B, C, R-Mode Farm cycle drops: 1 Sciser |
|

Get a bit of run speed on the block and jump to the right ledge. If Samus misses the ledge, try to shoot the block to still collect the item. Requires: {
"or": [
{
"and": [
"canDash",
"canCarefulJump",
"canDisableEquipment"
]
},
"canUseGrapple",
"canWallJump",
"SpaceJump"
]
}
{
"obstaclesCleared": [
"B"
]
}Resets obstacles: B Collects items: 2 |
|
Reveal the item while jumping to the right wall and collect it as Samus falls past. Requires: "canDash"
"canDodgeWhileShooting"
"canCarefulJump"
{
"notable": "Shoot Down and Grab Right Item"
}
{
"or": [
"Wave",
"Spazer",
"h_usePowerBomb",
{
"and": [
"canTrickyJump",
"canDodgeWhileShooting",
{
"ammo": {
"type": "Missile",
"count": 5
}
}
]
},
{
"and": [
"canTrickyJump",
"canResetFallSpeed",
"canDownBack"
]
},
"canInsaneJump"
]
} |
|
Requires: {
"or": [
"canDash",
"canTrickyJump"
]
}Dev note: To reach the upper ledge without dashing, Mama Turtle could be moved over to the left. |
|
Requires: {
"or": [
"canWallJump",
"SpaceJump",
{
"and": [
"HiJump",
"canDash",
"canCarefulJump"
]
},
{
"and": [
"canUseGrapple",
{
"or": [
"HiJump",
"canSpringBallJumpMidAir",
"canPreciseGrapple"
]
},
"h_midAirShootUp"
]
}
]
} |
From: 6
Platform Below Top Door
To: 5
Inside Maridia Tube Junction
Wedge Samus under the right side slope with either a moonfall or a low running jump. Then face left and turn around spin jump to the right; if necessary, do a second turnaround spin jump. Once deep enough, Samus will automatically clip down. It is possible to get under the slope with just a turnaround spin jump (no moonfall or running jump), but it is easy to softlock. Requires: {
"notable": "Tube Clip"
}
{
"or": [
"canMoonfall",
{
"and": [
"canDash",
"canTwoTileSqueeze",
"canTrickyJump"
]
},
"canInsaneJump"
]
}
"canTurnaroundSpinJump" |
|
Requires: {
"resetRoom": {
"nodes": [
2
]
}
}
{
"or": [
{
"and": [
"Gravity",
{
"or": [
"canDash",
{
"cycleFrames": 150
}
]
},
{
"or": [
{
"and": [
"Grapple",
{
"cycleFrames": 365
}
]
},
{
"and": [
"ScrewAttack",
{
"cycleFrames": 400
}
]
},
{
"and": [
{
"haveBlueSuit": {}
},
{
"cycleFrames": 400
}
]
},
{
"and": [
"Plasma",
{
"cycleFrames": 420
}
]
},
{
"and": [
"Wave",
{
"cycleFrames": 450
}
]
},
{
"and": [
"Spazer",
{
"cycleFrames": 510
}
]
},
{
"and": [
"Ice",
{
"cycleFrames": 630
}
]
},
{
"cycleFrames": 710
}
]
}
]
},
{
"and": [
"Grapple",
{
"cycleFrames": 840
}
]
},
{
"and": [
{
"or": [
"Plasma",
"Wave",
"Spazer",
{
"haveBlueSuit": {}
}
]
},
{
"cycleFrames": 920
}
]
},
{
"and": [
"Ice",
{
"cycleFrames": 1040
}
]
},
{
"and": [
"canDodgeWhileShooting",
{
"cycleFrames": 1200
}
]
}
]
}Resets obstacles: A, B Farm cycle drops: 2 Sciser |
|

Come in with high speed and jump after the transition to cross the room. Precise timing is needed to jump to the correct height: too high and Samus will bonk the Grapple block, too low and Samus will not make it onto the ledge. A Powamp may be in the path of the jump but can be destroyed with blue speed. Entrance condition: {
"comeInRunning": {
"speedBooster": "yes",
"minTiles": 31
}
}Requires: "h_speedJump" "canCrossRoomJumpIntoWater" "canInsaneJump" |
From: 7
Lower Hills Junction
To: 7
Lower Hills Junction
Requires: "Gravity"
{
"or": [
"canDash",
{
"cycleFrames": 400
}
]
}
{
"or": [
"canWallJump",
"SpaceJump"
]
}
{
"or": [
{
"resetRoom": {
"nodes": [
2
]
}
},
{
"and": [
{
"resetRoom": {
"nodes": [
6
]
}
},
"Morph",
{
"cycleFrames": 45
}
]
},
{
"and": [
{
"resetRoom": {
"nodes": [
1
]
}
},
{
"cycleFrames": 370
}
]
},
{
"and": [
{
"resetRoom": {
"nodes": [
3
]
}
},
{
"cycleFrames": 70
}
]
},
{
"and": [
{
"resetRoom": {
"nodes": [
5
]
}
},
"SpaceJump",
{
"cycleFrames": 330
}
]
},
{
"and": [
{
"resetRoom": {
"nodes": [
4
]
}
},
"SpaceJump",
{
"cycleFrames": 530
}
]
}
]
}
{
"or": [
{
"and": [
{
"or": [
"ScrewAttack",
"canPseudoScrew",
{
"haveBlueSuit": {}
}
]
},
{
"cycleFrames": 980
}
]
},
{
"and": [
"Grapple",
{
"cycleFrames": 1010
}
]
},
{
"and": [
"Plasma",
{
"cycleFrames": 1090
}
]
},
{
"and": [
"Wave",
{
"cycleFrames": 1220
}
]
},
{
"and": [
"Spazer",
{
"cycleFrames": 1390
}
]
},
{
"and": [
"Ice",
{
"cycleFrames": 2045
}
]
},
{
"cycleFrames": 2740
}
]
}Resets obstacles: A, B Farm cycle drops: 5 Sciser Dev note: FIXME: Other, slower options are also possible. |
|
With a running jump from the peak of the island, this requires no other movement tech or items. Requires: "Gravity"
{
"or": [
{
"and": [
"canDash",
"canCarefulJump"
]
},
"HiJump",
"SpaceJump",
"canWallJump",
"canGravityJump",
"canIBJ",
"canSpringBallJumpMidAir"
]
} |
From: 2
Bottom Left Door
To: 1
Middle Left Door
Use double spring ball jumps to reach the top-right of the room with temporary blue. To cross the two gaps at the top of the room to the left while chaining temporary blue, use spring ball jumps with HiJump disabled; in each case, perform a stationary lateral mid-air morph or a spring fling (or both); Entrance condition: {
"comeInRunning": {
"speedBooster": "yes",
"minTiles": 0.4375
}
}Requires: "h_waterGetBlueSpeed"
"HiJump"
"canLongChainTemporaryBlue"
"canBeExtremelyPatient"
"canXRayTurnaround"
"canDoubleSpringBallJumpMidAir"
"canTrickySpringBallJump"
{
"or": [
"canStationaryLateralMidAirMorph",
"canSpringFling"
]
}
"can4HighMidAirMorph" |
From: 2
Bottom Left Door
To: 7
Top Right Left Item
Use a double spring ball jump to reach the Speed blocks below the items while chaining temporary blue. Perform a spring ball jump and immediately unmorph and continue holding up, to break some of the Speed blocks while passing up through them. Leave one of the bottom Speed blocks unbroken to use as a platform. The top speed blocks will respawn; clip through them either using a snail clip with X-Ray or a Crystal Flash clip; In the case of a Crystal Flash clip, menu to Grapple before the Crystal Flash ends and mash shoot while holding down. Entrance condition: {
"comeInRunning": {
"speedBooster": "yes",
"minTiles": 0.4375
}
}Requires: {
"notable": "Suitless Temporary Blue To Items"
}
"canSuitlessMaridia"
"h_waterGetBlueSpeed"
"h_doubleSpringBallJumpWithHiJump"
"canChainTemporaryBlue"
{
"or": [
"canXRayCeilingClip",
{
"and": [
"h_jumpIntoCrystalFlashClip",
"Grapple",
{
"obstaclesNotCleared": [
"R-Mode"
]
}
]
}
]
} |
|

Gain blue speed by running right-to-left on the 20-tile runway below the items. Then use Space Jump to carry it across the top of the room to break the bomb blocks. To cross the room most easily, blue speed can be gained with low momentum by pressing pause, running a few tiles, stuttering just before the pause hits, disabling Gravity suit, continuing to run left, then re-enabling Gravity suit before jumping. Alternatively, a regular shortcharge can be used in combination with either HiJump or a precise amount of extra run speed ($2.0 or $2.1), to cross the room at higher speed. Requires: {
"notable": "Blue Space Jump"
}
"Gravity"
"canPreciseSpaceJump"
{
"or": [
{
"and": [
"canDisableEquipment",
"h_stutterWaterGetBlueSpeed"
]
},
{
"and": [
{
"getBlueSpeed": {
"usedTiles": 20,
"openEnd": 2
}
},
{
"or": [
"HiJump",
"canTrickyDashJump"
]
}
]
}
]
}
"canBlueSpaceJump" |
|
Use Speed Booster to break the Speed blocks, and run from the right side of the room, using blue speed to run on top of the sand. Requires: "Gravity"
{
"getBlueSpeed": {
"usedTiles": 22,
"openEnd": 1
}
}
"h_speedJump"Exit condition: {
"leaveSpaceJumping": {
"remoteRunway": {
"length": 45,
"openEnd": 1
}
}
} |
|
Requires: {
"obstaclesCleared": [
"A"
]
}
"Gravity"
"h_speedJump"
"canInsaneJump"
{
"or": [
{
"and": [
"canMomentumConservingMorph",
"canInsaneMidAirMorph"
]
},
"canMomentumConservingTurnaround"
]
}Exit condition: {
"leaveWithSidePlatform": {
"height": 1,
"runway": {
"length": 36,
"openEnd": 1,
"gentleUpTiles": 2
},
"obstruction": [
3,
0
]
}
}Dev note: Max extra run speed $6.3. |
From: 1
Left Door
To: 1
Left Door
Use Speed Booster to break the Speed blocks, and run from the right side of the room, using blue speed to run on top of the sand. Requires: "Gravity"
{
"getBlueSpeed": {
"usedTiles": 22,
"openEnd": 1
}
}
"h_speedJump"Exit condition: {
"leaveWithSpringBallBounce": {
"remoteRunway": {
"length": 45,
"openEnd": 1
},
"landingRunway": {
"length": 3,
"openEnd": 1
},
"movementType": "uncontrolled"
}
} |
|
Requires: {
"resetRoom": {
"nodes": [
1
]
}
}
{
"or": [
{
"and": [
"Gravity",
"canDash"
]
},
{
"and": [
"Gravity",
{
"cycleFrames": 100
}
]
},
{
"cycleFrames": 250
}
]
}
{
"or": [
{
"and": [
"Plasma",
{
"cycleFrames": 360
}
]
},
{
"and": [
"Gravity",
"ScrewAttack",
{
"cycleFrames": 375
}
]
},
{
"and": [
{
"haveBlueSuit": {}
},
{
"cycleFrames": 335
}
]
},
{
"and": [
"Wave",
{
"cycleFrames": 390
}
]
},
{
"and": [
"Grapple",
{
"cycleFrames": 400
}
]
},
{
"and": [
"Spazer",
{
"cycleFrames": 415
}
]
},
{
"and": [
"Gravity",
"canPseudoScrew",
{
"cycleFrames": 540
}
]
},
{
"and": [
"Ice",
{
"cycleFrames": 580
}
]
},
{
"and": [
"canDodgeWhileShooting",
{
"cycleFrames": 810
}
]
}
]
}Resets obstacles: A, B Farm cycle drops: 4 Puyo |
From: 1
Left Door
To: 4
Right Door
Enter the room with blue speed, and jump into a speedball. Entrance condition: {
"comeInGettingBlueSpeed": {
"length": 0,
"openEnd": 1
}
}Requires: "h_waterGetBlueSpeed" "canSpeedball" "canTrickyJump" |
From: 1
Left Door
To: 4
Right Door


Enter the room with blue speed, and jump into a speedball. Then chain temporary blue into the next room. Entrance condition: {
"comeInGettingBlueSpeed": {
"length": 0,
"openEnd": 1
}
}Requires: "h_waterGetBlueSpeed" "canSpeedball" "canTrickyJump" "canChainTemporaryBlue" Exit condition: {
"leaveWithTemporaryBlue": {}
}Unlocks doors: {"types":["ammo"],"requires":[]} |
|
Needs near max horizontal speed coming from about 40 runway tiles in the adjacent room. Jump after the transition. Running longer on the short runway is more difficult at maximum speed, but will increase the success of the jump. A crisp momentum conserving morph can also make up for a jump that is buffered through the door. Entrance condition: {
"comeInRunning": {
"speedBooster": "yes",
"minTiles": 40
}
}Requires: "h_speedJump" "canInsaneJump" "canLateralMidAirMorph" "canCrossRoomJumpIntoWater" "canMomentumConservingMorph" Collects items: 5 |
From: 4
Right Door
To: 8
Right of Sand with Blue Speed (Running)
Entrance condition: {
"comeInGettingBlueSpeed": {
"length": 6,
"openEnd": 1
}
}Requires: "h_waterGetBlueSpeed" Dev note: This is just a rough estimate of the minimum number of tiles that this runway can represent. It is designed for a skill level that won't be able to use canStutterWaterShineCharge. |
|
Requires: {
"resetRoom": {
"nodes": [
1
]
}
}
"SpaceJump"
{
"or": [
{
"and": [
"canDash",
{
"or": [
{
"and": [
"Plasma",
{
"cycleFrames": 1035
}
]
},
{
"and": [
"Grapple",
{
"cycleFrames": 1050
}
]
},
{
"and": [
"ScrewAttack",
{
"cycleFrames": 1080
}
]
},
{
"and": [
"Wave",
{
"cycleFrames": 1090
}
]
},
{
"and": [
"Spazer",
{
"cycleFrames": 1150
}
]
},
{
"and": [
"canDodgeWhileShooting",
{
"cycleFrames": 1260
}
]
}
]
}
]
},
{
"and": [
{
"haveBlueSuit": {}
},
{
"cycleFrames": 1580
}
]
}
]
}Farm cycle drops: 4 Mochtroid |
|
Jumping to the first platform is relatively tight without a wall jump and requires disabling HiJump. Requires: "h_storedSpark"
"canDash"
{
"shinespark": {
"frames": 112,
"excessFrames": 19
}
} |
From: 1
Left Door
To: 3
Top Right Door
Use the spikes, which are not in the water, to jump from platform to platform as a way to cross the room. Requires knowing the position of every spike in the room, and hitting the spikes while morphed can help. The first jump is particularly tough. A Spring Ball jump from the sand to the spike with HiJump, or a frozen Mochtroid can be used to get past it. Requires: {
"notable": "Spike Platforming with Move Assist"
}
"canDash"
"canWallJump"
"canSuitlessMaridia"
"canPlayInSand"
"canTrickyJump"
"Morph"
"canUseIFrames"
"canNeutralDamageBoost"
{
"spikeHits": 3
}
{
"or": [
{
"and": [
"HiJump",
"canTrickySpringBallJump"
]
},
{
"and": [
"canMochtroidIceClimb",
{
"or": [
"canInsaneJump",
{
"enemyDamage": {
"enemy": "Mochtroid",
"type": "contact",
"hits": 1
}
}
]
}
]
}
]
}
{
"or": [
{
"spikeHits": 1
},
"canHorizontalDamageBoost"
]
} |
From: 1
Left Door
To: 3
Top Right Door


Land on each set of spikes as a way to jump to the next safe platform. The first jump can be done with a very precise damage boost to bounce forward off the spike, or using morph. Requires: {
"notable": "Spike Platforming with No Equipment"
}
"canDash"
"canWallJump"
"canInsaneJump"
"canHorizontalDamageBoost"
"canUseIFrames"
{
"spikeHits": 3
}
{
"or": [
"Morph",
{
"spikeHits": 2
}
]
}
"h_extremelyTrickyToCarryFlashSuit"Dev note: Positioning on the spikes is harder to control without morph. |
|
Stay out of the water, and by extension the sand, of the room by using the spikes as platforms. Morphing before landing on the spikes helps to be able to control the knockback. The final spike jump (which would be the most difficult) is avoided by doing a crouch jump into spring ball jump into IBJ to reach the left door. Perform the spring ball jump near max height. Place the first bomb between about 4 and 6 frames after the spring ball jump; ideally it should be just above the water line. Press pause between about 5 and 10 frames after placing the bomb, to disable Spring Ball (a 'spring fling', to reset fall speed). Place the second bomb soon after regaining control, while the game is fading back in. A spike hit in the center of the room can avoided by doing another spring ball jump into IBJ (also with a spring fling). Requires: {
"notable": "Bomb Jump Water Escape"
}
"canDash"
"HiJump"
"canPreciseWallJump"
"canUseIFrames"
{
"spikeHits": 1
}
"canNeutralDamageBoost"
"canTrickyJump"
{
"or": [
"canHorizontalDamageBoost",
{
"spikeHits": 1
}
]
}
{
"or": [
"canBePatient",
{
"spikeHits": 1
}
]
}
"h_underwaterMaxHeightSpringBallJump"
"canSpringFling"
"canBombJumpWaterEscape"
"canJumpIntoIBJ"Dev note: The IBJ at the left side of the room can be done without a 'spring fling' but is far more precise: the first bomb must be placed exactly two frames before the spring ball jump, and the spring ball jump should be performed just before max height, during the 4-frame window between 2 and 5 frames before the last possible frame to jump (there are also 1-frame windows at 0 and 8 frames before the last frame). FIXME: This can be possible to do while carrying a blue suit, with much greater difficulty. |
From: 3
Top Right Door
To: 1
Left Door
Use the spikes, which are not in the water, to jump from platform to platform as a way to cross the room. Requires knowing the position of every spike in the room, and hitting the spikes while morphed can help. The final jump is particularly tough so a frozen Mochtroid is used to get past it. Requires: {
"notable": "Spike Platforming with Move Assist"
}
"canDash"
"canWallJump"
"canSuitlessMaridia"
"canPlayInSand"
"canTrickyJump"
"Morph"
"canUseIFrames"
"canNeutralDamageBoost"
{
"spikeHits": 3
}
"canMochtroidIceClimb"
{
"or": [
"canInsaneJump",
{
"enemyDamage": {
"enemy": "Mochtroid",
"type": "contact",
"hits": 1
}
}
]
}
{
"or": [
{
"spikeHits": 1
},
"canHorizontalDamageBoost"
]
} |
From: 3
Top Right Door
To: 1
Left Door

Stay out of the water, and by extension the sand, of the room by using the spikes as platforms. Landing on spikes aiming down with no other direction pressed can help control the knockback. Requires knowing the position of every spike in the room. The final spike jump is very difficult. Requires: {
"notable": "Spike Platforming with No Equipment"
}
"canDash"
"canPreciseWallJump"
"canInsaneJump"
"canUseIFrames"
{
"spikeHits": 3
}
"canNeutralDamageBoost"
{
"or": [
{
"and": [
"canHorizontalDamageBoost",
{
"noFlashSuit": {}
}
]
},
{
"spikeHits": 1
}
]
} |
|
Requires: {
"resetRoom": {
"nodes": [
3
]
}
}
"SpaceJump"
{
"or": [
{
"and": [
"canDash",
{
"or": [
{
"and": [
"ScrewAttack",
{
"cycleFrames": 710
}
]
},
{
"and": [
"Plasma",
{
"cycleFrames": 730
}
]
},
{
"and": [
"Grapple",
{
"cycleFrames": 770
}
]
},
{
"and": [
"Wave",
{
"cycleFrames": 810
}
]
},
{
"and": [
"Spazer",
{
"cycleFrames": 855
}
]
},
{
"and": [
"canDodgeWhileShooting",
"canTrickyJump",
{
"cycleFrames": 1140
}
]
}
]
}
]
},
{
"and": [
{
"haveBlueSuit": {}
},
{
"cycleFrames": 850
}
]
}
]
}Farm cycle drops: 3 Mochtroid |
|
Requires: {
"or": [
{
"resetRoom": {
"nodes": [
2
]
}
},
{
"and": [
{
"resetRoom": {
"nodes": [
1
]
}
},
{
"or": [
{
"and": [
"Gravity",
{
"cycleFrames": 180
}
]
},
{
"and": [
"HiJump",
"h_underwaterCrouchJumpDownGrab",
{
"cycleFrames": 540
}
]
}
]
}
]
},
{
"and": [
{
"resetRoom": {
"nodes": [
3
]
}
},
"Gravity",
{
"or": [
"canWallJump",
"HiJump",
"SpaceJump"
]
},
{
"cycleFrames": 460
}
]
}
]
}
{
"or": [
{
"and": [
"Gravity",
"canDash",
{
"or": [
{
"and": [
"Grapple",
{
"cycleFrames": 300
}
]
},
{
"and": [
"ScrewAttack",
{
"cycleFrames": 360
}
]
},
{
"and": [
"Plasma",
{
"cycleFrames": 370
}
]
},
{
"and": [
"canPseudoScrew",
{
"cycleFrames": 400
}
]
},
{
"and": [
"Wave",
{
"cycleFrames": 430
}
]
},
{
"and": [
"Spazer",
{
"cycleFrames": 460
}
]
},
{
"and": [
"Ice",
{
"cycleFrames": 690
}
]
},
{
"cycleFrames": 800
}
]
}
]
},
{
"and": [
"Gravity",
{
"haveBlueSuit": {}
},
{
"cycleFrames": 570
}
]
},
{
"and": [
"Grapple",
{
"cycleFrames": 640
}
]
},
{
"and": [
"Plasma",
{
"cycleFrames": 670
}
]
},
{
"and": [
"Wave",
{
"cycleFrames": 720
}
]
},
{
"and": [
"Spazer",
{
"cycleFrames": 750
}
]
},
{
"and": [
{
"haveBlueSuit": {}
},
{
"cycleFrames": 1000
}
]
},
{
"and": [
"Ice",
{
"cycleFrames": 1050
}
]
},
{
"cycleFrames": 1120
}
]
}Resets obstacles: R-Mode Farm cycle drops: 3 Sciser Dev note: Other, slower methods are possible for resetting the room using the upper doors. |
|
Requires: "Gravity"
{
"or": [
"SpaceJump",
"canHBJ",
{
"and": [
"canDash",
{
"or": [
"canTrickyJump",
"canResetFallSpeed",
{
"enemyDamage": {
"enemy": "Cacatac",
"type": "spike",
"hits": 1
}
}
]
}
]
}
]
}
{
"or": [
"SpaceJump",
"canWallJump",
"HiJump",
"canIBJ",
"canHBJ",
"canSpringBallBombJump",
{
"spikeHits": 1
}
]
} |
|
Requires: {
"resetRoom": {
"nodes": [
2
]
}
}
{
"or": [
"canDash",
{
"cycleFrames": 20
}
]
}
{
"or": [
{
"and": [
"Grapple",
{
"cycleFrames": 100
}
]
},
{
"and": [
"Plasma",
{
"cycleFrames": 160
}
]
},
{
"and": [
"Wave",
{
"cycleFrames": 170
}
]
},
{
"and": [
"Spazer",
{
"cycleFrames": 200
}
]
},
{
"and": [
"ScrewAttack",
{
"cycleFrames": 200
}
]
},
{
"and": [
{
"haveBlueSuit": {}
},
{
"cycleFrames": 200
}
]
},
{
"and": [
"canPseudoScrew",
{
"cycleFrames": 220
}
]
},
{
"and": [
"canFarmWhileShooting",
{
"cycleFrames": 250
}
]
},
{
"cycleFrames": 300
}
]
}Farm cycle drops: 1 Choot |
|
Requires: {
"resetRoom": {
"nodes": [
2
]
}
}
"canDodgeWhileShooting"
{
"or": [
"canDash",
{
"cycleFrames": 50
}
]
}
{
"or": [
{
"and": [
"ScrewAttack",
{
"cycleFrames": 210
}
]
},
{
"and": [
{
"haveBlueSuit": {}
},
{
"cycleFrames": 210
}
]
},
{
"and": [
"Plasma",
{
"cycleFrames": 220
}
]
},
{
"and": [
"Grapple",
{
"cycleFrames": 240
}
]
},
{
"and": [
"Wave",
{
"cycleFrames": 260
}
]
},
{
"and": [
"Spazer",
{
"cycleFrames": 285
}
]
},
{
"and": [
{
"or": [
"canTrickyDodgeEnemies",
{
"and": [
"Gravity",
"canTrickyJump"
]
}
]
},
{
"cycleFrames": 360
}
]
}
]
}Clears obstacles: A Farm cycle drops: 2 Menu Dev note: FIXME: It is also posssible to farm Owtches and/or additional Menus. |
From: 2
Right Door
To: 3
Junction Left of Morph Tunnel

With Gravity, it's possible to run forward and mid-air morph into the morph passage. The momentum can push Samus into the tunnel, no need to press forward while in mid-air. Requires: "canMidAirMorph"
"Gravity"
"canDash"
"canTrickyJump"
{
"obstaclesCleared": [
"A"
]
} |
|
Requires: {
"resetRoom": {
"nodes": [
1
]
}
}
{
"or": [
"canDash",
{
"cycleFrames": 100
}
]
}
{
"or": [
{
"and": [
"HiJump",
"SpaceJump",
{
"cycleFrames": 930
}
]
},
{
"and": [
"HiJump",
"canTrickyWallJump",
{
"cycleFrames": 960
}
]
},
{
"and": [
"SpaceJump",
{
"cycleFrames": 1220
}
]
},
{
"and": [
"canSpringwall",
{
"cycleFrames": 1035
},
"h_doubleEquipmentScreenCycleFrames"
]
},
{
"and": [
"HiJump",
"canSpringBallJumpMidAir",
{
"cycleFrames": 910
},
"h_doubleEquipmentScreenCycleFrames"
]
},
{
"and": [
"canDoubleBombJump",
{
"or": [
"canWallJump",
"h_crouchJumpDownGrab"
]
},
{
"cycleFrames": 1410
}
]
},
{
"and": [
"canDoubleBombJump",
{
"cycleFrames": 1560
}
]
}
]
}
{
"or": [
"ScrewAttack",
{
"haveBlueSuit": {}
},
"Plasma"
]
}Resets obstacles: A, B, C Farm cycle drops: 4 Pink Space Pirate (standing), 2 Pink Space Pirate (wall) Dev note: FIXME: Add option to kill the Pirates with speed echoes, and possibly to get back up with a shinespark. |
|
Requires: {
"resetRoom": {
"nodes": [
1
]
}
}
{
"or": [
"canDash",
{
"cycleFrames": 120
}
]
}
{
"or": [
{
"and": [
"Plasma",
{
"cycleFrames": 210
}
]
},
{
"and": [
{
"or": [
"ScrewAttack",
{
"haveBlueSuit": {}
}
]
},
{
"cycleFrames": 255
}
]
}
]
}Resets obstacles: A, B, C Farm cycle drops: 1 Pink Space Pirate (standing) |
|
Requires: {
"resetRoom": {
"nodes": [
1
]
}
}
{
"or": [
"canDash",
{
"cycleFrames": 120
}
]
}
{
"or": [
"canWallJump",
"HiJump",
{
"and": [
"SpaceJump",
{
"cycleFrames": 300
}
]
},
{
"and": [
"canTrickySpringBallJump",
{
"cycleFrames": 360
},
"h_doubleEquipmentScreenCycleFrames",
"h_doubleEquipmentScreenCycleFrames",
"h_doubleEquipmentScreenCycleFrames"
]
},
{
"and": [
"canDoubleBombJump",
{
"cycleFrames": 930
}
]
}
]
}
{
"or": [
{
"and": [
{
"or": [
"Grapple",
"Wave",
"Plasma"
]
},
{
"cycleFrames": 750
}
]
},
{
"and": [
{
"or": [
"ScrewAttack",
{
"haveBlueSuit": {}
}
]
},
{
"cycleFrames": 820
}
]
},
{
"and": [
"Spazer",
{
"cycleFrames": 850
}
]
},
{
"and": [
"canPseudoScrew",
{
"cycleFrames": 870
}
]
},
{
"cycleFrames": 1080
}
]
}Resets obstacles: R-Mode Farm cycle drops: 3 Choot |
From: 1
Left Vertical Door
To: 1
Left Vertical Door
Requires: {
"resetRoom": {
"nodes": [
1
]
}
}
{
"or": [
"canDash",
{
"cycleFrames": 10
}
]
}
{
"or": [
{
"and": [
"Grapple",
{
"cycleFrames": 130
}
]
},
{
"and": [
"Plasma",
{
"cycleFrames": 150
}
]
},
{
"and": [
{
"or": [
"Wave",
"Spazer"
]
},
{
"cycleFrames": 160
}
]
},
{
"and": [
{
"or": [
"ScrewAttack",
{
"haveBlueSuit": {}
}
]
},
{
"cycleFrames": 170
}
]
},
{
"and": [
"canPseudoScrew",
{
"cycleFrames": 180
}
]
},
{
"cycleFrames": 220
}
]
}Resets obstacles: R-Mode Farm cycle drops: 1 Choot |
|
Requires: {
"or": [
{
"resetRoom": {
"nodes": [
3
]
}
},
{
"and": [
{
"resetRoom": {
"nodes": [
2
]
}
},
{
"or": [
{
"and": [
"Gravity",
{
"cycleFrames": 835
}
]
},
{
"and": [
"canSuitlessMaridia",
"HiJump",
{
"cycleFrames": 1540
}
]
}
]
}
]
},
{
"and": [
{
"resetRoom": {
"nodes": [
4
]
}
},
{
"or": [
{
"and": [
"HiJump",
"SpaceJump",
{
"cycleFrames": 230
}
]
},
{
"and": [
"canTrickyWallJump",
"canConsecutiveWallJump",
{
"cycleFrames": 310
}
]
},
{
"and": [
"SpaceJump",
{
"cycleFrames": 400
}
]
}
]
}
]
}
]
}
{
"or": [
{
"and": [
"Plasma",
{
"cycleFrames": 320
}
]
},
{
"and": [
"Wave",
{
"cycleFrames": 340
}
]
},
{
"and": [
"Grapple",
{
"cycleFrames": 360
}
]
},
{
"and": [
"Spazer",
"canFarmWhileShooting",
{
"cycleFrames": 390
}
]
},
{
"and": [
"canDash",
"ScrewAttack",
"canDodgeWhileShooting",
{
"cycleFrames": 500
}
]
},
{
"cycleFrames": 640
}
]
}Resets obstacles: R-Mode Farm cycle drops: 2 Choot |
From: 3
Middle Right Door
To: 4
Top Right Door

Freeze the island Choot when it is at the far left of its second-highest swoop. Run right-to-left on it and perform a last-frame jump into a max-height spring ball jump. Getting the highest possible run speed requires starting from the right-most 87.5% of the last pixel (subpixel position at least $2000). Press pause at the same time as starting to run, or slightly earlier, and perform the mid-air morph quickly; timing the pause to hit as early as possible after morphing will maximize the time that Spring Ball is equipped, boosting Samus' horizontal speed and making it possible to clear the corner of the ceiling. Requires: {
"notable": "Insane Frozen Choot Spring Ball Jump"
}
"canDash"
"canTrickyUseFrozenEnemies"
"HiJump"
"can4HighMidAirMorph"
"canTrickySpringBallJump"
"canInsaneJump"Dev note: There is at least a 3-frame window for freezing the Choot that works: two frames with the Choot in position ($2DE, $2F7), and one frame in position ($2E1, $2F9) It is possible to make the jump with one less frame of run speed; in this case Samus should start running from a few pixels further left, and a tighter mid-air morph may be required. |
|
Requires: {
"or": [
{
"resetRoom": {
"nodes": [
1
]
}
},
{
"and": [
{
"resetRoom": {
"nodes": [
2
]
}
},
"Gravity",
{
"or": [
"h_crouchJumpDownGrab",
"canWallJump"
]
},
{
"cycleFrames": 130
}
]
}
]
}
{
"or": [
"canDash",
{
"cycleFrames": 200
}
]
}
{
"or": [
{
"and": [
"Plasma",
{
"cycleFrames": 740
}
]
},
{
"and": [
"Wave",
{
"cycleFrames": 800
}
]
},
{
"and": [
"Spazer",
{
"cycleFrames": 860
}
]
},
{
"and": [
"Grapple",
{
"cycleFrames": 890
}
]
},
{
"and": [
"ScrewAttack",
{
"cycleFrames": 960
}
]
},
{
"cycleFrames": 1500
}
]
}Farm cycle drops: 5 Choot Dev note: There is a sixth Choot on the far right but it's not worth going for. FIXME: add other movement options for reaching the top of the room from node 2. The canCrouchJump is not a h_underwaterCrouchJump, because Gravity is required. |
From: 2
Bottom Door
To: 4
Water Level Junction
Run and spin jump from the platform in the room below, gaining horizontal speed but without bonking the door frame. Perform a momentum-conserving turn-around to make it around the corner of the ledge above. With limited runway for gaining horizontal speed, the timing of the jump and turn-around may be very precise. Entrance condition: {
"comeInWithPlatformBelow": {
"minHeight": 8.5,
"maxHeight": 9,
"maxLeftPosition": -1.5,
"minRightPosition": 1.5
},
"comesThroughToilet": "yes"
}Requires: "canDash" "canCrossRoomJumpIntoWater" "HiJump" "canMomentumConservingTurnaround" "canInsaneJump" Dev note: This applies to Warehouse Zeela Room and Tourian Hopper Room. |
From: 2
Bottom Door
To: 4
Water Level Junction
Run left-to-right and spin jump from the platform in the room below, passing through the transition without bonking the door. Entrance condition: {
"comeInWithPlatformBelow": {
"minHeight": 7,
"maxHeight": 7,
"maxLeftPosition": -2.5,
"minRightPosition": 0.5
},
"comesThroughToilet": "no"
}Requires: "canDash" "canCrossRoomJumpIntoWater" "HiJump" Dev note: This is applicable using the platform in Tourian Escape Room 2. |
From: 2
Bottom Door
To: 4
Water Level Junction


Run left-to-right and spin jump from the platform in the room below, passing through the transition without bonking the door. Pass through the Toilet, and then perform a momentum conserving turnaround to make it onto the ledge. Entrance condition: {
"comeInWithPlatformBelow": {
"minHeight": 7,
"maxHeight": 7,
"maxLeftPosition": -2.5,
"minRightPosition": 0.5
},
"comesThroughToilet": "yes"
}Requires: "canDash" "canCrossRoomJumpIntoWater" "HiJump" "canMomentumConservingTurnaround" Dev note: This is applicable using the platform in Tourian Escape Room 2. |
From: 2
Bottom Door
To: 4
Water Level Junction


Run left-to-right and spin jump from the platform in the room below, passing through the transition without bonking the door. Entrance condition: {
"comeInWithPlatformBelow": {
"minHeight": 7,
"maxHeight": 7,
"maxLeftPosition": -5.5,
"minRightPosition": -1.5
},
"comesThroughToilet": "any"
}Requires: "canDash" "canCrossRoomJumpIntoWater" "HiJump" Dev note: This is applicable using the Power Bomb block platform in Indiana Jones Room. |
From: 2
Bottom Door
To: 4
Water Level Junction
Run and spin jump from the platform in the room below, gaining horizontal speed but without bonking the door frame. Perform a momentum-conserving turn-around to make it around the corner of the ledge above. Entrance condition: {
"comeInWithPlatformBelow": {
"minHeight": 8,
"maxHeight": 9,
"maxLeftPosition": -3,
"minRightPosition": 0
},
"comesThroughToilet": "yes"
}Requires: "canDash" "canCrossRoomJumpIntoWater" "HiJump" "canMomentumConservingTurnaround" |
From: 2
Bottom Door
To: 4
Water Level Junction
Gain run speed to the right and jump through the door without bonking the door frame. After the transition, continue holding right while remaining in spin jump. This strat could also be performed without passing through the Toilet, but a precise down-grab would be needed to get onto the ledge at the end; in this case it would be easier to perform a standing jump instead. Entrance condition: {
"comeInWithPlatformBelow": {
"minHeight": 6,
"maxHeight": 6,
"maxLeftPosition": -2.5,
"minRightPosition": -0.5
},
"comesThroughToilet": "yes"
}Requires: "canDash" "canCrossRoomJumpIntoWater" "canTrickyJump" Dev note: This strat only works for platforms that are 6 tiles below the door transition (which is the closest distance that occurs in the vanilla game). |
From: 2
Bottom Door
To: 4
Water Level Junction
Gain a few tiles of run speed and jump through the transition, without bonking against the door frame. Perform a momentum-conserving turn-around to make it around the corner of the ledge above. Entrance condition: {
"comeInWithPlatformBelow": {
"minHeight": 10,
"maxHeight": 10,
"maxLeftPosition": -4,
"minRightPosition": 0
},
"comesThroughToilet": "yes"
}Requires: "canDash" "canCrossRoomJumpIntoWater" "HiJump" "canSpeedyJump" "canMomentumConservingTurnaround" |
|
Requires: {
"resetRoom": {
"nodes": [
1
]
}
}
{
"or": [
"canDash",
"Gravity",
{
"cycleFrames": 330
}
]
}
{
"or": [
{
"and": [
"Plasma",
{
"cycleFrames": 1110
}
]
},
{
"and": [
"Grapple",
{
"cycleFrames": 1240
}
]
},
{
"and": [
{
"or": [
"ScrewAttack",
{
"haveBlueSuit": {}
}
]
},
{
"cycleFrames": 1330
}
]
},
{
"and": [
"Wave",
{
"cycleFrames": 1380
}
]
},
{
"and": [
"Spazer",
{
"cycleFrames": 1440
}
]
},
{
"and": [
"Ice",
{
"cycleFrames": 2010
}
]
},
{
"and": [
"canDodgeWhileShooting",
{
"cycleFrames": 2670
}
]
}
]
}Farm cycle drops: 5 Choot, 5 Puyo |
|
Requires: {
"resetRoom": {
"nodes": [
2
]
}
}
{
"or": [
"Gravity",
"canDash",
{
"cycleFrames": 120
}
]
}
{
"or": [
{
"and": [
"Plasma",
{
"cycleFrames": 610
}
]
},
{
"and": [
"Grapple",
{
"cycleFrames": 660
}
]
},
{
"and": [
"Wave",
{
"cycleFrames": 700
}
]
},
{
"and": [
"ScrewAttack",
{
"cycleFrames": 720
}
]
},
{
"and": [
"Spazer",
{
"cycleFrames": 820
}
]
},
{
"cycleFrames": 1070
}
]
}Farm cycle drops: 3 Choot, 3 Puyo |
|
Requires: "canDash" "Gravity" |
|
Enter with enough run speed to jump (after the transition) across the full room using one Spring Ball Jump. When exiting the first Sandfall, Samus will be rising still. That is the time to Spring Ball jump. Entrance condition: {
"comeInRunning": {
"speedBooster": "yes",
"minTiles": 10
}
}Requires: {
"notable": "Cross-Room Spring Ball Jump"
}
"canPlayInSand"
"canCrossRoomJumpIntoWater"
"h_speedJump"
"canLateralMidAirMorph"
"canTrickySpringBallJump"
"canTrickyJump" |
From: 2
Right Door
To: 1
Left Door
Perform a 1-tap to gain blue speed with a significant amount of momentum. Run through the door, and jump any time after the transition, crossing the room. Entrance condition: {
"comeInGettingBlueSpeed": {
"length": 1,
"openEnd": 1,
"minExtraRunSpeed": "$4.4"
}
}Requires: {
"notable": "Cross-Room Blue Speed Jump (Right to Left)"
}
"h_blueJump"
"canPlayInSand"
"canCrossRoomJumpIntoWater"Dev note: This assumes an extra run speed of at least $4.4, though some lower speeds can also work ($3.B through $3.F). The window between $4.0 and $4.3 must be avoided because it would give too much jump height. |
|
Enter with enough run speed to jump (after the transition) across the full room using one Spring Ball Jump. When exiting the first Sandfall, Samus will be rising still. That is the time to Spring Ball jump. Alternatively, an immediate pause can be used to Spring Ball jump during the first narrow gap between Sandfalls. Sometimes Samus will land above the sand on the far left end of the room, where it will be necessary to unmorph and jump out. Entrance condition: {
"comeInRunning": {
"speedBooster": "yes",
"minTiles": 10
}
}Requires: {
"notable": "Cross-Room Spring Ball Jump"
}
"canPlayInSand"
"canCrossRoomJumpIntoWater"
"h_speedJump"
"canLateralMidAirMorph"
"canTrickySpringBallJump"
"canTrickyJump" |
|
Requires: {
"resetRoom": {
"nodes": [
1
]
}
}
{
"or": [
{
"and": [
"canSuitlessMaridia",
{
"or": [
{
"and": [
"Grapple",
{
"cycleFrames": 180
}
]
},
{
"and": [
{
"haveBlueSuit": {}
},
{
"cycleFrames": 270
}
]
},
{
"and": [
"Plasma",
{
"cycleFrames": 280
}
]
},
{
"and": [
{
"or": [
"Wave",
"Spazer"
]
},
{
"cycleFrames": 290
}
]
},
{
"and": [
"Ice",
{
"cycleFrames": 320
}
]
},
{
"cycleFrames": 330
}
]
}
]
},
{
"and": [
"Gravity",
"canDash",
{
"or": [
{
"and": [
"Grapple",
{
"cycleFrames": 115
}
]
},
{
"and": [
"Plasma",
{
"cycleFrames": 130
}
]
},
{
"and": [
"ScrewAttack",
{
"cycleFrames": 130
}
]
},
{
"and": [
{
"or": [
"Wave",
"Spazer"
]
},
{
"cycleFrames": 160
}
]
},
{
"and": [
"canPseudoScrew",
{
"cycleFrames": 170
}
]
},
{
"and": [
"Ice",
{
"cycleFrames": 230
}
]
},
{
"cycleFrames": 265
}
]
}
]
},
{
"and": [
"Gravity",
{
"haveBlueSuit": {}
},
{
"cycleFrames": 160
}
]
}
]
}Farm cycle drops: 1 Sciser |
|
Requires: {
"resetRoom": {
"nodes": [
2
]
}
}
{
"or": [
{
"and": [
"canSuitlessMaridia",
{
"or": [
{
"and": [
"Grapple",
{
"cycleFrames": 90
}
]
},
{
"and": [
{
"haveBlueSuit": {}
},
{
"cycleFrames": 95
}
]
},
{
"and": [
"Plasma",
{
"cycleFrames": 100
}
]
},
{
"and": [
"Wave",
{
"cycleFrames": 115
}
]
},
{
"and": [
"Spazer",
{
"cycleFrames": 135
}
]
},
{
"and": [
"Ice",
{
"cycleFrames": 220
}
]
},
{
"cycleFrames": 340
}
]
}
]
},
{
"and": [
"Gravity",
"canDash",
{
"or": [
{
"and": [
"Grapple",
{
"cycleFrames": 70
}
]
},
{
"and": [
"ScrewAttack",
{
"cycleFrames": 70
}
]
},
{
"and": [
"Plasma",
{
"cycleFrames": 80
}
]
},
{
"and": [
"Wave",
{
"cycleFrames": 105
}
]
},
{
"and": [
"Spazer",
{
"cycleFrames": 115
}
]
},
{
"and": [
"canPseudoScrew",
{
"cycleFrames": 130
}
]
},
{
"and": [
"Ice",
{
"cycleFrames": 190
}
]
},
{
"cycleFrames": 255
}
]
}
]
},
{
"and": [
"Gravity",
{
"haveBlueSuit": {}
},
{
"cycleFrames": 75
}
]
}
]
}Farm cycle drops: 1 Sciser |
From: 1
Left Door
To: 1
Left Door
Gain blue speed running into the room, then jump to break the bomb block on the far side of the room. Entrance condition: {
"comeInGettingBlueSpeed": {
"length": 9,
"openEnd": 0
}
}Requires: "h_blueJump" "Gravity" "canTrickyJump" Clears obstacles: A |
From: 1
Left Door
To: 1
Left Door
Entrance condition: {
"comeInGettingBlueSpeed": {
"length": 2,
"openEnd": 1
}
}Requires: "h_blueJump" "canTrickyJump" "HiJump" Clears obstacles: A |
From: 1
Left Door
To: 1
Left Door
Gain blue speed running into the room, then jump to break the bomb block on the far side of the room. Entrance condition: {
"comeInGettingBlueSpeed": {
"length": 2,
"openEnd": 1,
"maxExtraRunSpeed": "$1.3"
}
}Requires: "h_blueJump" "canTrickyJump" Clears obstacles: A Dev note: With extra run speeds above $1.3, Samus' jump height is shorter, in which case this method would be ineffective compared to a temporary blue chain. |
|
Use blue speed to break the bomb block by entering from a non-water room with a spin jump. It generally helps to enter as low as possible and with as much horizontal speed as possible, and with HiJump turned off. Even if executed correctly, the trick can fail with 50% probability due to collision oscillation. Shinesparking is typically an easier alternative to this strat; but using blue speed can be useful to save some energy or if carrying a flash suit. Entrance condition: {
"comeInWithSidePlatform": {
"platforms": [
{
"minHeight": 1,
"maxHeight": 1,
"minTiles": 17,
"speedBooster": "yes",
"obstructions": [
[
1,
0
]
],
"requires": [
{
"getBlueSpeed": {
"usedTiles": 15,
"openEnd": 1
}
},
"canMomentumConservingMorph"
],
"note": [
"Applies to Warehouse Entrance."
]
},
{
"minHeight": 1,
"maxHeight": 1,
"minTiles": 27.4375,
"speedBooster": "yes",
"obstructions": [
[
1,
0
]
],
"requires": [
{
"getBlueSpeed": {
"usedTiles": 24,
"openEnd": 1
}
}
],
"note": [
"Applies to Dust Torizo Room and Halfie Climb Room."
]
},
{
"minHeight": 2,
"maxHeight": 2,
"minTiles": 45,
"speedBooster": "yes",
"obstructions": [
[
2,
0
]
],
"requires": [
"h_getBlueSpeedMaxRunway",
{
"or": [
"canInsaneJump",
"canMomentumConservingMorph"
]
}
],
"note": [
"Applies to Waterway Energy Tank Room."
],
"detailNote": [
"This is easier with a momentum-conserving morph, preferably with a pause to unequip Gravity."
]
},
{
"minHeight": 2,
"maxHeight": 2,
"minTiles": 45,
"speedBooster": "yes",
"obstructions": [
[
3,
0
]
],
"requires": [
"h_getBlueSpeedMaxRunway",
"canMomentumConservingMorph"
],
"note": [
"Applies to Statues Hallway."
]
},
{
"minHeight": 3,
"maxHeight": 3,
"minTiles": 37.4375,
"speedBooster": "yes",
"obstructions": [
[
3,
0
]
],
"requires": [
"h_getBlueSpeedMaxRunway",
"canMomentumConservingMorph"
],
"note": [
"Applies to Flyway."
]
},
{
"minHeight": 3,
"maxHeight": 3,
"minTiles": 39.4375,
"speedBooster": "yes",
"obstructions": [
[
3,
2
]
],
"requires": [
"h_getBlueSpeedMaxRunway",
{
"or": [
"canMomentumConservingMorph",
"canInsaneJump"
]
}
],
"note": [
"Applies to Metal Pirates Room."
]
}
]
}
}Requires: "h_blueJump" "canCrossRoomJumpIntoWater" "canTrickyJump" Clears obstacles: A Dev note: The momentum-conserving morph variants are included for completeness, though generally if Morph is available it would be easier to speedball and do a temporary blue chain. |
From: 1
Left Door
To: 3
Top Door
Use a 2-tap shortcharge and jump into the room with a last-frame jump, breaking the bomb block with blue speed, and making it all the way through the top door. Use angle to break spin, and do a momentum conserving turnaround either on the same frame or one frame later; this first turnaround should be done early enough that the turnaround is complete by the time Samus clears the two-tile passage in the middle of the room. Do a second momentum conserving turnaround somewhat late, and by switching from holding left to holding right one frame later (a perfect 'boomerang'). Shoot open the door, and use a third momentum conserving turnaround on it as it opens. Lower run speeds are generally better, as long as the extra run speed is at least $3.4. this gives up to a 7-frame window for the first turnaround, and typically a 4-frame window for the second turnaround if the first turnaround is done early enough. A perfect boomerang is always required for the second turnaround, regardless of where in the window it is done. It is recommended to buffer the spin break, by holding angle (up or down), jump, and forward through the transition, then switching from forward to backward, with at most 1 frame of neutral in between, while still holding jump and angle. Entrance condition: {
"comeInGettingBlueSpeed": {
"length": 0,
"openEnd": 1,
"minExtraRunSpeed": "$3.4",
"maxExtraRunSpeed": "$3.F"
}
}Requires: {
"notable": "Cross Room Jump Boomerang To Top"
}
"h_blueJump"
"canInsaneJump"
"canCrossRoomJumpIntoWater"
"canMomentumConservingTurnaround"
{
"noFlashSuit": {}
}Exit condition: {
"leaveNormally": {}
}Unlocks doors: {"types":["super"],"requires":[]}
{"types":["missiles","powerbomb"],"requires":["never"]} |
|
Use a 2-tap shortcharge and jump into the room with a last-frame jump, breaking the bomb block with blue speed, and making it all the way through the top door. Use angle to break spin, and do a momentum conserving turnaround either on the same frame or one frame later; this first turnaround should be done early enough that the turnaround is complete by the time Samus clears the two-tile passage in the middle of the room. Do a second momentum conserving turnaround somewhat late, and by switching from holding left to holding right one frame later (a perfect 'boomerang'). Lower run speeds are generally better, as long as the extra run speed is at least $3.2. this gives up to a 7-frame window for the first turnaround, and typically a 4-frame window for the second turnaround if the first turnaround is done early enough. A perfect boomerang is always required for the second turnaround, regardless of where in the window it is done. It is recommended to buffer the spin break, by holding angle (up or down), jump, and forward through the transition, then switching from forward to backward, with at most 1 frame of neutral in between, while still holding jump and angle. Entrance condition: {
"comeInGettingBlueSpeed": {
"length": 0,
"openEnd": 1,
"minExtraRunSpeed": "$3.2",
"maxExtraRunSpeed": "$3.F"
}
}Requires: {
"notable": "Cross Room Jump Boomerang To Top"
}
"h_blueJump"
"canInsaneJump"
"canCrossRoomJumpIntoWater"
"canMomentumConservingTurnaround"
"h_trickyToCarryFlashSuit" |
|
Use blue speed to break the bomb block by entering from a non-water room with a spin jump, and make it up to the center of the room. It helps to enter as low as possible and with as much horizontal speed as possible and with HiJump turned off. Enter with extra run speed between $3.2 and $3.F, with the lower speeds in this range being better. Entrance condition: {
"comeInGettingBlueSpeed": {
"length": 0,
"openEnd": 1,
"minExtraRunSpeed": "$3.2",
"maxExtraRunSpeed": "$3.F"
}
}Requires: "h_blueJump" "canInsaneJump" "canCrossRoomJumpIntoWater" "canMomentumConservingTurnaround" Dev note: This does not have collision oscillation. |
From: 2
Right Door
To: 2
Right Door
Gain blue speed running into the room, then jump to break the bomb block on the far side of the room. Entrance condition: {
"comeInGettingBlueSpeed": {
"length": 9,
"openEnd": 0
}
}Requires: "h_blueJump" "Gravity" "canTrickyJump" Clears obstacles: A |
From: 2
Right Door
To: 2
Right Door
Entrance condition: {
"comeInGettingBlueSpeed": {
"length": 2,
"openEnd": 1
}
}Requires: "h_blueJump" "canTrickyJump" "HiJump" Clears obstacles: A |
From: 2
Right Door
To: 2
Right Door
Gain blue speed running into the room, then jump to break the bomb block on the far side of the room. Entrance condition: {
"comeInGettingBlueSpeed": {
"length": 2,
"openEnd": 1,
"maxExtraRunSpeed": "$1.3"
}
}Requires: "h_blueJump" "canTrickyJump" Clears obstacles: A Dev note: With extra run speeds above $1.3, Samus' jump height is shorter, in which case this method would be ineffective compared to a temporary blue chain. |
From: 2
Right Door
To: 3
Top Door
Use a 2-tap shortcharge and jump into the room with a last-frame jump, breaking the bomb block with blue speed, and making it all the way through the top door. Use angle to break spin, and do a momentum conserving turnaround either on the same frame or one frame later; this first turnaround should be done early enough that the turnaround is complete by the time Samus clears the two-tile passage in the middle of the room. The second momentum conserving turnaround must be done somewhat late, and by switching from holding forward to holding backward one frame later (a perfect 'boomerang'). Shoot open the door, and use a third momentum conserving turnaround on it as it opens. Lower run speeds are generally better, as long as the extra run speed is at least $3.4. this gives up to a 7-frame window for the first turnaround, and typically a 4-frame window for the second turnaround if the first turnaround is done early enough. A perfect boomerang is always required for the second turnaround, regardless of where in the window it is done. It is recommended to buffer the spin break, by holding angle (up or down), jump, and forward through the transition, then switching from forward to backward, with at most 1 frame of neutral in between, while still holding jump and angle. Entrance condition: {
"comeInGettingBlueSpeed": {
"length": 0,
"openEnd": 1,
"minExtraRunSpeed": "$3.4",
"maxExtraRunSpeed": "$3.F"
}
}Requires: {
"notable": "Cross Room Jump Boomerang To Top"
}
"h_blueJump"
"canInsaneJump"
"canCrossRoomJumpIntoWater"
"canMomentumConservingTurnaround"
{
"noFlashSuit": {}
}Exit condition: {
"leaveNormally": {}
}Unlocks doors: {"types":["super"],"requires":[]}
{"types":["missiles","powerbomb"],"requires":["never"]} |
|
Use a 2-tap shortcharge and jump into the room with a last-frame jump, breaking the bomb block with blue speed, and making it all the way through the top door. Use angle to break spin, and do a momentum conserving turnaround either on the same frame or one frame later; this first turnaround should be done early enough that the turnaround is complete by the time Samus clears the two-tile passage in the middle of the room. Do a second momentum conserving turnaround somewhat late, and by switching from holding forward to holding backward one frame later (a perfect 'boomerang'). Lower run speeds are generally better, as long as the extra run speed is at least $3.2. this gives up to a 7-frame window for the first turnaround, and typically a 4-frame window for the second turnaround if the first turnaround is done early enough. A perfect boomerang is always required for the second turnaround, regardless of where in the window it is done. It is recommended to buffer the spin break, by holding angle (up or down), jump, and forward through the transition, then switching from forward to backward, with at most 1 frame of neutral in between, while still holding jump and angle. Entrance condition: {
"comeInGettingBlueSpeed": {
"length": 0,
"openEnd": 1,
"minExtraRunSpeed": "$3.2",
"maxExtraRunSpeed": "$3.F"
}
}Requires: {
"notable": "Cross Room Jump Boomerang To Top"
}
"h_blueJump"
"canInsaneJump"
"canCrossRoomJumpIntoWater"
"canMomentumConservingTurnaround"
"h_trickyToCarryFlashSuit" |
|
Use blue speed to break the bomb block by entering from a non-water room with a spin jump, and make it up to the center of the room. It helps to enter as low as possible and with as much horizontal speed as possible and with HiJump turned off. Enter with extra run speed between $3.2 and $3.F, with the lower speeds in this range being better. Entrance condition: {
"comeInGettingBlueSpeed": {
"length": 0,
"openEnd": 1,
"minExtraRunSpeed": "$3.2",
"maxExtraRunSpeed": "$3.F"
}
}Requires: "h_blueJump" "canInsaneJump" "canCrossRoomJumpIntoWater" "canMomentumConservingTurnaround" Dev note: This does not have collision oscillation. |
|
Requires: {
"or": [
{
"resetRoom": {
"nodes": [
1
]
}
},
{
"and": [
{
"or": [
"f_ShaktoolDoneDigging",
{
"obstaclesCleared": [
"f_ShaktoolDoneDigging"
]
}
]
},
{
"resetRoom": {
"nodes": [
2
]
}
},
{
"or": [
{
"and": [
"Gravity",
"canDash",
{
"cycleFrames": 290
}
]
},
{
"and": [
"canSuitlessMaridia",
"canDash",
{
"cycleFrames": 350
}
]
},
{
"and": [
"Gravity",
{
"cycleFrames": 500
}
]
},
{
"and": [
"canSuitlessMaridia",
{
"cycleFrames": 560
}
]
}
]
}
]
}
]
}
{
"or": [
{
"and": [
"canSuitlessMaridia",
{
"or": [
{
"and": [
"Plasma",
{
"cycleFrames": 280
}
]
},
{
"and": [
"Wave",
{
"cycleFrames": 420
}
]
},
{
"and": [
"Spazer",
{
"cycleFrames": 420
}
]
},
{
"and": [
"Ice",
{
"cycleFrames": 450
}
]
},
{
"cycleFrames": 570
}
]
}
]
},
{
"and": [
"Gravity",
{
"or": [
{
"and": [
"Plasma",
{
"cycleFrames": 160
}
]
},
{
"and": [
"Wave",
{
"cycleFrames": 250
}
]
},
{
"and": [
"Spazer",
{
"cycleFrames": 330
}
]
},
{
"and": [
"Ice",
{
"cycleFrames": 350
}
]
},
{
"cycleFrames": 510
}
]
}
]
}
]
}Resets obstacles: A, B, R-Mode Farm cycle drops: 1 Shaktool |
|
Avoid the Baby Metroid with no items at all. Jump over it many times in order to clear a path through the seaweed. With a counter clockwise setup, stand as close to the transition as possible while allowing the Baby to circle Samus. Then jump towards the transition and touch it with a walljump check. A clockwise setup is more difficult to clear the seaweed, but can jump directly into the transition. Requires: {
"notable": "Baby Skip With Nothing"
}
{
"obstaclesNotCleared": [
"A"
]
}
"canDash"
"canBabyMetroidAvoid"
"canInsaneJump"
"h_trickyToCarryFlashSuit"Dev note: FIXME: Add a Baby Skip with a flash suit. Note, however, it will only pair with rooms that have an entrance condition where Samus is sparking. In order to have it be properly implemented, all horizontal doors will need to have a shinespark entrance condition added. |
|
Avoid the Baby Metroid by jumping over it many times in order to clear a path through the seaweed. Requires: {
"notable": "Baby Skip Without Wave or Speed"
}
{
"obstaclesNotCleared": [
"A"
]
}
"canDash"
"canMidAirMorph"
"HiJump"
"canTrickyJump"
"canBabyMetroidAvoid"
"h_trickyToCarryFlashSuit" |
|


It is best to start 4 or 5 pixels from the end of the runway; equivalently, start at the end of the runway and use arm pumps to advance 4 or 5 pixels while running. Requires: "h_speedJump"
{
"or": [
"canMetroidAvoid",
"Ice",
{
"obstaclesCleared": [
"A"
]
}
]
}
{
"or": [
"canMomentumConservingMorph",
{
"and": [
"canMomentumConservingTurnaround",
"canInsaneJump"
]
}
]
}Exit condition: {
"leaveWithSidePlatform": {
"height": 2,
"runway": {
"length": 31,
"openEnd": 1
},
"obstruction": [
3,
0
]
}
}Dev note: Max extra run speed $5.7. |
|
Requires: "canDash"
{
"or": [
{
"and": [
"Gravity",
{
"acidFrames": 10
}
]
},
{
"and": [
{
"or": [
"canPreciseWallJump",
"HiJump"
]
},
{
"acidFrames": 20
}
]
}
]
}
{
"or": [
{
"obstaclesCleared": [
"A",
"B"
]
},
"Ice",
"ScrewAttack",
{
"and": [
"canPseudoScrew",
{
"or": [
"canTrickyJump",
"canWallJumpWithCharge",
"HiJump",
"Gravity"
]
}
]
},
"canMetroidAvoid",
{
"metroidFrames": 150
}
]
} |
|
Spin jump often to reduce the amount of time spent in the acid. Requires: "canDash"
{
"acidFrames": 65
}
{
"or": [
{
"obstaclesCleared": [
"A",
"B"
]
},
{
"and": [
"canMetroidAvoid",
"canInsaneJump"
]
},
"ScrewAttack",
{
"and": [
"canPseudoScrew",
"canTrickyJump"
]
},
{
"metroidFrames": 150
}
]
}
{
"or": [
"canTrickyJump",
{
"enemyDamage": {
"enemy": "Rinka",
"type": "contact",
"hits": 1
}
}
]
} |
|

Bomb Jump between the two floating platforms. Requires: "canDash"
{
"or": [
{
"obstaclesCleared": [
"A"
]
},
{
"and": [
"canCameraManip",
"canMetroidAvoid"
]
}
]
}
{
"or": [
{
"and": [
"canHBJ",
"canResetFallSpeed"
]
},
{
"and": [
{
"obstaclesCleared": [
"A"
]
},
"canDiagonalBombJump"
]
},
"canCeilingBombJump"
]
} |
|

Aim the leftmost Rinka to travel horizontally across the top of the room and use it to damage boost between the two floating platforms. Killing the Rinka will normalize it's respawn timer, which may help in setting up the correct angle. Let the Rinka stay far enough ahead of Samus that she can jump the full distance to the first platform without hitting it. And then once it has reached the right edge of the platform, use it to damage boost. Requires: {
"notable": "Rinka Damage Boost"
}
{
"enemyDamage": {
"enemy": "Rinka",
"type": "contact",
"hits": 1
}
}
"canDash"
"canTrickyJump"
"canHorizontalDamageBoost"
"canCameraManip"
{
"or": [
{
"obstaclesCleared": [
"A",
"B"
]
},
"canMetroidAvoid"
]
} |
|

Use the full runway to gain blue speed and enough speed to reach the far platform. Requires: {
"getBlueSpeed": {
"usedTiles": 31,
"openEnd": 1
}
}
"h_blueJump"
"canCarefulJump"
{
"or": [
{
"obstaclesCleared": [
"A",
"B"
]
},
"Ice",
"ScrewAttack",
"canPseudoScrew",
"canMetroidAvoid",
{
"metroidFrames": 130
}
]
} |
|
Requires: {
"or": [
{
"obstaclesCleared": [
"A",
"B"
]
},
"canMetroidAvoid"
]
}
"h_storedSpark"
"canDash"
{
"shinespark": {
"frames": 4,
"excessFrames": 2
}
} |
|


Requires: "canDash"
"canCarefulJump"
{
"acidFrames": 65
}
{
"or": [
{
"obstaclesCleared": [
"A",
"B"
]
},
"Ice",
"ScrewAttack",
{
"and": [
"canPseudoScrew",
"canDodgeWhileShooting"
]
},
{
"and": [
"canInsaneJump",
"canMetroidAvoid"
]
},
{
"metroidFrames": 670
}
]
} |
|
Use the lower Rinka as a platform to setup the angle for the top Rinka. Then use the frozen Rinka to cross the acid. Alternatively, if the Metroids are alive, the second one can be frozen immediately once it is on camera to use as a platform. Requires: "canTrickyUseFrozenEnemies"
"canTrickyJump"
"canCameraManip"
{
"or": [
"canDash",
"canInsaneJump"
]
} |
|

Aim the ceiling Rinka to travel horizontally across the top of the room and use it to damage boost between the two floating platforms. Killing the lower Rinka shortly before killing the higher Rinka will synchronize their respawn timers so that Samus can jump when the lower Rinka reappears in order to get a good angle on the higher Rinka. Jump to the floating platform ahead of the high Rinka, jumping extra high to lead the Metroid out of the way if it is alive. Jump into the Rinka once it reaches the left edge of the platform to reach the next platform. Then use i-frames to pass through the Metroid if it is still alive. Requires: {
"notable": "Rinka Damage Boost"
}
{
"enemyDamage": {
"enemy": "Rinka",
"type": "contact",
"hits": 1
}
}
"canDash"
"canTrickyJump"
"canHorizontalDamageBoost"
"canCameraManip"
{
"or": [
{
"obstaclesCleared": [
"A",
"B"
]
},
{
"and": [
"canMetroidAvoid",
"canUseIFrames"
]
}
]
}
{
"or": [
"canInsaneJump",
{
"enemyDamage": {
"enemy": "Rinka",
"type": "contact",
"hits": 1
}
},
{
"and": [
"canTrickyJump",
"canLateralMidAirMorph"
]
},
{
"and": [
"Gravity",
{
"acidFrames": 16
}
]
},
{
"acidFrames": 27
}
]
} |
|
Requires: "h_speedJump"
"canCarefulJump"
{
"or": [
"canPreciseWallJump",
"canTrickyJump"
]
}
{
"or": [
{
"obstaclesCleared": [
"A",
"B"
]
},
"Ice",
"canMetroidAvoid",
{
"metroidFrames": 200
}
]
}
{
"or": [
"canTrickyJump",
{
"acidFrames": 27
},
{
"and": [
{
"acidFrames": 16
},
"canPreciseWallJump"
]
},
{
"and": [
{
"acidFrames": 16
},
"Gravity"
]
}
]
} |
|
While on the first platform, perform a long jump to the left then diagonally spark low into the side of the next platform. This will put Samus into a position where the Metroid will swoop underneath her. Requires: "canMetroidAvoid"
"h_storedSpark"
"canDash"
{
"shinespark": {
"frames": 8,
"excessFrames": 1
}
}
{
"or": [
"canInsaneJump",
{
"and": [
"canTrickyJump",
"canLateralMidAirMorph"
]
},
{
"and": [
"canTrickyJump",
"canPreciseWallJump",
{
"acidFrames": 16
}
]
},
{
"and": [
"Gravity",
{
"acidFrames": 16
}
]
},
{
"acidFrames": 27
}
]
}Dev note: This is only useful with a flash suit without Speed Booster. |
|
Requires: {
"obstaclesCleared": [
"A",
"B"
]
}
"h_storedSpark"
"canDash"
{
"shinespark": {
"frames": 4,
"excessFrames": 2
}
}
{
"or": [
"canInsaneJump",
{
"and": [
"canTrickyJump",
"canLateralMidAirMorph"
]
},
{
"and": [
"canTrickyJump",
"canPreciseWallJump",
{
"acidFrames": 16
}
]
},
{
"and": [
"Gravity",
{
"acidFrames": 16
}
]
},
{
"acidFrames": 27
}
]
} |
|


Requires: "h_speedJump"
{
"or": [
"canMetroidAvoid",
{
"obstaclesCleared": [
"B"
]
}
]
}
{
"or": [
"canMomentumConservingMorph",
{
"and": [
"canMomentumConservingTurnaround",
"canInsaneJump"
]
}
]
}Exit condition: {
"leaveWithSidePlatform": {
"height": 2,
"runway": {
"length": 23,
"openEnd": 1
},
"obstruction": [
3,
0
]
}
}Dev note: Max extra run speed $4.7. Using almost the full runway (between 3 and 6 pixels from the edge), the momentum conserving turnaround has a 2-frame window for the jump, and a 1-frame or 3-frame window for the turnaround, depending on the jump (with a last-frame jump giving the larger window). |
|
Requires: "h_speedJump"
{
"or": [
"canMetroidAvoid",
{
"or": [
"f_KilledMetroidRoom2",
{
"obstaclesCleared": [
"f_KilledMetroidRoom2"
]
}
]
}
]
}
"canInsaneJump"
"canMomentumConservingMorph"Exit condition: {
"leaveWithSidePlatform": {
"height": 3,
"runway": {
"length": 11,
"openEnd": 0
},
"obstruction": [
3,
0
]
}
}Dev note: Max extra run speed $2.6 This strat is included for completeness, though it apparently doesn't have any applications. |
|
Requires: "canDash"
{
"metroidFrames": 670
}Exit condition: {
"leaveNormally": {}
}Unlocks doors: {
"types": [
"missiles"
],
"requires": [
{
"enemyDamage": {
"enemy": "Rinka",
"type": "contact",
"hits": 1
}
},
{
"ammo": {
"type": "Missile",
"count": 2
}
}
]
}
{"types":["super"],"requires":[{"metroidFrames":15},{"ammo":{"type":"Super","count":1}}]}
{"types":["powerbomb"],"requires":[]}Dev note: PB at door is energy neutral. |
|
Requires: {
"or": [
"canDash",
"canWallJump",
"SpaceJump",
"canSpringFling",
{
"and": [
"canMidAirMorph",
"h_useSpringBall",
"canResetFallSpeed",
{
"or": [
{
"disableEquipment": "HiJump"
},
"canInsaneJump"
]
}
]
},
"canBombHorizontally",
"canTrickyUseFrozenEnemies",
{
"acidFrames": 20
}
]
} |
|
Requires: "canDash"
{
"metroidFrames": 600
}Exit condition: {
"leaveNormally": {}
}Unlocks doors: {
"types": [
"missiles"
],
"requires": [
{
"enemyDamage": {
"enemy": "Rinka",
"type": "contact",
"hits": 1
}
},
{
"ammo": {
"type": "Missile",
"count": 2
}
}
]
}
{"types":["super"],"requires":[{"or":[{"ammo":{"type":"Super","count":1}},"canDodgeWhileShooting"]}]}
{"types":["powerbomb"],"requires":[{"metroidFrames":25}]} |
|
Requires: {
"or": [
"canDash",
{
"and": [
"canCarefulJump",
{
"disableEquipment": "HiJump"
}
]
},
{
"and": [
{
"or": [
"canIBJ",
{
"tech": "canJumpIntoIBJ"
}
]
},
"canBombHorizontally"
]
},
"canSpringFling",
{
"and": [
"canMidAirMorph",
"h_useSpringBall",
"canInsaneJump",
"canResetFallSpeed"
]
},
"SpaceJump",
{
"and": [
"HiJump",
{
"acidFrames": 20
}
]
}
]
} |
|
Taking a rinka hit stops the Metroid damage for a while and is less damage. Note that angle-down shots with a Metroid on Samus are unreliable, so it is recommended to jump and shoot down to open the door. Requires: "canDash"
{
"metroidFrames": 240
}Exit condition: {
"leaveNormally": {}
}Unlocks doors: {"types":["missiles"],"requires":[{"ammo":{"type":"Missile","count":1}},{"metroidFrames":50}]}
{"types":["super"],"requires":["canTrickyJump",{"metroidFrames":50}]}
{"types":["powerbomb"],"requires":[{"metroidFrames":50}]}Dev note: Power Bombs negate some of the damage taken while waiting for the door to unlock. |
From: 2
Bottom Door
To: 1
Top Left Door
Avoid all of the Rinkas and Metroids with no equipment and taking no damage. Begin by shooting the bottom Metroid hold it in place, and wait right below the first ledge. Once the middle Metroid passes by, jump up and shoot any Rinkas that are in the way. Repeat for the next ledge, clear any Rinkas, and then run to the door. Requires: {
"notable": "Bottom Metroid Avoid"
}
"canMetroidAvoid"
"canDodgeWhileShooting"
"canCarefulJump"
{
"or": [
"canDash",
"canInsaneJump"
]
} |
|
Taking a rinka hit stops the Metroid damage for a while and is less damage. Requires: "canDash"
{
"enemyDamage": {
"enemy": "Rinka",
"type": "contact",
"hits": 1
}
}
{
"metroidFrames": 256
}Exit condition: {
"leaveNormally": {}
}Unlocks doors: {"types":["missiles"],"requires":[{"metroidFrames":50},{"ammo":{"type":"Missile","count":2}}]}
{"types":["super"],"requires":[{"ammo":{"type":"Super","count":1}}]}
{"types":["powerbomb"],"requires":[]}Dev note: Avoiding Rinkas is more difficult than getting hit, so it is not important to know to want to get hit. Opening a door with a Power Bomb is energy neutral since you can place it early. |
|


Run from or Roll under the pirate lasers. The Pirates will also not shoot if they come on screen while Samus is crouched. Requires: {
"or": [
{
"and": [
"canDodgeWhileShooting",
"canCameraManip",
{
"or": [
"Plasma",
{
"and": [
"h_hasBeamUpgrade",
"canDash",
"canBePatient"
]
},
"canBeVeryPatient"
]
}
]
},
{
"and": [
{
"or": [
"canBePatient",
{
"enemyDamage": {
"enemy": "Tourian Space Pirate (all)",
"type": "contact",
"hits": 1
}
}
]
},
"Morph"
]
}
]
}Clears obstacles: A Dev note: Technically it's not possible to kill the bottom Pirates while staying at node 2 (not dropping down); but if we're not going down, then it doesn't matter that the bottom ones aren't killed. |
|
Enter through the far left side of the door. Wait for the top hopper to move right to start running. Run under the right Hopper and jump over the left Hopper to avoid all damage. Jump when Samus reaches the leftmost lump in the ground to avoid the left hopper. It helps to keep the camera scrolled to the right. Entrance condition: {
"comeInNormally": {},
"comesThroughToilet": "no"
}Requires: {
"notable": "Hopper Dodge"
}
"canDash"
"canTrickyDodgeEnemies"
{
"or": [
"canPrepareForNextRoom",
{
"and": [
"canCameraManip",
"canMoonwalk",
"canInsaneJump"
]
}
]
}Unlocks doors: {"types":["super"],"requires":[]}
{"types":["missiles","powerbomb"],"requires":[{"enemyDamage":{"enemy":"Blue Sidehopper","type":"contact","hits":1}}]} |
|
Try to scroll the camera to the right to keep the left Hopper off-camera for longer. Wait for the top hopper to move right to start running. Run under the right Hopper and jump over the left Hopper to avoid all damage. Jump when Samus reaches the leftmost lump in the ground to avoid the left hopper. Entrance condition: {
"comeInNormally": {},
"comesThroughToilet": "any"
}Requires: {
"notable": "Hopper Dodge"
}
"canDash"
"canCameraManip"
"canMoonwalk"
"canInsaneJump"Unlocks doors: {"types":["super"],"requires":[]}
{"types":["missiles","powerbomb"],"requires":[{"enemyDamage":{"enemy":"Blue Sidehopper","type":"contact","hits":1}}]} |
|
Wait for the top hopper to move right, then jump through the left hopper. The left hopper may be harder to dodge if the camera is scrolled to the left. Requires: "canDash"
"ScrewAttack"
"canCarefulJump"
{
"or": [
"canTrickyJump",
"SpaceJump",
{
"enemyDamage": {
"enemy": "Blue Sidehopper",
"type": "contact",
"hits": 1
}
}
]
}Unlocks doors: {"types":["super"],"requires":[]}
{"types":["missiles","powerbomb"],"requires":[{"enemyDamage":{"enemy":"Blue Sidehopper","type":"contact","hits":1}}]} |
|
Requires: "canDash" "canCarefulJump" "h_complexToCarryFlashSuit" |
From: 2
Left Door
To: 1
Top Right Door
Jump far enough to land on the first floor pillar. Entrance condition: {
"comeInGettingBlueSpeed": {
"length": 0,
"openEnd": 0
}
}Requires: "h_blueJump"
"canPrepareForNextRoom"
{
"or": [
"SpaceJump",
"canCarefulJump"
]
}
"h_complexToCarryFlashSuit"Dev note: This is not the level of precision that would call for canBlueSpaceJump. |
|
Time Samus' movement carefully to roll underneath a Tourian Hopper and also race it to the far door. Enter the room morphed and let the hoppers jump against the wall a couple of times. After the lower hopper has long enough time between jumps, roll under and run to the door. Entrance condition: {
"comeInNormally": {}
}Requires: {
"notable": "Roll Under Hoppers"
}
"Morph"
"canPrepareForNextRoom"
"canTrickyDodgeEnemies"
"canDash"
"h_complexToCarryFlashSuit" |
|
Spin jump into the room with Screw Attack, holding left through the transition to land near the door. Do a turn-around spin jump to the right, bonking the ceiling and overhang and then falling straight down. Then run and spin jump to the right through the Hoppers, to make it to the door without taking damage. Entrance condition: {
"comeInNormally": {}
}Requires: {
"notable": "Screw Attack Jumps"
}
"canDash"
"canPrepareForNextRoom"
"ScrewAttack"
"canTrickyJump"
"h_complexToCarryFlashSuit" |