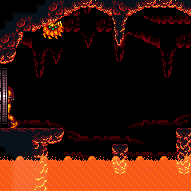
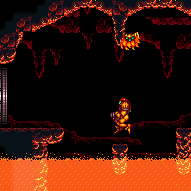
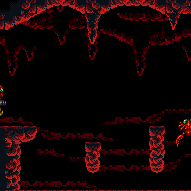
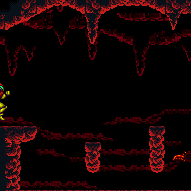
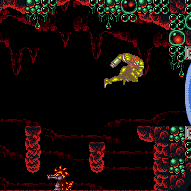
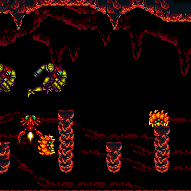
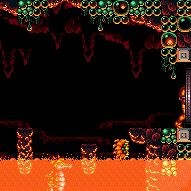
Rising Tide
Room ID: 92

|
Exit condition: {
"leaveWithRunway": {
"length": 4,
"openEnd": 1
}
} |
|
Requires: "h_heatedRemoteRunwaySpaceJump"
{
"heatFrames": 320
}Exit condition: {
"leaveSpinning": {
"remoteRunway": {
"length": 5,
"openEnd": 2
},
"minExtraRunSpeed": "$1.B"
}
} |
|
Requires: "canTrickyJump"
{
"or": [
"h_heatProof",
"h_heatedRemoteRunwaySpaceJump",
"canInsaneJump"
]
}
{
"heatFrames": 320
}Exit condition: {
"leaveWithMockball": {
"remoteRunway": {
"length": 5,
"openEnd": 2
},
"landingRunway": {
"length": 4,
"openEnd": 1
},
"minExtraRunSpeed": "$1.B"
}
} |
From: 1
Left Door
To: 1
Left Door
Requires: "h_heatedRemoteRunwaySpaceJump"
{
"heatFrames": 320
}Exit condition: {
"leaveWithSpringBallBounce": {
"remoteRunway": {
"length": 5,
"openEnd": 2
},
"landingRunway": {
"length": 4,
"openEnd": 1
},
"minExtraRunSpeed": "$1.B",
"movementType": "uncontrolled"
}
} |
|
Requires: "h_heatedRemoteRunwayPreciseSpaceJump"
{
"heatFrames": 320
}Exit condition: {
"leaveSpaceJumping": {
"remoteRunway": {
"length": 5,
"openEnd": 2
},
"minExtraRunSpeed": "$1.B"
}
} |
|
Requires: "canDash"
"h_heatProof"
{
"resetRoom": {
"nodes": [
1
]
}
}
{
"cycleFrames": 680
}
{
"or": [
"SpaceJump",
{
"cycleFrames": 40
}
]
}
{
"or": [
"Wave",
"Spazer",
"Plasma",
{
"cycleFrames": 360
}
]
}Farm cycle drops: 4 Sova |
|
Requires: "h_heatProof"
{
"haveBlueSuit": {}
}
{
"resetRoom": {
"nodes": [
1
]
}
}
{
"cycleFrames": 1080
}Farm cycle drops: 3 Sova |
|
Requires: "canDash"
{
"resetRoom": {
"nodes": [
1
]
}
}
"h_heatProof"
"Plasma"
{
"or": [
{
"and": [
"h_lavaProof",
{
"or": [
{
"and": [
"Morph",
{
"cycleFrames": 1170
}
]
},
{
"cycleFrames": 1500
}
]
}
]
},
{
"and": [
"SpaceJump",
{
"cycleFrames": 1440
}
]
},
{
"and": [
"Grapple",
{
"cycleFrames": 1800
}
]
}
]
}Farm cycle drops: 5 Sova, 4 Dragon |
|
Requires: "canDash"
"h_heatProof"
"ScrewAttack"
{
"or": [
{
"and": [
{
"resetRoom": {
"nodes": [
1
]
}
},
{
"cycleFrames": 340
}
]
},
{
"and": [
{
"resetRoom": {
"nodes": [
2
]
}
},
{
"cycleFrames": 900
},
{
"or": [
"SpaceJump",
{
"cycleFrames": 320
}
]
}
]
}
]
}Farm cycle drops: 2 Squeept Dev note: With a blue suit, Screw Attack does not work against the Squeepts. |
|
Requires: "h_heatedCrystalFlash" |
|
Entrance condition: {
"comeInShinecharging": {
"length": 3,
"openEnd": 0
}
}Requires: "h_heatedCrystalSpark" |
|
Partially cross the room until a Sova falls from the ceiling, follow it back and forth across the room. Alternatively, to save a lot of Energy, use a Super to knock off the first Sova after the one that falls, while it is on the right side of it's platform. Requires: {
"or": [
"canDash",
{
"heatFrames": 60
}
]
}
{
"heatFrames": 1500
}
{
"or": [
{
"ammo": {
"type": "Super",
"count": 1
}
},
{
"heatFrames": 2000
}
]
}Exit condition: {
"leaveWithGModeSetup": {}
} |
|
Building run speed can speed up the room a noticable amount. Requires: "canDash"
"SpaceJump"
{
"heatFrames": 460
} |
|
Building runspeed can speed up the room a noticable amount. Entrance condition: {
"comeInRunning": {
"speedBooster": "any",
"minTiles": 2
}
}Requires: "SpaceJump"
{
"heatFrames": 370
} |
|
Requires: "canDash"
{
"or": [
{
"and": [
"canTrickyJump",
{
"heatFrames": 540
}
]
},
{
"heatFrames": 660
}
]
}
{
"or": [
"canDodgeWhileShooting",
"Ice",
"Plasma",
{
"and": [
"canCarefulJump",
{
"enemyDamage": {
"enemy": "Dragon",
"type": "fireball",
"hits": 1
}
}
]
},
{
"and": [
{
"lavaFrames": 40
},
{
"enemyDamage": {
"enemy": "Dragon",
"type": "fireball",
"hits": 3
}
}
]
}
]
} |
|
Requires: {
"haveBlueSuit": {}
}
{
"heatFrames": 840
} |
|
Entrance condition: {
"comeInNormally": {}
}Requires: "canDash"
"Morph"
{
"enemyDamage": {
"enemy": "Sova",
"type": "contact",
"hits": 1
}
}
{
"enemyDamage": {
"enemy": "Dragon",
"type": "contact",
"hits": 1
}
}
{
"heatFrames": 480
} |
|
Entrance condition: {
"comeInNormally": {}
}Requires: "Morph"
{
"haveBlueSuit": {}
}
{
"heatFrames": 505
} |
From: 1
Left Door
To: 2
Right Door

Jump between the first and second floating platforms, to speedball through the room. Entrance condition: {
"comeInGettingBlueSpeed": {
"length": 3,
"openEnd": 1,
"minExtraRunSpeed": "$0.E",
"maxExtraRunSpeed": "$1.B"
}
}Requires: "canSpeedball"
"canSlowShortCharge"
{
"heatFrames": 350
}Dev note: Some heat frames are implicit in the entrance condition. |
From: 1
Left Door
To: 2
Right Door


Jump into the room with blue speed, and fall between the door ledge and the first floating platform, to speedball through the room. Entrance condition: {
"comeInBlueSpinning": {
"minExtraRunSpeed": "$0.E",
"maxExtraRunSpeed": "$1.9",
"unusableTiles": 3
}
}Requires: "canSpeedball"
"canSlowShortCharge"
"canInsaneJump"
{
"heatFrames": 360
} |
|
Spark in line with the top of the door. Sparking too low or too high will crash early. Entrance condition: {
"comeInShinecharging": {
"length": 3,
"openEnd": 1
}
}Requires: "canHorizontalMidairShinespark"
{
"heatFrames": 210
}
{
"shinespark": {
"frames": 90,
"excessFrames": 5
}
} |
|
Spark in line with the top of the door. Sparking too low or too high will crash early. Entrance condition: {
"comeInShinecharged": {}
}Requires: {
"shineChargeFrames": 13
}
"canHorizontalMidairShinespark"
{
"heatFrames": 205
}
{
"shinespark": {
"frames": 92,
"excessFrames": 5
}
} |
|
Spark in line with the top of the door. Sparking too low or too high will crash early. Entrance condition: {
"comeInWithSpark": {
"position": "top"
}
}Requires: {
"heatFrames": 195
}
{
"shinespark": {
"frames": 95,
"excessFrames": 5
}
} |
From: 1
Left Door
To: 2
Right Door
Entrance condition: {
"comeInGettingBlueSpeed": {
"length": 3,
"openEnd": 1,
"minExtraRunSpeed": "$1.2"
}
}Requires: "canLongChainTemporaryBlue"
{
"enemyDamage": {
"enemy": "Sova",
"type": "contact",
"hits": 1
}
}
{
"heatFrames": 1350
}Exit condition: {
"leaveWithTemporaryBlue": {}
}Unlocks doors: {"types":["super","powerbomb"],"requires":[]}
{"types":["missiles"],"requires":[{"heatFrames":50}]} |
|
Cross the room while following the Sova that falls from the ceiling to the right door. Requires: {
"or": [
"canDash",
{
"heatFrames": 60
}
]
}
{
"heatFrames": 1390
}Exit condition: {
"leaveWithGModeSetup": {}
}Unlocks doors: {"types":["missiles","super"],"requires":[]}
{"types":["powerbomb"],"requires":["never"]} |
|
To save Energy, it is possible to lure a Sova to the right door and pause abuse to grab its Energy drop on G-mode exit. The left-most Sova falls into the lava and walks to the right. It is important to prevent the Dragons from shooting too many fireballs, as they will eventually prevent drops from appearing. Keeping the Sova on camera and moving a reasonable amount of the time will prevent the drops from being overloaded. Entrance condition: {
"comeInWithGMode": {
"mode": "any",
"morphed": false
}
}Requires: {
"or": [
"h_heatedGModePauseAbuse",
"h_heatedGModeOpenDifferentDoor"
]
} |
|
Use controlled Spring Ball bounces to cross the whole room while avoiding all enemy damage. There is a significant chance of failure due to bad Squeept RNG. Entrance condition: {
"comeInRunning": {
"speedBooster": "no",
"minTiles": 4
}
}Requires: "canTrickySpringBallBounce"
"canInsaneJump"
"canBeVeryPatient"
{
"heatFrames": 390
} |
|
Requires: "canDash"
"SpaceJump"
{
"heatFrames": 450
} |
|
Entrance condition: {
"comeInRunning": {
"speedBooster": "any",
"minTiles": 2
}
}Requires: "SpaceJump"
{
"heatFrames": 390
} |
|
Spark in line with the top of the door. Sparking too low or too high will crash early. Entrance condition: {
"comeInShinecharging": {
"length": 3,
"openEnd": 1
}
}Requires: "canHorizontalMidairShinespark"
{
"heatFrames": 210
}
{
"shinespark": {
"frames": 90,
"excessFrames": 3
}
} |
|
Spark in line with the top of the door. Sparking too low or too high will crash early. Entrance condition: {
"comeInShinecharged": {}
}Requires: {
"shineChargeFrames": 13
}
"canHorizontalMidairShinespark"
{
"heatFrames": 205
}
{
"shinespark": {
"frames": 92,
"excessFrames": 3
}
} |
|
Spark in line with the top of the door. Sparking too low or too high will crash early. Entrance condition: {
"comeInWithSpark": {
"position": "top"
}
}Requires: {
"heatFrames": 195
}
{
"shinespark": {
"frames": 95,
"excessFrames": 3
}
} |
|


Build up run speed to travel farther when jumping. Requires: "canDash"
{
"heatFrames": 540
}
{
"or": [
"canTrickyJump",
{
"heatFrames": 160
}
]
}
{
"or": [
"canDodgeWhileShooting",
"Ice",
"Plasma",
{
"and": [
"canCarefulJump",
{
"enemyDamage": {
"enemy": "Dragon",
"type": "fireball",
"hits": 1
}
}
]
},
{
"and": [
{
"lavaFrames": 40
},
{
"enemyDamage": {
"enemy": "Dragon",
"type": "fireball",
"hits": 3
}
}
]
}
]
} |
|
Requires: {
"haveBlueSuit": {}
}
{
"heatFrames": 840
} |
|
Entrance condition: {
"comeInNormally": {}
}Requires: "canDash"
"Gravity"
{
"enemyDamage": {
"enemy": "Dragon",
"type": "contact",
"hits": 1
}
}
{
"enemyDamage": {
"enemy": "Sova",
"type": "contact",
"hits": 1
}
}
{
"heatFrames": 500
}
{
"lavaFrames": 360
} |
|


Jump to the first long platform then use a the full platform to jump and mockball through the lava. Entrance condition: {
"comeInNormally": {}
}Requires: "Gravity"
"canTrickyJump"
"canMockball"
{
"enemyDamage": {
"enemy": "Dragon",
"type": "contact",
"hits": 1
}
}
{
"heatFrames": 480
}
{
"lavaFrames": 240
} |
|
Entrance condition: {
"comeInNormally": {}
}Requires: "Morph"
{
"haveBlueSuit": {}
}
{
"heatFrames": 460
}
{
"lavaFrames": 355
} |
From: 2
Right Door
To: 1
Left Door

Entrance condition: {
"comeInGettingBlueSpeed": {
"length": 3,
"openEnd": 1,
"minExtraRunSpeed": "$1.2"
}
}Requires: "canLongChainTemporaryBlue"
{
"heatFrames": 1450
}Exit condition: {
"leaveWithTemporaryBlue": {}
}Unlocks doors: {"types":["super","powerbomb"],"requires":[]}
{"types":["missiles"],"requires":[{"heatFrames":50}]} |
|

Entrance condition: {
"comeInWithGrappleTeleport": {
"blockPositions": [
[
7,
2
]
]
}
}Requires: {
"heatFrames": 50
} |
|
Entrance condition: {
"comeInWithGrappleTeleport": {
"blockPositions": [
[
3,
12
],
[
3,
13
]
]
}
}Bypasses door shell: true |
|
Entrance condition: {
"comeInWithGrappleTeleport": {
"blockPositions": [
[
3,
12
]
]
}
}Exit condition: {
"leaveWithGrappleTeleport": {
"blockPositions": [
[
3,
12
]
]
}
}Bypasses door shell: true |
|
Entrance condition: {
"comeInWithGrappleTeleport": {
"blockPositions": [
[
3,
13
]
]
}
}Exit condition: {
"leaveWithGrappleTeleport": {
"blockPositions": [
[
3,
13
]
]
}
}Bypasses door shell: true |
|
Cross more than half way across the room until a Sova falls from the ceiling then follow it back and forth across the room. Alternatively, to save a lot of Energy, use a Super to knock off the Sova just before that, while it is on the right side of it's thin platform. Requires: {
"or": [
"canDash",
{
"heatFrames": 140
}
]
}
{
"heatFrames": 1780
}
{
"or": [
{
"ammo": {
"type": "Super",
"count": 1
}
},
{
"heatFrames": 2050
}
]
}Exit condition: {
"leaveWithGModeSetup": {}
}Unlocks doors: {"types":["missiles","super"],"requires":[]}
{"types":["powerbomb"],"requires":["never"]} |
|
Entrance condition: {
"comeInWithGMode": {
"mode": "any",
"morphed": false
}
}Requires: "h_heatedGModeOpenDifferentDoor" |
|
Lure a Sova to the left door and pause abuse to grab its Energy drop on G-mode exit. It is important to prevent the Dragons from shooting too many fireballs, as they will eventually prevent drops from appearing. Either use a Super to bring the left-most Sova that circles a platform, by knocking it off while it is on the right side of the platform, or lure the left-most Sova that falls into the lava to the right and back to the left. Without a Super, Samus must quickly kill or freeze the Dragons. Only the right 3 Dragons must be killed in order to prevent the drops from being overloaded, but killing more makes it more lenient. Entrance condition: {
"comeInWithGMode": {
"mode": "any",
"morphed": false
}
}Requires: {
"or": [
"Plasma",
{
"and": [
"Charge",
"Wave"
]
},
{
"ammo": {
"type": "Super",
"count": 1
}
},
{
"ammo": {
"type": "Missile",
"count": 9
}
},
{
"and": [
"canTrickyUseFrozenEnemies",
"canTrickyJump"
]
}
]
}
"h_heatedGModePauseAbuse" |
|
Use controlled Spring Ball bounces to cross the whole room while avoiding all enemy damage. There is a significant chance of failure due to bad Squeept RNG. Entrance condition: {
"comeInRunning": {
"speedBooster": "no",
"minTiles": 4
}
}Requires: "canTrickySpringBallBounce"
"canInsaneJump"
"canBeVeryPatient"
{
"heatFrames": 390
} |
|
Exit condition: {
"leaveWithRunway": {
"length": 4,
"openEnd": 1
}
} |
|
Requires: "h_heatedRemoteRunwaySpaceJump"
{
"heatFrames": 540
}
{
"or": [
"canTrickyDodgeEnemies",
{
"and": [
{
"heatFrames": 100
},
{
"enemyKill": {
"enemies": [
[
"Dragon"
],
[
"Dragon"
]
],
"excludedWeapons": [
"Bombs"
]
}
}
]
}
]
}Exit condition: {
"leaveSpinning": {
"remoteRunway": {
"length": 5,
"openEnd": 2
},
"minExtraRunSpeed": "$1.A"
}
} |
|
Requires: "h_heatedRemoteRunwaySpaceJump"
{
"heatFrames": 540
}
{
"or": [
"canTrickyDodgeEnemies",
{
"and": [
{
"heatFrames": 100
},
{
"enemyKill": {
"enemies": [
[
"Dragon"
],
[
"Dragon"
]
],
"excludedWeapons": [
"Bombs"
]
}
}
]
}
]
}Exit condition: {
"leaveWithMockball": {
"remoteRunway": {
"length": 5,
"openEnd": 2
},
"landingRunway": {
"length": 4,
"openEnd": 1
},
"minExtraRunSpeed": "$1.A"
}
}Dev note: FIXME: a 1 -> 2 version of this could be added, to save heat frames. |
From: 2
Right Door
To: 2
Right Door
Requires: "h_heatedRemoteRunwaySpaceJump"
{
"heatFrames": 540
}
{
"or": [
"canTrickyDodgeEnemies",
{
"and": [
{
"heatFrames": 100
},
{
"enemyKill": {
"enemies": [
[
"Dragon"
],
[
"Dragon"
]
],
"excludedWeapons": [
"Bombs"
]
}
}
]
}
]
}Exit condition: {
"leaveWithSpringBallBounce": {
"remoteRunway": {
"length": 5,
"openEnd": 2
},
"landingRunway": {
"length": 4,
"openEnd": 1
},
"minExtraRunSpeed": "$1.A",
"movementType": "uncontrolled"
}
}Dev note: FIXME: a 1 -> 2 version of this could be added, to save heat frames. |
|
Requires: "h_heatedRemoteRunwayTrickySpringBall"
{
"heatFrames": 600
}
{
"or": [
"canTrickyDodgeEnemies",
{
"and": [
{
"heatFrames": 100
},
{
"enemyKill": {
"enemies": [
[
"Dragon"
],
[
"Dragon"
]
],
"excludedWeapons": [
"Bombs"
]
}
}
]
}
]
}Exit condition: {
"leaveWithSpringBallBounce": {
"remoteRunway": {
"length": 5,
"openEnd": 2
},
"landingRunway": {
"length": 4,
"openEnd": 1
},
"minExtraRunSpeed": "$1.A",
"movementType": "controlled"
}
} |
|
Requires: "canDash"
"h_heatProof"
{
"resetRoom": {
"nodes": [
2
]
}
}
{
"cycleFrames": 720
}
{
"or": [
"SpaceJump",
{
"cycleFrames": 30
}
]
}
{
"or": [
"Wave",
"Spazer",
"Plasma",
{
"and": [
"canFarmWhileShooting",
{
"cycleFrames": 30
}
]
}
]
}
{
"or": [
"canTrickyJump",
{
"cycleFrames": 60
}
]
}Farm cycle drops: 4 Sova Dev note: Add canTrickyJump for catching the Sovas on their first cycles. |
|
Requires: "h_heatProof"
{
"haveBlueSuit": {}
}
{
"resetRoom": {
"nodes": [
2
]
}
}
{
"cycleFrames": 1020
}Farm cycle drops: 3 Sova |
|
Requires: "canDash"
{
"resetRoom": {
"nodes": [
2
]
}
}
"h_heatProof"
"Plasma"
{
"or": [
{
"and": [
"h_lavaProof",
{
"or": [
{
"and": [
"Morph",
{
"cycleFrames": 930
}
]
},
{
"and": [
"SpaceJump",
{
"cycleFrames": 1100
}
]
},
{
"cycleFrames": 1290
}
]
}
]
},
{
"and": [
"SpaceJump",
{
"cycleFrames": 1230
}
]
},
{
"and": [
"Grapple",
{
"cycleFrames": 1680
}
]
}
]
}Farm cycle drops: 5 Sova, 4 Dragon |
|
Requires: "h_heatedCrystalFlash" |
|
Entrance condition: {
"comeInShinecharging": {
"length": 3,
"openEnd": 0
}
}Requires: "h_heatedCrystalSpark" |
|

Cross more than half way across the room until a Sova falls from the ceiling. Alternatively, to save Energy, use a Super to knock off the second Sova from the right, while it is on the left side of it's platform. Requires: {
"or": [
"canDash",
{
"heatFrames": 140
}
]
}
{
"heatFrames": 1500
}
{
"or": [
{
"ammo": {
"type": "Super",
"count": 1
}
},
{
"heatFrames": 320
}
]
}Exit condition: {
"leaveWithGModeSetup": {}
} |
{
"$schema": "../../../schema/m3-room.schema.json",
"id": 92,
"name": "Rising Tide",
"area": "Norfair",
"subarea": "Upper",
"subsubarea": "East",
"roomAddress": "0x7AFA3",
"roomEnvironments": [
{
"heated": true
}
],
"mapTileMask": [
[
1,
1,
1,
1,
1
]
],
"nodes": [
{
"id": 1,
"name": "Left Door",
"nodeType": "door",
"nodeSubType": "blue",
"nodeAddress": "0x0019732",
"doorOrientation": "left",
"doorEnvironments": [
{
"physics": "air"
}
],
"mapTileMask": [
[
2,
2,
2,
1,
1
]
]
},
{
"id": 2,
"name": "Right Door",
"nodeType": "door",
"nodeSubType": "blue",
"nodeAddress": "0x001973e",
"doorOrientation": "right",
"doorEnvironments": [
{
"physics": "air"
}
],
"mapTileMask": [
[
1,
1,
1,
2,
2
]
]
}
],
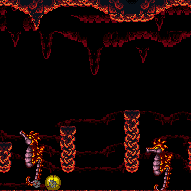
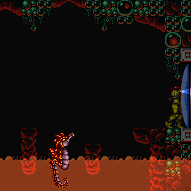
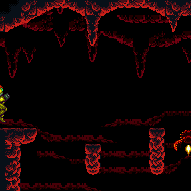
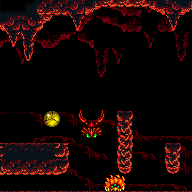
"enemies": [
{
"id": "e1",
"groupName": "Rising Tide Sovas",
"enemyName": "Sova",
"quantity": 5,
"betweenNodes": [
1,
2
]
},
{
"id": "e2",
"groupName": "Rising Tide Dragons",
"enemyName": "Dragon",
"quantity": 4,
"betweenNodes": [
1,
2
]
},
{
"id": "e3",
"groupName": "Rising Tide Squeepts",
"enemyName": "Squeept",
"quantity": 2,
"betweenNodes": [
1,
2
]
}
],
"strats": [
{
"link": [
1,
1
],
"name": "Base (Unlock Door)",
"requires": [],
"unlocksDoors": [
{
"types": [
"missiles"
],
"requires": [
{
"heatFrames": 50
}
]
},
{
"types": [
"super"
],
"requires": []
},
{
"types": [
"powerbomb"
],
"requires": [
{
"heatFrames": 110
}
]
}
],
"flashSuitChecked": true,
"blueSuitChecked": true
},
{
"link": [
1,
1
],
"name": "Base (Come In Normally)",
"entranceCondition": {
"comeInNormally": {}
},
"requires": [],
"flashSuitChecked": true,
"blueSuitChecked": true
},
{
"link": [
1,
1
],
"name": "Base (Come In With Mockball)",
"entranceCondition": {
"comeInWithMockball": {
"adjacentMinTiles": 0,
"remoteAndLandingMinTiles": [
[
0,
0
]
],
"speedBooster": "any"
}
},
"requires": [
{
"heatFrames": 10
}
],
"flashSuitChecked": true,
"blueSuitChecked": true
},
{
"link": [
2,
2
],
"name": "Base (Unlock Door)",
"requires": [],
"unlocksDoors": [
{
"types": [
"missiles"
],
"requires": [
{
"heatFrames": 50
}
]
},
{
"types": [
"super"
],
"requires": []
},
{
"types": [
"powerbomb"
],
"requires": [
{
"heatFrames": 110
}
]
}
],
"flashSuitChecked": true,
"blueSuitChecked": true
},
{
"link": [
2,
2
],
"name": "Base (Come In Normally)",
"entranceCondition": {
"comeInNormally": {}
},
"requires": [],
"flashSuitChecked": true,
"blueSuitChecked": true
},
{
"link": [
2,
2
],
"name": "Base (Come In With Mockball)",
"entranceCondition": {
"comeInWithMockball": {
"adjacentMinTiles": 0,
"remoteAndLandingMinTiles": [
[
0,
0
]
],
"speedBooster": "any"
}
},
"requires": [
{
"heatFrames": 10
}
],
"flashSuitChecked": true,
"blueSuitChecked": true
},
{
"id": 1,
"link": [
1,
1
],
"name": "Leave with Runway",
"requires": [],
"exitCondition": {
"leaveWithRunway": {
"length": 4,
"openEnd": 1
}
},
"flashSuitChecked": true,
"blueSuitChecked": true
},
{
"id": 50,
"link": [
1,
1
],
"name": "Leave Spinning (Space Jump)",
"requires": [
"h_heatedRemoteRunwaySpaceJump",
{
"heatFrames": 320
}
],
"exitCondition": {
"leaveSpinning": {
"remoteRunway": {
"length": 5,
"openEnd": 2
},
"minExtraRunSpeed": "$1.B"
}
},
"flashSuitChecked": true,
"blueSuitChecked": true
},
{
"id": 51,
"link": [
1,
1
],
"name": "Leave With Mockball",
"requires": [
"canTrickyJump",
{
"or": [
"h_heatProof",
"h_heatedRemoteRunwaySpaceJump",
"canInsaneJump"
]
},
{
"heatFrames": 320
}
],
"exitCondition": {
"leaveWithMockball": {
"remoteRunway": {
"length": 5,
"openEnd": 2
},
"landingRunway": {
"length": 4,
"openEnd": 1
},
"minExtraRunSpeed": "$1.B"
}
},
"flashSuitChecked": true,
"blueSuitChecked": true
},
{
"id": 52,
"link": [
1,
1
],
"name": "Leave With Spring Ball Bounce (Space Jump)",
"requires": [
"h_heatedRemoteRunwaySpaceJump",
{
"heatFrames": 320
}
],
"exitCondition": {
"leaveWithSpringBallBounce": {
"remoteRunway": {
"length": 5,
"openEnd": 2
},
"landingRunway": {
"length": 4,
"openEnd": 1
},
"minExtraRunSpeed": "$1.B",
"movementType": "uncontrolled"
}
},
"flashSuitChecked": true,
"blueSuitChecked": true
},
{
"id": 53,
"link": [
1,
1
],
"name": "Leave Space Jumping",
"requires": [
"h_heatedRemoteRunwayPreciseSpaceJump",
{
"heatFrames": 320
}
],
"exitCondition": {
"leaveSpaceJumping": {
"remoteRunway": {
"length": 5,
"openEnd": 2
},
"minExtraRunSpeed": "$1.B"
}
},
"flashSuitChecked": true,
"blueSuitChecked": true
},
{
"id": 2,
"link": [
1,
1
],
"name": "Sova Farm",
"requires": [
"canDash",
"h_heatProof",
{
"resetRoom": {
"nodes": [
1
]
}
},
{
"cycleFrames": 680
},
{
"or": [
"SpaceJump",
{
"cycleFrames": 40
}
]
},
{
"or": [
"Wave",
"Spazer",
"Plasma",
{
"cycleFrames": 360
}
]
}
],
"farmCycleDrops": [
{
"enemy": "Sova",
"count": 4
}
],
"flashSuitChecked": true,
"blueSuitChecked": true
},
{
"id": 42,
"link": [
1,
1
],
"name": "Sova Farm (Blue Suit)",
"requires": [
"h_heatProof",
{
"haveBlueSuit": {}
},
{
"resetRoom": {
"nodes": [
1
]
}
},
{
"cycleFrames": 1080
}
],
"farmCycleDrops": [
{
"enemy": "Sova",
"count": 3
}
],
"flashSuitChecked": true,
"blueSuitChecked": true
},
{
"id": 38,
"link": [
1,
1
],
"name": "Dragon and Sova Farm",
"requires": [
"canDash",
{
"resetRoom": {
"nodes": [
1
]
}
},
"h_heatProof",
"Plasma",
{
"or": [
{
"and": [
"h_lavaProof",
{
"or": [
{
"and": [
"Morph",
{
"cycleFrames": 1170
}
]
},
{
"cycleFrames": 1500
}
]
}
]
},
{
"and": [
"SpaceJump",
{
"cycleFrames": 1440
}
]
},
{
"and": [
"Grapple",
{
"cycleFrames": 1800
}
]
}
]
}
],
"farmCycleDrops": [
{
"enemy": "Sova",
"count": 5
},
{
"enemy": "Dragon",
"count": 4
}
],
"flashSuitChecked": true,
"blueSuitChecked": true
},
{
"id": 39,
"link": [
1,
1
],
"name": "Squeept Farm",
"requires": [
"canDash",
"h_heatProof",
"ScrewAttack",
{
"or": [
{
"and": [
{
"resetRoom": {
"nodes": [
1
]
}
},
{
"cycleFrames": 340
}
]
},
{
"and": [
{
"resetRoom": {
"nodes": [
2
]
}
},
{
"cycleFrames": 900
},
{
"or": [
"SpaceJump",
{
"cycleFrames": 320
}
]
}
]
}
]
}
],
"farmCycleDrops": [
{
"enemy": "Squeept",
"count": 2
}
],
"flashSuitChecked": true,
"blueSuitChecked": true,
"devNote": [
"With a blue suit, Screw Attack does not work against the Squeepts."
]
},
{
"id": 3,
"link": [
1,
1
],
"name": "Crystal Flash",
"requires": [
"h_heatedCrystalFlash"
],
"flashSuitChecked": true,
"blueSuitChecked": true
},
{
"id": 43,
"link": [
1,
1
],
"name": "Come in Shinecharging, Crystal Spark",
"entranceCondition": {
"comeInShinecharging": {
"length": 3,
"openEnd": 0
}
},
"requires": [
"h_heatedCrystalSpark"
],
"flashSuitChecked": true,
"blueSuitChecked": true
},
{
"id": 28,
"link": [
1,
1
],
"name": "G-Mode Setup - Get Hit By Sova",
"requires": [
{
"or": [
"canDash",
{
"heatFrames": 60
}
]
},
{
"heatFrames": 1500
},
{
"or": [
{
"ammo": {
"type": "Super",
"count": 1
}
},
{
"heatFrames": 2000
}
]
}
],
"exitCondition": {
"leaveWithGModeSetup": {}
},
"flashSuitChecked": true,
"blueSuitChecked": true,
"note": [
"Partially cross the room until a Sova falls from the ceiling, follow it back and forth across the room.",
"Alternatively, to save a lot of Energy, use a Super to knock off the first Sova after the one that falls, while it is on the right side of it's platform."
]
},
{
"id": 4,
"link": [
1,
2
],
"name": "Space Jump",
"requires": [
"canDash",
"SpaceJump",
{
"heatFrames": 460
}
],
"flashSuitChecked": true,
"blueSuitChecked": true,
"note": "Building run speed can speed up the room a noticable amount."
},
{
"id": 5,
"link": [
1,
2
],
"name": "Space Jump with Run Speed",
"entranceCondition": {
"comeInRunning": {
"speedBooster": "any",
"minTiles": 2
}
},
"requires": [
"SpaceJump",
{
"heatFrames": 370
}
],
"flashSuitChecked": true,
"blueSuitChecked": true,
"note": "Building runspeed can speed up the room a noticable amount."
},
{
"id": 6,
"link": [
1,
2
],
"name": "Platforming",
"requires": [
"canDash",
{
"or": [
{
"and": [
"canTrickyJump",
{
"heatFrames": 540
}
]
},
{
"heatFrames": 660
}
]
},
{
"or": [
"canDodgeWhileShooting",
"Ice",
"Plasma",
{
"and": [
"canCarefulJump",
{
"enemyDamage": {
"enemy": "Dragon",
"type": "fireball",
"hits": 1
}
}
]
},
{
"and": [
{
"lavaFrames": 40
},
{
"enemyDamage": {
"enemy": "Dragon",
"type": "fireball",
"hits": 3
}
}
]
}
]
}
],
"flashSuitChecked": true,
"blueSuitChecked": true
},
{
"id": 44,
"link": [
1,
2
],
"name": "Platforming (Blue Suit)",
"requires": [
{
"haveBlueSuit": {}
},
{
"heatFrames": 840
}
],
"flashSuitChecked": true,
"blueSuitChecked": true
},
{
"id": 7,
"link": [
1,
2
],
"name": "Roll Under",
"entranceCondition": {
"comeInNormally": {}
},
"requires": [
"canDash",
"Morph",
{
"enemyDamage": {
"enemy": "Sova",
"type": "contact",
"hits": 1
}
},
{
"enemyDamage": {
"enemy": "Dragon",
"type": "contact",
"hits": 1
}
},
{
"heatFrames": 480
}
],
"flashSuitChecked": true,
"blueSuitChecked": true
},
{
"id": 45,
"link": [
1,
2
],
"name": "Roll Under (Blue Suit)",
"entranceCondition": {
"comeInNormally": {}
},
"requires": [
"Morph",
{
"haveBlueSuit": {}
},
{
"heatFrames": 505
}
],
"flashSuitChecked": true,
"blueSuitChecked": true
},
{
"id": 8,
"link": [
1,
2
],
"name": "Speedball Roll Under (Come in Getting Blue Speed)",
"entranceCondition": {
"comeInGettingBlueSpeed": {
"length": 3,
"openEnd": 1,
"minExtraRunSpeed": "$0.E",
"maxExtraRunSpeed": "$1.B"
}
},
"requires": [
"canSpeedball",
"canSlowShortCharge",
{
"heatFrames": 350
}
],
"flashSuitChecked": true,
"blueSuitChecked": true,
"note": "Jump between the first and second floating platforms, to speedball through the room.",
"devNote": [
"Some heat frames are implicit in the entrance condition."
]
},
{
"id": 37,
"link": [
1,
2
],
"name": "Speedball Roll Under (Come in Blue Spinning)",
"entranceCondition": {
"comeInBlueSpinning": {
"minExtraRunSpeed": "$0.E",
"maxExtraRunSpeed": "$1.9",
"unusableTiles": 3
}
},
"requires": [
"canSpeedball",
"canSlowShortCharge",
"canInsaneJump",
{
"heatFrames": 360
}
],
"flashSuitChecked": true,
"blueSuitChecked": true,
"note": [
"Jump into the room with blue speed,",
"and fall between the door ledge and the first floating platform, to speedball through the room."
]
},
{
"id": 9,
"link": [
1,
2
],
"name": "Come In Shinecharging, Shinespark",
"entranceCondition": {
"comeInShinecharging": {
"length": 3,
"openEnd": 1
}
},
"requires": [
"canHorizontalMidairShinespark",
{
"heatFrames": 210
},
{
"shinespark": {
"frames": 90,
"excessFrames": 5
}
}
],
"flashSuitChecked": true,
"blueSuitChecked": true,
"note": [
"Spark in line with the top of the door.",
"Sparking too low or too high will crash early."
]
},
{
"id": 10,
"link": [
1,
2
],
"name": "Come In Shinecharged, Shinespark",
"entranceCondition": {
"comeInShinecharged": {}
},
"requires": [
{
"shineChargeFrames": 13
},
"canHorizontalMidairShinespark",
{
"heatFrames": 205
},
{
"shinespark": {
"frames": 92,
"excessFrames": 5
}
}
],
"flashSuitChecked": true,
"blueSuitChecked": true,
"note": [
"Spark in line with the top of the door.",
"Sparking too low or too high will crash early."
]
},
{
"id": 11,
"link": [
1,
2
],
"name": "Come In With Spark",
"entranceCondition": {
"comeInWithSpark": {
"position": "top"
}
},
"requires": [
{
"heatFrames": 195
},
{
"shinespark": {
"frames": 95,
"excessFrames": 5
}
}
],
"flashSuitChecked": true,
"blueSuitChecked": true,
"note": [
"Spark in line with the top of the door.",
"Sparking too low or too high will crash early."
]
},
{
"id": 26,
"link": [
1,
2
],
"name": "Come in Getting Blue Speed, Leave With Temporary Blue",
"entranceCondition": {
"comeInGettingBlueSpeed": {
"length": 3,
"openEnd": 1,
"minExtraRunSpeed": "$1.2"
}
},
"requires": [
"canLongChainTemporaryBlue",
{
"enemyDamage": {
"enemy": "Sova",
"type": "contact",
"hits": 1
}
},
{
"heatFrames": 1350
}
],
"exitCondition": {
"leaveWithTemporaryBlue": {}
},
"unlocksDoors": [
{
"types": [
"super",
"powerbomb"
],
"requires": []
},
{
"types": [
"missiles"
],
"requires": [
{
"heatFrames": 50
}
]
}
],
"flashSuitChecked": true,
"blueSuitChecked": true
},
{
"id": 29,
"link": [
1,
2
],
"name": "G-Mode Setup - Get Hit By Sova",
"requires": [
{
"or": [
"canDash",
{
"heatFrames": 60
}
]
},
{
"heatFrames": 1390
}
],
"exitCondition": {
"leaveWithGModeSetup": {}
},
"unlocksDoors": [
{
"types": [
"missiles",
"super"
],
"requires": []
},
{
"types": [
"powerbomb"
],
"requires": [
"never"
]
}
],
"flashSuitChecked": true,
"blueSuitChecked": true,
"note": "Cross the room while following the Sova that falls from the ceiling to the right door."
},
{
"id": 32,
"link": [
1,
2
],
"name": "G-Mode",
"entranceCondition": {
"comeInWithGMode": {
"mode": "any",
"morphed": false
}
},
"requires": [
{
  "or": [
    "h_heatedGModePauseAbuse",
    "h_heatedGModeOpenDifferentDoor"
  ]
}
],
"flashSuitChecked": true,
"blueSuitChecked": true,
"note": [
"To save Energy, it is possible to lure a Sova to the right door and pause abuse to grab its Energy drop on G-mode exit.",
"The left-most Sova falls into the lava and walks to the right.",
"It is important to prevent the Dragons from shooting too many fireballs, as they will eventually prevent drops from appearing.",
"Keeping the Sova on camera and moving a reasonable amount of the time will prevent the drops from being overloaded."
]
},
{
"id": 35,
"link": [
1,
2
],
"name": "Spring Ball Bounce",
"entranceCondition": {
"comeInRunning": {
"speedBooster": "no",
"minTiles": 4
}
},
"requires": [
"canTrickySpringBallBounce",
"canInsaneJump",
"canBeVeryPatient",
{
"heatFrames": 390
}
],
"flashSuitChecked": true,
"blueSuitChecked": true,
"note": [
"Use controlled Spring Ball bounces to cross the whole room while avoiding all enemy damage.",
"There is a significant chance of failure due to bad Squeept RNG."
]
},
{
"id": 12,
"link": [
2,
1
],
"name": "Space Jump",
"requires": [
"canDash",
"SpaceJump",
{
"heatFrames": 450
}
],
"flashSuitChecked": true,
"blueSuitChecked": true
},
{
"id": 13,
"link": [
2,
1
],
"name": "Space Jump with Run Speed",
"entranceCondition": {
"comeInRunning": {
"speedBooster": "any",
"minTiles": 2
}
},
"requires": [
"SpaceJump",
{
"heatFrames": 390
}
],
"flashSuitChecked": true,
"blueSuitChecked": true
},
{
"id": 14,
"link": [
2,
1
],
"name": "Come In Shinecharging, Shinespark",
"entranceCondition": {
"comeInShinecharging": {
"length": 3,
"openEnd": 1
}
},
"requires": [
"canHorizontalMidairShinespark",
{
"heatFrames": 210
},
{
"shinespark": {
"frames": 90,
"excessFrames": 3
}
}
],
"flashSuitChecked": true,
"blueSuitChecked": true,
"note": [
"Spark in line with the top of the door.",
"Sparking too low or too high will crash early."
]
},
{
"id": 15,
"link": [
2,
1
],
"name": "Come In Shinecharged, Shinespark",
"entranceCondition": {
"comeInShinecharged": {}
},
"requires": [
{
"shineChargeFrames": 13
},
"canHorizontalMidairShinespark",
{
"heatFrames": 205
},
{
"shinespark": {
"frames": 92,
"excessFrames": 3
}
}
],
"flashSuitChecked": true,
"blueSuitChecked": true,
"note": [
"Spark in line with the top of the door.",
"Sparking too low or too high will crash early."
]
},
{
"id": 16,
"link": [
2,
1
],
"name": "Come In With Spark",
"entranceCondition": {
"comeInWithSpark": {
"position": "top"
}
},
"requires": [
{
"heatFrames": 195
},
{
"shinespark": {
"frames": 95,
"excessFrames": 3
}
}
],
"flashSuitChecked": true,
"blueSuitChecked": true,
"note": [
"Spark in line with the top of the door.",
"Sparking too low or too high will crash early."
]
},
{
"id": 17,
"link": [
2,
1
],
"name": "Platforming",
"requires": [
"canDash",
{
"heatFrames": 540
},
{
"or": [
"canTrickyJump",
{
"heatFrames": 160
}
]
},
{
"or": [
"canDodgeWhileShooting",
"Ice",
"Plasma",
{
"and": [
"canCarefulJump",
{
"enemyDamage": {
"enemy": "Dragon",
"type": "fireball",
"hits": 1
}
}
]
},
{
"and": [
{
"lavaFrames": 40
},
{
"enemyDamage": {
"enemy": "Dragon",
"type": "fireball",
"hits": 3
}
}
]
}
]
}
],
"flashSuitChecked": true,
"blueSuitChecked": true,
"note": "Build up run speed to travel farther when jumping."
},
{
"id": 46,
"link": [
2,
1
],
"name": "Platforming (Blue Suit)",
"requires": [
{
"haveBlueSuit": {}
},
{
"heatFrames": 840
}
],
"flashSuitChecked": true,
"blueSuitChecked": true
},
{
"id": 18,
"link": [
2,
1
],
"name": "Roll Under",
"entranceCondition": {
"comeInNormally": {}
},
"requires": [
"canDash",
"Gravity",
{
"enemyDamage": {
"enemy": "Dragon",
"type": "contact",
"hits": 1
}
},
{
"enemyDamage": {
"enemy": "Sova",
"type": "contact",
"hits": 1
}
},
{
"heatFrames": 500
},
{
"lavaFrames": 360
}
],
"flashSuitChecked": true,
"blueSuitChecked": true
},
{
"id": 19,
"link": [
2,
1
],
"name": "Tricky Roll Under",
"entranceCondition": {
"comeInNormally": {}
},
"requires": [
"Gravity",
"canTrickyJump",
"canMockball",
{
"enemyDamage": {
"enemy": "Dragon",
"type": "contact",
"hits": 1
}
},
{
"heatFrames": 480
},
{
"lavaFrames": 240
}
],
"flashSuitChecked": true,
"blueSuitChecked": true,
"note": "Jump to the first long platform then use a the full platform to jump and mockball through the lava."
},
{
"id": 47,
"link": [
2,
1
],
"name": "Roll Under (Blue Suit)",
"entranceCondition": {
"comeInNormally": {}
},
"requires": [
"Morph",
{
"haveBlueSuit": {}
},
{
"heatFrames": 460
},
{
"lavaFrames": 355
}
],
"flashSuitChecked": true,
"blueSuitChecked": true
},
{
"id": 27,
"link": [
2,
1
],
"name": "Come in Getting Blue Speed, Leave With Temporary Blue",
"entranceCondition": {
"comeInGettingBlueSpeed": {
"length": 3,
"openEnd": 1,
"minExtraRunSpeed": "$1.2"
}
},
"requires": [
"canLongChainTemporaryBlue",
{
"heatFrames": 1450
}
],
"exitCondition": {
"leaveWithTemporaryBlue": {}
},
"unlocksDoors": [
{
"types": [
"super",
"powerbomb"
],
"requires": []
},
{
"types": [
"missiles"
],
"requires": [
{
  "heatFrames": 50
}
]
}
],
"flashSuitChecked": true,
"blueSuitChecked": true
},
{
"id": 20,
"link": [
2,
1
],
"name": "Grapple Teleport",
"entranceCondition": {
"comeInWithGrappleTeleport": {
"blockPositions": [
[
7,
2
]
]
}
},
"requires": [
{
"heatFrames": 50
}
],
"flashSuitChecked": true,
"blueSuitChecked": true
},
{
"id": 21,
"link": [
2,
1
],
"name": "Grapple Teleport Door Lock Skip",
"entranceCondition": {
"comeInWithGrappleTeleport": {
"blockPositions": [
[
3,
12
],
[
3,
13
]
]
}
},
"requires": [],
"bypassesDoorShell": "yes",
"flashSuitChecked": true,
"blueSuitChecked": true
},
{
"id": 22,
"link": [
2,
1
],
"name": "Carry Grapple Teleport (Top Position)",
"entranceCondition": {
"comeInWithGrappleTeleport": {
"blockPositions": [
[
3,
12
]
]
}
},
"requires": [],
"exitCondition": {
"leaveWithGrappleTeleport": {
"blockPositions": [
[
3,
12
]
]
}
},
"bypassesDoorShell": "yes",
"flashSuitChecked": true,
"blueSuitChecked": true
},
{
"id": 23,
"link": [
2,
1
],
"name": "Carry Grapple Teleport (Bottom Position)",
"entranceCondition": {
"comeInWithGrappleTeleport": {
"blockPositions": [
[
3,
13
]
]
}
},
"requires": [],
"exitCondition": {
"leaveWithGrappleTeleport": {
"blockPositions": [
[
3,
13
]
]
}
},
"bypassesDoorShell": "yes",
"flashSuitChecked": true,
"blueSuitChecked": true
},
{
"id": 30,
"link": [
2,
1
],
"name": "G-Mode Setup - Get Hit By Sova",
"requires": [
{
"or": [
"canDash",
{
"heatFrames": 140
}
]
},
{
"heatFrames": 1780
},
{
"or": [
{
"ammo": {
"type": "Super",
"count": 1
}
},
{
"heatFrames": 2050
}
]
}
],
"exitCondition": {
"leaveWithGModeSetup": {}
},
"unlocksDoors": [
{
"types": [
"missiles",
"super"
],
"requires": []
},
{
"types": [
"powerbomb"
],
"requires": [
"never"
]
}
],
"flashSuitChecked": true,
"blueSuitChecked": true,
"note": [
"Cross more than half way across the room until a Sova falls from the ceiling then follow it back and forth across the room.",
"Alternatively, to save a lot of Energy, use a Super to knock off the Sova just before that, while it is on the right side of it's thin platform."
]
},
{
"id": 33,
"link": [
2,
1
],
"name": "G-Mode",
"entranceCondition": {
"comeInWithGMode": {
"mode": "any",
"morphed": false
}
},
"requires": [
"h_heatedGModeOpenDifferentDoor"
],
"flashSuitChecked": true,
"blueSuitChecked": true
},
{
"id": 34,
"link": [
2,
1
],
"name": "G-Mode Sova Farm",
"entranceCondition": {
"comeInWithGMode": {
"mode": "any",
"morphed": false
}
},
"requires": [
{
"or": [
"Plasma",
{
"and": [
"Charge",
"Wave"
]
},
{
"ammo": {
"type": "Super",
"count": 1
}
},
{
"ammo": {
"type": "Missile",
"count": 9
}
},
{
"and": [
"canTrickyUseFrozenEnemies",
"canTrickyJump"
]
}
]
},
"h_heatedGModePauseAbuse"
],
"flashSuitChecked": true,
"blueSuitChecked": false,
"note": [
"Lure a Sova to the left door and pause abuse to grab its Energy drop on G-mode exit.",
"It is important to prevent the Dragons from shooting too many fireballs, as they will eventually prevent drops from appearing.",
"Either use a Super to bring the left-most Sova that circles a platform, by knocking it off while it is on the right side of the platform,",
"or lure the left-most Sova that falls into the lava to the right and back to the left.",
"Without a Super, Samus must quickly kill or freeze the Dragons. Only the right 3 Dragons must be killed in order to prevent the drops from being overloaded, but killing more makes it more lenient."
]
},
{
"id": 36,
"link": [
2,
1
],
"name": "Spring Ball Bounce",
"entranceCondition": {
"comeInRunning": {
"speedBooster": "no",
"minTiles": 4
}
},
"requires": [
"canTrickySpringBallBounce",
"canInsaneJump",
"canBeVeryPatient",
{
"heatFrames": 390
}
],
"flashSuitChecked": true,
"blueSuitChecked": true,
"note": [
"Use controlled Spring Ball bounces to cross the whole room while avoiding all enemy damage.",
"There is a significant chance of failure due to bad Squeept RNG."
]
},
{
"id": 24,
"link": [
2,
2
],
"name": "Leave with Runway",
"requires": [],
"exitCondition": {
"leaveWithRunway": {
"length": 4,
"openEnd": 1
}
},
"flashSuitChecked": true,
"blueSuitChecked": true
},
{
"id": 54,
"link": [
2,
2
],
"name": "Leave Spinning (Space Jump)",
"requires": [
"h_heatedRemoteRunwaySpaceJump",
{
"heatFrames": 540
},
{
"or": [
"canTrickyDodgeEnemies",
{
"and": [
{
"heatFrames": 100
},
{
"enemyKill": {
"enemies": [
[
"Dragon"
],
[
"Dragon"
]
],
"excludedWeapons": [
"Bombs"
]
}
}
]
}
]
}
],
"exitCondition": {
"leaveSpinning": {
"remoteRunway": {
"length": 5,
"openEnd": 2
},
"minExtraRunSpeed": "$1.A"
}
},
"flashSuitChecked": true,
"blueSuitChecked": true
},
{
"id": 55,
"link": [
2,
2
],
"name": "Leave With Mockball (Space Jump)",
"requires": [
"h_heatedRemoteRunwaySpaceJump",
{
"heatFrames": 540
},
{
"or": [
"canTrickyDodgeEnemies",
{
"and": [
{
"heatFrames": 100
},
{
"enemyKill": {
"enemies": [
[
"Dragon"
],
[
"Dragon"
]
],
"excludedWeapons": [
"Bombs"
]
}
}
]
}
]
}
],
"exitCondition": {
"leaveWithMockball": {
"remoteRunway": {
"length": 5,
"openEnd": 2
},
"landingRunway": {
"length": 4,
"openEnd": 1
},
"minExtraRunSpeed": "$1.A"
}
},
"flashSuitChecked": true,
"blueSuitChecked": true,
"devNote": [
"FIXME: a 1 -> 2 version of this could be added, to save heat frames."
]
},
{
"id": 56,
"link": [
2,
2
],
"name": "Leave With Spring Ball Bounce (Space Jump)",
"requires": [
"h_heatedRemoteRunwaySpaceJump",
{
"heatFrames": 540
},
{
"or": [
"canTrickyDodgeEnemies",
{
"and": [
{
"heatFrames": 100
},
{
"enemyKill": {
"enemies": [
[
"Dragon"
],
[
"Dragon"
]
],
"excludedWeapons": [
"Bombs"
]
}
}
]
}
]
}
],
"exitCondition": {
"leaveWithSpringBallBounce": {
"remoteRunway": {
"length": 5,
"openEnd": 2
},
"landingRunway": {
"length": 4,
"openEnd": 1
},
"minExtraRunSpeed": "$1.A",
"movementType": "uncontrolled"
}
},
"flashSuitChecked": true,
"blueSuitChecked": true,
"devNote": [
"FIXME: a 1 -> 2 version of this could be added, to save heat frames."
]
},
{
"id": 57,
"link": [
2,
2
],
"name": "Leave With Controlled Spring Ball Bounce",
"requires": [
"h_heatedRemoteRunwayTrickySpringBall",
{
"heatFrames": 600
},
{
"or": [
"canTrickyDodgeEnemies",
{
"and": [
{
"heatFrames": 100
},
{
"enemyKill": {
"enemies": [
[
"Dragon"
],
[
"Dragon"
]
],
"excludedWeapons": [
"Bombs"
]
}
}
]
}
]
}
],
"exitCondition": {
"leaveWithSpringBallBounce": {
"remoteRunway": {
"length": 5,
"openEnd": 2
},
"landingRunway": {
"length": 4,
"openEnd": 1
},
"minExtraRunSpeed": "$1.A",
"movementType": "controlled"
}
},
"flashSuitChecked": true,
"blueSuitChecked": true
},
{
"id": 40,
"link": [
2,
2
],
"name": "Sova Farm",
"requires": [
"canDash",
"h_heatProof",
{
"resetRoom": {
"nodes": [
2
]
}
},
{
"cycleFrames": 720
},
{
"or": [
"SpaceJump",
{
"cycleFrames": 30
}
]
},
{
"or": [
"Wave",
"Spazer",
"Plasma",
{
"and": [
"canFarmWhileShooting",
{
"cycleFrames": 30
}
]
}
]
},
{
"or": [
"canTrickyJump",
{
"cycleFrames": 60
}
]
}
],
"farmCycleDrops": [
{
"enemy": "Sova",
"count": 4
}
],
"flashSuitChecked": true,
"blueSuitChecked": true,
"devNote": "Add canTrickyJump for catching the Sovas on their first cycles."
},
{
"id": 48,
"link": [
2,
2
],
"name": "Sova Farm (Blue Suit)",
"requires": [
"h_heatProof",
{
"haveBlueSuit": {}
},
{
"resetRoom": {
"nodes": [
2
]
}
},
{
"cycleFrames": 1020
}
],
"farmCycleDrops": [
{
"enemy": "Sova",
"count": 3
}
],
"flashSuitChecked": true,
"blueSuitChecked": true
},
{
"id": 41,
"link": [
2,
2
],
"name": "Dragon and Sova Farm",
"requires": [
"canDash",
{
"resetRoom": {
"nodes": [
2
]
}
},
"h_heatProof",
"Plasma",
{
"or": [
{
"and": [
"h_lavaProof",
{
"or": [
{
"and": [
"Morph",
{
"cycleFrames": 930
}
]
},
{
"and": [
"SpaceJump",
{
"cycleFrames": 1100
}
]
},
{
"cycleFrames": 1290
}
]
}
]
},
{
"and": [
"SpaceJump",
{
"cycleFrames": 1230
}
]
},
{
"and": [
"Grapple",
{
"cycleFrames": 1680
}
]
}
]
}
],
"farmCycleDrops": [
{
"enemy": "Sova",
"count": 5
},
{
"enemy": "Dragon",
"count": 4
}
],
"flashSuitChecked": true,
"blueSuitChecked": true
},
{
"id": 25,
"link": [
2,
2
],
"name": "Crystal Flash",
"requires": [
"h_heatedCrystalFlash"
],
"flashSuitChecked": true,
"blueSuitChecked": true
},
{
"id": 49,
"link": [
2,
2
],
"name": "Come in Shinecharging, Crystal Spark",
"entranceCondition": {
"comeInShinecharging": {
"length": 3,
"openEnd": 0
}
},
"requires": [
"h_heatedCrystalSpark"
],
"flashSuitChecked": true,
"blueSuitChecked": true
},
{
"id": 31,
"link": [
2,
2
],
"name": "G-Mode Setup - Get Hit By Sova",
"requires": [
{
"or": [
"canDash",
{
"heatFrames": 140
}
]
},
{
"heatFrames": 1500
},
{
"or": [
{
"ammo": {
"type": "Super",
"count": 1
}
},
{
"heatFrames": 320
}
]
}
],
"exitCondition": {
"leaveWithGModeSetup": {}
},
"flashSuitChecked": true,
"blueSuitChecked": true,
"note": [
"Cross more than half way across the room until a Sova falls from the ceiling.",
"Alternatively, to save Energy, use a Super to knock off the second Sova from the right, while it is on the left side of it's platform."
]
}
],
"notables": [],
"nextStratId": 58,
"nextNotableId": 1
}