Lava Grapple Tunnel
Room ID: 112
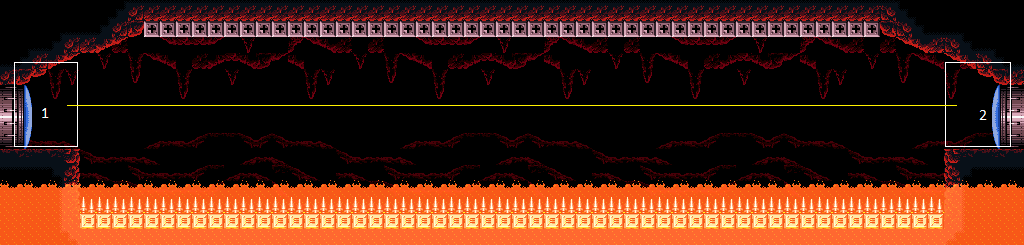
|
Exit condition: "leaveWithRunway": {
"length": 4,
"openEnd": 1
} |
|


Requires: "h_heatProof" Exit condition: "leaveWithGrappleSwing": {
"blocks": [{"position": [9, 2], "note": "Closest Grapple block to the left door"}]
} |
|
Requires: "h_heatedCrystalFlash" |
From: 1
Left Door
To: 1
Left Door
Entrance condition: "comeInShinecharging": {
"length": 3,
"openEnd": 0
}Requires: "h_heatedCrystalSpark" |
From: 1
Left Door
To: 1
Left Door
Entrance condition: "comeInShinecharged": {}Requires: "Gravity",
{"shineChargeFrames": 75},
{"heatFrames": 300},
{"lavaFrames": 10},
{"spikeHits": 1},
"h_spikeSuitSpikeHitLeniency",
"canPatientSpikeSuit",
{"shinespark": {"frames": 4, "excessFrames": 4}} |
From: 1
Left Door
To: 1
Left Door


Entrance condition: "comeInShinecharging": {
"length": 4,
"openEnd": 0
}Requires: "Gravity",
{"heatFrames": 300},
{"lavaFrames": 10},
{"spikeHits": 1},
"h_spikeSuitSpikeHitLeniency",
"canPatientSpikeSuit",
{"shinespark": {"frames": 4, "excessFrames": 4}} |
From: 1
Left Door
To: 1
Left Door
Entrance condition: "comeInShinecharged": {}Requires: "Gravity",
{"shineChargeFrames": 115},
{"heatFrames": 180},
{"lavaFrames": 15},
"h_spikeXModeBlueSuit",
{"shinespark": {"frames": 1}} |
From: 1
Left Door
To: 1
Left Door


Entrance condition: "comeInShinecharging": {
"length": 4,
"openEnd": 0
}Requires: "Gravity",
{"heatFrames": 180},
{"lavaFrames": 15},
"h_spikeXModeBlueSuit",
{"shinespark": {"frames": 1}} |
|


To optimize the Grapple swings for minimal heat damage, 1) hold forward and angle-up the entire time, 2) press down to extend Grapple immediately after each Grapple attachment, 3) release Grapple soon after Samus swings past vertical, 4) re-press Grapple as quickly as possible after release. If there is no runway (or only 1 tile) to gain momentum from the neighboring room, it is faster to begin grappling as quickly as possible, rather than doing a big jump. Requires: "Grapple",
{"heatFrames": 320},
{"or": [
{"noFlashSuit": {}},
{"and": [
"canMidAirMorph",
"canComplexCarryFlashSuit",
{"heatFrames": 130}
]}
]} |
|
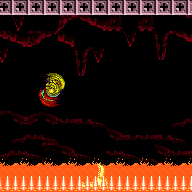
Requires: "SpaceJump",
{"heatFrames": 390},
{"or": [
"canDash",
{"heatFrames": 300}
]} |
|
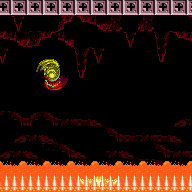
Entrance condition: "comeInRunning": {
"speedBooster": "any",
"minTiles": 1
}Requires: "SpaceJump",
{"heatFrames": 350} |
|
Entrance condition: "comeInRunning": {
"speedBooster": "any",
"minTiles": 2
}Requires: "SpaceJump",
{"heatFrames": 330} |
|
Entrance condition: "comeInRunning": {
"speedBooster": "any",
"minTiles": 3
}Requires: "SpaceJump",
{"heatFrames": 310} |
|
Entrance condition: "comeInRunning": {
"speedBooster": "any",
"minTiles": 4
}Requires: "SpaceJump",
{"heatFrames": 285} |
From: 1
Left Door
To: 2
Right Door
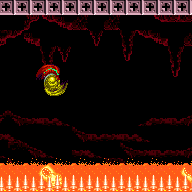

Entrance condition: "comeInRunning": {
"speedBooster": "yes",
"minTiles": 6
}Requires: "h_speedJump", "SpaceJump", {"heatFrames": 250} |
From: 1
Left Door
To: 2
Right Door
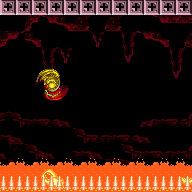
Entrance condition: "comeInRunning": {
"speedBooster": "yes",
"minTiles": 9
}Requires: "h_speedJump", "SpaceJump", {"heatFrames": 225} |
From: 1
Left Door
To: 2
Right Door
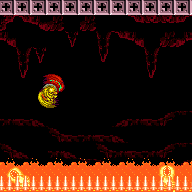
Entrance condition: "comeInRunning": {
"speedBooster": "yes",
"minTiles": 12.4375
}Requires: "h_speedJump", "SpaceJump", {"heatFrames": 195} |
From: 1
Left Door
To: 2
Right Door
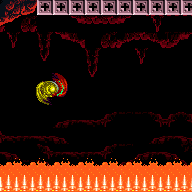
Entrance condition: "comeInRunning": {
"speedBooster": "yes",
"minTiles": 17
}Requires: "h_speedJump", "SpaceJump", {"heatFrames": 175} |
From: 1
Left Door
To: 2
Right Door
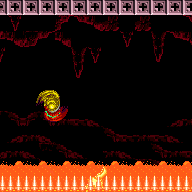
Entrance condition: "comeInRunning": {
"speedBooster": "yes",
"minTiles": 26
}Requires: "h_speedJump", "SpaceJump", {"heatFrames": 145} |
From: 1
Left Door
To: 2
Right Door
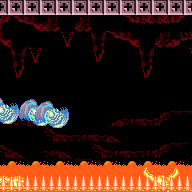
Entrance condition: "comeInRunning": {
"speedBooster": "yes",
"minTiles": 45
}Requires: "h_speedJump", "SpaceJump", {"heatFrames": 120} |
From: 1
Left Door
To: 2
Right Door
Entrance condition: "comeInRunning": {
"speedBooster": "any",
"minTiles": 2
}Requires: "canPreciseSpaceJump", {"heatFrames": 330} Exit condition: "leaveWithMockball": {
"remoteRunway": {
"length": 5,
"openEnd": 1
},
"landingRunway": {
"length": 4,
"openEnd": 1
}
}Unlocks doors: {"types": ["super"], "requires": []},
{"types": ["missiles", "powerbomb"], "requires": ["never"]}Dev note: FIXME: This is a specific length needed for the Ice Beam Gate Room mockball; when the schema allows it, represent the possible runways more generally. |
From: 1
Left Door
To: 2
Right Door
Entrance condition: "comeInSpinning": {
"speedBooster": "any",
"unusableTiles": 0,
"minExtraRunSpeed": "$1.A"
}Requires: "canPreciseSpaceJump", {"heatFrames": 330} Exit condition: "leaveWithMockball": {
"remoteRunway": {
"length": 5,
"openEnd": 1
},
"landingRunway": {
"length": 4,
"openEnd": 1
}
}Unlocks doors: {"types": ["super"], "requires": []},
{"types": ["missiles", "powerbomb"], "requires": ["never"]}Dev note: FIXME: This is a specific length needed for the Ice Beam Gate Room mockball; when the schema allows it, represent the possible runways more generally. |
|
Requires: "canDash", {"heatFrames": 820}, {"lavaFrames": 150}, {"spikeHits": 7} |
|


Damage boosts can be used to save energy - delay the damage boost from the spikes slightly in order to rise above the lava before moving. Requires: "canDash", {"notable": "Suitless Damage Boosts"}, {"heatFrames": 460}, {"lavaFrames": 60}, {"spikeHits": 3}, "canUseIFrames", "canHorizontalDamageBoost" |
From: 1
Left Door
To: 2
Right Door

The presence of the Yapping Maws causes Samus to immediately lose i-frames while moving; so the damage boosts must be chained directly from one to the next. This can be done by holding jump the entire time, and releasing right at the end of each boost, to fall straight down for the next boost, facing left the whole time. At the end of the final boost, hold left to boost downward, wait for knockback to expire, then press right to do a buffered turnaround spin jump out of the lava. Requires: {"haveBlueSuit": {}},
{"noFlashSuit": {}},
"Gravity",
{"tech": "canHorizontalDamageBoost"},
"canBlueSuitSpikeJump",
{"heatFrames": 320},
{"spikeHits": 5},
{"lavaFrames": 40} |
From: 1
Left Door
To: 2
Right Door

The presence of the Yapping Maws causes Samus to immediately lose i-frames while moving; so the damage boosts must be chained directly from one to the next, with the exception of the first. Do the first damage boost from far enough left that Samus can land without bringing the first Yapping Maw on camera; use i-frames to do a spin jump, then chain 4 more damage boosts to cross the room. This can be done by holding jump the entire time, and releasing right at the end of each boost, to fall straight down for the next boost, facing left the whole time. At the end of the final boost, hold left to boost downward, wait for knockback to expire, then press right to do a buffered turnaround spin jump out of the lava. Requires: {"haveBlueSuit": {}},
{"noFlashSuit": {}},
{"notable": "Blue Suit Rapid Suitless Damage Boosts"},
"canBlueSuitSpikeJump",
{"tech": "canHorizontalDamageBoost"},
{"heatFrames": 425},
{"spikeHits": 6},
{"lavaFrames": 70} |
|


With each jump, turn and hold left just before landing on the spikes, to get knocked back and down to the right, without damage boosting. Then turnaround spin jump to the right for the next jump. Jump can be held the entire time, to buffer the jumps. This method can be used while simultaneously carrying a blue suit and flash suit. Requires: {"haveBlueSuit": {}},
"canBlueSuitSpikeJump",
"h_complexToCarryFlashSuit",
{"heatFrames": 740},
{"spikeHits": 6},
{"lavaFrames": 110} |
|
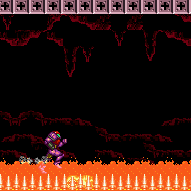

Speedbooster significantly reduces your jump speed in lava and should be turned off. Requires: "canDash", "Gravity", {"disableEquipment": "SpeedBooster"}, {"heatFrames": 330}, {"lavaFrames": 90}, {"spikeHits": 2}, {"or": [ "canUseIFrames", {"and": [ {"spikeHits": 2}, {"heatFrames": 50} ]} ]}, {"or": [ "canHorizontalDamageBoost", {"and": [ {"heatFrames": 20}, {"lavaFrames": 20} ]} ]} |
From: 1
Left Door
To: 2
Right Door
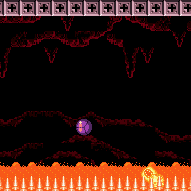

Entrance condition: "comeInRunning": {
"speedBooster": "no",
"minTiles": 4
}Requires: "Gravity", "canCarefulJump", "canSpringBallBounce", {"spikeHits": 2}, {"heatFrames": 350}, {"lavaFrames": 20} |
From: 1
Left Door
To: 2
Right Door
Uses a runway of at least 14 tiles in the adjacent room. Disable SpeedBooster after jumping so that the lava will not take away all of Samus' momentum. Entrance condition: "comeInRunning": {
"speedBooster": "yes",
"minTiles": 14
}Requires: "Gravity", "h_speedJump", {"disableEquipment": "SpeedBooster"}, "canSpringBallBounce", "canTrickyJump", {"spikeHits": 1}, {"heatFrames": 240}, {"lavaFrames": 10} |
From: 1
Left Door
To: 2
Right Door
It may help to perform the first jump with HiJump disabled. Entrance condition: "comeInRunning": {
"speedBooster": "no",
"minTiles": 4
}Requires: "canCarefulJump", "HiJump", {"disableEquipment": "HiJump"}, "canSpringBallBounce", {"spikeHits": 3}, {"heatFrames": 350}, {"lavaFrames": 32} |
From: 1
Left Door
To: 2
Right Door


Uses a runway of at least 8 tiles in the adjacent room. It will help to perform the first jump with HiJump disabled. Disable SpeedBooster before Samus reaches the lava. Entrance condition: "comeInRunning": {
"speedBooster": "yes",
"minTiles": 8
}Requires: "canTrickyJump", "h_speedJump", "HiJump", {"disableEquipment": "HiJump"}, {"disableEquipment": "SpeedBooster"}, "canSpringBallBounce", {"spikeHits": 2}, {"heatFrames": 311}, {"lavaFrames": 22} |
From: 1
Left Door
To: 2
Right Door


Uses a runway of at least 21 tiles in the adjacent room. It will help to perform the first jump with HiJump disabled. Disable SpeedBooster before Samus reaches the lava. Entrance condition: "comeInRunning": {
"speedBooster": "yes",
"minTiles": 21
}Requires: "h_speedJump", "HiJump", {"disableEquipment": "HiJump"}, {"disableEquipment": "SpeedBooster"}, "canSpringBallBounce", "canTrickyJump", {"spikeHits": 1}, {"heatFrames": 200}, {"lavaFrames": 11} Dev note: SpringFling can be used to extend the last SpringBall bounce so that runway can be shortened, but it mostly inflates the number of strats. |
|


Entrance condition: "comeInWithSpark": {}Requires: {"shinespark": {"frames": 80, "excessFrames": 4}},
{"heatFrames": 210} |
|
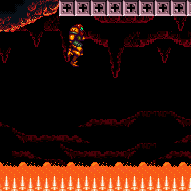

Entrance condition: "comeInShinecharging": {
"length": 3,
"openEnd": 0
}Requires: {"or": [
{"and": [
"canHorizontalShinespark",
{"shinespark": {"frames": 76, "excessFrames": 4}},
{"heatFrames": 210}
]},
{"and": [
"canHorizontalMidairShinespark",
{"shinespark": {"frames": 67, "excessFrames": 4}},
{"heatFrames": 300}
]}
]} |
From: 1
Left Door
To: 2
Right Door
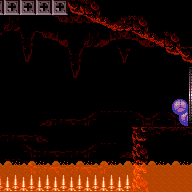

Entrance condition: "comeInGettingBlueSpeed": {
"length": 3,
"openEnd": 1,
"minExtraRunSpeed": "$1.A"
}Requires: "canBlueSpaceJump", "canChainTemporaryBlue", {"heatFrames": 330} Exit condition: "leaveWithTemporaryBlue": {}Unlocks doors: {"types": ["super"], "requires": []},
{
"types": ["missiles"],
"requires": [{"heatFrames": 90}]
},
{
"types": ["powerbomb"],
"requires": [{"heatFrames": 90}]
}Dev note: The minimum speed $1.A is arbitrary; lower speeds could work with larger heatFrames. FIXME: set up a mechanism to automate heat frames required in cases like this. |
From: 1
Left Door
To: 2
Right Door
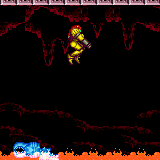

While crossing the Spiky Lava, land on frozen Yapping Maws to reduce the number of spike hits needed. Damage boost towards then freeze the Leftmost enemy as it extends. Morph and unmorph while above the middle Yapping Maw to land on it just above the lava line. Ignore the rightmost Yapping Maw. Delay the damage boost from the spikes slightly in order to rise above the lava before moving. Requires: {"notable": "Frozen Maw Platforms"},
"canDash",
"canResetFallSpeed",
"canTrickyUseFrozenEnemies",
"canTrickyJump",
{"or": [
{"and": [
{"notable": "Suitless Damage Boosts"},
"canHorizontalDamageBoost"
]},
{"and": [
{"spikeHits": 2},
{"lavaFrames": 30},
{"heatFrames": 240}
]}
]},
"canUseIFrames",
{"spikeHits": 2},
{"lavaFrames": 35},
{"heatFrames": 520},
"h_complexToCarryFlashSuit" |
From: 1
Left Door
To: 2
Right Door
Entrance condition: "comeInShinecharged": {}Requires: "canUseFlashSuitInitialSpark", "Gravity", {"shineChargeFrames": 75}, {"heatFrames": 425}, {"lavaFrames": 10}, {"spikeHits": 1}, "h_spikeSuitSpikeHitLeniency", "canPatientSpikeSuit", {"shinespark": {"frames": 75, "excessFrames": 3}} |
From: 1
Left Door
To: 2
Right Door


Entrance condition: "comeInShinecharging": {
"length": 4,
"openEnd": 0
}Requires: "canUseFlashSuitInitialSpark", "Gravity", {"heatFrames": 425}, {"lavaFrames": 10}, {"spikeHits": 1}, "h_spikeSuitSpikeHitLeniency", "canPatientSpikeSuit", {"shinespark": {"frames": 75, "excessFrames": 3}} |
|
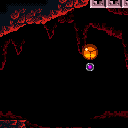

Samus can ceiling bomb jump up gentle slopes. Going down gentle slopes is also possible but harder, instead an unmorph to reset fall speed is recommended here. Requires: "h_heatProof", "canLongCeilingBombJump", "canResetFallSpeed" |
|
Entrance condition: "comeInWithGMode": {
"mode": "any",
"morphed": false
}Requires: "SpaceJump", "h_heatedGModeOpenDifferentDoor" |
|
Entrance condition: "comeInWithGMode": {
"mode": "any",
"morphed": false
}Requires: "canDash", {"or": [ {"and": [ {"lavaFrames": 150}, {"spikeHits": 7} ]}, {"and": [ {"notable": "Suitless Damage Boosts"}, {"lavaFrames": 80}, {"spikeHits": 3}, "canUseIFrames", "canHorizontalDamageBoost" ]}, {"and": [ "Gravity", {"disableEquipment": "SpeedBooster"}, {"lavaFrames": 100}, {"spikeHits": 2}, {"or": [ "canUseIFrames", "canHorizontalDamageBoost" ]} ]}, {"and": [ {"notable": "Frozen Maw Platforms"}, "canResetFallSpeed", "canTrickyUseFrozenEnemies", "canTrickyJump", "canHorizontalDamageBoost", "canUseIFrames", {"spikeHits": 2}, {"lavaFrames": 15} ]} ]}, "h_heatedGModeOpenDifferentDoor" Dev note: FIXME: Grapple could maybe be used to skip some damage by partially swinging across the room. Blue suit damage boost options could also be added. |
From: 1
Left Door
To: 2
Right Door
Samus can ceiling bomb jump up gentle slopes. Going down gentle slopes is also possible but harder, instead an unmorph to reset fall speed is recommended here. Entrance condition: "comeInWithGMode": {
"mode": "any",
"morphed": true
}Requires: "h_artificialMorphLongCeilingBombJump", "h_artificialMorphResetFallSpeed", "h_heatedGModeOpenDifferentDoor" |
|
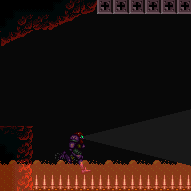

Enter X-mode in the spikes near the door. Release forward to make Samus move forward at a rate of 1 pixel per frame. After passing the third Yapping Maw, when Samus appears to move forward, this is the indication that the camera scroll has locked against the opposite side of the room, which is a good cue for when to stop, by holding forward again. To avoid taking another spike hit, press jump, then release dash to exit X-mode while jumping. Requires: "Gravity", "canXMode", "h_XModeSpikeHit", {"heatFrames": 200}, {"lavaFrames": 15} |
|
Pause abuse the spike and lava damage to cross the room while losing minimal Energy. Requires: "canDash", {"noFlashSuit": {}}, {"notable": "Pause Abuse Damage Boosts"}, {"or": [ {"and": [ {"disableEquipment": "SpeedBooster"}, "Gravity" ]}, {"and": [ "canInsaneJump", {"notable": "Suitless Damage Boosts"} ]} ]}, "canHorizontalDamageBoost", "canPauseAbuse", {"resourceAvailable": [ {"type": "RegularEnergy", "count": 99}, {"type": "ReserveEnergy", "count": 100} ]}, {"resourceAtMost": [{"type": "RegularEnergy", "count": 1}]}, {"lavaFrames": 30}, {"heatFrames": 340} Dev note: Energy ineffeciency is necessary and is represented by extra heatFrames. |
|


To optimize the Grapple swings for minimal heat damage, 1) hold forward and angle-up the entire time, 2) press down to extend Grapple immediately after each Grapple attachment, 3) release Grapple soon after Samus swings past vertical, 4) re-press Grapple as quickly as possible after release. If there is no runway (or only 1 tile) to gain momentum from the neighboring room, it is faster to begin grappling as quickly as possible, rather than doing a big jump. Requires: "Grapple",
{"heatFrames": 320},
{"or": [
{"noFlashSuit": {}},
{"and": [
"canMidAirMorph",
"canComplexCarryFlashSuit",
{"heatFrames": 130}
]}
]} |
|
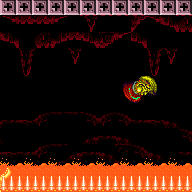

Requires: "SpaceJump",
{"heatFrames": 390},
{"or": [
"canDash",
{"heatFrames": 300}
]} |
|
Entrance condition: "comeInRunning": {
"speedBooster": "any",
"minTiles": 1
}Requires: "SpaceJump",
{"heatFrames": 350} |
|
Entrance condition: "comeInRunning": {
"speedBooster": "any",
"minTiles": 2
}Requires: "SpaceJump",
{"heatFrames": 330} |
|
Entrance condition: "comeInRunning": {
"speedBooster": "any",
"minTiles": 3
}Requires: "SpaceJump",
{"heatFrames": 310} |
|
Entrance condition: "comeInRunning": {
"speedBooster": "any",
"minTiles": 4
}Requires: "SpaceJump",
{"heatFrames": 285} |
From: 2
Right Door
To: 1
Left Door
Entrance condition: "comeInRunning": {
"speedBooster": "yes",
"minTiles": 6
}Requires: "h_speedJump", "SpaceJump", {"heatFrames": 250} |
From: 2
Right Door
To: 1
Left Door
Entrance condition: "comeInRunning": {
"speedBooster": "yes",
"minTiles": 9
}Requires: "h_speedJump", "SpaceJump", {"heatFrames": 225} |
From: 2
Right Door
To: 1
Left Door
Entrance condition: "comeInRunning": {
"speedBooster": "yes",
"minTiles": 12.4375
}Requires: "h_speedJump", "SpaceJump", {"heatFrames": 195} |
From: 2
Right Door
To: 1
Left Door
Entrance condition: "comeInRunning": {
"speedBooster": "yes",
"minTiles": 17
}Requires: "h_speedJump", "SpaceJump", {"heatFrames": 175} |
From: 2
Right Door
To: 1
Left Door
Entrance condition: "comeInRunning": {
"speedBooster": "yes",
"minTiles": 26
}Requires: "h_speedJump", "SpaceJump", {"heatFrames": 145} |
From: 2
Right Door
To: 1
Left Door
Entrance condition: "comeInRunning": {
"speedBooster": "yes",
"minTiles": 45
}Requires: "h_speedJump", "SpaceJump", {"heatFrames": 120} |
|
Requires: "canDash", {"heatFrames": 820}, {"lavaFrames": 150}, {"spikeHits": 7} |
From: 2
Right Door
To: 1
Left Door
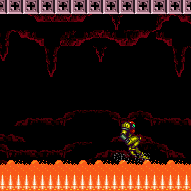

Damage boosts can be used to save energy - delay the damage boost from the spikes slightly in order to rise above the lava before moving. Requires: "canDash", {"notable": "Suitless Damage Boosts"}, {"heatFrames": 460}, {"lavaFrames": 60}, {"spikeHits": 3}, "canUseIFrames", "canHorizontalDamageBoost" |
From: 2
Right Door
To: 1
Left Door

The presence of the Yapping Maws causes Samus to immediately lose i-frames while moving; so the damage boosts must be chained directly from one to the next. This can be done by holding jump the entire time, and releasing left at the end of each boost to fall straight down for next boost, facing right the whole time. At the end of the final boost, Samus should be out of range of the Yapping Maws, and so should have i-frames to jump normally out of the lava. Requires: {"haveBlueSuit": {}},
{"noFlashSuit": {}},
"Gravity",
{"tech": "canHorizontalDamageBoost"},
"canBlueSuitSpikeJump",
{"heatFrames": 320},
{"spikeHits": 4},
{"or": [
{"spikeHits": 1},
"canInsaneJump"
]},
{"lavaFrames": 30} |
From: 2
Right Door
To: 1
Left Door


The presence of the Yapping Maws causes Samus to immediately lose i-frames while moving; so the damage boosts must be chained directly from one to the next. This can be done by holding jump the entire time, and releasing left at the end of each boost, to fall straight down for the next boost, facing right the whole time. At the end of the final boost, Samus should be out of range of the Yapping Maws, and so should have i-frames to jump normally out of the lava. Requires: {"haveBlueSuit": {}},
{"noFlashSuit": {}},
{"notable": "Blue Suit Rapid Suitless Damage Boosts"},
"canBlueSuitSpikeJump",
{"tech": "canHorizontalDamageBoost"},
{"heatFrames": 340},
{"spikeHits": 6},
{"lavaFrames": 70} |
|
With each jump, turn and hold right just before landing on the spikes, to get knocked back and down to the left, without damage boosting. Then turnaround spin jump to the left for the next jump. Jump can be held the entire time, to buffer the jumps. This method can be used while simultaneously carrying a blue suit and flash suit. Requires: {"haveBlueSuit": {}},
"canBlueSuitSpikeJump",
"h_complexToCarryFlashSuit",
{"heatFrames": 740},
{"spikeHits": 6},
{"lavaFrames": 110} |
|
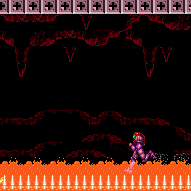

Speedbooster significantly reduces your jump speed in lava and should be turned off. Requires: "canDash", "Gravity", {"disableEquipment": "SpeedBooster"}, {"heatFrames": 330}, {"lavaFrames": 90}, {"spikeHits": 2}, {"or": [ "canUseIFrames", {"and": [ {"spikeHits": 2}, {"heatFrames": 50} ]} ]}, {"or": [ "canHorizontalDamageBoost", {"and": [ {"heatFrames": 20}, {"lavaFrames": 20} ]} ]} |
From: 2
Right Door
To: 1
Left Door


Entrance condition: "comeInRunning": {
"speedBooster": "no",
"minTiles": 4
}Requires: "Gravity", "canSpringBallBounce", {"spikeHits": 2}, {"heatFrames": 350}, {"lavaFrames": 20} |
From: 2
Right Door
To: 1
Left Door
Uses a runway of at least 14 tiles in the adjacent room. Disable SpeedBooster after jumping so that the lava will not take away all of Samus' momentum. Entrance condition: "comeInRunning": {
"speedBooster": "yes",
"minTiles": 14
}Requires: "Gravity", "h_speedJump", {"disableEquipment": "SpeedBooster"}, "canSpringBallBounce", "canTrickyJump", {"spikeHits": 1}, {"heatFrames": 240}, {"lavaFrames": 10} |
From: 2
Right Door
To: 1
Left Door
It may help to perform the first jump with HiJump disabled. Entrance condition: "comeInRunning": {
"speedBooster": "no",
"minTiles": 4
}Requires: "canCarefulJump", "HiJump", {"disableEquipment": "HiJump"}, "canSpringBallBounce", {"spikeHits": 3}, {"heatFrames": 350}, {"lavaFrames": 32} |
From: 2
Right Door
To: 1
Left Door


Uses a runway of at least 8 tiles in the adjacent room. It will help to perform the first jump with HiJump disabled. Disable SpeedBooster before Samus reaches the lava. Entrance condition: "comeInRunning": {
"speedBooster": "yes",
"minTiles": 8
}Requires: "h_speedJump", "canTrickyJump", "HiJump", {"disableEquipment": "HiJump"}, {"disableEquipment": "SpeedBooster"}, "canSpringBallBounce", {"spikeHits": 2}, {"heatFrames": 311}, {"lavaFrames": 22} |
From: 2
Right Door
To: 1
Left Door


Uses a runway of at least 21 tiles in the adjacent room. It will help to perform the first jump with HiJump disabled. Disable SpeedBooster before Samus reaches the lava. Entrance condition: "comeInRunning": {
"speedBooster": "yes",
"minTiles": 21
}Requires: "h_speedJump", "HiJump", {"disableEquipment": "HiJump"}, {"disableEquipment": "SpeedBooster"}, "canSpringBallBounce", "canTrickyJump", {"spikeHits": 1}, {"heatFrames": 200}, {"lavaFrames": 11} Dev note: SpringFling can be used to extend the last SpringBall bounce so that runway can be shortened, but it mostly inflates the number of strats. |
|


Entrance condition: "comeInWithSpark": {}Requires: {"shinespark": {"frames": 80, "excessFrames": 4}},
{"heatFrames": 210} |
|


Entrance condition: "comeInShinecharging": {
"length": 3,
"openEnd": 0
}Requires: {"or": [
{"and": [
"canHorizontalShinespark",
{"shinespark": {"frames": 76, "excessFrames": 4}},
{"heatFrames": 210}
]},
{"and": [
"canHorizontalMidairShinespark",
{"shinespark": {"frames": 67, "excessFrames": 4}},
{"heatFrames": 300}
]}
]} |
From: 2
Right Door
To: 1
Left Door
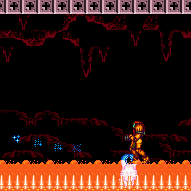

While crossing the Spiky Lava, land on frozen Yapping Maws to reduce the number of spike hits needed. Morph and unmorph while above the rightmost Yapping Maw to land on it just above the lava line. Ignore the second Yapping Maw. Freeze the Leftmost enemy as it extends. Delay the damage boost from the spikes slightly in order to rise above the lava before moving. Requires: "canDash", {"notable": "Frozen Maw Platforms"}, "canResetFallSpeed", "canTrickyUseFrozenEnemies", "canTrickyJump", {"or": [ {"and": [ {"notable": "Suitless Damage Boosts"}, "canHorizontalDamageBoost" ]}, {"and": [ {"spikeHits": 1}, {"lavaFrames": 20}, {"heatFrames": 240} ]} ]}, "canUseIFrames", {"spikeHits": 2}, {"lavaFrames": 35}, {"heatFrames": 520}, "h_complexToCarryFlashSuit" |
From: 2
Right Door
To: 1
Left Door
Entrance condition: "comeInGettingBlueSpeed": {
"length": 3,
"openEnd": 1,
"minExtraRunSpeed": "$1.A"
}Requires: "canBlueSpaceJump", "canChainTemporaryBlue", {"heatFrames": 330} Exit condition: "leaveWithTemporaryBlue": {}Unlocks doors: {"types": ["super"], "requires": []},
{
"types": ["missiles"],
"requires": [{"heatFrames": 90}]
},
{
"types": ["powerbomb"],
"requires": [{"heatFrames": 90}]
}Dev note: The minimum speed $1.A is arbitrary; lower speeds could work with larger heatFrames. FIXME: set up a mechanism to automate heat frames required in cases like this. |
From: 2
Right Door
To: 1
Left Door
Entrance condition: "comeInShinecharged": {}Requires: "canUseFlashSuitInitialSpark", "Gravity", {"shineChargeFrames": 75}, {"heatFrames": 425}, {"lavaFrames": 10}, {"spikeHits": 1}, "h_spikeSuitSpikeHitLeniency", "canPatientSpikeSuit", {"shinespark": {"frames": 75, "excessFrames": 3}} |
From: 2
Right Door
To: 1
Left Door


Entrance condition: "comeInShinecharging": {
"length": 4,
"openEnd": 0
}Requires: "canUseFlashSuitInitialSpark", "Gravity", {"heatFrames": 425}, {"lavaFrames": 10}, {"spikeHits": 1}, "h_spikeSuitSpikeHitLeniency", "canPatientSpikeSuit", {"shinespark": {"frames": 75, "excessFrames": 3}} |
|


Entrance condition: "comeInWithGrappleTeleport": {
"blockPositions": [[5, 3], [7, 2]]
}Requires: {"heatFrames": 45} |
|
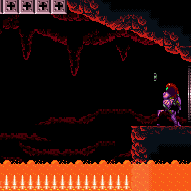

Entrance condition: "comeInWithGrappleTeleport": {
"blockPositions": [[3, 12], [3, 13]]
}Bypasses door shell: true |
From: 2
Right Door
To: 1
Left Door
Entrance condition: "comeInWithGrappleTeleport": {
"blockPositions": [[3, 12]]
}Exit condition: "leaveWithGrappleTeleport": {
"blockPositions": [[3, 12]]
}Bypasses door shell: true |
From: 2
Right Door
To: 1
Left Door
Entrance condition: "comeInWithGrappleTeleport": {
"blockPositions": [[3, 13]]
}Exit condition: "leaveWithGrappleTeleport": {
"blockPositions": [[3, 13]]
}Bypasses door shell: true |
|


Samus can ceiling bomb jump up gentle slopes. Going down gentle slopes is also possible but harder, instead an unmorph to reset fall speed is recommended here. Requires: "h_heatProof", "canLongCeilingBombJump", "canResetFallSpeed" |
|
Entrance condition: "comeInWithGMode": {
"mode": "any",
"morphed": false
}Requires: "SpaceJump", "h_heatedGModeOpenDifferentDoor" |
|
Entrance condition: "comeInWithGMode": {
"mode": "any",
"morphed": false
}Requires: "canDash", {"or": [ {"and": [ {"lavaFrames": 150}, {"spikeHits": 7} ]}, {"and": [ {"notable": "Suitless Damage Boosts"}, {"lavaFrames": 80}, {"spikeHits": 3}, "canUseIFrames", "canHorizontalDamageBoost" ]}, {"and": [ "Gravity", {"disableEquipment": "SpeedBooster"}, {"lavaFrames": 100}, {"spikeHits": 2}, {"or": [ "canUseIFrames", "canHorizontalDamageBoost" ]} ]}, {"and": [ {"notable": "Frozen Maw Platforms"}, "canResetFallSpeed", "canTrickyUseFrozenEnemies", "canTrickyJump", "canHorizontalDamageBoost", "canUseIFrames", {"spikeHits": 2}, {"lavaFrames": 15} ]} ]}, "h_heatedGModeOpenDifferentDoor" Dev note: FIXME: Grapple could maybe be used to skip some damage by partially swinging across the room. |
From: 2
Right Door
To: 1
Left Door
Samus can ceiling bomb jump up gentle slopes. Going down gentle slopes is also possible but harder, instead an unmorph to reset fall speed is recommended here. Entrance condition: "comeInWithGMode": {
"mode": "any",
"morphed": true
}Requires: "h_artificialMorphLongCeilingBombJump", "h_artificialMorphResetFallSpeed", "h_heatedGModeOpenDifferentDoor" |
|
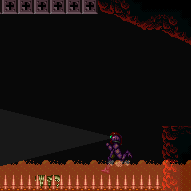

Enter X-mode in the spikes near the door. Release forward to make Samus move forward at a rate of 1 pixel per frame. After passing the third Yapping Maw, when Samus appears to move forward, this is the indication that the camera scroll has locked against the opposite side of the room, which is a good cue for when to stop, by holding forward again. To avoid taking another spike hit, press jump, then release dash to exit X-mode while jumping. Requires: "Gravity", "canXMode", "h_XModeSpikeHit", {"heatFrames": 200}, {"lavaFrames": 15} |
|
Pause abuse the spike and lava damage to cross the room while losing minimal Energy. Requires: "canDash", {"noFlashSuit": {}}, {"notable": "Pause Abuse Damage Boosts"}, {"or": [ {"and": [ {"disableEquipment": "SpeedBooster"}, "Gravity" ]}, {"and": [ "canInsaneJump", {"notable": "Suitless Damage Boosts"} ]} ]}, "canHorizontalDamageBoost", "canPauseAbuse", {"resourceAvailable": [ {"type": "RegularEnergy", "count": 99}, {"type": "ReserveEnergy", "count": 100} ]}, {"resourceAtMost": [{"type": "RegularEnergy", "count": 1}]}, {"lavaFrames": 30}, {"heatFrames": 340} Dev note: Energy ineffeciency is necessary and is represented by extra heatFrames. |
|
Exit condition: "leaveWithRunway": {
"length": 4,
"openEnd": 1
} |
|
Requires: "h_heatedCrystalFlash" |
From: 2
Right Door
To: 2
Right Door
Entrance condition: "comeInShinecharging": {
"length": 3,
"openEnd": 0
}Requires: "h_heatedCrystalSpark" |
|


Requires: "h_heatProof" Exit condition: "leaveWithGrappleSwing": {
"blocks": [{"position": [6, 2], "note": "Closest Grapple block to the right door"}]
} |
From: 2
Right Door
To: 2
Right Door
Entrance condition: "comeInShinecharged": {}Requires: "Gravity",
{"shineChargeFrames": 75},
{"heatFrames": 300},
{"lavaFrames": 10},
{"spikeHits": 1},
"h_spikeSuitSpikeHitLeniency",
"canPatientSpikeSuit",
{"shinespark": {"frames": 4, "excessFrames": 4}} |
From: 2
Right Door
To: 2
Right Door
Entrance condition: "comeInShinecharging": {
"length": 4,
"openEnd": 0
}Requires: "Gravity",
{"heatFrames": 300},
{"lavaFrames": 10},
{"spikeHits": 1},
"h_spikeSuitSpikeHitLeniency",
"canPatientSpikeSuit",
{"shinespark": {"frames": 4, "excessFrames": 4}} |
From: 2
Right Door
To: 2
Right Door
Entrance condition: "comeInShinecharged": {}Requires: "Gravity",
{"shineChargeFrames": 115},
{"heatFrames": 180},
{"lavaFrames": 15},
"h_spikeXModeBlueSuit",
{"shinespark": {"frames": 1}} |
From: 2
Right Door
To: 2
Right Door
Entrance condition: "comeInShinecharging": {
"length": 4,
"openEnd": 0
}Requires: "Gravity",
{"heatFrames": 180},
{"lavaFrames": 15},
"h_spikeXModeBlueSuit",
{"shinespark": {"frames": 1}} |