Lower Norfair Elevator
Room ID: 309
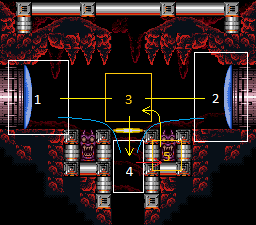
|
Exit condition: "leaveWithRunway": {
"length": 13,
"openEnd": 0
} |
|
Requires: {"doorUnlockedAtNode": 2}Exit condition: "leaveWithRunway": {
"length": 14,
"openEnd": 0
}Unlocks doors: {
"nodeId": 2,
"types": ["missiles"],
"requires": [{"heatFrames": 50}]
},
{"nodeId": 2, "types": ["super"], "requires": []},
{
"nodeId": 2,
"types": ["powerbomb"],
"requires": [{"heatFrames": 110}]
} |
|


Requires: "h_heatedCrystalFlash" |
From: 1
Left Door
To: 1
Left Door
Entrance condition: "comeInShinecharging": {
"length": 12,
"openEnd": 0
}Requires: "h_heatedCrystalSpark" |
|
Requires: {"heatFrames": 55},
{"or": [
"canDash",
{"heatFrames": 20}
]} |
|
Requires: "canDash", {"heatFrames": 10} Exit condition: "leaveWithRunway": {
"length": 13,
"openEnd": 0
}Unlocks doors: {
"types": ["missiles"],
"requires": [{"heatFrames": 50}]
},
{"types": ["super"], "requires": []},
{
"types": ["powerbomb"],
"requires": [{"heatFrames": 110}]
}Dev note: The 10 heat frames are for moonwalking back against the door on entry. FIXME: heat frames to unlock the door could be reduced. |
|
Requires: "canDash", {"doorUnlockedAtNode": 1}, {"heatFrames": 65} Exit condition: "leaveWithRunway": {
"length": 14,
"openEnd": 0
}Unlocks doors: {
"nodeId": 2,
"types": ["missiles"],
"requires": [{"heatFrames": 50}]
},
{"nodeId": 2, "types": ["super"], "requires": []},
{
"nodeId": 2,
"types": ["powerbomb"],
"requires": [{"heatFrames": 110}]
}Dev note: The 65 heat frames are for shooting open the door and moonwalking back into the doorway. FIXME: heat frames to unlock the door could be reduced. |
|
Entrance condition: "comeInShinecharged": {}Requires: {"shineChargeFrames": 55},
{"heatFrames": 55}Exit condition: "leaveShinecharged": {}Unlocks doors: {"types": ["super"], "requires": []},
{"types": ["missiles", "powerbomb"], "requires": ["never"]} |
From: 1
Left Door
To: 2
Right Door
Entrance condition: "comeInShinecharging": {
"length": 13,
"openEnd": 0
}Requires: {"heatFrames": 20},
{"shineChargeFrames": 20}Exit condition: "leaveShinecharged": {}Unlocks doors: {"types": ["super"], "requires": []},
{"types": ["missiles", "powerbomb"], "requires": ["never"]} |
From: 1
Left Door
To: 2
Right Door
Entrance condition: "comeInShinecharged": {}Requires: {"shineChargeFrames": 10},
{"shinespark": {"frames": 21, "excessFrames": 0}},
{"heatFrames": 55}Exit condition: "leaveWithSpark": {}Unlocks doors: {"types": ["super"], "requires": []},
{"types": ["missiles", "powerbomb"], "requires": ["never"]} |
From: 1
Left Door
To: 2
Right Door
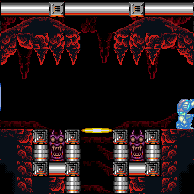

Entrance condition: "comeInShinecharging": {
"length": 11,
"openEnd": 1
}Requires: {"heatFrames": 120},
{"or": [
"canXRayCancelShinecharge",
{"heatFrames": 160}
]}Exit condition: "leaveWithTemporaryBlue": {}Unlocks doors: {"types": ["super", "powerbomb"], "requires": []},
{
"types": ["missiles"],
"requires": [{"heatFrames": 50}]
} |
|
Entrance condition: "comeInWithGMode": {
"mode": "any",
"morphed": false
}Requires: "h_heatedGModeOpenDifferentDoor" |
|
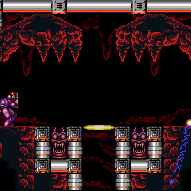

Entrance condition: "comeInWithGrappleTeleport": {
"blockPositions": [[12, 12], [12, 13]]
}Bypasses door shell: true |
From: 1
Left Door
To: 2
Right Door
Entrance condition: "comeInWithGrappleTeleport": {
"blockPositions": [[12, 12]]
}Exit condition: "leaveWithGrappleTeleport": {
"blockPositions": [[12, 12]]
}Bypasses door shell: true |
From: 1
Left Door
To: 2
Right Door
Entrance condition: "comeInWithGrappleTeleport": {
"blockPositions": [[12, 13]]
}Exit condition: "leaveWithGrappleTeleport": {
"blockPositions": [[12, 13]]
}Bypasses door shell: true |
From: 1
Left Door
To: 2
Right Door
Entrance condition: "comeInWithStoredFallSpeed": {
"fallSpeedInTiles": 1
}Requires: {"heatFrames": 55},
{"or": [
"canDash",
{"heatFrames": 20}
]}Exit condition: "leaveWithStoredFallSpeed": {
"fallSpeedInTiles": 1
}Unlocks doors: {"types": ["missiles", "super"], "requires": []},
{"types": ["powerbomb"], "requires": ["never"]} |
From: 1
Left Door
To: 2
Right Door
Entrance condition: "comeInWithStoredFallSpeed": {
"fallSpeedInTiles": 2
}Requires: {"heatFrames": 55},
{"or": [
"canDash",
{"heatFrames": 20}
]}Exit condition: "leaveWithStoredFallSpeed": {
"fallSpeedInTiles": 2
}Unlocks doors: {"types": ["missiles", "super"], "requires": []},
{"types": ["powerbomb"], "requires": ["never"]} |
|
Requires: {"heatFrames": 30},
{"or": [
"canDash",
{"heatFrames": 10}
]} |
|
Entrance condition: "comeInShinecharged": {}Requires: {"shineChargeFrames": 30},
"canShinechargeMovementComplex",
"h_LowerNorfairElevatorDownwardFrames",
{"heatFrames": 30}Exit condition: "leaveShinecharged": {} |
|
Entrance condition: "comeInShinecharging": {
"length": 13,
"openEnd": 0
}Requires: "h_LowerNorfairElevatorDownwardFrames", {"heatFrames": 45}, {"shineChargeFrames": 45} Exit condition: "leaveShinecharged": {} |
From: 1
Left Door
To: 4
Elevator
Entrance condition: "comeInShinecharging": {
"length": 6,
"openEnd": 0
}Requires: "h_LowerNorfairElevatorDownwardFrames", {"heatFrames": 15}, {"shineChargeFrames": 15} Exit condition: "leaveShinecharged": {} |
|
Crystal Flash and shinecharge between the doors. Use heat damage to interrupt. Entrance condition: "comeInWithRMode": {}Requires: "h_heatedCrystalFlashForReserveEnergy", {"or": [ {"canShineCharge": {"usedTiles": 12, "openEnd": 0}}, {"and": [ {"or": [ {"doorUnlockedAtNode": 1}, {"doorUnlockedAtNode": 2} ]}, {"canShineCharge": {"usedTiles": 13, "openEnd": 0}} ]}, {"and": [ {"doorUnlockedAtNode": 1}, {"doorUnlockedAtNode": 2}, {"canShineCharge": {"usedTiles": 14, "openEnd": 0}} ]} ]}, "h_heatTriggerRModeSparkInterrupt" Unlocks doors: {"nodeId": 1, "types": ["ammo"], "requires": []},
{"nodeId": 2, "types": ["ammo"], "requires": []} |
|
Entrance condition: "comeInWithGMode": {
"mode": "any",
"morphed": false
}Requires: {"heatFrames": 0}Exit condition: "leaveWithGMode": {
"morphed": false
} |
|
Requires: {"heatFrames": 55},
{"or": [
"canDash",
{"heatFrames": 20}
]} |
|
Requires: "canDash", {"heatFrames": 10} Exit condition: "leaveWithRunway": {
"length": 13,
"openEnd": 0
}Unlocks doors: {
"types": ["missiles"],
"requires": [{"heatFrames": 50}]
},
{"types": ["super"], "requires": []},
{
"types": ["powerbomb"],
"requires": [{"heatFrames": 110}]
}Dev note: The 10 heat frames are for moonwalking back against the door on entry. FIXME: heat frames to unlock the door could be reduced. |
|
Requires: "canDash", {"doorUnlockedAtNode": 2}, {"heatFrames": 65} Exit condition: "leaveWithRunway": {
"length": 14,
"openEnd": 0
}Unlocks doors: {
"nodeId": 1,
"types": ["missiles"],
"requires": [{"heatFrames": 50}]
},
{"nodeId": 1, "types": ["super"], "requires": []},
{
"nodeId": 1,
"types": ["powerbomb"],
"requires": [{"heatFrames": 110}]
}Dev note: The 65 heat frames are for shooting open the door and moonwalking back into the doorway. FIXME: heat frames to unlock the door could be reduced. |
|
Entrance condition: "comeInShinecharged": {}Requires: {"shineChargeFrames": 55},
{"heatFrames": 55}Exit condition: "leaveShinecharged": {}Unlocks doors: {"types": ["super"], "requires": []},
{"types": ["missiles", "powerbomb"], "requires": ["never"]} |
From: 2
Right Door
To: 1
Left Door
Entrance condition: "comeInShinecharging": {
"length": 13,
"openEnd": 0
}Requires: {"heatFrames": 20},
{"shineChargeFrames": 20}Exit condition: "leaveShinecharged": {}Unlocks doors: {"types": ["super"], "requires": []},
{"types": ["missiles", "powerbomb"], "requires": ["never"]} |
From: 2
Right Door
To: 1
Left Door
Entrance condition: "comeInShinecharged": {}Requires: {"shineChargeFrames": 10},
{"shinespark": {"frames": 21, "excessFrames": 0}},
{"heatFrames": 55}Exit condition: "leaveWithSpark": {}Unlocks doors: {"types": ["super"], "requires": []},
{"types": ["missiles", "powerbomb"], "requires": ["never"]} |
From: 2
Right Door
To: 1
Left Door
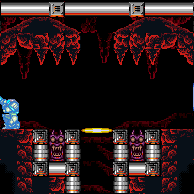

Entrance condition: "comeInShinecharging": {
"length": 11,
"openEnd": 1
}Requires: {"heatFrames": 120},
{"or": [
"canXRayCancelShinecharge",
{"heatFrames": 160}
]}Exit condition: "leaveWithTemporaryBlue": {}Unlocks doors: {"types": ["super", "powerbomb"], "requires": []},
{
"types": ["missiles"],
"requires": [{"heatFrames": 50}]
} |
From: 2
Right Door
To: 1
Left Door
Entrance condition: "comeInWithStoredFallSpeed": {
"fallSpeedInTiles": 1
}Requires: {"heatFrames": 55},
{"or": [
"canDash",
{"heatFrames": 20}
]}Exit condition: "leaveWithStoredFallSpeed": {
"fallSpeedInTiles": 1
}Unlocks doors: {"types": ["missiles", "super"], "requires": []},
{"types": ["powerbomb"], "requires": ["never"]} |
From: 2
Right Door
To: 1
Left Door
Entrance condition: "comeInWithStoredFallSpeed": {
"fallSpeedInTiles": 2
}Requires: {"heatFrames": 55},
{"or": [
"canDash",
{"heatFrames": 20}
]}Exit condition: "leaveWithStoredFallSpeed": {
"fallSpeedInTiles": 2
}Unlocks doors: {"types": ["missiles", "super"], "requires": []},
{"types": ["powerbomb"], "requires": ["never"]} |
|
Entrance condition: "comeInWithGMode": {
"mode": "any",
"morphed": false
}Requires: "h_heatedGModeOpenDifferentDoor" |
|
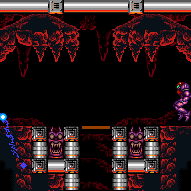

Entrance condition: "comeInWithGrappleTeleport": {
"blockPositions": [[3, 12], [3, 13]]
}Bypasses door shell: true |
From: 2
Right Door
To: 1
Left Door
Entrance condition: "comeInWithGrappleTeleport": {
"blockPositions": [[3, 12]]
}Exit condition: "leaveWithGrappleTeleport": {
"blockPositions": [[3, 12]]
}Bypasses door shell: true |
From: 2
Right Door
To: 1
Left Door
Entrance condition: "comeInWithGrappleTeleport": {
"blockPositions": [[3, 13]]
}Exit condition: "leaveWithGrappleTeleport": {
"blockPositions": [[3, 13]]
}Bypasses door shell: true |
|
Exit condition: "leaveWithRunway": {
"length": 13,
"openEnd": 0
} |
|
Requires: {"doorUnlockedAtNode": 1}Exit condition: "leaveWithRunway": {
"length": 14,
"openEnd": 0
}Unlocks doors: {
"nodeId": 1,
"types": ["missiles"],
"requires": [{"heatFrames": 50}]
},
{"nodeId": 1, "types": ["super"], "requires": []},
{
"nodeId": 1,
"types": ["powerbomb"],
"requires": [{"heatFrames": 110}]
} |
|
Requires: "h_heatedCrystalFlash" |
From: 2
Right Door
To: 2
Right Door
Entrance condition: "comeInShinecharging": {
"length": 12,
"openEnd": 0
}Requires: "h_heatedCrystalSpark" |
|
Requires: {"heatFrames": 30},
{"or": [
"canDash",
{"heatFrames": 10}
]} |
|
Entrance condition: "comeInShinecharged": {}Requires: {"shineChargeFrames": 30},
"canShinechargeMovementComplex",
"h_LowerNorfairElevatorDownwardFrames",
{"heatFrames": 30}Exit condition: "leaveShinecharged": {} |
|
Entrance condition: "comeInShinecharging": {
"length": 13,
"openEnd": 0
}Requires: "h_LowerNorfairElevatorDownwardFrames", {"heatFrames": 45}, {"shineChargeFrames": 45} Exit condition: "leaveShinecharged": {} |
From: 2
Right Door
To: 4
Elevator
Entrance condition: "comeInShinecharging": {
"length": 6,
"openEnd": 0
}Requires: "h_LowerNorfairElevatorDownwardFrames", {"heatFrames": 15}, {"shineChargeFrames": 15} Exit condition: "leaveShinecharged": {} |
|
Crystal Flash and shinecharge between the doors. Use heat damage to interrupt. Entrance condition: "comeInWithRMode": {}Requires: "h_heatedCrystalFlashForReserveEnergy", {"or": [ {"canShineCharge": {"usedTiles": 12, "openEnd": 0}}, {"and": [ {"or": [ {"doorUnlockedAtNode": 1}, {"doorUnlockedAtNode": 2} ]}, {"canShineCharge": {"usedTiles": 13, "openEnd": 0}} ]}, {"and": [ {"doorUnlockedAtNode": 1}, {"doorUnlockedAtNode": 2}, {"canShineCharge": {"usedTiles": 14, "openEnd": 0}} ]} ]}, "h_heatTriggerRModeSparkInterrupt" Unlocks doors: {"nodeId": 1, "types": ["ammo"], "requires": []},
{"nodeId": 2, "types": ["ammo"], "requires": []} |
|
Entrance condition: "comeInWithGMode": {
"mode": "any",
"morphed": false
}Requires: {"heatFrames": 0}Exit condition: "leaveWithGMode": {
"morphed": false
} |
|
Requires: {"heatFrames": 45},
{"or": [
"canDash",
{"heatFrames": 5}
]}Unlocks doors: {
"types": ["missiles"],
"requires": [{"heatFrames": 30}]
} |
|
Entrance condition: "comeInShinecharged": {}Requires: {"shineChargeFrames": 45},
"canShinechargeMovementComplex",
"h_LowerNorfairElevatorUpwardFrames",
{"heatFrames": 45}Exit condition: "leaveShinecharged": {}Unlocks doors: {"types": ["super"], "requires": []},
{"types": ["missiles", "powerbomb"], "requires": ["never"]} |
From: 4
Elevator
To: 1
Left Door
Entrance condition: "comeInShinecharged": {}Requires: {"shineChargeFrames": 20},
"h_LowerNorfairElevatorUpwardFrames",
{"shinespark": {"frames": 6, "excessFrames": 0}},
{"heatFrames": 50}Exit condition: "leaveWithSpark": {}Unlocks doors: {"types": ["super"], "requires": []},
{"types": ["missiles", "powerbomb"], "requires": ["never"]} |
|
Entrance condition: "comeInWithGMode": {
"mode": "any",
"morphed": false
}Requires: "h_heatedGModeOpenDifferentDoor" |
|
Requires: {"heatFrames": 50}Unlocks doors: {
"types": ["missiles"],
"requires": [{"heatFrames": 30}]
} |
|
Entrance condition: "comeInShinecharged": {}Requires: {"shineChargeFrames": 50},
"canShinechargeMovementComplex",
"h_LowerNorfairElevatorUpwardFrames",
{"heatFrames": 50}Exit condition: "leaveShinecharged": {}Unlocks doors: {"types": ["super"], "requires": []},
{"types": ["missiles", "powerbomb"], "requires": ["never"]} |
From: 4
Elevator
To: 2
Right Door
Entrance condition: "comeInShinecharged": {}Requires: {"shineChargeFrames": 20},
"h_LowerNorfairElevatorUpwardFrames",
{"shinespark": {"frames": 6, "excessFrames": 0}},
{"heatFrames": 50}Exit condition: "leaveWithSpark": {}Unlocks doors: {"types": ["super"], "requires": []},
{"types": ["missiles", "powerbomb"], "requires": ["never"]} |
|
Entrance condition: "comeInWithGMode": {
"mode": "any",
"morphed": false
}Requires: "h_heatedGModeOpenDifferentDoor" |
|
Riding the elevator without enough energy will cause a reserve trigger in the next room, reducing the total heat damage dealt. Requires: "canManageReserves", {"autoReserveTrigger": {}}, {"heatFrames": 0} Exit condition: "leaveNormally": {}Dev note: FIXME: If the next room is also heated, the reserve won't trigger until after that elevator ride as well, but then the reserve will trigger during heat damage. |
|
Riding the elevator without enough energy will cause a reserve trigger in the next room, reducing the total heat damage dealt. Entrance condition: "comeInNormally": {}Requires: "canManageReserves", {"autoReserveTrigger": {}}, {"heatFrames": 0} Dev note: FIXME: If the previous room is also heated, the reserve won't trigger until after this elevator ride as well, but it will trigger during heat damage. |
|
Requires: {"or": [
{"and": [
{"doorUnlockedAtNode": 1},
{"doorUnlockedAtNode": 2},
{"canShineCharge": {"usedTiles": 14, "openEnd": 0}}
]},
{"and": [
{"or": [
{"doorUnlockedAtNode": 1},
{"doorUnlockedAtNode": 2}
]},
{"canShineCharge": {"usedTiles": 13, "openEnd": 0}}
]},
{"canShineCharge": {"usedTiles": 12, "openEnd": 0}}
]},
{"heatFrames": 240},
"h_LowerNorfairElevatorDownwardFrames",
{"shineChargeFrames": 50}Exit condition: "leaveShinecharged": {}Unlocks doors: {
"nodeId": 1,
"types": ["missiles"],
"requires": [{"heatFrames": 50}]
},
{"nodeId": 1, "types": ["super"], "requires": []},
{
"nodeId": 1,
"types": ["powerbomb"],
"requires": [{"heatFrames": 110}]
},
{
  "nodeId": 2,
  "types": ["missiles"],
  "requires": [{"heatFrames": 50}]
},
{"nodeId": 2, "types": ["super"], "requires": []},
{
  "nodeId": 2,
  "types": ["powerbomb"],
  "requires": [{"heatFrames": 110}]
} |
|
Requires: {"or": [
{"and": [
{"doorUnlockedAtNode": 1},
{"doorUnlockedAtNode": 2},
{"canShineCharge": {"usedTiles": 14, "openEnd": 0}}
]},
{"and": [
{"or": [
{"doorUnlockedAtNode": 1},
{"doorUnlockedAtNode": 2}
]},
{"canShineCharge": {"usedTiles": 13, "openEnd": 0}}
]},
{"canShineCharge": {"usedTiles": 12, "openEnd": 0}}
]},
"h_heatedCrystalSpark"Unlocks doors: {"nodeId": 1, "types": ["ammo"], "requires": []},
{"nodeId": 2, "types": ["ammo"], "requires": []} |
From: 4
Elevator
To: 4
Elevator
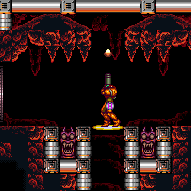

In order to align and place a Power Bomb at the correct pixel, jump and hit the ceiling in the aim-down pose, then morph on the descent. Requires: "h_heatProof", "h_elevatorCrystalFlash" Exit condition: "leaveNormally": {}Dev note: In order to have more than one attempt, Samus must be heat proof. |
From: 4
Elevator
To: 4
Elevator
Entrance condition: "comeInWithGMode": {
"mode": "any",
"morphed": false
}Exit condition: "leaveWithGMode": {
"morphed": false
} |