Warehouse Entrance
Room ID: 78
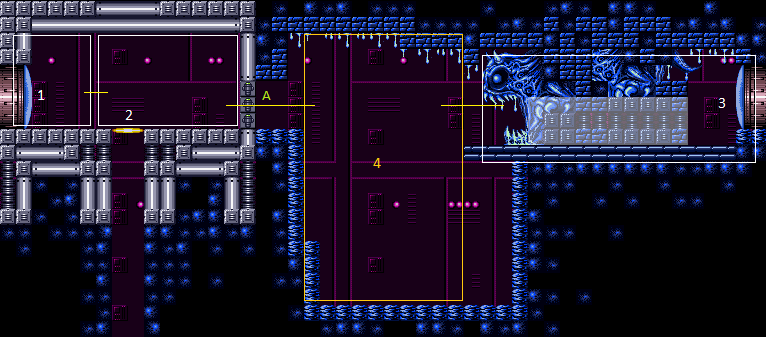
|
Exit condition: "leaveWithRunway": {
"length": 14,
"openEnd": 0
} |
From: 1
Left Door
To: 1
Left Door
All 3 Super blocks must be broken for this longer runway to be usable. Requires: {"obstaclesCleared": ["A"]}Exit condition: "leaveWithRunway": {
"length": 18,
"openEnd": 1
} |
|
Requires: "h_CrystalFlash" |
|
Requires: {"or": [
{"canShineCharge": {"usedTiles": 13, "openEnd": 0}},
{"and": [
{"doorUnlockedAtNode": 1},
{"canShineCharge": {"usedTiles": 14, "openEnd": 0}}
]},
{"and": [
{"obstaclesCleared": ["A"]},
{"canShineCharge": {"usedTiles": 17, "openEnd": 1}}
]}
]},
"h_CrystalSpark"Unlocks doors: {"types": ["ammo"], "requires": []} |
|
Entrance condition: "comeInShinecharging": {
"length": 13,
"openEnd": 0
},
"comesInHeated": "no"Requires: "h_CrystalSpark" |
From: 1
Left Door
To: 1
Left Door
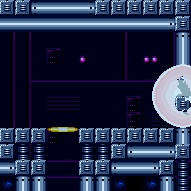

Use a Super on the top and bottom blocks. Crystal Flash below the lower block to standup and then begin Moondancing. After Samus sinks through the bottom tile, use a Super to break the final block, then use Grapple to get out of the floor. Without Grapple, count to 174 Moonfalls and delicately Moonfall to prevent clipping into the ground. Requires: {"ammo": {"type": "Super", "count": 3}},
"h_CrystalFlash",
"canMoondance",
{"or": [
"canCount",
"Grapple"
]}Exit condition: "leaveWithStoredFallSpeed": {
"fallSpeedInTiles": 1
}Dev note: Obstacle A doesnt need to be checked, because there is no reason to have destroyed more than one block, with Morph. FIXME: This should have a pixel precise setup to prevent using another Super. |
From: 1
Left Door
To: 1
Left Door
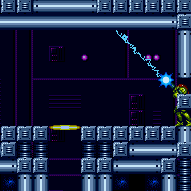

Use a Super on the top and bottom blocks. Crystal Flash below the lower block to standup and then begin Moondancing. After Samus sinks through the floor tiles, use Grapple to return to a standing position and count an additional 145 moonfalls. Then use Grapple to get out of the floor. Requires: {"ammo": {"type": "Super", "count": 3}},
"h_CrystalFlash",
"canExtendedMoondance"Exit condition: "leaveWithStoredFallSpeed": {
"fallSpeedInTiles": 2
}Dev note: Obstacle A doesnt need to be checked, because there is no reason to have destroyed more than one block, with Morph. FIXME: This should have a pixel precise setup to prevent using another Super. |
|
|
From: 1
Left Door
To: 2
Elevator
Entrance condition: "comeInShinecharging": {
"length": 13,
"openEnd": 0
}Requires: "canShinechargeMovementComplex", {"shineChargeFrames": 50} Exit condition: "leaveShinecharged": {} |
From: 1
Left Door
To: 2
Elevator
Entrance condition: "comeInShinecharging": {
"length": 6,
"openEnd": 0
}Requires: "canStopOnADime", "canShinechargeMovementComplex", {"shineChargeFrames": 10} Exit condition: "leaveShinecharged": {} |
|
Entrance condition: "comeInShinecharged": {}Requires: {"shineChargeFrames": 30},
"canShinechargeMovementComplex"Exit condition: "leaveShinecharged": {} |
|
Entrance condition: "comeInWithGMode": {
"mode": "any",
"morphed": false
}Exit condition: "leaveWithGMode": {
"morphed": false
} |
From: 1
Left Door
To: 3
Right Door
Requires: "canTrickyJump", {"obstaclesCleared": ["A"]} Exit condition: "leaveWithSpringBallBounce": {
"remoteRunway": {
"length": 17,
"openEnd": 1
},
"landingRunway": {
"length": 1,
"openEnd": 1
},
"minExtraRunSpeed": "$1.9",
"movementType": "controlled"
}Unlocks doors: {"types": ["ammo"], "requires": []} |
Leave With Controlled Spring Ball Bounce (Super Blocks Broken, Door Open)
(Very Hard)
Warehouse Entrance
From: 1
Left Door
To: 3
Right Door
Requires: "canTrickyJump", {"obstaclesCleared": ["A"]}, {"doorUnlockedAtNode": 1} Exit condition: "leaveWithSpringBallBounce": {
"remoteRunway": {
"length": 18,
"openEnd": 1
},
"landingRunway": {
"length": 1,
"openEnd": 1
},
"minExtraRunSpeed": "$1.9",
"movementType": "controlled"
}Unlocks doors: {"types": ["ammo"], "requires": []} |
|
|
|
Entrance condition: "comeInShinecharged": {}Requires: {"shineChargeFrames": 45},
"canShinechargeMovementComplex"Exit condition: "leaveShinecharged": {}Unlocks doors: {"types": ["super"], "requires": []},
{"types": ["missiles", "powerbomb"], "requires": ["never"]} |
From: 2
Elevator
To: 1
Left Door


Entrance condition: "comeInShinecharged": {}Requires: {"shineChargeFrames": 15},
"canShinechargeMovementComplex",
{"shinespark": {"frames": 12, "excessFrames": 0}}Exit condition: "leaveWithSpark": {}Unlocks doors: {"types": ["super"], "requires": []},
{"types": ["missiles", "powerbomb"], "requires": ["never"]} |
From: 2
Elevator
To: 2
Elevator
Requires: {"obstaclesCleared": ["A"]},
{"canShineCharge": {"usedTiles": 17, "openEnd": 0}},
{"shineChargeFrames": 50}Exit condition: "leaveShinecharged": {} |
|


Requires: {"or": [
{"canShineCharge": {"usedTiles": 13, "openEnd": 0}},
{"and": [
{"doorUnlockedAtNode": 1},
{"canShineCharge": {"usedTiles": 14, "openEnd": 0}}
]}
]},
{"shineChargeFrames": 50}Exit condition: "leaveShinecharged": {}Unlocks doors: {"nodeId": 1, "types": ["ammo"], "requires": []} |
|
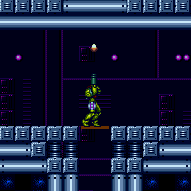

In order to align and place a Power Bomb at the correct pixel, jump and morph before hitting the ceiling. Requires: "h_elevatorCrystalFlash" Exit condition: "leaveNormally": {} |
|
Entrance condition: "comeInWithGMode": {
"mode": "any",
"morphed": false
}Exit condition: "leaveWithGMode": {
"morphed": false
} |
|
Requires: {"or": [
{"obstaclesCleared": ["A"]},
{"ammo": {"type": "Super", "count": 3}}
]}Clears obstacles: A |
|
Requires: {"ammo": {"type": "Super", "count": 1}},
"Morph" |
|
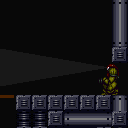

This strat makes it possible to squeeze through Morphless with just 2 supers. Requires: {"ammo": {"type": "Super", "count": 2}},
{"or": [
"canXRayTurnaround",
"canTurnaroundAimCancel"
]} |
|
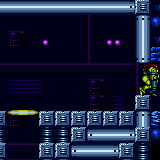

Use 2 supers, then squeeze through with a spin jump or down-aim jump. Requires: {"ammo": {"type": "Super", "count": 2}},
"canDash",
"canTwoTileSqueeze" |
|
Requires: {"ammo": {"type": "Super", "count": 2}},
"canTunnelCrawl" |
|


Entrance condition: "comeInWithGrappleTeleport": {
"blockPositions": [[5, 3], [7, 2]]
} |
|
Entrance condition: "comeInWithGrappleTeleport": {
"blockPositions": [[3, 12], [3, 13]]
}Requires: {"or": [
"canGrappleTeleportWallEscape",
{"doorUnlockedAtNode": 1}
]}Unlocks doors: {"types": ["ammo"], "requires": []} |
|
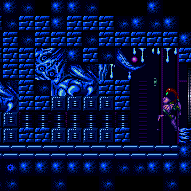

Entrance condition: "comeInWithGrappleTeleport": {
"blockPositions": [[3, 12], [3, 13]]
}Bypasses door shell: true |
From: 3
Right Door
To: 1
Left Door
Entrance condition: "comeInWithGrappleTeleport": {
"blockPositions": [[3, 12]]
}Exit condition: "leaveWithGrappleTeleport": {
"blockPositions": [[3, 12]]
}Bypasses door shell: true |
From: 3
Right Door
To: 1
Left Door
Entrance condition: "comeInWithGrappleTeleport": {
"blockPositions": [[3, 13]]
}Exit condition: "leaveWithGrappleTeleport": {
"blockPositions": [[3, 13]]
}Bypasses door shell: true |
|
Exit condition: "leaveWithRunway": {
"length": 1,
"openEnd": 1
} |
|


Exit condition: "leaveWithSidePlatform": {
"height": 1,
"runway": {
"length": 17,
"openEnd": 1
},
"obstruction": [1, 0]
}Dev note: Max extra run speed $3.B |
|
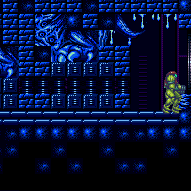

Requires: {"canShineCharge": {"usedTiles": 17, "openEnd": 1}},
"canShinechargeMovement",
{"shineChargeFrames": 60}Exit condition: "leaveShinecharged": {} |
|


Exit condition: "leaveSpinning": {
"remoteRunway": {
"length": 16,
"openEnd": 0
}
} |
|
Exit condition: "leaveWithMockball": {
"remoteRunway": {
"length": 14,
"openEnd": 0
},
"landingRunway": {
"length": 1,
"openEnd": 1
}
} |
|
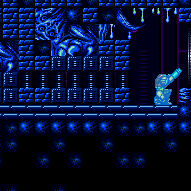

Requires: {"canShineCharge": {"usedTiles": 16, "openEnd": 0}}Exit condition: "leaveWithTemporaryBlue": {} |
|
Requires: "h_CrystalFlash" |
|
Requires: {"canShineCharge": {"usedTiles": 17, "openEnd": 1}},
"h_CrystalSpark"Dev note: FIXME: Coming in from the left would incorrectly require a Super to get here and another to return. |
|
|
|
Requires: {"or": [
{"obstaclesCleared": ["A"]},
{"ammo": {"type": "Super", "count": 3}}
]}Clears obstacles: A |
|
Requires: {"ammo": {"type": "Super", "count": 1}},
"Morph" |
|
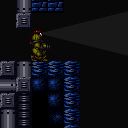

Shoot out the bottom two super blocks and crouch-wiggle through. Requires: {"ammo": {"type": "Super", "count": 2}},
"canXRayTurnaround" |
|
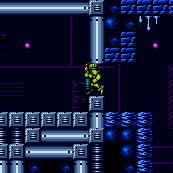

Use 2 supers, then squeeze through with a spin jump or down-aim jump. Requires: {"ammo": {"type": "Super", "count": 2}},
"canDash",
"canTwoTileSqueeze" |
|
Requires: {"ammo": {"type": "Super", "count": 2}},
"canTunnelCrawl" |
|
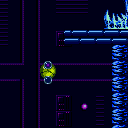

Requires: {"or": [
"SpaceJump",
"canIBJ",
"HiJump"
]} |
|
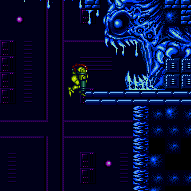

Break all 3 super blocks to build enough run speed to jump over the pit. Requires: {"obstaclesCleared": ["A"]},
"canDash",
"canCarefulJump" |
|
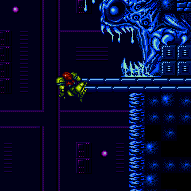

It's much easier without Speed Booster equipped. Requires: "canDash", "canPreciseWallJump", {"disableEquipment": "SpeedBooster"} Dev note: With Speed Booster and without canDisableEquipment, the player would use the canTrickyDashJump strat. |
|
Requires: "canInsaneWallJump" |
|


Run along the bottom of the pit to build speed for a speedy jump. Only run 7.5 tiles left to right. If done optimally, no wall jump is required. Requires: "canTrickyDashJump" |
|
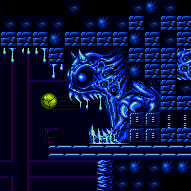

Use Spring Ball as a movement item to reach the Kraid Mouth ledge by jumping from the elevator runway, or by jumping from below. Requires: {"or": [
"canSpringBallBombJump",
"canSpringBallJumpMidAir",
{"and": [
"canMockball",
"h_useSpringBall"
]}
]}Dev note: By reaching 4, the super wall has been broken enough to fit in morph. |
|
To save energy, jump from the runway by the Super blocks. This is doable with less than 29 Energy. Requires: "h_storedSpark", "canDash", {"shinespark": {"frames": 2, "excessFrames": 2}} |
|
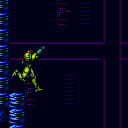

Back up against the wall of the single-tile ledge. Run forward, perform a single arm pump, and jump on the last possible frame. Aim down just before reaching the platform. The arm pump can be performed by pressing shot, or by pressing an angle button (but not releasing it until after the jump). Requires: {"notable": "Arm Pump Jump"},
"h_backIntoCorner",
"canDash",
"canInsaneJump",
"canDownGrab" |