Aqueduct
Room ID: 183
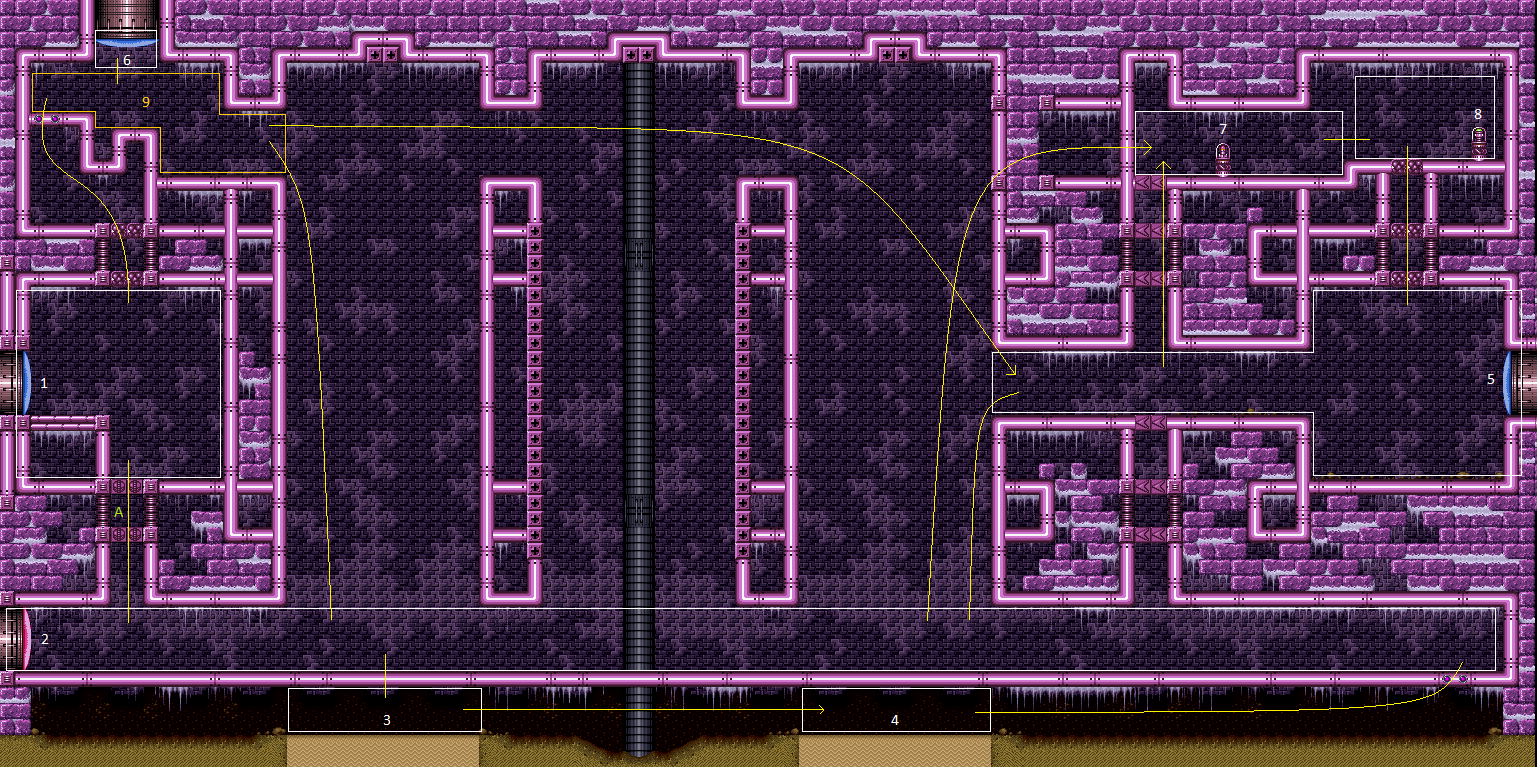
|
Exit condition: "leaveWithRunway": {
"length": 6,
"openEnd": 1
} |
|
Requires: "h_CrystalFlash", {"obstaclesNotCleared": ["R-Mode"]} Clears obstacles: A |
From: 1
Middle Left Door
To: 1
Middle Left Door
Entrance condition: "comeInShinecharging": {
"length": 5,
"openEnd": 0
},
"comesInHeated": "no"Requires: "Gravity", "h_CrystalSpark" Clears obstacles: A |
|
Entrance condition: "comeInWithRMode": {}Clears obstacles: R-Mode |
|


Requires: {"or": [
{"obstaclesCleared": ["A"]},
"h_usePowerBomb"
]}Exit condition: "leaveWithDamage": {
"enemy": "Yard"
} |
From: 1
Middle Left Door
To: 1
Middle Left Door
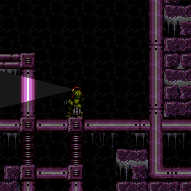

Place a Power Bomb then exit G-Mode. Entrance condition: "comeInWithGMode": {
"mode": "any",
"morphed": true
}Requires: "h_artificialMorphPowerBomb" Clears obstacles: A |
|
Requires: {"or": [
{"obstaclesCleared": ["A"]},
"h_usePowerBomb"
]}Clears obstacles: A |
|


Moonfall twice into the wall adjacent the Power Bomb blocks and then wiggle out to the right. Then moonfall again to clip through the Power Bomb Blocks Without Gravity, break spin to avoid clipping down too far. Entrance condition: "comeInWithStoredFallSpeed": {
"fallSpeedInTiles": 2
}Requires: "canMoonfall" |
From: 1
Middle Left Door
To: 7
Top Right Left Item
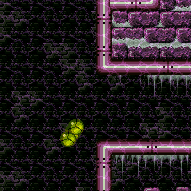

Use a double spring ball jump to reach the Speed blocks below the items while chaining temporary blue. Perform a spring ball jump and immediately unmorph and continue holding up, to break some of the Speed blocks while passing up through them. Leave one of the bottom Speed blocks unbroken to use as a platform. The top speed blocks will respawn; clip through them either using a snail clip with X-Ray or a Crystal Flash clip; In the case of a Crystal Flash clip, menu to Grapple before the Crystal Flash ends and mash shoot while holding down. Entrance condition: "comeInWithTemporaryBlue": {}Requires: {"notable": "Suitless Temporary Blue To Items"},
"canSuitlessMaridia",
"canLongChainTemporaryBlue",
{"ammo": {"type": "PowerBomb", "count": 1}},
"h_doubleSpringBallJumpWithHiJump",
{"or": [
"canXRayCeilingClip",
{"and": [
"h_jumpIntoCrystalFlashClip",
"Grapple",
{"obstaclesNotCleared": ["R-Mode"]}
]}
]},
"canBeExtremelyPatient" |
From: 1
Middle Left Door
To: 9
Junction Below Top Door
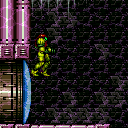

Climb up 1 screen. Aim to end this XRay climb when Samus is visually near but not above the top of the left side door. Fall out of the wall by turning to the right, from a crouch if possible. This XRay climb has a window of 4 crouches, but with a way to break bomb blocks it can be ended earlier. Entrance condition: "comeInWithDoorStuckSetup": {}Requires: {"notable": "Left-Side X-Ray Climb (Upper)"},
"canXRayClimb" |
From: 1
Middle Left Door
To: 9
Junction Below Top Door
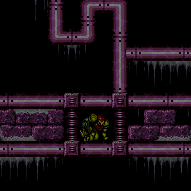

Bomb the Power Bomb blocks below to overload PLMs, then go up through the crumble blocks to escape. Entrance condition: "comeInWithGMode": {
"mode": "any",
"morphed": true
}Requires: "h_artificialMorphBombs", "h_navigateUnderwater", {"or": [ {"and": [ "Gravity", {"or": [ "h_artificialMorphLongIBJ", "h_artificialMorphJumpIntoIBJ" ]} ]}, {"and": [ "canGravityJump", "h_artificialMorphSpringBall" ]}, {"and": [ "HiJump", "canSpringBallJumpMidAir" ]}, {"and": [ "HiJump", "canConsecutiveWallJump", "canPreciseWallJump" ]}, "h_artificialMorphDoubleSpringBallJump", {"and": [ "Gravity", "HiJump", "h_artificialMorphSpringBallBombJump" ]} ]} Dev note: FIXME: Eventually a CF doorlock bypass should be added from this 1 or from 12 with a 1->12 option. |
From: 1
Middle Left Door
To: 10
G-Mode Morph Junction (By Bottom Left Door)
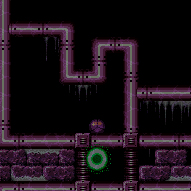

Bomb the Power Bomb blocks below to overload PLMs, then IBJ up through the crumble blocks to escape. Entrance condition: "comeInWithGMode": {
"mode": "any",
"morphed": true
}Requires: "h_artificialMorphBombs", {"or": [ {"and": [ "Gravity", {"or": [ "h_artificialMorphLongIBJ", "h_artificialMorphJumpIntoIBJ" ]} ]}, {"and": [ "canGravityJump", "h_artificialMorphSpringBall" ]}, "h_artificialMorphDoubleSpringBallJump", {"and": [ "Gravity", "HiJump", "h_artificialMorphSpringBallBombJump" ]} ]} |
From: 1
Middle Left Door
To: 11
G-Mode Overloaded PLMs (By Bottom Left Door)
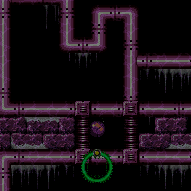

Bomb the PB blocks below to overload PLMs, then go up through the crumble blocks to escape. Entrance condition: "comeInWithGMode": {
"mode": "any",
"morphed": true
}Requires: "h_artificialMorphBombs", "h_navigateUnderwater", {"or": [ "canGravityJump", {"and": [ "Gravity", {"or": [ "h_artificialMorphLongIBJ", "h_artificialMorphJumpIntoIBJ" ]} ]}, {"and": [ "HiJump", "canSpringBallJumpMidAir" ]}, {"and": [ "HiJump", "canConsecutiveWallJump", "canPreciseWallJump" ]}, "h_artificialMorphDoubleSpringBallJump", {"and": [ "Gravity", "HiJump", "h_artificialMorphSpringBallBombJump" ]} ]} |
|


Requires: "Gravity",
{"or": [
"canWallJump",
"SpaceJump",
"canLongIBJ",
"canJumpIntoIBJ",
"canSpeedyJump",
"canSpringBallJumpMidAir",
"canUseEnemies"
]},
{"or": [
  {"obstaclesCleared": ["A"]},
  "h_usePowerBomb"
]}Clears obstacles: A |
|


Requires: "canGravityJump" |
From: 2
Bottom Left Door
To: 1
Middle Left Door
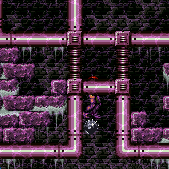

Jump on the Snail when it is at a precise location, and then crouch jump through the ceiling and jump again, without moving between jumps. The Snail's positioning is more lenient with Morph and an X-Ray Turn Around. X-Ray can also be useful for helping position the Snail. Requires: "Gravity", "canUseEnemies", "canXRayCeilingClip" |
From: 2
Bottom Left Door
To: 1
Middle Left Door


Jump on the Snail when it is at a precise location, and then crouch jump through the ceiling and jump again, without moving between jumps. The Snail's positioning is very precise. Morph can be used to help get onto the Snail and get off without taking a hit if it is in the wrong location. Requires: {"notable": "Precise Snail Clip With Gravity"},
"Gravity",
"canUseEnemies",
"canCeilingClip",
{"or": [
"Morph",
"canPreciseCeilingClip",
{"enemyDamage": {"enemy": "Yard", "type": "contact", "hits": 2}}
]} |
|

Climb up 1 screen. Entrance condition: "comeInWithDoorStuckSetup": {}Requires: "canXRayClimb" |
|
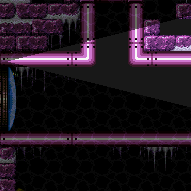

Enter with G-mode direct, back up to between 1 and 6 pixels from the door transition, and activate X-ray to get very deep stuck in the door. Climb up 1 screen, and perform a turnaround buffered spin-jump away from the door to trigger the transition, bypassing any lock on the door. Entrance condition: "comeInWithGMode": {
"mode": "direct",
"morphed": false
}Requires: "canGModeXRayClimb" Bypasses door shell: true |
|


Requires: "canSuitlessMaridia", "HiJump", "canSpringBallJumpMidAir", {"or": [ {"obstaclesCleared": ["A"]}, "h_usePowerBomb" ]} Clears obstacles: A |
|
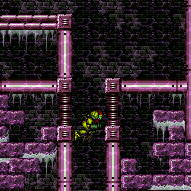

Requires: "canSuitlessMaridia", "HiJump", "canConsecutiveWallJump", "canTrickyWallJump", {"or": [ {"obstaclesCleared": ["A"]}, "h_usePowerBomb" ]} Clears obstacles: A |
|
Requires: "canUseEnemies", {"or": [ "Gravity", {"and": [ "canSuitlessMaridia", "HiJump" ]} ]}, {"or": [ {"obstaclesCleared": ["A"]}, "h_usePowerBomb" ]} Clears obstacles: A Dev note: Spring Ball jumps without HiJump require less obvious snail positioning. |
From: 2
Bottom Left Door
To: 1
Middle Left Door
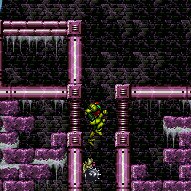

Stop the snail when it is on the lower part of the overhang (hug the snail to gain extra jump height). Climb it by waiting until it is just about to become active to jump. Requires: {"notable": "Bootless Suitless Snail Climb"},
"h_navigateUnderwater",
"canSnailClimb",
{"or": [
  {"obstaclesCleared": ["A"]},
  "h_usePowerBomb"
]}
Clears obstacles: A |
|
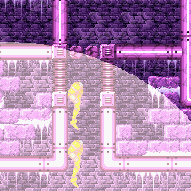

Entrance condition: "comeInShinecharged": {}Requires: {"shineChargeFrames": 130},
"canSuitlessMaridia",
"h_usePowerBomb",
"canShinechargeMovement",
{"shinespark": {"frames": 25, "excessFrames": 11}}Clears obstacles: A |
|
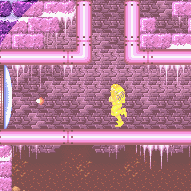

Entrance condition: "comeInStutterShinecharging": {
"minTiles": 2
}Requires: "h_usePowerBomb", "canStutterWaterShineCharge", "canShinechargeMovementComplex", "h_shinechargeMaxRunway", {"shinespark": {"frames": 22, "excessFrames": 11}} Clears obstacles: A |
From: 2
Bottom Left Door
To: 1
Middle Left Door
With only 1 tile of runway, this requires a single-frame stutter (release forward then repress on the next frame), on the last possible frame. Entrance condition: "comeInStutterShinecharging": {
"minTiles": 1
}Requires: "h_usePowerBomb", "canPreciseStutterWaterShineCharge", "canInsaneJump", "canShinechargeMovementTricky", "h_shinechargeMaxRunway", {"shinespark": {"frames": 22, "excessFrames": 11}} Clears obstacles: A |
|
Requires: "Gravity",
{"or": [
{"obstaclesCleared": ["A"]},
"h_usePowerBomb"
]},
"h_shinechargeMaxRunway",
"canShinechargeMovementComplex",
{"or": [
{"and": [
"HiJump",
"canWallJump",
{"shineChargeFrames": 100}
]},
{"and": [
"HiJump",
"SpaceJump",
{"shineChargeFrames": 105}
]},
{"and": [
"HiJump",
{"shineChargeFrames": 125}
]},
{"and": [
"canWallJump",
{"shineChargeFrames": 125}
]},
{"and": [
"SpaceJump",
{"shineChargeFrames": 130}
]},
{"and": [
"canGravityJump",
"canShinechargeMovementTricky",
{"shineChargeFrames": 125}
]}
]}Exit condition: "leaveShinecharged": {}Unlocks doors: {"types": ["ammo"], "requires": []} |
From: 2
Bottom Left Door
To: 1
Middle Left Door
Use double spring ball jumps to reach the top-right of the room with temporary blue. To cross the two gaps at the top of the room to the left while chaining temporary blue, use spring ball jumps with HiJump disabled; in each case, perform a stationary lateral mid-air morph or a spring fling (or both); Entrance condition: "comeInWithTemporaryBlue": {}Requires: "HiJump", "canLongChainTemporaryBlue", "canBeExtremelyPatient", "canXRayTurnaround", "canDoubleSpringBallJumpMidAir", "canTrickySpringBallJump", {"or": [ "canStationaryLateralMidAirMorph", "canSpringFling" ]}, "can4HighMidAirMorph" |
From: 2
Bottom Left Door
To: 1
Middle Left Door
Use double spring ball jumps to reach the top-right of the room with temporary blue. To cross the two gaps at the top of the room to the left while chaining temporary blue, use spring ball jumps with HiJump disabled; in each case, perform a stationary lateral mid-air morph or a spring fling (or both); Entrance condition: "comeInRunning": {
"speedBooster": "yes",
"minTiles": 0.4375
}Requires: "h_waterGetBlueSpeed", "HiJump", "canLongChainTemporaryBlue", "canBeExtremelyPatient", "canXRayTurnaround", "canDoubleSpringBallJumpMidAir", "canTrickySpringBallJump", {"or": [ "canStationaryLateralMidAirMorph", "canSpringFling" ]}, "can4HighMidAirMorph" |
From: 2
Bottom Left Door
To: 1
Middle Left Door
Position the snail on the high pixel without using x-ray. Ceiling clip then use the stored spark while in the crouched pose that Samus is already in to spark vertically and clip through the next block. Changing pose will make it so Samus is no longer able to spark. If Samus has a blue suit, after standing up on the snail, crouch to gain a shinecharge, then press forward to stand again; continuing to hold forward while jumping allows Samus to clip through without activating the spark. Requires: "HiJump", "canHighPixelCeilingClip", "h_storedSpark", {"shinespark": {"frames": 15, "excessFrames": 13}} |
From: 2
Bottom Left Door
To: 1
Middle Left Door


Position the snail low on the ceiling so that Samus can get onto it. Wait for another snail and position it on the high pixel without using x-ray. Ceiling clip then use the flash suit while in the crouched pose that Samus is already in to spark vertically and clip through the next block. Changing pose will make it so Samus is no longer able to spark. If Samus has a blue suit, after standing up on the snail, crouch to gain a shinecharge, then press forward to stand again; continuing to hold forward while jumping allows Samus to clip through without activating the spark. Requires: {"notable": "High Pixel Suitless Bootless Snail Clip, Use Stored Spark"},
"canHighPixelCeilingClip",
"h_storedSpark",
{"shinespark": {"frames": 15, "excessFrames": 13}} |
|
Exit condition: "leaveWithRunway": {
"length": 45,
"openEnd": 1
} |
From: 2
Bottom Left Door
To: 2
Bottom Left Door


Entrance condition: "comeInStutterShinecharging": {
"minTiles": 2
}Requires: "canStutterWaterShineCharge", "canShinechargeMovementComplex", {"or": [ {"shinespark": {"frames": 12, "excessFrames": 0}}, {"and": [ "canShinechargeMovementTricky", {"shinespark": {"frames": 3, "excessFrames": 0}} ]} ]} Exit condition: "leaveWithSpark": {}Unlocks doors: {"types": ["super"], "requires": []},
{"types": ["missiles", "powerbomb"], "requires": ["never"]} |
From: 2
Bottom Left Door
To: 2
Bottom Left Door
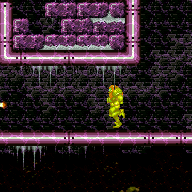
Start with low run speed by positioning exactly 2 pixels from the door. Entrance condition: "comeInRunning": {
"speedBooster": "yes",
"minTiles": 0.4375
}Requires: "canWaterShineCharge", "canShinechargeMovementTricky", "canHeroShot", {"shinespark": {"frames": 29, "excessFrames": 0}} Exit condition: "leaveWithSpark": {}Unlocks doors: {"types": ["super"], "requires": []},
{"types": ["missiles", "powerbomb"], "requires": ["never"]} |
From: 2
Bottom Left Door
To: 2
Bottom Left Door
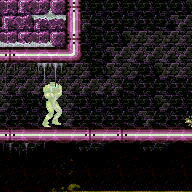
With only 1 tile of runway, this requires a single-frame stutter (release forward then repress on the next frame), on the last possible frame. Entrance condition: "comeInStutterShinecharging": {
"minTiles": 1
}Requires: "canShinechargeMovementComplex", "canPreciseStutterWaterShineCharge", "canInsaneJump", "h_shinechargeMaxRunway", {"or": [ {"shinespark": {"frames": 12, "excessFrames": 0}}, {"and": [ "canShinechargeMovementTricky", {"shinespark": {"frames": 3, "excessFrames": 0}} ]} ]} Exit condition: "leaveWithSpark": {}Unlocks doors: {"types": ["super"], "requires": []},
{"types": ["missiles", "powerbomb"], "requires": ["never"]} |
From: 2
Bottom Left Door
To: 2
Bottom Left Door
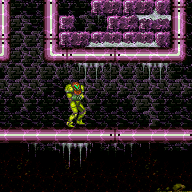
With a runway of 5 tiles (open end) in the other room, the ideal timing for the stutter is to release forward for 5 frames, and repress forward on the last possible frame before the transition. Other timings can work, but will gain the shinecharge further from the door, leaving fewer shinecharge frames remaining. After gaining the shinecharge, continue holding forward in order to make Samus stand. Then turnaround spin jump back toward the door, and continue spin jumping to reach the transition with a shinecharge. Entrance condition: "comeInStutterShinecharging": {
"minTiles": 5
}Requires: "canPreciseStutterWaterShineCharge", "canShinechargeMovementTricky", "canInsaneJump", {"shineChargeFrames": 130}, {"or": [ "canBeVeryPatient", {"shineChargeFrames": 15} ]} Exit condition: "leaveShinecharged": {}Unlocks doors: {"types": ["super"], "requires": []},
{"types": ["missiles", "powerbomb"], "requires": ["never"]} |
From: 2
Bottom Left Door
To: 2
Bottom Left Door
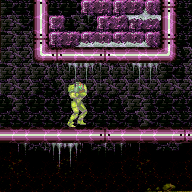
With only a runway of 4 tiles (open end) in the other room, the ideal timing for the stutter is to release forward for 4 frames, and repress forward on the last possible frame before the transition. It also works well to release forward for 3 frames and repress on the last possible frame. Other timings can also work, but may gain the shinecharge further from the door, leaving fewer shinecharge frames remaining. After gaining the shinecharge, continue holding forward in order to make Samus stand. Then turnaround spin jump back toward the door, and continue spin jumping to reach the transition with a shinecharge. Entrance condition: "comeInStutterShinecharging": {
"minTiles": 4
}Requires: "canPreciseStutterWaterShineCharge", "canShinechargeMovementTricky", "canInsaneJump", {"shineChargeFrames": 140}, {"or": [ "canBeVeryPatient", {"shineChargeFrames": 10} ]} Exit condition: "leaveShinecharged": {}Unlocks doors: {"types": ["super"], "requires": []},
{"types": ["missiles", "powerbomb"], "requires": ["never"]} |
From: 2
Bottom Left Door
To: 2
Bottom Left Door
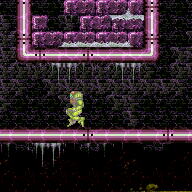
With only a runway of 3 tiles (open end) in the other room, the ideal timing for the stutter is to release forward for 3 or 4 frames, and repress forward on the last possible frame before the transition. Other timings can work, but will gain the shinecharge further from the door, leaving fewer shinecharge frames remaining. After gaining the shinecharge, continue holding forward in order to make Samus stand. Then turnaround spin jump back toward the door, and continue spin jumping to reach the transition with a shinecharge. Alternatively, with greater difficulty but saving some shinecharge frames, after performing the turnaround spin jump, briefly moonwalk back, then retain momentum by boomeranging forward (switching from pressing backward to pressing forward on the next frame), and arm pump to reach the door quickly. Entrance condition: "comeInStutterShinecharging": {
"minTiles": 3
}Requires: "canPreciseStutterWaterShineCharge", "canShinechargeMovementTricky", "canInsaneJump", {"shineChargeFrames": 145}, {"or": [ "canBeVeryPatient", {"shineChargeFrames": 10} ]} Exit condition: "leaveShinecharged": {}Unlocks doors: {"types": ["super"], "requires": []},
{"types": ["missiles", "powerbomb"], "requires": ["never"]}Dev note: The same shinecharge frames could be achieved with a closed end runway (effective length of 2.4375), with a 3-frame stutter, but there doesn't appear to be any application. |
From: 2
Bottom Left Door
To: 2
Bottom Left Door
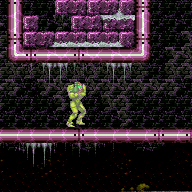
With only a runway of 2 tiles (open end) in the other room, the ideal timing for the stutter is to release forward for 3 frames, and repress forward on the last possible frame before the transition. Other timings can work, but will gain the shinecharge further from the door, leaving fewer shinecharge frames remaining. After gaining the shinecharge, continue holding forward in order to make Samus stand. Then turnaround spin jump back toward the door, and continue spin jumping to reach the transition with a shinecharge. Alternatively, with greater difficulty but saving some shinecharge frames, after performing the turnaround spin jump, briefly moonwalk back, then retain momentum by boomeranging forward (switching from pressing backward to pressing forward on the next frame), and arm pump to reach the door quickly. Entrance condition: "comeInStutterShinecharging": {
"minTiles": 2
}Requires: "canPreciseStutterWaterShineCharge", "canShinechargeMovementTricky", "canInsaneJump", {"shineChargeFrames": 150}, {"or": [ "canBeVeryPatient", {"shineChargeFrames": 15} ]} Exit condition: "leaveShinecharged": {}Unlocks doors: {"types": ["super"], "requires": []},
{"types": ["missiles", "powerbomb"], "requires": ["never"]}Dev note: FIXME: The canBeVeryPatient requirement is for difficulty placement of the boomerang method; but the boomerang (or maybe specifically the moonwalk boomerang) should possibly be its own tech, and the same with rapid arm pumping. |
From: 2
Bottom Left Door
To: 2
Bottom Left Door
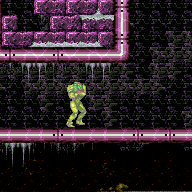
With only 1 tile of runway in the other room, Samus should ideally start on the last pixel of runway with X subpixels of $3FFF or less. Run toward the door, releasing forward for exactly 1 frame and pressing it again on the last possible frame before the transition. Starting with X subpixels of $7FFF can also work (e.g., by simply backing against the door ledge, then jumping and turning around mid-air); in this case, Samus must advance 1 or 2 pixels with an arm pump before the transition (e.g., firing a shot or pressing and/or releasing an angle button), and the shinecharge will be gained slightly further away from the door. After gaining the shinecharge, continue holding forward in order to make Samus stand. Then turnaround spin jump back toward the door, and continue spin jumping to reach the transition with a shinecharge. Alternatively, with greater difficulty but saving some shinecharge frames, after performing the turnaround spin jump, briefly moonwalk back, then retain momentum by boomeranging forward (switching from pressing backward to pressing forward on the next frame), and arm pump to reach the door quickly. Ideal subpixels ($3FFF) can be achieved using one of several methods: 1) press forward against the door ledge (or a wall aligned with it); jump, and while mid-air, tap forward for exactly 1 frame to land with subpixels $BFFF, moonwalk back for exactly 1 frame to end with subpixels $3FFF. 2) press forward against the door ledge (from a platform below, assuming one exists) turn around (while on the ground), and moonwalk back two pixels, then jump and mid-air turnaround onto the ledge; if Samus jumped from the correct pixel but does not land on the ledge, then it was needed to moonwalk back 1 more frame; in this case it is possible to retry by doing a mid-air turnaround back onto the platform, and moonwalking back for 1 frame. 3) if X-Ray is available, press against the door ledge (from a platform below, assuming one exists) turn around (while on the ground), then jump and mid-air turnaround toward the door, and use X-Ray to turnaround in place away from the door; repeat this sequence 3 more times: jump, mid-air turnaround, X-Ray turnaround; then do one more jump and mid-air turnaround, high enough to land on the door ledge, and Samus should be in the correct position with subpixels $3FFF. Entrance condition: "comeInStutterShinecharging": {
"minTiles": 1
}Requires: "canPreciseStutterWaterShineCharge", "canInsaneJump", "canBeVeryPatient", "canShinechargeMovementTricky", {"shineChargeFrames": 160} Exit condition: "leaveShinecharged": {}Unlocks doors: {"types": ["super"], "requires": []},
{"types": ["missiles", "powerbomb"], "requires": ["never"]} |
From: 2
Bottom Left Door
To: 2
Bottom Left Door


Start with low run speed by positioning exactly 2 pixels from the door. Use X-Ray to cancel the shinecharge early, to avoid getting hit by the angry snail. Entrance condition: "comeInRunning": {
"speedBooster": "yes",
"minTiles": 0.4375
}Requires: "canWaterShineCharge", "canXRayCancelShinecharge", "canXRayTurnaround", "canLongChainTemporaryBlue" Exit condition: "leaveWithTemporaryBlue": {}Unlocks doors: {"types": ["ammo"], "requires": []}Dev note: This can also be done with a stutter shinecharge, which can shorten the temp blue chain, but not by enough to remove the need for the canLongChainTemporaryBlue requirement. |
|
Requires: {"resetRoom": {"nodes": [2]}},
{"or": [
"h_useMorphBombs",
{"haveBlueSuit": {}}
]},
"canDodgeWhileShooting",
{"or": [
{"and": [
"Gravity",
{"cycleFrames": 430}
]},
{"cycleFrames": 1045}
]}Resets obstacles: A, R-Mode Farm cycle drops: 2 Yard |
|
Requires: "h_CrystalFlash", {"obstaclesNotCleared": ["R-Mode"]} Clears obstacles: A |
|
Requires: "Gravity", "h_shinechargeMaxRunway", "h_CrystalSpark" Clears obstacles: A |
|
Enter this room while holding dash in the previous room, before the door transition. Do not release dash in the water or Samus will not be able to get blue speed. Entrance condition: "comeInRunning": {
"speedBooster": "yes",
"minTiles": 0.4375
},
"comesInHeated": "no"Requires: "canWaterShineCharge", "h_shinechargeMaxRunway", "h_underwaterCrystalSpark" |
|
Entrance condition: "comeInWithRMode": {}Clears obstacles: R-Mode |
|
Gain Energy with a Crystal Flash or farm Yards with Bombs or Speed Booster. To kill one with Speed Booster, shoot it, run away then run back with blue speed. Then use an angry Yard to interrupt a spark. Requires: {"obstaclesCleared": ["R-Mode"]},
"Gravity",
{"or": [
"h_CrystalFlashForReserveEnergy",
{"and": [
"h_RModeCanRefillReserves",
{"partialRefill": {"type": "ReserveEnergy", "limit": 20}}
]}
]},
"h_shinechargeMaxRunway",
{"autoReserveTrigger": {}},
"canRModeSparkInterrupt"Dev note: This could also be done at 5, which could be important if Samus is not able to pause or Gravity Jump. This will be important when doing this with a flash suit with no Gravity or Speed. |
|
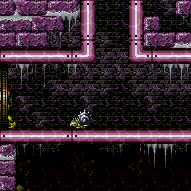

Exit condition: "leaveWithDamage": {
"enemy": "Yard"
} |
|
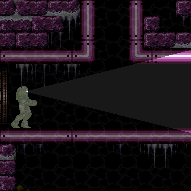

Requires: {"enemyDamage": {"enemy": "Yard", "type": "contact", "hits": 1}} |
|
Requires: "Gravity",
{"or": [
"SpaceJump",
"canCarefulJump",
"h_getBlueSpeedMaxRunway",
"h_useSpringBall"
]} |
|
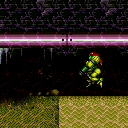

Requires: "canSuitlessMaridia", {"or": [ {"and": [ "HiJump", "h_useSpringBall" ]}, "canPlayInSand" ]} |
|
Enter this room while holding dash in the previous room, before the door transition. Do not release dash in the water or Samus will not be able to get blue speed. Entrance condition: "comeInRunning": {
"speedBooster": "yes",
"minTiles": 0.4375
}Requires: "canShinechargeMovementComplex", "canWaterShineCharge", "h_shinechargeMaxRunway", {"shinespark": {"frames": 139, "excessFrames": 66}} Dev note: This is obscure enough that it's assumed you can canShinechargeMovementComplex |
|
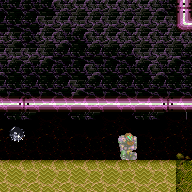

It is possible to run across the sand, using blue speed gained from the long runway on the bottom-right. Requires: "Gravity",
{"canShineCharge": {"usedTiles": 32, "openEnd": 0}},
{"shineChargeFrames": 30}Exit condition: "leaveShinecharged": {}Dev note: FIXME: split into separate variants for with and without a momentum-conserving turnaround, since it affects Samus' state in the next room, e.g. whether it will be possible to spark mid-air without landing first. |
|
|
|


Requires: "Gravity",
{"or": [
"canWallJump",
"SpaceJump",
"canLongIBJ",
"canJumpIntoIBJ",
"canSpeedyJump",
"Grapple",
{"and": [
"HiJump",
"canSpringBallJumpMidAir"
]},
{"and": [
"HiJump",
"canUseEnemies"
]}
]}Dev note: A very precise crouch-jump down-grab, or spring ball jumping to the snail is closer to canSnailClimb. |
|


Requires: "canGravityJump" |
|
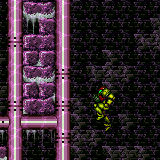

Requires: "canSuitlessMaridia", "canGrappleJump" |
|


Requires: "canSnailClimb", "h_useSpringBall", {"or": [ "Gravity", {"and": [ "canSuitlessMaridia", "HiJump" ]} ]} |
From: 2
Bottom Left Door
To: 5
Right Door
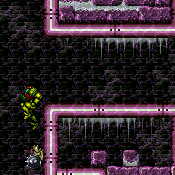

Stop the snail when it is on the lower part of the overhang (hug the snail to gain extra jump height). Climb it by waiting until it is just about to become active to jump. Requires: {"notable": "Bootless Suitless Snail Climb"},
"h_navigateUnderwater",
"canSnailClimb" |
|
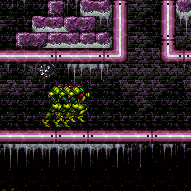

Enter this room while holding dash in the previous room, before the door transition. Do not release dash in the water or Samus will not be able to get blue speed. Entrance condition: "comeInRunning": {
"speedBooster": "yes",
"minTiles": 0.4375
}Requires: "canWaterShineCharge", "h_shinechargeMaxRunway", {"shinespark": {"frames": 37, "excessFrames": 3}} |
|
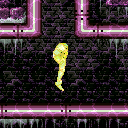

Requires: "Gravity", "h_shinechargeMaxRunway", {"or": [ {"shinespark": {"frames": 40, "excessFrames": 7}}, {"and": [ "canMidairShinespark", {"shinespark": {"frames": 34, "excessFrames": 7}} ]} ]} |
|
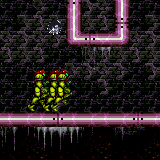
Enter this room while holding dash in the previous room, before the door transition. Do not release dash in the water or Samus will not be able to get blue speed. Entrance condition: "comeInRunning": {
"speedBooster": "yes",
"minTiles": 0.4375
}Requires: "canWaterShineCharge", "h_shinechargeMaxRunway", {"or": [ {"shinespark": {"frames": 40, "excessFrames": 7}}, {"and": [ "canMidairShinespark", {"shinespark": {"frames": 37, "excessFrames": 7}} ]}, {"and": [ "HiJump", "canMidairShinespark", {"shinespark": {"frames": 34, "excessFrames": 7}} ]} ]} |
|

Gain temporary blue using the long runway. Chaining temporary blue, use two Gravity jumps to navigate the room and break the Speed blocks. Requires: "h_shinechargeMaxRunway", "canGravityJump", "canTemporaryBlue", {"or": [ "canChainTemporaryBlue", "HiJump" ]} Dev note: This avoids the energy requirement of performing a shinespark. |
From: 2
Bottom Left Door
To: 7
Top Right Left Item
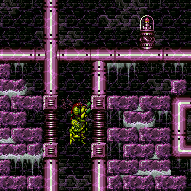

Use a double spring ball jump to reach the Speed blocks below the items while chaining temporary blue. Perform a spring ball jump and immediately unmorph and continue holding up, to break some of the Speed blocks while passing up through them. Leave one of the bottom Speed blocks unbroken to use as a platform. The top speed blocks will respawn; clip through them either using a snail clip with X-Ray or a Crystal Flash clip; In the case of a Crystal Flash clip, menu to Grapple before the Crystal Flash ends and mash shoot while holding down. Entrance condition: "comeInRunning": {
"speedBooster": "yes",
"minTiles": 0.4375
}Requires: {"notable": "Suitless Temporary Blue To Items"},
"canSuitlessMaridia",
"h_waterGetBlueSpeed",
"h_doubleSpringBallJumpWithHiJump",
"canChainTemporaryBlue",
{"or": [
"canXRayCeilingClip",
{"and": [
"h_jumpIntoCrystalFlashClip",
"Grapple",
{"obstaclesNotCleared": ["R-Mode"]}
]}
]} |
From: 2
Bottom Left Door
To: 7
Top Right Left Item
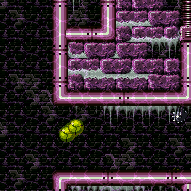

Use a double spring ball jump to reach the Speed blocks below the items while chaining temporary blue. Perform a spring ball jump and immediately unmorph and continue holding up, to break some of the Speed blocks while passing up through them. Leave one of the bottom Speed blocks unbroken to use as a platform. The top speed blocks will respawn; clip through them either using a snail clip with X-Ray or a Crystal Flash clip; In the case of a Crystal Flash clip, menu to Grapple before the Crystal Flash ends and mash shoot while holding down. Entrance condition: "comeInWithTemporaryBlue": {}Requires: {"notable": "Suitless Temporary Blue To Items"},
"canSuitlessMaridia",
"h_doubleSpringBallJumpWithHiJump",
"canChainTemporaryBlue",
{"or": [
"canXRayCeilingClip",
{"and": [
"h_jumpIntoCrystalFlashClip",
"Grapple",
{"obstaclesNotCleared": ["R-Mode"]}
]}
]} |
|
Requires: "Gravity",
{"or": [
"SpaceJump",
"Grapple",
"canConsecutiveWallJump"
]} |
|
Requires: "canSuitlessMaridia", "canGrappleJump" |
|
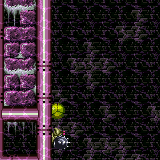

Watch out for snails coming from above, or aggressive snails from below, who will either block or attack Samus. Requires: "canSnailClimb", "h_useSpringBall", {"or": [ "Gravity", {"and": [ "canSuitlessMaridia", "HiJump" ]} ]} |
|


Gravity Jump up to the top with HiJump. It is possible to jump up without HiJump with a precise jump and equipping Spring Ball and Gravity at the peak of the jump. Requires: "canGravityJump", {"or": [ "HiJump", {"and": [ "canSpringBallJumpMidAir", "canTrickyJump" ]} ]} |
From: 2
Bottom Left Door
To: 9
Junction Below Top Door
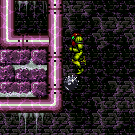

Stop the snail when it is on the lower part of the overhang (hug the snail to gain extra jump height). Climb it by waiting until it is just about to become active to jump. Watch out for snails coming from above, or aggressive snails from below, who will either block or attack Samus. Requires: {"notable": "Bootless Suitless Snail Climb"},
"h_navigateUnderwater",
"canSnailClimb" |
|
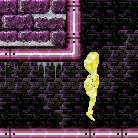

Requires: "Gravity", "h_shinechargeMaxRunway", {"or": [ {"shinespark": {"frames": 37, "excessFrames": 3}}, {"and": [ "canMidairShinespark", {"shinespark": {"frames": 29, "excessFrames": 3}} ]}, {"and": [ "HiJump", "canMidairShinespark", {"shinespark": {"frames": 25, "excessFrames": 3}} ]}, {"and": [ "HiJump", "canMidairShinespark", "canSpeedyJump", {"shinespark": {"frames": 17, "excessFrames": 3}} ]} ]} Dev note: It's possible to include more precise speedy jump variants to save Energy, But it's assumed you can do a Gravity jump. |
|
Begin shinecharging in the previous room and continue through the door transition. Do not release dash in the water or Samus will not be able to get blue speed. Entrance condition: "comeInShinecharging": {
"length": 3,
"openEnd": 1
}Requires: "canWaterShineCharge", {"shinespark": {"frames": 37, "excessFrames": 3}} |
From: 2
Bottom Left Door
To: 9
Junction Below Top Door
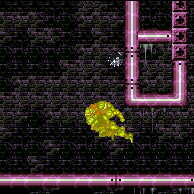
Enter this room while holding dash in the previous room, before the door transition. Do not release dash in the water or Samus will not be able to get blue speed. This is easiest by starting close to the transition (but at least 2 pixels away) so that Samus has very low run speed. Entrance condition: "comeInRunning": {
"speedBooster": "yes",
"minTiles": 0.4375
}Requires: "canWaterShineCharge", "canShinechargeMovement", {"canShineCharge": {"usedTiles": 25, "openEnd": 2}}, {"shinespark": {"frames": 37, "excessFrames": 3}} Dev note: In order for Samus to shinecharge without going too far to the right and without utilizing the low run speed, a one-tap or long adjacent runway is required. |
From: 2
Bottom Left Door
To: 10
G-Mode Morph Junction (By Bottom Left Door)
Entrance condition: "comeInWithGMode": {
"mode": "any",
"morphed": true
} |
|
Entrance condition: "comeInWithGMode": {
"mode": "any",
"morphed": false
} |
From: 2
Bottom Left Door
To: 13
Direct G-Mode Morph (By Bottom Left Door)
Entrance condition: "comeInWithGMode": {
"mode": "direct",
"morphed": true
} |
|
Requires: {"blueSuitShinecharge": {}},
{"shineChargeFrames": 40}Exit condition: "leaveShinecharged": {} |
|
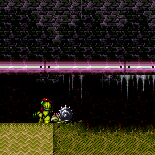

Time a Yard's movement with entering the sand. Crouch in the sand and press forward when near the transition to stand up and touch the transition on the first frame of standing. If it is important to touch the transition near the middle of the sand, shoot a Yard so that it will move faster and quickly get into position. Requires: "h_navigateUnderwater", {"noBlueSuit": {}}, "canPlayInSand", "canDownwardGModeSetup" Exit condition: "leaveWithDamage": {
"enemy": "Yard"
} |
|
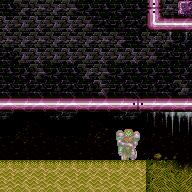

Requires: "Gravity",
{"canShineCharge": {"usedTiles": 32, "openEnd": 0}},
{"shineChargeFrames": 30}Exit condition: "leaveShinecharged": {}Dev note: FIXME: split into separate variants for with and without a momentum-conserving turnaround, since it affects Samus' state in the next room, e.g. whether it will be possible to spark mid-air without landing first. |
|
Requires: {"blueSuitShinecharge": {}},
{"shineChargeFrames": 40}Exit condition: "leaveShinecharged": {} |
|
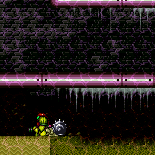

Time a Yard's movement with entering the sand. Crouch in the sand and press forward when near the transition to stand up and touch the transition on the first frame of standing. If it is important to touch the transition near the middle of the sand, shoot a Yard so that it will move faster and quickly get into position. Requires: "h_navigateUnderwater", {"noBlueSuit": {}}, "canPlayInSand", "canDownwardGModeSetup" Exit condition: "leaveWithDamage": {
"enemy": "Yard"
} |
|
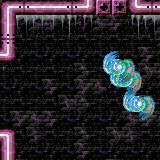

Gain blue speed by running right-to-left on the 20-tile runway below the items. Then use Space Jump to carry it across the top of the room to break the bomb blocks. To cross the room most easily, blue speed can be gained with low momentum by pressing pause, running a few tiles, stuttering just before the pause hits, disabling Gravity suit, continuing to run left, then re-enabling Gravity suit before jumping. Alternatively, a regular shortcharge can be used in combination with either HiJump or a precise amount of extra run speed ($2.0 or $2.1), to cross the room at higher speed. Requires: {"notable": "Blue Space Jump"},
"Gravity",
"canPreciseSpaceJump",
{"or": [
{"and": [
"canDisableEquipment",
"h_stutterWaterGetBlueSpeed"
]},
{"and": [
{"getBlueSpeed": {"usedTiles": 20, "openEnd": 2}},
{"or": [
"HiJump",
"canTrickyDashJump"
]}
]}
]},
"canBlueSpaceJump" |
|
Use a double spring ball jump to reach the top of the room with temporary blue. To cross the two gaps at the top of the room while chaining temporary blue, use spring ball jumps with HiJump disabled; in each case, perform a stationary lateral mid-air morph or a spring fling (or both); Entrance condition: "comeInWithTemporaryBlue": {}Requires: "HiJump", "canLongChainTemporaryBlue", "canDoubleSpringBallJumpMidAir", "canTrickySpringBallJump", {"or": [ "canStationaryLateralMidAirMorph", "canSpringFling" ]}, "canBeVeryPatient" |
|
Hold Grapple through the transition and then immediately release it to teleport below the Bomb blocks. Entrance condition: "comeInWithGrappleTeleport": {
"blockPositions": [[5, 3], [7, 2]]
} |
|
Exit the previous room with Samus in a standing pose (while grappled) with a horizontal position of 21 (as far right as possible). After teleporting, press right to release Grapple while staying standing (not being forced into a crouch). Then X-ray climb to get to the door transition above, without needing to open the door. At the beginning of the climb, avoid pressing left without X-Ray being held, to prevent triggering the transition of the bottom door. Entrance condition: "comeInWithGrappleTeleport": {
"blockPositions": [[2, 34]]
}Requires: "canXRayClimb" Bypasses door shell: true |
|
|
|
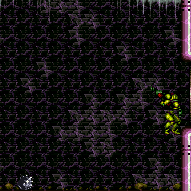

Entrance condition: "comeInWithGrappleTeleport": {
"blockPositions": [[2, 34]]
}Bypasses door shell: true |
|
Entrance condition: "comeInWithGrappleTeleport": {
"blockPositions": [[2, 34]]
}Exit condition: "leaveWithGrappleTeleport": {
"blockPositions": [[2, 34]]
}Bypasses door shell: true |
|
Exit condition: "leaveWithRunway": {
"length": 1,
"openEnd": 1
} |
|


Requires: "Gravity" Exit condition: "leaveWithSidePlatform": {
"height": 4,
"runway": {
"length": 12,
"openEnd": 0
},
"obstruction": [1, 0]
}Dev note: Max extra run speed $2.6. This strat is included for completeness, though it apparently doesn't have any applications. |
|
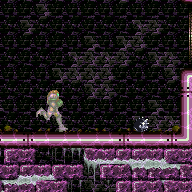

Requires: "Gravity",
{"or": [
{"canShineCharge": {"usedTiles": 20, "openEnd": 2}},
{"and": [
"canEnemyExtendRunway",
{"canShineCharge": {"usedTiles": 21, "openEnd": 2}}
]}
]},
{"shineChargeFrames": 90}Exit condition: "leaveShinecharged": {}Dev note: It is possible, although not overly useful, to extend the runway here using a snail. |
|
Requires: "Gravity" Exit condition: "leaveSpinning": {
"remoteRunway": {
"length": 7,
"openEnd": 2
}
} |
|
Requires: "Gravity", "SpaceJump" Exit condition: "leaveSpinning": {
"remoteRunway": {
"length": 20,
"openEnd": 2
}
} |
|
Requires: "Gravity" Exit condition: "leaveWithMockball": {
"remoteRunway": {
"length": 7,
"openEnd": 2
},
"landingRunway": {
"length": 1,
"openEnd": 1
}
} |
|
Requires: "Gravity" Exit condition: "leaveWithMockball": {
"remoteRunway": {
"length": 20,
"openEnd": 2
},
"landingRunway": {
"length": 1,
"openEnd": 1
},
"minExtraRunSpeed": "$1.2"
} |
From: 5
Right Door
To: 5
Right Door
Requires: "Gravity" Exit condition: "leaveWithSpringBallBounce": {
"remoteRunway": {
"length": 6,
"openEnd": 1
},
"landingRunway": {
"length": 1,
"openEnd": 1
},
"movementType": "uncontrolled"
} |
|
Requires: "Gravity" Exit condition: "leaveWithSpringBallBounce": {
"remoteRunway": {
"length": 20,
"openEnd": 2
},
"landingRunway": {
"length": 1,
"openEnd": 1
},
"minExtraRunSpeed": "$0.F",
"movementType": "uncontrolled"
} |
|
Requires: "Gravity" Exit condition: "leaveSpaceJumping": {
"remoteRunway": {
"length": 20,
"openEnd": 2
}
} |
|
Requires: {"resetRoom": {"nodes": [5]}},
{"or": [
"h_useMorphBombs",
{"haveBlueSuit": {}}
]},
"canDodgeWhileShooting",
{"or": [
{"and": [
"Gravity",
{"cycleFrames": 220}
]},
{"cycleFrames": 260}
]}Resets obstacles: A, R-Mode Farm cycle drops: 1 Yard |
|
Requires: "h_CrystalFlash", {"obstaclesNotCleared": ["R-Mode"]} |
|
Entrance condition: "comeInWithRMode": {}Clears obstacles: R-Mode |
|
Exit condition: "leaveWithDamage": {
"enemy": "Yard"
}Dev note: Requires no items or tech if you step on a Snail - canUseEnemies is necessary for G-Mode Setup. |
|
Requires: {"enemyDamage": {"enemy": "Yard", "type": "contact", "hits": 1}} |
|
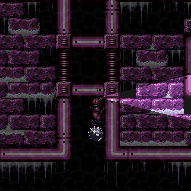

Jump on the Snail when it is at a precise location, and then crouch jump through the ceiling and jump again, without moving between jumps. The Snail's positioning is more lenient with Morph and an X-Ray Turn Around. X-Ray can also be useful for helping position the Snail. Requires: "Gravity", "canUseEnemies", "canXRayCeilingClip" |
|
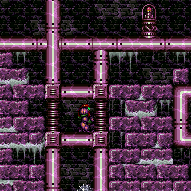

Jump on the Snail when it is at a precise location, and then crouch jump through the ceiling and jump again, without moving between jumps. The Snail's positioning is very precise. Morph can be used to help get onto the Snail and get off without taking a hit if it is in the wrong location. Requires: {"notable": "Precise Snail Clip With Gravity"},
"Gravity",
"canUseEnemies",
"canCeilingClip",
{"or": [
"Morph",
"canPreciseCeilingClip",
{"enemyDamage": {"enemy": "Yard", "type": "contact", "hits": 2}}
]} |
|
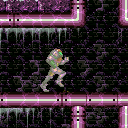

Spark diagonally to the right in order to save some Energy. Requires: "Gravity", "canShinechargeMovement", {"or": [ {"canShineCharge": {"usedTiles": 20, "openEnd": 2}}, {"and": [ "canEnemyExtendRunway", {"canShineCharge": {"usedTiles": 21, "openEnd": 2}} ]} ]}, {"or": [ {"shinespark": {"frames": 19, "excessFrames": 4}}, {"and": [ "canMidairShinespark", {"shinespark": {"frames": 13, "excessFrames": 4}} ]} ]} Dev note: It is possible, although not overly useful, to extend the runway here using a snail. FIXME: It is possible to use a snail here and in Shaktool's room to extend the runway at the door. This can be useful when short charging, but can not be used to leave running, as running on the snail does not work. |
|
Requires: {"haveBlueSuit": {}},
"canSnailClimb"Dev note: FIXME: other options are also possible, aside from snail climbing. |
From: 5
Right Door
To: 7
Top Right Left Item
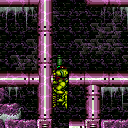

Depending on Samus' speed and position, either perform a speedball or an uncontrolled bounce onto the platform below the Speed blocks. Unmorph and continue holding up in order to break the Speed blocks while passing up through them. The top Speed blocks will respawn; to get on top of them, it can help to press against the wall (to discard blue speed) and then aim down to reduce Samus' hitbox. If available, using Grapple while aiming down can also help. Alternatively, if Samus breaks only the right column of Speed blocks, Samus can use the center left Speed block as a stepping stone. Be careful not to fall through the Speed blocks below as it will result in a softlock. Entrance condition: "comeInBlueSpinning": {
"minExtraRunSpeed": "$3.4",
"maxExtraRunSpeed": "$4.C",
"unusableTiles": 1
}Requires: {"notable": "Suitless Blue Bomber"},
"canSuitlessMaridia",
"HiJump",
"canSpeedball",
"canTrickySpringBallBounce",
"canMomentumConservingMorph"Dev note: Slightly lower or higher speeds could work but with greater difficulty. |
From: 5
Right Door
To: 7
Top Right Left Item
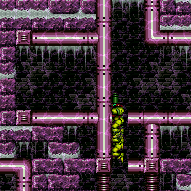

Bounce onto the platform below the Speed blocks. Unmorph and continue holding up in order to break the Speed blocks while passing up through them. The top Speed blocks will respawn; to get on top of them, it can help to press against the wall (to discard blue speed) and then aim down to reduce Samus' hitbox. If available, using Grapple while aiming down can also help. Alternatively, if Samus breaks only the right column of Speed blocks, Samus can use the center left Speed block as a stepping stone. Be careful not to fall through the Speed blocks below as it will result in a softlock. Entrance condition: "comeInWithBlueSpringBallBounce": {
"movementType": "controlled",
"minExtraRunSpeed": "$3.4",
"maxExtraRunSpeed": "$4.C"
}Requires: {"notable": "Suitless Blue Bomber"},
"canSuitlessMaridia",
"HiJump",
"canTrickySpringBallBounce",
"canInsaneJump",
"canMomentumConservingMorph"Dev note: Lower or higher speeds could work but with greater difficulty. |
From: 5
Right Door
To: 7
Top Right Left Item
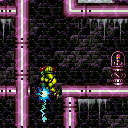

In the previous room, perform a relatively precise 1-tap in order to gain blue speed with momentum in a specific range, then spin jump through the door transition. Depending on Samus' speed and position, either perform a speedball or an uncontrolled bounce onto the platform below the Speed blocks. Unmorph and continue holding up in order to break the Speed blocks while passing up through them. The top Speed blocks will respawn; to get on top of them, it can help to press against the wall (to discard blue speed) and then aim down to reduce Samus' hitbox. If available, using Grapple while aiming down can also help. Alternatively, if Samus breaks only the right column of Speed blocks, Samus can use the center left Speed block as a stepping stone. Be careful not to fall through the Speed blocks below as it will result in a softlock. Entrance condition: "comeInBlueSpinning": {
"minExtraRunSpeed": "$4.0",
"maxExtraRunSpeed": "$4.3",
"unusableTiles": 1
}Requires: {"notable": "Suitless Blue Bomber"},
"canSuitlessMaridia",
"canTrickyDashJump",
"canSpeedball",
"canTrickySpringBallBounce",
"canMomentumConservingMorph" |
From: 5
Right Door
To: 7
Top Right Left Item
In the previous room, perform a relatively precise 1-tap in order to gain blue speed with momentum in a specific range, then use spring ball to bounce through the door transition. Bounce onto the platform below the Speed blocks. Unmorph and continue holding up in order to break the Speed blocks while passing up through them. The top Speed blocks will respawn; to get on top of them, it can help to press against the wall (to discard blue speed) and then aim down to reduce Samus' hitbox. If available, using Grapple while aiming down can also help. Alternatively, if Samus breaks only the right column of Speed blocks, Samus can use the center left Speed block as a stepping stone. Be careful not to fall through the Speed blocks below as it will result in a softlock. Entrance condition: "comeInWithBlueSpringBallBounce": {
"movementType": "controlled",
"minExtraRunSpeed": "$4.0",
"maxExtraRunSpeed": "$4.3"
}Requires: {"notable": "Suitless Blue Bomber"},
"canSuitlessMaridia",
"canTrickyDashJump",
"canInsaneJump",
"canTrickySpringBallBounce",
"canMomentumConservingMorph" |
|
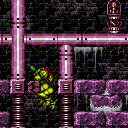

Chain temporary blue to reach the Speed blocks below the items. Perform a spring ball jump and immediately unmorph and continue holding up, to break some of the Speed blocks while passing up through them. Leave one of the bottom Speed blocks unbroken to use as a platform. The top speed blocks will respawn; clip through them either using a snail clip with X-Ray or a Crystal Flash clip; In the case of a Crystal Flash clip, menu to Grapple before the Crystal Flash ends and mash shoot while holding down. Entrance condition: "comeInWithTemporaryBlue": {}Requires: {"notable": "Suitless Temporary Blue To Items"},
"canSuitlessMaridia",
"HiJump",
"canChainTemporaryBlue",
"canTrickySpringBallJump",
{"or": [
"canXRayCeilingClip",
{"and": [
"h_jumpIntoCrystalFlashClip",
"Grapple",
{"obstaclesNotCleared": ["R-Mode"]}
]}
]} |
|


Sparking up right from a snail can save some Energy. With very little Energy, spark up the center of the speed blocks to clear both sides, then snail clip through the last one. It may be helpful to turn around before sparking so the snail doesn't hit Samus. Requires: "canUseEnemies", "h_storedSpark", {"or": [ {"shinespark": {"frames": 13, "excessFrames": 4}}, {"and": [ {"shinespark": {"frames": 13, "excessFrames": 10}}, {"or": [ "canHighPixelCeilingClip", {"and": [ "Gravity", "canPreciseCeilingClip" ]}, {"and": [ "Gravity", "canXRayCeilingClip" ]} ]} ]} ]} |
|
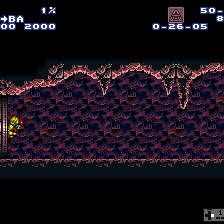

Climb up 1 screen. Entrance condition: "comeInWithDoorStuckSetup": {}Requires: "canXRayClimb" |
From: 5
Right Door
To: 9
Junction Below Top Door
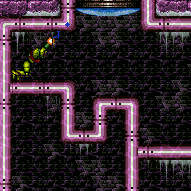

Entrance condition: "comeInWithGrappleTeleport": {
"blockPositions": [[5, 3]]
} |
|
Press down immediately after teleporting, in order to get above the bomb blocks. Entrance condition: "comeInWithGrappleTeleport": {
"blockPositions": [[7, 2]]
} |
From: 5
Right Door
To: 10
G-Mode Morph Junction (By Bottom Left Door)
Entrance condition: "comeInWithGMode": {
"mode": "any",
"morphed": true
}Requires: {"or": [
"h_artificialMorphSpringBall",
"Morph",
{"and": [
"Gravity",
"h_artificialMorphIBJ"
]}
]} |
From: 5
Right Door
To: 11
G-Mode Overloaded PLMs (By Bottom Left Door)
Entrance condition: "comeInWithGMode": {
"mode": "any",
"morphed": true
}Requires: "h_artificialMorphBombs", {"or": [ "h_artificialMorphSpringBall", "Morph", {"and": [ "Gravity", "h_artificialMorphIBJ" ]} ]} |
From: 5
Right Door
To: 11
G-Mode Overloaded PLMs (By Bottom Left Door)
PLMs can be overloaded in direct G-Mode with a single Power Bomb if both items are still there and 2 PBs if only one item is. There is a row of tiles that works, just above and to the left of the right door. The row is one tile higher than the horizontal pipe that is part of the door frame, spanning from the left to one tile away from the right wall. Entrance condition: "comeInWithGMode": {
"mode": "direct",
"morphed": true
}Requires: "canPowerBombItemOverloadPLMs", {"notable": "G-Mode Overload PLMs - Power Bomb the Items"}, "canRiskPermanentLossOfAccess", {"or": [ {"itemNotCollectedAtNode": 7}, {"itemNotCollectedAtNode": 8} ]}, "h_artificialMorphSpringBall", "h_artificialMorphPowerBomb", "h_artificialMorphPowerBomb" Dev note: This canRiskPermanentLossOfAccess variant is only added from this door, as the only other place to use overloaded PLMs would be the top left bomb block, and if you can get here artificially morphed, you can get to the top left and instead use the bomb on the block. |
|
Entrance condition: "comeInWithGMode": {
"mode": "any",
"morphed": false
} |
From: 5
Right Door
To: 13
Direct G-Mode Morph (By Bottom Left Door)
Entrance condition: "comeInWithGMode": {
"mode": "direct",
"morphed": true
}Requires: {"or": [
"h_artificialMorphSpringBall",
"Morph"
]}Dev note: Strats that can go 5->13->7 will, others will go directly from 5->7. Gravity + IBJ is not included, as there is no benefit of Direct G-mode with those items - it will go to 5->10 instead. |
|
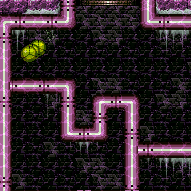
Entrance condition: "comeInWithTemporaryBlue": {
"direction": "left"
},
"comesThroughToilet": "any"Requires: "canChainTemporaryBlue" |
|
Entrance condition: "comeInWithTemporaryBlue": {
"direction": "right"
},
"comesThroughToilet": "any"Requires: "canChainTemporaryBlue", "canXRayTurnaround" |
|
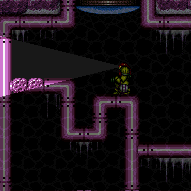
Entrance condition: "comeInWithGMode": {
"mode": "any",
"morphed": true
},
"comesThroughToilet": "any"Requires: {"or": [
"h_artificialMorphPowerBomb",
{"and": [
"h_artificialMorphBombs",
{"or": [
"Gravity",
"h_artificialMorphSpringBall"
]}
]}
]}Dev note: FIXME: This is doable with just Bombs and entering on the left side. |
|
Entrance condition: "comeInShinecharged": {},
"comesThroughToilet": "any"Requires: {"shineChargeFrames": 35},
"Gravity",
"canHorizontalShinespark",
{"shinespark": {"frames": 78, "excessFrames": 16}} |
|


Entrance condition: "comeInShinecharged": {},
"comesThroughToilet": "any"Requires: {"shineChargeFrames": 55},
"canSuitlessMaridia",
"canHorizontalShinespark",
{"shinespark": {"frames": 99, "excessFrames": 29}} |
|
Requires: "canPreciseGrappleJump" Exit condition: "leaveWithGrappleJump": {
"position": "right"
}Dev note: FIXME: It's probably possible to leave in 'left' position, with an exceptionally precise swing and maybe a bit of arm pumping. |
|
Entrance condition: "comeInWithRMode": {},
"comesThroughToilet": "no"Clears obstacles: R-Mode |
|

Use a clockwise or counter-clockwise snail to setup G-Mode on either side of the door. Requires: "canUpwardGModeSetup", "h_navigateUnderwater" Exit condition: "leaveWithDamage": {
"enemy": "Yard"
} |
|
Requires: {"enemyDamage": {"enemy": "Yard", "type": "contact", "hits": 1}}Dev note: Requires entry on either side of the doorway, but not the center. |
|
Entrance condition: "comeInWithGMode": {
"mode": "direct",
"morphed": false
},
"comesThroughToilet": "any"Requires: {"or": [
"Gravity",
"HiJump",
"canSpringBallJumpMidAir",
"canUseEnemies",
{"and": [
"h_underwaterCrouchJump",
"canTrickyJump"
]}
]}Exit condition: "leaveWithGMode": {
"morphed": false
} |
|
Entrance condition: "comeInWithGMode": {
"mode": "direct",
"morphed": true
},
"comesThroughToilet": "any"Requires: {"or": [
{"and": [
"Gravity",
"h_artificialMorphIBJ"
]},
{"and": [
"Gravity",
"h_artificialMorphSpringBall"
]},
{"and": [
"HiJump",
"h_artificialMorphSpringBall"
]}
]}Exit condition: "leaveWithGMode": {
"morphed": true
} |
|
It is easiest to use a single snail on the bottom of the ceiling to the right of the door. Use at least a small amount of momentum before jumping over towards the snail. Entrance condition: "comeInWithGMode": {
"mode": "direct",
"morphed": true
},
"comesThroughToilet": "any"Requires: "h_artificialMorphSpringBall", "canUseEnemies", "canTrickyJump" Exit condition: "leaveWithGMode": {
"morphed": true
} |
|


Gain Reserve Energy with a Crystal Flash or farm Yards with Bombs or Speed Booster. Shoot a Yard with a beam shot to anger it, then Morph on top of another against the door. Shortly after the angry one circles the room and hits Samus, jump to clip through the door. To kill a Yard with Speed Booster, tap it with a beam shot, run away from it, then run back towards it with blue speed. Requires: {"obstaclesCleared": ["R-Mode"]},
"Morph",
{"or": [
"h_CrystalFlashForReserveEnergy",
{"and": [
"h_RModeCanRefillReserves",
{"partialRefill": {"type": "ReserveEnergy", "limit": 20}},
{"or": [
"h_useMorphBombs",
{"and": [
"Gravity",
"h_getBlueSpeedMaxRunway"
]}
]}
]}
]},
{"autoReserveTrigger": {}}Bypasses door shell: true |
|
Requires: {"resetRoom": {"nodes": [6]}},
{"or": [
"h_useMorphBombs",
{"haveBlueSuit": {}}
]},
"canDodgeWhileShooting",
{"or": [
{"and": [
"Gravity",
{"cycleFrames": 2805}
]},
{"and": [
"HiJump",
{"cycleFrames": 2870}
]},
{"and": [
"h_underwaterCrouchJump",
{"or": [
"canTrickyJump",
"canMorphTurnaround"
]},
{"cycleFrames": 3405}
]}
]}Resets obstacles: A, R-Mode Farm cycle drops: 2 Yard |
|
Use a double spring ball jump to reach the Speed blocks below the items while chaining temporary blue. Perform a spring ball jump and immediately unmorph and continue holding up, to break some of the Speed blocks while passing up through them. Leave one of the bottom Speed blocks unbroken to use as a platform. The top speed blocks will respawn; clip through them either using a snail clip with X-Ray or a Crystal Flash clip; In the case of a Crystal Flash clip, menu to Grapple before the Crystal Flash ends and mash shoot while holding down. Entrance condition: "comeInWithTemporaryBlue": {
"direction": "right"
},
"comesThroughToilet": "any"Requires: {"notable": "Suitless Temporary Blue To Items"},
"canSuitlessMaridia",
"canChainTemporaryBlue",
{"ammo": {"type": "PowerBomb", "count": 1}},
"h_doubleSpringBallJumpWithHiJump",
{"or": [
"canXRayCeilingClip",
{"and": [
"h_jumpIntoCrystalFlashClip",
"Grapple",
{"obstaclesNotCleared": ["R-Mode"]}
]}
]} |
From: 6
Top Door
To: 7
Top Right Left Item
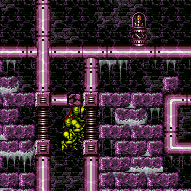

Use a double spring ball jump to reach the Speed blocks below the items while chaining temporary blue. Perform a spring ball jump and immediately unmorph and continue holding up, to break some of the Speed blocks while passing up through them. Leave one of the bottom Speed blocks unbroken to use as a platform. The top speed blocks will respawn; clip through them either using a snail clip with X-Ray. Entrance condition: "comeInWithTemporaryBlue": {
"direction": "left"
},
"comesThroughToilet": "any"Requires: {"notable": "Suitless Temporary Blue To Items"},
"canSuitlessMaridia",
"canChainTemporaryBlue",
"canXRayTurnaround",
{"ammo": {"type": "PowerBomb", "count": 1}},
"h_doubleSpringBallJumpWithHiJump",
"canXRayCeilingClip" |
|
Entrance condition: "comeInNormally": {},
"comesThroughToilet": "any" |
|
Entrance condition: "comeInWithGMode": {
"mode": "any",
"morphed": true
},
"comesThroughToilet": "any" |
|
Entrance condition: "comeInWithGMode": {
"mode": "any",
"morphed": false
},
"comesThroughToilet": "any" |
From: 6
Top Door
To: 13
Direct G-Mode Morph (By Bottom Left Door)
Entrance condition: "comeInWithGMode": {
"mode": "direct",
"morphed": true
},
"comesThroughToilet": "any" |
|
|
|
|
|
|
|
Requires: "Gravity", "h_destroyBombWalls" |
|
Requires: "h_bombThings" |
|
Requires: {"haveBlueSuit": {}} |
|
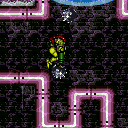

Use two snails to perform an 'Enemy Stuck Moonfall' to bypass the bomb blocks above the middle left door. Position one snail on the above door shell, and the second above the corner of pipe below. Samus will clip through the lower snail, taking damage, then continue through a segment of pipe where the crumble blocks can be reached. Facing both snails during the moonfall while positioning Samus for the clip can be precise. Depending on the exact heights of the snails, it may be necessary to pose change while clipping. Damage from the snail can be avoided by shooting the snail at a precise time: the water cycle or Samus' air bubbles can be used as a cue for the timing. Requires: {"notable": "Snail Stuck Moonfall"},
"h_navigateUnderwater",
"canEnemyStuckMoonfall",
"canBePatient",
{"or": [
{"enemyDamage": {"enemy": "Yard", "type": "contact", "hits": 1}},
"canFreeFallClip",
{"haveBlueSuit": {}}
]} |
From: 9
Junction Below Top Door
To: 1
Middle Left Door
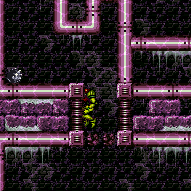

Requires: {"or": [
"h_useMorphBombs",
{"and": [
"Gravity",
"ScrewAttack"
]}
]}Exit condition: "leaveWithDamage": {
"enemy": "Yard"
}Unlocks doors: {"types": ["ammo"], "requires": []}Dev note: It is probably possible to use a Power Bomb while the snail is far enough away and have it get here before the block respawns, but it would make more sense to come through the Power Bomb blocks from below. FIXME: this can also be possible using blue Space Jump or temporary blue. |
|
|
|


Requires: "h_navigateUnderwater", "Grapple" |
|


Requires: "canSuitlessMaridia", "canFlatleyJump", "HiJump" |
|
Requires: "Gravity", "canLateralMidAirMorph", "canCarefulJump", {"or": [ "canTrickyJump", "canSpringBallBounce" ]} |
|
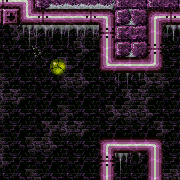

Requires either a spring fling or a stationary lateral midair morph with an unmorph to reset fall speed. Requires: "canSuitlessMaridia", "canTrickySpringBallJump", {"or": [ "canSpringFling", {"and": [ "canStationaryLateralMidAirMorph", "canResetFallSpeed" ]} ]} |
|
Requires: "canSuitlessMaridia", "canSpringFling", "canTrickySpringBallJump" |
|
Requires: {"or": [
"Gravity",
"HiJump",
"canSpringBallJumpMidAir"
]} |
|
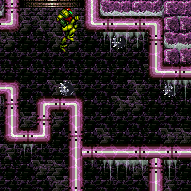

Wait for a snail to come along, in order to reach the door by jumping while standing on it. It is helpful to use a crouch jump; otherwise the snail must be lured higher. If entering from above, the quickest way to lure a snail is by pressing against the left wall. Requires: "canSuitlessMaridia", "canUseEnemies", {"notable": "Top Door Snail Step"} |
|
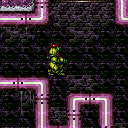

Crouch on rightmost pixel of the ledge to the left of the door, jump then move over quickly without spin jumping. The timing for the forward press needs to be between 0 and 5 frames after pressing jump (a 6-frame window). Samus's subpixel position is important: X position needs to be at least $64.4000, this is the rightmost 75% of the rightmost pixel. Morph provides an easier setup. From below the ledge, press left against the wall, jump, mid-air morph, and tap left to move slightly onto the ledge. Requires: "canSuitlessMaridia", "h_underwaterCrouchJump", {"or": [ "canTrickyJump", "canMorphTurnaround" ]} |
|
Requires: "h_CrystalFlash", {"obstaclesNotCleared": ["R-Mode"]} |
From: 10
G-Mode Morph Junction (By Bottom Left Door)
To: 1
Middle Left Door
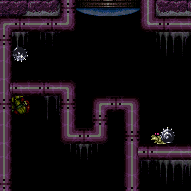

Requires: "canGMode", "Gravity", {"or": [ "h_artificialMorphLongIBJ", "h_artificialMorphJumpIntoIBJ" ]} |
From: 10
G-Mode Morph Junction (By Bottom Left Door)
To: 1
Middle Left Door
Requires: "canGMode", "h_artificialMorphBombThings", "h_artificialMorphSpringBall", "canSnailClimb", {"or": [ "HiJump", "Gravity" ]} |
From: 10
G-Mode Morph Junction (By Bottom Left Door)
To: 1
Middle Left Door
It is barely possible to start a snail climb with just Spring Ball. Get a snail positioned such that it is on the bottom of an overhang above, and sticking out a bit to be usable as a platform. Use Spring Ball to jump and press against the snail for the maximum possible duration, in order to gain enough height to get onto it. Requires: "canGMode", "h_artificialMorphBombThings", "h_artificialMorphSpringBall", "canSnailClimb", "canTrickyJump" |
From: 10
G-Mode Morph Junction (By Bottom Left Door)
To: 2
Bottom Left Door
Place a Power Bomb, then exit G-Mode to break the blocks. Requires: "canGMode", "h_artificialMorphPowerBomb" Clears obstacles: A |
From: 10
G-Mode Morph Junction (By Bottom Left Door)
To: 10
G-Mode Morph Junction (By Bottom Left Door)
Place a Power Bomb by the blocks before overloading PLMs. If coming from the left door, this needs to be done before getting to this node. Requires: "canGMode", "h_artificialMorphPowerBomb" Clears obstacles: A Dev note: Obstacle A is not cleared until after exiting G-mode, but no strat in G-mode will use A and try to go through them. |
From: 10
G-Mode Morph Junction (By Bottom Left Door)
To: 11
G-Mode Overloaded PLMs (By Bottom Left Door)
Requires: "canGMode", "Gravity", {"or": [ "h_artificialMorphLongIBJ", "h_artificialMorphJumpIntoIBJ" ]} |
From: 10
G-Mode Morph Junction (By Bottom Left Door)
To: 11
G-Mode Overloaded PLMs (By Bottom Left Door)
Bomb the Speed blocks by the right door. Requires: "canGMode", "h_useMorphBombs", {"or": [ "canSnailClimb", "Gravity", "HiJump" ]} |
From: 10
G-Mode Morph Junction (By Bottom Left Door)
To: 11
G-Mode Overloaded PLMs (By Bottom Left Door)
Requires: "canGMode", "h_artificialMorphBombs", "HiJump", "h_artificialMorphSpringBall", "canSnailClimb" |
From: 10
G-Mode Morph Junction (By Bottom Left Door)
To: 11
G-Mode Overloaded PLMs (By Bottom Left Door)
It is barely possible to start a snail climb with just Spring Ball. Get a snail positioned such that it is on the bottom of an overhang above, and sticking out a bit to be usable as a platform. Use Spring Ball to jump and press against the snail for the maximum possible duration, in order to gain enough height to get onto it. Requires: "canGMode", "h_artificialMorphBombs", "h_artificialMorphSpringBall", "canSnailClimb", "canTrickyJump" |
From: 10
G-Mode Morph Junction (By Bottom Left Door)
To: 12
G-Mode Junction (By Bottom Left Door)
Requires: "canGMode" |
From: 11
G-Mode Overloaded PLMs (By Bottom Left Door)
To: 1
Middle Left Door
After PLMs are overloaded, climb to the top left door and fall through the Bomb Blocks. Requires: "canGMode", {"or": [ "canSnailClimb", {"and": [ "Gravity", {"or": [ "SpaceJump", "canConsecutiveWallJump" ]} ]} ]} |
From: 11
G-Mode Overloaded PLMs (By Bottom Left Door)
To: 7
Top Right Left Item
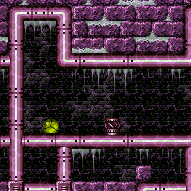

After PLMs are overloaded, use a snail to help climb to the top right items. Requires: "canGMode", "canSnailClimb", {"or": [ "Gravity", "h_underwaterMaxHeightSpringBallJump", {"and": [ "HiJump", {"or": [ "h_underwaterCrouchJump", "canDownGrab" ]} ]} ]} |
From: 11
G-Mode Overloaded PLMs (By Bottom Left Door)
To: 7
Top Right Left Item


After PLMs are overloaded, use a snail to climb to the right then bootless UWJ to the items. Requires: "canGMode", "canSnailClimb", "canBootless2WideUWJ" |
From: 12
G-Mode Junction (By Bottom Left Door)
To: 3
Left Sand Pit
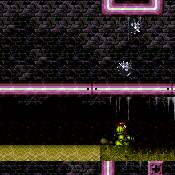

Use two snails to moonfall down through the pipe to the section below. The snails should be easy to align, with one on the floor and another on a ceiling 4 tiles higher. Shoot the lower snail after Samus has enough fall speed in order to avoid taking a snail hit. There is a small set of frames between these two, in which Samus will fall out of bounds. With Gravity, there is approximately a 5 second fall, with a 15 frame window. Suitless, there is approximately a 17 second fall, with almost a full second window - this is approximately 8 sets of bubbles out of Samus' arm. With blue suit no timing is necessary, with or without Gravity. Samus will clip automatically once enough fall speed is reached without taking damage, killing the bottom yard. Requires: "canComplexGMode", "h_navigateUnderwater", "canEnemyStuckMoonfall", {"or": [ "canFreeFallClip", {"enemyDamage": {"enemy": "Yard", "type": "contact", "hits": 1}}, {"haveBlueSuit": {}} ]} Exit condition: "leaveWithGMode": {
"morphed": false
} |
From: 12
G-Mode Junction (By Bottom Left Door)
To: 4
Right Sand Pit
Use two snails to moonfall down through the pipe to the section below. The snails should be easy to align, with one on the floor and another on a ceiling 4 tiles higher. Slide off or shoot the lower snail after Samus has enough fall speed in order to avoid taking a snail hit. There is a small set of frames between these two, in which Samus will fall out of bounds. With Gravity, there is approximately a 5 second fall, with a 15 frame window. Suitless, there is approximately a 17 second fall, with almost a full second window - this is approximately 8 sets of bubbles out of Samus' arm. With blue suit no timing is necessary, with or without Gravity. Samus will clip automatically once enough fall speed is reached without taking damage, killing the bottom yard. Requires: "canComplexGMode", "h_navigateUnderwater", "canEnemyStuckMoonfall", {"or": [ "canFreeFallClip", {"enemyDamage": {"enemy": "Yard", "type": "contact", "hits": 1}}, {"haveBlueSuit": {}} ]} Exit condition: "leaveWithGMode": {
"morphed": false
} |
From: 12
G-Mode Junction (By Bottom Left Door)
To: 11
G-Mode Overloaded PLMs (By Bottom Left Door)
Overload PLMs using the Grapple Blocks. Requires: "canGMode", "Grapple", "h_navigateUnderwater" |
From: 12
G-Mode Junction (By Bottom Left Door)
To: 11
G-Mode Overloaded PLMs (By Bottom Left Door)


Use two snails to moonfall down through the pipe to the section below. The snails should be easy to align, with one on the floor and another on a ceiling 4 tiles higher. Slide off or shoot the lower snail after Samus has enough fall speed in order to avoid taking a snail hit. There is a small set of frames between these two, in which Samus will fall out of bounds. With Gravity, there is approximately a 5 second fall, with a 15 frame window. Suitless, there is approximately a 17 second fall, with almost a full second window - this is approximately 8 sets of bubbles out of Samus' arm. With blue suit no timing is necessary, with or without Gravity. Samus will clip automatically once enough fall speed is reached without taking damage, killing the bottom yard. Clip down on the right side of the room without luring the snail underneath, or clip down in the center of the room with Spring Ball or Gravity and Space Jump and carefully cross the sand. Stand partially on the sand's edge to quickly overload PLMs, then go to the right and set up a pixel-precise high ceiling snail clip first try. Requires: "canTrickyGMode", "h_navigateUnderwater", "canEnemyStuckMoonfall", {"or": [ "canFreeFallClip", {"enemyDamage": {"enemy": "Yard", "type": "contact", "hits": 1}}, {"haveBlueSuit": {}} ]}, "canHighPixelCeilingClip", {"or": [ "canBeVeryPatient", "h_useSpringBall", {"and": [ "Gravity", "SpaceJump" ]} ]} Dev note: It is possible to try multiple times with Gravity+Space+patience by moving the snail around the bottom of the room. It is also possible to use the gentle slopes in the middle of the room for a larger window ceiling clip, but the snails behave unusually on slopes and it ends up not really being easier. |
From: 13
Direct G-Mode Morph (By Bottom Left Door)
To: 7
Top Right Left Item
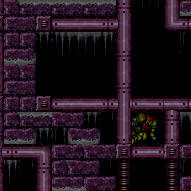

PLMs can be overloaded in direct G-Mode with a single Power Bomb if both items are still there and 2 PBs if only one item is. There is a row of tiles that works, just above and to the left of the right door. The row is one tile higher than the horizontal pipe that is part of the door frame, spanning from the left to one tile away from the right wall. Requires: "canPowerBombItemOverloadPLMs", {"notable": "G-Mode Overload PLMs - Power Bomb the Items"}, {"or": [ {"itemNotCollectedAtNode": 7}, {"itemNotCollectedAtNode": 8} ]}, "h_usePowerBomb", "h_usePowerBomb", "h_navigateUnderwater", "canSnailClimb", {"or": [ "Gravity", "h_underwaterMaxHeightSpringBallJump", {"and": [ "HiJump", {"or": [ "h_underwaterCrouchJump", "canDownGrab" ]} ]} ]} Dev note: This does not include canRiskPermanentLossOfAccess, as it is only worth doing this strat if the items are there. |
From: 13
Direct G-Mode Morph (By Bottom Left Door)
To: 7
Top Right Left Item
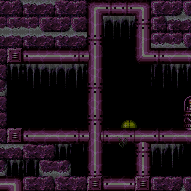
PLMs can be overloaded in direct G-Mode with a single Power Bomb if both items are still there and 2 PBs if only one item is. There is a row of tiles that works, just above and to the left of the right door. The row is one tile higher than the horizontal pipe that is part of the door frame, spanning from the left to one tile away from the right wall. Requires: "canPowerBombItemOverloadPLMs", {"notable": "G-Mode Overload PLMs - Power Bomb the Items"}, {"or": [ {"itemNotCollectedAtNode": 7}, {"itemNotCollectedAtNode": 8} ]}, "h_artificialMorphSpringBall", "h_artificialMorphPowerBomb", "h_artificialMorphPowerBomb", "h_navigateUnderwater", "canSnailClimb", {"or": [ "Gravity", {"and": [ "HiJump", {"or": [ "h_underwaterCrouchJump", "canDownGrab" ]} ]} ]} Dev note: This does not include canRiskPermanentLossOfAccess, as it is only worth doing this strat if the items are there. |
From: 13
Direct G-Mode Morph (By Bottom Left Door)
To: 7
Top Right Left Item
PLMs can be overloaded in direct G-Mode with a single Power Bomb if both items are still there and 2 PBs if only one item is. There is a row of tiles that works, just above and to the left of the right door. The row is one tile higher than the horizontal pipe that is part of the door frame, spanning from the left to one tile away from the right wall. Climb one snail to place the Power Bomb, then another to reduce the distance of the wall jump climb. Requires: "canPowerBombItemOverloadPLMs", {"notable": "G-Mode Overload PLMs - Power Bomb the Items"}, {"or": [ {"itemNotCollectedAtNode": 7}, {"itemNotCollectedAtNode": 8} ]}, "h_usePowerBomb", "h_usePowerBomb", "canSnailClimb", "canBootless2WideUWJ" Dev note: This does not include canRiskPermanentLossOfAccess, as it is only worth doing this strat if the items are there. |
From: 13
Direct G-Mode Morph (By Bottom Left Door)
To: 7
Top Right Left Item
It is barely possible to start a snail climb with just Spring Ball. Get a snail positioned such that it is on the bottom of an overhang above, and sticking out a bit to be usable as a platform. Use Spring Ball to jump and press against the snail for the maximum possible duration, in order to gain enough height to get onto it. PLMs can be overloaded in direct G-Mode with a single Power Bomb if both items are still there and 2 PBs if only one item is. There is a row of tiles that works, just above and to the left of the right door. The row is one tile higher than the horizontal pipe that is part of the door frame, spanning from the left to one tile away from the right wall. Climb one snail to place the Power Bomb, then another to reduce the distance of the wall jump climb. Requires: "canPowerBombItemOverloadPLMs", {"notable": "G-Mode Overload PLMs - Power Bomb the Items"}, {"or": [ {"itemNotCollectedAtNode": 7}, {"itemNotCollectedAtNode": 8} ]}, "h_artificialMorphSpringBall", "h_artificialMorphPowerBomb", "h_artificialMorphPowerBomb", "canSnailClimb", "canBootless2WideUWJ" Dev note: This does not include canRiskPermanentLossOfAccess, as it is only worth doing this strat if the items are there. |
From: 13
Direct G-Mode Morph (By Bottom Left Door)
To: 10
G-Mode Morph Junction (By Bottom Left Door)
Requires: "canGMode" |
From: 13
Direct G-Mode Morph (By Bottom Left Door)
To: 13
Direct G-Mode Morph (By Bottom Left Door)
Place a Power Bomb by the blocks before overloading PLMs. Requires: "canGMode", "h_artificialMorphPowerBomb" Clears obstacles: A Dev note: Obstacle A is not cleared until after exiting G-mode, but no strat in G-mode will use A and try to go through them. |