Lava Farm Tunnel
Room ID: 119
|
Exit condition: {
"leaveWithRunway": {
"length": 14,
"openEnd": 1
}
} |
|
Entrance condition: {
"comeInShinecharging": {
"length": 13,
"openEnd": 0
}
}Requires: {
"or": [
{
"and": [
"h_enemyDrops",
"h_heatedCrystalSparkWithoutLenience"
]
},
"h_heatedCrystalSpark"
]
}Dev note: No lenience, since the Gamets are a good Power Bomb farm. |
|
The right and left runways are the same length, use whichever side has a door that can be opened. Requires: {
"or": [
{
"canShineCharge": {
"usedTiles": 13,
"openEnd": 1
}
},
{
"and": [
{
"or": [
{
"doorUnlockedAtNode": 1
},
{
"doorUnlockedAtNode": 2
}
]
},
{
"canShineCharge": {
"usedTiles": 14,
"openEnd": 1
}
}
]
}
]
}
{
  "or": [
    {
      "and": [
        "h_enemyDrops",
        "h_heatedCrystalSparkWithoutLenience"
      ]
    },
    "h_heatedCrystalSpark"
  ]
}Unlocks doors: {"nodeId":1,"types":["ammo"],"requires":[]}
{"nodeId":2,"types":["ammo"],"requires":[]}Dev note: No lenience, since the Gamets are a good Power Bomb farm. |
|
Entrance condition: {
"comeInWithRMode": {}
}Clears obstacles: R-Mode |
From: 1
Left Door
To: 2
Right Door
Use Space Jump, Spring Ball, to carry blue speed across the room; alternatively, use a long series of temporary blue chains. Entrance condition: {
"comeInGettingBlueSpeed": {
"length": 13,
"openEnd": 1
}
}Requires: "canChainTemporaryBlue"
{
"or": [
{
"and": [
"canSpeedball",
"canSpringBallBounce",
{
"heatFrames": 490
}
]
},
{
"and": [
"SpaceJump",
{
"heatFrames": 420
}
]
},
{
"and": [
"canSpeedball",
"canLongChainTemporaryBlue",
{
"heatFrames": 780
}
]
}
]
}Exit condition: {
"leaveWithTemporaryBlue": {}
}Unlocks doors: {"types":["super","powerbomb"],"requires":[]}
{"types":["missiles"],"requires":[{"heatFrames":50}]} |
|
It is possible to kill a Gamet by the door and pause abuse to grab its Energy drop on G-mode exit. Entrance condition: {
"comeInWithGMode": {
"mode": "any",
"morphed": false
}
}Requires: {
"or": [
"h_heatedGModePauseAbuse",
"h_heatedGModeOpenDifferentDoor"
]
}Dev note: This is not useful unless heat damage is increased or Energy capacity is reduced. |
From: 1
Left Door
To: 3
Top Door
Use Space Jump, Spring Ball, to carry blue speed across the room; alternatively, use a long series of temporary blue chains. Entrance condition: {
"comeInShinecharging": {
"length": 13,
"openEnd": 1
}
}Requires: "canChainTemporaryBlue"
{
"or": [
{
"and": [
"canSpeedball",
"canSpringBallBounce",
{
"heatFrames": 400
}
]
},
{
"and": [
"SpaceJump",
{
"heatFrames": 420
}
]
},
{
"and": [
"canSpeedball",
"canLongChainTemporaryBlue",
{
"heatFrames": 670
}
]
}
]
}Exit condition: {
"leaveWithTemporaryBlue": {
"direction": "right"
}
}Unlocks doors: {"types":["super","powerbomb"],"requires":[]}
{"types":["missiles"],"requires":[{"heatFrames":50}]} |
|

Entrance condition: {
"comeInWithGMode": {
"mode": "any",
"morphed": false
}
}Requires: "h_heatedGMode"
{
"heatFrames": 50
} |
|
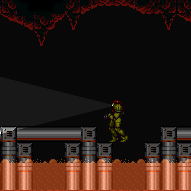
Jump next to the Gamet farm until one is at the correct height, which is just over one tile above Samus. Lure it to the right and use it to ice clip through the top door shell. Avoid killing any of the Gamets or they will all stop spawning. With bad positioning, move the Gamets off camera to try again; ice can help get around them. Also, be careful to avoid touching the invisible, stationary projectiles that the Dragons shoot. Entrance condition: {
"comeInWithGMode": {
"mode": "any",
"morphed": false
}
}Requires: "canComplexGMode"
{
"or": [
"h_preciseIceClip",
"h_highPixelIceClip"
]
}Exit condition: {
"leaveWithGMode": {
"morphed": false
}
}Bypasses door shell: true |
|
Requires: {
"heatFrames": 50
}
{
"or": [
"canDash",
{
"heatFrames": 25
}
]
} |
|


Fill up with the Gamets. Shinecharge from the left door, then get hit by a Gamet to interrupt. Requires: {
"obstaclesCleared": [
"R-Mode"
]
}
{
"heatFrames": 110
}
{
"or": [
{
"canShineCharge": {
"usedTiles": 13,
"openEnd": 1
}
},
{
"and": [
{
"doorUnlockedAtNode": 1
},
{
"canShineCharge": {
"usedTiles": 14,
"openEnd": 1
}
}
]
}
]
}
{
"autoReserveTrigger": {}
}
"canRModeSparkInterrupt"Resets obstacles: R-Mode |
|
Kill the Gamets where Samus can grab the drops. Exit G-mode, then pause abuse to pick them up without dying. Entrance condition: {
"comeInWithGMode": {
"mode": "any",
"morphed": false
}
}Requires: "h_heatedGMode"
{
"or": [
"h_heatedGModePauseAbuse",
{
"heatFrames": 40
}
]
} |
From: 2
Right Door
To: 1
Left Door
Use Space Jump, Spring Ball, to carry blue speed across the room; alternatively, use a long series of temporary blue chains. Entrance condition: {
"comeInGettingBlueSpeed": {
"length": 13,
"openEnd": 1
}
}Requires: "canChainTemporaryBlue"
{
"or": [
{
"and": [
"canSpeedball",
"canSpringBallBounce",
{
"heatFrames": 490
}
]
},
{
"and": [
"SpaceJump",
{
"heatFrames": 420
}
]
},
{
"and": [
"canSpeedball",
"canLongChainTemporaryBlue",
{
"heatFrames": 790
}
]
}
]
}Exit condition: {
"leaveWithTemporaryBlue": {}
}Unlocks doors: {"types":["super","powerbomb"],"requires":[]}
{"types":["missiles"],"requires":[{"heatFrames":50}]} |
|
Entrance condition: {
"comeInWithGrappleTeleport": {
"blockPositions": [
[
7,
2
]
]
}
}Requires: {
"heatFrames": 50
} |
|
Entrance condition: {
"comeInWithGrappleTeleport": {
"blockPositions": [
[
3,
12
],
[
3,
13
]
]
}
}Bypasses door shell: true |
|
Entrance condition: {
"comeInWithGrappleTeleport": {
"blockPositions": [
[
3,
12
]
]
}
}Exit condition: {
"leaveWithGrappleTeleport": {
"blockPositions": [
[
3,
12
]
]
}
}Bypasses door shell: true |
From: 2
Right Door
To: 1
Left Door
Entrance condition: {
"comeInWithGrappleTeleport": {
"blockPositions": [
[
3,
13
]
]
}
}Exit condition: {
"leaveWithGrappleTeleport": {
"blockPositions": [
[
3,
13
]
]
}
}Bypasses door shell: true |
|
Exit condition: {
"leaveWithRunway": {
"length": 14,
"openEnd": 1
}
} |
|
Requires: {
"obstaclesNotCleared": [
"R-Mode"
]
}
"h_heatedCrystalFlash" |
|
Entrance condition: {
"comeInShinecharging": {
"length": 13,
"openEnd": 0
}
}Requires: {
"or": [
{
"and": [
"h_enemyDrops",
"h_heatedCrystalSparkWithoutLenience"
]
},
"h_heatedCrystalSpark"
]
}Dev note: No lenience, since the Gamets are a good Power Bomb farm. |
|
Entrance condition: {
"comeInWithRMode": {}
}Clears obstacles: R-Mode |
|
Requires: {
"heatFrames": 55
} |
|

Requires: {
"or": [
{
"canShineCharge": {
"usedTiles": 13,
"openEnd": 1
}
},
{
"and": [
{
"doorUnlockedAtNode": 2
},
{
"canShineCharge": {
"usedTiles": 14,
"openEnd": 1
}
},
{
"heatFrames": 20
}
]
}
]
}
{
"heatFrames": 240
}
{
"shineChargeFrames": 90
}Exit condition: {
"leaveShinecharged": {}
}Unlocks doors: {"nodeId":2,"types":["missiles"],"requires":[{"heatFrames":50}]}
{"nodeId":2,"types":["super"],"requires":[]}
{"nodeId":2,"types":["powerbomb"],"requires":[{"heatFrames":110}]}
{"types":["missiles"],"requires":[{"heatFrames":50}]}
{"types":["super"],"requires":[]}
{"types":["powerbomb"],"requires":[{"heatFrames":110}]}Dev note: FIXME: One Power Bomb would open both doors. |
|
Entrance condition: {
"comeInShinecharged": {}
}Requires: {
"shineChargeFrames": 40
}
{
"shinespark": {
"frames": 8,
"excessFrames": 0
}
}
{
"heatFrames": 50
}Exit condition: {
"leaveWithSpark": {}
}Unlocks doors: {"types":["super"],"requires":[]}
{"types":["missiles","powerbomb"],"requires":["never"]}Dev note: FIXME: Missiles could unlock the door with more shinespark frames available. |
|
Break spin to trigger the transition early, or use a wall jump. Entrance condition: {
"comeInShinecharged": {}
}Requires: {
"shineChargeFrames": 65
}
"canShinechargeMovementComplex"
{
"heatFrames": 65
}Exit condition: {
"leaveShinecharged": {}
}Unlocks doors: {"types":["super"],"requires":[]}
{"types":["missiles","powerbomb"],"requires":["never"]} |
|
Entrance condition: {
"comeInShinecharged": {}
}Requires: {
"shineChargeFrames": 50
}
"HiJump"
"canShinechargeMovementComplex"
{
"heatFrames": 50
}Exit condition: {
"leaveShinecharged": {}
}Unlocks doors: {"types":["super"],"requires":[]}
{"types":["missiles","powerbomb"],"requires":["never"]} |
From: 2
Right Door
To: 3
Top Door
Entrance condition: {
"comeInShinecharging": {
"length": 13,
"openEnd": 1
}
}Requires: {
"heatFrames": 80
}
{
"shineChargeFrames": 90
}Exit condition: {
"leaveShinecharged": {}
}Unlocks doors: {"types":["super"],"requires":[]}
{"types":["missiles","powerbomb"],"requires":["never"]}Dev note: FIXME: Missiles could unlock the door but would end with fewer shinespark frames available. |
|
Requires: {
"heatFrames": 65
}Exit condition: {
"leaveWithDoorFrameBelow": {
"height": 2
}
}Unlocks doors: {"types":["missiles"],"requires":[{"heatFrames":50}]}
{"types":["super"],"requires":[]}
{"types":["powerbomb"],"requires":[{"heatFrames":110}]} |
|
Requires: {
"heatFrames": 80
}Exit condition: {
"leaveWithPlatformBelow": {
"height": 9,
"leftPosition": -2,
"rightPosition": 2
}
}Unlocks doors: {"types":["ammo"],"requires":[]} |
|
Requires: "h_backIntoCorner"
{
"heatFrames": 100
}Exit condition: {
"leaveWithPlatformBelow": {
"height": 9,
"leftPosition": -2,
"rightPosition": 6
}
}Unlocks doors: {"types":["missiles"],"requires":[{"heatFrames":50}]}
{"types":["super"],"requires":[]}
{"types":["powerbomb"],"requires":[{"heatFrames":110}]}Dev note: This includes time to moonwalk back against the right door, without shooting it open. An additional tile could be used by opening the right door but there is not yet any known application. |
From: 2
Right Door
To: 3
Top Door
Gain the shinecharge below the right edge of the door above to avoid bringing the Dragon on-camera. Entrance condition: {
"comeInShinecharging": {
"length": 5,
"openEnd": 0
}
}Requires: {
"or": [
{
"heatFrames": 245
},
{
"and": [
{
"heatFrames": 85
},
"canXRayCancelShinecharge"
]
}
]
}Exit condition: {
"leaveWithTemporaryBlue": {
"direction": "left"
}
}Unlocks doors: {"types":["super","powerbomb"],"requires":[]}
{"types":["missiles"],"requires":[{"heatFrames":50}]} |
From: 2
Right Door
To: 3
Top Door
Entrance condition: {
"comeInShinecharging": {
"length": 13,
"openEnd": 0
}
}Requires: "canXRayTurnaround"
"canXRayCancelShinecharge"
"canChainTemporaryBlue"
{
"heatFrames": 240
}Exit condition: {
"leaveWithTemporaryBlue": {
"direction": "any"
}
}Unlocks doors: {"types":["super","powerbomb"],"requires":[]}
{"types":["missiles"],"requires":[{"heatFrames":50}]} |
|
Jump next to the Gamet farm until one is at the correct height, which is just over one tile above Samus. Lure it to the right and use it to ice clip through the top door shell. Avoid killing any of the Gamets or they will all stop spawning. With bad positioning, move the Gamets off camera to try again; ice can help get around them. Also, be careful to avoid touching the invisible, stationary projectiles that the Dragons shoot. Entrance condition: {
"comeInWithGMode": {
"mode": "any",
"morphed": false
}
}Requires: "canComplexGMode"
{
"or": [
"h_preciseIceClip",
"h_highPixelIceClip"
]
}Exit condition: {
"leaveWithGMode": {
"morphed": false
}
}Bypasses door shell: true |
|
Requires: {
"heatFrames": 180
}
{
"or": [
"canDash",
{
"heatFrames": 120
}
]
} |
|
Kill the Gamets where Samus can grab the drops. Exit G-mode, then pause abuse to pick them up without dying. Entrance condition: {
"comeInWithGMode": {
"mode": "any",
"morphed": false
}
}Requires: "h_heatedGMode"
{
"or": [
"h_heatedGModePauseAbuse",
{
"heatFrames": 40
}
]
} |
|
Requires: {
"heatFrames": 40
}
{
"or": [
"canDash",
{
"heatFrames": 5
}
]
} |
|
Entrance condition: {
"comeInShinecharged": {},
"comesThroughToilet": "any"
}Requires: {
"shineChargeFrames": 50
}
"canShinechargeMovementComplex"
{
"heatFrames": 50
}Exit condition: {
"leaveShinecharged": {}
}Unlocks doors: {"types":["super"],"requires":[]}
{"types":["missiles","powerbomb"],"requires":["never"]} |
From: 3
Top Door
To: 2
Right Door
Entrance condition: {
"comeInShinecharged": {},
"comesThroughToilet": "any"
}Requires: {
"shineChargeFrames": 30
}
"canShinechargeMovementComplex"
{
"shinespark": {
"frames": 10,
"excessFrames": 0
}
}
{
"heatFrames": 50
}Exit condition: {
"leaveWithSpark": {}
}Unlocks doors: {"types":["super"],"requires":[]}
{"types":["missiles","powerbomb"],"requires":["never"]} |
|
Requires: {
"heatFrames": 70
}Exit condition: {
"leaveWithDoorFrameBelow": {
"height": 2
}
} |
|
Requires: {
"heatFrames": 70
}Exit condition: {
"leaveWithPlatformBelow": {
"height": 9,
"leftPosition": -2.5,
"rightPosition": 2.5
}
} |
|
Requires: {
"heatFrames": 120
}Exit condition: {
"leaveWithPlatformBelow": {
"height": 9,
"leftPosition": -7.5,
"rightPosition": 6
}
}Dev note: An additional tile could be used by opening the right door but there is not yet any known application. |
|
Entrance condition: {
"comeInWithRMode": {},
"comesThroughToilet": "any"
}Clears obstacles: R-Mode |
|
Freeze the stack of Gamets together a few times to try and raise them as high as possible. Run with them to the door and freeze the top two such that Samus can stand on the lower and take damage from the higher Gamet when it unfreezes. It is possible to jump onto the Gamet without Morph, as long as it is not too high. Requires: "h_heatProof"
"canUpwardGModeSetup"
"canTrickyUseFrozenEnemies"
{
"or": [
"Morph",
"canInsaneJump"
]
}Exit condition: {
"leaveWithGModeSetup": {}
}Dev note: FIXME: h_heatProof could be dropped in favor of heatFrames + canTrickyGMode? |
|
Entrance condition: {
"comeInWithGMode": {
"mode": "direct",
"morphed": false
},
"comesThroughToilet": "any"
}Exit condition: {
"leaveWithGMode": {
"morphed": false
}
} |
|
Entrance condition: {
"comeInWithGMode": {
"mode": "direct",
"morphed": true
},
"comesThroughToilet": "any"
}Requires: {
"or": [
"h_artificialMorphIBJ",
"h_artificialMorphSpringBallBombJump",
{
"and": [
"HiJump",
"h_artificialMorphSpringBall"
]
}
]
}Exit condition: {
"leaveWithGMode": {
"morphed": true
}
} |
|
Jump next to the Gamet farm until one is at the correct height, which is just over one tile above Samus. Lure it to the right and use it to ice clip through the top door shell. Avoid killing any of the Gamets or they will all stop spawning. With bad positioning, move the Gamets off camera to try again; ice can help get around them. Also, be careful to avoid touching the invisible, stationary projectiles that the Dragons shoot. Entrance condition: {
"comeInWithGMode": {
"mode": "indirect",
"morphed": false
},
"comesThroughToilet": "any"
}Requires: "canComplexGMode"
{
"or": [
"h_preciseIceClip",
"h_highPixelIceClip"
]
}Exit condition: {
"leaveWithGMode": {
"morphed": false
}
}Bypasses door shell: true Dev note: This is only for indirect G-Mode, because it is trivial while in direct, and would use a different strat. |
|
Requires: {
"heatFrames": 175
}
{
"or": [
"canDash",
{
"heatFrames": 105
}
]
} |
|
Kill the Gamets where Samus can grab the drops. Exit G-mode, then pause abuse to pick them up without dying. Entrance condition: {
"comeInWithGMode": {
"mode": "any",
"morphed": false
},
"comesThroughToilet": "any"
}Requires: "h_heatedGMode"
{
"or": [
"h_heatedGModePauseAbuse",
{
"heatFrames": 40
}
]
} |
|
Requires: {
"heatFrames": 75
}
{
"or": [
"canDash",
{
"heatFrames": 25
}
]
} |
|
Requires: "canDash"
{
"heatFrames": 10
}Exit condition: {
"leaveWithRunway": {
"length": 14,
"openEnd": 1
}
}Unlocks doors: {"types":["ammo"],"requires":[]} |
From: 4
Gamet Farm Junction
To: 1
Left Door

Requires: {
"heatFrames": 290
}Exit condition: {
"leaveWithGModeSetup": {}
}Unlocks doors: {"types":["ammo"],"requires":[]} |
|
Requires: {
"heatFrames": 205
}
{
"or": [
"canDash",
{
"heatFrames": 135
}
]
}Unlocks doors: {"types":["missiles"],"requires":[]} |
|
Requires: "canDash"
{
"heatFrames": 155
}Exit condition: {
"leaveWithRunway": {
"length": 14,
"openEnd": 1
}
}Unlocks doors: {"types":["missiles"],"requires":[{"heatFrames":40}]}
{"types":["super"],"requires":[]}
{"types":["powerbomb"],"requires":[{"heatFrames":110}]} |
From: 4
Gamet Farm Junction
To: 2
Right Door

Requires: "canDash"
{
"heatFrames": 440
}Exit condition: {
"leaveWithGModeSetup": {}
}Unlocks doors: {"types":["missiles","powerbomb"],"requires":["never"]}
{"types":["super"],"requires":[]}Dev note: FIXME: with Ice, this could be done dashless. |
|
Requires: {
"heatFrames": 210
}
{
"or": [
"h_trickyToCarryFlashSuit",
{
"heatFrames": 40
}
]
}
{
"or": [
"canDash",
{
"heatFrames": 110
}
]
} |
|
Requires: {
"heatFrames": 220
}
{
"or": [
"canDash",
{
"heatFrames": 110
}
]
}Exit condition: {
"leaveWithDoorFrameBelow": {
"height": 2
}
}Unlocks doors: {"types":["missiles"],"requires":[{"heatFrames":50}]}
{"types":["super"],"requires":[]}
{"types":["powerbomb"],"requires":[{"heatFrames":110}]} |
|
Requires: {
"heatFrames": 220
}
{
"or": [
"canDash",
{
"heatFrames": 110
}
]
}Exit condition: {
"leaveWithPlatformBelow": {
"height": 9,
"leftPosition": -7.5,
"rightPosition": 2
}
}Unlocks doors: {"types":["missiles"],"requires":[{"heatFrames":50}]}
{"types":["super"],"requires":[]}
{"types":["powerbomb"],"requires":[{"heatFrames":110}]} |
|
Bring a Gamet from the farm and freeze it at a precise distance below the door in order to crouch-jump up and clip through the door shell. The pixel window is larger and higher with Morph and an X-Ray stand-up, in which case a standing jump is used. Requires: {
"or": [
"canDash",
"h_heatProof"
]
}
{
"heatFrames": 560
}
"h_iceClip"Bypasses door shell: true Dev note: FIXME: This could be done dashless without heat protection. |
From: 4
Gamet Farm Junction
To: 3
Top Door

Position below the door, jump when Samus reaches 7 Energy, and mid-air morph, timed so that reserves trigger while Samus still has upward momentum just before Samus would hit the door. If done properly, the R-mode standup will cause Samus to clip past the door shell. With a mid-air morph, this has a 5-frame window for the jump. Otherwise, with a jump aim-down it has a 3-frame window. If Spring Ball is available, jumping in Spring Ball increases the window to 6 frames. In any case, it may help to pause abuse: instead of jumping at a precise Energy value, set reserves to manual, wait until Samus is close to zero Energy, and press pause a moment before jumping, so that Samus is at 0 energy and in position just below the door when the pause hits. Then set reserves to auto (and re-equip Varia if available), and unpause. Requires: {
"obstaclesCleared": [
"R-Mode"
]
}
"canDash"
"canRModeStandupClip"
"canInsaneJump"
{
"or": [
"canMidAirMorph",
"canBeVeryPatient"
]
}
{
"heatFrames": 210
}
{
"disableEquipment": "Varia"
}
{
"autoReserveTrigger": {}
}
{
"heatFrames": 5
}Bypasses door shell: true |
|
Requires: {
"or": [
{
"and": [
{
"heatFrames": 0
},
"canPauseAbuse"
]
},
{
"heatFrames": 60
}
]
}
{
"partialRefill": {
"type": "RegularEnergy",
"limit": 50
}
}Dev note: Raise energy high enough to use the farm if it is low. |
|
Requires: {
"or": [
{
"and": [
"h_lavaProof",
{
"simpleHeatFrames": 60
},
{
"heatFrames": 50
},
{
"simpleCycleFrames": 60
},
{
"cycleFrames": 50
}
]
},
{
"and": [
{
"simpleHeatFrames": 135
},
{
"heatFrames": 20
},
{
"simpleCycleFrames": 135
},
{
"cycleFrames": 20
}
]
}
]
}Farm cycle drops: 5 Gamet |
{
"$schema": "../../../schema/m3-room.schema.json",
"id": 119,
"name": "Lava Farm Tunnel",
"area": "Norfair",
"subarea": "Upper",
"subsubarea": "East",
"roomAddress": "0x7AFCE",
"roomEnvironments": [
{
"heated": true
}
],
"mapTileMask": [
[
1,
1,
1,
1
]
],
"nodes": [
{
"id": 1,
"name": "Left Door",
"nodeType": "door",
"nodeSubType": "blue",
"nodeAddress": "0x001974a",
"doorOrientation": "left",
"doorEnvironments": [
{
"physics": "air"
}
],
"mapTileMask": [
[
2,
1,
1,
1
]
]
},
{
"id": 2,
"name": "Right Door",
"nodeType": "door",
"nodeSubType": "blue",
"nodeAddress": "0x0019756",
"doorOrientation": "right",
"doorEnvironments": [
{
"physics": "air"
}
],
"mapTileMask": [
[
1,
1,
1,
2
]
]
},
{
"id": 3,
"name": "Top Door",
"nodeType": "door",
"nodeSubType": "blue",
"nodeAddress": "0x0019762",
"doorOrientation": "up",
"doorEnvironments": [
{
"physics": "air"
}
],
"mapTileMask": [
[
1,
1,
1,
2
]
]
},
{
"id": 4,
"name": "Gamet Farm Junction",
"nodeType": "junction",
"nodeSubType": "junction",
"mapTileMask": [
[
1,
2,
2,
1
]
]
}
],
"obstacles": [
{
"id": "R-Mode",
"name": "Entered with R-Mode",
"obstacleType": "abstract"
}
],
"enemies": [
{
"id": "e1",
"groupName": "Lava Farm Tunnel Gamets",
"enemyName": "Gamet",
"quantity": 5,
"homeNodes": [
4
]
},
{
"id": "e2",
"groupName": "Lava Farm Tunnel Dragons",
"enemyName": "Dragon",
"quantity": 2,
"homeNodes": [
4,
2
],
"note": "Drops can be reached from land"
}
],
"strats": [
{
"link": [
1,
1
],
"name": "Base (Unlock Door)",
"requires": [],
"unlocksDoors": [
{
"types": [
"missiles"
],
"requires": [
{
"heatFrames": 50
}
]
},
{
"types": [
"super"
],
"requires": []
},
{
"types": [
"powerbomb"
],
"requires": [
{
"heatFrames": 110
}
]
}
],
"flashSuitChecked": true,
"blueSuitChecked": true
},
{
"link": [
1,
1
],
"name": "Base (Come In Normally)",
"entranceCondition": {
"comeInNormally": {}
},
"requires": [],
"flashSuitChecked": true,
"blueSuitChecked": true
},
{
"link": [
1,
1
],
"name": "Base (Come In With Mockball)",
"entranceCondition": {
"comeInWithMockball": {
"adjacentMinTiles": 0,
"remoteAndLandingMinTiles": [
[
0,
0
]
],
"speedBooster": "any"
}
},
"requires": [
{
"heatFrames": 10
}
],
"flashSuitChecked": true,
"blueSuitChecked": true
},
{
"link": [
2,
2
],
"name": "Base (Unlock Door)",
"requires": [],
"unlocksDoors": [
{
"types": [
"missiles"
],
"requires": [
{
"heatFrames": 50
}
]
},
{
"types": [
"super"
],
"requires": []
},
{
"types": [
"powerbomb"
],
"requires": [
{
"heatFrames": 110
}
]
}
],
"flashSuitChecked": true,
"blueSuitChecked": true
},
{
"link": [
2,
2
],
"name": "Base (Come In Normally)",
"entranceCondition": {
"comeInNormally": {}
},
"requires": [],
"flashSuitChecked": true,
"blueSuitChecked": true
},
{
"link": [
2,
2
],
"name": "Base (Come In With Mockball)",
"entranceCondition": {
"comeInWithMockball": {
"adjacentMinTiles": 0,
"remoteAndLandingMinTiles": [
[
0,
0
]
],
"speedBooster": "any"
}
},
"requires": [
{
"heatFrames": 10
}
],
"flashSuitChecked": true,
"blueSuitChecked": true
},
{
"link": [
3,
3
],
"name": "Base (Unlock Door)",
"requires": [],
"unlocksDoors": [
{
"types": [
"missiles"
],
"requires": [
{
"heatFrames": 50
}
]
},
{
"types": [
"super"
],
"requires": []
},
{
"types": [
"powerbomb"
],
"requires": [
{
"heatFrames": 110
}
]
}
],
"flashSuitChecked": true,
"blueSuitChecked": true
},
{
"link": [
3,
3
],
"name": "Base (Come In Normally)",
"entranceCondition": {
"comeInNormally": {}
},
"requires": [],
"flashSuitChecked": true,
"blueSuitChecked": true
},
{
"id": 43,
"link": [
1,
1
],
"name": "Leave with Runway",
"requires": [],
"exitCondition": {
"leaveWithRunway": {
"length": 14,
"openEnd": 1
}
},
"flashSuitChecked": true,
"blueSuitChecked": true
},
{
"id": 60,
"link": [
1,
1
],
"name": "Come in Shinecharging, Crystal Spark",
"entranceCondition": {
"comeInShinecharging": {
"length": 13,
"openEnd": 0
}
},
"requires": [
{
"or": [
{
"and": [
"h_enemyDrops",
"h_heatedCrystalSparkWithoutLenience"
]
},
"h_heatedCrystalSpark"
]
}
],
"flashSuitChecked": true,
"blueSuitChecked": true,
"devNote": [
"No lenience, since the Gamets are a good Power Bomb farm."
]
},
{
"id": 61,
"link": [
1,
1
],
"name": "Crystal Spark",
"requires": [
{
"or": [
{
"canShineCharge": {
"usedTiles": 13,
"openEnd": 1
}
},
{
"and": [
{
"or": [
{
"doorUnlockedAtNode": 1
},
{
"doorUnlockedAtNode": 2
}
]
},
{
"canShineCharge": {
"usedTiles": 14,
"openEnd": 1
}
}
]
}
]
},
{
"or": [
{
"and": [
"h_enemyDrops",
"h_heatedCrystalSparkWithoutLenience"
]
},
"h_heatedCrystalSpark"
]
}
],
"unlocksDoors": [
{
"nodeId": 1,
"types": [
"ammo"
],
"requires": []
},
{
"nodeId": 2,
"types": [
"ammo"
],
"requires": []
}
],
"flashSuitChecked": true,
"blueSuitChecked": true,
"note": "The right and left runways are the same length, use whichever side has a door that can be opened.",
"devNote": [
"No lenience, since the Gamets are a good Power Bomb farm."
]
},
{
"id": 55,
"link": [
1,
1
],
"name": "R-Mode Entry",
"entranceCondition": {
"comeInWithRMode": {}
},
"requires": [],
"clearsObstacles": [
"R-Mode"
],
"flashSuitChecked": true,
"blueSuitChecked": true
},
{
"id": 1,
"link": [
1,
2
],
"name": "Come in Getting Blue Speed, Leave With Temporary Blue",
"entranceCondition": {
"comeInGettingBlueSpeed": {
"length": 13,
"openEnd": 1
}
},
"requires": [
"canChainTemporaryBlue",
{
"or": [
{
"and": [
"canSpeedball",
"canSpringBallBounce",
{
"heatFrames": 490
}
]
},
{
"and": [
"SpaceJump",
{
"heatFrames": 420
}
]
},
{
"and": [
"canSpeedball",
"canLongChainTemporaryBlue",
{
"heatFrames": 780
}
]
}
]
}
],
"exitCondition": {
"leaveWithTemporaryBlue": {}
},
"unlocksDoors": [
{
"types": [
"super",
"powerbomb"
],
"requires": []
},
{
"types": [
"missiles"
],
"requires": [
{
"heatFrames": 50
}
]
}
],
"flashSuitChecked": true,
"blueSuitChecked": true,
"note": [
"Use Space Jump, Spring Ball, to carry blue speed across the room;",
"alternatively, use a long series of temporary blue chains."
]
},
{
"id": 46,
"link": [
1,
2
],
"name": "G-Mode",
"entranceCondition": {
"comeInWithGMode": {
"mode": "any",
"morphed": false
}
},
"requires": [
{
  "or": [
    "h_heatedGModePauseAbuse",
    "h_heatedGModeOpenDifferentDoor"
  ]
}
],
"flashSuitChecked": true,
"blueSuitChecked": true,
"note": "It is possible to kill a Gamet by the door and pause abuse to grab its Energy drop on G-mode exit.",
"devNote": "This is not useful unless heat damage is increased or Energy capacity is reduced."
},
{
"id": 2,
"link": [
1,
3
],
"name": "Come in Shinecharging, Leave With Temporary Blue",
"entranceCondition": {
"comeInShinecharging": {
"length": 13,
"openEnd": 1
}
},
"requires": [
"canChainTemporaryBlue",
{
"or": [
{
"and": [
"canSpeedball",
"canSpringBallBounce",
{
"heatFrames": 400
}
]
},
{
"and": [
"SpaceJump",
{
"heatFrames": 420
}
]
},
{
"and": [
"canSpeedball",
"canLongChainTemporaryBlue",
{
"heatFrames": 670
}
]
}
]
}
],
"exitCondition": {
"leaveWithTemporaryBlue": {
"direction": "right"
}
},
"unlocksDoors": [
{
"types": [
"super",
"powerbomb"
],
"requires": []
},
{
"types": [
"missiles"
],
"requires": [
{
  "heatFrames": 50
}
]
}
],
"flashSuitChecked": true,
"blueSuitChecked": true,
"note": [
"Use Space Jump, Spring Ball, to carry blue speed across the room;",
"alternatively, use a long series of temporary blue chains."
]
},
{
"id": 47,
"link": [
1,
3
],
"name": "G-Mode",
"entranceCondition": {
"comeInWithGMode": {
"mode": "any",
"morphed": false
}
},
"requires": [
"h_heatedGMode",
{
"heatFrames": 50
}
],
"flashSuitChecked": true,
"blueSuitChecked": true
},
{
"id": 51,
"link": [
1,
3
],
"name": "G-Mode Ice Clip, Door Lock Skip",
"entranceCondition": {
"comeInWithGMode": {
"mode": "any",
"morphed": false
}
},
"requires": [
"canComplexGMode",
{
"or": [
"h_preciseIceClip",
"h_highPixelIceClip"
]
}
],
"exitCondition": {
"leaveWithGMode": {
"morphed": false
}
},
"bypassesDoorShell": "yes",
"flashSuitChecked": true,
"blueSuitChecked": true,
"note": [
"Jump next to the Gamet farm until one is at the correct height, which is just over one tile above Samus.",
"Lure it to the right and use it to ice clip through the top door shell. Avoid killing any of the Gamets or they will all stop spawning.",
"With bad positioning, move the Gamets off camera to try again; ice can help get around them.",
"Also, be careful to avoid touching the invisible, stationary projectiles that the Dragons shoot."
]
},
{
"id": 3,
"link": [
1,
4
],
"name": "Base",
"requires": [
{
"heatFrames": 50
},
{
"or": [
"canDash",
{
"heatFrames": 25
}
]
}
],
"flashSuitChecked": true,
"blueSuitChecked": true
},
{
"id": 59,
"link": [
1,
4
],
"name": "R-Mode Spark Interrupt",
"requires": [
{
"obstaclesCleared": [
"R-Mode"
]
},
{
"heatFrames": 110
},
{
"or": [
{
"canShineCharge": {
"usedTiles": 13,
"openEnd": 1
}
},
{
"and": [
{
"doorUnlockedAtNode": 1
},
{
"canShineCharge": {
"usedTiles": 14,
"openEnd": 1
}
}
]
}
]
},
{
"autoReserveTrigger": {}
},
"canRModeSparkInterrupt"
],
"resetsObstacles": [
"R-Mode"
],
"flashSuitChecked": true,
"blueSuitChecked": true,
"note": [
"Fill up with the Gamets. Shinecharge from the left door, then get hit by a Gamet to interrupt."
]
},
{
"id": 48,
"link": [
1,
4
],
"name": "G-Mode, To the Farm",
"entranceCondition": {
"comeInWithGMode": {
"mode": "any",
"morphed": false
}
},
"requires": [
"h_heatedGMode",
{
"or": [
"h_heatedGModePauseAbuse",
{
"heatFrames": 40
}
]
}
],
"flashSuitChecked": true,
"blueSuitChecked": true,
"note": "Kill the Gamets where Samus can grab the drops. Exit G-mode, then pause abuse to pick them up without dying."
},
{
"id": 4,
"link": [
2,
1
],
"name": "Come in Getting Blue Speed, Leave With Temporary Blue",
"entranceCondition": {
"comeInGettingBlueSpeed": {
"length": 13,
"openEnd": 1
}
},
"requires": [
"canChainTemporaryBlue",
{
"or": [
{
"and": [
"canSpeedball",
"canSpringBallBounce",
{
"heatFrames": 490
}
]
},
{
"and": [
"SpaceJump",
{
"heatFrames": 420
}
]
},
{
"and": [
"canSpeedball",
"canLongChainTemporaryBlue",
{
"heatFrames": 790
}
]
}
]
}
],
"exitCondition": {
"leaveWithTemporaryBlue": {}
},
"unlocksDoors": [
{
"types": [
"super",
"powerbomb"
],
"requires": []
},
{
"types": [
"missiles"
],
"requires": [
{
"heatFrames": 50
}
]
}
],
"flashSuitChecked": true,
"blueSuitChecked": true,
"note": [
"Use Space Jump, Spring Ball, to carry blue speed across the room;",
"alternatively, use a long series of temporary blue chains."
]
},
{
"id": 5,
"link": [
2,
1
],
"name": "Grapple Teleport",
"entranceCondition": {
"comeInWithGrappleTeleport": {
"blockPositions": [
[
7,
2
]
]
}
},
"requires": [
{
"heatFrames": 50
}
],
"flashSuitChecked": true,
"blueSuitChecked": true
},
{
"id": 6,
"link": [
2,
1
],
"name": "Grapple Teleport Door Lock Skip",
"entranceCondition": {
"comeInWithGrappleTeleport": {
"blockPositions": [
[
3,
12
],
[
3,
13
]
]
}
},
"requires": [],
"bypassesDoorShell": "yes",
"flashSuitChecked": true,
"blueSuitChecked": true
},
{
"id": 7,
"link": [
2,
1
],
"name": "Carry Grapple Teleport (Top Position)",
"entranceCondition": {
"comeInWithGrappleTeleport": {
"blockPositions": [
[
3,
12
]
]
}
},
"requires": [],
"exitCondition": {
"leaveWithGrappleTeleport": {
"blockPositions": [
[
3,
12
]
]
}
},
"bypassesDoorShell": "yes",
"flashSuitChecked": true,
"blueSuitChecked": true
},
{
"id": 8,
"link": [
2,
1
],
"name": "Carry Grapple Teleport (Bottom Position)",
"entranceCondition": {
"comeInWithGrappleTeleport": {
"blockPositions": [
[
3,
13
]
]
}
},
"requires": [],
"exitCondition": {
"leaveWithGrappleTeleport": {
"blockPositions": [
[
3,
13
]
]
}
},
"bypassesDoorShell": "yes",
"flashSuitChecked": true,
"blueSuitChecked": true
},
{
"id": 9,
"link": [
2,
2
],
"name": "Leave with Runway",
"requires": [],
"exitCondition": {
"leaveWithRunway": {
"length": 14,
"openEnd": 1
}
},
"flashSuitChecked": true,
"blueSuitChecked": true
},
{
"id": 10,
"link": [
2,
2
],
"name": "Crystal Flash",
"requires": [
{
"obstaclesNotCleared": [
"R-Mode"
]
},
"h_heatedCrystalFlash"
],
"flashSuitChecked": true,
"blueSuitChecked": true
},
{
"id": 62,
"link": [
2,
2
],
"name": "Come in Shinecharging, Crystal Spark",
"entranceCondition": {
"comeInShinecharging": {
"length": 13,
"openEnd": 0
}
},
"requires": [
{
  "or": [
    {
      "and": [
        "h_enemyDrops",
        "h_heatedCrystalSparkWithoutLenience"
      ]
    },
    "h_heatedCrystalSpark"
  ]
}
],
"flashSuitChecked": true,
"blueSuitChecked": true,
"devNote": [
"No lenience, since the Gamets are a good Power Bomb farm."
]
},
{
"id": 56,
"link": [
2,
2
],
"name": "R-Mode Entry",
"entranceCondition": {
"comeInWithRMode": {}
},
"requires": [],
"clearsObstacles": [
"R-Mode"
],
"flashSuitChecked": true,
"blueSuitChecked": true
},
{
"id": 11,
"link": [
2,
3
],
"name": "Base",
"requires": [
{
  "heatFrames": 55
}
],
"flashSuitChecked": true,
"blueSuitChecked": true
},
{
"id": 12,
"link": [
2,
3
],
"name": "In-Room Shortcharge",
"requires": [
{
"or": [
{
"canShineCharge": {
"usedTiles": 13,
"openEnd": 1
}
},
{
"and": [
{
"doorUnlockedAtNode": 2
},
{
"canShineCharge": {
"usedTiles": 14,
"openEnd": 1
}
},
{
"heatFrames": 20
}
]
}
]
},
{
"heatFrames": 240
},
{
"shineChargeFrames": 90
}
],
"exitCondition": {
"leaveShinecharged": {}
},
"unlocksDoors": [
{
"nodeId": 2,
"types": [
"missiles"
],
"requires": [
{
"heatFrames": 50
}
]
},
{
"nodeId": 2,
"types": [
"super"
],
"requires": []
},
{
"nodeId": 2,
"types": [
"powerbomb"
],
"requires": [
{
"heatFrames": 110
}
]
},
{
"types": [
"missiles"
],
"requires": [
{
"heatFrames": 50
}
]
},
{
"types": [
"super"
],
"requires": []
},
{
"types": [
"powerbomb"
],
"requires": [
{
"heatFrames": 110
}
]
}
],
"flashSuitChecked": true,
"blueSuitChecked": true,
"devNote": "FIXME: One Power Bomb would open both doors."
},
{
"id": 13,
"link": [
2,
3
],
"name": "Come In Shinecharged, Leave Sparking",
"entranceCondition": {
"comeInShinecharged": {}
},
"requires": [
{
"shineChargeFrames": 40
},
{
"shinespark": {
"frames": 8,
"excessFrames": 0
}
},
{
"heatFrames": 50
}
],
"exitCondition": {
"leaveWithSpark": {}
},
"unlocksDoors": [
{
"types": [
"super"
],
"requires": []
},
{
"types": [
"missiles",
"powerbomb"
],
"requires": [
"never"
]
}
],
"flashSuitChecked": true,
"blueSuitChecked": true,
"devNote": "FIXME: Missiles could unlock the door with more shinespark frames available."
},
{
"id": 14,
"link": [
2,
3
],
"name": "Carry Shinecharge",
"entranceCondition": {
"comeInShinecharged": {}
},
"requires": [
{
"shineChargeFrames": 65
},
"canShinechargeMovementComplex",
{
  "heatFrames": 65
}
],
"exitCondition": {
"leaveShinecharged": {}
},
"unlocksDoors": [
{
"types": [
"super"
],
"requires": []
},
{
"types": [
"missiles",
"powerbomb"
],
"requires": [
"never"
]
}
],
"flashSuitChecked": true,
"blueSuitChecked": true,
"note": "Break spin to trigger the transition early, or use a wall jump."
},
{
"id": 15,
"link": [
2,
3
],
"name": "Carry Shinecharge (HiJump)",
"entranceCondition": {
"comeInShinecharged": {}
},
"requires": [
{
"shineChargeFrames": 50
},
"HiJump",
"canShinechargeMovementComplex",
{
"heatFrames": 50
}
],
"exitCondition": {
"leaveShinecharged": {}
},
"unlocksDoors": [
{
"types": [
"super"
],
"requires": []
},
{
"types": [
"missiles",
"powerbomb"
],
"requires": [
"never"
]
}
],
"flashSuitChecked": true,
"blueSuitChecked": true
},
{
"id": 16,
"link": [
2,
3
],
"name": "Come In Shinecharging, Leave Shinecharged",
"entranceCondition": {
"comeInShinecharging": {
"length": 13,
"openEnd": 1
}
},
"requires": [
{
  "heatFrames": 80
},
{
"shineChargeFrames": 90
}
],
"exitCondition": {
"leaveShinecharged": {}
},
"unlocksDoors": [
{
"types": [
"super"
],
"requires": []
},
{
"types": [
"missiles",
"powerbomb"
],
"requires": [
"never"
]
}
],
"flashSuitChecked": true,
"blueSuitChecked": true,
"devNote": "FIXME: Missiles could unlock the door but would end with fewer shinespark frames available."
},
{
"id": 17,
"link": [
2,
3
],
"name": "Leave With Door Frame Below",
"requires": [
{
"heatFrames": 65
}
],
"exitCondition": {
"leaveWithDoorFrameBelow": {
"height": 2
}
},
"unlocksDoors": [
{
"types": [
"missiles"
],
"requires": [
{
"heatFrames": 50
}
]
},
{
"types": [
"super"
],
"requires": []
},
{
"types": [
"powerbomb"
],
"requires": [
{
"heatFrames": 110
}
]
}
],
"flashSuitChecked": true,
"blueSuitChecked": true
},
{
"id": 18,
"link": [
2,
3
],
"name": "Leave With Platform Below (Small Runway)",
"requires": [
{
"heatFrames": 80
}
],
"exitCondition": {
"leaveWithPlatformBelow": {
"height": 9,
"leftPosition": -2,
"rightPosition": 2
}
},
"unlocksDoors": [
{
"types": [
"ammo"
],
"requires": []
}
],
"flashSuitChecked": true,
"blueSuitChecked": true
},
{
"id": 19,
"link": [
2,
3
],
"name": "Leave With Platform Below (Full Runway)",
"requires": [
"h_backIntoCorner",
{
"heatFrames": 100
}
],
"exitCondition": {
"leaveWithPlatformBelow": {
"height": 9,
"leftPosition": -2,
"rightPosition": 6
}
},
"unlocksDoors": [
{
"types": [
"missiles"
],
"requires": [
{
"heatFrames": 50
}
]
},
{
"types": [
"super"
],
"requires": []
},
{
"types": [
"powerbomb"
],
"requires": [
{
"heatFrames": 110
}
]
}
],
"flashSuitChecked": true,
"blueSuitChecked": true,
"devNote": [
"This includes time to moonwalk back against the right door, without shooting it open.",
"An additional tile could be used by opening the right door but there is not yet any known application."
]
},
{
"id": 20,
"link": [
2,
3
],
"name": "Come in Shinecharging, Leave With Temporary Blue (Short Runway)",
"entranceCondition": {
"comeInShinecharging": {
"length": 5,
"openEnd": 0
}
},
"requires": [
{
  "or": [
    {
      "heatFrames": 245
    },
    {
      "and": [
        {
          "heatFrames": 85
        },
        "canXRayCancelShinecharge"
      ]
    }
  ]
}
],
"exitCondition": {
"leaveWithTemporaryBlue": {
"direction": "left"
}
},
"unlocksDoors": [
{
"types": [
"super",
"powerbomb"
],
"requires": []
},
{
"types": [
"missiles"
],
"requires": [
{
"heatFrames": 50
}
]
}
],
"flashSuitChecked": true,
"blueSuitChecked": true,
"note": [
"Gain the shinecharge below the right edge of the door above to avoid bringing the Dragon on-camera."
]
},
{
"id": 21,
"link": [
2,
3
],
"name": "Come in Shinecharging, Leave With Temporary Blue (Full Runway)",
"entranceCondition": {
"comeInShinecharging": {
"length": 13,
"openEnd": 0
}
},
"requires": [
"canXRayTurnaround",
"canXRayCancelShinecharge",
"canChainTemporaryBlue",
{
"heatFrames": 240
}
],
"exitCondition": {
"leaveWithTemporaryBlue": {
"direction": "any"
}
},
"unlocksDoors": [
{
"types": [
"super",
"powerbomb"
],
"requires": []
},
{
"types": [
"missiles"
],
"requires": [
{
"heatFrames": 50
}
]
}
],
"flashSuitChecked": true,
"blueSuitChecked": true
},
{
"id": 52,
"link": [
2,
3
],
"name": "G-Mode Ice Clip, Door Lock Skip",
"entranceCondition": {
"comeInWithGMode": {
"mode": "any",
"morphed": false
}
},
"requires": [
"canComplexGMode",
{
"or": [
"h_preciseIceClip",
"h_highPixelIceClip"
]
}
],
"exitCondition": {
"leaveWithGMode": {
"morphed": false
}
},
"bypassesDoorShell": "yes",
"flashSuitChecked": true,
"blueSuitChecked": true,
"note": [
"Jump next to the Gamet farm until one is at the correct height, which is just over one tile above Samus.",
"Lure it to the right and use it to ice clip through the top door shell. Avoid killing any of the Gamets or they will all stop spawning.",
"With bad positioning, move the Gamets off camera to try again; ice can help get around them.",
"Also, be careful to avoid touching the invisible, stationary projectiles that the Dragons shoot."
]
},
{
"id": 22,
"link": [
2,
4
],
"name": "Base",
"requires": [
{
"heatFrames": 180
},
{
"or": [
"canDash",
{
"heatFrames": 120
}
]
}
],
"flashSuitChecked": true,
"blueSuitChecked": true
},
{
"id": 49,
"link": [
2,
4
],
"name": "G-Mode, To the Farm",
"entranceCondition": {
"comeInWithGMode": {
"mode": "any",
"morphed": false
}
},
"requires": [
"h_heatedGMode",
{
"or": [
"h_heatedGModePauseAbuse",
{
"heatFrames": 40
}
]
}
],
"flashSuitChecked": true,
"blueSuitChecked": true,
"note": "Kill the Gamets where Samus can grab the drops. Exit G-mode, then pause abuse to pick them up without dying."
},
{
"id": 23,
"link": [
3,
2
],
"name": "Base",
"requires": [
{
"heatFrames": 40
},
{
"or": [
"canDash",
{
"heatFrames": 5
}
]
}
],
"flashSuitChecked": true,
"blueSuitChecked": true
},
{
"id": 24,
"link": [
3,
2
],
"name": "Carry Shinecharge",
"entranceCondition": {
"comeInShinecharged": {},
"comesThroughToilet": "any"
},
"requires": [
{
"shineChargeFrames": 50
},
"canShinechargeMovementComplex",
{
"heatFrames": 50
}
],
"exitCondition": {
"leaveShinecharged": {}
},
"unlocksDoors": [
{
"types": [
"super"
],
"requires": []
},
{
"types": [
"missiles",
"powerbomb"
],
"requires": [
"never"
]
}
],
"flashSuitChecked": true,
"blueSuitChecked": true
},
{
"id": 25,
"link": [
3,
2
],
"name": "Come in Shinecharged, Leave With Spark",
"entranceCondition": {
"comeInShinecharged": {},
"comesThroughToilet": "any"
},
"requires": [
{
"shineChargeFrames": 30
},
"canShinechargeMovementComplex",
{
"shinespark": {
"frames": 10,
"excessFrames": 0
}
},
{
"heatFrames": 50
}
],
"exitCondition": {
"leaveWithSpark": {}
},
"unlocksDoors": [
{
"types": [
"super"
],
"requires": []
},
{
"types": [
"missiles",
"powerbomb"
],
"requires": [
"never"
]
}
],
"flashSuitChecked": true,
"blueSuitChecked": true
},
{
"id": 26,
"link": [
3,
3
],
"name": "Leave With Door Frame Below",
"requires": [
{
  "heatFrames": 70
}
],
"exitCondition": {
"leaveWithDoorFrameBelow": {
"height": 2
}
},
"flashSuitChecked": true,
"blueSuitChecked": true
},
{
"id": 27,
"link": [
3,
3
],
"name": "Leave With Platform Below (Small Runway)",
"requires": [
{
  "heatFrames": 70
}
],
"exitCondition": {
"leaveWithPlatformBelow": {
"height": 9,
"leftPosition": -2.5,
"rightPosition": 2.5
}
},
"flashSuitChecked": true,
"blueSuitChecked": true
},
{
"id": 28,
"link": [
3,
3
],
"name": "Leave With Platform Below (Full Runway)",
"requires": [
{
  "heatFrames": 120
}
],
"exitCondition": {
"leaveWithPlatformBelow": {
"height": 9,
"leftPosition": -7.5,
"rightPosition": 6
}
},
"flashSuitChecked": true,
"blueSuitChecked": true,
"devNote": "An additional tile could be used by opening the right door but there is not yet any known application."
},
{
"id": 57,
"link": [
3,
3
],
"name": "R-Mode Entry",
"entranceCondition": {
"comeInWithRMode": {},
"comesThroughToilet": "any"
},
"requires": [],
"clearsObstacles": [
"R-Mode"
],
"flashSuitChecked": true,
"blueSuitChecked": true
},
{
"id": 29,
"link": [
3,
3
],
"name": "G-Mode Setup - Frozen Gamets",
"requires": [
"h_heatProof",
"canUpwardGModeSetup",
"canTrickyUseFrozenEnemies",
{
"or": [
"Morph",
"canInsaneJump"
]
}
],
"exitCondition": {
"leaveWithGModeSetup": {}
},
"flashSuitChecked": true,
"blueSuitChecked": true,
"note": [
"Freeze the stack of Gamets together a few times to try and raise them as high as possible.",
"Run with them to the door and freeze the top two such that Samus can stand on the lower and take damage from the higher Gamet when it unfreezes."
],
"detailNote": "It is possible to jump onto the Gamet without Morph, as long as it is not too high.",
"devNote": [
"FIXME: h_heatProof could be dropped in favor of heatFrames + canTrickyGMode?"
]
},
{
"id": 30,
"link": [
3,
3
],
"name": "Carry G-Mode Back Up",
"entranceCondition": {
"comeInWithGMode": {
"mode": "direct",
"morphed": false
},
"comesThroughToilet": "any"
},
"requires": [],
"exitCondition": {
"leaveWithGMode": {
"morphed": false
}
},
"bypassesDoorShell": "free",
"flashSuitChecked": true,
"blueSuitChecked": true
},
{
"id": 31,
"link": [
3,
3
],
"name": "Carry G-Mode Morph Back Up",
"entranceCondition": {
"comeInWithGMode": {
"mode": "direct",
"morphed": true
},
"comesThroughToilet": "any"
},
"requires": [
{
  "or": [
    "h_artificialMorphIBJ",
    "h_artificialMorphSpringBallBombJump",
    {
      "and": [
        "HiJump",
        "h_artificialMorphSpringBall"
      ]
    }
  ]
}
],
"exitCondition": {
"leaveWithGMode": {
"morphed": true
}
},
"bypassesDoorShell": "free",
"flashSuitChecked": true,
"blueSuitChecked": true
},
{
"id": 53,
"link": [
3,
3
],
"name": "G-Mode Ice Clip, Door Lock Skip",
"entranceCondition": {
"comeInWithGMode": {
"mode": "indirect",
"morphed": false
},
"comesThroughToilet": "any"
},
"requires": [
"canComplexGMode",
{
"or": [
"h_preciseIceClip",
"h_highPixelIceClip"
]
}
],
"exitCondition": {
"leaveWithGMode": {
"morphed": false
}
},
"bypassesDoorShell": "yes",
"flashSuitChecked": true,
"blueSuitChecked": true,
"note": [
"Jump next to the Gamet farm until one is at the correct height, which is just over one tile above Samus.",
"Lure it to the right and use it to ice clip through the top door shell. Avoid killing any of the Gamets or they will all stop spawning.",
"With bad positioning, move the Gamets off camera to try again; ice can help get around them.",
"Also, be careful to avoid touching the invisible, stationary projectiles that the Dragons shoot."
],
"devNote": "This is only for indirect G-Mode, because it is trivial while in direct, and would use a different strat."
},
{
"id": 32,
"link": [
3,
4
],
"name": "Base",
"requires": [
{
"heatFrames": 175
},
{
"or": [
"canDash",
{
"heatFrames": 105
}
]
}
],
"flashSuitChecked": true,
"blueSuitChecked": true
},
{
"id": 50,
"link": [
3,
4
],
"name": "G-Mode, To the Farm",
"entranceCondition": {
"comeInWithGMode": {
"mode": "any",
"morphed": false
},
"comesThroughToilet": "any"
},
"requires": [
"h_heatedGMode",
{
"or": [
"h_heatedGModePauseAbuse",
{
"heatFrames": 40
}
]
}
],
"flashSuitChecked": true,
"blueSuitChecked": true,
"note": "Kill the Gamets where Samus can grab the drops. Exit G-mode, then pause abuse to pick them up without dying."
},
{
"id": 33,
"link": [
4,
1
],
"name": "Base",
"requires": [
{
"heatFrames": 75
},
{
"or": [
"canDash",
{
"heatFrames": 25
}
]
}
],
"flashSuitChecked": true,
"blueSuitChecked": true
},
{
"id": 34,
"link": [
4,
1
],
"name": "Leave with Runway",
"requires": [
"canDash",
{
"heatFrames": 10
}
],
"exitCondition": {
"leaveWithRunway": {
"length": 14,
"openEnd": 1
}
},
"unlocksDoors": [
{
"types": [
"ammo"
],
"requires": []
}
],
"flashSuitChecked": true,
"blueSuitChecked": true
},
{
"id": 44,
"link": [
4,
1
],
"name": "G-Mode Setup - Get Hit By Gamet",
"requires": [
{
  "heatFrames": 290
}
],
"exitCondition": {
"leaveWithGModeSetup": {}
},
"unlocksDoors": [
{
"types": [
"ammo"
],
"requires": []
}
],
"flashSuitChecked": true,
"blueSuitChecked": true
},
{
"id": 35,
"link": [
4,
2
],
"name": "Base",
"requires": [
{
"heatFrames": 205
},
{
"or": [
"canDash",
{
"heatFrames": 135
}
]
}
],
"unlocksDoors": [
{
"types": [
"missiles"
],
"requires": []
}
],
"flashSuitChecked": true,
"blueSuitChecked": true
},
{
"id": 36,
"link": [
4,
2
],
"name": "Leave with Runway",
"requires": [
"canDash",
{
"heatFrames": 155
}
],
"exitCondition": {
"leaveWithRunway": {
"length": 14,
"openEnd": 1
}
},
"unlocksDoors": [
{
"types": [
"missiles"
],
"requires": [
{
"heatFrames": 40
}
]
},
{
"types": [
"super"
],
"requires": []
},
{
"types": [
"powerbomb"
],
"requires": [
{
"heatFrames": 110
}
]
}
],
"flashSuitChecked": true,
"blueSuitChecked": true
},
{
"id": 45,
"link": [
4,
2
],
"name": "G-Mode Setup - Get Hit By Gamet",
"requires": [
"canDash",
{
"heatFrames": 440
}
],
"exitCondition": {
"leaveWithGModeSetup": {}
},
"unlocksDoors": [
{
"types": [
"missiles",
"powerbomb"
],
"requires": [
"never"
]
},
{
"types": [
"super"
],
"requires": []
}
],
"flashSuitChecked": true,
"blueSuitChecked": true,
"devNote": "FIXME: with Ice, this could be done dashless."
},
{
"id": 37,
"link": [
4,
3
],
"name": "Base",
"requires": [
{
"heatFrames": 210
},
{
"or": [
"h_trickyToCarryFlashSuit",
{
"heatFrames": 40
}
]
},
{
"or": [
"canDash",
{
"heatFrames": 110
}
]
}
],
"flashSuitChecked": true,
"blueSuitChecked": true
},
{
"id": 39,
"link": [
4,
3
],
"name": "Leave With Door Frame Below",
"requires": [
{
"heatFrames": 220
},
{
"or": [
"canDash",
{
"heatFrames": 110
}
]
}
],
"exitCondition": {
"leaveWithDoorFrameBelow": {
"height": 2
}
},
"unlocksDoors": [
{
"types": [
"missiles"
],
"requires": [
{
"heatFrames": 50
}
]
},
{
"types": [
"super"
],
"requires": []
},
{
"types": [
"powerbomb"
],
"requires": [
{
"heatFrames": 110
}
]
}
],
"flashSuitChecked": true,
"blueSuitChecked": true
},
{
"id": 40,
"link": [
4,
3
],
"name": "Leave With Platform Below",
"requires": [
{
"heatFrames": 220
},
{
"or": [
"canDash",
{
"heatFrames": 110
}
]
}
],
"exitCondition": {
"leaveWithPlatformBelow": {
"height": 9,
"leftPosition": -7.5,
"rightPosition": 2
}
},
"unlocksDoors": [
{
"types": [
"missiles"
],
"requires": [
{
"heatFrames": 50
}
]
},
{
"types": [
"super"
],
"requires": []
},
{
"types": [
"powerbomb"
],
"requires": [
{
"heatFrames": 110
}
]
}
],
"flashSuitChecked": true,
"blueSuitChecked": true
},
{
"id": 41,
"link": [
4,
3
],
"name": "Gamet Ice Clip Door Lock Skip",
"requires": [
{
"or": [
"canDash",
"h_heatProof"
]
},
{
"heatFrames": 560
},
"h_iceClip"
],
"bypassesDoorShell": "yes",
"flashSuitChecked": true,
"blueSuitChecked": true,
"note": [
"Bring a Gamet from the farm and freeze it at a precise distance below the door in order to crouch-jump up and clip through the door shell.",
"The pixel window is larger and higher with Morph and an X-Ray stand-up, in which case a standing jump is used."
],
"devNote": [
"FIXME: This could be done dashless without heat protection."
]
},
{
"id": 58,
"link": [
4,
3
],
"name": "R-Mode Forced Standup Door Lock Skip",
"requires": [
{
"obstaclesCleared": [
"R-Mode"
]
},
"canDash",
"canRModeStandupClip",
"canInsaneJump",
{
"or": [
"canMidAirMorph",
"canBeVeryPatient"
]
},
{
"heatFrames": 210
},
{
"disableEquipment": "Varia"
},
{
"autoReserveTrigger": {}
},
{
"heatFrames": 5
}
],
"bypassesDoorShell": "yes",
"flashSuitChecked": true,
"blueSuitChecked": true,
"note": [
"Position below the door, jump when Samus reaches 7 Energy, and mid-air morph,",
"timed so that reserves trigger while Samus still has upward momentum just before Samus would hit the door.",
"If done properly, the R-mode standup will cause Samus to clip past the door shell."
],
"detailNote": [
"With a mid-air morph, this has a 5-frame window for the jump.",
"Otherwise, with a jump aim-down it has a 3-frame window.",
"If Spring Ball is available, jumping in Spring Ball increases the window to 6 frames.",
"In any case, it may help to pause abuse: instead of jumping at a precise Energy value,",
"set reserves to manual, wait until Samus is close to zero Energy,",
"and press pause a moment before jumping,",
"so that Samus is at 0 energy and in position just below the door when the pause hits.",
"Then set reserves to auto (and re-equip Varia if available), and unpause."
]
},
{
"id": 54,
"link": [
4,
4
],
"name": "Approach Farm",
"requires": [
{
"or": [
{
"and": [
{
"heatFrames": 0
},
"canPauseAbuse"
]
},
{
"heatFrames": 60
}
]
},
{
"partialRefill": {
"type": "RegularEnergy",
"limit": 50
}
}
],
"flashSuitChecked": true,
"blueSuitChecked": true,
"devNote": "Raise energy high enough to use the farm if it is low."
},
{
"id": 42,
"link": [
4,
4
],
"name": "Gamet Farm",
"requires": [
{
  "or": [
    {
      "and": [
        "h_lavaProof",
        {
          "simpleHeatFrames": 60
        },
        {
          "heatFrames": 50
        },
        {
          "simpleCycleFrames": 60
        },
        {
          "cycleFrames": 50
        }
      ]
    },
    {
      "and": [
        {
          "simpleHeatFrames": 135
        },
        {
          "heatFrames": 20
        },
        {
          "simpleCycleFrames": 135
        },
        {
          "cycleFrames": 20
        }
      ]
    }
  ]
}
],
"farmCycleDrops": [
{
"enemy": "Gamet",
"count": 5
}
],
"flashSuitChecked": true,
"blueSuitChecked": true
}
],
"notables": [],
"nextStratId": 63,
"nextNotableId": 1
}