Bubble Mountain
Room ID: 97
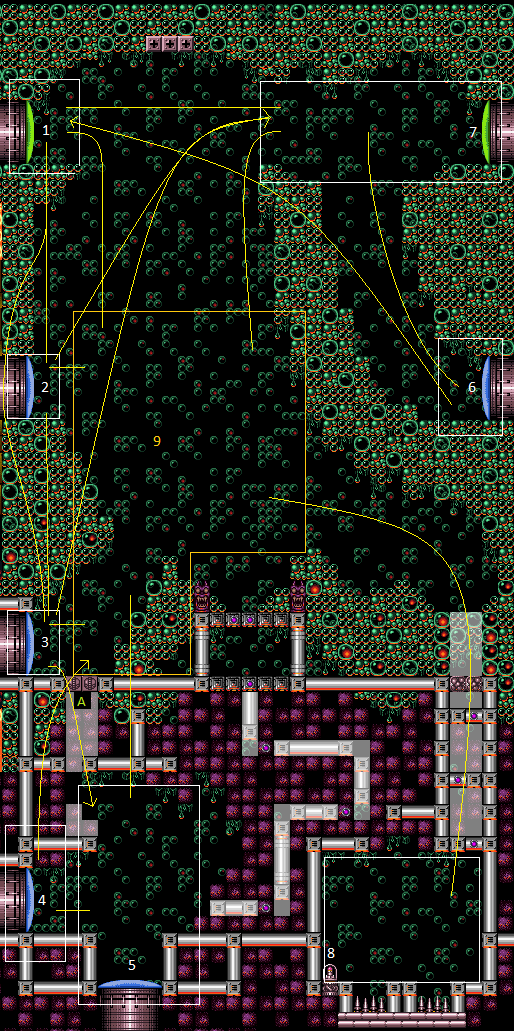
|
Exit condition: "leaveWithRunway": {
"length": 4,
"openEnd": 1
} |
From: 1
Left Side - Top Door
To: 1
Left Side - Top Door


Place a Power Bomb on the bottom stair attached to the door in order to prevent killing the Sova, or free a Sova from the Morph maze with Bombs. If coming from below, be sure to lure the Sova to the bottom before placing a Power Bomb near the blocks in order to prevent killing it. Use the frozen Sova to climb to the top left door. Stand on a low frozen Waver to lower the camera enough to get the Sova to move again. Requires: "h_frozenEnemyRunway", {"or": [ {"obstaclesCleared": ["A"]}, "h_bombThings" ]}, {"or": [ "canTrickyJump", "SpaceJump" ]} Exit condition: "leaveWithRunway": {
"length": 5,
"openEnd": 1
} |
From: 1
Left Side - Top Door
To: 1
Left Side - Top Door


Exit condition: "leaveWithGrappleSwing": {
"blocks": [{"position": [9, 2], "note": "Closest Grapple block to the door"}]
} |
|
Requires: "h_CrystalFlash" |
From: 1
Left Side - Top Door
To: 1
Left Side - Top Door
Immediately after entry, a Waver will be near the door - this one will not be used and can be killed. About 15 seconds later, another Waver will come and get into position. Due to the way the Waver moves, it is not possible to freeze it in the correct position from a crouched angle shot; either shoot it from a jump aim-down shot, or stand near the door uncrouched. If frozen in the correct position, the waver will be in a 'wide/open' animation frame. The Waver will get into position 2 pixels higher than the runway, making it unreliable and unexpected to stutter shinecharge. Entrance condition: "comeInNormally": {}Requires: "h_trickyFrozenEnemyRunway" Exit condition: "leaveWithRunway": {
"length": 5,
"openEnd": 1,
"startingStutterlessTiles": 1
}Unlocks doors: {"types": ["missiles", "super"], "requires": []},
{"types": ["powerbomb"], "requires": ["never"]} |
From: 1
Left Side - Top Door
To: 1
Left Side - Top Door
Entrance condition: "comeInShinecharging": {
"length": 3,
"openEnd": 0
},
"comesInHeated": "no"Requires: "canTrickyDodgeEnemies", "h_CrystalSpark" |
|
Requires: {"resetRoom": {"nodes": [1]}},
{"cycleFrames": 80}Resets obstacles: A, B Farm cycle drops: 1 Waver |
From: 1
Left Side - Top Door
To: 1
Left Side - Top Door
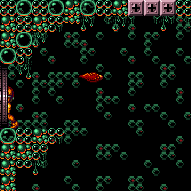

Exit condition: "leaveWithDamage": {
"enemy": "Waver"
} |
From: 1
Left Side - Top Door
To: 1
Left Side - Top Door
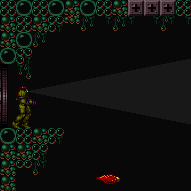

Wait 20 seconds for a Waver to come and hit Samus. Requires: {"enemyDamage": {"enemy": "Waver", "type": "contact", "hits": 1}} |
From: 1
Left Side - Top Door
To: 2
Left Side - Top Middle Door


Entrance condition: "comeInShinecharging": {
"length": 3,
"openEnd": 1
}Requires: "canShinechargeMovementComplex", {"or": [ {"enemyKill": { "enemies": [["Waver"], ["Waver"]], "explicitWeapons": ["Wave", "Spazer", "Plasma", "Missile", "Super", "Grapple"] }}, {"enemyDamage": {"enemy": "Waver", "type": "contact", "hits": 1}} ]}, {"shineChargeFrames": 110} Exit condition: "leaveShinecharged": {}Unlocks doors: {"types": ["super"], "requires": []},
{"types": ["missiles", "powerbomb"], "requires": ["never"]} |
From: 1
Left Side - Top Door
To: 2
Left Side - Top Middle Door
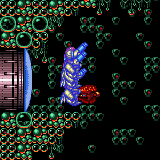
Use X-ray to cancel the shinecharge, in order to quickly destroy the Waver before taking a hit. Alternatively, run, jump, or slide off the edge, using a pause buffer to morph. Or if enough runway is available, simply avoid using the last tile to stay out of the way of the Waver. Entrance condition: "comeInShinecharging": {
"length": 3,
"openEnd": 1
}Requires: "canLongChainTemporaryBlue", "canXRayTurnaround", "canXRayCancelShinecharge" Exit condition: "leaveWithTemporaryBlue": {}Unlocks doors: {"types": ["ammo"], "requires": []} |
From: 1
Left Side - Top Door
To: 3
Left Side - Bottom Middle Door


Slide off the edge to kill the Waver with blue. Entrance condition: "comeInShinecharging": {
"length": 3,
"openEnd": 1
}Requires: "canShinechargeMovementTricky", {"shineChargeFrames": 156} Exit condition: "leaveShinecharged": {}Unlocks doors: {"types": ["super"], "requires": []},
{"types": ["missiles", "powerbomb"], "requires": ["never"]} |
From: 1
Left Side - Top Door
To: 3
Left Side - Bottom Middle Door

Use X-ray to cancel the shinecharge, in order to quickly destroy the Waver before taking a hit. Alternatively, run, jump, or slide off the edge, using a pause buffer to morph. Or if enough runway is available, simply avoid using the last tile to stay out of the way of the Waver. Entrance condition: "comeInShinecharging": {
"length": 3,
"openEnd": 1
}Requires: "canLongChainTemporaryBlue", "canXRayTurnaround", "canXRayCancelShinecharge" Exit condition: "leaveWithTemporaryBlue": {}Unlocks doors: {"types": ["ammo"], "requires": []} |
From: 1
Left Side - Top Door
To: 4
Left Side - Bottom Door

Use X-ray to cancel the shinecharge, in order to quickly destroy the Waver before taking a hit. Alternatively, run, jump, or slide off the edge, using a pause buffer to morph. Or if enough runway is available, simply avoid using the last tile to stay out of the way of the Waver. Lay the Power Bomb low enough to kill the Sova. Descend during the Power Bomb explosion, to take advantage of the more lenient timing provided by the lag. Entrance condition: "comeInShinecharging": {
"length": 3,
"openEnd": 1
}Requires: "canLongChainTemporaryBlue", "canXRayTurnaround", "canXRayCancelShinecharge", {"ammo": {"type": "PowerBomb", "count": 1}} Exit condition: "leaveWithTemporaryBlue": {}Unlocks doors: {"types": ["ammo"], "requires": []} |
From: 1
Left Side - Top Door
To: 5
Bottom Door


Use X-ray to cancel the shinecharge, in order to quickly destroy the Waver before taking a hit. Alternatively, run, jump, or slide off the edge, using a pause buffer to morph. Or if enough runway is available, simply avoid using the last tile to stay out of the way of the Waver. Lay the Power Bomb low enough to kill the Sova. Descend during the Power Bomb explosion, to take advantage of the more lenient timing provided by the lag. Entrance condition: "comeInShinecharging": {
"length": 3,
"openEnd": 1
}Requires: "canLongChainTemporaryBlue", "canXRayTurnaround", "canXRayCancelShinecharge", {"ammo": {"type": "PowerBomb", "count": 1}} Exit condition: "leaveWithTemporaryBlue": {
"direction": "any"
}Unlocks doors: {"types": ["ammo"], "requires": []} |
From: 1
Left Side - Top Door
To: 6
Middle Right Door
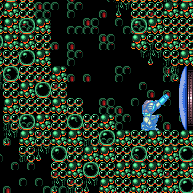
Destroy the Cac by touching it while in aim-down pose; enter a speedball for a moment, before unmorphing past the two half-tile dropoffs. Alternatively, if enough run speed is available, it is also an option to airball over the Cac. Entrance condition: "comeInGettingBlueSpeed": {
"length": 3,
"openEnd": 1,
"minExtraRunSpeed": "$1.2"
}Requires: "canSpeedball", "canLongChainTemporaryBlue" Exit condition: "leaveWithTemporaryBlue": {}Unlocks doors: {"types": ["ammo"], "requires": []} |
|
Kill King Cac by scrolling the camera before Grappling across. Requires: "Grapple" |
|


King Cac can be killed by scrolling the camera before jumping across. Requires: "canDash", "canWallJump", "canCarefulJump", {"or": [ "canCameraManip", "canTrickyWallJump", {"and": [ "canNeutralDamageBoost", {"enemyDamage": {"enemy": "Cacatac", "type": "contact", "hits": 1}} ]} ]} |
|


Entrance condition: "comeInRunning": {
"speedBooster": "any",
"minTiles": 2
}Requires: {"or": [
"canTrickyJump",
{"and": [
"canSpeedyJump",
"canCarefulJump"
]}
]},
{"or": [
"ScrewAttack",
{"and": [
"canNeutralDamageBoost",
{"enemyDamage": {"enemy": "Cacatac", "type": "contact", "hits": 1}}
]}
]} |
|


Kill King Cac by scrolling the camera, before attempting the jump. Requires: {"doorUnlockedAtNode": 1},
"canDash",
"canTrickyJump",
"canCameraManip" |
|


King Cac can be killed by scrolling the camera before jumping across. Requires: "h_speedJump", "canCarefulJump", {"or": [ {"doorUnlockedAtNode": 1}, "canTrickyJump" ]}, {"or": [ "canCameraManip", {"and": [ "canNeutralDamageBoost", {"enemyDamage": {"enemy": "Cacatac", "type": "contact", "hits": 1}} ]} ]} |
|


King Cac can be killed by scrolling the camera before jumping across. Requires: "canLateralMidAirMorph", {"or": [ "canTrickyJump", {"doorUnlockedAtNode": 1} ]}, {"or": [ "canCameraManip", {"enemyDamage": {"enemy": "Cacatac", "type": "contact", "hits": 1}} ]} |
From: 1
Left Side - Top Door
To: 7
Top Right Door


Damage Boost off a Waver to cross the gap. Requires: {"notable": "Damage Boost"},
"canHorizontalDamageBoost",
{"enemyDamage": {"enemy": "Waver", "type": "contact", "hits": 1}} |
|


Entrance condition: "comeInWithSpark": {}Requires: {"shinespark": {"frames": 42, "excessFrames": 22}} |
|


Jump over the Waver, fire a shot mid-air, and activate the shinespark wind-up. Wait until the shot is at a specific position before sparking. Sparking too late will cause the shot to despawn before reaching the door. Sparking too early will cause Samus to bonk the door as it will not yet be open. A beam shot, Missile, or Super can be used. Entrance condition: "comeInShinecharged": {}Requires: {"shineChargeFrames": 50},
"canHeroShot",
"canShinechargeMovementComplex",
{"shinespark": {"frames": 35, "excessFrames": 0}}Exit condition: "leaveWithSpark": {}Unlocks doors: {"types": ["super"], "requires": []},
{"types": ["missiles", "powerbomb"], "requires": ["never"]} |
From: 1
Left Side - Top Door
To: 7
Top Right Door
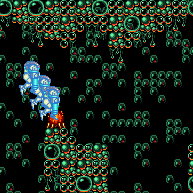

Destroy the Cac by touching it while in aim-down pose; enter a speedball for a moment, before unmorphing past the two half-tile drops. Alternatively, if enough run speed is available, it is also an option to airball over the Cac. Entrance condition: "comeInGettingBlueSpeed": {
"length": 3,
"openEnd": 1,
"minExtraRunSpeed": "$1.2"
}Requires: "canSpeedball", "canLongChainTemporaryBlue" Exit condition: "leaveWithTemporaryBlue": {}Unlocks doors: {"types": ["ammo"], "requires": []} |
From: 1
Left Side - Top Door
To: 7
Top Right Door

Destroy the Cac by bouncing on it with a controlled blue spring ball bounce. Entrance condition: "comeInWithBlueSpringBallBounce": {
"movementType": "controlled",
"minExtraRunSpeed": "$1.2",
"minLandingTiles": 0
}Requires: "canChainTemporaryBlue" Exit condition: "leaveWithTemporaryBlue": {}Unlocks doors: {"types": ["ammo"], "requires": []} |
From: 1
Left Side - Top Door
To: 7
Top Right Door
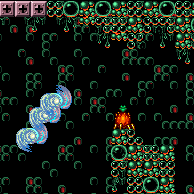
Entrance condition: "comeInBlueSpinning": {
"unusableTiles": 0
}Requires: "SpaceJump", "canChainTemporaryBlue" Exit condition: "leaveWithTemporaryBlue": {}Unlocks doors: {"types": ["ammo"], "requires": []} |
|
Kill the Cacatac by shooting, jumping to the right to scroll the camera slightly, and returning. From the right edge, pause then press left and jump just before the pause fully triggers. Disable Spring Ball in order to get a large horizontal boost. Pause again as soon as possible and re-enable Spring to reset fall speed. Requires: "canHeroShot", "canCameraManip", "canSpringFling", "canInsaneJump", {"disableEquipment": "HiJump"} |
From: 1
Left Side - Top Door
To: 7
Top Right Door
Place a Power Bomb at the right edge of the runway to kill the Cacatac. It helps to delay placing it to also kill the Wavers. From the right edge, pause then press right and jump just before the pause fully triggers. Disable Spring Ball in order to get a large horizontal boost. Pause again as soon as possible and re-enable Spring to reset fall speed. Entrance condition: "comeInWithGMode": {
"mode": "any",
"morphed": true
}Requires: "h_artificialMorphPowerBomb", "h_artificialMorphSpringFling", "canInsaneJump", {"disableEquipment": "HiJump"} |
|
|
From: 1
Left Side - Top Door
To: 10
G-Mode Morph, Above the Power Bomb Blocks
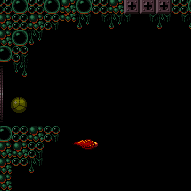

Entrance condition: "comeInWithGMode": {
"mode": "any",
"morphed": true
} |
From: 2
Left Side - Top Middle Door
To: 1
Left Side - Top Door
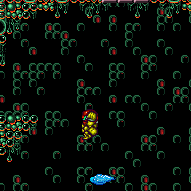

Freeze the Wavers on entry, as their initial pattern makes climbing much easier. Entrance condition: "comeInNormally": {}Requires: "canTrickyUseFrozenEnemies" |
From: 2
Left Side - Top Middle Door
To: 1
Left Side - Top Door
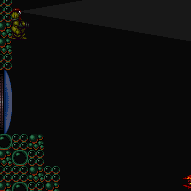
Climb up 1 screen. Entrance condition: "comeInWithDoorStuckSetup": {}Requires: "canXRayClimb" |
From: 2
Left Side - Top Middle Door
To: 1
Left Side - Top Door

Enter with G-mode direct, back up to between 1 and 6 pixels from the door transition, and activate X-ray to get very deep stuck in the door. Climb up 1 screen, and perform a turnaround buffered spin-jump away from the door to trigger the transition, bypassing any lock on the door. Entrance condition: "comeInWithGMode": {
"mode": "direct",
"morphed": false
}Requires: "canGModeXRayClimb" Bypasses door shell: true |
From: 2
Left Side - Top Middle Door
To: 1
Left Side - Top Door


Entrance condition: "comeInRunning": {
"speedBooster": "yes",
"minTiles": 35
}Requires: "canSpeedyJump", "canTrickyJump" |
From: 2
Left Side - Top Middle Door
To: 1
Left Side - Top Door


Entrance condition: "comeInRunning": {
"speedBooster": "yes",
"minTiles": 25
}Requires: "canSpeedyJump", "canPreciseGrapple", "h_midAirShootUp" |
From: 2
Left Side - Top Middle Door
To: 1
Left Side - Top Door
Entrance condition: "comeInRunning": {
"speedBooster": "yes",
"minTiles": 18
}Requires: "canTrickyDashJump", "canPreciseGrapple", "h_midAirShootUp" |
From: 2
Left Side - Top Middle Door
To: 1
Left Side - Top Door
Entrance condition: "comeInRunning": {
"speedBooster": "yes",
"minTiles": 8
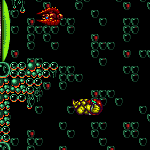
}Requires: "canSpeedyJump", "canCarefulJump", "HiJump", {"or": [ "ScrewAttack", {"enemyDamage": {"enemy": "Waver", "type": "contact", "hits": 1}} ]} |
From: 2
Left Side - Top Middle Door
To: 1
Left Side - Top Door

Entrance condition: "comeInRunning": {
"speedBooster": "yes",
"minTiles": 7

}Requires: "canSpeedyJump", "canTrickyJump", "HiJump", {"or": [ "ScrewAttack", {"enemyDamage": {"enemy": "Waver", "type": "contact", "hits": 1}} ]} |
From: 2
Left Side - Top Middle Door
To: 1
Left Side - Top Door

Entrance condition: "comeInRunning": {
"speedBooster": "yes",
"minTiles": 15

}Requires: "canSpeedyJump", "canTrickyJump", "canTrickySpringBallJump", "canNeutralDamageBoost", {"enemyDamage": {"enemy": "Waver", "type": "contact", "hits": 1}} |
From: 2
Left Side - Top Middle Door
To: 1
Left Side - Top Door
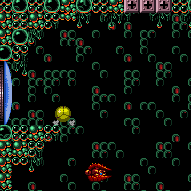

Use 7 tiles from the adjacent runway then use Spring Ball at the peak of the jump and bounce off the Waver to get up onto the top left ledge. Entrance condition: "comeInRunning": {
"speedBooster": "yes",
"minTiles": 7
}Requires: "canTrickyDashJump", "canTrickySpringBallJump", "canNeutralDamageBoost", {"enemyDamage": {"enemy": "Waver", "type": "contact", "hits": 1}} |
From: 2
Left Side - Top Middle Door
To: 1
Left Side - Top Door
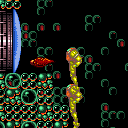

Entrance condition: "comeInShinecharging": {
"length": 2,
"openEnd": 1
}Requires: "canHorizontalShinespark", {"shinespark": {"frames": 27, "excessFrames": 2}} |
From: 2
Left Side - Top Middle Door
To: 1
Left Side - Top Door
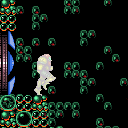
Entrance condition: "comeInShinecharged": {}Requires: {"shineChargeFrames": 50},
"canHorizontalShinespark",
{"shinespark": {"frames": 27, "excessFrames": 2}} |
From: 2
Left Side - Top Middle Door
To: 1
Left Side - Top Door
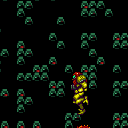
Entrance condition: "comeInShinecharged": {}Requires: {"shineChargeFrames": 25},
"canMidairShinespark",
{"shinespark": {"frames": 20, "excessFrames": 4}} |
From: 2
Left Side - Top Middle Door
To: 1
Left Side - Top Door


Entrance condition: "comeInShinecharged": {}Requires: {"shineChargeFrames": 125},
"HiJump",
"canPreciseWallJump",
"canShinechargeMovementTricky",
{"shinespark": {"frames": 18, "excessFrames": 0}}Exit condition: "leaveWithSpark": {}Unlocks doors: {"types": ["super"], "requires": []},
{"types": ["missiles", "powerbomb"], "requires": ["never"]} |
From: 2
Left Side - Top Middle Door
To: 1
Left Side - Top Door
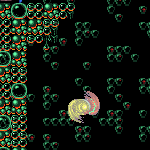

Entrance condition: "comeInShinecharged": {}Requires: {"shineChargeFrames": 105},
"HiJump",
"SpaceJump",
"canShinechargeMovementComplex",
{"shinespark": {"frames": 10, "excessFrames": 0}}Exit condition: "leaveWithSpark": {}Unlocks doors: {"types": ["super"], "requires": []},
{"types": ["missiles", "powerbomb"], "requires": ["never"]} |
From: 2
Left Side - Top Middle Door
To: 1
Left Side - Top Door


Entrance condition: "comeInShinecharging": {
"length": 2,
"openEnd": 0
}Requires: "HiJump", "canPreciseWallJump", "canShinechargeMovementTricky", {"shineChargeFrames": 160} Exit condition: "leaveShinecharged": {}Unlocks doors: {"types": ["super"], "requires": []},
{"types": ["missiles", "powerbomb"], "requires": ["never"]} |
From: 2
Left Side - Top Middle Door
To: 1
Left Side - Top Door


Entrance condition: "comeInShinecharging": {
"length": 2,
"openEnd": 0
}Requires: "HiJump", "SpaceJump", "canShinechargeMovementComplex", {"shineChargeFrames": 145} Exit condition: "leaveShinecharged": {}Unlocks doors: {"types": ["super"], "requires": []},
{"types": ["missiles", "powerbomb"], "requires": ["never"]} |
From: 2
Left Side - Top Middle Door
To: 1
Left Side - Top Door
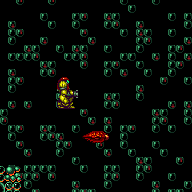

Entrance condition: "comeInWithGrappleSwing": {
"blocks": [
{"position": [-1, 5], "environment": "water", "note": "Mt. Everest"},
{"position": [8, 3], "note": "Grapple Beam Room"},
{"position": [7, 3], "note": "Colosseum"}
]
}Requires: "canPreciseGrappleJump" |
From: 2
Left Side - Top Middle Door
To: 1
Left Side - Top Door
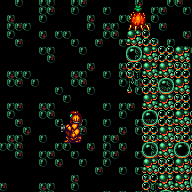
Entrance condition: "comeInWithGrappleSwing": {
"blocks": [
{"position": [6, 4], "note": "Grapple Tutorial Room 2"},
{"position": [6, 2], "note": "Lava Grapple Tunnel"},
{
"position": [5, 2],
"note": "The Moat, Double Chamber, Wrecked Ship Energy Tank Room"
},
{"position": [2.375, 4.5625], "note": "Post Crocomire Farming Room"}
]
}Requires: "canTrickyGrappleJump" |
From: 2
Left Side - Top Middle Door
To: 1
Left Side - Top Door
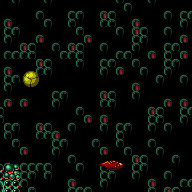

Entrance condition: "comeInWithSidePlatform": {
"platforms": [
{
"minHeight": 1,
"maxHeight": 1,
"minTiles": 13,
"speedBooster": "yes",
"obstructions": [[1, 0]],
"requires": [
{"or": [
{"and": [
"HiJump",
{"or": [
"canTrickyDodgeEnemies",
{"enemyDamage": {"enemy": "Waver", "type": "contact", "hits": 1}}
]}
]},
{"and": [
"canTrickySpringBallJump",
{"or": [
"canTrickyDashJump",
{"and": [
"canNeutralDamageBoost",
{"enemyDamage": {"enemy": "Waver", "type": "contact", "hits": 1}}
]}
]}
]}
]}
],
"note": ["This applies to Warehouse Entrance."],
"detailNote": [
"If Hi-Jump is available, it is possible to kill the Waver using angle-up shots."
]
},
{
"minHeight": 2,
"maxHeight": 2,
"minTiles": 11.4375,
"speedBooster": "yes",
"obstructions": [[1, 0]],
"requires": [
{"or": [
{"and": [
"HiJump",
"canHorizontalDamageBoost",
{"enemyDamage": {"enemy": "Waver", "type": "contact", "hits": 1}}
]},
{"and": [
"canTrickyDashJump",
"canTrickySpringBallJump"
]}
]}
],
"note": ["This applies to Ridley Tank Room, Halfie Climb Room, and Dust Torizo Room."],
"detailNote": [
"In the case of the Spring Ball mid-air jump, maintain forward momentum while entering the pause menu,",
"so that the mid-air jump gets a boost in jump height.",
"A backward input may be buffered along with the jump input during the unpause black screen."
]
},
{
"minHeight": 2,
"maxHeight": 2,
"minTiles": 27.4375,
"speedBooster": "yes",
"obstructions": [[1, 0]],
"requires": [
"canTrickyJump",
{"or": [
{"and": [
"HiJump",
{"or": [
"canTrickyDashJump",
"canTrickyDodgeEnemies",
{"enemyDamage": {"enemy": "Waver", "type": "contact", "hits": 1}}
]}
]},
"canTrickySpringBallJump"
]}
],
"note": ["This applies to Dust Torizo Room and Halfie Climb Room."],
"detailNote": [
"In the Hi-Jump case, it helps to use a little less than the full available runway,",
"in order to get a higher jump and more easily avoid the Waver."
]
},
{
"minHeight": 3,
"maxHeight": 3,
"minTiles": 10.4375,
"speedBooster": "yes",
"obstructions": [[1, 0]],
"requires": [
"canTrickyDashJump",
"canTrickySpringBallJump"
],
"note": ["This applies to Big Boy Room and Mickey Mouse Room."]
},
{
"minHeight": 2,
"maxHeight": 2,
"minTiles": 45,
"speedBooster": "yes",
"obstructions": [[2, 0]],
"requires": [
{"or": [
{"and": [
"canMomentumConservingMorph",
"canTrickySpringBallJump"
]},
{"and": [
"canInsaneJump",
{"or": [
"canHorizontalDamageBoost",
"canNeutralDamageBoost"
]},
{"enemyDamage": {"enemy": "Waver", "type": "contact", "hits": 1}}
]},
{"and": [
"canInsaneJump",
"HiJump"
]}
]}
],
"note": ["This applies to Waterway Energy Tank Room."],
"detailNote": [
"If Spring Ball is available, it is easier to use less than the full runway;",
"a momentum-conserving morph is not required but makes it more reliable.",
"Otherwise, back against the Speed blocks, and arm pump 4 times to advance 8 pixels.",
"Spin jump through the door (do not aim down), and use Hi-Jump or neutral knockback or a damage boost from a Waver to get up."
]
},
{
"minHeight": 2,
"maxHeight": 2,
"minTiles": 20,
"speedBooster": "yes",
"obstructions": [[3, 0]],
"requires": [
"canTrickyDashJump",
"canMomentumConservingMorph",
"canTrickySpringBallJump"
],
"note": ["This applies to Metroid Room 1 and Statues Hallway."]
},
{
"minHeight": 3,
"maxHeight": 3,
"minTiles": 37.4375,
"speedBooster": "yes",
"obstructions": [[3, 0]],
"requires": [
{"or": [
"canMomentumConservingMorph",
{"and": [
"canInsaneJump",
"HiJump"
]}
]}
],
"note": ["This applies to Flyway."]
},
{
"minHeight": 2,
"maxHeight": 2,
"minTiles": 45,
"speedBooster": "yes",
"obstructions": [[4, 0]],
"requires": [
"canInsaneJump",
"canMomentumConservingMorph",
"canInsaneMidAirMorph"
],
"note": ["This applies to Baby Kraid Room."]
},
{
"minHeight": 3,
"maxHeight": 3,
"minTiles": 39.4375,
"speedBooster": "yes",
"obstructions": [[3, 2]],
"requires": [
"canTrickyJump",
{"or": [
"HiJump",
"canTrickySpringBallJump"
]}
],
"note": ["This applies to Metal Pirates Room."]
}
]
} |
From: 2
Left Side - Top Middle Door
To: 2
Left Side - Top Middle Door
Exit condition: "leaveWithRunway": {
"length": 3,
"openEnd": 1
} |
From: 2
Left Side - Top Middle Door
To: 2
Left Side - Top Middle Door


Place a Power Bomb on the bottom stair attached to the door in order to prevent killing the Sova, or free a Sova from the Morph maze with Bombs. If coming from below, be sure to lure the Sova to the bottom before placing a Power Bomb near the blocks in order to prevent killing it. Requires: "h_frozenEnemyRunway", {"or": [ {"obstaclesCleared": ["A"]}, "h_bombThings" ]} Exit condition: "leaveWithRunway": {
"length": 4,
"openEnd": 1
} |
From: 2
Left Side - Top Middle Door
To: 2
Left Side - Top Middle Door
Immediately after entry, the Waver will run into the door; open the door after it has run into it once. The Waver will quickly return and bounce off the open door, then return again about 10 seconds after room entry. On this third pass, the Waver gets into position to extend the runway. The Waver will get into position 2 pixels higher than the runway, making it unreliable and unexpected to stutter shinecharge. Entrance condition: "comeInNormally": {}Requires: "h_trickyFrozenEnemyRunway" Exit condition: "leaveWithRunway": {
"length": 4,
"openEnd": 1,
"startingStutterlessTiles": 1
}Unlocks doors: {"types": ["missiles", "super"], "requires": []},
{"types": ["powerbomb"], "requires": ["never"]} |
From: 2
Left Side - Top Middle Door
To: 2
Left Side - Top Middle Door
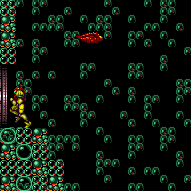

Exit condition: "leaveWithDamage": {
"enemy": "Waver"
} |
From: 2
Left Side - Top Middle Door
To: 2
Left Side - Top Middle Door
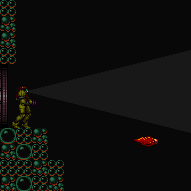

Requires: {"enemyDamage": {"enemy": "Waver", "type": "contact", "hits": 1}} |
From: 2
Left Side - Top Middle Door
To: 3
Left Side - Bottom Middle Door


Entrance condition: "comeInShinecharged": {}Requires: {"shineChargeFrames": 115},
"canShinechargeMovement"Exit condition: "leaveShinecharged": {}Unlocks doors: {"types": ["super"], "requires": []},
{"types": ["missiles", "powerbomb"], "requires": ["never"]} |
From: 2
Left Side - Top Middle Door
To: 3
Left Side - Bottom Middle Door


Entrance condition: "comeInShinecharged": {}Requires: {"shineChargeFrames": 105},
"canShinechargeMovement",
{"shinespark": {"frames": 7, "excessFrames": 0}}Exit condition: "leaveWithSpark": {}Unlocks doors: {"types": ["super"], "requires": []},
{"types": ["missiles", "powerbomb"], "requires": ["never"]} |
From: 2
Left Side - Top Middle Door
To: 3
Left Side - Bottom Middle Door


Entrance condition: "comeInShinecharging": {
"length": 2,
"openEnd": 1
}Requires: "canShinechargeMovement", {"shineChargeFrames": 105} Exit condition: "leaveShinecharged": {}Unlocks doors: {"types": ["super"], "requires": []},
{"types": ["missiles", "powerbomb"], "requires": ["never"]} |
From: 2
Left Side - Top Middle Door
To: 3
Left Side - Bottom Middle Door

Entrance condition: "comeInGettingBlueSpeed": {
"length": 2,
"openEnd": 1
}Requires: "canLongChainTemporaryBlue", "canXRayTurnaround" Exit condition: "leaveWithTemporaryBlue": {}Unlocks doors: {"types": ["ammo"], "requires": []} |
From: 2
Left Side - Top Middle Door
To: 4
Left Side - Bottom Door


Lay the Power Bomb low enough to kill the Sova. Descend during the Power Bomb explosion, to take advantage of the more lenient timing provided by the lag. Entrance condition: "comeInGettingBlueSpeed": {
"length": 2,
"openEnd": 1
}Requires: "canLongChainTemporaryBlue", "canXRayTurnaround", {"ammo": {"type": "PowerBomb", "count": 1}} Exit condition: "leaveWithTemporaryBlue": {}Unlocks doors: {"types": ["ammo"], "requires": []} |
From: 2
Left Side - Top Middle Door
To: 5
Bottom Door

Lay the Power Bomb low enough to kill the Sova. Descend during the Power Bomb explosion, to take advantage of the more lenient timing provided by the lag. Entrance condition: "comeInGettingBlueSpeed": {
"length": 2,
"openEnd": 1
}Requires: "canLongChainTemporaryBlue", "canXRayTurnaround", {"ammo": {"type": "PowerBomb", "count": 1}} Exit condition: "leaveWithTemporaryBlue": {
"direction": "any"
}Unlocks doors: {"types": ["ammo"], "requires": []} |
Come in Getting Blue Speed, Leave With Temporary Blue (HiJump, Pause Remorph)
(Extreme+)
Bubble Mountain
From: 2
Left Side - Top Middle Door
To: 6
Middle Right Door
With blue speed, jump over or through the Cacatac. With a precisely controlled jump, morph, and unmorph it is possible to land on the platform past the Cac; but it is easier to unmorph in the open space past the platform and use a pause to buffer a remorph. Entrance condition: "comeInGettingBlueSpeed": {
"length": 0,
"openEnd": 1,
"minExtraRunSpeed": "$2.6"
}Requires: "HiJump", "canPauseRemorphTemporaryBlue" Exit condition: "leaveWithTemporaryBlue": {}Unlocks doors: {"types": ["ammo"], "requires": []}Dev note: The 2 in-room runway tiles are unusable, since at the minimal speed ($2.6) it is necessary to jump either through the transition or on the first frame after, to avoid bonking the ledge below the Cacatac. |
From: 2
Left Side - Top Middle Door
To: 6
Middle Right Door
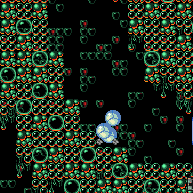

Entrance condition: "comeInShinecharging": {
"length": 2,
"openEnd": 0
}Requires: "HiJump", "canSpringBallJumpMidAir", "canChainTemporaryBlue" Exit condition: "leaveWithTemporaryBlue": {}Unlocks doors: {"types": ["ammo"], "requires": []} |
From: 2
Left Side - Top Middle Door
To: 7
Top Right Door
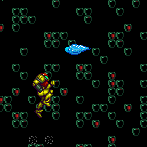
Freeze the Wavers on entry, as their initial pattern makes climbing much easier. Entrance condition: "comeInNormally": {}Requires: "canTrickyUseFrozenEnemies" |
|
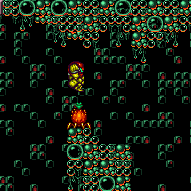
Entrance condition: "comeInRunning": {
"speedBooster": "yes",
"minTiles": 35
}Requires: "canSpeedyJump", "canTrickyJump" |
|

Entrance condition: "comeInRunning": {
"speedBooster": "yes",
"minTiles": 7
}Requires: "canSpeedyJump", "canCarefulJump", "HiJump", {"or": [ "ScrewAttack", {"enemyDamage": {"enemy": "Cacatac", "type": "contact", "hits": 1}} ]} |
From: 2
Left Side - Top Middle Door
To: 7
Top Right Door
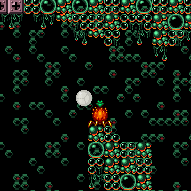

Entrance condition: "comeInRunning": {
"speedBooster": "yes",
"minTiles": 15
}Requires: "canSpeedyJump", "canTrickyJump", "canTrickySpringBallJump", "canNeutralDamageBoost", {"enemyDamage": {"enemy": "Cacatac", "type": "contact", "hits": 1}} |
From: 2
Left Side - Top Middle Door
To: 7
Top Right Door


Entrance condition: "comeInRunning": {
"speedBooster": "no",
"minTiles": 2.4375
}Requires: "canTrickyJump", "canConsecutiveWallJump", "canPreciseWallJump", {"or": [ "canTrickyWallJump", "ScrewAttack", "canWallJumpWithCharge", {"and": [ "canWallJumpInstantMorph", {"enemyDamage": {"enemy": "Cacatac", "type": "spike", "hits": 1}} ]} ]} |
From: 2
Left Side - Top Middle Door
To: 7
Top Right Door
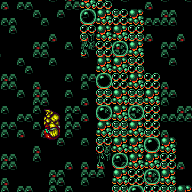
Entrance condition: "comeInRunning": {
"speedBooster": "no",
"minTiles": 4
}Requires: "canCarefulJump", "canConsecutiveWallJump", {"or": [ "canTrickyWallJump", "ScrewAttack", "canWallJumpWithCharge", {"and": [ "canWallJumpInstantMorph", {"enemyDamage": {"enemy": "Cacatac", "type": "spike", "hits": 1}} ]} ]} |
From: 2
Left Side - Top Middle Door
To: 7
Top Right Door


Entrance condition: "comeInRunning": {
"speedBooster": "any",
"minTiles": 5
}Requires: "canCarefulJump", "canConsecutiveWallJump", {"or": [ "canTrickyWallJump", "ScrewAttack", "canWallJumpWithCharge", {"and": [ "canWallJumpInstantMorph", {"enemyDamage": {"enemy": "Cacatac", "type": "spike", "hits": 1}} ]} ]} |
From: 2
Left Side - Top Middle Door
To: 7
Top Right Door
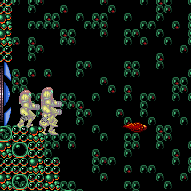

Entrance condition: "comeInShinecharging": {
"length": 2,
"openEnd": 1
}Requires: {"or": [
{"shinespark": {"frames": 22, "excessFrames": 2}},
{"and": [
"canMidairShinespark",
{"shinespark": {"frames": 14, "excessFrames": 3}}
]}
]} |
From: 2
Left Side - Top Middle Door
To: 7
Top Right Door
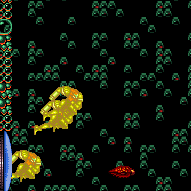

Entrance condition: "comeInShinecharged": {}Requires: {"shineChargeFrames": 5},
{"shinespark": {"frames": 22, "excessFrames": 2}} |
From: 2
Left Side - Top Middle Door
To: 7
Top Right Door


Entrance condition: "comeInShinecharging": {
"length": 2,
"openEnd": 0
}Requires: "HiJump", "SpaceJump", "canHeroShot", "canShinechargeMovementComplex", {"shinespark": {"frames": 31, "excessFrames": 0}} Exit condition: "leaveWithSpark": {}Unlocks doors: {"types": ["super"], "requires": []},
{"types": ["missiles", "powerbomb"], "requires": ["never"]} |
From: 2
Left Side - Top Middle Door
To: 7
Top Right Door


Entrance condition: "comeInShinecharged": {}Requires: {"or": [
{"and": [
"canSpeedyJump",
{"shineChargeFrames": 125}
]},
{"and": [
{"shineChargeFrames": 160},
{"enemyDamage": {"enemy": "Waver", "type": "contact", "hits": 1}}
]}
]},
"canHeroShot",
"HiJump",
"canWallJump",
"canShinechargeMovementTricky",
{"shinespark": {"frames": 27, "excessFrames": 0}},
{"or": [
"canBeLucky",
{"enemyDamage": {"enemy": "Cacatac", "type": "spike", "hits": 1}}
]}Exit condition: "leaveWithSpark": {}Unlocks doors: {"types": ["super"], "requires": []},
{"types": ["missiles", "powerbomb"], "requires": ["never"]} |
From: 2
Left Side - Top Middle Door
To: 7
Top Right Door
Entrance condition: "comeInGettingBlueSpeed": {
"length": 0,
"openEnd": 1,
"minExtraRunSpeed": "$2.6",
"maxExtraRunSpeed": "$2.F"
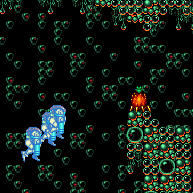
}Requires: "HiJump", "canLongChainTemporaryBlue" Exit condition: "leaveWithTemporaryBlue": {}Unlocks doors: {"types": ["ammo"], "requires": []}Dev note: The 2 in-room runway tiles are unusable, since at the minimal speed ($2.6) it is necessary to jump either through the transition or on the first frame after, to avoid bonking the ledge below the Cacatac. |
From: 2
Left Side - Top Middle Door
To: 7
Top Right Door

Entrance condition: "comeInShinecharging": {
"length": 2,
"openEnd": 0
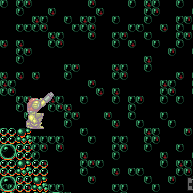
}Requires: "HiJump", "canSpringBallJumpMidAir", "canLongChainTemporaryBlue" Exit condition: "leaveWithTemporaryBlue": {}Unlocks doors: {"types": ["ammo"], "requires": []} |
|
|
From: 2
Left Side - Top Middle Door
To: 10
G-Mode Morph, Above the Power Bomb Blocks
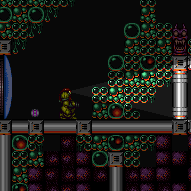

Entrance condition: "comeInWithGMode": {
"mode": "any",
"morphed": true
} |
From: 3
Left Side - Bottom Middle Door
To: 1
Left Side - Top Door


Climb up 2 screens. Entrance condition: "comeInWithDoorStuckSetup": {}Requires: "canLongXRayClimb" |
From: 3
Left Side - Bottom Middle Door
To: 1
Left Side - Top Door
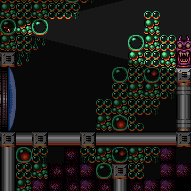

Enter with G-mode direct, back up to between 1 and 6 pixels from the door transition, and activate X-ray to get very deep stuck in the door. Climb up 2 screens, and perform a turnaround buffered spin-jump away from the door to trigger the transition, bypassing any lock on the door. Entrance condition: "comeInWithGMode": {
"mode": "direct",
"morphed": false
}Requires: "canGModeXRayClimb", "canLongXRayClimb" Bypasses door shell: true |
From: 3
Left Side - Bottom Middle Door
To: 1
Left Side - Top Door


Entrance condition: "comeInShinecharging": {
"length": 5,
"openEnd": 0
}Requires: {"or": [
{"and": [
"canShinechargeMovement",
{"shinespark": {"frames": 39, "excessFrames": 2}}
]},
{"and": [
"canShinechargeMovementComplex",
{"shinespark": {"frames": 20, "excessFrames": 2}}
]}
]} |
From: 3
Left Side - Bottom Middle Door
To: 1
Left Side - Top Door


Entrance condition: "comeInShinecharged": {}Requires: {"shineChargeFrames": 35},
"canShinechargeMovement",
{"shinespark": {"frames": 39}} |
From: 3
Left Side - Bottom Middle Door
To: 1
Left Side - Top Door
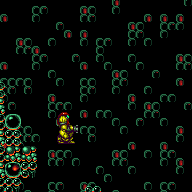

Entrance condition: "comeInWithGrappleSwing": {
"blocks": [
{"position": [-1, 5], "environment": "water", "note": "Mt. Everest"},
{"position": [8, 3], "note": "Grapple Beam Room"},
{"position": [7, 3], "note": "Colosseum"}
]
}Requires: "canPreciseGrappleJump", "h_trickyToCarryFlashSuit" |
From: 3
Left Side - Bottom Middle Door
To: 1
Left Side - Top Door
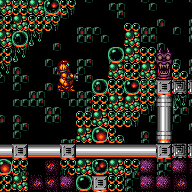
Entrance condition: "comeInWithGrappleSwing": {
"blocks": [
{"position": [6, 4], "note": "Grapple Tutorial Room 2"},
{"position": [6, 2], "note": "Lava Grapple Tunnel"},
{
"position": [5, 2],
"note": "The Moat, Double Chamber, Wrecked Ship Energy Tank Room"
},
{"position": [2.375, 4.5625], "note": "Post Crocomire Farming Room"}
]
}Requires: "canTrickyGrappleJump" |
From: 3
Left Side - Bottom Middle Door
To: 2
Left Side - Top Middle Door


Entrance condition: "comeInShinecharging": {
"length": 5,
"openEnd": 0
}Requires: "canShinechargeMovementComplex", {"shineChargeFrames": 135} Exit condition: "leaveShinecharged": {}Unlocks doors: {"types": ["super"], "requires": []},
{"types": ["missiles", "powerbomb"], "requires": ["never"]} |
From: 3
Left Side - Bottom Middle Door
To: 2
Left Side - Top Middle Door


Entrance condition: "comeInShinecharging": {
"length": 5,
"openEnd": 0
}Requires: "HiJump",
{"enemyDamage": {"enemy": "Waver", "type": "contact", "hits": 1}},
"canShinechargeMovementComplex",
{"shineChargeFrames": 110}Exit condition: "leaveShinecharged": {}Unlocks doors: {"types": ["super"], "requires": []},
{"types": ["missiles", "powerbomb"], "requires": ["never"]} |
From: 3
Left Side - Bottom Middle Door
To: 2
Left Side - Top Middle Door


Entrance condition: "comeInShinecharged": {}Requires: {"shineChargeFrames": 125},
"canShinechargeMovementComplex",
{"shinespark": {"frames": 5}}Exit condition: "leaveWithSpark": {}Unlocks doors: {"types": ["super"], "requires": []},
{"types": ["missiles", "powerbomb"], "requires": ["never"]} |
From: 3
Left Side - Bottom Middle Door
To: 2
Left Side - Top Middle Door


Entrance condition: "comeInShinecharged": {}Requires: {"shineChargeFrames": 90},
"HiJump",
"canShinechargeMovementComplex",
{"enemyDamage": {"enemy": "Waver", "type": "contact", "hits": 1}},
{"shinespark": {"frames": 7, "excessFrames": 0}}Exit condition: "leaveWithSpark": {}Unlocks doors: {"types": ["super"], "requires": []},
{"types": ["missiles", "powerbomb"], "requires": ["never"]} |
From: 3
Left Side - Bottom Middle Door
To: 2
Left Side - Top Middle Door
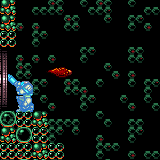

Entrance condition: "comeInShinecharging": {
"length": 4,
"openEnd": 1
}Requires: "canLongChainTemporaryBlue", "canXRayTurnaround" Exit condition: "leaveWithTemporaryBlue": {}Unlocks doors: {"types": ["ammo"], "requires": []} |
From: 3
Left Side - Bottom Middle Door
To: 2
Left Side - Top Middle Door


Enter with G-mode direct, back up to between 1 and 6 pixels from the door transition, and activate X-ray to get very deep stuck in the door. Climb up 1 screen, and perform a turnaround buffered spin-jump away from the door to trigger the transition, bypassing any lock on the door. Entrance condition: "comeInWithGMode": {
"mode": "direct",
"morphed": false
}Requires: "canGModeXRayClimb" Bypasses door shell: true |
From: 3
Left Side - Bottom Middle Door
To: 3
Left Side - Bottom Middle Door
Exit condition: "leaveWithRunway": {
"length": 3,
"openEnd": 1
} |
From: 3
Left Side - Bottom Middle Door
To: 3
Left Side - Bottom Middle Door
Requires: {"obstaclesNotCleared": ["A"]}Exit condition: "leaveWithRunway": {
"length": 6,
"openEnd": 0
} |
From: 3
Left Side - Bottom Middle Door
To: 3
Left Side - Bottom Middle Door
Be sure to lure the Sova to the bottom before placing a Power Bomb near the blocks in order to prevent killing it. Requires: "h_frozenEnemyRunway" Exit condition: "leaveWithRunway": {
"length": 4,
"openEnd": 1
}Dev note: This is only useful if the blocks are broken, but if they are not broken the longer runway can be used. |
From: 3
Left Side - Bottom Middle Door
To: 3
Left Side - Bottom Middle Door
Entrance condition: "comeInShinecharging": {
"length": 5,
"openEnd": 0
},
"comesInHeated": "no"Requires: "h_CrystalSpark" |
From: 3
Left Side - Bottom Middle Door
To: 3
Left Side - Bottom Middle Door
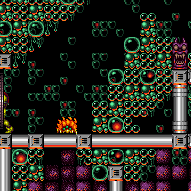

Lure a Sova from the bomb maze, or from just below the Power Bomb blocks. Using a Power Bomb while avoiding killing the Sova can be done by placing the Power Bomb on the lowest stair on the ledge above, Starting at the bottom of the room and going up through the Power Bomb blocks can be done by first luring the Sova into safety at the bottom of the room. Requires: {"or": [
{"obstaclesCleared": ["A"]},
"h_bombThings"
]}Exit condition: "leaveWithDamage": {
"enemy": "Sova"
} |
From: 3
Left Side - Bottom Middle Door
To: 3
Left Side - Bottom Middle Door
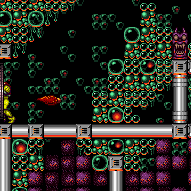

Lure the Waver from the right side of the room. It only moves while on camera. Crouch next to the closed door and let the Waver pass just overhead twice before opening it and getting into position, in order to get hit by the third swoop. Or open the door and use the Waver's second swoop, which is a bit tighter. Requires: "canComplexGMode" Exit condition: "leaveWithDamage": {
"enemy": "Waver"
} |
From: 3
Left Side - Bottom Middle Door
To: 3
Left Side - Bottom Middle Door
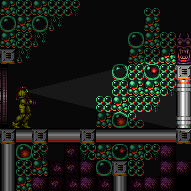

It takes nearly 6 minutes for a Waver to come and hit Samus. Requires: {"enemyDamage": {"enemy": "Waver", "type": "contact", "hits": 1}},
"canBeExtremelyPatient" |
From: 3
Left Side - Bottom Middle Door
To: 4
Left Side - Bottom Door
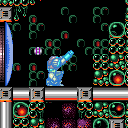
Lay the Power Bomb low enough to kill the Sova. Descend during the Power Bomb explosion, to take advantage of the more lenient timing provided by the lag. Entrance condition: "comeInShinecharging": {
"length": 4,
"openEnd": 1
}Requires: "canLongChainTemporaryBlue", "canXRayTurnaround", {"ammo": {"type": "PowerBomb", "count": 1}} Exit condition: "leaveWithTemporaryBlue": {}Unlocks doors: {"types": ["ammo"], "requires": []} |
From: 3
Left Side - Bottom Middle Door
To: 5
Bottom Door
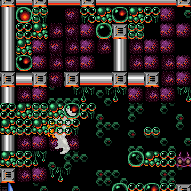

Entrance condition: "comeInWithStoredFallSpeed": {
"fallSpeedInTiles": 1
}Requires: "canMoonfall" |
From: 3
Left Side - Bottom Middle Door
To: 5
Bottom Door


Lay the Power Bomb low enough to kill the Sova. Descend during the Power Bomb explosion, to take advantage of the more lenient timing provided by the lag. Entrance condition: "comeInShinecharging": {
"length": 2,
"openEnd": 0
}Requires: "canLongChainTemporaryBlue", {"ammo": {"type": "PowerBomb", "count": 1}} Exit condition: "leaveWithTemporaryBlue": {
"direction": "right"
}Unlocks doors: {"types": ["ammo"], "requires": []}Dev note: FIXME: With X-Ray, more runway could be used. |
From: 3
Left Side - Bottom Middle Door
To: 6
Middle Right Door

Entrance condition: "comeInShinecharging": {
"length": 4,
"openEnd": 1
}Requires: "canLongChainTemporaryBlue", "canXRayTurnaround", "HiJump", "canSpringBallJumpMidAir" Exit condition: "leaveWithTemporaryBlue": {}Unlocks doors: {"types": ["ammo"], "requires": []} |
From: 3
Left Side - Bottom Middle Door
To: 7
Top Right Door


Diagonal spark from the Save Room Door steps. Entrance condition: "comeInShinecharging": {
"length": 5,
"openEnd": 0
}Requires: "canShinechargeMovementComplex", {"shinespark": {"frames": 26, "excessFrames": 3}} |
From: 3
Left Side - Bottom Middle Door
To: 7
Top Right Door


Diagonal spark from the Save Room Door steps. Entrance condition: "comeInShinecharged": {}Requires: {"shineChargeFrames": 100},
"canShinechargeMovementComplex",
{"shinespark": {"frames": 26, "excessFrames": 3}} |
From: 3
Left Side - Bottom Middle Door
To: 7
Top Right Door
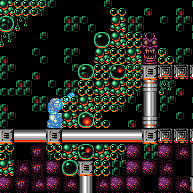

Entrance condition: "comeInShinecharging": {
"length": 4,
"openEnd": 1
}Requires: "canLongChainTemporaryBlue", "canXRayTurnaround", "HiJump", "canSpringBallJumpMidAir" Exit condition: "leaveWithTemporaryBlue": {}Unlocks doors: {"types": ["ammo"], "requires": []} |
|
|
From: 3
Left Side - Bottom Middle Door
To: 10
G-Mode Morph, Above the Power Bomb Blocks
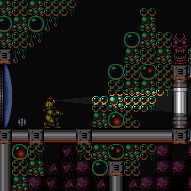

Entrance condition: "comeInWithGMode": {
"mode": "any",
"morphed": true
} |
|


Climb up 3 screens. Entrance condition: "comeInWithDoorStuckSetup": {}Requires: "canLongXRayClimb", "canBePatient" |
From: 4
Left Side - Bottom Door
To: 1
Left Side - Top Door
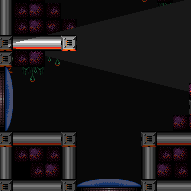
Enter with G-mode direct, back up to between 1 and 6 pixels from the door transition, and activate X-ray to get very deep stuck in the door. Climb up 3 screens, and perform a turnaround buffered spin-jump away from the door to trigger the transition, bypassing any lock on the door. Entrance condition: "comeInWithGMode": {
"mode": "direct",
"morphed": false
}Requires: "canGModeXRayClimb", "canLongXRayClimb", "canBePatient" Bypasses door shell: true |
From: 4
Left Side - Bottom Door
To: 2
Left Side - Top Middle Door
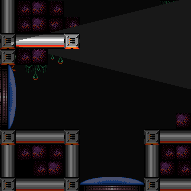

Enter with G-mode direct, back up to between 1 and 6 pixels from the door transition, and activate X-ray to get very deep stuck in the door. Climb up 2 screens, and perform a turnaround buffered spin-jump away from the door to trigger the transition, bypassing any lock on the door. Entrance condition: "comeInWithGMode": {
"mode": "direct",
"morphed": false
}Requires: "canGModeXRayClimb", "canLongXRayClimb" Bypasses door shell: true |
From: 4
Left Side - Bottom Door
To: 2
Left Side - Top Middle Door


Entrance condition: "comeInShinecharging": {
"length": 4,
"openEnd": 0
}Requires: "canLongChainTemporaryBlue", "canXRayTurnaround", {"ammo": {"type": "PowerBomb", "count": 1}}, "canBeVeryPatient" Exit condition: "leaveWithTemporaryBlue": {}Unlocks doors: {"types": ["ammo"], "requires": []}Dev note: The canBeVeryPatient requirement is for difficulty placement |
From: 4
Left Side - Bottom Door
To: 3
Left Side - Bottom Middle Door
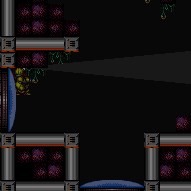
Climb up 1 screen. Entrance condition: "comeInWithDoorStuckSetup": {}Requires: "canXRayClimb" |
From: 4
Left Side - Bottom Door
To: 3
Left Side - Bottom Middle Door
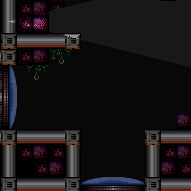

Enter with G-mode direct, back up to between 1 and 6 pixels from the door transition, and activate X-ray to get very deep stuck in the door. Climb up 1 screen, and perform a turnaround buffered spin-jump away from the door to trigger the transition, bypassing any lock on the door. Entrance condition: "comeInWithGMode": {
"mode": "direct",
"morphed": false
}Requires: "canGModeXRayClimb" Bypasses door shell: true |
From: 4
Left Side - Bottom Door
To: 3
Left Side - Bottom Middle Door

Entrance condition: "comeInShinecharging": {
"length": 4,
"openEnd": 0
}Requires: "canLongChainTemporaryBlue", "canXRayTurnaround", {"ammo": {"type": "PowerBomb", "count": 1}}, "canBeVeryPatient" Exit condition: "leaveWithTemporaryBlue": {}Unlocks doors: {"types": ["ammo"], "requires": []}Dev note: The canBeVeryPatient requirement is for difficulty placement |
From: 4
Left Side - Bottom Door
To: 4
Left Side - Bottom Door
Exit condition: "leaveWithRunway": {
"length": 5,
"openEnd": 1
} |
From: 4
Left Side - Bottom Door
To: 4
Left Side - Bottom Door


Starting from the top of the room will require careful manipulation of the Sovas. If going through the Power Bomb blocks, place the Power Bomb on the lowest stair on the ledge above, go down and lure the Sova up and use a Super to knock it off once it is just above the right side of where the Power Bomb blocks were. If using Bombs, lure the Sova that is just below the Power Bomb blocks, then use a Super to prevent it from going into the Morph tunnel. Starting at the bottom of the room and going up for the item before coming back down can be done, even with a Power Bomb, by first luring the Sova into safety at the bottom of the room. Requires: "h_frozenEnemyRunway", {"or": [ {"resetRoom": {"nodes": [4, 5]}}, {"ammo": {"type": "Super", "count": 1}} ]} Exit condition: "leaveWithRunway": {
"length": 6,
"openEnd": 1
}Dev note: FIXME: It is possible to do this by following the Sova around the room to avoid resetting the room or using a Super. |
|
Requires: "h_CrystalFlash" Clears obstacles: A |
From: 4
Left Side - Bottom Door
To: 4
Left Side - Bottom Door
Entrance condition: "comeInShinecharging": {
"length": 4,
"openEnd": 0
},
"comesInHeated": "no"Requires: "h_CrystalSpark" |
From: 4
Left Side - Bottom Door
To: 4
Left Side - Bottom Door
Requires: {"or": [
{"and": [
{"resetRoom": {"nodes": [4]}},
{"cycleFrames": 155},
{"or": [
"canDash",
{"cycleFrames": 15}
]}
]},
{"and": [
{"resetRoom": {"nodes": [5]}},
{"cycleFrames": 220}
]}
]}Clears obstacles: B Resets obstacles: A Farm cycle drops: 1 Sova |
From: 4
Left Side - Bottom Door
To: 4
Left Side - Bottom Door
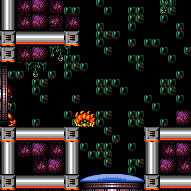

Starting from the top of the room will require careful manipulation of the Sovas. If going through the Power Bomb blocks, place the Power Bomb on the lowest stair on the ledge above, go down and lure the Sova up and use a Super to knock it off once it is just above the right side of where the Power Bomb blocks were. If using Bombs, lure the Sova that is just below the Power Bomb blocks, then use a Super to prevent it from going into the Morph tunnel. Starting at the bottom of the room and going up for the item before coming back down can be done, even with a Power Bomb, by first luring the Sova into safety at the bottom of the room. Requires: {"or": [
{"resetRoom": {"nodes": [4, 5]}},
{"and": [
"canComplexGMode",
{"obstaclesNotCleared": ["B"]},
{"or": [
{"ammo": {"type": "Super", "count": 1}},
{"and": [
"canBeVeryPatient",
{"or": [
"SpaceJump",
"canJumpIntoIBJ",
{"and": [
{"notable": "Right Side Delayed Walljumps"},
"canTrickyWallJump",
"canConsecutiveWallJump"
]},
{"and": [
"HiJump",
"canSpringBallJumpMidAir"
]},
{"and": [
"canTrickySpringBallJump",
"Grapple"
]},
{"and": [
"HiJump",
"h_storedSpark",
{"shinespark": {"frames": 10, "excessFrames": 4}}
]}
]}
]}
]}
]}
]}Exit condition: "leaveWithDamage": {
"enemy": "Sova"
}Dev note: FIXME: This strat is handling too many room states and should be simplified. and entering from 4 or 5 has increased requirements if resetRoom is not possible. FIXME: There are ways to use the right Sova in the maze instead of B. |
From: 4
Left Side - Bottom Door
To: 4
Left Side - Bottom Door
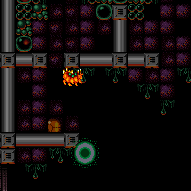

Place a Power Bomb high enough to reach the blocks above. Entrance condition: "comeInWithGMode": {
"mode": "any",
"morphed": true
}Requires: "h_artificialMorphMovement", "h_artificialMorphPowerBomb" Clears obstacles: A |
From: 4
Left Side - Bottom Door
To: 4
Left Side - Bottom Door
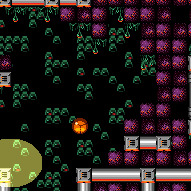

The blocks are breakable with 4 Power Bombs. Horizontally bomb over the vertical door then up two ledges before placing a Power Bomb that can reach the blocks above. Entrance condition: "comeInWithGMode": {
"mode": "any",
"morphed": true
}Requires: "h_artificialMorphBombHorizontally", {"ammo": {"type": "PowerBomb", "count": 3}} Clears obstacles: A Dev note: FIXME: It is possible to enter 5 in indirect, and shoot the door at 4 if it has ever been locked, or 5 if its still locked to overload PLMs and go through the bomb maze. |
|
|
From: 4
Left Side - Bottom Door
To: 5
Bottom Door
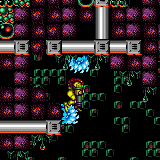

Use two frozen Sovas to moonfall and clip down past the door shell. One of the Sovas behind the bomb blocks will need to be released using a bomb or Power Bomb. In Norfair rooms, enemies thaw more quickly, so there is probably not enough time to clip down through the enemy; instead, before it thaws, slide off the edge or shoot it. Entrance condition: "comeInNormally": {}Requires: "h_bombThings", "canTrickyUseFrozenEnemies", "canEnemyStuckMoonfall", "canFreeFallClip" Bypasses door shell: true Dev note: FIXME: add strats for entering from the top, through the Power Bomb blocks or Bomb tunnel. |
|


Entrance condition: "comeInShinecharged": {}Requires: {"shineChargeFrames": 70},
"canShinechargeMovement"Exit condition: "leaveShinecharged": {}Unlocks doors: {"types": ["super"], "requires": []},
{"types": ["missiles", "powerbomb"], "requires": ["never"]} |
From: 4
Left Side - Bottom Door
To: 5
Bottom Door


Entrance condition: "comeInShinecharging": {
"length": 4,
"openEnd": 1
}Requires: "canShinechargeMovement", {"shineChargeFrames": 50} Exit condition: "leaveShinecharged": {}Unlocks doors: {"types": ["super"], "requires": []},
{"types": ["missiles", "powerbomb"], "requires": ["never"]} |
From: 4
Left Side - Bottom Door
To: 5
Bottom Door
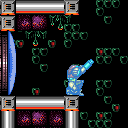
Entrance condition: "comeInShinecharging": {
"length": 4,
"openEnd": 0
}Requires: "canChainTemporaryBlue" Exit condition: "leaveWithTemporaryBlue": {
"direction": "right"
}Unlocks doors: {"types": ["ammo"], "requires": []} |
From: 4
Left Side - Bottom Door
To: 5
Bottom Door


Entrance condition: "comeInWithStoredFallSpeed": {
"fallSpeedInTiles": 1
}Requires: "canMoonfall" Bypasses door shell: true |
From: 4
Left Side - Bottom Door
To: 6
Middle Right Door


Entrance condition: "comeInShinecharging": {
"length": 4,
"openEnd": 0
}Requires: "canLongChainTemporaryBlue", "canXRayTurnaround", {"ammo": {"type": "PowerBomb", "count": 1}}, "HiJump", "canSpringBallJumpMidAir", "canBeVeryPatient" Exit condition: "leaveWithTemporaryBlue": {}Unlocks doors: {"types": ["ammo"], "requires": []}Dev note: The canBeVeryPatient requirement is for difficulty placement |
From: 4
Left Side - Bottom Door
To: 7
Top Right Door


Entrance condition: "comeInShinecharging": {
"length": 4,
"openEnd": 0
}Requires: "canLongChainTemporaryBlue", "canXRayTurnaround", {"ammo": {"type": "PowerBomb", "count": 1}}, "HiJump", "canSpringBallJumpMidAir", "canBeVeryPatient" Exit condition: "leaveWithTemporaryBlue": {}Unlocks doors: {"types": ["ammo"], "requires": []}Dev note: The canBeVeryPatient requirement is for difficulty placement |
From: 4
Left Side - Bottom Door
To: 9
Main Junction
Entrance condition: "comeInWithGMode": {
"mode": "any",
"morphed": true
}Requires: "h_blueSuitGMode", {"or": [ "h_artificialMorphIBJ", "h_artificialMorphSpringBall" ]} |
|
|
|


Entrance condition: "comeInShinecharged": {},
"comesThroughToilet": "any"Requires: {"shineChargeFrames": 70},
"canShinechargeMovementComplex"Exit condition: "leaveShinecharged": {}Unlocks doors: {"types": ["super"], "requires": []},
{"types": ["missiles", "powerbomb"], "requires": ["never"]} |
From: 5
Bottom Door
To: 4
Left Side - Bottom Door


Entrance condition: "comeInShinecharged": {},
"comesThroughToilet": "any"Requires: {"shineChargeFrames": 40},
"canShinechargeMovement",
{"shinespark": {"frames": 9, "excessFrames": 0}}Exit condition: "leaveWithSpark": {}Unlocks doors: {"types": ["super"], "requires": []},
{"types": ["missiles", "powerbomb"], "requires": ["never"]} |
|
Entrance condition: "comeInWithSpark": {},
"comesThroughToilet": "any"Requires: {"shinespark": {"frames": 12, "excessFrames": 12}}Clears obstacles: B Dev note: This strat is not useful in-room, but can satisfy a strat in the room before with an exit shinespark. It doesn't have any controlled position or energy requirements so it is assumed to kill the single Sova on entry. |
From: 5
Bottom Door
To: 5
Bottom Door
Entering through the Toilet will center Samus's position. To not kill the Sova in this room with the Shinespark echos, Samus must enter the previous room door transition with 38 Energy or less. Entrance condition: "comeInWithSpark": {},
"comesThroughToilet": "yes"Requires: "canControlShinesparkEnd", {"shinespark": {"frames": 9, "excessFrames": 9}}, {"resourceAtMost": [{"type": "RegularEnergy", "count": 29}]} Dev note: This strat is not useful in-room, but can satisfy a strat in the room before with an exit Shinespark. This variant avoids killing the Sova, so it can be used for other means. |
From: 5
Bottom Door
To: 5
Bottom Door
Place a Power Bomb high enough to reach the blocks above. Entrance condition: "comeInWithGMode": {
"mode": "indirect",
"morphed": true
},
"comesThroughToilet": "any"Requires: "h_artificialMorphMovement", "h_artificialMorphPowerBomb" Clears obstacles: A |
|
Requires: {"or": [
"h_usePowerBomb",
{"obstaclesCleared": ["A"]}
]}Clears obstacles: A Dev note: It is possible to go through the Morph Maze with a single Power Bomb, placed low enough to not break A, but this isn't very useful. |
|
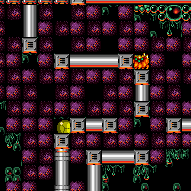

Requires: "h_useMorphBombs", {"or": [ "canMidAirMorph", "h_useSpringBall", "canIBJ" ]} |
|
Requires: {"haveBlueSuit": {}},
"Morph",
{"or": [
"canMidAirMorph",
"h_useSpringBall",
"canIBJ"
]} |
|
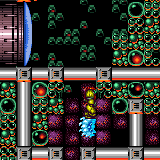

Freeze the wall crawler at a precise location in order to jump through the Power Bomb Blocks. The pixel window is larger and higher with Morph and an X-Ray Stand Up. Requires: "h_iceClip", {"obstaclesNotCleared": ["B"]} |
From: 6
Middle Right Door
To: 1
Left Side - Top Door
Entrance condition: "comeInShinecharged": {}Requires: {"shineChargeFrames": 115},
"canShinechargeMovementComplex",
{"shinespark": {"frames": 30, "excessFrames": 6}} |
From: 6
Middle Right Door
To: 1
Left Side - Top Door
Entrance condition: "comeInShinecharging": {
"length": 4,
"openEnd": 0
}Requires: "canShinechargeMovementComplex", {"shinespark": {"frames": 30, "excessFrames": 6}} |
From: 6
Middle Right Door
To: 1
Left Side - Top Door


On entry, place a Power Bomb at the peak of a jump to kill the Cacatac without letting it place any projectiles. Without Power Bombs, either kill it with Bombs then jump over the projectiles it has spawned, or jump over it and land on one of the last pixels of the corner without touching it. From the left edge where the Cacatac was, pause then press left and jump just before the pause fully triggers. Disable Spring Ball in order to get a large horizontal boost. Pause again as soon as possible and re-enable Spring to reset fall speed. With the Cacatac alive, Samus can only use the last 4 pixels of the ledge; with the projectiles alone, she has 10 pixels available. Entrance condition: "comeInWithGMode": {
"mode": "any",
"morphed": true
}Requires: {"or": [
"h_artificialMorphPowerBomb",
{"and": [
"h_artificialMorphBombs",
"canComplexGMode"
]},
"canTrickyGMode"
]},
"h_artificialMorphSpringFling",
"canInsaneJump",
{"disableEquipment": "HiJump"} |
From: 6
Middle Right Door
To: 1
Left Side - Top Door
Exit the previous room with Samus in a standing pose (while grappled) with a horizontal position of 21 (as far right as possible). After teleporting, press right to release Grapple while staying standing (not being forced into a crouch). Then X-ray climb 1 screen to get up to the door transition above, without needing to open the door. At the beginning of the climb, avoid pressing left without X-Ray being held, to prevent triggering the transition of the lower door. Entrance condition: "comeInWithGrappleTeleport": {
"blockPositions": [[2, 28], [2, 29]]
}Requires: "canXRayClimb" Bypasses door shell: true |
From: 6
Middle Right Door
To: 1
Left Side - Top Door
Exit the previous room with Samus in a standing pose (while grappled) with a horizontal position of 21 (as far right as possible). After teleporting, press right to release Grapple while staying standing (not being forced into a crouch). Then X-ray climb 2 screens to get up to the door transition above, without needing to open the door. At the beginning of the climb, avoid pressing left without X-Ray being held, to prevent triggering the transition of the lower door. Entrance condition: "comeInWithGrappleTeleport": {
"blockPositions": [[2, 34]]
}Requires: "canLongXRayClimb" Bypasses door shell: true |
From: 6
Middle Right Door
To: 2
Left Side - Top Middle Door
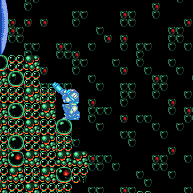
Entrance condition: "comeInShinecharging": {
"length": 3,
"openEnd": 0
}Requires: "canLongChainTemporaryBlue" Exit condition: "leaveWithTemporaryBlue": {}Unlocks doors: {"types": ["ammo"], "requires": []} |
From: 6
Middle Right Door
To: 2
Left Side - Top Middle Door
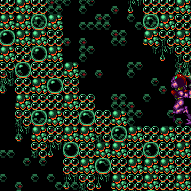

Entrance condition: "comeInWithGrappleTeleport": {
"blockPositions": [[2, 28], [2, 29]]
}Bypasses door shell: true |
From: 6
Middle Right Door
To: 2
Left Side - Top Middle Door
Entrance condition: "comeInWithGrappleTeleport": {
"blockPositions": [[2, 28]]
}Exit condition: "leaveWithGrappleTeleport": {
"blockPositions": [[2, 28]]
}Bypasses door shell: true |
From: 6
Middle Right Door
To: 2
Left Side - Top Middle Door
Entrance condition: "comeInWithGrappleTeleport": {
"blockPositions": [[2, 29]]
}Exit condition: "leaveWithGrappleTeleport": {
"blockPositions": [[2, 29]]
}Bypasses door shell: true |
From: 6
Middle Right Door
To: 2
Left Side - Top Middle Door
Exit the previous room with Samus in a standing pose (while grappled) with a horizontal position of 21 (as far right as possible). After teleporting, press right to release Grapple while staying standing (not being forced into a crouch). Then X-ray climb 1 screen to get up to the door transition above, without needing to open the door. At the beginning of the climb, avoid pressing left without X-Ray being held, to prevent triggering the transition of the lower door. Entrance condition: "comeInWithGrappleTeleport": {
"blockPositions": [[2, 34]]
}Requires: "canXRayClimb" Bypasses door shell: true |
From: 6
Middle Right Door
To: 3
Left Side - Bottom Middle Door


Entrance condition: "comeInShinecharging": {
"length": 3,
"openEnd": 0
}Requires: "canLongChainTemporaryBlue" Exit condition: "leaveWithTemporaryBlue": {}Unlocks doors: {"types": ["ammo"], "requires": []} |
From: 6
Middle Right Door
To: 3
Left Side - Bottom Middle Door
Entrance condition: "comeInWithGrappleTeleport": {
"blockPositions": [[2, 34]]
}Bypasses door shell: true |
From: 6
Middle Right Door
To: 3
Left Side - Bottom Middle Door
Entrance condition: "comeInWithGrappleTeleport": {
"blockPositions": [[2, 34]]
}Exit condition: "leaveWithGrappleTeleport": {
"blockPositions": [[2, 34]]
}Bypasses door shell: true |
From: 6
Middle Right Door
To: 4
Left Side - Bottom Door


Lay the Power Bomb low enough to kill the Sova. Descend during the Power Bomb explosion, to take advantage of the more lenient timing provided by the lag. Entrance condition: "comeInShinecharging": {
"length": 3,
"openEnd": 0
}Requires: "canLongChainTemporaryBlue", "canXRayTurnaround", {"ammo": {"type": "PowerBomb", "count": 1}} Exit condition: "leaveWithTemporaryBlue": {}Unlocks doors: {"types": ["ammo"], "requires": []} |
From: 6
Middle Right Door
To: 5
Bottom Door

Entrance condition: "comeInShinecharging": {
"length": 3,
"openEnd": 0
}Requires: "canLongChainTemporaryBlue", "canXRayTurnaround", {"ammo": {"type": "PowerBomb", "count": 1}} Exit condition: "leaveWithTemporaryBlue": {
"direction": "any"
}Unlocks doors: {"types": ["ammo"], "requires": []} |
|
Exit condition: "leaveWithRunway": {
"length": 5,
"openEnd": 0
} |
From: 6
Middle Right Door
To: 6
Middle Right Door
Entrance condition: "comeInShinecharging": {
"length": 4,
"openEnd": 0
},
"comesInHeated": "no"Requires: "h_CrystalSpark" |
|
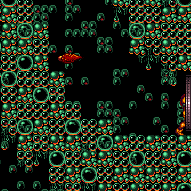

Wait 50 seconds for a Waver to get to this door. Exit condition: "leaveWithDamage": {
"enemy": "Waver"
} |
|
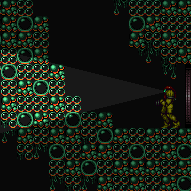

Wait 50 seconds for a Waver to come and hit Samus. Requires: {"enemyDamage": {"enemy": "Waver", "type": "contact", "hits": 1}} |
|
|
From: 6
Middle Right Door
To: 7
Top Right Door
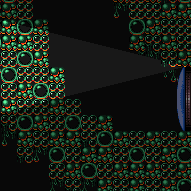
Enter with G-mode direct, back up to between 1 and 6 pixels from the door transition, and activate X-ray to get very deep stuck in the door. Climb up 1 screen, and perform a turnaround buffered spin-jump away from the door to trigger the transition, bypassing any lock on the door. Entrance condition: "comeInWithGMode": {
"mode": "direct",
"morphed": false
}Requires: "canGModeXRayClimb" Bypasses door shell: true |
From: 6
Middle Right Door
To: 7
Top Right Door


Entrance condition: "comeInShinecharged": {}Requires: {"shineChargeFrames": 120},
"canShinechargeMovementComplex",
{"shinespark": {"frames": 15, "excessFrames": 0}}Exit condition: "leaveWithSpark": {}Unlocks doors: {"types": ["super"], "requires": []},
{"types": ["missiles", "powerbomb"], "requires": ["never"]} |
From: 6
Middle Right Door
To: 7
Top Right Door


Entrance condition: "comeInShinecharged": {}Requires: "HiJump", "canShinechargeMovementComplex", {"or": [ {"and": [ "canWallJump", "canSpeedyJump", {"shineChargeFrames": 80}, {"shinespark": {"frames": 11, "excessFrames": 0}} ]}, {"and": [ "canWallJump", {"shineChargeFrames": 95}, {"shinespark": {"frames": 10, "excessFrames": 0}} ]}, {"and": [ "canSpeedyJump", {"shineChargeFrames": 95}, {"shinespark": {"frames": 15, "excessFrames": 0}} ]}, {"and": [ {"shineChargeFrames": 110}, {"shinespark": {"frames": 17, "excessFrames": 0}} ]} ]} Exit condition: "leaveWithSpark": {}Unlocks doors: {"types": ["super"], "requires": []},
{"types": ["missiles", "powerbomb"], "requires": ["never"]} |
From: 6
Middle Right Door
To: 7
Top Right Door


Entrance condition: "comeInShinecharging": {
"length": 4,
"openEnd": 0
}Requires: "canShinechargeMovementTricky", {"shinespark": {"frames": 5, "excessFrames": 0}} Exit condition: "leaveWithSpark": {}Unlocks doors: {"types": ["super"], "requires": []},
{"types": ["missiles", "powerbomb"], "requires": ["never"]} |
From: 6
Middle Right Door
To: 7
Top Right Door


Entrance condition: "comeInShinecharging": {
"length": 4,
"openEnd": 0
}Requires: "canShinechargeMovementComplex", "HiJump", "canWallJump", {"shineChargeFrames": 135} Exit condition: "leaveShinecharged": {}Unlocks doors: {"types": ["super"], "requires": []},
{"types": ["missiles", "powerbomb"], "requires": ["never"]} |
From: 6
Middle Right Door
To: 7
Top Right Door
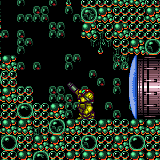

Entrance condition: "comeInShinecharging": {
"length": 3,
"openEnd": 0
}Requires: "canLongChainTemporaryBlue", "canXRayTurnaround" Exit condition: "leaveWithTemporaryBlue": {}Unlocks doors: {"types": ["ammo"], "requires": []} |
From: 6
Middle Right Door
To: 10
G-Mode Morph, Above the Power Bomb Blocks
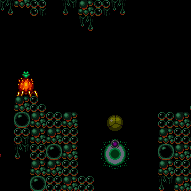

Lower the camera to watch the Wavers and to help avoid them. With Bombs alone, it may be helpful to kill the top Waver; this can be done by placing Bombs in a vertical line and then moving out of the way as it approaches. Entrance condition: "comeInWithGMode": {
"mode": "any",
"morphed": true
}Requires: "h_artificialMorphMovement", {"or": [ {"and": [ "canTrickyJump", "canCameraManip" ]}, "h_artificialMorphPowerBomb", {"enemyDamage": {"enemy": "Waver", "type": "contact", "hits": 1}} ]} |
|
Requires: "Grapple" |
|
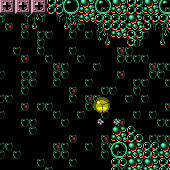

Use the full runway of the top-right door to jump to the ledge below the Cacatac and mockball on it. Either full jump from the left side of this platform, or do a small hop followed by a big jump to cross the gap. Disabling Springball once past the Grapple Blocks makes this much easier. Requires: "canCarefulJump", "canSpringBallBounce", "canMockball", {"or": [ {"doorUnlockedAtNode": 7}, "canTrickyJump" ]} |
|
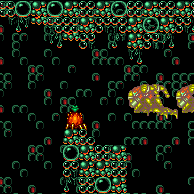

Entrance condition: "comeInWithSpark": {}Requires: {"shinespark": {"frames": 41, "excessFrames": 2}}Dev note: Ending the spark earlier takes a hit from the Waver |
From: 7
Top Right Door
To: 1
Left Side - Top Door


Dealing with spikes is up to luck. It is possible to shoot the Cacatac while jumping towards it. Entrance condition: "comeInShinecharged": {}Requires: {"shineChargeFrames": 100},
"canShinechargeMovementComplex",
"canCarefulJump",
{"or": [
"canBeLucky",
{"enemyDamage": {"enemy": "Cacatac", "type": "spike", "hits": 1}}
]},
{"shinespark": {"frames": 30, "excessFrames": 6}} |
From: 7
Top Right Door
To: 1
Left Side - Top Door
Dealing with spikes is up to luck. It is possible to shoot the Cacatac while jumping towards it. Entrance condition: "comeInShinecharging": {
"length": 2.5,
"openEnd": 1
}Requires: "canShinechargeMovementComplex", "canCarefulJump", {"or": [ "canBeLucky", {"enemyDamage": {"enemy": "Cacatac", "type": "spike", "hits": 1}} ]}, {"shinespark": {"frames": 30, "excessFrames": 6}} |
From: 7
Top Right Door
To: 1
Left Side - Top Door
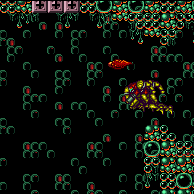
Kill the Cacatac and quickly jump over to its platform. Shoot towards the top-left door to open it, then follow the shot by jumping over the pit before initiating the shinespark. Entrance condition: "comeInShinecharging": {
"length": 2.5,
"openEnd": 1
}Requires: "canShinechargeMovementComplex", "canTrickyJump", "canHeroShot", {"shinespark": {"frames": 25}}, {"or": [ {"and": [ "Wave", "Spazer" ]}, "Plasma", {"ammo": {"type": "Missile", "count": 2}}, {"ammo": {"type": "Super", "count": 2}} ]} Dev note: FIXME: this strat was maybe intended as a leaveWithSpark? |
From: 7
Top Right Door
To: 1
Left Side - Top Door


Damage Boost off a Waver to cross the gap. Requires: {"notable": "Damage Boost"},
"canHorizontalDamageBoost",
{"enemyDamage": {"enemy": "Waver", "type": "contact", "hits": 1}} |
|


Run and jump, fire a shot mid-air, and activate the shinespark wind-up. Wait until the shot is at a specific position before sparking. Sparking too late will cause the shot to despawn before reaching the door. Sparking too early will cause Samus to bonk the door as it will not yet be open. A beam shot, Missile, or Super can be used. Entrance condition: "comeInShinecharged": {}Requires: {"shineChargeFrames": 45},
"canHeroShot",
"canShinechargeMovementTricky",
{"shinespark": {"frames": 36, "excessFrames": 0}}Exit condition: "leaveWithSpark": {}Unlocks doors: {"types": ["super"], "requires": []},
{"types": ["missiles", "powerbomb"], "requires": ["never"]} |
From: 7
Top Right Door
To: 1
Left Side - Top Door

Entrance condition: "comeInGettingBlueSpeed": {
"length": 2.5,
"openEnd": 1,
"minExtraRunSpeed": "$1.9",
"maxExtraRunSpeed": "$2.8"
}Requires: "canSpeedball", "canTrickySpringBallBounce", "canChainTemporaryBlue" Exit condition: "leaveWithTemporaryBlue": {}Unlocks doors: {"types": ["ammo"], "requires": []}Dev note: Speeds higher or lower than this can work but with greater difficulty. |
From: 7
Top Right Door
To: 1
Left Side - Top Door
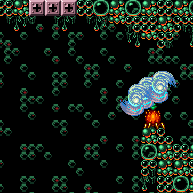

Entrance condition: "comeInGettingBlueSpeed": {
"length": 2.5,
"openEnd": 1,
"minExtraRunSpeed": "$1.9",
"maxExtraRunSpeed": "$2.8"
}Requires: "canBlueSpaceJump", "canChainTemporaryBlue" Exit condition: "leaveWithTemporaryBlue": {}Unlocks doors: {"types": ["ammo"], "requires": []} |
|


From the left edge of the Cacatac's platform, pause then press left and jump just before the pause fully triggers. Disable Spring Ball in order to get a large horizontal boost. Pause again as soon as possible and re-enable Spring to reset fall speed. Requires: "canSpringFling", "canInsaneJump", {"disableEquipment": "HiJump"} |
From: 7
Top Right Door
To: 1
Left Side - Top Door


Kill the Cacatac with a Power Bomb or Bombs, then jump over the projectiles it has spawned. Without a way to kill the Cacatac jump over it and land on one of the last pixels of the corner without touching it. From the left edge where the Cacatac was, pause then press left and jump just before the pause fully triggers. Disable Spring Ball in order to get a large horizontal boost. Pause again as soon as possible and re-enable Spring to reset fall speed. With the Cacatac alive, Samus can only use the last 4 pixels of the ledge; with the projectiles alone, she has 10 pixels available. Entrance condition: "comeInWithGMode": {
"mode": "any",
"morphed": true
}Requires: "canComplexGMode", {"or": [ "h_artificialMorphBombThings", "canTrickyGMode" ]}, "h_artificialMorphSpringFling", "canInsaneJump", {"disableEquipment": "HiJump"} |
From: 7
Top Right Door
To: 1
Left Side - Top Door
Exit the previous room with Samus in a standing pose (while grappled) with a horizontal position of 21 (as far right as possible). After teleporting, press right to release Grapple while staying standing (not being forced into a crouch). Then X-ray climb 1 screen to get up to the door transition above, without needing to open the door. At the beginning of the climb, avoid pressing left without X-Ray being held, to prevent triggering the transition of the lower door. Entrance condition: "comeInWithGrappleTeleport": {
"blockPositions": [[2, 28], [2, 29]]
}Requires: "canXRayClimb" Bypasses door shell: true |
From: 7
Top Right Door
To: 1
Left Side - Top Door
Exit the previous room with Samus in a standing pose (while grappled) with a horizontal position of 21 (as far right as possible). After teleporting, press right to release Grapple while staying standing (not being forced into a crouch). Then X-ray climb 2 screens to get up to the door transition above, without needing to open the door. At the beginning of the climb, avoid pressing left without X-Ray being held, to prevent triggering the transition of the lower door. Entrance condition: "comeInWithGrappleTeleport": {
"blockPositions": [[2, 34]]
}Requires: "canLongXRayClimb" Bypasses door shell: true |
From: 7
Top Right Door
To: 2
Left Side - Top Middle Door


Entrance condition: "comeInGettingBlueSpeed": {
"length": 2.5,
"openEnd": 1
}Requires: "canLongChainTemporaryBlue" Exit condition: "leaveWithTemporaryBlue": {}Unlocks doors: {"types": ["ammo"], "requires": []} |
From: 7
Top Right Door
To: 2
Left Side - Top Middle Door
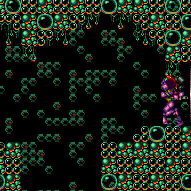

Entrance condition: "comeInWithGrappleTeleport": {
"blockPositions": [[2, 28], [2, 29]]
}Bypasses door shell: true |
From: 7
Top Right Door
To: 2
Left Side - Top Middle Door
Entrance condition: "comeInWithGrappleTeleport": {
"blockPositions": [[2, 28]]
}Exit condition: "leaveWithGrappleTeleport": {
"blockPositions": [[2, 28]]
}Bypasses door shell: true |
From: 7
Top Right Door
To: 2
Left Side - Top Middle Door
Entrance condition: "comeInWithGrappleTeleport": {
"blockPositions": [[2, 29]]
}Exit condition: "leaveWithGrappleTeleport": {
"blockPositions": [[2, 29]]
}Bypasses door shell: true |
From: 7
Top Right Door
To: 2
Left Side - Top Middle Door
Exit the previous room with Samus in a standing pose (while grappled) with a horizontal position of 21 (as far right as possible). After teleporting, press right to release Grapple while staying standing (not being forced into a crouch). Then X-ray climb 1 screen to get up to the door transition above, without needing to open the door. At the beginning of the climb, avoid pressing left without X-Ray being held, to prevent triggering the transition of the lower door. Entrance condition: "comeInWithGrappleTeleport": {
"blockPositions": [[2, 34]]
}Requires: "canXRayClimb" Bypasses door shell: true |
From: 7
Top Right Door
To: 3
Left Side - Bottom Middle Door

Entrance condition: "comeInGettingBlueSpeed": {
"length": 2.5,
"openEnd": 1
}Requires: "canLongChainTemporaryBlue" Exit condition: "leaveWithTemporaryBlue": {}Unlocks doors: {"types": ["ammo"], "requires": []} |
From: 7
Top Right Door
To: 3
Left Side - Bottom Middle Door


Entrance condition: "comeInWithGrappleTeleport": {
"blockPositions": [[2, 34]]
}Bypasses door shell: true |
From: 7
Top Right Door
To: 3
Left Side - Bottom Middle Door
Entrance condition: "comeInWithGrappleTeleport": {
"blockPositions": [[2, 34]]
}Exit condition: "leaveWithGrappleTeleport": {
"blockPositions": [[2, 34]]
}Bypasses door shell: true |
From: 7
Top Right Door
To: 4
Left Side - Bottom Door
Lay the Power Bomb low enough to kill the Sova. Descend during the Power Bomb explosion, to take advantage of the more lenient timing provided by the lag. Entrance condition: "comeInGettingBlueSpeed": {
"length": 2.5,
"openEnd": 1
}Requires: "canLongChainTemporaryBlue", "canXRayTurnaround", {"ammo": {"type": "PowerBomb", "count": 1}} Exit condition: "leaveWithTemporaryBlue": {}Unlocks doors: {"types": ["ammo"], "requires": []} |
From: 7
Top Right Door
To: 5
Bottom Door
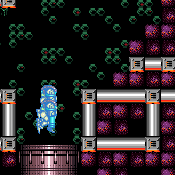
Lay the Power Bomb low enough to kill the Sova. Descend during the Power Bomb explosion, to take advantage of the more lenient timing provided by the lag. Entrance condition: "comeInGettingBlueSpeed": {
"length": 2.5,
"openEnd": 1
}Requires: "canLongChainTemporaryBlue", "canXRayTurnaround", {"ammo": {"type": "PowerBomb", "count": 1}} Exit condition: "leaveWithTemporaryBlue": {
"direction": "any"
}Unlocks doors: {"types": ["ammo"], "requires": []} |
|
|
|


Entrance condition: "comeInShinecharged": {}Requires: {"shineChargeFrames": 120},
"canShinechargeMovementComplex"Exit condition: "leaveShinecharged": {}Unlocks doors: {"types": ["super"], "requires": []},
{"types": ["missiles", "powerbomb"], "requires": ["never"]} |
From: 7
Top Right Door
To: 6
Middle Right Door


Entrance condition: "comeInShinecharged": {}Requires: {"shineChargeFrames": 105},
{"shinespark": {"frames": 5, "excessFrames": 0}}Exit condition: "leaveWithSpark": {}Unlocks doors: {"types": ["super"], "requires": []},
{"types": ["missiles", "powerbomb"], "requires": ["never"]} |
From: 7
Top Right Door
To: 6
Middle Right Door


Entrance condition: "comeInShinecharging": {
"length": 2.5,
"openEnd": 1
}Requires: {"shineChargeFrames": 125}Exit condition: "leaveShinecharged": {}Unlocks doors: {"types": ["super"], "requires": []},
{"types": ["missiles", "powerbomb"], "requires": ["never"]} |
From: 7
Top Right Door
To: 6
Middle Right Door

Entrance condition: "comeInShinecharging": {
"length": 2.5,
"openEnd": 0
}Requires: "canXRayCancelShinecharge", "canChainTemporaryBlue", "canXRayTurnaround" Exit condition: "leaveWithTemporaryBlue": {}Unlocks doors: {"types": ["ammo"], "requires": []} |
|
Exit condition: "leaveWithRunway": {
"length": 3.5,
"openEnd": 1
} |
From: 7
Top Right Door
To: 7
Top Right Door


Place a Power Bomb on the bottom stair attached to the door in order to prevent killing the Sova, or free a Sova from the Morph maze with Bombs. If coming from below, be sure to lure the Sova to the bottom before placing a Power Bomb near the blocks in order to prevent killing it. Use Space Jump to follow the Sova to the top right door. Freeze it just at the bottom of the small stairs, as Samus can run over the half-tile gap that remains. Requires: "h_frozenEnemyRunway", "SpaceJump", "canBePatient", {"or": [ {"obstaclesCleared": ["A"]}, "h_bombThings" ]} Exit condition: "leaveWithRunway": {
"length": 5,
"openEnd": 1
} |
|
Requires: {"or": [
{"and": [
{"resetRoom": {"nodes": [1]}},
{"or": [
{"and": [
"Grapple",
{"cycleFrames": 300}
]},
{"and": [
"SpaceJump",
{"cycleFrames": 390}
]},
{"and": [
"canDash",
"HiJump",
"canTrickyWallJump",
{"cycleFrames": 690}
]}
]}
]},
{"and": [
{"resetRoom": {"nodes": [6]}},
{"cycleFrames": 370}
]},
{"and": [
{"resetRoom": {"nodes": [7]}},
{"cycleFrames": 360}
]}
]},
{"or": [
"canDash",
{"cycleFrames": 20}
]}Resets obstacles: A, B Farm cycle drops: 1 Cacatac, 1 Waver |
|
Requires: "h_CrystalFlash" |
From: 7
Top Right Door
To: 7
Top Right Door
Requires: {"enemyDamage": {"enemy": "Cacatac", "type": "spike", "hits": 1}}Exit condition: "leaveWithKnockback": {} |
|
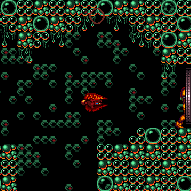

Wait 40 seconds for a Waver to get to this door. Exit condition: "leaveWithDamage": {
"enemy": "Waver"
} |
|
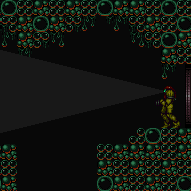

Wait 40 seconds for a Waver to come and hit Samus. Requires: {"enemyDamage": {"enemy": "Waver", "type": "contact", "hits": 1}} |
|
|
From: 7
Top Right Door
To: 10
G-Mode Morph, Above the Power Bomb Blocks
Lower the camera to watch the Wavers and to help avoid them. With Bombs alone, it may be helpful to kill the top Waver; this can be done by placing Bombs in a vertical line and then moving out of the way as it approaches. Entrance condition: "comeInWithGMode": {
"mode": "any",
"morphed": true
}Requires: "h_artificialMorphMovement", {"or": [ {"and": [ "canTrickyJump", "canCameraManip" ]}, "h_artificialMorphPowerBomb", {"enemyDamage": {"enemy": "Waver", "type": "contact", "hits": 1}} ]} |
From: 7
Top Right Door
To: 10
G-Mode Morph, Above the Power Bomb Blocks
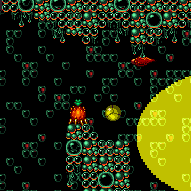

Wait for the Waver to pass or quickly use a Power Bomb to boost over the gap towards the Cacatac. Use a second Power Bomb to jump over it and down below; hold left as soon as Samus starts moving upward, in order to avoid the invisible Cacatac spikes. Entrance condition: "comeInWithGMode": {
"mode": "any",
"morphed": true
}Requires: {"tech": "canBombHorizontally"},
"h_artificialMorphPowerBomb",
"h_additionalBomb",
"canTrickyDodgeEnemies" |
From: 8
Bottom Right Item
To: 8
Bottom Right Item


Requires: "h_spikeXModeSpikeSuit", {"shinespark": {"frames": 5, "excessFrames": 5}} |
From: 8
Bottom Right Item
To: 8
Bottom Right Item


Requires: "h_spikeDoubleXModeBlueSuit", {"shinespark": {"frames": 0, "excessFrames": 0}} |
|
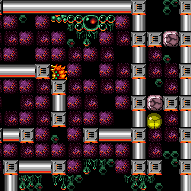

Requires: {"or": [
"canWallJump",
"HiJump",
"SpaceJump",
"canSpringBallJumpMidAir"
]} |
|
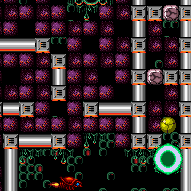

Either kill the Ripper, or dodge it by jumping into IBJ. Requires: "canIBJ", {"or": [ {"enemyKill": { "enemies": [["Ripper"]], "explicitWeapons": ["ScrewAttack", "Super", "PowerBomb"] }}, "canJumpIntoIBJ" ]} |
|
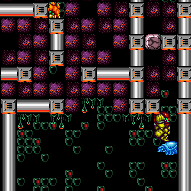

Jump above the Ripper, and shoot down to freeze it as it moves below Samus. Alternatively, from below, freeze the Ripper as far to the right as possible, and spin jump to squeeze on top of it from the left. Requires: "canTrickyUseFrozenEnemies" |
|
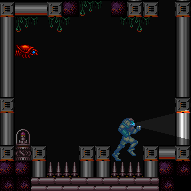

Requires: "h_spikeXModeShinecharge", {"shinespark": {"frames": 4, "excessFrames": 2}} |
From: 8
Bottom Right Item
To: 9
Main Junction


Use the right side of the right spike pit to spikesuit. A diagonal spark from here will clear the ledge to the platform. Either a first or second frame spikesuit will work. Requires: "canUseFlashSuitInitialSpark", "h_spikeXModeSpikeSuit", {"shinespark": {"frames": 9, "excessFrames": 1}} |
|
Requires: "h_storedSpark", {"shinespark": {"frames": 4, "excessFrames": 2}} |
|
Requires: {"or": [
"SpaceJump",
"canLongIBJ",
{"and": [
"HiJump",
"canJumpIntoIBJ"
]}
]} |
|


Requires: "HiJump", "canSpringBallJumpMidAir" |
|
Requires: "canSpringwall" |
|

This is the same size of ledge as WRITG. Requires: "HiJump", "canPreciseWallJump" |
From: 9
Main Junction
To: 1
Left Side - Top Door
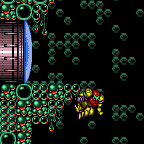

This is the same size of ledge as WRITG. Requires: "canConsecutiveWallJump", "canInsaneWallJump" |
|
Requires: "canUseFrozenEnemies", {"or": [ "HiJump", "canSpringBallJumpMidAir", {"and": [ "canWallJump", "canTrickyUseFrozenEnemies" ]}, {"and": [ "canTrickyJump", "canTrickyUseFrozenEnemies" ]} ]} |
|
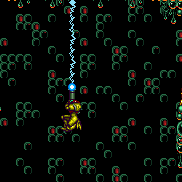
Jump from the Save room door runway and use Grapple to grab onto the Grapple Blocks. Requires: "HiJump", "canSpeedyJump", "canPreciseGrapple", "h_midAirShootUp" |
From: 9
Main Junction
To: 1
Left Side - Top Door

Perform a very tight Spring Ball jump from the Save room door runway, starting from either a crouch or spin jump, then use Grapple to barely reach the ceiling blocks. Requires: {"notable": "Tricky Spring Ball Jump with Grapple"},
"canTrickySpringBallJump",
"canPreciseGrapple" |
|
Requires: "h_storedSpark", {"shinespark": {"frames": 15, "excessFrames": 5}} |
|
|
|
|
|
Requires: {"or": [
"h_usePowerBomb",
{"obstaclesCleared": ["A"]}
]}Clears obstacles: A |
|
Requires: "h_useMorphBombs" |
|
Requires: {"haveBlueSuit": {}},
"Morph" |
|
Requires: {"or": [
"SpaceJump",
"canLongIBJ"
]} |
|
Starting from the platform near the door to the left, run and jump to the right wall and wall jump twice to get to the top. Requires: "canDash", "HiJump", "canCarefulJump", "canWallJump" |
|
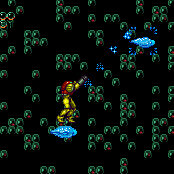
Requires: "canUseFrozenEnemies", "canCarefulJump", {"or": [ "canWallJump", {"and": [ "canTrickyUseFrozenEnemies", {"or": [ "canTrickyJump", "HiJump", "canSpringBallJumpMidAir" ]} ]} ]} |
|


Run and Jump into a Spring Ball Jump from the Save Room runway. Requires: "HiJump", "canTrickySpringBallJump" |
|
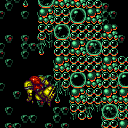

A tricky, delayed walljump makes it possible to climb to top right in-room, with nothing. Requires: {"notable": "Right Side Delayed Walljumps"},
"canTrickyWallJump",
"canConsecutiveWallJump" |
|
Requires: "h_storedSpark", {"shinespark": {"frames": 14, "excessFrames": 4}} |
|
|
|
Requires: "h_CrystalFlash" Clears obstacles: A |
|
Requires: {"or": [
{"and": [
{"resetRoom": {"nodes": [2]}},
{"cycleFrames": 660}
]},
{"and": [
{"resetRoom": {"nodes": [3]}},
{"cycleFrames": 720}
]}
]},
{"or": [
"canDash",
{"cycleFrames": 60}
]}Resets obstacles: A, B Farm cycle drops: 2 Waver |
|
Requires: {"or": [
{"and": [
{"resetRoom": {"nodes": [1]}},
{"or": [
{"and": [
"SpaceJump",
{"cycleFrames": 1500}
]},
{"and": [
"canDash",
"HiJump",
"canTrickyWallJump",
{"cycleFrames": 1320}
]},
{"and": [
"HiJump",
"canSpringBallJumpMidAir",
{"cycleFrames": 1320},
"h_doubleEquipmentScreenCycleFrames"
]}
]}
]},
{"and": [
{"resetRoom": {"nodes": [2]}},
{"cycleFrames": 1140}
]},
{"and": [
{"resetRoom": {"nodes": [3]}},
{"cycleFrames": 1140}
]},
{"and": [
{"resetRoom": {"nodes": [4]}},
{"cycleFrames": 720}
]},
{"and": [
{"resetRoom": {"nodes": [5]}},
{"cycleFrames": 730}
]},
{"and": [
{"resetRoom": {"nodes": [6]}},
{"cycleFrames": 1770},
{"or": [
"SpaceJump",
{"and": [
"canDash",
"HiJump",
"canTrickyWallJump"
]}
]}
]},
{"and": [
{"resetRoom": {"nodes": [7]}},
{"cycleFrames": 1740},
{"or": [
"SpaceJump",
{"and": [
"canDash",
"HiJump",
"canTrickyWallJump"
]}
]}
]}
]},
"h_useMorphBombs"Resets obstacles: A, B Farm cycle drops: 3 Sova |
|
Requires: {"or": [
{"resetRoom": {"nodes": [2]}},
{"and": [
{"resetRoom": {"nodes": [3]}},
{"cycleFrames": 60}
]}
]},
{"or": [
{"and": [
"SpaceJump",
{"cycleFrames": 600}
]},
{"and": [
"canDash",
"HiJump",
"canTrickyWallJump",
{"cycleFrames": 660}
]}
]}Resets obstacles: A, B Farm cycle drops: 1 Cacatac, 2 Waver |
|
Requires: {"noBlueSuit": {}},
"ScrewAttack",
{"or": [
"canWallJump",
"HiJump",
"SpaceJump",
{"and": [
"canSpringBallJumpMidAir",
"h_doubleEquipmentScreenCycleFrames",
{"cycleFrames": 20}
]},
{"and": [
"canIBJ",
{"cycleFrames": 600}
]}
]},
{"or": [
{"and": [
{"resetRoom": {"nodes": [1]}},
{"or": [
{"and": [
"SpaceJump",
{"cycleFrames": 1050}
]},
{"and": [
"canDash",
"HiJump",
"canTrickyWallJump",
{"cycleFrames": 970}
]},
{"and": [
"HiJump",
"canSpringBallJumpMidAir",
{"cycleFrames": 970},
"h_doubleEquipmentScreenCycleFrames"
]}
]}
]},
{"and": [
{"resetRoom": {"nodes": [2]}},
{"cycleFrames": 840}
]},
{"and": [
{"resetRoom": {"nodes": [3]}},
{"cycleFrames": 960}
]},
{"and": [
{"resetRoom": {"nodes": [4]}},
{"cycleFrames": 1800},
"h_useMorphBombs"
]},
{"and": [
{"resetRoom": {"nodes": [5]}},
{"cycleFrames": 1800},
"h_useMorphBombs"
]}
]}Resets obstacles: A, B Farm cycle drops: 1 Ripper 2 (red), 1 Waver |
From: 10
G-Mode Morph, Above the Power Bomb Blocks
To: 1
Left Side - Top Door

Carefully dodge the Wavers while being prepared to abort the IBJ and start over if necessary. Requires: "canGMode", "h_artificialMorphLongIBJ", {"or": [ "h_artificialMorphPowerBomb", {"and": [ "canTrickyDodgeEnemies", {"or": [ "canBePatient", "canDoubleBombJump" ]} ]} ]} |
From: 10
G-Mode Morph, Above the Power Bomb Blocks
To: 3
Left Side - Bottom Middle Door
Requires: "canGMode" |
From: 10
G-Mode Morph, Above the Power Bomb Blocks
To: 3
Left Side - Bottom Middle Door
Requires: "canGMode", "h_artificialMorphPowerBomb" Clears obstacles: A |
From: 10
G-Mode Morph, Above the Power Bomb Blocks
To: 7
Top Right Door
Carefully dodge the Wavers while being prepared to abort the IBJ and start over if necessary. It may be best to first IBJ to the top left side and kill the top Waver with Bombs; this can be done by placing bombs in a vertical line, then dodging the Waver as it approaches. Requires: "canGMode", "h_artificialMorphLongIBJ", {"or": [ "h_artificialMorphPowerBomb", {"and": [ "canTrickyDodgeEnemies", "canBePatient", {"or": [ "canBeVeryPatient", "canDoubleBombJump" ]} ]} ]} |