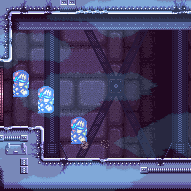
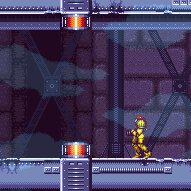
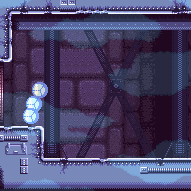
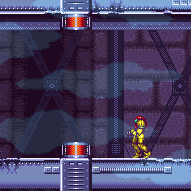
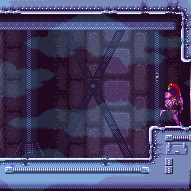
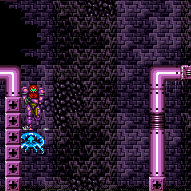
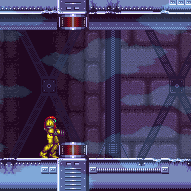
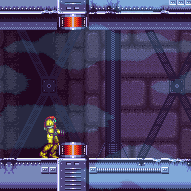
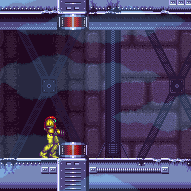
Statues Hallway
Room ID: 26

|
Exit condition: {
"leaveWithRunway": {
"length": 3,
"openEnd": 1
}
} |
|

Leaving with upward momentum is possible in three ways: 1) Most easily, with a momentum-conserving morph against the ceiling through the transition, 2) With a momentum-conserving turnaround through the transition, or 3) Jumping specifically with a extra run speed $5.2 or $5.3 and aiming down through the transition. For the first two methods, back into the corner to use the full runway; it helps to use an arm pump to advance a single pixel while running. This can be done by holding an angle button before starting to move forward, then releasing angle while running. Requires: "h_speedJump"
{
"or": [
"canMomentumConservingMorph",
"canInsaneJump"
]
}Exit condition: {
"leaveWithSidePlatform": {
"height": 2,
"runway": {
"length": 45,
"openEnd": 1
},
"obstruction": [
3,
0
]
}
}Dev note: Max extra run speed $7.0. Using the full runway with a single-pixel arm pump, the momentum-conserving morph has a 4-frame window for the jump, and between a 3-frame and 5-frame window for the morph depending on the jump timing (with later jumps giving a bigger window for the morph); these windows will be more narrow if the ceiling in the next room extends past the door shell. The momentum-conserving turnaround requires a frame-perfect jump, with a 4-frame window for the turnaround, again possibly less depending on what is required in the next room. The aim-down method requires specific positioning to ensure Samus barely clears the door ledge with a frame-perfect jump. |
|
Requires: "canShinechargeMovement"
"h_shinechargeMaxRunway"
{
"shineChargeFrames": 40
}Exit condition: {
"leaveShinecharged": {}
} |
|
Exit condition: {
"leaveSpinning": {
"remoteRunway": {
"length": 45,
"openEnd": 1
},
"minExtraRunSpeed": "$1.3"
}
} |
|
Exit condition: {
"leaveWithMockball": {
"remoteRunway": {
"length": 45,
"openEnd": 1
},
"landingRunway": {
"length": 3,
"openEnd": 1
}
}
} |
|
Exit condition: {
"leaveWithSpringBallBounce": {
"remoteRunway": {
"length": 45,
"openEnd": 1
},
"landingRunway": {
"length": 3,
"openEnd": 1
},
"movementType": "uncontrolled"
}
} |
|
Exit condition: {
"leaveSpaceJumping": {
"remoteRunway": {
"length": 45,
"openEnd": 1
}
}
} |
|
Requires: "h_shinechargeMaxRunway" "canChainTemporaryBlue" Exit condition: {
"leaveWithTemporaryBlue": {}
} |
|
Requires: "h_CrystalFlash" |
|


Requires: "h_shinechargeMaxRunway" "h_CrystalSpark" |
|
|
|
|
|
Entrance condition: {
"comeInWithGrappleTeleport": {
"blockPositions": [
[
3,
12
],
[
3,
13
]
]
}
}Bypasses door shell: true |
|
Entrance condition: {
"comeInWithGrappleTeleport": {
"blockPositions": [
[
3,
12
]
]
}
}Exit condition: {
"leaveWithGrappleTeleport": {
"blockPositions": [
[
3,
12
]
]
}
}Bypasses door shell: true |
From: 2
Right Door
To: 1
Left Door
Entrance condition: {
"comeInWithGrappleTeleport": {
"blockPositions": [
[
3,
13
]
]
}
}Exit condition: {
"leaveWithGrappleTeleport": {
"blockPositions": [
[
3,
13
]
]
}
}Bypasses door shell: true |
|
Exit condition: {
"leaveWithRunway": {
"length": 3,
"openEnd": 1
}
} |
|
Leaving with upward momentum is possible in three ways: 1) Most easily, with a momentum-conserving morph against the ceiling through the transition, 2) With a momentum-conserving turnaround through the transition, or 3) Jumping specifically with a extra run speed $5.2 or $5.3 and aiming down through the transition. For the first two methods, back into the corner to use the full runway. Requires: "h_speedJump"
{
"or": [
"canMomentumConservingMorph",
"canInsaneJump"
]
}Exit condition: {
"leaveWithSidePlatform": {
"height": 2,
"runway": {
"length": 45,
"openEnd": 1
},
"obstruction": [
3,
0
]
}
}Dev note: Max extra run speed $7.0. The momentum-conserving morph has a 4-frame window for the jump, and between a 2-frame and 5-frame window for the morph depending on the jump timing (with later jumps giving a bigger window for the morph); these windows will be more narrow if the ceiling in the next room extends past the door shell. The momentum-conserving turnaround requires a frame-perfect jump, with a 4-frame window for the turnaround, again possibly less depending on what is required in the next room. The aim-down method requires specific positioning to ensure Samus barely clears the door ledge with a frame-perfect jump. |
|
Requires: "canShinechargeMovement"
"h_shinechargeMaxRunway"
{
"shineChargeFrames": 40
}Exit condition: {
"leaveShinecharged": {}
} |
|
Exit condition: {
"leaveSpinning": {
"remoteRunway": {
"length": 45,
"openEnd": 1
},
"minExtraRunSpeed": "$1.3"
}
} |
|
Exit condition: {
"leaveWithMockball": {
"remoteRunway": {
"length": 45,
"openEnd": 1
},
"landingRunway": {
"length": 3,
"openEnd": 1
}
}
} |
|
Exit condition: {
"leaveWithSpringBallBounce": {
"remoteRunway": {
"length": 45,
"openEnd": 1
},
"landingRunway": {
"length": 3,
"openEnd": 1
},
"movementType": "uncontrolled"
}
} |
|
Exit condition: {
"leaveSpaceJumping": {
"remoteRunway": {
"length": 45,
"openEnd": 1
}
}
} |
|
Requires: "h_shinechargeMaxRunway" "canChainTemporaryBlue" Exit condition: {
"leaveWithTemporaryBlue": {}
} |
{
"$schema": "../../../schema/m3-room.schema.json",
"id": 26,
"name": "Statues Hallway",
"area": "Crateria",
"subarea": "West",
"roomAddress": "0x7A5ED",
"roomEnvironments": [
{
"heated": false
}
],
"mapTileMask": [
[
1,
1,
1,
1,
1
]
],
"nodes": [
{
"id": 1,
"name": "Left Door",
"nodeType": "door",
"nodeSubType": "blue",
"nodeAddress": "0x00191e6",
"doorOrientation": "left",
"doorEnvironments": [
{
"physics": "air"
}
],
"mapTileMask": [
[
2,
2,
2,
2,
1
]
]
},
{
"id": 2,
"name": "Right Door",
"nodeType": "door",
"nodeSubType": "blue",
"nodeAddress": "0x00191f2",
"doorOrientation": "right",
"doorEnvironments": [
{
"physics": "air"
}
],
"mapTileMask": [
[
1,
1,
1,
1,
2
]
]
}
],
"enemies": [],
"strats": [
{
"link": [
1,
1
],
"name": "Base (Unlock Door)",
"requires": [],
"unlocksDoors": [
{
"types": [
"ammo"
],
"requires": []
}
],
"flashSuitChecked": true,
"blueSuitChecked": true
},
{
"link": [
1,
1
],
"name": "Base (Come In Normally)",
"entranceCondition": {
"comeInNormally": {}
},
"requires": [],
"flashSuitChecked": true,
"blueSuitChecked": true
},
{
"link": [
1,
1
],
"name": "Base (Come In With Mockball)",
"entranceCondition": {
"comeInWithMockball": {
"adjacentMinTiles": 0,
"remoteAndLandingMinTiles": [
[
0,
0
]
],
"speedBooster": "any"
}
},
"requires": [],
"flashSuitChecked": true,
"blueSuitChecked": true
},
{
"link": [
2,
2
],
"name": "Base (Unlock Door)",
"requires": [],
"unlocksDoors": [
{
"types": [
"ammo"
],
"requires": []
}
],
"flashSuitChecked": true,
"blueSuitChecked": true
},
{
"link": [
2,
2
],
"name": "Base (Come In Normally)",
"entranceCondition": {
"comeInNormally": {}
},
"requires": [],
"flashSuitChecked": true,
"blueSuitChecked": true
},
{
"link": [
2,
2
],
"name": "Base (Come In With Mockball)",
"entranceCondition": {
"comeInWithMockball": {
"adjacentMinTiles": 0,
"remoteAndLandingMinTiles": [
[
0,
0
]
],
"speedBooster": "any"
}
},
"requires": [],
"flashSuitChecked": true,
"blueSuitChecked": true
},
{
"id": 1,
"link": [
1,
1
],
"name": "Leave with Runway",
"requires": [],
"exitCondition": {
"leaveWithRunway": {
"length": 3,
"openEnd": 1
}
},
"flashSuitChecked": true,
"blueSuitChecked": true
},
{
"id": 21,
"link": [
1,
1
],
"name": "Leave With Side Platform",
"requires": [
"h_speedJump",
{
"or": [
"canMomentumConservingMorph",
"canInsaneJump"
]
}
],
"exitCondition": {
"leaveWithSidePlatform": {
"height": 2,
"runway": {
"length": 45,
"openEnd": 1
},
"obstruction": [
3,
0
]
}
},
"flashSuitChecked": true,
"blueSuitChecked": true,
"note": [
"Leaving with upward momentum is possible in three ways:",
"1) Most easily, with a momentum-conserving morph against the ceiling through the transition,",
"2) With a momentum-conserving turnaround through the transition, or",
"3) Jumping specifically with a extra run speed $5.2 or $5.3 and aiming down through the transition.",
"For the first two methods, back into the corner to use the full runway;",
"it helps to use an arm pump to advance a single pixel while running.",
"This can be done by holding an angle button before starting to move forward,",
"then releasing angle while running."
],
"devNote": [
"Max extra run speed $7.0.",
"Using the full runway with a single-pixel arm pump, the momentum-conserving morph has a 4-frame window for the jump,",
"and between a 3-frame and 5-frame window for the morph depending on the jump timing (with later jumps giving a bigger window for the morph);",
"these windows will be more narrow if the ceiling in the next room extends past the door shell.",
"The momentum-conserving turnaround requires a frame-perfect jump, with a 4-frame window for the turnaround,",
"again possibly less depending on what is required in the next room.",
"The aim-down method requires specific positioning to ensure Samus barely clears the door ledge with a frame-perfect jump."
]
},
{
"id": 2,
"link": [
1,
1
],
"name": "Leave Shinecharged",
"requires": [
"canShinechargeMovement",
"h_shinechargeMaxRunway",
{
"shineChargeFrames": 40
}
],
"exitCondition": {
"leaveShinecharged": {}
},
"flashSuitChecked": true,
"blueSuitChecked": true
},
{
"id": 3,
"link": [
1,
1
],
"name": "Leave Spinning",
"requires": [],
"exitCondition": {
"leaveSpinning": {
"remoteRunway": {
"length": 45,
"openEnd": 1
},
"minExtraRunSpeed": "$1.3"
}
},
"flashSuitChecked": true,
"blueSuitChecked": true
},
{
"id": 4,
"link": [
1,
1
],
"name": "Leave With Mockball",
"requires": [],
"exitCondition": {
"leaveWithMockball": {
"remoteRunway": {
"length": 45,
"openEnd": 1
},
"landingRunway": {
"length": 3,
"openEnd": 1
}
}
},
"flashSuitChecked": true,
"blueSuitChecked": true
},
{
"id": 5,
"link": [
1,
1
],
"name": "Leave With Spring Ball Bounce",
"requires": [],
"exitCondition": {
"leaveWithSpringBallBounce": {
"remoteRunway": {
"length": 45,
"openEnd": 1
},
"landingRunway": {
"length": 3,
"openEnd": 1
},
"movementType": "uncontrolled"
}
},
"flashSuitChecked": true,
"blueSuitChecked": true
},
{
"id": 6,
"link": [
1,
1
],
"name": "Leave Space Jumping",
"requires": [],
"exitCondition": {
"leaveSpaceJumping": {
"remoteRunway": {
"length": 45,
"openEnd": 1
}
}
},
"flashSuitChecked": true,
"blueSuitChecked": true
},
{
"id": 7,
"link": [
1,
1
],
"name": "Leave With Temporary Blue",
"requires": [
"h_shinechargeMaxRunway",
"canChainTemporaryBlue"
],
"exitCondition": {
"leaveWithTemporaryBlue": {}
},
"flashSuitChecked": true,
"blueSuitChecked": true
},
{
"id": 8,
"link": [
1,
1
],
"name": "Crystal Flash",
"requires": [
"h_CrystalFlash"
],
"flashSuitChecked": true,
"blueSuitChecked": true
},
{
"id": 23,
"link": [
1,
1
],
"name": "Crystal Spark",
"requires": [
"h_shinechargeMaxRunway",
"h_CrystalSpark"
],
"flashSuitChecked": true,
"blueSuitChecked": true
},
{
"id": 9,
"link": [
1,
2
],
"name": "Base",
"requires": [],
"flashSuitChecked": true,
"blueSuitChecked": true
},
{
"id": 10,
"link": [
2,
1
],
"name": "Base",
"requires": [],
"flashSuitChecked": true,
"blueSuitChecked": true
},
{
"id": 11,
"link": [
2,
1
],
"name": "Grapple Teleport Door Lock Skip",
"entranceCondition": {
"comeInWithGrappleTeleport": {
"blockPositions": [
[
3,
12
],
[
3,
13
]
]
}
},
"requires": [],
"bypassesDoorShell": "yes",
"flashSuitChecked": true,
"blueSuitChecked": true
},
{
"id": 12,
"link": [
2,
1
],
"name": "Carry Grapple Teleport (Top Position)",
"entranceCondition": {
"comeInWithGrappleTeleport": {
"blockPositions": [
[
3,
12
]
]
}
},
"requires": [],
"exitCondition": {
"leaveWithGrappleTeleport": {
"blockPositions": [
[
3,
12
]
]
}
},
"bypassesDoorShell": "yes",
"flashSuitChecked": true,
"blueSuitChecked": true
},
{
"id": 13,
"link": [
2,
1
],
"name": "Carry Grapple Teleport (Bottom Position)",
"entranceCondition": {
"comeInWithGrappleTeleport": {
"blockPositions": [
[
3,
13
]
]
}
},
"requires": [],
"exitCondition": {
"leaveWithGrappleTeleport": {
"blockPositions": [
[
3,
13
]
]
}
},
"bypassesDoorShell": "yes",
"flashSuitChecked": true,
"blueSuitChecked": true
},
{
"id": 14,
"link": [
2,
2
],
"name": "Leave with Runway",
"requires": [],
"exitCondition": {
"leaveWithRunway": {
"length": 3,
"openEnd": 1
}
},
"flashSuitChecked": true,
"blueSuitChecked": true
},
{
"id": 22,
"link": [
2,
2
],
"name": "Leave With Side Platform",
"requires": [
"h_speedJump",
{
"or": [
"canMomentumConservingMorph",
"canInsaneJump"
]
}
],
"exitCondition": {
"leaveWithSidePlatform": {
"height": 2,
"runway": {
"length": 45,
"openEnd": 1
},
"obstruction": [
3,
0
]
}
},
"flashSuitChecked": true,
"blueSuitChecked": true,
"note": [
"Leaving with upward momentum is possible in three ways:",
"1) Most easily, with a momentum-conserving morph against the ceiling through the transition,",
"2) With a momentum-conserving turnaround through the transition, or",
"3) Jumping specifically with a extra run speed $5.2 or $5.3 and aiming down through the transition.",
"For the first two methods, back into the corner to use the full runway."
],
"devNote": [
"Max extra run speed $7.0.",
"The momentum-conserving morph has a 4-frame window for the jump,",
"and between a 2-frame and 5-frame window for the morph depending on the jump timing (with later jumps giving a bigger window for the morph);",
"these windows will be more narrow if the ceiling in the next room extends past the door shell.",
"The momentum-conserving turnaround requires a frame-perfect jump, with a 4-frame window for the turnaround,",
"again possibly less depending on what is required in the next room.",
"The aim-down method requires specific positioning to ensure Samus barely clears the door ledge with a frame-perfect jump."
]
},
{
"id": 15,
"link": [
2,
2
],
"name": "Leave Shinecharged",
"requires": [
"canShinechargeMovement",
"h_shinechargeMaxRunway",
{
"shineChargeFrames": 40
}
],
"exitCondition": {
"leaveShinecharged": {}
},
"flashSuitChecked": true,
"blueSuitChecked": true
},
{
"id": 16,
"link": [
2,
2
],
"name": "Leave Spinning",
"requires": [],
"exitCondition": {
"leaveSpinning": {
"remoteRunway": {
"length": 45,
"openEnd": 1
},
"minExtraRunSpeed": "$1.3"
}
},
"flashSuitChecked": true,
"blueSuitChecked": true
},
{
"id": 17,
"link": [
2,
2
],
"name": "Leave With Mockball",
"requires": [],
"exitCondition": {
"leaveWithMockball": {
"remoteRunway": {
"length": 45,
"openEnd": 1
},
"landingRunway": {
"length": 3,
"openEnd": 1
}
}
},
"flashSuitChecked": true,
"blueSuitChecked": true
},
{
"id": 18,
"link": [
2,
2
],
"name": "Leave With Spring Ball Bounce",
"requires": [],
"exitCondition": {
"leaveWithSpringBallBounce": {
"remoteRunway": {
"length": 45,
"openEnd": 1
},
"landingRunway": {
"length": 3,
"openEnd": 1
},
"movementType": "uncontrolled"
}
},
"flashSuitChecked": true,
"blueSuitChecked": true
},
{
"id": 19,
"link": [
2,
2
],
"name": "Leave Space Jumping",
"requires": [],
"exitCondition": {
"leaveSpaceJumping": {
"remoteRunway": {
"length": 45,
"openEnd": 1
}
}
},
"flashSuitChecked": true,
"blueSuitChecked": true
},
{
"id": 20,
"link": [
2,
2
],
"name": "Leave With Temporary Blue",
"requires": [
"h_shinechargeMaxRunway",
"canChainTemporaryBlue"
],
"exitCondition": {
"leaveWithTemporaryBlue": {}
},
"flashSuitChecked": true,
"blueSuitChecked": true
}
],
"notables": [],
"nextStratId": 24,
"nextNotableId": 1
}