Lower Norfair Fireflea Room
Room ID: 145
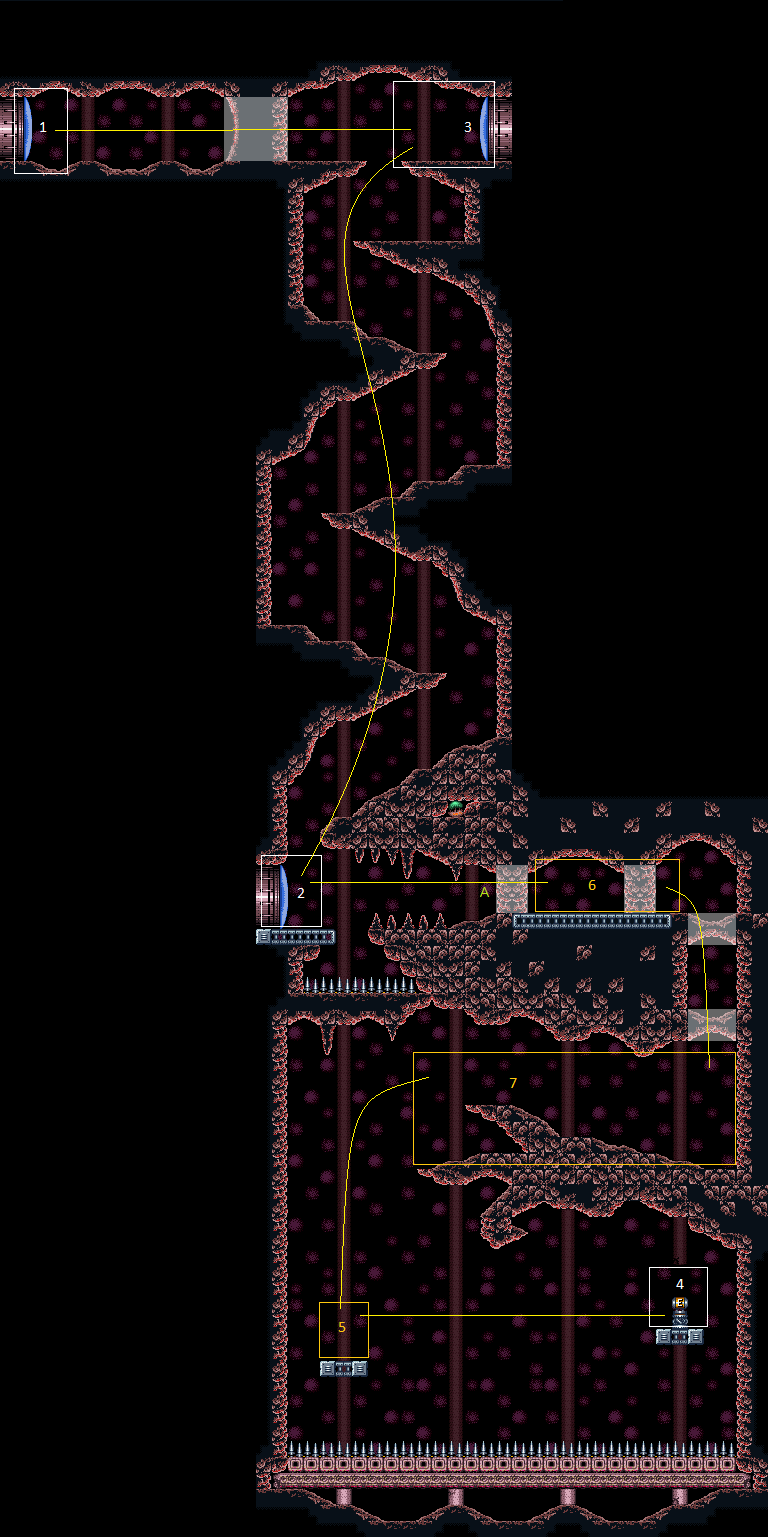
|
Exit condition: "leaveWithRunway": {
"length": 22,
"openEnd": 1,
"gentleUpTiles": 3,
"gentleDownTiles": 3
} |
|
Requires: {"or": [
{"canShineCharge": {
"usedTiles": 21,
"gentleUpTiles": 3,
"gentleDownTiles": 3,
"openEnd": 1
}},
{"and": [
{"doorUnlockedAtNode": 1},
{"canShineCharge": {
"usedTiles": 22,
"gentleUpTiles": 3,
"gentleDownTiles": 3,
"openEnd": 1
}}
]}
]},
"h_CrystalSpark" |
From: 1
Top Left Door
To: 1
Top Left Door


Requires: {"or": [
{"canShineCharge": {
"usedTiles": 21,
"gentleUpTiles": 3,
"gentleDownTiles": 3,
"openEnd": 1
}},
{"and": [
{"doorUnlockedAtNode": 1},
{"canShineCharge": {
"usedTiles": 22,
"gentleUpTiles": 3,
"gentleDownTiles": 3,
"openEnd": 1
}}
]}
]},
{"enemyDamage": {"enemy": "Boulder", "type": "contact", "hits": 1}},
"canSlopeSpark",
"h_XModeSpikeHitLeniency",
"h_XModeSpikeHitLeniency",
{"shinespark": {"frames": 1, "excessFrames": 1}} |
From: 1
Top Left Door
To: 1
Top Left Door


Requires: {"or": [
{"canShineCharge": {
"usedTiles": 21,
"gentleUpTiles": 3,
"gentleDownTiles": 3,
"openEnd": 1
}},
{"and": [
{"doorUnlockedAtNode": 1},
{"canShineCharge": {
"usedTiles": 22,
"gentleUpTiles": 3,
"gentleDownTiles": 3,
"openEnd": 1
}}
]}
]},
{"enemyDamage": {"enemy": "Boulder", "type": "contact", "hits": 1}},
"canSlopeXMode",
"h_XModeSpikeHitLeniency",
"h_XModeSpikeHitLeniency",
"canShinechargeMovementTricky",
{"shinespark": {"frames": 0}},
{"gainBlueSuit": {}} |
G-Mode Morph Blind Top to Bottom - Power Bomb the Bottom Fune (Top Left Door)
(Extreme+)
Lower Norfair Fireflea Room
From: 1
Top Left Door
To: 2
Bottom Left Door


Traversing the room without getting hit requires fairly tricky off-screen movement. Note that Samus moves freely through the off-screen Funes, but will take damage from the Boulders. The Boulders will behave normally and start to roll as Samus is in front of them, except for the top Boulder. Roll off the first ledge and immediately roll to the right all the way to the right wall. Use Spring Ball or a horizontal bomb boost to get over the next Boulder. Quickly roll off the left edge and back to the right in order to avoid the third Boulder. Roll to the right wall then the left wall and place a Power Bomb, exit G-Mode, and jump repeatedly to fix the camera. Entrance condition: "comeInWithGMode": {
"mode": "any",
"morphed": true
}Requires: {"notable": "G-Mode Morph Blind Top to Bottom"},
"canOffScreenMovement",
"canTrickyJump",
{"or": [
"h_artificialMorphSpringBall",
"h_artificialMorphBombHorizontally",
{"enemyDamage": {"enemy": "Boulder", "type": "contact", "hits": 1}},
{"haveBlueSuit": {}}
]},
"h_artificialMorphPowerBomb"Clears obstacles: A |
From: 1
Top Left Door
To: 3
Top Right Door
Crystal Flash, then pick up a shinecharge. Drop into the top Fune's fireball path for the interupt. Entrance condition: "comeInWithRMode": {}Requires: "h_CrystalFlashForReserveEnergy", {"canShineCharge": { "usedTiles": 21, "gentleUpTiles": 3, "gentleDownTiles": 3, "openEnd": 1 }}, {"autoReserveTrigger": {"maxReserveEnergy": 95}}, "canRModeSparkInterrupt" |
From: 1
Top Left Door
To: 3
Top Right Door


With Supers or Power Bombs, kill Funes except for the topmost. Without either, use Morph and bombs or springball to get over the secret Fune and farm a Fireflea. It is possible to escape the Fireflea pit with a shinespark. Entrance condition: "comeInWithRMode": {}Requires: "canTrickyJump", {"or": [ "Morph", {"enemyKill": { "enemies": [["Boulder"]] }}, {"and": [ {"disableEquipment": "ScrewAttack"}, "canPseudoScrew" ]} ]}, {"or": [ {"and": [ {"enemyKill": { "enemies": [["Fune"]] }}, "h_RModeCanRefillReserves", {"partialRefill": {"type": "ReserveEnergy", "limit": 20}}, {"resourceMissingAtMost": [{"type": "Missile", "count": 0}]} ]}, {"and": [ "Morph", {"or": [ "h_useSpringBall", {"and": [ "h_useMorphBombs", "canBombHorizontally" ]} ]}, "h_RModeCanRefillReserves", {"partialRefill": {"type": "ReserveEnergy", "limit": 20}}, {"resourceMissingAtMost": [{"type": "PowerBomb", "count": 0}]}, {"canShineCharge": { "usedTiles": 17, "gentleUpTiles": 6, "steepUpTiles": 1, "openEnd": 1 }}, {"shinespark": {"frames": 9, "excessFrames": 4}} ]} ]}, {"canShineCharge": { "usedTiles": 21, "gentleUpTiles": 3, "gentleDownTiles": 3, "openEnd": 1 }}, {"autoReserveTrigger": {"maxReserveEnergy": 95}}, "canRModeSparkInterrupt" Dev note: FIXME: Notable strat 'Morph Over The Fune' for getting over the secret fune (and then R-Jump to get out) isn't included. |
|
|
G-Mode Morph Blind Top to Bottom - Jump over the Bottom Fune (Top Left Door)
(Extreme+)
Lower Norfair Fireflea Room
From: 1
Top Left Door
To: 6
Junction Behind Fune
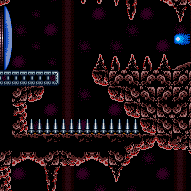

Traversing the room without getting hit requires fairly tricky off-screen movement. Note that Samus moves freely through the off-screen Funes, but will take damage from the Boulders. The Boulders will behave normally and start to roll as Samus is in front of them, except for the top Boulder. Roll off the first ledge and immediately roll to the right all the way to the right wall. Use Spring Ball or a horizontal bomb boost to get over the next Boulder. Quickly roll off the left edge and back to the right in order to avoid the third Boulder. Roll to the right wall then the left wall and use Spring Ball to jump over the Fune, exit G-Mode, and jump repeatedly to fix the camera. Entrance condition: "comeInWithGMode": {
"mode": "any",
"morphed": true
}Requires: {"notable": "G-Mode Morph Blind Top to Bottom"},
"canOffScreenMovement",
"canTrickyJump",
"h_artificialMorphSpringBall"Dev note: This is only useful if the item is Morph or a way to kill the Fune. |
From: 2
Bottom Left Door
To: 2
Bottom Left Door
Exit condition: "leaveWithRunway": {
"length": 4,
"openEnd": 1
} |
|
Requires: {"or": [
{"and": [
{"resetRoom": {"nodes": [1]}},
"canDodgeWhileShooting",
{"cycleFrames": 2370}
]},
{"and": [
{"resetRoom": {"nodes": [2]}},
"canMidAirMorph",
{"or": [
{"and": [
"canTrickyJump",
{"cycleFrames": 2000}
]},
{"and": [
{"or": [
"Grapple",
"SpaceJump"
]},
{"cycleFrames": 2200}
]}
]}
]},
{"and": [
{"resetRoom": {"nodes": [3]}},
"canDodgeWhileShooting",
{"cycleFrames": 2250}
]}
]},
"h_usePowerBomb",
"h_usePowerBomb",
{"or": [
"SpaceJump",
"canPreciseWallJump",
{"and": [
"HiJump",
"canSpeedyJump"
]}
]},
{"or": [
"canDash",
{"cycleFrames": 500}
]}Clears obstacles: A Farm cycle drops: 2 Fireflea, 5 Fune Dev note: An extra Power Bomb can be used but an extra Fireflea farm is included in that case. |
From: 2
Bottom Left Door
To: 2
Bottom Left Door
Requires: {"or": [
{"and": [
"canTrickyDodgeEnemies",
{"resetRoom": {"nodes": [1]}},
{"cycleFrames": 2900}
]},
{"and": [
{"resetRoom": {"nodes": [2]}},
{"cycleFrames": 1560}
]},
{"and": [
"canTrickyDodgeEnemies",
{"resetRoom": {"nodes": [3]}},
{"cycleFrames": 2780}
]}
]},
"Morph",
{"or": [
{"ammo": {"type": "PowerBomb", "count": 1}},
"SpringBall",
{"and": [
"Bombs",
{"cycleFrames": 60},
{"or": [
"canTrickyJump",
{"and": [
"Ice",
"canDodgeWhileShooting"
]}
]}
]}
]},
{"or": [
"SpaceJump",
{"and": [
"canDash",
"canFarmWhileShooting",
"canHorizontalDamageBoost",
{"enemyDamage": {"enemy": "Fireflea", "type": "contact", "hits": 2}},
{"or": [
"canPreciseWallJump",
{"and": [
"HiJump",
"canSpeedyJump"
]},
{"and": [
"canJumpIntoIBJ",
{"cycleFrames": 1000}
]}
]}
]}
]},
{"or": [
"SpaceJump",
"canPreciseWallJump",
{"and": [
"HiJump",
"canSpeedyJump"
]}
]},
{"or": [
"canDash",
{"cycleFrames": 500}
]}Resets obstacles: A Farm cycle drops: 5 Fireflea |
From: 2
Bottom Left Door
To: 2
Bottom Left Door
Requires: {"or": [
{"and": [
"canTrickyDodgeEnemies",
{"resetRoom": {"nodes": [1]}},
{"cycleFrames": 2480}
]},
{"and": [
{"resetRoom": {"nodes": [2]}},
{"cycleFrames": 1140}
]},
{"and": [
"canTrickyDodgeEnemies",
{"resetRoom": {"nodes": [3]}},
{"cycleFrames": 2360}
]}
]},
"Morph",
{"or": [
{"ammo": {"type": "PowerBomb", "count": 1}},
"SpringBall",
{"and": [
"Bombs",
{"cycleFrames": 60},
{"or": [
"canTrickyJump",
{"and": [
"Ice",
"canDodgeWhileShooting"
]}
]}
]}
]},
{"or": [
"SpaceJump",
"canPreciseWallJump",
{"and": [
"HiJump",
"canSpeedyJump"
]}
]},
{"or": [
"canDash",
{"cycleFrames": 500}
]}Resets obstacles: A Farm cycle drops: 2 Fireflea |
|
Requires: "h_CrystalFlash" Clears obstacles: A |
From: 2
Bottom Left Door
To: 2
Bottom Left Door
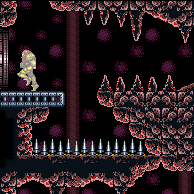

Requires: {"canShineCharge": {"usedTiles": 20, "gentleDownTiles": 2, "openEnd": 1}},
{"or": [
{"enemyKill": {
  "enemies": [["Fune"]]
}},
{"obstaclesCleared": ["A"]}
]},
"canShinechargeMovement",
{"shineChargeFrames": 55}Exit condition: "leaveShinecharged": {} |
From: 2
Bottom Left Door
To: 2
Bottom Left Door
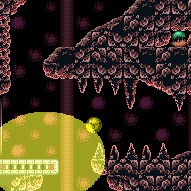

Place a Power Bomb then exit G-Mode to kill the Fune. Entrance condition: "comeInWithGMode": {
"mode": "any",
"morphed": true
}Requires: "h_artificialMorphPowerBomb" Clears obstacles: A |
From: 2
Bottom Left Door
To: 2
Bottom Left Door
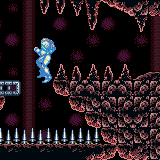

Requires: {"obstaclesCleared": ["A"]},
{"canShineCharge": {"usedTiles": 20, "gentleDownTiles": 2, "openEnd": 1}},
{"spikeHits": 1},
{"or": [
"h_spikeSuitSpikeHitLeniency",
{"and": [
{"resourceCapacity": [{"type": "PowerBomb", "count": 1}]},
{"resetRoom": {"nodes": [2]}},
{"or": [
"SpaceJump",
"HiJump",
"canPreciseWallJump"
]}
]}
]},
"canPatientSpikeSuit",
{"shinespark": {"frames": 4, "excessFrames": 4}}Clears obstacles: A |
From: 2
Bottom Left Door
To: 2
Bottom Left Door

Precise timing is required to dodge the fune's fireballs. Entrance condition: "comeInShinecharged": {}Requires: {"shineChargeFrames": 75},
{"spikeHits": 1},
"h_spikeSuitSpikeHitLeniency",
"canPatientSpikeSuit",
{"shinespark": {"frames": 4}} |
From: 2
Bottom Left Door
To: 2
Bottom Left Door


Requires: "canUseFlashSuitInitialSpark", {"obstaclesCleared": ["A"]}, {"canShineCharge": {"usedTiles": 20, "gentleDownTiles": 2, "openEnd": 1}}, {"spikeHits": 1}, "h_spikeSuitSpikeHitLeniency", "canPatientSpikeSuit", {"shinespark": {"frames": 11}} Exit condition: "leaveWithSpark": {
"position": "bottom"
}Unlocks doors: {"types": ["ammo"], "requires": []} |
From: 2
Bottom Left Door
To: 2
Bottom Left Door

Precise timing is required to dodge the fune's fireballs. Entrance condition: "comeInShinecharged": {}Requires: {"shineChargeFrames": 155},
"h_spikeXModeBlueSuit",
{"shinespark": {"frames": 1}} |
From: 2
Bottom Left Door
To: 2
Bottom Left Door
Requires: {"obstaclesCleared": ["A"]},
{"canShineCharge": {"usedTiles": 20, "gentleDownTiles": 2, "openEnd": 1}},
"h_spikeXModeBlueSuit",
{"shinespark": {"frames": 1}} |
From: 2
Bottom Left Door
To: 2
Bottom Left Door


Kill the Fune. Crystal Flash or farm the top fireflea. After the shine charge, jump up to the first fune and take a fireball to interrupt. Note: farming more than the top fireflea while still in R-Mode will cause Samus to become difficult to see. Entrance condition: "comeInWithRMode": {}Requires: {"enemyKill": {
"enemies": [["Fune"]]
}},
{"or": [
"h_CrystalFlashForReserveEnergy",
{"and": [
"h_RModeCanRefillReserves",
{"partialRefill": {"type": "ReserveEnergy", "limit": 20}},
{"or": [
{"resourceMissingAtMost": [{"type": "PowerBomb", "count": 0}]},
{"resourceMissingAtMost": [{"type": "Missile", "count": 0}]}
]}
]}
]},
{"canShineCharge": {"usedTiles": 20, "gentleDownTiles": 2, "openEnd": 1}},
{"autoReserveTrigger": {"maxReserveEnergy": 95}},
"canRModeSparkInterrupt"Clears obstacles: A |
From: 2
Bottom Left Door
To: 3
Top Right Door
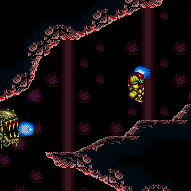

Requires: "canTrickyJump" |
|


Clear one of the paired Fune heads with a Super Missile or Power Bomb. Standing down hill of the Boulders will make them start to roll, retreat until they break. Dodge or kill the top Fune. Requires: {"enemyKill": {
"enemies": [["Fune"]]
}},
{"or": [
"canCarefulJump",
{"enemyDamage": {"enemy": "Boulder", "type": "contact", "hits": 1}}
]},
{"or": [
"canDodgeWhileShooting",
{"enemyKill": {
  "enemies": [["Fune"]]
}}
]} |
|
Freeze the Fune heads and run from the Boulders. Requires: "Ice" |
|
The 2 Funes plus Boulder can be tricky. Try to activate the Boulder then retreat before jumping up to that platform. Note that the Funes can be killed with a Super or Power Bomb, and the Boulder can be killed with a Super if available. Standing down hill of the Boulders will also make them start to roll, it is possible to retreat until they break. Requires: "ScrewAttack",
{"or": [
"canCarefulJump",
"SpaceJump",
{"enemyKill": {
"enemies": [["Fune"]]
}}
]} |
From: 2
Bottom Left Door
To: 6
Junction Behind Fune
Requires: {"obstaclesCleared": ["A"]} |
|


Use SpringBall to get up and over the Fune. Requires: "h_useSpringBall" |
|
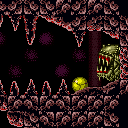

Place a bomb just a bit left of the Fune and have it boost Samus horizontally to get over the Fune. The bomb can be placed at a similar time to when the Fune shoots a fireball. Alternatively, it is possible to land on a fireball to be boosted up. Requires: "h_useMorphBombs", {"or": [ {"and": [ "canBombHorizontally", {"or": [ "Ice", "canCarefulJump" ]} ]}, {"and": [ "h_midAirMorphDamageBoost", {"enemyDamage": {"enemy": "Fune", "type": "fireball", "hits": 1}} ]} ]} |
From: 2
Bottom Left Door
To: 6
Junction Behind Fune


A paricularly precise mid-air morph can get up and over the Fune without damage. Stand a half tile away from the Fune when jump morphing for a higher ceiling. It's a 2.5 tile high mid air morph. It can be performed similar to how a 2 or 3 tile high morph is performed. Requires: {"notable": "Morph Over the Fune"},
{"noFlashSuit": {}},
"h_fourTileJumpMorph",
"canTrickyJump",
{"or": [
"canInsaneJump",
{"enemyDamage": {"enemy": "Fune", "type": "fireball", "hits": 1}}
]}Dev note: It is possible but very hard to jump morph over the fune with a flash suit. R jumping helps. |
From: 2
Bottom Left Door
To: 6
Junction Behind Fune
Requires: {"enemyKill": {
"enemies": [["Fune"]]
}}Clears obstacles: A |
From: 2
Bottom Left Door
To: 6
Junction Behind Fune
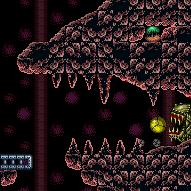

Entrance condition: "comeInWithGMode": {
"mode": "any",
"morphed": true
}Requires: "h_artificialMorphSpringBall" Dev note: This is only useful if the item is Morph or a way to kill the Fune. |
|
|
From: 3
Top Right Door
To: 1
Top Left Door


Entrance condition: "comeInWithGrappleTeleport": {
"blockPositions": [[3, 12], [3, 13]]
}Bypasses door shell: true |
From: 3
Top Right Door
To: 1
Top Left Door
Entrance condition: "comeInWithGrappleTeleport": {
"blockPositions": [[3, 12]]
}Exit condition: "leaveWithGrappleTeleport": {
"blockPositions": [[3, 12]]
}Bypasses door shell: true |
From: 3
Top Right Door
To: 1
Top Left Door
Entrance condition: "comeInWithGrappleTeleport": {
"blockPositions": [[3, 13]]
}Exit condition: "leaveWithGrappleTeleport": {
"blockPositions": [[3, 13]]
}Bypasses door shell: true |
From: 3
Top Right Door
To: 1
Top Left Door


Exit the previous room with Samus in a standing pose (while grappled). After teleporting, press right to release Grapple while staying standing (not being forced into a crouch). Then X-ray climb 1 screen to get up to the door transition, without needing to open the door. Samus will not be visible during the climb. Entrance condition: "comeInWithGrappleTeleport": {
"blockPositions": [[2, 18], [2, 19], [2, 28], [2, 29]]
}Requires: "canXRayClimb" Bypasses door shell: true |
From: 3
Top Right Door
To: 1
Top Left Door
Exit the previous room with Samus in a standing pose (while grappled). After teleporting, press right to release Grapple while staying standing (not being forced into a crouch). Then X-ray climb 2 screens to get up to the door transition, without needing to open the door. Samus will not be visible during the climb. Entrance condition: "comeInWithGrappleTeleport": {
"blockPositions": [[2, 34]]
}Requires: "canLongXRayClimb" Bypasses door shell: true |
|
Requires: "ScrewAttack",
{"or": [
"canDodgeWhileShooting",
{"enemyKill": {
"enemies": [["Fune"]]
}},
{"enemyDamage": {"enemy": "Fune", "type": "fireball", "hits": 1}}
]} |
|
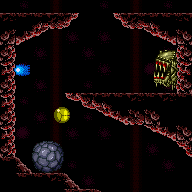

Roll under the top Fune fireball then roll off the edge to avoid the first Boulder. Kill a Fune or use the Boulder for i-frames to get through the tricky section. It is also possible to Kago the Fune to save health compared to taking a Boulder hit. Requires: "Morph", "canDodgeWhileShooting", {"or": [ "canTrickyJump", {"enemyKill": { "enemies": [["Fune"]] }}, {"enemyDamage": {"enemy": "Boulder", "type": "contact", "hits": 1}}, {"and": [ {"enemyDamage": {"enemy": "Fune", "type": "kago", "hits": 1}}, "canKago", "canUseIFrames" ]} ]} |
|
Use Space Jump to reset Samus' fall speed, by jumping, to avoid the topmost boulder. Requires: "SpaceJump", "canTrickyJump" |
|
Destroy the Boulders with Supers or with pseudo screw. Requires: "canDodgeWhileShooting", {"or": [ {"ammo": {"type": "Super", "count": 1}}, {"enemyDamage": {"enemy": "Boulder", "type": "contact", "hits": 1}}, {"and": [ {"disableEquipment": "ScrewAttack"}, "canPseudoScrew" ]} ]}, {"or": [ "Ice", {"enemyDamage": {"enemy": "Boulder", "type": "contact", "hits": 1}}, {"ammo": {"type": "Super", "count": 1}}, "canTrickyJump" ]} Dev note: canDodgeWhileShooting is used partially as a knowledge check that Boulders can be destroyed and partially for dodging requirements. |
|


Requires: {"enemyDamage": {"enemy": "Boulder", "type": "contact", "hits": 2}} |
|
Requires: {"haveBlueSuit": {}} |
From: 3
Top Right Door
To: 2
Bottom Left Door
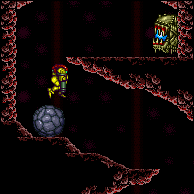

An extremely precise spinjump or walljump can avoid the top Boulder. The spinjump requires dash state and to jump right away. Aiming down shortly after helps by reducing Samus' hitbox. Requires: {"or": [
"canInsaneWallJump",
"canInsaneJump"
]} |
G-Mode Morph Blind Top to Bottom - Power Bomb the Bottom Fune (Top Right Door)
(Extreme+)
Lower Norfair Fireflea Room
From: 3
Top Right Door
To: 2
Bottom Left Door
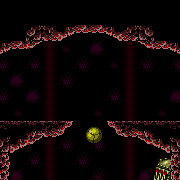

Traversing the room without getting hit requires fairly tricky off-screen movement. Note that Samus moves freely through the off-screen Funes, but will take damage from the Boulders. The Boulders will behave normally and start to roll as Samus is in front of them, except for the top Boulder. Roll off the first ledge and immediately roll to the right all the way to the right wall. Use Spring Ball or a horizontal bomb boost to get over the next Boulder. Quickly roll off the left edge and back to the right in order to avoid the third Boulder. Roll to the right wall then the left wall and place a Power Bomb, exit G-Mode, and jump repeatedly to fix the camera. Entrance condition: "comeInWithGMode": {
"mode": "any",
"morphed": true
}Requires: {"notable": "G-Mode Morph Blind Top to Bottom"},
"canOffScreenMovement",
"canTrickyJump",
{"or": [
"h_artificialMorphSpringBall",
"h_artificialMorphBombHorizontally",
{"enemyDamage": {"enemy": "Boulder", "type": "contact", "hits": 1}}
]},
"h_artificialMorphPowerBomb"Clears obstacles: A |
From: 3
Top Right Door
To: 3
Top Right Door
Crystal Flash, then pick up a shinecharge. Drop into the top Fune's fireball path for the interupt. Entrance condition: "comeInWithRMode": {}Requires: "h_CrystalFlashForReserveEnergy", {"canShineCharge": { "usedTiles": 21, "gentleUpTiles": 3, "gentleDownTiles": 3, "openEnd": 1 }}, {"autoReserveTrigger": {"maxReserveEnergy": 95}}, "canRModeSparkInterrupt" |
From: 3
Top Right Door
To: 3
Top Right Door
With Supers or PBs, kill Funes except for the topmost. If you have neither, use Morph and bombs or springball to get over the secret Fune and farm a fireflea. Shinespark can get you back out of the fireflea pit if you can't jump out. Entrance condition: "comeInWithRMode": {}Requires: "canTrickyJump", {"or": [ "Morph", {"enemyKill": { "enemies": [["Boulder"]] }}, {"and": [ {"disableEquipment": "ScrewAttack"}, "canPseudoScrew" ]} ]}, {"or": [ {"and": [ {"enemyKill": { "enemies": [["Fune"]] }}, "h_RModeCanRefillReserves", {"partialRefill": {"type": "ReserveEnergy", "limit": 20}}, {"resourceMissingAtMost": [{"type": "Missile", "count": 0}]} ]}, {"and": [ "Morph", {"or": [ "h_useSpringBall", {"and": [ "h_useMorphBombs", "canBombHorizontally" ]} ]}, "h_RModeCanRefillReserves", {"partialRefill": {"type": "ReserveEnergy", "limit": 20}}, {"resourceMissingAtMost": [{"type": "PowerBomb", "count": 0}]}, {"canShineCharge": { "usedTiles": 17, "gentleUpTiles": 6, "steepUpTiles": 1, "openEnd": 1 }}, {"shinespark": {"frames": 9, "excessFrames": 4}} ]} ]}, {"canShineCharge": { "usedTiles": 21, "gentleUpTiles": 3, "gentleDownTiles": 3, "openEnd": 1 }}, {"autoReserveTrigger": {"maxReserveEnergy": 95}}, "canRModeSparkInterrupt" Dev note: FIXME: Notable strat 'Morph Over The Fune' for getting over the secret fune (and then R-Jump to get out) isn't included. |
|
Exit condition: "leaveWithRunway": {
"length": 6,
"openEnd": 1
} |
|
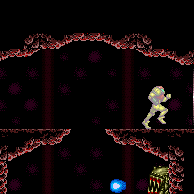

Requires: {"or": [
{"canShineCharge": {
"usedTiles": 21,
"gentleUpTiles": 3,
"gentleDownTiles": 3,
"openEnd": 1
}},
{"and": [
{"doorUnlockedAtNode": 1},
{"canShineCharge": {
"usedTiles": 22,
"gentleUpTiles": 3,
"gentleDownTiles": 3,
"openEnd": 1
}}
]}
]},
"canShinechargeMovement",
{"shineChargeFrames": 60}Exit condition: "leaveShinecharged": {}Unlocks doors: {"nodeId": 1, "types": ["ammo"], "requires": []} |
|
Exit condition: "leaveWithMockball": {
"remoteRunway": {
"length": 21,
"openEnd": 1
},
"landingRunway": {
"length": 6,
"openEnd": 1
}
} |
From: 3
Top Right Door
To: 3
Top Right Door
Requires: {"canShineCharge": {
"usedTiles": 21,
"gentleUpTiles": 3,
"gentleDownTiles": 3,
"openEnd": 1
}},
"canChainTemporaryBlue"Exit condition: "leaveWithTemporaryBlue": {} |
|
Requires: "h_CrystalFlash" |
From: 3
Top Right Door
To: 3
Top Right Door
Entrance condition: "comeInShinecharging": {
"length": 5,
"openEnd": 0
}Requires: "h_CrystalSpark" |
G-Mode Morph Blind Top to Bottom - Jump over the Bottom Fune (Top Left Door)
(Extreme+)
Lower Norfair Fireflea Room
From: 3
Top Right Door
To: 6
Junction Behind Fune
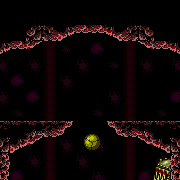

Traversing the room without getting hit requires fairly tricky off-screen movement. Note that Samus moves freely through the off-screen Funes, but will take damage from the Boulders. The Boulders will behave normally and start to roll as Samus is in front of them, except for the top Boulder. Roll off the first ledge and immediately roll to the right all the way to the right wall. Use Spring Ball or a horizontal bomb boost to get over the next Boulder. Quickly roll off the left edge and back to the right in order to avoid the third Boulder. Roll to the right wall then the left wall and use Spring Ball to jump over the Fune, exit G-Mode, and jump repeatedly to fix the camera. Entrance condition: "comeInWithGMode": {
"mode": "any",
"morphed": true
}Requires: {"notable": "G-Mode Morph Blind Top to Bottom"},
"canOffScreenMovement",
"canTrickyJump",
"h_artificialMorphSpringBall"Dev note: This is only useful if the item is Morph or a way to kill the Fune. |
From: 4
Firefleas Item
To: 5
Firefleas Bottom Left Platform Junction
Requires: "SpaceJump" |
From: 4
Firefleas Item
To: 5
Firefleas Bottom Left Platform Junction
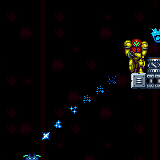

Avoid killing the Firefleas and instead freeze them as a way accross the spikes. It helps to freeze them low, closer to the spikes. Requires: "canTrickyUseFrozenEnemies", "canTrickyJump", {"or": [ "canDash", "canInsaneJump" ]} |
From: 4
Firefleas Item
To: 5
Firefleas Bottom Left Platform Junction
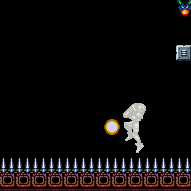

Requires: {"enemyDamage": {"enemy": "Fireflea", "type": "contact", "hits": 1}},
"canUseEnemies",
"canDash",
"canUseIFrames" |
From: 4
Firefleas Item
To: 5
Firefleas Bottom Left Platform Junction
Requires: {"spikeHits": 1},
{"or": [
{"noBlueSuit": {}},
{"and": [
"canBlueSuitSpikeJump",
{"spikeHits": 1}
]}
]} |
From: 4
Firefleas Item
To: 7
Fireflea Statue's Claw Junction


After armpumping for a while Samus will start to move forwards again, when this happens armpump to move forward one tile Requires: "h_spikeXModeShinecharge", {"shinespark": {"frames": 14, "excessFrames": 9}} |
From: 4
Firefleas Item
To: 7
Fireflea Statue's Claw Junction
After armpumping for a while Samus will start to move forwards again, when this happens armpump to move forward one tile Requires: "canUseFlashSuitInitialSpark", "h_spikeXModeSpikeSuit", {"shinespark": {"frames": 24, "excessFrames": 8}} |
From: 5
Firefleas Bottom Left Platform Junction
To: 4
Firefleas Item
Requires: "SpaceJump" |
From: 5
Firefleas Bottom Left Platform Junction
To: 4
Firefleas Item


Avoid killing the Firefleas and instead freeze them as a way accross the spikes. It helps to freeze them low, closer to the spikes. Requires: "canTrickyUseFrozenEnemies", "canTrickyJump", {"or": [ "canDash", "canInsaneJump" ]} |
From: 5
Firefleas Bottom Left Platform Junction
To: 4
Firefleas Item
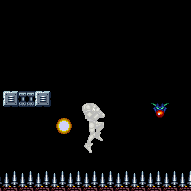

Requires: {"enemyDamage": {"enemy": "Fireflea", "type": "contact", "hits": 1}},
"canUseEnemies",
"canDash",
"canUseIFrames" |
From: 5
Firefleas Bottom Left Platform Junction
To: 4
Firefleas Item
Requires: {"spikeHits": 1},
{"or": [
{"noBlueSuit": {}},
{"and": [
"canBlueSuitSpikeJump",
{"spikeHits": 1}
]}
]} |
From: 5
Firefleas Bottom Left Platform Junction
To: 7
Fireflea Statue's Claw Junction
Requires: "SpaceJump" |
From: 5
Firefleas Bottom Left Platform Junction
To: 7
Fireflea Statue's Claw Junction
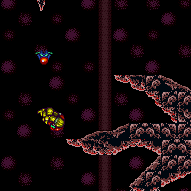

Requires: "HiJump", "canSpeedyJump", "canCarefulJump" |
From: 5
Firefleas Bottom Left Platform Junction
To: 7
Fireflea Statue's Claw Junction
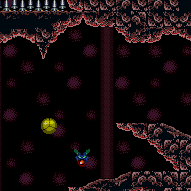

Requires: "canSpringBallJumpMidAir" |
From: 5
Firefleas Bottom Left Platform Junction
To: 7
Fireflea Statue's Claw Junction
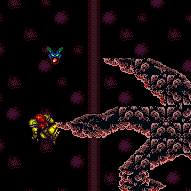

Requires: "HiJump", "canWallJump" |
From: 5
Firefleas Bottom Left Platform Junction
To: 7
Fireflea Statue's Claw Junction
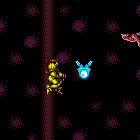

Be careful not to touch the Firefleas or they will die. Requires: {"or": [
{"and": [
"canWallJump",
"canUseFrozenEnemies"
]},
{"and": [
"HiJump",
"canUseFrozenEnemies"
]},
{"and": [
"canTrickyUseFrozenEnemies",
"canTrickyJump"
]}
]}Dev note: The double frozen Fireflea isn't difficult, but you only get one try, and you have to get to and from the item without killing either of the left Firefleas, which can be difficult. |
From: 5
Firefleas Bottom Left Platform Junction
To: 7
Fireflea Statue's Claw Junction


Set up to Damage boost off the highest Fireflea at the apex of Samus' jump, right next to the statue's claw. The positioning of the Fireflea is very precise, and this can only be attempted once. To position the Fireflea, jump to move it on camera and move it off camera while it is at the top of its circle. Be careful not to touch the Fireflea while setting up its precise positioning. Note that morphing can make the boost a little easier, and a crouch jump can also help, but is not required. Requires: "HiJump", "canCameraManip", "canHorizontalDamageBoost", "canTrickyDodgeEnemies", {"or": [ "canCrouchJump", "canTrickyCarryFlashSuit" ]}, {"enemyDamage": {"enemy": "Fireflea", "type": "contact", "hits": 1}} |
From: 5
Firefleas Bottom Left Platform Junction
To: 7
Fireflea Statue's Claw Junction
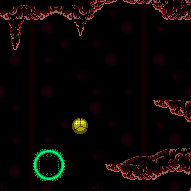

IBJ on the right side of the platform. Requires: "canLongIBJ" |
From: 5
Firefleas Bottom Left Platform Junction
To: 7
Fireflea Statue's Claw Junction
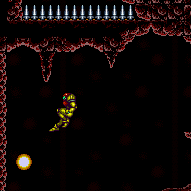

This can only be attempted once. Requires: "canTrickyWallJump", "canCarefulJump", "canHorizontalDamageBoost", {"enemyDamage": {"enemy": "Fireflea", "type": "contact", "hits": 1}} |
From: 5
Firefleas Bottom Left Platform Junction
To: 7
Fireflea Statue's Claw Junction


Requires: "canConsecutiveWallJump", "canPreciseWallJump", "canCarefulJump", {"or": [ "canTrickyJump", "canResetFallSpeed" ]} |
From: 5
Firefleas Bottom Left Platform Junction
To: 7
Fireflea Statue's Claw Junction
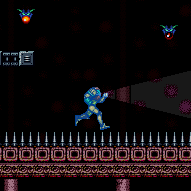

Requires: "h_spikeXModeShinecharge", {"shinespark": {"frames": 14, "excessFrames": 9}} |
From: 6
Junction Behind Fune
To: 2
Bottom Left Door
Requires: {"obstaclesCleared": ["A"]} |
|
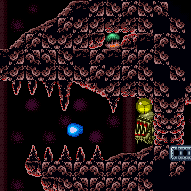

Use SpringBall to get up and over the Fune. Jump when slightly away from the Fune. Requires: "h_useSpringBall" |
|


Use a Bomb to get up and over the Fune. Requires: "h_useMorphBombs" |
From: 6
Junction Behind Fune
To: 2
Bottom Left Door
Requires: {"enemyKill": {
"enemies": [["Fune"]]
}}Clears obstacles: A |
From: 6
Junction Behind Fune
To: 2
Bottom Left Door
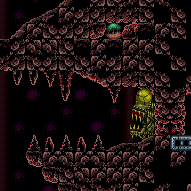

Requires: "canRJump" Dev note: There is a way to walljump morph over the Fune, but a pause buffer is magnitudes easier. |
From: 6
Junction Behind Fune
To: 6
Junction Behind Fune
Requires: {"obstaclesCleared": ["A"]},
{"canShineCharge": {"usedTiles": 20, "gentleUpTiles": 2, "openEnd": 1}},
"h_CrystalSpark" |
From: 6
Junction Behind Fune
To: 7
Fireflea Statue's Claw Junction
|
From: 7
Fireflea Statue's Claw Junction
To: 5
Firefleas Bottom Left Platform Junction
|
From: 7
Fireflea Statue's Claw Junction
To: 5
Firefleas Bottom Left Platform Junction
Requires: {"canShineCharge": {
"usedTiles": 17,
"gentleUpTiles": 6,
"steepUpTiles": 1,
"openEnd": 1
}},
{"spikeHits": 1},
"canPatientSpikeSuit",
{"shinespark": {"frames": 24, "excessFrames": 22}}Dev note: No leniency added becuase can farm the firefleas. |
From: 7
Fireflea Statue's Claw Junction
To: 6
Junction Behind Fune
Requires: {"or": [
"canWallJump",
"SpaceJump"
]} |
From: 7
Fireflea Statue's Claw Junction
To: 6
Junction Behind Fune
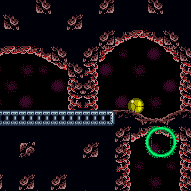

Requires: "canLongIBJ" |
From: 7
Fireflea Statue's Claw Junction
To: 6
Junction Behind Fune
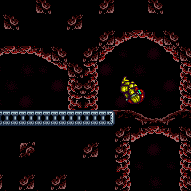

If using a speedy Spring Ball jump, it is best to jump while still as far left as possible, while still clearing the corner, to use the higher runway, or jump just before hitting the right wall. Requires: "canSpeedyJump", {"or": [ "HiJump", "canTrickySpringBallJump" ]} |
From: 7
Fireflea Statue's Claw Junction
To: 6
Junction Behind Fune


Requires: {"canShineCharge": {
"usedTiles": 17,
"gentleUpTiles": 6,
"steepUpTiles": 1,
"openEnd": 1
}},
{"or": [
{"shinespark": {"frames": 21, "excessFrames": 4}},
{"and": [
"canMidairShinespark",
{"shinespark": {"frames": 13, "excessFrames": 4}}
]},
{"and": [
"HiJump",
"canMidairShinespark",
{"shinespark": {"frames": 9, "excessFrames": 3}}
]},
{"and": [
"canShinechargeMovementComplex",
"canSpeedyJump",
{"shinespark": {"frames": 9, "excessFrames": 3}}
]}
]} |
From: 7
Fireflea Statue's Claw Junction
To: 6
Junction Behind Fune
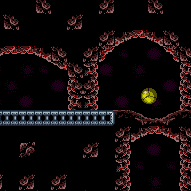

Requires: "HiJump", "canSpringBallJumpMidAir" |
From: 7
Fireflea Statue's Claw Junction
To: 7
Fireflea Statue's Claw Junction


Failing the spikesuit without a way to get back up to the junction results in a softlock. Requires: "canUseFlashSuitInitialSpark", {"canShineCharge": { "usedTiles": 17, "gentleUpTiles": 6, "steepUpTiles": 1, "openEnd": 1 }}, {"spikeHits": 1}, "canRiskySpikeSuit", {"shinespark": {"frames": 24, "excessFrames": 8}} |