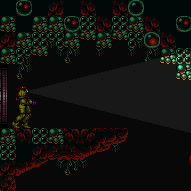
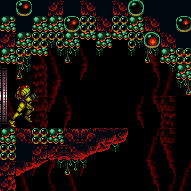
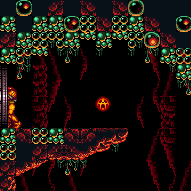
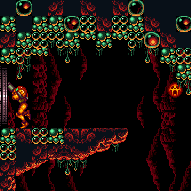
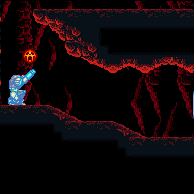
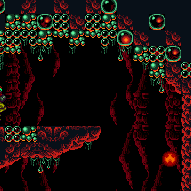
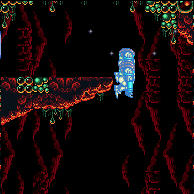
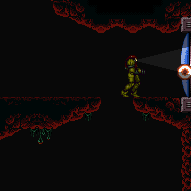
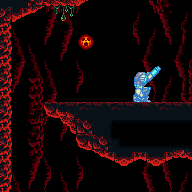
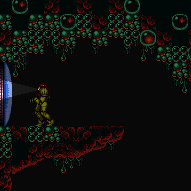
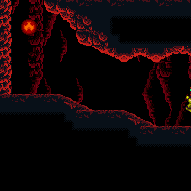
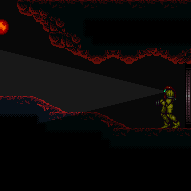
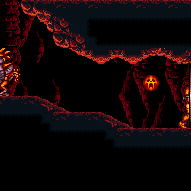
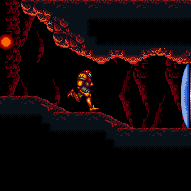
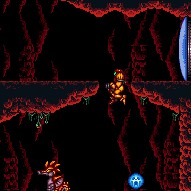
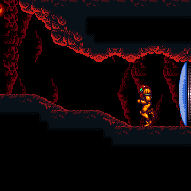
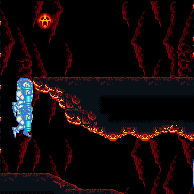
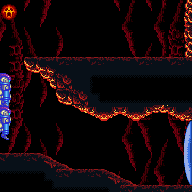
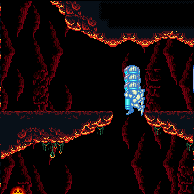
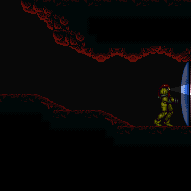
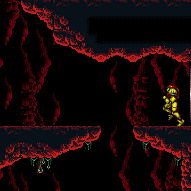
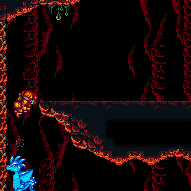
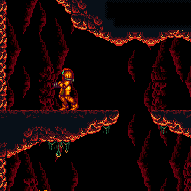
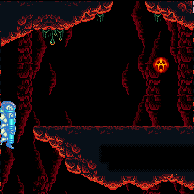
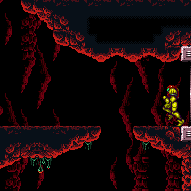
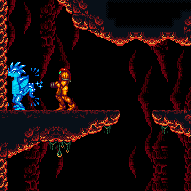
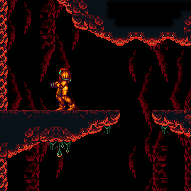
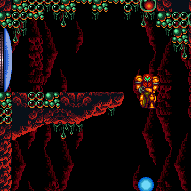
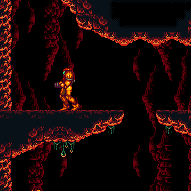
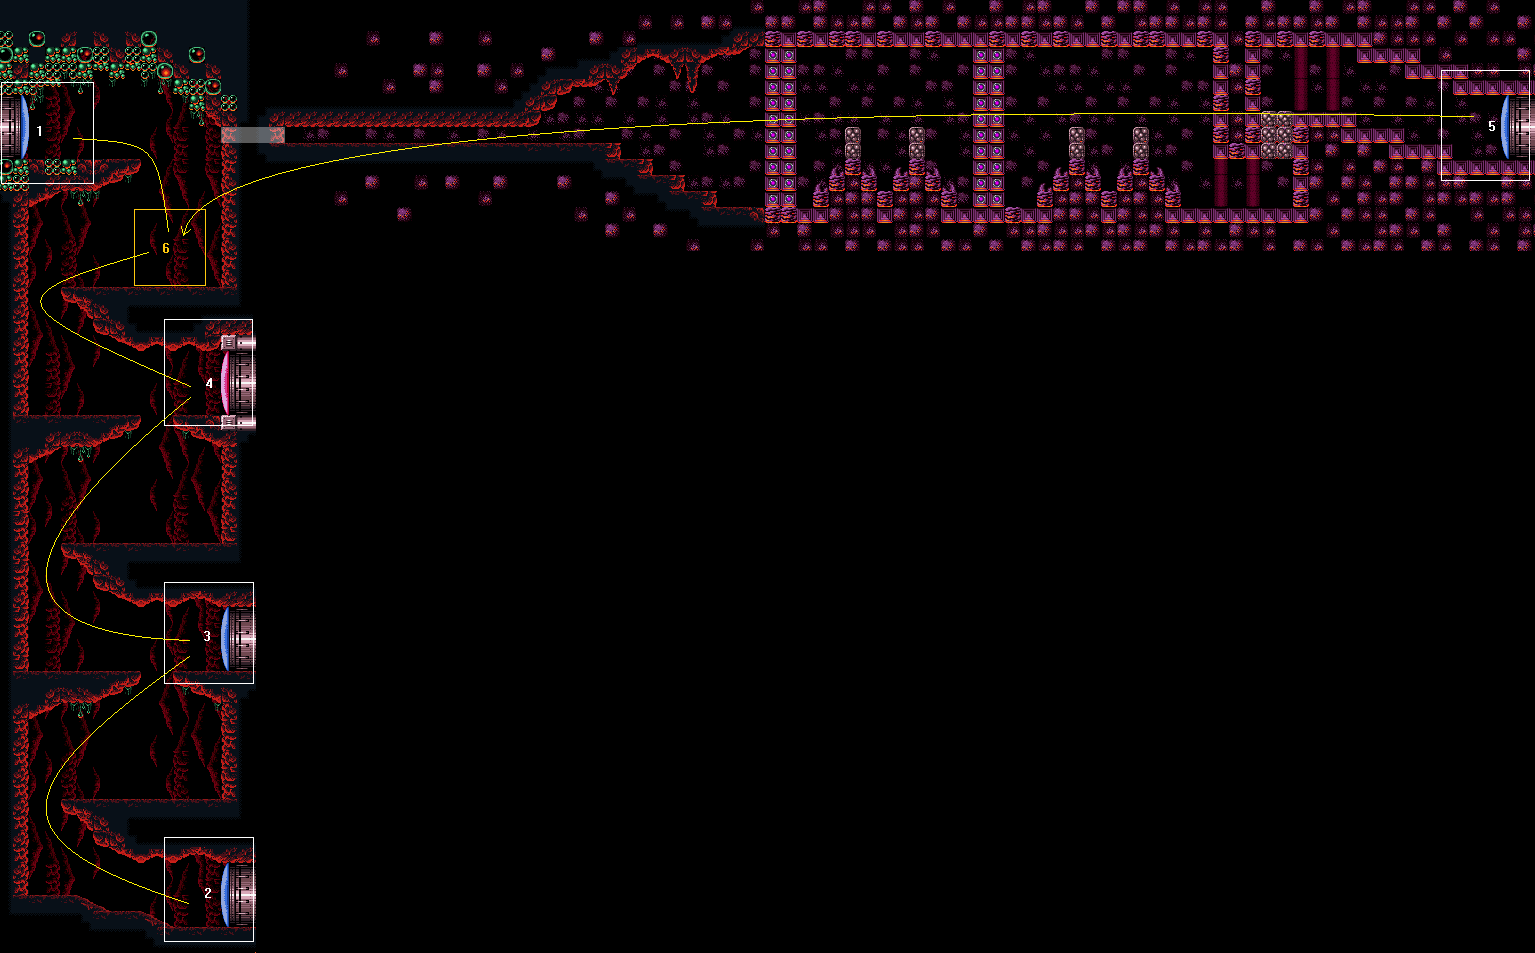
Single Chamber
Room ID: 103
From: 1
Left Shaft - Top Left Door
To: 1
Left Shaft - Top Left Door
Exit condition: {
"leaveWithRunway": {
"length": 8,
"openEnd": 1
}
} |
From: 1
Left Shaft - Top Left Door
To: 1
Left Shaft - Top Left Door
Requires: "h_heatProof"
{
"resetRoom": {
"nodes": [
1
]
}
}
{
"or": [
{
"and": [
"canDash",
{
"cycleFrames": 130
},
{
"or": [
"Plasma",
"Wave",
"Spazer",
{
"cycleFrames": 30
}
]
}
]
},
{
"and": [
{
"haveBlueSuit": {}
},
{
"cycleFrames": 140
}
]
}
]
}Resets obstacles: R-Mode Farm cycle drops: 1 Multiviola |
From: 1
Left Shaft - Top Left Door
To: 1
Left Shaft - Top Left Door
Requires: "h_heatProof"
{
"resetRoom": {
"nodes": [
1
]
}
}
{
"or": [
{
"and": [
"canDash",
{
"cycleFrames": 285
},
{
"or": [
"Plasma",
"ScrewAttack",
{
"and": [
"Wave",
{
"cycleFrames": 90
}
]
},
{
"and": [
"Spazer",
{
"cycleFrames": 205
}
]
},
{
"and": [
"canDodgeWhileShooting",
{
"cycleFrames": 315
}
]
}
]
}
]
},
{
"and": [
{
"haveBlueSuit": {}
},
{
"cycleFrames": 340
}
]
}
]
}
{
"or": [
"canWallJump",
"HiJump",
"h_crouchJumpDownGrab",
{
"and": [
"SpaceJump",
{
"cycleFrames": 20
}
]
}
]
}Resets obstacles: R-Mode Farm cycle drops: 1 Multiviola, 2 Alcoon |
From: 1
Left Shaft - Top Left Door
To: 1
Left Shaft - Top Left Door
Requires: {
"obstaclesNotCleared": [
"R-Mode"
]
}
"h_heatedCrystalFlash" |
From: 1
Left Shaft - Top Left Door
To: 1
Left Shaft - Top Left Door
Store the shinecharge while falling off the ledge then quickly morph and place the Power Bomb on the descent. Entrance condition: {
"comeInShinecharging": {
"length": 7,
"openEnd": 1
}
}Requires: "canShinechargeMovementTricky"
"canInsaneJump"
{
"or": [
{
"and": [
"h_enemyDrops",
"h_heatedCrystalSparkWithoutLenience"
]
},
"h_heatedCrystalSpark"
]
}Dev note: No lenience, since the Alcoons are a good Power Bomb farm. Since this can not be done with a flash suit, it is implicitly assumed Samus can crouch jump and down grab. |
From: 1
Left Shaft - Top Left Door
To: 1
Left Shaft - Top Left Door
Entrance condition: {
"comeInWithRMode": {}
}Clears obstacles: R-Mode |
From: 1
Left Shaft - Top Left Door
To: 1
Left Shaft - Top Left Door
Requires: {
"enemyDamage": {
"enemy": "Multiviola",
"type": "contact",
"hits": 1
}
} |
From: 1
Left Shaft - Top Left Door
To: 1
Left Shaft - Top Left Door
Requires: {
"heatFrames": 120
}Exit condition: {
"leaveWithGModeSetup": {}
} |
From: 1
Left Shaft - Top Left Door
To: 2
Left Shaft - Bottom Right Door
Entrance condition: {
"comeInShinecharging": {
"length": 7,
"openEnd": 0
}
}Requires: "canXRayCancelShinecharge"
"canXRayTurnaround"
"canLongChainTemporaryBlue"
{
"heatFrames": 1380
}Exit condition: {
"leaveWithTemporaryBlue": {}
}Unlocks doors: {"types":["super","powerbomb"],"requires":[]}
{"types":["missiles"],"requires":[{"heatFrames":50}]} |
From: 1
Left Shaft - Top Left Door
To: 2
Left Shaft - Bottom Right Door
It is possible to kill a Multiviola by the door and pause abuse to grab its Energy drop on G-mode exit. It is important avoid touching the invisible fireballs the Alcoons place, and to prevent them from shooting too many fireballs, as they will eventually prevent drops from appearing. The Alcoons are global, so it is best to kill those at the top of the room and either kill or avoid those lower, depending on if Samus has a way to kill them quickly. Entrance condition: {
"comeInWithGMode": {
"mode": "any",
"morphed": false
}
}Requires: {
"or": [
"h_heatedGModeOpenDifferentDoor",
{
"and": [
"h_heatedGModePauseAbuse",
"canFarmWhileShooting",
"canTrickyDodgeEnemies"
]
}
]
} |
From: 1
Left Shaft - Top Left Door
To: 3
Left Shaft - Middle Right Door
Entrance condition: {
"comeInShinecharging": {
"length": 7,
"openEnd": 0
}
}Requires: "canXRayCancelShinecharge"
"canXRayTurnaround"
"canLongChainTemporaryBlue"
{
"heatFrames": 830
}Exit condition: {
"leaveWithTemporaryBlue": {}
}Unlocks doors: {"types":["super","powerbomb"],"requires":[]}
{"types":["missiles"],"requires":[{"heatFrames":50}]} |
From: 1
Left Shaft - Top Left Door
To: 3
Left Shaft - Middle Right Door
It is important avoid touching the invisible fireballs the Alcoons place. Entrance condition: {
"comeInWithGMode": {
"mode": "any",
"morphed": false
}
}Requires: "h_heatedGModeOpenDifferentDoor" |
From: 1
Left Shaft - Top Left Door
To: 4
Left Shaft - Top Right Door
Entrance condition: {
"comeInShinecharging": {
"length": 7,
"openEnd": 1
}
}Requires: {
"or": [
{
"and": [
"canShinechargeMovementComplex",
{
"heatFrames": 225
},
{
"shinespark": {
"frames": 15,
"excessFrames": 0
}
}
]
},
{
"and": [
"canShinechargeMovementTricky",
{
"heatFrames": 215
},
{
"shinespark": {
"frames": 6,
"excessFrames": 0
}
}
]
}
]
}Exit condition: {
"leaveWithSpark": {}
}Unlocks doors: {"types":["super"],"requires":[]}
{"types":["missiles","powerbomb"],"requires":["never"]} |
From: 1
Left Shaft - Top Left Door
To: 4
Left Shaft - Top Right Door
Entrance condition: {
"comeInShinecharging": {
"length": 7,
"openEnd": 0
}
}Requires: "canXRayCancelShinecharge"
"canXRayTurnaround"
"canLongChainTemporaryBlue"
{
"heatFrames": 505
}Exit condition: {
"leaveWithTemporaryBlue": {}
}Unlocks doors: {"types":["super","powerbomb"],"requires":[]}
{"types":["missiles"],"requires":[{"heatFrames":50}]} |
From: 1
Left Shaft - Top Left Door
To: 4
Left Shaft - Top Right Door
Entrance condition: {
"comeInWithGMode": {
"mode": "any",
"morphed": false
}
}Requires: "h_heatedGModeOpenDifferentDoor" Dev note: FIXME: It is possible to kill a Multiviola in the gap in the floor, but Samus only gets one attempt, and its very difficult to escape with a small Energy drop. |
From: 1
Left Shaft - Top Left Door
To: 5
Far Right Door
It is important avoid touching the invisible fireballs the Alcoons place. It is possible to kill them without any beam upgrades or ammo by jumping and shooting horizontally near the floor surface. Stay near the far wall when shooting to prevent getting too close and triggering their jump. After entering the morph tunnel, roll through the two camera scroll blocks a few times to overload PLMs. They are at the entrance and two tiles in the tunnel. Exit G-mode and go through the room to the far right door. Entrance condition: {
"comeInWithGMode": {
"mode": "any",
"morphed": false
}
}Requires: "Morph"
{
"or": [
{
"and": [
"canBombHorizontally",
"canTrickyJump"
]
},
"HiJump",
"canWallJump",
"SpaceJump",
"canSpringBallJumpMidAir",
"canIBJ",
"canTrickyUseFrozenEnemies"
]
}
"h_heatedGModeOffCameraDoor"Dev note: It is possible to go from 5->1 with a bomb spread, but it requires difficult off-screen movement to escape the room. |
From: 1
Left Shaft - Top Left Door
To: 5
Far Right Door
It is important avoid touching the invisible fireballs the Alcoons place. It is possible to bomb from the edge of the top door runway into the hidden morph tunnel, but if Samus is not at the edge, she will bonk and fall. After entering the morph tunnel, roll through the two camera scroll blocks a few times to overload PLMs. They are at the entrance and two tiles in the tunnel. Exit G-mode and go through the room to the far right door. Entrance condition: {
"comeInWithGMode": {
"mode": "any",
"morphed": true
}
}Requires: "canTrickyDodgeEnemies"
{
"or": [
"h_artificialMorphBombHorizontally",
"h_artificialMorphJumpIntoIBJ",
{
"and": [
"h_artificialMorphIBJ",
"h_artificialMorphPowerBomb"
]
},
{
"and": [
"h_artificialMorphSpringBall",
"HiJump"
]
},
"h_artificialMorphSpringBallBombJump"
]
}
"h_heatedGModeOffCameraDoor" |
|
Requires: {
"heatFrames": 80
}
{
"or": [
"canDash",
{
"heatFrames": 15
}
]
} |
From: 2
Left Shaft - Bottom Right Door
To: 1
Left Shaft - Top Left Door
Entrance condition: {
"comeInShinecharging": {
"length": 12,
"openEnd": 0,
"gentleUpTiles": 4
}
}Requires: "canXRayTurnaround"
"canLongChainTemporaryBlue"
{
"or": [
{
"and": [
"HiJump",
{
"heatFrames": 1220
}
]
},
{
"and": [
"canTrickySpringBallJump",
{
"heatFrames": 1440
}
]
}
]
}Exit condition: {
"leaveWithTemporaryBlue": {}
}Unlocks doors: {"types":["super","powerbomb"],"requires":[]}
{"types":["missiles"],"requires":[{"heatFrames":50}]} |
From: 2
Left Shaft - Bottom Right Door
To: 1
Left Shaft - Top Left Door
It is possible to kill a Multiviola by the door and pause abuse to grab its Energy drop on G-mode exit. It is important avoid touching the invisible fireballs the Alcoons place, and to prevent them from shooting too many fireballs, as they will eventually prevent drops from appearing. One easy way to do this without any beam upgrades or ammo is to kill them before they jump. This can be done from below by jumping and shooting horizontally near the floor surface. Stay near the far wall when shooting to prevent getting too close and triggering their jump. Entrance condition: {
"comeInWithGMode": {
"mode": "any",
"morphed": false
}
}Requires: {
"or": [
"h_crouchJumpDownGrab",
"HiJump",
"canWallJump",
"SpaceJump",
"canSpringBallJumpMidAir"
]
}
{
"or": [
"h_heatedGModeOpenDifferentDoor",
{
"and": [
"h_heatedGModePauseAbuse",
"canFarmWhileShooting",
"canTrickyDodgeEnemies"
]
}
]
}Dev note: Frozen Alcoon platforms and Artificial morph IBJ are not included, as Samus can crouch jump and down grab; they can be considered if G-mode + flash suits are added, though they are still likely not useful. Those are also likely not compatible with preventing the Alcoons from overloading drops. |
From: 2
Left Shaft - Bottom Right Door
To: 1
Left Shaft - Top Left Door
Entrance condition: {
"comeInWithGrappleTeleport": {
"blockPositions": [
[
5,
3
],
[
7,
2
]
]
}
}Requires: {
"heatFrames": 45
} |
From: 2
Left Shaft - Bottom Right Door
To: 1
Left Shaft - Top Left Door
Entrance condition: {
"comeInWithGrappleTeleport": {
"blockPositions": [
[
3,
12
]
]
}
}Requires: {
"or": [
"h_heatedGrappleTeleportWallEscape",
{
"and": [
{
"doorUnlockedAtNode": 1
},
{
"heatFrames": 20
}
]
}
]
}
"canOffScreenMovement"
{
  "enemyDamage": {
    "enemy": "Multiviola",
    "type": "contact",
    "hits": 1
  }
}Unlocks doors: {"types":["ammo"],"requires":[]} |
From: 2
Left Shaft - Bottom Right Door
To: 1
Left Shaft - Top Left Door
Entrance condition: {
"comeInWithGrappleTeleport": {
"blockPositions": [
[
3,
12
]
]
}
}Bypasses door shell: true |
From: 2
Left Shaft - Bottom Right Door
To: 1
Left Shaft - Top Left Door
Entrance condition: {
"comeInWithGrappleTeleport": {
"blockPositions": [
[
3,
12
]
]
}
}Exit condition: {
"leaveWithGrappleTeleport": {
"blockPositions": [
[
3,
12
]
]
}
}Bypasses door shell: true |
From: 2
Left Shaft - Bottom Right Door
To: 1
Left Shaft - Top Left Door
Exit the previous room with Samus in a standing pose (while grappled). After teleporting, press right to release Grapple while staying standing (not being forced into a crouch). Then X-ray climb 1 screen to get up to the door transition, without needing to open the door. Entrance condition: {
"comeInWithGrappleTeleport": {
"blockPositions": [
[
2,
28
]
]
}
}Requires: "canXRayClimb"
{
"heatFrames": 1600
}Bypasses door shell: true |
From: 2
Left Shaft - Bottom Right Door
To: 2
Left Shaft - Bottom Right Door
Exit condition: {
"leaveWithRunway": {
"length": 13,
"openEnd": 0,
"gentleDownTiles": 4
}
} |
From: 2
Left Shaft - Bottom Right Door
To: 2
Left Shaft - Bottom Right Door
Requires: "h_heatProof"
{
"resetRoom": {
"nodes": [
2
]
}
}
{
"or": [
{
"and": [
"canDash",
{
"cycleFrames": 245
},
{
"or": [
"ScrewAttack",
{
"and": [
"Plasma",
{
"cycleFrames": 25
}
]
},
{
"and": [
"Wave",
{
"cycleFrames": 40
}
]
},
{
"and": [
"Spazer",
{
"cycleFrames": 100
}
]
},
{
"and": [
"canDodgeWhileShooting",
{
"cycleFrames": 220
}
]
}
]
}
]
},
{
"and": [
{
"haveBlueSuit": {}
},
{
"cycleFrames": 360
}
]
}
]
}Resets obstacles: R-Mode Farm cycle drops: 1 Multiviola, 1 Alcoon |
From: 2
Left Shaft - Bottom Right Door
To: 2
Left Shaft - Bottom Right Door
Requires: {
"obstaclesNotCleared": [
"R-Mode"
]
}
"h_heatedCrystalFlash" |
From: 2
Left Shaft - Bottom Right Door
To: 2
Left Shaft - Bottom Right Door
Entrance condition: {
"comeInShinecharging": {
"length": 13,
"openEnd": 0
}
}Requires: {
"or": [
{
"and": [
"h_enemyDrops",
"h_heatedCrystalSparkWithoutLenience"
]
},
"h_heatedCrystalSpark"
]
}Dev note: No lenience, since the Alcoons are a good Power Bomb farm. Since this can not be done with a flash suit, it is implicitly assumed Samus can crouch jump and down grab. |
From: 2
Left Shaft - Bottom Right Door
To: 2
Left Shaft - Bottom Right Door
Requires: {
"or": [
{
"canShineCharge": {
"usedTiles": 12,
"gentleUpTiles": 4,
"openEnd": 0
}
},
{
"and": [
{
"doorUnlockedAtNode": 2
},
{
"canShineCharge": {
"usedTiles": 13,
"gentleUpTiles": 4,
"openEnd": 0
}
}
]
}
]
}
{
"or": [
{
"and": [
"h_enemyDrops",
"h_heatedCrystalSparkWithoutLenience"
]
},
"h_heatedCrystalSpark"
]
}Dev note: No lenience, since the Alcoons are a good Power Bomb farm. |
From: 2
Left Shaft - Bottom Right Door
To: 2
Left Shaft - Bottom Right Door
Entrance condition: {
"comeInWithRMode": {}
}Clears obstacles: R-Mode |
From: 2
Left Shaft - Bottom Right Door
To: 2
Left Shaft - Bottom Right Door
Farm the enemies, and leave the bottom Alcoon alive to interrupt after shinecharging at the bottom door. Requires: {
"obstaclesCleared": [
"R-Mode"
]
}
{
"or": [
"h_heatedCrystalFlashForReserveEnergy",
{
"and": [
"h_heatProof",
"h_RModeCanRefillReserves",
{
"resourceMissingAtMost": [
{
"type": "PowerBomb",
"count": 0
}
]
},
{
"partialRefill": {
"type": "ReserveEnergy",
"limit": 20
}
}
]
}
]
}
{
"or": [
{
"canShineCharge": {
"usedTiles": 12,
"gentleUpTiles": 4,
"openEnd": 0
}
},
{
"and": [
{
"doorUnlockedAtNode": 2
},
{
"canShineCharge": {
"usedTiles": 13,
"gentleUpTiles": 4,
"openEnd": 0
}
}
]
}
]
}
{
"autoReserveTrigger": {
"maxReserveEnergy": 95
}
}
"canRModeSparkInterrupt"Resets obstacles: R-Mode |
From: 2
Left Shaft - Bottom Right Door
To: 2
Left Shaft - Bottom Right Door
Requires: {
"enemyDamage": {
"enemy": "Multiviola",
"type": "contact",
"hits": 1
}
} |
From: 2
Left Shaft - Bottom Right Door
To: 2
Left Shaft - Bottom Right Door
Enter the room and crouch next to the closed door. After the Multiviola hits the door, open it and it will be on a trajectory to hit Samus the next pass. Requires: {
"heatFrames": 920
}Exit condition: {
"leaveWithGModeSetup": {}
} |
From: 2
Left Shaft - Bottom Right Door
To: 3
Left Shaft - Middle Right Door
Entrance condition: {
"comeInShinecharging": {
"length": 12,
"openEnd": 0,
"gentleUpTiles": 4
}
}Requires: "canShinechargeMovementComplex"
{
"or": [
"HiJump",
"canWallJump"
]
}
{
"shinespark": {
"frames": 5,
"excessFrames": 0
}
}
{
"heatFrames": 230
}Exit condition: {
"leaveWithSpark": {}
}Unlocks doors: {"types":["super"],"requires":[]}
{"types":["missiles","powerbomb"],"requires":["never"]} |
From: 2
Left Shaft - Bottom Right Door
To: 3
Left Shaft - Middle Right Door
Entrance condition: {
"comeInShinecharging": {
"length": 11,
"openEnd": 1,
"gentleUpTiles": 4
}
}Requires: "HiJump"
"canShinechargeMovementComplex"
"canTrickyJump"
{
"heatFrames": 150
}
{
"shineChargeFrames": 120
}Exit condition: {
"leaveShinecharged": {}
}Unlocks doors: {"types":["super"],"requires":[]}
{"types":["missiles","powerbomb"],"requires":["never"]}Dev note: 1 unused tile since you must jump earlier for this strat. |
From: 2
Left Shaft - Bottom Right Door
To: 3
Left Shaft - Middle Right Door
Requires: "canUseFrozenEnemies"
{
"heatFrames": 290
}
{
"or": [
"canTrickyJump",
{
"heatFrames": 160
}
]
} |
From: 2
Left Shaft - Bottom Right Door
To: 3
Left Shaft - Middle Right Door
Entrance condition: {
"comeInShinecharging": {
"length": 12,
"openEnd": 0,
"gentleUpTiles": 4
}
}Requires: "canXRayTurnaround"
"canLongChainTemporaryBlue"
{
"or": [
{
"and": [
"HiJump",
{
"heatFrames": 365
}
]
},
{
"and": [
"canTrickySpringBallJump",
{
"heatFrames": 380
}
]
}
]
}Exit condition: {
"leaveWithTemporaryBlue": {}
}Unlocks doors: {"types":["super","powerbomb"],"requires":[]}
{"types":["missiles"],"requires":[{"heatFrames":50}]} |
From: 2
Left Shaft - Bottom Right Door
To: 3
Left Shaft - Middle Right Door
It is important avoid touching the invisible fireballs the Alcoons place. Entrance condition: {
"comeInWithGMode": {
"mode": "any",
"morphed": false
}
}Requires: {
"or": [
"h_crouchJumpDownGrab",
"HiJump",
"canWallJump",
"SpaceJump",
"canSpringBallJumpMidAir",
"canIBJ"
]
}
"h_heatedGModeOpenDifferentDoor"Dev note: Frozen Alcoon platforms and Artificial morph IBJ are not included, as Samus can crouch jump and down grab; they can be considered if G-mode + flash suits are added, though they are still likely not useful. |
From: 2
Left Shaft - Bottom Right Door
To: 4
Left Shaft - Top Right Door
Entrance condition: {
"comeInShinecharging": {
"length": 12,
"openEnd": 0,
"gentleUpTiles": 4
}
}Requires: "canXRayTurnaround"
"canLongChainTemporaryBlue"
{
"or": [
{
"and": [
"HiJump",
{
"heatFrames": 700
}
]
},
{
"and": [
"canTrickySpringBallJump",
{
"heatFrames": 840
}
]
}
]
}Exit condition: {
"leaveWithTemporaryBlue": {}
}Unlocks doors: {"types":["super","powerbomb"],"requires":[]}
{"types":["missiles"],"requires":[{"heatFrames":50}]} |
From: 2
Left Shaft - Bottom Right Door
To: 4
Left Shaft - Top Right Door
It is important avoid touching the invisible fireballs the Alcoons place. Entrance condition: {
"comeInWithGMode": {
"mode": "any",
"morphed": false
}
}Requires: {
"or": [
"h_crouchJumpDownGrab",
"HiJump",
"canWallJump",
"SpaceJump",
"canSpringBallJumpMidAir",
"canIBJ"
]
}
"h_heatedGModeOpenDifferentDoor"Dev note: Frozen Alcoon platforms and Artificial morph IBJ are not included, as Samus can crouch jump and down grab; they can be considered if G-mode + flash suits are added, though they are still likely not useful. FIXME: It is possible to kill a Multiviola in the gap in the floor, but Samus only gets one attempt, and its very difficult to escape with a small Energy drop. |
From: 2
Left Shaft - Bottom Right Door
To: 5
Far Right Door
It is important avoid touching the invisible fireballs the Alcoons place. It is possible to kill them without any beam upgrades or ammo by jumping and shooting horizontally near the floor surface. Stay near the far wall when shooting to prevent getting too close and triggering their jump. After entering the morph tunnel, roll through the two camera scroll blocks a few times to overload PLMs. They are at the entrance and two tiles in the tunnel. Exit G-mode and go through the room to the far right door. Entrance condition: {
"comeInWithGMode": {
"mode": "any",
"morphed": false
}
}Requires: "Morph"
{
"or": [
"HiJump",
"canWallJump",
"SpaceJump",
"canSpringBallJumpMidAir",
"canIBJ",
{
"and": [
"h_crouchJumpDownGrab",
"canBombHorizontally"
]
},
{
"and": [
"h_crouchJumpDownGrab",
"canTrickyUseFrozenEnemies"
]
}
]
}
"h_heatedGModeOffCameraDoor"Dev note: Frozen Alcoon platforms and Artificial morph IBJ are not included, as Samus can crouch jump and down grab; they can be considered if G-mode + flash suits are added, though they are still likely not useful. |
From: 2
Left Shaft - Bottom Right Door
To: 5
Far Right Door
It is important avoid touching the invisible fireballs the Alcoons place. Jump over them or kill the Alcoons with Power Bombs. After entering the morph tunnel, roll through the two camera scroll blocks a few times to overload PLMs. They are at the entrance and two tiles in the tunnel. Exit G-mode and go through the room to the far right door. Entrance condition: {
"comeInWithGMode": {
"mode": "any",
"morphed": true
}
}Requires: {
"or": [
{
"and": [
"h_artificialMorphIBJ",
{
"ammo": {
"type": "PowerBomb",
"count": 3
}
}
]
},
{
"and": [
"h_artificialMorphSpringBall",
"HiJump"
]
},
{
"and": [
"h_artificialMorphSpringBallBombJump",
{
"or": [
"h_artificialMorphBombs",
{
"ammo": {
"type": "PowerBomb",
"count": 4
}
}
]
}
]
}
]
}
"h_heatedGModeOffCameraDoor" |
From: 2
Left Shaft - Bottom Right Door
To: 8
Left Shaft - Bottom Junction
Requires: {
"or": [
{
"heatFrames": 100
},
{
"and": [
"HiJump",
{
"heatFrames": 95
}
]
}
]
}
{
"or": [
"canDash",
{
"and": [
{
"haveBlueSuit": {}
},
{
"heatFrames": 30
}
]
}
]
} |
From: 3
Left Shaft - Middle Right Door
To: 1
Left Shaft - Top Left Door
Entrance condition: {
"comeInGettingBlueSpeed": {
"length": 3,
"openEnd": 1,
"minExtraRunSpeed": "$2.0"
}
}Requires: "canXRayTurnaround"
"canLongChainTemporaryBlue"
{
"or": [
{
"and": [
"HiJump",
{
"heatFrames": 890
}
]
},
{
"and": [
"canTrickySpringBallJump",
{
"heatFrames": 1020
}
]
}
]
}Exit condition: {
"leaveWithTemporaryBlue": {}
}Unlocks doors: {"types":["super","powerbomb"],"requires":[]}
{"types":["missiles"],"requires":[{"heatFrames":50}]}Dev note: FIXME: This could be done with lower run speed, at the cost of more heat frames. |
From: 3
Left Shaft - Middle Right Door
To: 1
Left Shaft - Top Left Door
It is possible to kill a Multiviola by the door and pause abuse to grab its Energy drop on G-mode exit. It is important avoid touching the invisible fireballs the Alcoons place, and to prevent them from shooting too many fireballs, as they will eventually prevent drops from appearing. One easy way to do this without any beam upgrades or ammo is to kill them before they jump. This can be done from below by jumping and shooting horizontally near the floor surface. Stay near the far wall when shooting to prevent getting too close and triggering their jump. Entrance condition: {
"comeInWithGMode": {
"mode": "any",
"morphed": false
}
}Requires: {
"or": [
"h_crouchJumpDownGrab",
"HiJump",
"canWallJump",
"SpaceJump",
"canSpringBallJumpMidAir"
]
}
{
"or": [
"h_heatedGModeOpenDifferentDoor",
{
"and": [
"h_heatedGModePauseAbuse",
"canFarmWhileShooting",
"canTrickyDodgeEnemies"
]
}
]
}Dev note: Frozen Alcoon platforms and Artificial morph IBJ are not included, as Samus can crouch jump and down grab; they can be considered if G-mode + flash suits are added, though they are still likely not useful. Those are also likely not compatible with preventing the Alcoons from overloading drops. |
From: 3
Left Shaft - Middle Right Door
To: 1
Left Shaft - Top Left Door
Entrance condition: {
"comeInWithGrappleTeleport": {
"blockPositions": [
[
5,
3
],
[
7,
2
]
]
}
}Requires: {
"heatFrames": 45
} |
From: 3
Left Shaft - Middle Right Door
To: 1
Left Shaft - Top Left Door
Entrance condition: {
"comeInWithGrappleTeleport": {
"blockPositions": [
[
3,
12
]
]
}
}Requires: {
"or": [
"h_heatedGrappleTeleportWallEscape",
{
"and": [
{
"doorUnlockedAtNode": 1
},
{
"heatFrames": 20
}
]
}
]
}
"canOffScreenMovement"
{
"enemyDamage": {
"enemy": "Multiviola",
"type": "contact",
"hits": 1
}
}Unlocks doors: {"types":["ammo"],"requires":[]} |
From: 3
Left Shaft - Middle Right Door
To: 1
Left Shaft - Top Left Door
Entrance condition: {
"comeInWithGrappleTeleport": {
"blockPositions": [
[
3,
12
]
]
}
}Bypasses door shell: true |
From: 3
Left Shaft - Middle Right Door
To: 1
Left Shaft - Top Left Door
Entrance condition: {
"comeInWithGrappleTeleport": {
"blockPositions": [
[
3,
12
]
]
}
}Exit condition: {
"leaveWithGrappleTeleport": {
"blockPositions": [
[
3,
12
]
]
}
}Bypasses door shell: true |
From: 3
Left Shaft - Middle Right Door
To: 1
Left Shaft - Top Left Door
Exit the previous room with Samus in a standing pose (while grappled). After teleporting, press right to release Grapple while staying standing (not being forced into a crouch). Then X-ray climb 1 screen to get up to the door transition, without needing to open the door. Entrance condition: {
"comeInWithGrappleTeleport": {
"blockPositions": [
[
2,
28
]
]
}
}Requires: "canXRayClimb"
{
"heatFrames": 1600
}Bypasses door shell: true |
From: 3
Left Shaft - Middle Right Door
To: 2
Left Shaft - Bottom Right Door
Entrance condition: {
"comeInShinecharging": {
"length": 3,
"openEnd": 1
}
}Requires: "canShinechargeMovementTricky"
{
"heatFrames": 180
}
{
"shineChargeFrames": 170
}Exit condition: {
"leaveShinecharged": {}
}Unlocks doors: {"types":["super"],"requires":[]}
{"types":["missiles","powerbomb"],"requires":["never"]} |
From: 3
Left Shaft - Middle Right Door
To: 2
Left Shaft - Bottom Right Door
Entrance condition: {
"comeInShinecharging": {
"length": 3,
"openEnd": 1
}
}Requires: "canShinechargeMovementComplex"
{
"shinespark": {
"frames": 5,
"excessFrames": 0
}
}
{
"heatFrames": 220
}Exit condition: {
"leaveWithSpark": {
"position": "top"
}
}Unlocks doors: {"types":["super"],"requires":[]}
{"types":["missiles","powerbomb"],"requires":["never"]} |
From: 3
Left Shaft - Middle Right Door
To: 2
Left Shaft - Bottom Right Door
Entrance condition: {
"comeInShinecharged": {}
}Requires: {
"shineChargeFrames": 145
}
"canShinechargeMovementComplex"
{
"shinespark": {
"frames": 18,
"excessFrames": 0
}
}
{
"heatFrames": 190
}Exit condition: {
"leaveWithSpark": {
"position": "top"
}
}Unlocks doors: {"types":["super"],"requires":[]}
{"types":["missiles","powerbomb"],"requires":["never"]} |
From: 3
Left Shaft - Middle Right Door
To: 2
Left Shaft - Bottom Right Door
Entrance condition: {
"comeInShinecharging": {
"length": 3,
"openEnd": 0
}
}Requires: "canXRayCancelShinecharge"
"canXRayTurnaround"
"canLongChainTemporaryBlue"
{
"heatFrames": 610
}Exit condition: {
"leaveWithTemporaryBlue": {}
}Unlocks doors: {"types":["super","powerbomb"],"requires":[]}
{"types":["missiles"],"requires":[{"heatFrames":50}]} |
From: 3
Left Shaft - Middle Right Door
To: 2
Left Shaft - Bottom Right Door
It is possible to kill a Multiviola by the door and pause abuse to grab its Energy drop on G-mode exit. It is important avoid touching the invisible fireballs the Alcoon places, and to prevent it from shooting too many fireballs, as they will eventually prevent drops from appearing. Either kill the Alcoon or avoid it then kill the Multiviola near the door without too much delay. Entrance condition: {
"comeInWithGMode": {
"mode": "any",
"morphed": false
}
}Requires: {
"or": [
"h_heatedGModeOpenDifferentDoor",
"h_heatedGModePauseAbuse"
]
} |
From: 3
Left Shaft - Middle Right Door
To: 3
Left Shaft - Middle Right Door
Exit condition: {
"leaveWithRunway": {
"length": 4,
"openEnd": 1
}
} |
From: 3
Left Shaft - Middle Right Door
To: 3
Left Shaft - Middle Right Door
Requires: {
"heatFrames": 140
}
"SpaceJump"Exit condition: {
"leaveSpinning": {
"remoteRunway": {
"length": 5,
"openEnd": 1
}
}
} |
From: 3
Left Shaft - Middle Right Door
To: 3
Left Shaft - Middle Right Door
Requires: {
"heatFrames": 140
}Exit condition: {
"leaveWithMockball": {
"remoteRunway": {
"length": 7,
"openEnd": 1
},
"landingRunway": {
"length": 4,
"openEnd": 1
}
}
} |
From: 3
Left Shaft - Middle Right Door
To: 3
Left Shaft - Middle Right Door
Requires: {
"heatFrames": 140
}Exit condition: {
"leaveWithSpringBallBounce": {
"remoteRunway": {
"length": 7,
"openEnd": 1
},
"landingRunway": {
"length": 4,
"openEnd": 1
},
"movementType": "uncontrolled"
}
} |
From: 3
Left Shaft - Middle Right Door
To: 3
Left Shaft - Middle Right Door
Requires: {
"heatFrames": 140
}
"h_heatedRemoteRunwayPreciseSpaceJump"Exit condition: {
"leaveSpaceJumping": {
"remoteRunway": {
"length": 7,
"openEnd": 0
}
}
} |
From: 3
Left Shaft - Middle Right Door
To: 3
Left Shaft - Middle Right Door
Requires: "h_heatProof"
{
"resetRoom": {
"nodes": [
3
]
}
}
{
"or": [
{
"and": [
"canDash",
{
"or": [
"Plasma",
"ScrewAttack",
{
"and": [
"Wave",
{
"cycleFrames": 90
}
]
},
{
"and": [
"Spazer",
{
"cycleFrames": 90
}
]
},
{
"and": [
"canDodgeWhileShooting",
{
"cycleFrames": 285
}
]
}
]
}
]
},
{
"haveBlueSuit": {}
}
]
}
{
"or": [
"canWallJump",
"HiJump",
"h_crouchJumpDownGrab",
"SpaceJump"
]
}
{
"cycleFrames": 210
}Resets obstacles: R-Mode Farm cycle drops: 1 Multiviola, 1 Alcoon |
From: 3
Left Shaft - Middle Right Door
To: 3
Left Shaft - Middle Right Door
Requires: {
"obstaclesNotCleared": [
"R-Mode"
]
}
"h_heatedCrystalFlash" |
From: 3
Left Shaft - Middle Right Door
To: 3
Left Shaft - Middle Right Door
Entrance condition: {
"comeInShinecharging": {
"length": 3,
"openEnd": 0
}
}Requires: {
"or": [
{
"and": [
"h_enemyDrops",
"h_heatedCrystalSparkWithoutLenience"
]
},
"h_heatedCrystalSpark"
]
}Dev note: No lenience, since the Alcoons are a good Power Bomb farm. Since this can not be done with a flash suit, it is implicitly assumed Samus can crouch jump and down grab. |
From: 3
Left Shaft - Middle Right Door
To: 3
Left Shaft - Middle Right Door
Entrance condition: {
"comeInWithRMode": {}
}Clears obstacles: R-Mode |
From: 3
Left Shaft - Middle Right Door
To: 4
Left Shaft - Top Right Door
Entrance condition: {
"comeInShinecharging": {
"length": 3,
"openEnd": 0
}
}Requires: "HiJump"
"canTrickyJump"
"canShinechargeMovementTricky"
{
"heatFrames": 170
}
{
"shineChargeFrames": 165
}Exit condition: {
"leaveShinecharged": {}
}Unlocks doors: {"types":["super"],"requires":[]}
{"types":["missiles","powerbomb"],"requires":["never"]} |
From: 3
Left Shaft - Middle Right Door
To: 4
Left Shaft - Top Right Door
Entrance condition: {
"comeInShinecharged": {}
}Requires: {
"or": [
{
"shineChargeFrames": 150
},
{
"and": [
"canSpeedyJump",
{
"shineChargeFrames": 140
}
]
}
]
}
"HiJump"
"canTrickyJump"
"canShinechargeMovementComplex"
{
"shinespark": {
"frames": 9,
"excessFrames": 0
}
}
{
"heatFrames": 170
}Exit condition: {
"leaveWithSpark": {}
}Unlocks doors: {"types":["super"],"requires":[]}
{"types":["missiles","powerbomb"],"requires":["never"]} |
From: 3
Left Shaft - Middle Right Door
To: 4
Left Shaft - Top Right Door
Wait for the Alcoon to walk off the edge. Use it and the Multiviola as platforms. Spawn the Alcoon, then run back to the right so it will not stop and fire projectiles. Requires: "canTrickyUseFrozenEnemies"
{
"heatFrames": 1250
}
{
"or": [
"canDash",
{
"heatFrames": 30
}
]
}Dev note: FIXME: split this into 3->7 and 7->4 strats. |
From: 3
Left Shaft - Middle Right Door
To: 4
Left Shaft - Top Right Door
Entrance condition: {
"comeInGettingBlueSpeed": {
"length": 3,
"openEnd": 1,
"minExtraRunSpeed": "$2.0"
}
}Requires: "canXRayTurnaround"
"canLongChainTemporaryBlue"
{
"or": [
{
"and": [
"HiJump",
{
"heatFrames": 370
}
]
},
{
"and": [
"canTrickySpringBallJump",
{
"heatFrames": 380
}
]
}
]
}Exit condition: {
"leaveWithTemporaryBlue": {}
}Unlocks doors: {"types":["super","powerbomb"],"requires":[]}
{"types":["missiles"],"requires":[{"heatFrames":50}]}Dev note: FIXME: This could be done with lower run speed, at the cost of more heat frames. |
From: 3
Left Shaft - Middle Right Door
To: 4
Left Shaft - Top Right Door
It is important avoid touching the invisible fireballs the Alcoons place. Entrance condition: {
"comeInWithGMode": {
"mode": "any",
"morphed": false
}
}Requires: {
"or": [
"h_crouchJumpDownGrab",
"HiJump",
"canWallJump",
"SpaceJump",
"canSpringBallJumpMidAir",
"canIBJ"
]
}
"h_heatedGModeOpenDifferentDoor"Dev note: Frozen Alcoon platforms and Artificial morph IBJ are not included, as Samus can crouch jump and down grab; they can be considered if G-mode + flash suits are added, though they are still likely not useful. FIXME: It is possible to kill a Multiviola in the gap in the floor, but Samus only gets one attempt, and its very difficult to escape with a small Energy drop. |
From: 3
Left Shaft - Middle Right Door
To: 5
Far Right Door
It is important avoid touching the invisible fireballs the Alcoons place. It is possible to kill them without any beam upgrades or ammo by jumping and shooting horizontally near the floor surface. Stay near the far wall when shooting to prevent getting too close and triggering their jump. After entering the morph tunnel, roll through the two camera scroll blocks a few times to overload PLMs. They are at the entrance and two tiles in the tunnel. Exit G-mode and go through the room to the far right door. Entrance condition: {
"comeInWithGMode": {
"mode": "any",
"morphed": false
}
}Requires: "Morph"
{
"or": [
"HiJump",
"canWallJump",
"SpaceJump",
"canSpringBallJumpMidAir",
"canIBJ",
{
"and": [
"h_crouchJumpDownGrab",
"canBombHorizontally"
]
},
{
"and": [
"h_crouchJumpDownGrab",
"canTrickyUseFrozenEnemies"
]
}
]
}
"h_heatedGModeOffCameraDoor"Dev note: Frozen Alcoon platforms and Artificial morph IBJ are not included, as Samus can crouch jump and down grab; they can be considered if G-mode + flash suits are added, though they are still likely not useful. |
From: 3
Left Shaft - Middle Right Door
To: 5
Far Right Door
It is important avoid touching the invisible fireballs the Alcoons place. Jump over them or kill the Alcoons with Power Bombs. After entering the morph tunnel, roll through the two camera scroll blocks a few times to overload PLMs. They are at the entrance and two tiles in the tunnel. Exit G-mode and go through the room to the far right door. Entrance condition: {
"comeInWithGMode": {
"mode": "any",
"morphed": true
}
}Requires: {
"or": [
{
"and": [
"h_artificialMorphIBJ",
{
"ammo": {
"type": "PowerBomb",
"count": 2
}
}
]
},
{
"and": [
"h_artificialMorphSpringBall",
"HiJump"
]
},
{
"and": [
"h_artificialMorphSpringBallBombJump",
{
"or": [
"h_artificialMorphBombs",
{
"ammo": {
"type": "PowerBomb",
"count": 3
}
}
]
}
]
}
]
}
"h_heatedGModeOffCameraDoor" |
From: 3
Left Shaft - Middle Right Door
To: 7
Left Shaft - Middle Junction
Requires: {
"or": [
{
"and": [
"canWallJump",
{
  "heatFrames": 120
}
]
},
{
"and": [
"HiJump",
{
"heatFrames": 110
}
]
},
{
"and": [
"h_heatedCrouchJumpDownGrab",
{
"heatFrames": 150
}
]
},
{
"and": [
"SpaceJump",
{
"heatFrames": 155
}
]
},
{
"and": [
"canSpringBallJumpMidAir",
{
"heatFrames": 180
}
]
}
]
}
{
"or": [
"canDash",
{
"and": [
{
"haveBlueSuit": {}
},
{
"heatFrames": 45
}
]
}
]
} |
From: 3
Left Shaft - Middle Right Door
To: 7
Left Shaft - Middle Junction
Requires: "canIBJ"
{
"or": [
{
"heatFrames": 770
},
{
"and": [
"canJumpIntoIBJ",
{
"heatFrames": 320
}
]
},
{
"and": [
"canDoubleBombJump",
{
"heatFrames": 275
}
]
}
]
} |
From: 3
Left Shaft - Middle Right Door
To: 8
Left Shaft - Bottom Junction
Requires: {
"heatFrames": 65
}
{
"or": [
"canDash",
{
"heatFrames": 5
}
]
} |
From: 4
Left Shaft - Top Right Door
To: 1
Left Shaft - Top Left Door
Entrance condition: {
"comeInShinecharging": {
"length": 3,
"openEnd": 0
}
}Requires: "HiJump"
"canTrickyJump"
"canShinechargeMovementTricky"
{
"or": [
{
"ammo": {
"type": "Missile",
"count": 1
}
},
"Plasma"
]
}
{
"shinespark": {
"frames": 14,
"excessFrames": 0
}
}
{
"heatFrames": 190
}Exit condition: {
"leaveWithSpark": {}
}Unlocks doors: {"types":["super"],"requires":[]}
{"types":["missiles","powerbomb"],"requires":["never"]} |
From: 4
Left Shaft - Top Right Door
To: 1
Left Shaft - Top Left Door
Entrance condition: {
"comeInGettingBlueSpeed": {
"length": 3,
"openEnd": 1,
"minExtraRunSpeed": "$2.0"
}
}Requires: "canXRayTurnaround"
"canLongChainTemporaryBlue"
{
"or": [
{
"and": [
"HiJump",
{
"heatFrames": 490
}
]
},
{
"and": [
"canTrickySpringBallJump",
{
"heatFrames": 580
}
]
}
]
}Exit condition: {
"leaveWithTemporaryBlue": {}
}Unlocks doors: {"types":["super","powerbomb"],"requires":[]}
{"types":["missiles"],"requires":[{"heatFrames":50}]}Dev note: FIXME: This could be done with lower run speed, at the cost of more heat frames. |
From: 4
Left Shaft - Top Right Door
To: 1
Left Shaft - Top Left Door
It is possible to kill a Multiviola by the door and pause abuse to grab its Energy drop on G-mode exit. It is important avoid touching the invisible fireballs the Alcoons place, and to prevent them from shooting too many fireballs, as they will eventually prevent drops from appearing. One easy way to do this without any beam upgrades or ammo is to kill them before they jump. This can be done from below by jumping and shooting horizontally near the floor surface. Stay near the far wall when shooting to prevent getting too close and triggering their jump. Entrance condition: {
"comeInWithGMode": {
"mode": "any",
"morphed": false
}
}Requires: {
"or": [
"h_crouchJumpDownGrab",
"HiJump",
"canWallJump",
"SpaceJump",
"canSpringBallJumpMidAir"
]
}
{
  "or": [
    "h_heatedGModeOpenDifferentDoor",
    {
      "and": [
        "h_heatedGModePauseAbuse",
        "canFarmWhileShooting",
        "canTrickyDodgeEnemies"
      ]
    }
  ]
}Dev note: Frozen Alcoon platforms and Artificial morph IBJ are not included, as Samus can crouch jump and down grab; they can be considered if G-mode + flash suits are added, though they are still likely not useful. Those are also likely not compatible with preventing the Alcoons from overloading drops. |
From: 4
Left Shaft - Top Right Door
To: 1
Left Shaft - Top Left Door
Entrance condition: {
"comeInWithGrappleTeleport": {
"blockPositions": [
[
5,
3
],
[
7,
2
]
]
}
}Requires: {
"heatFrames": 45
} |
From: 4
Left Shaft - Top Right Door
To: 1
Left Shaft - Top Left Door
Entrance condition: {
"comeInWithGrappleTeleport": {
"blockPositions": [
[
3,
12
]
]
}
}Bypasses door shell: true |
From: 4
Left Shaft - Top Right Door
To: 1
Left Shaft - Top Left Door
Entrance condition: {
"comeInWithGrappleTeleport": {
"blockPositions": [
[
3,
12
]
]
}
}Exit condition: {
"leaveWithGrappleTeleport": {
"blockPositions": [
[
3,
12
]
]
}
}Bypasses door shell: true |
From: 4
Left Shaft - Top Right Door
To: 1
Left Shaft - Top Left Door
Exit the previous room with Samus in a standing pose (while grappled). After teleporting, press right to release Grapple while staying standing (not being forced into a crouch). Then X-ray climb 1 screen to get up to the door transition, without needing to open the door. Entrance condition: {
"comeInWithGrappleTeleport": {
"blockPositions": [
[
2,
28
]
]
}
}Requires: "canXRayClimb"
{
"heatFrames": 1600
}Bypasses door shell: true |
From: 4
Left Shaft - Top Right Door
To: 2
Left Shaft - Bottom Right Door
Entrance condition: {
"comeInShinecharging": {
"length": 3,
"openEnd": 0
}
}Requires: "canXRayCancelShinecharge"
"canXRayTurnaround"
"canLongChainTemporaryBlue"
{
"heatFrames": 945
}Exit condition: {
"leaveWithTemporaryBlue": {}
}Unlocks doors: {"types":["super","powerbomb"],"requires":[]}
{"types":["missiles"],"requires":[{"heatFrames":50}]} |
From: 4
Left Shaft - Top Right Door
To: 2
Left Shaft - Bottom Right Door
It is possible to kill a Multiviola by the door and pause abuse to grab its Energy drop on G-mode exit. It is important avoid touching the invisible fireballs the Alcoons place, and to prevent them from shooting too many fireballs, as they will eventually prevent drops from appearing. Either kill them or avoid them then kill the Multiviola near the door without too much delay. Entrance condition: {
"comeInWithGMode": {
"mode": "any",
"morphed": false
}
}Requires: {
"or": [
"h_heatedGModeOpenDifferentDoor",
"h_heatedGModePauseAbuse"
]
} |
From: 4
Left Shaft - Top Right Door
To: 3
Left Shaft - Middle Right Door
Entrance condition: {
"comeInShinecharging": {
"length": 3,
"openEnd": 1
}
}Requires: {
"or": [
{
"and": [
"canShinechargeMovementComplex",
{
"heatFrames": 215
},
{
"shinespark": {
"frames": 15,
"excessFrames": 0
}
}
]
},
{
"and": [
"canShinechargeMovementTricky",
{
"heatFrames": 195
},
{
"shinespark": {
"frames": 5,
"excessFrames": 0
}
}
]
}
]
}Exit condition: {
"leaveWithSpark": {}
}Unlocks doors: {"types":["super"],"requires":[]}
{"types":["missiles","powerbomb"],"requires":["never"]} |
From: 4
Left Shaft - Top Right Door
To: 3
Left Shaft - Middle Right Door
Entrance condition: {
"comeInShinecharging": {
"length": 3,
"openEnd": 0
}
}Requires: "canXRayCancelShinecharge"
"canXRayTurnaround"
"canLongChainTemporaryBlue"
{
"heatFrames": 500
}Exit condition: {
"leaveWithTemporaryBlue": {}
}Unlocks doors: {"types":["super","powerbomb"],"requires":[]}
{"types":["missiles"],"requires":[{"heatFrames":50}]} |
From: 4
Left Shaft - Top Right Door
To: 3
Left Shaft - Middle Right Door
It is important avoid touching the invisible fireballs the Alcoons place. Entrance condition: {
"comeInWithGMode": {
"mode": "any",
"morphed": false
}
}Requires: "h_heatedGModeOpenDifferentDoor" |
From: 4
Left Shaft - Top Right Door
To: 4
Left Shaft - Top Right Door
Exit condition: {
"leaveWithRunway": {
"length": 4,
"openEnd": 1
}
} |
From: 4
Left Shaft - Top Right Door
To: 4
Left Shaft - Top Right Door
Requires: {
"heatFrames": 140
}
"SpaceJump"Exit condition: {
"leaveSpinning": {
"remoteRunway": {
"length": 5,
"openEnd": 1
}
}
} |
From: 4
Left Shaft - Top Right Door
To: 4
Left Shaft - Top Right Door
Requires: {
"heatFrames": 140
}Exit condition: {
"leaveWithMockball": {
"remoteRunway": {
"length": 7,
"openEnd": 1
},
"landingRunway": {
"length": 4,
"openEnd": 1
}
}
} |
From: 4
Left Shaft - Top Right Door
To: 4
Left Shaft - Top Right Door
Requires: {
"heatFrames": 140
}Exit condition: {
"leaveWithSpringBallBounce": {
"remoteRunway": {
"length": 7,
"openEnd": 1
},
"landingRunway": {
"length": 4,
"openEnd": 1
},
"movementType": "uncontrolled"
}
} |
From: 4
Left Shaft - Top Right Door
To: 4
Left Shaft - Top Right Door
Requires: {
"heatFrames": 140
}
"h_heatedRemoteRunwayPreciseSpaceJump"Exit condition: {
"leaveSpaceJumping": {
"remoteRunway": {
"length": 7,
"openEnd": 0
}
}
} |
From: 4
Left Shaft - Top Right Door
To: 4
Left Shaft - Top Right Door
Requires: "h_heatProof"
{
"resetRoom": {
"nodes": [
4
]
}
}
{
"or": [
{
"and": [
"canDash",
{
"or": [
"Plasma",
"ScrewAttack",
{
"and": [
"Wave",
{
"cycleFrames": 20
}
]
},
{
"and": [
"Spazer",
{
"cycleFrames": 90
}
]
},
{
"and": [
"canDodgeWhileShooting",
{
"cycleFrames": 260
},
{
"or": [
"canFarmWhileShooting",
{
"cycleFrames": 90
}
]
}
]
}
]
}
]
},
{
"and": [
{
"haveBlueSuit": {}
},
{
"cycleFrames": 90
}
]
}
]
}
{
"or": [
"canWallJump",
"HiJump",
"h_crouchJumpDownGrab",
"SpaceJump"
]
}
{
"cycleFrames": 450
}Resets obstacles: R-Mode Farm cycle drops: 1 Multiviola, 2 Alcoon |
From: 4
Left Shaft - Top Right Door
To: 4
Left Shaft - Top Right Door
Jump and aim down two to three times to activate the Multiviola. Requires: "h_heatProof"
{
"resetRoom": {
"nodes": [
4
]
}
}
{
"cycleFrames": 200
}
"canCameraManip"
{
"or": [
{
"and": [
"canDash",
{
"or": [
"Plasma",
"Wave",
"Spazer",
{
"cycleFrames": 30
}
]
}
]
},
{
"haveBlueSuit": {}
}
]
}Resets obstacles: R-Mode Farm cycle drops: 1 Multiviola |
From: 4
Left Shaft - Top Right Door
To: 4
Left Shaft - Top Right Door
Requires: {
"obstaclesNotCleared": [
"R-Mode"
]
}
"h_heatedCrystalFlash" |
From: 4
Left Shaft - Top Right Door
To: 4
Left Shaft - Top Right Door
Entrance condition: {
"comeInShinecharging": {
"length": 3,
"openEnd": 0
}
}Requires: {
"or": [
{
"and": [
"h_enemyDrops",
"h_heatedCrystalSparkWithoutLenience"
]
},
"h_heatedCrystalSpark"
]
}Dev note: No lenience, since the Alcoons are a good Power Bomb farm. Since this can not be done with a flash suit, it is implicitly assumed Samus can crouch jump and down grab. |
From: 4
Left Shaft - Top Right Door
To: 4
Left Shaft - Top Right Door
Entrance condition: {
"comeInWithRMode": {}
}Clears obstacles: R-Mode |
From: 4
Left Shaft - Top Right Door
To: 4
Left Shaft - Top Right Door
Requires: "canComplexGMode"
{
"or": [
"canWallJump",
"HiJump",
"SpaceJump",
"h_heatedCrouchJumpDownGrab",
"Wave"
]
}
{
"heatFrames": 950
}
{
"or": [
"canTrickyJump",
"Wave",
"Spazer",
"Plasma",
{
"ammo": {
"type": "Missile",
"count": 1
}
},
{
"ammo": {
"type": "Super",
"count": 1
}
},
{
"enemyDamage": {
"enemy": "Alcoon",
"type": "fireball",
"hits": 1
}
}
]
}Exit condition: {
"leaveWithGModeSetup": {}
} |
From: 4
Left Shaft - Top Right Door
To: 5
Far Right Door
It is important avoid touching the invisible fireballs the Alcoons place. It is possible to kill them without any beam upgrades or ammo by jumping and shooting horizontally near the floor surface. Stay near the far wall when shooting to prevent getting too close and triggering their jump. After entering the morph tunnel, roll through the two camera scroll blocks a few times to overload PLMs. They are at the entrance and two tiles in the tunnel. Exit G-mode and go through the room to the far right door. Entrance condition: {
"comeInWithGMode": {
"mode": "any",
"morphed": false
}
}Requires: "Morph"
{
"or": [
"HiJump",
"canWallJump",
"SpaceJump",
"canSpringBallJumpMidAir",
"canIBJ",
{
"and": [
"h_crouchJumpDownGrab",
"canBombHorizontally"
]
},
{
"and": [
"h_crouchJumpDownGrab",
"canTrickyUseFrozenEnemies"
]
}
]
}
"h_heatedGModeOffCameraDoor"Dev note: Frozen Alcoon platforms and Artificial morph IBJ are not included, as Samus can crouch jump and down grab; they can be considered if G-mode + flash suits are added, though they are still likely not useful. |
From: 4
Left Shaft - Top Right Door
To: 5
Far Right Door
It is important avoid touching the invisible fireballs the Alcoons place. Jump over them or kill the Alcoons with Power Bombs. After entering the morph tunnel, roll through the two camera scroll blocks a few times to overload PLMs. They are at the entrance and two tiles in the tunnel. Exit G-mode and go through the room to the far right door. Entrance condition: {
"comeInWithGMode": {
"mode": "any",
"morphed": true
}
}Requires: {
"or": [
{
"and": [
"h_artificialMorphIBJ",
"h_artificialMorphPowerBomb"
]
},
{
"and": [
"h_artificialMorphSpringBall",
"HiJump"
]
},
{
"and": [
"h_artificialMorphSpringBallBombJump",
"h_additionalBomb"
]
}
]
}
"h_heatedGModeOffCameraDoor" |
|
Requires: {
"or": [
{
"and": [
"canWallJump",
{
"heatFrames": 130
}
]
},
{
"and": [
"HiJump",
{
"heatFrames": 115
}
]
},
{
"and": [
"h_heatedCrouchJumpDownGrab",
{
"heatFrames": 150
}
]
},
{
"and": [
"SpaceJump",
{
"heatFrames": 155
}
]
},
{
"and": [
"canSpringBallJumpMidAir",
{
"heatFrames": 180
}
]
}
]
}
{
"or": [
"canDash",
{
"and": [
{
"haveBlueSuit": {}
},
{
"heatFrames": 40
}
]
}
]
} |
|
Kill the enemies, then IBJ. Requires: "canIBJ"
{
"or": [
{
"heatFrames": 735
},
{
"and": [
"canJumpIntoIBJ",
{
"heatFrames": 285
}
]
},
{
"and": [
"canDoubleBombJump",
{
"heatFrames": 240
}
]
}
]
}
{
"or": [
"canTrickyDodgeEnemies",
{
"heatFrames": 100
}
]
}
{
"or": [
"canDash",
{
"and": [
{
"haveBlueSuit": {}
},
{
"heatFrames": 40
}
]
}
]
} |
From: 4
Left Shaft - Top Right Door
To: 6
Left Shaft - Top Junction
Spawn the Alcoon, then run back to the right so it will not stop and fire projectiles. Then wait for it to walk off the ledge. Requires: "canCameraManip"
"canTrickyUseFrozenEnemies"
{
"heatFrames": 750
}
{
"or": [
"canDash",
{
"heatFrames": 40
}
]
} |
From: 4
Left Shaft - Top Right Door
To: 6
Left Shaft - Top Junction
Jump and aim down twice to bring the Multiviola below onto camera. Freeze it and use it as a platform. Entrance condition: {
"comeInNormally": {}
}Requires: "canCameraManip"
"canTrickyUseFrozenEnemies"
{
"heatFrames": 330
} |
|
Requires: {
"heatFrames": 65
}
{
"or": [
"canDash",
{
"heatFrames": 5
}
]
} |
|
Entrance condition: {
"comeInWithGrappleTeleport": {
"blockPositions": [
[
5,
3
],
[
7,
2
]
]
}
}Requires: {
"heatFrames": 45
} |
From: 5
Far Right Door
To: 1
Left Shaft - Top Left Door
Entrance condition: {
"comeInWithGrappleTeleport": {
"blockPositions": [
[
3,
12
]
]
}
}Requires: {
"or": [
"h_heatedGrappleTeleportWallEscape",
{
"and": [
{
"doorUnlockedAtNode": 1
},
{
"heatFrames": 20
}
]
}
]
}
"canOffScreenMovement"
{
"enemyDamage": {
"enemy": "Multiviola",
"type": "contact",
"hits": 1
}
}Unlocks doors: {"types":["ammo"],"requires":[]} |
From: 5
Far Right Door
To: 1
Left Shaft - Top Left Door
Entrance condition: {
"comeInWithGrappleTeleport": {
"blockPositions": [
[
3,
12
]
]
}
}Bypasses door shell: true |
From: 5
Far Right Door
To: 1
Left Shaft - Top Left Door
Entrance condition: {
"comeInWithGrappleTeleport": {
"blockPositions": [
[
3,
12
]
]
}
}Exit condition: {
"leaveWithGrappleTeleport": {
"blockPositions": [
[
3,
12
]
]
}
}Bypasses door shell: true |
From: 5
Far Right Door
To: 1
Left Shaft - Top Left Door
Exit the previous room with Samus in a standing pose (while grappled). After teleporting, press right to release Grapple while staying standing (not being forced into a crouch). Then X-ray climb 1 screen to get up to the door transition, without needing to open the door. Entrance condition: {
"comeInWithGrappleTeleport": {
"blockPositions": [
[
2,
28
]
]
}
}Requires: "canXRayClimb"
{
"heatFrames": 1600
}Bypasses door shell: true |
|
Exit condition: {
"leaveWithRunway": {
"length": 4,
"openEnd": 0
}
} |
|
Requires: {
"obstaclesNotCleared": [
"R-Mode"
]
}
"h_heatedCrystalFlash" |
From: 5
Far Right Door
To: 5
Far Right Door
Entrance condition: {
"comeInShinecharging": {
"length": 3,
"openEnd": 0
}
}Requires: "h_heatedCrystalSpark" |
|
Entrance condition: {
"comeInWithRMode": {}
}Clears obstacles: R-Mode |
|
Requires: "canDash"
"Morph"
"ScrewAttack"
{
"heatFrames": 600
} |
|
Requires: "canDash"
"h_usePowerBomb"
{
"heatFrames": 660
} |
|
Requires: "canDash"
"h_useMorphBombs"
{
"heatFrames": 730
} |
|
Requires: {
"haveBlueSuit": {}
}
"Morph"
{
"heatFrames": 910
} |
From: 5
Far Right Door
To: 6
Left Shaft - Top Junction
Requires: "canDash"
{
"heatFrames": 250
}
"h_heatedCrystalFlash"
{
"heatFrames": 380
}Dev note: FIXME: a dashless option could be added here. |
From: 5
Far Right Door
To: 6
Left Shaft - Top Junction
Requires: "canDash"
{
"heatFrames": 450
}
{
"or": [
"ScrewAttack",
{
"and": [
"h_usePowerBomb",
{
"heatFrames": 40
}
]
},
{
"and": [
"h_useMorphBombs",
{
"heatFrames": 80
}
]
}
]
}
"h_heatedCrystalFlash"
{
"heatFrames": 250
}Dev note: FIXME: a dashless option could be added here. |
|
Requires: "Morph"
{
"useFlashSuit": {}
}
{
"or": [
{
"and": [
"h_heatProof",
{
"shinespark": {
"frames": 32,
"excessFrames": 10
}
}
]
},
{
"and": [
{
"shinespark": {
"frames": 53
}
},
{
"heatFrames": 520
}
]
}
]
} |
|
Requires: {
"or": [
{
"and": [
"canWallJump",
{
"heatFrames": 100
}
]
},
{
"and": [
"canWallJump",
"ScrewAttack",
{
"heatFrames": 85
}
]
},
{
"and": [
"HiJump",
{
"heatFrames": 95
}
]
},
{
"and": [
"HiJump",
"ScrewAttack",
{
"heatFrames": 75
}
]
},
{
"and": [
"HiJump",
"Plasma",
{
"heatFrames": 70
}
]
},
{
"and": [
"h_heatedCrouchJumpDownGrab",
{
"heatFrames": 100
}
]
},
{
"and": [
"SpaceJump",
{
"heatFrames": 115
}
]
},
{
"and": [
"canSpringBallJumpMidAir",
{
"heatFrames": 120
}
]
}
]
}
{
"or": [
"canDash",
{
"heatFrames": 30
}
]
}Unlocks doors: {"types":["missiles"],"requires":[{"heatFrames":30}]}
{"types":["powerbomb"],"requires":[{"heatFrames":70}]}Dev note: The heat frames account for bad scenarios of where the Multiviola may be (entering from node 4), which is why Screw Attack can be helpful. |
From: 6
Left Shaft - Top Junction
To: 1
Left Shaft - Top Left Door
Requires: "canDash"
{
"or": [
{
"and": [
"canWallJump",
{
"heatFrames": 80
}
]
},
{
"and": [
"canWallJump",
"ScrewAttack",
{
"heatFrames": 60
}
]
},
{
"and": [
"HiJump",
{
"heatFrames": 80
}
]
},
{
"and": [
"HiJump",
"ScrewAttack",
{
"heatFrames": 60
}
]
},
{
"and": [
"h_heatedCrouchJumpDownGrab",
{
"heatFrames": 80
}
]
},
{
"and": [
"SpaceJump",
{
"heatFrames": 80
}
]
},
{
"and": [
"canSpringBallJumpMidAir",
{
"heatFrames": 90
}
]
}
]
}Exit condition: {
"leaveWithRunway": {
"length": 8,
"openEnd": 1
}
}Unlocks doors: {"types":["missiles"],"requires":[{"heatFrames":50}]}
{"types":["super"],"requires":[]}
{"types":["powerbomb"],"requires":[{"heatFrames":70}]} |
|
Kill the enemies or carefully dodge them, then IBJ. Requires: "canIBJ"
{
"or": [
{
"heatFrames": 1500
},
{
"and": [
"canTrickyDodgeEnemies",
"canJumpIntoIBJ",
{
"heatFrames": 185
}
]
}
]
} |
From: 6
Left Shaft - Top Junction
To: 1
Left Shaft - Top Left Door
Requires: "canUseFrozenEnemies"
{
"heatFrames": 285
}
{
"or": [
"canDash",
{
"heatFrames": 15
}
]
}Dev note: FIXME: this represents a worst case Multiviola cycle. Typically freezing the Multiviola is faster but the Alcoon is also an option. |
|
Requires: "canDash"
{
"or": [
{
"heatFrames": 130
},
{
"and": [
{
"enemyKill": {
"enemies": [
[
"Alcoon"
]
],
"explicitWeapons": [
"ScrewAttack",
"Missile",
"Super",
"Wave+Plasma"
]
}
},
{
"heatFrames": 125
}
]
},
{
"and": [
"h_PlasmaHitbox",
{
"heatFrames": 125
}
]
}
]
}Unlocks doors: {"types":["missiles"],"requires":[{"heatFrames":20}]}
{"types":["powerbomb"],"requires":[{"heatFrames":20}]} |
From: 6
Left Shaft - Top Junction
To: 4
Left Shaft - Top Right Door
Requires: {
"haveBlueSuit": {}
}
{
"heatFrames": 170
} |
From: 6
Left Shaft - Top Junction
To: 4
Left Shaft - Top Right Door
Requires: "canDash"
{
"or": [
{
"heatFrames": 115
},
{
"and": [
{
"enemyKill": {
"enemies": [
[
"Alcoon"
]
],
"explicitWeapons": [
"ScrewAttack",
"Missile",
"Super",
"Wave+Plasma"
]
}
},
{
"heatFrames": 110
}
]
},
{
"and": [
"h_PlasmaHitbox",
{
"heatFrames": 110
}
]
}
]
}Exit condition: {
"leaveWithRunway": {
"length": 4,
"openEnd": 1
}
}Unlocks doors: {"types":["missiles"],"requires":[{"heatFrames":20}]}
{"types":["super"],"requires":[]}
{"types":["powerbomb"],"requires":[{"heatFrames":20}]} |
|
Requires: "canDash"
{
"or": [
{
"heatFrames": 145
},
{
"and": [
{
"enemyKill": {
"enemies": [
[
"Alcoon"
]
],
"explicitWeapons": [
"ScrewAttack",
"Missile",
"Super",
"Wave+Plasma"
]
}
},
{
"heatFrames": 140
}
]
},
{
"and": [
"h_PlasmaHitbox",
{
"heatFrames": 140
}
]
}
]
} |
From: 6
Left Shaft - Top Junction
To: 7
Left Shaft - Middle Junction
Requires: {
"haveBlueSuit": {}
}
{
"heatFrames": 170
} |
From: 7
Left Shaft - Middle Junction
To: 3
Left Shaft - Middle Right Door
Requires: "canDash"
{
"or": [
{
"heatFrames": 130
},
{
"and": [
{
"enemyKill": {
"enemies": [
[
"Alcoon"
]
],
"explicitWeapons": [
"ScrewAttack",
"Missile",
"Super",
"Wave+Plasma"
]
}
},
{
"heatFrames": 125
}
]
},
{
"and": [
"h_PlasmaHitbox",
{
"heatFrames": 125
}
]
}
]
}Unlocks doors: {"types":["missiles"],"requires":[{"heatFrames":20}]}
{"types":["powerbomb"],"requires":[{"heatFrames":10}]} |
From: 7
Left Shaft - Middle Junction
To: 3
Left Shaft - Middle Right Door
Requires: {
"haveBlueSuit": {}
}
{
"heatFrames": 170
} |
From: 7
Left Shaft - Middle Junction
To: 3
Left Shaft - Middle Right Door
Requires: "canDash"
{
"or": [
{
"heatFrames": 110
},
{
"and": [
{
"enemyKill": {
"enemies": [
[
"Alcoon"
]
],
"explicitWeapons": [
"ScrewAttack",
"Missile",
"Super",
"Wave+Plasma"
]
}
},
{
"heatFrames": 100
}
]
},
{
"and": [
"h_PlasmaHitbox",
{
"heatFrames": 100
}
]
}
]
}Exit condition: {
"leaveWithRunway": {
"length": 4,
"openEnd": 1
}
}Unlocks doors: {"types":["missiles"],"requires":[{"heatFrames":65}]}
{"types":["super"],"requires":[]}
{"types":["powerbomb"],"requires":[{"heatFrames":30}]} |
|
Requires: {
"or": [
{
"and": [
"canWallJump",
{
"heatFrames": 75
}
]
},
{
"and": [
"HiJump",
{
"heatFrames": 60
}
]
},
{
"and": [
"h_heatedCrouchJumpDownGrab",
{
"heatFrames": 110
}
]
},
{
"and": [
"SpaceJump",
{
"heatFrames": 95
}
]
},
{
"and": [
"canSpringBallJumpMidAir",
{
"heatFrames": 120
}
]
}
]
} |
From: 7
Left Shaft - Middle Junction
To: 4
Left Shaft - Top Right Door
Requires: "canDash"
{
"or": [
{
"and": [
"canWallJump",
{
"heatFrames": 55
}
]
},
{
"and": [
"HiJump",
{
"heatFrames": 40
}
]
},
{
"and": [
"h_heatedCrouchJumpDownGrab",
{
"heatFrames": 90
}
]
},
{
"and": [
"SpaceJump",
{
"heatFrames": 75
}
]
},
{
"and": [
"canSpringBallJumpMidAir",
{
"heatFrames": 100
}
]
}
]
}Exit condition: {
"leaveWithRunway": {
"length": 4,
"openEnd": 1
}
}Unlocks doors: {"types":["missiles"],"requires":[{"heatFrames":50}]}
{"types":["super"],"requires":[]}
{"types":["powerbomb"],"requires":[{"heatFrames":110}]} |
|
Requires: "canIBJ"
{
"or": [
{
"heatFrames": 670
},
{
"and": [
"canJumpIntoIBJ",
{
"heatFrames": 220
}
]
},
{
"and": [
"canDoubleBombJump",
{
"heatFrames": 175
}
]
}
]
} |
|
Requires: {
"or": [
{
"and": [
"canWallJump",
{
"heatFrames": 150
}
]
},
{
"and": [
"HiJump",
{
"heatFrames": 110
}
]
},
{
"and": [
"h_heatedCrouchJumpDownGrab",
"h_heatedCrouchJumpDownGrab",
{
"heatFrames": 270
}
]
},
{
"and": [
"h_heatedCrouchJumpDownGrab",
"h_heatedCrouchJumpDownGrab",
{
"enemyKill": {
"enemies": [
[
"Multiviola"
]
],
"explicitWeapons": [
"Missile",
"Super",
"Wave",
"Plasma"
]
}
},
{
"heatFrames": 200
}
]
},
{
"and": [
"SpaceJump",
{
"heatFrames": 205
}
]
}
]
}
{
"or": [
"canDash",
{
"and": [
{
"haveBlueSuit": {}
},
{
"heatFrames": 40
}
]
}
]
} |
|
Requires: "canDash"
{
"or": [
{
"heatFrames": 160
},
{
"and": [
{
"enemyKill": {
"enemies": [
[
"Multiviola",
"Alcoon"
]
],
"explicitWeapons": [
"ScrewAttack",
"Wave+Plasma"
]
}
},
{
"heatFrames": 145
}
]
},
{
"and": [
{
"enemyKill": {
"enemies": [
[
"Multiviola"
]
],
"explicitWeapons": [
"Missile",
"Super",
"Plasma"
]
}
},
{
"heatFrames": 150
}
]
},
{
"and": [
"h_PlasmaHitbox",
{
"heatFrames": 145
}
]
}
]
}Dev note: This includes time to wait for the Multiviola to move out of the way (if it can't be quickly killed), as will normally be a problem when entering through the upper doors (node 1 or 4). |
From: 7
Left Shaft - Middle Junction
To: 8
Left Shaft - Bottom Junction
Requires: {
"haveBlueSuit": {}
}
{
"heatFrames": 170
} |
From: 8
Left Shaft - Bottom Junction
To: 2
Left Shaft - Bottom Right Door
Requires: "canDash"
{
"or": [
{
"heatFrames": 115
},
{
"and": [
{
"enemyKill": {
"enemies": [
[
"Alcoon"
]
],
"explicitWeapons": [
"ScrewAttack",
"Missile",
"Super",
"Wave+Plasma"
]
}
},
{
"heatFrames": 110
}
]
},
{
"and": [
"h_PlasmaHitbox",
{
"heatFrames": 110
}
]
}
]
}Unlocks doors: {"types":["missiles"],"requires":[{"heatFrames":30}]}
{"types":["powerbomb"],"requires":[{"heatFrames":10}]} |
From: 8
Left Shaft - Bottom Junction
To: 2
Left Shaft - Bottom Right Door
Requires: {
"haveBlueSuit": {}
}
{
"heatFrames": 140
} |
From: 8
Left Shaft - Bottom Junction
To: 2
Left Shaft - Bottom Right Door
Requires: "canDash"
{
"heatFrames": 70
}Exit condition: {
"leaveWithRunway": {
"length": 13,
"openEnd": 0,
"gentleDownTiles": 4
}
}Unlocks doors: {"types":["missiles"],"requires":[{"heatFrames":50}]}
{"types":["super"],"requires":[]}
{"types":["powerbomb"],"requires":[{"heatFrames":30}]} |
From: 8
Left Shaft - Bottom Junction
To: 3
Left Shaft - Middle Right Door
Requires: {
"or": [
{
"and": [
"canWallJump",
{
"heatFrames": 85
}
]
},
{
"and": [
"canWallJump",
"ScrewAttack",
{
"heatFrames": 65
}
]
},
{
"and": [
"HiJump",
{
"heatFrames": 75
}
]
},
{
"and": [
"HiJump",
"ScrewAttack",
{
"heatFrames": 55
}
]
},
{
"and": [
"h_heatedCrouchJumpDownGrab",
{
"heatFrames": 80
},
{
"or": [
{
"noBlueSuit": {}
},
"canXRayCancelShinecharge",
"canMidAirMorph",
{
"heatFrames": 60
}
]
}
]
},
{
"and": [
"SpaceJump",
{
"heatFrames": 100
}
]
},
{
"and": [
"canSpringBallJumpMidAir",
{
"heatFrames": 95
}
]
}
]
} |
From: 8
Left Shaft - Bottom Junction
To: 3
Left Shaft - Middle Right Door
Requires: "canIBJ"
{
"or": [
{
"heatFrames": 670
},
{
"and": [
"canJumpIntoIBJ",
{
"heatFrames": 220
}
]
},
{
"and": [
"canDoubleBombJump",
{
"heatFrames": 175
}
]
}
]
} |
From: 8
Left Shaft - Bottom Junction
To: 3
Left Shaft - Middle Right Door
Requires: "canDash"
{
"or": [
{
"and": [
"canWallJump",
{
"heatFrames": 65
}
]
},
{
"and": [
"canWallJump",
"ScrewAttack",
{
"heatFrames": 45
}
]
},
{
"and": [
"HiJump",
{
"heatFrames": 55
}
]
},
{
"and": [
"HiJump",
"ScrewAttack",
{
"heatFrames": 35
}
]
},
{
"and": [
"h_heatedCrouchJumpDownGrab",
{
"heatFrames": 60
}
]
},
{
"and": [
"SpaceJump",
{
"heatFrames": 80
}
]
},
{
"and": [
"canSpringBallJumpMidAir",
{
"heatFrames": 75
}
]
}
]
}Exit condition: {
"leaveWithRunway": {
"length": 4,
"openEnd": 1
}
}Unlocks doors: {"types":["missiles"],"requires":[{"heatFrames":50}]}
{"types":["super"],"requires":[]}
{"types":["powerbomb"],"requires":[{"heatFrames":110}]} |
From: 8
Left Shaft - Bottom Junction
To: 3
Left Shaft - Middle Right Door
Requires: {
"heatFrames": 65
}
"h_storedSpark"
{
"or": [
{
"shinespark": {
"frames": 4,
"excessFrames": 3
}
},
{
"and": [
"canDownGrab",
{
"shinespark": {
"frames": 4,
"excessFrames": 4
}
}
]
}
]
}
{
"heatFrames": 105
} |
|
Requires: {
"or": [
{
"and": [
"canWallJump",
{
"heatFrames": 160
}
]
},
{
"and": [
"canWallJump",
"ScrewAttack",
{
"heatFrames": 140
}
]
},
{
"and": [
"HiJump",
{
"heatFrames": 135
}
]
},
{
"and": [
"HiJump",
"ScrewAttack",
{
"heatFrames": 105
}
]
},
{
"and": [
"h_heatedCrouchJumpDownGrab",
"h_heatedCrouchJumpDownGrab",
{
"heatFrames": 195
},
{
"or": [
{
"noBlueSuit": {}
},
"canXRayCancelShinecharge",
"canMidAirMorph",
{
"heatFrames": 60
}
]
}
]
},
{
"and": [
"SpaceJump",
{
"heatFrames": 210
}
]
},
{
"and": [
"canSpringBallJumpMidAir",
{
"heatFrames": 280
}
]
}
]
}
{
"or": [
"canDash",
{
"and": [
{
"haveBlueSuit": {}
},
{
"heatFrames": 40
}
]
}
]
} |
{
"$schema": "../../../schema/m3-room.schema.json",
"id": 103,
"name": "Single Chamber",
"area": "Norfair",
"subarea": "Upper",
"subsubarea": "East",
"roomAddress": "0x7AD5E",
"roomEnvironments": [
{
"heated": true
}
],
"mapTileMask": [
[
1,
1,
1,
1,
1,
1
],
[
1,
0,
0,
0,
0,
0
],
[
1,
0,
0,
0,
0,
0
],
[
1,
0,
0,
0,
0,
0
]
],
"nodes": [
{
"id": 1,
"name": "Left Shaft - Top Left Door",
"nodeType": "door",
"nodeSubType": "blue",
"nodeAddress": "0x00195ca",
"doorOrientation": "left",
"doorEnvironments": [
{
"physics": "air"
}
],
"mapTileMask": [
[
2,
1,
1,
1,
1,
1
],
[
1,
0,
0,
0,
0,
0
],
[
1,
0,
0,
0,
0,
0
],
[
1,
0,
0,
0,
0,
0
]
]
},
{
"id": 2,
"name": "Left Shaft - Bottom Right Door",
"nodeType": "door",
"nodeSubType": "blue",
"nodeAddress": "0x00195ee",
"doorOrientation": "right",
"doorEnvironments": [
{
"physics": "air"
}
],
"mapTileMask": [
[
1,
1,
1,
1,
1,
1
],
[
1,
0,
0,
0,
0,
0
],
[
1,
0,
0,
0,
0,
0
],
[
2,
0,
0,
0,
0,
0
]
]
},
{
"id": 3,
"name": "Left Shaft - Middle Right Door",
"nodeType": "door",
"nodeSubType": "blue",
"nodeAddress": "0x00195e2",
"doorOrientation": "right",
"doorEnvironments": [
{
"physics": "air"
}
],
"mapTileMask": [
[
1,
1,
1,
1,
1,
1
],
[
1,
0,
0,
0,
0,
0
],
[
2,
0,
0,
0,
0,
0
],
[
1,
0,
0,
0,
0,
0
]
]
},
{
"id": 4,
"name": "Left Shaft - Top Right Door",
"nodeType": "door",
"nodeSubType": "red",
"nodeAddress": "0x00195d6",
"doorOrientation": "right",
"doorEnvironments": [
{
"physics": "air"
}
],
"mapTileMask": [
[
1,
1,
1,
1,
1,
1
],
[
2,
0,
0,
0,
0,
0
],
[
1,
0,
0,
0,
0,
0
],
[
1,
0,
0,
0,
0,
0
]
]
},
{
"id": 5,
"name": "Far Right Door",
"nodeType": "door",
"nodeSubType": "blue",
"nodeAddress": "0x00195fa",
"doorOrientation": "right",
"doorEnvironments": [
{
"physics": "air"
}
],
"mapTileMask": [
[
1,
2,
2,
2,
2,
2
],
[
1,
0,
0,
0,
0,
0
],
[
1,
0,
0,
0,
0,
0
],
[
1,
0,
0,
0,
0,
0
]
]
},
{
"id": 6,
"name": "Left Shaft - Top Junction",
"nodeType": "junction",
"nodeSubType": "junction",
"mapTileMask": [
[
2,
1,
1,
1,
1,
1
],
[
2,
0,
0,
0,
0,
0
],
[
1,
0,
0,
0,
0,
0
],
[
1,
0,
0,
0,
0,
0
]
],
"note": "Represents the platform where Samus will land after falling from the morph tunnel when arriving from Lower Norfair."
},
{
"id": 7,
"name": "Left Shaft - Middle Junction",
"nodeType": "junction",
"nodeSubType": "junction",
"mapTileMask": [
[
1,
1,
1,
1,
1,
1
],
[
2,
0,
0,
0,
0,
0
],
[
2,
0,
0,
0,
0,
0
],
[
1,
0,
0,
0,
0,
0
]
],
"note": "Represents the platform below the top right door of the left shaft."
},
{
"id": 8,
"name": "Left Shaft - Bottom Junction",
"nodeType": "junction",
"nodeSubType": "junction",
"mapTileMask": [
[
1,
1,
1,
1,
1,
1
],
[
1,
0,
0,
0,
0,
0
],
[
2,
0,
0,
0,
0,
0
],
[
2,
0,
0,
0,
0,
0
]
],
"note": "Represents the platform below the middle right door of the left shaft."
}
],
"obstacles": [
{
"id": "R-Mode",
"name": "Entered with R-Mode",
"obstacleType": "abstract"
}
],
"enemies": [
{
"id": "e1",
"groupName": "Single Chamber Top Alcoons",
"enemyName": "Alcoon",
"quantity": 2,
"homeNodes": [
6
]
},
{
"id": "e2",
"groupName": "Single Chamber Top Multiviola",
"enemyName": "Multiviola",
"quantity": 1,
"homeNodes": [
6
]
},
{
"id": "e3",
"groupName": "Single Chamber Middle Alcoon",
"enemyName": "Alcoon",
"quantity": 1,
"betweenNodes": [
3,
4
]
},
{
"id": "e4",
"groupName": "Single Chamber Middle Multiviola",
"enemyName": "Multiviola",
"quantity": 1,
"betweenNodes": [
3,
4
]
},
{
"id": "e5",
"groupName": "Single Chamber Bottom Alcoon",
"enemyName": "Alcoon",
"quantity": 1,
"betweenNodes": [
2,
3
]
},
{
"id": "e6",
"groupName": "Single Chamber Bottom Multiviola",
"enemyName": "Multiviola",
"quantity": 1,
"betweenNodes": [
2,
3
]
}
],
"strats": [
{
"link": [
1,
1
],
"name": "Base (Unlock Door)",
"requires": [],
"unlocksDoors": [
{
"types": [
"missiles"
],
"requires": [
{
"heatFrames": 50
}
]
},
{
"types": [
"super"
],
"requires": []
},
{
"types": [
"powerbomb"
],
"requires": [
{
"heatFrames": 110
}
]
}
],
"flashSuitChecked": true,
"blueSuitChecked": true
},
{
"link": [
1,
1
],
"name": "Base (Come In Normally)",
"entranceCondition": {
"comeInNormally": {}
},
"requires": [],
"flashSuitChecked": true,
"blueSuitChecked": true
},
{
"link": [
1,
1
],
"name": "Base (Come In With Mockball)",
"entranceCondition": {
"comeInWithMockball": {
"adjacentMinTiles": 0,
"remoteAndLandingMinTiles": [
[
0,
0
]
],
"speedBooster": "any"
}
},
"requires": [
{
"heatFrames": 10
}
],
"flashSuitChecked": true,
"blueSuitChecked": true
},
{
"link": [
2,
2
],
"name": "Base (Unlock Door)",
"requires": [],
"unlocksDoors": [
{
"types": [
"missiles"
],
"requires": [
{
"heatFrames": 50
}
]
},
{
"types": [
"super"
],
"requires": []
},
{
"types": [
"powerbomb"
],
"requires": [
{
"heatFrames": 110
}
]
}
],
"flashSuitChecked": true,
"blueSuitChecked": true
},
{
"link": [
2,
2
],
"name": "Base (Come In Normally)",
"entranceCondition": {
"comeInNormally": {}
},
"requires": [],
"flashSuitChecked": true,
"blueSuitChecked": true
},
{
"link": [
2,
2
],
"name": "Base (Come In With Mockball)",
"entranceCondition": {
"comeInWithMockball": {
"adjacentMinTiles": 0,
"remoteAndLandingMinTiles": [
[
0,
0
]
],
"speedBooster": "any"
}
},
"requires": [
{
"heatFrames": 10
}
],
"flashSuitChecked": true,
"blueSuitChecked": true
},
{
"link": [
3,
3
],
"name": "Base (Unlock Door)",
"requires": [],
"unlocksDoors": [
{
"types": [
"missiles"
],
"requires": [
{
"heatFrames": 50
}
]
},
{
"types": [
"super"
],
"requires": []
},
{
"types": [
"powerbomb"
],
"requires": [
{
"heatFrames": 110
}
]
}
],
"flashSuitChecked": true,
"blueSuitChecked": true
},
{
"link": [
3,
3
],
"name": "Base (Come In Normally)",
"entranceCondition": {
"comeInNormally": {}
},
"requires": [],
"flashSuitChecked": true,
"blueSuitChecked": true
},
{
"link": [
3,
3
],
"name": "Base (Come In With Mockball)",
"entranceCondition": {
"comeInWithMockball": {
"adjacentMinTiles": 0,
"remoteAndLandingMinTiles": [
[
0,
0
]
],
"speedBooster": "any"
}
},
"requires": [
{
"heatFrames": 10
}
],
"flashSuitChecked": true,
"blueSuitChecked": true
},
{
"link": [
4,
4
],
"name": "Base (Unlock Door)",
"requires": [],
"unlocksDoors": [
{
"types": [
"missiles"
],
"requires": [
{
"heatFrames": 50
}
]
},
{
"types": [
"super"
],
"requires": []
},
{
"types": [
"powerbomb"
],
"requires": [
{
"heatFrames": 110
}
]
}
],
"flashSuitChecked": true,
"blueSuitChecked": true
},
{
"link": [
4,
4
],
"name": "Base (Come In Normally)",
"entranceCondition": {
"comeInNormally": {}
},
"requires": [],
"flashSuitChecked": true,
"blueSuitChecked": true
},
{
"link": [
4,
4
],
"name": "Base (Come In With Mockball)",
"entranceCondition": {
"comeInWithMockball": {
"adjacentMinTiles": 0,
"remoteAndLandingMinTiles": [
[
0,
0
]
],
"speedBooster": "any"
}
},
"requires": [
{
"heatFrames": 10
}
],
"flashSuitChecked": true,
"blueSuitChecked": true
},
{
"link": [
5,
5
],
"name": "Base (Unlock Door)",
"requires": [],
"unlocksDoors": [
{
"types": [
"missiles"
],
"requires": [
{
"heatFrames": 50
}
]
},
{
"types": [
"super"
],
"requires": []
},
{
"types": [
"powerbomb"
],
"requires": [
{
"heatFrames": 110
}
]
}
],
"flashSuitChecked": true,
"blueSuitChecked": true
},
{
"link": [
5,
5
],
"name": "Base (Come In Normally)",
"entranceCondition": {
"comeInNormally": {}
},
"requires": [],
"flashSuitChecked": true,
"blueSuitChecked": true
},
{
"link": [
5,
5
],
"name": "Base (Come In With Mockball)",
"entranceCondition": {
"comeInWithMockball": {
"adjacentMinTiles": 0,
"remoteAndLandingMinTiles": [
[
0,
0
]
],
"speedBooster": "any"
}
},
"requires": [
{
"heatFrames": 10
}
],
"flashSuitChecked": true,
"blueSuitChecked": true
},
{
"id": 1,
"link": [
1,
1
],
"name": "Leave with Runway",
"requires": [],
"exitCondition": {
"leaveWithRunway": {
"length": 8,
"openEnd": 1
}
},
"flashSuitChecked": true,
"blueSuitChecked": true
},
{
"id": 97,
"link": [
1,
1
],
"name": "Single Multiviola Farm",
"requires": [
"h_heatProof",
{
"resetRoom": {
"nodes": [
1
]
}
},
{
"or": [
{
"and": [
"canDash",
{
"cycleFrames": 130
},
{
"or": [
"Plasma",
"Wave",
"Spazer",
{
"cycleFrames": 30
}
]
}
]
},
{
"and": [
{
"haveBlueSuit": {}
},
{
"cycleFrames": 140
}
]
}
]
}
],
"resetsObstacles": [
"R-Mode"
],
"farmCycleDrops": [
{
"enemy": "Multiviola",
"count": 1
}
],
"flashSuitChecked": true,
"blueSuitChecked": true
},
{
"id": 61,
"link": [
1,
1
],
"name": "Alcoon and Multiviola Farm",
"requires": [
"h_heatProof",
{
"resetRoom": {
"nodes": [
1
]
}
},
{
"or": [
{
"and": [
"canDash",
{
"cycleFrames": 285
},
{
"or": [
"Plasma",
"ScrewAttack",
{
"and": [
"Wave",
{
"cycleFrames": 90
}
]
},
{
"and": [
"Spazer",
{
"cycleFrames": 205
}
]
},
{
"and": [
"canDodgeWhileShooting",
{
"cycleFrames": 315
}
]
}
]
}
]
},
{
"and": [
{
"haveBlueSuit": {}
},
{
"cycleFrames": 340
}
]
}
]
},
{
"or": [
"canWallJump",
"HiJump",
"h_crouchJumpDownGrab",
{
"and": [
"SpaceJump",
{
"cycleFrames": 20
}
]
}
]
}
],
"resetsObstacles": [
"R-Mode"
],
"farmCycleDrops": [
{
"enemy": "Multiviola",
"count": 1
},
{
"enemy": "Alcoon",
"count": 2
}
],
"flashSuitChecked": true,
"blueSuitChecked": true
},
{
"id": 2,
"link": [
1,
1
],
"name": "Crystal Flash",
"requires": [
{
"obstaclesNotCleared": [
"R-Mode"
]
},
"h_heatedCrystalFlash"
],
"flashSuitChecked": true,
"blueSuitChecked": true
},
{
"id": 146,
"link": [
1,
1
],
"name": "Come in Shinecharging, Crystal Spark",
"entranceCondition": {
"comeInShinecharging": {
"length": 7,
"openEnd": 1
}
},
"requires": [
"canShinechargeMovementTricky",
"canInsaneJump",
{
"or": [
{
"and": [
"h_enemyDrops",
"h_heatedCrystalSparkWithoutLenience"
]
},
"h_heatedCrystalSpark"
]
}
],
"flashSuitChecked": true,
"blueSuitChecked": true,
"note": "Store the shinecharge while falling off the ledge then quickly morph and place the Power Bomb on the descent.",
"devNote": [
"No lenience, since the Alcoons are a good Power Bomb farm.",
"Since this can not be done with a flash suit, it is implicitly assumed Samus can crouch jump and down grab."
]
},
{
"id": 132,
"link": [
1,
1
],
"name": "R-Mode Entry",
"entranceCondition": {
"comeInWithRMode": {}
},
"requires": [],
"clearsObstacles": [
"R-Mode"
],
"flashSuitChecked": true,
"blueSuitChecked": true
},
{
"id": 3,
"link": [
1,
1
],
"name": "G-Mode Regain Mobility",
"requires": [
{
"enemyDamage": {
"enemy": "Multiviola",
"type": "contact",
"hits": 1
}
}
],
"gModeRegainMobility": {},
"flashSuitChecked": true,
"blueSuitChecked": true
},
{
"id": 62,
"link": [
1,
1
],
"name": "G-Mode Setup - Get Hit By Multiviola",
"requires": [
{
"heatFrames": 120
}
],
"exitCondition": {
"leaveWithGModeSetup": {}
},
"flashSuitChecked": true,
"blueSuitChecked": true
},
{
"id": 65,
"link": [
1,
2
],
"name": "Come in Shinecharging, Leave With Temporary Blue",
"entranceCondition": {
"comeInShinecharging": {
"length": 7,
"openEnd": 0
}
},
"requires": [
"canXRayCancelShinecharge",
"canXRayTurnaround",
"canLongChainTemporaryBlue",
{
"heatFrames": 1380
}
],
"exitCondition": {
"leaveWithTemporaryBlue": {}
},
"unlocksDoors": [
{
"types": [
"super",
"powerbomb"
],
"requires": []
},
{
"types": [
"missiles"
],
"requires": [
{
"heatFrames": 50
}
]
}
],
"flashSuitChecked": true,
"blueSuitChecked": true
},
{
"id": 77,
"link": [
1,
2
],
"name": "G-Mode",
"entranceCondition": {
"comeInWithGMode": {
"mode": "any",
"morphed": false
}
},
"requires": [
{
"or": [
"h_heatedGModeOpenDifferentDoor",
{
"and": [
"h_heatedGModePauseAbuse",
"canFarmWhileShooting",
"canTrickyDodgeEnemies"
]
}
]
}
],
"flashSuitChecked": true,
"blueSuitChecked": true,
"note": [
"It is possible to kill a Multiviola by the door and pause abuse to grab its Energy drop on G-mode exit.",
"It is important avoid touching the invisible fireballs the Alcoons place, and to prevent them from shooting too many fireballs, as they will eventually prevent drops from appearing.",
"The Alcoons are global, so it is best to kill those at the top of the room and either kill or avoid those lower, depending on if Samus has a way to kill them quickly."
]
},
{
"id": 66,
"link": [
1,
3
],
"name": "Come in Shinecharging, Leave With Temporary Blue",
"entranceCondition": {
"comeInShinecharging": {
"length": 7,
"openEnd": 0
}
},
"requires": [
"canXRayCancelShinecharge",
"canXRayTurnaround",
"canLongChainTemporaryBlue",
{
"heatFrames": 830
}
],
"exitCondition": {
"leaveWithTemporaryBlue": {}
},
"unlocksDoors": [
{
"types": [
"super",
"powerbomb"
],
"requires": []
},
{
"types": [
"missiles"
],
"requires": [
{
"heatFrames": 50
}
]
}
],
"flashSuitChecked": true,
"blueSuitChecked": true
},
{
"id": 78,
"link": [
1,
3
],
"name": "G-Mode",
"entranceCondition": {
"comeInWithGMode": {
"mode": "any",
"morphed": false
}
},
"requires": [
"h_heatedGModeOpenDifferentDoor"
],
"flashSuitChecked": true,
"blueSuitChecked": true,
"note": "It is important avoid touching the invisible fireballs the Alcoons place."
},
{
"id": 4,
"link": [
1,
4
],
"name": "Come in Shinecharging, Leave With Spark",
"entranceCondition": {
"comeInShinecharging": {
"length": 7,
"openEnd": 1
}
},
"requires": [
{
  "or": [
    {
      "and": [
        "canShinechargeMovementComplex",
        {
          "heatFrames": 225
        },
        {
          "shinespark": {
            "frames": 15,
            "excessFrames": 0
          }
        }
      ]
    },
    {
      "and": [
        "canShinechargeMovementTricky",
        {
          "heatFrames": 215
        },
        {
          "shinespark": {
            "frames": 6,
            "excessFrames": 0
          }
        }
      ]
    }
  ]
}
],
"exitCondition": {
"leaveWithSpark": {}
},
"unlocksDoors": [
{
"types": [
"super"
],
"requires": []
},
{
"types": [
"missiles",
"powerbomb"
],
"requires": [
"never"
]
}
],
"flashSuitChecked": true,
"blueSuitChecked": true
},
{
"id": 67,
"link": [
1,
4
],
"name": "Come in Shinecharging, Leave With Temporary Blue",
"entranceCondition": {
"comeInShinecharging": {
"length": 7,
"openEnd": 0
}
},
"requires": [
"canXRayCancelShinecharge",
"canXRayTurnaround",
"canLongChainTemporaryBlue",
{
"heatFrames": 505
}
],
"exitCondition": {
"leaveWithTemporaryBlue": {}
},
"unlocksDoors": [
{
"types": [
"super",
"powerbomb"
],
"requires": []
},
{
"types": [
"missiles"
],
"requires": [
{
"heatFrames": 50
}
]
}
],
"flashSuitChecked": true,
"blueSuitChecked": true
},
{
"id": 79,
"link": [
1,
4
],
"name": "G-Mode",
"entranceCondition": {
"comeInWithGMode": {
"mode": "any",
"morphed": false
}
},
"requires": [
"h_heatedGModeOpenDifferentDoor"
],
"flashSuitChecked": true,
"blueSuitChecked": true,
"note": "It is important avoid touching the invisible fireballs the Alcoons place.",
"devNote": "FIXME: It is possible to kill a Multiviola in the gap in the floor, but Samus only gets one attempt, and its very difficult to escape with a small Energy drop."
},
{
"id": 80,
"link": [
1,
5
],
"name": "G-Mode, Simple Blind Movement",
"entranceCondition": {
"comeInWithGMode": {
"mode": "any",
"morphed": false
}
},
"requires": [
"Morph",
{
"or": [
{
"and": [
"canBombHorizontally",
"canTrickyJump"
]
},
"HiJump",
"canWallJump",
"SpaceJump",
"canSpringBallJumpMidAir",
"canIBJ",
"canTrickyUseFrozenEnemies"
]
},
"h_heatedGModeOffCameraDoor"
],
"flashSuitChecked": true,
"blueSuitChecked": true,
"note": [
"It is important avoid touching the invisible fireballs the Alcoons place.",
"It is possible to kill them without any beam upgrades or ammo by jumping and shooting horizontally near the floor surface.",
"Stay near the far wall when shooting to prevent getting too close and triggering their jump.",
"After entering the morph tunnel, roll through the two camera scroll blocks a few times to overload PLMs.",
"They are at the entrance and two tiles in the tunnel. Exit G-mode and go through the room to the far right door."
],
"devNote": "It is possible to go from 5->1 with a bomb spread, but it requires difficult off-screen movement to escape the room."
},
{
"id": 81,
"link": [
1,
5
],
"name": "G-Mode Morph, Simple Blind Movement",
"entranceCondition": {
"comeInWithGMode": {
"mode": "any",
"morphed": true
}
},
"requires": [
"canTrickyDodgeEnemies",
{
"or": [
"h_artificialMorphBombHorizontally",
"h_artificialMorphJumpIntoIBJ",
{
"and": [
"h_artificialMorphIBJ",
"h_artificialMorphPowerBomb"
]
},
{
"and": [
"h_artificialMorphSpringBall",
"HiJump"
]
},
"h_artificialMorphSpringBallBombJump"
]
},
"h_heatedGModeOffCameraDoor"
],
"flashSuitChecked": true,
"blueSuitChecked": true,
"note": [
"It is important avoid touching the invisible fireballs the Alcoons place.",
"It is possible to bomb from the edge of the top door runway into the hidden morph tunnel, but if Samus is not at the edge, she will bonk and fall.",
"After entering the morph tunnel, roll through the two camera scroll blocks a few times to overload PLMs.",
"They are at the entrance and two tiles in the tunnel. Exit G-mode and go through the room to the far right door."
]
},
{
"id": 5,
"link": [
1,
6
],
"name": "Base",
"requires": [
{
"heatFrames": 80
},
{
"or": [
"canDash",
{
"heatFrames": 15
}
]
}
],
"flashSuitChecked": true,
"blueSuitChecked": true
},
{
"id": 68,
"link": [
2,
1
],
"name": "Come in Shinecharging, Leave With Temporary Blue",
"entranceCondition": {
"comeInShinecharging": {
"length": 12,
"openEnd": 0,
"gentleUpTiles": 4
}
},
"requires": [
"canXRayTurnaround",
"canLongChainTemporaryBlue",
{
"or": [
{
"and": [
"HiJump",
{
"heatFrames": 1220
}
]
},
{
"and": [
"canTrickySpringBallJump",
{
"heatFrames": 1440
}
]
}
]
}
],
"exitCondition": {
"leaveWithTemporaryBlue": {}
},
"unlocksDoors": [
{
"types": [
"super",
"powerbomb"
],
"requires": []
},
{
"types": [
"missiles"
],
"requires": [
{
"heatFrames": 50
}
]
}
],
"flashSuitChecked": true,
"blueSuitChecked": true
},
{
"id": 82,
"link": [
2,
1
],
"name": "G-Mode",
"entranceCondition": {
"comeInWithGMode": {
"mode": "any",
"morphed": false
}
},
"requires": [
{
"or": [
"h_crouchJumpDownGrab",
"HiJump",
"canWallJump",
"SpaceJump",
"canSpringBallJumpMidAir"
]
},
{
"or": [
"h_heatedGModeOpenDifferentDoor",
{
"and": [
"h_heatedGModePauseAbuse",
"canFarmWhileShooting",
"canTrickyDodgeEnemies"
]
}
]
}
],
"flashSuitChecked": true,
"blueSuitChecked": true,
"note": [
"It is possible to kill a Multiviola by the door and pause abuse to grab its Energy drop on G-mode exit.",
"It is important avoid touching the invisible fireballs the Alcoons place, and to prevent them from shooting too many fireballs, as they will eventually prevent drops from appearing.",
"One easy way to do this without any beam upgrades or ammo is to kill them before they jump. This can be done from below by jumping and shooting horizontally near the floor surface.",
"Stay near the far wall when shooting to prevent getting too close and triggering their jump."
],
"devNote": [
"Frozen Alcoon platforms and Artificial morph IBJ are not included, as Samus can crouch jump and down grab;",
"they can be considered if G-mode + flash suits are added, though they are still likely not useful.",
"Those are also likely not compatible with preventing the Alcoons from overloading drops."
]
},
{
"id": 6,
"link": [
2,
1
],
"name": "Grapple Teleport",
"entranceCondition": {
"comeInWithGrappleTeleport": {
"blockPositions": [
[
5,
3
],
[
7,
2
]
]
}
},
"requires": [
{
  "heatFrames": 45
}
],
"flashSuitChecked": true,
"blueSuitChecked": true
},
{
"id": 104,
"link": [
2,
1
],
"name": "Grapple Teleport Door Escape",
"entranceCondition": {
"comeInWithGrappleTeleport": {
"blockPositions": [
[
3,
12
]
]
}
},
"requires": [
{
"or": [
"h_heatedGrappleTeleportWallEscape",
{
"and": [
{
"doorUnlockedAtNode": 1
},
{
"heatFrames": 20
}
]
}
]
},
"canOffScreenMovement",
{
"enemyDamage": {
"enemy": "Multiviola",
"type": "contact",
"hits": 1
}
}
],
"unlocksDoors": [
{
"types": [
"ammo"
],
"requires": []
}
],
"flashSuitChecked": true,
"blueSuitChecked": true
},
{
"id": 7,
"link": [
2,
1
],
"name": "Grapple Teleport Door Lock Skip",
"entranceCondition": {
"comeInWithGrappleTeleport": {
"blockPositions": [
[
3,
12
]
]
}
},
"requires": [],
"bypassesDoorShell": "yes",
"flashSuitChecked": true,
"blueSuitChecked": true
},
{
"id": 8,
"link": [
2,
1
],
"name": "Carry Grapple Teleport",
"entranceCondition": {
"comeInWithGrappleTeleport": {
"blockPositions": [
[
3,
12
]
]
}
},
"requires": [],
"exitCondition": {
"leaveWithGrappleTeleport": {
"blockPositions": [
[
3,
12
]
]
}
},
"bypassesDoorShell": "yes",
"flashSuitChecked": true,
"blueSuitChecked": true
},
{
"id": 9,
"link": [
2,
1
],
"name": "Grapple Teleport X-Ray Climb",
"entranceCondition": {
"comeInWithGrappleTeleport": {
"blockPositions": [
[
2,
28
]
]
}
},
"requires": [
"canXRayClimb",
{
"heatFrames": 1600
}
],
"bypassesDoorShell": "yes",
"flashSuitChecked": true,
"blueSuitChecked": true,
"note": [
"Exit the previous room with Samus in a standing pose (while grappled).",
"After teleporting, press right to release Grapple while staying standing (not being forced into a crouch).",
"Then X-ray climb 1 screen to get up to the door transition, without needing to open the door."
]
},
{
"id": 10,
"link": [
2,
2
],
"name": "Leave with Runway",
"requires": [],
"exitCondition": {
"leaveWithRunway": {
"length": 13,
"openEnd": 0,
"gentleDownTiles": 4
}
},
"flashSuitChecked": true,
"blueSuitChecked": true
},
{
"id": 98,
"link": [
2,
2
],
"name": "Alcoon and Multiviola Farm",
"requires": [
"h_heatProof",
{
"resetRoom": {
"nodes": [
2
]
}
},
{
"or": [
{
"and": [
"canDash",
{
"cycleFrames": 245
},
{
"or": [
"ScrewAttack",
{
"and": [
"Plasma",
{
"cycleFrames": 25
}
]
},
{
"and": [
"Wave",
{
"cycleFrames": 40
}
]
},
{
"and": [
"Spazer",
{
"cycleFrames": 100
}
]
},
{
"and": [
"canDodgeWhileShooting",
{
"cycleFrames": 220
}
]
}
]
}
]
},
{
"and": [
{
"haveBlueSuit": {}
},
{
"cycleFrames": 360
}
]
}
]
}
],
"resetsObstacles": [
"R-Mode"
],
"farmCycleDrops": [
{
"enemy": "Multiviola",
"count": 1
},
{
"enemy": "Alcoon",
"count": 1
}
],
"flashSuitChecked": true,
"blueSuitChecked": true
},
{
"id": 11,
"link": [
2,
2
],
"name": "Crystal Flash",
"requires": [
{
"obstaclesNotCleared": [
"R-Mode"
]
},
"h_heatedCrystalFlash"
],
"flashSuitChecked": true,
"blueSuitChecked": true
},
{
"id": 147,
"link": [
2,
2
],
"name": "Come in Shinecharging, Crystal Spark",
"entranceCondition": {
"comeInShinecharging": {
"length": 13,
"openEnd": 0
}
},
"requires": [
{
  "or": [
    {
      "and": [
        "h_enemyDrops",
        "h_heatedCrystalSparkWithoutLenience"
      ]
    },
    "h_heatedCrystalSpark"
  ]
}
],
"flashSuitChecked": true,
"blueSuitChecked": true,
"devNote": [
"No lenience, since the Alcoons are a good Power Bomb farm.",
"Since this can not be done with a flash suit, it is implicitly assumed Samus can crouch jump and down grab."
]
},
{
"id": 148,
"link": [
2,
2
],
"name": "Crystal Spark",
"requires": [
{
"or": [
{
"canShineCharge": {
"usedTiles": 12,
"gentleUpTiles": 4,
"openEnd": 0
}
},
{
"and": [
{
"doorUnlockedAtNode": 2
},
{
"canShineCharge": {
"usedTiles": 13,
"gentleUpTiles": 4,
"openEnd": 0
}
}
]
}
]
},
{
"or": [
{
"and": [
"h_enemyDrops",
"h_heatedCrystalSparkWithoutLenience"
]
},
"h_heatedCrystalSpark"
]
}
],
"flashSuitChecked": true,
"blueSuitChecked": true,
"devNote": [
"No lenience, since the Alcoons are a good Power Bomb farm."
]
},
{
"id": 133,
"link": [
2,
2
],
"name": "R-Mode Entry",
"entranceCondition": {
"comeInWithRMode": {}
},
"requires": [],
"clearsObstacles": [
"R-Mode"
],
"flashSuitChecked": true,
"blueSuitChecked": true
},
{
"id": 134,
"link": [
2,
2
],
"name": "R-Mode Spark Interrupt",
"requires": [
{
"obstaclesCleared": [
"R-Mode"
]
},
{
"or": [
"h_heatedCrystalFlashForReserveEnergy",
{
"and": [
"h_heatProof",
"h_RModeCanRefillReserves",
{
"resourceMissingAtMost": [
{
"type": "PowerBomb",
"count": 0
}
]
},
{
"partialRefill": {
"type": "ReserveEnergy",
"limit": 20
}
}
]
}
]
},
{
"or": [
{
"canShineCharge": {
"usedTiles": 12,
"gentleUpTiles": 4,
"openEnd": 0
}
},
{
"and": [
{
"doorUnlockedAtNode": 2
},
{
"canShineCharge": {
"usedTiles": 13,
"gentleUpTiles": 4,
"openEnd": 0
}
}
]
}
]
},
{
"autoReserveTrigger": {
"maxReserveEnergy": 95
}
},
"canRModeSparkInterrupt"
],
"resetsObstacles": [
"R-Mode"
],
"flashSuitChecked": true,
"blueSuitChecked": true,
"note": [
"Farm the enemies, and leave the bottom Alcoon alive to interrupt after shinecharging at the bottom door."
]
},
{
"id": 12,
"link": [
2,
2
],
"name": "G-Mode Regain Mobility",
"requires": [
{
  "enemyDamage": {
    "enemy": "Multiviola",
    "type": "contact",
    "hits": 1
  }
}
],
"gModeRegainMobility": {},
"flashSuitChecked": true,
"blueSuitChecked": true
},
{
"id": 63,
"link": [
2,
2
],
"name": "G-Mode Setup - Get Hit By Multiviola",
"requires": [
{
  "heatFrames": 920
}
],
"exitCondition": {
"leaveWithGModeSetup": {}
},
"flashSuitChecked": true,
"blueSuitChecked": true,
"note": "Enter the room and crouch next to the closed door. After the Multiviola hits the door, open it and it will be on a trajectory to hit Samus the next pass."
},
{
"id": 15,
"link": [
2,
3
],
"name": "Come in Shinecharging, Leave with Spark",
"entranceCondition": {
"comeInShinecharging": {
"length": 12,
"openEnd": 0,
"gentleUpTiles": 4
}
},
"requires": [
"canShinechargeMovementComplex",
{
"or": [
"HiJump",
"canWallJump"
]
},
{
"shinespark": {
"frames": 5,
"excessFrames": 0
}
},
{
"heatFrames": 230
}
],
"exitCondition": {
"leaveWithSpark": {}
},
"unlocksDoors": [
{
"types": [
"super"
],
"requires": []
},
{
"types": [
"missiles",
"powerbomb"
],
"requires": [
"never"
]
}
],
"flashSuitChecked": true,
"blueSuitChecked": true
},
{
"id": 16,
"link": [
2,
3
],
"name": "Come in Shinecharging, Leave Shinecharged",
"entranceCondition": {
"comeInShinecharging": {
"length": 11,
"openEnd": 1,
"gentleUpTiles": 4
}
},
"requires": [
"HiJump",
"canShinechargeMovementComplex",
"canTrickyJump",
{
"heatFrames": 150
},
{
"shineChargeFrames": 120
}
],
"exitCondition": {
"leaveShinecharged": {}
},
"unlocksDoors": [
{
"types": [
"super"
],
"requires": []
},
{
"types": [
"missiles",
"powerbomb"
],
"requires": [
"never"
]
}
],
"flashSuitChecked": true,
"blueSuitChecked": true,
"note": "Quickly ledge grab the platform to run below the Multiviola and get ahead of it.",
"devNote": "1 unused tile since you must jump earlier for this strat."
},
{
"id": 18,
"link": [
2,
3
],
"name": "Frozen Multiviola",
"requires": [
"canUseFrozenEnemies",
{
"heatFrames": 290
},
{
"or": [
"canTrickyJump",
{
"heatFrames": 160
}
]
}
],
"wallJumpAvoid": true,
"flashSuitChecked": true,
"blueSuitChecked": true,
"note": "Kill or jump over the Alcoon, then freeze the Multiviola to use as a platform."
},
{
"id": 69,
"link": [
2,
3
],
"name": "Come in Shinecharging, Leave With Temporary Blue",
"entranceCondition": {
"comeInShinecharging": {
"length": 12,
"openEnd": 0,
"gentleUpTiles": 4
}
},
"requires": [
"canXRayTurnaround",
"canLongChainTemporaryBlue",
{
"or": [
{
"and": [
"HiJump",
{
"heatFrames": 365
}
]
},
{
"and": [
"canTrickySpringBallJump",
{
"heatFrames": 380
}
]
}
]
}
],
"exitCondition": {
"leaveWithTemporaryBlue": {}
},
"unlocksDoors": [
{
"types": [
"super",
"powerbomb"
],
"requires": []
},
{
"types": [
"missiles"
],
"requires": [
{
"heatFrames": 50
}
]
}
],
"flashSuitChecked": true,
"blueSuitChecked": true
},
{
"id": 83,
"link": [
2,
3
],
"name": "G-Mode",
"entranceCondition": {
"comeInWithGMode": {
"mode": "any",
"morphed": false
}
},
"requires": [
{
"or": [
"h_crouchJumpDownGrab",
"HiJump",
"canWallJump",
"SpaceJump",
"canSpringBallJumpMidAir",
"canIBJ"
]
},
"h_heatedGModeOpenDifferentDoor"
],
"flashSuitChecked": true,
"blueSuitChecked": true,
"note": "It is important avoid touching the invisible fireballs the Alcoons place.",
"devNote": [
"Frozen Alcoon platforms and Artificial morph IBJ are not included, as Samus can crouch jump and down grab;",
"they can be considered if G-mode + flash suits are added, though they are still likely not useful."
]
},
{
"id": 70,
"link": [
2,
4
],
"name": "Come in Shinecharging, Leave With Temporary Blue",
"entranceCondition": {
"comeInShinecharging": {
"length": 12,
"openEnd": 0,
"gentleUpTiles": 4
}
},
"requires": [
"canXRayTurnaround",
"canLongChainTemporaryBlue",
{
"or": [
{
"and": [
"HiJump",
{
"heatFrames": 700
}
]
},
{
"and": [
"canTrickySpringBallJump",
{
"heatFrames": 840
}
]
}
]
}
],
"exitCondition": {
"leaveWithTemporaryBlue": {}
},
"unlocksDoors": [
{
"types": [
"super",
"powerbomb"
],
"requires": []
},
{
"types": [
"missiles"
],
"requires": [
{
"heatFrames": 50
}
]
}
],
"flashSuitChecked": true,
"blueSuitChecked": true
},
{
"id": 84,
"link": [
2,
4
],
"name": "G-Mode",
"entranceCondition": {
"comeInWithGMode": {
"mode": "any",
"morphed": false
}
},
"requires": [
{
"or": [
"h_crouchJumpDownGrab",
"HiJump",
"canWallJump",
"SpaceJump",
"canSpringBallJumpMidAir",
"canIBJ"
]
},
"h_heatedGModeOpenDifferentDoor"
],
"flashSuitChecked": true,
"blueSuitChecked": true,
"note": "It is important avoid touching the invisible fireballs the Alcoons place.",
"devNote": [
"Frozen Alcoon platforms and Artificial morph IBJ are not included, as Samus can crouch jump and down grab;",
"they can be considered if G-mode + flash suits are added, though they are still likely not useful.",
"FIXME: It is possible to kill a Multiviola in the gap in the floor, but Samus only gets one attempt, and its very difficult to escape with a small Energy drop."
]
},
{
"id": 85,
"link": [
2,
5
],
"name": "G-Mode, Simple Blind Movement",
"entranceCondition": {
"comeInWithGMode": {
"mode": "any",
"morphed": false
}
},
"requires": [
"Morph",
{
"or": [
"HiJump",
"canWallJump",
"SpaceJump",
"canSpringBallJumpMidAir",
"canIBJ",
{
"and": [
"h_crouchJumpDownGrab",
"canBombHorizontally"
]
},
{
"and": [
"h_crouchJumpDownGrab",
"canTrickyUseFrozenEnemies"
]
}
]
},
"h_heatedGModeOffCameraDoor"
],
"flashSuitChecked": true,
"blueSuitChecked": true,
"note": [
"It is important avoid touching the invisible fireballs the Alcoons place.",
"It is possible to kill them without any beam upgrades or ammo by jumping and shooting horizontally near the floor surface.",
"Stay near the far wall when shooting to prevent getting too close and triggering their jump.",
"After entering the morph tunnel, roll through the two camera scroll blocks a few times to overload PLMs.",
"They are at the entrance and two tiles in the tunnel. Exit G-mode and go through the room to the far right door."
],
"devNote": [
"Frozen Alcoon platforms and Artificial morph IBJ are not included, as Samus can crouch jump and down grab;",
"they can be considered if G-mode + flash suits are added, though they are still likely not useful."
]
},
{
"id": 86,
"link": [
2,
5
],
"name": "G-Mode Morph, Simple Blind Movement",
"entranceCondition": {
"comeInWithGMode": {
"mode": "any",
"morphed": true
}
},
"requires": [
{
"or": [
{
"and": [
"h_artificialMorphIBJ",
{
"ammo": {
"type": "PowerBomb",
"count": 3
}
}
]
},
{
"and": [
"h_artificialMorphSpringBall",
"HiJump"
]
},
{
"and": [
"h_artificialMorphSpringBallBombJump",
{
"or": [
"h_artificialMorphBombs",
{
"ammo": {
"type": "PowerBomb",
"count": 4
}
}
]
}
]
}
]
},
"h_heatedGModeOffCameraDoor"
],
"flashSuitChecked": true,
"blueSuitChecked": true,
"note": [
"It is important avoid touching the invisible fireballs the Alcoons place. Jump over them or kill the Alcoons with Power Bombs.",
"After entering the morph tunnel, roll through the two camera scroll blocks a few times to overload PLMs.",
"They are at the entrance and two tiles in the tunnel. Exit G-mode and go through the room to the far right door."
]
},
{
"id": 110,
"link": [
2,
8
],
"name": "Base",
"requires": [
{
"or": [
{
"heatFrames": 100
},
{
"and": [
"HiJump",
{
"heatFrames": 95
}
]
}
]
},
{
"or": [
"canDash",
{
"and": [
{
"haveBlueSuit": {}
},
{
"heatFrames": 30
}
]
}
]
}
],
"flashSuitChecked": true,
"blueSuitChecked": true
},
{
"id": 71,
"link": [
3,
1
],
"name": "Come in Getting Blue Speed, Leave With Temporary Blue",
"entranceCondition": {
"comeInGettingBlueSpeed": {
"length": 3,
"openEnd": 1,
"minExtraRunSpeed": "$2.0"
}
},
"requires": [
"canXRayTurnaround",
"canLongChainTemporaryBlue",
{
"or": [
{
"and": [
"HiJump",
{
"heatFrames": 890
}
]
},
{
"and": [
"canTrickySpringBallJump",
{
"heatFrames": 1020
}
]
}
]
}
],
"exitCondition": {
"leaveWithTemporaryBlue": {}
},
"unlocksDoors": [
{
"types": [
"super",
"powerbomb"
],
"requires": []
},
{
"types": [
"missiles"
],
"requires": [
{
"heatFrames": 50
}
]
}
],
"flashSuitChecked": true,
"blueSuitChecked": true,
"devNote": [
"FIXME: This could be done with lower run speed, at the cost of more heat frames."
]
},
{
"id": 87,
"link": [
3,
1
],
"name": "G-Mode",
"entranceCondition": {
"comeInWithGMode": {
"mode": "any",
"morphed": false
}
},
"requires": [
{
"or": [
"h_crouchJumpDownGrab",
"HiJump",
"canWallJump",
"SpaceJump",
"canSpringBallJumpMidAir"
]
},
{
"or": [
"h_heatedGModeOpenDifferentDoor",
{
"and": [
"h_heatedGModePauseAbuse",
"canFarmWhileShooting",
"canTrickyDodgeEnemies"
]
}
]
}
],
"flashSuitChecked": true,
"blueSuitChecked": true,
"note": [
"It is possible to kill a Multiviola by the door and pause abuse to grab its Energy drop on G-mode exit.",
"It is important avoid touching the invisible fireballs the Alcoons place, and to prevent them from shooting too many fireballs, as they will eventually prevent drops from appearing.",
"One easy way to do this without any beam upgrades or ammo is to kill them before they jump. This can be done from below by jumping and shooting horizontally near the floor surface.",
"Stay near the far wall when shooting to prevent getting too close and triggering their jump."
],
"devNote": [
"Frozen Alcoon platforms and Artificial morph IBJ are not included, as Samus can crouch jump and down grab;",
"they can be considered if G-mode + flash suits are added, though they are still likely not useful.",
"Those are also likely not compatible with preventing the Alcoons from overloading drops."
]
},
{
"id": 19,
"link": [
3,
1
],
"name": "Grapple Teleport",
"entranceCondition": {
"comeInWithGrappleTeleport": {
"blockPositions": [
[
5,
3
],
[
7,
2
]
]
}
},
"requires": [
{
  "heatFrames": 45
}
],
"flashSuitChecked": true,
"blueSuitChecked": true
},
{
"id": 105,
"link": [
3,
1
],
"name": "Grapple Teleport Door Escape",
"entranceCondition": {
"comeInWithGrappleTeleport": {
"blockPositions": [
[
3,
12
]
]
}
},
"requires": [
{
"or": [
"h_heatedGrappleTeleportWallEscape",
{
"and": [
{
"doorUnlockedAtNode": 1
},
{
"heatFrames": 20
}
]
}
]
},
"canOffScreenMovement",
{
"enemyDamage": {
"enemy": "Multiviola",
"type": "contact",
"hits": 1
}
}
],
"unlocksDoors": [
{
"types": [
"ammo"
],
"requires": []
}
],
"flashSuitChecked": true,
"blueSuitChecked": true
},
{
"id": 20,
"link": [
3,
1
],
"name": "Grapple Teleport Door Lock Skip",
"entranceCondition": {
"comeInWithGrappleTeleport": {
"blockPositions": [
[
3,
12
]
]
}
},
"requires": [],
"bypassesDoorShell": "yes",
"flashSuitChecked": true,
"blueSuitChecked": true
},
{
"id": 106,
"link": [
3,
1
],
"name": "Carry Grapple Teleport",
"entranceCondition": {
"comeInWithGrappleTeleport": {
"blockPositions": [
[
3,
12
]
]
}
},
"requires": [],
"exitCondition": {
"leaveWithGrappleTeleport": {
"blockPositions": [
[
3,
12
]
]
}
},
"bypassesDoorShell": "yes",
"flashSuitChecked": true,
"blueSuitChecked": true
},
{
"id": 21,
"link": [
3,
1
],
"name": "Grapple Teleport X-Ray Climb",
"entranceCondition": {
"comeInWithGrappleTeleport": {
"blockPositions": [
[
2,
28
]
]
}
},
"requires": [
"canXRayClimb",
{
"heatFrames": 1600
}
],
"bypassesDoorShell": "yes",
"flashSuitChecked": true,
"blueSuitChecked": true,
"note": [
"Exit the previous room with Samus in a standing pose (while grappled).",
"After teleporting, press right to release Grapple while staying standing (not being forced into a crouch).",
"Then X-ray climb 1 screen to get up to the door transition, without needing to open the door."
]
},
{
"id": 24,
"link": [
3,
2
],
"name": "Come in Shinecharging, Leave Shinecharged",
"entranceCondition": {
"comeInShinecharging": {
"length": 3,
"openEnd": 1
}
},
"requires": [
"canShinechargeMovementTricky",
{
"heatFrames": 180
},
{
"shineChargeFrames": 170
}
],
"exitCondition": {
"leaveShinecharged": {}
},
"unlocksDoors": [
{
"types": [
"super"
],
"requires": []
},
{
"types": [
"missiles",
"powerbomb"
],
"requires": [
"never"
]
}
],
"flashSuitChecked": true,
"blueSuitChecked": true
},
{
"id": 25,
"link": [
3,
2
],
"name": "Come in Shinecharging, Leave With Spark",
"entranceCondition": {
"comeInShinecharging": {
"length": 3,
"openEnd": 1
}
},
"requires": [
"canShinechargeMovementComplex",
{
"shinespark": {
"frames": 5,
"excessFrames": 0
}
},
{
"heatFrames": 220
}
],
"exitCondition": {
"leaveWithSpark": {
"position": "top"
}
},
"unlocksDoors": [
{
"types": [
"super"
],
"requires": []
},
{
"types": [
"missiles",
"powerbomb"
],
"requires": [
"never"
]
}
],
"flashSuitChecked": true,
"blueSuitChecked": true
},
{
"id": 26,
"link": [
3,
2
],
"name": "Come in Shinecharged, Leave With Spark",
"entranceCondition": {
"comeInShinecharged": {}
},
"requires": [
{
"shineChargeFrames": 145
},
"canShinechargeMovementComplex",
{
"shinespark": {
"frames": 18,
"excessFrames": 0
}
},
{
"heatFrames": 190
}
],
"exitCondition": {
"leaveWithSpark": {
"position": "top"
}
},
"unlocksDoors": [
{
"types": [
"super"
],
"requires": []
},
{
"types": [
"missiles",
"powerbomb"
],
"requires": [
"never"
]
}
],
"flashSuitChecked": true,
"blueSuitChecked": true
},
{
"id": 72,
"link": [
3,
2
],
"name": "Come in Shinecharging, Leave With Temporary Blue",
"entranceCondition": {
"comeInShinecharging": {
"length": 3,
"openEnd": 0
}
},
"requires": [
"canXRayCancelShinecharge",
"canXRayTurnaround",
"canLongChainTemporaryBlue",
{
"heatFrames": 610
}
],
"exitCondition": {
"leaveWithTemporaryBlue": {}
},
"unlocksDoors": [
{
"types": [
"super",
"powerbomb"
],
"requires": []
},
{
"types": [
"missiles"
],
"requires": [
{
"heatFrames": 50
}
]
}
],
"flashSuitChecked": true,
"blueSuitChecked": true
},
{
"id": 88,
"link": [
3,
2
],
"name": "G-Mode",
"entranceCondition": {
"comeInWithGMode": {
"mode": "any",
"morphed": false
}
},
"requires": [
{
  "or": [
    "h_heatedGModeOpenDifferentDoor",
    "h_heatedGModePauseAbuse"
  ]
}
],
"flashSuitChecked": true,
"blueSuitChecked": true,
"note": [
"It is possible to kill a Multiviola by the door and pause abuse to grab its Energy drop on G-mode exit.",
"It is important avoid touching the invisible fireballs the Alcoon places, and to prevent it from shooting too many fireballs, as they will eventually prevent drops from appearing.",
"Either kill the Alcoon or avoid it then kill the Multiviola near the door without too much delay."
]
},
{
"id": 27,
"link": [
3,
3
],
"name": "Leave with Runway",
"requires": [],
"exitCondition": {
"leaveWithRunway": {
"length": 4,
"openEnd": 1
}
},
"flashSuitChecked": true,
"blueSuitChecked": true
},
{
"id": 122,
"link": [
3,
3
],
"name": "Leave Spinning (Space Jump)",
"requires": [
{
  "heatFrames": 140
},
"SpaceJump"
],
"exitCondition": {
"leaveSpinning": {
"remoteRunway": {
"length": 5,
"openEnd": 1
}
}
},
"flashSuitChecked": true,
"blueSuitChecked": true
},
{
"id": 123,
"link": [
3,
3
],
"name": "Leave With Mockball",
"requires": [
{
  "heatFrames": 140
}
],
"exitCondition": {
"leaveWithMockball": {
"remoteRunway": {
"length": 7,
"openEnd": 1
},
"landingRunway": {
"length": 4,
"openEnd": 1
}
}
},
"flashSuitChecked": true,
"blueSuitChecked": true
},
{
"id": 124,
"link": [
3,
3
],
"name": "Leave With Spring Ball Bounce",
"requires": [
{
"heatFrames": 140
}
],
"exitCondition": {
"leaveWithSpringBallBounce": {
"remoteRunway": {
"length": 7,
"openEnd": 1
},
"landingRunway": {
"length": 4,
"openEnd": 1
},
"movementType": "uncontrolled"
}
},
"flashSuitChecked": true,
"blueSuitChecked": true
},
{
"id": 125,
"link": [
3,
3
],
"name": "Leave Space Jumping",
"requires": [
{
"heatFrames": 140
},
"h_heatedRemoteRunwayPreciseSpaceJump"
],
"exitCondition": {
"leaveSpaceJumping": {
"remoteRunway": {
"length": 7,
"openEnd": 0
}
}
},
"flashSuitChecked": true,
"blueSuitChecked": true
},
{
"id": 99,
"link": [
3,
3
],
"name": "Alcoon and Multiviola Farm",
"requires": [
"h_heatProof",
{
"resetRoom": {
"nodes": [
3
]
}
},
{
"or": [
{
"and": [
"canDash",
{
"or": [
"Plasma",
"ScrewAttack",
{
"and": [
"Wave",
{
"cycleFrames": 90
}
]
},
{
"and": [
"Spazer",
{
"cycleFrames": 90
}
]
},
{
"and": [
"canDodgeWhileShooting",
{
"cycleFrames": 285
}
]
}
]
}
]
},
{
"haveBlueSuit": {}
}
]
},
{
"or": [
"canWallJump",
"HiJump",
"h_crouchJumpDownGrab",
"SpaceJump"
]
},
{
"cycleFrames": 210
}
],
"resetsObstacles": [
"R-Mode"
],
"farmCycleDrops": [
{
"enemy": "Multiviola",
"count": 1
},
{
"enemy": "Alcoon",
"count": 1
}
],
"flashSuitChecked": true,
"blueSuitChecked": true
},
{
"id": 28,
"link": [
3,
3
],
"name": "Crystal Flash",
"requires": [
{
"obstaclesNotCleared": [
"R-Mode"
]
},
"h_heatedCrystalFlash"
],
"flashSuitChecked": true,
"blueSuitChecked": true
},
{
"id": 149,
"link": [
3,
3
],
"name": "Come in Shinecharging, Crystal Spark",
"entranceCondition": {
"comeInShinecharging": {
"length": 3,
"openEnd": 0
}
},
"requires": [
{
  "or": [
    {
      "and": [
        "h_enemyDrops",
        "h_heatedCrystalSparkWithoutLenience"
      ]
    },
    "h_heatedCrystalSpark"
  ]
}
],
"flashSuitChecked": true,
"blueSuitChecked": true,
"devNote": [
"No lenience, since the Alcoons are a good Power Bomb farm.",
"Since this can not be done with a flash suit, it is implicitly assumed Samus can crouch jump and down grab."
]
},
{
"id": 135,
"link": [
3,
3
],
"name": "R-Mode Entry",
"entranceCondition": {
"comeInWithRMode": {}
},
"requires": [],
"clearsObstacles": [
"R-Mode"
],
"flashSuitChecked": true,
"blueSuitChecked": true
},
{
"id": 31,
"link": [
3,
4
],
"name": "Come in Shinecharging, Leave Shinecharged",
"entranceCondition": {
"comeInShinecharging": {
"length": 3,
"openEnd": 0
}
},
"requires": [
"HiJump",
"canTrickyJump",
"canShinechargeMovementTricky",
{
"heatFrames": 170
},
{
"shineChargeFrames": 165
}
],
"exitCondition": {
"leaveShinecharged": {}
},
"unlocksDoors": [
{
"types": [
"super"
],
"requires": []
},
{
"types": [
"missiles",
"powerbomb"
],
"requires": [
"never"
]
}
],
"flashSuitChecked": true,
"blueSuitChecked": true
},
{
"id": 32,
"link": [
3,
4
],
"name": "Come In Shinecharged, Leave With Spark",
"entranceCondition": {
"comeInShinecharged": {}
},
"requires": [
{
"or": [
{
"shineChargeFrames": 150
},
{
"and": [
"canSpeedyJump",
{
"shineChargeFrames": 140
}
]
}
]
},
"HiJump",
"canTrickyJump",
"canShinechargeMovementComplex",
{
"shinespark": {
"frames": 9,
"excessFrames": 0
}
},
{
"heatFrames": 170
}
],
"exitCondition": {
"leaveWithSpark": {}
},
"unlocksDoors": [
{
"types": [
"super"
],
"requires": []
},
{
"types": [
"missiles",
"powerbomb"
],
"requires": [
"never"
]
}
],
"flashSuitChecked": true,
"blueSuitChecked": true
},
{
"id": 34,
"link": [
3,
4
],
"name": "Frozen Enemies",
"requires": [
"canTrickyUseFrozenEnemies",
{
"heatFrames": 1250
},
{
"or": [
"canDash",
{
"heatFrames": 30
}
]
}
],
"wallJumpAvoid": true,
"flashSuitChecked": true,
"blueSuitChecked": true,
"note": [
"Wait for the Alcoon to walk off the edge. Use it and the Multiviola as platforms.",
"Spawn the Alcoon, then run back to the right so it will not stop and fire projectiles."
],
"devNote": "FIXME: split this into 3->7 and 7->4 strats."
},
{
"id": 73,
"link": [
3,
4
],
"name": "Come in Getting Blue Speed, Leave With Temporary Blue",
"entranceCondition": {
"comeInGettingBlueSpeed": {
"length": 3,
"openEnd": 1,
"minExtraRunSpeed": "$2.0"
}
},
"requires": [
"canXRayTurnaround",
"canLongChainTemporaryBlue",
{
"or": [
{
"and": [
"HiJump",
{
"heatFrames": 370
}
]
},
{
"and": [
"canTrickySpringBallJump",
{
"heatFrames": 380
}
]
}
]
}
],
"exitCondition": {
"leaveWithTemporaryBlue": {}
},
"unlocksDoors": [
{
"types": [
"super",
"powerbomb"
],
"requires": []
},
{
"types": [
"missiles"
],
"requires": [
{
"heatFrames": 50
}
]
}
],
"flashSuitChecked": true,
"blueSuitChecked": true,
"devNote": [
"FIXME: This could be done with lower run speed, at the cost of more heat frames."
]
},
{
"id": 89,
"link": [
3,
4
],
"name": "G-Mode",
"entranceCondition": {
"comeInWithGMode": {
"mode": "any",
"morphed": false
}
},
"requires": [
{
"or": [
"h_crouchJumpDownGrab",
"HiJump",
"canWallJump",
"SpaceJump",
"canSpringBallJumpMidAir",
"canIBJ"
]
},
"h_heatedGModeOpenDifferentDoor"
],
"flashSuitChecked": true,
"blueSuitChecked": true,
"note": "It is important avoid touching the invisible fireballs the Alcoons place.",
"devNote": [
"Frozen Alcoon platforms and Artificial morph IBJ are not included, as Samus can crouch jump and down grab;",
"they can be considered if G-mode + flash suits are added, though they are still likely not useful.",
"FIXME: It is possible to kill a Multiviola in the gap in the floor, but Samus only gets one attempt, and its very difficult to escape with a small Energy drop."
]
},
{
"id": 90,
"link": [
3,
5
],
"name": "G-Mode, Simple Blind Movement",
"entranceCondition": {
"comeInWithGMode": {
"mode": "any",
"morphed": false
}
},
"requires": [
"Morph",
{
"or": [
"HiJump",
"canWallJump",
"SpaceJump",
"canSpringBallJumpMidAir",
"canIBJ",
{
"and": [
"h_crouchJumpDownGrab",
"canBombHorizontally"
]
},
{
"and": [
"h_crouchJumpDownGrab",
"canTrickyUseFrozenEnemies"
]
}
]
},
"h_heatedGModeOffCameraDoor"
],
"flashSuitChecked": true,
"blueSuitChecked": true,
"note": [
"It is important avoid touching the invisible fireballs the Alcoons place.",
"It is possible to kill them without any beam upgrades or ammo by jumping and shooting horizontally near the floor surface.",
"Stay near the far wall when shooting to prevent getting too close and triggering their jump.",
"After entering the morph tunnel, roll through the two camera scroll blocks a few times to overload PLMs.",
"They are at the entrance and two tiles in the tunnel. Exit G-mode and go through the room to the far right door."
],
"devNote": [
"Frozen Alcoon platforms and Artificial morph IBJ are not included, as Samus can crouch jump and down grab;",
"they can be considered if G-mode + flash suits are added, though they are still likely not useful."
]
},
{
"id": 91,
"link": [
3,
5
],
"name": "G-Mode Morph, Simple Blind Movement",
"entranceCondition": {
"comeInWithGMode": {
"mode": "any",
"morphed": true
}
},
"requires": [
{
"or": [
{
"and": [
"h_artificialMorphIBJ",
{
"ammo": {
"type": "PowerBomb",
"count": 2
}
}
]
},
{
"and": [
"h_artificialMorphSpringBall",
"HiJump"
]
},
{
"and": [
"h_artificialMorphSpringBallBombJump",
{
"or": [
"h_artificialMorphBombs",
{
"ammo": {
"type": "PowerBomb",
"count": 3
}
}
]
}
]
}
]
},
"h_heatedGModeOffCameraDoor"
],
"flashSuitChecked": true,
"blueSuitChecked": true,
"note": [
"It is important avoid touching the invisible fireballs the Alcoons place. Jump over them or kill the Alcoons with Power Bombs.",
"After entering the morph tunnel, roll through the two camera scroll blocks a few times to overload PLMs.",
"They are at the entrance and two tiles in the tunnel. Exit G-mode and go through the room to the far right door."
]
},
{
"id": 111,
"link": [
3,
7
],
"name": "Base",
"requires": [
{
"or": [
{
"and": [
"canWallJump",
{
"heatFrames": 120
}
]
},
{
"and": [
"HiJump",
{
"heatFrames": 110
}
]
},
{
"and": [
"h_heatedCrouchJumpDownGrab",
{
"heatFrames": 150
}
]
},
{
"and": [
"SpaceJump",
{
"heatFrames": 155
}
]
},
{
"and": [
"canSpringBallJumpMidAir",
{
"heatFrames": 180
}
]
}
]
},
{
"or": [
"canDash",
{
"and": [
{
"haveBlueSuit": {}
},
{
  "heatFrames": 45
}
]
}
]
}
],
"flashSuitChecked": true,
"blueSuitChecked": true
},
{
"id": 138,
"link": [
3,
7
],
"name": "IBJ",
"requires": [
"canIBJ",
{
"or": [
{
"heatFrames": 770
},
{
"and": [
"canJumpIntoIBJ",
{
"heatFrames": 320
}
]
},
{
"and": [
"canDoubleBombJump",
{
"heatFrames": 275
}
]
}
]
}
],
"flashSuitChecked": true,
"blueSuitChecked": true
},
{
"id": 112,
"link": [
3,
8
],
"name": "Base",
"requires": [
{
"heatFrames": 65
},
{
"or": [
"canDash",
{
"heatFrames": 5
}
]
}
],
"flashSuitChecked": true,
"blueSuitChecked": true
},
{
"id": 35,
"link": [
4,
1
],
"name": "Come in Shinecharging, Leave with Spark",
"entranceCondition": {
"comeInShinecharging": {
"length": 3,
"openEnd": 0
}
},
"requires": [
"HiJump",
"canTrickyJump",
"canShinechargeMovementTricky",
{
"or": [
{
"ammo": {
"type": "Missile",
"count": 1
}
},
"Plasma"
]
},
{
"shinespark": {
"frames": 14,
"excessFrames": 0
}
},
{
"heatFrames": 190
}
],
"exitCondition": {
"leaveWithSpark": {}
},
"unlocksDoors": [
{
"types": [
"super"
],
"requires": []
},
{
"types": [
"missiles",
"powerbomb"
],
"requires": [
"never"
]
}
],
"flashSuitChecked": true,
"blueSuitChecked": true
},
{
"id": 74,
"link": [
4,
1
],
"name": "Come in Getting Blue Speed, Leave With Temporary Blue",
"entranceCondition": {
"comeInGettingBlueSpeed": {
"length": 3,
"openEnd": 1,
"minExtraRunSpeed": "$2.0"
}
},
"requires": [
"canXRayTurnaround",
"canLongChainTemporaryBlue",
{
"or": [
{
"and": [
"HiJump",
{
"heatFrames": 490
}
]
},
{
"and": [
"canTrickySpringBallJump",
{
"heatFrames": 580
}
]
}
]
}
],
"exitCondition": {
"leaveWithTemporaryBlue": {}
},
"unlocksDoors": [
{
"types": [
"super",
"powerbomb"
],
"requires": []
},
{
"types": [
"missiles"
],
"requires": [
{
"heatFrames": 50
}
]
}
],
"flashSuitChecked": true,
"blueSuitChecked": true,
"devNote": [
"FIXME: This could be done with lower run speed, at the cost of more heat frames."
]
},
{
"id": 92,
"link": [
4,
1
],
"name": "G-Mode",
"entranceCondition": {
"comeInWithGMode": {
"mode": "any",
"morphed": false
}
},
"requires": [
{
"or": [
"h_crouchJumpDownGrab",
"HiJump",
"canWallJump",
"SpaceJump",
"canSpringBallJumpMidAir"
]
},
{
"or": [
"h_heatedGModeOpenDifferentDoor",
{
"and": [
"h_heatedGModePauseAbuse",
"canFarmWhileShooting",
"canTrickyDodgeEnemies"
]
}
]
}
],
"flashSuitChecked": true,
"blueSuitChecked": true,
"note": [
"It is possible to kill a Multiviola by the door and pause abuse to grab its Energy drop on G-mode exit.",
"It is important avoid touching the invisible fireballs the Alcoons place, and to prevent them from shooting too many fireballs, as they will eventually prevent drops from appearing.",
"One easy way to do this without any beam upgrades or ammo is to kill them before they jump. This can be done from below by jumping and shooting horizontally near the floor surface.",
"Stay near the far wall when shooting to prevent getting too close and triggering their jump."
],
"devNote": [
"Frozen Alcoon platforms and Artificial morph IBJ are not included, as Samus can crouch jump and down grab;",
"they can be considered if G-mode + flash suits are added, though they are still likely not useful.",
"Those are also likely not compatible with preventing the Alcoons from overloading drops."
]
},
{
"id": 36,
"link": [
4,
1
],
"name": "Grapple Teleport",
"entranceCondition": {
"comeInWithGrappleTeleport": {
"blockPositions": [
[
5,
3
],
[
7,
2
]
]
}
},
"requires": [
{
"heatFrames": 45
}
],
"flashSuitChecked": true,
"blueSuitChecked": true
},
{
"id": 37,
"link": [
4,
1
],
"name": "Grapple Teleport Door Lock Skip",
"entranceCondition": {
"comeInWithGrappleTeleport": {
"blockPositions": [
[
3,
12
]
]
}
},
"requires": [],
"bypassesDoorShell": "yes",
"flashSuitChecked": true,
"blueSuitChecked": true
},
{
"id": 107,
"link": [
4,
1
],
"name": "Carry Grapple Teleport",
"entranceCondition": {
"comeInWithGrappleTeleport": {
"blockPositions": [
[
3,
12
]
]
}
},
"requires": [],
"exitCondition": {
"leaveWithGrappleTeleport": {
"blockPositions": [
[
3,
12
]
]
}
},
"bypassesDoorShell": "yes",
"flashSuitChecked": true,
"blueSuitChecked": true
},
{
"id": 38,
"link": [
4,
1
],
"name": "Grapple Teleport X-Ray Climb",
"entranceCondition": {
"comeInWithGrappleTeleport": {
"blockPositions": [
[
2,
28
]
]
}
},
"requires": [
"canXRayClimb",
{
"heatFrames": 1600
}
],
"bypassesDoorShell": "yes",
"flashSuitChecked": true,
"blueSuitChecked": true,
"note": [
"Exit the previous room with Samus in a standing pose (while grappled).",
"After teleporting, press right to release Grapple while staying standing (not being forced into a crouch).",
"Then X-ray climb 1 screen to get up to the door transition, without needing to open the door."
]
},
{
"id": 75,
"link": [
4,
2
],
"name": "Come in Shinecharging, Leave With Temporary Blue",
"entranceCondition": {
"comeInShinecharging": {
"length": 3,
"openEnd": 0
}
},
"requires": [
"canXRayCancelShinecharge",
"canXRayTurnaround",
"canLongChainTemporaryBlue",
{
"heatFrames": 945
}
],
"exitCondition": {
"leaveWithTemporaryBlue": {}
},
"unlocksDoors": [
{
"types": [
"super",
"powerbomb"
],
"requires": []
},
{
"types": [
"missiles"
],
"requires": [
{
"heatFrames": 50
}
]
}
],
"flashSuitChecked": true,
"blueSuitChecked": true
},
{
"id": 93,
"link": [
4,
2
],
"name": "G-Mode",
"entranceCondition": {
"comeInWithGMode": {
"mode": "any",
"morphed": false
}
},
"requires": [
{
  "or": [
    "h_heatedGModeOpenDifferentDoor",
    "h_heatedGModePauseAbuse"
  ]
}
],
"flashSuitChecked": true,
"blueSuitChecked": true,
"note": [
"It is possible to kill a Multiviola by the door and pause abuse to grab its Energy drop on G-mode exit.",
"It is important avoid touching the invisible fireballs the Alcoons place, and to prevent them from shooting too many fireballs, as they will eventually prevent drops from appearing.",
"Either kill them or avoid them then kill the Multiviola near the door without too much delay."
]
},
{
"id": 41,
"link": [
4,
3
],
"name": "Come in Shinecharging, Leave With Spark",
"entranceCondition": {
"comeInShinecharging": {
"length": 3,
"openEnd": 1
}
},
"requires": [
{
  "or": [
    {
      "and": [
        "canShinechargeMovementComplex",
        {
          "heatFrames": 215
        },
        {
          "shinespark": {
            "frames": 15,
            "excessFrames": 0
          }
        }
      ]
    },
    {
      "and": [
        "canShinechargeMovementTricky",
        {
          "heatFrames": 195
        },
        {
          "shinespark": {
            "frames": 5,
            "excessFrames": 0
          }
        }
      ]
    }
  ]
}
],
"exitCondition": {
"leaveWithSpark": {}
},
"unlocksDoors": [
{
"types": [
"super"
],
"requires": []
},
{
"types": [
"missiles",
"powerbomb"
],
"requires": [
"never"
]
}
],
"flashSuitChecked": true,
"blueSuitChecked": true
},
{
"id": 76,
"link": [
4,
3
],
"name": "Come in Shinecharging, Leave With Temporary Blue",
"entranceCondition": {
"comeInShinecharging": {
"length": 3,
"openEnd": 0
}
},
"requires": [
"canXRayCancelShinecharge",
"canXRayTurnaround",
"canLongChainTemporaryBlue",
{
"heatFrames": 500
}
],
"exitCondition": {
"leaveWithTemporaryBlue": {}
},
"unlocksDoors": [
{
"types": [
"super",
"powerbomb"
],
"requires": []
},
{
"types": [
"missiles"
],
"requires": [
{
"heatFrames": 50
}
]
}
],
"flashSuitChecked": true,
"blueSuitChecked": true
},
{
"id": 94,
"link": [
4,
3
],
"name": "G-Mode",
"entranceCondition": {
"comeInWithGMode": {
"mode": "any",
"morphed": false
}
},
"requires": [
"h_heatedGModeOpenDifferentDoor"
],
"flashSuitChecked": true,
"blueSuitChecked": true,
"note": "It is important avoid touching the invisible fireballs the Alcoons place."
},
{
"id": 42,
"link": [
4,
4
],
"name": "Leave with Runway",
"requires": [],
"exitCondition": {
"leaveWithRunway": {
"length": 4,
"openEnd": 1
}
},
"flashSuitChecked": true,
"blueSuitChecked": true
},
{
"id": 126,
"link": [
4,
4
],
"name": "Leave Spinning (Space Jump)",
"requires": [
{
  "heatFrames": 140
},
"SpaceJump"
],
"exitCondition": {
"leaveSpinning": {
"remoteRunway": {
"length": 5,
"openEnd": 1
}
}
},
"flashSuitChecked": true,
"blueSuitChecked": true
},
{
"id": 127,
"link": [
4,
4
],
"name": "Leave With Mockball",
"requires": [
{
  "heatFrames": 140
}
],
"exitCondition": {
"leaveWithMockball": {
"remoteRunway": {
"length": 7,
"openEnd": 1
},
"landingRunway": {
"length": 4,
"openEnd": 1
}
}
},
"flashSuitChecked": true,
"blueSuitChecked": true
},
{
"id": 128,
"link": [
4,
4
],
"name": "Leave With Spring Ball Bounce",
"requires": [
{
"heatFrames": 140
}
],
"exitCondition": {
"leaveWithSpringBallBounce": {
"remoteRunway": {
"length": 7,
"openEnd": 1
},
"landingRunway": {
"length": 4,
"openEnd": 1
},
"movementType": "uncontrolled"
}
},
"flashSuitChecked": true,
"blueSuitChecked": true
},
{
"id": 129,
"link": [
4,
4
],
"name": "Leave Space Jumping",
"requires": [
{
"heatFrames": 140
},
"h_heatedRemoteRunwayPreciseSpaceJump"
],
"exitCondition": {
"leaveSpaceJumping": {
"remoteRunway": {
"length": 7,
"openEnd": 0
}
}
},
"flashSuitChecked": true,
"blueSuitChecked": true
},
{
"id": 100,
"link": [
4,
4
],
"name": "Alcoon and Multiviola Farm",
"requires": [
"h_heatProof",
{
"resetRoom": {
"nodes": [
4
]
}
},
{
"or": [
{
"and": [
"canDash",
{
"or": [
"Plasma",
"ScrewAttack",
{
"and": [
"Wave",
{
"cycleFrames": 20
}
]
},
{
"and": [
"Spazer",
{
"cycleFrames": 90
}
]
},
{
"and": [
"canDodgeWhileShooting",
{
"cycleFrames": 260
},
{
"or": [
"canFarmWhileShooting",
{
"cycleFrames": 90
}
]
}
]
}
]
}
]
},
{
"and": [
{
"haveBlueSuit": {}
},
{
"cycleFrames": 90
}
]
}
]
},
{
"or": [
"canWallJump",
"HiJump",
"h_crouchJumpDownGrab",
"SpaceJump"
]
},
{
"cycleFrames": 450
}
],
"resetsObstacles": [
"R-Mode"
],
"farmCycleDrops": [
{
"enemy": "Multiviola",
"count": 1
},
{
"enemy": "Alcoon",
"count": 2
}
],
"flashSuitChecked": true,
"blueSuitChecked": true
},
{
"id": 101,
"link": [
4,
4
],
"name": "Single Multiviola Farm",
"requires": [
"h_heatProof",
{
"resetRoom": {
"nodes": [
4
]
}
},
{
"cycleFrames": 200
},
"canCameraManip",
{
"or": [
{
"and": [
"canDash",
{
"or": [
"Plasma",
"Wave",
"Spazer",
{
"cycleFrames": 30
}
]
}
]
},
{
"haveBlueSuit": {}
}
]
}
],
"resetsObstacles": [
"R-Mode"
],
"farmCycleDrops": [
{
"enemy": "Multiviola",
"count": 1
}
],
"flashSuitChecked": true,
"blueSuitChecked": true,
"note": "Jump and aim down two to three times to activate the Multiviola."
},
{
"id": 43,
"link": [
4,
4
],
"name": "Crystal Flash",
"requires": [
{
"obstaclesNotCleared": [
"R-Mode"
]
},
"h_heatedCrystalFlash"
],
"flashSuitChecked": true,
"blueSuitChecked": true
},
{
"id": 150,
"link": [
4,
4
],
"name": "Come in Shinecharging, Crystal Spark",
"entranceCondition": {
"comeInShinecharging": {
"length": 3,
"openEnd": 0
}
},
"requires": [
{
"or": [
{
"and": [
"h_enemyDrops",
"h_heatedCrystalSparkWithoutLenience"
]
},
"h_heatedCrystalSpark"
]
}
],
"flashSuitChecked": true,
"blueSuitChecked": true,
"devNote": [
"No lenience, since the Alcoons are a good Power Bomb farm.",
"Since this can not be done with a flash suit, it is implicitly assumed Samus can crouch jump and down grab."
]
},
{
"id": 136,
"link": [
4,
4
],
"name": "R-Mode Entry",
"entranceCondition": {
"comeInWithRMode": {}
},
"requires": [],
"clearsObstacles": [
"R-Mode"
],
"flashSuitChecked": true,
"blueSuitChecked": true
},
{
"id": 64,
"link": [
4,
4
],
"name": "G-Mode Setup - Get Hit By Multiviola",
"requires": [
"canComplexGMode",
{
"or": [
"canWallJump",
"HiJump",
"SpaceJump",
"h_heatedCrouchJumpDownGrab",
"Wave"
]
},
{
"heatFrames": 950
},
{
"or": [
"canTrickyJump",
"Wave",
"Spazer",
"Plasma",
{
"ammo": {
"type": "Missile",
"count": 1
}
},
{
"ammo": {
"type": "Super",
"count": 1
}
},
{
"enemyDamage": {
"enemy": "Alcoon",
"type": "fireball",
"hits": 1
}
}
]
}
],
"exitCondition": {
"leaveWithGModeSetup": {}
},
"flashSuitChecked": true,
"blueSuitChecked": true,
"note": "Climb the room and open the top door, so that the Multiviola will reach the second door."
},
{
"id": 95,
"link": [
4,
5
],
"name": "G-Mode, Simple Blind Movement",
"entranceCondition": {
"comeInWithGMode": {
"mode": "any",
"morphed": false
}
},
"requires": [
"Morph",
{
"or": [
"HiJump",
"canWallJump",
"SpaceJump",
"canSpringBallJumpMidAir",
"canIBJ",
{
"and": [
"h_crouchJumpDownGrab",
"canBombHorizontally"
]
},
{
"and": [
"h_crouchJumpDownGrab",
"canTrickyUseFrozenEnemies"
]
}
]
},
"h_heatedGModeOffCameraDoor"
],
"flashSuitChecked": true,
"blueSuitChecked": true,
"note": [
"It is important avoid touching the invisible fireballs the Alcoons place.",
"It is possible to kill them without any beam upgrades or ammo by jumping and shooting horizontally near the floor surface.",
"Stay near the far wall when shooting to prevent getting too close and triggering their jump.",
"After entering the morph tunnel, roll through the two camera scroll blocks a few times to overload PLMs.",
"They are at the entrance and two tiles in the tunnel. Exit G-mode and go through the room to the far right door."
],
"devNote": [
"Frozen Alcoon platforms and Artificial morph IBJ are not included, as Samus can crouch jump and down grab;",
"they can be considered if G-mode + flash suits are added, though they are still likely not useful."
]
},
{
"id": 96,
"link": [
4,
5
],
"name": "G-Mode Morph, Simple Blind Movement",
"entranceCondition": {
"comeInWithGMode": {
"mode": "any",
"morphed": true
}
},
"requires": [
{
"or": [
{
"and": [
"h_artificialMorphIBJ",
"h_artificialMorphPowerBomb"
]
},
{
"and": [
"h_artificialMorphSpringBall",
"HiJump"
]
},
{
"and": [
"h_artificialMorphSpringBallBombJump",
"h_additionalBomb"
]
}
]
},
"h_heatedGModeOffCameraDoor"
],
"flashSuitChecked": true,
"blueSuitChecked": true,
"note": [
"It is important avoid touching the invisible fireballs the Alcoons place. Jump over them or kill the Alcoons with Power Bombs.",
"After entering the morph tunnel, roll through the two camera scroll blocks a few times to overload PLMs.",
"They are at the entrance and two tiles in the tunnel. Exit G-mode and go through the room to the far right door."
]
},
{
"id": 44,
"link": [
4,
6
],
"name": "Base",
"requires": [
{
"or": [
{
"and": [
"canWallJump",
{
"heatFrames": 130
}
]
},
{
"and": [
"HiJump",
{
"heatFrames": 115
}
]
},
{
"and": [
"h_heatedCrouchJumpDownGrab",
{
"heatFrames": 150
}
]
},
{
"and": [
"SpaceJump",
{
"heatFrames": 155
}
]
},
{
"and": [
"canSpringBallJumpMidAir",
{
"heatFrames": 180
}
]
}
]
},
{
"or": [
"canDash",
{
"and": [
{
"haveBlueSuit": {}
},
{
"heatFrames": 40
}
]
}
]
}
],
"flashSuitChecked": true,
"blueSuitChecked": true
},
{
"id": 45,
"link": [
4,
6
],
"name": "IBJ",
"requires": [
"canIBJ",
{
"or": [
{
"heatFrames": 735
},
{
"and": [
"canJumpIntoIBJ",
{
"heatFrames": 285
}
]
},
{
"and": [
"canDoubleBombJump",
{
"heatFrames": 240
}
]
}
]
},
{
"or": [
"canTrickyDodgeEnemies",
{
"heatFrames": 100
}
]
},
{
"or": [
"canDash",
{
"and": [
{
"haveBlueSuit": {}
},
{
"heatFrames": 40
}
]
}
]
}
],
"flashSuitChecked": true,
"blueSuitChecked": true,
"note": "Kill the enemies, then IBJ."
},
{
"id": 46,
"link": [
4,
6
],
"name": "Frozen Alcoon",
"requires": [
"canCameraManip",
"canTrickyUseFrozenEnemies",
{
"heatFrames": 750
},
{
"or": [
"canDash",
{
"heatFrames": 40
}
]
}
],
"wallJumpAvoid": true,
"flashSuitChecked": true,
"blueSuitChecked": true,
"note": [
"Spawn the Alcoon, then run back to the right so it will not stop and fire projectiles.",
"Then wait for it to walk off the ledge."
]
},
{
"id": 139,
"link": [
4,
6
],
"name": "Frozen Multiviola from Below",
"entranceCondition": {
"comeInNormally": {}
},
"requires": [
"canCameraManip",
"canTrickyUseFrozenEnemies",
{
"heatFrames": 330
}
],
"wallJumpAvoid": true,
"flashSuitChecked": true,
"blueSuitChecked": true,
"note": [
"Jump and aim down twice to bring the Multiviola below onto camera.",
"Freeze it and use it as a platform."
]
},
{
"id": 113,
"link": [
4,
7
],
"name": "Base",
"requires": [
{
"heatFrames": 65
},
{
"or": [
"canDash",
{
"heatFrames": 5
}
]
}
],
"flashSuitChecked": true,
"blueSuitChecked": true
},
{
"id": 47,
"link": [
5,
1
],
"name": "Grapple Teleport",
"entranceCondition": {
"comeInWithGrappleTeleport": {
"blockPositions": [
[
5,
3
],
[
7,
2
]
]
}
},
"requires": [
{
"heatFrames": 45
}
],
"flashSuitChecked": true,
"blueSuitChecked": true
},
{
"id": 108,
"link": [
5,
1
],
"name": "Grapple Teleport Door Escape",
"entranceCondition": {
"comeInWithGrappleTeleport": {
"blockPositions": [
[
3,
12
]
]
}
},
"requires": [
{
"or": [
"h_heatedGrappleTeleportWallEscape",
{
"and": [
{
"doorUnlockedAtNode": 1
},
{
"heatFrames": 20
}
]
}
]
},
"canOffScreenMovement",
{
"enemyDamage": {
"enemy": "Multiviola",
"type": "contact",
"hits": 1
}
}
],
"unlocksDoors": [
{
"types": [
"ammo"
],
"requires": []
}
],
"flashSuitChecked": true,
"blueSuitChecked": true
},
{
"id": 48,
"link": [
5,
1
],
"name": "Grapple Teleport Door Lock Skip",
"entranceCondition": {
"comeInWithGrappleTeleport": {
"blockPositions": [
[
3,
12
]
]
}
},
"requires": [],
"bypassesDoorShell": "yes",
"flashSuitChecked": true,
"blueSuitChecked": true
},
{
"id": 109,
"link": [
5,
1
],
"name": "Carry Grapple Teleport",
"entranceCondition": {
"comeInWithGrappleTeleport": {
"blockPositions": [
[
3,
12
]
]
}
},
"requires": [],
"exitCondition": {
"leaveWithGrappleTeleport": {
"blockPositions": [
[
3,
12
]
]
}
},
"bypassesDoorShell": "yes",
"flashSuitChecked": true,
"blueSuitChecked": true
},
{
"id": 49,
"link": [
5,
1
],
"name": "Grapple Teleport X-Ray Climb",
"entranceCondition": {
"comeInWithGrappleTeleport": {
"blockPositions": [
[
2,
28
]
]
}
},
"requires": [
"canXRayClimb",
{
"heatFrames": 1600
}
],
"bypassesDoorShell": "yes",
"flashSuitChecked": true,
"blueSuitChecked": true,
"note": [
"Exit the previous room with Samus in a standing pose (while grappled).",
"After teleporting, press right to release Grapple while staying standing (not being forced into a crouch).",
"Then X-ray climb 1 screen to get up to the door transition, without needing to open the door."
]
},
{
"id": 50,
"link": [
5,
5
],
"name": "Leave with Runway",
"requires": [],
"exitCondition": {
"leaveWithRunway": {
"length": 4,
"openEnd": 0
}
},
"flashSuitChecked": true,
"blueSuitChecked": true
},
{
"id": 51,
"link": [
5,
5
],
"name": "Crystal Flash",
"requires": [
{
"obstaclesNotCleared": [
"R-Mode"
]
},
"h_heatedCrystalFlash"
],
"flashSuitChecked": true,
"blueSuitChecked": true
},
{
"id": 151,
"link": [
5,
5
],
"name": "Come in Shinecharging, Crystal Spark",
"entranceCondition": {
"comeInShinecharging": {
"length": 3,
"openEnd": 0
}
},
"requires": [
"h_heatedCrystalSpark"
],
"flashSuitChecked": true,
"blueSuitChecked": true
},
{
"id": 137,
"link": [
5,
5
],
"name": "R-Mode Entry",
"entranceCondition": {
"comeInWithRMode": {}
},
"requires": [],
"clearsObstacles": [
"R-Mode"
],
"flashSuitChecked": true,
"blueSuitChecked": true
},
{
"id": 52,
"link": [
5,
6
],
"name": "Screw",
"requires": [
"canDash",
"Morph",
"ScrewAttack",
{
"heatFrames": 600
}
],
"flashSuitChecked": true,
"blueSuitChecked": true
},
{
"id": 53,
"link": [
5,
6
],
"name": "Power Bomb",
"requires": [
"canDash",
"h_usePowerBomb",
{
"heatFrames": 660
}
],
"flashSuitChecked": true,
"blueSuitChecked": true
},
{
"id": 54,
"link": [
5,
6
],
"name": "Bombs",
"requires": [
"canDash",
"h_useMorphBombs",
{
"heatFrames": 730
}
],
"flashSuitChecked": true,
"blueSuitChecked": true
},
{
"id": 140,
"link": [
5,
6
],
"name": "Blue Suit",
"requires": [
{
"haveBlueSuit": {}
},
"Morph",
{
"heatFrames": 910
}
],
"flashSuitChecked": true,
"blueSuitChecked": true
},
{
"id": 102,
"link": [
5,
6
],
"name": "Cross with Crystal Flash (Early Position)",
"requires": [
"canDash",
{
"heatFrames": 250
},
"h_heatedCrystalFlash",
{
"heatFrames": 380
}
],
"flashSuitChecked": true,
"blueSuitChecked": true,
"devNote": "FIXME: a dashless option could be added here."
},
{
"id": 103,
"link": [
5,
6
],
"name": "Cross with Crystal Flash (Later Position)",
"requires": [
"canDash",
{
"heatFrames": 450
},
{
"or": [
"ScrewAttack",
{
"and": [
"h_usePowerBomb",
{
"heatFrames": 40
}
]
},
{
"and": [
"h_useMorphBombs",
{
"heatFrames": 80
}
]
}
]
},
"h_heatedCrystalFlash",
{
"heatFrames": 250
}
],
"flashSuitChecked": true,
"blueSuitChecked": true,
"devNote": "FIXME: a dashless option could be added here."
},
{
"id": 131,
"link": [
5,
6
],
"name": "Use Flash Suit",
"requires": [
"Morph",
{
"useFlashSuit": {}
},
{
"or": [
{
"and": [
"h_heatProof",
{
"shinespark": {
"frames": 32,
"excessFrames": 10
}
}
]
},
{
"and": [
{
"shinespark": {
"frames": 53
}
},
{
"heatFrames": 520
}
]
}
]
}
],
"flashSuitChecked": true,
"blueSuitChecked": true
},
{
"id": 55,
"link": [
6,
1
],
"name": "Base",
"requires": [
{
"or": [
{
"and": [
"canWallJump",
{
"heatFrames": 100
}
]
},
{
"and": [
"canWallJump",
"ScrewAttack",
{
"heatFrames": 85
}
]
},
{
"and": [
"HiJump",
{
"heatFrames": 95
}
]
},
{
"and": [
"HiJump",
"ScrewAttack",
{
"heatFrames": 75
}
]
},
{
"and": [
"HiJump",
"Plasma",
{
"heatFrames": 70
}
]
},
{
"and": [
"h_heatedCrouchJumpDownGrab",
{
"heatFrames": 100
}
]
},
{
"and": [
"SpaceJump",
{
"heatFrames": 115
}
]
},
{
"and": [
"canSpringBallJumpMidAir",
{
"heatFrames": 120
}
]
}
]
},
{
"or": [
"canDash",
{
"heatFrames": 30
}
]
}
],
"unlocksDoors": [
{
"types": [
"missiles"
],
"requires": [
{
"heatFrames": 30
}
]
},
{
"types": [
"powerbomb"
],
"requires": [
{
"heatFrames": 70
}
]
}
],
"flashSuitChecked": true,
"blueSuitChecked": true,
"devNote": [
"The heat frames account for bad scenarios of where the Multiviola may be (entering from node 4),",
"which is why Screw Attack can be helpful."
]
},
{
"id": 56,
"link": [
6,
1
],
"name": "Leave With Runway",
"requires": [
"canDash",
{
"or": [
{
"and": [
"canWallJump",
{
"heatFrames": 80
}
]
},
{
"and": [
"canWallJump",
"ScrewAttack",
{
"heatFrames": 60
}
]
},
{
"and": [
"HiJump",
{
"heatFrames": 80
}
]
},
{
"and": [
"HiJump",
"ScrewAttack",
{
"heatFrames": 60
}
]
},
{
"and": [
"h_heatedCrouchJumpDownGrab",
{
"heatFrames": 80
}
]
},
{
"and": [
"SpaceJump",
{
"heatFrames": 80
}
]
},
{
"and": [
"canSpringBallJumpMidAir",
{
"heatFrames": 90
}
]
}
]
}
],
"exitCondition": {
"leaveWithRunway": {
"length": 8,
"openEnd": 1
}
},
"unlocksDoors": [
{
"types": [
"missiles"
],
"requires": [
{
"heatFrames": 50
}
]
},
{
"types": [
"super"
],
"requires": []
},
{
"types": [
"powerbomb"
],
"requires": [
{
"heatFrames": 70
}
]
}
],
"flashSuitChecked": true,
"blueSuitChecked": true
},
{
"id": 57,
"link": [
6,
1
],
"name": "IBJ",
"requires": [
"canIBJ",
{
"or": [
{
"heatFrames": 1500
},
{
"and": [
"canTrickyDodgeEnemies",
"canJumpIntoIBJ",
{
"heatFrames": 185
}
]
}
]
}
],
"flashSuitChecked": true,
"blueSuitChecked": true,
"note": "Kill the enemies or carefully dodge them, then IBJ."
},
{
"id": 58,
"link": [
6,
1
],
"name": "Frozen Enemies",
"requires": [
"canUseFrozenEnemies",
{
"heatFrames": 285
},
{
"or": [
"canDash",
{
"heatFrames": 15
}
]
}
],
"wallJumpAvoid": true,
"flashSuitChecked": true,
"blueSuitChecked": true,
"devNote": [
"FIXME: this represents a worst case Multiviola cycle.",
"Typically freezing the Multiviola is faster but the Alcoon is also an option."
]
},
{
"id": 59,
"link": [
6,
4
],
"name": "Base",
"requires": [
"canDash",
{
"or": [
{
"heatFrames": 130
},
{
"and": [
{
"enemyKill": {
"enemies": [
[
"Alcoon"
]
],
"explicitWeapons": [
"ScrewAttack",
"Missile",
"Super",
"Wave+Plasma"
]
}
},
{
"heatFrames": 125
}
]
},
{
"and": [
"h_PlasmaHitbox",
{
"heatFrames": 125
}
]
}
]
}
],
"unlocksDoors": [
{
"types": [
"missiles"
],
"requires": [
{
"heatFrames": 20
}
]
},
{
"types": [
"powerbomb"
],
"requires": [
{
"heatFrames": 20
}
]
}
],
"flashSuitChecked": true,
"blueSuitChecked": true
},
{
"id": 141,
"link": [
6,
4
],
"name": "Blue Suit",
"requires": [
{
"haveBlueSuit": {}
},
{
"heatFrames": 170
}
],
"flashSuitChecked": true,
"blueSuitChecked": true
},
{
"id": 60,
"link": [
6,
4
],
"name": "Leave with Runway",
"requires": [
"canDash",
{
"or": [
{
"heatFrames": 115
},
{
"and": [
{
"enemyKill": {
"enemies": [
[
"Alcoon"
]
],
"explicitWeapons": [
"ScrewAttack",
"Missile",
"Super",
"Wave+Plasma"
]
}
},
{
"heatFrames": 110
}
]
},
{
"and": [
"h_PlasmaHitbox",
{
"heatFrames": 110
}
]
}
]
}
],
"exitCondition": {
"leaveWithRunway": {
"length": 4,
"openEnd": 1
}
},
"unlocksDoors": [
{
"types": [
"missiles"
],
"requires": [
{
"heatFrames": 20
}
]
},
{
"types": [
"super"
],
"requires": []
},
{
"types": [
"powerbomb"
],
"requires": [
{
"heatFrames": 20
}
]
}
],
"flashSuitChecked": true,
"blueSuitChecked": true
},
{
"id": 114,
"link": [
6,
7
],
"name": "Base",
"requires": [
"canDash",
{
"or": [
{
"heatFrames": 145
},
{
"and": [
{
"enemyKill": {
"enemies": [
[
"Alcoon"
]
],
"explicitWeapons": [
"ScrewAttack",
"Missile",
"Super",
"Wave+Plasma"
]
}
},
{
"heatFrames": 140
}
]
},
{
"and": [
"h_PlasmaHitbox",
{
"heatFrames": 140
}
]
}
]
}
],
"flashSuitChecked": true,
"blueSuitChecked": true
},
{
"id": 142,
"link": [
6,
7
],
"name": "Blue Suit",
"requires": [
{
"haveBlueSuit": {}
},
{
"heatFrames": 170
}
],
"flashSuitChecked": true,
"blueSuitChecked": true
},
{
"id": 115,
"link": [
7,
3
],
"name": "Base",
"requires": [
"canDash",
{
"or": [
{
"heatFrames": 130
},
{
"and": [
{
"enemyKill": {
"enemies": [
[
"Alcoon"
]
],
"explicitWeapons": [
"ScrewAttack",
"Missile",
"Super",
"Wave+Plasma"
]
}
},
{
"heatFrames": 125
}
]
},
{
"and": [
"h_PlasmaHitbox",
{
"heatFrames": 125
}
]
}
]
}
],
"unlocksDoors": [
{
"types": [
"missiles"
],
"requires": [
{
"heatFrames": 20
}
]
},
{
"types": [
"powerbomb"
],
"requires": [
{
"heatFrames": 10
}
]
}
],
"flashSuitChecked": true,
"blueSuitChecked": true
},
{
"id": 143,
"link": [
7,
3
],
"name": "Blue Suit",
"requires": [
{
"haveBlueSuit": {}
},
{
"heatFrames": 170
}
],
"flashSuitChecked": true,
"blueSuitChecked": true
},
{
"id": 40,
"link": [
7,
3
],
"name": "Leave with Runway",
"requires": [
"canDash",
{
"or": [
{
"heatFrames": 110
},
{
"and": [
{
"enemyKill": {
"enemies": [
[
"Alcoon"
]
],
"explicitWeapons": [
"ScrewAttack",
"Missile",
"Super",
"Wave+Plasma"
]
}
},
{
"heatFrames": 100
}
]
},
{
"and": [
"h_PlasmaHitbox",
{
"heatFrames": 100
}
]
}
]
}
],
"exitCondition": {
"leaveWithRunway": {
"length": 4,
"openEnd": 1
}
},
"unlocksDoors": [
{
"types": [
"missiles"
],
"requires": [
{
"heatFrames": 65
}
]
},
{
"types": [
"super"
],
"requires": []
},
{
"types": [
"powerbomb"
],
"requires": [
{
"heatFrames": 30
}
]
}
],
"flashSuitChecked": true,
"blueSuitChecked": true
},
{
"id": 116,
"link": [
7,
4
],
"name": "Base",
"requires": [
{
"or": [
{
"and": [
"canWallJump",
{
"heatFrames": 75
}
]
},
{
"and": [
"HiJump",
{
"heatFrames": 60
}
]
},
{
"and": [
"h_heatedCrouchJumpDownGrab",
{
"heatFrames": 110
}
]
},
{
"and": [
"SpaceJump",
{
"heatFrames": 95
}
]
},
{
"and": [
"canSpringBallJumpMidAir",
{
"heatFrames": 120
}
]
}
]
}
],
"flashSuitChecked": true,
"blueSuitChecked": true
},
{
"id": 30,
"link": [
7,
4
],
"name": "Leave with Runway",
"requires": [
"canDash",
{
"or": [
{
"and": [
"canWallJump",
{
"heatFrames": 55
}
]
},
{
"and": [
"HiJump",
{
"heatFrames": 40
}
]
},
{
"and": [
"h_heatedCrouchJumpDownGrab",
{
"heatFrames": 90
}
]
},
{
"and": [
"SpaceJump",
{
"heatFrames": 75
}
]
},
{
"and": [
"canSpringBallJumpMidAir",
{
"heatFrames": 100
}
]
}
]
}
],
"exitCondition": {
"leaveWithRunway": {
"length": 4,
"openEnd": 1
}
},
"unlocksDoors": [
{
"types": [
"missiles"
],
"requires": [
{
"heatFrames": 50
}
]
},
{
"types": [
"super"
],
"requires": []
},
{
"types": [
"powerbomb"
],
"requires": [
{
"heatFrames": 110
}
]
}
],
"flashSuitChecked": true,
"blueSuitChecked": true
},
{
"id": 33,
"link": [
7,
4
],
"name": "IBJ",
"requires": [
"canIBJ",
{
"or": [
{
"heatFrames": 670
},
{
"and": [
"canJumpIntoIBJ",
{
"heatFrames": 220
}
]
},
{
"and": [
"canDoubleBombJump",
{
"heatFrames": 175
}
]
}
]
}
],
"flashSuitChecked": true,
"blueSuitChecked": true
},
{
"id": 117,
"link": [
7,
6
],
"name": "Base",
"requires": [
{
"or": [
{
"and": [
"canWallJump",
{
"heatFrames": 150
}
]
},
{
"and": [
"HiJump",
{
"heatFrames": 110
}
]
},
{
"and": [
"h_heatedCrouchJumpDownGrab",
"h_heatedCrouchJumpDownGrab",
{
"heatFrames": 270
}
]
},
{
"and": [
"h_heatedCrouchJumpDownGrab",
"h_heatedCrouchJumpDownGrab",
{
"enemyKill": {
"enemies": [
[
"Multiviola"
]
],
"explicitWeapons": [
"Missile",
"Super",
"Wave",
"Plasma"
]
}
},
{
"heatFrames": 200
}
]
},
{
"and": [
"SpaceJump",
{
"heatFrames": 205
}
]
}
]
},
{
"or": [
"canDash",
{
"and": [
{
"haveBlueSuit": {}
},
{
"heatFrames": 40
}
]
}
]
}
],
"flashSuitChecked": true,
"blueSuitChecked": true
},
{
"id": 118,
"link": [
7,
8
],
"name": "Base",
"requires": [
"canDash",
{
"or": [
{
"heatFrames": 160
},
{
"and": [
{
"enemyKill": {
"enemies": [
[
"Multiviola",
"Alcoon"
]
],
"explicitWeapons": [
"ScrewAttack",
"Wave+Plasma"
]
}
},
{
"heatFrames": 145
}
]
},
{
"and": [
{
"enemyKill": {
"enemies": [
[
"Multiviola"
]
],
"explicitWeapons": [
"Missile",
"Super",
"Plasma"
]
}
},
{
"heatFrames": 150
}
]
},
{
"and": [
"h_PlasmaHitbox",
{
"heatFrames": 145
}
]
}
]
}
],
"flashSuitChecked": true,
"blueSuitChecked": true,
"devNote": [
"This includes time to wait for the Multiviola to move out of the way (if it can't be quickly killed),",
"as will normally be a problem when entering through the upper doors (node 1 or 4)."
]
},
{
"id": 144,
"link": [
7,
8
],
"name": "Blue Suit",
"requires": [
{
"haveBlueSuit": {}
},
{
"heatFrames": 170
}
],
"flashSuitChecked": true,
"blueSuitChecked": true
},
{
"id": 119,
"link": [
8,
2
],
"name": "Base",
"requires": [
"canDash",
{
"or": [
{
"heatFrames": 115
},
{
"and": [
{
"enemyKill": {
"enemies": [
[
"Alcoon"
]
],
"explicitWeapons": [
"ScrewAttack",
"Missile",
"Super",
"Wave+Plasma"
]
}
},
{
"heatFrames": 110
}
]
},
{
"and": [
"h_PlasmaHitbox",
{
"heatFrames": 110
}
]
}
]
}
],
"unlocksDoors": [
{
"types": [
"missiles"
],
"requires": [
{
"heatFrames": 30
}
]
},
{
"types": [
"powerbomb"
],
"requires": [
{
"heatFrames": 10
}
]
}
],
"flashSuitChecked": true,
"blueSuitChecked": true
},
{
"id": 145,
"link": [
8,
2
],
"name": "Blue Suit",
"requires": [
{
"haveBlueSuit": {}
},
{
"heatFrames": 140
}
],
"flashSuitChecked": true,
"blueSuitChecked": true
},
{
"id": 23,
"link": [
8,
2
],
"name": "Leave with Runway",
"requires": [
"canDash",
{
"heatFrames": 70
}
],
"exitCondition": {
"leaveWithRunway": {
"length": 13,
"openEnd": 0,
"gentleDownTiles": 4
}
},
"unlocksDoors": [
{
"types": [
"missiles"
],
"requires": [
{
"heatFrames": 50
}
]
},
{
"types": [
"super"
],
"requires": []
},
{
"types": [
"powerbomb"
],
"requires": [
{
"heatFrames": 30
}
]
}
],
"flashSuitChecked": true,
"blueSuitChecked": true
},
{
"id": 120,
"link": [
8,
3
],
"name": "Base",
"requires": [
{
"or": [
{
"and": [
"canWallJump",
{
"heatFrames": 85
}
]
},
{
"and": [
"canWallJump",
"ScrewAttack",
{
"heatFrames": 65
}
]
},
{
"and": [
"HiJump",
{
"heatFrames": 75
}
]
},
{
"and": [
"HiJump",
"ScrewAttack",
{
"heatFrames": 55
}
]
},
{
"and": [
"h_heatedCrouchJumpDownGrab",
{
"heatFrames": 80
},
{
"or": [
{
"noBlueSuit": {}
},
"canXRayCancelShinecharge",
"canMidAirMorph",
{
"heatFrames": 60
}
]
}
]
},
{
"and": [
"SpaceJump",
{
"heatFrames": 100
}
]
},
{
"and": [
"canSpringBallJumpMidAir",
{
"heatFrames": 95
}
]
}
]
}
],
"flashSuitChecked": true,
"blueSuitChecked": true
},
{
"id": 17,
"link": [
8,
3
],
"name": "IBJ",
"requires": [
"canIBJ",
{
"or": [
{
"heatFrames": 670
},
{
"and": [
"canJumpIntoIBJ",
{
"heatFrames": 220
}
]
},
{
"and": [
"canDoubleBombJump",
{
"heatFrames": 175
}
]
}
]
}
],
"flashSuitChecked": true,
"blueSuitChecked": true
},
{
"id": 14,
"link": [
8,
3
],
"name": "Leave With Runway",
"requires": [
"canDash",
{
"or": [
{
"and": [
"canWallJump",
{
"heatFrames": 65
}
]
},
{
"and": [
"canWallJump",
"ScrewAttack",
{
"heatFrames": 45
}
]
},
{
"and": [
"HiJump",
{
"heatFrames": 55
}
]
},
{
"and": [
"HiJump",
"ScrewAttack",
{
"heatFrames": 35
}
]
},
{
"and": [
"h_heatedCrouchJumpDownGrab",
{
"heatFrames": 60
}
]
},
{
"and": [
"SpaceJump",
{
"heatFrames": 80
}
]
},
{
"and": [
"canSpringBallJumpMidAir",
{
"heatFrames": 75
}
]
}
]
}
],
"exitCondition": {
"leaveWithRunway": {
"length": 4,
"openEnd": 1
}
},
"unlocksDoors": [
{
"types": [
"missiles"
],
"requires": [
{
"heatFrames": 50
}
]
},
{
"types": [
"super"
],
"requires": []
},
{
"types": [
"powerbomb"
],
"requires": [
{
"heatFrames": 110
}
]
}
],
"flashSuitChecked": true,
"blueSuitChecked": true
},
{
"id": 130,
"link": [
8,
3
],
"name": "Use Stored Spark",
"requires": [
{
"heatFrames": 65
},
"h_storedSpark",
{
"or": [
{
"shinespark": {
"frames": 4,
"excessFrames": 3
}
},
{
"and": [
"canDownGrab",
{
"shinespark": {
"frames": 4,
"excessFrames": 4
}
}
]
}
]
},
{
"heatFrames": 105
}
],
"flashSuitChecked": true,
"blueSuitChecked": true
},
{
"id": 121,
"link": [
8,
7
],
"name": "Base",
"requires": [
{
"or": [
{
"and": [
"canWallJump",
{
"heatFrames": 160
}
]
},
{
"and": [
"canWallJump",
"ScrewAttack",
{
"heatFrames": 140
}
]
},
{
"and": [
"HiJump",
{
"heatFrames": 135
}
]
},
{
"and": [
"HiJump",
"ScrewAttack",
{
"heatFrames": 105
}
]
},
{
"and": [
"h_heatedCrouchJumpDownGrab",
"h_heatedCrouchJumpDownGrab",
{
"heatFrames": 195
},
{
"or": [
{
"noBlueSuit": {}
},
"canXRayCancelShinecharge",
"canMidAirMorph",
{
"heatFrames": 60
}
]
}
]
},
{
"and": [
"SpaceJump",
{
"heatFrames": 210
}
]
},
{
"and": [
"canSpringBallJumpMidAir",
{
"heatFrames": 280
}
]
}
]
},
{
"or": [
"canDash",
{
"and": [
{
"haveBlueSuit": {}
},
{
"heatFrames": 40
}
]
}
]
}
],
"flashSuitChecked": true,
"blueSuitChecked": true
}
],
"notables": [],
"nextStratId": 152,
"nextNotableId": 1,
"devNote": [
"FIXME: Using a Power Bomb (e.g. for Crystal Flash) prevents using frozen enemies."
]
}
