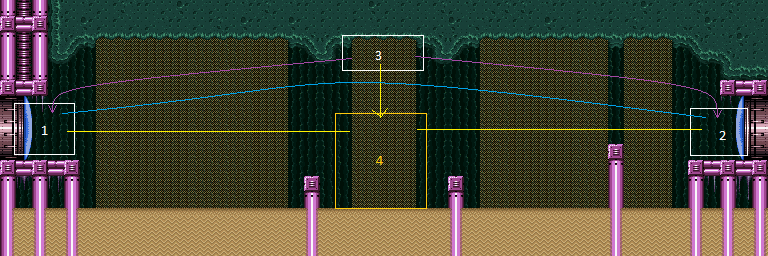
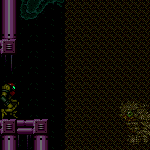
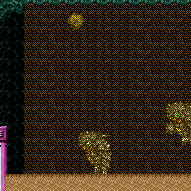
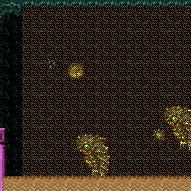
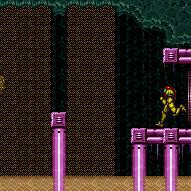
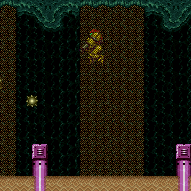
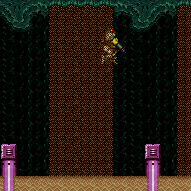
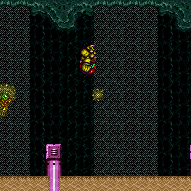
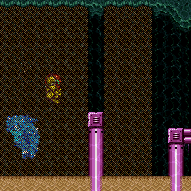
East Sand Hall
Room ID: 210
|
Exit condition: {
"leaveWithRunway": {
"length": 4,
"openEnd": 1
}
} |
|
Fire angle-down shots to kill the first Evir from safely on the ledge, then collect the drop using Grapple. Crouching can help in reaching the Evir's drop if it is low. Requires: {
"resetRoom": {
"nodes": [
1
]
}
}
"canSuitlessMaridia"
"Grapple"
"canDodgeWhileShooting"
{
"or": [
{
"and": [
"Plasma",
{
"cycleFrames": 180
}
]
},
{
"and": [
"Wave",
{
"cycleFrames": 240
}
]
},
{
"and": [
"Spazer",
"canFarmWhileShooting",
{
"cycleFrames": 280
}
]
}
]
}Resets obstacles: A Farm cycle drops: 1 Evir |
|
Walk off the ledge and touch the Evir with a blue suit to kill it. Use arm pumps to reach it quickly before it sinks too far. Turn around on the sand to collect the drop. Requires: {
"resetRoom": {
"nodes": [
1
]
}
}
{
"haveBlueSuit": {}
}
"canSuitlessMaridia"
"canDodgeWhileShooting"
{
"notable": "Blue Suit Sand Walk"
}
{
"cycleFrames": 300
}Resets obstacles: A Farm cycle drops: 1 Evir |
|
If Screw Attack or Plasma are available (or Gravity and a blue suit), farm the two Evirs closest to the door. With Wave or Spazer, it won't be possible to kill the second Evir in time, in which case the room can be crossed to reach a third one. Requires: {
"resetRoom": {
"nodes": [
1
]
}
}
"canPlayInSand"
"canDodgeWhileShooting"
{
"or": [
{
"and": [
"Gravity",
"ScrewAttack",
{
"cycleFrames": 320
}
]
},
{
"and": [
"Gravity",
{
"haveBlueSuit": {}
},
{
"notable": "Blue Suit Sand Walk"
},
{
"cycleFrames": 290
}
]
},
{
"and": [
"Plasma",
{
"cycleFrames": 330
},
{
"or": [
"Gravity",
{
"and": [
"canSuitlessMaridia",
"HiJump",
{
"cycleFrames": 50
}
]
},
{
"and": [
{
"haveBlueSuit": {}
},
{
"notable": "Blue Suit Sand Walk"
},
{
"cycleFrames": 270
}
]
}
]
}
]
},
{
"and": [
{
"or": [
"Wave",
"Spazer"
]
},
"canFarmWhileShooting",
{
"cycleFrames": 975
},
{
"or": [
"Gravity",
{
"and": [
"canSuitlessMaridia",
"HiJump",
{
"cycleFrames": 90
}
]
}
]
}
]
}
]
}Resets obstacles: A Farm cycle drops: 2 Evir Dev note: Farming a third Evir is possible but would rarely be worthwhile. |
|
Requires: "h_CrystalFlash" |
|
Entrance condition: {
"comeInShinecharging": {
"length": 3,
"openEnd": 0
},
"comesInHeated": "no"
}Requires: "Gravity" "h_CrystalSpark" |
From: 1
Left Door
To: 1
Left Door


The easiest way to lure an Evir projectile and get through the door before it is to stand facing and against the door cap, open the door then turn right and run back to the left. Requires: "h_navigateUnderwater"
{
"or": [
"Gravity",
"canComplexGMode"
]
}Exit condition: {
"leaveWithGModeSetup": {}
} |
|


Spark through the top of the door to avoid bonking. Entrance condition: {
"comeInWithSpark": {
"position": "top"
}
}Requires: {
"shinespark": {
"frames": 75,
"excessFrames": 7
}
} |
|
Spark through the top of the door to avoid bonking. Entrance condition: {
"comeInWithSpark": {
"position": "top"
}
}Requires: "Gravity"
{
"shinespark": {
"frames": 61,
"excessFrames": 6
}
} |
From: 1
Left Door
To: 2
Right Door
Shinespark midair to avoid bonking. Jump outward before sparking save Energy. Entrance condition: {
"comeInShinecharging": {
"length": 3,
"openEnd": 0
}
}Requires: "Gravity"
"canHorizontalMidairShinespark"
{
"shinespark": {
"frames": 49,
"excessFrames": 4
}
} |
From: 1
Left Door
To: 2
Right Door
It helps to wait to enter the sandfall until after Samus is near the peak of her jump. Entrance condition: {
"comeInShinecharging": {
"length": 1,
"openEnd": 0
}
}Requires: "canShinechargeMovementComplex"
"canPlayInSand"
{
"or": [
{
"shinespark": {
"frames": 67,
"excessFrames": 13
}
},
{
"and": [
"canInsaneJump",
{
"shinespark": {
"frames": 54,
"excessFrames": 0
}
},
"canDownGrab"
]
}
]
} |
|
Stand at an effective distance of between about 20 and 21 tiles from the door. Run through the door, and jump any time after the transition, holding jump through the entire room to make it to the other side. Samus will go over the Evirs, so there is no need for blue speed. Entrance condition: {
"comeInRunning": {
"speedBooster": "yes",
"minTiles": 19.3625,
"maxTiles": 21.25
}
}Requires: {
"notable": "Cross-Room Speed Jump over Evirs"
}
"canPlayInSand"
"canCrossRoomJumpIntoWater"
"canTrickyDashJump" |
|
Enter with enough run speed to jump (after the transition) across the full room using one Spring Ball Jump. When exiting the first Sandfall, Samus will be rising still. That is the time to Spring Ball jump. Entrance condition: {
"comeInRunning": {
"speedBooster": "yes",
"minTiles": 10
}
}Requires: {
"notable": "Cross-Room Spring Ball Jump"
}
"canPlayInSand"
"canCrossRoomJumpIntoWater"
"h_speedJump"
"canLateralMidAirMorph"
"canTrickySpringBallJump"
"canTrickyJump" |
From: 1
Left Door
To: 2
Right Door

Gain run speed using between 19 and 33 tiles in the other room, and either roll in or do a controlled bounce to enter while descending close to the ground. Bounce near the end of the platform in front of the door, clearing the whole room at once. Samus will go over the Evirs, so there is no need for blue speed. Entrance condition: {
"comeInWithSpringBallBounce": {
"speedBooster": "yes",
"movementType": "controlled",
"remoteAndLandingMinTiles": [
[
19.3625,
1
]
]
}
}Requires: {
"notable": "Cross-Room Spring Ball Bounce (Left to Right)"
}
"canTrickyJump" |
From: 1
Left Door
To: 2
Right Door

Use a 3-tap or 4-tap to gain a speedball with a specific amount of speed in the other room (between $2.1 and $2.3 extra run speed), and either roll in or do a controlled bounce to enter while descending close to the ground. Bounce on the platform in front of the door, then bounce on the second-to-last pillar. Entrance condition: {
"comeInWithBlueSpringBallBounce": {
"movementType": "controlled",
"minExtraRunSpeed": "$2.1",
"maxExtraRunSpeed": "$2.3"
}
}Requires: {
"notable": "Cross-Room Blue Spring Ball Bounce (Left to Right)"
}
"canTrickyDashJump"
"canTrickySpringBallBounce"
"canInsaneJump" |
From: 1
Left Door
To: 2
Right Door
Perform a 1-tap to gain blue speed with a significant amount of momentum. Run through the door, and jump near the end of the platform, crossing the room. If Samus gains enough height from the jump, it is possible unmorph mid-air to discard horizontal speed at the right side of the room, then pause to remorph (`canPauseRemorphTemporaryBlue`). Otherwise, a precisely timed unmorph is needed to avoid bonking the door and losing the blue state; at certain speeds, it may be necessary to briefly release jump in order to control the height for the unmorph. Entrance condition: {
"comeInGettingBlueSpeed": {
"length": 1,
"openEnd": 1,
"minExtraRunSpeed": "$4.4"
}
}Requires: "canPlayInSand" "canCrossRoomJumpIntoWater" "canInsaneJump" "canChainTemporaryBlue" "canBeVeryPatient" Exit condition: {
"leaveWithTemporaryBlue": {}
}Unlocks doors: {"types":["ammo"],"requires":[]}Dev note: This needs an extra run speed of at least $4.4, and ideally not much more than that. |
From: 1
Left Door
To: 2
Right Door
Use a 3-tap or 4-tap to gain a speedball with a specific amount of speed in the other room (between $2.1 and $2.3 extra run speed), and either roll in or do a controlled bounce to enter while descending close to the ground. Cross the room by bouncing on the pillars. Then chain temporary blue into the next room. Entrance condition: {
"comeInWithBlueSpringBallBounce": {
"movementType": "controlled",
"minExtraRunSpeed": "$2.1",
"maxExtraRunSpeed": "$2.3"
}
}Requires: {
"notable": "Cross-Room Blue Spring Ball Bounce (Left to Right)"
}
"canTrickyDashJump"
"canTrickySpringBallBounce"
"canInsaneJump"
"canChainTemporaryBlue"
"canBeVeryPatient"Exit condition: {
"leaveWithTemporaryBlue": {}
}Unlocks doors: {"types":["ammo"],"requires":[]}Dev note: The 'canBeVeryPatient' requirement is for difficulty placement as this is quite precise and unforgiving. |
From: 1
Left Door
To: 2
Right Door
Enter with an extra run speed between $2.1 and $2.3. Jump over the first set of Evirs, and bounce on the first pillar to cross the room. Entrance condition: {
"comeInRunning": {
"speedBooster": "yes",
"minTiles": 6.4375
}
}Requires: {
"notable": "Cross-Room Tricky Spring Ball Bounce (Left to Right)"
}
"canTrickyDashJump"
"canInsaneJump"
"canTrickySpringBallBounce" |
From: 1
Left Door
To: 2
Right Door


Enter with an extra run speed of between $2.1 and $2.3. Bounce over the first set of Evirs, and bounce on the first pillar to cross the room. If entering at lower speed ($2.1), it can help to time a pause to hit soon after bouncing on the first pillar, unequipping Spring Ball to boost Samus' horizontal speed. If Samus enters with low base speed (i.e. if mockballing with a short landing runway), it can affect Samus' horizontal speed even after the bounce. This can make it harder to clear the final pillar, though it can also help with clearing the initial Evirs. Entrance condition: {
"comeInWithSpringBallBounce": {
"speedBooster": "yes",
"movementType": "controlled",
"remoteAndLandingMinTiles": [
[
6.4375,
1
]
]
}
}Requires: {
"notable": "Cross-Room Tricky Spring Ball Bounce (Left to Right)"
}
"canTrickyDashJump"
"canInsaneJump"
"canTrickySpringBallBounce"
"canBeVeryPatient"Dev note: The canBeVeryPatient requirement is for difficulty placement, given the high likelihood of failure: with a mockball or bouncing entry, a frame-perfect release of jump is usually required. |
|


Spark at the peak of the jump, just before or after touching the sand fall, in order to be high enough to get over the last pillar. Requires: "h_storedSpark"
{
"or": [
{
"shinespark": {
"frames": 67,
"excessFrames": 13
}
},
{
"and": [
"canInsaneJump",
{
"shinespark": {
"frames": 54,
"excessFrames": 0
}
},
"canDownGrab"
]
}
]
} |
|
The sand does not impede Samus in G-Mode. Entrance condition: {
"comeInWithGMode": {
"mode": "any",
"morphed": false
}
}Requires: "h_navigateUnderwater"
{
"or": [
"Gravity",
"HiJump",
"canSpringBallJumpMidAir"
]
} |
|


The sand does not impede Samus in G-Mode. Carefully jump over the first two Evirs. Crouch against the pillar and wait a brief moment before jumping and down grabbing onto it. Lure the third Evir's projectile by jumping then crouch jump and down grab the second pillar. Getting onto the final pillar is the hardest part, which requires a subpixel precise jump. Carefully lure the Evir projectile while getting into position, one pixel from the right edge. Stand and spinjump to the right. Note that running before jumping doesn't help. Entrance condition: {
"comeInWithGMode": {
"mode": "any",
"morphed": false
}
}Requires: "canSuitlessMaridia" "h_underwaterCrouchJumpDownGrab" "canInsaneJump" |
|
Requires: "Gravity" "SpaceJump" |
|
Wait a little bit for the Evirs to descend some before jumping. Requires: "Gravity"
{
"or": [
"canCarefulJump",
{
"enemyDamage": {
"enemy": "Evir",
"type": "particle",
"hits": 1
}
}
]
}
{
"noBlueSuit": {}
}Dev note: Running in with speed to kill or jump over the Evirs is still a careful jump. |
|
Requires: "Gravity"
{
"or": [
"Ice",
"ScrewAttack",
{
"enemyKill": {
"enemies": [
[
"Evir"
],
[
"Evir"
]
],
"explicitWeapons": [
"Plasma",
"Super",
"PowerBombPeriphery"
]
}
}
]
}
{
"noBlueSuit": {}
}Dev note: Other weapons take too long to kill the enemy. |
|
Simply walk off the ledges and hold forward to walk on the sand with a blue suit. Requires: {
"haveBlueSuit": {}
}
{
"notable": "Blue Suit Sand Walk"
} |
From: 1
Left Door
To: 4
Junction Below Sand Entrance
By entering the room with run speed, it is possible to jump over the pair of Evirs. Entrance condition: {
"comeInRunning": {
"speedBooster": "any",
"minTiles": 3.4375
}
}Requires: "canCrossRoomJumpIntoWater" "HiJump" "canCarefulJump" |
From: 1
Left Door
To: 4
Junction Below Sand Entrance
By entering the room with run speed, it is possible to jump over the pair of Evirs. Entrance condition: {
"comeInRunning": {
"speedBooster": "yes",
"minTiles": 3
}
}Requires: "canCrossRoomJumpIntoWater" "HiJump" |
From: 1
Left Door
To: 4
Junction Below Sand Entrance
Requires: "canSuitlessMaridia"
"HiJump"
"canPlayInSand"
{
"or": [
"canTrickyJump",
{
"enemyDamage": {
"enemy": "Evir",
"type": "particle",
"hits": 1
}
}
]
}
{
"noBlueSuit": {}
} |
|
Requires: "canSuitlessMaridia"
"canDodgeWhileShooting"
"HiJump"
"canPlayInSand"
"canTrickyJump"
{
"or": [
"Ice",
{
"enemyKill": {
"enemies": [
[
"Evir"
],
[
"Evir"
]
],
"explicitWeapons": [
"Plasma",
"Super",
"PowerBombPeriphery"
]
}
}
]
}
{
"noBlueSuit": {}
}Dev note: Other weapons take too long to kill the enemy. |
|
Gain momentum in the room to the left, then jump at the edge of the runway in this room in order to jump off of the sand and land on the first pillar. Requires a runway of 7 tiles (with no open end) in the adjacent room, and killing the second Evir with a quick super or two plasma hits (note that the particle despawns as the Evir dies). Entrance condition: {
"comeInJumping": {
"speedBooster": "no",
"minTiles": 6.4375
}
}Requires: "canCrossRoomJumpIntoWater"
"canPlayInSand"
"canTrickyJump"
{
"enemyKill": {
"enemies": [
[
"Evir"
]
],
"explicitWeapons": [
"Plasma",
"Super"
]
}
}Dev note: This is not technically a canCrossRoomJumpIntoWater, but it is used here because of the way the momentum changes as Samus enters the water. |
From: 1
Left Door
To: 4
Junction Below Sand Entrance
Requires a runway of 7 tiles (with no open end) in the adjacent room. Requires two precise inputs of jumping through the doorway and a short aiming down press before hitting the ceiling. Damage boost off of the right Evir in order to land on the first pillar. With Ice, instead freeze the Evir to land on it and avoid the damage. When entering the room with a bad jump, it is possible to perform a midair wiggle to get back to the door platform. Entrance condition: {
"comeInJumping": {
"speedBooster": "no",
"minTiles": 6.4375
}
}Requires: {
"notable": "Cross Room Jump with Ice or Damage Boost"
}
"canCrossRoomJumpIntoWater"
"canPlayInSand"
"canInsaneJump"
{
"or": [
"canTrickyUseFrozenEnemies",
{
"and": [
"canNeutralDamageBoost",
{
"enemyDamage": {
"enemy": "Evir",
"type": "contact",
"hits": 1
}
}
]
},
{
"and": [
"canNeutralDamageBoost",
"h_pauseAbuseMinimalReserveRefill"
]
}
]
} |
From: 1
Left Door
To: 4
Junction Below Sand Entrance


When entering the room, immediately shoot straight ahead to freeze the second Evir, then quickly also freeze the first Evir, with a diagonal-down shot. Wait on top of the first Evir for the second Evir to sink far enough to be able to jump onto it, then use it as a platform to jump onto the first pillar (either directly or after a jump on the sand). Requires: {
"notable": "Suitless Bootless Evir Freeze (Left to Center)"
}
"canSuitlessMaridia"
"canTrickyJump"
"canTrickyUseFrozenEnemies"
"canPlayInSand"
"canCameraManip"
{
"noBlueSuit": {}
} |
From: 1
Left Door
To: 4
Junction Below Sand Entrance
Requires a runway of 7 tiles (with no open end) in the adjacent room. Jump into an air ball on room entry in order to get to the first pillar. Aim down after the transition to avoid hitting the overhang near the door. Entrance condition: {
"comeInJumping": {
"speedBooster": "no",
"minTiles": 6.4375
}
}Requires: "canCrossRoomJumpIntoWater"
"canPlayInSand"
"canLateralMidAirMorph"
{
"or": [
"canTrickyJump",
{
"and": [
"canCarefulJump",
{
"enemyDamage": {
"enemy": "Evir",
"type": "contact",
"hits": 1
}
}
]
}
]
}Dev note: It is assumed that getting to the second pillar is free relative to getting to the right door. |
From: 1
Left Door
To: 4
Junction Below Sand Entrance
Bomb boost through the doorway as close to the door transition as possible in order to get as far as possible. Entrance condition: {
"comeInWithBombBoost": {}
}Requires: "canCrossRoomJumpIntoWater" "canTrickyJump" Dev note: It is assumed that getting to the second pillar is free relative to getting to the right door. |
|
Space Jump into the room with full run speed without Speed Booster, jumping as low as possible through the doorway. Aim down when close to bonking the ceiling. Samus should land on the first pillar. Entrance condition: {
"comeInSpaceJumping": {
"speedBooster": "no",
"minTiles": 6.4375
}
}Requires: "canPreciseSpaceJump" "canInsaneJump" "canTrickyDodgeEnemies" |
From: 1
Left Door
To: 4
Junction Below Sand Entrance


Space Jump into the room relatively low through the doorway. Do a momentum-conserving morph to avoid bonking on the corner at the edge of the sandfall. The morph should happen relatively early, in order to avoid an Evir projectile hit. Jump into the room with extra run speed of at least $1.B At low speed, Samus may not make it onto the pillar and will not have time to unmorph until close to the sand; in this case, crouch jumping can be the safest way to escape. Entrance condition: {
"comeInSpaceJumping": {
"speedBooster": "no",
"minTiles": 5.4375
}
}Requires: "canPreciseSpaceJump" "canMomentumConservingMorph" "canTrickyDodgeEnemies" "canPlayInSand" Dev note: Lower speeds can also work (as low as $1.4), with damage from an Evir projectile. |
From: 1
Left Door
To: 4
Junction Below Sand Entrance
With Speed Booster equipped, Space Jump into the room relatively low through the doorway. Do a momentum-conserving morph on the ceiling. Jump into the room with extra run speed of at least $1.3. Entrance condition: {
"comeInSpaceJumping": {
"speedBooster": "yes",
"minTiles": 3.4375
}
}Requires: "canPreciseSpaceJump" "canMomentumConservingMorph" "canTrickyDodgeEnemies" |
From: 1
Left Door
To: 4
Junction Below Sand Entrance
Jump and spark diagonally into the ceiling before touching the sand at the bottom. Land on the platform or before it and jump onto it. Sparking after touching the sand will prevent Samus from moving much horizontally and will not work. Requires: "canPlayInSand"
"h_storedSpark"
{
"shinespark": {
"frames": 9,
"excessFrames": 2
}
} |
From: 1
Left Door
To: 4
Junction Below Sand Entrance
After entering, avoid the Evir projectiles and Crystal Flash, then kill the second Evir with beam shots. Jump into the sandfall and land back on the door ledge to overload PLMs. Jump into the sandpit which should now be air. Shinecharge, then jump to the right Evir and use a projectile to interrupt. Be sure to not stop moving if Samus must land on the sand once bluesuit is obtained. Entrance condition: {
"comeInWithGMode": {
"mode": "direct",
"morphed": false
}
}Requires: "Gravity"
"canPlayInSand"
"canComplexGMode"
{
"enemyKill": {
"enemies": [
[
"Evir",
"Evir"
]
]
}
}
"h_CrystalFlashForReserveEnergy"
{
"canShineCharge": {
"usedTiles": 14,
"openEnd": 0
}
}
{
"autoReserveTrigger": {}
}
"canRModeSparkInterrupt"
{
"notable": "Blue Suit Sand Walk"
} |
|

Stand at an effective distance of about 20 tiles from the door. Run through the door, and jump any time after the transition, holding jump through the entire room to make it to the other side. Samus will go over the Evirs, so there is no need for blue speed. Entrance condition: {
"comeInRunning": {
"speedBooster": "yes",
"minTiles": 19.3625,
"maxTiles": 20.3
}
}Requires: {
"notable": "Cross-Room Speed Jump over Evirs"
}
"canPlayInSand"
"canCrossRoomJumpIntoWater"
"canTrickyDashJump"Dev note: This needs an extra run speed of at least $4.4, and ideally not much more than that. A little higher run speed can also work but may require releasing jump near the peak to avoid getting caught on the overhang. |
From: 2
Right Door
To: 1
Left Door
Perform a 1-tap to gain blue speed with a significant amount of momentum. Run through the door, and jump any time after the transition, crossing the room. Entrance condition: {
"comeInGettingBlueSpeed": {
"length": 1,
"openEnd": 1,
"minExtraRunSpeed": "$4.4"
}
}Requires: {
"notable": "Cross-Room Blue Speed Jump (Right to Left)"
}
"h_blueJump"
"canPlayInSand"
"canCrossRoomJumpIntoWater"Dev note: This assumes an extra run speed of at least $4.4, though some lower speeds can also work ($3.B through $3.F). The window between $4.0 and $4.3 must be avoided because it would give too much jump height. |
From: 2
Right Door
To: 1
Left Door
Perform a 1-tap to gain blue speed with a significant amount of momentum. Run through the door, and jump into an airball any time after the transition, crossing the room. At higher speeds, it may be necessary to unmorph at the left side of the room while still high in the air, to discard horizontal speed, then pause to remorph (`canPauseRemorphTemporaryBlue`). Entrance condition: {
"comeInGettingBlueSpeed": {
"length": 1,
"openEnd": 1,
"minExtraRunSpeed": "$4.4"
}
}Requires: {
"notable": "Cross-Room Blue Speed Jump (Right to Left)"
}
"canPlayInSand"
"canCrossRoomJumpIntoWater"
"canInsaneJump"
"canPauseRemorphTemporaryBlue"
"canChainTemporaryBlue"Exit condition: {
"leaveWithTemporaryBlue": {}
}Unlocks doors: {"types":["ammo"],"requires":[]}Dev note: This needs an extra run speed of at least $4.4. For speed $4.5, it helps to jump early and hold an aim-down pose. Speed $4.6 doesn't seem possible, as you end up too high to land without bonking the door, and too low to have time for a pause remorph? For speeds between $4.7 and $4.9, a pause remorph works. Speed $4.A is difficult but can be done with a last-frame jump, a momentum-conserving morph (ceiling mockball) while touching the second overhang, and a pause remorph. Speed $4.B doesn't seem to work as you can't avoid bonking the first overhang? |
From: 2
Right Door
To: 1
Left Door

Gain a speedball in the other room, and either roll in or do a controlled bounce to enter while descending close to the ground. Bounce anywhere on the platform in front of the door, clearing the whole room at once. If needed, blue speed will destroy any Evirs along the way and allow bouncing on the sand at the end to make it onto the ledge. Entrance condition: {
"comeInWithBlueSpringBallBounce": {
"movementType": "controlled",
"minExtraRunSpeed": "$2.0"
}
}Requires: {
"notable": "Cross-Room Blue Spring Ball Bounce (Right to Left)"
}
{
"or": [
"canTrickyJump",
"canSlowShortCharge"
]
} |
From: 2
Right Door
To: 1
Left Door
Use a 3-tap or 4-tap to gain a speedball with a specific amount of speed in the other room (between $2.1 and $2.3 extra run speed), and either roll in or do a controlled bounce to enter while descending close to the ground. Bounce across the room, destroying the Evirs along the path, then bounce on the sand at the left side of the room, and unmorph to go straight up in the single-tile-wide space with no sandfall; perform a pause remorph to chain temporary blue to the door. Entrance condition: {
"comeInWithBlueSpringBallBounce": {
"movementType": "controlled",
"minExtraRunSpeed": "$2.1",
"maxExtraRunSpeed": "$2.3"
}
}Requires: {
"notable": "Cross-Room Blue Spring Ball Bounce (Right to Left)"
}
"canTrickyDashJump"
"canTrickySpringBallBounce"
"canPauseRemorphTemporaryBlue"
"canBeVeryPatient"Exit condition: {
"leaveWithTemporaryBlue": {}
}Unlocks doors: {"types":["ammo"],"requires":[]}Dev note: The 'canBeVeryPatient' requirement is for difficulty placement as this is quite precise and unforgiving. Bouncing on the pillars is also possible, as an alternative to doing a pause remorph. |
From: 2
Right Door
To: 1
Left Door
Gain run speed using between 19 and 33 tiles in the other room, and either roll in or do a controlled bounce to enter while descending close to the ground. Bounce near the end of the platform in front of the door, clearing the whole room at once. Samus will go over the Evirs, so there is no need for blue speed. Entrance condition: {
"comeInWithSpringBallBounce": {
"speedBooster": "yes",
"movementType": "controlled",
"remoteAndLandingMinTiles": [
[
19.3625,
1
]
]
}
}Requires: {
"notable": "Cross-Room Spring Ball Bounce (Right to Left)"
}
"canTrickyJump" |
From: 2
Right Door
To: 1
Left Door


Gain max run speed with Speed Booster unequipped (extra run speed $2.0), reequipping Speed Booster before the transition. Jump over the first pillar and first Evir, bouncing on the second pillar; this requires releasing jump when Samus is about 3 tiles past the first pillar. From there, Samus should bounce over all the remaining Evirs. A safe way to get out of the sand is to land inside the sandfall and do a spin jump to the left to less than full height, then turn right while spinning, break spin, and turnaround spin jump to the left. Entrance condition: {
"comeInRunning": {
"speedBooster": "yes",
"minTiles": 6.4375
}
}Requires: {
"notable": "Cross-Room Tricky Spring Ball Bounce (Right to Left)"
}
"canTrickyDashJump"
"canTrickySpringBallBounce"
"canPlayInSand" |
From: 2
Right Door
To: 1
Left Door
Gain max run speed with Speed Booster unequipped (extra run speed $2.0), reequipping Speed Booster before the transition. Bounce over the first pillar and first Evir, bouncing on the second pillar; this requires releasing jump when Samus is about 2 tiles past the first pillar. From there, Samus should bounce over all the remaining Evirs. Entrance condition: {
"comeInWithSpringBallBounce": {
"speedBooster": "yes",
"movementType": "controlled",
"remoteAndLandingMinTiles": [
[
6.4375,
1
]
]
}
}Requires: {
"notable": "Cross-Room Tricky Spring Ball Bounce (Right to Left)"
}
"canTrickyDashJump"
"canTrickySpringBallBounce"
"canPlayInSand" |
|
Enter with enough run speed to jump (after the transition) across the full room using one Spring Ball Jump. When exiting the first Sandfall, Samus will be rising still. That is the time to Spring Ball jump. Alternatively, an immediate pause can be used to Spring Ball jump during the first narrow gap between Sandfalls. Sometimes Samus will land above the sand on the far left end of the room, where it will be necessary to unmorph and jump out. Entrance condition: {
"comeInRunning": {
"speedBooster": "yes",
"minTiles": 10
}
}Requires: {
"notable": "Cross-Room Spring Ball Jump"
}
"canPlayInSand"
"canCrossRoomJumpIntoWater"
"h_speedJump"
"canLateralMidAirMorph"
"canTrickySpringBallJump"
"canTrickyJump" |
|


Spark through the top of the door to avoid bonking. Entrance condition: {
"comeInWithSpark": {
"position": "top"
}
}Requires: {
"shinespark": {
"frames": 75,
"excessFrames": 7
}
} |
|
Spark through the top of the door to avoid bonking. Entrance condition: {
"comeInWithSpark": {
"position": "top"
}
}Requires: "Gravity"
{
"shinespark": {
"frames": 61,
"excessFrames": 6
}
} |
From: 2
Right Door
To: 1
Left Door
Shinespark midair to avoid bonking. Jump outward before sparking save Energy. Entrance condition: {
"comeInShinecharging": {
"length": 3,
"openEnd": 0
}
}Requires: "Gravity"
"canHorizontalMidairShinespark"
{
"shinespark": {
"frames": 48,
"excessFrames": 4
}
} |
From: 2
Right Door
To: 1
Left Door

Spin jump from close to the door in order to enter the sandfall near the peak of Samus' jump. Entrance condition: {
"comeInShinecharging": {
"length": 1,
"openEnd": 0
}
}Requires: "canShinechargeMovementComplex"
"canPlayInSand"
{
"shinespark": {
"frames": 67,
"excessFrames": 13
}
} |
|


Spin jump from close to the door in order to enter the sandfall near the peak of Samus' jump. Requires: "h_storedSpark"
{
"or": [
{
"shinespark": {
"frames": 67,
"excessFrames": 7
}
},
{
"and": [
"canSandfallBounce",
{
"shinespark": {
"frames": 67,
"excessFrames": 13
}
}
]
}
]
} |
|


The sand does not impede Samus in G-Mode. Entrance condition: {
"comeInWithGMode": {
"mode": "any",
"morphed": false
}
}Requires: "h_navigateUnderwater"
{
"or": [
"Gravity",
"HiJump",
"canSpringBallJumpMidAir",
{
"and": [
"h_underwaterCrouchJumpDownGrab",
"h_storedSpark",
{
"shinespark": {
"frames": 6,
"excessFrames": 5
}
}
]
}
]
}Dev note: Only the last jump needs any items. |
|
Exit condition: {
"leaveWithRunway": {
"length": 4,
"openEnd": 1
}
} |
|
If Plasma is available, quickly fire two shots when entering to kill the Evir; it can help to crouch for the second shot. If only Wave is available, quickly fire three shots, then jump out exactly one tile away from the ledge and fire three more shots angled-down to kill the Evir. In any case, use Grapple to collect the drop from the pillar without needing to drop down. Requires: {
"resetRoom": {
"nodes": [
2
]
}
}
"canDodgeWhileShooting"
"canSuitlessMaridia"
"HiJump"
"Grapple"
{
"or": [
{
"and": [
"Plasma",
{
"cycleFrames": 240
}
]
},
{
"and": [
"Wave",
{
"disableEquipment": "Ice"
},
"canFarmWhileShooting",
{
"cycleFrames": 420
}
]
}
]
}
{
"or": [
{
"noBlueSuit": {}
},
{
"notable": "Blue Suit Sand Walk"
}
]
}Resets obstacles: A Farm cycle drops: 1 Evir Dev note: If Gravity is available, then other farm strats can be used instead. |
From: 2
Right Door
To: 2
Right Door
Requires: {
"resetRoom": {
"nodes": [
2
]
}
}
"Gravity"
{
"or": [
"ScrewAttack",
{
"haveBlueSuit": {}
},
{
"and": [
"Plasma",
"Wave"
]
}
]
}
"canCarefulJump"
{
"cycleFrames": 290
}
{
"or": [
"SpaceJump",
{
"and": [
"canPlayInSand",
{
"or": [
"HiJump",
"canWallJump",
{
"and": [
"canGravityJump",
"canTrickyJump",
"h_doubleEquipmentScreenCycleFrames"
]
}
]
}
]
}
]
}
{
"or": [
{
"noBlueSuit": {}
},
{
"notable": "Blue Suit Sand Walk"
}
]
}Resets obstacles: A Farm cycle drops: 1 Evir Dev note: Other ways of farming Evirs with Gravity are covered in the 3 Evir farm strat. These strong weapon cases are unique in that farming just the first Evir can be done at significantly lower difficulty. Technically it could make sense to clear obstacle A, but with Gravity it is irrelevant. |
|
The Evirs must be killed quickly before they descend too far. It can help to fire at the Evirs from a safe distance so they will not be triggered to attack Samus. Requires: {
"resetRoom": {
"nodes": [
2
]
}
}
"Gravity"
"canDodgeWhileShooting"
"canPlayInSand"
{
"or": [
{
"and": [
"Plasma",
"Wave"
]
},
"canTrickyJump"
]
}
{
"or": [
{
"and": [
"Plasma",
{
"cycleFrames": 900
}
]
},
{
"and": [
{
"haveBlueSuit": {}
},
{
"cycleFrames": 900
}
]
},
{
"and": [
"Wave",
{
"disableEquipment": "Ice"
},
{
"cycleFrames": 1320
}
]
},
{
"and": [
"ScrewAttack",
"canFarmWhileShooting",
{
"cycleFrames": 980
}
]
},
{
"and": [
"Spazer",
{
"disableEquipment": "Ice"
},
"canFarmWhileShooting",
{
"cycleFrames": 1360
}
]
}
]
}
{
"or": [
"canWallJump",
"HiJump",
{
"and": [
"canGravityJump",
"canTrickyJump",
"h_doubleEquipmentScreenCycleFrames"
]
}
]
}
{
"or": [
{
"noBlueSuit": {}
},
{
"notable": "Blue Suit Sand Walk"
}
]
}Resets obstacles: A Farm cycle drops: 3 Evir Dev note: Technically it could make sense to clear obstacle A, but with Gravity it is irrelevant. FIXME: HiJump + Spring fling can be an alternative to Gravity. |
|
Requires: "h_CrystalFlash" |
|
Entrance condition: {
"comeInShinecharging": {
"length": 3,
"openEnd": 0
},
"comesInHeated": "no"
}Requires: "Gravity" "h_CrystalSpark" |
From: 2
Right Door
To: 2
Right Door


The Evir won't shoot unless Samus enters the sand falls. Getting to the transition tiles while standing before the projectile can be tricky. With no movement items besides Gravity, walk off the platform while facing right, turn around spin jump to barely enter the sand fall before landing back on the platform and quickly getting to the door. Requires: "Gravity"
"canComplexGMode"
{
"or": [
{
"noBlueSuit": {}
},
"canTrickyGMode"
]
}Exit condition: {
"leaveWithGModeSetup": {}
} |
From: 2
Right Door
To: 2
Right Door

The Evir won't shoot unless Samus enters the sand falls. Getting to the transition tiles while standing before the projectile while suitless is very precise. From the sand, turnaround spinjump towards the right. Turn towards the sandfall about when you're just above the platform. Turn right and shoot as soon as you enter the sandfall. And try to land right next to the transition. Requires: {
"notable": "Right Door G-Mode Setup Suitless HiJump"
}
"canTrickyGMode"
"canSuitlessMaridia"
"canPlayInSand"
"canMidairWiggle"
"HiJump"
{
"or": [
{
"noBlueSuit": {}
},
{
"and": [
"canTrickyGMode",
{
"notable": "Blue Suit Sand Walk"
}
]
}
]
}Exit condition: {
"leaveWithGModeSetup": {}
} |
From: 2
Right Door
To: 4
Junction Below Sand Entrance


Bomb boost through the doorway. With a good enough boost, it's possible to go over the first Evir, landing on the second pillar. Entrance condition: {
"comeInWithBombBoost": {}
}Requires: "canCrossRoomJumpIntoWater" |
From: 2
Right Door
To: 4
Junction Below Sand Entrance
Gain momentum in the room to the right (with extra run speed between $2.0 and $2.3), then jump after the transition. Samus should be able to jump over the first Evir and reach the center of the room. Entrance condition: {
"comeInRunning": {
"speedBooster": "yes",
"minTiles": 6.4375,
"maxTiles": 7.4375
}
}Requires: "canCrossRoomJumpIntoWater" "canTrickyDashJump" Dev note: This is not technically a canCrossRoomJumpIntoWater, but it is used here because of the way the momentum changes as Samus enters the water. |
From: 2
Right Door
To: 4
Junction Below Sand Entrance
Space Jump into the room with full run speed without Speed Booster, jumping as low as possible through the doorway. To avoid getting caught on the overhang, release jump slightly before bonking, and aim down to clear the Evir. Entrance condition: {
"comeInSpaceJumping": {
"speedBooster": "no",
"minTiles": 6.4375
}
}Requires: "canPreciseSpaceJump" "canInsaneJump" "canTrickyDodgeEnemies" "canPlayInSand" |
From: 2
Right Door
To: 4
Junction Below Sand Entrance
Overload PLMs by jumping into the sandfall and landing back on the door ledge. Jump over the Evirs to get the left door. Crystal Flash, then kill the second Evir with beam shots. Jump into the sandpit which should now be air. Shinecharge, then jump to the right Evir and use a projectile to interrupt. Be sure to not stop moving if Samus must land on the sand once bluesuit is obtained. Entrance condition: {
"comeInWithGMode": {
"mode": "direct",
"morphed": false
}
}Requires: "Gravity"
"canPlayInSand"
"canComplexGMode"
{
"enemyKill": {
"enemies": [
[
"Evir",
"Evir"
]
]
}
}
"h_CrystalFlashForReserveEnergy"
{
"canShineCharge": {
"usedTiles": 14,
"openEnd": 0
}
}
{
"autoReserveTrigger": {}
}
"canRModeSparkInterrupt" |
|
Requires: {
"or": [
"Gravity",
"HiJump",
"canTrickySpringBallJump"
]
} |
|
Gain momentum in the room to the right, then jump immediately on entry in order to land on the first pillar. Jumping too late will likely put Samus into the pit. Requires a small runway of only one tile or less in the adjacent room. Jumping before the door transition will set Samus straight into an Evir projectile, knocking her into the sand. Entrance condition: {
"comeInRunning": {
"speedBooster": "no",
"minTiles": 0.4375
}
}Requires: "canCrossRoomJumpIntoWater" "canTrickyJump" Dev note: This is not technically a canCrossRoomJumpIntoWater, but it is used here because of the way the momentum changes as Samus enters the water. |
|
Spark vertically from within the rightmost column of sandfall, and hold left to land on the pillar; a vertical spark helps to avoid killing the Evir with speed echoes, in case it needs to be frozen and used as a platform. Requires: "h_storedSpark"
{
"shinespark": {
"frames": 5,
"excessFrames": 2
}
} |
|


Enter the room with a door stuck setup. Perform a frame-perfect Flatley jump from inside the door to just barely reach the first pillar. Entrance condition: {
"comeInWithDoorStuckSetup": {}
}Requires: {
"notable": "Door Stuck Flatley Jump"
}
"canInsaneJump"Clears obstacles: A Dev note: This is only really useful when entering from a water room or when carrying a blue suit, since otherwise there is an easier strat that simply runs into the room with momentum and jumps. |
From: 3
Top Sand Entrance
To: 1
Left Door

Enter with a falling pose in order to be able to spark immediately on entry. This may require a quick drop through the sand in the room above. Entrance condition: {
"comeInShinecharged": {},
"comesThroughToilet": "any"
}Requires: {
"shineChargeFrames": 10
}
"h_navigateUnderwater"
"canShinechargeMovementComplex"
"canHorizontalMidairShinespark"
"canPrepareForNextRoom"
{
"or": [
{
"and": [
"Gravity",
{
"shinespark": {
"frames": 34,
"excessFrames": 6
}
}
]
},
{
"shinespark": {
"frames": 39,
"excessFrames": 8
}
}
]
}Dev note: Frames are all assuming a toilet entry, frames could be reduced slightly if entering in a more favorable position. While the shinecharge frames could be smaller, this gives a small buffer to orient the direction Samus is facing in the room above. FIXME: It is possible to hero shot spark out the door. |
|
Perform a diagonal spark to cross the sand. Requires: "canPrepareForNextRoom"
"canPlayInSand"
{
"useFlashSuit": {}
}
{
"shinespark": {
"frames": 11,
"excessFrames": 4
}
}Dev note: This is a separate strat, because the suitless bootless Evir projectile dodge is much more difficult when starting from the right side of the room. |
|
The sand does not impede Samus in G-Mode. Enter the room on the right half of the transition, where both Evirs will be off camera to avoid their projectiles. Entrance condition: {
"comeInWithGMode": {
"mode": "any",
"morphed": false
},
"comesThroughToilet": "any"
}Requires: "h_navigateUnderwater"
{
"or": [
"canInsaneJump",
{
"enemyDamage": {
"enemy": "Evir",
"type": "particle",
"hits": 1
}
}
]
}
{
"or": [
"Gravity",
"HiJump",
"canSpringBallJumpMidAir",
{
"and": [
"h_underwaterCrouchJumpDownGrab",
"h_storedSpark",
{
"shinespark": {
"frames": 7,
"excessFrames": 6
}
}
]
}
]
}Dev note: Only the last jump needs any items. |
From: 3
Top Sand Entrance
To: 2
Right Door

Enter with a falling pose in order to be able to spark immediately on entry. This may require a quick drop through the sand in the room above. Avoid entering too far to the right or Samus will be hit by the Evir. Entrance condition: {
"comeInShinecharged": {},
"comesThroughToilet": "any"
}Requires: {
"shineChargeFrames": 10
}
"h_navigateUnderwater"
"canShinechargeMovementComplex"
"canHorizontalMidairShinespark"
"canPrepareForNextRoom"
{
"or": [
{
"and": [
"Gravity",
{
"shinespark": {
"frames": 34,
"excessFrames": 12
}
}
]
},
{
"shinespark": {
"frames": 39,
"excessFrames": 15
}
}
]
}Dev note: Frames are all assuming a toilet entry, frames could be reduced slightly if entering in a more favorable position. While the shinecharge frames could be smaller, this gives a small buffer to orient the direction Samus is facing in the room above. FIXME: It is possible to come in with Gravity and more frames, jump off the sand and pillar, and hero shot spark out the door. |
|
The sand does not impede Samus in G-Mode. Enter the room on the right half of the transition, where both Evirs will be off camera to avoid their projectiles. It is possible to jump to the tall pillar with nothing, requiring a subpixel precise jump. Running before jumping doesn't help. Stand one pixel from the right edge and spinjump to the right. Entrance condition: {
"comeInWithGMode": {
"mode": "any",
"morphed": false
},
"comesThroughToilet": "any"
}Requires: "h_navigateUnderwater"
{
"or": [
"canInsaneJump",
{
"enemyDamage": {
"enemy": "Evir",
"type": "particle",
"hits": 1
}
}
]
}
{
"or": [
"Gravity",
"HiJump",
"canSpringBallJumpMidAir",
{
"and": [
"h_underwaterCrouchJumpDownGrab",
"canInsaneJump"
]
}
]
} |
|
Requires: {
"or": [
{
"enemyDamage": {
"enemy": "Evir",
"type": "particle",
"hits": 1
}
},
"h_pauseAbuseMinimalReserveRefill"
]
} |
|
To safely avoid the Evir shot, enter in a spin jump from either the far left or far right side of the transition. Requires: "canPrepareForNextRoom"
"canPlayInSand"
"canTrickyJump"
{
"or": [
"Gravity",
"HiJump",
"canInsaneJump"
]
}Dev note: Entering from a non-sand room, or passing throught the toilet does not change the ability to dodge the evirs much. |
From: 3
Top Sand Entrance
To: 4
Junction Below Sand Entrance
PLM Overload will occur immediately open entering due to the sandfall. Jump over the two Evir in the left pit. Avoid a projectile and Crystal Flash, then kill the remaining Evir with beam shots. Jump into the sandpit which should now be air. Shinecharge, then jump to the right Evir and use a projectile to interrupt. Be sure to not stop moving if Samus must land on the sand once bluesuit is obtained. Entrance condition: {
"comeInWithGMode": {
"mode": "direct",
"morphed": false
},
"comesThroughToilet": "no"
}Requires: "Gravity"
"canPlayInSand"
"canComplexGMode"
{
"enemyKill": {
"enemies": [
[
"Evir",
"Evir"
]
]
}
}
"h_CrystalFlashForReserveEnergy"
{
"canShineCharge": {
"usedTiles": 14,
"openEnd": 0
}
}
{
"autoReserveTrigger": {}
}
"canRModeSparkInterrupt"
{
"notable": "Blue Suit Sand Walk"
} |
|
Requires: "Gravity" "SpaceJump" |
From: 4
Junction Below Sand Entrance
To: 1
Left Door


Requires: "Gravity"
{
"or": [
"canPlayInSand",
"canWallJump",
"h_useSpringBall"
]
}
{
"or": [
"canTrickyJump",
{
"enemyDamage": {
"enemy": "Evir",
"type": "particle",
"hits": 1
}
},
{
"and": [
"canDodgeWhileShooting",
{
"or": [
"ScrewAttack",
{
"enemyKill": {
"enemies": [
[
"Evir"
],
[
"Evir"
]
],
"explicitWeapons": [
"Super",
"Plasma",
"PowerBombPeriphery"
]
}
}
]
}
]
}
]
}
{
"noBlueSuit": {}
}Dev note: Other weapons take too long to kill the enemy. Ice is likely to be blocked by the particle. |
|
Requires: "canSuitlessMaridia"
"HiJump"
"canPlayInSand"
{
"or": [
"canTrickyJump",
{
"enemyDamage": {
"enemy": "Evir",
"type": "particle",
"hits": 1
}
}
]
}
{
"or": [
"canTrickyDodgeEnemies",
{
"enemyDamage": {
"enemy": "Evir",
"type": "particle",
"hits": 1
}
},
"h_pauseAbuseMinimalReserveRefill"
]
}
{
"noBlueSuit": {}
} |
|
Requires: "canSuitlessMaridia"
"HiJump"
"canPlayInSand"
"canDodgeWhileShooting"
{
"enemyKill": {
"enemies": [
[
"Evir"
],
[
"Evir"
]
],
"explicitWeapons": [
"Super",
"Plasma",
"PowerBombPeriphery"
]
}
}
{
"noBlueSuit": {}
}Dev note: Other weapons take too long to kill the enemy. Ice is likely to be blocked by the particle. |
From: 4
Junction Below Sand Entrance
To: 1
Left Door


If entering from the sandfall above, come in at the far left of the transition, with either a spin-jump or i-frames, to avoid the Evir shot; land on the right side of the pillar to the left, being careful to not bring left Evir on camera. If coming from the right side of the room, then moonwalk on the center pillar to scroll the camera as far right as possible, to avoid getting hit by an Evir shot; alternatively, jump slightly to the left and freeze the Evir, then return back to the center pillar before jumping across the sand. Freeze the right Evir and jump onto it. Quickly move left and fire an angle-down shot to freeze the left Evir before it descends too far. Jump onto the left Evir, back up to the right side of it to maximize space to build momentum, and jump to the left onto the sand and then onto the ledge. If Samus does not quite get enough height to make it onto the ledge, then break spin, turn around to the right, land on the sand again, and do a turnaround spin-jump to the left. If the Evirs descend too far, it is possible to use a Power Bomb to bring them back up again, but caution is needed to avoid killing the first Evir, and it is difficult to avoid getting shot. Requires: {
"notable": "Suitless Bootless Evir Freeze (Center to Left)"
}
"canSuitlessMaridia"
"canTrickyJump"
"canTrickyUseFrozenEnemies"
"canPlayInSand"
"canCameraManip"
{
"or": [
"canTrickyDodgeEnemies",
{
"and": [
{
"ammo": {
"type": "PowerBomb",
"count": 1
}
},
{
"enemyDamage": {
"enemy": "Evir",
"type": "particle",
"hits": 2
}
}
]
},
{
"and": [
{
"ammo": {
"type": "PowerBomb",
"count": 1
}
},
"h_pauseAbuseMinimalReserveRefill",
"h_pauseAbuseMinimalReserveRefill"
]
}
]
}
{
"noBlueSuit": {}
}Dev note: This strat is still possible after falling through the sandpit after being centered by the toilet by landing towards the right, then crossing back left. |
|
To normalize Samus' position, do a full height jump to land on the sand. Avoid touching the sandfalls until after landing. If HiJump is equipped, avoid bonking a sloped part of the ceiling. Requires: {
"haveBlueSuit": {}
}
{
"notable": "Blue Suit Sand Walk"
} |
|
Either perform a horizontal shinespark from the second to last platform, or perform a particularly tight dodge to get to the last platform and then spark diagonally across the rest. The horizontal spark can be done relatively low and then jump off of the sand in order to save Energy. Requires: {
"useFlashSuit": {}
}
{
"or": [
{
"shinespark": {
"frames": 34,
"excessFrames": 6
}
},
{
"and": [
"canCameraManip",
"canInsaneJump",
{
"shinespark": {
"frames": 9,
"excessFrames": 2
}
}
]
}
]
}Dev note: The Evir projectile dodge is much more difficult when starting from the right side of the room. |
|
Requires: "h_storedSpark"
{
"or": [
{
"shinespark": {
"frames": 27,
"excessFrames": 15
}
},
{
"and": [
"canInsaneJump",
{
"shinespark": {
"frames": 13,
"excessFrames": 0
}
},
"canDownGrab"
]
}
]
} |
|
Requires: "Gravity" "SpaceJump" |
|
Requires: "Gravity"
{
"noBlueSuit": {}
}
{
"or": [
"canTrickyJump",
"Ice",
"ScrewAttack",
{
"enemyKill": {
"enemies": [
[
"Evir"
]
],
"explicitWeapons": [
"Plasma",
"Super",
"PowerBombPeriphery"
]
}
},
{
"enemyDamage": {
"enemy": "Evir",
"type": "particle",
"hits": 1
}
}
]
}
"canPlayInSand"
{
"or": [
"canWallJump",
"HiJump",
"canUseFrozenEnemies"
]
}Dev note: Technically it could make sense to clear obstacle A if the Right Evir is killed, but with Gravity it is irrelevant. |
|
From the low platform, Gravity Jump to the raised platform. The pause should initiate significantly later than a normal Gravity Jump, while Samus is a couple tiles off the ground. It is possible to instead Spring Ball jump off the sand, with a tight midair morph, but this is more precise. Requires: {
"noBlueSuit": {}
}
"Gravity"
"canTrickyJump"
"canPlayInSand"
{
"or": [
"canGravityJump",
{
"and": [
"can4HighMidAirMorph",
"canTrickySpringBallJump"
]
}
]
} |
From: 4
Junction Below Sand Entrance
To: 5
Right Pillar
Simply walk off the ledges and hold forward to walk on the sand with a blue suit. Requires: {
"haveBlueSuit": {}
}
{
"notable": "Blue Suit Sand Walk"
}
"Gravity"
"canPlayInSand"
{
"or": [
"canWallJump",
"HiJump",
"canUseFrozenEnemies",
"canGravityJump",
"canTrickySpringBallJump"
]
} |
From: 4
Junction Below Sand Entrance
To: 5
Right Pillar

Requires: "Gravity"
"canTrickyJump"
"canHorizontalDamageBoost"
{
"enemyDamage": {
"enemy": "Evir",
"type": "particle",
"hits": 1
}
} |
From: 4
Junction Below Sand Entrance
To: 5
Right Pillar
Let the Evir descend slightly from its spawn point to be at the correct height. A power bomb can be used to bring it back up if it falls too far. Requires: "canSuitlessMaridia" "HiJump" "canTrickyJump" "canTrickyUseFrozenEnemies" "canPlayInSand" |
|

On the left side of the raised platform, jump for max height. Lateral Midair Morph for horizontal momentum, and perform the Spring Ball jump the moment before touching the sandfall. Pause again to disable Spring Ball as soon as possible. Requires: {
"notable": "Spring Ball HiJump"
}
"canSuitlessMaridia"
"HiJump"
"canTrickySpringBallJump"
"canStationaryLateralMidAirMorph"
"canSpringFling"
"canPlayInSand"
{
"or": [
{
"enemyDamage": {
"enemy": "Evir",
"type": "particle",
"hits": 1
}
},
{
"enemyKill": {
"enemies": [
[
"Evir"
]
],
"explicitWeapons": [
"Plasma",
"Super",
"PowerBomb"
]
}
},
"canTrickyDodgeEnemies",
"h_pauseAbuseMinimalReserveRefill"
]
}
{
"or": [
{
"noBlueSuit": {}
},
{
"notable": "Blue Suit Sand Walk"
}
]
} |
From: 4
Junction Below Sand Entrance
To: 5
Right Pillar

From the sand fall, quickly get onto the left platform to prevent the right side Evir from lowering too far. Jump on the sand to the right while freezing the Evir as high as possible. Refreeze the Evir so it is a slightly higher platform than the right pillar. Perform a spring ball jump with a stationary lateral mid-air morph from the left side of the current platform to get onto the Evir. Use a running jump off of the Evir. As a backup, it may be possible to make the Evir rise again by hitting it with a PB - place the PB in the air to avoid double hitting and killing it. Requires: {
"notable": "Suitless Bootless Evir Freeze (Center to Right)"
}
"canSuitlessMaridia"
"canTrickyUseFrozenEnemies"
"canPlayInSand"
"h_underwaterMaxHeightSpringBallJump"
"canStationaryLateralMidAirMorph" |
From: 4
Junction Below Sand Entrance
To: 5
Right Pillar


Use a Power Bomb to make the right-most Evir rise. Freeze it low and jump onto it. Crouch and continue holding down; when the Evir is about to thaw, jump with a buffered aim-down and refreeze the Evir after it climbs a few pixels. Repeat many times until gaining enough height to spin jump onto the pillar. With each refreeze, it is recommended that Samus switch which side of the Evir to stand on, to avoid a risk of getting shot by the Evir. Requires: {
"notable": "Suitless Bootless Evir Climb"
}
"h_usePowerBomb"
"canBePatient"
"canTrickyUseFrozenEnemies"
"canPlayInSand"
"canTrickyDodgeEnemies" |
|
To save Energy, spark diagonally to get onto the pillar, then jump to the door. Requires: "canPlayInSand"
"h_storedSpark"
{
"or": [
{
"shinespark": {
"frames": 8,
"excessFrames": 2
}
},
{
"and": [
"HiJump",
{
"shinespark": {
"frames": 6,
"excessFrames": 1
}
}
]
}
]
} |
|
Requires: "h_storedSpark"
{
"shinespark": {
"frames": 53,
"excessFrames": 8
}
}Dev note: With a controlled shinespark end, starting with 74 energy, this can collect an Evir drop. |
|
Requires: "h_navigateUnderwater" |
|
Requires: "Gravity"
{
"noBlueSuit": {}
} |
|


Requires: "canSuitlessMaridia"
"HiJump"
"canPlayInSand"
{
"noBlueSuit": {}
} |
From: 5
Right Pillar
To: 4
Junction Below Sand Entrance
Requires: {
"haveBlueSuit": {}
}
{
"notable": "Blue Suit Sand Walk"
} |
|


Use the Evir as a platform, which should have been frozen soon after entering the room. Requires: {
"obstaclesNotCleared": [
"A"
]
}
"canTrickyUseFrozenEnemies"
"canTrickyJump"
"canPlayInSand"
{
"noBlueSuit": {}
} |
From: 5
Right Pillar
To: 4
Junction Below Sand Entrance
Use a Power Bomb to make the Evir rise. Freeze it and use it as a platform to jump across. Requires: "h_usePowerBomb"
"canTrickyUseFrozenEnemies"
"canTrickyJump"
"canPlayInSand"
{
"noBlueSuit": {}
} |
{
"$schema": "../../../schema/m3-room.schema.json",
"id": 210,
"name": "East Sand Hall",
"area": "Maridia",
"subarea": "Inner",
"subsubarea": "Green",
"roomAddress": "0x7D4C2",
"roomEnvironments": [
{
"heated": false
}
],
"mapTileMask": [
[
1,
1,
1
]
],
"nodes": [
{
"id": 1,
"name": "Left Door",
"nodeType": "door",
"nodeSubType": "blue",
"nodeAddress": "0x001a684",
"doorOrientation": "left",
"doorEnvironments": [
{
"physics": "water"
}
],
"mapTileMask": [
[
2,
1,
1
]
]
},
{
"id": 2,
"name": "Right Door",
"nodeType": "door",
"nodeSubType": "blue",
"nodeAddress": "0x001a690",
"doorOrientation": "right",
"doorEnvironments": [
{
"physics": "water"
}
],
"mapTileMask": [
[
1,
1,
2
]
]
},
{
"id": 3,
"name": "Top Sand Entrance",
"nodeType": "entrance",
"nodeSubType": "sandpit",
"nodeAddress": "0x001a69c",
"doorOrientation": "up",
"mapTileMask": [
[
1,
2,
1
]
]
},
{
"id": 4,
"name": "Junction Below Sand Entrance",
"nodeType": "junction",
"nodeSubType": "junction",
"mapTileMask": [
[
1,
2,
1
]
]
},
{
"id": 5,
"name": "Right Pillar",
"nodeType": "junction",
"nodeSubType": "junction",
"mapTileMask": [
[
1,
1,
2
]
]
}
],
"obstacles": [
{
"id": "A",
"name": "Right Evir Non-Freezable",
"obstacleType": "abstract",
"note": "This represents that the rightmost Evir has descended far enough to not be usable as a frozen platform from the right."
}
],
"enemies": [
{
"id": "e1",
"groupName": "East Sand Hall Left Evirs",
"enemyName": "Evir",
"quantity": 2,
"betweenNodes": [
1,
4
]
},
{
"id": "e2",
"groupName": "East Sand Hall Right Evir",
"enemyName": "Evir",
"quantity": 1,
"betweenNodes": [
2,
4
]
}
],
"strats": [
{
"link": [
1,
1
],
"name": "Base (Unlock Door)",
"requires": [],
"unlocksDoors": [
{
"types": [
"ammo"
],
"requires": []
}
],
"flashSuitChecked": true,
"blueSuitChecked": true
},
{
"link": [
1,
1
],
"name": "Base (Come In Normally)",
"entranceCondition": {
"comeInNormally": {}
},
"requires": [],
"flashSuitChecked": true,
"blueSuitChecked": true
},
{
"link": [
1,
1
],
"name": "Base (Come In With Mockball)",
"entranceCondition": {
"comeInWithMockball": {
"adjacentMinTiles": 0,
"remoteAndLandingMinTiles": [
[
0,
0
]
],
"speedBooster": "any"
}
},
"requires": [],
"flashSuitChecked": true,
"blueSuitChecked": true
},
{
"link": [
2,
2
],
"name": "Base (Unlock Door)",
"requires": [],
"unlocksDoors": [
{
"types": [
"ammo"
],
"requires": []
}
],
"flashSuitChecked": true,
"blueSuitChecked": true
},
{
"link": [
2,
2
],
"name": "Base (Come In Normally)",
"entranceCondition": {
"comeInNormally": {}
},
"requires": [],
"flashSuitChecked": true,
"blueSuitChecked": true
},
{
"link": [
2,
2
],
"name": "Base (Come In With Mockball)",
"entranceCondition": {
"comeInWithMockball": {
"adjacentMinTiles": 0,
"remoteAndLandingMinTiles": [
[
0,
0
]
],
"speedBooster": "any"
}
},
"requires": [],
"flashSuitChecked": true,
"blueSuitChecked": true
},
{
"link": [
3,
3
],
"name": "Base (Come In Normally)",
"entranceCondition": {
"comeInNormally": {}
},
"requires": [],
"flashSuitChecked": true,
"blueSuitChecked": true
},
{
"id": 1,
"link": [
1,
1
],
"name": "Leave with Runway",
"requires": [],
"exitCondition": {
"leaveWithRunway": {
"length": 4,
"openEnd": 1
}
},
"flashSuitChecked": true,
"blueSuitChecked": true
},
{
"id": 73,
"link": [
1,
1
],
"name": "Evir Farm (1 Evir, Grapple)",
"requires": [
{
"resetRoom": {
"nodes": [
1
]
}
},
"canSuitlessMaridia",
"Grapple",
"canDodgeWhileShooting",
{
"or": [
{
"and": [
"Plasma",
{
"cycleFrames": 180
}
]
},
{
"and": [
"Wave",
{
"cycleFrames": 240
}
]
},
{
"and": [
"Spazer",
"canFarmWhileShooting",
{
"cycleFrames": 280
}
]
}
]
}
],
"resetsObstacles": [
"A"
],
"farmCycleDrops": [
{
"enemy": "Evir",
"count": 1
}
],
"flashSuitChecked": true,
"blueSuitChecked": true,
"note": [
"Fire angle-down shots to kill the first Evir from safely on the ledge,",
"then collect the drop using Grapple.",
"Crouching can help in reaching the Evir's drop if it is low."
]
},
{
"id": 97,
"link": [
1,
1
],
"name": "Evir Farm (1 Evir, Blue Suit)",
"requires": [
{
"resetRoom": {
"nodes": [
1
]
}
},
{
"haveBlueSuit": {}
},
"canSuitlessMaridia",
"canDodgeWhileShooting",
{
"notable": "Blue Suit Sand Walk"
},
{
"cycleFrames": 300
}
],
"resetsObstacles": [
"A"
],
"farmCycleDrops": [
{
"enemy": "Evir",
"count": 1
}
],
"flashSuitChecked": true,
"blueSuitChecked": true,
"note": [
"Walk off the ledge and touch the Evir with a blue suit to kill it.",
"Use arm pumps to reach it quickly before it sinks too far.",
"Turn around on the sand to collect the drop."
]
},
{
"id": 74,
"link": [
1,
1
],
"name": "Evir Farm (2 Evirs)",
"requires": [
{
"resetRoom": {
"nodes": [
1
]
}
},
"canPlayInSand",
"canDodgeWhileShooting",
{
"or": [
{
"and": [
"Gravity",
"ScrewAttack",
{
"cycleFrames": 320
}
]
},
{
"and": [
"Gravity",
{
"haveBlueSuit": {}
},
{
"notable": "Blue Suit Sand Walk"
},
{
"cycleFrames": 290
}
]
},
{
"and": [
"Plasma",
{
"cycleFrames": 330
},
{
"or": [
"Gravity",
{
"and": [
"canSuitlessMaridia",
"HiJump",
{
"cycleFrames": 50
}
]
},
{
"and": [
{
"haveBlueSuit": {}
},
{
"notable": "Blue Suit Sand Walk"
},
{
"cycleFrames": 270
}
]
}
]
}
]
},
{
"and": [
{
"or": [
"Wave",
"Spazer"
]
},
"canFarmWhileShooting",
{
"cycleFrames": 975
},
{
"or": [
"Gravity",
{
"and": [
"canSuitlessMaridia",
"HiJump",
{
"cycleFrames": 90
}
]
}
]
}
]
}
]
}
],
"resetsObstacles": [
"A"
],
"farmCycleDrops": [
{
"enemy": "Evir",
"count": 2
}
],
"flashSuitChecked": true,
"blueSuitChecked": true,
"note": [
"If Screw Attack or Plasma are available (or Gravity and a blue suit), farm the two Evirs closest to the door.",
"With Wave or Spazer, it won't be possible to kill the second Evir in time,",
"in which case the room can be crossed to reach a third one."
],
"devNote": [
"Farming a third Evir is possible but would rarely be worthwhile."
]
},
{
"id": 2,
"link": [
1,
1
],
"name": "Crystal Flash",
"requires": [
"h_CrystalFlash"
],
"flashSuitChecked": true,
"blueSuitChecked": true
},
{
"id": 98,
"link": [
1,
1
],
"name": "Come in Shinecharging, Crystal Spark",
"entranceCondition": {
"comeInShinecharging": {
"length": 3,
"openEnd": 0
},
"comesInHeated": "no"
},
"requires": [
"Gravity",
"h_CrystalSpark"
],
"flashSuitChecked": true,
"blueSuitChecked": true
},
{
"id": 3,
"link": [
1,
1
],
"name": "G-Mode Setup - Get Hit By Evir Projectile",
"requires": [
"h_navigateUnderwater",
{
"or": [
"Gravity",
"canComplexGMode"
]
}
],
"exitCondition": {
"leaveWithGModeSetup": {}
},
"flashSuitChecked": true,
"blueSuitChecked": true,
"note": [
"The easiest way to lure an Evir projectile and get through the door before it is to stand facing and against the door cap, open the door then turn right and run back to the left."
]
},
{
"id": 4,
"link": [
1,
2
],
"name": "Come In With Spark (Suitless)",
"entranceCondition": {
"comeInWithSpark": {
"position": "top"
}
},
"requires": [
{
  "shinespark": {
    "frames": 75,
    "excessFrames": 7
  }
}
],
"flashSuitChecked": true,
"blueSuitChecked": true,
"note": "Spark through the top of the door to avoid bonking."
},
{
"id": 5,
"link": [
1,
2
],
"name": "Come In With Spark (Gravity)",
"entranceCondition": {
"comeInWithSpark": {
"position": "top"
}
},
"requires": [
"Gravity",
{
"shinespark": {
"frames": 61,
"excessFrames": 6
}
}
],
"flashSuitChecked": true,
"blueSuitChecked": true,
"note": "Spark through the top of the door to avoid bonking."
},
{
"id": 6,
"link": [
1,
2
],
"name": "Come In Shinecharging, Shinespark (Gravity)",
"entranceCondition": {
"comeInShinecharging": {
"length": 3,
"openEnd": 0
}
},
"requires": [
"Gravity",
"canHorizontalMidairShinespark",
{
"shinespark": {
"frames": 49,
"excessFrames": 4
}
}
],
"flashSuitChecked": true,
"blueSuitChecked": true,
"note": "Shinespark midair to avoid bonking. Jump outward before sparking save Energy."
},
{
"id": 7,
"link": [
1,
2
],
"name": "Come In Shinecharging, Shinespark (Suitless)",
"entranceCondition": {
"comeInShinecharging": {
"length": 1,
"openEnd": 0
}
},
"requires": [
"canShinechargeMovementComplex",
"canPlayInSand",
{
"or": [
{
"shinespark": {
"frames": 67,
"excessFrames": 13
}
},
{
"and": [
"canInsaneJump",
{
"shinespark": {
"frames": 54,
"excessFrames": 0
}
},
"canDownGrab"
]
}
]
}
],
"flashSuitChecked": true,
"blueSuitChecked": true,
"note": [
"It helps to wait to enter the sandfall until after Samus is near the peak of her jump."
]
},
{
"id": 8,
"link": [
1,
2
],
"name": "Cross-Room Speed Jump over Evirs",
"entranceCondition": {
"comeInRunning": {
"speedBooster": "yes",
"minTiles": 19.3625,
"maxTiles": 21.25
}
},
"requires": [
{
"notable": "Cross-Room Speed Jump over Evirs"
},
"canPlayInSand",
"canCrossRoomJumpIntoWater",
"canTrickyDashJump"
],
"flashSuitChecked": true,
"blueSuitChecked": true,
"note": [
"Stand at an effective distance of between about 20 and 21 tiles from the door.",
"Run through the door, and jump any time after the transition, holding jump through the entire room to make it to the other side.",
"Samus will go over the Evirs, so there is no need for blue speed."
]
},
{
"id": 9,
"link": [
1,
2
],
"name": "Cross-Room Spring Ball Jump",
"entranceCondition": {
"comeInRunning": {
"speedBooster": "yes",
"minTiles": 10
}
},
"requires": [
{
"notable": "Cross-Room Spring Ball Jump"
},
"canPlayInSand",
"canCrossRoomJumpIntoWater",
"h_speedJump",
"canLateralMidAirMorph",
"canTrickySpringBallJump",
"canTrickyJump"
],
"flashSuitChecked": true,
"blueSuitChecked": true,
"note": [
"Enter with enough run speed to jump (after the transition) across the full room using one Spring Ball Jump.",
"When exiting the first Sandfall, Samus will be rising still. That is the time to Spring Ball jump."
]
},
{
"id": 10,
"link": [
1,
2
],
"name": "Cross-Room Spring Ball Bounce (Left to Right)",
"entranceCondition": {
"comeInWithSpringBallBounce": {
"speedBooster": "yes",
"movementType": "controlled",
"remoteAndLandingMinTiles": [
[
19.3625,
1
]
]
}
},
"requires": [
{
"notable": "Cross-Room Spring Ball Bounce (Left to Right)"
},
"canTrickyJump"
],
"flashSuitChecked": true,
"blueSuitChecked": true,
"note": [
"Gain run speed using between 19 and 33 tiles in the other room, and either roll in or do a controlled bounce to enter while descending close to the ground.",
"Bounce near the end of the platform in front of the door, clearing the whole room at once.",
"Samus will go over the Evirs, so there is no need for blue speed."
]
},
{
"id": 11,
"link": [
1,
2
],
"name": "Cross-Room Blue Spring Ball Bounce (Left to Right)",
"entranceCondition": {
"comeInWithBlueSpringBallBounce": {
"movementType": "controlled",
"minExtraRunSpeed": "$2.1",
"maxExtraRunSpeed": "$2.3"
}
},
"requires": [
{
"notable": "Cross-Room Blue Spring Ball Bounce (Left to Right)"
},
"canTrickyDashJump",
"canTrickySpringBallBounce",
"canInsaneJump"
],
"flashSuitChecked": true,
"blueSuitChecked": true,
"note": [
"Use a 3-tap or 4-tap to gain a speedball with a specific amount of speed in the other room (between $2.1 and $2.3 extra run speed), and either roll in or do a controlled bounce to enter while descending close to the ground.",
"Bounce on the platform in front of the door, then bounce on the second-to-last pillar."
]
},
{
"id": 12,
"link": [
1,
2
],
"name": "Cross-Room Blue Speed Jump, Leave With Temporary Blue",
"entranceCondition": {
"comeInGettingBlueSpeed": {
"length": 1,
"openEnd": 1,
"minExtraRunSpeed": "$4.4"
}
},
"requires": [
"canPlayInSand",
"canCrossRoomJumpIntoWater",
"canInsaneJump",
"canChainTemporaryBlue",
"canBeVeryPatient"
],
"exitCondition": {
"leaveWithTemporaryBlue": {}
},
"unlocksDoors": [
{
"types": [
"ammo"
],
"requires": []
}
],
"flashSuitChecked": true,
"blueSuitChecked": true,
"note": [
"Perform a 1-tap to gain blue speed with a significant amount of momentum.",
"Run through the door, and jump near the end of the platform, crossing the room.",
"If Samus gains enough height from the jump, it is possible unmorph mid-air to discard horizontal speed at the right side of the room, then pause to remorph (`canPauseRemorphTemporaryBlue`).",
"Otherwise, a precisely timed unmorph is needed to avoid bonking the door and losing the blue state;",
"at certain speeds, it may be necessary to briefly release jump in order to control the height for the unmorph."
],
"devNote": [
"This needs an extra run speed of at least $4.4, and ideally not much more than that."
]
},
{
"id": 13,
"link": [
1,
2
],
"name": "Cross-Room Blue Spring Ball Bounce, Leave With Temporary Blue",
"entranceCondition": {
"comeInWithBlueSpringBallBounce": {
"movementType": "controlled",
"minExtraRunSpeed": "$2.1",
"maxExtraRunSpeed": "$2.3"
}
},
"requires": [
{
"notable": "Cross-Room Blue Spring Ball Bounce (Left to Right)"
},
"canTrickyDashJump",
"canTrickySpringBallBounce",
"canInsaneJump",
"canChainTemporaryBlue",
"canBeVeryPatient"
],
"exitCondition": {
"leaveWithTemporaryBlue": {}
},
"unlocksDoors": [
{
"types": [
"ammo"
],
"requires": []
}
],
"flashSuitChecked": true,
"blueSuitChecked": true,
"note": [
"Use a 3-tap or 4-tap to gain a speedball with a specific amount of speed in the other room (between $2.1 and $2.3 extra run speed), and either roll in or do a controlled bounce to enter while descending close to the ground.",
"Cross the room by bouncing on the pillars.",
"Then chain temporary blue into the next room."
],
"devNote": [
"The 'canBeVeryPatient' requirement is for difficulty placement as this is quite precise and unforgiving."
]
},
{
"id": 86,
"link": [
1,
2
],
"name": "Cross-Room Tricky Spring Ball Bounce (Come in Running)",
"entranceCondition": {
"comeInRunning": {
"speedBooster": "yes",
"minTiles": 6.4375
}
},
"requires": [
{
"notable": "Cross-Room Tricky Spring Ball Bounce (Left to Right)"
},
"canTrickyDashJump",
"canInsaneJump",
"canTrickySpringBallBounce"
],
"flashSuitChecked": true,
"blueSuitChecked": true,
"note": [
"Enter with an extra run speed between $2.1 and $2.3.",
"Jump over the first set of Evirs, and bounce on the first pillar to cross the room."
]
},
{
"id": 87,
"link": [
1,
2
],
"name": "Cross-Room Tricky Spring Ball Bounce (Come in With Spring Ball Bounce)",
"entranceCondition": {
"comeInWithSpringBallBounce": {
"speedBooster": "yes",
"movementType": "controlled",
"remoteAndLandingMinTiles": [
[
6.4375,
1
]
]
}
},
"requires": [
{
"notable": "Cross-Room Tricky Spring Ball Bounce (Left to Right)"
},
"canTrickyDashJump",
"canInsaneJump",
"canTrickySpringBallBounce",
"canBeVeryPatient"
],
"flashSuitChecked": true,
"blueSuitChecked": true,
"note": [
"Enter with an extra run speed of between $2.1 and $2.3.",
"Bounce over the first set of Evirs, and bounce on the first pillar to cross the room.",
"If entering at lower speed ($2.1), it can help to time a pause to hit soon after bouncing on the first pillar,",
"unequipping Spring Ball to boost Samus' horizontal speed."
],
"detailNote": [
"If Samus enters with low base speed (i.e. if mockballing with a short landing runway),",
"it can affect Samus' horizontal speed even after the bounce.",
"This can make it harder to clear the final pillar,",
"though it can also help with clearing the initial Evirs."
],
"devNote": [
"The canBeVeryPatient requirement is for difficulty placement, given the high likelihood of failure:",
"with a mockball or bouncing entry, a frame-perfect release of jump is usually required."
]
},
{
"id": 61,
"link": [
1,
2
],
"name": "Use Stored Spark",
"requires": [
"h_storedSpark",
{
"or": [
{
"shinespark": {
"frames": 67,
"excessFrames": 13
}
},
{
"and": [
"canInsaneJump",
{
"shinespark": {
"frames": 54,
"excessFrames": 0
}
},
"canDownGrab"
]
}
]
}
],
"flashSuitChecked": true,
"blueSuitChecked": true,
"note": "Spark at the peak of the jump, just before or after touching the sand fall, in order to be high enough to get over the last pillar."
},
{
"id": 14,
"link": [
1,
2
],
"name": "G-Mode With Assist",
"entranceCondition": {
"comeInWithGMode": {
"mode": "any",
"morphed": false
}
},
"requires": [
"h_navigateUnderwater",
{
"or": [
"Gravity",
"HiJump",
"canSpringBallJumpMidAir"
]
}
],
"flashSuitChecked": true,
"blueSuitChecked": true,
"note": "The sand does not impede Samus in G-Mode."
},
{
"id": 68,
"link": [
1,
2
],
"name": "G-Mode Itemless",
"entranceCondition": {
"comeInWithGMode": {
"mode": "any",
"morphed": false
}
},
"requires": [
"canSuitlessMaridia",
"h_underwaterCrouchJumpDownGrab",
"canInsaneJump"
],
"flashSuitChecked": true,
"blueSuitChecked": true,
"note": [
"The sand does not impede Samus in G-Mode.",
"Carefully jump over the first two Evirs. Crouch against the pillar and wait a brief moment before jumping and down grabbing onto it.",
"Lure the third Evir's projectile by jumping then crouch jump and down grab the second pillar.",
"Getting onto the final pillar is the hardest part, which requires a subpixel precise jump.",
"Carefully lure the Evir projectile while getting into position, one pixel from the right edge.",
"Stand and spinjump to the right. Note that running before jumping doesn't help."
]
},
{
"id": 15,
"link": [
1,
4
],
"name": "Base",
"requires": [
"Gravity",
"SpaceJump"
],
"flashSuitChecked": true,
"blueSuitChecked": true
},
{
"id": 16,
"link": [
1,
4
],
"name": "Evir Avoid with Gravity",
"requires": [
"Gravity",
{
"or": [
"canCarefulJump",
{
"enemyDamage": {
"enemy": "Evir",
"type": "particle",
"hits": 1
}
}
]
},
{
"noBlueSuit": {}
}
],
"flashSuitChecked": true,
"blueSuitChecked": true,
"note": "Wait a little bit for the Evirs to descend some before jumping.",
"devNote": "Running in with speed to kill or jump over the Evirs is still a careful jump."
},
{
"id": 17,
"link": [
1,
4
],
"name": "Evir Fight Gravity",
"requires": [
"Gravity",
{
"or": [
"Ice",
"ScrewAttack",
{
"enemyKill": {
"enemies": [
[
"Evir"
],
[
"Evir"
]
],
"explicitWeapons": [
"Plasma",
"Super",
"PowerBombPeriphery"
]
}
}
]
},
{
"noBlueSuit": {}
}
],
"flashSuitChecked": true,
"blueSuitChecked": true,
"devNote": "Other weapons take too long to kill the enemy."
},
{
"id": 99,
"link": [
1,
4
],
"name": "Blue Suit Sand Walk",
"requires": [
{
"haveBlueSuit": {}
},
{
"notable": "Blue Suit Sand Walk"
}
],
"flashSuitChecked": true,
"blueSuitChecked": true,
"note": [
"Simply walk off the ledges and hold forward to walk on the sand with a blue suit."
]
},
{
"id": 18,
"link": [
1,
4
],
"name": "Suitless HiJump Jump with Momentum",
"entranceCondition": {
"comeInRunning": {
"speedBooster": "any",
"minTiles": 3.4375
}
},
"requires": [
"canCrossRoomJumpIntoWater",
"HiJump",
"canCarefulJump"
],
"flashSuitChecked": true,
"blueSuitChecked": true,
"note": "By entering the room with run speed, it is possible to jump over the pair of Evirs."
},
{
"id": 19,
"link": [
1,
4
],
"name": "Suitless Speed HiJump Jump with Momentum",
"entranceCondition": {
"comeInRunning": {
"speedBooster": "yes",
"minTiles": 3
}
},
"requires": [
"canCrossRoomJumpIntoWater",
"HiJump"
],
"flashSuitChecked": true,
"blueSuitChecked": true,
"note": "By entering the room with run speed, it is possible to jump over the pair of Evirs."
},
{
"id": 20,
"link": [
1,
4
],
"name": "Suitless HiJump Evir Avoid",
"requires": [
"canSuitlessMaridia",
"HiJump",
"canPlayInSand",
{
"or": [
"canTrickyJump",
{
"enemyDamage": {
"enemy": "Evir",
"type": "particle",
"hits": 1
}
}
]
},
{
"noBlueSuit": {}
}
],
"flashSuitChecked": true,
"blueSuitChecked": true
},
{
"id": 21,
"link": [
1,
4
],
"name": "Evir Fight Suitless",
"requires": [
"canSuitlessMaridia",
"canDodgeWhileShooting",
"HiJump",
"canPlayInSand",
"canTrickyJump",
{
"or": [
"Ice",
{
"enemyKill": {
"enemies": [
[
"Evir"
],
[
"Evir"
]
],
"explicitWeapons": [
"Plasma",
"Super",
"PowerBombPeriphery"
]
}
}
]
},
{
"noBlueSuit": {}
}
],
"flashSuitChecked": true,
"blueSuitChecked": true,
"devNote": "Other weapons take too long to kill the enemy."
},
{
"id": 22,
"link": [
1,
4
],
"name": "Jump with Momentum",
"entranceCondition": {
"comeInJumping": {
"speedBooster": "no",
"minTiles": 6.4375
}
},
"requires": [
"canCrossRoomJumpIntoWater",
"canPlayInSand",
"canTrickyJump",
{
"enemyKill": {
"enemies": [
[
"Evir"
]
],
"explicitWeapons": [
"Plasma",
"Super"
]
}
}
],
"flashSuitChecked": true,
"blueSuitChecked": true,
"note": [
"Gain momentum in the room to the left, then jump at the edge of the runway in this room in order to jump off of the sand and land on the first pillar.",
"Requires a runway of 7 tiles (with no open end) in the adjacent room, and killing the second Evir with a quick super or two plasma hits (note that the particle despawns as the Evir dies)."
],
"devNote": "This is not technically a canCrossRoomJumpIntoWater, but it is used here because of the way the momentum changes as Samus enters the water."
},
{
"id": 23,
"link": [
1,
4
],
"name": "Cross Room Jump with Ice or Damage Boost",
"entranceCondition": {
"comeInJumping": {
"speedBooster": "no",
"minTiles": 6.4375
}
},
"requires": [
{
"notable": "Cross Room Jump with Ice or Damage Boost"
},
"canCrossRoomJumpIntoWater",
"canPlayInSand",
"canInsaneJump",
{
"or": [
"canTrickyUseFrozenEnemies",
{
"and": [
"canNeutralDamageBoost",
{
"enemyDamage": {
"enemy": "Evir",
"type": "contact",
"hits": 1
}
}
]
},
{
"and": [
"canNeutralDamageBoost",
"h_pauseAbuseMinimalReserveRefill"
]
}
]
}
],
"flashSuitChecked": true,
"blueSuitChecked": true,
"note": [
"Requires a runway of 7 tiles (with no open end) in the adjacent room. Requires two precise inputs of jumping through the doorway and a short aiming down press before hitting the ceiling.",
"Damage boost off of the right Evir in order to land on the first pillar. With Ice, instead freeze the Evir to land on it and avoid the damage.",
"When entering the room with a bad jump, it is possible to perform a midair wiggle to get back to the door platform."
]
},
{
"id": 70,
"link": [
1,
4
],
"name": "Suitless Bootless Evir Freeze (Left to Center)",
"requires": [
{
"notable": "Suitless Bootless Evir Freeze (Left to Center)"
},
"canSuitlessMaridia",
"canTrickyJump",
"canTrickyUseFrozenEnemies",
"canPlayInSand",
"canCameraManip",
{
"noBlueSuit": {}
}
],
"flashSuitChecked": true,
"blueSuitChecked": true,
"note": [
"When entering the room, immediately shoot straight ahead to freeze the second Evir,",
"then quickly also freeze the first Evir, with a diagonal-down shot.",
"Wait on top of the first Evir for the second Evir to sink far enough to be able to jump onto it,",
"then use it as a platform to jump onto the first pillar (either directly or after a jump on the sand)."
]
},
{
"id": 24,
"link": [
1,
4
],
"name": "Cross Room Jump with Air Ball",
"entranceCondition": {
"comeInJumping": {
"speedBooster": "no",
"minTiles": 6.4375
}
},
"requires": [
"canCrossRoomJumpIntoWater",
"canPlayInSand",
"canLateralMidAirMorph",
{
"or": [
"canTrickyJump",
{
"and": [
"canCarefulJump",
{
"enemyDamage": {
"enemy": "Evir",
"type": "contact",
"hits": 1
}
}
]
}
]
}
],
"flashSuitChecked": true,
"blueSuitChecked": true,
"note": [
"Requires a runway of 7 tiles (with no open end) in the adjacent room.",
"Jump into an air ball on room entry in order to get to the first pillar.",
"Aim down after the transition to avoid hitting the overhang near the door."
],
"devNote": "It is assumed that getting to the second pillar is free relative to getting to the right door."
},
{
"id": 25,
"link": [
1,
4
],
"name": "Cross Room Jump with Bomb Boost",
"entranceCondition": {
"comeInWithBombBoost": {}
},
"requires": [
"canCrossRoomJumpIntoWater",
"canTrickyJump"
],
"flashSuitChecked": true,
"blueSuitChecked": true,
"note": [
"Bomb boost through the doorway as close to the door transition as possible in order to get as far as possible."
],
"devNote": "It is assumed that getting to the second pillar is free relative to getting to the right door."
},
{
"id": 88,
"link": [
1,
4
],
"name": "Cross Room Space Jump",
"entranceCondition": {
"comeInSpaceJumping": {
"speedBooster": "no",
"minTiles": 6.4375
}
},
"requires": [
"canPreciseSpaceJump",
"canInsaneJump",
"canTrickyDodgeEnemies"
],
"flashSuitChecked": true,
"blueSuitChecked": true,
"note": [
"Space Jump into the room with full run speed without Speed Booster,",
"jumping as low as possible through the doorway.",
"Aim down when close to bonking the ceiling.",
"Samus should land on the first pillar."
]
},
{
"id": 89,
"link": [
1,
4
],
"name": "Cross Room Space Jump into Ceiling Mockball",
"entranceCondition": {
"comeInSpaceJumping": {
"speedBooster": "no",
"minTiles": 5.4375
}
},
"requires": [
"canPreciseSpaceJump",
"canMomentumConservingMorph",
"canTrickyDodgeEnemies",
"canPlayInSand"
],
"flashSuitChecked": true,
"blueSuitChecked": true,
"note": [
"Space Jump into the room relatively low through the doorway.",
"Do a momentum-conserving morph to avoid bonking on the corner at the edge of the sandfall.",
"The morph should happen relatively early, in order to avoid an Evir projectile hit."
],
"detailNote": [
"Jump into the room with extra run speed of at least $1.B",
"At low speed, Samus may not make it onto the pillar and will not have time to unmorph until close to the sand;",
"in this case, crouch jumping can be the safest way to escape."
],
"devNote": [
"Lower speeds can also work (as low as $1.4), with damage from an Evir projectile."
]
},
{
"id": 90,
"link": [
1,
4
],
"name": "Cross Room Speedy Space Jump into Ceiling Mockball",
"entranceCondition": {
"comeInSpaceJumping": {
"speedBooster": "yes",
"minTiles": 3.4375
}
},
"requires": [
"canPreciseSpaceJump",
"canMomentumConservingMorph",
"canTrickyDodgeEnemies"
],
"flashSuitChecked": true,
"blueSuitChecked": true,
"note": [
"With Speed Booster equipped, Space Jump into the room relatively low through the doorway.",
"Do a momentum-conserving morph on the ceiling."
],
"detailNote": [
"Jump into the room with extra run speed of at least $1.3."
]
},
{
"id": 62,
"link": [
1,
4
],
"name": "Use Stored Spark, Diagonal Spark and Evir Avoid",
"requires": [
"canPlayInSand",
"h_storedSpark",
{
"shinespark": {
"frames": 9,
"excessFrames": 2
}
}
],
"flashSuitChecked": true,
"blueSuitChecked": true,
"note": [
"Jump and spark diagonally into the ceiling before touching the sand at the bottom.",
"Land on the platform or before it and jump onto it.",
"Sparking after touching the sand will prevent Samus from moving much horizontally and will not work."
]
},
{
"id": 94,
"link": [
1,
4
],
"name": "Direct G-Mode Spark Interrupt",
"entranceCondition": {
"comeInWithGMode": {
"mode": "direct",
"morphed": false
}
},
"requires": [
"Gravity",
"canPlayInSand",
"canComplexGMode",
{
"enemyKill": {
"enemies": [
[
"Evir",
"Evir"
]
]
}
},
"h_CrystalFlashForReserveEnergy",
{
"canShineCharge": {
"usedTiles": 14,
"openEnd": 0
}
},
{
"autoReserveTrigger": {}
},
"canRModeSparkInterrupt",
{
"notable": "Blue Suit Sand Walk"
}
],
"flashSuitChecked": true,
"blueSuitChecked": true,
"note": [
"After entering, avoid the Evir projectiles and Crystal Flash, then kill the second Evir with beam shots. Jump into the sandfall and land back on the door ledge to overload PLMs.",
"Jump into the sandpit which should now be air. Shinecharge, then jump to the right Evir and use a projectile to interrupt.",
"Be sure to not stop moving if Samus must land on the sand once bluesuit is obtained."
]
},
{
"id": 26,
"link": [
2,
1
],
"name": "Cross-Room Speed Jump over Evirs",
"entranceCondition": {
"comeInRunning": {
"speedBooster": "yes",
"minTiles": 19.3625,
"maxTiles": 20.3
}
},
"requires": [
{
"notable": "Cross-Room Speed Jump over Evirs"
},
"canPlayInSand",
"canCrossRoomJumpIntoWater",
"canTrickyDashJump"
],
"flashSuitChecked": true,
"blueSuitChecked": true,
"note": [
"Stand at an effective distance of about 20 tiles from the door.",
"Run through the door, and jump any time after the transition, holding jump through the entire room to make it to the other side.",
"Samus will go over the Evirs, so there is no need for blue speed."
],
"devNote": [
"This needs an extra run speed of at least $4.4, and ideally not much more than that.",
"A little higher run speed can also work but may require releasing jump near the peak to avoid getting caught on the overhang."
]
},
{
"id": 69,
"link": [
2,
1
],
"name": "Cross-Room Blue Speed Jump (Right to Left)",
"entranceCondition": {
"comeInGettingBlueSpeed": {
"length": 1,
"openEnd": 1,
"minExtraRunSpeed": "$4.4"
}
},
"requires": [
{
"notable": "Cross-Room Blue Speed Jump (Right to Left)"
},
"h_blueJump",
"canPlayInSand",
"canCrossRoomJumpIntoWater"
],
"flashSuitChecked": true,
"blueSuitChecked": true,
"note": [
"Perform a 1-tap to gain blue speed with a significant amount of momentum.",
"Run through the door, and jump any time after the transition, crossing the room."
],
"devNote": [
"This assumes an extra run speed of at least $4.4, though some lower speeds can also work ($3.B through $3.F).",
"The window between $4.0 and $4.3 must be avoided because it would give too much jump height."
]
},
{
"id": 27,
"link": [
2,
1
],
"name": "Cross-Room Blue Speed Jump, Leave With Temporary Blue",
"entranceCondition": {
"comeInGettingBlueSpeed": {
"length": 1,
"openEnd": 1,
"minExtraRunSpeed": "$4.4"
}
},
"requires": [
{
"notable": "Cross-Room Blue Speed Jump (Right to Left)"
},
"canPlayInSand",
"canCrossRoomJumpIntoWater",
"canInsaneJump",
"canPauseRemorphTemporaryBlue",
"canChainTemporaryBlue"
],
"exitCondition": {
"leaveWithTemporaryBlue": {}
},
"unlocksDoors": [
{
"types": [
"ammo"
],
"requires": []
}
],
"flashSuitChecked": true,
"blueSuitChecked": true,
"note": [
"Perform a 1-tap to gain blue speed with a significant amount of momentum.",
"Run through the door, and jump into an airball any time after the transition, crossing the room.",
"At higher speeds, it may be necessary to unmorph at the left side of the room while still high in the air, to discard horizontal speed, then pause to remorph (`canPauseRemorphTemporaryBlue`)."
],
"devNote": [
"This needs an extra run speed of at least $4.4.",
"For speed $4.5, it helps to jump early and hold an aim-down pose.",
"Speed $4.6 doesn't seem possible, as you end up too high to land without bonking the door, and too low to have time for a pause remorph?",
"For speeds between $4.7 and $4.9, a pause remorph works.",
"Speed $4.A is difficult but can be done with a last-frame jump, a momentum-conserving morph (ceiling mockball) while touching the second overhang, and a pause remorph.",
"Speed $4.B doesn't seem to work as you can't avoid bonking the first overhang?"
]
},
{
"id": 28,
"link": [
2,
1
],
"name": "Cross-Room Blue Spring Ball Bounce (Right to Left)",
"entranceCondition": {
"comeInWithBlueSpringBallBounce": {
"movementType": "controlled",
"minExtraRunSpeed": "$2.0"
}
},
"requires": [
{
"notable": "Cross-Room Blue Spring Ball Bounce (Right to Left)"
},
{
"or": [
"canTrickyJump",
"canSlowShortCharge"
]
}
],
"flashSuitChecked": true,
"blueSuitChecked": true,
"note": [
"Gain a speedball in the other room, and either roll in or do a controlled bounce to enter while descending close to the ground.",
"Bounce anywhere on the platform in front of the door, clearing the whole room at once.",
"If needed, blue speed will destroy any Evirs along the way and allow bouncing on the sand at the end to make it onto the ledge."
]
},
{
"id": 29,
"link": [
2,
1
],
"name": "Cross-Room Blue Spring Ball Bounce, Leave With Temporary Blue",
"entranceCondition": {
"comeInWithBlueSpringBallBounce": {
"movementType": "controlled",
"minExtraRunSpeed": "$2.1",
"maxExtraRunSpeed": "$2.3"
}
},
"requires": [
{
"notable": "Cross-Room Blue Spring Ball Bounce (Right to Left)"
},
"canTrickyDashJump",
"canTrickySpringBallBounce",
"canPauseRemorphTemporaryBlue",
"canBeVeryPatient"
],
"exitCondition": {
"leaveWithTemporaryBlue": {}
},
"unlocksDoors": [
{
"types": [
"ammo"
],
"requires": []
}
],
"flashSuitChecked": true,
"blueSuitChecked": true,
"note": [
"Use a 3-tap or 4-tap to gain a speedball with a specific amount of speed in the other room (between $2.1 and $2.3 extra run speed), and either roll in or do a controlled bounce to enter while descending close to the ground.",
"Bounce across the room, destroying the Evirs along the path, then bounce on the sand at the left side of the room, and unmorph to go straight up in the single-tile-wide space with no sandfall;",
"perform a pause remorph to chain temporary blue to the door."
],
"devNote": [
"The 'canBeVeryPatient' requirement is for difficulty placement as this is quite precise and unforgiving.",
"Bouncing on the pillars is also possible, as an alternative to doing a pause remorph."
]
},
{
"id": 30,
"link": [
2,
1
],
"name": "Cross-Room Spring Ball Bounce (Right to Left)",
"entranceCondition": {
"comeInWithSpringBallBounce": {
"speedBooster": "yes",
"movementType": "controlled",
"remoteAndLandingMinTiles": [
[
19.3625,
1
]
]
}
},
"requires": [
{
"notable": "Cross-Room Spring Ball Bounce (Right to Left)"
},
"canTrickyJump"
],
"flashSuitChecked": true,
"blueSuitChecked": true,
"note": [
"Gain run speed using between 19 and 33 tiles in the other room, and either roll in or do a controlled bounce to enter while descending close to the ground.",
"Bounce near the end of the platform in front of the door, clearing the whole room at once.",
"Samus will go over the Evirs, so there is no need for blue speed."
]
},
{
"id": 91,
"link": [
2,
1
],
"name": "Cross-Room Tricky Spring Ball Bounce (Come in Running)",
"entranceCondition": {
"comeInRunning": {
"speedBooster": "yes",
"minTiles": 6.4375
}
},
"requires": [
{
"notable": "Cross-Room Tricky Spring Ball Bounce (Right to Left)"
},
"canTrickyDashJump",
"canTrickySpringBallBounce",
"canPlayInSand"
],
"flashSuitChecked": true,
"blueSuitChecked": true,
"note": [
"Gain max run speed with Speed Booster unequipped (extra run speed $2.0),",
"reequipping Speed Booster before the transition.",
"Jump over the first pillar and first Evir, bouncing on the second pillar;",
"this requires releasing jump when Samus is about 3 tiles past the first pillar.",
"From there, Samus should bounce over all the remaining Evirs.",
"A safe way to get out of the sand is to land inside the sandfall and",
"do a spin jump to the left to less than full height,",
"then turn right while spinning, break spin, and turnaround spin jump to the left."
]
},
{
"id": 92,
"link": [
2,
1
],
"name": "Cross-Room Tricky Spring Ball Bounce (Come in With Spring Ball Bounce)",
"entranceCondition": {
"comeInWithSpringBallBounce": {
"speedBooster": "yes",
"movementType": "controlled",
"remoteAndLandingMinTiles": [
[
6.4375,
1
]
]
}
},
"requires": [
{
"notable": "Cross-Room Tricky Spring Ball Bounce (Right to Left)"
},
"canTrickyDashJump",
"canTrickySpringBallBounce",
"canPlayInSand"
],
"flashSuitChecked": true,
"blueSuitChecked": true,
"note": [
"Gain max run speed with Speed Booster unequipped (extra run speed $2.0),",
"reequipping Speed Booster before the transition.",
"Bounce over the first pillar and first Evir, bouncing on the second pillar;",
"this requires releasing jump when Samus is about 2 tiles past the first pillar.",
"From there, Samus should bounce over all the remaining Evirs."
]
},
{
"id": 31,
"link": [
2,
1
],
"name": "Cross-Room Spring Ball Jump",
"entranceCondition": {
"comeInRunning": {
"speedBooster": "yes",
"minTiles": 10
}
},
"requires": [
{
"notable": "Cross-Room Spring Ball Jump"
},
"canPlayInSand",
"canCrossRoomJumpIntoWater",
"h_speedJump",
"canLateralMidAirMorph",
"canTrickySpringBallJump",
"canTrickyJump"
],
"flashSuitChecked": true,
"blueSuitChecked": true,
"note": [
"Enter with enough run speed to jump (after the transition) across the full room using one Spring Ball Jump.",
"When exiting the first Sandfall, Samus will be rising still. That is the time to Spring Ball jump.",
"Alternatively, an immediate pause can be used to Spring Ball jump during the first narrow gap between Sandfalls.",
"Sometimes Samus will land above the sand on the far left end of the room, where it will be necessary to unmorph and jump out."
]
},
{
"id": 32,
"link": [
2,
1
],
"name": "Come In With Spark (Suitless)",
"entranceCondition": {
"comeInWithSpark": {
"position": "top"
}
},
"requires": [
{
  "shinespark": {
    "frames": 75,
    "excessFrames": 7
  }
}
],
"flashSuitChecked": true,
"blueSuitChecked": true,
"note": "Spark through the top of the door to avoid bonking."
},
{
"id": 33,
"link": [
2,
1
],
"name": "Come In With Spark (Gravity)",
"entranceCondition": {
"comeInWithSpark": {
"position": "top"
}
},
"requires": [
"Gravity",
{
"shinespark": {
"frames": 61,
"excessFrames": 6
}
}
],
"flashSuitChecked": true,
"blueSuitChecked": true,
"note": "Spark through the top of the door to avoid bonking."
},
{
"id": 34,
"link": [
2,
1
],
"name": "Come In Shinecharging, Shinespark (Gravity)",
"entranceCondition": {
"comeInShinecharging": {
"length": 3,
"openEnd": 0
}
},
"requires": [
"Gravity",
"canHorizontalMidairShinespark",
{
"shinespark": {
"frames": 48,
"excessFrames": 4
}
}
],
"flashSuitChecked": true,
"blueSuitChecked": true,
"note": "Shinespark midair to avoid bonking. Jump outward before sparking save Energy."
},
{
"id": 35,
"link": [
2,
1
],
"name": "Come In Shinecharging, Shinespark (Suitless)",
"entranceCondition": {
"comeInShinecharging": {
"length": 1,
"openEnd": 0
}
},
"requires": [
"canShinechargeMovementComplex",
"canPlayInSand",
{
"shinespark": {
"frames": 67,
"excessFrames": 13
}
}
],
"flashSuitChecked": true,
"blueSuitChecked": true,
"note": "Spin jump from close to the door in order to enter the sandfall near the peak of Samus' jump."
},
{
"id": 63,
"link": [
2,
1
],
"name": "Use Stored Spark",
"requires": [
"h_storedSpark",
{
"or": [
{
"shinespark": {
"frames": 67,
"excessFrames": 7
}
},
{
"and": [
"canSandfallBounce",
{
"shinespark": {
"frames": 67,
"excessFrames": 13
}
}
]
}
]
}
],
"flashSuitChecked": true,
"blueSuitChecked": true,
"note": "Spin jump from close to the door in order to enter the sandfall near the peak of Samus' jump."
},
{
"id": 36,
"link": [
2,
1
],
"name": "G-Mode",
"entranceCondition": {
"comeInWithGMode": {
"mode": "any",
"morphed": false
}
},
"requires": [
"h_navigateUnderwater",
{
"or": [
"Gravity",
"HiJump",
"canSpringBallJumpMidAir",
{
"and": [
"h_underwaterCrouchJumpDownGrab",
"h_storedSpark",
{
"shinespark": {
"frames": 6,
"excessFrames": 5
}
}
]
}
]
}
],
"flashSuitChecked": true,
"blueSuitChecked": true,
"note": "The sand does not impede Samus in G-Mode.",
"devNote": "Only the last jump needs any items."
},
{
"id": 37,
"link": [
2,
2
],
"name": "Leave with Runway",
"requires": [],
"exitCondition": {
"leaveWithRunway": {
"length": 4,
"openEnd": 1
}
},
"flashSuitChecked": true,
"blueSuitChecked": true
},
{
"id": 75,
"link": [
2,
2
],
"name": "Suitless Evir Farm (1 Evir, Grapple)",
"requires": [
{
"resetRoom": {
"nodes": [
2
]
}
},
"canDodgeWhileShooting",
"canSuitlessMaridia",
"HiJump",
"Grapple",
{
"or": [
{
"and": [
"Plasma",
{
"cycleFrames": 240
}
]
},
{
"and": [
"Wave",
{
"disableEquipment": "Ice"
},
"canFarmWhileShooting",
{
"cycleFrames": 420
}
]
}
]
},
{
"or": [
{
"noBlueSuit": {}
},
{
"notable": "Blue Suit Sand Walk"
}
]
}
],
"resetsObstacles": [
"A"
],
"farmCycleDrops": [
{
"enemy": "Evir",
"count": 1
}
],
"flashSuitChecked": true,
"blueSuitChecked": true,
"note": [
"If Plasma is available, quickly fire two shots when entering to kill the Evir;",
"it can help to crouch for the second shot.",
"If only Wave is available, quickly fire three shots,",
"then jump out exactly one tile away from the ledge",
"and fire three more shots angled-down to kill the Evir.",
"In any case, use Grapple to collect the drop from the pillar without needing to drop down."
],
"devNote": [
"If Gravity is available, then other farm strats can be used instead."
]
},
{
"id": 76,
"link": [
2,
2
],
"name": "Evir Farm (1 Evir, Gravity, Strong Weapon)",
"requires": [
{
"resetRoom": {
"nodes": [
2
]
}
},
"Gravity",
{
"or": [
"ScrewAttack",
{
"haveBlueSuit": {}
},
{
"and": [
"Plasma",
"Wave"
]
}
]
},
"canCarefulJump",
{
"cycleFrames": 290
},
{
"or": [
"SpaceJump",
{
"and": [
"canPlayInSand",
{
"or": [
"HiJump",
"canWallJump",
{
"and": [
"canGravityJump",
"canTrickyJump",
"h_doubleEquipmentScreenCycleFrames"
]
}
]
}
]
}
]
},
{
"or": [
{
"noBlueSuit": {}
},
{
"notable": "Blue Suit Sand Walk"
}
]
}
],
"resetsObstacles": [
"A"
],
"farmCycleDrops": [
{
"enemy": "Evir",
"count": 1
}
],
"flashSuitChecked": true,
"blueSuitChecked": true,
"devNote": [
"Other ways of farming Evirs with Gravity are covered in the 3 Evir farm strat.",
"These strong weapon cases are unique in that farming just the first Evir can be done at significantly lower difficulty.",
"Technically it could make sense to clear obstacle A, but with Gravity it is irrelevant."
]
},
{
"id": 77,
"link": [
2,
2
],
"name": "Evir Farm (3 Evirs, Gravity)",
"requires": [
{
"resetRoom": {
"nodes": [
2
]
}
},
"Gravity",
"canDodgeWhileShooting",
"canPlayInSand",
{
"or": [
{
"and": [
"Plasma",
"Wave"
]
},
"canTrickyJump"
]
},
{
"or": [
{
"and": [
"Plasma",
{
"cycleFrames": 900
}
]
},
{
"and": [
{
"haveBlueSuit": {}
},
{
"cycleFrames": 900
}
]
},
{
"and": [
"Wave",
{
"disableEquipment": "Ice"
},
{
"cycleFrames": 1320
}
]
},
{
"and": [
"ScrewAttack",
"canFarmWhileShooting",
{
"cycleFrames": 980
}
]
},
{
"and": [
"Spazer",
{
"disableEquipment": "Ice"
},
"canFarmWhileShooting",
{
"cycleFrames": 1360
}
]
}
]
},
{
"or": [
"canWallJump",
"HiJump",
{
"and": [
"canGravityJump",
"canTrickyJump",
"h_doubleEquipmentScreenCycleFrames"
]
}
]
},
{
"or": [
{
"noBlueSuit": {}
},
{
"notable": "Blue Suit Sand Walk"
}
]
}
],
"resetsObstacles": [
"A"
],
"farmCycleDrops": [
{
"enemy": "Evir",
"count": 3
}
],
"flashSuitChecked": true,
"blueSuitChecked": true,
"note": [
"The Evirs must be killed quickly before they descend too far.",
"It can help to fire at the Evirs from a safe distance",
"so they will not be triggered to attack Samus."
],
"devNote": [
"Technically it could make sense to clear obstacle A, but with Gravity it is irrelevant.",
"FIXME: HiJump + Spring fling can be an alternative to Gravity."
]
},
{
"id": 38,
"link": [
2,
2
],
"name": "Crystal Flash",
"requires": [
"h_CrystalFlash"
],
"flashSuitChecked": true,
"blueSuitChecked": true
},
{
"id": 100,
"link": [
2,
2
],
"name": "Come in Shinecharging, Crystal Spark",
"entranceCondition": {
"comeInShinecharging": {
"length": 3,
"openEnd": 0
},
"comesInHeated": "no"
},
"requires": [
"Gravity",
"h_CrystalSpark"
],
"flashSuitChecked": true,
"blueSuitChecked": true
},
{
"id": 39,
"link": [
2,
2
],
"name": "G-Mode Setup - Get Hit By Evir Projectile",
"requires": [
"Gravity",
"canComplexGMode",
{
"or": [
{
"noBlueSuit": {}
},
"canTrickyGMode"
]
}
],
"exitCondition": {
"leaveWithGModeSetup": {}
},
"flashSuitChecked": true,
"blueSuitChecked": true,
"note": [
"The Evir won't shoot unless Samus enters the sand falls. Getting to the transition tiles while standing before the projectile can be tricky.",
"With no movement items besides Gravity, walk off the platform while facing right, turn around spin jump to barely enter the sand fall before landing back on the platform and quickly getting to the door."
]
},
{
"id": 40,
"link": [
2,
2
],
"name": "Right Door G-Mode Setup Suitless HiJump",
"requires": [
{
"notable": "Right Door G-Mode Setup Suitless HiJump"
},
"canTrickyGMode",
"canSuitlessMaridia",
"canPlayInSand",
"canMidairWiggle",
"HiJump",
{
"or": [
{
"noBlueSuit": {}
},
{
"and": [
"canTrickyGMode",
{
"notable": "Blue Suit Sand Walk"
}
]
}
]
}
],
"exitCondition": {
"leaveWithGModeSetup": {}
},
"flashSuitChecked": true,
"blueSuitChecked": true,
"note": [
"The Evir won't shoot unless Samus enters the sand falls. Getting to the transition tiles while standing before the projectile while suitless is very precise.",
"From the sand, turnaround spinjump towards the right. Turn towards the sandfall about when you're just above the platform. Turn right and shoot as soon as you enter the sandfall. And try to land right next to the transition."
]
},
{
"id": 44,
"link": [
2,
4
],
"name": "Cross Room Jump with Bomb Boost",
"entranceCondition": {
"comeInWithBombBoost": {}
},
"requires": [
"canCrossRoomJumpIntoWater"
],
"flashSuitChecked": true,
"blueSuitChecked": true,
"note": [
"Bomb boost through the doorway.",
"With a good enough boost, it's possible to go over the first Evir, landing on the second pillar."
]
},
{
"id": 78,
"link": [
2,
4
],
"name": "Tricky Dash Jump with Momentum",
"entranceCondition": {
"comeInRunning": {
"speedBooster": "yes",
"minTiles": 6.4375,
"maxTiles": 7.4375
}
},
"requires": [
"canCrossRoomJumpIntoWater",
"canTrickyDashJump"
],
"flashSuitChecked": true,
"blueSuitChecked": true,
"note": [
"Gain momentum in the room to the right (with extra run speed between $2.0 and $2.3), then jump after the transition.",
"Samus should be able to jump over the first Evir and reach the center of the room."
],
"devNote": [
"This is not technically a canCrossRoomJumpIntoWater, but it is used here because of the way the momentum changes as Samus enters the water."
]
},
{
"id": 93,
"link": [
2,
4
],
"name": "Cross Room Space Jump",
"entranceCondition": {
"comeInSpaceJumping": {
"speedBooster": "no",
"minTiles": 6.4375
}
},
"requires": [
"canPreciseSpaceJump",
"canInsaneJump",
"canTrickyDodgeEnemies",
"canPlayInSand"
],
"flashSuitChecked": true,
"blueSuitChecked": true,
"note": [
"Space Jump into the room with full run speed without Speed Booster,",
"jumping as low as possible through the doorway.",
"To avoid getting caught on the overhang, release jump slightly before bonking, and aim down to clear the Evir."
]
},
{
"id": 95,
"link": [
2,
4
],
"name": "Direct G-Mode Spark Interrupt",
"entranceCondition": {
"comeInWithGMode": {
"mode": "direct",
"morphed": false
}
},
"requires": [
"Gravity",
"canPlayInSand",
"canComplexGMode",
{
"enemyKill": {
"enemies": [
[
"Evir",
"Evir"
]
]
}
},
"h_CrystalFlashForReserveEnergy",
{
"canShineCharge": {
"usedTiles": 14,
"openEnd": 0
}
},
{
"autoReserveTrigger": {}
},
"canRModeSparkInterrupt"
],
"flashSuitChecked": true,
"blueSuitChecked": true,
"note": [
"Overload PLMs by jumping into the sandfall and landing back on the door ledge. Jump over the Evirs to get the left door. Crystal Flash, then kill the second Evir with beam shots.",
"Jump into the sandpit which should now be air. Shinecharge, then jump to the right Evir and use a projectile to interrupt.",
"Be sure to not stop moving if Samus must land on the sand once bluesuit is obtained."
]
},
{
"id": 79,
"link": [
2,
5
],
"name": "Base",
"requires": [
{
  "or": [
    "Gravity",
    "HiJump",
    "canTrickySpringBallJump"
  ]
}
],
"flashSuitChecked": true,
"blueSuitChecked": true
},
{
"id": 43,
"link": [
2,
5
],
"name": "Jump with Momentum",
"entranceCondition": {
"comeInRunning": {
"speedBooster": "no",
"minTiles": 0.4375
}
},
"requires": [
"canCrossRoomJumpIntoWater",
"canTrickyJump"
],
"flashSuitChecked": true,
"blueSuitChecked": true,
"note": [
"Gain momentum in the room to the right, then jump immediately on entry in order to land on the first pillar. Jumping too late will likely put Samus into the pit.",
"Requires a small runway of only one tile or less in the adjacent room. Jumping before the door transition will set Samus straight into an Evir projectile, knocking her into the sand."
],
"devNote": [
"This is not technically a canCrossRoomJumpIntoWater, but it is used here because of the way the momentum changes as Samus enters the water."
]
},
{
"id": 64,
"link": [
2,
5
],
"name": "Use Stored Spark",
"requires": [
"h_storedSpark",
{
"shinespark": {
"frames": 5,
"excessFrames": 2
}
}
],
"flashSuitChecked": true,
"blueSuitChecked": true,
"note": [
"Spark vertically from within the rightmost column of sandfall, and hold left to land on the pillar;",
"a vertical spark helps to avoid killing the Evir with speed echoes, in case it needs to be frozen and used as a platform."
]
},
{
"id": 71,
"link": [
2,
5
],
"name": "Door Stuck Flatley Jump",
"entranceCondition": {
"comeInWithDoorStuckSetup": {}
},
"requires": [
{
"notable": "Door Stuck Flatley Jump"
},
"canInsaneJump"
],
"clearsObstacles": [
"A"
],
"flashSuitChecked": true,
"blueSuitChecked": true,
"note": [
"Enter the room with a door stuck setup.",
"Perform a frame-perfect Flatley jump from inside the door to just barely reach the first pillar."
],
"devNote": [
"This is only really useful when entering from a water room or when carrying a blue suit,",
"since otherwise there is an easier strat that simply runs into the room with momentum and jumps."
]
},
{
"id": 103,
"link": [
3,
1
],
"name": "Shinespark - Enter in Jumping State",
"entranceCondition": {
"comeInShinecharged": {},
"comesThroughToilet": "any"
},
"requires": [
{
"shineChargeFrames": 10
},
"h_navigateUnderwater",
"canShinechargeMovementComplex",
"canHorizontalMidairShinespark",
"canPrepareForNextRoom",
{
"or": [
{
"and": [
"Gravity",
{
"shinespark": {
"frames": 34,
"excessFrames": 6
}
}
]
},
{
"shinespark": {
"frames": 39,
"excessFrames": 8
}
}
]
}
],
"flashSuitChecked": true,
"blueSuitChecked": true,
"note": [
"Enter with a falling pose in order to be able to spark immediately on entry.",
"This may require a quick drop through the sand in the room above."
],
"devNote": [
"Frames are all assuming a toilet entry, frames could be reduced slightly if entering in a more favorable position.",
"While the shinecharge frames could be smaller, this gives a small buffer to orient the direction Samus is facing in the room above.",
"FIXME: It is possible to hero shot spark out the door."
]
},
{
"id": 65,
"link": [
3,
1
],
"name": "Use Flash Suit",
"requires": [
"canPrepareForNextRoom",
"canPlayInSand",
{
"useFlashSuit": {}
},
{
"shinespark": {
"frames": 11,
"excessFrames": 4
}
}
],
"flashSuitChecked": true,
"blueSuitChecked": true,
"note": "Perform a diagonal spark to cross the sand.",
"devNote": "This is a separate strat, because the suitless bootless Evir projectile dodge is much more difficult when starting from the right side of the room."
},
{
"id": 46,
"link": [
3,
1
],
"name": "G-Mode",
"entranceCondition": {
"comeInWithGMode": {
"mode": "any",
"morphed": false
},
"comesThroughToilet": "any"
},
"requires": [
"h_navigateUnderwater",
{
"or": [
"canInsaneJump",
{
"enemyDamage": {
"enemy": "Evir",
"type": "particle",
"hits": 1
}
}
]
},
{
"or": [
"Gravity",
"HiJump",
"canSpringBallJumpMidAir",
{
"and": [
"h_underwaterCrouchJumpDownGrab",
"h_storedSpark",
{
"shinespark": {
"frames": 7,
"excessFrames": 6
}
}
]
}
]
}
],
"flashSuitChecked": true,
"blueSuitChecked": true,
"note": [
"The sand does not impede Samus in G-Mode.",
"Enter the room on the right half of the transition, where both Evirs will be off camera to avoid their projectiles."
],
"devNote": "Only the last jump needs any items."
},
{
"id": 104,
"link": [
3,
2
],
"name": "Shinespark - Enter in Jumping State",
"entranceCondition": {
"comeInShinecharged": {},
"comesThroughToilet": "any"
},
"requires": [
{
"shineChargeFrames": 10
},
"h_navigateUnderwater",
"canShinechargeMovementComplex",
"canHorizontalMidairShinespark",
"canPrepareForNextRoom",
{
"or": [
{
"and": [
"Gravity",
{
"shinespark": {
"frames": 34,
"excessFrames": 12
}
}
]
},
{
"shinespark": {
"frames": 39,
"excessFrames": 15
}
}
]
}
],
"flashSuitChecked": true,
"blueSuitChecked": true,
"note": [
"Enter with a falling pose in order to be able to spark immediately on entry.",
"This may require a quick drop through the sand in the room above.",
"Avoid entering too far to the right or Samus will be hit by the Evir."
],
"devNote": [
"Frames are all assuming a toilet entry, frames could be reduced slightly if entering in a more favorable position.",
"While the shinecharge frames could be smaller, this gives a small buffer to orient the direction Samus is facing in the room above.",
"FIXME: It is possible to come in with Gravity and more frames, jump off the sand and pillar, and hero shot spark out the door."
]
},
{
"id": 47,
"link": [
3,
2
],
"name": "G-Mode",
"entranceCondition": {
"comeInWithGMode": {
"mode": "any",
"morphed": false
},
"comesThroughToilet": "any"
},
"requires": [
"h_navigateUnderwater",
{
"or": [
"canInsaneJump",
{
"enemyDamage": {
"enemy": "Evir",
"type": "particle",
"hits": 1
}
}
]
},
{
"or": [
"Gravity",
"HiJump",
"canSpringBallJumpMidAir",
{
"and": [
"h_underwaterCrouchJumpDownGrab",
"canInsaneJump"
]
}
]
}
],
"flashSuitChecked": true,
"blueSuitChecked": true,
"note": [
"The sand does not impede Samus in G-Mode.",
"Enter the room on the right half of the transition, where both Evirs will be off camera to avoid their projectiles.",
"It is possible to jump to the tall pillar with nothing, requiring a subpixel precise jump.",
"Running before jumping doesn't help. Stand one pixel from the right edge and spinjump to the right."
]
},
{
"id": 48,
"link": [
3,
4
],
"name": "Base",
"requires": [
{
  "or": [
    {
      "enemyDamage": {
        "enemy": "Evir",
        "type": "particle",
        "hits": 1
      }
    },
    "h_pauseAbuseMinimalReserveRefill"
  ]
}
],
"flashSuitChecked": true,
"blueSuitChecked": true
},
{
"id": 49,
"link": [
3,
4
],
"name": "Evir Dodge",
"requires": [
"canPrepareForNextRoom",
"canPlayInSand",
"canTrickyJump",
{
"or": [
"Gravity",
"HiJump",
"canInsaneJump"
]
}
],
"flashSuitChecked": true,
"blueSuitChecked": true,
"note": [
"To safely avoid the Evir shot, enter in a spin jump from either the far left or far right side of the transition."
],
"devNote": [
"Entering from a non-sand room, or passing throught the toilet does not change the ability to dodge the evirs much."
]
},
{
"id": 96,
"link": [
3,
4
],
"name": "Direct G-Mode Spark Interrupt",
"entranceCondition": {
"comeInWithGMode": {
"mode": "direct",
"morphed": false
},
"comesThroughToilet": "no"
},
"requires": [
"Gravity",
"canPlayInSand",
"canComplexGMode",
{
"enemyKill": {
"enemies": [
[
"Evir",
"Evir"
]
]
}
},
"h_CrystalFlashForReserveEnergy",
{
"canShineCharge": {
"usedTiles": 14,
"openEnd": 0
}
},
{
"autoReserveTrigger": {}
},
"canRModeSparkInterrupt",
{
"notable": "Blue Suit Sand Walk"
}
],
"flashSuitChecked": true,
"blueSuitChecked": true,
"note": [
"PLM Overload will occur immediately open entering due to the sandfall. Jump over the two Evir in the left pit. Avoid a projectile and Crystal Flash, then kill the remaining Evir with beam shots.",
"Jump into the sandpit which should now be air. Shinecharge, then jump to the right Evir and use a projectile to interrupt.",
"Be sure to not stop moving if Samus must land on the sand once bluesuit is obtained."
]
},
{
"id": 50,
"link": [
4,
1
],
"name": "Base",
"requires": [
"Gravity",
"SpaceJump"
],
"flashSuitChecked": true,
"blueSuitChecked": true
},
{
"id": 51,
"link": [
4,
1
],
"name": "Fight Evirs with Gravity",
"requires": [
"Gravity",
{
"or": [
"canPlayInSand",
"canWallJump",
"h_useSpringBall"
]
},
{
"or": [
"canTrickyJump",
{
"enemyDamage": {
"enemy": "Evir",
"type": "particle",
"hits": 1
}
},
{
"and": [
"canDodgeWhileShooting",
{
"or": [
"ScrewAttack",
{
"enemyKill": {
"enemies": [
[
"Evir"
],
[
"Evir"
]
],
"explicitWeapons": [
"Super",
"Plasma",
"PowerBombPeriphery"
]
}
}
]
}
]
}
]
},
{
"noBlueSuit": {}
}
],
"flashSuitChecked": true,
"blueSuitChecked": true,
"devNote": [
"Other weapons take too long to kill the enemy.",
"Ice is likely to be blocked by the particle."
]
},
{
"id": 52,
"link": [
4,
1
],
"name": "Suitless Evir Avoid",
"requires": [
"canSuitlessMaridia",
"HiJump",
"canPlayInSand",
{
"or": [
"canTrickyJump",
{
"enemyDamage": {
"enemy": "Evir",
"type": "particle",
"hits": 1
}
}
]
},
{
"or": [
"canTrickyDodgeEnemies",
{
"enemyDamage": {
"enemy": "Evir",
"type": "particle",
"hits": 1
}
},
"h_pauseAbuseMinimalReserveRefill"
]
},
{
"noBlueSuit": {}
}
],
"flashSuitChecked": true,
"blueSuitChecked": true
},
{
"id": 53,
"link": [
4,
1
],
"name": "Fight Evirs Suitless",
"requires": [
"canSuitlessMaridia",
"HiJump",
"canPlayInSand",
"canDodgeWhileShooting",
{
"enemyKill": {
"enemies": [
[
"Evir"
],
[
"Evir"
]
],
"explicitWeapons": [
"Super",
"Plasma",
"PowerBombPeriphery"
]
}
},
{
"noBlueSuit": {}
}
],
"flashSuitChecked": true,
"blueSuitChecked": true,
"devNote": [
"Other weapons take too long to kill the enemy.",
"Ice is likely to be blocked by the particle."
]
},
{
"id": 54,
"link": [
4,
1
],
"name": "Suitless Bootless Evir Freeze (Center to Left)",
"requires": [
{
"notable": "Suitless Bootless Evir Freeze (Center to Left)"
},
"canSuitlessMaridia",
"canTrickyJump",
"canTrickyUseFrozenEnemies",
"canPlayInSand",
"canCameraManip",
{
"or": [
"canTrickyDodgeEnemies",
{
"and": [
{
"ammo": {
"type": "PowerBomb",
"count": 1
}
},
{
"enemyDamage": {
"enemy": "Evir",
"type": "particle",
"hits": 2
}
}
]
},
{
"and": [
{
"ammo": {
"type": "PowerBomb",
"count": 1
}
},
"h_pauseAbuseMinimalReserveRefill",
"h_pauseAbuseMinimalReserveRefill"
]
}
]
},
{
"noBlueSuit": {}
}
],
"flashSuitChecked": true,
"blueSuitChecked": true,
"note": [
"If entering from the sandfall above, come in at the far left of the transition, with either a spin-jump or i-frames, to avoid the Evir shot;",
"land on the right side of the pillar to the left, being careful to not bring left Evir on camera.",
"If coming from the right side of the room, then moonwalk on the center pillar to scroll the camera as far right as possible, to avoid getting hit by an Evir shot;",
"alternatively, jump slightly to the left and freeze the Evir, then return back to the center pillar before jumping across the sand.",
"Freeze the right Evir and jump onto it.",
"Quickly move left and fire an angle-down shot to freeze the left Evir before it descends too far.",
"Jump onto the left Evir, back up to the right side of it to maximize space to build momentum, and jump to the left onto the sand and then onto the ledge.",
"If Samus does not quite get enough height to make it onto the ledge, then break spin, turn around to the right, land on the sand again, and do a turnaround spin-jump to the left.",
"If the Evirs descend too far, it is possible to use a Power Bomb to bring them back up again, but caution is needed to avoid killing the first Evir, and it is difficult to avoid getting shot."
],
"devNote": [
"This strat is still possible after falling through the sandpit after being centered by the toilet by landing towards the right, then crossing back left."
]
},
{
"id": 101,
"link": [
4,
1
],
"name": "Blue Suit Sand Walk",
"requires": [
{
"haveBlueSuit": {}
},
{
"notable": "Blue Suit Sand Walk"
}
],
"flashSuitChecked": true,
"blueSuitChecked": true,
"note": [
"To normalize Samus' position, do a full height jump to land on the sand.",
"Avoid touching the sandfalls until after landing.",
"If HiJump is equipped, avoid bonking a sloped part of the ceiling."
]
},
{
"id": 66,
"link": [
4,
1
],
"name": "Use Flash Suit",
"requires": [
{
"useFlashSuit": {}
},
{
"or": [
{
"shinespark": {
"frames": 34,
"excessFrames": 6
}
},
{
"and": [
"canCameraManip",
"canInsaneJump",
{
"shinespark": {
"frames": 9,
"excessFrames": 2
}
}
]
}
]
}
],
"flashSuitChecked": true,
"blueSuitChecked": true,
"note": [
"Either perform a horizontal shinespark from the second to last platform, or perform a particularly tight dodge to get to the last platform and then spark diagonally across the rest.",
"The horizontal spark can be done relatively low and then jump off of the sand in order to save Energy."
],
"devNote": "The Evir projectile dodge is much more difficult when starting from the right side of the room."
},
{
"id": 80,
"link": [
4,
2
],
"name": "Use Stored Spark",
"requires": [
"h_storedSpark",
{
"or": [
{
"shinespark": {
"frames": 27,
"excessFrames": 15
}
},
{
"and": [
"canInsaneJump",
{
"shinespark": {
"frames": 13,
"excessFrames": 0
}
},
"canDownGrab"
]
}
]
}
],
"flashSuitChecked": true,
"blueSuitChecked": true
},
{
"id": 55,
"link": [
4,
5
],
"name": "Base",
"requires": [
"Gravity",
"SpaceJump"
],
"flashSuitChecked": true,
"blueSuitChecked": true
},
{
"id": 56,
"link": [
4,
5
],
"name": "Gravity in Sand",
"requires": [
"Gravity",
{
"noBlueSuit": {}
},
{
"or": [
"canTrickyJump",
"Ice",
"ScrewAttack",
{
"enemyKill": {
"enemies": [
[
"Evir"
]
],
"explicitWeapons": [
"Plasma",
"Super",
"PowerBombPeriphery"
]
}
},
{
"enemyDamage": {
"enemy": "Evir",
"type": "particle",
"hits": 1
}
}
]
},
"canPlayInSand",
{
"or": [
"canWallJump",
"HiJump",
"canUseFrozenEnemies"
]
}
],
"flashSuitChecked": true,
"blueSuitChecked": true,
"devNote": [
"Technically it could make sense to clear obstacle A if the Right Evir is killed, but with Gravity it is irrelevant."
]
},
{
"id": 105,
"link": [
4,
5
],
"name": "Gravity Jump",
"requires": [
{
"noBlueSuit": {}
},
"Gravity",
"canTrickyJump",
"canPlayInSand",
{
"or": [
"canGravityJump",
{
"and": [
"can4HighMidAirMorph",
"canTrickySpringBallJump"
]
}
]
}
],
"wallJumpAvoid": true,
"flashSuitChecked": true,
"blueSuitChecked": true,
"note": [
"From the low platform, Gravity Jump to the raised platform.",
"The pause should initiate significantly later than a normal Gravity Jump, while Samus is a couple tiles off the ground.",
"It is possible to instead Spring Ball jump off the sand, with a tight midair morph, but this is more precise."
]
},
{
"id": 106,
"link": [
4,
5
],
"name": "Gravity Blue Suit Sand Walk",
"requires": [
{
"haveBlueSuit": {}
},
{
"notable": "Blue Suit Sand Walk"
},
"Gravity",
"canPlayInSand",
{
"or": [
"canWallJump",
"HiJump",
"canUseFrozenEnemies",
"canGravityJump",
"canTrickySpringBallJump"
]
}
],
"flashSuitChecked": true,
"blueSuitChecked": true,
"note": [
"Simply walk off the ledges and hold forward to walk on the sand with a blue suit."
]
},
{
"id": 57,
"link": [
4,
5
],
"name": "Evir Damage Boost",
"requires": [
"Gravity",
"canTrickyJump",
"canHorizontalDamageBoost",
{
"enemyDamage": {
"enemy": "Evir",
"type": "particle",
"hits": 1
}
}
],
"flashSuitChecked": true,
"blueSuitChecked": true
},
{
"id": 58,
"link": [
4,
5
],
"name": "Suitless Evir Freeze",
"requires": [
"canSuitlessMaridia",
"HiJump",
"canTrickyJump",
"canTrickyUseFrozenEnemies",
"canPlayInSand"
],
"flashSuitChecked": true,
"blueSuitChecked": true,
"note": [
"Let the Evir descend slightly from its spawn point to be at the correct height.",
"A power bomb can be used to bring it back up if it falls too far."
]
},
{
"id": 59,
"link": [
4,
5
],
"name": "Spring Ball HiJump",
"requires": [
{
"notable": "Spring Ball HiJump"
},
"canSuitlessMaridia",
"HiJump",
"canTrickySpringBallJump",
"canStationaryLateralMidAirMorph",
"canSpringFling",
"canPlayInSand",
{
"or": [
{
"enemyDamage": {
"enemy": "Evir",
"type": "particle",
"hits": 1
}
},
{
"enemyKill": {
"enemies": [
[
"Evir"
]
],
"explicitWeapons": [
"Plasma",
"Super",
"PowerBomb"
]
}
},
"canTrickyDodgeEnemies",
"h_pauseAbuseMinimalReserveRefill"
]
},
{
"or": [
{
"noBlueSuit": {}
},
{
"notable": "Blue Suit Sand Walk"
}
]
}
],
"flashSuitChecked": true,
"blueSuitChecked": true,
"note": [
"On the left side of the raised platform, jump for max height.",
"Lateral Midair Morph for horizontal momentum, and perform the Spring Ball jump the moment before touching the sandfall.",
"Pause again to disable Spring Ball as soon as possible."
]
},
{
"id": 60,
"link": [
4,
5
],
"name": "Suitless Bootless Evir Freeze (Center to Right)",
"requires": [
{
"notable": "Suitless Bootless Evir Freeze (Center to Right)"
},
"canSuitlessMaridia",
"canTrickyUseFrozenEnemies",
"canPlayInSand",
"h_underwaterMaxHeightSpringBallJump",
"canStationaryLateralMidAirMorph"
],
"flashSuitChecked": true,
"blueSuitChecked": true,
"note": [
"From the sand fall, quickly get onto the left platform to prevent the right side Evir from lowering too far.",
"Jump on the sand to the right while freezing the Evir as high as possible. Refreeze the Evir so it is a slightly higher platform than the right pillar.",
"Perform a spring ball jump with a stationary lateral mid-air morph from the left side of the current platform to get onto the Evir. Use a running jump off of the Evir.",
"As a backup, it may be possible to make the Evir rise again by hitting it with a PB - place the PB in the air to avoid double hitting and killing it."
]
},
{
"id": 72,
"link": [
4,
5
],
"name": "Suitless Bootless Evir Climb",
"requires": [
{
"notable": "Suitless Bootless Evir Climb"
},
"h_usePowerBomb",
"canBePatient",
"canTrickyUseFrozenEnemies",
"canPlayInSand",
"canTrickyDodgeEnemies"
],
"flashSuitChecked": true,
"blueSuitChecked": true,
"note": [
"Use a Power Bomb to make the right-most Evir rise.",
"Freeze it low and jump onto it.",
"Crouch and continue holding down;",
"when the Evir is about to thaw, jump with a buffered aim-down and refreeze the Evir after it climbs a few pixels.",
"Repeat many times until gaining enough height to spin jump onto the pillar."
],
"detailNote": [
"With each refreeze, it is recommended that Samus switch which side of the Evir to stand on,",
"to avoid a risk of getting shot by the Evir."
]
},
{
"id": 67,
"link": [
4,
5
],
"name": "Use Stored Spark",
"requires": [
"canPlayInSand",
"h_storedSpark",
{
"or": [
{
"shinespark": {
"frames": 8,
"excessFrames": 2
}
},
{
"and": [
"HiJump",
{
"shinespark": {
"frames": 6,
"excessFrames": 1
}
}
]
}
]
}
],
"flashSuitChecked": true,
"blueSuitChecked": true,
"note": "To save Energy, spark diagonally to get onto the pillar, then jump to the door."
},
{
"id": 81,
"link": [
5,
1
],
"name": "Use Stored Spark",
"requires": [
"h_storedSpark",
{
"shinespark": {
"frames": 53,
"excessFrames": 8
}
}
],
"flashSuitChecked": true,
"blueSuitChecked": true,
"devNote": [
"With a controlled shinespark end, starting with 74 energy, this can collect an Evir drop."
]
},
{
"id": 82,
"link": [
5,
2
],
"name": "Base",
"requires": [
"h_navigateUnderwater"
],
"flashSuitChecked": true,
"blueSuitChecked": true
},
{
"id": 83,
"link": [
5,
4
],
"name": "Base",
"requires": [
"Gravity",
{
"noBlueSuit": {}
}
],
"flashSuitChecked": true,
"blueSuitChecked": true
},
{
"id": 42,
"link": [
5,
4
],
"name": "Suitless In Sand",
"requires": [
"canSuitlessMaridia",
"HiJump",
"canPlayInSand",
{
"noBlueSuit": {}
}
],
"flashSuitChecked": true,
"blueSuitChecked": true
},
{
"id": 102,
"link": [
5,
4
],
"name": "Blue Suit Sand Walk",
"requires": [
{
"haveBlueSuit": {}
},
{
"notable": "Blue Suit Sand Walk"
}
],
"flashSuitChecked": true,
"blueSuitChecked": true
},
{
"id": 84,
"link": [
5,
4
],
"name": "Frozen Evir",
"requires": [
{
"obstaclesNotCleared": [
"A"
]
},
"canTrickyUseFrozenEnemies",
"canTrickyJump",
"canPlayInSand",
{
"noBlueSuit": {}
}
],
"flashSuitChecked": true,
"blueSuitChecked": true,
"note": [
"Use the Evir as a platform, which should have been frozen soon after entering the room."
]
},
{
"id": 85,
"link": [
5,
4
],
"name": "Power Bomb and Freeze Evir",
"requires": [
"h_usePowerBomb",
"canTrickyUseFrozenEnemies",
"canTrickyJump",
"canPlayInSand",
{
"noBlueSuit": {}
}
],
"flashSuitChecked": true,
"blueSuitChecked": true,
"note": [
"Use a Power Bomb to make the Evir rise.",
"Freeze it and use it as a platform to jump across."
]
}
],
"notables": [
{
"id": 1,
"name": "Cross-Room Speed Jump over Evirs",
"note": [
"Stand at an effective distance of approximately 20 tiles from the door.",
"Run through the door, and jump any time after the transition, holding jump through the entire room to make it to the other side.",
"Samus will go over the Evirs, so there is no need for blue speed."
]
},
{
"id": 2,
"name": "Cross-Room Spring Ball Jump",
"note": [
"Enter with enough run speed to jump (after the transition) across the full room using one Spring Ball Jump.",
"When exiting the first Sandfall, Samus will be rising still. That is the time to Spring Ball jump."
]
},
{
"id": 3,
"name": "Cross-Room Blue Spring Ball Bounce (Left to Right)",
"note": [
"Use a 3-tap or 4-tap to gain a speedball with a specific amount of speed in the other room (between $2.1 and $2.3 extra run speed), and either roll in or do a controlled bounce to enter while descending close to the ground.",
"Bounce on the platform in front of the door, then bounce on the second-to-last pillar."
]
},
{
"id": 4,
"name": "Cross-Room Blue Spring Ball Bounce (Right to Left)",
"note": [
"Gain a speedball in the other room, and either roll in or do a controlled bounce to enter while descending close to the ground.",
"Bounce anywhere on the platform in front of the door, clearing the whole room at once.",
"If needed, blue speed will destroy any Evirs along the way and allow bouncing on the sand at the end to make it onto the ledge."
]
},
{
"id": 5,
"name": "Cross-Room Spring Ball Bounce (Left to Right)",
"note": [
"Gain run speed using between 19 and 33 tiles in the other room, and either roll in or do a controlled bounce to enter while descending close to the ground.",
"Bounce near the end of the platform in front of the door, clearing the whole room at once.",
"Samus will go over the Evirs, so there is no need for blue speed."
]
},
{
"id": 6,
"name": "Cross Room Jump with Ice or Damage Boost",
"note": [
"Requires a runway of 7 tiles (with no open end) in the adjacent room. Requires two precise inputs of jumping through the doorway and aiming down before hitting the ceiling.",
"Damage boost off of the right Evir in order to land on the first pillar. With Ice, instead freeze the Evir to land on it and avoid the damage.",
"When entering the room with a bad jump, it is possible to perform a midair wiggle to get back to the door platform."
]
},
{
"id": 7,
"name": "Cross-Room Spring Ball Bounce (Right to Left)",
"note": [
"Gain run speed using between 19 and 33 tiles in the other room, and either roll in or do a controlled bounce to enter while descending close to the ground.",
"Bounce near the end of the platform in front of the door, clearing the whole room at once.",
"Samus will go over the Evirs, so there is no need for blue speed."
]
},
{
"id": 8,
"name": "Right Door G-Mode Setup Suitless HiJump",
"note": [
"The Evir won't shoot unless Samus enters the sand falls. Getting to the transition tiles while standing before the projectile while suitless is very precise.",
"From the sand, turnaround spinjump towards the right. Turn towards the sandfall about when you're level with the platform. Turn right and shoot as soon as you enter the sandfall. And try to land right next to the transition."
]
},
{
"id": 9,
"name": "Suitless Bootless Evir Freeze (Center to Left)",
"note": [
"If entering from the sandfall above, come in at the far left of the transition, with either a spin-jump or i-frames, to avoid the Evir shot;",
"land on the right side of the pillar to the left, being careful to not bring left Evir on camera.",
"If coming from the right side of the room, then moonwalk on the center pillar to scroll the camera as far right as possible, to avoid getting hit by an Evir shot;",
"alternatively, jump slightly to the left and freeze the Evir, then return back to the center pillar before jumping across the sand.",
"Freeze the right Evir and jump onto it.",
"Quickly move left and fire an angle-down shot to freeze the left Evir before it descends too far.",
"Jump onto the left Evir, back up to the right side of it to maximize space to build momentum, and jump to the left onto the sand and then onto the ledge.",
"If Samus does not quite get enough height to make it onto the ledge, then break spin, turn around to the right, land on the sand again, and do a turnaround spin-jump to the left.",
"If the Evirs descend too far, it is possible to use a Power Bomb to bring them back up again, but caution is needed to avoid killing the first Evir, and it is difficult to avoid getting shot."
]
},
{
"id": 10,
"name": "Spring Ball HiJump",
"note": [
"On the left side of the raised platform, jump for max height.",
"Use a stationary lateral mid-air morph for horizontal momentum, and perform the Spring Ball jump the moment before touching the sandfall.",
"Pause again to disable Spring Ball as soon as possible."
]
},
{
"id": 11,
"name": "Suitless Bootless Evir Freeze (Center to Right)",
"note": [
"From the sand fall, quickly get onto the left platform to prevent the right side Evir from lowering too far.",
"Jump on the sand to the right while freezing the Evir as high as possible. Refreeze the Evir so it is a slightly higher platform than the right pillar.",
"Perform a spring ball jump with a stationary lateral mid-air morph from the left side of the current platform to get onto the Evir. Use a running jump off of the Evir.",
"As a backup, it may be possible to make the Evir rise again by hitting it with a PB - place the PB in the air to avoid double hitting and killing it."
]
},
{
"id": 12,
"name": "Cross-Room Blue Speed Jump (Right to Left)",
"note": [
"Perform a 1-tap to gain blue speed with a significant amount of momentum.",
"Run through the door, and jump any time after the transition, crossing the room."
]
},
{
"id": 13,
"name": "Suitless Bootless Evir Freeze (Left to Center)",
"note": [
"When entering the room, immediately shoot straight ahead to freeze the second Evir,",
"then quickly also freeze the first Evir.",
"Wait on top of the first Evir for the second Evir to sink far enough to be able to jump onto it,",
"then use it as a platform to jump onto the first pillar (either directly or after a jump on the sand)."
]
},
{
"id": 14,
"name": "Suitless Bootless Evir Climb",
"note": [
"Use a Power Bomb to make the right-most Evir rise.",
"Freeze it low and jump onto it.",
"Crouch and continue holding down;",
"when the Evir is about to thaw, jump with a buffered aim-down and refreeze the Evir after it climbs a few pixels.",
"Repeat many times until gaining enough height to spin jump onto the pillar."
]
},
{
"id": 15,
"name": "Door Stuck Flatley Jump",
"note": [
"Enter the room with a door stuck setup.",
"Perform a frame-perfect Flatley jump from inside the door to just barely reach the first pillar.",
"Use a Power Bomb to make the Evir rise.",
"Freeze it with Ice to jump across."
]
},
{
"id": 16,
"name": "Cross-Room Tricky Spring Ball Bounce (Right to Left)",
"note": [
"Either run or bounce into the room with a normalized extra run speed of $2.0",
"which can be obtained by gaining full speed with Speed Booster unequipped,",
"then reequipping Speed Booster before the transition.",
"Jump or bounce over the first pillar and first Evir, and bounce on the second pillar,",
"going over all the remaining Evirs."
]
},
{
"id": 17,
"name": "Cross-Room Tricky Spring Ball Bounce (Left to Right)",
"note": [
"Enter with an extra run speed between $2.1 and $2.3.",
"Jump or bounce over the first set of Evirs, and bounce on the first pillar to cross the room."
]
},
{
"id": 18,
"name": "Blue Suit Sand Walk",
"note": [
"To reliably land on the sand while keeping a blue suit, normalized movement is required."
]
}
],
"nextStratId": 107,
"nextNotableId": 19
}