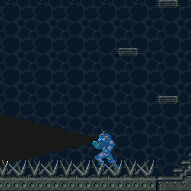
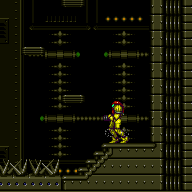
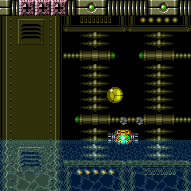
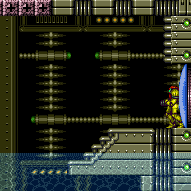
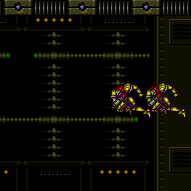
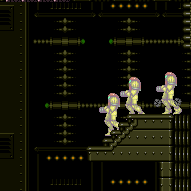
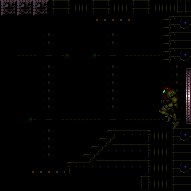
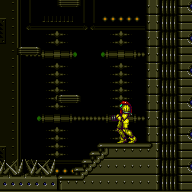
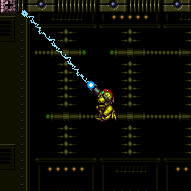
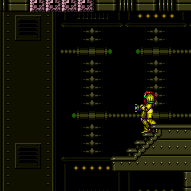
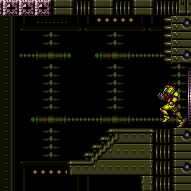
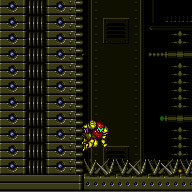
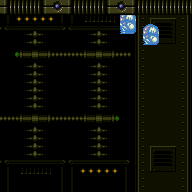
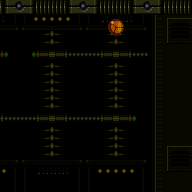
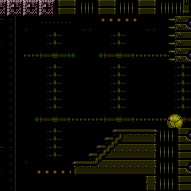
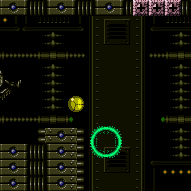
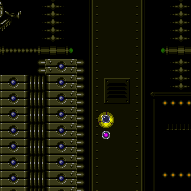
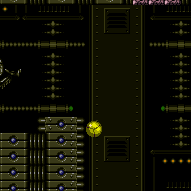
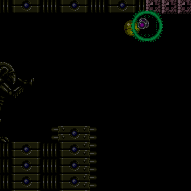
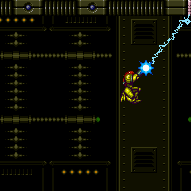
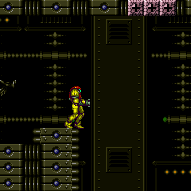
Wrecked Ship Energy Tank Room
Room ID: 167

|
Run must be synched with the low tide. Exit condition: {
"leaveWithRunway": {
"length": 6,
"openEnd": 1,
"steepUpTiles": 1
}
} |
From: 1
Right Door
To: 1
Right Door
Requires: {
"or": [
"Gravity",
{
"and": [
{
"not": "f_DefeatedPhantoon"
},
"canRiskPermanentLossOfAccess"
]
}
]
}Exit condition: {
"leaveWithRunway": {
"length": 8,
"openEnd": 1,
"steepUpTiles": 2
}
} |
From: 1
Right Door
To: 1
Right Door
Entrance condition: {
"comeInShinecharging": {
"length": 7,
"openEnd": 0,
"steepDownTiles": 2
},
"comesInHeated": "no"
}Requires: {
"or": [
"Gravity",
{
"and": [
{
"not": "f_DefeatedPhantoon"
},
"canRiskPermanentLossOfAccess"
]
}
]
}
"h_CrystalSpark" |
From: 1
Right Door
To: 1
Right Door
Entrance condition: {
"comeInShinecharging": {
"length": 4,
"openEnd": 1
},
"comesInHeated": "no"
}Requires: "h_CrystalSpark" |
|


Exit condition: {
"leaveWithGrappleSwing": {
"blocks": [
{
"position": [
5,
2
],
"note": "Closest Grapple block to the door"
}
]
}
} |
From: 1
Right Door
To: 1
Right Door
Requires: "h_thornXModeShinecharge"
"h_thornXModeFramePerfectExtraLeniency"
"SpaceJump"
"HiJump"
"canShinechargeMovementComplex"
{
"shinespark": {
"frames": 21,
"excessFrames": 0
}
}
{
  "or": [
    "Gravity",
    {
      "and": [
        {
          "not": "f_DefeatedPhantoon"
        },
        "canRiskPermanentLossOfAccess"
      ]
    }
  ]
}
Exit condition: {
"leaveWithSpark": {}
}Dev note: Two thorn hits are expected per attempt (with any additional leniency hits being multiplied by this amount). FIXME: There is likely a fast wall jump climb strat with more spark frames. |
From: 1
Right Door
To: 1
Right Door
Power Off: Crystal Flash, enter X-Mode using the bottom spikes and shinecharge, then pause abuse from the spikes to interrupt. Power On: Crystal Flash or farm Skultera. Enter X-Mode using the bottom spikes and shinecharge, then pause abuse from the spikes to interrupt. Entrance condition: {
"comeInWithRMode": {}
}Requires: {
"or": [
"Gravity",
{
"and": [
{
"not": "f_DefeatedPhantoon"
},
"canRiskPermanentLossOfAccess"
]
}
]
}
{
"or": [
"h_CrystalFlashForReserveEnergy",
{
"and": [
"f_DefeatedPhantoon",
"h_RModeCanRefillReserves",
"canBeLucky",
{
"resourceMissingAtMost": [
{
"type": "Missile",
"count": 0
}
]
},
{
"or": [
{
"partialRefill": {
"type": "ReserveEnergy",
"limit": 5
}
},
{
"and": [
{
"partialRefill": {
"type": "ReserveEnergy",
"limit": 20
}
},
"canBeVeryLucky"
]
}
]
}
]
}
]
}
"canBeVeryPatient"
"h_thornXModeShinecharge"
"h_thornXModeFramePerfectExtraLeniency"
{
"autoReserveTrigger": {}
}
"canRModePauseAbuseSparkInterrupt" |
From: 1
Right Door
To: 1
Right Door

Entrance condition: {
"comeInShinecharged": {}
}Requires: {
"or": [
"Gravity",
{
"and": [
{
"not": "f_DefeatedPhantoon"
},
"canRiskPermanentLossOfAccess"
]
}
]
}
{
"shineChargeFrames": 120
}
"h_spikeSuitThornHitLeniency"
{
"thornHits": 1
}
"canSpikeSuit"
{
"shinespark": {
"frames": 2,
"excessFrames": 2
}
} |
From: 1
Right Door
To: 1
Right Door

Requires: {
"or": [
"Gravity",
{
"and": [
{
"not": "f_DefeatedPhantoon"
},
"canRiskPermanentLossOfAccess"
]
}
]
}
"h_thornXModeSpikeSuit"
{
"shinespark": {
"frames": 2,
"excessFrames": 2
}
} |
From: 1
Right Door
To: 1
Right Door

Requires: {
"or": [
"Gravity",
{
"and": [
{
"not": "f_DefeatedPhantoon"
},
"canRiskPermanentLossOfAccess"
]
}
]
}
"h_thornDoubleXModeBlueSuit"
{
"shinespark": {
"frames": 0,
"excessFrames": 0
}
} |
|
The sinking platforms can be used to collect drops if the fish gets away. Without movement items, hold down while jumping to ascend while on the platform. Requires: "f_DefeatedPhantoon"
{
"resetRoom": {
"nodes": [
1
]
}
}
"canDash"
"canDodgeWhileShooting"
{
"or": [
"Gravity",
{
"and": [
"canSuitlessMaridia",
{
"cycleFrames": 150
}
]
}
]
}
{
"or": [
{
"and": [
"Plasma",
{
"or": [
"canTrickyJump",
"Grapple"
]
}
]
},
{
"and": [
"Spazer",
"Wave",
{
"or": [
"canTrickyJump",
"canInsaneJump",
"Grapple"
]
},
{
"cycleFrames": 80
}
]
},
{
"and": [
"canTrickyJump",
"Wave",
{
"or": [
"canInsaneJump",
"Grapple",
{
"cycleFrames": 150
}
]
},
{
"cycleFrames": 180
}
]
}
]
}
{
"cycleFrames": 220
}Resets obstacles: A Farm cycle drops: 1 Skultera |
From: 1
Right Door
To: 1
Right Door
Requires: "f_DefeatedPhantoon"
{
"resetRoom": {
"nodes": [
1
]
}
}
{
"haveBlueSuit": {}
}
{
"or": [
{
"and": [
"Gravity",
{
"cycleFrames": 250
}
]
},
{
"cycleFrames": 335
}
]
}Resets obstacles: A Farm cycle drops: 1 Skultera |
From: 1
Right Door
To: 1
Right Door
Requires: "f_DefeatedPhantoon"
{
"resetRoom": {
"nodes": [
1
]
}
}
"canDash"
"Gravity"
"SpaceJump"
{
"or": [
"ScrewAttack",
{
"and": [
"canDodgeWhileShooting",
{
"or": [
"Plasma",
{
"and": [
"Spazer",
"canFarmWhileShooting",
{
"cycleFrames": 200
}
]
},
{
"and": [
"Wave",
{
"cycleFrames": 130
}
]
},
{
"cycleFrames": 1000
}
]
}
]
}
]
}
{
"cycleFrames": 230
}Resets obstacles: A Farm cycle drops: 1 Skultera |
|
Requires: "h_CrystalFlash" |
|
Requires: "SpaceJump" |
|


Requires: "Grapple" "f_DefeatedPhantoon" |
|


Jump across the first platforms. It is fine to jump from them when they are a bit submerged. Get a bit of run speed on the final platform, and wall jump if necessary. When accidentally falling off the platforms, it may be best to take a spike hit and climb the left wall. Requires: "Gravity" "canWallJump" "f_DefeatedPhantoon" |
|


Jump onto the first platform, which is easiest when the water is low. Continue jumping on the platforms to prevent them from going into the water. Get a bit of run speed on the final platform, which is easiest while the water is low, then jump to the solid ground. Requires: "canDash"
"canCarefulJump"
{
"disableEquipment": "HiJump"
}
{
"or": [
"canMoonwalk",
"canTrickyJump"
]
}
"f_DefeatedPhantoon" |
|
From a standstill at the door, jump just before the first step. Do a lateral mid-air morph and bounce on the first platform. This should bounce on the third platform and get to the item. Requires: "canSpringBallBounce" "f_DefeatedPhantoon" |
|
Use a mid-air horizontal bomb boost to reach the first platform. Jump across to the last platform. Wait until the water is low, let the platform sink slightly, then jump and horizontal bomb boost to the item. If HiJump is available, then it is possible to simply spin jump from the underwater platform to the first moving platform. If HiJump cannot be disabled, then the bomb boost from the last platform is more difficult: in this case Samus must jump, lay the bomb on the way down, then jump again to a precise height and morph to get the boost. Requires: "f_DefeatedPhantoon" "canJumpIntoIBJ" "canBombHorizontally" "canTrickyJump" "h_complexToCarryFlashSuit" |
|
Use a mid-air horizontal Power Bomb boost to reach the first platform. Jump across to the last platform. Wait until the water is low, let the platform sink slightly, then jump and horizontal Power Bomb boost to the item. If HiJump is available, then it is possible to simply spin jump from the underwater platform to the first moving platform, saving a Power Bomb. If HiJump cannot be disabled, then the Power Bomb boost from the last platform is more difficult: in this case Samus must jump, lay the Power Bomb on the way down, then jump again to a precise height and morph to get the boost. Requires: "f_DefeatedPhantoon"
"canMidAirMorph"
{
"tech": "canJumpIntoIBJ"
}
{
"tech": "canBombHorizontally"
}
"canInsaneJump"
{
"or": [
{
"and": [
"HiJump",
{
"ammo": {
"type": "PowerBomb",
"count": 1
}
}
]
},
{
"ammo": {
"type": "PowerBomb",
"count": 2
}
}
]
}
"h_complexToCarryFlashSuit" |
|
Let the platform sink several tiles before jumping into a mid-air spring ball jump. Requires: "f_DefeatedPhantoon" "Gravity" "canSpringBallJumpMidAir" |
|
Bounce on the platform, timing a pause to hit soon after bouncing, then hold left and unequip Spring Ball to get a horizontal boost. Requires: "f_DefeatedPhantoon" "canSpringFling" |
|
Sink on the platform until it on or near the floor, then gravity jump. Requires: "f_DefeatedPhantoon" "canGravityJump" |
|
Sink on the platform a precise amount before spin jumping; the peak of Samus' jump should just barely reach the ceiling or slightly below it, making it possible to just barely make it to the ledge. Requires: "f_DefeatedPhantoon" "HiJump" "Gravity" "canInsaneJump" |
|

Entrance condition: {
"comeInWithSpark": {}
}Requires: {
"shinespark": {
"frames": 59,
"excessFrames": 7
}
} |
From: 1
Right Door
To: 2
Item
Jump as far as possible before activating the spark, while sparking high enough to crash into the Chozo statue's hand. Entrance condition: {
"comeInShinecharged": {}
}Requires: {
"shineChargeFrames": 100
}
"canShinechargeMovementComplex"
{
"shinespark": {
"frames": 33,
"excessFrames": 7
}
}
{
"or": [
{
"and": [
{
"not": "f_DefeatedPhantoon"
},
"canRiskPermanentLossOfAccess"
]
},
"Gravity",
{
"disableEquipment": "HiJump"
},
"canTrickyJump"
]
}Dev note: If power is on, then this strat may not quite work because the water can interfere with the runway for the jump. But in that case, platforming is possible as a relatively free alternative. |
From: 1
Right Door
To: 2
Item
Gain a shinecharge while entering the room. Run back to the door, and then run left and jump as far as possible before activating the spark, while sparking high enough to crash into the Chozo statue's hand. Entrance condition: {
"comeInShinecharging": {
"length": 7,
"openEnd": 0,
"steepDownTiles": 2
}
}Requires: "canShinechargeMovementComplex"
{
"shinespark": {
"frames": 33,
"excessFrames": 7
}
}
{
"or": [
{
"and": [
{
"not": "f_DefeatedPhantoon"
},
"canRiskPermanentLossOfAccess"
]
},
"Gravity",
{
"disableEquipment": "HiJump"
},
"canTrickyJump"
]
}Dev note: If power is on, then this strat may not quite work because the water can interfere with the runway. But in that case, platforming is possible as a relatively free alternative. |
|

Arm pump until samus starts to move again. If the power is on, regular platforming can be used instead. Requires: "h_thornXModeShinecharge"
{
"shinespark": {
"frames": 19,
"excessFrames": 4
}
} |
|


Fling Samus from the first set of grapple blocks to the second set without falling. This requires precise timing but is made easier by morphing and unmorphing to reset Samus' fall speed. Requires: "canPreciseGrapple"
"canLateralMidAirMorph"
"canResetFallSpeed"
{
"or": [
"canInsaneJump",
{
"thornHits": 5
}
]
}
"h_complexToCarryFlashSuit"Dev note: The 5 thornHits are for lenience since it is difficult to get this first try. |
|
Fling Samus from the first set of grapple blocks to the second set without falling. This requires a frame-perfect release of Grapple and a 2-frame window to fire Grapple again. Requires: "canPreciseGrapple"
"canInsaneJump"
{
"or": [
"canBeVeryPatient",
{
"thornHits": 5
}
]
}
{
"noFlashSuit": {}
}Dev note: The 5 thornHits are for lenience since it is very difficult to get this first try. |
|
Requires: "canLongCeilingBombJump" "canBePatient" |
|
From the top right platform, jump to the left into the thorns, then climb the left wall. Requires: {
"thornHits": 1
}
{
"or": [
{
"and": [
"canUseIFrames",
"canDash"
]
},
{
"and": [
{
"tech": "canHorizontalDamageBoost"
},
"h_complexToCarryFlashSuit"
]
},
{
"thornHits": 1
}
]
}
"canWallJump"
{
"not": "f_DefeatedPhantoon"
}
{
"or": [
"canRiskPermanentLossOfAccess",
{
"and": [
"canDash",
"canCarefulJump",
{
"disableEquipment": "HiJump"
},
{
"or": [
"canMoonwalk",
"canTrickyJump"
]
}
]
},
{
"and": [
"Gravity",
"canDash"
]
},
{
"and": [
"canJumpIntoIBJ",
"canBombHorizontally",
"canTrickyJump"
]
},
{
"and": [
"Gravity",
"canSpringBallJumpMidAir"
]
},
"canSpringFling",
{
"and": [
"HiJump",
"Gravity",
"canInsaneJump"
]
}
]
}Dev note: The canCarefulJump and Gravity are here, as with either of those, there is access across with or without f_DefeatedPhantoon. |
|
Run from the adjacent room and jump at the end of the platform. From the top right platform, jump to the left and wall jump just above the spikes and climb the left wall. Entrance condition: {
"comeInRunning": {
"speedBooster": "yes",
"minTiles": 5
}
}Requires: "h_speedJump"
"canCarefulJump"
"canConsecutiveWallJump"
{
"not": "f_DefeatedPhantoon"
}
{
"or": [
"canRiskPermanentLossOfAccess",
"canTrickyJump",
{
"and": [
{
"disableEquipment": "HiJump"
},
"canMoonwalk"
]
}
]
}Dev note: This variant of the strat includes an extra couple of tiles of runway for lenience. |
From: 1
Right Door
To: 2
Item
Run from the adjacent room and jump at the end of the platform. From the top right platform, jump to the left and wall jump just above the spikes and climb the left wall. Entrance condition: {
"comeInRunning": {
"speedBooster": "yes",
"minTiles": 3
}
}Requires: "h_speedJump"
"canTrickyJump"
"canConsecutiveWallJump"
{
"not": "f_DefeatedPhantoon"
} |
From: 1
Right Door
To: 2
Item


Run from the adjacent room and jump at the end of the platform. From the top right platform, jump to the left and wall jump just above the spikes and climb the left wall. With minimal runway length (2 tiles), this has a 2-frame window for the jump. With a last-frame jump it has a 3-frame window for wall jump, otherwise the wall jump is frame-perfect. Entrance condition: {
"comeInRunning": {
"speedBooster": "yes",
"minTiles": 2
}
}Requires: "h_speedJump"
"canInsaneJump"
"canConsecutiveWallJump"
{
"not": "f_DefeatedPhantoon"
} |
From: 1
Right Door
To: 2
Item

Using speed from the adjacent room, perform a ceiling mockball to make it across the gap. Entrance condition: {
"comeInRunning": {
"speedBooster": "yes",
"minTiles": 23
}
}Requires: "h_speedJump"
"canTrickyJump"
"canMomentumConservingMorph"
{
"or": [
"canInsaneJump",
{
"thornHits": 5
}
]
}
{
"not": "f_DefeatedPhantoon"
}Dev note: The 5 thornHits are for lenience since it is very difficult to get this first try. |
From: 1
Right Door
To: 2
Item
Using speed from the adjacent room, perform a ceiling mockball and equip or unequip Spring Ball to make it across the gap. Entrance condition: {
"comeInRunning": {
"speedBooster": "yes",
"minTiles": 12
}
}Requires: "h_speedJump"
"canTrickyJump"
"canMomentumConservingMorph"
"canSpringFling"
"h_unpauseKeepMomentum"
{
"or": [
"canInsaneJump",
{
"thornHits": 5
}
]
}
{
"not": "f_DefeatedPhantoon"
}Dev note: The 5 thornHits are for lenience since it is very difficult to get this first try. |
From: 1
Right Door
To: 2
Item
Entrance condition: {
"comeInWithMockball": {
"speedBooster": "yes",
"remoteAndLandingMinTiles": [
[
19,
0
]
]
}
}Requires: "canTrickyJump"
"canSpringBallBounce"
"canSpringFling"
{
"or": [
"canInsaneJump",
{
"thornHits": 5
}
]
}
{
"not": "f_DefeatedPhantoon"
}Dev note: The 5 thornHits are for lenience since it is difficult to get this first try. |
|


Run from the adjacent room and jump at the end of the platform. Aim down just before bonking the ceiling. This requires a last-frame jump and has a 2-frame window for the aim-down. Entrance condition: {
"comeInRunning": {
"speedBooster": "yes",
"minTiles": 36
}
}Requires: "h_speedJump"
"canInsaneJump"
{
"or": [
"canBeVeryPatient",
{
"thornHits": 5
}
]
}
{
"not": "f_DefeatedPhantoon"
}Dev note: The 5 thornHits are for lenience since it is very difficult to get this first try. |
From: 1
Right Door
To: 2
Item
In the spike pit, near the left wall, jump into an IBJ to climb out. Requires: "h_IBJFromThorns"
"canLongIBJ"
{
"not": "f_DefeatedPhantoon"
}Dev note: The h_IBJFromThorns requires canCarefulJump. There is no loss of access, because with that it is possible to get across with or without f_DefeatedPhantoon. |
From: 1
Right Door
To: 2
Item
Requires: {
"thornHits": 1
}
"HiJump"
"canSpringBallJumpMidAir"
{
"not": "f_DefeatedPhantoon"
}
{
"or": [
"canRiskPermanentLossOfAccess",
{
"and": [
"canDash",
"canCarefulJump",
{
"disableEquipment": "HiJump"
},
{
"or": [
"canMoonwalk",
"canTrickyJump"
]
}
]
},
{
"and": [
"canJumpIntoIBJ",
"canBombHorizontally",
"canTrickyJump"
]
},
"Gravity",
"canSpringFling"
]
} |
|


Requires: "h_storedSpark"
"canDash"
{
"shinespark": {
"frames": 13,
"excessFrames": 2
}
} |
|
Entrance condition: {
"comeInWithGMode": {
"mode": "any",
"morphed": true
}
}Requires: "h_artificialMorphLongCeilingBombJump" "canBePatient" Clears obstacles: A |
|
After teleporting, press down to retract Grapple, to prevent getting stuck inside the Chozo statue. Entrance condition: {
"comeInWithGrappleTeleport": {
"blockPositions": [
[
7,
2
]
]
}
} |
|
After teleporting, Samus should be standing inside the wall. Retract Grapple by pressing up, which will pull Samus down and right. Turn around to the left, then hold right, and release Grapple while still holding right. Perform a turn-around spin jump (to the left). Then morph and roll out to the right. Alternatively, X-Ray climb up about 1 tile until Samus can walk out to the right. Entrance condition: {
"comeInWithGrappleTeleport": {
"blockPositions": [
[
3,
12
],
[
3,
13
]
]
}
}Requires: "canGrappleTeleportWallEscape" "canOffScreenMovement" |
|
Exit the previous room with Samus in a standing pose (while grappled). After teleporting, press right to release Grapple while staying standing (not being forced into a crouch). Then X-ray climb to get on top of the Chozo statue. Entrance condition: {
"comeInWithGrappleTeleport": {
"blockPositions": [
[
2,
18
],
[
2,
19
],
[
2,
28
],
[
2,
29
]
]
}
}Requires: "canXRayClimb" |
|
Requires: {
"or": [
{
"and": [
"f_DefeatedPhantoon",
"canDash"
]
},
"SpaceJump"
]
} |
|
Requires: {
"or": [
{
"and": [
{
"not": "f_DefeatedPhantoon"
},
"canRiskPermanentLossOfAccess"
]
},
"canDash"
]
}
{
"thornHits": 1
}
{
"or": [
"HiJump",
"canWallJump",
"canUseIFrames",
"Grapple",
"canHorizontalDamageBoost",
{
"thornHits": 1
}
]
}Dev note: When the power is off, the floor has thorns. if power is on and dash is available, then the floating platforms could be used instead to avoid all damage. |
|
When the power is on, the floor has spikes (not thorns), and Samus will quickly lose i-frames. Requires: {
"haveBlueSuit": {}
}
"canBlueSuitSpikeJump"
{
"or": [
{
"and": [
"canGravityJump",
{
"spikeHits": 1
}
]
},
{
"and": [
{
"disableEquipment": "Gravity"
},
{
"spikeHits": 2
}
]
},
{
"and": [
"Gravity",
"HiJump",
{
"spikeHits": 2
}
]
},
{
"and": [
"Gravity",
{
"tech": "canHorizontalDamageBoost"
},
{
"noFlashSuit": {}
},
{
"spikeHits": 2
}
]
},
{
"spikeHits": 3
}
]
} |
|
Requires: "canSpringFling" |
|
Jump, place a bomb mid-air, then jump with controlled height to precisely mid-air morph and get a horizontal boost. Requires: "canJumpIntoIBJ" "canBombHorizontally" "canInsaneJump" "canInsaneMidAirMorph" "canResetFallSpeed" |
|
Wall jump from near the top of the ledge to barely be able to wall jump off the floating platform. Requires: "Gravity" "canInsaneWallJump" |
|
Wall jump from a few tiles below the ledge, then wall jump off the floating platform. Requires: "Gravity" "HiJump" "canPreciseWallJump" |
|
Press pause, wall jump from about halfway down the wall, disable Gravity, then wall jump off the floating platform. Requires: "canPreciseWallJump" "canGravityJump" "canTrickyJump" |
|
Fling Samus from the first set of grapple blocks to the second set without falling. Requires precise timing. Requires: "canPreciseGrapple" "canTrickyJump" "h_midAirShootUp" |
|
Requires: "h_storedSpark"
"canDash"
{
"shinespark": {
"frames": 14,
"excessFrames": 4
}
} |
|
Requires: "canLongCeilingBombJump" "canBePatient" |
|
Touch the item while remaining in artificial morph. Ceiling bomb jump back to the right, then use X-Ray to cancel G-mode and obtain the item. Requires: "canGMode"
"h_artificialMorphLongCeilingBombJump"
"canBeVeryPatient"
{
"obstaclesCleared": [
"A"
]
}Dev note: This strat alone would only require canBePatient, but it is only possible after Ceiling Bomb Jumping there, so it would be a combined 4 minutes. |
{
"$schema": "../../../schema/m3-room.schema.json",
"id": 167,
"name": "Wrecked Ship Energy Tank Room",
"area": "Wrecked Ship",
"subarea": "Main",
"roomAddress": "0x7CC27",
"roomEnvironments": [
{
"heated": false
}
],
"mapTileMask": [
[
1,
1,
1
],
[
1,
1,
1
]
],
"nodes": [
{
"id": 1,
"name": "Right Door",
"nodeType": "door",
"nodeSubType": "blue",
"nodeAddress": "0x001a288",
"doorOrientation": "right",
"doorEnvironments": [
{
"physics": "air"
}
],
"mapTileMask": [
[
1,
2,
2
],
[
1,
2,
2
]
]
},
{
"id": 2,
"name": "Item",
"nodeType": "item",
"nodeSubType": "visible",
"nodeItem": "ETank",
"nodeAddress": "0x7C337",
"locks": [
{
"name": "Wrecked Ship Energy Tank Spawn Lock",
"lockType": "gameFlag",
"unlockStrats": [
{
"name": "Base",
"requires": [
{
"or": [
"f_DefeatedPhantoon",
"h_allItemsSpawned"
]
}
],
"flashSuitChecked": true,
"blueSuitChecked": true,
"note": "The item doesn't spawn until Phantoon is defeated."
}
]
}
],
"mapTileMask": [
[
2,
1,
1
],
[
2,
1,
1
]
]
}
],
"obstacles": [
{
"id": "A",
"name": "Remain in G-Mode Morph to Ceiling Bomb Jump",
"obstacleType": "abstract"
}
],
"enemies": [
{
"id": "e1",
"groupName": "Wrecked Ship E-Tank Skulteras",
"enemyName": "Skultera",
"quantity": 2,
"homeNodes": [
1
],
"spawn": [
"f_DefeatedPhantoon"
],
"note": "Drops can be reached for free using the platforms"
}
],
"strats": [
{
"link": [
1,
1
],
"name": "Base (Unlock Door)",
"requires": [],
"unlocksDoors": [
{
"types": [
"ammo"
],
"requires": []
}
],
"flashSuitChecked": true,
"blueSuitChecked": true
},
{
"link": [
1,
1
],
"name": "Base (Come In Normally)",
"entranceCondition": {
"comeInNormally": {}
},
"requires": [],
"flashSuitChecked": true,
"blueSuitChecked": true
},
{
"link": [
1,
1
],
"name": "Base (Come In With Mockball)",
"entranceCondition": {
"comeInWithMockball": {
"adjacentMinTiles": 0,
"remoteAndLandingMinTiles": [
[
0,
0
]
],
"speedBooster": "any"
}
},
"requires": [],
"flashSuitChecked": true,
"blueSuitChecked": true
},
{
"name": "Base",
"requires": [
{
"or": [
"f_DefeatedPhantoon",
"h_allItemsSpawned"
]
}
],
"flashSuitChecked": true,
"blueSuitChecked": true,
"note": "The item doesn't spawn until Phantoon is defeated.",
"link": [
2,
2
],
"collectsItems": [
2
]
},
{
"id": 1,
"link": [
1,
1
],
"name": "Leave with Runway",
"requires": [],
"exitCondition": {
"leaveWithRunway": {
"length": 6,
"openEnd": 1,
"steepUpTiles": 1
}
},
"flashSuitChecked": true,
"blueSuitChecked": true,
"note": "Run must be synched with the low tide."
},
{
"id": 2,
"link": [
1,
1
],
"name": "Leave with Runway, Full Length",
"requires": [
{
"or": [
"Gravity",
{
"and": [
{
"not": "f_DefeatedPhantoon"
},
"canRiskPermanentLossOfAccess"
]
}
]
}
],
"exitCondition": {
"leaveWithRunway": {
"length": 8,
"openEnd": 1,
"steepUpTiles": 2
}
},
"flashSuitChecked": true,
"blueSuitChecked": true
},
{
"id": 44,
"link": [
1,
1
],
"name": "Come in Shinecharging, Crystal Spark (Full Runway)",
"entranceCondition": {
"comeInShinecharging": {
"length": 7,
"openEnd": 0,
"steepDownTiles": 2
},
"comesInHeated": "no"
},
"requires": [
{
"or": [
"Gravity",
{
"and": [
{
"not": "f_DefeatedPhantoon"
},
"canRiskPermanentLossOfAccess"
]
}
]
},
"h_CrystalSpark"
],
"flashSuitChecked": true,
"blueSuitChecked": true
},
{
"id": 45,
"link": [
1,
1
],
"name": "Come in Shinecharging, Crystal Spark (Short Runway)",
"entranceCondition": {
"comeInShinecharging": {
"length": 4,
"openEnd": 1
},
"comesInHeated": "no"
},
"requires": [
"h_CrystalSpark"
],
"flashSuitChecked": true,
"blueSuitChecked": true
},
{
"id": 29,
"link": [
1,
1
],
"name": "Leave With Grapple Swing",
"requires": [],
"exitCondition": {
"leaveWithGrappleSwing": {
"blocks": [
{
"position": [
5,
2
],
"note": "Closest Grapple block to the door"
}
]
}
},
"flashSuitChecked": true,
"blueSuitChecked": true
},
{
"id": 3,
"link": [
1,
1
],
"name": "X-Mode and Space Jump, Leave with Shinespark",
"requires": [
"h_thornXModeShinecharge",
"h_thornXModeFramePerfectExtraLeniency",
"SpaceJump",
"HiJump",
"canShinechargeMovementComplex",
{
"shinespark": {
"frames": 21,
"excessFrames": 0
}
},
{
"or": [
"Gravity",
{
"and": [
{
"not": "f_DefeatedPhantoon"
},
"canRiskPermanentLossOfAccess"
]
}
]
}
],
"exitCondition": {
"leaveWithSpark": {}
},
"flashSuitChecked": true,
"blueSuitChecked": true,
"devNote": [
"Two thorn hits are expected per attempt (with any additional leniency hits being multiplied by this amount).",
"FIXME: There is likely a fast wall jump climb strat with more spark frames."
]
},
{
"id": 43,
"link": [
1,
1
],
"name": "X-Mode Shinecharge, R-Mode Spark Interrupt",
"entranceCondition": {
"comeInWithRMode": {}
},
"requires": [
{
"or": [
"Gravity",
{
"and": [
{
"not": "f_DefeatedPhantoon"
},
"canRiskPermanentLossOfAccess"
]
}
]
},
{
"or": [
"h_CrystalFlashForReserveEnergy",
{
"and": [
"f_DefeatedPhantoon",
"h_RModeCanRefillReserves",
"canBeLucky",
{
"resourceMissingAtMost": [
{
"type": "Missile",
"count": 0
}
]
},
{
"or": [
{
"partialRefill": {
"type": "ReserveEnergy",
"limit": 5
}
},
{
"and": [
{
"partialRefill": {
"type": "ReserveEnergy",
"limit": 20
}
},
"canBeVeryLucky"
]
}
]
}
]
}
]
},
"canBeVeryPatient",
"h_thornXModeShinecharge",
"h_thornXModeFramePerfectExtraLeniency",
{
"autoReserveTrigger": {}
},
"canRModePauseAbuseSparkInterrupt"
],
"flashSuitChecked": true,
"blueSuitChecked": true,
"note": [
"Power Off: Crystal Flash, enter X-Mode using the bottom spikes and shinecharge, then pause abuse from the spikes to interrupt.",
"Power On: Crystal Flash or farm Skultera. Enter X-Mode using the bottom spikes and shinecharge, then pause abuse from the spikes to interrupt."
]
},
{
"id": 39,
"link": [
1,
1
],
"name": "Come in Shinecharged, Gain Flash Suit (Spikesuit)",
"entranceCondition": {
"comeInShinecharged": {}
},
"requires": [
{
"or": [
"Gravity",
{
"and": [
{
"not": "f_DefeatedPhantoon"
},
"canRiskPermanentLossOfAccess"
]
}
]
},
{
"shineChargeFrames": 120
},
"h_spikeSuitThornHitLeniency",
{
"thornHits": 1
},
"canSpikeSuit",
{
"shinespark": {
"frames": 2,
"excessFrames": 2
}
}
],
"flashSuitChecked": true,
"blueSuitChecked": true
},
{
"id": 40,
"link": [
1,
1
],
"name": "X-Mode Shinecharge, Gain Flash Suit (Spikesuit)",
"requires": [
{
"or": [
"Gravity",
{
"and": [
{
"not": "f_DefeatedPhantoon"
},
"canRiskPermanentLossOfAccess"
]
}
]
},
"h_thornXModeSpikeSuit",
{
"shinespark": {
"frames": 2,
"excessFrames": 2
}
}
],
"flashSuitChecked": true,
"blueSuitChecked": true
},
{
"id": 41,
"link": [
1,
1
],
"name": "Gain Blue Suit (Double X-Mode)",
"requires": [
{
"or": [
"Gravity",
{
"and": [
{
"not": "f_DefeatedPhantoon"
},
"canRiskPermanentLossOfAccess"
]
}
]
},
"h_thornDoubleXModeBlueSuit",
{
"shinespark": {
"frames": 0,
"excessFrames": 0
}
}
],
"flashSuitChecked": true,
"blueSuitChecked": true
},
{
"id": 37,
"link": [
1,
1
],
"name": "Skultera Farm",
"requires": [
"f_DefeatedPhantoon",
{
"resetRoom": {
"nodes": [
1
]
}
},
"canDash",
"canDodgeWhileShooting",
{
"or": [
"Gravity",
{
"and": [
"canSuitlessMaridia",
{
"cycleFrames": 150
}
]
}
]
},
{
"or": [
{
"and": [
"Plasma",
{
"or": [
"canTrickyJump",
"Grapple"
]
}
]
},
{
"and": [
"Spazer",
"Wave",
{
"or": [
"canTrickyJump",
"canInsaneJump",
"Grapple"
]
},
{
"cycleFrames": 80
}
]
},
{
"and": [
"canTrickyJump",
"Wave",
{
"or": [
"canInsaneJump",
"Grapple",
{
"cycleFrames": 150
}
]
},
{
"cycleFrames": 180
}
]
}
]
},
{
"cycleFrames": 220
}
],
"resetsObstacles": [
"A"
],
"farmCycleDrops": [
{
"enemy": "Skultera",
"count": 1
}
],
"flashSuitChecked": true,
"blueSuitChecked": true,
"note": [
"The sinking platforms can be used to collect drops if the fish gets away.",
"Without movement items, hold down while jumping to ascend while on the platform."
]
},
{
"id": 46,
"link": [
1,
1
],
"name": "Skultera Farm (Blue Suit)",
"requires": [
"f_DefeatedPhantoon",
{
"resetRoom": {
"nodes": [
1
]
}
},
{
"haveBlueSuit": {}
},
{
"or": [
{
"and": [
"Gravity",
{
"cycleFrames": 250
}
]
},
{
"cycleFrames": 335
}
]
}
],
"resetsObstacles": [
"A"
],
"farmCycleDrops": [
{
"enemy": "Skultera",
"count": 1
}
],
"flashSuitChecked": true,
"blueSuitChecked": true
},
{
"id": 38,
"link": [
1,
1
],
"name": "Skultera Farm (Space Jump)",
"requires": [
"f_DefeatedPhantoon",
{
"resetRoom": {
"nodes": [
1
]
}
},
"canDash",
"Gravity",
"SpaceJump",
{
"or": [
"ScrewAttack",
{
"and": [
"canDodgeWhileShooting",
{
"or": [
"Plasma",
{
"and": [
"Spazer",
"canFarmWhileShooting",
{
"cycleFrames": 200
}
]
},
{
"and": [
"Wave",
{
"cycleFrames": 130
}
]
},
{
"cycleFrames": 1000
}
]
}
]
}
]
},
{
"cycleFrames": 230
}
],
"resetsObstacles": [
"A"
],
"farmCycleDrops": [
{
"enemy": "Skultera",
"count": 1
}
],
"flashSuitChecked": true,
"blueSuitChecked": true
},
{
"id": 4,
"link": [
1,
1
],
"name": "Crystal Flash",
"requires": [
"h_CrystalFlash"
],
"flashSuitChecked": true,
"blueSuitChecked": true
},
{
"id": 5,
"link": [
1,
2
],
"name": "Space Jump",
"requires": [
"SpaceJump"
],
"flashSuitChecked": true,
"blueSuitChecked": true
},
{
"id": 6,
"link": [
1,
2
],
"name": "Grapple",
"requires": [
"Grapple",
"f_DefeatedPhantoon"
],
"flashSuitChecked": true,
"blueSuitChecked": true
},
{
"id": 7,
"link": [
1,
2
],
"name": "Wall Jump",
"requires": [
"Gravity",
"canWallJump",
"f_DefeatedPhantoon"
],
"flashSuitChecked": true,
"blueSuitChecked": true,
"note": [
"Jump across the first platforms. It is fine to jump from them when they are a bit submerged.",
"Get a bit of run speed on the final platform, and wall jump if necessary.",
"When accidentally falling off the platforms, it may be best to take a spike hit and climb the left wall."
]
},
{
"id": 8,
"link": [
1,
2
],
"name": "Platforming",
"requires": [
"canDash",
"canCarefulJump",
{
"disableEquipment": "HiJump"
},
{
"or": [
"canMoonwalk",
"canTrickyJump"
]
},
"f_DefeatedPhantoon"
],
"flashSuitChecked": true,
"blueSuitChecked": true,
"note": [
"Jump onto the first platform, which is easiest when the water is low.",
"Continue jumping on the platforms to prevent them from going into the water.",
"Get a bit of run speed on the final platform, which is easiest while the water is low, then jump to the solid ground."
]
},
{
"id": 9,
"link": [
1,
2
],
"name": "Spring Ball Bounce",
"requires": [
"canSpringBallBounce",
"f_DefeatedPhantoon"
],
"flashSuitChecked": true,
"blueSuitChecked": true,
"note": [
"From a standstill at the door, jump just before the first step.",
"Do a lateral mid-air morph and bounce on the first platform.",
"This should bounce on the third platform and get to the item."
]
},
{
"id": 47,
"link": [
1,
2
],
"name": "Horizontal Bomb Boost",
"requires": [
"f_DefeatedPhantoon",
"canJumpIntoIBJ",
"canBombHorizontally",
"canTrickyJump",
"h_complexToCarryFlashSuit"
],
"flashSuitChecked": true,
"blueSuitChecked": true,
"note": [
"Use a mid-air horizontal bomb boost to reach the first platform.",
"Jump across to the last platform.",
"Wait until the water is low, let the platform sink slightly,",
"then jump and horizontal bomb boost to the item."
],
"detailNote": [
"If HiJump is available, then it is possible to simply spin jump from the underwater platform to the first moving platform.",
"If HiJump cannot be disabled, then the bomb boost from the last platform is more difficult:",
"in this case Samus must jump, lay the bomb on the way down, then jump again to a precise height and morph to get the boost."
]
},
{
"id": 48,
"link": [
1,
2
],
"name": "Horizontal Power Bomb Boost",
"requires": [
"f_DefeatedPhantoon",
"canMidAirMorph",
{
"tech": "canJumpIntoIBJ"
},
{
"tech": "canBombHorizontally"
},
"canInsaneJump",
{
"or": [
{
"and": [
"HiJump",
{
"ammo": {
"type": "PowerBomb",
"count": 1
}
}
]
},
{
"ammo": {
"type": "PowerBomb",
"count": 2
}
}
]
},
"h_complexToCarryFlashSuit"
],
"flashSuitChecked": true,
"blueSuitChecked": true,
"note": [
"Use a mid-air horizontal Power Bomb boost to reach the first platform.",
"Jump across to the last platform.",
"Wait until the water is low, let the platform sink slightly,",
"then jump and horizontal Power Bomb boost to the item."
],
"detailNote": [
"If HiJump is available, then it is possible to simply spin jump from the underwater platform to the first moving platform, saving a Power Bomb.",
"If HiJump cannot be disabled, then the Power Bomb boost from the last platform is more difficult:",
"in this case Samus must jump, lay the Power Bomb on the way down, then jump again to a precise height and morph to get the boost."
]
},
{
"id": 49,
"link": [
1,
2
],
"name": "Spring Ball Jump",
"requires": [
"f_DefeatedPhantoon",
"Gravity",
"canSpringBallJumpMidAir"
],
"flashSuitChecked": true,
"blueSuitChecked": true,
"note": [
"Let the platform sink several tiles before jumping into a mid-air spring ball jump."
]
},
{
"id": 50,
"link": [
1,
2
],
"name": "Spring Fling",
"requires": [
"f_DefeatedPhantoon",
"canSpringFling"
],
"flashSuitChecked": true,
"blueSuitChecked": true,
"note": [
"Bounce on the platform, timing a pause to hit soon after bouncing,",
"then hold left and unequip Spring Ball to get a horizontal boost."
]
},
{
"id": 51,
"link": [
1,
2
],
"name": "Gravity Jump",
"requires": [
"f_DefeatedPhantoon",
"canGravityJump"
],
"flashSuitChecked": true,
"blueSuitChecked": true,
"note": [
"Sink on the platform until it on or near the floor, then gravity jump."
]
},
{
"id": 52,
"link": [
1,
2
],
"name": "HiJump Insane Jump",
"requires": [
"f_DefeatedPhantoon",
"HiJump",
"Gravity",
"canInsaneJump"
],
"flashSuitChecked": true,
"blueSuitChecked": true,
"note": [
"Sink on the platform a precise amount before spin jumping;",
"the peak of Samus' jump should just barely reach the ceiling or slightly below it,",
"making it possible to just barely make it to the ledge."
]
},
{
"id": 10,
"link": [
1,
2
],
"name": "Come In With Shinespark",
"entranceCondition": {
"comeInWithSpark": {}
},
"requires": [
{
  "shinespark": {
    "frames": 59,
    "excessFrames": 7
  }
}
],
"flashSuitChecked": true,
"blueSuitChecked": true
},
{
"id": 11,
"link": [
1,
2
],
"name": "Come In Shinecharged (Power Off)",
"entranceCondition": {
"comeInShinecharged": {}
},
"requires": [
{
"shineChargeFrames": 100
},
"canShinechargeMovementComplex",
{
"shinespark": {
"frames": 33,
"excessFrames": 7
}
},
{
"or": [
{
"and": [
{
"not": "f_DefeatedPhantoon"
},
"canRiskPermanentLossOfAccess"
]
},
"Gravity",
{
"disableEquipment": "HiJump"
},
"canTrickyJump"
]
}
],
"flashSuitChecked": true,
"blueSuitChecked": true,
"note": [
"Jump as far as possible before activating the spark, while sparking high enough to crash into the Chozo statue's hand."
],
"devNote": [
"If power is on, then this strat may not quite work because the water can interfere with the runway for the jump.",
"But in that case, platforming is possible as a relatively free alternative."
]
},
{
"id": 12,
"link": [
1,
2
],
"name": "Come In Shinecharging (Power Off)",
"entranceCondition": {
"comeInShinecharging": {
"length": 7,
"openEnd": 0,
"steepDownTiles": 2
}
},
"requires": [
"canShinechargeMovementComplex",
{
"shinespark": {
"frames": 33,
"excessFrames": 7
}
},
{
"or": [
{
"and": [
{
"not": "f_DefeatedPhantoon"
},
"canRiskPermanentLossOfAccess"
]
},
"Gravity",
{
"disableEquipment": "HiJump"
},
"canTrickyJump"
]
}
],
"flashSuitChecked": true,
"blueSuitChecked": true,
"note": [
"Gain a shinecharge while entering the room.",
"Run back to the door, and then run left and jump as far as possible before activating the spark, while sparking high enough to crash into the Chozo statue's hand."
],
"devNote": [
"If power is on, then this strat may not quite work because the water can interfere with the runway.",
"But in that case, platforming is possible as a relatively free alternative."
]
},
{
"id": 42,
"link": [
1,
2
],
"name": "X-Mode Shinespark to the Item",
"requires": [
"h_thornXModeShinecharge",
{
"shinespark": {
"frames": 19,
"excessFrames": 4
}
}
],
"wallJumpAvoid": true,
"flashSuitChecked": true,
"blueSuitChecked": true,
"note": "Arm pump until samus starts to move again. If the power is on, regular platforming can be used instead."
},
{
"id": 13,
"link": [
1,
2
],
"name": "Precise Grapple Fling with Morph",
"requires": [
"canPreciseGrapple",
"canLateralMidAirMorph",
"canResetFallSpeed",
{
"or": [
"canInsaneJump",
{
"thornHits": 5
}
]
},
"h_complexToCarryFlashSuit"
],
"flashSuitChecked": true,
"blueSuitChecked": true,
"note": [
"Fling Samus from the first set of grapple blocks to the second set without falling.",
"This requires precise timing but is made easier by morphing and unmorphing to reset Samus' fall speed."
],
"devNote": [
"The 5 thornHits are for lenience since it is difficult to get this first try."
]
},
{
"id": 30,
"link": [
1,
2
],
"name": "Very Precise Grapple Fling",
"requires": [
"canPreciseGrapple",
"canInsaneJump",
{
"or": [
"canBeVeryPatient",
{
"thornHits": 5
}
]
},
{
"noFlashSuit": {}
}
],
"flashSuitChecked": true,
"blueSuitChecked": true,
"note": [
"Fling Samus from the first set of grapple blocks to the second set without falling.",
"This requires a frame-perfect release of Grapple and a 2-frame window to fire Grapple again."
],
"devNote": [
"The 5 thornHits are for lenience since it is very difficult to get this first try."
]
},
{
"id": 14,
"link": [
1,
2
],
"name": "Ceiling Bomb Jump",
"requires": [
"canLongCeilingBombJump",
"canBePatient"
],
"flashSuitChecked": true,
"blueSuitChecked": true
},
{
"id": 15,
"link": [
1,
2
],
"name": "Wall Jump (Power Off)",
"requires": [
{
"thornHits": 1
},
{
"or": [
{
"and": [
"canUseIFrames",
"canDash"
]
},
{
"and": [
{
"tech": "canHorizontalDamageBoost"
},
"h_complexToCarryFlashSuit"
]
},
{
"thornHits": 1
}
]
},
"canWallJump",
{
"not": "f_DefeatedPhantoon"
},
{
"or": [
"canRiskPermanentLossOfAccess",
{
"and": [
"canDash",
"canCarefulJump",
{
"disableEquipment": "HiJump"
},
{
"or": [
"canMoonwalk",
"canTrickyJump"
]
}
]
},
{
"and": [
"Gravity",
"canDash"
]
},
{
"and": [
"canJumpIntoIBJ",
"canBombHorizontally",
"canTrickyJump"
]
},
{
"and": [
"Gravity",
"canSpringBallJumpMidAir"
]
},
"canSpringFling",
{
"and": [
"HiJump",
"Gravity",
"canInsaneJump"
]
}
]
}
],
"flashSuitChecked": true,
"blueSuitChecked": true,
"note": "From the top right platform, jump to the left into the thorns, then climb the left wall.",
"devNote": "The canCarefulJump and Gravity are here, as with either of those, there is access across with or without f_DefeatedPhantoon."
},
{
"id": 16,
"link": [
1,
2
],
"name": "Speed Jump Wall Jump (Power Off)",
"entranceCondition": {
"comeInRunning": {
"speedBooster": "yes",
"minTiles": 5
}
},
"requires": [
"h_speedJump",
"canCarefulJump",
"canConsecutiveWallJump",
{
"not": "f_DefeatedPhantoon"
},
{
"or": [
"canRiskPermanentLossOfAccess",
"canTrickyJump",
{
"and": [
{
"disableEquipment": "HiJump"
},
"canMoonwalk"
]
}
]
}
],
"flashSuitChecked": true,
"blueSuitChecked": true,
"note": [
"Run from the adjacent room and jump at the end of the platform.",
"From the top right platform, jump to the left and wall jump just above the spikes and climb the left wall."
],
"devNote": [
"This variant of the strat includes an extra couple of tiles of runway for lenience."
]
},
{
"id": 31,
"link": [
1,
2
],
"name": "Tricky Speed Jump Wall Jump (Power Off)",
"entranceCondition": {
"comeInRunning": {
"speedBooster": "yes",
"minTiles": 3
}
},
"requires": [
"h_speedJump",
"canTrickyJump",
"canConsecutiveWallJump",
{
"not": "f_DefeatedPhantoon"
}
],
"flashSuitChecked": true,
"blueSuitChecked": true,
"note": [
"Run from the adjacent room and jump at the end of the platform.",
"From the top right platform, jump to the left and wall jump just above the spikes and climb the left wall."
]
},
{
"id": 32,
"link": [
1,
2
],
"name": "Insane Speed Jump Wall Jump (Power Off)",
"entranceCondition": {
"comeInRunning": {
"speedBooster": "yes",
"minTiles": 2
}
},
"requires": [
"h_speedJump",
"canInsaneJump",
"canConsecutiveWallJump",
{
"not": "f_DefeatedPhantoon"
}
],
"flashSuitChecked": true,
"blueSuitChecked": true,
"note": [
"Run from the adjacent room and jump at the end of the platform.",
"From the top right platform, jump to the left and wall jump just above the spikes and climb the left wall."
],
"detailNote": [
"With minimal runway length (2 tiles), this has a 2-frame window for the jump.",
"With a last-frame jump it has a 3-frame window for wall jump,",
"otherwise the wall jump is frame-perfect."
]
},
{
"id": 33,
"link": [
1,
2
],
"name": "Speed Jump Ceiling Mockball (Power Off)",
"entranceCondition": {
"comeInRunning": {
"speedBooster": "yes",
"minTiles": 23
}
},
"requires": [
"h_speedJump",
"canTrickyJump",
"canMomentumConservingMorph",
{
"or": [
"canInsaneJump",
{
"thornHits": 5
}
]
},
{
"not": "f_DefeatedPhantoon"
}
],
"flashSuitChecked": true,
"blueSuitChecked": true,
"note": [
"Using speed from the adjacent room, perform a ceiling mockball to make it across the gap."
],
"devNote": [
"The 5 thornHits are for lenience since it is very difficult to get this first try."
]
},
{
"id": 34,
"link": [
1,
2
],
"name": "Speed Jump Spring Fling (Power Off)",
"entranceCondition": {
"comeInRunning": {
"speedBooster": "yes",
"minTiles": 12
}
},
"requires": [
"h_speedJump",
"canTrickyJump",
"canMomentumConservingMorph",
"canSpringFling",
"h_unpauseKeepMomentum",
{
"or": [
"canInsaneJump",
{
"thornHits": 5
}
]
},
{
"not": "f_DefeatedPhantoon"
}
],
"flashSuitChecked": true,
"blueSuitChecked": true,
"note": [
"Using speed from the adjacent room, perform a ceiling mockball and equip or unequip Spring Ball to make it across the gap."
],
"devNote": [
"The 5 thornHits are for lenience since it is very difficult to get this first try."
]
},
{
"id": 35,
"link": [
1,
2
],
"name": "Spring Ball Bounce Spring Fling (Power Off)",
"entranceCondition": {
"comeInWithMockball": {
"speedBooster": "yes",
"remoteAndLandingMinTiles": [
[
19,
0
]
]
}
},
"requires": [
"canTrickyJump",
"canSpringBallBounce",
"canSpringFling",
{
"or": [
"canInsaneJump",
{
"thornHits": 5
}
]
},
{
"not": "f_DefeatedPhantoon"
}
],
"flashSuitChecked": true,
"blueSuitChecked": true,
"devNote": [
"The 5 thornHits are for lenience since it is difficult to get this first try."
]
},
{
"id": 36,
"link": [
1,
2
],
"name": "Insane Speed Jump (Power Off)",
"entranceCondition": {
"comeInRunning": {
"speedBooster": "yes",
"minTiles": 36
}
},
"requires": [
"h_speedJump",
"canInsaneJump",
{
"or": [
"canBeVeryPatient",
{
"thornHits": 5
}
]
},
{
"not": "f_DefeatedPhantoon"
}
],
"flashSuitChecked": true,
"blueSuitChecked": true,
"note": [
"Run from the adjacent room and jump at the end of the platform.",
"Aim down just before bonking the ceiling."
],
"detailNote": [
"This requires a last-frame jump and has a 2-frame window for the aim-down."
],
"devNote": [
"The 5 thornHits are for lenience since it is very difficult to get this first try."
]
},
{
"id": 17,
"link": [
1,
2
],
"name": "Phantoon is Alive, IBJ From Spikes",
"requires": [
"h_IBJFromThorns",
"canLongIBJ",
{
"not": "f_DefeatedPhantoon"
}
],
"flashSuitChecked": true,
"blueSuitChecked": true,
"note": "In the spike pit, near the left wall, jump into an IBJ to climb out.",
"devNote": "The h_IBJFromThorns requires canCarefulJump. There is no loss of access, because with that it is possible to get across with or without f_DefeatedPhantoon."
},
{
"id": 18,
"link": [
1,
2
],
"name": "Phantoon is Alive, HiJump Spring Ball Jump",
"requires": [
{
"thornHits": 1
},
"HiJump",
"canSpringBallJumpMidAir",
{
"not": "f_DefeatedPhantoon"
},
{
"or": [
"canRiskPermanentLossOfAccess",
{
"and": [
"canDash",
"canCarefulJump",
{
"disableEquipment": "HiJump"
},
{
"or": [
"canMoonwalk",
"canTrickyJump"
]
}
]
},
{
"and": [
"canJumpIntoIBJ",
"canBombHorizontally",
"canTrickyJump"
]
},
"Gravity",
"canSpringFling"
]
}
],
"flashSuitChecked": true,
"blueSuitChecked": true
},
{
"id": 19,
"link": [
1,
2
],
"name": "Use Stored Spark",
"requires": [
"h_storedSpark",
"canDash",
{
"shinespark": {
"frames": 13,
"excessFrames": 2
}
}
],
"flashSuitChecked": true,
"blueSuitChecked": true
},
{
"id": 20,
"link": [
1,
2
],
"name": "G-Mode Morph Ceiling Bomb Jump",
"entranceCondition": {
"comeInWithGMode": {
"mode": "any",
"morphed": true
}
},
"requires": [
"h_artificialMorphLongCeilingBombJump",
"canBePatient"
],
"clearsObstacles": [
"A"
],
"flashSuitChecked": true,
"blueSuitChecked": true
},
{
"id": 21,
"link": [
1,
2
],
"name": "Grapple Teleport",
"entranceCondition": {
"comeInWithGrappleTeleport": {
"blockPositions": [
[
7,
2
]
]
}
},
"requires": [],
"flashSuitChecked": true,
"blueSuitChecked": true,
"note": "After teleporting, press down to retract Grapple, to prevent getting stuck inside the Chozo statue."
},
{
"id": 22,
"link": [
1,
2
],
"name": "Grapple Teleport Inside Wall",
"entranceCondition": {
"comeInWithGrappleTeleport": {
"blockPositions": [
[
3,
12
],
[
3,
13
]
]
}
},
"requires": [
"canGrappleTeleportWallEscape",
"canOffScreenMovement"
],
"flashSuitChecked": true,
"blueSuitChecked": true,
"note": [
"After teleporting, Samus should be standing inside the wall.",
"Retract Grapple by pressing up, which will pull Samus down and right.",
"Turn around to the left, then hold right, and release Grapple while still holding right.",
"Perform a turn-around spin jump (to the left).",
"Then morph and roll out to the right. ",
"Alternatively, X-Ray climb up about 1 tile until Samus can walk out to the right."
]
},
{
"id": 23,
"link": [
1,
2
],
"name": "Grapple Teleport X-Ray Climb",
"entranceCondition": {
"comeInWithGrappleTeleport": {
"blockPositions": [
[
2,
18
],
[
2,
19
],
[
2,
28
],
[
2,
29
]
]
}
},
"requires": [
"canXRayClimb"
],
"flashSuitChecked": true,
"blueSuitChecked": true,
"note": [
"Exit the previous room with Samus in a standing pose (while grappled).",
"After teleporting, press right to release Grapple while staying standing (not being forced into a crouch).",
"Then X-ray climb to get on top of the Chozo statue."
]
},
{
"id": 24,
"link": [
2,
1
],
"name": "Base",
"requires": [
{
  "or": [
    {
      "and": [
        "f_DefeatedPhantoon",
        "canDash"
      ]
    },
    "SpaceJump"
  ]
}
],
"flashSuitChecked": true,
"blueSuitChecked": true
},
{
"id": 53,
"link": [
2,
1
],
"name": "Tank Damage (Power Off)",
"requires": [
{
"or": [
{
"and": [
{
"not": "f_DefeatedPhantoon"
},
"canRiskPermanentLossOfAccess"
]
},
"canDash"
]
},
{
"thornHits": 1
},
{
"or": [
"HiJump",
"canWallJump",
"canUseIFrames",
"Grapple",
"canHorizontalDamageBoost",
{
"thornHits": 1
}
]
}
],
"flashSuitChecked": true,
"blueSuitChecked": true,
"devNote": [
"When the power is off, the floor has thorns.",
"if power is on and dash is available, then the floating platforms could be used instead to avoid all damage."
]
},
{
"id": 54,
"link": [
2,
1
],
"name": "Tank Damage (Blue Suit)",
"requires": [
{
"haveBlueSuit": {}
},
"canBlueSuitSpikeJump",
{
"or": [
{
"and": [
"canGravityJump",
{
"spikeHits": 1
}
]
},
{
"and": [
{
"disableEquipment": "Gravity"
},
{
"spikeHits": 2
}
]
},
{
"and": [
"Gravity",
"HiJump",
{
"spikeHits": 2
}
]
},
{
"and": [
"Gravity",
{
"tech": "canHorizontalDamageBoost"
},
{
"noFlashSuit": {}
},
{
"spikeHits": 2
}
]
},
{
"spikeHits": 3
}
]
}
],
"flashSuitChecked": true,
"blueSuitChecked": true,
"note": [
"When the power is on, the floor has spikes (not thorns), and Samus will quickly lose i-frames."
]
},
{
"id": 55,
"link": [
2,
1
],
"name": "Spring Fling",
"requires": [
"canSpringFling"
],
"flashSuitChecked": true,
"blueSuitChecked": true
},
{
"id": 56,
"link": [
2,
1
],
"name": "Insane Bomb Boost",
"requires": [
"canJumpIntoIBJ",
"canBombHorizontally",
"canInsaneJump",
"canInsaneMidAirMorph",
"canResetFallSpeed"
],
"flashSuitChecked": true,
"blueSuitChecked": true,
"note": [
"Jump, place a bomb mid-air, then jump with controlled height to precisely mid-air morph and get a horizontal boost."
]
},
{
"id": 57,
"link": [
2,
1
],
"name": "Insane Wall Jump",
"requires": [
"Gravity",
"canInsaneWallJump"
],
"flashSuitChecked": true,
"blueSuitChecked": true,
"note": [
"Wall jump from near the top of the ledge to barely be able to wall jump off the floating platform."
]
},
{
"id": 58,
"link": [
2,
1
],
"name": "HiJump Wall Jump",
"requires": [
"Gravity",
"HiJump",
"canPreciseWallJump"
],
"flashSuitChecked": true,
"blueSuitChecked": true,
"note": [
"Wall jump from a few tiles below the ledge, then wall jump off the floating platform."
]
},
{
"id": 59,
"link": [
2,
1
],
"name": "Gravity Jump Wall Jump",
"requires": [
"canPreciseWallJump",
"canGravityJump",
"canTrickyJump"
],
"flashSuitChecked": true,
"blueSuitChecked": true,
"note": [
"Press pause, wall jump from about halfway down the wall, disable Gravity, then wall jump off the floating platform."
]
},
{
"id": 25,
"link": [
2,
1
],
"name": "Precise Grapple",
"requires": [
"canPreciseGrapple",
"canTrickyJump",
"h_midAirShootUp"
],
"flashSuitChecked": true,
"blueSuitChecked": true,
"note": "Fling Samus from the first set of grapple blocks to the second set without falling. Requires precise timing."
},
{
"id": 26,
"link": [
2,
1
],
"name": "Use Stored Spark",
"requires": [
"h_storedSpark",
"canDash",
{
"shinespark": {
"frames": 14,
"excessFrames": 4
}
}
],
"flashSuitChecked": true,
"blueSuitChecked": true
},
{
"id": 27,
"link": [
2,
1
],
"name": "Ceiling Bomb Jump",
"requires": [
"canLongCeilingBombJump",
"canBePatient"
],
"flashSuitChecked": true,
"blueSuitChecked": true
},
{
"id": 28,
"link": [
2,
1
],
"name": "G-Mode Morph Ceiling Bomb Jump",
"requires": [
"canGMode",
"h_artificialMorphLongCeilingBombJump",
"canBeVeryPatient",
{
"obstaclesCleared": [
"A"
]
}
],
"flashSuitChecked": true,
"blueSuitChecked": true,
"note": "Touch the item while remaining in artificial morph. Ceiling bomb jump back to the right, then use X-Ray to cancel G-mode and obtain the item.",
"devNote": "This strat alone would only require canBePatient, but it is only possible after Ceiling Bomb Jumping there, so it would be a combined 4 minutes."
}
],
"notables": [],
"nextStratId": 60,
"nextNotableId": 1
}