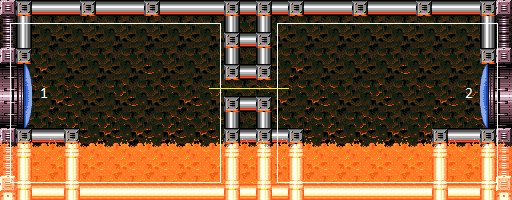
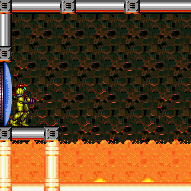
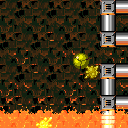
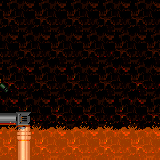
Ice Beam Tutorial Room
Room ID: 110
|
Exit condition: {
"leaveWithRunway": {
"length": 4,
"openEnd": 1
}
} |
|
Requires: "h_heatedCrystalFlash" |
From: 1
Left Door
To: 1
Left Door
Entrance condition: {
"comeInShinecharging": {
"length": 3,
"openEnd": 0
}
}Requires: "h_heatedCrystalSpark" |
|
Requires: {
"resetRoom": {
"nodes": [
1,
2
]
}
}
"h_heatProof"
"h_lavaProof"
"h_useMorphBombs"
"canBePatient"
"canDodgeWhileShooting"
{
"or": [
"Ice",
"canFarmWhileShooting",
{
"cycleFrames": 2700
}
]
}
{
"cycleFrames": 4500
}Farm cycle drops: 3 Boyon |
|


Requires: "Gravity"
{
"or": [
"canTrivialMidAirMorph",
"h_useSpringBall"
]
}
{
"or": [
{
"and": [
"canDash",
{
"heatFrames": 290
},
{
"lavaFrames": 25
}
]
},
{
"and": [
{
"haveBlueSuit": {}
},
{
"heatFrames": 335
},
{
"lavaFrames": 40
}
]
}
]
}Dev note: FIXME: Add a lava dip + spring ball midair strat, and a HiJump + damage boost strat. |
|
Requires: "canMidAirMorph"
"canWallJump"
{
"or": [
{
"and": [
"canDash",
"canUseIFrames",
{
"heatFrames": 330
},
{
"lavaFrames": 50
},
{
"enemyDamage": {
"enemy": "Boyon",
"type": "contact",
"hits": 1
}
}
]
},
{
"and": [
{
"haveBlueSuit": {}
},
{
"heatFrames": 370
},
{
"lavaFrames": 50
}
]
}
]
} |
|
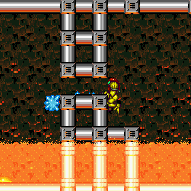
Use the full runway in order to get a good jump. If entering without run speed, a last-frame jump would be needed to reach the necessary dash speed of $1.2 to shorten Samus' jump; alternatively, turn around and open the door to extend the runway and make the jump more lenient. Requires: "canMidAirMorph"
"canSpeedyJump"
{
"heatFrames": 240
} |
|
Requires: "SpaceJump"
"canMidAirMorph"
{
"or": [
{
"and": [
"canDash",
{
"heatFrames": 240
}
]
},
{
"heatFrames": 340
}
]
} |
|
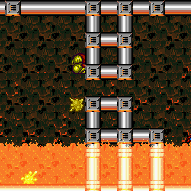
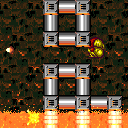
Requires laying PBs on the very edge of the platform by the doorway, mostly hanging over the lava, in order to double hit the rightmost Boyon. Requires: "canDash"
"canMidAirMorph"
"canWallJump"
"canCarefulJump"
{
"enemyKill": {
"enemies": [
[
"Boyon",
"Boyon",
"Boyon"
]
],
"explicitWeapons": [
"PowerBomb"
]
}
}
{
"heatFrames": 780
} |
|
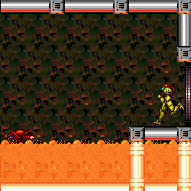
Jump and shoot supers diagonally down at the rightmost Boyon. Jump at the edge of the platform and shoot just before hitting the ceiling, or start one tile left and shoot while at the ceiling. Requires: "canDash"
"canMidAirMorph"
"canWallJump"
"canCarefulJump"
{
"enemyKill": {
"enemies": [
[
"Boyon"
]
],
"explicitWeapons": [
"Super"
]
}
}
{
"heatFrames": 540
} |
|
Requires: "Morph"
"canTrivialUseFrozenEnemies"
{
"or": [
{
"and": [
"canDash",
{
"heatFrames": 240
}
]
},
{
"heatFrames": 350
}
]
} |
|
A well-executed lateral mid-air morph can get into the passage without taking a hit. Otherwise, the Boyon can be used to push Samus into the passage. Requires: "canLateralMidAirMorph"
{
"or": [
"canTrickyJump",
{
"and": [
"canNeutralDamageBoost",
{
"enemyDamage": {
"enemy": "Boyon",
"type": "contact",
"hits": 1
}
}
]
}
]
}
{
"heatFrames": 240
}Dev note: It's possible to get into the passage by a non-mockball mid-air morph, it just needs to be fairly late. Due to its risk and not really being easier, it's not included here |
From: 1
Left Door
To: 2
Right Door

Entrance condition: {
"comeInShinecharged": {}
}Requires: {
"shineChargeFrames": 145
}
"canLateralMidAirMorph"
"canTrickyJump"
"canShinechargeMovementTricky"
{
"heatFrames": 190
}
{
"shinespark": {
"frames": 21,
"excessFrames": 0
}
}Exit condition: {
"leaveWithSpark": {}
}Unlocks doors: {"types":["super"],"requires":[]}
{"types":["missiles","powerbomb"],"requires":["never"]} |
From: 1
Left Door
To: 2
Right Door
Entrance condition: {
"comeInShinecharging": {
"length": 3,
"openEnd": 0
}
}Requires: "canLateralMidAirMorph"
"canTrickyJump"
"canShinechargeMovementTricky"
{
"heatFrames": 235
}
{
"shinespark": {
"frames": 22,
"excessFrames": 0
}
}Exit condition: {
"leaveWithSpark": {
"position": "bottom"
}
}Unlocks doors: {"types":["super"],"requires":[]}
{"types":["missiles","powerbomb"],"requires":["never"]} |
|
To save Energy, it is possible to kill to the Ripper at the far right, stand over where the drop will spawn and pause abuse to grab its Energy drop on G-mode exit. With a Power Bomb, place on the right edge when the Ripper is about to hit the left edge. It is also possible to kill it with Screw Attack and a precise wall jump. Entrance condition: {
"comeInWithGMode": {
"mode": "any",
"morphed": true
}
}Requires: "Morph"
{
"or": [
"SpaceJump",
"canTrivialUseFrozenEnemies",
{
"and": [
"canLateralMidAirMorph",
"canTrickyJump"
]
},
{
"and": [
"Gravity",
{
"lavaFrames": 24
}
]
}
]
}
{
"or": [
"h_heatedGModeOpenDifferentDoor",
{
"and": [
"h_heatedGModePauseAbuse",
{
"or": [
{
"ammo": {
"type": "Super",
"count": 1
}
},
"h_usePowerBomb",
{
"and": [
"ScrewAttack",
{
"or": [
"h_lavaProof",
"SpaceJump",
"canWallJump"
]
}
]
}
]
}
]
}
]
} |
|
Getting across the lava while artificially morphed requires an HBJ or Spring Fling. For the Spring Fling, jump immediately before the pause triggers. To save Energy, it is possible to kill to the Ripper at the far right, stand over where the drop will spawn and pause abuse to grab its Energy drop on G-mode exit. With a Power Bomb, place on the left edge when the Ripper is moving left, 2/3 of the way to the left edge. It is also possible to kill it with Screw Attack and a precise wall jump. Entrance condition: {
"comeInWithGMode": {
"mode": "any",
"morphed": true
}
}Requires: {
"or": [
{
"and": [
"h_artificialMorphSpringFling",
"canTrickyJump"
]
},
"h_artificialMorphHBJ",
{
"and": [
"Gravity",
"h_artificialMorphIBJ",
"h_artificialMorphBombHorizontally",
{
"lavaFrames": 160
}
]
},
{
"and": [
"Gravity",
"h_artificialMorphSpringBall",
{
"lavaFrames": 40
}
]
}
]
}
{
"or": [
"h_heatedGModeOpenDifferentDoor",
{
"and": [
"h_heatedGModePauseAbuse",
{
"or": [
{
"ammo": {
"type": "Super",
"count": 1
}
},
"h_artificialMorphPowerBomb",
{
"and": [
"ScrewAttack",
{
"or": [
"h_lavaProof",
"SpaceJump",
"canWallJump"
]
}
]
}
]
}
]
}
]
} |
|
Requires: {
"or": [
"canTrivialMidAirMorph",
"h_useSpringBall",
{
"and": [
"h_bombThings",
{
"heatFrames": 80
}
]
}
]
}
{
"heatFrames": 270
}
{
"or": [
{
"lavaFrames": 70
},
{
"and": [
"Gravity",
"canDash",
{
"disableEquipment": "SpeedBooster"
},
{
"lavaFrames": 25
}
]
}
]
}
{
"or": [
{
"haveBlueSuit": {}
},
{
"enemyDamage": {
"enemy": "Boyon",
"type": "contact",
"hits": 1
}
},
{
"heatFrames": 30
}
]
}
{
"or": [
"canDash",
{
"heatFrames": 70
}
]
} |
|
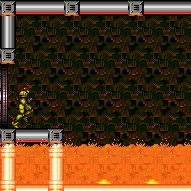
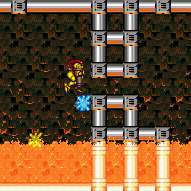
An ice shot can shoot through the wall below the Morph tunnel and can freeze the Boyon even without Wave. Requires: {
"or": [
"canTrivialMidAirMorph",
"h_useSpringBall",
{
"and": [
"h_bombThings",
{
"heatFrames": 80
}
]
}
]
}
{
"or": [
"canTrickyUseFrozenEnemies",
{
"and": [
"canUseFrozenEnemies",
"Wave"
]
}
]
}
{
"heatFrames": 280
}
{
"or": [
"canDash",
{
"heatFrames": 100
}
]
} |
|
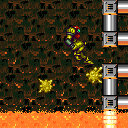
Unmorph with the right timing to damage boost using the Boyon who is closest to the Morph tunnel in order to avoid taking any lava damage. Requires: {
"notable": "Impressive Damage Boost"
}
"canHorizontalDamageBoost"
"canTrivialMidAirMorph"
"canTrickyJump"
{
"enemyDamage": {
"enemy": "Boyon",
"type": "contact",
"hits": 1
}
}
{
"heatFrames": 220
} |
|
Entrance condition: {
"comeInWithGrappleTeleport": {
"blockPositions": [
[
7,
2
]
]
}
}Requires: {
"heatFrames": 50
} |
|

Entrance condition: {
"comeInWithGrappleTeleport": {
"blockPositions": [
[
3,
12
],
[
3,
13
]
]
}
}Bypasses door shell: true |
From: 2
Right Door
To: 1
Left Door
Entrance condition: {
"comeInWithGrappleTeleport": {
"blockPositions": [
[
3,
12
]
]
}
}Exit condition: {
"leaveWithGrappleTeleport": {
"blockPositions": [
[
3,
12
]
]
}
}Bypasses door shell: true |
From: 2
Right Door
To: 1
Left Door
Entrance condition: {
"comeInWithGrappleTeleport": {
"blockPositions": [
[
3,
13
]
]
}
}Exit condition: {
"leaveWithGrappleTeleport": {
"blockPositions": [
[
3,
13
]
]
}
}Bypasses door shell: true |
|
Getting across the lava while artificially morphed requires an HBJ or Bomb boosting out and freezing a Boyon below. Entrance condition: {
"comeInWithGMode": {
"mode": "any",
"morphed": true
}
}Requires: {
"or": [
{
"and": [
"h_artificialMorphMovement",
"h_lavaProof"
]
},
{
"and": [
"Morph",
"canTrickyUseFrozenEnemies"
]
},
{
"and": [
"h_artificialMorphIBJ",
"h_artificialMorphBombHorizontally",
"canTrickyUseFrozenEnemies"
]
},
{
"and": [
"canInsaneJump",
{
"or": [
"h_artificialMorphHBJ",
"h_artificialMorphDiagonalBombJump"
]
}
]
}
]
}
"h_heatedGModeOpenDifferentDoor"Dev note: FIXME: It is also possible with a rolling speed bomb boost down back. |
|
Spring Fling or IBJ across the right pit and damage boost or lava dive in the second; to Spring Fling, jump immediately before the pause triggers. Entrance condition: {
"comeInWithGMode": {
"mode": "any",
"morphed": true
}
}Requires: {
"or": [
"Morph",
{
"and": [
"h_artificialMorphSpringFling",
"canTrickyJump"
]
},
{
"and": [
"h_artificialMorphIBJ",
"h_artificialMorphBombHorizontally"
]
},
{
"and": [
"Gravity",
"h_artificialMorphSpringBall",
{
"lavaFrames": 20
}
]
},
{
"and": [
"h_artificialMorphSpringBall",
{
"lavaFrames": 50
}
]
}
]
}
{
"or": [
{
"and": [
{
"notable": "Impressive Damage Boost"
},
"canHorizontalDamageBoost",
"canTrickyJump",
{
"enemyDamage": {
"enemy": "Boyon",
"type": "contact",
"hits": 1
}
}
]
},
{
"lavaFrames": 90
},
{
"and": [
"Gravity",
{
"lavaFrames": 35
}
]
}
]
}
"h_heatedGModeOpenDifferentDoor" |
From: 2
Right Door
To: 1
Left Door


Enter the lava pool as the Ripper touches the left wall. Place a Power Bomb in the corner and boost up into the Ripper to escape. The Power Bomb timing is somewhat lenient, but incorrectly timing it will kill the Ripper and leave Samus in the lava pool. Entrance condition: {
"comeInWithGMode": {
"mode": "any",
"morphed": true
}
}Requires: "canComplexGMode"
"Gravity"
"h_artificialMorphPowerBomb"
"canNeutralDamageBoost"
{
"enemyDamage": {
"enemy": "Ripper 2 (red)",
"type": "contact",
"hits": 1
}
}
"canTrickyJump"
{
"lavaFrames": 140
}
"h_additionalBomb"
{
"or": [
{
"and": [
{
"notable": "Impressive Damage Boost"
},
"canHorizontalDamageBoost",
{
"enemyDamage": {
"enemy": "Boyon",
"type": "contact",
"hits": 1
}
}
]
},
{
"lavaFrames": 25
}
]
}
"h_heatedGModeOpenDifferentDoor" |
|
Exit condition: {
"leaveWithRunway": {
"length": 4,
"openEnd": 1
}
} |
|
Requires: "h_heatedCrystalFlash" |
From: 2
Right Door
To: 2
Right Door
Entrance condition: {
"comeInShinecharging": {
"length": 3,
"openEnd": 0
}
}Requires: "h_heatedCrystalSpark" |
|
Requires: {
"or": [
{
"resetRoom": {
"nodes": [
2
]
}
},
{
"and": [
{
"resetRoom": {
"nodes": [
1
]
}
},
"canMidAirMorph",
{
"cycleFrames": 330
}
]
}
]
}
"h_heatProof"
{
"or": [
"h_lavaProof",
{
"and": [
"canFarmWhileShooting",
"canPreciseWallJump",
{
"cycleFrames": 15
}
]
},
{
"and": [
"SpaceJump",
{
"cycleFrames": 10
}
]
}
]
}
{
"noBlueSuit": {}
}
"ScrewAttack"
{
"cycleFrames": 125
}Farm cycle drops: 1 Ripper 2 (red) |
{
"$schema": "../../../schema/m3-room.schema.json",
"id": 110,
"name": "Ice Beam Tutorial Room",
"area": "Norfair",
"subarea": "Upper",
"subsubarea": "West",
"roomAddress": "0x7A865",
"roomEnvironments": [
{
"heated": true
}
],
"mapTileMask": [
[
1,
1
]
],
"nodes": [
{
"id": 1,
"name": "Left Door",
"nodeType": "door",
"nodeSubType": "blue",
"nodeAddress": "0x0019342",
"doorOrientation": "left",
"doorEnvironments": [
{
"physics": "air"
}
],
"mapTileMask": [
[
2,
1
]
]
},
{
"id": 2,
"name": "Right Door",
"nodeType": "door",
"nodeSubType": "blue",
"nodeAddress": "0x001934e",
"doorOrientation": "right",
"doorEnvironments": [
{
"physics": "air"
}
],
"mapTileMask": [
[
1,
2
]
]
}
],
"enemies": [
{
"id": "e1",
"groupName": "Ice Beam Tutorial Room Boyons",
"enemyName": "Boyon",
"quantity": 3,
"homeNodes": [
1
]
},
{
"id": "e2",
"groupName": "Ice Beam Tutorial Room Ripper 2",
"enemyName": "Ripper 2 (red)",
"quantity": 1,
"homeNodes": [
2
]
}
],
"strats": [
{
"link": [
1,
1
],
"name": "Base (Unlock Door)",
"requires": [],
"unlocksDoors": [
{
"types": [
"missiles"
],
"requires": [
{
  "heatFrames": 50
}
]
},
{
"types": [
"super"
],
"requires": []
},
{
"types": [
"powerbomb"
],
"requires": [
{
"heatFrames": 110
}
]
}
],
"flashSuitChecked": true,
"blueSuitChecked": true
},
{
"link": [
1,
1
],
"name": "Base (Come In Normally)",
"entranceCondition": {
"comeInNormally": {}
},
"requires": [],
"flashSuitChecked": true,
"blueSuitChecked": true
},
{
"link": [
1,
1
],
"name": "Base (Come In With Mockball)",
"entranceCondition": {
"comeInWithMockball": {
"adjacentMinTiles": 0,
"remoteAndLandingMinTiles": [
[
0,
0
]
],
"speedBooster": "any"
}
},
"requires": [
{
"heatFrames": 10
}
],
"flashSuitChecked": true,
"blueSuitChecked": true
},
{
"link": [
2,
2
],
"name": "Base (Unlock Door)",
"requires": [],
"unlocksDoors": [
{
"types": [
"missiles"
],
"requires": [
{
"heatFrames": 50
}
]
},
{
"types": [
"super"
],
"requires": []
},
{
"types": [
"powerbomb"
],
"requires": [
{
"heatFrames": 110
}
]
}
],
"flashSuitChecked": true,
"blueSuitChecked": true
},
{
"link": [
2,
2
],
"name": "Base (Come In Normally)",
"entranceCondition": {
"comeInNormally": {}
},
"requires": [],
"flashSuitChecked": true,
"blueSuitChecked": true
},
{
"link": [
2,
2
],
"name": "Base (Come In With Mockball)",
"entranceCondition": {
"comeInWithMockball": {
"adjacentMinTiles": 0,
"remoteAndLandingMinTiles": [
[
0,
0
]
],
"speedBooster": "any"
}
},
"requires": [
{
"heatFrames": 10
}
],
"flashSuitChecked": true,
"blueSuitChecked": true
},
{
"id": 1,
"link": [
1,
1
],
"name": "Leave with Runway",
"requires": [],
"exitCondition": {
"leaveWithRunway": {
"length": 4,
"openEnd": 1
}
},
"flashSuitChecked": true,
"blueSuitChecked": true
},
{
"id": 2,
"link": [
1,
1
],
"name": "Crystal Flash",
"requires": [
"h_heatedCrystalFlash"
],
"flashSuitChecked": true,
"blueSuitChecked": true
},
{
"id": 29,
"link": [
1,
1
],
"name": "Come in Shinecharging, Crystal Spark",
"entranceCondition": {
"comeInShinecharging": {
"length": 3,
"openEnd": 0
}
},
"requires": [
"h_heatedCrystalSpark"
],
"flashSuitChecked": true,
"blueSuitChecked": true
},
{
"id": 25,
"link": [
1,
1
],
"name": "Boyon Farm",
"requires": [
{
"resetRoom": {
"nodes": [
1,
2
]
}
},
"h_heatProof",
"h_lavaProof",
"h_useMorphBombs",
"canBePatient",
"canDodgeWhileShooting",
{
"or": [
"Ice",
"canFarmWhileShooting",
{
"cycleFrames": 2700
}
]
},
{
"cycleFrames": 4500
}
],
"farmCycleDrops": [
{
"enemy": "Boyon",
"count": 3
}
],
"flashSuitChecked": true,
"blueSuitChecked": true
},
{
"id": 3,
"link": [
1,
2
],
"name": "Gravity",
"requires": [
"Gravity",
{
"or": [
"canTrivialMidAirMorph",
"h_useSpringBall"
]
},
{
"or": [
{
"and": [
"canDash",
{
"heatFrames": 290
},
{
"lavaFrames": 25
}
]
},
{
"and": [
{
"haveBlueSuit": {}
},
{
"heatFrames": 335
},
{
"lavaFrames": 40
}
]
}
]
}
],
"flashSuitChecked": true,
"blueSuitChecked": true,
"devNote": "FIXME: Add a lava dip + spring ball midair strat, and a HiJump + damage boost strat."
},
{
"id": 27,
"link": [
1,
2
],
"name": "Suitless Tank the Damage",
"requires": [
"canMidAirMorph",
"canWallJump",
{
"or": [
{
"and": [
"canDash",
"canUseIFrames",
{
"heatFrames": 330
},
{
"lavaFrames": 50
},
{
"enemyDamage": {
"enemy": "Boyon",
"type": "contact",
"hits": 1
}
}
]
},
{
"and": [
{
"haveBlueSuit": {}
},
{
"heatFrames": 370
},
{
"lavaFrames": 50
}
]
}
]
}
],
"flashSuitChecked": true,
"blueSuitChecked": true
},
{
"id": 4,
"link": [
1,
2
],
"name": "Speedy Jump",
"requires": [
"canMidAirMorph",
"canSpeedyJump",
{
"heatFrames": 240
}
],
"flashSuitChecked": true,
"blueSuitChecked": true,
"note": "Use the full runway in order to get a good jump.",
"detailNote": [
"If entering without run speed, a last-frame jump would be needed",
"to reach the necessary dash speed of $1.2 to shorten Samus' jump;",
"alternatively, turn around and open the door to extend the runway and make the jump more lenient."
]
},
{
"id": 28,
"link": [
1,
2
],
"name": "Space Jump",
"requires": [
"SpaceJump",
"canMidAirMorph",
{
"or": [
{
"and": [
"canDash",
{
"heatFrames": 240
}
]
},
{
"heatFrames": 340
}
]
}
],
"flashSuitChecked": true,
"blueSuitChecked": true
},
{
"id": 5,
"link": [
1,
2
],
"name": "Boyon PB Kill",
"requires": [
"canDash",
"canMidAirMorph",
"canWallJump",
"canCarefulJump",
{
"enemyKill": {
"enemies": [
[
"Boyon",
"Boyon",
"Boyon"
]
],
"explicitWeapons": [
"PowerBomb"
]
}
},
{
"heatFrames": 780
}
],
"flashSuitChecked": true,
"blueSuitChecked": true,
"note": "Requires laying PBs on the very edge of the platform by the doorway, mostly hanging over the lava, in order to double hit the rightmost Boyon."
},
{
"id": 6,
"link": [
1,
2
],
"name": "Boyon Super Kill",
"requires": [
"canDash",
"canMidAirMorph",
"canWallJump",
"canCarefulJump",
{
"enemyKill": {
"enemies": [
[
"Boyon"
]
],
"explicitWeapons": [
"Super"
]
}
},
{
"heatFrames": 540
}
],
"flashSuitChecked": true,
"blueSuitChecked": true,
"note": [
"Jump and shoot supers diagonally down at the rightmost Boyon.",
"Jump at the edge of the platform and shoot just before hitting the ceiling, or start one tile left and shoot while at the ceiling."
]
},
{
"id": 7,
"link": [
1,
2
],
"name": "Frozen Boyon",
"requires": [
"Morph",
"canTrivialUseFrozenEnemies",
{
"or": [
{
"and": [
"canDash",
{
"heatFrames": 240
}
]
},
{
"heatFrames": 350
}
]
}
],
"flashSuitChecked": true,
"blueSuitChecked": true
},
{
"id": 9,
"link": [
1,
2
],
"name": "Lateral Mid-Air Morph",
"requires": [
"canLateralMidAirMorph",
{
"or": [
"canTrickyJump",
{
"and": [
"canNeutralDamageBoost",
{
"enemyDamage": {
"enemy": "Boyon",
"type": "contact",
"hits": 1
}
}
]
}
]
},
{
"heatFrames": 240
}
],
"flashSuitChecked": true,
"blueSuitChecked": true,
"note": [
"A well-executed lateral mid-air morph can get into the passage without taking a hit.",
"Otherwise, the Boyon can be used to push Samus into the passage."
],
"devNote": [
"It's possible to get into the passage by a non-mockball mid-air morph, it just needs to be fairly late.",
"Due to its risk and not really being easier, it's not included here"
]
},
{
"id": 19,
"link": [
1,
2
],
"name": "Come In Shinecharged, Leave With Spark",
"entranceCondition": {
"comeInShinecharged": {}
},
"requires": [
{
"shineChargeFrames": 145
},
"canLateralMidAirMorph",
"canTrickyJump",
"canShinechargeMovementTricky",
{
"heatFrames": 190
},
{
"shinespark": {
"frames": 21,
"excessFrames": 0
}
}
],
"exitCondition": {
"leaveWithSpark": {}
},
"unlocksDoors": [
{
"types": [
"super"
],
"requires": []
},
{
"types": [
"missiles",
"powerbomb"
],
"requires": [
"never"
]
}
],
"flashSuitChecked": true,
"blueSuitChecked": true
},
{
"id": 20,
"link": [
1,
2
],
"name": "Come In Shinecharging, Leave With Spark (Bottom Position)",
"entranceCondition": {
"comeInShinecharging": {
"length": 3,
"openEnd": 0
}
},
"requires": [
"canLateralMidAirMorph",
"canTrickyJump",
"canShinechargeMovementTricky",
{
"heatFrames": 235
},
{
"shinespark": {
"frames": 22,
"excessFrames": 0
}
}
],
"exitCondition": {
"leaveWithSpark": {
"position": "bottom"
}
},
"unlocksDoors": [
{
"types": [
"super"
],
"requires": []
},
{
"types": [
"missiles",
"powerbomb"
],
"requires": [
"never"
]
}
],
"flashSuitChecked": true,
"blueSuitChecked": true
},
{
"id": 31,
"link": [
1,
2
],
"name": "G-Mode",
"entranceCondition": {
"comeInWithGMode": {
"mode": "any",
"morphed": true
}
},
"requires": [
"Morph",
{
"or": [
"SpaceJump",
"canTrivialUseFrozenEnemies",
{
"and": [
"canLateralMidAirMorph",
"canTrickyJump"
]
},
{
"and": [
"Gravity",
{
"lavaFrames": 24
}
]
}
]
},
{
"or": [
"h_heatedGModeOpenDifferentDoor",
{
"and": [
"h_heatedGModePauseAbuse",
{
"or": [
{
"ammo": {
"type": "Super",
"count": 1
}
},
"h_usePowerBomb",
{
"and": [
"ScrewAttack",
{
"or": [
"h_lavaProof",
"SpaceJump",
"canWallJump"
]
}
]
}
]
}
]
}
]
}
],
"flashSuitChecked": true,
"blueSuitChecked": true,
"note": [
"To save Energy, it is possible to kill to the Ripper at the far right, stand over where the drop will spawn and pause abuse to grab its Energy drop on G-mode exit.",
"With a Power Bomb, place on the right edge when the Ripper is about to hit the left edge.",
"It is also possible to kill it with Screw Attack and a precise wall jump."
]
},
{
"id": 21,
"link": [
1,
2
],
"name": "G-Mode Morph",
"entranceCondition": {
"comeInWithGMode": {
"mode": "any",
"morphed": true
}
},
"requires": [
{
"or": [
{
"and": [
"h_artificialMorphSpringFling",
"canTrickyJump"
]
},
"h_artificialMorphHBJ",
{
"and": [
"Gravity",
"h_artificialMorphIBJ",
"h_artificialMorphBombHorizontally",
{
"lavaFrames": 160
}
]
},
{
"and": [
"Gravity",
"h_artificialMorphSpringBall",
{
"lavaFrames": 40
}
]
}
]
},
{
"or": [
"h_heatedGModeOpenDifferentDoor",
{
"and": [
"h_heatedGModePauseAbuse",
{
"or": [
{
"ammo": {
"type": "Super",
"count": 1
}
},
"h_artificialMorphPowerBomb",
{
"and": [
"ScrewAttack",
{
"or": [
"h_lavaProof",
"SpaceJump",
"canWallJump"
]
}
]
}
]
}
]
}
]
}
],
"flashSuitChecked": true,
"blueSuitChecked": true,
"note": [
"Getting across the lava while artificially morphed requires an HBJ or Spring Fling.",
"For the Spring Fling, jump immediately before the pause triggers.",
"To save Energy, it is possible to kill to the Ripper at the far right, stand over where the drop will spawn and pause abuse to grab its Energy drop on G-mode exit.",
"With a Power Bomb, place on the left edge when the Ripper is moving left, 2/3 of the way to the left edge.",
"It is also possible to kill it with Screw Attack and a precise wall jump."
]
},
{
"id": 10,
"link": [
2,
1
],
"name": "Base",
"requires": [
{
"or": [
"canTrivialMidAirMorph",
"h_useSpringBall",
{
"and": [
"h_bombThings",
{
"heatFrames": 80
}
]
}
]
},
{
"heatFrames": 270
},
{
"or": [
{
"lavaFrames": 70
},
{
"and": [
"Gravity",
"canDash",
{
"disableEquipment": "SpeedBooster"
},
{
"lavaFrames": 25
}
]
}
]
},
{
"or": [
{
"haveBlueSuit": {}
},
{
"enemyDamage": {
"enemy": "Boyon",
"type": "contact",
"hits": 1
}
},
{
"heatFrames": 30
}
]
},
{
"or": [
"canDash",
{
"heatFrames": 70
}
]
}
],
"flashSuitChecked": true,
"blueSuitChecked": true
},
{
"id": 11,
"link": [
2,
1
],
"name": "Ice",
"requires": [
{
"or": [
"canTrivialMidAirMorph",
"h_useSpringBall",
{
"and": [
"h_bombThings",
{
"heatFrames": 80
}
]
}
]
},
{
"or": [
"canTrickyUseFrozenEnemies",
{
"and": [
"canUseFrozenEnemies",
"Wave"
]
}
]
},
{
"heatFrames": 280
},
{
"or": [
"canDash",
{
"heatFrames": 100
}
]
}
],
"flashSuitChecked": true,
"blueSuitChecked": true,
"note": "An ice shot can shoot through the wall below the Morph tunnel and can freeze the Boyon even without Wave."
},
{
"id": 12,
"link": [
2,
1
],
"name": "Impressive Damage Boost",
"requires": [
{
"notable": "Impressive Damage Boost"
},
"canHorizontalDamageBoost",
"canTrivialMidAirMorph",
"canTrickyJump",
{
"enemyDamage": {
"enemy": "Boyon",
"type": "contact",
"hits": 1
}
},
{
"heatFrames": 220
}
],
"flashSuitChecked": true,
"blueSuitChecked": true,
"note": "Unmorph with the right timing to damage boost using the Boyon who is closest to the Morph tunnel in order to avoid taking any lava damage."
},
{
"id": 13,
"link": [
2,
1
],
"name": "Grapple Teleport",
"entranceCondition": {
"comeInWithGrappleTeleport": {
"blockPositions": [
[
7,
2
]
]
}
},
"requires": [
{
"heatFrames": 50
}
],
"flashSuitChecked": true,
"blueSuitChecked": true
},
{
"id": 14,
"link": [
2,
1
],
"name": "Grapple Teleport Door Lock Skip",
"entranceCondition": {
"comeInWithGrappleTeleport": {
"blockPositions": [
[
3,
12
],
[
3,
13
]
]
}
},
"requires": [],
"bypassesDoorShell": "yes",
"flashSuitChecked": true,
"blueSuitChecked": true
},
{
"id": 15,
"link": [
2,
1
],
"name": "Carry Grapple Teleport (Top Position)",
"entranceCondition": {
"comeInWithGrappleTeleport": {
"blockPositions": [
[
3,
12
]
]
}
},
"requires": [],
"exitCondition": {
"leaveWithGrappleTeleport": {
"blockPositions": [
[
3,
12
]
]
}
},
"bypassesDoorShell": "yes",
"flashSuitChecked": true,
"blueSuitChecked": true
},
{
"id": 16,
"link": [
2,
1
],
"name": "Carry Grapple Teleport (Bottom Position)",
"entranceCondition": {
"comeInWithGrappleTeleport": {
"blockPositions": [
[
3,
13
]
]
}
},
"requires": [],
"exitCondition": {
"leaveWithGrappleTeleport": {
"blockPositions": [
[
3,
13
]
]
}
},
"bypassesDoorShell": "yes",
"flashSuitChecked": true,
"blueSuitChecked": true
},
{
"id": 22,
"link": [
2,
1
],
"name": "G-Mode Morph, Damageless",
"entranceCondition": {
"comeInWithGMode": {
"mode": "any",
"morphed": true
}
},
"requires": [
{
"or": [
{
"and": [
"h_artificialMorphMovement",
"h_lavaProof"
]
},
{
"and": [
"Morph",
"canTrickyUseFrozenEnemies"
]
},
{
"and": [
"h_artificialMorphIBJ",
"h_artificialMorphBombHorizontally",
"canTrickyUseFrozenEnemies"
]
},
{
"and": [
"canInsaneJump",
{
"or": [
"h_artificialMorphHBJ",
"h_artificialMorphDiagonalBombJump"
]
}
]
}
]
},
"h_heatedGModeOpenDifferentDoor"
],
"flashSuitChecked": true,
"blueSuitChecked": true,
"note": "Getting across the lava while artificially morphed requires an HBJ or Bomb boosting out and freezing a Boyon below.",
"devNote": "FIXME: It is also possible with a rolling speed bomb boost down back."
},
{
"id": 23,
"link": [
2,
1
],
"name": "G-Mode Morph, Tank",
"entranceCondition": {
"comeInWithGMode": {
"mode": "any",
"morphed": true
}
},
"requires": [
{
"or": [
"Morph",
{
"and": [
"h_artificialMorphSpringFling",
"canTrickyJump"
]
},
{
"and": [
"h_artificialMorphIBJ",
"h_artificialMorphBombHorizontally"
]
},
{
"and": [
"Gravity",
"h_artificialMorphSpringBall",
{
"lavaFrames": 20
}
]
},
{
"and": [
"h_artificialMorphSpringBall",
{
"lavaFrames": 50
}
]
}
]
},
{
"or": [
{
"and": [
{
"notable": "Impressive Damage Boost"
},
"canHorizontalDamageBoost",
"canTrickyJump",
{
"enemyDamage": {
"enemy": "Boyon",
"type": "contact",
"hits": 1
}
}
]
},
{
"lavaFrames": 90
},
{
"and": [
"Gravity",
{
"lavaFrames": 35
}
]
}
]
},
"h_heatedGModeOpenDifferentDoor"
],
"flashSuitChecked": true,
"blueSuitChecked": true,
"note": "Spring Fling or IBJ across the right pit and damage boost or lava dive in the second; to Spring Fling, jump immediately before the pause triggers."
},
{
"id": 24,
"link": [
2,
1
],
"name": "G-Mode Morph, Power Bomb Ripper Boost",
"entranceCondition": {
"comeInWithGMode": {
"mode": "any",
"morphed": true
}
},
"requires": [
"canComplexGMode",
"Gravity",
"h_artificialMorphPowerBomb",
"canNeutralDamageBoost",
{
"enemyDamage": {
"enemy": "Ripper 2 (red)",
"type": "contact",
"hits": 1
}
},
"canTrickyJump",
{
"lavaFrames": 140
},
"h_additionalBomb",
{
"or": [
{
"and": [
{
"notable": "Impressive Damage Boost"
},
"canHorizontalDamageBoost",
{
"enemyDamage": {
"enemy": "Boyon",
"type": "contact",
"hits": 1
}
}
]
},
{
"lavaFrames": 25
}
]
},
"h_heatedGModeOpenDifferentDoor"
],
"flashSuitChecked": true,
"blueSuitChecked": true,
"note": [
"Enter the lava pool as the Ripper touches the left wall. Place a Power Bomb in the corner and boost up into the Ripper to escape.",
"The Power Bomb timing is somewhat lenient, but incorrectly timing it will kill the Ripper and leave Samus in the lava pool."
]
},
{
"id": 17,
"link": [
2,
2
],
"name": "Leave with Runway",
"requires": [],
"exitCondition": {
"leaveWithRunway": {
"length": 4,
"openEnd": 1
}
},
"flashSuitChecked": true,
"blueSuitChecked": true
},
{
"id": 18,
"link": [
2,
2
],
"name": "Crystal Flash",
"requires": [
"h_heatedCrystalFlash"
],
"flashSuitChecked": true,
"blueSuitChecked": true
},
{
"id": 30,
"link": [
2,
2
],
"name": "Come in Shinecharging, Crystal Spark",
"entranceCondition": {
"comeInShinecharging": {
"length": 3,
"openEnd": 0
}
},
"requires": [
"h_heatedCrystalSpark"
],
"flashSuitChecked": true,
"blueSuitChecked": true
},
{
"id": 26,
"link": [
2,
2
],
"name": "Ripper Farm",
"requires": [
{
"or": [
{
"resetRoom": {
"nodes": [
2
]
}
},
{
"and": [
{
"resetRoom": {
"nodes": [
1
]
}
},
"canMidAirMorph",
{
"cycleFrames": 330
}
]
}
]
},
"h_heatProof",
{
"or": [
"h_lavaProof",
{
"and": [
"canFarmWhileShooting",
"canPreciseWallJump",
{
"cycleFrames": 15
}
]
},
{
"and": [
"SpaceJump",
{
"cycleFrames": 10
}
]
}
]
},
{
"noBlueSuit": {}
},
"ScrewAttack",
{
"cycleFrames": 125
}
],
"farmCycleDrops": [
{
"enemy": "Ripper 2 (red)",
"count": 1
}
],
"flashSuitChecked": true,
"blueSuitChecked": true
}
],
"notables": [
{
"id": 1,
"name": "Impressive Damage Boost",
"note": "Unmorph with the right timing to damage boost using the Boyon who is closest to the Morph tunnel in order to avoid taking any lava damage."
}
],
"nextStratId": 32,
"nextNotableId": 2
}