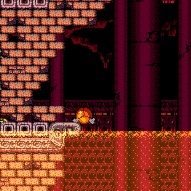
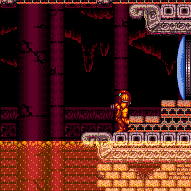
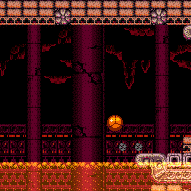
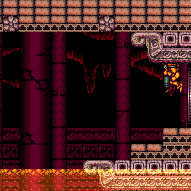
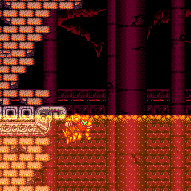
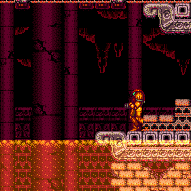
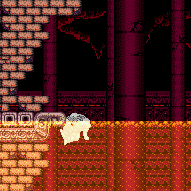
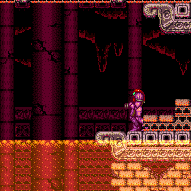
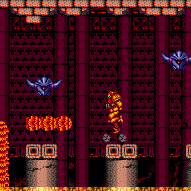
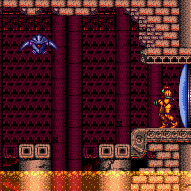
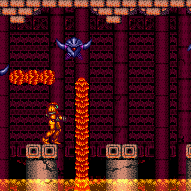
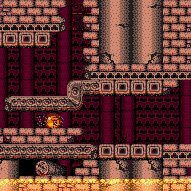
Acid Statue Room
Room ID: 149
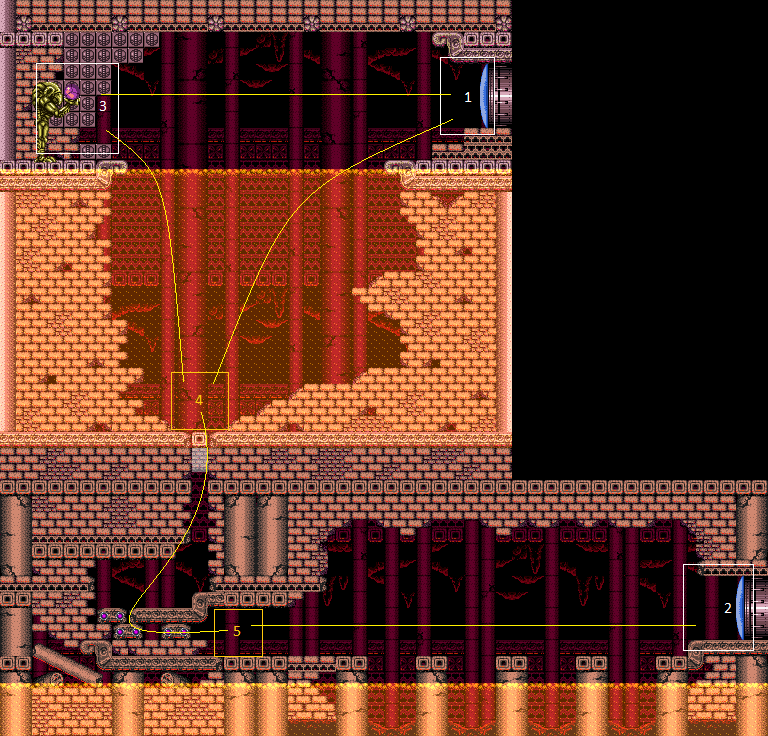
|
Exit condition: {
"leaveWithRunway": {
"length": 2,
"openEnd": 1
}
} |
|
Requires: "h_heatedCrystalFlash" |
|
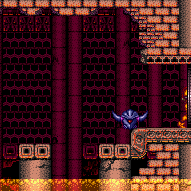
Enter the room with a super sink, in order to clip down to the bottom part of the room. Blindly traverse to the right door. It is recommended to open the door using Grapple if possible, since it can reach the door from a distance even while off-camera whereas beams cannot. Entrance condition: {
"comeInWithSuperSink": {}
}Requires: "canOffScreenMovement"
{
"heatFrames": 360
}
{
"acidFrames": 345
}
{
"enemyDamage": {
"enemy": "Magdollite",
"type": "contact",
"hits": 1
}
}Exit condition: {
"leaveNormally": {}
}Unlocks doors: {"types":["missiles"],"requires":[{"acidFrames":75},{"heatFrames":75}]}
{"types":["super"],"requires":[{"acidFrames":25},{"heatFrames":25}]}
{"types":["powerbomb"],"requires":[{"acidFrames":90},{"heatFrames":90}]}Dev note: FIXME: With better off-camera movement, this can be done with significantly less damage (and with Gravity the Magdollite hit can also be avoided); but after the supersink setup it's not clear if it's reasonable to assume any more than this. FIXME: If the acid is already drained, then the requirements here could be reduced (though in that case there's not as much reason to do this strat). |
|
Requires: "SpaceJump"
{
"or": [
{
"and": [
"canDash",
{
"heatFrames": 180
}
]
},
{
"heatFrames": 260
}
]
} |
|
Entrance condition: {
"comeInWithSpark": {}
}Requires: {
"heatFrames": 140
}
{
"shinespark": {
"frames": 36,
"excessFrames": 6
}
} |
|
Entrance condition: {
"comeInJumping": {
"speedBooster": "yes",
"minTiles": 19
}
}Requires: "canMomentumConservingMorph"
{
"heatFrames": 70
} |
|
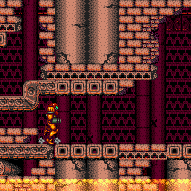
Beginning with Speed Booster unequipped, run and jump over the acid into an airball. Once Samus begins falling, equip Spring Ball and Speed Booster to safely land on the other side near the statue. Requires: "canSpringFling"
"canDisableEquipment"
"canSpeedyJump"
"canTrickyJump"
"canLateralMidAirMorph"
{
"heatFrames": 210
} |
From: 1
Top Right Door
To: 3
Acid Chozo Statue
Enter the room with a spin jump, with enough speed to bounce across the acid pit. If needed, a Spring fling near the end of Samus' descent can help. Entrance condition: {
"comeInSpinning": {
"speedBooster": "any",
"unusableTiles": 0,
"minExtraRunSpeed": "$1.7"
}
}Requires: "canSpringBallBounce"
{
"heatFrames": 135
} |
|
Try to jump to the far left side raised ledges to reduce the time spent in acid. This could mean turning off HiJump, or airballing to jump farther. Requires: "canSuitlessLavaDive"
{
"or": [
"HiJump",
"canWallJump",
"canSpringBallJumpMidAir"
]
}
{
"acidFrames": 110
}
{
"heatFrames": 285
}
{
"or": [
"canDash",
{
"and": [
{
"acidFrames": 100
},
{
"heatFrames": 90
}
]
}
]
} |
|
Requires: "canSuitlessLavaDive"
"Gravity"
{
"or": [
"canDash",
{
"and": [
{
"acidFrames": 70
},
{
"heatFrames": 100
}
]
}
]
}
{
"or": [
{
"and": [
{
"disableEquipment": "HiJump"
},
"HiJump",
{
"acidFrames": 75
},
{
"heatFrames": 230
}
]
},
{
"and": [
"canWallJump",
{
"acidFrames": 90
},
{
"heatFrames": 245
}
]
},
{
"and": [
"canSpringBallJumpMidAir",
{
"acidFrames": 75
},
{
"heatFrames": 230
}
]
},
{
"and": [
"canGravityJump",
{
"heatFrames": 190
},
{
"acidFrames": 40
},
{
"gravitylessAcidFrames": 35
},
{
"gravitylessHeatFrames": 45
}
]
}
]
}Dev note: FIXME: An IBJ option can be added back here. |
|
There is a hole in the left side wall that Samus can fit into by shrinking her hitbox. Once in the wall, stand up if crouched then turnaround into a buffered spinjump to jump out of the acid. Requires: {
"tech": "canPartialFloorClip"
}
"canSuitlessLavaDive"
{
"or": [
{
"and": [
"canLateralMidAirMorph",
"canDownBack",
"canTrickyJump",
{
"acidFrames": 110
},
{
"heatFrames": 285
}
]
},
{
"and": [
"canDash",
"canTrickyJump",
{
"acidFrames": 140
},
{
"heatFrames": 300
}
]
},
{
"and": [
{
"acidFrames": 230
},
{
"heatFrames": 390
}
]
}
]
} |
|
Requires: "h_heatProof" "canCeilingBombJump" |
From: 1
Top Right Door
To: 3
Acid Chozo Statue
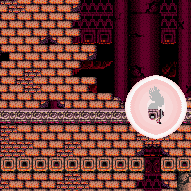
Grapple teleporting here will spawn Samus inside the wall behind the Acid Chozo statue. To escape, perform a Crystal Flash to stand up, then morph and roll out to the right. Samus will be visible but off-camera, making the movement tricky. Entrance condition: {
"comeInWithGrappleTeleport": {
"blockPositions": [
[
5,
3
]
]
}
}Requires: {
"heatFrames": 220
}
"h_CrystalFlash"
{
"heatFrames": 20
}
"canOffScreenMovement" |
From: 1
Top Right Door
To: 3
Acid Chozo Statue
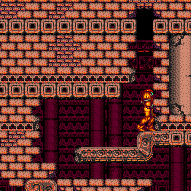
After teleporting, press down to retract Grapple. Samus will be inside the Power Bomb blocks behind the Acid Chozo statue hand. Use a Power Bomb, wait to begin falling, then hold right to roll out under the hand. Samus will be visible but off-camera, making the movement tricky. Holding right too early after laying the Power Bomb will cause Samus to get stuck inside the Chozo hand; in this case, Samus can get out by unmorphing, remorphing, and rolling to the right on top of the hand. Entrance condition: {
"comeInWithGrappleTeleport": {
"blockPositions": [
[
7,
2
]
]
}
}Requires: "h_usePowerBomb"
{
"heatFrames": 220
}
"canOffScreenMovement" |
|
Requires: {
"or": [
"f_UsedAcidChozoStatue",
{
"obstaclesCleared": [
"f_UsedAcidChozoStatue"
]
}
]
}
{
"or": [
{
"and": [
"canDash",
{
"heatFrames": 130
}
]
},
{
"heatFrames": 190
}
]
} |
From: 1
Top Right Door
To: 5
Bottom Junction Right of Morph Tunnel
Enter the room in Direct G-mode, otherwise the acid will still be present. Jump in the vertical shaft to touch the camera scroll block and overload PLMs, then roll through the bomb blocks. Exit G-mode and jump multiple times to fix the camera before crossing the section with the Holtzes. Entrance condition: {
"comeInWithGMode": {
"mode": "direct",
"morphed": true
}
}Requires: "h_heatedGMode"
{
"or": [
"f_UsedAcidChozoStatue",
{
"obstaclesCleared": [
"f_UsedAcidChozoStatue"
]
}
]
}
"h_artificialMorphMovement"
{
"heatFrames": 200
}Dev note: It is possible but not expected to cross the lower section while completely blind. The Holtz still damage Samus, and the middle one is low enough to make it difficult to bomb boost across. Other strats in the room are ignored because Samus needs real Morph and Varia or a lot of Energy to use the statue, and there is no way to overload PLMs to go through the bomb blocks from the bottom of the room. |
From: 2
Bottom Right Door
To: 1
Top Right Door
Gain a shinecharge and spark into the wall at the left side of the room to clip into it. From there, X-Ray climb to the top portion of the room (about 0.75 screens). Samus will be visible but off-camera, making the movement tricky. Only certain horizontal positions for the spark will work. There are periodic windows of approximately 4 good pixels followed by 8 bad pixels. Moonwalking back against the ledge below the door will put Samus into a good position. Being centered over this two-tile ledge is another position that works. Entrance condition: {
"comeInShinecharged": {}
}Requires: {
"shineChargeFrames": 35
}
{
  "shinespark": {
    "frames": 33,
    "excessFrames": 0
  }
}
"canShinesparkSlopeClip"
"canXRayClimb"
"canOffScreenMovement"
{
  "heatFrames": 1020
} |
From: 2
Bottom Right Door
To: 1
Top Right Door
Gain a shinecharge and spark into the wall at the left side of the room to clip into it. From there, X-Ray climb to the top portion of the room (about 0.75 screens). Samus will be visible but off-camera, making the movement tricky. Only certain horizontal positions for the spark will work. There are periodic windows of approximately 4 good pixels followed by 8 bad pixels. Moonwalking back against the ledge below the door will put Samus into a good position. Being centered over this two-tile ledge is another position that works. Entrance condition: {
"comeInShinecharging": {
"length": 3,
"openEnd": 1
}
}Requires: {
"shinespark": {
"frames": 33,
"excessFrames": 0
}
}
"canShinesparkSlopeClip"
"canXRayClimb"
"canOffScreenMovement"
{
"heatFrames": 1020
} |
|
Exit condition: {
"leaveWithRunway": {
"length": 4,
"openEnd": 1
}
} |
|
Requires: "h_heatedCrystalFlash" |
From: 2
Bottom Right Door
To: 2
Bottom Right Door
Entrance condition: {
"comeInNormally": {}
}Requires: {
"heatFrames": 440
}Exit condition: {
"leaveWithGModeSetup": {}
}Unlocks doors: {"types":["ammo"],"requires":[]} |
From: 2
Bottom Right Door
To: 3
Acid Chozo Statue
Grapple teleporting here will spawn Samus inside the wall behind the Acid Chozo statue. To escape, perform a Crystal Flash to stand up, then morph and roll out to the right. Samus will be visible but off-camera, making the movement tricky. Entrance condition: {
"comeInWithGrappleTeleport": {
"blockPositions": [
[
5,
3
]
]
}
}Requires: {
"heatFrames": 220
}
"h_CrystalFlash"
{
"heatFrames": 20
}
"canOffScreenMovement" |
From: 2
Bottom Right Door
To: 3
Acid Chozo Statue
After teleporting, press down to retract Grapple. Samus will be inside the Power Bomb blocks behind the Acid Chozo statue hand. Use a Power Bomb, wait to begin falling, then hold right to roll out under the hand. Samus will be visible but off-camera, making the movement tricky. Holding right too early after laying the Power Bomb will cause Samus to get stuck inside the Chozo hand; in this case, Samus can get out by unmorphing, remorphing, and rolling to the right on top of the hand. Entrance condition: {
"comeInWithGrappleTeleport": {
"blockPositions": [
[
7,
2
]
]
}
}Requires: "h_usePowerBomb"
{
"heatFrames": 220
}
"canOffScreenMovement" |
From: 2
Bottom Right Door
To: 3
Acid Chozo Statue
Gain a shinecharge and spark into the wall at the left side of the room to clip into it. From there, X-Ray climb to the top portion of the room (about 0.75 screens). Samus will be visible but off-camera, making the movement tricky. Only certain horizontal positions for the spark will work. There are periodic windows of approximately 4 good pixels followed by 8 bad pixels. Moonwalking back against the ledge below the door will put Samus into a good position. Being centered over this two-tile ledge is another position that works. Entrance condition: {
"comeInShinecharged": {}
}Requires: {
"shineChargeFrames": 35
}
{
"shinespark": {
"frames": 33,
"excessFrames": 0
}
}
"canShinesparkSlopeClip"
"canXRayClimb"
"canOffScreenMovement"
{
"or": [
"canPreciseWallJump",
"SpaceJump",
"HiJump",
"canTrickySpringBallJump"
]
}
{
"heatFrames": 970
} |
From: 2
Bottom Right Door
To: 3
Acid Chozo Statue
Gain a shinecharge and spark into the wall at the left side of the room to clip into it. From there, X-Ray climb to the top portion of the room (about 0.75 screens). Samus will be visible but off-camera, making the movement tricky. Only certain horizontal positions for the spark will work. There are periodic windows of approximately 4 good pixels followed by 8 bad pixels. Moonwalking back against the ledge below the door will put Samus into a good position. Being centered over this two-tile ledge is another position that works. Entrance condition: {
"comeInShinecharging": {
"length": 3,
"openEnd": 1
}
}Requires: {
"shinespark": {
"frames": 33,
"excessFrames": 0
}
}
"canShinesparkSlopeClip"
"canXRayClimb"
"canOffScreenMovement"
{
"or": [
"canPreciseWallJump",
"SpaceJump",
"HiJump",
"canTrickySpringBallJump"
]
}
{
"heatFrames": 970
} |
From: 2
Bottom Right Door
To: 4
Junction Above Acid Plug, Without Acid
Entrance condition: {
"comeInWithRMode": {}
}Requires: "canRModeStandupClip"
"h_RModeCanRefillReserves"
"h_heatProof"
"Morph"
{
"or": [
"h_bombThings",
{
"haveBlueSuit": {}
}
]
}
{
"or": [
"HiJump",
"canWallJump",
"canSpringBallJumpMidAir",
"canDoubleBombJump"
]
}
{
"partialRefill": {
"type": "ReserveEnergy",
"limit": 100
}
}
{
"disableEquipment": "Varia"
}
{
"autoReserveTrigger": {
"implicitHeatFrames": "suitless"
}
}
{
"suitlessHeatFrames": 30
} |
|
Requires: "canDash"
"ScrewAttack"
{
"heatFrames": 210
}Clears obstacles: A |
From: 2
Bottom Right Door
To: 5
Bottom Junction Right of Morph Tunnel
Requires: {
"haveBlueSuit": {}
}
{
"heatFrames": 310
} |
From: 2
Bottom Right Door
To: 5
Bottom Junction Right of Morph Tunnel
Wait for the first Holtz to attack then either use the Magdollite for i-frames, or avoid the projectiles and continue dodging bats. Requires: "canDash"
{
"or": [
"canTrickyJump",
{
"and": [
"canHorizontalDamageBoost",
"canUseIFrames",
{
"enemyDamage": {
"enemy": "Magdollite",
"type": "flame",
"hits": 1
}
}
]
}
]
}
{
"heatFrames": 290
} |
From: 2
Bottom Right Door
To: 5
Bottom Junction Right of Morph Tunnel
Requires: "canDash"
"canFarmWhileShooting"
{
"heatFramesWithEnergyDrops": {
"frames": 170,
"drops": [
{
"enemy": "Magdollite",
"count": 3
}
]
}
}
{
"heatFrames": 130
} |
From: 2
Bottom Right Door
To: 5
Bottom Junction Right of Morph Tunnel
Wait for the first Holtz before trying to cross. Requires: "canDash"
{
"enemyDamage": {
"enemy": "Holtz",
"type": "contact",
"hits": 1
}
}
{
"or": [
"canCarefulJump",
{
"and": [
"Gravity",
{
"enemyDamage": {
"enemy": "Holtz",
"type": "contact",
"hits": 1
}
},
{
"acidFrames": 60
}
]
}
]
}
{
"heatFrames": 375
} |
From: 2
Bottom Right Door
To: 5
Bottom Junction Right of Morph Tunnel
Requires: "canDash"
{
"or": [
{
"and": [
"Plasma",
"Wave",
"Ice",
{
"heatFrames": 300
}
]
},
{
"and": [
"Plasma",
{
"or": [
"Wave",
"Ice"
]
},
{
"heatFrames": 390
}
]
},
{
"and": [
{
"ammo": {
"type": "Super",
"count": 9
}
},
{
"heatFrames": 420
}
]
}
]
}Clears obstacles: A |
From: 2
Bottom Right Door
To: 5
Bottom Junction Right of Morph Tunnel
Requires: "canDash"
"canDodgeWhileShooting"
{
"or": [
{
"and": [
"Spazer",
"Wave",
"Ice",
{
"heatFrames": 480
}
]
},
{
"and": [
"Plasma",
{
"heatFrames": 510
}
]
},
{
"and": [
"Ice",
{
"or": [
"Wave",
"Spazer"
]
},
{
"heatFrames": 750
}
]
},
{
"and": [
"canTrickyDodgeEnemies",
"Morph",
{
"ammo": {
"type": "PowerBomb",
"count": 3
}
},
{
"heatFrames": 850
}
]
}
]
}Clears obstacles: A |
From: 2
Bottom Right Door
To: 5
Bottom Junction Right of Morph Tunnel
Requires: "canDash"
"canTrickyDodgeEnemies"
{
"or": [
{
"and": [
"Spazer",
"Wave",
{
"heatFrames": 1280
}
]
},
{
"and": [
"Spazer",
{
"heatFrames": 2060
}
]
},
{
"and": [
"Wave",
{
"heatFrames": 1640
}
]
},
{
"and": [
"Ice",
{
"heatFrames": 1560
}
]
},
{
"and": [
"Morph",
{
"ammo": {
"type": "PowerBomb",
"count": 10
}
},
{
"heatFrames": 2160
}
]
}
]
}Clears obstacles: A Dev note: FIXME: This could probably be done with just Power Beam, but dodging the Holtzes becomes very tricky. |
From: 2
Bottom Right Door
To: 5
Bottom Junction Right of Morph Tunnel
Entrance condition: {
"comeInWithSpark": {}
}Requires: {
"heatFrames": 125
}
{
"shinespark": {
"frames": 41,
"excessFrames": 6
}
} |
|
Requires: "SpaceJump"
{
"or": [
{
"and": [
"canDash",
{
"heatFrames": 200
}
]
},
{
"heatFrames": 275
}
]
} |
|
Requires: {
"or": [
"f_UsedAcidChozoStatue",
{
"obstaclesCleared": [
"f_UsedAcidChozoStatue"
]
}
]
}
{
"or": [
{
"and": [
"canDash",
{
"heatFrames": 270
}
]
},
{
"heatFrames": 295
}
]
} |
|
Requires: "h_activateAcidChozo"
"h_usePowerBomb"
{
"heatFrames": 1020
}Clears obstacles: f_UsedAcidChozoStatue Sets flags: f_UsedAcidChozoStatue |
|
Requires: "h_heatedCrystalFlash" |
From: 3
Acid Chozo Statue
To: 3
Acid Chozo Statue
Requires: "h_heatedCrystalFlash"
"h_activateAcidChozo"
{
"heatFrames": 920
}Clears obstacles: f_UsedAcidChozoStatue Sets flags: f_UsedAcidChozoStatue |
From: 3
Acid Chozo Statue
To: 3
Acid Chozo Statue
Requires: "h_activateAcidChozo"
"h_usePowerBomb"
{
"heatFrames": 180
}
"canManageReserves"
{
"autoReserveTrigger": {}
}
{
"heatFrames": 50
}Clears obstacles: f_UsedAcidChozoStatue Sets flags: f_UsedAcidChozoStatue |
From: 3
Acid Chozo Statue
To: 4
Junction Above Acid Plug, Without Acid
Requires: {
"or": [
"f_UsedAcidChozoStatue",
{
"obstaclesCleared": [
"f_UsedAcidChozoStatue"
]
}
]
}
{
"heatFrames": 100
} |
|
Requires: {
"or": [
{
"and": [
"canDash",
{
"heatFrames": 195
}
]
},
{
"heatFrames": 215
}
]
}Dev note: 4 requires that the acid is gone. |
From: 4
Junction Above Acid Plug, Without Acid
To: 3
Acid Chozo Statue
Requires: {
"or": [
"HiJump",
"canWallJump",
"canSpringBallJumpMidAir"
]
}
{
"heatFrames": 120
} |
|
Requires: {
"or": [
{
"and": [
"canLongIBJ",
{
"heatFrames": 780
}
]
},
{
"and": [
"canJumpIntoIBJ",
{
"heatFrames": 560
}
]
},
{
"and": [
"canJumpIntoIBJ",
"canDoubleBombJump",
{
"heatFrames": 360
}
]
}
]
} |
From: 4
Junction Above Acid Plug, Without Acid
To: 4
Junction Above Acid Plug, Without Acid
Requires: "h_heatedCrystalFlash" |
From: 4
Junction Above Acid Plug, Without Acid
To: 6
Junction Below Acid Plug
Requires: {
"heatFrames": 60
} |
From: 5
Bottom Junction Right of Morph Tunnel
To: 1
Top Right Door
Jump, press against the wall, and use a flash suit or blue suit to spark into it, clipping inside of it. From there, X-Ray climb to the top portion of the room (about 0.75 screens). Samus will be visible but off-camera, making the movement tricky. Requires: "h_storedSpark"
{
"shinespark": {
"frames": 1,
"excessFrames": 1
}
}
"canShinesparkSlopeClip"
"canXRayClimb"
"canOffScreenMovement"
{
"heatFrames": 1020
} |
|
Requires: "canDash"
"ScrewAttack"
{
"heatFrames": 210
}
{
"or": [
"canTrickyJump",
{
"heatFrames": 30
}
]
}Clears obstacles: A |
From: 5
Bottom Junction Right of Morph Tunnel
To: 2
Bottom Right Door
Requires: {
"haveBlueSuit": {}
}
{
"heatFrames": 330
} |
From: 5
Bottom Junction Right of Morph Tunnel
To: 2
Bottom Right Door
Requires: "canDash"
{
"enemyDamage": {
"enemy": "Magdollite",
"type": "flame",
"hits": 1
}
}
"canHorizontalDamageBoost"
"canUseIFrames"
{
"heatFrames": 290
} |
From: 5
Bottom Junction Right of Morph Tunnel
To: 2
Bottom Right Door
Requires: "canDash"
"canTrickyDodgeEnemies"
{
"heatFrames": 280
}
{
"or": [
"canInsaneJump",
{
"heatFrames": 20
}
]
} |
From: 5
Bottom Junction Right of Morph Tunnel
To: 2
Bottom Right Door
Requires: "canDash"
"canFarmWhileShooting"
{
"heatFramesWithEnergyDrops": {
"frames": 240,
"drops": [
{
"enemy": "Magdollite",
"count": 3
}
]
}
}
{
"heatFrames": 40
}
{
"or": [
"canInsaneJump",
{
"heatFrames": 110
}
]
} |
From: 5
Bottom Junction Right of Morph Tunnel
To: 2
Bottom Right Door
Requires: "canDash"
{
"enemyDamage": {
"enemy": "Holtz",
"type": "contact",
"hits": 1
}
}
{
"or": [
"canCarefulJump",
{
"and": [
"Gravity",
{
"enemyDamage": {
"enemy": "Holtz",
"type": "contact",
"hits": 1
}
},
{
"acidFrames": 60
}
]
}
]
}
{
"heatFrames": 330
} |
From: 5
Bottom Junction Right of Morph Tunnel
To: 2
Bottom Right Door
Requires: "canDash"
"Ice"
"Wave"
"Plasma"
{
"heatFrames": 330
} |
From: 5
Bottom Junction Right of Morph Tunnel
To: 2
Bottom Right Door
Requires: "canDash"
"h_PlasmaHitbox"
"canInsaneJump"
{
"heatFrames": 190
} |
From: 5
Bottom Junction Right of Morph Tunnel
To: 2
Bottom Right Door
Requires: {
"obstaclesCleared": [
"A"
]
}
"h_heatedRemoteRunwaySpaceJump"
{
"heatFrames": 185
}Exit condition: {
"leaveSpinning": {
"remoteRunway": {
"length": 10,
"openEnd": 1
}
}
}Unlocks doors: {"types":["missiles"],"requires":[{"heatFrames":50}]}
{"types":["super"],"requires":[]}
{"types":["powerbomb"],"requires":[{"heatFrames":50}]}Dev note: It is assumed that the door was shot open when entering on the right, but extra heat frames are included here for it. |
From: 5
Bottom Junction Right of Morph Tunnel
To: 2
Bottom Right Door
Requires: {
"obstaclesCleared": [
"A"
]
}
"h_heatedRemoteRunwaySpaceJump"
{
"heatFrames": 165
}Exit condition: {
"leaveWithMockball": {
"remoteRunway": {
"length": 10,
"openEnd": 1
},
"landingRunway": {
"length": 4,
"openEnd": 1
},
"minExtraRunSpeed": "$2.0"
}
}Unlocks doors: {"types":["missiles"],"requires":[{"heatFrames":50}]}
{"types":["super"],"requires":[]}
{"types":["powerbomb"],"requires":[{"heatFrames":50}]} |
From: 5
Bottom Junction Right of Morph Tunnel
To: 2
Bottom Right Door
Requires: {
"obstaclesCleared": [
"A"
]
}
"h_heatedRemoteRunwayTrickySpringBall"
{
"heatFrames": 185
}Exit condition: {
"leaveWithSpringBallBounce": {
"remoteRunway": {
"length": 10,
"openEnd": 1
},
"landingRunway": {
"length": 4,
"openEnd": 1
},
"minExtraRunSpeed": "$2.0",
"movementType": "controlled"
}
}Unlocks doors: {"types":["missiles"],"requires":[{"heatFrames":50}]}
{"types":["super"],"requires":[]}
{"types":["powerbomb"],"requires":[{"heatFrames":50}]}Dev note: It is assumed that the door was shot open when entering on the right, but extra heat frames are included here for it. |
From: 5
Bottom Junction Right of Morph Tunnel
To: 2
Bottom Right Door
Requires: {
"obstaclesCleared": [
"A"
]
}
"h_heatedRemoteRunwaySpaceJump"
{
"heatFrames": 165
}Exit condition: {
"leaveWithSpringBallBounce": {
"remoteRunway": {
"length": 10,
"openEnd": 1
},
"landingRunway": {
"length": 4,
"openEnd": 1
},
"minExtraRunSpeed": "$2.0",
"movementType": "uncontrolled"
}
}Unlocks doors: {"types":["missiles"],"requires":[{"heatFrames":50}]}
{"types":["super"],"requires":[]}
{"types":["powerbomb"],"requires":[{"heatFrames":50}]} |
From: 5
Bottom Junction Right of Morph Tunnel
To: 2
Bottom Right Door
Requires: {
"obstaclesCleared": [
"A"
]
}
"h_heatedRemoteRunwayPreciseSpaceJump"
{
"heatFrames": 185
}Exit condition: {
"leaveSpaceJumping": {
"remoteRunway": {
"length": 10,
"openEnd": 1
},
"minExtraRunSpeed": "$2.0"
}
}Unlocks doors: {"types":["missiles"],"requires":[{"heatFrames":50}]}
{"types":["super"],"requires":[]}
{"types":["powerbomb"],"requires":[{"heatFrames":50}]}Dev note: It is assumed that the door was shot open when entering on the right, but extra heat frames are included here for it. |
From: 5
Bottom Junction Right of Morph Tunnel
To: 2
Bottom Right Door
Requires: {
"or": [
{
"and": [
"canDash",
"canTrickyJump",
{
"heatFrames": 820
}
]
},
{
"and": [
"canDash",
"ScrewAttack",
{
"heatFrames": 660
}
]
},
{
"and": [
"canDash",
"canHorizontalDamageBoost",
"canUseIFrames",
{
"enemyDamage": {
"enemy": "Magdollite",
"type": "flame",
"hits": 1
}
},
{
"heatFrames": 660
}
]
},
{
"and": [
{
"haveBlueSuit": {}
},
{
"heatFrames": 725
}
]
}
]
}Exit condition: {
"leaveWithGModeSetup": {}
}Unlocks doors: {"types":["ammo"],"requires":[]} |
From: 5
Bottom Junction Right of Morph Tunnel
To: 5
Bottom Junction Right of Morph Tunnel
The Magdollite can be farmed from the left without activating the Holtzes. Or from the right by trapping the Holtz by quickly jumping past them. Requires: "h_heatProof"
{
"cycleFrames": 330
}
{
"or": [
{
"and": [
"canTrickyJump",
"canCameraManip"
]
},
"Plasma",
"ScrewAttack",
{
"and": [
"Wave",
{
"or": [
"Spazer",
"Ice"
]
}
]
}
]
}
{
"or": [
"canTrickyJump",
{
"cycleFrames": 200
}
]
}Farm cycle drops: 3 Magdollite |
From: 5
Bottom Junction Right of Morph Tunnel
To: 5
Bottom Junction Right of Morph Tunnel
Requires: "h_heatedCrystalFlash" |
From: 5
Bottom Junction Right of Morph Tunnel
To: 6
Junction Below Acid Plug
Requires: "h_usePowerBomb"
{
"heatFrames": 235
} |
From: 5
Bottom Junction Right of Morph Tunnel
To: 6
Junction Below Acid Plug
Requires: "h_useMorphBombs"
{
"heatFrames": 350
} |
From: 5
Bottom Junction Right of Morph Tunnel
To: 6
Junction Below Acid Plug
Requires: {
"haveBlueSuit": {}
}
"canMidAirMorph"
{
"heatFrames": 135
} |
From: 6
Junction Below Acid Plug
To: 4
Junction Above Acid Plug, Without Acid
Requires: {
"or": [
"f_UsedAcidChozoStatue",
{
"obstaclesCleared": [
"f_UsedAcidChozoStatue"
]
}
]
}
{
"or": [
{
"and": [
"HiJump",
{
"heatFrames": 55
}
]
},
{
"and": [
"canWallJump",
{
"heatFrames": 55
}
]
},
{
"and": [
"canSpringBallJumpMidAir",
{
"heatFrames": 70
}
]
}
]
} |
From: 6
Junction Below Acid Plug
To: 4
Junction Above Acid Plug, Without Acid
Requires: {
"or": [
"f_UsedAcidChozoStatue",
{
"obstaclesCleared": [
"f_UsedAcidChozoStatue"
]
}
]
}
{
"or": [
{
"and": [
"canLongIBJ",
{
"heatFrames": 790
}
]
},
{
"and": [
"canJumpIntoIBJ",
{
"heatFrames": 330
}
]
},
{
"and": [
"canJumpIntoIBJ",
"canDoubleBombJump",
{
"heatFrames": 260
}
]
}
]
} |
From: 6
Junction Below Acid Plug
To: 4
Junction Above Acid Plug, Without Acid
Jump a high as possible, and use a flash suit or blue suit to diagonally spark either to the right or left to reach the top of the room. If heat protection is available, sparking diagonally left uses less energy; in this case, Samus will end lodged inside the wall but can use Morph to escape. Alternatively, spark horizontally left to clip into the wall; turn back and forth 3 times to wiggle most of the way out, then turn-around spin jump up to the ledge; clipping into the right wall can also work but requires much greater precision in the spark position. Requires: {
"or": [
"f_UsedAcidChozoStatue",
{
"obstaclesCleared": [
"f_UsedAcidChozoStatue"
]
}
]
}
"h_storedSpark"
{
"or": [
{
"and": [
{
"heatFrames": 210
},
{
"shinespark": {
"frames": 28,
"excessFrames": 0
}
}
]
},
{
"and": [
"h_heatProof",
{
"shinespark": {
"frames": 16,
"excessFrames": 13
}
}
]
},
{
"and": [
"h_heatProof",
"canShinesparkSlopeClip",
{
"shinespark": {
"frames": 1,
"excessFrames": 1
}
}
]
}
]
} |
From: 6
Junction Below Acid Plug
To: 4
Junction Above Acid Plug, Without Acid
Requires: "h_heatProof" "h_bombThings" "h_jumpIntoCrystalFlashClip" "HiJump" "Grapple" Dev note: The extra Power Bomb or bombs is to get through the bomb blocks. |
From: 6
Junction Below Acid Plug
To: 5
Bottom Junction Right of Morph Tunnel
Requires: "h_useMorphBombs"
{
"heatFrames": 320
} |
From: 6
Junction Below Acid Plug
To: 5
Bottom Junction Right of Morph Tunnel
Requires: "h_usePowerBomb"
{
"heatFrames": 155
} |
From: 6
Junction Below Acid Plug
To: 5
Bottom Junction Right of Morph Tunnel
Requires: "Morph"
{
"haveBlueSuit": {}
}
{
"heatFrames": 115
} |
{
"$schema": "../../../schema/m3-room.schema.json",
"id": 149,
"name": "Acid Statue Room",
"area": "Norfair",
"subarea": "Lower",
"subsubarea": "West",
"roomAddress": "0x7B1E5",
"roomEnvironments": [
{
"heated": true
}
],
"mapTileMask": [
[
1,
1,
0
],
[
1,
1,
0
],
[
1,
1,
1
]
],
"nodes": [
{
"id": 1,
"name": "Top Right Door",
"nodeType": "door",
"nodeSubType": "blue",
"nodeAddress": "0x0019846",
"doorOrientation": "right",
"doorEnvironments": [
{
"physics": "air"
}
],
"mapTileMask": [
[
1,
2,
0
],
[
1,
1,
0
],
[
1,
1,
1
]
]
},
{
"id": 2,
"name": "Bottom Right Door",
"nodeType": "door",
"nodeSubType": "blue",
"nodeAddress": "0x001983a",
"doorOrientation": "right",
"doorEnvironments": [
{
"physics": "air",
"devNote": [
"Technically it is acid if entering from node 1 and the statue hasn't been cleared, but that doesn't seem worth modeling.",
"The acid is not there regardless when entering from node 2."
]
}
],
"mapTileMask": [
[
1,
1,
0
],
[
1,
1,
0
],
[
1,
2,
2
]
]
},
{
"id": 3,
"name": "Acid Chozo Statue",
"nodeType": "junction",
"nodeSubType": "junction",
"mapTileMask": [
[
2,
1,
0
],
[
1,
1,
0
],
[
1,
1,
1
]
],
"devNote": "FIXME: This node can be eliminated."
},
{
"id": 4,
"name": "Junction Above Acid Plug, Without Acid",
"nodeType": "junction",
"nodeSubType": "junction",
"mapTileMask": [
[
1,
1,
0
],
[
2,
2,
0
],
[
1,
1,
1
]
],
"note": "Because going here while there is acid is pointless unless traveling from 1 to 3, this node will be considered to only be visitable when the acid is gone"
},
{
"id": 5,
"name": "Bottom Junction Right of Morph Tunnel",
"nodeType": "junction",
"nodeSubType": "junction",
"mapTileMask": [
[
1,
1,
0
],
[
1,
1,
0
],
[
2,
2,
1
]
]
},
{
"id": 6,
"name": "Junction Below Acid Plug",
"nodeType": "junction",
"nodeSubType": "junction",
"mapTileMask": [
[
1,
1,
0
],
[
1,
1,
0
],
[
2,
1,
1
]
]
}
],
"obstacles": [
{
"id": "A",
"name": "Holtzes",
"obstacleType": "enemies",
"devNote": [
"We only track this obstacle when coming from the right,",
"in order to use the remote runway on the left."
]
},
{
"id": "f_UsedAcidChozoStatue",
"name": "f_UsedAcidChozoStatue"
}
],
"enemies": [
{
"id": "e1",
"groupName": "Acid Statue Room Holtzes",
"enemyName": "Holtz",
"quantity": 3,
"homeNodes": [
2
]
},
{
"id": "e2",
"groupName": "Acid Statue Room Magdollite",
"enemyName": "Magdollite",
"quantity": 1,
"homeNodes": [
2
]
}
],
"strats": [
{
"link": [
1,
1
],
"name": "Base (Unlock Door)",
"requires": [],
"unlocksDoors": [
{
"types": [
"missiles"
],
"requires": [
{
"heatFrames": 50
}
]
},
{
"types": [
"super"
],
"requires": []
},
{
"types": [
"powerbomb"
],
"requires": [
{
"heatFrames": 110
}
]
}
],
"flashSuitChecked": true,
"blueSuitChecked": true
},
{
"link": [
1,
1
],
"name": "Base (Come In Normally)",
"entranceCondition": {
"comeInNormally": {}
},
"requires": [],
"flashSuitChecked": true,
"blueSuitChecked": true
},
{
"link": [
1,
1
],
"name": "Base (Come In With Mockball)",
"entranceCondition": {
"comeInWithMockball": {
"adjacentMinTiles": 0,
"remoteAndLandingMinTiles": [
[
0,
0
]
],
"speedBooster": "any"
}
},
"requires": [
{
"heatFrames": 10
}
],
"flashSuitChecked": true,
"blueSuitChecked": true
},
{
"link": [
2,
2
],
"name": "Base (Unlock Door)",
"requires": [],
"unlocksDoors": [
{
"types": [
"missiles"
],
"requires": [
{
"heatFrames": 50
}
]
},
{
"types": [
"super"
],
"requires": []
},
{
"types": [
"powerbomb"
],
"requires": [
{
"heatFrames": 110
}
]
}
],
"flashSuitChecked": true,
"blueSuitChecked": true
},
{
"link": [
2,
2
],
"name": "Base (Come In Normally)",
"entranceCondition": {
"comeInNormally": {}
},
"requires": [],
"flashSuitChecked": true,
"blueSuitChecked": true
},
{
"link": [
2,
2
],
"name": "Base (Come In With Mockball)",
"entranceCondition": {
"comeInWithMockball": {
"adjacentMinTiles": 0,
"remoteAndLandingMinTiles": [
[
0,
0
]
],
"speedBooster": "any"
}
},
"requires": [
{
"heatFrames": 10
}
],
"flashSuitChecked": true,
"blueSuitChecked": true
},
{
"id": 1,
"link": [
1,
1
],
"name": "Leave With Runway",
"requires": [],
"exitCondition": {
"leaveWithRunway": {
"length": 2,
"openEnd": 1
}
},
"flashSuitChecked": true,
"blueSuitChecked": true
},
{
"id": 2,
"link": [
1,
1
],
"name": "Crystal Flash",
"requires": [
"h_heatedCrystalFlash"
],
"flashSuitChecked": true,
"blueSuitChecked": true
},
{
"id": 52,
"link": [
1,
2
],
"name": "Super Sink",
"entranceCondition": {
"comeInWithSuperSink": {}
},
"requires": [
"canOffScreenMovement",
{
"heatFrames": 360
},
{
"acidFrames": 345
},
{
"enemyDamage": {
"enemy": "Magdollite",
"type": "contact",
"hits": 1
}
}
],
"exitCondition": {
"leaveNormally": {}
},
"unlocksDoors": [
{
"types": [
"missiles"
],
"requires": [
{
"acidFrames": 75
},
{
"heatFrames": 75
}
]
},
{
"types": [
"super"
],
"requires": [
{
"acidFrames": 25
},
{
"heatFrames": 25
}
]
},
{
"types": [
"powerbomb"
],
"requires": [
{
"acidFrames": 90
},
{
"heatFrames": 90
}
]
}
],
"flashSuitChecked": true,
"blueSuitChecked": true,
"note": [
"Enter the room with a super sink, in order to clip down to the bottom part of the room.",
"Blindly traverse to the right door.",
"It is recommended to open the door using Grapple if possible,",
"since it can reach the door from a distance even while off-camera whereas beams cannot."
],
"devNote": [
"FIXME: With better off-camera movement, this can be done with significantly less damage",
"(and with Gravity the Magdollite hit can also be avoided);",
"but after the supersink setup it's not clear if it's reasonable to assume any more than this.",
"FIXME: If the acid is already drained, then the requirements here could be reduced",
"(though in that case there's not as much reason to do this strat)."
]
},
{
"id": 3,
"link": [
1,
3
],
"name": "Base",
"requires": [
"SpaceJump",
{
"or": [
{
"and": [
"canDash",
{
"heatFrames": 180
}
]
},
{
"heatFrames": 260
}
]
}
],
"flashSuitChecked": true,
"blueSuitChecked": true
},
{
"id": 5,
"link": [
1,
3
],
"name": "Shinespark",
"entranceCondition": {
"comeInWithSpark": {}
},
"requires": [
{
"heatFrames": 140
},
{
"shinespark": {
"frames": 36,
"excessFrames": 6
}
}
],
"flashSuitChecked": true,
"blueSuitChecked": true
},
{
"id": 46,
"link": [
1,
3
],
"name": "Speedy Jump Morph",
"entranceCondition": {
"comeInJumping": {
"speedBooster": "yes",
"minTiles": 19
}
},
"requires": [
"canMomentumConservingMorph",
{
"heatFrames": 70
}
],
"flashSuitChecked": true,
"blueSuitChecked": true
},
{
"id": 6,
"link": [
1,
3
],
"name": "Spring Fling over the Acid",
"requires": [
"canSpringFling",
"canDisableEquipment",
"canSpeedyJump",
"canTrickyJump",
"canLateralMidAirMorph",
{
"heatFrames": 210
}
],
"flashSuitChecked": true,
"blueSuitChecked": true,
"note": [
"Beginning with Speed Booster unequipped, run and jump over the acid into an airball.",
"Once Samus begins falling, equip Spring Ball and Speed Booster to safely land on the other side near the statue."
]
},
{
"id": 47,
"link": [
1,
3
],
"name": "Cross Room Spring Ball Bounce",
"entranceCondition": {
"comeInSpinning": {
"speedBooster": "any",
"unusableTiles": 0,
"minExtraRunSpeed": "$1.7"
}
},
"requires": [
"canSpringBallBounce",
{
"heatFrames": 135
}
],
"flashSuitChecked": true,
"blueSuitChecked": true,
"note": [
"Enter the room with a spin jump, with enough speed to bounce across the acid pit.",
"If needed, a Spring fling near the end of Samus' descent can help."
]
},
{
"id": 7,
"link": [
1,
3
],
"name": "Gravityless Acid Dive",
"requires": [
"canSuitlessLavaDive",
{
"or": [
"HiJump",
"canWallJump",
"canSpringBallJumpMidAir"
]
},
{
"acidFrames": 110
},
{
"heatFrames": 285
},
{
"or": [
"canDash",
{
"and": [
{
"acidFrames": 100
},
{
"heatFrames": 90
}
]
}
]
}
],
"flashSuitChecked": true,
"blueSuitChecked": true,
"note": [
"Try to jump to the far left side raised ledges to reduce the time spent in acid.",
"This could mean turning off HiJump, or airballing to jump farther."
]
},
{
"id": 8,
"link": [
1,
3
],
"name": "Gravity Acid Dive",
"requires": [
"canSuitlessLavaDive",
"Gravity",
{
"or": [
"canDash",
{
"and": [
{
"acidFrames": 70
},
{
"heatFrames": 100
}
]
}
]
},
{
"or": [
{
"and": [
{
"disableEquipment": "HiJump"
},
"HiJump",
{
"acidFrames": 75
},
{
"heatFrames": 230
}
]
},
{
"and": [
"canWallJump",
{
"acidFrames": 90
},
{
"heatFrames": 245
}
]
},
{
"and": [
"canSpringBallJumpMidAir",
{
"acidFrames": 75
},
{
"heatFrames": 230
}
]
},
{
"and": [
"canGravityJump",
{
"heatFrames": 190
},
{
"acidFrames": 40
},
{
"gravitylessAcidFrames": 35
},
{
"gravitylessHeatFrames": 45
}
]
}
]
}
],
"flashSuitChecked": true,
"blueSuitChecked": true,
"devNote": [
"FIXME: An IBJ option can be added back here."
]
},
{
"id": 9,
"link": [
1,
3
],
"name": "Wall Pocket Acid Dive",
"requires": [
{
"tech": "canPartialFloorClip"
},
"canSuitlessLavaDive",
{
"or": [
{
"and": [
"canLateralMidAirMorph",
"canDownBack",
"canTrickyJump",
{
"acidFrames": 110
},
{
"heatFrames": 285
}
]
},
{
"and": [
"canDash",
"canTrickyJump",
{
"acidFrames": 140
},
{
"heatFrames": 300
}
]
},
{
"and": [
{
"acidFrames": 230
},
{
"heatFrames": 390
}
]
}
]
}
],
"flashSuitChecked": true,
"blueSuitChecked": true,
"note": [
"There is a hole in the left side wall that Samus can fit into by shrinking her hitbox.",
"Once in the wall, stand up if crouched then turnaround into a buffered spinjump to jump out of the acid."
]
},
{
"id": 10,
"link": [
1,
3
],
"name": "Ceiling Bomb Jump",
"requires": [
"h_heatProof",
"canCeilingBombJump"
],
"flashSuitChecked": true,
"blueSuitChecked": true
},
{
"id": 11,
"link": [
1,
3
],
"name": "Grapple Teleport Crystal Flash (from Red Brinstar Firefleas)",
"entranceCondition": {
"comeInWithGrappleTeleport": {
"blockPositions": [
[
5,
3
]
]
}
},
"requires": [
{
"heatFrames": 220
},
"h_CrystalFlash",
{
"heatFrames": 20
},
"canOffScreenMovement"
],
"flashSuitChecked": true,
"blueSuitChecked": true,
"note": [
"Grapple teleporting here will spawn Samus inside the wall behind the Acid Chozo statue.",
"To escape, perform a Crystal Flash to stand up, then morph and roll out to the right.",
"Samus will be visible but off-camera, making the movement tricky."
]
},
{
"id": 12,
"link": [
1,
3
],
"name": "Grapple Teleport Power Bomb (from Moat)",
"entranceCondition": {
"comeInWithGrappleTeleport": {
"blockPositions": [
[
7,
2
]
]
}
},
"requires": [
"h_usePowerBomb",
{
"heatFrames": 220
},
"canOffScreenMovement"
],
"flashSuitChecked": true,
"blueSuitChecked": true,
"note": [
"After teleporting, press down to retract Grapple.",
"Samus will be inside the Power Bomb blocks behind the Acid Chozo statue hand.",
"Use a Power Bomb, wait to begin falling, then hold right to roll out under the hand.",
"Samus will be visible but off-camera, making the movement tricky.",
"Holding right too early after laying the Power Bomb will cause Samus to get stuck inside the Chozo hand;",
"in this case, Samus can get out by unmorphing, remorphing, and rolling to the right on top of the hand."
]
},
{
"id": 13,
"link": [
1,
4
],
"name": "Base",
"requires": [
{
"or": [
"f_UsedAcidChozoStatue",
{
"obstaclesCleared": [
"f_UsedAcidChozoStatue"
]
}
]
},
{
"or": [
{
"and": [
"canDash",
{
"heatFrames": 130
}
]
},
{
"heatFrames": 190
}
]
}
],
"flashSuitChecked": true,
"blueSuitChecked": true
},
{
"id": 45,
"link": [
1,
5
],
"name": "Direct G-Mode Morph",
"entranceCondition": {
"comeInWithGMode": {
"mode": "direct",
"morphed": true
}
},
"requires": [
"h_heatedGMode",
{
"or": [
"f_UsedAcidChozoStatue",
{
"obstaclesCleared": [
"f_UsedAcidChozoStatue"
]
}
]
},
"h_artificialMorphMovement",
{
"heatFrames": 200
}
],
"flashSuitChecked": true,
"blueSuitChecked": true,
"note": [
"Enter the room in Direct G-mode, otherwise the acid will still be present.",
"Jump in the vertical shaft to touch the camera scroll block and overload PLMs, then roll through the bomb blocks.",
"Exit G-mode and jump multiple times to fix the camera before crossing the section with the Holtzes."
],
"devNote": [
"It is possible but not expected to cross the lower section while completely blind.",
"The Holtz still damage Samus, and the middle one is low enough to make it difficult to bomb boost across.",
"Other strats in the room are ignored because Samus needs real Morph and Varia or a lot of Energy to use the statue,",
"and there is no way to overload PLMs to go through the bomb blocks from the bottom of the room."
]
},
{
"id": 48,
"link": [
2,
1
],
"name": "Shinespark Slope Clip X-Ray Climb (Come in Shinecharged)",
"entranceCondition": {
"comeInShinecharged": {}
},
"requires": [
{
"shineChargeFrames": 35
},
{
"shinespark": {
"frames": 33,
"excessFrames": 0
}
},
"canShinesparkSlopeClip",
"canXRayClimb",
"canOffScreenMovement",
{
"heatFrames": 1020
}
],
"flashSuitChecked": true,
"blueSuitChecked": true,
"note": [
"Gain a shinecharge and spark into the wall at the left side of the room to clip into it.",
"From there, X-Ray climb to the top portion of the room (about 0.75 screens).",
"Samus will be visible but off-camera, making the movement tricky."
],
"detailNote": [
"Only certain horizontal positions for the spark will work.",
"There are periodic windows of approximately 4 good pixels followed by 8 bad pixels.",
"Moonwalking back against the ledge below the door will put Samus into a good position.",
"Being centered over this two-tile ledge is another position that works."
]
},
{
"id": 49,
"link": [
2,
1
],
"name": "Shinespark Slope Clip X-Ray Climb (Come in Shinecharging)",
"entranceCondition": {
"comeInShinecharging": {
"length": 3,
"openEnd": 1
}
},
"requires": [
{
"shinespark": {
"frames": 33,
"excessFrames": 0
}
},
"canShinesparkSlopeClip",
"canXRayClimb",
"canOffScreenMovement",
{
"heatFrames": 1020
}
],
"flashSuitChecked": true,
"blueSuitChecked": true,
"note": [
"Gain a shinecharge and spark into the wall at the left side of the room to clip into it.",
"From there, X-Ray climb to the top portion of the room (about 0.75 screens).",
"Samus will be visible but off-camera, making the movement tricky."
],
"detailNote": [
"Only certain horizontal positions for the spark will work.",
"There are periodic windows of approximately 4 good pixels followed by 8 bad pixels.",
"Moonwalking back against the ledge below the door will put Samus into a good position.",
"Being centered over this two-tile ledge is another position that works."
]
},
{
"id": 14,
"link": [
2,
2
],
"name": "Leave With Runway",
"requires": [],
"exitCondition": {
"leaveWithRunway": {
"length": 4,
"openEnd": 1
}
},
"flashSuitChecked": true,
"blueSuitChecked": true
},
{
"id": 15,
"link": [
2,
2
],
"name": "Crystal Flash",
"requires": [
"h_heatedCrystalFlash"
],
"flashSuitChecked": true,
"blueSuitChecked": true
},
{
"id": 43,
"link": [
2,
2
],
"name": "G-Mode Setup - Get Hit By Holtz",
"entranceCondition": {
"comeInNormally": {}
},
"requires": [
{
  "heatFrames": 440
}
],
"exitCondition": {
"leaveWithGModeSetup": {}
},
"unlocksDoors": [
{
"types": [
"ammo"
],
"requires": []
}
],
"flashSuitChecked": true,
"blueSuitChecked": true
},
{
"id": 16,
"link": [
2,
3
],
"name": "Grapple Teleport Crystal Flash (from Red Brinstar Firefleas)",
"entranceCondition": {
"comeInWithGrappleTeleport": {
"blockPositions": [
[
5,
3
]
]
}
},
"requires": [
{
"heatFrames": 220
},
"h_CrystalFlash",
{
"heatFrames": 20
},
"canOffScreenMovement"
],
"flashSuitChecked": true,
"blueSuitChecked": true,
"note": [
"Grapple teleporting here will spawn Samus inside the wall behind the Acid Chozo statue.",
"To escape, perform a Crystal Flash to stand up, then morph and roll out to the right.",
"Samus will be visible but off-camera, making the movement tricky."
]
},
{
"id": 17,
"link": [
2,
3
],
"name": "Grapple Teleport Power Bomb (from Moat)",
"entranceCondition": {
"comeInWithGrappleTeleport": {
"blockPositions": [
[
7,
2
]
]
}
},
"requires": [
"h_usePowerBomb",
{
"heatFrames": 220
},
"canOffScreenMovement"
],
"flashSuitChecked": true,
"blueSuitChecked": true,
"note": [
"After teleporting, press down to retract Grapple.",
"Samus will be inside the Power Bomb blocks behind the Acid Chozo statue hand.",
"Use a Power Bomb, wait to begin falling, then hold right to roll out under the hand.",
"Samus will be visible but off-camera, making the movement tricky.",
"Holding right too early after laying the Power Bomb will cause Samus to get stuck inside the Chozo hand;",
"in this case, Samus can get out by unmorphing, remorphing, and rolling to the right on top of the hand."
]
},
{
"id": 50,
"link": [
2,
3
],
"name": "Shinespark Slope Clip X-Ray Climb (Come in Shinecharged)",
"entranceCondition": {
"comeInShinecharged": {}
},
"requires": [
{
"shineChargeFrames": 35
},
{
"shinespark": {
"frames": 33,
"excessFrames": 0
}
},
"canShinesparkSlopeClip",
"canXRayClimb",
"canOffScreenMovement",
{
"or": [
"canPreciseWallJump",
"SpaceJump",
"HiJump",
"canTrickySpringBallJump"
]
},
{
"heatFrames": 970
}
],
"flashSuitChecked": true,
"blueSuitChecked": true,
"note": [
"Gain a shinecharge and spark into the wall at the left side of the room to clip into it.",
"From there, X-Ray climb to the top portion of the room (about 0.75 screens).",
"Samus will be visible but off-camera, making the movement tricky."
],
"detailNote": [
"Only certain horizontal positions for the spark will work.",
"There are periodic windows of approximately 4 good pixels followed by 8 bad pixels.",
"Moonwalking back against the ledge below the door will put Samus into a good position.",
"Being centered over this two-tile ledge is another position that works."
]
},
{
"id": 51,
"link": [
2,
3
],
"name": "Shinespark Slope Clip X-Ray Climb (Come in Shinecharging)",
"entranceCondition": {
"comeInShinecharging": {
"length": 3,
"openEnd": 1
}
},
"requires": [
{
"shinespark": {
"frames": 33,
"excessFrames": 0
}
},
"canShinesparkSlopeClip",
"canXRayClimb",
"canOffScreenMovement",
{
"or": [
"canPreciseWallJump",
"SpaceJump",
"HiJump",
"canTrickySpringBallJump"
]
},
{
"heatFrames": 970
}
],
"flashSuitChecked": true,
"blueSuitChecked": true,
"note": [
"Gain a shinecharge and spark into the wall at the left side of the room to clip into it.",
"From there, X-Ray climb to the top portion of the room (about 0.75 screens).",
"Samus will be visible but off-camera, making the movement tricky."
],
"detailNote": [
"Only certain horizontal positions for the spark will work.",
"There are periodic windows of approximately 4 good pixels followed by 8 bad pixels.",
"Moonwalking back against the ledge below the door will put Samus into a good position.",
"Being centered over this two-tile ledge is another position that works."
]
},
{
"id": 65,
"link": [
2,
4
],
"name": "R-Mode Forced Standup Clip",
"entranceCondition": {
"comeInWithRMode": {}
},
"requires": [
"canRModeStandupClip",
"h_RModeCanRefillReserves",
"h_heatProof",
"Morph",
{
"or": [
"h_bombThings",
{
"haveBlueSuit": {}
}
]
},
{
"or": [
"HiJump",
"canWallJump",
"canSpringBallJumpMidAir",
"canDoubleBombJump"
]
},
{
"partialRefill": {
"type": "ReserveEnergy",
"limit": 100
}
},
{
"disableEquipment": "Varia"
},
{
"autoReserveTrigger": {
"implicitHeatFrames": "suitless"
}
},
{
"suitlessHeatFrames": 30
}
],
"flashSuitChecked": true,
"blueSuitChecked": true
},
{
"id": 18,
"link": [
2,
5
],
"name": "Base",
"requires": [
"canDash",
"ScrewAttack",
{
"heatFrames": 210
}
],
"clearsObstacles": [
"A"
],
"flashSuitChecked": true,
"blueSuitChecked": true
},
{
"id": 66,
"link": [
2,
5
],
"name": "Blue Suit",
"requires": [
{
"haveBlueSuit": {}
},
{
"heatFrames": 310
}
],
"flashSuitChecked": true,
"blueSuitChecked": true
},
{
"id": 19,
"link": [
2,
5
],
"name": "Avoid Damage",
"requires": [
"canDash",
{
"or": [
"canTrickyJump",
{
"and": [
"canHorizontalDamageBoost",
"canUseIFrames",
{
"enemyDamage": {
"enemy": "Magdollite",
"type": "flame",
"hits": 1
}
}
]
}
]
},
{
"heatFrames": 290
}
],
"flashSuitChecked": true,
"blueSuitChecked": true,
"note": "Wait for the first Holtz to attack then either use the Magdollite for i-frames, or avoid the projectiles and continue dodging bats."
},
{
"id": 67,
"link": [
2,
5
],
"name": "Farm While Crossing",
"requires": [
"canDash",
"canFarmWhileShooting",
{
"heatFramesWithEnergyDrops": {
"frames": 170,
"drops": [
{
"enemy": "Magdollite",
"count": 3
}
]
}
},
{
"heatFrames": 130
}
],
"flashSuitChecked": true,
"blueSuitChecked": true
},
{
"id": 20,
"link": [
2,
5
],
"name": "Tank the Damage",
"requires": [
"canDash",
{
"enemyDamage": {
"enemy": "Holtz",
"type": "contact",
"hits": 1
}
},
{
"or": [
"canCarefulJump",
{
"and": [
"Gravity",
{
"enemyDamage": {
"enemy": "Holtz",
"type": "contact",
"hits": 1
}
},
{
"acidFrames": 60
}
]
}
]
},
{
"heatFrames": 375
}
],
"flashSuitChecked": true,
"blueSuitChecked": true,
"note": "Wait for the first Holtz before trying to cross."
},
{
"id": 21,
"link": [
2,
5
],
"name": "Kill Holtzes (Strong Weapon)",
"requires": [
"canDash",
{
"or": [
{
"and": [
"Plasma",
"Wave",
"Ice",
{
"heatFrames": 300
}
]
},
{
"and": [
"Plasma",
{
"or": [
"Wave",
"Ice"
]
},
{
"heatFrames": 390
}
]
},
{
"and": [
{
"ammo": {
"type": "Super",
"count": 9
}
},
{
"heatFrames": 420
}
]
}
]
}
],
"clearsObstacles": [
"A"
],
"flashSuitChecked": true,
"blueSuitChecked": true
},
{
"id": 56,
"link": [
2,
5
],
"name": "Kill Holtzes (Medium Weapon)",
"requires": [
"canDash",
"canDodgeWhileShooting",
{
"or": [
{
"and": [
"Spazer",
"Wave",
"Ice",
{
"heatFrames": 480
}
]
},
{
"and": [
"Plasma",
{
"heatFrames": 510
}
]
},
{
"and": [
"Ice",
{
"or": [
"Wave",
"Spazer"
]
},
{
"heatFrames": 750
}
]
},
{
"and": [
"canTrickyDodgeEnemies",
"Morph",
{
"ammo": {
"type": "PowerBomb",
"count": 3
}
},
{
"heatFrames": 850
}
]
}
]
}
],
"clearsObstacles": [
"A"
],
"flashSuitChecked": true,
"blueSuitChecked": true
},
{
"id": 57,
"link": [
2,
5
],
"name": "Kill Holtzes (Slow Weapon)",
"requires": [
"canDash",
"canTrickyDodgeEnemies",
{
"or": [
{
"and": [
"Spazer",
"Wave",
{
"heatFrames": 1280
}
]
},
{
"and": [
"Spazer",
{
"heatFrames": 2060
}
]
},
{
"and": [
"Wave",
{
"heatFrames": 1640
}
]
},
{
"and": [
"Ice",
{
"heatFrames": 1560
}
]
},
{
"and": [
"Morph",
{
"ammo": {
"type": "PowerBomb",
"count": 10
}
},
{
"heatFrames": 2160
}
]
}
]
}
],
"clearsObstacles": [
"A"
],
"flashSuitChecked": true,
"blueSuitChecked": true,
"devNote": [
"FIXME: This could probably be done with just Power Beam, but dodging the Holtzes becomes very tricky."
]
},
{
"id": 22,
"link": [
2,
5
],
"name": "Shinespark",
"entranceCondition": {
"comeInWithSpark": {}
},
"requires": [
{
"heatFrames": 125
},
{
"shinespark": {
"frames": 41,
"excessFrames": 6
}
}
],
"flashSuitChecked": true,
"blueSuitChecked": true
},
{
"id": 23,
"link": [
3,
1
],
"name": "Base",
"requires": [
"SpaceJump",
{
"or": [
{
"and": [
"canDash",
{
"heatFrames": 200
}
]
},
{
"heatFrames": 275
}
]
}
],
"flashSuitChecked": true,
"blueSuitChecked": true
},
{
"id": 24,
"link": [
3,
1
],
"name": "Without Acid",
"requires": [
{
"or": [
"f_UsedAcidChozoStatue",
{
"obstaclesCleared": [
"f_UsedAcidChozoStatue"
]
}
]
},
{
"or": [
{
"and": [
"canDash",
{
"heatFrames": 270
}
]
},
{
"heatFrames": 295
}
]
}
],
"flashSuitChecked": true,
"blueSuitChecked": true
},
{
"id": 40,
"link": [
3,
3
],
"name": "Use Acid Statue",
"requires": [
"h_activateAcidChozo",
"h_usePowerBomb",
{
"heatFrames": 1020
}
],
"setsFlags": [
"f_UsedAcidChozoStatue"
],
"flashSuitChecked": true,
"blueSuitChecked": true,
"clearsObstacles": [
"f_UsedAcidChozoStatue"
]
},
{
"id": 25,
"link": [
3,
3
],
"name": "Crystal Flash",
"requires": [
"h_heatedCrystalFlash"
],
"flashSuitChecked": true,
"blueSuitChecked": true
},
{
"id": 41,
"link": [
3,
3
],
"name": "Crystal Flash, Use Acid Statue",
"requires": [
"h_heatedCrystalFlash",
"h_activateAcidChozo",
{
"heatFrames": 920
}
],
"setsFlags": [
"f_UsedAcidChozoStatue"
],
"flashSuitChecked": true,
"blueSuitChecked": true,
"note": "Using the Crystal Flash Power Bomb to clear the statue can save some heat frames.",
"clearsObstacles": [
"f_UsedAcidChozoStatue"
]
},
{
"id": 42,
"link": [
3,
3
],
"name": "Acid Statue with Reserve Trigger",
"requires": [
"h_activateAcidChozo",
"h_usePowerBomb",
{
"heatFrames": 180
},
"canManageReserves",
{
"autoReserveTrigger": {}
},
{
"heatFrames": 50
}
],
"setsFlags": [
"f_UsedAcidChozoStatue"
],
"flashSuitChecked": true,
"blueSuitChecked": true,
"clearsObstacles": [
"f_UsedAcidChozoStatue"
]
},
{
"id": 26,
"link": [
3,
4
],
"name": "Base",
"requires": [
{
"or": [
"f_UsedAcidChozoStatue",
{
"obstaclesCleared": [
"f_UsedAcidChozoStatue"
]
}
]
},
{
"heatFrames": 100
}
],
"flashSuitChecked": true,
"blueSuitChecked": true
},
{
"id": 27,
"link": [
4,
1
],
"name": "Base",
"requires": [
{
  "or": [
    {
      "and": [
        "canDash",
        {
          "heatFrames": 195
        }
      ]
    },
    {
      "heatFrames": 215
    }
  ]
}
],
"flashSuitChecked": true,
"blueSuitChecked": true,
"devNote": "4 requires that the acid is gone."
},
{
"id": 28,
"link": [
4,
3
],
"name": "Base",
"requires": [
{
"or": [
"HiJump",
"canWallJump",
"canSpringBallJumpMidAir"
]
},
{
"heatFrames": 120
}
],
"flashSuitChecked": true,
"blueSuitChecked": true
},
{
"id": 68,
"link": [
4,
3
],
"name": "IBJ",
"requires": [
{
  "or": [
    {
      "and": [
        "canLongIBJ",
        {
          "heatFrames": 780
        }
      ]
    },
    {
      "and": [
        "canJumpIntoIBJ",
        {
          "heatFrames": 560
        }
      ]
    },
    {
      "and": [
        "canJumpIntoIBJ",
        "canDoubleBombJump",
        {
          "heatFrames": 360
        }
      ]
    }
  ]
}
],
"flashSuitChecked": true,
"blueSuitChecked": true
},
{
"id": 29,
"link": [
4,
4
],
"name": "Crystal Flash",
"requires": [
"h_heatedCrystalFlash"
],
"flashSuitChecked": true,
"blueSuitChecked": true
},
{
"id": 69,
"link": [
4,
6
],
"name": "Base",
"requires": [
{
  "heatFrames": 60
}
],
"flashSuitChecked": true,
"blueSuitChecked": true
},
{
"id": 55,
"link": [
5,
1
],
"name": "Shinespark Slope Clip X-Ray Climb (Use Stored Spark)",
"requires": [
"h_storedSpark",
{
"shinespark": {
"frames": 1,
"excessFrames": 1
}
},
"canShinesparkSlopeClip",
"canXRayClimb",
"canOffScreenMovement",
{
"heatFrames": 1020
}
],
"flashSuitChecked": true,
"blueSuitChecked": true,
"note": [
"Jump, press against the wall, and use a flash suit or blue suit to spark into it, clipping inside of it.",
"From there, X-Ray climb to the top portion of the room (about 0.75 screens).",
"Samus will be visible but off-camera, making the movement tricky."
]
},
{
"id": 32,
"link": [
5,
2
],
"name": "Base",
"requires": [
"canDash",
"ScrewAttack",
{
"heatFrames": 210
},
{
"or": [
"canTrickyJump",
{
"heatFrames": 30
}
]
}
],
"clearsObstacles": [
"A"
],
"flashSuitChecked": true,
"blueSuitChecked": true
},
{
"id": 70,
"link": [
5,
2
],
"name": "Blue Suit",
"requires": [
{
"haveBlueSuit": {}
},
{
"heatFrames": 330
}
],
"flashSuitChecked": true,
"blueSuitChecked": true
},
{
"id": 33,
"link": [
5,
2
],
"name": "Magdollite Damage Boost",
"requires": [
"canDash",
{
"enemyDamage": {
"enemy": "Magdollite",
"type": "flame",
"hits": 1
}
},
"canHorizontalDamageBoost",
"canUseIFrames",
{
"heatFrames": 290
}
],
"flashSuitChecked": true,
"blueSuitChecked": true,
"note": "Wait for the Magdollite to attack then use it for i-frames."
},
{
"id": 58,
"link": [
5,
2
],
"name": "Tricky Avoid Damage",
"requires": [
"canDash",
"canTrickyDodgeEnemies",
{
"heatFrames": 280
},
{
"or": [
"canInsaneJump",
{
"heatFrames": 20
}
]
}
],
"flashSuitChecked": true,
"blueSuitChecked": true
},
{
"id": 71,
"link": [
5,
2
],
"name": "Farm While Crossing",
"requires": [
"canDash",
"canFarmWhileShooting",
{
"heatFramesWithEnergyDrops": {
"frames": 240,
"drops": [
{
"enemy": "Magdollite",
"count": 3
}
]
}
},
{
"heatFrames": 40
},
{
"or": [
"canInsaneJump",
{
"heatFrames": 110
}
]
}
],
"flashSuitChecked": true,
"blueSuitChecked": true
},
{
"id": 34,
"link": [
5,
2
],
"name": "Tank the Damage",
"requires": [
"canDash",
{
"enemyDamage": {
"enemy": "Holtz",
"type": "contact",
"hits": 1
}
},
{
"or": [
"canCarefulJump",
{
"and": [
"Gravity",
{
"enemyDamage": {
"enemy": "Holtz",
"type": "contact",
"hits": 1
}
},
{
"acidFrames": 60
}
]
}
]
},
{
"heatFrames": 330
}
],
"flashSuitChecked": true,
"blueSuitChecked": true
},
{
"id": 35,
"link": [
5,
2
],
"name": "Strong Beam Kill",
"requires": [
"canDash",
"Ice",
"Wave",
"Plasma",
{
"heatFrames": 330
}
],
"flashSuitChecked": true,
"blueSuitChecked": true
},
{
"id": 59,
"link": [
5,
2
],
"name": "Plasma Hitbox Insane Jump",
"requires": [
"canDash",
"h_PlasmaHitbox",
"canInsaneJump",
{
"heatFrames": 190
}
],
"flashSuitChecked": true,
"blueSuitChecked": true
},
{
"id": 60,
"link": [
5,
2
],
"name": "Leave Spinning (Space Jump)",
"requires": [
{
"obstaclesCleared": [
"A"
]
},
"h_heatedRemoteRunwaySpaceJump",
{
"heatFrames": 185
}
],
"exitCondition": {
"leaveSpinning": {
"remoteRunway": {
"length": 10,
"openEnd": 1
}
}
},
"unlocksDoors": [
{
"types": [
"missiles"
],
"requires": [
{
"heatFrames": 50
}
]
},
{
"types": [
"super"
],
"requires": []
},
{
"types": [
"powerbomb"
],
"requires": [
{
"heatFrames": 50
}
]
}
],
"flashSuitChecked": true,
"blueSuitChecked": true,
"devNote": [
"It is assumed that the door was shot open when entering on the right,",
"but extra heat frames are included here for it."
]
},
{
"id": 61,
"link": [
5,
2
],
"name": "Leave With Mockball (Space Jump)",
"requires": [
{
"obstaclesCleared": [
"A"
]
},
"h_heatedRemoteRunwaySpaceJump",
{
"heatFrames": 165
}
],
"exitCondition": {
"leaveWithMockball": {
"remoteRunway": {
"length": 10,
"openEnd": 1
},
"landingRunway": {
"length": 4,
"openEnd": 1
},
"minExtraRunSpeed": "$2.0"
}
},
"unlocksDoors": [
{
"types": [
"missiles"
],
"requires": [
{
"heatFrames": 50
}
]
},
{
"types": [
"super"
],
"requires": []
},
{
"types": [
"powerbomb"
],
"requires": [
{
"heatFrames": 50
}
]
}
],
"flashSuitChecked": true,
"blueSuitChecked": true
},
{
"id": 62,
"link": [
5,
2
],
"name": "Leave With Controlled Spring Ball Bounce",
"requires": [
{
"obstaclesCleared": [
"A"
]
},
"h_heatedRemoteRunwayTrickySpringBall",
{
"heatFrames": 185
}
],
"exitCondition": {
"leaveWithSpringBallBounce": {
"remoteRunway": {
"length": 10,
"openEnd": 1
},
"landingRunway": {
"length": 4,
"openEnd": 1
},
"minExtraRunSpeed": "$2.0",
"movementType": "controlled"
}
},
"unlocksDoors": [
{
"types": [
"missiles"
],
"requires": [
{
"heatFrames": 50
}
]
},
{
"types": [
"super"
],
"requires": []
},
{
"types": [
"powerbomb"
],
"requires": [
{
"heatFrames": 50
}
]
}
],
"flashSuitChecked": true,
"blueSuitChecked": true,
"devNote": [
"It is assumed that the door was shot open when entering on the right,",
"but extra heat frames are included here for it."
]
},
{
"id": 63,
"link": [
5,
2
],
"name": "Leave With Spring Ball Bounce (Space Jump)",
"requires": [
{
"obstaclesCleared": [
"A"
]
},
"h_heatedRemoteRunwaySpaceJump",
{
"heatFrames": 165
}
],
"exitCondition": {
"leaveWithSpringBallBounce": {
"remoteRunway": {
"length": 10,
"openEnd": 1
},
"landingRunway": {
"length": 4,
"openEnd": 1
},
"minExtraRunSpeed": "$2.0",
"movementType": "uncontrolled"
}
},
"unlocksDoors": [
{
"types": [
"missiles"
],
"requires": [
{
"heatFrames": 50
}
]
},
{
"types": [
"super"
],
"requires": []
},
{
"types": [
"powerbomb"
],
"requires": [
{
"heatFrames": 50
}
]
}
],
"flashSuitChecked": true,
"blueSuitChecked": true
},
{
"id": 64,
"link": [
5,
2
],
"name": "Leave Space Jumping",
"requires": [
{
"obstaclesCleared": [
"A"
]
},
"h_heatedRemoteRunwayPreciseSpaceJump",
{
"heatFrames": 185
}
],
"exitCondition": {
"leaveSpaceJumping": {
"remoteRunway": {
"length": 10,
"openEnd": 1
},
"minExtraRunSpeed": "$2.0"
}
},
"unlocksDoors": [
{
"types": [
"missiles"
],
"requires": [
{
"heatFrames": 50
}
]
},
{
"types": [
"super"
],
"requires": []
},
{
"types": [
"powerbomb"
],
"requires": [
{
"heatFrames": 50
}
]
}
],
"flashSuitChecked": true,
"blueSuitChecked": true,
"devNote": [
"It is assumed that the door was shot open when entering on the right,",
"but extra heat frames are included here for it."
]
},
{
"id": 44,
"link": [
5,
2
],
"name": "G-Mode Setup - Get Hit By Holtz",
"requires": [
{
  "or": [
    {
      "and": [
        "canDash",
        "canTrickyJump",
        {
          "heatFrames": 820
        }
      ]
    },
    {
      "and": [
        "canDash",
        "ScrewAttack",
        {
          "heatFrames": 660
        }
      ]
    },
    {
      "and": [
        "canDash",
        "canHorizontalDamageBoost",
        "canUseIFrames",
        {
          "enemyDamage": {
            "enemy": "Magdollite",
            "type": "flame",
            "hits": 1
          }
        },
        {
          "heatFrames": 660
        }
      ]
    },
    {
      "and": [
        {
          "haveBlueSuit": {}
        },
        {
          "heatFrames": 725
        }
      ]
    }
  ]
}
],
"exitCondition": {
"leaveWithGModeSetup": {}
},
"unlocksDoors": [
{
"types": [
"ammo"
],
"requires": []
}
],
"flashSuitChecked": true,
"blueSuitChecked": true
},
{
"id": 53,
"link": [
5,
5
],
"name": "Magdollite Farm",
"requires": [
"h_heatProof",
{
"cycleFrames": 330
},
{
"or": [
{
"and": [
"canTrickyJump",
"canCameraManip"
]
},
"Plasma",
"ScrewAttack",
{
"and": [
"Wave",
{
"or": [
"Spazer",
"Ice"
]
}
]
}
]
},
{
"or": [
"canTrickyJump",
{
"cycleFrames": 200
}
]
}
],
"farmCycleDrops": [
{
"enemy": "Magdollite",
"count": 3
}
],
"flashSuitChecked": true,
"blueSuitChecked": true,
"note": [
"The Magdollite can be farmed from the left without activating the Holtzes.",
"Or from the right by trapping the Holtz by quickly jumping past them."
]
},
{
"id": 39,
"link": [
5,
5
],
"name": "Crystal Flash",
"requires": [
"h_heatedCrystalFlash"
],
"flashSuitChecked": true,
"blueSuitChecked": true
},
{
"id": 72,
"link": [
5,
6
],
"name": "Power Bomb",
"requires": [
"h_usePowerBomb",
{
"heatFrames": 235
}
],
"flashSuitChecked": true,
"blueSuitChecked": true
},
{
"id": 73,
"link": [
5,
6
],
"name": "Bombs",
"requires": [
"h_useMorphBombs",
{
"heatFrames": 350
}
],
"flashSuitChecked": true,
"blueSuitChecked": true
},
{
"id": 74,
"link": [
5,
6
],
"name": "Blue Suit",
"requires": [
{
"haveBlueSuit": {}
},
"canMidAirMorph",
{
"heatFrames": 135
}
],
"flashSuitChecked": true,
"blueSuitChecked": true
},
{
"id": 36,
"link": [
6,
4
],
"name": "Base",
"requires": [
{
"or": [
"f_UsedAcidChozoStatue",
{
"obstaclesCleared": [
"f_UsedAcidChozoStatue"
]
}
]
},
{
"or": [
{
"and": [
"HiJump",
{
"heatFrames": 55
}
]
},
{
"and": [
"canWallJump",
{
"heatFrames": 55
}
]
},
{
"and": [
"canSpringBallJumpMidAir",
{
"heatFrames": 70
}
]
}
]
}
],
"flashSuitChecked": true,
"blueSuitChecked": true
},
{
"id": 75,
"link": [
6,
4
],
"name": "IBJ",
"requires": [
{
"or": [
"f_UsedAcidChozoStatue",
{
"obstaclesCleared": [
"f_UsedAcidChozoStatue"
]
}
]
},
{
"or": [
{
"and": [
"canLongIBJ",
{
"heatFrames": 790
}
]
},
{
"and": [
"canJumpIntoIBJ",
{
"heatFrames": 330
}
]
},
{
"and": [
"canJumpIntoIBJ",
"canDoubleBombJump",
{
"heatFrames": 260
}
]
}
]
}
],
"flashSuitChecked": true,
"blueSuitChecked": true
},
{
"id": 54,
"link": [
6,
4
],
"name": "Use Stored Spark",
"requires": [
{
"or": [
"f_UsedAcidChozoStatue",
{
"obstaclesCleared": [
"f_UsedAcidChozoStatue"
]
}
]
},
"h_storedSpark",
{
"or": [
{
"and": [
{
"heatFrames": 210
},
{
"shinespark": {
"frames": 28,
"excessFrames": 0
}
}
]
},
{
"and": [
"h_heatProof",
{
"shinespark": {
"frames": 16,
"excessFrames": 13
}
}
]
},
{
"and": [
"h_heatProof",
"canShinesparkSlopeClip",
{
"shinespark": {
"frames": 1,
"excessFrames": 1
}
}
]
}
]
}
],
"flashSuitChecked": true,
"blueSuitChecked": true,
"note": [
"Jump a high as possible, and use a flash suit or blue suit to diagonally spark either to the right or left to reach the top of the room.",
"If heat protection is available, sparking diagonally left uses less energy;",
"in this case, Samus will end lodged inside the wall but can use Morph to escape.",
"Alternatively, spark horizontally left to clip into the wall;",
"turn back and forth 3 times to wiggle most of the way out, then turn-around spin jump up to the ledge;",
"clipping into the right wall can also work but requires much greater precision in the spark position."
]
},
{
"id": 38,
"link": [
6,
4
],
"name": "Crystal Flash Grapple Clip",
"requires": [
"h_heatProof",
"h_bombThings",
"h_jumpIntoCrystalFlashClip",
"HiJump",
"Grapple"
],
"flashSuitChecked": true,
"blueSuitChecked": true,
"note": "Menu to Grappling Beam before the Crystal Flash ends and mash shoot while holding down.",
"devNote": "The extra Power Bomb or bombs is to get through the bomb blocks."
},
{
"id": 30,
"link": [
6,
5
],
"name": "Bombs",
"requires": [
"h_useMorphBombs",
{
"heatFrames": 320
}
],
"flashSuitChecked": true,
"blueSuitChecked": true
},
{
"id": 31,
"link": [
6,
5
],
"name": "Power Bomb",
"requires": [
"h_usePowerBomb",
{
"heatFrames": 155
}
],
"flashSuitChecked": true,
"blueSuitChecked": true
},
{
"id": 76,
"link": [
6,
5
],
"name": "Blue Suit",
"requires": [
"Morph",
{
"haveBlueSuit": {}
},
{
"heatFrames": 115
}
],
"flashSuitChecked": true,
"blueSuitChecked": true
}
],
"notables": [],
"nextStratId": 77,
"nextNotableId": 1
}


