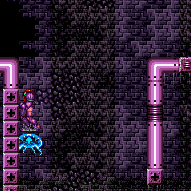
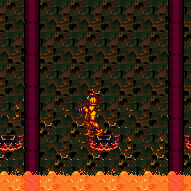
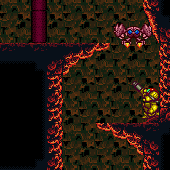
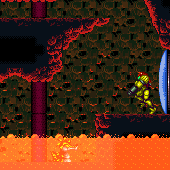
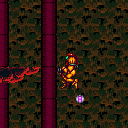
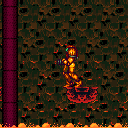
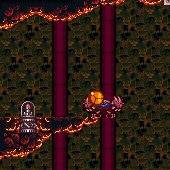
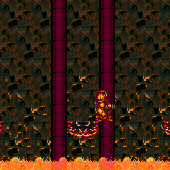
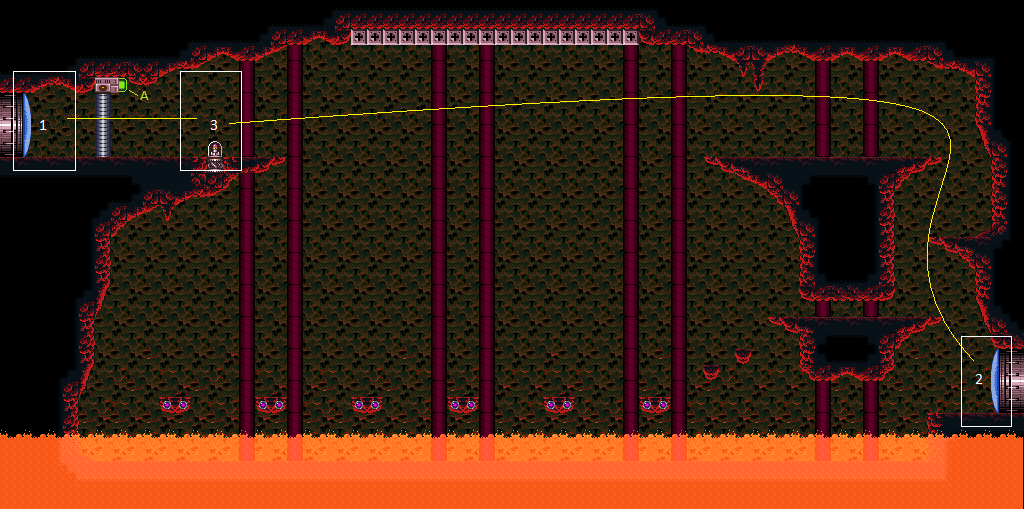
Crocomire Escape
Room ID: 121
|
Exit condition: {
"leaveWithRunway": {
"length": 5,
"openEnd": 0
}
} |
|
Requires: "h_heatedCrystalFlash" |
|
Entrance condition: {
"comeInShinecharging": {
"length": 4,
"openEnd": 0
}
}Requires: "h_heatedCrystalSpark" |
|
Requires: {
"obstaclesCleared": [
"A"
]
}
{
"or": [
{
"canShineCharge": {
"usedTiles": 16,
"openEnd": 1
}
},
{
"and": [
{
"doorUnlockedAtNode": 1
},
{
"canShineCharge": {
"usedTiles": 17,
"openEnd": 0
}
}
]
}
]
}
"h_heatedCrystalSpark"Dev note: If the door is opened, it is expected to shinecharge left to right, because touching the transition is particularly unforgiving. |
From: 1
Left Door
To: 2
Right Door
It is possible to lure the Geruta to be used as a platform with nothing but Ice. Entrance condition: {
"comeInWithGMode": {
"mode": "indirect",
"morphed": false
}
}Requires: "canTrickyUseFrozenEnemies"
{
"or": [
"HiJump",
"canTrickyDodgeEnemies"
]
}
"h_heatedGModeOpenDifferentDoor" |
From: 1
Left Door
To: 2
Right Door
Go over the plateau, or under it with lava protection. To avoid the Dragon's fireballs, be sure to kill it quickly, overload the drops with the Dragons on the left first, or exit G-mode. Entrance condition: {
"comeInWithGMode": {
"mode": "indirect",
"morphed": false
}
}Requires: {
"or": [
"SpaceJump",
{
"and": [
"HiJump",
"canWallJump"
]
},
{
"and": [
"HiJump",
"canSpeedyJump"
]
},
{
"and": [
"canComplexGMode",
"h_lavaProof"
]
}
]
}
"h_heatedGModeOpenDifferentDoor"Dev note: FIXME: Damage through the lava could work, or maybe a Geruta damage boost. (Energy from immobile or CF) |
|
Entrance condition: {
"comeInWithGMode": {
"mode": "indirect",
"morphed": true
}
}Requires: "h_artificialMorphMovement" "h_heatedGModeOpenDifferentDoor" |
|
Requires: {
"obstaclesCleared": [
"A"
]
}
{
"heatFrames": 50
}
{
"or": [
"canDash",
{
"heatFrames": 10
}
]
} |
|
Entrance condition: {
"comeInWithGrappleTeleport": {
"blockPositions": [
[
12,
12
]
]
}
}Requires: {
"heatFrames": 20
} |
|
Build up 34 tiles worth of run speed and jump into the door on the last frame. Hold angle up through the transition but also aim down to duck below the ceiling until Samus is past it. Fire the Super Missile frame perfectly to open the gate. Entrance condition: {
"comeInRunning": {
"speedBooster": "yes",
"minTiles": 34
}
}Requires: {
"notable": "High Speed Gate Glitch"
}
"h_speedJump"
"h_heatedGreenGateGlitch"
{
"ammo": {
"type": "Super",
"count": 1
}
}
"canInsaneJump"
{
"noFlashSuit": {}
}Clears obstacles: A Dev note: 1 extra tile is added so that you can jump into the door, simplifying the inputs a bit. |
|
Entrance condition: {
"comeInWithGMode": {
"mode": "indirect",
"morphed": false
}
}Requires: "h_heatedGMode"
{
"heatFrames": 90
}Clears obstacles: A Dev note: Goes to 3 because opening the gate mostly only makes sense when going back to the right for a longer runway or obtaining the item. |
|
Entrance condition: {
"comeInWithGMode": {
"mode": "indirect",
"morphed": false
}
}Requires: "h_heatedGMode"
{
"heatFrames": 0
} |
|
Entrance condition: {
"comeInWithGrappleTeleport": {
"blockPositions": [
[
5,
3
],
[
7,
2
]
]
}
}Requires: {
"heatFrames": 45
} |
|
Entrance condition: {
"comeInWithGrappleTeleport": {
"blockPositions": [
[
3,
12
],
[
3,
13
]
]
}
}Bypasses door shell: true |
|
Entrance condition: {
"comeInWithGrappleTeleport": {
"blockPositions": [
[
3,
12
]
]
}
}Exit condition: {
"leaveWithGrappleTeleport": {
"blockPositions": [
[
3,
12
]
]
}
}Bypasses door shell: true |
From: 2
Right Door
To: 1
Left Door
Entrance condition: {
"comeInWithGrappleTeleport": {
"blockPositions": [
[
3,
13
]
]
}
}Exit condition: {
"leaveWithGrappleTeleport": {
"blockPositions": [
[
3,
13
]
]
}
}Bypasses door shell: true |
|
Exit the previous room with Samus in a standing pose (while grappled). After teleporting, press right to release Grapple while staying standing (not being forced into a crouch). Then X-ray climb 1 screen to get up to the door transition, without needing to open the door. Samus will not be visible during the climb. Entrance condition: {
"comeInWithGrappleTeleport": {
"blockPositions": [
[
2,
18
],
[
2,
19
],
[
2,
28
],
[
2,
29
]
]
}
}Requires: "canXRayClimb"
{
"heatFrames": 1600
}Bypasses door shell: true |
From: 2
Right Door
To: 1
Left Door
Lure the Geruta to the left door. This may require many jumps to get it to swoop up onto the ledge and not get stuck. Requires: "canComplexGMode"
"h_heatProof"
"canBePatient"
"canCameraManip"
"Morph"
{
"or": [
"canTrickyDodgeEnemies",
"SpaceJump",
"Charge",
"Ice",
"Plasma",
{
"ammo": {
"type": "Missile",
"count": 2
}
},
{
"ammo": {
"type": "Super",
"count": 2
}
},
{
"ammo": {
"type": "PowerBomb",
"count": 2
}
},
{
"enemyDamage": {
"enemy": "Dragon",
"type": "fireball",
"hits": 5
}
},
{
"and": [
"h_lavaProof",
{
"or": [
"ScrewAttack",
"h_bombThings"
]
}
]
}
]
}
{
"or": [
"SpaceJump",
{
"and": [
"HiJump",
"canSpeedyJump",
"canWallJump"
]
},
{
"and": [
{
"noBlueSuit": {}
},
"HiJump",
"canSpringBallJumpMidAir"
]
},
{
"and": [
{
"noBlueSuit": {}
},
"canBeVeryPatient",
{
"or": [
"canLongIBJ",
"canJumpIntoIBJ"
]
}
]
},
{
"and": [
"canBeVeryPatient",
"Grapple",
{
"or": [
"HiJump",
"canSpringBallJumpMidAir"
]
}
]
}
]
}
{
"or": [
{
"ammo": {
"type": "Super",
"count": 1
}
},
{
"obstaclesCleared": [
"A"
]
}
]
}Exit condition: {
"leaveWithGModeSetup": {}
}Collects items: 3 Unlocks doors: {"types":["ammo"],"requires":[]}Dev note: It's possible to avoid the item, but the Geruta will get stuck on it and usually require many swoops to get past it. |
From: 2
Right Door
To: 1
Left Door
Lure the Geruta to the left door. This may require many jumps to get it to swoop up onto the ledge and not get stuck. To safely pass the Geruta without a hit, jump left below it, to get it to swoop left before going up. Requires: "canComplexGMode"
"h_heatProof"
"canBePatient"
"canCameraManip"
{
"or": [
"canInsaneJump",
"Ice",
"h_lavaProof",
{
"enemyDamage": {
"enemy": "Geruta",
"type": "contact",
"hits": 1
}
},
{
"and": [
"canUseIFrames",
{
"enemyDamage": {
"enemy": "Dragon",
"type": "fireball",
"hits": 1
}
},
{
"lavaFrames": 55
}
]
}
]
}
{
"or": [
"canTrickyDodgeEnemies",
"SpaceJump",
"Charge",
"Ice",
"Plasma",
{
"ammo": {
"type": "Missile",
"count": 2
}
},
{
"ammo": {
"type": "Super",
"count": 2
}
},
{
"enemyDamage": {
"enemy": "Dragon",
"type": "fireball",
"hits": 5
}
},
{
"and": [
"h_lavaProof",
"ScrewAttack"
]
}
]
}
{
"or": [
"SpaceJump",
{
"and": [
"HiJump",
"canSpeedyJump",
"canWallJump"
]
},
{
"and": [
"canBeVeryPatient",
"HiJump",
"Grapple"
]
}
]
}
{
"or": [
{
"ammo": {
"type": "Super",
"count": 1
}
},
{
"obstaclesCleared": [
"A"
]
}
]
}Exit condition: {
"leaveWithGModeSetup": {}
}Collects items: 3 Unlocks doors: {"types":["ammo"],"requires":[]}Dev note: It's possible to avoid the item, but the Geruta will get stuck on it and usually require many swoops to get past it. |
From: 2
Right Door
To: 1
Left Door
Use the Geruta to get up to the top left ledge while also getting it to swoop into the top left region. This requires many jumps from below to get it to swoop up onto the ledge and not get stuck. When the Geruta is heading into the right spot, use it as a platform to get up as well. Requires: {
"noBlueSuit": {}
}
"canComplexGMode"
"h_heatProof"
"canBeVeryPatient"
"canCameraManip"
"canTrickyUseFrozenEnemies"
{
"or": [
"HiJump",
"canSpringBallJumpMidAir"
]
}
{
"or": [
{
"ammo": {
"type": "Super",
"count": 1
}
},
{
"obstaclesCleared": [
"A"
]
}
]
}Exit condition: {
"leaveWithGModeSetup": {}
}Collects items: 3 Unlocks doors: {"types":["ammo"],"requires":[]}Dev note: It's possible to avoid the item, but the Geruta will get stuck on it and usually require many swoops to get past it. |
From: 2
Right Door
To: 1
Left Door
Entrance condition: {
"comeInWithGMode": {
"mode": "indirect",
"morphed": false
}
}Requires: {
"noBlueSuit": {}
}
"canTrickyUseFrozenEnemies"
"canTrickyDodgeEnemies"
{
"or": [
"HiJump",
"canSpringBallJumpMidAir"
]
}
"h_heatedGModeOpenDifferentDoor"Dev note: FIXME: By staying up with the Geruta the whole time, this could be done without HiJump or Spring Ball and could carry a blue suit. |
From: 2
Right Door
To: 1
Left Door
Entrance condition: {
"comeInWithGMode": {
"mode": "indirect",
"morphed": false
}
}Requires: {
"or": [
"SpaceJump",
{
"and": [
"HiJump",
"canSpeedyJump",
"canWallJump"
]
},
{
"and": [
"HiJump",
"canSpringBallJumpMidAir",
{
"or": [
{
"noBlueSuit": {}
},
{
"and": [
"Gravity",
{
"lavaFrames": 25
}
]
}
]
}
]
},
{
"and": [
{
"notable": "Spring Ball Bomb Boost"
},
{
"noBlueSuit": {}
},
"canSpringBallJumpMidAir",
"canUnmorphBombBoost",
"h_crouchJumpDownGrab",
{
"or": [
"canInsaneJump",
"h_additionalBomb"
]
}
]
},
{
"and": [
{
"or": [
{
"canShineCharge": {
"usedTiles": 15,
"openEnd": 2
}
},
"h_storedSpark"
]
},
"canShinechargeMovementComplex",
{
"or": [
{
"shinespark": {
"frames": 12,
"excessFrames": 2
}
},
{
"and": [
"h_speedJump",
{
"shinespark": {
"frames": 9,
"excessFrames": 3
}
}
]
}
]
}
]
},
{
"and": [
{
"notable": "Ceiling Mockball Spring Fling"
},
"h_speedJump",
"canInsaneJump",
"canMomentumConservingMorph",
"canSpringFling"
]
}
]
}
"h_heatedGModeOpenDifferentDoor" |
|
Entrance condition: {
"comeInWithGMode": {
"mode": "indirect",
"morphed": true
}
}Requires: {
"noBlueSuit": {}
}
{
"or": [
"h_artificialMorphLongIBJ",
"h_artificialMorphJumpIntoIBJ"
]
}
"h_heatedGModeOpenDifferentDoor" |
|
Exit condition: {
"leaveWithRunway": {
"length": 5,
"openEnd": 1
}
} |
|
Requires: "h_heatProof"
{
"canShineCharge": {
"usedTiles": 15,
"openEnd": 2
}
}
{
"shineChargeFrames": 165
}Exit condition: {
"leaveShinecharged": {}
} |
From: 2
Right Door
To: 2
Right Door
Enter from the right door and spin jump onto the first ledge while barely landing on the ledge in order to prevent getting the Geruta on camera. Walk against the left wall and jump to trigger the Geruta. It should now be moving leftwards. Stand on the next platform against the right wall and shoot the Geruta to get it one shot away from being frozen. After a few swoops, it will come down; either freeze it or tank a hit. Then go up and stand on the corner and freeze it when it is in position. The Geruta will be stuck below and keep swooping, so if Energy permits, Samus will have several attempts. Quickly shinecharge left to right, kill the Geruta and spark out the bottom right door. Entrance condition: {
"comeInNormally": {}
}Requires: {
"notable": "Frozen Geruta Shinecharge"
}
"h_trickyFrozenEnemyRunway"
"canCarefulJump"
{
"canShineCharge": {
"usedTiles": 17,
"openEnd": 1
}
}
"canShinechargeMovementTricky"
{
"heatFrames": 1260
}
{
"shinespark": {
"frames": 2,
"excessFrames": 0
}
}Exit condition: {
"leaveWithSpark": {}
}Unlocks doors: {"types":["ammo"],"requires":[]} |
|
Requires: "h_heatedCrystalFlash" |
|
Requires: {
"canShineCharge": {
"usedTiles": 15,
"openEnd": 1
}
}
"h_heatedCrystalSpark" |
|
Use the platform at the top-right of the room to gain temporary blue, then chain it through the door. Requires: {
"heatFrames": 1180
}
{
"canShineCharge": {
"usedTiles": 15,
"openEnd": 2
}
}
"canLongChainTemporaryBlue"
"canXRayTurnaround"
{
"or": [
"canXRayCancelShinecharge",
{
"heatFrames": 160
}
]
}Exit condition: {
"leaveWithTemporaryBlue": {}
} |
|
Farm the Dragons and Geruta. Shinecharge on the upper platform with the Geruta, then weave back down to the Dragon by the door to interrupt. Entrance condition: {
"comeInWithRMode": {}
}Requires: "h_heatProof"
{
"or": [
"h_heatedCrystalFlashForReserveEnergy",
{
"and": [
"h_RModeCanRefillReserves",
{
"or": [
{
"and": [
{
"enemyKill": {
"enemies": [
[
"Dragon"
],
[
"Dragon"
],
[
"Dragon"
],
[
"Dragon"
],
[
"Dragon"
]
],
"explicitWeapons": [
"Missile",
"Super",
"Charge",
"Plasma"
]
}
},
"Grapple"
]
},
{
"and": [
{
"enemyKill": {
"enemies": [
[
"Dragon"
],
[
"Dragon"
],
[
"Dragon"
],
[
"Dragon"
],
[
"Dragon"
]
]
}
},
"h_lavaProof"
]
}
]
},
{
"partialRefill": {
"type": "ReserveEnergy",
"limit": 20
}
}
]
}
]
}
"canTrickyJump"
{
"or": [
{
"canShineCharge": {
"usedTiles": 15,
"openEnd": 2
}
},
{
"and": [
{
"notable": "Frozen Geruta Shinecharge"
},
"h_trickyFrozenEnemyRunway",
{
"canShineCharge": {
"usedTiles": 17,
"openEnd": 1
}
},
"canShinechargeMovementTricky"
]
}
]
}
{
"autoReserveTrigger": {
"maxReserveEnergy": 95
}
}
"canRModeSparkInterrupt" |
|
On room entry, perform a low spin jump onto the first ledge to avoid getting the Geruta to swoop to the right. Jump against the left wall, then move right and the Geruta should come down quickly. Move back and forth until it comes down further. This can be tricky if needing to avoid contact damage. Quickly freezing the Geruta as it starts to come down can be used to avoid taking a hit. Killing the Dragon on room entry can also be helpful. Requires: "canComplexGMode"
"h_heatProof"
"canBePatient"
{
"or": [
{
"and": [
"canInsaneJump",
"canTrickyUseFrozenEnemies"
]
},
{
"enemyDamage": {
"enemy": "Geruta",
"type": "contact",
"hits": 2
}
}
]
}
{
"or": [
"canInsaneJump",
"canTrickyUseFrozenEnemies",
"Charge",
"Plasma",
"h_usePowerBomb",
{
"ammo": {
"type": "Missile",
"count": 3
}
},
{
"ammo": {
"type": "Super",
"count": 1
}
},
{
"and": [
"ScrewAttack",
{
"lavaFrames": 20
}
]
}
]
}Exit condition: {
"leaveWithGModeSetup": {}
} |
From: 2
Right Door
To: 2
Right Door
Entrance condition: {
"comeInWithGMode": {
"mode": "direct",
"morphed": false
}
}Requires: {
"noBlueSuit": {}
}
"canRemoteAcquire"
"canTrickyUseFrozenEnemies"
"canTrickyDodgeEnemies"
{
"or": [
"HiJump",
"canSpringBallJumpMidAir"
]
}
"h_heatedDirectGModeLeaveSameDoor"Collects items: 3 Dev note: FIXME: By staying up with the Geruta the whole time, this could be done without HiJump or Spring Ball and could carry blue suit. |
From: 2
Right Door
To: 2
Right Door
Touch the item as little as possible in order to prevent PLMs from being overloaded, so the platforms below remain solid. Entrance condition: {
"comeInWithGMode": {
"mode": "direct",
"morphed": false
}
}Requires: "canRemoteAcquire"
{
"or": [
"SpaceJump",
{
"and": [
"HiJump",
"canSpeedyJump",
"canWallJump"
]
},
{
"and": [
"HiJump",
"canSpringBallJumpMidAir",
{
"or": [
{
"noBlueSuit": {}
},
{
"and": [
"Gravity",
{
"lavaFrames": 25
}
]
}
]
}
]
},
{
"and": [
{
"notable": "Spring Ball Bomb Boost"
},
{
"noBlueSuit": {}
},
"canSpringBallJumpMidAir",
"canUnmorphBombBoost",
"h_crouchJumpDownGrab",
"canInsaneJump"
]
},
{
"and": [
{
"or": [
{
"canShineCharge": {
"usedTiles": 15,
"openEnd": 2
}
},
"h_storedSpark"
]
},
"canShinechargeMovementComplex",
{
"or": [
{
"shinespark": {
"frames": 12,
"excessFrames": 2
}
},
{
"and": [
"h_speedJump",
{
"shinespark": {
"frames": 9,
"excessFrames": 3
}
}
]
}
]
}
]
},
{
"and": [
{
"notable": "Ceiling Mockball Spring Fling"
},
"h_speedJump",
"canInsaneJump",
"canMomentumConservingMorph",
"canSpringFling"
]
}
]
}
"h_heatedDirectGModeLeaveSameDoor"Collects items: 3 Dev note: There is no leniency option for using an extra Power Bomb, because it will contribute to PLM overload. (2 PBs is technically barely possible) |
|
Entrance condition: {
"comeInWithGMode": {
"mode": "direct",
"morphed": true
}
}Requires: {
"noBlueSuit": {}
}
"canRemoteAcquire"
{
"or": [
"h_artificialMorphLongIBJ",
"h_artificialMorphJumpIntoIBJ"
]
}
"h_heatedDirectGModeLeaveSameDoor"Collects items: 3 |
|
Requires: {
"resetRoom": {
"nodes": [
2
]
}
}
"h_heatProof"
{
"cycleFrames": 300
}
{
"or": [
{
"haveBlueSuit": {}
},
"Plasma",
"ScrewAttack",
"Wave",
"Spazer",
"canPseudoScrew",
{
"cycleFrames": 90
}
]
}Resets obstacles: A Farm cycle drops: 1 Geruta |
|
Requires: {
"resetRoom": {
"nodes": [
2
]
}
}
"h_heatProof"
"h_lavaProof"
"Gravity"
{
"cycleFrames": 500
}
{
"or": [
{
"and": [
"canDash",
{
"or": [
"ScrewAttack",
{
"and": [
"Plasma",
{
"cycleFrames": 60
}
]
},
{
"and": [
"h_useMorphBombs",
"canFarmWhileShooting",
{
"cycleFrames": 1700
}
]
}
]
}
]
},
{
"and": [
{
"haveBlueSuit": {}
},
{
"cycleFrames": 690
}
]
}
]
}Resets obstacles: A Farm cycle drops: 5 Dragon |
|
Jump and aim down to make the Dragons active by bringing them on camera. Requires: {
"noBlueSuit": {}
}
{
"resetRoom": {
"nodes": [
2
]
}
}
"h_heatProof"
{
"or": [
{
"and": [
"Morph",
"Grapple",
"Plasma",
"canCameraManip",
{
"cycleFrames": 1620
}
]
},
{
"and": [
"HiJump",
"canSpeedyJump",
"Grapple",
"Plasma",
"canCameraManip",
{
"cycleFrames": 1920
}
]
},
{
"and": [
"SpaceJump",
"Plasma",
"canCameraManip",
{
"cycleFrames": 1770
}
]
},
{
"and": [
"canPreciseSpaceJump",
"ScrewAttack",
{
"cycleFrames": 1440
}
]
}
]
}Resets obstacles: A Farm cycle drops: 5 Dragon |
|
Requires: "Grapple"
{
"heatFrames": 320
}
{
"or": [
"canInsaneJump",
{
"and": [
"canTrickyDodgeEnemies",
{
"heatFrames": 60
}
]
},
{
"and": [
{
"enemyKill": {
"enemies": [
[
"Geruta"
]
],
"explicitWeapons": [
"Missile",
"Super",
"Wave",
"Spazer",
"Plasma"
]
}
},
{
"heatFrames": 50
}
]
},
{
"heatFrames": 160
}
]
}
{
"or": [
{
"noFlashSuit": {}
},
{
"and": [
"canMidAirMorph",
{
  "heatFrames": 20
}
]
}
]
}
{
"or": [
"canDash",
{
"heatFrames": 80
}
]
} |
|
Requires: "SpaceJump"
{
"or": [
{
"and": [
"canDash",
{
"heatFrames": 300
},
{
"or": [
"canInsaneJump",
{
"and": [
"canTrickyDodgeEnemies",
{
"heatFrames": 60
}
]
},
{
"and": [
{
"enemyKill": {
"enemies": [
[
"Geruta"
]
],
"explicitWeapons": [
"Missile",
"Super",
"Wave",
"Spazer",
"Plasma"
]
}
},
{
"heatFrames": 50
}
]
},
{
"heatFrames": 160
}
]
}
]
},
{
"and": [
{
"haveBlueSuit": {}
},
{
"heatFrames": 530
}
]
}
]
} |
|
Requires: "HiJump"
"canSpeedyJump"
"canWallJump"
{
"heatFrames": 360
}
{
"or": [
"canInsaneJump",
{
"and": [
"canTrickyDodgeEnemies",
{
"heatFrames": 60
}
]
},
{
"and": [
{
"enemyKill": {
"enemies": [
[
"Geruta"
]
],
"explicitWeapons": [
"Missile",
"Super",
"Wave",
"Spazer",
"Plasma"
]
}
},
{
"heatFrames": 50
}
]
},
{
"heatFrames": 160
}
]
} |
|
Requires: "canDash"
"canJumpIntoIBJ"
"canBombHorizontally"
{
"heatFrames": 810
}
{
"or": [
"canDoubleBombJump",
{
"and": [
"canJumpIntoIBJ",
{
"heatFrames": 330
}
]
}
]
} |
|
Kill the Dragon with bombs, then start the IBJ in the lava. It's an option without canJumpIntoIBJ. Requires: "h_heatProof" "h_lavaProof" "Gravity" "canLongIBJ" Dev note: FIXME: This doesn't need heatproof. |
|
With a blue suit, the IBJ must start from the lava, since the blue suit destroys the bomb block platforms. The blue suit can be used to kill the Dragons. Requires: {
"haveBlueSuit": {}
}
"canJumpIntoIBJ"
"canBombHorizontally"
"canBombJumpWaterEscape"
"canInsaneJump"
"canDoubleBombJump"
{
"heatFrames": 1260
}
{
"lavaFrames": 120
} |
|
Requires: "HiJump"
"canSpringBallJumpMidAir"
{
"or": [
{
"and": [
"canDash",
{
"heatFrames": 440
}
]
},
{
"and": [
{
"haveBlueSuit": {}
},
"Gravity",
{
"heatFrames": 520
},
{
"lavaFrames": 60
}
]
}
]
} |
|
Uses a bomb boost at the end of a mid-air SpringBall jump. Also requires a crouch jump and down-grab to complete the maneuver. Requires: "canDash"
{
"notable": "Spring Ball Bomb Boost"
}
"canSpringBallJumpMidAir"
"canUnmorphBombBoost"
"h_crouchJumpDownGrab"
{
"heatFrames": 800
}
{
"or": [
"canInsaneJump",
{
"and": [
{
"heatFrames": 250
},
"h_additionalBomb"
]
}
]
} |
|
Use mid-air Spring Ball jumps to manipulate the Geruta into position near the ledge. Then do a Spring Ball jump into a neutral damage boost (while still morphed) to reach the ledge. Requires: "canDash"
{
"notable": "Spring Ball Jump into Damage Boost"
}
{
"heatFrames": 1920
}
"canTrickyDodgeEnemies"
"canTrickySpringBallJump"
"canNeutralDamageBoost"
{
"enemyDamage": {
"enemy": "Geruta",
"type": "contact",
"hits": 1
}
} |
|
Either freeze the Geruta and turn off and on Ice to quickly thaw it and save Energy, or carefully jump over it without freezing it or getting hit. Then lure it left by jumping towards it from below with a series of mid-air Spring Ball jumps. Freeze it when it performs a larger swoop and use it as a platform to get to the item. Be careful not to jump into the Geruta's path to avoid hitting it. Requires: "canDash"
{
"notable": "Spring Ball Freeze"
}
"canTrickyUseFrozenEnemies"
"canSpringBallJumpMidAir"
{
"heatFrames": 1600
}
{
"or": [
"canTrickyDodgeEnemies",
{
"and": [
{
"heatFrames": 110
},
{
"enemyDamage": {
"enemy": "Geruta",
"type": "contact",
"hits": 1
}
}
]
}
]
}
{
"or": [
"canInsaneJump",
{
"heatFrames": 700
}
]
}Dev note: The canInsaneJump option is to represent the difference between good and bad Geruta RNG. |
|
Either freeze the Geruta and turn off and on Ice to quickly thaw it and save Energy, or carefully jump over it without freezing it or getting hit. Then lure it left by jumping towards it from below. Freeze it when it performs a larger swoop and use it as a platform to get to the item. Requires: "canDash"
"canTrickyUseFrozenEnemies"
"HiJump"
{
"heatFrames": 1050
}
{
"or": [
"canTrickyDodgeEnemies",
{
"heatFrames": 110
}
]
}
{
"or": [
"canInsaneJump",
{
"heatFrames": 500
}
]
}
{
"or": [
"h_midAirShootUp",
{
"heatFrames": 1000
}
]
}Dev note: The canInsaneJump option is to represent the difference between good and bad Geruta RNG. |
|
Ride the Geruta left to reach the missile location by freezing it repeatedly. Stay on its left side when it touches the ceiling for the enemy to continue moving forward. It may not be possible to climb back up to the Geruta if Samus falls. When it moves towards the ceiling, reset Samus' fall speed using an unmorph or by taking knockback damage, in order to wait for the Geruta to fall low enough to refreeze. Requires: {
"notable": "Ice Only Geruta Platforming"
}
"canTrickyUseFrozenEnemies"
"canTrickyJump"
{
"or": [
{
"and": [
"canResetFallSpeed",
"canTrickyDodgeEnemies",
{
"heatFrames": 1000
},
{
"or": [
"canInsaneJump",
{
"and": [
{
"noBlueSuit": {}
},
{
"enemyDamage": {
"enemy": "Geruta",
"type": "contact",
"hits": 1
}
}
]
}
]
}
]
},
{
"and": [
"canNeutralDamageBoost",
{
"enemyDamage": {
"enemy": "Geruta",
"type": "contact",
"hits": 3
}
}
]
}
]
}
{
"heatFrames": 3000
} |
|
Position at the end of the runway (or up to 4 pixels away) at the top-right of the room, gain run speed, perform a last-frame jump and ceiling mockball, then equip or unequip Spring Ball in order to reset Samus' vertical speed and just barely make it onto the ledge with the item. Requires: {
"notable": "Ceiling Mockball Spring Fling"
}
"h_speedJump"
"canInsaneJump"
{
"heatFrames": 500
}
"canMomentumConservingMorph"
"canSpringFling"
{
"or": [
"h_heatProof",
"canBeVeryPatient"
]
} |
From: 2
Right Door
To: 3
Item
Entrance condition: {
"comeInShinecharged": {}
}Requires: {
"shineChargeFrames": 110
}
"canShinechargeMovementComplex"
{
"shinespark": {
"frames": 70,
"excessFrames": 12
}
}
{
"heatFrames": 300
} |
From: 2
Right Door
To: 3
Item
Move quickly to avoid being hit by the Geruta before sparking. Samus can still take damage from the Geruta during the shinespark wind-up; this can be avoided by activating the spark quickly enough. Entrance condition: {
"comeInShinecharged": {}
}Requires: {
"shineChargeFrames": 100
}
"canShinechargeMovementTricky"
{
"shinespark": {
"frames": 70,
"excessFrames": 12
}
}
{
"heatFrames": 290
}
{
"or": [
{
"enemyDamage": {
"enemy": "Geruta",
"type": "contact",
"hits": 1
}
},
"canInsaneJump"
]
}Collects items: 3 |
|
To safely avoid Geruta damage, run left on the middle platform before jumping right, to manipulate the Geruta into swooping left. Alternatively, activate the spark quickly enough to avoid taking a Geruta hit. Entrance condition: {
"comeInShinecharging": {
"length": 4,
"openEnd": 0
}
}Requires: "canShinechargeMovementComplex"
{
"shinespark": {
"frames": 70,
"excessFrames": 12
}
}
{
"heatFrames": 310
} |
|
Requires: {
"canShineCharge": {
"usedTiles": 15,
"openEnd": 2
}
}
{
"or": [
{
"and": [
"canHorizontalShinespark",
{
"shinespark": {
"frames": 54,
"excessFrames": 15
}
}
]
},
{
"and": [
"h_heatProof",
"canShinechargeMovementComplex",
{
"shinespark": {
"frames": 12,
"excessFrames": 2
}
}
]
},
{
"and": [
"h_heatProof",
"canShinechargeMovementComplex",
"h_speedJump",
{
"shinespark": {
"frames": 9,
"excessFrames": 3
}
}
]
}
]
}
{
"heatFrames": 600
} |
From: 2
Right Door
To: 3
Item
Enter from the right door and spin jump onto the first ledge while barely landing on the ledge in order to prevent getting the Geruta on camera. Walk against the left wall and jump to trigger the Geruta. It should now be moving leftwards. Stand on the next platform against the right wall and shoot the Geruta to get it one shot away from being frozen. After a few swoops, it will come down; either freeze it or tank a hit. Then go up and stand on the corner and freeze it when it is in position. The Geruta will be stuck below and keep swooping, so if Energy permits, Samus will have several attempts. With full heat protection, Samus can quickly shinecharge left to right then run and spark midair to the left to save Energy. Entrance condition: {
"comeInNormally": {}
}Requires: {
"notable": "Frozen Geruta Shinecharge"
}
"h_trickyFrozenEnemyRunway"
"canCarefulJump"
"canHorizontalShinespark"
{
"canShineCharge": {
"usedTiles": 17,
"openEnd": 1
}
}
{
"heatFrames": 1050
}
{
"or": [
{
"and": [
"canHorizontalShinespark",
{
"shinespark": {
"frames": 54,
"excessFrames": 15
}
}
]
},
{
"and": [
"h_heatProof",
"canShinechargeMovementComplex",
{
"shinespark": {
"frames": 12,
"excessFrames": 2
}
}
]
},
{
"and": [
"h_heatProof",
"canShinechargeMovementComplex",
"h_speedJump",
{
"shinespark": {
"frames": 9,
"excessFrames": 3
}
}
]
}
]
} |
|
Entrance condition: {
"comeInWithGMode": {
"mode": "any",
"morphed": false
}
}Requires: "canDash"
"h_heatedGMode"
"canTrickyUseFrozenEnemies"
"canTrickyDodgeEnemies"
{
"or": [
"HiJump",
"canSpringBallJumpMidAir"
]
}
{
"heatFrames": 0
}Dev note: FIXME: A variant with only ice and reset fall speed could be added (possibly while carrying blue suit). |
|
Entrance condition: {
"comeInWithGMode": {
"mode": "any",
"morphed": false
}
}Requires: "h_heatedGMode"
{
"or": [
"SpaceJump",
{
"and": [
"HiJump",
"canSpeedyJump",
"canWallJump"
]
},
{
"and": [
"HiJump",
"canSpringBallJumpMidAir",
{
"or": [
"canDash",
{
"and": [
{
"haveBlueSuit": {}
},
"Gravity"
]
}
]
}
]
},
{
"and": [
"canDash",
{
"notable": "Spring Ball Bomb Boost"
},
"canSpringBallJumpMidAir",
"canUnmorphBombBoost",
"h_crouchJumpDownGrab",
{
"or": [
"canInsaneJump",
"h_additionalBomb"
]
}
]
},
{
"and": [
{
"canShineCharge": {
"usedTiles": 15,
"openEnd": 2
}
},
"canShinechargeMovementComplex",
{
"or": [
{
"shinespark": {
"frames": 12,
"excessFrames": 2
}
},
{
"and": [
"h_speedJump",
{
"shinespark": {
"frames": 9,
"excessFrames": 3
}
}
]
}
]
}
]
},
{
"and": [
{
"notable": "Ceiling Mockball Spring Fling"
},
"h_speedJump",
"canInsaneJump",
"canMomentumConservingMorph",
"canSpringFling"
]
}
]
}
{
"heatFrames": 0
}Dev note: FIXME: Variants with Geruta damage boost can be added. (Energy from immobile or CF) |
|
Entrance condition: {
"comeInWithGMode": {
"mode": "any",
"morphed": true
}
}Requires: "h_heatedGMode"
{
"or": [
"h_artificialMorphLongIBJ",
"h_artificialMorphJumpIntoIBJ"
]
}
{
"or": [
{
"noBlueSuit": {}
},
{
"and": [
"h_lavaProof",
"Gravity"
]
}
]
}
{
"heatFrames": 0
} |
From: 2
Right Door
To: 3
Item
Entrance condition: {
"comeInWithGMode": {
"mode": "indirect",
"morphed": false
}
}Requires: "h_heatedGMode"
"canTrickyUseFrozenEnemies"
"canTrickyDodgeEnemies"
"canDash"
{
"or": [
"HiJump",
"canSpringBallJumpMidAir"
]
}
{
"heatFrames": 90
}Clears obstacles: A Dev note: Goes to 3 because opening the gate mostly only makes sense when going back to the right for a longer runway or obtaining the item. FIXME: A variant with only ice and reset fall speed could be added (possibly while carrying blue suit). |
|
Entrance condition: {
"comeInWithGMode": {
"mode": "indirect",
"morphed": false
}
}Requires: "h_heatedGMode"
{
"or": [
"SpaceJump",
{
"and": [
"HiJump",
"canSpeedyJump",
"canWallJump"
]
},
{
"and": [
"HiJump",
"canSpringBallJumpMidAir",
{
"or": [
{
"noBlueSuit": {}
},
{
"and": [
"Gravity",
{
"lavaFrames": 25
}
]
}
]
}
]
},
{
"and": [
{
"notable": "Spring Ball Bomb Boost"
},
{
"noBlueSuit": {}
},
"canSpringBallJumpMidAir",
"canUnmorphBombBoost",
"h_crouchJumpDownGrab",
{
"or": [
"canInsaneJump",
"h_additionalBomb"
]
}
]
},
{
"and": [
{
"or": [
{
"canShineCharge": {
"usedTiles": 15,
"openEnd": 2
}
},
"h_storedSpark"
]
},
"canShinechargeMovementComplex",
{
"or": [
{
"shinespark": {
"frames": 12,
"excessFrames": 2
}
},
{
"and": [
"h_speedJump",
{
"shinespark": {
"frames": 9,
"excessFrames": 3
}
}
]
}
]
}
]
},
{
"and": [
{
"notable": "Ceiling Mockball Spring Fling"
},
"h_speedJump",
"canInsaneJump",
"canMomentumConservingMorph",
"canSpringFling"
]
}
]
}
{
"heatFrames": 90
}Clears obstacles: A Dev note: Goes to 3 because opening the gate mostly only makes sense when going back to the right for a longer runway or obtaining the item. FIXME: Variants with shinesparking or Geruta damage boost can be added. (Energy from immobile, CF, or energy free sparks) |
|
Entrance condition: {
"comeInWithGMode": {
"mode": "indirect",
"morphed": true
}
}Requires: "h_heatedGMode"
{
"or": [
"h_artificialMorphLongIBJ",
"h_artificialMorphJumpIntoIBJ"
]
}
{
"or": [
{
"noBlueSuit": {}
},
{
"and": [
"h_lavaProof",
"Gravity"
]
}
]
}
{
"heatFrames": 90
}Clears obstacles: A Dev note: Goes to 3 because opening the gate mostly only makes sense when going back to the right for a longer runway or obtaining the item. |
|
Requires: {
"or": [
{
"and": [
{
"ammo": {
"type": "Super",
"count": 1
}
},
{
"heatFrames": 110
}
]
},
{
"and": [
{
"obstaclesCleared": [
"A"
]
},
{
"heatFrames": 50
}
]
}
]
}
{
"or": [
"canDash",
{
"heatFrames": 10
}
]
}Clears obstacles: A |
|
Requires: "canDash"
{
"or": [
{
"and": [
{
"ammo": {
"type": "Super",
"count": 1
}
},
{
"heatFrames": 160
}
]
},
{
"and": [
{
"obstaclesCleared": [
"A"
]
},
{
"heatFrames": 50
}
]
}
]
}Exit condition: {
"leaveWithRunway": {
"length": 17,
"openEnd": 1
}
}Collects items: 3 Unlocks doors: {"types":["missiles"],"requires":[{"heatFrames":70}]}
{"types":["super"],"requires":[]}
{"types":["powerbomb"],"requires":[{"heatFrames":120}]} |
|
Requires: "canDash"
{
"or": [
{
"and": [
{
"ammo": {
"type": "Super",
"count": 1
}
},
{
"heatFrames": 160
}
]
},
{
"and": [
{
"obstaclesCleared": [
"A"
]
},
{
"heatFrames": 50
}
]
}
]
}Exit condition: {
"leaveWithRunway": {
"length": 12,
"openEnd": 0
}
}Unlocks doors: {"types":["missiles"],"requires":[{"heatFrames":70}]}
{"types":["super"],"requires":[]}
{"types":["powerbomb"],"requires":[{"heatFrames":120}]} |
|
Requires: "Grapple"
{
"heatFrames": 420
}
{
"noFlashSuit": {}
}
{
"or": [
"canDash",
{
"heatFrames": 30
}
]
}Dev note: With a flash suit, swinging across with Grapple would require morphing/unmorphing; but if Morph is available, it's faster to just go through the morph tunnel. |
|
Requires: "SpaceJump"
{
"heatFrames": 410
}
{
"or": [
"canDash",
{
"heatFrames": 190
}
]
} |
|
Requires: "HiJump"
"canSpeedyJump"
{
"heatFrames": 500
}Collects items: 3 |
|
This can be done from the top right, single tile block. Requires: "HiJump"
"canWallJump"
{
"heatFrames": 550
}
{
"or": [
"canDash",
{
"and": [
{
"haveBlueSuit": {}
},
{
"heatFrames": 210
},
{
"lavaFrames": 60
}
]
}
]
} |
|
Requires: "Morph"
{
"heatFrames": 360
}
{
"or": [
"canDash",
{
"and": [
{
"haveBlueSuit": {}
},
"Gravity",
{
"heatFrames": 200
},
{
"lavaFrames": 40
}
]
}
]
} |
|
Requires: "canDash"
{
"heatFrames": 350
}
{
"or": [
{
"lavaFrames": 70
},
{
"and": [
"Gravity",
{
"lavaFrames": 30
}
]
}
]
}
{
"or": [
{
"and": [
"canTrickyDodgeEnemies",
"Gravity"
]
},
{
"enemyDamage": {
"enemy": "Dragon",
"type": "contact",
"hits": 1
}
},
{
"enemyKill": {
"enemies": [
[
"Dragon"
]
],
"explicitWeapons": [
"Super",
"Missile",
"Plasma",
"ScrewAttack"
]
}
}
]
} |
|
Requires: {
"haveBlueSuit": {}
}
{
"heatFrames": 570
}
{
"lavaFrames": 110
} |
|
This strat just waits out the Dragon. Requires: "h_heatProof" "h_lavaProof" |
|
Requires: {
"noBlueSuit": {}
}
"h_heatProof"
"canTrickyUseFrozenEnemies"
{
"or": [
"HiJump",
"canTrickyDodgeEnemies"
]
} |
|
Requires: {
"or": [
{
"and": [
{
"ammo": {
"type": "Super",
"count": 1
}
},
{
"heatFrames": 90
}
]
},
{
"obstaclesCleared": [
"A"
]
}
]
}
{
"or": [
{
"and": [
{
"doorUnlockedAtNode": 1
},
{
"heatFrames": 30
},
{
"canShineCharge": {
"usedTiles": 17,
"openEnd": 0
}
}
]
},
{
"canShineCharge": {
"usedTiles": 16,
"openEnd": 0
}
}
]
}
{
"or": [
{
"and": [
"canHorizontalShinespark",
{
"shinespark": {
"frames": 62,
"excessFrames": 20
}
}
]
},
{
"and": [
"h_heatProof",
"canShinechargeMovementComplex",
{
"shinespark": {
"frames": 12,
"excessFrames": 2
}
}
]
},
{
"and": [
"h_heatProof",
"canShinechargeMovementComplex",
"h_speedJump",
{
"shinespark": {
"frames": 10,
"excessFrames": 4
}
}
]
}
]
}
{
"heatFrames": 450
}Clears obstacles: A Collects items: 3 Unlocks doors: {"nodeId":1,"types":["missiles"],"requires":[{"heatFrames":30}]}
{"nodeId":1,"types":["super"],"requires":[]}
{"nodeId":1,"types":["powerbomb"],"requires":[{"heatFrames":60}]} |
|
Requires: "h_heatedCrystalFlash" |
{
"$schema": "../../../schema/m3-room.schema.json",
"id": 121,
"name": "Crocomire Escape",
"area": "Norfair",
"subarea": "Upper",
"subsubarea": "West",
"roomAddress": "0x7AA0E",
"roomEnvironments": [
{
"heated": true
}
],
"mapTileMask": [
[
1,
1,
1,
1
],
[
1,
1,
1,
1
]
],
"nodes": [
{
"id": 1,
"name": "Left Door",
"nodeType": "door",
"nodeSubType": "blue",
"nodeAddress": "0x0019402",
"doorOrientation": "left",
"doorEnvironments": [
{
"physics": "air"
}
],
"mapTileMask": [
[
2,
1,
1,
1
],
[
1,
1,
1,
1
]
]
},
{
"id": 2,
"name": "Right Door",
"nodeType": "door",
"nodeSubType": "blue",
"nodeAddress": "0x001940e",
"doorOrientation": "right",
"doorEnvironments": [
{
"physics": "air"
}
],
"mapTileMask": [
[
1,
1,
2,
2
],
[
2,
2,
2,
2
]
]
},
{
"id": 3,
"name": "Item",
"nodeType": "item",
"nodeSubType": "visible",
"nodeItem": "Missile",
"nodeAddress": "0x78BC0",
"mapTileMask": [
[
1,
2,
1,
1
],
[
1,
1,
1,
1
]
],
"locks": [
{
"name": "Dummy Item Lock",
"lockType": "gameFlag",
"unlockStrats": [
{
"name": "Base (Collect Item)",
"notable": false,
"requires": [],
"flashSuitChecked": true,
"blueSuitChecked": true
}
]
}
]
}
],
"obstacles": [
{
"id": "A",
"name": "Green Gate Opened",
"obstacleType": "inanimate"
}
],
"enemies": [
{
"id": "e1",
"groupName": "Crocomire Escape Geruta",
"enemyName": "Geruta",
"quantity": 1,
"homeNodes": [
2
]
},
{
"id": "e2",
"groupName": "Crocomire Escape Dragons",
"enemyName": "Dragon",
"quantity": 5,
"homeNodes": [
2
]
}
],
"strats": [
{
"link": [
1,
1
],
"name": "Base (Unlock Door)",
"requires": [],
"unlocksDoors": [
{
"types": [
"missiles"
],
"requires": [
{
"heatFrames": 50
}
]
},
{
"types": [
"super"
],
"requires": []
},
{
"types": [
"powerbomb"
],
"requires": [
{
"heatFrames": 110
}
]
}
],
"flashSuitChecked": true,
"blueSuitChecked": true
},
{
"link": [
1,
1
],
"name": "Base (Come In Normally)",
"entranceCondition": {
"comeInNormally": {}
},
"requires": [],
"flashSuitChecked": true,
"blueSuitChecked": true
},
{
"link": [
1,
1
],
"name": "Base (Come In With Mockball)",
"entranceCondition": {
"comeInWithMockball": {
"adjacentMinTiles": 0,
"remoteAndLandingMinTiles": [
[
0,
0
]
],
"speedBooster": "any"
}
},
"requires": [
{
"heatFrames": 10
}
],
"flashSuitChecked": true,
"blueSuitChecked": true
},
{
"link": [
2,
2
],
"name": "Base (Unlock Door)",
"requires": [],
"unlocksDoors": [
{
"types": [
"missiles"
],
"requires": [
{
"heatFrames": 50
}
]
},
{
"types": [
"super"
],
"requires": []
},
{
"types": [
"powerbomb"
],
"requires": [
{
"heatFrames": 110
}
]
}
],
"flashSuitChecked": true,
"blueSuitChecked": true
},
{
"link": [
2,
2
],
"name": "Base (Come In Normally)",
"entranceCondition": {
"comeInNormally": {}
},
"requires": [],
"flashSuitChecked": true,
"blueSuitChecked": true
},
{
"link": [
2,
2
],
"name": "Base (Come In With Mockball)",
"entranceCondition": {
"comeInWithMockball": {
"adjacentMinTiles": 0,
"remoteAndLandingMinTiles": [
[
0,
0
]
],
"speedBooster": "any"
}
},
"requires": [
{
"heatFrames": 10
}
],
"flashSuitChecked": true,
"blueSuitChecked": true
},
{
"name": "Base (Collect Item)",
"notable": false,
"requires": [],
"flashSuitChecked": true,
"blueSuitChecked": true,
"link": [
3,
3
],
"collectsItems": [
3
]
},
{
"id": 1,
"link": [
1,
1
],
"name": "Leave with Runway",
"requires": [],
"exitCondition": {
"leaveWithRunway": {
"length": 5,
"openEnd": 0
}
},
"flashSuitChecked": true,
"blueSuitChecked": true
},
{
"id": 2,
"link": [
1,
1
],
"name": "Crystal Flash",
"requires": [
"h_heatedCrystalFlash"
],
"flashSuitChecked": true,
"blueSuitChecked": true
},
{
"id": 73,
"link": [
1,
1
],
"name": "Come in Shinecharging, Crystal Spark",
"entranceCondition": {
"comeInShinecharging": {
"length": 4,
"openEnd": 0
}
},
"requires": [
"h_heatedCrystalSpark"
],
"flashSuitChecked": true,
"blueSuitChecked": true
},
{
"id": 74,
"link": [
1,
1
],
"name": "Crystal Spark (In-Room)",
"requires": [
{
"obstaclesCleared": [
"A"
]
},
{
"or": [
{
"canShineCharge": {
"usedTiles": 16,
"openEnd": 1
}
},
{
"and": [
{
"doorUnlockedAtNode": 1
},
{
"canShineCharge": {
"usedTiles": 17,
"openEnd": 0
}
}
]
}
]
},
"h_heatedCrystalSpark"
],
"flashSuitChecked": true,
"blueSuitChecked": true,
"devNote": "If the door is opened, it is expected to shinecharge left to right, because touching the transition is particularly unforgiving."
},
{
"id": 45,
"link": [
1,
2
],
"name": "G-Mode Indirect With Frozen Geruta, Despawn Gate",
"entranceCondition": {
"comeInWithGMode": {
"mode": "indirect",
"morphed": false
}
},
"requires": [
"canTrickyUseFrozenEnemies",
{
"or": [
"HiJump",
"canTrickyDodgeEnemies"
]
},
"h_heatedGModeOpenDifferentDoor"
],
"flashSuitChecked": true,
"blueSuitChecked": true,
"note": "It is possible to lure the Geruta to be used as a platform with nothing but Ice."
},
{
"id": 46,
"link": [
1,
2
],
"name": "G-Mode Indirect With Assist, Despawn Gate",
"entranceCondition": {
"comeInWithGMode": {
"mode": "indirect",
"morphed": false
}
},
"requires": [
{
"or": [
"SpaceJump",
{
"and": [
"HiJump",
"canWallJump"
]
},
{
"and": [
"HiJump",
"canSpeedyJump"
]
},
{
"and": [
"canComplexGMode",
"h_lavaProof"
]
}
]
},
"h_heatedGModeOpenDifferentDoor"
],
"flashSuitChecked": true,
"blueSuitChecked": true,
"note": [
"Go over the plateau, or under it with lava protection.",
"To avoid the Dragon's fireballs, be sure to kill it quickly, overload the drops with the Dragons on the left first, or exit G-mode."
],
"devNote": "FIXME: Damage through the lava could work, or maybe a Geruta damage boost. (Energy from immobile or CF)"
},
{
"id": 47,
"link": [
1,
2
],
"name": "G-Mode Morph Indirect, Despawn Gate",
"entranceCondition": {
"comeInWithGMode": {
"mode": "indirect",
"morphed": true
}
},
"requires": [
"h_artificialMorphMovement",
"h_heatedGModeOpenDifferentDoor"
],
"flashSuitChecked": true,
"blueSuitChecked": true
},
{
"id": 3,
"link": [
1,
3
],
"name": "Base",
"requires": [
{
"obstaclesCleared": [
"A"
]
},
{
"heatFrames": 50
},
{
"or": [
"canDash",
{
"heatFrames": 10
}
]
}
],
"flashSuitChecked": true,
"blueSuitChecked": true
},
{
"id": 4,
"link": [
1,
3
],
"name": "Grapple Teleport",
"entranceCondition": {
"comeInWithGrappleTeleport": {
"blockPositions": [
[
12,
12
]
]
}
},
"requires": [
{
"heatFrames": 20
}
],
"flashSuitChecked": true,
"blueSuitChecked": true
},
{
"id": 5,
"link": [
1,
3
],
"name": "High Speed Gate Glitch",
"entranceCondition": {
"comeInRunning": {
"speedBooster": "yes",
"minTiles": 34
}
},
"requires": [
{
"notable": "High Speed Gate Glitch"
},
"h_speedJump",
"h_heatedGreenGateGlitch",
{
"ammo": {
"type": "Super",
"count": 1
}
},
"canInsaneJump",
{
"noFlashSuit": {}
}
],
"clearsObstacles": [
"A"
],
"flashSuitChecked": true,
"blueSuitChecked": true,
"note": [
"Build up 34 tiles worth of run speed and jump into the door on the last frame.",
"Hold angle up through the transition but also aim down to duck below the ceiling until Samus is past it.",
"Fire the Super Missile frame perfectly to open the gate."
],
"devNote": [
"1 extra tile is added so that you can jump into the door, simplifying the inputs a bit."
]
},
{
"id": 48,
"link": [
1,
3
],
"name": "G-Mode Indirect, Open Gate",
"entranceCondition": {
"comeInWithGMode": {
"mode": "indirect",
"morphed": false
}
},
"requires": [
"h_heatedGMode",
{
"heatFrames": 90
}
],
"clearsObstacles": [
"A"
],
"flashSuitChecked": true,
"blueSuitChecked": true,
"devNote": "Goes to 3 because opening the gate mostly only makes sense when going back to the right for a longer runway or obtaining the item."
},
{
"id": 49,
"link": [
1,
3
],
"name": "G-Mode Indirect, Despawn Gate",
"entranceCondition": {
"comeInWithGMode": {
"mode": "indirect",
"morphed": false
}
},
"requires": [
"h_heatedGMode",
{
"heatFrames": 0
}
],
"flashSuitChecked": true,
"blueSuitChecked": true
},
{
"id": 6,
"link": [
2,
1
],
"name": "Grapple Teleport",
"entranceCondition": {
"comeInWithGrappleTeleport": {
"blockPositions": [
[
5,
3
],
[
7,
2
]
]
}
},
"requires": [
{
  "heatFrames": 45
}
],
"flashSuitChecked": true,
"blueSuitChecked": true
},
{
"id": 7,
"link": [
2,
1
],
"name": "Grapple Teleport Door Lock Skip",
"entranceCondition": {
"comeInWithGrappleTeleport": {
"blockPositions": [
[
3,
12
],
[
3,
13
]
]
}
},
"requires": [],
"bypassesDoorShell": "yes",
"flashSuitChecked": true,
"blueSuitChecked": true
},
{
"id": 8,
"link": [
2,
1
],
"name": "Carry Grapple Teleport (Top Position)",
"entranceCondition": {
"comeInWithGrappleTeleport": {
"blockPositions": [
[
3,
12
]
]
}
},
"requires": [],
"exitCondition": {
"leaveWithGrappleTeleport": {
"blockPositions": [
[
3,
12
]
]
}
},
"bypassesDoorShell": "yes",
"flashSuitChecked": true,
"blueSuitChecked": true
},
{
"id": 9,
"link": [
2,
1
],
"name": "Carry Grapple Teleport (Bottom Position)",
"entranceCondition": {
"comeInWithGrappleTeleport": {
"blockPositions": [
[
3,
13
]
]
}
},
"requires": [],
"exitCondition": {
"leaveWithGrappleTeleport": {
"blockPositions": [
[
3,
13
]
]
}
},
"bypassesDoorShell": "yes",
"flashSuitChecked": true,
"blueSuitChecked": true
},
{
"id": 10,
"link": [
2,
1
],
"name": "Grapple Teleport X-Ray Climb",
"entranceCondition": {
"comeInWithGrappleTeleport": {
"blockPositions": [
[
2,
18
],
[
2,
19
],
[
2,
28
],
[
2,
29
]
]
}
},
"requires": [
"canXRayClimb",
{
"heatFrames": 1600
}
],
"bypassesDoorShell": "yes",
"flashSuitChecked": true,
"blueSuitChecked": true,
"note": [
"Exit the previous room with Samus in a standing pose (while grappled).",
"After teleporting, press right to release Grapple while staying standing (not being forced into a crouch).",
"Then X-ray climb 1 screen to get up to the door transition, without needing to open the door.",
"Samus will not be visible during the climb."
]
},
{
"id": 42,
"link": [
2,
1
],
"name": "G-Mode Setup - Get Hit By Geruta, Heatproof, Morph",
"requires": [
"canComplexGMode",
"h_heatProof",
"canBePatient",
"canCameraManip",
"Morph",
{
"or": [
"canTrickyDodgeEnemies",
"SpaceJump",
"Charge",
"Ice",
"Plasma",
{
"ammo": {
"type": "Missile",
"count": 2
}
},
{
"ammo": {
"type": "Super",
"count": 2
}
},
{
"ammo": {
"type": "PowerBomb",
"count": 2
}
},
{
"enemyDamage": {
"enemy": "Dragon",
"type": "fireball",
"hits": 5
}
},
{
"and": [
"h_lavaProof",
{
"or": [
"ScrewAttack",
"h_bombThings"
]
}
]
}
]
},
{
"or": [
"SpaceJump",
{
"and": [
"HiJump",
"canSpeedyJump",
"canWallJump"
]
},
{
"and": [
{
"noBlueSuit": {}
},
"HiJump",
"canSpringBallJumpMidAir"
]
},
{
"and": [
{
"noBlueSuit": {}
},
"canBeVeryPatient",
{
"or": [
"canLongIBJ",
"canJumpIntoIBJ"
]
}
]
},
{
"and": [
"canBeVeryPatient",
"Grapple",
{
"or": [
"HiJump",
"canSpringBallJumpMidAir"
]
}
]
}
]
},
{
"or": [
{
"ammo": {
"type": "Super",
"count": 1
}
},
{
"obstaclesCleared": [
"A"
]
}
]
}
],
"exitCondition": {
"leaveWithGModeSetup": {}
},
"unlocksDoors": [
{
"types": [
"ammo"
],
"requires": []
}
],
"collectsItems": [
3
],
"flashSuitChecked": true,
"blueSuitChecked": true,
"note": "Lure the Geruta to the left door. This may require many jumps to get it to swoop up onto the ledge and not get stuck.",
"devNote": "It's possible to avoid the item, but the Geruta will get stuck on it and usually require many swoops to get past it."
},
{
"id": 43,
"link": [
2,
1
],
"name": "G-Mode Setup - Get Hit By Geruta, Heatproof, Morphless",
"requires": [
"canComplexGMode",
"h_heatProof",
"canBePatient",
"canCameraManip",
{
"or": [
"canInsaneJump",
"Ice",
"h_lavaProof",
{
"enemyDamage": {
"enemy": "Geruta",
"type": "contact",
"hits": 1
}
},
{
"and": [
"canUseIFrames",
{
"enemyDamage": {
"enemy": "Dragon",
"type": "fireball",
"hits": 1
}
},
{
"lavaFrames": 55
}
]
}
]
},
{
"or": [
"canTrickyDodgeEnemies",
"SpaceJump",
"Charge",
"Ice",
"Plasma",
{
"ammo": {
"type": "Missile",
"count": 2
}
},
{
"ammo": {
"type": "Super",
"count": 2
}
},
{
"enemyDamage": {
"enemy": "Dragon",
"type": "fireball",
"hits": 5
}
},
{
"and": [
"h_lavaProof",
"ScrewAttack"
]
}
]
},
{
"or": [
"SpaceJump",
{
"and": [
"HiJump",
"canSpeedyJump",
"canWallJump"
]
},
{
"and": [
"canBeVeryPatient",
"HiJump",
"Grapple"
]
}
]
},
{
"or": [
{
"ammo": {
"type": "Super",
"count": 1
}
},
{
"obstaclesCleared": [
"A"
]
}
]
}
],
"exitCondition": {
"leaveWithGModeSetup": {}
},
"unlocksDoors": [
{
"types": [
"ammo"
],
"requires": []
}
],
"collectsItems": [
3
],
"flashSuitChecked": true,
"blueSuitChecked": true,
"note": [
"Lure the Geruta to the left door. This may require many jumps to get it to swoop up onto the ledge and not get stuck.",
"To safely pass the Geruta without a hit, jump left below it, to get it to swoop left before going up."
],
"devNote": "It's possible to avoid the item, but the Geruta will get stuck on it and usually require many swoops to get past it."
},
{
"id": 44,
"link": [
2,
1
],
"name": "G-Mode Setup - Get Hit By Geruta, Heatproof, Frozen Geruta Step",
"requires": [
{
"noBlueSuit": {}
},
"canComplexGMode",
"h_heatProof",
"canBeVeryPatient",
"canCameraManip",
"canTrickyUseFrozenEnemies",
{
"or": [
"HiJump",
"canSpringBallJumpMidAir"
]
},
{
"or": [
{
"ammo": {
"type": "Super",
"count": 1
}
},
{
"obstaclesCleared": [
"A"
]
}
]
}
],
"exitCondition": {
"leaveWithGModeSetup": {}
},
"unlocksDoors": [
{
"types": [
"ammo"
],
"requires": []
}
],
"collectsItems": [
3
],
"flashSuitChecked": true,
"blueSuitChecked": true,
"note": [
"Use the Geruta to get up to the top left ledge while also getting it to swoop into the top left region.",
"This requires many jumps from below to get it to swoop up onto the ledge and not get stuck.",
"When the Geruta is heading into the right spot, use it as a platform to get up as well."
],
"devNote": "It's possible to avoid the item, but the Geruta will get stuck on it and usually require many swoops to get past it."
},
{
"id": 50,
"link": [
2,
1
],
"name": "G-Mode Indirect With Frozen Geruta, Despawn Gate",
"entranceCondition": {
"comeInWithGMode": {
"mode": "indirect",
"morphed": false
}
},
"requires": [
{
"noBlueSuit": {}
},
"canTrickyUseFrozenEnemies",
"canTrickyDodgeEnemies",
{
"or": [
"HiJump",
"canSpringBallJumpMidAir"
]
},
"h_heatedGModeOpenDifferentDoor"
],
"flashSuitChecked": true,
"blueSuitChecked": true,
"devNote": "FIXME: By staying up with the Geruta the whole time, this could be done without HiJump or Spring Ball and could carry a blue suit."
},
{
"id": 51,
"link": [
2,
1
],
"name": "G-Mode Indirect With Assist, Despawn Gate",
"entranceCondition": {
"comeInWithGMode": {
"mode": "indirect",
"morphed": false
}
},
"requires": [
{
"or": [
"SpaceJump",
{
"and": [
"HiJump",
"canSpeedyJump",
"canWallJump"
]
},
{
"and": [
"HiJump",
"canSpringBallJumpMidAir",
{
"or": [
{
"noBlueSuit": {}
},
{
"and": [
"Gravity",
{
"lavaFrames": 25
}
]
}
]
}
]
},
{
"and": [
{
"notable": "Spring Ball Bomb Boost"
},
{
"noBlueSuit": {}
},
"canSpringBallJumpMidAir",
"canUnmorphBombBoost",
"h_crouchJumpDownGrab",
{
"or": [
"canInsaneJump",
"h_additionalBomb"
]
}
]
},
{
"and": [
{
"or": [
{
"canShineCharge": {
"usedTiles": 15,
"openEnd": 2
}
},
"h_storedSpark"
]
},
"canShinechargeMovementComplex",
{
"or": [
{
"shinespark": {
"frames": 12,
"excessFrames": 2
}
},
{
"and": [
"h_speedJump",
{
"shinespark": {
"frames": 9,
"excessFrames": 3
}
}
]
}
]
}
]
},
{
"and": [
{
"notable": "Ceiling Mockball Spring Fling"
},
"h_speedJump",
"canInsaneJump",
"canMomentumConservingMorph",
"canSpringFling"
]
}
]
},
"h_heatedGModeOpenDifferentDoor"
],
"flashSuitChecked": true,
"blueSuitChecked": true
},
{
"id": 52,
"link": [
2,
1
],
"name": "G-Mode Indirect Morph, Despawn Gate",
"entranceCondition": {
"comeInWithGMode": {
"mode": "indirect",
"morphed": true
}
},
"requires": [
{
"noBlueSuit": {}
},
{
"or": [
"h_artificialMorphLongIBJ",
"h_artificialMorphJumpIntoIBJ"
]
},
"h_heatedGModeOpenDifferentDoor"
],
"flashSuitChecked": true,
"blueSuitChecked": true
},
{
"id": 11,
"link": [
2,
2
],
"name": "Leave with Runway",
"requires": [],
"exitCondition": {
"leaveWithRunway": {
"length": 5,
"openEnd": 1
}
},
"flashSuitChecked": true,
"blueSuitChecked": true
},
{
"id": 12,
"link": [
2,
2
],
"name": "Short Short Charge Leave Shinecharged",
"requires": [
"h_heatProof",
{
"canShineCharge": {
"usedTiles": 15,
"openEnd": 2
}
},
{
"shineChargeFrames": 165
}
],
"exitCondition": {
"leaveShinecharged": {}
},
"flashSuitChecked": true,
"blueSuitChecked": true
},
{
"id": 13,
"link": [
2,
2
],
"name": "Frozen Geruta Shinecharge (Shinespark Out Right)",
"entranceCondition": {
"comeInNormally": {}
},
"requires": [
{
"notable": "Frozen Geruta Shinecharge"
},
"h_trickyFrozenEnemyRunway",
"canCarefulJump",
{
"canShineCharge": {
"usedTiles": 17,
"openEnd": 1
}
},
"canShinechargeMovementTricky",
{
"heatFrames": 1260
},
{
"shinespark": {
"frames": 2,
"excessFrames": 0
}
}
],
"exitCondition": {
"leaveWithSpark": {}
},
"unlocksDoors": [
{
"types": [
"ammo"
],
"requires": []
}
],
"flashSuitChecked": true,
"blueSuitChecked": true,
"note": [
"Enter from the right door and spin jump onto the first ledge while barely landing on the ledge in order to prevent getting the Geruta on camera.",
"Walk against the left wall and jump to trigger the Geruta. It should now be moving leftwards.",
"Stand on the next platform against the right wall and shoot the Geruta to get it one shot away from being frozen.",
"After a few swoops, it will come down; either freeze it or tank a hit. Then go up and stand on the corner and freeze it when it is in position.",
"The Geruta will be stuck below and keep swooping, so if Energy permits, Samus will have several attempts.",
"Quickly shinecharge left to right, kill the Geruta and spark out the bottom right door."
]
},
{
"id": 14,
"link": [
2,
2
],
"name": "Crystal Flash",
"requires": [
"h_heatedCrystalFlash"
],
"flashSuitChecked": true,
"blueSuitChecked": true
},
{
"id": 75,
"link": [
2,
2
],
"name": "Crystal Spark (In-Room)",
"requires": [
{
"canShineCharge": {
"usedTiles": 15,
"openEnd": 1
}
},
"h_heatedCrystalSpark"
],
"flashSuitChecked": true,
"blueSuitChecked": true
},
{
"id": 62,
"link": [
2,
2
],
"name": "Leave With Temporary Blue",
"requires": [
{
"heatFrames": 1180
},
{
"canShineCharge": {
"usedTiles": 15,
"openEnd": 2
}
},
"canLongChainTemporaryBlue",
"canXRayTurnaround",
{
"or": [
"canXRayCancelShinecharge",
{
"heatFrames": 160
}
]
}
],
"exitCondition": {
"leaveWithTemporaryBlue": {}
},
"flashSuitChecked": true,
"blueSuitChecked": true,
"note": [
"Use the platform at the top-right of the room to gain temporary blue, then chain it through the door."
]
},
{
"id": 70,
"link": [
2,
2
],
"name": "R-Mode Spark Interrupt",
"entranceCondition": {
"comeInWithRMode": {}
},
"requires": [
"h_heatProof",
{
"or": [
"h_heatedCrystalFlashForReserveEnergy",
{
"and": [
"h_RModeCanRefillReserves",
{
"or": [
{
"and": [
{
"enemyKill": {
"enemies": [
[
"Dragon"
],
[
"Dragon"
],
[
"Dragon"
],
[
"Dragon"
],
[
"Dragon"
]
],
"explicitWeapons": [
"Missile",
"Super",
"Charge",
"Plasma"
]
}
},
"Grapple"
]
},
{
"and": [
{
"enemyKill": {
"enemies": [
[
"Dragon"
],
[
"Dragon"
],
[
"Dragon"
],
[
"Dragon"
],
[
"Dragon"
]
]
}
},
"h_lavaProof"
]
}
]
},
{
"partialRefill": {
"type": "ReserveEnergy",
"limit": 20
}
}
]
}
]
},
"canTrickyJump",
{
"or": [
{
"canShineCharge": {
"usedTiles": 15,
"openEnd": 2
}
},
{
"and": [
{
"notable": "Frozen Geruta Shinecharge"
},
"h_trickyFrozenEnemyRunway",
{
"canShineCharge": {
"usedTiles": 17,
"openEnd": 1
}
},
"canShinechargeMovementTricky"
]
}
]
},
{
"autoReserveTrigger": {
"maxReserveEnergy": 95
}
},
"canRModeSparkInterrupt"
],
"flashSuitChecked": true,
"blueSuitChecked": true,
"note": [
"Farm the Dragons and Geruta. Shinecharge on the upper platform with the Geruta, then weave back down to the Dragon by the door to interrupt."
]
},
{
"id": 65,
"link": [
2,
2
],
"name": "G-Mode Setup - Get Hit By Geruta",
"requires": [
"canComplexGMode",
"h_heatProof",
"canBePatient",
{
"or": [
{
"and": [
"canInsaneJump",
"canTrickyUseFrozenEnemies"
]
},
{
"enemyDamage": {
"enemy": "Geruta",
"type": "contact",
"hits": 2
}
}
]
},
{
"or": [
"canInsaneJump",
"canTrickyUseFrozenEnemies",
"Charge",
"Plasma",
"h_usePowerBomb",
{
"ammo": {
"type": "Missile",
"count": 3
}
},
{
"ammo": {
"type": "Super",
"count": 1
}
},
{
"and": [
"ScrewAttack",
{
"lavaFrames": 20
}
]
}
]
}
],
"exitCondition": {
"leaveWithGModeSetup": {}
},
"flashSuitChecked": true,
"blueSuitChecked": true,
"note": [
"On room entry, perform a low spin jump onto the first ledge to avoid getting the Geruta to swoop to the right.",
"Jump against the left wall, then move right and the Geruta should come down quickly.",
"Move back and forth until it comes down further. This can be tricky if needing to avoid contact damage.",
"Quickly freezing the Geruta as it starts to come down can be used to avoid taking a hit.",
"Killing the Dragon on room entry can also be helpful."
]
},
{
"id": 53,
"link": [
2,
2
],
"name": "G-Mode With Frozen Geruta, Remote Acquire Item",
"entranceCondition": {
"comeInWithGMode": {
"mode": "direct",
"morphed": false
}
},
"requires": [
{
"noBlueSuit": {}
},
"canRemoteAcquire",
"canTrickyUseFrozenEnemies",
"canTrickyDodgeEnemies",
{
"or": [
"HiJump",
"canSpringBallJumpMidAir"
]
},
"h_heatedDirectGModeLeaveSameDoor"
],
"collectsItems": [
3
],
"flashSuitChecked": true,
"blueSuitChecked": true,
"devNote": "FIXME: By staying up with the Geruta the whole time, this could be done without HiJump or Spring Ball and could carry blue suit."
},
{
"id": 54,
"link": [
2,
2
],
"name": "G-Mode With Assist, Remote Acquire Item",
"entranceCondition": {
"comeInWithGMode": {
"mode": "direct",
"morphed": false
}
},
"requires": [
"canRemoteAcquire",
{
"or": [
"SpaceJump",
{
"and": [
"HiJump",
"canSpeedyJump",
"canWallJump"
]
},
{
"and": [
"HiJump",
"canSpringBallJumpMidAir",
{
"or": [
{
"noBlueSuit": {}
},
{
"and": [
"Gravity",
{
"lavaFrames": 25
}
]
}
]
}
]
},
{
"and": [
{
"notable": "Spring Ball Bomb Boost"
},
{
"noBlueSuit": {}
},
"canSpringBallJumpMidAir",
"canUnmorphBombBoost",
"h_crouchJumpDownGrab",
"canInsaneJump"
]
},
{
"and": [
{
"or": [
{
"canShineCharge": {
"usedTiles": 15,
"openEnd": 2
}
},
"h_storedSpark"
]
},
"canShinechargeMovementComplex",
{
"or": [
{
"shinespark": {
"frames": 12,
"excessFrames": 2
}
},
{
"and": [
"h_speedJump",
{
"shinespark": {
"frames": 9,
"excessFrames": 3
}
}
]
}
]
}
]
},
{
"and": [
{
"notable": "Ceiling Mockball Spring Fling"
},
"h_speedJump",
"canInsaneJump",
"canMomentumConservingMorph",
"canSpringFling"
]
}
]
},
"h_heatedDirectGModeLeaveSameDoor"
],
"collectsItems": [
3
],
"flashSuitChecked": true,
"blueSuitChecked": true,
"note": "Touch the item as little as possible in order to prevent PLMs from being overloaded, so the platforms below remain solid.",
"devNote": [
"There is no leniency option for using an extra Power Bomb, because it will contribute to PLM overload. (2 PBs is technically barely possible)"
]
},
{
"id": 55,
"link": [
2,
2
],
"name": "G-Mode Morph, Remote Acquire Item",
"entranceCondition": {
"comeInWithGMode": {
"mode": "direct",
"morphed": true
}
},
"requires": [
{
"noBlueSuit": {}
},
"canRemoteAcquire",
{
"or": [
"h_artificialMorphLongIBJ",
"h_artificialMorphJumpIntoIBJ"
]
},
"h_heatedDirectGModeLeaveSameDoor"
],
"collectsItems": [
3
],
"flashSuitChecked": true,
"blueSuitChecked": true
},
{
"id": 66,
"link": [
2,
2
],
"name": "Geruta Farm",
"requires": [
{
"resetRoom": {
"nodes": [
2
]
}
},
"h_heatProof",
{
"cycleFrames": 300
},
{
"or": [
{
"haveBlueSuit": {}
},
"Plasma",
"ScrewAttack",
"Wave",
"Spazer",
"canPseudoScrew",
{
"cycleFrames": 90
}
]
}
],
"resetsObstacles": [
"A"
],
"farmCycleDrops": [
{
"enemy": "Geruta",
"count": 1
}
],
"flashSuitChecked": true,
"blueSuitChecked": true
},
{
"id": 67,
"link": [
2,
2
],
"name": "Dragon Farm (Lava Dive)",
"requires": [
{
"resetRoom": {
"nodes": [
2
]
}
},
"h_heatProof",
"h_lavaProof",
"Gravity",
{
"cycleFrames": 500
},
{
"or": [
{
"and": [
"canDash",
{
"or": [
"ScrewAttack",
{
"and": [
"Plasma",
{
"cycleFrames": 60
}
]
},
{
"and": [
"h_useMorphBombs",
"canFarmWhileShooting",
{
"cycleFrames": 1700
}
]
}
]
}
]
},
{
"and": [
{
"haveBlueSuit": {}
},
{
"cycleFrames": 690
}
]
}
]
}
],
"resetsObstacles": [
"A"
],
"farmCycleDrops": [
{
"enemy": "Dragon",
"count": 5
}
],
"flashSuitChecked": true,
"blueSuitChecked": true
},
{
"id": 68,
"link": [
2,
2
],
"name": "Dragon Farm (Avoid Lava)",
"requires": [
{
"noBlueSuit": {}
},
{
"resetRoom": {
"nodes": [
2
]
}
},
"h_heatProof",
{
"or": [
{
"and": [
"Morph",
"Grapple",
"Plasma",
"canCameraManip",
{
"cycleFrames": 1620
}
]
},
{
"and": [
"HiJump",
"canSpeedyJump",
"Grapple",
"Plasma",
"canCameraManip",
{
"cycleFrames": 1920
}
]
},
{
"and": [
"SpaceJump",
"Plasma",
"canCameraManip",
{
"cycleFrames": 1770
}
]
},
{
"and": [
"canPreciseSpaceJump",
"ScrewAttack",
{
"cycleFrames": 1440
}
]
}
]
}
],
"resetsObstacles": [
"A"
],
"farmCycleDrops": [
{
"enemy": "Dragon",
"count": 5
}
],
"flashSuitChecked": true,
"blueSuitChecked": true,
"note": "Jump and aim down to make the Dragons active by bringing them on camera."
},
{
"id": 15,
"link": [
2,
3
],
"name": "Grapple",
"requires": [
"Grapple",
{
"heatFrames": 320
},
{
"or": [
"canInsaneJump",
{
"and": [
"canTrickyDodgeEnemies",
{
"heatFrames": 60
}
]
},
{
"and": [
{
"enemyKill": {
"enemies": [
[
"Geruta"
]
],
"explicitWeapons": [
"Missile",
"Super",
"Wave",
"Spazer",
"Plasma"
]
}
},
{
"heatFrames": 50
}
]
},
{
"heatFrames": 160
}
]
},
{
"or": [
{
"noFlashSuit": {}
},
{
"and": [
"canMidAirMorph",
{
"heatFrames": 20
}
]
}
]
},
{
"or": [
"canDash",
{
"heatFrames": 80
}
]
}
],
"flashSuitChecked": true,
"blueSuitChecked": true
},
{
"id": 16,
"link": [
2,
3
],
"name": "Space Jump",
"requires": [
"SpaceJump",
{
"or": [
{
"and": [
"canDash",
{
"heatFrames": 300
},
{
"or": [
"canInsaneJump",
{
"and": [
"canTrickyDodgeEnemies",
{
"heatFrames": 60
}
]
},
{
"and": [
{
"enemyKill": {
"enemies": [
[
"Geruta"
]
],
"explicitWeapons": [
"Missile",
"Super",
"Wave",
"Spazer",
"Plasma"
]
}
},
{
"heatFrames": 50
}
]
},
{
"heatFrames": 160
}
]
}
]
},
{
"and": [
{
"haveBlueSuit": {}
},
{
"heatFrames": 530
}
]
}
]
}
],
"flashSuitChecked": true,
"blueSuitChecked": true
},
{
"id": 17,
"link": [
2,
3
],
"name": "Speedy HiJump Wall Jump",
"requires": [
"HiJump",
"canSpeedyJump",
"canWallJump",
{
"heatFrames": 360
},
{
"or": [
"canInsaneJump",
{
"and": [
"canTrickyDodgeEnemies",
{
"heatFrames": 60
}
]
},
{
"and": [
{
"enemyKill": {
"enemies": [
[
"Geruta"
]
],
"explicitWeapons": [
"Missile",
"Super",
"Wave",
"Spazer",
"Plasma"
]
}
},
{
"heatFrames": 50
}
]
},
{
"heatFrames": 160
}
]
}
],
"flashSuitChecked": true,
"blueSuitChecked": true
},
{
"id": 18,
"link": [
2,
3
],
"name": "Jump into IBJ",
"requires": [
"canDash",
"canJumpIntoIBJ",
"canBombHorizontally",
{
"heatFrames": 810
},
{
"or": [
"canDoubleBombJump",
{
"and": [
"canJumpIntoIBJ",
{
"heatFrames": 330
}
]
}
]
}
],
"flashSuitChecked": true,
"blueSuitChecked": true
},
{
"id": 19,
"link": [
2,
3
],
"name": "Lava Proof IBJ",
"requires": [
"h_heatProof",
"h_lavaProof",
"Gravity",
"canLongIBJ"
],
"flashSuitChecked": true,
"blueSuitChecked": true,
"note": "Kill the Dragon with bombs, then start the IBJ in the lava. It's an option without canJumpIntoIBJ.",
"devNote": "FIXME: This doesn't need heatproof."
},
{
"id": 71,
"link": [
2,
3
],
"name": "Blue Suit Lava Escape IBJ",
"requires": [
{
"haveBlueSuit": {}
},
"canJumpIntoIBJ",
"canBombHorizontally",
"canBombJumpWaterEscape",
"canInsaneJump",
"canDoubleBombJump",
{
"heatFrames": 1260
},
{
"lavaFrames": 120
}
],
"flashSuitChecked": true,
"blueSuitChecked": true,
"note": [
"With a blue suit, the IBJ must start from the lava, since the blue suit destroys the bomb block platforms.",
"The blue suit can be used to kill the Dragons."
]
},
{
"id": 20,
"link": [
2,
3
],
"name": "Spring Ball Jump",
"requires": [
"HiJump",
"canSpringBallJumpMidAir",
{
"or": [
{
"and": [
"canDash",
{
"heatFrames": 440
}
]
},
{
"and": [
{
"haveBlueSuit": {}
},
"Gravity",
{
"heatFrames": 520
},
{
"lavaFrames": 60
}
]
}
]
}
],
"flashSuitChecked": true,
"blueSuitChecked": true
},
{
"id": 21,
"link": [
2,
3
],
"name": "Spring Ball Bomb Boost",
"requires": [
"canDash",
{
"notable": "Spring Ball Bomb Boost"
},
"canSpringBallJumpMidAir",
"canUnmorphBombBoost",
"h_crouchJumpDownGrab",
{
"heatFrames": 800
},
{
"or": [
"canInsaneJump",
{
"and": [
{
"heatFrames": 250
},
"h_additionalBomb"
]
}
]
}
],
"flashSuitChecked": true,
"blueSuitChecked": true,
"note": [
"Uses a bomb boost at the end of a mid-air SpringBall jump.",
"Also requires a crouch jump and down-grab to complete the maneuver."
]
},
{
"id": 63,
"link": [
2,
3
],
"name": "Spring Ball Jump into Damage Boost",
"requires": [
"canDash",
{
"notable": "Spring Ball Jump into Damage Boost"
},
{
"heatFrames": 1920
},
"canTrickyDodgeEnemies",
"canTrickySpringBallJump",
"canNeutralDamageBoost",
{
"enemyDamage": {
"enemy": "Geruta",
"type": "contact",
"hits": 1
}
}
],
"flashSuitChecked": true,
"blueSuitChecked": true,
"note": [
"Use mid-air Spring Ball jumps to manipulate the Geruta into position near the ledge.",
"Then do a Spring Ball jump into a neutral damage boost (while still morphed) to reach the ledge."
]
},
{
"id": 22,
"link": [
2,
3
],
"name": "Spring Ball Freeze",
"requires": [
"canDash",
{
"notable": "Spring Ball Freeze"
},
"canTrickyUseFrozenEnemies",
"canSpringBallJumpMidAir",
{
"heatFrames": 1600
},
{
"or": [
"canTrickyDodgeEnemies",
{
"and": [
{
"heatFrames": 110
},
{
"enemyDamage": {
"enemy": "Geruta",
"type": "contact",
"hits": 1
}
}
]
}
]
},
{
"or": [
"canInsaneJump",
{
"heatFrames": 700
}
]
}
],
"flashSuitChecked": true,
"blueSuitChecked": true,
"note": [
"Either freeze the Geruta and turn off and on Ice to quickly thaw it and save Energy, or carefully jump over it without freezing it or getting hit.",
"Then lure it left by jumping towards it from below with a series of mid-air Spring Ball jumps. Freeze it when it performs a larger swoop and use it as a platform to get to the item.",
"Be careful not to jump into the Geruta's path to avoid hitting it."
],
"devNote": [
"The canInsaneJump option is to represent the difference between good and bad Geruta RNG."
]
},
{
"id": 23,
"link": [
2,
3
],
"name": "Hi-Jump Freeze",
"requires": [
"canDash",
"canTrickyUseFrozenEnemies",
"HiJump",
{
"heatFrames": 1050
},
{
"or": [
"canTrickyDodgeEnemies",
{
"heatFrames": 110
}
]
},
{
"or": [
"canInsaneJump",
{
"heatFrames": 500
}
]
},
{
"or": [
"h_midAirShootUp",
{
"heatFrames": 1000
}
]
}
],
"flashSuitChecked": true,
"blueSuitChecked": true,
"note": [
"Either freeze the Geruta and turn off and on Ice to quickly thaw it and save Energy, or carefully jump over it without freezing it or getting hit.",
"Then lure it left by jumping towards it from below. Freeze it when it performs a larger swoop and use it as a platform to get to the item."
],
"devNote": "The canInsaneJump option is to represent the difference between good and bad Geruta RNG."
},
{
"id": 24,
"link": [
2,
3
],
"name": "Ice Only Geruta Platforming",
"requires": [
{
"notable": "Ice Only Geruta Platforming"
},
"canTrickyUseFrozenEnemies",
"canTrickyJump",
{
"or": [
{
"and": [
"canResetFallSpeed",
"canTrickyDodgeEnemies",
{
"heatFrames": 1000
},
{
"or": [
"canInsaneJump",
{
"and": [
{
"noBlueSuit": {}
},
{
"enemyDamage": {
"enemy": "Geruta",
"type": "contact",
"hits": 1
}
}
]
}
]
}
]
},
{
"and": [
"canNeutralDamageBoost",
{
"enemyDamage": {
"enemy": "Geruta",
"type": "contact",
"hits": 3
}
}
]
}
]
},
{
"heatFrames": 3000
}
],
"flashSuitChecked": false,
"blueSuitChecked": true,
"note": [
"Ride the Geruta left to reach the missile location by freezing it repeatedly.",
"Stay on its left side when it touches the ceiling for the enemy to continue moving forward.",
"It may not be possible to climb back up to the Geruta if Samus falls.",
"When it moves towards the ceiling, reset Samus' fall speed using an unmorph or by taking knockback damage, in order to wait for the Geruta to fall low enough to refreeze."
]
},
{
"id": 64,
"link": [
2,
3
],
"name": "Ceiling Mockball Spring Fling",
"requires": [
{
"notable": "Ceiling Mockball Spring Fling"
},
"h_speedJump",
"canInsaneJump",
{
"heatFrames": 500
},
"canMomentumConservingMorph",
"canSpringFling",
{
"or": [
"h_heatProof",
"canBeVeryPatient"
]
}
],
"flashSuitChecked": true,
"blueSuitChecked": true,
"note": [
"Position at the end of the runway (or up to 4 pixels away) at the top-right of the room,",
"gain run speed, perform a last-frame jump and ceiling mockball,",
"then equip or unequip Spring Ball in order to reset Samus' vertical speed",
"and just barely make it onto the ledge with the item."
]
},
{
"id": 25,
"link": [
2,
3
],
"name": "Come in Shinecharged, Shinespark (Safe Geruta Manipulation)",
"entranceCondition": {
"comeInShinecharged": {}
},
"requires": [
{
"shineChargeFrames": 110
},
"canShinechargeMovementComplex",
{
"shinespark": {
"frames": 70,
"excessFrames": 12
}
},
{
"heatFrames": 300
}
],
"flashSuitChecked": true,
"blueSuitChecked": true,
"note": "Run left on the middle platform before jumping right, to manipulate the Geruta into swooping left."
},
{
"id": 40,
"link": [
2,
3
],
"name": "Come in Shinecharged, Shinespark (Fast Method)",
"entranceCondition": {
"comeInShinecharged": {}
},
"requires": [
{
"shineChargeFrames": 100
},
"canShinechargeMovementTricky",
{
"shinespark": {
"frames": 70,
"excessFrames": 12
}
},
{
"heatFrames": 290
},
{
"or": [
{
"enemyDamage": {
"enemy": "Geruta",
"type": "contact",
"hits": 1
}
},
"canInsaneJump"
]
}
],
"collectsItems": [
3
],
"flashSuitChecked": true,
"blueSuitChecked": true,
"note": [
"Move quickly to avoid being hit by the Geruta before sparking.",
"Samus can still take damage from the Geruta during the shinespark wind-up;",
"this can be avoided by activating the spark quickly enough."
]
},
{
"id": 26,
"link": [
2,
3
],
"name": "Come In Shinecharging, Shinespark",
"entranceCondition": {
"comeInShinecharging": {
"length": 4,
"openEnd": 0
}
},
"requires": [
"canShinechargeMovementComplex",
{
"shinespark": {
"frames": 70,
"excessFrames": 12
}
},
{
"heatFrames": 310
}
],
"flashSuitChecked": true,
"blueSuitChecked": true,
"note": [
"To safely avoid Geruta damage, run left on the middle platform before jumping right, to manipulate the Geruta into swooping left.",
"Alternatively, activate the spark quickly enough to avoid taking a Geruta hit."
]
},
{
"id": 27,
"link": [
2,
3
],
"name": "Short Short Charge",
"requires": [
{
"canShineCharge": {
"usedTiles": 15,
"openEnd": 2
}
},
{
"or": [
{
"and": [
"canHorizontalShinespark",
{
"shinespark": {
"frames": 54,
"excessFrames": 15
}
}
]
},
{
"and": [
"h_heatProof",
"canShinechargeMovementComplex",
{
"shinespark": {
"frames": 12,
"excessFrames": 2
}
}
]
},
{
"and": [
"h_heatProof",
"canShinechargeMovementComplex",
"h_speedJump",
{
"shinespark": {
"frames": 9,
"excessFrames": 3
}
}
]
}
]
},
{
"heatFrames": 600
}
],
"flashSuitChecked": true,
"blueSuitChecked": true
},
{
"id": 28,
"link": [
2,
3
],
"name": "Frozen Geruta Shinecharge (Shinespark Left)",
"entranceCondition": {
"comeInNormally": {}
},
"requires": [
{
"notable": "Frozen Geruta Shinecharge"
},
"h_trickyFrozenEnemyRunway",
"canCarefulJump",
"canHorizontalShinespark",
{
"canShineCharge": {
"usedTiles": 17,
"openEnd": 1
}
},
{
"heatFrames": 1050
},
{
"or": [
{
"and": [
"canHorizontalShinespark",
{
"shinespark": {
"frames": 54,
"excessFrames": 15
}
}
]
},
{
"and": [
"h_heatProof",
"canShinechargeMovementComplex",
{
"shinespark": {
"frames": 12,
"excessFrames": 2
}
}
]
},
{
"and": [
"h_heatProof",
"canShinechargeMovementComplex",
"h_speedJump",
{
"shinespark": {
"frames": 9,
"excessFrames": 3
}
}
]
}
]
}
],
"flashSuitChecked": true,
"blueSuitChecked": true,
"note": [
"Enter from the right door and spin jump onto the first ledge while barely landing on the ledge in order to prevent getting the Geruta on camera.",
"Walk against the left wall and jump to trigger the Geruta. It should now be moving leftwards.",
"Stand on the next platform against the right wall and shoot the Geruta to get it one shot away from being frozen.",
"After a few swoops, it will come down; either freeze it or tank a hit. Then go up and stand on the corner and freeze it when it is in position.",
"The Geruta will be stuck below and keep swooping, so if Energy permits, Samus will have several attempts.",
"With full heat protection, Samus can quickly shinecharge left to right then run and spark midair to the left to save Energy."
]
},
{
"id": 56,
"link": [
2,
3
],
"name": "G-Mode With Frozen Geruta",
"entranceCondition": {
"comeInWithGMode": {
"mode": "any",
"morphed": false
}
},
"requires": [
"canDash",
"h_heatedGMode",
"canTrickyUseFrozenEnemies",
"canTrickyDodgeEnemies",
{
"or": [
"HiJump",
"canSpringBallJumpMidAir"
]
},
{
"heatFrames": 0
}
],
"flashSuitChecked": true,
"blueSuitChecked": true,
"devNote": "FIXME: A variant with only ice and reset fall speed could be added (possibly while carrying blue suit)."
},
{
"id": 57,
"link": [
2,
3
],
"name": "G-Mode With Assist",
"entranceCondition": {
"comeInWithGMode": {
"mode": "any",
"morphed": false
}
},
"requires": [
"h_heatedGMode",
{
"or": [
"SpaceJump",
{
"and": [
"HiJump",
"canSpeedyJump",
"canWallJump"
]
},
{
"and": [
"HiJump",
"canSpringBallJumpMidAir",
{
"or": [
"canDash",
{
"and": [
{
"haveBlueSuit": {}
},
"Gravity"
]
}
]
}
]
},
{
"and": [
"canDash",
{
"notable": "Spring Ball Bomb Boost"
},
"canSpringBallJumpMidAir",
"canUnmorphBombBoost",
"h_crouchJumpDownGrab",
{
"or": [
"canInsaneJump",
"h_additionalBomb"
]
}
]
},
{
"and": [
{
"canShineCharge": {
"usedTiles": 15,
"openEnd": 2
}
},
"canShinechargeMovementComplex",
{
"or": [
{
"shinespark": {
"frames": 12,
"excessFrames": 2
}
},
{
"and": [
"h_speedJump",
{
"shinespark": {
"frames": 9,
"excessFrames": 3
}
}
]
}
]
}
]
},
{
"and": [
{
"notable": "Ceiling Mockball Spring Fling"
},
"h_speedJump",
"canInsaneJump",
"canMomentumConservingMorph",
"canSpringFling"
]
}
]
},
{
"heatFrames": 0
}
],
"flashSuitChecked": true,
"blueSuitChecked": true,
"devNote": "FIXME: Variants with Geruta damage boost can be added. (Energy from immobile or CF)"
},
{
"id": 58,
"link": [
2,
3
],
"name": "G-Mode Morph",
"entranceCondition": {
"comeInWithGMode": {
"mode": "any",
"morphed": true
}
},
"requires": [
"h_heatedGMode",
{
"or": [
"h_artificialMorphLongIBJ",
"h_artificialMorphJumpIntoIBJ"
]
},
{
"or": [
{
"noBlueSuit": {}
},
{
"and": [
"h_lavaProof",
"Gravity"
]
}
]
},
{
"heatFrames": 0
}
],
"flashSuitChecked": true,
"blueSuitChecked": true
},
{
"id": 59,
"link": [
2,
3
],
"name": "G-Mode Indirect With Frozen Geruta, Open Gate",
"entranceCondition": {
"comeInWithGMode": {
"mode": "indirect",
"morphed": false
}
},
"requires": [
"h_heatedGMode",
"canTrickyUseFrozenEnemies",
"canTrickyDodgeEnemies",
"canDash",
{
"or": [
"HiJump",
"canSpringBallJumpMidAir"
]
},
{
"heatFrames": 90
}
],
"clearsObstacles": [
"A"
],
"flashSuitChecked": true,
"blueSuitChecked": true,
"devNote": [
"Goes to 3 because opening the gate mostly only makes sense when going back to the right for a longer runway or obtaining the item.",
"FIXME: A variant with only ice and reset fall speed could be added (possibly while carrying blue suit)."
]
},
{
"id": 60,
"link": [
2,
3
],
"name": "G-Mode Indirect With Assist, Open Gate",
"entranceCondition": {
"comeInWithGMode": {
"mode": "indirect",
"morphed": false
}
},
"requires": [
"h_heatedGMode",
{
"or": [
"SpaceJump",
{
"and": [
"HiJump",
"canSpeedyJump",
"canWallJump"
]
},
{
"and": [
"HiJump",
"canSpringBallJumpMidAir",
{
"or": [
{
"noBlueSuit": {}
},
{
"and": [
"Gravity",
{
"lavaFrames": 25
}
]
}
]
}
]
},
{
"and": [
{
"notable": "Spring Ball Bomb Boost"
},
{
"noBlueSuit": {}
},
"canSpringBallJumpMidAir",
"canUnmorphBombBoost",
"h_crouchJumpDownGrab",
{
"or": [
"canInsaneJump",
"h_additionalBomb"
]
}
]
},
{
"and": [
{
"or": [
{
"canShineCharge": {
"usedTiles": 15,
"openEnd": 2
}
},
"h_storedSpark"
]
},
"canShinechargeMovementComplex",
{
"or": [
{
"shinespark": {
"frames": 12,
"excessFrames": 2
}
},
{
"and": [
"h_speedJump",
{
"shinespark": {
"frames": 9,
"excessFrames": 3
}
}
]
}
]
}
]
},
{
"and": [
{
"notable": "Ceiling Mockball Spring Fling"
},
"h_speedJump",
"canInsaneJump",
"canMomentumConservingMorph",
"canSpringFling"
]
}
]
},
{
"heatFrames": 90
}
],
"clearsObstacles": [
"A"
],
"flashSuitChecked": true,
"blueSuitChecked": true,
"devNote": [
"Goes to 3 because opening the gate mostly only makes sense when going back to the right for a longer runway or obtaining the item.",
"FIXME: Variants with shinesparking or Geruta damage boost can be added. (Energy from immobile, CF, or energy free sparks)"
]
},
{
"id": 61,
"link": [
2,
3
],
"name": "G-Mode Morph Indirect, Open Gate",
"entranceCondition": {
"comeInWithGMode": {
"mode": "indirect",
"morphed": true
}
},
"requires": [
"h_heatedGMode",
{
"or": [
"h_artificialMorphLongIBJ",
"h_artificialMorphJumpIntoIBJ"
]
},
{
"or": [
{
"noBlueSuit": {}
},
{
"and": [
"h_lavaProof",
"Gravity"
]
}
]
},
{
"heatFrames": 90
}
],
"clearsObstacles": [
"A"
],
"flashSuitChecked": true,
"blueSuitChecked": true,
"devNote": "Goes to 3 because opening the gate mostly only makes sense when going back to the right for a longer runway or obtaining the item."
},
{
"id": 29,
"link": [
3,
1
],
"name": "Base",
"requires": [
{
"or": [
{
"and": [
{
"ammo": {
"type": "Super",
"count": 1
}
},
{
"heatFrames": 110
}
]
},
{
"and": [
{
"obstaclesCleared": [
"A"
]
},
{
"heatFrames": 50
}
]
}
]
},
{
"or": [
"canDash",
{
"heatFrames": 10
}
]
}
],
"clearsObstacles": [
"A"
],
"flashSuitChecked": true,
"blueSuitChecked": true
},
{
"id": 30,
"link": [
3,
1
],
"name": "Leave with Runway",
"requires": [
"canDash",
{
"or": [
{
"and": [
{
"ammo": {
"type": "Super",
"count": 1
}
},
{
"heatFrames": 160
}
]
},
{
"and": [
{
"obstaclesCleared": [
"A"
]
},
{
"heatFrames": 50
}
]
}
]
}
],
"exitCondition": {
"leaveWithRunway": {
"length": 17,
"openEnd": 1
}
},
"unlocksDoors": [
{
"types": [
"missiles"
],
"requires": [
{
"heatFrames": 70
}
]
},
{
"types": [
"super"
],
"requires": []
},
{
"types": [
"powerbomb"
],
"requires": [
{
"heatFrames": 120
}
]
}
],
"collectsItems": [
3
],
"flashSuitChecked": true,
"blueSuitChecked": true
},
{
"id": 41,
"link": [
3,
1
],
"name": "Leave with Runway, Avoid Item",
"requires": [
"canDash",
{
"or": [
{
"and": [
{
"ammo": {
"type": "Super",
"count": 1
}
},
{
"heatFrames": 160
}
]
},
{
"and": [
{
"obstaclesCleared": [
"A"
]
},
{
"heatFrames": 50
}
]
}
]
}
],
"exitCondition": {
"leaveWithRunway": {
"length": 12,
"openEnd": 0
}
},
"unlocksDoors": [
{
"types": [
"missiles"
],
"requires": [
{
"heatFrames": 70
}
]
},
{
"types": [
"super"
],
"requires": []
},
{
"types": [
"powerbomb"
],
"requires": [
{
"heatFrames": 120
}
]
}
],
"flashSuitChecked": true,
"blueSuitChecked": true
},
{
"id": 31,
"link": [
3,
2
],
"name": "Grapple",
"requires": [
"Grapple",
{
"heatFrames": 420
},
{
"noFlashSuit": {}
},
{
"or": [
"canDash",
{
"heatFrames": 30
}
]
}
],
"flashSuitChecked": true,
"blueSuitChecked": true,
"devNote": [
"With a flash suit, swinging across with Grapple would require morphing/unmorphing;",
"but if Morph is available, it's faster to just go through the morph tunnel."
]
},
{
"id": 32,
"link": [
3,
2
],
"name": "Space Jump",
"requires": [
"SpaceJump",
{
"heatFrames": 410
},
{
"or": [
"canDash",
{
"heatFrames": 190
}
]
}
],
"flashSuitChecked": true,
"blueSuitChecked": true
},
{
"id": 33,
"link": [
3,
2
],
"name": "Hi-Jump Speedy Jump",
"requires": [
"HiJump",
"canSpeedyJump",
{
"heatFrames": 500
}
],
"collectsItems": [
3
],
"flashSuitChecked": true,
"blueSuitChecked": true,
"note": "This can be done from the top right, single tile block."
},
{
"id": 34,
"link": [
3,
2
],
"name": "HiJump",
"requires": [
"HiJump",
"canWallJump",
{
"heatFrames": 550
},
{
"or": [
"canDash",
{
"and": [
{
"haveBlueSuit": {}
},
{
"heatFrames": 210
},
{
"lavaFrames": 60
}
]
}
]
}
],
"flashSuitChecked": true,
"blueSuitChecked": true,
"note": "This can be done from the top right, single tile block."
},
{
"id": 35,
"link": [
3,
2
],
"name": "Morph",
"requires": [
"Morph",
{
"heatFrames": 360
},
{
"or": [
"canDash",
{
"and": [
{
"haveBlueSuit": {}
},
"Gravity",
{
"heatFrames": 200
},
{
"lavaFrames": 40
}
]
}
]
}
],
"flashSuitChecked": true,
"blueSuitChecked": true
},
{
"id": 36,
"link": [
3,
2
],
"name": "Quick Lava Bath",
"requires": [
"canDash",
{
"heatFrames": 350
},
{
"or": [
{
"lavaFrames": 70
},
{
"and": [
"Gravity",
{
"lavaFrames": 30
}
]
}
]
},
{
"or": [
{
"and": [
"canTrickyDodgeEnemies",
"Gravity"
]
},
{
"enemyDamage": {
"enemy": "Dragon",
"type": "contact",
"hits": 1
}
},
{
"enemyKill": {
"enemies": [
[
"Dragon"
]
],
"explicitWeapons": [
"Super",
"Missile",
"Plasma",
"ScrewAttack"
]
}
}
]
}
],
"flashSuitChecked": true,
"blueSuitChecked": true
},
{
"id": 72,
"link": [
3,
2
],
"name": "Blue Suit Lava Bath",
"requires": [
{
"haveBlueSuit": {}
},
{
"heatFrames": 570
},
{
"lavaFrames": 110
}
],
"flashSuitChecked": true,
"blueSuitChecked": true
},
{
"id": 37,
"link": [
3,
2
],
"name": "Safe Lava Bath",
"requires": [
"h_heatProof",
"h_lavaProof"
],
"flashSuitChecked": true,
"blueSuitChecked": true,
"note": "This strat just waits out the Dragon."
},
{
"id": 69,
"link": [
3,
2
],
"name": "Frozen Geruta Platform",
"requires": [
{
"noBlueSuit": {}
},
"h_heatProof",
"canTrickyUseFrozenEnemies",
{
"or": [
"HiJump",
"canTrickyDodgeEnemies"
]
}
],
"flashSuitChecked": false,
"blueSuitChecked": true,
"note": "It is possible to lure the Geruta to be used as a platform with nothing but Ice."
},
{
"id": 38,
"link": [
3,
2
],
"name": "Reverse Shinespark",
"requires": [
{
"or": [
{
"and": [
{
"ammo": {
"type": "Super",
"count": 1
}
},
{
"heatFrames": 90
}
]
},
{
"obstaclesCleared": [
"A"
]
}
]
},
{
"or": [
{
"and": [
{
"doorUnlockedAtNode": 1
},
{
"heatFrames": 30
},
{
"canShineCharge": {
"usedTiles": 17,
"openEnd": 0
}
}
]
},
{
"canShineCharge": {
"usedTiles": 16,
"openEnd": 0
}
}
]
},
{
"or": [
{
"and": [
"canHorizontalShinespark",
{
"shinespark": {
"frames": 62,
"excessFrames": 20
}
}
]
},
{
"and": [
"h_heatProof",
"canShinechargeMovementComplex",
{
"shinespark": {
"frames": 12,
"excessFrames": 2
}
}
]
},
{
"and": [
"h_heatProof",
"canShinechargeMovementComplex",
"h_speedJump",
{
"shinespark": {
"frames": 10,
"excessFrames": 4
}
}
]
}
]
},
{
"heatFrames": 450
}
],
"unlocksDoors": [
{
"nodeId": 1,
"types": [
"missiles"
],
"requires": [
{
"heatFrames": 30
}
]
},
{
"nodeId": 1,
"types": [
"super"
],
"requires": []
},
{
"nodeId": 1,
"types": [
"powerbomb"
],
"requires": [
{
"heatFrames": 60
}
]
}
],
"clearsObstacles": [
"A"
],
"collectsItems": [
3
],
"flashSuitChecked": true,
"blueSuitChecked": true
},
{
"id": 39,
"link": [
3,
3
],
"name": "Crystal Flash",
"requires": [
"h_heatedCrystalFlash"
],
"flashSuitChecked": true,
"blueSuitChecked": true
}
],
"notables": [
{
"id": 1,
"name": "Frozen Geruta Shinecharge",
"note": [
"Enter from the right door and spin jump onto the first ledge while barely landing on the ledge in order to prevent getting the Geruta on camera.",
"Walk against the left wall and jump to trigger the Geruta. It should now be moving leftwards.",
"Stand on the next platform against the right wall and shoot the Geruta to get it one shot away from being frozen.",
"After a few swoops, it will come down; either freeze it or tank a hit. Then go up and stand on the corner and freeze it when it is in position.",
"The Geruta will be stuck below and keep swooping, so if Energy permits, Samus will have several attempts."
]
},
{
"id": 2,
"name": "High Speed Gate Glitch",
"note": [
"Build up 34 tiles worth of run speed and jump into the door on the last frame.",
"Hold angle up through the transition but also aim down to duck below the ceiling until Samus is past it.",
"Fire the Super Missile frame perfectly to open the gate."
]
},
{
"id": 3,
"name": "Spring Ball Bomb Boost",
"note": [
"Uses a bomb boost at the end of a mid-air SpringBall jump.",
"Also requires a crouchjump and downgrab to complete the maneuver.",
"A spring fling can help add some lenience to the bomb placement and unmorph timing;",
"it requires pausing early, before jumping, in order to be able to initiate another pause immediately before placing a Power Bomb."
]
},
{
"id": 4,
"name": "Spring Ball Freeze",
"note": "Do a series of mid-air SpringBall jumps to bring the Geruta over, then freeze it and step on it."
},
{
"id": 5,
"name": "Ice Only Geruta Platforming",
"note": [
"Ride the Geruta left to reach the missile location by freezing it repeatedly.",
"Stay on its left side when it touches the ceiling for the enemy to continue moving forward.",
"It may not be possible to climb back up to the Geruta if Samus falls.",
"When it moves towards the ceiling, reset Samus' fall speed using an unmorph or by taking knockback damage, in order to wait for the Geruta to fall low enough to refreeze."
]
},
{
"id": 6,
"name": "Ceiling Mockball Spring Fling",
"note": [
"Perform a last-frame jump and ceiling mockball,",
"then spring fling to just barely make it onto the ledge with the item."
]
},
{
"id": 7,
"name": "Spring Ball Jump into Damage Boost",
"note": [
"Use mid-air Spring Ball jumps to manipulate the Geruta into position near the ledge.",
"Then do a Spring Ball jump into a neutral damage boost (while still morphed) to reach the ledge."
]
}
],
"nextStratId": 76,
"nextNotableId": 8
}


