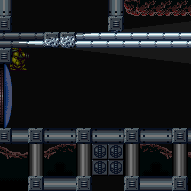
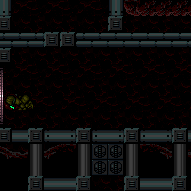
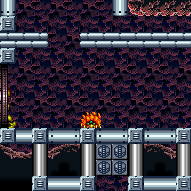
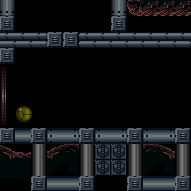
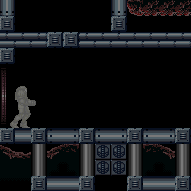
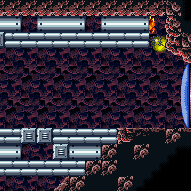
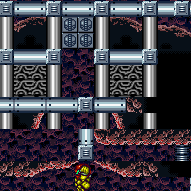
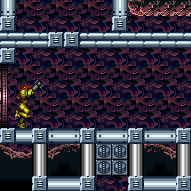
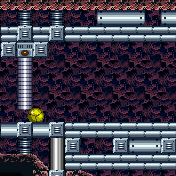
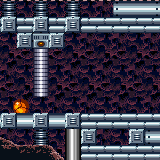
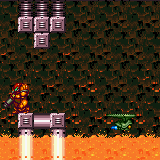
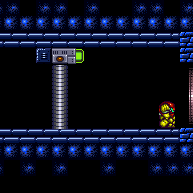
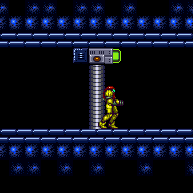
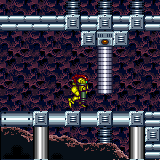
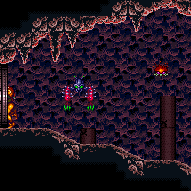
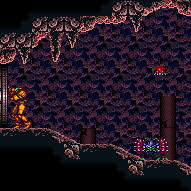
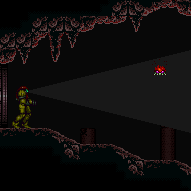
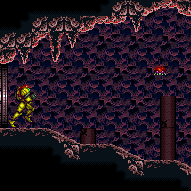
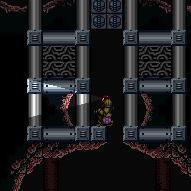
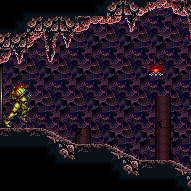
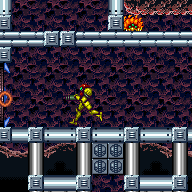
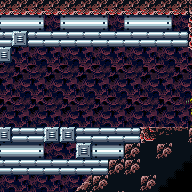
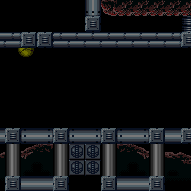
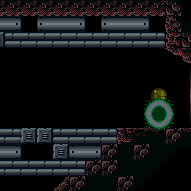
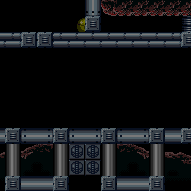
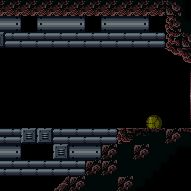
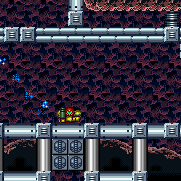
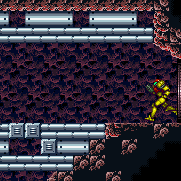
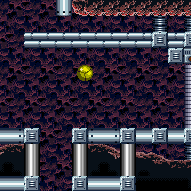
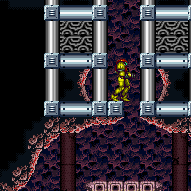
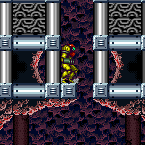
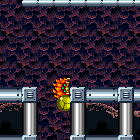
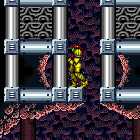
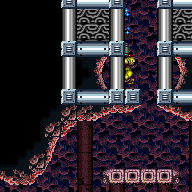
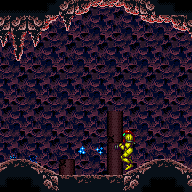
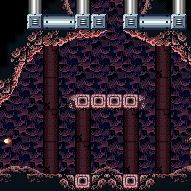
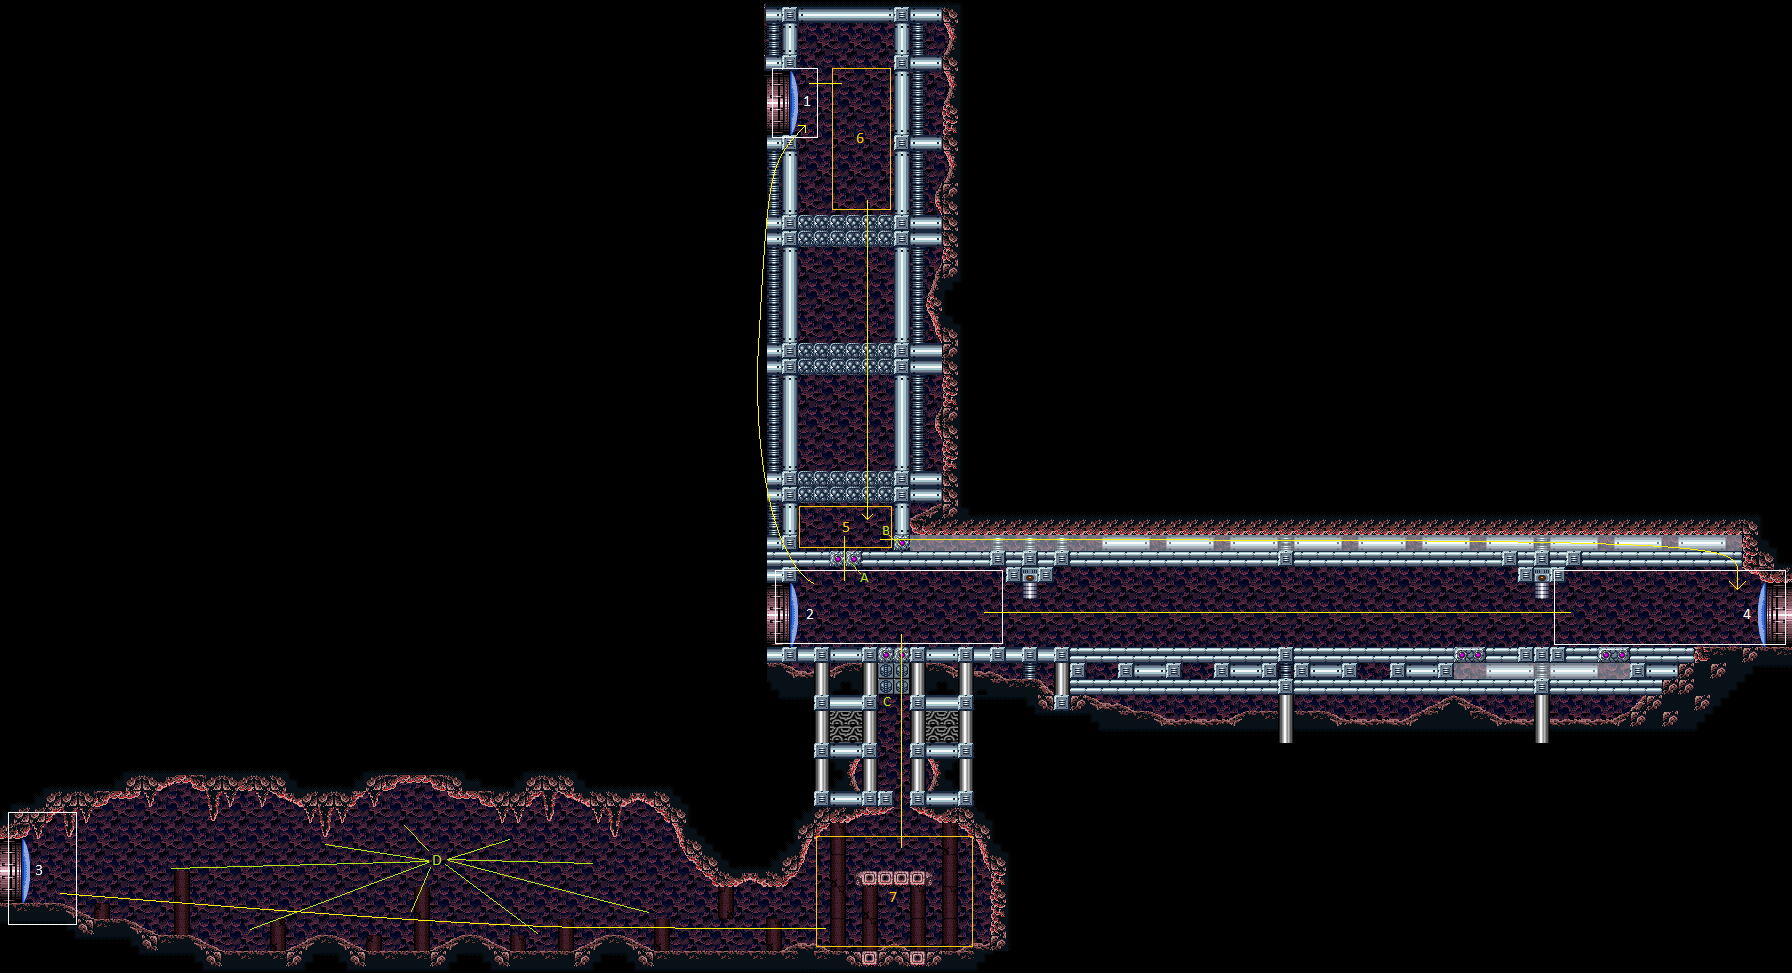
Ice Beam Gate Room
Room ID: 106
|
Exit condition: {
"leaveWithRunway": {
"length": 1,
"openEnd": 1
}
} |
|
Jump through the door and shoot it open as you enter, landing on the door frame to avoid falling. Entrance condition: {
"comeInNormally": {}
}Requires: "canPrepareForNextRoom"
"canCarefulJump"
{
"doorUnlockedAtNode": 1
}Unlocks doors: {"types":["super"],"requires":["canInsaneJump"]}
{"types":["missiles","powerbomb"],"requires":["never"]} |
|
Entrance condition: {
"comeInWithDoorStuckSetup": {}
}Requires: "canPrepareForNextRoom"
{
"doorUnlockedAtNode": 1
}Unlocks doors: {"types":["ammo"],"requires":[]} |
From: 1
Top Left Door
To: 1
Top Left Door
Use Spring Ball or a crumble jump while opening the door. Entrance condition: {
"comeInNormally": {}
}Requires: {
"or": [
"canCrumbleJump",
{
"and": [
"canPrepareForNextRoom",
"h_useSpringBall"
]
}
]
}
{
"doorUnlockedAtNode": 1
}Unlocks doors: {"types":["super","powerbomb"],"requires":[]}
{"types":["missiles"],"requires":[{"or":["canTrickyJump","h_useSpringBall"]}]} |
From: 1
Top Left Door
To: 1
Top Left Door
Jump into the room and Space Jump or wall jump while opening the door. Entrance condition: {
"comeInNormally": {}
}Requires: "canPrepareForNextRoom"
{
"or": [
"SpaceJump",
"canWallJump"
]
}
{
"doorUnlockedAtNode": 1
}Unlocks doors: {"types":["super"],"requires":[]}
{"types":["missiles","powerbomb"],"requires":["never"]} |
|
Requires: "h_CrystalFlash" |
From: 1
Top Left Door
To: 1
Top Left Door
Use Spring Ball or a crumble jump while opening the door. Entrance condition: {
"comeInWithMockball": {
"speedBooster": "any",
"adjacentMinTiles": 0,
"remoteAndLandingMinTiles": [
[
0,
0
]
]
}
}Requires: {
"or": [
"canCrumbleJump",
{
"and": [
"canPrepareForNextRoom",
"h_useSpringBall"
]
}
]
}
{
"doorUnlockedAtNode": 1
}Unlocks doors: {"types":["super"],"requires":[]}
{"types":["missiles","powerbomb"],"requires":[{"or":["canTrickyJump","h_useSpringBall"]}]} |
|
Entrance condition: {
"comeInNormally": {}
} |
From: 1
Top Left Door
To: 5
Junction Below Top Crumble Blocks
Entrance condition: {
"comeInWithMockball": {
"speedBooster": "any",
"adjacentMinTiles": 0,
"remoteAndLandingMinTiles": [
[
0,
0
]
]
}
} |
From: 1
Top Left Door
To: 7
Junction Below Power Bomb Blocks
Farm the enemies on the bottom - the first Sm. Dessgeega will give back the Power Bomb used to get down. Shinecharge and use any enemy at the bottom to interrupt. Entrance condition: {
"comeInWithRMode": {}
}Requires: {
"or": [
"h_CrystalFlashForReserveEnergy",
{
"and": [
"h_usePowerBomb",
"h_RModeCanRefillReserves",
{
"or": [
{
"resourceMissingAtMost": [
{
"type": "Missile",
"count": 0
}
]
},
{
"resourceMissingAtMost": [
{
"type": "PowerBomb",
"count": 1
}
]
}
]
},
{
"partialRefill": {
"type": "ReserveEnergy",
"limit": 20
}
}
]
}
]
}
"h_shinechargeMaxRunway"
{
"autoReserveTrigger": {
"maxReserveEnergy": 95
}
}
"canRModeSparkInterrupt"Clears obstacles: A, B, C, D |
|
Entrance condition: {
"comeInWithDoorStuckSetup": {}
}Requires: "canLongXRayClimb" |
From: 2
Middle Left Door
To: 1
Top Left Door
Enter with G-mode direct, back up to between 1 and 6 pixels from the door transition, and activate X-ray to get very deep stuck in the door. Climb up 2 screens, and perform a turnaround buffered spin-jump away from the door to trigger the transition, bypassing any lock on the door. Entrance condition: {
"comeInWithGMode": {
"mode": "direct",
"morphed": false
}
}Requires: "canGModeXRayClimb" "canLongXRayClimb" Bypasses door shell: true |
|
Requires: {
"obstaclesNotCleared": [
"C"
]
}Exit condition: {
"leaveWithRunway": {
"length": 15,
"openEnd": 0
}
} |
From: 2
Middle Left Door
To: 2
Middle Left Door
Exit condition: {
"leaveWithRunway": {
"length": 6,
"openEnd": 1
}
} |
From: 2
Middle Left Door
To: 2
Middle Left Door
If the Power Bomb blocks are broken and the room cannot be reset, the runway can be extended by waiting for the slow global Sova. Be careful to prevent killing the Sova when breaking the Power Bomb blocks, while still ensuring breaking the ceiling Bomb blocks. Using a Super to knock off the Sova once it is near the gates will save approximately 30 seconds. Requires: "h_frozenEnemyRunway"
{
"obstaclesCleared": [
"A",
"B",
"C"
]
}
{
"or": [
"canBeVeryPatient",
{
"and": [
"canBePatient",
{
"ammo": {
"type": "Super",
"count": 1
}
}
]
}
]
}Exit condition: {
"leaveWithRunway": {
"length": 7,
"openEnd": 1
}
}Dev note: This strat only takes 60-90 seconds, but could be much longer if Samus has to wait for the Sova to move out of the Power Bomb area. |
|
Requires: "h_usePowerBomb" Clears obstacles: A, B, C |
|
Requires: "h_CrystalFlash" Clears obstacles: A, B, C |
From: 2
Middle Left Door
To: 2
Middle Left Door
Entrance condition: {
"comeInShinecharging": {
"length": 14,
"openEnd": 0
},
"comesInHeated": "no"
}Requires: "h_CrystalSpark" Clears obstacles: A, B, C |
|
Requires: {
"resetRoom": {
"nodes": [
2
]
}
}
"Morph"
{
"or": [
"h_useMorphBombs",
{
"haveBlueSuit": {}
}
]
}
{
"or": [
{
"and": [
"canFarmWhileShooting",
{
"or": [
"ScrewAttack",
{
"and": [
"canMidAirMorph",
{
"cycleFrames": 60
}
]
}
]
},
{
"cycleFrames": 490
}
]
},
{
"cycleFrames": 610
}
]
}Clears obstacles: A, B Resets obstacles: C, D Farm cycle drops: 1 Sova |
From: 2
Middle Left Door
To: 2
Middle Left Door
Requires: "h_usePowerBomb"
{
"or": [
{
"resetRoom": {
"nodes": [
2
]
}
},
{
"and": [
{
"resetRoom": {
"nodes": [
4
]
}
},
{
"or": [
{
"and": [
{
"getBlueSpeed": {
"usedTiles": 18,
"gentleUpTiles": 2,
"gentleDownTiles": 3,
"openEnd": 0
}
},
{
"cycleFrames": 420
}
]
},
{
"and": [
"canMockball",
{
"cycleFrames": 60
}
]
}
]
}
]
}
]
}
{
"or": [
"canWallJump",
"HiJump",
"SpaceJump",
{
"and": [
"canSpringBallJumpMidAir",
"h_doubleEquipmentScreenCycleFrames",
{
"cycleFrames": 30
}
]
}
]
}
{
"or": [
{
"and": [
"canDash",
{
"or": [
{
"and": [
"ScrewAttack",
{
"cycleFrames": 1080
}
]
},
{
"and": [
"Wave",
{
"cycleFrames": 1140
}
]
},
{
"and": [
"Spazer",
{
"cycleFrames": 990
}
]
},
{
"and": [
"Plasma",
{
"cycleFrames": 850
}
]
},
{
"and": [
"canMockball",
{
"ammo": {
"type": "PowerBomb",
"count": 1
}
},
{
"cycleFrames": 900
}
]
}
]
}
]
},
{
"and": [
{
"haveBlueSuit": {}
},
{
"cycleFrames": 1200
}
]
}
]
}Clears obstacles: A, B, C, D Farm cycle drops: 6 Mella, 3 Sm. Dessgeega Dev note: FIXME: The cycleFrame numbers for resetting at node 4 don't make sense. |
From: 2
Middle Left Door
To: 2
Middle Left Door
Release the ceiling Sova while being careful not to kill it if using Power Bombs. The Sova takes 90 seconds to get to the door if the Power Bomb blocks are broken and 45 seconds if they are not. Using a Super when the Sova is exiting the ceiling takes only 12 seconds. Requires: {
"obstaclesCleared": [
"A"
]
}
{
"obstaclesCleared": [
"B"
]
}
{
"or": [
"canBePatient",
{
"ammo": {
"type": "Super",
"count": 1
}
},
{
"obstaclesNotCleared": [
"C"
]
}
]
}Exit condition: {
"leaveWithGModeSetup": {}
} |
From: 2
Middle Left Door
To: 2
Middle Left Door
Entrance condition: {
"comeInWithGMode": {
"mode": "any",
"morphed": true
}
}Requires: "h_artificialMorphPowerBomb" Clears obstacles: A, B, C |
From: 2
Middle Left Door
To: 4
Right Door
Release the ceiling Sova while being careful not to kill it if using Power Bombs. Go through the ceiling morph tunnel and wait for the Sova on the other side. Requires: {
"obstaclesCleared": [
"A",
"B"
]
}
"Morph"Exit condition: {
"leaveWithGModeSetup": {}
}Unlocks doors: {"types":["ammo"],"requires":[]} |
|
Requires: {
"or": [
"h_useMorphBombs",
"ScrewAttack",
{
"obstaclesCleared": [
"A"
]
}
]
}Clears obstacles: A |
From: 2
Middle Left Door
To: 5
Junction Below Top Crumble Blocks
Requires: {
"haveBlueSuit": {}
}Clears obstacles: A |
From: 2
Middle Left Door
To: 5
Junction Below Top Crumble Blocks
Requires: "h_usePowerBomb" Clears obstacles: A, B, C |
From: 2
Middle Left Door
To: 5
Junction Below Top Crumble Blocks
Use a temporary blue chain to jump through the bomb blocks and land on the center of the ledge above. Break the last block by jumping directly into it, as there is not enough height available to get a bounce. With this method, there is a 2-frame window for when to morph; jumping from the platform below is also possible but requires a frame-perfect morph. If Spring Ball is available, it can be used to increase the window by one frame in either case. Entrance condition: {
"comeInShinecharging": {
"length": 4,
"openEnd": 0
}
}Requires: "canChainTemporaryBlue" "can4HighMidAirMorph" "canInsaneJump" Clears obstacles: A, B |
From: 2
Middle Left Door
To: 5
Junction Below Top Crumble Blocks
Use a temporary blue chain to jump through the bomb blocks and land on the center of the ledge above. Break the last block by jumping directly into it, as there is not enough height available to get a bounce. With this method, there is a 2-frame window for when to morph; jumping from the platform below is also possible but requires a frame-perfect morph. If Spring Ball is available, it can be used to increase the window by one frame in either case. Entrance condition: {
"comeInShinecharging": {
"length": 14,
"openEnd": 0
}
}Requires: "canChainTemporaryBlue" "canXRayTurnaround" "can4HighMidAirMorph" "canInsaneJump" Clears obstacles: A, B |
From: 2
Middle Left Door
To: 5
Junction Below Top Crumble Blocks
Use a temporary blue chain to jump through the bomb blocks and land on the center of the ledge above. Break the last block by jumping directly into it, as there is not enough height available to get a bounce. With this method, there is a 2-frame window for when to morph; jumping from the platform below is also possible but requires a frame-perfect morph. If Spring Ball is available, it can be used to increase the window by one frame in either case. Requires: {
"or": [
{
"canShineCharge": {
"usedTiles": 14,
"openEnd": 0
}
},
{
"and": [
{
"canShineCharge": {
"usedTiles": 15,
"openEnd": 0
}
},
{
"doorUnlockedAtNode": 2
}
]
}
]
}
"canChainTemporaryBlue"
"canXRayTurnaround"
"can4HighMidAirMorph"
"canInsaneJump"Clears obstacles: A, B Unlocks doors: {"nodeId":2,"types":["ammo"],"requires":[]} |
|
Requires: {
"obstaclesCleared": [
"C"
]
} |
From: 2
Middle Left Door
To: 7
Junction Below Power Bomb Blocks
Farm the enemies on the bottom - the first Sm. Dessgeega will give back the Power Bomb used to get down. Shinecharge and use any enemy at the bottom to interrupt. Entrance condition: {
"comeInWithRMode": {}
}Requires: {
"or": [
"h_CrystalFlashForReserveEnergy",
{
"and": [
"h_usePowerBomb",
"h_RModeCanRefillReserves",
{
"or": [
{
"resourceMissingAtMost": [
{
"type": "Missile",
"count": 0
}
]
},
{
"resourceMissingAtMost": [
{
"type": "PowerBomb",
"count": 1
}
]
}
]
},
{
"partialRefill": {
"type": "ReserveEnergy",
"limit": 20
}
}
]
}
]
}
"h_shinechargeMaxRunway"
{
"autoReserveTrigger": {
"maxReserveEnergy": 95
}
}
"canRModeSparkInterrupt"Clears obstacles: C, D |
From: 2
Middle Left Door
To: 7
Junction Below Power Bomb Blocks
Entrance condition: {
"comeInWithStoredFallSpeed": {
"fallSpeedInTiles": 2
}
}Requires: {
"noBlueSuit": {}
}
"canMoonfall" |
From: 2
Middle Left Door
To: 8
Right of Left Shutter, Raised Right Shutter
Entrance condition: {
"comeInWithMockball": {
"speedBooster": "any",
"adjacentMinTiles": 11.4375,
"remoteAndLandingMinTiles": [
[
8,
2
],
[
7,
3
]
]
}
} |
From: 2
Middle Left Door
To: 8
Right of Left Shutter, Raised Right Shutter
Entrance condition: {
"comeInWithMockball": {
"speedBooster": "yes",
"remoteAndLandingMinTiles": [
[
9,
1
]
]
}
} |
From: 2
Middle Left Door
To: 8
Right of Left Shutter, Raised Right Shutter
Entrance condition: {
"comeInWithMockball": {
"speedBooster": "any",
"adjacentMinTiles": 10.4375,
"remoteAndLandingMinTiles": [
[
7,
1
],
[
6,
2
],
[
5,
3
]
]
}
}Requires: "canTrickyJump" |
From: 2
Middle Left Door
To: 8
Right of Left Shutter, Raised Right Shutter
Entrance condition: {
"comeInWithMockball": {
"speedBooster": "any",
"adjacentMinTiles": 9.4375,
"remoteAndLandingMinTiles": [
[
5,
1
]
]
}
}Requires: "canInsaneJump" Dev note: Theoretically this can be done with 8 tiles (technically even 7.4375 tiles) but would require higher movement tech. |
From: 2
Middle Left Door
To: 8
Right of Left Shutter, Raised Right Shutter
Run into the room, and perform a very low short-hop mockball, delaying it so that Samus morphs right before the gate. Entrance condition: {
"comeInRunning": {
"speedBooster": "yes",
"minTiles": 5
}
}Requires: "h_speedJump" "canInsaneJump" "canMockball" Dev note: Theoretically this can be done with 4 tiles (technically even 3.4375 tiles) but would require higher movement tech. |
From: 2
Middle Left Door
To: 8
Right of Left Shutter, Raised Right Shutter
Run into the room with sufficient speed, perform a very low spin jump, and aim down to clip inside the gate. This requires entering with extra run speed of at least $2.D. Ideally the spin jump should be performed by tapping jump for exactly one frame. If entering with near-minimal speed, a frame-perfect jump is required. Entrance condition: {
"comeInRunning": {
"speedBooster": "yes",
"minTiles": 11
}
}Requires: {
"notable": "Speedy Crouch Gate Clip"
}
"h_speedJump"
"canCrouchGateClip" |
|
Requires: {
"obstaclesCleared": [
"D"
]
}Exit condition: {
"leaveWithRunway": {
"length": 45,
"openEnd": 1
}
} |
From: 3
Bottom Left Door
To: 3
Bottom Left Door
Requires: {
"resetRoom": {
"nodes": [
3
]
}
}
{
"or": [
{
"and": [
"canDash",
{
"or": [
{
"and": [
"ScrewAttack",
{
"cycleFrames": 600
}
]
},
{
"and": [
"Wave",
{
"cycleFrames": 630
}
]
},
{
"and": [
"Spazer",
{
"cycleFrames": 600
}
]
},
{
"and": [
"Plasma",
{
"cycleFrames": 510
}
]
}
]
}
]
},
{
"and": [
{
"haveBlueSuit": {}
},
{
"cycleFrames": 650
}
]
}
]
}Clears obstacles: D Resets obstacles: A, B, C Farm cycle drops: 6 Mella, 3 Sm. Dessgeega |
From: 3
Bottom Left Door
To: 3
Bottom Left Door
Requires: "canDash"
{
"resetRoom": {
"nodes": [
3
]
}
}
"h_usePowerBomb"
"canTrickyJump"
"canLateralMidAirMorph"
{
"cycleFrames": 450
}Clears obstacles: D Resets obstacles: A, B, C Farm cycle drops: 4 Mella, 3 Sm. Dessgeega |
|
Kill some or all of the enemies before Crystal Flashing. Requires: {
"or": [
{
"obstaclesCleared": [
"D"
]
},
{
"enemyDamage": {
"enemy": "Sm. Dessgeega",
"type": "contact",
"hits": 1
}
},
{
"enemyKill": {
"enemies": [
[
"Sm. Dessgeega"
]
],
"explicitWeapons": [
"Missile",
"Super"
]
}
}
]
}
"h_CrystalFlash" |
From: 3
Bottom Left Door
To: 3
Bottom Left Door
Exit condition: {
"leaveWithGModeSetup": {}
} |
|
Requires: {
"enemyDamage": {
"enemy": "Sm. Dessgeega",
"type": "contact",
"hits": 1
}
} |
From: 3
Bottom Left Door
To: 7
Junction Below Power Bomb Blocks
Requires: {
"obstaclesCleared": [
"D"
]
} |
From: 3
Bottom Left Door
To: 7
Junction Below Power Bomb Blocks
Requires: {
"or": [
{
"haveBlueSuit": {}
},
"Spazer",
"Plasma",
"ScrewAttack",
"Wave",
{
"and": [
"canDodgeWhileShooting",
"h_usePowerBomb"
]
},
{
"enemyKill": {
"enemies": [
[
"Sm. Dessgeega"
],
[
"Sm. Dessgeega"
]
],
"explicitWeapons": [
"Missile",
"Super"
]
}
},
{
"and": [
"canDodgeWhileShooting",
{
"enemyDamage": {
"enemy": "Sm. Dessgeega",
"type": "contact",
"hits": 1
}
}
]
},
{
"enemyDamage": {
"enemy": "Sm. Dessgeega",
"type": "contact",
"hits": 2
}
}
]
}Clears obstacles: D |
From: 3
Bottom Left Door
To: 7
Junction Below Power Bomb Blocks
Avoiding damage from all enemies with just Power Beam is tricky, but doable. Enter the room holding angle to remove momentum and avoid getting hit by the Dessgeega. Crouch to fire the first two shots, stand for the next two shots, then crouch again for the final two shots. Requires: "canTrickyDodgeEnemies" "canPrepareForNextRoom" "canStopOnADime" Clears obstacles: D |
From: 3
Bottom Left Door
To: 7
Junction Below Power Bomb Blocks
Kill or run past an enemy before attempting to Crystal Flash, or farm the Sm. Dessgeegas and Mellas. Shinecharge and use any enemy at the bottom to interrupt. Entrance condition: {
"comeInWithRMode": {}
}Requires: {
"or": [
{
"enemyDamage": {
"enemy": "Sm. Dessgeega",
"type": "contact",
"hits": 1
}
},
{
"enemyKill": {
"enemies": [
[
"Sm. Dessgeega"
]
],
"explicitWeapons": [
"Missile",
"Super"
]
}
}
]
}
{
"or": [
"h_CrystalFlashForReserveEnergy",
{
"and": [
"h_RModeCanRefillReserves",
{
"or": [
{
"resourceMissingAtMost": [
{
"type": "Missile",
"count": 0
}
]
},
{
"resourceMissingAtMost": [
{
"type": "PowerBomb",
"count": 1
}
]
}
]
},
{
"partialRefill": {
"type": "ReserveEnergy",
"limit": 20
}
}
]
}
]
}
"h_shinechargeMaxRunway"
{
"autoReserveTrigger": {
"maxReserveEnergy": 95
}
}
"canRModeSparkInterrupt"Clears obstacles: D |
From: 3
Bottom Left Door
To: 7
Junction Below Power Bomb Blocks
It is tricky but possible to cross the room without any damage by rolling through the room. The enemies can be killed with extra Power Bombs, but without them, it's arguably easier to roll through the room without the use of Spring Ball or Bombs. After crossing the room, use a Power Bomb then quickly exit G-Mode before it explodes in order to break the bomb and Power Bomb blocks above. Without Spring Ball, it is still possible to place the Power Bomb high enough to break all the blocks above from an IBJ and still exit G-Mode before it explodes. Entrance condition: {
"comeInWithGMode": {
"mode": "indirect",
"morphed": true
}
}Requires: "h_artificialMorphMovement"
{
"or": [
"canTrickyDodgeEnemies",
{
"and": [
"h_artificialMorphPowerBomb",
"h_artificialMorphPowerBomb"
]
},
{
"enemyDamage": {
"enemy": "Sm. Dessgeega",
"type": "contact",
"hits": 2
}
}
]
}
"h_artificialMorphPowerBomb"Clears obstacles: A, B, C |
From: 3
Bottom Left Door
To: 7
Junction Below Power Bomb Blocks
It is tricky but possible to cross the room without any damage by utilizing Samus' i-frames on room entry. After morphing, immediately roll to the right, through the Small Dessgeega. Either precisely dodge all of the enemies or quickly place a Power Bomb to kill several of them. Note that crossing the room damageless is easier in indirect G-Mode. After crossing the room, use a Power Bomb then quickly exit G-Mode before it explodes in order to break the bomb and Power Bomb blocks above. Without Spring Ball, it is still possible to place the Power Bomb high enough to break all the blocks above from an IBJ and still exit G-Mode before it explodes. Entrance condition: {
"comeInWithGMode": {
"mode": "direct",
"morphed": true
}
}Requires: "h_artificialMorphMovement"
{
"or": [
{
"and": [
"h_artificialMorphPowerBomb",
"canInsaneJump"
]
},
"canTrickyGMode",
{
"enemyDamage": {
"enemy": "Sm. Dessgeega",
"type": "contact",
"hits": 2
}
}
]
}
"h_artificialMorphPowerBomb"Clears obstacles: A, B, C |
From: 3
Bottom Left Door
To: 7
Junction Below Power Bomb Blocks
Requires: {
"enemyDamage": {
"enemy": "Mella",
"type": "contact",
"hits": 1
}
}
{
"enemyDamage": {
"enemy": "Sm. Dessgeega",
"type": "contact",
"hits": 1
}
} |
From: 3
Bottom Left Door
To: 7
Junction Below Power Bomb Blocks
Entrance condition: {
"comeInGettingBlueSpeed": {
"length": 6,
"openEnd": 0,
"steepDownTiles": 2
}
}Clears obstacles: D |
|
Entrance condition: {
"comeInNormally": {}
}Requires: "h_speedDash" |
From: 4
Right Door
To: 2
Middle Left Door
Entrance condition: {
"comeInNormally": {}
}Requires: "h_shinechargeMaxRunway"
{
"shineChargeFrames": 50
}Exit condition: {
"leaveShinecharged": {}
}Unlocks doors: {"types":["super"],"requires":[]}
{"types":["missiles","powerbomb"],"requires":["never"]} |
|
Avoid the first two magic frames by briefly releasing dash, to avoid gaining blue speed until after Samus has run over the bomb blocks. Fire a shot while running, to open the door and run through. Entrance condition: {
"comeInNormally": {}
}Requires: {
"notable": "Anti-Short Charge Hero Shot"
}
"h_speedDash"
"canHeroShot"Exit condition: {
"leaveWithRunway": {
"length": 45,
"openEnd": 1,
"minExtraRunSpeed": "$5.9"
}
}Unlocks doors: {"types":["super"],"requires":[]}
{"types":["missiles","powerbomb"],"requires":["never"]} |
|
Entrance condition: {
"comeInNormally": {}
}Requires: "canMockball" |
|
Arm pump while approaching the left gate from the right, perform a very low spin jump, and aim down to clip inside the gate. Failure results in a soft-lock. Samus must use arm pumping to advance a minimum of about 6 pixels, to have an opportunity for a frame-perfect jump, with a single-frame tap of jump. If advancing by about 12 pixels or more, then tapping jump for 2 frames becomes possible (still frame-perfect). If advancing by about 16 pixels or more, then a 2-frame window for the jump becomes possible. Entrance condition: {
"comeInNormally": {}
}Requires: "canDash"
{
"notable": "Arm Pump Crouch Gate Clip"
}
"canCrouchGateClip" |
|
Place Bombs against the crumble block to overload PLMs, then go through it and through the bomb blocks at the left. Entrance condition: {
"comeInWithGMode": {
"mode": "any",
"morphed": true
}
}Requires: "h_artificialMorphIBJ"
{
"or": [
"canBePatient",
"h_artificialMorphSpringBall",
"h_artificialMorphCeilingBombJump"
]
} |
From: 4
Right Door
To: 2
Middle Left Door
Place Bombs against the crumble block to overload PLMs, then go through it and through the bomb blocks at the left. Place a Power Bomb and quickly exit G-Mode before it goes off in order to break the blocks. Entrance condition: {
"comeInWithGMode": {
"mode": "any",
"morphed": true
}
}Requires: "h_artificialMorphIBJ"
{
"or": [
"canBePatient",
"h_artificialMorphSpringBall",
"h_artificialMorphCeilingBombJump"
]
}
"h_artificialMorphPowerBomb"Clears obstacles: A, B, C |
From: 4
Right Door
To: 2
Middle Left Door
Entrance condition: {
"comeInWithStoredFallSpeed": {
"fallSpeedInTiles": 1
}
}Requires: "h_speedDash" Exit condition: {
"leaveWithStoredFallSpeed": {
"fallSpeedInTiles": 1
}
}Unlocks doors: {"types":["missiles","super"],"requires":[]}
{"types":["powerbomb"],"requires":["never"]} |
From: 4
Right Door
To: 2
Middle Left Door
Entrance condition: {
"comeInWithStoredFallSpeed": {
"fallSpeedInTiles": 2
}
}Requires: "h_speedDash" Exit condition: {
"leaveWithStoredFallSpeed": {
"fallSpeedInTiles": 2
}
}Unlocks doors: {"types":["missiles","super"],"requires":[]}
{"types":["powerbomb"],"requires":["never"]} |
|
Exit condition: {
"leaveWithRunway": {
"length": 14,
"openEnd": 0
}
} |
|
Destroy the shot blocks at the entrance and exit of the morph tunnel near the right door. Gain a shinecharge running left-to-right in the space between the two gates. Pass through the morph tunnel to carry the shinecharge out of the room. Requires: "Morph"
{
"canShineCharge": {
"usedTiles": 26,
"openEnd": 1
}
}
"canShinechargeMovementComplex"
{
"shineChargeFrames": 130
}Exit condition: {
"leaveShinecharged": {}
} |
|
Requires: "h_CrystalFlash" |
From: 4
Right Door
To: 4
Right Door
On a failed attempt, it is free to go back through the morph tunnel to the right without any Bombs or beam upgrades. Entrance condition: {
"comeInShinecharging": {
"length": 45,
"openEnd": 0
},
"comesInHeated": "no"
}Requires: "h_CrystalSpark" |
|
Requires: {
"resetRoom": {
"nodes": [
4
]
}
}
"h_useMorphBombs"
{
"cycleFrames": 630
}
{
"or": [
"h_speedDash",
{
"and": [
"canMockball",
{
"cycleFrames": 50
}
]
}
]
}
{
"or": [
"ScrewAttack",
{
"and": [
{
"or": [
"canMidAirMorph",
"SpringBall"
]
},
{
"cycleFrames": 120
}
]
}
]
}Clears obstacles: A, B Resets obstacles: C, D Farm cycle drops: 1 Sova |
From: 4
Right Door
To: 7
Junction Below Power Bomb Blocks
Farm the enemies on the bottom - the first Sm. Dessgeega will give back the Power Bomb used to get down. Shinecharge and use any enemy at the bottom to interrupt. Entrance condition: {
"comeInWithRMode": {}
}Requires: "h_speedDash"
{
  "or": [
    "h_CrystalFlashForReserveEnergy",
    {
      "and": [
        "h_usePowerBomb",
        "h_RModeCanRefillReserves",
        {
          "or": [
            {
              "resourceMissingAtMost": [
                {
                  "type": "Missile",
                  "count": 0
                }
              ]
            },
            {
              "resourceMissingAtMost": [
                {
                  "type": "PowerBomb",
                  "count": 1
                }
              ]
            }
          ]
        },
        {
          "partialRefill": {
            "type": "ReserveEnergy",
            "limit": 20
          }
        }
      ]
    }
  ]
}
"h_shinechargeMaxRunway"
{
  "autoReserveTrigger": {
    "maxReserveEnergy": 95
  }
}
"canRModeSparkInterrupt"
Clears obstacles: C, D |
From: 4
Right Door
To: 7
Junction Below Power Bomb Blocks
Run under the gates with Speed Booster but do not break the Bomb Blocks. Moonfall twice to clip through the Power Bomb blocks. Entrance condition: {
"comeInWithStoredFallSpeed": {
"fallSpeedInTiles": 2
}
}Requires: "h_speedDash" "canMoonfall" |
From: 5
Junction Below Top Crumble Blocks
To: 2
Middle Left Door
Requires: "ScrewAttack" Clears obstacles: A |
|
Requires: "h_useMorphBombs" Clears obstacles: A, B |
From: 5
Junction Below Top Crumble Blocks
To: 2
Middle Left Door
Requires: {
"obstaclesCleared": [
"A"
]
} |
From: 5
Junction Below Top Crumble Blocks
To: 2
Middle Left Door
Requires: {
"haveBlueSuit": {}
}Clears obstacles: A |
From: 5
Junction Below Top Crumble Blocks
To: 2
Middle Left Door
Requires: {
"haveBlueSuit": {}
}
"Morph"Clears obstacles: A, B |
From: 5
Junction Below Top Crumble Blocks
To: 2
Middle Left Door
Requires: "h_usePowerBomb" Clears obstacles: A, B, C |
|
Requires: "Morph"
{
"or": [
"h_useMorphBombs",
{
"obstaclesCleared": [
"B"
]
}
]
}Clears obstacles: B |
|
Requires: {
"haveBlueSuit": {}
}
"Morph"Clears obstacles: B |
|
Requires: "h_usePowerBomb" Clears obstacles: A, B, C |
|
Requires: {
"obstaclesCleared": [
"C"
]
}
{
"or": [
"canWallJump",
"HiJump",
"SpaceJump",
"canIBJ",
"canSpringBallJumpMidAir"
]
} |
From: 7
Junction Below Power Bomb Blocks
To: 2
Middle Left Door
Requires: {
"obstaclesCleared": [
"C",
"D"
]
}
"h_shinechargeMaxRunway"
"canShinechargeMovement"
{
"or": [
{
"shinespark": {
"frames": 19,
"excessFrames": 4
}
},
{
"and": [
"canShinechargeMovementComplex",
{
"shinespark": {
"frames": 6,
"excessFrames": 4
}
}
]
}
]
} |
From: 7
Junction Below Power Bomb Blocks
To: 2
Middle Left Door
Requires: {
"obstaclesCleared": [
"C"
]
}
"h_storedSpark"
{
"shinespark": {
"frames": 6,
"excessFrames": 4
}
} |
From: 7
Junction Below Power Bomb Blocks
To: 2
Middle Left Door
Place a Power Bomb to break the Power Bomb blocks and the bomb blocks, without killing the global Sova. Wait 30-50 seconds for the Sova to get into position to be used as a platform. It is also possible to use a Mella as a platform. Requires: {
"notable": "Frozen Sova Platform"
}
"h_usePowerBomb"
"canTrickyUseFrozenEnemies"Clears obstacles: A, B, C |
From: 7
Junction Below Power Bomb Blocks
To: 2
Middle Left Door
Place a Power Bomb to break the Power Bomb blocks and the bomb blocks, without killing the global Sova. Wait 30-50 seconds for the Sova to get into position. Crouch jump, morph, and hold right against the wall, hitting the Sova from below while near the peak of Samus's jump. Continue holding right to pass through the Sova and onto the ledge above. Requires: {
"notable": "Sova Boost"
}
"h_usePowerBomb"
"canCrouchJump"
"canTrickyJump"
"h_midAirMorphDamageBoost"
{
"enemyDamage": {
"enemy": "Sova",
"type": "contact",
"hits": 1
}
}Clears obstacles: A, B, C Dev note: This is only notable with wall jumps disabled. FIXME: Consider also adding a Mella version of this strat. It takes longer to setup but allows retrying. The Mella version does slightly less damage. With either the Mella or Sova, you could kill it and collect its drop after getting onto the ledge; for the Sova you'd have to wait for it to come back around. |
From: 7
Junction Below Power Bomb Blocks
To: 2
Middle Left Door
Bring a Mella on-camera while moonwalking, to set it up to move upward at the maximum rate (about 4 pixels per swoop). Guide it to a horizontal position inside the left wall below the Power Bomb blocks. When it is high enough, freeze it as it retreats from a near-vertical swoop. Get into position on the ledge below the Power Bomb blocks and wait for the Mella to thaw. Freeze the it inside the wall as it continues its retreat upward, by jumping and firing a downward shot. Run into the wall to clip into it. Crouch and destroy the Mella by shooting up (by holding angle up and angle down) Then X-Ray climb above the Power Bomb blocks. Requires: {
"notable": "Mella Wall Ice Clip X-Ray Climb"
}
"canManipulateMellas"
"canWallIceClip"
"canXRayClimb" |
From: 7
Junction Below Power Bomb Blocks
To: 3
Bottom Left Door
Requires: {
"obstaclesCleared": [
"D"
]
} |
From: 7
Junction Below Power Bomb Blocks
To: 3
Bottom Left Door
Requires: {
"or": [
{
"haveBlueSuit": {}
},
"Spazer",
"Plasma",
"ScrewAttack",
"Wave",
{
"and": [
"canDodgeWhileShooting",
"h_usePowerBomb"
]
},
{
"enemyKill": {
"enemies": [
[
"Sm. Dessgeega"
],
[
"Sm. Dessgeega"
]
],
"explicitWeapons": [
"Missile",
"Super"
]
}
},
{
"and": [
"canDodgeWhileShooting",
{
"enemyDamage": {
"enemy": "Sm. Dessgeega",
"type": "contact",
"hits": 1
}
}
]
},
{
"enemyDamage": {
"enemy": "Sm. Dessgeega",
"type": "contact",
"hits": 2
}
}
]
}Clears obstacles: D |
From: 7
Junction Below Power Bomb Blocks
To: 3
Bottom Left Door
Avoiding damage from all enemies with just Power Beam is tricky, but doable. Requires: "canDodgeWhileShooting" "canCarefulJump" Clears obstacles: D |
From: 7
Junction Below Power Bomb Blocks
To: 3
Bottom Left Door
Requires: {
"enemyDamage": {
"enemy": "Mella",
"type": "contact",
"hits": 1
}
}
{
"enemyDamage": {
"enemy": "Sm. Dessgeega",
"type": "contact",
"hits": 1
}
} |
From: 7
Junction Below Power Bomb Blocks
To: 3
Bottom Left Door
Requires: {
"getBlueSpeed": {
"usedTiles": 18,
"gentleUpTiles": 2,
"gentleDownTiles": 3,
"openEnd": 0
}
} |
|
Requires: "canMockball" "canCarefulJump" |
From: 7
Junction Below Power Bomb Blocks
To: 7
Junction Below Power Bomb Blocks
Placing the Power Bomb high enough will also break the bomb blocks in the ceiling. Requires: "h_usePowerBomb" Clears obstacles: A, B, C |
From: 7
Junction Below Power Bomb Blocks
To: 7
Junction Below Power Bomb Blocks
Requires: "h_CrystalFlash" Clears obstacles: C |
From: 7
Junction Below Power Bomb Blocks
To: 7
Junction Below Power Bomb Blocks
Requires: {
"obstaclesCleared": [
"D"
]
}
"h_shinechargeMaxRunway"
{
"or": [
{
"and": [
"h_enemyDrops",
"h_CrystalSparkWithoutLenience"
]
},
"h_CrystalSpark"
]
}Dev note: No lenience, because Power Bombs can be farmed from the Small Dessgeegas. |
From: 8
Right of Left Shutter, Raised Right Shutter
To: 4
Right Door
Requires: {
"or": [
"canDash",
"Morph"
]
} |
From: 8
Right of Left Shutter, Raised Right Shutter
To: 4
Right Door
Requires: "h_shinechargeMaxRunway"
{
"shineChargeFrames": 30
}Exit condition: {
"leaveShinecharged": {}
}Unlocks doors: {"types":["super"],"requires":[]}
{"types":["missiles","powerbomb"],"requires":["never"]} |
From: 8
Right of Left Shutter, Raised Right Shutter
To: 4
Right Door
Requires: "h_shinechargeMaxRunway" Exit condition: {
"leaveWithTemporaryBlue": {}
}Unlocks doors: {"types":["ammo"],"requires":[]} |
From: 8
Right of Left Shutter, Raised Right Shutter
To: 4
Right Door
Requires: "canDash" "canHeroShot" Exit condition: {
"leaveWithRunway": {
"length": 45,
"openEnd": 1
}
}Unlocks doors: {"types":["super"],"requires":[]}
{"types":["missiles","powerbomb"],"requires":["never"]} |
{
"$schema": "../../../schema/m3-room.schema.json",
"id": 106,
"name": "Ice Beam Gate Room",
"area": "Norfair",
"subarea": "Upper",
"subsubarea": "West",
"roomAddress": "0x7A815",
"roomEnvironments": [
{
"heated": false
}
],
"mapTileMask": [
[
0,
0,
0,
1,
0,
0,
0
],
[
0,
0,
0,
1,
0,
0,
0
],
[
0,
0,
0,
1,
1,
1,
1
],
[
1,
1,
1,
1,
0,
0,
0
]
],
"nodes": [
{
"id": 1,
"name": "Top Left Door",
"nodeType": "door",
"nodeSubType": "blue",
"nodeAddress": "0x0019312",
"doorOrientation": "left",
"doorEnvironments": [
{
"physics": "air"
}
],
"useImplicitComeInNormally": false,
"useImplicitComeInWithMockball": false,
"mapTileMask": [
[
0,
0,
0,
2,
0,
0,
0
],
[
0,
0,
0,
2,
0,
0,
0
],
[
0,
0,
0,
1,
1,
1,
1
],
[
1,
1,
1,
1,
0,
0,
0
]
]
},
{
"id": 2,
"name": "Middle Left Door",
"nodeType": "door",
"nodeSubType": "blue",
"nodeAddress": "0x001931e",
"doorOrientation": "left",
"doorEnvironments": [
{
"physics": "air"
}
],
"mapTileMask": [
[
0,
0,
0,
1,
0,
0,
0
],
[
0,
0,
0,
1,
0,
0,
0
],
[
0,
0,
0,
2,
1,
1,
1
],
[
1,
1,
1,
1,
0,
0,
0
]
]
},
{
"id": 3,
"name": "Bottom Left Door",
"nodeType": "door",
"nodeSubType": "blue",
"nodeAddress": "0x0019336",
"doorOrientation": "left",
"doorEnvironments": [
{
"physics": "air"
}
],
"mapTileMask": [
[
0,
0,
0,
1,
0,
0,
0
],
[
0,
0,
0,
1,
0,
0,
0
],
[
0,
0,
0,
1,
1,
1,
1
],
[
2,
2,
2,
1,
0,
0,
0
]
]
},
{
"id": 4,
"name": "Right Door",
"nodeType": "door",
"nodeSubType": "blue",
"nodeAddress": "0x001932a",
"doorOrientation": "right",
"doorEnvironments": [
{
"physics": "air"
}
],
"mapTileMask": [
[
0,
0,
0,
1,
0,
0,
0
],
[
0,
0,
0,
1,
0,
0,
0
],
[
0,
0,
0,
1,
2,
2,
2
],
[
1,
1,
1,
1,
0,
0,
0
]
]
},
{
"id": 5,
"name": "Junction Below Top Crumble Blocks",
"nodeType": "junction",
"nodeSubType": "junction",
"mapTileMask": [
[
0,
0,
0,
1,
0,
0,
0
],
[
0,
0,
0,
1,
0,
0,
0
],
[
0,
0,
0,
2,
1,
1,
1
],
[
1,
1,
1,
1,
0,
0,
0
]
]
},
{
"id": 7,
"name": "Junction Below Power Bomb Blocks",
"nodeType": "junction",
"nodeSubType": "junction",
"mapTileMask": [
[
0,
0,
0,
1,
0,
0,
0
],
[
0,
0,
0,
1,
0,
0,
0
],
[
0,
0,
0,
1,
1,
1,
1
],
[
1,
1,
1,
2,
0,
0,
0
]
]
},
{
"id": 8,
"name": "Right of Left Shutter, Raised Right Shutter",
"nodeType": "junction",
"nodeSubType": "junction",
"mapTileMask": [
[
0,
0,
0,
1,
0,
0,
0
],
[
0,
0,
0,
1,
0,
0,
0
],
[
0,
0,
0,
1,
2,
1,
1
],
[
1,
1,
1,
1,
0,
0,
0
]
]
}
],
"obstacles": [
{
"id": "A",
"name": "Ceiling bomb blocks",
"obstacleType": "inanimate"
},
{
"id": "B",
"name": "Morph path bomb blocks",
"obstacleType": "inanimate"
},
{
"id": "C",
"name": "Power Bomb blocks",
"obstacleType": "inanimate"
},
{
"id": "D",
"name": "Lower enemies",
"obstacleType": "enemies"
}
],
"enemies": [
{
"id": "e1",
"groupName": "Ice Beam Gate Room Sova",
"enemyName": "Sova",
"quantity": 1,
"homeNodes": [
5
]
},
{
"id": "e2",
"groupName": "Ice Beam Gate Room Small Dessgeegas",
"enemyName": "Sm. Dessgeega",
"quantity": 3,
"homeNodes": [
3
]
},
{
"id": "e3",
"groupName": "Ice Beam Gate Room Mellas",
"enemyName": "Mella",
"quantity": 6,
"homeNodes": [
3
]
}
],
"strats": [
{
"link": [
1,
1
],
"name": "Base (Unlock Door)",
"requires": [],
"unlocksDoors": [
{
"types": [
"ammo"
],
"requires": []
}
],
"flashSuitChecked": true,
"blueSuitChecked": true
},
{
"link": [
2,
2
],
"name": "Base (Unlock Door)",
"requires": [],
"unlocksDoors": [
{
"types": [
"ammo"
],
"requires": []
}
],
"flashSuitChecked": true,
"blueSuitChecked": true
},
{
"link": [
2,
2
],
"name": "Base (Come In Normally)",
"entranceCondition": {
"comeInNormally": {}
},
"requires": [],
"flashSuitChecked": true,
"blueSuitChecked": true
},
{
"link": [
2,
2
],
"name": "Base (Come In With Mockball)",
"entranceCondition": {
"comeInWithMockball": {
"adjacentMinTiles": 0,
"remoteAndLandingMinTiles": [
[
0,
0
]
],
"speedBooster": "any"
}
},
"requires": [],
"flashSuitChecked": true,
"blueSuitChecked": true
},
{
"link": [
3,
3
],
"name": "Base (Unlock Door)",
"requires": [],
"unlocksDoors": [
{
"types": [
"ammo"
],
"requires": []
}
],
"flashSuitChecked": true,
"blueSuitChecked": true
},
{
"link": [
3,
3
],
"name": "Base (Come In Normally)",
"entranceCondition": {
"comeInNormally": {}
},
"requires": [],
"flashSuitChecked": true,
"blueSuitChecked": true
},
{
"link": [
3,
3
],
"name": "Base (Come In With Mockball)",
"entranceCondition": {
"comeInWithMockball": {
"adjacentMinTiles": 0,
"remoteAndLandingMinTiles": [
[
0,
0
]
],
"speedBooster": "any"
}
},
"requires": [],
"flashSuitChecked": true,
"blueSuitChecked": true
},
{
"link": [
4,
4
],
"name": "Base (Unlock Door)",
"requires": [],
"unlocksDoors": [
{
"types": [
"ammo"
],
"requires": []
}
],
"flashSuitChecked": true,
"blueSuitChecked": true
},
{
"link": [
4,
4
],
"name": "Base (Come In Normally)",
"entranceCondition": {
"comeInNormally": {}
},
"requires": [],
"flashSuitChecked": true,
"blueSuitChecked": true
},
{
"link": [
4,
4
],
"name": "Base (Come In With Mockball)",
"entranceCondition": {
"comeInWithMockball": {
"adjacentMinTiles": 0,
"remoteAndLandingMinTiles": [
[
0,
0
]
],
"speedBooster": "any"
}
},
"requires": [],
"flashSuitChecked": true,
"blueSuitChecked": true
},
{
"id": 1,
"link": [
1,
1
],
"name": "Leave with Runway",
"requires": [],
"exitCondition": {
"leaveWithRunway": {
"length": 1,
"openEnd": 1
}
},
"flashSuitChecked": true,
"blueSuitChecked": true
},
{
"id": 68,
"link": [
1,
1
],
"name": "Land in Door Frame",
"entranceCondition": {
"comeInNormally": {}
},
"requires": [
"canPrepareForNextRoom",
"canCarefulJump",
{
"doorUnlockedAtNode": 1
}
],
"unlocksDoors": [
{
"types": [
"super"
],
"requires": [
"canInsaneJump"
]
},
{
"types": [
"missiles",
"powerbomb"
],
"requires": [
"never"
]
}
],
"flashSuitChecked": true,
"blueSuitChecked": true,
"note": "Jump through the door and shoot it open as you enter, landing on the door frame to avoid falling."
},
{
"id": 69,
"link": [
1,
1
],
"name": "Door Stuck, Open Door",
"entranceCondition": {
"comeInWithDoorStuckSetup": {}
},
"requires": [
"canPrepareForNextRoom",
{
"doorUnlockedAtNode": 1
}
],
"unlocksDoors": [
{
"types": [
"ammo"
],
"requires": []
}
],
"flashSuitChecked": true,
"blueSuitChecked": true
},
{
"id": 70,
"link": [
1,
1
],
"name": "Prepared Entry, Land on Crumble Blocks",
"entranceCondition": {
"comeInNormally": {}
},
"requires": [
{
"or": [
"canCrumbleJump",
{
"and": [
"canPrepareForNextRoom",
"h_useSpringBall"
]
}
]
},
{
"doorUnlockedAtNode": 1
}
],
"unlocksDoors": [
{
"types": [
"super",
"powerbomb"
],
"requires": []
},
{
"types": [
"missiles"
],
"requires": [
{
"or": [
"canTrickyJump",
"h_useSpringBall"
]
}
]
}
],
"flashSuitChecked": true,
"blueSuitChecked": true,
"note": "Use Spring Ball or a crumble jump while opening the door."
},
{
"id": 53,
"link": [
1,
1
],
"name": "Prepared Entry, Avoid Crumble Blocks",
"entranceCondition": {
"comeInNormally": {}
},
"requires": [
"canPrepareForNextRoom",
{
"or": [
"SpaceJump",
"canWallJump"
]
},
{
"doorUnlockedAtNode": 1
}
],
"unlocksDoors": [
{
"types": [
"super"
],
"requires": []
},
{
"types": [
"missiles",
"powerbomb"
],
"requires": [
"never"
]
}
],
"flashSuitChecked": true,
"blueSuitChecked": true,
"note": "Jump into the room and Space Jump or wall jump while opening the door."
},
{
"id": 2,
"link": [
1,
1
],
"name": "Crystal Flash",
"requires": [
"h_CrystalFlash"
],
"flashSuitChecked": true,
"blueSuitChecked": true
},
{
"id": 71,
"link": [
1,
1
],
"name": "Enter With Mockball Without Falling",
"entranceCondition": {
"comeInWithMockball": {
"speedBooster": "any",
"adjacentMinTiles": 0,
"remoteAndLandingMinTiles": [
[
0,
0
]
]
}
},
"requires": [
{
"or": [
"canCrumbleJump",
{
"and": [
"canPrepareForNextRoom",
"h_useSpringBall"
]
}
]
},
{
"doorUnlockedAtNode": 1
}
],
"unlocksDoors": [
{
"types": [
"super"
],
"requires": []
},
{
"types": [
"missiles",
"powerbomb"
],
"requires": [
{
"or": [
"canTrickyJump",
"h_useSpringBall"
]
}
]
}
],
"flashSuitChecked": true,
"blueSuitChecked": true,
"note": "Use Spring Ball or a crumble jump while opening the door."
},
{
"id": 5,
"link": [
1,
5
],
"name": "Base",
"entranceCondition": {
"comeInNormally": {}
},
"requires": [],
"flashSuitChecked": true,
"blueSuitChecked": true
},
{
"id": 72,
"link": [
1,
5
],
"name": "Fall Into Room With Mockball",
"entranceCondition": {
"comeInWithMockball": {
"speedBooster": "any",
"adjacentMinTiles": 0,
"remoteAndLandingMinTiles": [
[
0,
0
]
]
}
},
"requires": [],
"flashSuitChecked": true,
"blueSuitChecked": true
},
{
"id": 89,
"link": [
1,
7
],
"name": "R-Mode Spark Interrupt",
"entranceCondition": {
"comeInWithRMode": {}
},
"requires": [
{
"or": [
"h_CrystalFlashForReserveEnergy",
{
"and": [
"h_usePowerBomb",
"h_RModeCanRefillReserves",
{
"or": [
{
"resourceMissingAtMost": [
{
"type": "Missile",
"count": 0
}
]
},
{
"resourceMissingAtMost": [
{
"type": "PowerBomb",
"count": 1
}
]
}
]
},
{
"partialRefill": {
"type": "ReserveEnergy",
"limit": 20
}
}
]
}
]
},
"h_shinechargeMaxRunway",
{
"autoReserveTrigger": {
"maxReserveEnergy": 95
}
},
"canRModeSparkInterrupt"
],
"clearsObstacles": [
"A",
"B",
"C",
"D"
],
"flashSuitChecked": true,
"blueSuitChecked": true,
"note": [
"Farm the enemies on the bottom - the first Sm. Dessgeega will give back the Power Bomb used to get down.",
"Shinecharge and use any enemy at the bottom to interrupt."
]
},
{
"id": 6,
"link": [
2,
1
],
"name": "X-Ray Climb",
"entranceCondition": {
"comeInWithDoorStuckSetup": {}
},
"requires": [
"canLongXRayClimb"
],
"flashSuitChecked": true,
"blueSuitChecked": true,
"note": "Climb up 2 screens."
},
{
"id": 7,
"link": [
2,
1
],
"name": "Very Deep Stuck X-Ray Climb",
"entranceCondition": {
"comeInWithGMode": {
"mode": "direct",
"morphed": false
}
},
"requires": [
"canGModeXRayClimb",
"canLongXRayClimb"
],
"bypassesDoorShell": "yes",
"flashSuitChecked": true,
"blueSuitChecked": true,
"note": [
"Enter with G-mode direct, back up to between 1 and 6 pixels from the door transition, and activate X-ray to get very deep stuck in the door.",
"Climb up 2 screens, and perform a turnaround buffered spin-jump away from the door to trigger the transition, bypassing any lock on the door."
]
},
{
"id": 8,
"link": [
2,
2
],
"name": "Leave with Runway",
"requires": [
{
  "obstaclesNotCleared": [
    "C"
  ]
}
],
"exitCondition": {
"leaveWithRunway": {
"length": 15,
"openEnd": 0
}
},
"flashSuitChecked": true,
"blueSuitChecked": true
},
{
"id": 9,
"link": [
2,
2
],
"name": "Leave with Runway Floor Blocks Destroyed",
"requires": [],
"exitCondition": {
"leaveWithRunway": {
"length": 6,
"openEnd": 1
}
},
"flashSuitChecked": true,
"blueSuitChecked": true
},
{
"id": 10,
"link": [
2,
2
],
"name": "Leave With Runway - Slow Frozen Sova",
"requires": [
"h_frozenEnemyRunway",
{
"obstaclesCleared": [
"A",
"B",
"C"
]
},
{
"or": [
"canBeVeryPatient",
{
"and": [
"canBePatient",
{
"ammo": {
"type": "Super",
"count": 1
}
}
]
}
]
}
],
"exitCondition": {
"leaveWithRunway": {
"length": 7,
"openEnd": 1
}
},
"flashSuitChecked": true,
"blueSuitChecked": true,
"note": [
"If the Power Bomb blocks are broken and the room cannot be reset, the runway can be extended by waiting for the slow global Sova.",
"Be careful to prevent killing the Sova when breaking the Power Bomb blocks, while still ensuring breaking the ceiling Bomb blocks.",
"Using a Super to knock off the Sova once it is near the gates will save approximately 30 seconds."
],
"devNote": "This strat only takes 60-90 seconds, but could be much longer if Samus has to wait for the Sova to move out of the Power Bomb area."
},
{
"id": 11,
"link": [
2,
2
],
"name": "Power Bomb the Blocks",
"requires": [
"h_usePowerBomb"
],
"clearsObstacles": [
"A",
"B",
"C"
],
"flashSuitChecked": true,
"blueSuitChecked": true
},
{
"id": 12,
"link": [
2,
2
],
"name": "Crystal Flash",
"requires": [
"h_CrystalFlash"
],
"clearsObstacles": [
"A",
"B",
"C"
],
"flashSuitChecked": true,
"blueSuitChecked": true
},
{
"id": 101,
"link": [
2,
2
],
"name": "Come in Shinecharging, Crystal Spark",
"entranceCondition": {
"comeInShinecharging": {
"length": 14,
"openEnd": 0
},
"comesInHeated": "no"
},
"requires": [
"h_CrystalSpark"
],
"clearsObstacles": [
"A",
"B",
"C"
],
"flashSuitChecked": true,
"blueSuitChecked": true
},
{
"id": 79,
"link": [
2,
2
],
"name": "Sova Farm",
"requires": [
{
"resetRoom": {
"nodes": [
2
]
}
},
"Morph",
{
"or": [
"h_useMorphBombs",
{
"haveBlueSuit": {}
}
]
},
{
"or": [
{
"and": [
"canFarmWhileShooting",
{
"or": [
"ScrewAttack",
{
"and": [
"canMidAirMorph",
{
"cycleFrames": 60
}
]
}
]
},
{
"cycleFrames": 490
}
]
},
{
"cycleFrames": 610
}
]
}
],
"clearsObstacles": [
"A",
"B"
],
"resetsObstacles": [
"C",
"D"
],
"farmCycleDrops": [
{
"enemy": "Sova",
"count": 1
}
],
"flashSuitChecked": true,
"blueSuitChecked": true
},
{
"id": 80,
"link": [
2,
2
],
"name": "Mella and Sm. Dessgeega Farm",
"requires": [
"h_usePowerBomb",
{
"or": [
{
"resetRoom": {
"nodes": [
2
]
}
},
{
"and": [
{
"resetRoom": {
"nodes": [
4
]
}
},
{
"or": [
{
"and": [
{
"getBlueSpeed": {
"usedTiles": 18,
"gentleUpTiles": 2,
"gentleDownTiles": 3,
"openEnd": 0
}
},
{
"cycleFrames": 420
}
]
},
{
"and": [
"canMockball",
{
"cycleFrames": 60
}
]
}
]
}
]
}
]
},
{
"or": [
"canWallJump",
"HiJump",
"SpaceJump",
{
"and": [
"canSpringBallJumpMidAir",
"h_doubleEquipmentScreenCycleFrames",
{
"cycleFrames": 30
}
]
}
]
},
{
"or": [
{
"and": [
"canDash",
{
"or": [
{
"and": [
"ScrewAttack",
{
"cycleFrames": 1080
}
]
},
{
"and": [
"Wave",
{
"cycleFrames": 1140
}
]
},
{
"and": [
"Spazer",
{
"cycleFrames": 990
}
]
},
{
"and": [
"Plasma",
{
"cycleFrames": 850
}
]
},
{
"and": [
"canMockball",
{
"ammo": {
"type": "PowerBomb",
"count": 1
}
},
{
"cycleFrames": 900
}
]
}
]
}
]
},
{
"and": [
{
"haveBlueSuit": {}
},
{
"cycleFrames": 1200
}
]
}
]
}
],
"clearsObstacles": [
"A",
"B",
"C",
"D"
],
"farmCycleDrops": [
{
"enemy": "Mella",
"count": 6
},
{
"enemy": "Sm. Dessgeega",
"count": 3
}
],
"flashSuitChecked": true,
"blueSuitChecked": true,
"devNote": [
"FIXME: The cycleFrame numbers for resetting at node 4 don't make sense."
]
},
{
"id": 13,
"link": [
2,
2
],
"name": "G-Mode Setup - Get Hit By Sova",
"requires": [
{
"obstaclesCleared": [
"A"
]
},
{
"obstaclesCleared": [
"B"
]
},
{
"or": [
"canBePatient",
{
"ammo": {
"type": "Super",
"count": 1
}
},
{
"obstaclesNotCleared": [
"C"
]
}
]
}
],
"exitCondition": {
"leaveWithGModeSetup": {}
},
"flashSuitChecked": true,
"blueSuitChecked": true,
"note": [
"Release the ceiling Sova while being careful not to kill it if using Power Bombs.",
"The Sova takes 90 seconds to get to the door if the Power Bomb blocks are broken and 45 seconds if they are not.",
"Using a Super when the Sova is exiting the ceiling takes only 12 seconds."
]
},
{
"id": 14,
"link": [
2,
2
],
"name": "G-Mode Morph Power Bomb the Blocks",
"entranceCondition": {
"comeInWithGMode": {
"mode": "any",
"morphed": true
}
},
"requires": [
"h_artificialMorphPowerBomb"
],
"clearsObstacles": [
"A",
"B",
"C"
],
"flashSuitChecked": true,
"blueSuitChecked": true,
"note": "Place a Power Bomb and exit G-Mode in order to break the blocks."
},
{
"id": 19,
"link": [
2,
4
],
"name": "G-Mode Setup - Get Hit By Sova",
"requires": [
{
"obstaclesCleared": [
"A",
"B"
]
},
"Morph"
],
"exitCondition": {
"leaveWithGModeSetup": {}
},
"unlocksDoors": [
{
"types": [
"ammo"
],
"requires": []
}
],
"flashSuitChecked": true,
"blueSuitChecked": true,
"note": [
"Release the ceiling Sova while being careful not to kill it if using Power Bombs.",
"Go through the ceiling morph tunnel and wait for the Sova on the other side."
]
},
{
"id": 20,
"link": [
2,
5
],
"name": "Base",
"requires": [
{
  "or": [
    "h_useMorphBombs",
    "ScrewAttack",
    {
      "obstaclesCleared": [
        "A"
      ]
    }
  ]
}
],
"clearsObstacles": [
"A"
],
"flashSuitChecked": true,
"blueSuitChecked": true
},
{
"id": 93,
"link": [
2,
5
],
"name": "Blue Suit",
"requires": [
{
  "haveBlueSuit": {}
}
],
"clearsObstacles": [
"A"
],
"flashSuitChecked": true,
"blueSuitChecked": true
},
{
"id": 21,
"link": [
2,
5
],
"name": "Power Bomb",
"requires": [
"h_usePowerBomb"
],
"clearsObstacles": [
"A",
"B",
"C"
],
"flashSuitChecked": true,
"blueSuitChecked": true
},
{
"id": 22,
"link": [
2,
5
],
"name": "Temporary Blue Chain (Come in Shinecharging)",
"entranceCondition": {
"comeInShinecharging": {
"length": 4,
"openEnd": 0
}
},
"requires": [
"canChainTemporaryBlue",
"can4HighMidAirMorph",
"canInsaneJump"
],
"clearsObstacles": [
"A",
"B"
],
"flashSuitChecked": true,
"blueSuitChecked": true,
"note": [
"Use a temporary blue chain to jump through the bomb blocks and land on the center of the ledge above.",
"Break the last block by jumping directly into it, as there is not enough height available to get a bounce.",
"With this method, there is a 2-frame window for when to morph;",
"jumping from the platform below is also possible but requires a frame-perfect morph.",
"If Spring Ball is available, it can be used to increase the window by one frame in either case."
]
},
{
"id": 23,
"link": [
2,
5
],
"name": "Temporary Blue Chain With X-Ray (Come in Shinecharging)",
"entranceCondition": {
"comeInShinecharging": {
"length": 14,
"openEnd": 0
}
},
"requires": [
"canChainTemporaryBlue",
"canXRayTurnaround",
"can4HighMidAirMorph",
"canInsaneJump"
],
"clearsObstacles": [
"A",
"B"
],
"flashSuitChecked": true,
"blueSuitChecked": true,
"note": [
"Use a temporary blue chain to jump through the bomb blocks and land on the center of the ledge above.",
"Break the last block by jumping directly into it, as there is not enough height available to get a bounce.",
"With this method, there is a 2-frame window for when to morph;",
"jumping from the platform below is also possible but requires a frame-perfect morph.",
"If Spring Ball is available, it can be used to increase the window by one frame in either case."
]
},
{
"id": 24,
"link": [
2,
5
],
"name": "Temporary Blue Chain With X-Ray (In Room)",
"requires": [
{
"or": [
{
"canShineCharge": {
"usedTiles": 14,
"openEnd": 0
}
},
{
"and": [
{
"canShineCharge": {
"usedTiles": 15,
"openEnd": 0
}
},
{
"doorUnlockedAtNode": 2
}
]
}
]
},
"canChainTemporaryBlue",
"canXRayTurnaround",
"can4HighMidAirMorph",
"canInsaneJump"
],
"unlocksDoors": [
{
"nodeId": 2,
"types": [
"ammo"
],
"requires": []
}
],
"clearsObstacles": [
"A",
"B"
],
"flashSuitChecked": true,
"blueSuitChecked": true,
"note": [
"Use a temporary blue chain to jump through the bomb blocks and land on the center of the ledge above.",
"Break the last block by jumping directly into it, as there is not enough height available to get a bounce.",
"With this method, there is a 2-frame window for when to morph;",
"jumping from the platform below is also possible but requires a frame-perfect morph.",
"If Spring Ball is available, it can be used to increase the window by one frame in either case."
]
},
{
"id": 25,
"link": [
2,
7
],
"name": "Base",
"requires": [
{
  "obstaclesCleared": [
    "C"
  ]
}
],
"flashSuitChecked": true,
"blueSuitChecked": true
},
{
"id": 90,
"link": [
2,
7
],
"name": "R-Mode Spark Interrupt",
"entranceCondition": {
"comeInWithRMode": {}
},
"requires": [
{
"or": [
"h_CrystalFlashForReserveEnergy",
{
"and": [
"h_usePowerBomb",
"h_RModeCanRefillReserves",
{
"or": [
{
"resourceMissingAtMost": [
{
"type": "Missile",
"count": 0
}
]
},
{
"resourceMissingAtMost": [
{
"type": "PowerBomb",
"count": 1
}
]
}
]
},
{
"partialRefill": {
"type": "ReserveEnergy",
"limit": 20
}
}
]
}
]
},
"h_shinechargeMaxRunway",
{
"autoReserveTrigger": {
"maxReserveEnergy": 95
}
},
"canRModeSparkInterrupt"
],
"clearsObstacles": [
"C",
"D"
],
"flashSuitChecked": true,
"blueSuitChecked": true,
"note": [
"Farm the enemies on the bottom - the first Sm. Dessgeega will give back the Power Bomb used to get down.",
"Shinecharge and use any enemy at the bottom to interrupt."
]
},
{
"id": 26,
"link": [
2,
7
],
"name": "Stored Moonfall Clip",
"entranceCondition": {
"comeInWithStoredFallSpeed": {
"fallSpeedInTiles": 2
}
},
"requires": [
{
"noBlueSuit": {}
},
"canMoonfall"
],
"flashSuitChecked": true,
"blueSuitChecked": true,
"note": "Moonfall twice to clip through the Bomb and Power Bomb blocks."
},
{
"id": 15,
"link": [
2,
8
],
"name": "Mockball",
"entranceCondition": {
"comeInWithMockball": {
"speedBooster": "any",
"adjacentMinTiles": 11.4375,
"remoteAndLandingMinTiles": [
[
8,
2
],
[
7,
3
]
]
}
},
"requires": [],
"flashSuitChecked": true,
"blueSuitChecked": true
},
{
"id": 16,
"link": [
2,
8
],
"name": "Mockball (Speed Booster, Short Landing)",
"entranceCondition": {
"comeInWithMockball": {
"speedBooster": "yes",
"remoteAndLandingMinTiles": [
[
9,
1
]
]
}
},
"requires": [],
"flashSuitChecked": true,
"blueSuitChecked": true
},
{
"id": 17,
"link": [
2,
8
],
"name": "Tricky Mockball",
"entranceCondition": {
"comeInWithMockball": {
"speedBooster": "any",
"adjacentMinTiles": 10.4375,
"remoteAndLandingMinTiles": [
[
7,
1
],
[
6,
2
],
[
5,
3
]
]
}
},
"requires": [
"canTrickyJump"
],
"flashSuitChecked": true,
"blueSuitChecked": true
},
{
"id": 18,
"link": [
2,
8
],
"name": "Insane Mockball",
"entranceCondition": {
"comeInWithMockball": {
"speedBooster": "any",
"adjacentMinTiles": 9.4375,
"remoteAndLandingMinTiles": [
[
5,
1
]
]
}
},
"requires": [
"canInsaneJump"
],
"flashSuitChecked": true,
"blueSuitChecked": true,
"devNote": "Theoretically this can be done with 8 tiles (technically even 7.4375 tiles) but would require higher movement tech."
},
{
"id": 74,
"link": [
2,
8
],
"name": "Insane Speedy Mockball",
"entranceCondition": {
"comeInRunning": {
"speedBooster": "yes",
"minTiles": 5
}
},
"requires": [
"h_speedJump",
"canInsaneJump",
"canMockball"
],
"flashSuitChecked": true,
"blueSuitChecked": true,
"note": [
"Run into the room, and perform a very low short-hop mockball, delaying it so that Samus morphs right before the gate."
],
"devNote": "Theoretically this can be done with 4 tiles (technically even 3.4375 tiles) but would require higher movement tech."
},
{
"id": 83,
"link": [
2,
8
],
"name": "Speedy Crouch Gate Clip",
"entranceCondition": {
"comeInRunning": {
"speedBooster": "yes",
"minTiles": 11
}
},
"requires": [
{
"notable": "Speedy Crouch Gate Clip"
},
"h_speedJump",
"canCrouchGateClip"
],
"flashSuitChecked": true,
"blueSuitChecked": true,
"note": [
"Run into the room with sufficient speed,",
"perform a very low spin jump, and aim down to clip inside the gate."
],
"detailNote": [
"This requires entering with extra run speed of at least $2.D.",
"Ideally the spin jump should be performed by tapping jump for exactly one frame.",
"If entering with near-minimal speed, a frame-perfect jump is required."
]
},
{
"id": 27,
"link": [
3,
3
],
"name": "Leave with Runway",
"requires": [
{
  "obstaclesCleared": [
    "D"
  ]
}
],
"exitCondition": {
"leaveWithRunway": {
"length": 45,
"openEnd": 1
}
},
"flashSuitChecked": true,
"blueSuitChecked": true
},
{
"id": 28,
"link": [
3,
3
],
"name": "Mella and Sm. Dessgeega Farm",
"requires": [
{
"resetRoom": {
"nodes": [
3
]
}
},
{
"or": [
{
"and": [
"canDash",
{
"or": [
{
"and": [
"ScrewAttack",
{
"cycleFrames": 600
}
]
},
{
"and": [
"Wave",
{
"cycleFrames": 630
}
]
},
{
"and": [
"Spazer",
{
"cycleFrames": 600
}
]
},
{
"and": [
"Plasma",
{
"cycleFrames": 510
}
]
}
]
}
]
},
{
"and": [
{
"haveBlueSuit": {}
},
{
"cycleFrames": 650
}
]
}
]
}
],
"clearsObstacles": [
"D"
],
"resetsObstacles": [
"A",
"B",
"C"
],
"farmCycleDrops": [
{
"enemy": "Mella",
"count": 6
},
{
"enemy": "Sm. Dessgeega",
"count": 3
}
],
"flashSuitChecked": true,
"blueSuitChecked": true
},
{
"id": 81,
"link": [
3,
3
],
"name": "Mella and Sm. Dessgeega Power Bomb Farm",
"requires": [
"canDash",
{
"resetRoom": {
"nodes": [
3
]
}
},
"h_usePowerBomb",
"canTrickyJump",
"canLateralMidAirMorph",
{
"cycleFrames": 450
}
],
"clearsObstacles": [
"D"
],
"resetsObstacles": [
"A",
"B",
"C"
],
"farmCycleDrops": [
{
"enemy": "Mella",
"count": 4
},
{
"enemy": "Sm. Dessgeega",
"count": 3
}
],
"flashSuitChecked": true,
"blueSuitChecked": true
},
{
"id": 29,
"link": [
3,
3
],
"name": "Crystal Flash",
"requires": [
{
"or": [
{
"obstaclesCleared": [
"D"
]
},
{
  "enemyDamage": {
    "enemy": "Sm. Dessgeega",
    "type": "contact",
    "hits": 1
  }
},
{
"enemyKill": {
"enemies": [
[
"Sm. Dessgeega"
]
],
"explicitWeapons": [
"Missile",
"Super"
]
}
}
]
},
"h_CrystalFlash"
],
"flashSuitChecked": true,
"blueSuitChecked": true,
"note": "Kill some or all of the enemies before Crystal Flashing."
},
{
"id": 30,
"link": [
3,
3
],
"name": "G-Mode Setup - Get Hit By Mella or Small Dessgeega",
"requires": [],
"exitCondition": {
"leaveWithGModeSetup": {}
},
"flashSuitChecked": true,
"blueSuitChecked": true,
"note": "Either enemy type can be used, so it may be best to kill one and use the other."
},
{
"id": 31,
"link": [
3,
3
],
"name": "G-Mode Regain Mobility",
"requires": [
{
"enemyDamage": {
"enemy": "Sm. Dessgeega",
"type": "contact",
"hits": 1
}
}
],
"gModeRegainMobility": {},
"flashSuitChecked": true,
"blueSuitChecked": true
},
{
"id": 32,
"link": [
3,
7
],
"name": "Enemies Already Killed",
"requires": [
{
  "obstaclesCleared": [
    "D"
  ]
}
],
"flashSuitChecked": true,
"blueSuitChecked": true
},
{
"id": 33,
"link": [
3,
7
],
"name": "Enemy Kill",
"requires": [
{
  "or": [
    {
      "haveBlueSuit": {}
    },
    "Spazer",
    "Plasma",
    "ScrewAttack",
    "Wave",
    {
      "and": [
        "canDodgeWhileShooting",
        "h_usePowerBomb"
      ]
    },
    {
      "enemyKill": {
        "enemies": [
          [
            "Sm. Dessgeega"
          ],
          [
            "Sm. Dessgeega"
          ]
        ],
        "explicitWeapons": [
          "Missile",
          "Super"
        ]
      }
    },
    {
      "and": [
        "canDodgeWhileShooting",
        {
          "enemyDamage": {
            "enemy": "Sm. Dessgeega",
            "type": "contact",
            "hits": 1
          }
        }
      ]
    },
    {
      "enemyDamage": {
        "enemy": "Sm. Dessgeega",
        "type": "contact",
        "hits": 2
      }
    }
  ]
}
],
"clearsObstacles": [
"D"
],
"flashSuitChecked": true,
"blueSuitChecked": true
},
{
"id": 34,
"link": [
3,
7
],
"name": "Tricky Kill",
"requires": [
"canTrickyDodgeEnemies",
"canPrepareForNextRoom",
"canStopOnADime"
],
"clearsObstacles": [
"D"
],
"flashSuitChecked": true,
"blueSuitChecked": true,
"note": [
"Avoiding damage from all enemies with just Power Beam is tricky, but doable.",
"Enter the room holding angle to remove momentum and avoid getting hit by the Dessgeega.",
"Crouch to fire the first two shots, stand for the next two shots, then crouch again for the final two shots."
]
},
{
"id": 91,
"link": [
3,
7
],
"name": "R-Mode Spark Interrupt",
"entranceCondition": {
"comeInWithRMode": {}
},
"requires": [
{
"or": [
{
"enemyDamage": {
"enemy": "Sm. Dessgeega",
"type": "contact",
"hits": 1
}
},
{
"enemyKill": {
"enemies": [
[
"Sm. Dessgeega"
]
],
"explicitWeapons": [
"Missile",
"Super"
]
}
}
]
},
{
"or": [
"h_CrystalFlashForReserveEnergy",
{
"and": [
"h_RModeCanRefillReserves",
{
"or": [
{
"resourceMissingAtMost": [
{
"type": "Missile",
"count": 0
}
]
},
{
"resourceMissingAtMost": [
{
"type": "PowerBomb",
"count": 1
}
]
}
]
},
{
"partialRefill": {
"type": "ReserveEnergy",
"limit": 20
}
}
]
}
]
},
"h_shinechargeMaxRunway",
{
"autoReserveTrigger": {
"maxReserveEnergy": 95
}
},
"canRModeSparkInterrupt"
],
"clearsObstacles": [
"D"
],
"flashSuitChecked": true,
"blueSuitChecked": true,
"note": [
"Kill or run past an enemy before attempting to Crystal Flash, or farm the Sm. Dessgeegas and Mellas.",
"Shinecharge and use any enemy at the bottom to interrupt."
]
},
{
"id": 35,
"link": [
3,
7
],
"name": "G-Mode Morph Power Bomb the Blocks (Indirect G-Mode)",
"entranceCondition": {
"comeInWithGMode": {
"mode": "indirect",
"morphed": true
}
},
"requires": [
"h_artificialMorphMovement",
{
"or": [
"canTrickyDodgeEnemies",
{
"and": [
"h_artificialMorphPowerBomb",
"h_artificialMorphPowerBomb"
]
},
{
"enemyDamage": {
"enemy": "Sm. Dessgeega",
"type": "contact",
"hits": 2
}
}
]
},
"h_artificialMorphPowerBomb"
],
"clearsObstacles": [
"A",
"B",
"C"
],
"flashSuitChecked": true,
"blueSuitChecked": true,
"note": [
"It is tricky but possible to cross the room without any damage by rolling through the room.",
"The enemies can be killed with extra Power Bombs, but without them, it's arguably easier to roll through the room without the use of Spring Ball or Bombs.",
"After crossing the room, use a Power Bomb then quickly exit G-Mode before it explodes in order to break the bomb and Power Bomb blocks above.",
"Without Spring Ball, it is still possible to place the Power Bomb high enough to break all the blocks above from an IBJ and still exit G-Mode before it explodes."
]
},
{
"id": 36,
"link": [
3,
7
],
"name": "G-Mode Morph Power Bomb the Blocks (Direct G-Mode)",
"entranceCondition": {
"comeInWithGMode": {
"mode": "direct",
"morphed": true
}
},
"requires": [
"h_artificialMorphMovement",
{
"or": [
{
"and": [
"h_artificialMorphPowerBomb",
"canInsaneJump"
]
},
"canTrickyGMode",
{
"enemyDamage": {
"enemy": "Sm. Dessgeega",
"type": "contact",
"hits": 2
}
}
]
},
"h_artificialMorphPowerBomb"
],
"clearsObstacles": [
"A",
"B",
"C"
],
"flashSuitChecked": true,
"blueSuitChecked": true,
"note": [
"It is tricky but possible to cross the room without any damage by utilizing Samus' i-frames on room entry.",
"After morphing, immediately roll to the right, through the Small Dessgeega.",
"Either precisely dodge all of the enemies or quickly place a Power Bomb to kill several of them.",
"Note that crossing the room damageless is easier in indirect G-Mode.",
"After crossing the room, use a Power Bomb then quickly exit G-Mode before it explodes in order to break the bomb and Power Bomb blocks above.",
"Without Spring Ball, it is still possible to place the Power Bomb high enough to break all the blocks above from an IBJ and still exit G-Mode before it explodes."
]
},
{
"id": 37,
"link": [
3,
7
],
"name": "Tank Enemy Damage",
"requires": [
{
"enemyDamage": {
"enemy": "Mella",
"type": "contact",
"hits": 1
}
},
{
"enemyDamage": {
"enemy": "Sm. Dessgeega",
"type": "contact",
"hits": 1
}
}
],
"flashSuitChecked": true,
"blueSuitChecked": true
},
{
"id": 38,
"link": [
3,
7
],
"name": "Come in Getting Blue Speed",
"entranceCondition": {
"comeInGettingBlueSpeed": {
"length": 6,
"openEnd": 0,
"steepDownTiles": 2
}
},
"requires": [],
"clearsObstacles": [
"D"
],
"flashSuitChecked": true,
"blueSuitChecked": true
},
{
"id": 39,
"link": [
4,
2
],
"name": "Speed Through",
"entranceCondition": {
"comeInNormally": {}
},
"requires": [
"h_speedDash"
],
"flashSuitChecked": true,
"blueSuitChecked": true
},
{
"id": 40,
"link": [
4,
2
],
"name": "Speed Through and Leave Shinecharged",
"entranceCondition": {
"comeInNormally": {}
},
"requires": [
"h_shinechargeMaxRunway",
{
"shineChargeFrames": 50
}
],
"exitCondition": {
"leaveShinecharged": {}
},
"unlocksDoors": [
{
"types": [
"super"
],
"requires": []
},
{
"types": [
"missiles",
"powerbomb"
],
"requires": [
"never"
]
}
],
"flashSuitChecked": true,
"blueSuitChecked": true,
"note": "Store the Shinespark after the second shutter to avoid breaking the Bomb Blocks in the floor."
},
{
"id": 78,
"link": [
4,
2
],
"name": "Anti-Short Charge Hero Shot",
"entranceCondition": {
"comeInNormally": {}
},
"requires": [
{
"notable": "Anti-Short Charge Hero Shot"
},
"h_speedDash",
"canHeroShot"
],
"exitCondition": {
"leaveWithRunway": {
"length": 45,
"openEnd": 1,
"minExtraRunSpeed": "$5.9"
}
},
"unlocksDoors": [
{
"types": [
"super"
],
"requires": []
},
{
"types": [
"missiles",
"powerbomb"
],
"requires": [
"never"
]
}
],
"flashSuitChecked": true,
"blueSuitChecked": true,
"note": [
"Avoid the first two magic frames by briefly releasing dash,",
"to avoid gaining blue speed until after Samus has run over the bomb blocks.",
"Fire a shot while running, to open the door and run through."
]
},
{
"id": 41,
"link": [
4,
2
],
"name": "Mockball",
"entranceCondition": {
"comeInNormally": {}
},
"requires": [
"canMockball"
],
"flashSuitChecked": true,
"blueSuitChecked": true
},
{
"id": 84,
"link": [
4,
2
],
"name": "Arm Pump Crouch Gate Clip",
"entranceCondition": {
"comeInNormally": {}
},
"requires": [
"canDash",
{
"notable": "Arm Pump Crouch Gate Clip"
},
"canCrouchGateClip"
],
"flashSuitChecked": true,
"blueSuitChecked": true,
"note": [
"Arm pump while approaching the left gate from the right,",
"perform a very low spin jump, and aim down to clip inside the gate.",
"Failure results in a soft-lock."
],
"detailNote": [
"Samus must use arm pumping to advance a minimum of about 6 pixels,",
"to have an opportunity for a frame-perfect jump, with a single-frame tap of jump.",
"If advancing by about 12 pixels or more, then tapping jump for 2 frames becomes possible (still frame-perfect).",
"If advancing by about 16 pixels or more, then a 2-frame window for the jump becomes possible."
]
},
{
"id": 42,
"link": [
4,
2
],
"name": "G-Mode Morph Overload PLMs",
"entranceCondition": {
"comeInWithGMode": {
"mode": "any",
"morphed": true
}
},
"requires": [
"h_artificialMorphIBJ",
{
"or": [
"canBePatient",
"h_artificialMorphSpringBall",
"h_artificialMorphCeilingBombJump"
]
}
],
"flashSuitChecked": true,
"blueSuitChecked": true,
"note": "Place Bombs against the crumble block to overload PLMs, then go through it and through the bomb blocks at the left."
},
{
"id": 43,
"link": [
4,
2
],
"name": "G-Mode Morph Overload PLMs, Power Bomb the Blocks",
"entranceCondition": {
"comeInWithGMode": {
"mode": "any",
"morphed": true
}
},
"requires": [
"h_artificialMorphIBJ",
{
"or": [
"canBePatient",
"h_artificialMorphSpringBall",
"h_artificialMorphCeilingBombJump"
]
},
"h_artificialMorphPowerBomb"
],
"clearsObstacles": [
"A",
"B",
"C"
],
"flashSuitChecked": true,
"blueSuitChecked": true,
"note": [
"Place Bombs against the crumble block to overload PLMs, then go through it and through the bomb blocks at the left.",
"Place a Power Bomb and quickly exit G-Mode before it goes off in order to break the blocks."
]
},
{
"id": 44,
"link": [
4,
2
],
"name": "Transition with Stored Fall Speed",
"entranceCondition": {
"comeInWithStoredFallSpeed": {
"fallSpeedInTiles": 1
}
},
"requires": [
"h_speedDash"
],
"exitCondition": {
"leaveWithStoredFallSpeed": {
"fallSpeedInTiles": 1
}
},
"unlocksDoors": [
{
"types": [
"missiles",
"super"
],
"requires": []
},
{
"types": [
"powerbomb"
],
"requires": [
"never"
]
}
],
"flashSuitChecked": true,
"blueSuitChecked": true
},
{
"id": 45,
"link": [
4,
2
],
"name": "Transition with Stored Fall Speed (more speed)",
"entranceCondition": {
"comeInWithStoredFallSpeed": {
"fallSpeedInTiles": 2
}
},
"requires": [
"h_speedDash"
],
"exitCondition": {
"leaveWithStoredFallSpeed": {
"fallSpeedInTiles": 2
}
},
"unlocksDoors": [
{
"types": [
"missiles",
"super"
],
"requires": []
},
{
"types": [
"powerbomb"
],
"requires": [
"never"
]
}
],
"flashSuitChecked": true,
"blueSuitChecked": true
},
{
"id": 46,
"link": [
4,
4
],
"name": "Leave with Runway",
"requires": [],
"exitCondition": {
"leaveWithRunway": {
"length": 14,
"openEnd": 0
}
},
"flashSuitChecked": true,
"blueSuitChecked": true
},
{
"id": 67,
"link": [
4,
4
],
"name": "Leave Shinecharged",
"requires": [
"Morph",
{
"canShineCharge": {
"usedTiles": 26,
"openEnd": 1
}
},
"canShinechargeMovementComplex",
{
"shineChargeFrames": 130
}
],
"exitCondition": {
"leaveShinecharged": {}
},
"flashSuitChecked": true,
"blueSuitChecked": true,
"note": [
"Destroy the shot blocks at the entrance and exit of the morph tunnel near the right door.",
"Gain a shinecharge running left-to-right in the space between the two gates.",
"Pass through the morph tunnel to carry the shinecharge out of the room."
]
},
{
"id": 47,
"link": [
4,
4
],
"name": "Crystal Flash",
"requires": [
"h_CrystalFlash"
],
"flashSuitChecked": true,
"blueSuitChecked": true
},
{
"id": 102,
"link": [
4,
4
],
"name": "Come in Shinecharging, Crystal Spark",
"entranceCondition": {
"comeInShinecharging": {
"length": 45,
"openEnd": 0
},
"comesInHeated": "no"
},
"requires": [
"h_CrystalSpark"
],
"flashSuitChecked": true,
"blueSuitChecked": true,
"note": "On a failed attempt, it is free to go back through the morph tunnel to the right without any Bombs or beam upgrades."
},
{
"id": 82,
"link": [
4,
4
],
"name": "Sova Farm",
"requires": [
{
"resetRoom": {
"nodes": [
4
]
}
},
"h_useMorphBombs",
{
"cycleFrames": 630
},
{
"or": [
"h_speedDash",
{
"and": [
"canMockball",
{
"cycleFrames": 50
}
]
}
]
},
{
"or": [
"ScrewAttack",
{
"and": [
{
"or": [
"canMidAirMorph",
"SpringBall"
]
},
{
"cycleFrames": 120
}
]
}
]
}
],
"clearsObstacles": [
"A",
"B"
],
"resetsObstacles": [
"C",
"D"
],
"farmCycleDrops": [
{
"enemy": "Sova",
"count": 1
}
],
"flashSuitChecked": true,
"blueSuitChecked": true
},
{
"id": 92,
"link": [
4,
7
],
"name": "R-Mode Spark Interrupt",
"entranceCondition": {
"comeInWithRMode": {}
},
"requires": [
"h_speedDash",
{
"or": [
"h_CrystalFlashForReserveEnergy",
{
"and": [
"h_usePowerBomb",
"h_RModeCanRefillReserves",
{
"or": [
{
"resourceMissingAtMost": [
{
"type": "Missile",
"count": 0
}
]
},
{
"resourceMissingAtMost": [
{
"type": "PowerBomb",
"count": 1
}
]
}
]
},
{
"partialRefill": {
"type": "ReserveEnergy",
"limit": 20
}
}
]
}
]
},
"h_shinechargeMaxRunway",
{
"autoReserveTrigger": {
"maxReserveEnergy": 95
}
},
"canRModeSparkInterrupt"
],
"clearsObstacles": [
"C",
"D"
],
"flashSuitChecked": true,
"blueSuitChecked": true,
"note": [
"Farm the enemies on the bottom - the first Sm. Dessgeega will give back the Power Bomb used to get down.",
"Shinecharge and use any enemy at the bottom to interrupt."
]
},
{
"id": 48,
"link": [
4,
7
],
"name": "Stored Moonfall Clip",
"entranceCondition": {
"comeInWithStoredFallSpeed": {
"fallSpeedInTiles": 2
}
},
"requires": [
"h_speedDash",
"canMoonfall"
],
"flashSuitChecked": true,
"blueSuitChecked": true,
"note": [
"Run under the gates with Speed Booster but do not break the Bomb Blocks.",
"Moonfall twice to clip through the Power Bomb blocks."
]
},
{
"id": 94,
"link": [
5,
2
],
"name": "Screw Attack",
"requires": [
"ScrewAttack"
],
"clearsObstacles": [
"A"
],
"flashSuitChecked": true,
"blueSuitChecked": true
},
{
"id": 95,
"link": [
5,
2
],
"name": "Bombs",
"requires": [
"h_useMorphBombs"
],
"clearsObstacles": [
"A",
"B"
],
"flashSuitChecked": true,
"blueSuitChecked": true
},
{
"id": 96,
"link": [
5,
2
],
"name": "Bomb Blocks Already Cleared",
"requires": [
{
  "obstaclesCleared": [
    "A"
  ]
}
],
"flashSuitChecked": true,
"blueSuitChecked": true
},
{
"id": 97,
"link": [
5,
2
],
"name": "Blue Suit",
"requires": [
{
  "haveBlueSuit": {}
}
],
"clearsObstacles": [
"A"
],
"flashSuitChecked": true,
"blueSuitChecked": true
},
{
"id": 98,
"link": [
5,
2
],
"name": "Blue Suit with Morph",
"requires": [
{
"haveBlueSuit": {}
},
"Morph"
],
"clearsObstacles": [
"A",
"B"
],
"flashSuitChecked": true,
"blueSuitChecked": true
},
{
"id": 50,
"link": [
5,
2
],
"name": "Power Bomb",
"requires": [
"h_usePowerBomb"
],
"clearsObstacles": [
"A",
"B",
"C"
],
"flashSuitChecked": true,
"blueSuitChecked": true
},
{
"id": 51,
"link": [
5,
4
],
"name": "Base",
"requires": [
"Morph",
{
"or": [
"h_useMorphBombs",
{
"obstaclesCleared": [
"B"
]
}
]
}
],
"clearsObstacles": [
"B"
],
"flashSuitChecked": true,
"blueSuitChecked": true
},
{
"id": 99,
"link": [
5,
4
],
"name": "Blue Suit",
"requires": [
{
"haveBlueSuit": {}
},
"Morph"
],
"clearsObstacles": [
"B"
],
"flashSuitChecked": true,
"blueSuitChecked": true
},
{
"id": 52,
"link": [
5,
4
],
"name": "Power Bombs",
"requires": [
"h_usePowerBomb"
],
"clearsObstacles": [
"A",
"B",
"C"
],
"flashSuitChecked": true,
"blueSuitChecked": true
},
{
"id": 55,
"link": [
7,
2
],
"name": "Base",
"requires": [
{
"obstaclesCleared": [
"C"
]
},
{
"or": [
"canWallJump",
"HiJump",
"SpaceJump",
"canIBJ",
"canSpringBallJumpMidAir"
]
}
],
"flashSuitChecked": true,
"blueSuitChecked": true
},
{
"id": 56,
"link": [
7,
2
],
"name": "Shinespark",
"requires": [
{
"obstaclesCleared": [
"C",
"D"
]
},
"h_shinechargeMaxRunway",
"canShinechargeMovement",
{
"or": [
{
"shinespark": {
"frames": 19,
"excessFrames": 4
}
},
{
"and": [
"canShinechargeMovementComplex",
{
"shinespark": {
"frames": 6,
"excessFrames": 4
}
}
]
}
]
}
],
"flashSuitChecked": true,
"blueSuitChecked": true
},
{
"id": 100,
"link": [
7,
2
],
"name": "Use Stored Spark",
"requires": [
{
"obstaclesCleared": [
"C"
]
},
"h_storedSpark",
{
"shinespark": {
"frames": 6,
"excessFrames": 4
}
}
],
"flashSuitChecked": true,
"blueSuitChecked": true
},
{
"id": 57,
"link": [
7,
2
],
"name": "Frozen Sova Platform",
"requires": [
{
"notable": "Frozen Sova Platform"
},
"h_usePowerBomb",
"canTrickyUseFrozenEnemies"
],
"clearsObstacles": [
"A",
"B",
"C"
],
"wallJumpAvoid": true,
"flashSuitChecked": true,
"blueSuitChecked": true,
"note": [
"Place a Power Bomb to break the Power Bomb blocks and the bomb blocks, without killing the global Sova.",
"Wait 30-50 seconds for the Sova to get into position to be used as a platform."
],
"detailNote": [
"It is also possible to use a Mella as a platform."
]
},
{
"id": 58,
"link": [
7,
2
],
"name": "Sova Boost",
"requires": [
{
"notable": "Sova Boost"
},
"h_usePowerBomb",
"canCrouchJump",
"canTrickyJump",
"h_midAirMorphDamageBoost",
{
"enemyDamage": {
"enemy": "Sova",
"type": "contact",
"hits": 1
}
}
],
"clearsObstacles": [
"A",
"B",
"C"
],
"wallJumpAvoid": true,
"flashSuitChecked": true,
"blueSuitChecked": true,
"note": [
"Place a Power Bomb to break the Power Bomb blocks and the bomb blocks, without killing the global Sova.",
"Wait 30-50 seconds for the Sova to get into position.",
"Crouch jump, morph, and hold right against the wall, hitting the Sova from below while near the peak of Samus's jump.",
"Continue holding right to pass through the Sova and onto the ledge above."
],
"devNote": [
"This is only notable with wall jumps disabled.",
"FIXME: Consider also adding a Mella version of this strat. It takes longer to setup but allows retrying.",
"The Mella version does slightly less damage.",
"With either the Mella or Sova, you could kill it and collect its drop after getting onto the ledge; for the Sova you'd have to wait for it to come back around."
]
},
{
"id": 73,
"link": [
7,
2
],
"name": "Mella Wall Ice Clip X-Ray Climb",
"requires": [
{
"notable": "Mella Wall Ice Clip X-Ray Climb"
},
"canManipulateMellas",
"canWallIceClip",
"canXRayClimb"
],
"flashSuitChecked": true,
"blueSuitChecked": true,
"note": [
"Bring a Mella on-camera while moonwalking, to set it up to move upward at the maximum rate (about 4 pixels per swoop).",
"Guide it to a horizontal position inside the left wall below the Power Bomb blocks.",
"When it is high enough, freeze it as it retreats from a near-vertical swoop.",
"Get into position on the ledge below the Power Bomb blocks and wait for the Mella to thaw.",
"Freeze the it inside the wall as it continues its retreat upward, by jumping and firing a downward shot.",
"Run into the wall to clip into it.",
"Crouch and destroy the Mella by shooting up (by holding angle up and angle down)",
"Then X-Ray climb above the Power Bomb blocks."
]
},
{
"id": 59,
"link": [
7,
3
],
"name": "Enemies Already Killed",
"requires": [
{
  "obstaclesCleared": [
    "D"
  ]
}
],
"flashSuitChecked": true,
"blueSuitChecked": true
},
{
"id": 60,
"link": [
7,
3
],
"name": "Enemy Kill",
"requires": [
{
  "or": [
    {
      "haveBlueSuit": {}
    },
    "Spazer",
    "Plasma",
    "ScrewAttack",
    "Wave",
    {
      "and": [
        "canDodgeWhileShooting",
        "h_usePowerBomb"
      ]
    },
    {
      "enemyKill": {
        "enemies": [
          [
            "Sm. Dessgeega"
          ],
          [
            "Sm. Dessgeega"
          ]
        ],
        "explicitWeapons": [
          "Missile",
          "Super"
        ]
      }
    },
    {
      "and": [
        "canDodgeWhileShooting",
        {
          "enemyDamage": {
            "enemy": "Sm. Dessgeega",
            "type": "contact",
            "hits": 1
          }
        }
      ]
    },
    {
      "enemyDamage": {
        "enemy": "Sm. Dessgeega",
        "type": "contact",
        "hits": 2
      }
    }
  ]
}
],
"clearsObstacles": [
"D"
],
"flashSuitChecked": true,
"blueSuitChecked": true
},
{
"id": 61,
"link": [
7,
3
],
"name": "Careful Kill",
"requires": [
"canDodgeWhileShooting",
"canCarefulJump"
],
"clearsObstacles": [
"D"
],
"flashSuitChecked": true,
"blueSuitChecked": true,
"note": "Avoiding damage from all enemies with just Power Beam is tricky, but doable."
},
{
"id": 62,
"link": [
7,
3
],
"name": "Tank Enemy Damage",
"requires": [
{
"enemyDamage": {
"enemy": "Mella",
"type": "contact",
"hits": 1
}
},
{
"enemyDamage": {
"enemy": "Sm. Dessgeega",
"type": "contact",
"hits": 1
}
}
],
"flashSuitChecked": true,
"blueSuitChecked": true
},
{
"id": 63,
"link": [
7,
3
],
"name": "Blue Speed Kill",
"requires": [
{
  "getBlueSpeed": {
    "usedTiles": 18,
    "gentleUpTiles": 2,
    "gentleDownTiles": 3,
    "openEnd": 0
  }
}
],
"flashSuitChecked": true,
"blueSuitChecked": true
},
{
"id": 64,
"link": [
7,
3
],
"name": "Mockball",
"requires": [
"canMockball",
"canCarefulJump"
],
"flashSuitChecked": true,
"blueSuitChecked": true,
"note": "With a fast mockball, it is possible to roll under all of the enemies."
},
{
"id": 65,
"link": [
7,
7
],
"name": "Power Bomb",
"requires": [
"h_usePowerBomb"
],
"clearsObstacles": [
"A",
"B",
"C"
],
"flashSuitChecked": true,
"blueSuitChecked": true,
"note": "Placing the Power Bomb high enough will also break the bomb blocks in the ceiling."
},
{
"id": 66,
"link": [
7,
7
],
"name": "Crystal Flash",
"requires": [
"h_CrystalFlash"
],
"clearsObstacles": [
"C"
],
"flashSuitChecked": true,
"blueSuitChecked": true
},
{
"id": 103,
"link": [
7,
7
],
"name": "In-Room Crystal Spark",
"requires": [
{
"obstaclesCleared": [
"D"
]
},
"h_shinechargeMaxRunway",
{
"or": [
{
"and": [
"h_enemyDrops",
"h_CrystalSparkWithoutLenience"
]
},
"h_CrystalSpark"
]
}
],
"flashSuitChecked": true,
"blueSuitChecked": true,
"devNote": [
"No lenience, because Power Bombs can be farmed from the Small Dessgeegas."
]
},
{
"id": 85,
"link": [
8,
4
],
"name": "Base",
"requires": [
{
  "or": [
    "canDash",
    "Morph"
  ]
}
],
"flashSuitChecked": true,
"blueSuitChecked": true
},
{
"id": 86,
"link": [
8,
4
],
"name": "Speed Through and Leave Shinecharged",
"requires": [
"h_shinechargeMaxRunway",
{
"shineChargeFrames": 30
}
],
"exitCondition": {
"leaveShinecharged": {}
},
"unlocksDoors": [
{
"types": [
"super"
],
"requires": []
},
{
"types": [
"missiles",
"powerbomb"
],
"requires": [
"never"
]
}
],
"flashSuitChecked": true,
"blueSuitChecked": true
},
{
"id": 87,
"link": [
8,
4
],
"name": "Speed Through and Leave With Temporary Blue",
"requires": [
"h_shinechargeMaxRunway"
],
"exitCondition": {
"leaveWithTemporaryBlue": {}
},
"unlocksDoors": [
{
"types": [
"ammo"
],
"requires": []
}
],
"flashSuitChecked": true,
"blueSuitChecked": true
},
{
"id": 88,
"link": [
8,
4
],
"name": "Speed Through and Leave With Runway (Hero Shot)",
"requires": [
"canDash",
"canHeroShot"
],
"exitCondition": {
"leaveWithRunway": {
"length": 45,
"openEnd": 1
}
},
"unlocksDoors": [
{
"types": [
"super"
],
"requires": []
},
{
"types": [
"missiles",
"powerbomb"
],
"requires": [
"never"
]
}
],
"flashSuitChecked": true,
"blueSuitChecked": true
}
],
"notables": [
{
"id": 1,
"name": "Frozen Sova Platform",
"wallJumpAvoid": true,
"note": [
"Place a Power Bomb to break the Power Bomb blocks and the bomb blocks, without killing the global Sova.",
"Wait 30-50 seconds for the Sova to get into position to be used as a platform."
]
},
{
"id": 2,
"name": "Sova Boost",
"wallJumpAvoid": true,
"note": [
"Place a Power Bomb to break the Power Bomb blocks and the bomb blocks, without killing the global Sova.",
"Wait 30-50 seconds for the Sova to get into position.",
"Crouch jump, morph, and hold right against the wall, hitting the Sova from below while near the peak of Samus's jump.",
"Continue holding right to pass through the Sova and onto the ledge above."
]
},
{
"id": 3,
"name": "Mella Wall Ice Clip X-Ray Climb",
"note": [
"Freeze a Mella inside the wall below the Power Bomb blocks.",
"Use it to clip slightly inside the wall, then X-Ray climb up past the Power Bomb blocks."
]
},
{
"id": 4,
"name": "Anti-Short Charge Hero Shot",
"note": [
"Run under the gates from right-to-left, carrying speed into the next room.",
"Avoid the first two magic frames by briefly releasing dash,",
"to avoid gaining blue speed until after Samus has run over the bomb blocks.",
"Fire a shot while running, to open the door and run through."
]
},
{
"id": 5,
"name": "Speedy Crouch Gate Clip",
"note": [
"Run into the room with sufficient speed,",
"perform a very low spin jump, and aim down to clip inside the gate."
]
},
{
"id": 6,
"name": "Arm Pump Crouch Gate Clip",
"note": [
"Arm pump while approaching the left gate from the right,",
"perform a very low spin jump, and aim down to clip inside the gate.",
"Failure results in a soft-lock."
]
}
],
"nextStratId": 104,
"nextNotableId": 7
}
