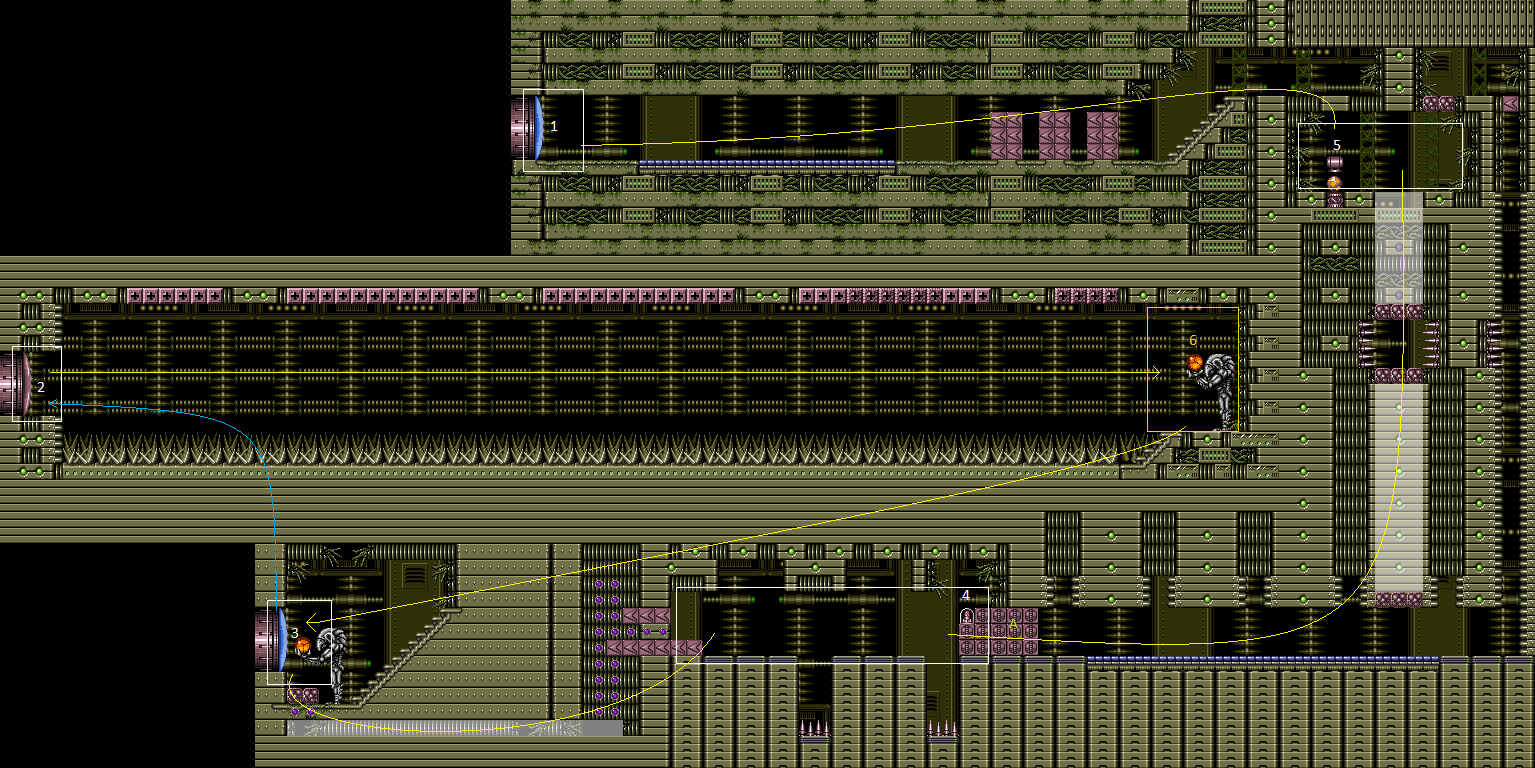
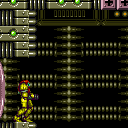
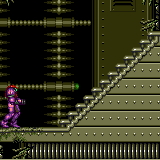
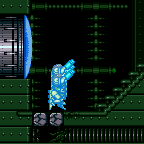
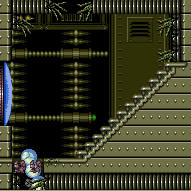
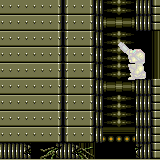
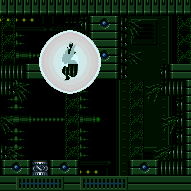
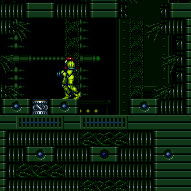
Bowling Alley
Room ID: 161
|
Requires: "f_DefeatedPhantoon" Exit condition: {
"leaveWithRunway": {
"length": 45,
"openEnd": 1
}
} |
|
Exit condition: {
"leaveWithRunway": {
"length": 28,
"openEnd": 0
}
} |
From: 1
Top Left Door
To: 1
Top Left Door
Requires: {
"or": [
{
"getBlueSpeed": {
"usedTiles": 28,
"openEnd": 0
}
},
{
"and": [
{
"getBlueSpeed": {
"usedTiles": 29,
"openEnd": 0
}
},
{
"doorUnlockedAtNode": 1
}
]
}
]
}Exit condition: {
"leaveWithRunway": {
"length": 45,
"openEnd": 1
}
} |
|
Entrance condition: {
"comeInGettingBlueSpeed": {
"length": 29,
"openEnd": 0
}
}Exit condition: {
"leaveWithRunway": {
"length": 45,
"openEnd": 1
}
}Unlocks doors: {"types":["ammo"],"requires":[]} |
From: 1
Top Left Door
To: 1
Top Left Door
Entrance condition: {
"comeInWithSpark": {
"position": "bottom"
}
}Requires: {
"shinespark": {
"frames": 71,
"excessFrames": 21
}
}Exit condition: {
"leaveWithRunway": {
"length": 45,
"openEnd": 1
}
}Unlocks doors: {"types":["ammo"],"requires":[]} |
|
Requires: "h_CrystalFlash" |
|
Requires: {
"canShineCharge": {
"usedTiles": 28,
"openEnd": 0
}
}
"h_CrystalSpark" |
From: 1
Top Left Door
To: 1
Top Left Door
Entrance condition: {
"comeInGettingBlueSpeed": {
"length": 28,
"openEnd": 0
}
}Requires: "h_shinechargeMaxRunway" "h_CrystalSpark" |
From: 1
Top Left Door
To: 1
Top Left Door
Use SpeedBooster to construct a structure for Moondancing that has 1 chest height block and 1 head height block to the right of it and no other Speed blocks. Crystal Flash below the lower block, exactly pixel aligned with its right side, to standup and then begin Moondancing. After Samus sinks through the bottom tile, it is possible to use Grapple to return to a crouch and wiggle right and then Turn-Around Aim Cancel to escape to the right. Without Grapple, count to 174 Moonfalls and delicately Moonfall so as to remain crouched and then wiggle to the right. Finally, shortcharge to break the remaining Speed blocks and reach the door. Requires: {
"notable": "Speed Block Moondance"
}
"h_CrystalFlash"
"canTrickyJump"
"canTurnaroundAimCancel"
{
"getBlueSpeed": {
"usedTiles": 16,
"steepDownTiles": 4,
"openEnd": 0
}
}
"canTemporaryBlue"
"canSpeedball"
"canMoondance"
{
"or": [
"canCount",
"Grapple"
]
}Exit condition: {
"leaveWithStoredFallSpeed": {
"fallSpeedInTiles": 1
}
} |
From: 1
Top Left Door
To: 1
Top Left Door
Use SpeedBooster to construct a structure for Moondancing that has 1 chest height block and 1 head height block to the right of it and no other Speed blocks. Crystal Flash below the lower block, exactly pixel aligned with its right side, to standup and then begin Moondancing. After Samus sinks through the floor tiles, use Grapple to return to a standing position and count an additional 145 moonfalls. Then use Grapple to return to a crouch and wiggle right and Turn-Around Aim Cancel to escape to the right. Finally, shortcharge to break the remaining Speed blocks and reach the door. Requires: {
"notable": "Speed Block Moondance"
}
"h_CrystalFlash"
"canTrickyJump"
"canTurnaroundAimCancel"
{
"getBlueSpeed": {
"usedTiles": 16,
"steepDownTiles": 4,
"openEnd": 0
}
}
"canTemporaryBlue"
"canExtendedMoondance"
"canSpeedball"
"Grapple"Exit condition: {
"leaveWithStoredFallSpeed": {
"fallSpeedInTiles": 2
}
} |
From: 1
Top Left Door
To: 5
Top Right Item

Use SpeedBooster to construct a structure for Moondancing that has 1 chest height block and 1 head height block to the right of it and no other Speed blocks. Crystal Flash below the lower block, exactly pixel aligned with its right side, to standup and then begin Moondancing. After Samus sinks through the bottom tile, it is possible to use Grapple to return to a crouch and wiggle right and then Turn-Around Aim Cancel to escape to the right. Without Grapple, count to 174 Moonfalls and delicately Moonfall so as to remain crouched and then wiggle to the right. The Camera will not follow Samus after clipping. Requires: {
"notable": "Speed Block Moondance"
}
"h_CrystalFlash"
"canTrickyJump"
"canTurnaroundAimCancel"
{
"getBlueSpeed": {
"usedTiles": 16,
"steepDownTiles": 4,
"openEnd": 0
}
}
"canTemporaryBlue"
"canMoondance"
"canSpeedball"
{
"or": [
"canCount",
"Grapple"
]
}Clears obstacles: B |
|
The camera will not follow Samus after clipping. Entrance condition: {
"comeInWithStoredFallSpeed": {
"fallSpeedInTiles": 1
}
}Requires: {
"or": [
{
"getBlueSpeed": {
"usedTiles": 28,
"openEnd": 0
}
},
{
"and": [
{
"getBlueSpeed": {
"usedTiles": 29,
"openEnd": 0
}
},
{
"doorUnlockedAtNode": 1
}
]
},
{
"haveBlueSuit": {}
}
]
}
"canMoonfall"Clears obstacles: B Unlocks doors: {"nodeId":1,"types":["missiles","super"],"requires":[]}
{"nodeId":1,"types":["powerbomb"],"requires":["never"]} |
From: 2
Middle Left Door
To: 1
Top Left Door
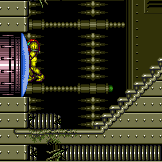
Gain a shinecharge near the Chozo statue, jump on top of it, press against the wall to the right, and activate a horizontal shinespark to the right. Samus will clip into the wall and be able to X-Ray climb to the space above. This trick works because the wall is made of half-tile slopes, rather than regular solid tiles. Requires: {
"not": "f_DefeatedPhantoon"
}
"canRiskPermanentLossOfAccess"
{
"or": [
"h_shinechargeMaxRunway",
"h_storedSpark"
]
}
"canShinechargeMovement"
{
"shinespark": {
"frames": 1,
"excessFrames": 1
}
}
"canShinesparkSlopeClip"
"canXRayClimb"
{
"or": [
{
"getBlueSpeed": {
"usedTiles": 16,
"steepDownTiles": 4,
"openEnd": 0
}
},
"can4HighMidAirMorph"
]
}Exit condition: {
"leaveNormally": {}
}Unlocks doors: {"types":["ammo"],"requires":[]}Dev note: The leaveNormally is to ensure it won't be required to do the Speed block moondance blind up there. |
From: 2
Middle Left Door
To: 1
Top Left Door


Jump close to ceiling, and activate a shinespark to the right. If successful, Samus will clip into the wall behind the Chozo statue and be able to X-Ray climb up. Only certain horizontal positions will cause Samus to clip into the wall. It will work to activate the spark while Samus is centered under the second Grapple block or slightly to the left. Entrance condition: {
"comeInShinecharged": {}
}Requires: {
"shineChargeFrames": 50
}
"canShinechargeMovementTricky"
{
"shinespark": {
"frames": 88,
"excessFrames": 0
}
}
"canShinesparkSlopeClip"
"canXRayClimb"
{
"or": [
{
"getBlueSpeed": {
"usedTiles": 16,
"steepDownTiles": 4,
"openEnd": 0
}
},
"can4HighMidAirMorph"
]
}Exit condition: {
"leaveNormally": {}
}Unlocks doors: {"types":["ammo"],"requires":[]}Dev note: The leaveNormally is to ensure it won't be required to do the Speed block moondance blind up there. |
From: 2
Middle Left Door
To: 1
Top Left Door

Arm pump slowly after the Chozo statue comes on screen, when the camera locks and Samus starts to move again, armpump only 3 or 4 more times to clear the last spike and avoid an extra spike hit. Requires: {
"doorUnlockedAtNode": 2
}
"canXMode"
"h_XModeSpikeHit"
"h_shinechargeMaxRunway"
"canShinechargeMovement"
{
"shinespark": {
"frames": 1,
"excessFrames": 1
}
}
"canShinesparkSlopeClip"
"canXRayClimb"
{
"or": [
{
"getBlueSpeed": {
"usedTiles": 16,
"steepDownTiles": 4,
"openEnd": 0
}
},
"can4HighMidAirMorph"
]
}Exit condition: {
"leaveNormally": {}
}Unlocks doors: {"types":["ammo"],"requires":[]}Dev note: The leaveNormally is to ensure it won't be required to do the Speed block moondance blind up there. |
From: 2
Middle Left Door
To: 1
Top Left Door


Jump close to ceiling, and activate a shinespark to the right. If successful, Samus will clip into the wall behind the Chozo statue and be able to X-Ray climb up. Only certain horizontal positions will cause Samus to clip into the wall. It will work to activate the spark while Samus is centered under the second Grapple block or slightly to the left. Requires: "h_storedSpark"
"canDash"
"canShinechargeMovementTricky"
{
"shinespark": {
"frames": 88,
"excessFrames": 0
}
}
"canShinesparkSlopeClip"
"canXRayClimb"
{
"or": [
{
"getBlueSpeed": {
"usedTiles": 16,
"steepDownTiles": 4,
"openEnd": 0
}
},
"can4HighMidAirMorph"
]
}Exit condition: {
"leaveNormally": {}
}Unlocks doors: {"types":["ammo"],"requires":[]}Dev note: The leaveNormally is to ensure it won't be required to do the Speed block moondance blind up there. |
|
Exit condition: {
"leaveWithRunway": {
"length": 3,
"openEnd": 1
}
} |
From: 2
Middle Left Door
To: 2
Middle Left Door
If using the full runway, back into the corner against the Chozo statue. Requires: {
"not": "f_DefeatedPhantoon"
}
"canRiskPermanentLossOfAccess"
{
"or": [
"canMomentumConservingMorph",
{
"and": [
"canMomentumConservingTurnaround",
"canInsaneJump"
]
}
]
}Exit condition: {
"leaveWithSidePlatform": {
"height": 3,
"runway": {
"length": 45,
"openEnd": 1
},
"obstruction": [
3,
0
]
}
}Dev note: Max extra run speed $7.0. |
|

Exit condition: {
"leaveWithGrappleSwing": {
"blocks": [
{
"position": [
8,
2
],
"note": "Closest Grapple block to the door"
}
]
}
} |
From: 2
Middle Left Door
To: 2
Middle Left Door
Requires: "h_spikeXModeShinecharge"
{
"or": [
"can4HighMidAirMorph",
"h_XModeSpikeHit"
]
}
"canUseIFrames"
{
"shineChargeFrames": 65
}Exit condition: {
"leaveShinecharged": {}
}Dev note: At least two spike hits are expected per attempt (with any additional leniency hits being multiplied by this amount). |
From: 2
Middle Left Door
To: 2
Middle Left Door
Requires: {
"not": "f_DefeatedPhantoon"
}
"canRiskPermanentLossOfAccess"
"h_shinechargeMaxRunway"
"canShinechargeMovement"
{
"shineChargeFrames": 40
}Exit condition: {
"leaveShinecharged": {}
} |
|
Requires: {
"not": "f_DefeatedPhantoon"
}
"canRiskPermanentLossOfAccess"Exit condition: {
"leaveSpinning": {
"remoteRunway": {
"length": 45,
"openEnd": 1
}
}
} |
|
Requires: "SpaceJump" Exit condition: {
"leaveSpinning": {
"remoteRunway": {
"length": 5,
"openEnd": 1
}
}
} |
From: 2
Middle Left Door
To: 2
Middle Left Door


Requires: {
"not": "f_DefeatedPhantoon"
}
"canRiskPermanentLossOfAccess"Exit condition: {
"leaveWithMockball": {
"remoteRunway": {
"length": 45,
"openEnd": 1
},
"landingRunway": {
"length": 3,
"openEnd": 1
}
}
} |
From: 2
Middle Left Door
To: 2
Middle Left Door
Requires: "SpaceJump" Exit condition: {
"leaveWithMockball": {
"remoteRunway": {
"length": 5,
"openEnd": 1
},
"landingRunway": {
"length": 3,
"openEnd": 1
}
}
} |
From: 2
Middle Left Door
To: 2
Middle Left Door
Requires: {
"not": "f_DefeatedPhantoon"
}
"canRiskPermanentLossOfAccess"Exit condition: {
"leaveWithSpringBallBounce": {
"remoteRunway": {
"length": 31,
"openEnd": 0
},
"landingRunway": {
"length": 3,
"openEnd": 1
},
"movementType": "uncontrolled"
}
} |
From: 2
Middle Left Door
To: 2
Middle Left Door
Requires: "SpaceJump" Exit condition: {
"leaveWithSpringBallBounce": {
"remoteRunway": {
"length": 5,
"openEnd": 1
},
"landingRunway": {
"length": 3,
"openEnd": 1
},
"movementType": "uncontrolled"
}
} |
From: 2
Middle Left Door
To: 2
Middle Left Door

Requires: {
"not": "f_DefeatedPhantoon"
}
"canRiskPermanentLossOfAccess"Exit condition: {
"leaveSpaceJumping": {
"remoteRunway": {
"length": 45,
"openEnd": 0
}
}
} |
|
Exit condition: {
"leaveSpaceJumping": {
"remoteRunway": {
"length": 5,
"openEnd": 1
}
}
} |
From: 2
Middle Left Door
To: 2
Middle Left Door
Requires: {
"not": "f_DefeatedPhantoon"
}
"canRiskPermanentLossOfAccess"
"h_shinechargeMaxRunway"
"canChainTemporaryBlue"Exit condition: {
"leaveWithTemporaryBlue": {}
} |
From: 2
Middle Left Door
To: 2
Middle Left Door


Entrance condition: {
"comeInShinecharged": {}
}Requires: "f_DefeatedPhantoon"
{
"shineChargeFrames": 65
}
{
"spikeHits": 1
}
"h_spikeSuitSpikeHitLeniency"
"canPatientSpikeSuit"
{
"shinespark": {
"frames": 3,
"excessFrames": 3
}
} |
From: 2
Middle Left Door
To: 2
Middle Left Door

This requires a first frame unmorph. Entrance condition: {
"comeInShinecharged": {}
}Requires: "f_DefeatedPhantoon"
"canUseFlashSuitInitialSpark"
{
"shineChargeFrames": 90
}
{
"spikeHits": 1
}
"h_spikeSuitSpikeHitLeniency"
"canPatientSpikeSuit"
{
"shinespark": {
"frames": 7,
"excessFrames": 0
}
}Exit condition: {
"leaveWithSpark": {
"position": "bottom"
}
}Unlocks doors: {"types":["super","powerbomb"],"requires":[]}
{"types":["missiles"],"requires":["never"]} |
From: 2
Middle Left Door
To: 2
Middle Left Door

Requires: "f_DefeatedPhantoon"
{
"doorUnlockedAtNode": 2
}
"h_spikeXModeSpikeSuit"
{
"shinespark": {
"frames": 3,
"excessFrames": 3
}
} |
From: 2
Middle Left Door
To: 2
Middle Left Door


This requires a first frame Spikesuit unmorph. Requires: "f_DefeatedPhantoon"
{
"doorUnlockedAtNode": 2
}
"canUseFlashSuitInitialSpark"
"h_spikeXModeSpikeSuit"
{
"shinespark": {
"frames": 9,
"excessFrames": 0
}
}Exit condition: {
"leaveWithSpark": {
"position": "bottom"
}
} |
From: 2
Middle Left Door
To: 2
Middle Left Door
Crystal Flash, enter X-Mode on the spikes and shinecharge. Use the spikes to pause abuse and interrupt shinespark. Entrance condition: {
"comeInWithRMode": {}
}Requires: "f_DefeatedPhantoon"
"canBeVeryLucky"
"h_CrystalFlashForReserveEnergy"
"h_usePowerBomb"
"canOffScreenMovement"
"canXMode"
{
"spikeHits": 1
}
"h_XModeSpikeHit"
"h_shinechargeMaxRunway"
{
"autoReserveTrigger": {}
}
{
"spikeHits": 2
}
"canRModePauseAbuseSparkInterrupt"Dev note: canBeVeryLucky added for difficulty placement. |
|
Requires: "h_CrystalFlash" |
|
Requires: {
"not": "f_DefeatedPhantoon"
}
"canRiskPermanentLossOfAccess"
"h_shinechargeMaxRunway"
"h_CrystalSpark" |
From: 2
Middle Left Door
To: 3
Bottom Left Door

Samus's shinecharge frames are paused while riding the Bowling Chozo. Requires: "f_DefeatedPhantoon"
{
"doorUnlockedAtNode": 2
}
"canXMode"
"h_XModeSpikeHit"
"h_shinechargeMaxRunway"
"canShinechargeMovement"
{
"shineChargeFrames": 145
}Exit condition: {
"leaveShinecharged": {}
}Sets flags: f_UsedBowlingStatue Unlocks doors: {"types":["super"],"requires":[]}
{"types":["missiles","powerbomb"],"requires":["never"]} |
From: 2
Middle Left Door
To: 3
Bottom Left Door


Samus's shinecharge frames are paused while riding the Bowling Chozo. Entrance condition: {
"comeInRunning": {
"speedBooster": "yes",
"minTiles": 19
}
}Requires: "f_DefeatedPhantoon"
"h_speedJump"
"canSpeedKeep"
"h_shinechargeMaxRunway"
{
"spikeHits": {
"mul": [
3,
"n_speedKeepAttempts"
]
}
}
{
"shineChargeFrames": 145
}Exit condition: {
"leaveShinecharged": {}
}Sets flags: f_UsedBowlingStatue Unlocks doors: {"types":["super"],"requires":[]}
{"types":["missiles","powerbomb"],"requires":["never"]} |
|
Requires: "Grapple" "h_midAirShootUp" |
|
Requires: "SpaceJump" |
From: 2
Middle Left Door
To: 6
Bowling Chozo Statue


Entrance condition: {
"comeInShinecharging": {
"length": 2,
"openEnd": 0
}
}Requires: {
"or": [
{
"shinespark": {
"frames": 89,
"excessFrames": 7
}
},
{
"and": [
"canHorizontalMidairShinespark",
{
"shinespark": {
"frames": 82,
"excessFrames": 9
}
}
]
}
]
} |
From: 2
Middle Left Door
To: 6
Bowling Chozo Statue


Jump into the room and morph along the ceiling to maximize distance. Unmorph while entering the spikes to minimize knockback Then build up speed and airball again to cross the spikes. Entrance condition: {
"comeInRunning": {
"speedBooster": "yes",
"minTiles": 28
}
}Requires: "h_speedJump"
"canInsaneJump"
"canMomentumConservingMorph"
"canUseIFrames"
{
"spikeHits": 1
} |
From: 2
Middle Left Door
To: 6
Bowling Chozo Statue


Jump into the room and morph along the ceiling to maximize distance. Unmorph while entering the spikes to minimize knockback Then build up speed and airball again to cross the spikes. With only a short runway available, high precision is required. Entrance condition: {
"comeInRunning": {
"speedBooster": "yes",
"minTiles": 25
}
}Requires: "h_speedJump"
"canInsaneJump"
"canMomentumConservingMorph"
"canInsaneMidAirMorph"
"canUseIFrames"
{
"spikeHits": 1
} |
From: 2
Middle Left Door
To: 6
Bowling Chozo Statue

Start with Spring Ball disabled. Jump over the spikes and mid-air morph. Spring fling on the way down, Spring Ball bounce through the spikes, then spring fling again to reach the statue taking only one spike hit. Entrance condition: {
"comeInRunning": {
"speedBooster": "yes",
"minTiles": 12
}
}Requires: "h_speedJump"
"canTrickyJump"
"canSpringFling"
"h_unpauseKeepMomentum"
"canLateralMidAirMorph"
"canUseIFrames"
{
"spikeHits": 1
} |
From: 2
Middle Left Door
To: 6
Bowling Chozo Statue
Enter the room with a mockball or bounce. Time a pause to unequip Spring Ball soon after bouncing after the spike hit. Pause again to re-equip Spring Ball on the way down. Entrance condition: {
"comeInWithSpringBallBounce": {
"speedBooster": "yes",
"movementType": "any",
"remoteAndLandingMinTiles": [
[
14,
1
]
]
}
}Requires: "canTrickyJump"
"canSpringFling"
"canUseIFrames"
{
"spikeHits": 1
}Dev note: This can be done with 13 tiles of run speed, with greater difficulty. |
|
This is doable even without any momentum from a previous room, but pretty tight. Requires: "canDash"
"canTrickyJump"
"canUseIFrames"
{
"or": [
"canHorizontalDamageBoost",
"canInsaneJump"
]
}
{
"spikeHits": 2
} |
|
A bit easier than 2-hit bowling Requires: "canUseIFrames"
"h_speedJump"
{
"spikeHits": 2
} |
|
Requires: "canDash"
"canUseIFrames"
{
"spikeHits": 3
} |
|
Requires: "canDash"
{
"spikeHits": 6
} |
|
Requires: {
"haveBlueSuit": {}
}
{
"tech": "canHorizontalDamageBoost"
}
"canBlueSuitSpikeJump"
{
"noFlashSuit": {}
}
{
"spikeHits": 6
} |
|
Requires: {
"haveBlueSuit": {}
}
"canBlueSuitSpikeJump"
{
"spikeHits": 8
} |
|

Entrance condition: {
"comeInWithSpark": {}
}Requires: {
"shinespark": {
"frames": 91,
"excessFrames": 8
}
} |
|


Requires: "canHorizontalMidairShinespark"
"h_storedSpark"
"canDash"
{
"shinespark": {
"frames": 82,
"excessFrames": 8
}
} |
|

Move in X-Mode until the Chozo Statue becomes visible and then jump before releasing X-Ray. Requires: "canXMode" "h_XModeSpikeHit" |
From: 2
Middle Left Door
To: 6
Bowling Chozo Statue
Crystal Flash and use another Power Bomb, then enter X-Mode on the spikes. Arm pump towards the statue and shinecharge once Samus appears to move into the border between the second and third spike Exit X-Mode, then jump back toward the spikes to pause abuse and interrupt shinespark, using a damage boost back toward the statue to get off of them. Entrance condition: {
"comeInWithRMode": {}
}Requires: "f_DefeatedPhantoon"
"canBeVeryLucky"
"h_CrystalFlashForReserveEnergy"
"h_usePowerBomb"
"canOffScreenMovement"
"canXMode"
"h_XModeSpikeHit"
"h_shinechargeMaxRunway"
{
"autoReserveTrigger": {}
}
"canHorizontalDamageBoost"
"canRModePauseAbuseSparkInterrupt"Dev note: canBeVeryLucky added for difficulty placement. |
|
This is a very long ceiling bomb jump. Requires: {
"notable": "Ceiling Bomb Jump"
}
"canLongCeilingBombJump"
"canBeVeryPatient"Dev note: There is no reason to go back to the left. |
|
Ride the statue, which will not take Samus down, and will instead drop her off in the spike pit somewhat near the door. Entrance condition: {
"comeInWithGMode": {
"mode": "any",
"morphed": false
}
}Requires: "canComplexGMode"
"f_DefeatedPhantoon"
"Morph"
{
"or": [
"SpaceJump",
{
"and": [
"canDash",
"canUseIFrames",
{
"spikeHits": 2
},
{
"or": [
"canHorizontalDamageBoost",
"canInsaneJump",
"h_speedJump",
{
"spikeHits": 1
}
]
}
]
},
{
"and": [
{
"haveBlueSuit": {}
},
{
"tech": "canHorizontalDamageBoost"
},
"canBlueSuitSpikeJump",
{
"spikeHits": 6
}
]
},
{
"and": [
{
"blueSuitShinecharge": {}
},
"canDash",
{
"shinespark": {
"frames": 80,
"excessFrames": 7
}
}
]
}
]
} |
From: 2
Middle Left Door
To: 7
Bowling In G-Mode
Crystal Flash then pause abuse to cross the spikeway with minimal Energy loss. Ride the statue, which will not take Samus down, and will instead drop her off in the spike pit somewhat near the door. Entrance condition: {
"comeInWithGMode": {
"mode": "any",
"morphed": false
}
}Requires: "canComplexGMode"
"f_DefeatedPhantoon"
"h_CrystalFlash"
{
"or": [
"SpaceJump",
{
"and": [
"canDash",
"canUseIFrames",
"h_pauseAbuseMinimalReserveRefill",
"h_pauseAbuseMinimalReserveRefill",
"h_pauseAbuseMinimalReserveRefill"
]
},
{
"and": [
"canUseIFrames",
"h_speedJump",
"h_pauseAbuseMinimalReserveRefill",
"h_pauseAbuseMinimalReserveRefill"
]
},
{
"and": [
{
"blueSuitShinecharge": {}
},
"canDash",
{
"shinespark": {
"frames": 80,
"excessFrames": 7
}
}
]
}
]
} |
From: 2
Middle Left Door
To: 7
Bowling In G-Mode


Spring fling many times to cross the spikeway with as few hits as possible. Ride the statue, which will not take Samus down, and will instead drop her off in the spike pit somewhat near the door. Entrance condition: {
"comeInWithGMode": {
"mode": "any",
"morphed": true
}
}Requires: "canComplexGMode"
"f_DefeatedPhantoon"
"h_artificialMorphSpringFling"
"canDash"
"canInsaneJump"
{
"spikeHits": 4
} |
From: 2
Middle Left Door
To: 7
Bowling In G-Mode
This is a very long ceiling bomb jump. Ride the statue, which will not take Samus down, and will instead drop her off in the spike pit somewhat near the door. Entrance condition: {
"comeInWithGMode": {
"mode": "any",
"morphed": true
}
}Requires: "canComplexGMode"
"f_DefeatedPhantoon"
{
"notable": "Ceiling Bomb Jump"
}
"canLongCeilingBombJump"
"canBeVeryPatient" |
|
Climb up about half a screen. If Phantoon is dead, the last part of the climb should be done carefully to avoid triggering collision with the spikes: Do not press forward or turn-around except while X-Ray is active. For each X-ray stand-up, release the turn-around input quickly to make sure that it is not still held after X-Ray deactivates; alternatively, hold both angle up and angle down to prevent Samus from touching the spikes (though this no longer gives protection if climbing so high that the bottom of Samus' hitbox reaches the spikes). Once Samus is high enough, unequip X-Ray, jump up (from either standing or crouch) to clip past the spikes, and land, taking a single spike hit. Then use the i-frames from the spike hit to run and jump to the left to make it to the door. Samus is high enough after the top of her arm cannon first becomes visible at the bottom of the screen; or up to 3 additional climbs can be performed after that point. In case of an accidental spike collision, it is possible to recover: Unless Samus climbed higher than needed, she will still be stuck in the wall, will take a single spike hit, and be able to continue climbing. With Grapple it is possible to swing on the Grapple blocks, avoiding all spike damage. Spike damage can also be avoided with Space Jump, by doing a stationary turn-around spin jump, which is very precise. With a blue suit, Samus will instantly lose i-frames, making the spikes very dangerous. Entrance condition: {
"comeInWithDoorStuckSetup": {}
}Requires: {
"notable": "X-Ray Climb"
}
"canXRayClimb"
{
"or": [
{
"and": [
{
"spikeHits": 3
},
{
"resourceCapacity": [
{
"type": "RegularEnergy",
"count": 199
}
]
}
]
},
{
"and": [
{
"not": "f_DefeatedPhantoon"
},
"canRiskPermanentLossOfAccess"
]
},
{
"and": [
"canOffScreenMovement",
{
"or": [
{
"and": [
"canDash",
{
"spikeHits": 1
},
"canUseIFrames"
]
},
{
"and": [
"canBlueSuitSpikeJump",
{
"spikeHits": 2
}
]
},
{
"and": [
"canBlueSuitSpikeJump",
"canWallJump",
"canBeVeryPatient",
{
"spikeHits": 1
}
]
},
"Grapple",
{
"and": [
"SpaceJump",
"canInsaneJump",
"canBeVeryPatient"
]
}
]
}
]
}
]
}Exit condition: {
"leaveNormally": {}
}Unlocks doors: {"types":["ammo"],"requires":[]}Dev note: FIXME: The canBeVeryPatient is for difficulty placement, as the damageless Space Jump version would likely require many attempts. The resourceCapacity requirement is to ensure that reserve energy management will not be needed for the lower-difficulty version of the strat; this could be refined since suits can affect spike damage, but we don't yet have a good way to represent that cleanly, given that randomizers are likely to modify suit damage protection. The leaveNormally is because the camera will be broken and we don't want to require unreasonable things without being able to reset it. |
|
Exit condition: {
"leaveWithRunway": {
"length": 1,
"openEnd": 1
}
} |
|


Requires: {
"obstaclesNotCleared": [
"C"
]
}Exit condition: {
"leaveWithSidePlatform": {
"height": 2,
"runway": {
"length": 10,
"openEnd": 0,
"steepDownTiles": 6
},
"obstruction": [
1,
0
]
}
}Dev note: Max extra run speed $2.7. |
|
Requires: {
"obstaclesNotCleared": [
"C"
]
}Exit condition: {
"leaveSpinning": {
"remoteRunway": {
"length": 8,
"openEnd": 1
}
}
} |
|
Requires: {
"obstaclesNotCleared": [
"C"
]
}Exit condition: {
"leaveWithMockball": {
"remoteRunway": {
"length": 7,
"openEnd": 1
},
"landingRunway": {
"length": 1,
"openEnd": 1
}
}
} |
From: 3
Bottom Left Door
To: 3
Bottom Left Door
Requires: {
"obstaclesNotCleared": [
"C"
]
}Exit condition: {
"leaveWithSpringBallBounce": {
"remoteRunway": {
"length": 6,
"openEnd": 1
},
"landingRunway": {
"length": 1,
"openEnd": 1
},
"movementType": "uncontrolled"
}
} |
|
Requires: {
"obstaclesNotCleared": [
"C"
]
}Exit condition: {
"leaveSpaceJumping": {
"remoteRunway": {
"length": 5,
"openEnd": 1
}
}
} |
|
Requires: "h_CrystalFlash" |
|


If using PBs, place it far enough right to reach the shot blocks. Requires: "h_bombThings" |
|
Plasma or Charged Spazer can reach the shot blocks through the tunnel while crouched. Requires: "ScrewAttack" "Morph" "Plasma" Dev note: Plasma is somewhat known as a way to reach the blocks. Charge+Spazer is not, and to shoot around the Bowling Chozo you would add Wave to make things more complicated. If we're requiring strat knowledge here, camera unlock is more generally applicable. A very precise wave shot from the stairs can also work but is much harder and less obvious than the camera unlock strat. |
From: 3
Bottom Left Door
To: 4
Bottom Chozo Item
Break the shot blocks with Power Beam by first rolling into the morph tunnel to unlock camera scroll for this room. The blocks can now be cleared from the left side by shooting and quickly scrolling the camera to the right a small amount. A shot from crouch will reach the bottom block by following the shot as a ball, or wave beam works from the stairs. Screw Attack is still needed to clear the bomb blocks. Requires: {
"notable": "Missile Chozo Camera Unlock"
}
"ScrewAttack"
"Morph"
"canCameraManip"
"canHeroShot" |
|
Roll most of the way into the morph tunnel to unlock the camera scroll, then roll back left, crouch, fire a shot, and follow it to the right, to clear the shot blocks. Requires: {
"haveBlueSuit": {}
}
"Morph"
"canCameraManip"
"canHeroShot" |
From: 3
Bottom Left Door
To: 4
Bottom Chozo Item
Get through the Morph tunnel to the robot area. Flush the robots into the spike pits and Crystal Flash to clear the Chozo statue. Shinecharge and then use a speedy jump up to the spikes in the right shaft. Pause, and jump into the spikes. Delay the damage boost so that Samus will not hit the spikes again after interrupt. Alternatively, flush both robots into the left pit and use the right pit to pause abuse and damage boost to gain some height. Quickly morph after the interrupt to avoid taking more than one spike hit. Entrance condition: {
"comeInWithRMode": {}
}Requires: "f_DefeatedPhantoon"
{
"or": [
"h_bombThings",
{
"and": [
"ScrewAttack",
"Morph",
{
"or": [
"Plasma",
{
"and": [
{
"notable": "Missile Chozo Camera Unlock"
},
"canCameraManip",
"canHeroShot"
]
}
]
}
]
}
]
}
"h_CrystalFlashForReserveEnergy"
{
"canShineCharge": {
"usedTiles": 25,
"openEnd": 2
}
}
"canHorizontalDamageBoost"
{
"autoReserveTrigger": {}
}
"canRModePauseAbuseSparkInterrupt"
{
"or": [
"canWallJump",
"HiJump",
"canTrickyDashJump",
{
"spikeHits": 1
}
]
}Clears obstacles: A Collects items: 4 |
From: 3
Bottom Left Door
To: 4
Bottom Chozo Item
Land on the crumble blocks while unmorphing, in order to retain temporary blue while falling, breaking the bomb blocks Roll most of the way into the morph tunnel to unlock the camera scroll, then roll back left, crouch, fire a shot, and follow it to the right, to clear the shot blocks. It is possible to keep a flash suit with this method. Entrance condition: {
"comeInSpeedballing": {
"runway": {
"length": 0,
"openEnd": 1
}
}
}Requires: {
"tech": "canTemporaryBlue"
}
{
"notable": "Missile Chozo Camera Unlock"
}
"canCameraManip"
"canHeroShot"Dev note: If we had a comeInWithSpeedball entrance condition, it should be used instead. |
From: 3
Bottom Left Door
To: 4
Bottom Chozo Item

Land on the crumble blocks while unmorphing, in order to retain temporary blue while falling, breaking the bomb blocks Roll most of the way into the morph tunnel to unlock the camera scroll, then roll back left, crouch, fire a shot, and follow it to the right, to clear the shot blocks. Entrance condition: {
"comeInWithTemporaryBlue": {}
}Requires: "canChainTemporaryBlue"
{
"notable": "Missile Chozo Camera Unlock"
}
"canCameraManip"
"canHeroShot" |
|
The bomb block respawns. It must be broken on the way back too. Requires: "h_bombThings"
{
"obstaclesNotCleared": [
"B"
]
} |
|
Requires: {
"haveBlueSuit": {}
}
"Morph"
{
"obstaclesNotCleared": [
"B"
]
} |
From: 4
Bottom Chozo Item
To: 3
Bottom Left Door

Use Temporary Blue to bounce into the Morph Tunnel with temp blue then continue to the bomb block using SpringBall. Just left of center of the pit is a good place to bounce for entering the tunnel. Requires either a tight shortcharge or clearing the power bomb blocks to open up more runway. Requires: {
"obstaclesNotCleared": [
"B"
]
}
{
"or": [
{
"and": [
"f_DefeatedPhantoon",
{
"canShineCharge": {
"usedTiles": 16,
"openEnd": 0
}
}
]
},
{
"and": [
{
"obstaclesCleared": [
"A"
]
},
{
"getBlueSpeed": {
"usedTiles": 35,
"openEnd": 1
}
},
{
"or": [
"f_DefeatedPhantoon",
"canSpeedball"
]
}
]
}
]
}
"canTemporaryBlue"
"canSpringBallBounce"Dev note: Killing phantoon only removes requirements for the strat. The runway is a bit longer with Phantoon killed and the Power Bomb blocks broken, but it shouldn't matter at this difficulty. FIXME: This needs the item to be collected or unspawned, at least if using the long runway variant. |
From: 4
Bottom Chozo Item
To: 3
Bottom Left Door

Gain temporary blue, and bounce into the morph tunnel, using Spring Ball to reach the left side while retaining temporary blue. After bouncing up out of the tunnel, unmorph, aim down, and use a pause buffer to remorph and land or bounce on the door frame, chaining temporary blue into the next room. FIXME: This needs the item to be collected or unspawned, at least if using the long runway variant. Requires: {
"obstaclesNotCleared": [
"B"
]
}
{
"or": [
{
"and": [
"f_DefeatedPhantoon",
{
"canShineCharge": {
"usedTiles": 16,
"openEnd": 0
}
}
]
},
{
"and": [
{
"obstaclesCleared": [
"A"
]
},
{
"getBlueSpeed": {
"usedTiles": 35,
"openEnd": 1
}
},
{
"or": [
"f_DefeatedPhantoon",
"canSpeedball"
]
}
]
}
]
}
"canSpringBallBounce"
"canPauseRemorphTemporaryBlue"Exit condition: {
"leaveWithTemporaryBlue": {}
}Unlocks doors: {"types":["ammo"],"requires":[]} |
|
The shot blocks must be broken using Bombs or Power Bombs because Beams will instantly despawn. Use X-Ray or a Crystal Flash to stand up, followed by a Partial Floor clip to jump through the Crumble blocks. Requires: {
"obstaclesCleared": [
"A",
"B"
]
}
"h_bombThings"
"canOffScreenMovement"
{
"or": [
{
"and": [
"canXRayStandUp",
"canPartialFloorClip",
"h_additionalBomb"
]
},
{
"and": [
{
"or": [
{
"and": [
{
"canShineCharge": {
"usedTiles": 35,
"openEnd": 1
}
},
"h_ShinesparksCostEnergy",
{
"shinespark": {
"frames": 0,
"excessFrames": 0
}
}
]
},
"f_DefeatedPhantoon"
]
},
"h_CrystalFlash"
]
}
]
}Dev note: FIXME: This can be done with a blue suit as well, but it still requires one Power Bomb, and falling in the spikes is extra deadly. |
|
Requires: {
"obstaclesCleared": [
"A"
]
}
"h_shinechargeMaxRunway"
"h_CrystalSpark" |
From: 4
Bottom Chozo Item
To: 4
Bottom Chozo Item
Requires: "f_DefeatedPhantoon"
{
"obstaclesNotCleared": [
"B"
]
}
{
"or": [
{
"and": [
{
"obstaclesCleared": [
"A"
]
},
{
"canShineCharge": {
"usedTiles": 30,
"openEnd": 1
}
}
]
},
{
"canShineCharge": {
"usedTiles": 14,
"openEnd": 1
}
}
]
}
{
"spikeHits": 1
}
"h_spikeSuitSpikeHitLeniency"
"canSpikeSuit"
{
"shinespark": {
"frames": 6,
"excessFrames": 6
}
} |
|
Requires: "f_DefeatedPhantoon"
{
"obstaclesNotCleared": [
"B"
]
}
{
"or": [
{
"and": [
{
"obstaclesCleared": [
"A"
]
},
{
"canShineCharge": {
"usedTiles": 30,
"openEnd": 1
}
}
]
},
{
"canShineCharge": {
"usedTiles": 14,
"openEnd": 1
}
}
]
}
{
"spikeHits": 1
}
"h_spikeXModeBlueSuit"
{
"shinespark": {
"frames": 0,
"excessFrames": 0
}
} |
|


Requires: {
"or": [
{
"obstaclesCleared": [
"A"
]
},
"h_usePowerBomb"
]
}
{
"or": [
{
"canShineCharge": {
"usedTiles": 35,
"openEnd": 1
}
},
{
"and": [
"f_DefeatedPhantoon",
"h_shinechargeMaxRunway"
]
}
]
}
{
"or": [
{
"shinespark": {
"frames": 40,
"excessFrames": 3
}
},
{
"and": [
"canMidairShinespark",
{
"shinespark": {
"frames": 32,
"excessFrames": 2
}
}
]
},
{
"and": [
"canMidairShinespark",
"HiJump",
{
"shinespark": {
"frames": 29,
"excessFrames": 3
}
}
]
},
{
"and": [
"canShinechargeMovementComplex",
"canSpeedyJump",
{
"or": [
{
"shinespark": {
"frames": 27,
"excessFrames": 2
}
},
{
"and": [
"HiJump",
{
"shinespark": {
"frames": 18,
"excessFrames": 2
}
}
]
}
]
}
]
}
]
}Clears obstacles: A |
|
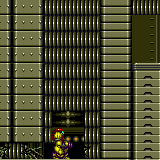
Wall jump repeatedly off of the left wall, jump before the spikes and hold jump while passing them to avoid wall jump checking them. Requires: {
"or": [
{
"obstaclesCleared": [
"A"
]
},
"h_usePowerBomb"
]
}
{
"or": [
{
"canShineCharge": {
"usedTiles": 35,
"openEnd": 1
}
},
{
"and": [
"f_DefeatedPhantoon",
"h_shinechargeMaxRunway"
]
}
]
}
"canShinechargeMovementComplex"
"canConsecutiveWallJump"
{
"or": [
{
"shinespark": {
"frames": 17,
"excessFrames": 2
}
},
{
"and": [
"HiJump",
{
"shinespark": {
"frames": 10,
"excessFrames": 2
}
}
]
},
{
"and": [
"canShinechargeMovementTricky",
"canFastWallJumpClimb",
{
"or": [
{
"shinespark": {
"frames": 10,
"excessFrames": 2
}
},
{
"and": [
"HiJump",
{
"shinespark": {
"frames": 6,
"excessFrames": 2
}
}
]
}
]
}
]
}
]
}Clears obstacles: A |
|
If Phantoon is killed, hold right while wall jumping, jump just before the spikes and after them. Don't release jump while passing the spikes to prevent taking a hit. Requires: {
"or": [
{
"obstaclesCleared": [
"A"
]
},
"h_usePowerBomb"
]
}
{
"haveBlueSuit": {}
}
{
"or": [
"canConsecutiveWallJump",
"SpaceJump",
"canLongIBJ"
]
}Clears obstacles: A |
|


If Phantoon is killed, hold right while wall jumping, jump just before the spikes and after them. Don't release jump while passing the spikes to prevent taking a hit. Requires: {
"or": [
{
"obstaclesCleared": [
"A"
]
},
"h_usePowerBomb"
]
}
{
"useFlashSuit": {}
}
{
"shinespark": {
"frames": 5,
"excessFrames": 3
}
}
{
"or": [
"canConsecutiveWallJump",
"SpaceJump",
{
"and": [
"canLongIBJ",
"canUnmorphBombBoost"
]
}
]
}Clears obstacles: A |
From: 4
Bottom Chozo Item
To: 5
Top Right Item
Requires: {
"or": [
{
"obstaclesCleared": [
"A"
]
},
"h_usePowerBomb"
]
}
"h_storedSpark"
{
"or": [
{
"shinespark": {
"frames": 32,
"excessFrames": 3
}
},
{
"and": [
"HiJump",
{
"shinespark": {
"frames": 29,
"excessFrames": 3
}
}
]
}
]
}Clears obstacles: A Dev note: There is no point in using a blue suit to spark or sparking at the bottom if Samus can wall jump. |
|
Menu to Grappling Beam before the Crystal Flash ends and mash shoot while holding down. Requires: "h_jumpIntoCrystalFlashClip"
"Grapple"
{
"obstaclesNotCleared": [
"B"
]
}Exit condition: {
"leaveNormally": {}
}Unlocks doors: {"types":["ammo"],"requires":[]} |
From: 5
Top Right Item
To: 1
Top Left Door
Fall through the Crumble blocks in order to damage down using either the spikes or repeated Shinesparks. Touching the Chozo statue will lock the camera in a less useful position. Menu to Grappling Beam before the crystal flash ends and mash shoot while holding down. Requires: {
"obstaclesCleared": [
"B"
]
}
"h_ShinesparksCostEnergy"
"h_jumpIntoCrystalFlashClip"
"Grapple"
"canOffScreenMovement"
{
"canShineCharge": {
"usedTiles": 25,
"openEnd": 1
}
}
{
"shinespark": {
"frames": 0,
"excessFrames": 0
}
}Exit condition: {
"leaveNormally": {}
}Unlocks doors: {"types":["ammo"],"requires":[]}Dev note: FIXME: If power is on, spikes or worker robots can damage Samus, but multiples of 60 may not put Samus into Crystal Flash range, and visiting the robots will lock the camera making the jump-into-CF much harder. |
|
Requires: {
"obstaclesCleared": [
"A"
]
}
{
"or": [
{
"obstaclesNotCleared": [
"B"
]
},
"canOffScreenMovement"
]
} |
|
Requires: "h_usePowerBomb"
{
"or": [
{
"obstaclesNotCleared": [
"B"
]
},
"canOffScreenMovement"
]
}Clears obstacles: A |
From: 6
Bowling Chozo Statue
To: 1
Top Left Door
Jump or Spring Ball jump into a breakable Grapple block. The timing is precise and it can help to break two Grapple blocks to use one as a cue. Crystal Flash then X-ray climb to the region above (less than 1 screen). There is a chance that Samus will not be able to Crystal Flash unless first placing a Bomb or Power Bomb. Requires: {
"notable": "Grapple Block Crystal Flash"
}
"canUseGrapple"
"canJumpIntoRespawningBlock"
"canTrickyJump"
{
"or": [
"HiJump",
"canTrickySpringBallJump",
{
"and": [
"canSpringBallJumpMidAir",
{
"not": "f_DefeatedPhantoon"
},
"canRiskPermanentLossOfAccess"
]
}
]
}
"h_bombThings"
"h_CrystalFlash"
"canXRayClimb"
{
"or": [
"h_fourTileJumpMorph",
"h_useSpringBall",
"canIBJ",
{
"getBlueSpeed": {
"usedTiles": 16,
"steepDownTiles": 4,
"openEnd": 0
}
},
{
"and": [
{
"not": "f_DefeatedPhantoon"
},
"canRiskPermanentLossOfAccess"
]
}
]
}Exit condition: {
"leaveNormally": {}
}Unlocks doors: {"types":["ammo"],"requires":[]}Dev note: FIXME: This may be possible with a spike hit and speedy jump. |
From: 6
Bowling Chozo Statue
To: 1
Top Left Door
IBJ into a breakable Grapple block. The timing is very precise and requires a quick morph and ascent with precisely placed double bomb jumps. Crystal Flash then X-ray climb to the region above (less than 1 screen). There is a chance that Samus will not be able to Crystal Flash unless first placing a Bomb or Power Bomb. Requires: {
"notable": "Grapple Block Crystal Flash"
}
"canUseGrapple"
"canJumpIntoRespawningBlock"
"canInsaneJump"
"canJumpIntoIBJ"
"canDoubleBombJump"
{
"or": [
{
"spikeHits": 1
},
{
"and": [
{
"not": "f_DefeatedPhantoon"
},
"canRiskPermanentLossOfAccess"
]
}
]
}
"h_CrystalFlash"
"canXRayClimb"Exit condition: {
"leaveNormally": {}
}Unlocks doors: {"types":["ammo"],"requires":[]}Dev note: FIXME: This may be possible without a spike hit. |
From: 6
Bowling Chozo Statue
To: 1
Top Left Door

Use a Grapple fling to get stuck inside a breakable Grapple block. It can help to break two or more Grapple blocks in a row. Crystal Flash then X-ray climb to the region above (less than 1 screen). There is a chance that Samus will not be able to Crystal Flash unless first placing a Bomb or Power Bomb. Requires: {
"notable": "Grapple Block Crystal Flash"
}
"canPreciseGrapple"
"canJumpIntoRespawningBlock"
"canInsaneJump"
"h_bombThings"
"h_CrystalFlash"
"canXRayClimb"
{
"or": [
"h_fourTileJumpMorph",
"h_useSpringBall",
"canIBJ",
{
"getBlueSpeed": {
"usedTiles": 16,
"steepDownTiles": 4,
"openEnd": 0
}
},
{
"and": [
{
"not": "f_DefeatedPhantoon"
},
"canRiskPermanentLossOfAccess"
]
}
]
}Exit condition: {
"leaveNormally": {}
}Unlocks doors: {"types":["ammo"],"requires":[]} |
From: 6
Bowling Chozo Statue
To: 1
Top Left Door


Use X-mode to gain a shinecharge near the Chozo statue. Jump onto the Chozo statue, press against the wall, and shinespark into it to clip in, then X-Ray climb up. A second spike hit can be avoided by holding an angle button to turn around while in X-mode; arm pump to move out of the spikes before activating the shinecharge and exiting X-mode. Requires: "canXMode"
"h_XModeSpikeHit"
"h_shinechargeMaxRunway"
"canShinechargeMovement"
{
"shinespark": {
"frames": 1,
"excessFrames": 1
}
}
"canShinesparkSlopeClip"
"canXRayClimb"
{
"or": [
{
"getBlueSpeed": {
"usedTiles": 16,
"steepDownTiles": 4,
"openEnd": 0
}
},
"can4HighMidAirMorph"
]
}Exit condition: {
"leaveNormally": {}
}Unlocks doors: {"types":["ammo"],"requires":[]}Dev note: The leaveNormally is to ensure it won't be required to do the Speed block moondance blind up there. |
From: 6
Bowling Chozo Statue
To: 1
Top Left Door
Jump onto the Chozo statue, press against the wall, and shinespark into it to clip in, then X-Ray climb up.. Requires: "h_storedSpark"
{
"shinespark": {
"frames": 1,
"excessFrames": 1
}
}
"canShinesparkSlopeClip"
"canXRayClimb"
{
"or": [
{
"getBlueSpeed": {
"usedTiles": 16,
"steepDownTiles": 4,
"openEnd": 0
}
},
"can4HighMidAirMorph"
]
}Exit condition: {
"leaveNormally": {}
}Unlocks doors: {"types":["ammo"],"requires":[]}Dev note: The leaveNormally is to ensure it won't be required to do the Speed block moondance blind up there. |
|
Requires: "f_DefeatedPhantoon" "Morph" Clears obstacles: C Sets flags: f_UsedBowlingStatue |
From: 7
Bowling In G-Mode
To: 2
Middle Left Door
Quickly unmorph and jump to the left edge to take as few spike hits as possible. It is also possible to place a bomb or Power Bomb just before being grabbed by the statue before the bowling ride. Samus will experience the boost after the ride, which can boost her straight onto the statue. Requires: "canComplexGMode"
{
"or": [
"h_artificialMorphBombThings",
{
"spikeHits": 1
}
]
}
{
"or": [
"canInsaneJump",
{
"spikeHits": 1
}
]
}Sets flags: f_UsedBowlingStatue |
From: 7
Bowling In G-Mode
To: 3
Bottom Left Door
Quickly unmorph and jump onto the bowling statue. Be careful not to jump below its hand and be pushed back down. It is also possible to place a bomb or Power Bomb just before being grabbed by the statue before the bowling ride. Samus will experience the boost after the ride, which can boost her straight onto the statue. Exit G-mode then jump to the right into the spike pit, which will now have a section that is air. Go to the bottom door to exit the room and fix the camera. Requires: "canComplexGMode"
{
"or": [
"h_artificialMorphBombThings",
{
"spikeHits": 1
}
]
}
{
"or": [
"canInsaneJump",
{
"spikeHits": 1
}
]
}Exit condition: {
"leaveNormally": {}
}Sets flags: f_UsedBowlingStatue Unlocks doors: {"types":["ammo"],"requires":[]}Dev note: FIXME: It is possible to go down and grab one or both items then return, but that is a difficult trek while blind, with the Workrobots awake. |
{
"$schema": "../../../schema/m3-room.schema.json",
"id": 161,
"name": "Bowling Alley",
"area": "Wrecked Ship",
"subarea": "Main",
"roomAddress": "0x7C98E",
"roomEnvironments": [
{
"heated": false
}
],
"mapTileMask": [
[
0,
0,
1,
1,
1,
1
],
[
1,
1,
1,
1,
1,
1
],
[
0,
1,
1,
1,
1,
1
]
],
"nodes": [
{
"id": 1,
"name": "Top Left Door",
"nodeType": "door",
"nodeSubType": "blue",
"nodeAddress": "0x001a18c",
"doorOrientation": "left",
"doorEnvironments": [
{
"physics": "air"
}
],
"mapTileMask": [
[
0,
0,
2,
2,
2,
2
],
[
1,
1,
1,
1,
1,
1
],
[
0,
1,
1,
1,
1,
1
]
]
},
{
"id": 2,
"name": "Middle Left Door",
"nodeType": "door",
"nodeSubType": "blue",
"nodeAddress": "0x001a198",
"doorOrientation": "left",
"doorEnvironments": [
{
"physics": "air"
}
],
"locks": [
{
"name": "Bowling Alley Top Left Gray Lock (to West Ocean Lower)",
"lockType": "permanent",
"lock": [
"f_DefeatedPhantoon"
],
"unlockStrats": [
{
"name": "Base",
"requires": [
"never"
],
"flashSuitChecked": true,
"blueSuitChecked": true
}
]
}
],
"mapTileMask": [
[
0,
0,
1,
1,
1,
1
],
[
2,
2,
2,
1,
1,
1
],
[
0,
1,
1,
1,
1,
1
]
]
},
{
"id": 3,
"name": "Bottom Left Door",
"nodeType": "door",
"nodeSubType": "blue",
"nodeAddress": "0x001a1a4",
"doorOrientation": "left",
"doorEnvironments": [
{
"physics": "air"
}
],
"mapTileMask": [
[
0,
0,
1,
1,
1,
1
],
[
1,
1,
1,
1,
1,
1
],
[
0,
2,
1,
1,
1,
1
]
]
},
{
"id": 4,
"name": "Bottom Chozo Item",
"nodeType": "item",
"nodeSubType": "visible",
"nodeItem": "Missile",
"nodeAddress": "0x7C2EF",
"locks": [
{
"name": "Bowling Alley Missiles Spawn Lock",
"lockType": "gameFlag",
"unlockStrats": [
{
"name": "Base",
"requires": [
{
"or": [
"f_DefeatedPhantoon",
"h_allItemsSpawned"
]
}
],
"flashSuitChecked": true,
"blueSuitChecked": true,
"note": "The item doesn't spawn until Phantoon is defeated."
}
]
}
],
"mapTileMask": [
[
0,
0,
1,
1,
1,
1
],
[
1,
1,
1,
1,
1,
1
],
[
0,
1,
2,
2,
1,
1
]
]
},
{
"id": 5,
"name": "Top Right Item",
"nodeType": "item",
"nodeSubType": "chozo",
"nodeItem": "ReserveTank",
"nodeAddress": "0x7C2E9",
"locks": [
{
"name": "Wrecked Ship Reserve Spawn Lock",
"lockType": "gameFlag",
"unlockStrats": [
{
"name": "Base",
"requires": [
{
"or": [
"f_DefeatedPhantoon",
"h_allItemsSpawned"
]
}
],
"flashSuitChecked": true,
"blueSuitChecked": true,
"note": "The item doesn't spawn until Phantoon is defeated."
}
]
}
],
"mapTileMask": [
[
0,
0,
1,
1,
1,
2
],
[
1,
1,
1,
1,
1,
2
],
[
0,
1,
1,
1,
2,
2
]
]
},
{
"id": 6,
"name": "Bowling Chozo Statue",
"nodeType": "junction",
"nodeSubType": "junction",
"mapTileMask": [
[
0,
0,
1,
1,
1,
1
],
[
1,
1,
1,
2,
2,
1
],
[
0,
1,
1,
1,
1,
1
]
]
},
{
"id": 7,
"name": "Bowling In G-Mode",
"nodeType": "junction",
"nodeSubType": "g-mode",
"mapTileMask": [
[
0,
0,
1,
1,
1,
1
],
[
1,
2,
2,
2,
2,
1
],
[
0,
1,
1,
1,
1,
1
]
],
"note": "Represents being in the statue's hands with G-mode and morph or artificial morph, and about to fall into the spike pit.",
"devNote": "Strats that go to or from this node require canComplexGMode, because the way it behaves and how you need to move while off camera after the Chozo ride is unintuitive."
}
],
"obstacles": [
{
"id": "A",
"name": "Destructible Chozo Statue",
"obstacleType": "inanimate"
},
{
"id": "B",
"name": "Traversing the Room Backwards",
"obstacleType": "abstract",
"note": "Clipping to the reserve location means the camera does not follow Samus and the crumble blocks are not broken."
},
{
"id": "C",
"name": "Bowling Ride Complete",
"obstacleType": "inanimate",
"note": "The bowling ride has been completed, meaning the Chozo statue will be in front of the bottom door."
}
],
"enemies": [
{
"id": "e1",
"groupName": "Bowling Alley Workrobots",
"enemyName": "Workrobot",
"quantity": 2,
"betweenNodes": [
3,
4
],
"spawn": [
"f_DefeatedPhantoon"
]
}
],
"strats": [
{
"link": [
1,
1
],
"name": "Base (Unlock Door)",
"requires": [],
"unlocksDoors": [
{
"types": [
"ammo"
],
"requires": []
}
],
"flashSuitChecked": true,
"blueSuitChecked": true
},
{
"link": [
1,
1
],
"name": "Base (Come In Normally)",
"entranceCondition": {
"comeInNormally": {}
},
"requires": [],
"flashSuitChecked": true,
"blueSuitChecked": true
},
{
"link": [
1,
1
],
"name": "Base (Come In With Mockball)",
"entranceCondition": {
"comeInWithMockball": {
"adjacentMinTiles": 0,
"remoteAndLandingMinTiles": [
[
0,
0
]
],
"speedBooster": "any"
}
},
"requires": [],
"flashSuitChecked": true,
"blueSuitChecked": true
},
{
"link": [
2,
2
],
"name": "Base (Unlock Door)",
"requires": [],
"unlocksDoors": [
{
"types": [
"ammo"
],
"requires": []
}
],
"flashSuitChecked": true,
"blueSuitChecked": true
},
{
"link": [
2,
2
],
"name": "Base (Come In Normally)",
"entranceCondition": {
"comeInNormally": {}
},
"requires": [],
"flashSuitChecked": true,
"blueSuitChecked": true
},
{
"link": [
2,
2
],
"name": "Base (Come In With Mockball)",
"entranceCondition": {
"comeInWithMockball": {
"adjacentMinTiles": 0,
"remoteAndLandingMinTiles": [
[
0,
0
]
],
"speedBooster": "any"
}
},
"requires": [],
"flashSuitChecked": true,
"blueSuitChecked": true
},
{
"link": [
3,
3
],
"name": "Base (Unlock Door)",
"requires": [],
"unlocksDoors": [
{
"types": [
"ammo"
],
"requires": []
}
],
"flashSuitChecked": true,
"blueSuitChecked": true
},
{
"link": [
3,
3
],
"name": "Base (Come In Normally)",
"entranceCondition": {
"comeInNormally": {}
},
"requires": [],
"flashSuitChecked": true,
"blueSuitChecked": true
},
{
"link": [
3,
3
],
"name": "Base (Come In With Mockball)",
"entranceCondition": {
"comeInWithMockball": {
"adjacentMinTiles": 0,
"remoteAndLandingMinTiles": [
[
0,
0
]
],
"speedBooster": "any"
}
},
"requires": [],
"flashSuitChecked": true,
"blueSuitChecked": true
},
{
"name": "Base",
"requires": [
{
"or": [
"f_DefeatedPhantoon",
"h_allItemsSpawned"
]
}
],
"flashSuitChecked": true,
"blueSuitChecked": true,
"note": "The item doesn't spawn until Phantoon is defeated.",
"link": [
4,
4
],
"collectsItems": [
4
]
},
{
"name": "Base",
"requires": [
{
"or": [
"f_DefeatedPhantoon",
"h_allItemsSpawned"
]
}
],
"flashSuitChecked": true,
"blueSuitChecked": true,
"note": "The item doesn't spawn until Phantoon is defeated.",
"link": [
5,
5
],
"collectsItems": [
5
]
},
{
"id": 1,
"link": [
1,
1
],
"name": "Leave with Runway, Conveyor On",
"requires": [
"f_DefeatedPhantoon"
],
"exitCondition": {
"leaveWithRunway": {
"length": 45,
"openEnd": 1
}
},
"flashSuitChecked": true,
"blueSuitChecked": true
},
{
"id": 2,
"link": [
1,
1
],
"name": "Leave with Runway",
"requires": [],
"exitCondition": {
"leaveWithRunway": {
"length": 28,
"openEnd": 0
}
},
"flashSuitChecked": true,
"blueSuitChecked": true
},
{
"id": 3,
"link": [
1,
1
],
"name": "Leave with Runway, Break Speed Blocks",
"requires": [
{
  "or": [
    {
      "getBlueSpeed": {
        "usedTiles": 28,
        "openEnd": 0
      }
    },
    {
      "and": [
        {
          "getBlueSpeed": {
            "usedTiles": 29,
            "openEnd": 0
          }
        },
        {
          "doorUnlockedAtNode": 1
        }
      ]
    }
  ]
}
],
"exitCondition": {
"leaveWithRunway": {
"length": 45,
"openEnd": 1
}
},
"flashSuitChecked": true,
"blueSuitChecked": true
},
{
"id": 4,
"link": [
1,
1
],
"name": "Leave with Runway, Enter with Speed",
"entranceCondition": {
"comeInGettingBlueSpeed": {
"length": 29,
"openEnd": 0
}
},
"requires": [],
"exitCondition": {
"leaveWithRunway": {
"length": 45,
"openEnd": 1
}
},
"unlocksDoors": [
{
"types": [
"ammo"
],
"requires": []
}
],
"flashSuitChecked": true,
"blueSuitChecked": true
},
{
"id": 5,
"link": [
1,
1
],
"name": "Leave with Runway (Enter with Shinespark to Break the Blocks)",
"entranceCondition": {
"comeInWithSpark": {
"position": "bottom"
}
},
"requires": [
{
  "shinespark": {
    "frames": 71,
    "excessFrames": 21
  }
}
],
"exitCondition": {
"leaveWithRunway": {
"length": 45,
"openEnd": 1
}
},
"unlocksDoors": [
{
"types": [
"ammo"
],
"requires": []
}
],
"flashSuitChecked": true,
"blueSuitChecked": true
},
{
"id": 6,
"link": [
1,
1
],
"name": "Crystal Flash",
"requires": [
"h_CrystalFlash"
],
"flashSuitChecked": true,
"blueSuitChecked": true
},
{
"id": 91,
"link": [
1,
1
],
"name": "Crystal Spark",
"requires": [
{
"canShineCharge": {
"usedTiles": 28,
"openEnd": 0
}
},
"h_CrystalSpark"
],
"flashSuitChecked": true,
"blueSuitChecked": true
},
{
"id": 92,
"link": [
1,
1
],
"name": "Come in Getting Blue Speed, Shinecharge, Crystal Spark",
"entranceCondition": {
"comeInGettingBlueSpeed": {
"length": 28,
"openEnd": 0
}
},
"requires": [
"h_shinechargeMaxRunway",
"h_CrystalSpark"
],
"flashSuitChecked": true,
"blueSuitChecked": true
},
{
"id": 7,
"link": [
1,
1
],
"name": "Speed Block Moondance (Leave with Stored Fall Speed)",
"requires": [
{
"notable": "Speed Block Moondance"
},
"h_CrystalFlash",
"canTrickyJump",
"canTurnaroundAimCancel",
{
"getBlueSpeed": {
"usedTiles": 16,
"steepDownTiles": 4,
"openEnd": 0
}
},
"canTemporaryBlue",
"canSpeedball",
"canMoondance",
{
"or": [
"canCount",
"Grapple"
]
}
],
"exitCondition": {
"leaveWithStoredFallSpeed": {
"fallSpeedInTiles": 1
}
},
"flashSuitChecked": true,
"blueSuitChecked": true,
"note": [
"Use SpeedBooster to construct a structure for Moondancing that has 1 chest height block and 1 head height block to the right of it and no other Speed blocks.",
"Crystal Flash below the lower block, exactly pixel aligned with its right side, to standup and then begin Moondancing.",
"After Samus sinks through the bottom tile, it is possible to use Grapple to return to a crouch and wiggle right and then Turn-Around Aim Cancel to escape to the right.",
"Without Grapple, count to 174 Moonfalls and delicately Moonfall so as to remain crouched and then wiggle to the right.",
"Finally, shortcharge to break the remaining Speed blocks and reach the door."
]
},
{
"id": 8,
"link": [
1,
1
],
"name": "Speed Block Moondance (Leave with More Stored Fall Speed)",
"requires": [
{
"notable": "Speed Block Moondance"
},
"h_CrystalFlash",
"canTrickyJump",
"canTurnaroundAimCancel",
{
"getBlueSpeed": {
"usedTiles": 16,
"steepDownTiles": 4,
"openEnd": 0
}
},
"canTemporaryBlue",
"canExtendedMoondance",
"canSpeedball",
"Grapple"
],
"exitCondition": {
"leaveWithStoredFallSpeed": {
"fallSpeedInTiles": 2
}
},
"flashSuitChecked": true,
"blueSuitChecked": true,
"note": [
"Use SpeedBooster to construct a structure for Moondancing that has 1 chest height block and 1 head height block to the right of it and no other Speed blocks.",
"Crystal Flash below the lower block, exactly pixel aligned with its right side, to standup and then begin Moondancing.",
"After Samus sinks through the floor tiles, use Grapple to return to a standing position and count an additional 145 moonfalls.",
"Then use Grapple to return to a crouch and wiggle right and Turn-Around Aim Cancel to escape to the right.",
"Finally, shortcharge to break the remaining Speed blocks and reach the door."
]
},
{
"id": 9,
"link": [
1,
5
],
"name": "Speed Block Moondance (Moonfall Clip)",
"requires": [
{
"notable": "Speed Block Moondance"
},
"h_CrystalFlash",
"canTrickyJump",
"canTurnaroundAimCancel",
{
"getBlueSpeed": {
"usedTiles": 16,
"steepDownTiles": 4,
"openEnd": 0
}
},
"canTemporaryBlue",
"canMoondance",
"canSpeedball",
{
"or": [
"canCount",
"Grapple"
]
}
],
"clearsObstacles": [
"B"
],
"flashSuitChecked": true,
"blueSuitChecked": true,
"note": [
"Use SpeedBooster to construct a structure for Moondancing that has 1 chest height block and 1 head height block to the right of it and no other Speed blocks.",
"Crystal Flash below the lower block, exactly pixel aligned with its right side, to standup and then begin Moondancing.",
"After Samus sinks through the bottom tile, it is possible to use Grapple to return to a crouch and wiggle right and then Turn-Around Aim Cancel to escape to the right.",
"Without Grapple, count to 174 Moonfalls and delicately Moonfall so as to remain crouched and then wiggle to the right.",
"The Camera will not follow Samus after clipping."
]
},
{
"id": 10,
"link": [
1,
5
],
"name": "Stored Moonfall Clip",
"entranceCondition": {
"comeInWithStoredFallSpeed": {
"fallSpeedInTiles": 1
}
},
"requires": [
{
"or": [
{
"getBlueSpeed": {
"usedTiles": 28,
"openEnd": 0
}
},
{
"and": [
{
"getBlueSpeed": {
"usedTiles": 29,
"openEnd": 0
}
},
{
"doorUnlockedAtNode": 1
}
]
},
{
"haveBlueSuit": {}
}
]
},
"canMoonfall"
],
"unlocksDoors": [
{
"nodeId": 1,
"types": [
"missiles",
"super"
],
"requires": []
},
{
"nodeId": 1,
"types": [
"powerbomb"
],
"requires": [
"never"
]
}
],
"clearsObstacles": [
"B"
],
"flashSuitChecked": true,
"blueSuitChecked": true,
"note": "The camera will not follow Samus after clipping."
},
{
"id": 69,
"link": [
2,
1
],
"name": "Shinespark Slope Clip X-Ray Climb (Power Off)",
"requires": [
{
"not": "f_DefeatedPhantoon"
},
"canRiskPermanentLossOfAccess",
{
"or": [
"h_shinechargeMaxRunway",
"h_storedSpark"
]
},
"canShinechargeMovement",
{
"shinespark": {
"frames": 1,
"excessFrames": 1
}
},
"canShinesparkSlopeClip",
"canXRayClimb",
{
"or": [
{
"getBlueSpeed": {
"usedTiles": 16,
"steepDownTiles": 4,
"openEnd": 0
}
},
"can4HighMidAirMorph"
]
}
],
"exitCondition": {
"leaveNormally": {}
},
"unlocksDoors": [
{
"types": [
"ammo"
],
"requires": []
}
],
"flashSuitChecked": true,
"blueSuitChecked": true,
"note": [
"Gain a shinecharge near the Chozo statue, jump on top of it,",
"press against the wall to the right, and activate a horizontal shinespark to the right.",
"Samus will clip into the wall and be able to X-Ray climb to the space above."
],
"detailNote": [
"This trick works because the wall is made of half-tile slopes, rather than regular solid tiles."
],
"devNote": [
"The leaveNormally is to ensure it won't be required to do the Speed block moondance blind up there."
]
},
{
"id": 70,
"link": [
2,
1
],
"name": "Shinespark Slope Clip X-Ray Climb (Come in Shinecharged)",
"entranceCondition": {
"comeInShinecharged": {}
},
"requires": [
{
"shineChargeFrames": 50
},
"canShinechargeMovementTricky",
{
"shinespark": {
"frames": 88,
"excessFrames": 0
}
},
"canShinesparkSlopeClip",
"canXRayClimb",
{
"or": [
{
"getBlueSpeed": {
"usedTiles": 16,
"steepDownTiles": 4,
"openEnd": 0
}
},
"can4HighMidAirMorph"
]
}
],
"exitCondition": {
"leaveNormally": {}
},
"unlocksDoors": [
{
"types": [
"ammo"
],
"requires": []
}
],
"flashSuitChecked": true,
"blueSuitChecked": true,
"note": [
"Jump close to ceiling, and activate a shinespark to the right.",
"If successful, Samus will clip into the wall behind the Chozo statue and be able to X-Ray climb up."
],
"detailNote": [
"Only certain horizontal positions will cause Samus to clip into the wall.",
"It will work to activate the spark while Samus is centered under the second Grapple block or slightly to the left."
],
"devNote": [
"The leaveNormally is to ensure it won't be required to do the Speed block moondance blind up there."
]
},
{
"id": 77,
"link": [
2,
1
],
"name": "Shinespark Slope Clip X-Ray Climb (X-Mode or Phantoon Alive)",
"requires": [
{
"doorUnlockedAtNode": 2
},
"canXMode",
"h_XModeSpikeHit",
"h_shinechargeMaxRunway",
"canShinechargeMovement",
{
"shinespark": {
"frames": 1,
"excessFrames": 1
}
},
"canShinesparkSlopeClip",
"canXRayClimb",
{
"or": [
{
"getBlueSpeed": {
"usedTiles": 16,
"steepDownTiles": 4,
"openEnd": 0
}
},
"can4HighMidAirMorph"
]
}
],
"exitCondition": {
"leaveNormally": {}
},
"unlocksDoors": [
{
"types": [
"ammo"
],
"requires": []
}
],
"flashSuitChecked": true,
"blueSuitChecked": true,
"note": [
"Arm pump slowly after the Chozo statue comes on screen, when the camera locks and Samus starts to move again, armpump only 3 or 4 more times to clear the last spike and avoid an extra spike hit."
],
"devNote": [
"The leaveNormally is to ensure it won't be required to do the Speed block moondance blind up there."
]
},
{
"id": 95,
"link": [
2,
1
],
"name": "Shinespark Slope Clip X-Ray Climb (Use Stored Spark)",
"requires": [
"h_storedSpark",
"canDash",
"canShinechargeMovementTricky",
{
"shinespark": {
"frames": 88,
"excessFrames": 0
}
},
"canShinesparkSlopeClip",
"canXRayClimb",
{
"or": [
{
"getBlueSpeed": {
"usedTiles": 16,
"steepDownTiles": 4,
"openEnd": 0
}
},
"can4HighMidAirMorph"
]
}
],
"exitCondition": {
"leaveNormally": {}
},
"unlocksDoors": [
{
"types": [
"ammo"
],
"requires": []
}
],
"flashSuitChecked": true,
"blueSuitChecked": true,
"note": [
"Jump close to ceiling, and activate a shinespark to the right.",
"If successful, Samus will clip into the wall behind the Chozo statue and be able to X-Ray climb up."
],
"detailNote": [
"Only certain horizontal positions will cause Samus to clip into the wall.",
"It will work to activate the spark while Samus is centered under the second Grapple block or slightly to the left."
],
"devNote": [
"The leaveNormally is to ensure it won't be required to do the Speed block moondance blind up there."
]
},
{
"id": 11,
"link": [
2,
2
],
"name": "Leave with Runway",
"requires": [],
"exitCondition": {
"leaveWithRunway": {
"length": 3,
"openEnd": 1
}
},
"flashSuitChecked": true,
"blueSuitChecked": true
},
{
"id": 58,
"link": [
2,
2
],
"name": "Leave With Side Platform (Power Off)",
"requires": [
{
"not": "f_DefeatedPhantoon"
},
"canRiskPermanentLossOfAccess",
{
"or": [
"canMomentumConservingMorph",
{
"and": [
"canMomentumConservingTurnaround",
"canInsaneJump"
]
}
]
}
],
"exitCondition": {
"leaveWithSidePlatform": {
"height": 3,
"runway": {
"length": 45,
"openEnd": 1
},
"obstruction": [
3,
0
]
}
},
"flashSuitChecked": true,
"blueSuitChecked": true,
"note": "If using the full runway, back into the corner against the Chozo statue.",
"devNote": [
"Max extra run speed $7.0."
]
},
{
"id": 57,
"link": [
2,
2
],
"name": "Leave With Grapple Swing",
"requires": [],
"exitCondition": {
"leaveWithGrappleSwing": {
"blocks": [
{
"position": [
8,
2
],
"note": "Closest Grapple block to the door"
}
]
}
},
"flashSuitChecked": true,
"blueSuitChecked": true
},
{
"id": 12,
"link": [
2,
2
],
"name": "Leave Shinecharged (X-Mode or Phantoon Alive)",
"requires": [
"h_spikeXModeShinecharge",
{
"or": [
"can4HighMidAirMorph",
"h_XModeSpikeHit"
]
},
"canUseIFrames",
{
"shineChargeFrames": 65
}
],
"exitCondition": {
"leaveShinecharged": {}
},
"flashSuitChecked": true,
"blueSuitChecked": true,
"devNote": "At least two spike hits are expected per attempt (with any additional leniency hits being multiplied by this amount)."
},
{
"id": 13,
"link": [
2,
2
],
"name": "Leave Shinecharged (Phantoon Alive)",
"requires": [
{
"not": "f_DefeatedPhantoon"
},
"canRiskPermanentLossOfAccess",
"h_shinechargeMaxRunway",
"canShinechargeMovement",
{
"shineChargeFrames": 40
}
],
"exitCondition": {
"leaveShinecharged": {}
},
"flashSuitChecked": true,
"blueSuitChecked": true
},
{
"id": 14,
"link": [
2,
2
],
"name": "Leave Spinning (Power Off)",
"requires": [
{
"not": "f_DefeatedPhantoon"
},
"canRiskPermanentLossOfAccess"
],
"exitCondition": {
"leaveSpinning": {
"remoteRunway": {
"length": 45,
"openEnd": 1
}
}
},
"flashSuitChecked": true,
"blueSuitChecked": true
},
{
"id": 15,
"link": [
2,
2
],
"name": "Leave Spinning (Space Jump)",
"requires": [
"SpaceJump"
],
"exitCondition": {
"leaveSpinning": {
"remoteRunway": {
"length": 5,
"openEnd": 1
}
}
},
"flashSuitChecked": true,
"blueSuitChecked": true
},
{
"id": 16,
"link": [
2,
2
],
"name": "Leave With Mockball (Power Off)",
"requires": [
{
"not": "f_DefeatedPhantoon"
},
"canRiskPermanentLossOfAccess"
],
"exitCondition": {
"leaveWithMockball": {
"remoteRunway": {
"length": 45,
"openEnd": 1
},
"landingRunway": {
"length": 3,
"openEnd": 1
}
}
},
"flashSuitChecked": true,
"blueSuitChecked": true
},
{
"id": 17,
"link": [
2,
2
],
"name": "Leave With Mockball (Space Jump)",
"requires": [
"SpaceJump"
],
"exitCondition": {
"leaveWithMockball": {
"remoteRunway": {
"length": 5,
"openEnd": 1
},
"landingRunway": {
"length": 3,
"openEnd": 1
}
}
},
"flashSuitChecked": true,
"blueSuitChecked": true
},
{
"id": 18,
"link": [
2,
2
],
"name": "Leave With Spring Ball Bounce (Power Off)",
"requires": [
{
"not": "f_DefeatedPhantoon"
},
"canRiskPermanentLossOfAccess"
],
"exitCondition": {
"leaveWithSpringBallBounce": {
"remoteRunway": {
"length": 31,
"openEnd": 0
},
"landingRunway": {
"length": 3,
"openEnd": 1
},
"movementType": "uncontrolled"
}
},
"flashSuitChecked": true,
"blueSuitChecked": true
},
{
"id": 19,
"link": [
2,
2
],
"name": "Leave With Spring Ball Bounce (Space Jump)",
"requires": [
"SpaceJump"
],
"exitCondition": {
"leaveWithSpringBallBounce": {
"remoteRunway": {
"length": 5,
"openEnd": 1
},
"landingRunway": {
"length": 3,
"openEnd": 1
},
"movementType": "uncontrolled"
}
},
"flashSuitChecked": true,
"blueSuitChecked": true
},
{
"id": 20,
"link": [
2,
2
],
"name": "Leave Space Jumping (Power Off)",
"requires": [
{
"not": "f_DefeatedPhantoon"
},
"canRiskPermanentLossOfAccess"
],
"exitCondition": {
"leaveSpaceJumping": {
"remoteRunway": {
"length": 45,
"openEnd": 0
}
}
},
"flashSuitChecked": true,
"blueSuitChecked": true
},
{
"id": 21,
"link": [
2,
2
],
"name": "Leave Space Jumping",
"requires": [],
"exitCondition": {
"leaveSpaceJumping": {
"remoteRunway": {
"length": 5,
"openEnd": 1
}
}
},
"flashSuitChecked": true,
"blueSuitChecked": true
},
{
"id": 22,
"link": [
2,
2
],
"name": "Leave With Temporary Blue (Power Off)",
"requires": [
{
"not": "f_DefeatedPhantoon"
},
"canRiskPermanentLossOfAccess",
"h_shinechargeMaxRunway",
"canChainTemporaryBlue"
],
"exitCondition": {
"leaveWithTemporaryBlue": {}
},
"flashSuitChecked": true,
"blueSuitChecked": true
},
{
"id": 78,
"link": [
2,
2
],
"name": "Come in Shinecharged, Gain Flash Suit (Spikesuit)",
"entranceCondition": {
"comeInShinecharged": {}
},
"requires": [
"f_DefeatedPhantoon",
{
"shineChargeFrames": 65
},
{
"spikeHits": 1
},
"h_spikeSuitSpikeHitLeniency",
"canPatientSpikeSuit",
{
"shinespark": {
"frames": 3,
"excessFrames": 3
}
}
],
"flashSuitChecked": true,
"blueSuitChecked": true
},
{
"id": 79,
"link": [
2,
2
],
"name": "Come in Shinecharged, Gain Flash Suit (Spikesuit) - Leave with Shinespark",
"entranceCondition": {
"comeInShinecharged": {}
},
"requires": [
"f_DefeatedPhantoon",
"canUseFlashSuitInitialSpark",
{
"shineChargeFrames": 90
},
{
"spikeHits": 1
},
"h_spikeSuitSpikeHitLeniency",
"canPatientSpikeSuit",
{
"shinespark": {
"frames": 7,
"excessFrames": 0
}
}
],
"exitCondition": {
"leaveWithSpark": {
"position": "bottom"
}
},
"unlocksDoors": [
{
"types": [
"super",
"powerbomb"
],
"requires": []
},
{
"types": [
"missiles"
],
"requires": [
"never"
]
}
],
"flashSuitChecked": true,
"blueSuitChecked": true,
"note": [
"This requires a first frame unmorph."
]
},
{
"id": 80,
"link": [
2,
2
],
"name": "Gain Flash Suit (X-Mode Spikesuit)",
"requires": [
"f_DefeatedPhantoon",
{
"doorUnlockedAtNode": 2
},
"h_spikeXModeSpikeSuit",
{
"shinespark": {
"frames": 3,
"excessFrames": 3
}
}
],
"flashSuitChecked": true,
"blueSuitChecked": true
},
{
"id": 81,
"link": [
2,
2
],
"name": "Gain Flash Suit (X-Mode Spikesuit) - Leave with Shinespark",
"requires": [
"f_DefeatedPhantoon",
{
"doorUnlockedAtNode": 2
},
"canUseFlashSuitInitialSpark",
"h_spikeXModeSpikeSuit",
{
"shinespark": {
"frames": 9,
"excessFrames": 0
}
}
],
"exitCondition": {
"leaveWithSpark": {
"position": "bottom"
}
},
"flashSuitChecked": true,
"blueSuitChecked": true,
"note": [
"This requires a first frame Spikesuit unmorph."
]
},
{
"id": 84,
"link": [
2,
2
],
"name": "X-Mode Shinecharge, R-Mode Pause Abuse Spark Interrupt",
"entranceCondition": {
"comeInWithRMode": {}
},
"requires": [
"f_DefeatedPhantoon",
"canBeVeryLucky",
"h_CrystalFlashForReserveEnergy",
"h_usePowerBomb",
"canOffScreenMovement",
"canXMode",
{
"spikeHits": 1
},
"h_XModeSpikeHit",
"h_shinechargeMaxRunway",
{
"autoReserveTrigger": {}
},
{
"spikeHits": 2
},
"canRModePauseAbuseSparkInterrupt"
],
"flashSuitChecked": true,
"blueSuitChecked": true,
"note": [
"Crystal Flash, enter X-Mode on the spikes and shinecharge. Use the spikes to pause abuse and interrupt shinespark."
],
"devNote": [
"canBeVeryLucky added for difficulty placement."
]
},
{
"id": 23,
"link": [
2,
2
],
"name": "Crystal Flash",
"requires": [
"h_CrystalFlash"
],
"flashSuitChecked": true,
"blueSuitChecked": true
},
{
"id": 93,
"link": [
2,
2
],
"name": "Crystal Spark (Power Off)",
"requires": [
{
"not": "f_DefeatedPhantoon"
},
"canRiskPermanentLossOfAccess",
"h_shinechargeMaxRunway",
"h_CrystalSpark"
],
"flashSuitChecked": true,
"blueSuitChecked": true
},
{
"id": 82,
"link": [
2,
3
],
"name": "Leave Shinecharged (X-Mode, Bowling)",
"requires": [
"f_DefeatedPhantoon",
{
"doorUnlockedAtNode": 2
},
"canXMode",
"h_XModeSpikeHit",
"h_shinechargeMaxRunway",
"canShinechargeMovement",
{
"shineChargeFrames": 145
}
],
"exitCondition": {
"leaveShinecharged": {}
},
"unlocksDoors": [
{
"types": [
"super"
],
"requires": []
},
{
"types": [
"missiles",
"powerbomb"
],
"requires": [
"never"
]
}
],
"setsFlags": [
"f_UsedBowlingStatue"
],
"flashSuitChecked": true,
"blueSuitChecked": true,
"note": "Samus's shinecharge frames are paused while riding the Bowling Chozo."
},
{
"id": 83,
"link": [
2,
3
],
"name": "Leave Shinecharged (Speedkeep Shinecharge, Bowling)",
"entranceCondition": {
"comeInRunning": {
"speedBooster": "yes",
"minTiles": 19
}
},
"requires": [
"f_DefeatedPhantoon",
"h_speedJump",
"canSpeedKeep",
"h_shinechargeMaxRunway",
{
"spikeHits": {
"mul": [
3,
"n_speedKeepAttempts"
]
}
},
{
"shineChargeFrames": 145
}
],
"exitCondition": {
"leaveShinecharged": {}
},
"unlocksDoors": [
{
"types": [
"super"
],
"requires": []
},
{
"types": [
"missiles",
"powerbomb"
],
"requires": [
"never"
]
}
],
"setsFlags": [
"f_UsedBowlingStatue"
],
"flashSuitChecked": true,
"blueSuitChecked": true,
"note": "Samus's shinecharge frames are paused while riding the Bowling Chozo."
},
{
"id": 24,
"link": [
2,
6
],
"name": "Grapple",
"requires": [
"Grapple",
"h_midAirShootUp"
],
"flashSuitChecked": true,
"blueSuitChecked": true
},
{
"id": 25,
"link": [
2,
6
],
"name": "Space Jump",
"requires": [
"SpaceJump"
],
"flashSuitChecked": true,
"blueSuitChecked": true
},
{
"id": 97,
"link": [
2,
6
],
"name": "Come In Shinecharging, Shinespark",
"entranceCondition": {
"comeInShinecharging": {
"length": 2,
"openEnd": 0
}
},
"requires": [
{
  "or": [
    {
      "shinespark": {
        "frames": 89,
        "excessFrames": 7
      }
    },
    {
      "and": [
        "canHorizontalMidairShinespark",
        {
          "shinespark": {
            "frames": 82,
            "excessFrames": 9
          }
        }
      ]
    }
  ]
}
],
"flashSuitChecked": true,
"blueSuitChecked": true
},
{
"id": 74,
"link": [
2,
6
],
"name": "Speed Jump 1-Hit Bowling",
"entranceCondition": {
"comeInRunning": {
"speedBooster": "yes",
"minTiles": 28
}
},
"requires": [
"h_speedJump",
"canInsaneJump",
"canMomentumConservingMorph",
"canUseIFrames",
{
"spikeHits": 1
}
],
"flashSuitChecked": true,
"blueSuitChecked": true,
"note": [
"Jump into the room and morph along the ceiling to maximize distance.",
"Unmorph while entering the spikes to minimize knockback",
"Then build up speed and airball again to cross the spikes."
]
},
{
"id": 75,
"link": [
2,
6
],
"name": "Tricky Speed Jump 1-Hit Bowling",
"entranceCondition": {
"comeInRunning": {
"speedBooster": "yes",
"minTiles": 25
}
},
"requires": [
"h_speedJump",
"canInsaneJump",
"canMomentumConservingMorph",
"canInsaneMidAirMorph",
"canUseIFrames",
{
"spikeHits": 1
}
],
"flashSuitChecked": true,
"blueSuitChecked": true,
"note": [
"Jump into the room and morph along the ceiling to maximize distance.",
"Unmorph while entering the spikes to minimize knockback",
"Then build up speed and airball again to cross the spikes.",
"With only a short runway available, high precision is required."
]
},
{
"id": 26,
"link": [
2,
6
],
"name": "Spring Fling 1-Hit Bowling (Come in Running)",
"entranceCondition": {
"comeInRunning": {
"speedBooster": "yes",
"minTiles": 12
}
},
"requires": [
"h_speedJump",
"canTrickyJump",
"canSpringFling",
"h_unpauseKeepMomentum",
"canLateralMidAirMorph",
"canUseIFrames",
{
"spikeHits": 1
}
],
"flashSuitChecked": true,
"blueSuitChecked": true,
"note": [
"Start with Spring Ball disabled. Jump over the spikes and mid-air morph.",
"Spring fling on the way down, Spring Ball bounce through the spikes, then spring fling again to reach the statue taking only one spike hit."
]
},
{
"id": 76,
"link": [
2,
6
],
"name": "Spring Fling 1-Hit Bowling (Come in With Spring Ball Bounce)",
"entranceCondition": {
"comeInWithSpringBallBounce": {
"speedBooster": "yes",
"movementType": "any",
"remoteAndLandingMinTiles": [
[
14,
1
]
]
}
},
"requires": [
"canTrickyJump",
"canSpringFling",
"canUseIFrames",
{
"spikeHits": 1
}
],
"flashSuitChecked": true,
"blueSuitChecked": true,
"note": [
"Enter the room with a mockball or bounce.",
"Time a pause to unequip Spring Ball soon after bouncing after the spike hit.",
"Pause again to re-equip Spring Ball on the way down."
],
"devNote": [
"This can be done with 13 tiles of run speed, with greater difficulty."
]
},
{
"id": 27,
"link": [
2,
6
],
"name": "2-hit Bowling",
"requires": [
"canDash",
"canTrickyJump",
"canUseIFrames",
{
"or": [
"canHorizontalDamageBoost",
"canInsaneJump"
]
},
{
"spikeHits": 2
}
],
"flashSuitChecked": true,
"blueSuitChecked": true,
"note": "This is doable even without any momentum from a previous room, but pretty tight."
},
{
"id": 28,
"link": [
2,
6
],
"name": "2-hit Speed Bowling",
"requires": [
"canUseIFrames",
"h_speedJump",
{
"spikeHits": 2
}
],
"flashSuitChecked": true,
"blueSuitChecked": true,
"note": "A bit easier than 2-hit bowling"
},
{
"id": 29,
"link": [
2,
6
],
"name": "3-hit Bowling",
"requires": [
"canDash",
"canUseIFrames",
{
"spikeHits": 3
}
],
"flashSuitChecked": true,
"blueSuitChecked": true
},
{
"id": 30,
"link": [
2,
6
],
"name": "Spike Run",
"requires": [
"canDash",
{
"spikeHits": 6
}
],
"flashSuitChecked": true,
"blueSuitChecked": true
},
{
"id": 99,
"link": [
2,
6
],
"name": "Blue Suit Damage Boosts",
"requires": [
{
"haveBlueSuit": {}
},
{
"tech": "canHorizontalDamageBoost"
},
"canBlueSuitSpikeJump",
{
"noFlashSuit": {}
},
{
"spikeHits": 6
}
],
"flashSuitChecked": true,
"blueSuitChecked": true
},
{
"id": 100,
"link": [
2,
6
],
"name": "Blue Suit Spike Jumps",
"requires": [
{
"haveBlueSuit": {}
},
"canBlueSuitSpikeJump",
{
"spikeHits": 8
}
],
"flashSuitChecked": true,
"blueSuitChecked": true
},
{
"id": 31,
"link": [
2,
6
],
"name": "Shinespark",
"entranceCondition": {
"comeInWithSpark": {}
},
"requires": [
{
  "shinespark": {
    "frames": 91,
    "excessFrames": 8
  }
}
],
"flashSuitChecked": true,
"blueSuitChecked": true
},
{
"id": 32,
"link": [
2,
6
],
"name": "Use Stored Spark",
"requires": [
"canHorizontalMidairShinespark",
"h_storedSpark",
"canDash",
{
"shinespark": {
"frames": 82,
"excessFrames": 8
}
}
],
"flashSuitChecked": true,
"blueSuitChecked": true
},
{
"id": 33,
"link": [
2,
6
],
"name": "X-Mode",
"requires": [
"canXMode",
"h_XModeSpikeHit"
],
"flashSuitChecked": true,
"blueSuitChecked": true,
"note": "Move in X-Mode until the Chozo Statue becomes visible and then jump before releasing X-Ray."
},
{
"id": 85,
"link": [
2,
6
],
"name": "X-Mode Shinecharge, R-Mode Pause Abuse Spark Interrupt",
"entranceCondition": {
"comeInWithRMode": {}
},
"requires": [
"f_DefeatedPhantoon",
"canBeVeryLucky",
"h_CrystalFlashForReserveEnergy",
"h_usePowerBomb",
"canOffScreenMovement",
"canXMode",
"h_XModeSpikeHit",
"h_shinechargeMaxRunway",
{
"autoReserveTrigger": {}
},
"canHorizontalDamageBoost",
"canRModePauseAbuseSparkInterrupt"
],
"flashSuitChecked": true,
"blueSuitChecked": true,
"note": [
"Crystal Flash and use another Power Bomb, then enter X-Mode on the spikes.",
"Arm pump towards the statue and shinecharge once Samus appears to move into the border between the second and third spike",
"Exit X-Mode, then jump back toward the spikes to pause abuse and interrupt shinespark, using a damage boost back toward the statue to get off of them."
],
"devNote": [
"canBeVeryLucky added for difficulty placement."
]
},
{
"id": 34,
"link": [
2,
6
],
"name": "Ceiling Bomb Jump",
"requires": [
{
"notable": "Ceiling Bomb Jump"
},
"canLongCeilingBombJump",
"canBeVeryPatient"
],
"flashSuitChecked": true,
"blueSuitChecked": true,
"note": "This is a very long ceiling bomb jump.",
"devNote": "There is no reason to go back to the left."
},
{
"id": 63,
"link": [
2,
7
],
"name": "G-Mode, Bowling",
"entranceCondition": {
"comeInWithGMode": {
"mode": "any",
"morphed": false
}
},
"requires": [
"canComplexGMode",
"f_DefeatedPhantoon",
"Morph",
{
"or": [
"SpaceJump",
{
"and": [
"canDash",
"canUseIFrames",
{
"spikeHits": 2
},
{
"or": [
"canHorizontalDamageBoost",
"canInsaneJump",
"h_speedJump",
{
"spikeHits": 1
}
]
}
]
},
{
"and": [
{
"haveBlueSuit": {}
},
{
"tech": "canHorizontalDamageBoost"
},
"canBlueSuitSpikeJump",
{
"spikeHits": 6
}
]
},
{
"and": [
{
"blueSuitShinecharge": {}
},
"canDash",
{
"shinespark": {
"frames": 80,
"excessFrames": 7
}
}
]
}
]
}
],
"flashSuitChecked": true,
"blueSuitChecked": true,
"note": [
"Ride the statue, which will not take Samus down, and will instead drop her off in the spike pit somewhat near the door."
]
},
{
"id": 64,
"link": [
2,
7
],
"name": "G-Mode, Crystal Flash, Bowling",
"entranceCondition": {
"comeInWithGMode": {
"mode": "any",
"morphed": false
}
},
"requires": [
"canComplexGMode",
"f_DefeatedPhantoon",
"h_CrystalFlash",
{
"or": [
"SpaceJump",
{
"and": [
"canDash",
"canUseIFrames",
"h_pauseAbuseMinimalReserveRefill",
"h_pauseAbuseMinimalReserveRefill",
"h_pauseAbuseMinimalReserveRefill"
]
},
{
"and": [
"canUseIFrames",
"h_speedJump",
"h_pauseAbuseMinimalReserveRefill",
"h_pauseAbuseMinimalReserveRefill"
]
},
{
"and": [
{
"blueSuitShinecharge": {}
},
"canDash",
{
"shinespark": {
"frames": 80,
"excessFrames": 7
}
}
]
}
]
}
],
"flashSuitChecked": true,
"blueSuitChecked": true,
"note": [
"Crystal Flash then pause abuse to cross the spikeway with minimal Energy loss.",
"Ride the statue, which will not take Samus down, and will instead drop her off in the spike pit somewhat near the door."
]
},
{
"id": 65,
"link": [
2,
7
],
"name": "G-Mode Morph, Bowling, Spring Fling",
"entranceCondition": {
"comeInWithGMode": {
"mode": "any",
"morphed": true
}
},
"requires": [
"canComplexGMode",
"f_DefeatedPhantoon",
"h_artificialMorphSpringFling",
"canDash",
"canInsaneJump",
{
"spikeHits": 4
}
],
"flashSuitChecked": true,
"blueSuitChecked": true,
"note": [
"Spring fling many times to cross the spikeway with as few hits as possible.",
"Ride the statue, which will not take Samus down, and will instead drop her off in the spike pit somewhat near the door."
]
},
{
"id": 66,
"link": [
2,
7
],
"name": "G-Mode Morph, Bowling, Long Ceiling IBJ",
"entranceCondition": {
"comeInWithGMode": {
"mode": "any",
"morphed": true
}
},
"requires": [
"canComplexGMode",
"f_DefeatedPhantoon",
{
"notable": "Ceiling Bomb Jump"
},
"canLongCeilingBombJump",
"canBeVeryPatient"
],
"flashSuitChecked": true,
"blueSuitChecked": true,
"note": [
"This is a very long ceiling bomb jump.",
"Ride the statue, which will not take Samus down, and will instead drop her off in the spike pit somewhat near the door."
]
},
{
"id": 35,
"link": [
3,
2
],
"name": "X-Ray Climb",
"entranceCondition": {
"comeInWithDoorStuckSetup": {}
},
"requires": [
{
"notable": "X-Ray Climb"
},
"canXRayClimb",
{
"or": [
{
"and": [
{
"spikeHits": 3
},
{
"resourceCapacity": [
{
"type": "RegularEnergy",
"count": 199
}
]
}
]
},
{
"and": [
{
"not": "f_DefeatedPhantoon"
},
"canRiskPermanentLossOfAccess"
]
},
{
"and": [
"canOffScreenMovement",
{
"or": [
{
"and": [
"canDash",
{
"spikeHits": 1
},
"canUseIFrames"
]
},
{
"and": [
"canBlueSuitSpikeJump",
{
"spikeHits": 2
}
]
},
{
"and": [
"canBlueSuitSpikeJump",
"canWallJump",
"canBeVeryPatient",
{
"spikeHits": 1
}
]
},
"Grapple",
{
"and": [
"SpaceJump",
"canInsaneJump",
"canBeVeryPatient"
]
}
]
}
]
}
]
}
],
"exitCondition": {
"leaveNormally": {}
},
"unlocksDoors": [
{
"types": [
"ammo"
],
"requires": []
}
],
"flashSuitChecked": true,
"blueSuitChecked": true,
"note": [
"Climb up about half a screen.",
"If Phantoon is dead, the last part of the climb should be done carefully to avoid triggering collision with the spikes:",
"Do not press forward or turn-around except while X-Ray is active.",
"For each X-ray stand-up, release the turn-around input quickly to make sure that it is not still held after X-Ray deactivates;",
"alternatively, hold both angle up and angle down to prevent Samus from touching the spikes",
"(though this no longer gives protection if climbing so high that the bottom of Samus' hitbox reaches the spikes).",
"Once Samus is high enough, unequip X-Ray, jump up (from either standing or crouch) to clip past the spikes, and land, taking a single spike hit.",
"Then use the i-frames from the spike hit to run and jump to the left to make it to the door.",
"Samus is high enough after the top of her arm cannon first becomes visible at the bottom of the screen; or up to 3 additional climbs can be performed after that point.",
"In case of an accidental spike collision, it is possible to recover:",
"Unless Samus climbed higher than needed, she will still be stuck in the wall, will take a single spike hit, and be able to continue climbing.",
"With Grapple it is possible to swing on the Grapple blocks, avoiding all spike damage.",
"Spike damage can also be avoided with Space Jump, by doing a stationary turn-around spin jump, which is very precise."
],
"detailNote": [
"With a blue suit, Samus will instantly lose i-frames, making the spikes very dangerous."
],
"devNote": [
"FIXME: The canBeVeryPatient is for difficulty placement, as the damageless Space Jump version would likely require many attempts.",
"The resourceCapacity requirement is to ensure that reserve energy management will not be needed for the lower-difficulty version of the strat;",
"this could be refined since suits can affect spike damage, but we don't yet have a good way to represent that cleanly, given that randomizers are likely to modify suit damage protection.",
"The leaveNormally is because the camera will be broken and we don't want to require unreasonable things without being able to reset it."
]
},
{
"id": 36,
"link": [
3,
3
],
"name": "Leave with Runway",
"requires": [],
"exitCondition": {
"leaveWithRunway": {
"length": 1,
"openEnd": 1
}
},
"flashSuitChecked": true,
"blueSuitChecked": true
},
{
"id": 59,
"link": [
3,
3
],
"name": "Leave With Side Platform",
"requires": [
{
  "obstaclesNotCleared": [
    "C"
  ]
}
],
"exitCondition": {
"leaveWithSidePlatform": {
"height": 2,
"runway": {
"length": 10,
"openEnd": 0,
"steepDownTiles": 6
},
"obstruction": [
1,
0
]
}
},
"flashSuitChecked": true,
"blueSuitChecked": true,
"devNote": [
"Max extra run speed $2.7."
]
},
{
"id": 37,
"link": [
3,
3
],
"name": "Leave Spinning",
"requires": [
{
  "obstaclesNotCleared": [
    "C"
  ]
}
],
"exitCondition": {
"leaveSpinning": {
"remoteRunway": {
"length": 8,
"openEnd": 1
}
}
},
"flashSuitChecked": true,
"blueSuitChecked": true
},
{
"id": 38,
"link": [
3,
3
],
"name": "Leave With Mockball",
"requires": [
{
  "obstaclesNotCleared": [
    "C"
  ]
}
],
"exitCondition": {
"leaveWithMockball": {
"remoteRunway": {
"length": 7,
"openEnd": 1
},
"landingRunway": {
"length": 1,
"openEnd": 1
}
}
},
"flashSuitChecked": true,
"blueSuitChecked": true
},
{
"id": 39,
"link": [
3,
3
],
"name": "Leave With Spring Ball Bounce",
"requires": [
{
  "obstaclesNotCleared": [
    "C"
  ]
}
],
"exitCondition": {
"leaveWithSpringBallBounce": {
"remoteRunway": {
"length": 6,
"openEnd": 1
},
"landingRunway": {
"length": 1,
"openEnd": 1
},
"movementType": "uncontrolled"
}
},
"flashSuitChecked": true,
"blueSuitChecked": true
},
{
"id": 40,
"link": [
3,
3
],
"name": "Leave Space Jumping",
"requires": [
{
  "obstaclesNotCleared": [
    "C"
  ]
}
],
"exitCondition": {
"leaveSpaceJumping": {
"remoteRunway": {
"length": 5,
"openEnd": 1
}
}
},
"flashSuitChecked": true,
"blueSuitChecked": true
},
{
"id": 41,
"link": [
3,
3
],
"name": "Crystal Flash",
"requires": [
"h_CrystalFlash"
],
"flashSuitChecked": true,
"blueSuitChecked": true
},
{
"id": 42,
"link": [
3,
4
],
"name": "Bomb the Blocks",
"requires": [
"h_bombThings"
],
"flashSuitChecked": true,
"blueSuitChecked": true,
"note": "If using PBs, place it far enough right to reach the shot blocks."
},
{
"id": 43,
"link": [
3,
4
],
"name": "Long Beam and Screw",
"requires": [
"ScrewAttack",
"Morph",
"Plasma"
],
"flashSuitChecked": true,
"blueSuitChecked": true,
"note": "Plasma or Charged Spazer can reach the shot blocks through the tunnel while crouched.",
"devNote": [
"Plasma is somewhat known as a way to reach the blocks.",
"Charge+Spazer is not, and to shoot around the Bowling Chozo you would add Wave to make things more complicated.",
"If we're requiring strat knowledge here, camera unlock is more generally applicable.",
"A very precise wave shot from the stairs can also work but is much harder and less obvious than the camera unlock strat."
]
},
{
"id": 44,
"link": [
3,
4
],
"name": "Missile Chozo Camera Unlock",
"requires": [
{
"notable": "Missile Chozo Camera Unlock"
},
"ScrewAttack",
"Morph",
"canCameraManip",
"canHeroShot"
],
"flashSuitChecked": true,
"blueSuitChecked": true,
"note": [
"Break the shot blocks with Power Beam by first rolling into the morph tunnel to unlock camera scroll for this room.",
"The blocks can now be cleared from the left side by shooting and quickly scrolling the camera to the right a small amount.",
"A shot from crouch will reach the bottom block by following the shot as a ball, or wave beam works from the stairs.",
"Screw Attack is still needed to clear the bomb blocks."
]
},
{
"id": 86,
"link": [
3,
4
],
"name": "Blue Suit",
"requires": [
{
"haveBlueSuit": {}
},
"Morph",
"canCameraManip",
"canHeroShot"
],
"flashSuitChecked": true,
"blueSuitChecked": true,
"note": [
"Roll most of the way into the morph tunnel to unlock the camera scroll, then roll back left, crouch, fire a shot, and follow it to the right, to clear the shot blocks."
]
},
{
"id": 87,
"link": [
3,
4
],
"name": "R-Mode Pause Abuse Spark Interrupt",
"entranceCondition": {
"comeInWithRMode": {}
},
"requires": [
"f_DefeatedPhantoon",
{
"or": [
"h_bombThings",
{
"and": [
"ScrewAttack",
"Morph",
{
"or": [
"Plasma",
{
"and": [
{
"notable": "Missile Chozo Camera Unlock"
},
"canCameraManip",
"canHeroShot"
]
}
]
}
]
}
]
},
"h_CrystalFlashForReserveEnergy",
{
"canShineCharge": {
"usedTiles": 25,
"openEnd": 2
}
},
"canHorizontalDamageBoost",
{
"autoReserveTrigger": {}
},
"canRModePauseAbuseSparkInterrupt",
{
"or": [
"canWallJump",
"HiJump",
"canTrickyDashJump",
{
"spikeHits": 1
}
]
}
],
"clearsObstacles": [
"A"
],
"collectsItems": [
4
],
"flashSuitChecked": true,
"blueSuitChecked": true,
"note": [
"Get through the Morph tunnel to the robot area. Flush the robots into the spike pits and Crystal Flash to clear the Chozo statue.",
"Shinecharge and then use a speedy jump up to the spikes in the right shaft. Pause, and jump into the spikes. Delay the damage boost",
"so that Samus will not hit the spikes again after interrupt.",
"Alternatively, flush both robots into the left pit and use the right pit to pause abuse and damage boost to gain some height. Quickly",
"morph after the interrupt to avoid taking more than one spike hit."
]
},
{
"id": 73,
"link": [
3,
4
],
"name": "Temporary Blue Break Bomb Blocks (Come in With Speedball)",
"entranceCondition": {
"comeInSpeedballing": {
"runway": {
"length": 0,
"openEnd": 1
}
}
},
"requires": [
{
"tech": "canTemporaryBlue"
},
{
"notable": "Missile Chozo Camera Unlock"
},
"canCameraManip",
"canHeroShot"
],
"flashSuitChecked": true,
"blueSuitChecked": true,
"note": [
"Land on the crumble blocks while unmorphing, in order to retain temporary blue while falling, breaking the bomb blocks",
"Roll most of the way into the morph tunnel to unlock the camera scroll, then roll back left, crouch, fire a shot, and follow it to the right, to clear the shot blocks."
],
"detailNote": [
"It is possible to keep a flash suit with this method."
],
"devNote": [
"If we had a comeInWithSpeedball entrance condition, it should be used instead."
]
},
{
"id": 55,
"link": [
3,
4
],
"name": "Temporary Blue Break Bomb Blocks (Come in With Temporary Blue)",
"entranceCondition": {
"comeInWithTemporaryBlue": {}
},
"requires": [
"canChainTemporaryBlue",
{
"notable": "Missile Chozo Camera Unlock"
},
"canCameraManip",
"canHeroShot"
],
"flashSuitChecked": true,
"blueSuitChecked": true,
"note": [
"Land on the crumble blocks while unmorphing, in order to retain temporary blue while falling, breaking the bomb blocks",
"Roll most of the way into the morph tunnel to unlock the camera scroll, then roll back left, crouch, fire a shot, and follow it to the right, to clear the shot blocks."
]
},
{
"id": 45,
"link": [
4,
3
],
"name": "Base",
"requires": [
"h_bombThings",
{
"obstaclesNotCleared": [
"B"
]
}
],
"flashSuitChecked": true,
"blueSuitChecked": true,
"note": "The bomb block respawns. It must be broken on the way back too."
},
{
"id": 88,
"link": [
4,
3
],
"name": "Blue Suit",
"requires": [
{
"haveBlueSuit": {}
},
"Morph",
{
"obstaclesNotCleared": [
"B"
]
}
],
"flashSuitChecked": true,
"blueSuitChecked": true
},
{
"id": 46,
"link": [
4,
3
],
"name": "Temporary Blue Spring Ball Bounce",
"requires": [
{
"obstaclesNotCleared": [
"B"
]
},
{
"or": [
{
"and": [
"f_DefeatedPhantoon",
{
"canShineCharge": {
"usedTiles": 16,
"openEnd": 0
}
}
]
},
{
"and": [
{
"obstaclesCleared": [
"A"
]
},
{
"getBlueSpeed": {
"usedTiles": 35,
"openEnd": 1
}
},
{
"or": [
"f_DefeatedPhantoon",
"canSpeedball"
]
}
]
}
]
},
"canTemporaryBlue",
"canSpringBallBounce"
],
"flashSuitChecked": true,
"blueSuitChecked": true,
"note": [
"Use Temporary Blue to bounce into the Morph Tunnel with temp blue then continue to the bomb block using SpringBall.",
"Just left of center of the pit is a good place to bounce for entering the tunnel.",
"Requires either a tight shortcharge or clearing the power bomb blocks to open up more runway."
],
"devNote": [
"Killing phantoon only removes requirements for the strat.",
"The runway is a bit longer with Phantoon killed and the Power Bomb blocks broken, but it shouldn't matter at this difficulty.",
"FIXME: This needs the item to be collected or unspawned, at least if using the long runway variant."
]
},
{
"id": 56,
"link": [
4,
3
],
"name": "Leave With Temporary Blue (Spring Ball Bounce, Pause Remorph)",
"requires": [
{
"obstaclesNotCleared": [
"B"
]
},
{
"or": [
{
"and": [
"f_DefeatedPhantoon",
{
"canShineCharge": {
"usedTiles": 16,
"openEnd": 0
}
}
]
},
{
"and": [
{
"obstaclesCleared": [
"A"
]
},
{
"getBlueSpeed": {
"usedTiles": 35,
"openEnd": 1
}
},
{
"or": [
"f_DefeatedPhantoon",
"canSpeedball"
]
}
]
}
]
},
"canSpringBallBounce",
"canPauseRemorphTemporaryBlue"
],
"exitCondition": {
"leaveWithTemporaryBlue": {}
},
"unlocksDoors": [
{
"types": [
"ammo"
],
"requires": []
}
],
"flashSuitChecked": true,
"blueSuitChecked": true,
"note": [
"Gain temporary blue, and bounce into the morph tunnel, using Spring Ball to reach the left side while retaining temporary blue.",
"After bouncing up out of the tunnel, unmorph, aim down, and use a pause buffer to remorph and land or bounce on the door frame, chaining temporary blue into the next room.",
"FIXME: This needs the item to be collected or unspawned, at least if using the long runway variant."
]
},
{
"id": 47,
"link": [
4,
3
],
"name": "Blind Traversal",
"requires": [
{
"obstaclesCleared": [
"A",
"B"
]
},
"h_bombThings",
"canOffScreenMovement",
{
"or": [
{
"and": [
"canXRayStandUp",
"canPartialFloorClip",
"h_additionalBomb"
]
},
{
"and": [
{
"or": [
{
"and": [
{
"canShineCharge": {
"usedTiles": 35,
"openEnd": 1
}
},
"h_ShinesparksCostEnergy",
{
"shinespark": {
"frames": 0,
"excessFrames": 0
}
}
]
},
"f_DefeatedPhantoon"
]
},
"h_CrystalFlash"
]
}
]
}
],
"flashSuitChecked": true,
"blueSuitChecked": true,
"note": [
"The shot blocks must be broken using Bombs or Power Bombs because Beams will instantly despawn.",
"Use X-Ray or a Crystal Flash to stand up, followed by a Partial Floor clip to jump through the Crumble blocks."
],
"devNote": "FIXME: This can be done with a blue suit as well, but it still requires one Power Bomb, and falling in the spikes is extra deadly."
},
{
"id": 94,
"link": [
4,
4
],
"name": "Crystal Spark",
"requires": [
{
"obstaclesCleared": [
"A"
]
},
"h_shinechargeMaxRunway",
"h_CrystalSpark"
],
"flashSuitChecked": true,
"blueSuitChecked": true
},
{
"id": 60,
"link": [
4,
4
],
"name": "Gain Flash Suit (Spikesuit)",
"requires": [
"f_DefeatedPhantoon",
{
"obstaclesNotCleared": [
"B"
]
},
{
"or": [
{
"and": [
{
"obstaclesCleared": [
"A"
]
},
{
"canShineCharge": {
"usedTiles": 30,
"openEnd": 1
}
}
]
},
{
"canShineCharge": {
"usedTiles": 14,
"openEnd": 1
}
}
]
},
{
"spikeHits": 1
},
"h_spikeSuitSpikeHitLeniency",
"canSpikeSuit",
{
"shinespark": {
"frames": 6,
"excessFrames": 6
}
}
],
"flashSuitChecked": true,
"blueSuitChecked": true
},
{
"id": 101,
"link": [
4,
4
],
"name": "Gain Blue Suit (X-Mode)",
"requires": [
"f_DefeatedPhantoon",
{
"obstaclesNotCleared": [
"B"
]
},
{
"or": [
{
"and": [
{
"obstaclesCleared": [
"A"
]
},
{
"canShineCharge": {
"usedTiles": 30,
"openEnd": 1
}
}
]
},
{
"canShineCharge": {
"usedTiles": 14,
"openEnd": 1
}
}
]
},
{
"spikeHits": 1
},
"h_spikeXModeBlueSuit",
{
"shinespark": {
"frames": 0,
"excessFrames": 0
}
}
],
"flashSuitChecked": true,
"blueSuitChecked": true
},
{
"id": 48,
"link": [
4,
5
],
"name": "Shinespark",
"requires": [
{
"or": [
{
"obstaclesCleared": [
"A"
]
},
"h_usePowerBomb"
]
},
{
"or": [
{
"canShineCharge": {
"usedTiles": 35,
"openEnd": 1
}
},
{
"and": [
"f_DefeatedPhantoon",
"h_shinechargeMaxRunway"
]
}
]
},
{
"or": [
{
"shinespark": {
"frames": 40,
"excessFrames": 3
}
},
{
"and": [
"canMidairShinespark",
{
"shinespark": {
"frames": 32,
"excessFrames": 2
}
}
]
},
{
"and": [
"canMidairShinespark",
"HiJump",
{
"shinespark": {
"frames": 29,
"excessFrames": 3
}
}
]
},
{
"and": [
"canShinechargeMovementComplex",
"canSpeedyJump",
{
"or": [
{
"shinespark": {
"frames": 27,
"excessFrames": 2
}
},
{
"and": [
"HiJump",
{
"shinespark": {
"frames": 18,
"excessFrames": 2
}
}
]
}
]
}
]
}
]
}
],
"clearsObstacles": [
"A"
],
"flashSuitChecked": true,
"blueSuitChecked": true
},
{
"id": 98,
"link": [
4,
5
],
"name": "Wall Jump Into Shinespark",
"requires": [
{
"or": [
{
"obstaclesCleared": [
"A"
]
},
"h_usePowerBomb"
]
},
{
"or": [
{
"canShineCharge": {
"usedTiles": 35,
"openEnd": 1
}
},
{
"and": [
"f_DefeatedPhantoon",
"h_shinechargeMaxRunway"
]
}
]
},
"canShinechargeMovementComplex",
"canConsecutiveWallJump",
{
"or": [
{
"shinespark": {
"frames": 17,
"excessFrames": 2
}
},
{
"and": [
"HiJump",
{
"shinespark": {
"frames": 10,
"excessFrames": 2
}
}
]
},
{
"and": [
"canShinechargeMovementTricky",
"canFastWallJumpClimb",
{
"or": [
{
"shinespark": {
"frames": 10,
"excessFrames": 2
}
},
{
"and": [
"HiJump",
{
"shinespark": {
"frames": 6,
"excessFrames": 2
}
}
]
}
]
}
]
}
]
}
],
"clearsObstacles": [
"A"
],
"flashSuitChecked": true,
"blueSuitChecked": true,
"note": "Wall jump repeatedly off of the left wall, jump before the spikes and hold jump while passing them to avoid wall jump checking them."
},
{
"id": 89,
"link": [
4,
5
],
"name": "Climb with Blue Suit",
"requires": [
{
"or": [
{
"obstaclesCleared": [
"A"
]
},
"h_usePowerBomb"
]
},
{
"haveBlueSuit": {}
},
{
"or": [
"canConsecutiveWallJump",
"SpaceJump",
"canLongIBJ"
]
}
],
"clearsObstacles": [
"A"
],
"flashSuitChecked": true,
"blueSuitChecked": true,
"note": [
"If Phantoon is killed, hold right while wall jumping, jump just before the spikes and after them.",
"Don't release jump while passing the spikes to prevent taking a hit."
]
},
{
"id": 49,
"link": [
4,
5
],
"name": "Use Flash Suit at the Top",
"requires": [
{
"or": [
{
"obstaclesCleared": [
"A"
]
},
"h_usePowerBomb"
]
},
{
"useFlashSuit": {}
},
{
"shinespark": {
"frames": 5,
"excessFrames": 3
}
},
{
"or": [
"canConsecutiveWallJump",
"SpaceJump",
{
"and": [
"canLongIBJ",
"canUnmorphBombBoost"
]
}
]
}
],
"clearsObstacles": [
"A"
],
"flashSuitChecked": true,
"blueSuitChecked": true,
"note": [
"If Phantoon is killed, hold right while wall jumping, jump just before the spikes and after them.",
"Don't release jump while passing the spikes to prevent taking a hit."
]
},
{
"id": 90,
"link": [
4,
5
],
"name": "Use Stored Spark (No Wall Jump)",
"requires": [
{
"or": [
{
"obstaclesCleared": [
"A"
]
},
"h_usePowerBomb"
]
},
"h_storedSpark",
{
"or": [
{
"shinespark": {
"frames": 32,
"excessFrames": 3
}
},
{
"and": [
"HiJump",
{
"shinespark": {
"frames": 29,
"excessFrames": 3
}
}
]
}
]
}
],
"clearsObstacles": [
"A"
],
"wallJumpAvoid": true,
"flashSuitChecked": true,
"blueSuitChecked": true,
"devNote": "There is no point in using a blue suit to spark or sparking at the bottom if Samus can wall jump."
},
{
"id": 50,
"link": [
5,
1
],
"name": "Crystal Flash Grapple Clip",
"requires": [
"h_jumpIntoCrystalFlashClip",
"Grapple",
{
"obstaclesNotCleared": [
"B"
]
}
],
"exitCondition": {
"leaveNormally": {}
},
"unlocksDoors": [
{
"types": [
"ammo"
],
"requires": []
}
],
"flashSuitChecked": true,
"blueSuitChecked": true,
"note": "Menu to Grappling Beam before the Crystal Flash ends and mash shoot while holding down."
},
{
"id": 51,
"link": [
5,
1
],
"name": "Damage Down then Crystal Flash Grapple Clip",
"requires": [
{
"obstaclesCleared": [
"B"
]
},
"h_ShinesparksCostEnergy",
"h_jumpIntoCrystalFlashClip",
"Grapple",
"canOffScreenMovement",
{
"canShineCharge": {
"usedTiles": 25,
"openEnd": 1
}
},
{
"shinespark": {
"frames": 0,
"excessFrames": 0
}
}
],
"exitCondition": {
"leaveNormally": {}
},
"unlocksDoors": [
{
"types": [
"ammo"
],
"requires": []
}
],
"flashSuitChecked": true,
"blueSuitChecked": true,
"note": [
"Fall through the Crumble blocks in order to damage down using either the spikes or repeated Shinesparks.",
"Touching the Chozo statue will lock the camera in a less useful position.",
"Menu to Grappling Beam before the crystal flash ends and mash shoot while holding down."
],
"devNote": [
"FIXME: If power is on, spikes or worker robots can damage Samus,",
"but multiples of 60 may not put Samus into Crystal Flash range, and visiting the robots will lock the camera making the jump-into-CF much harder."
]
},
{
"id": 52,
"link": [
5,
4
],
"name": "Base",
"requires": [
{
"obstaclesCleared": [
"A"
]
},
{
"or": [
{
"obstaclesNotCleared": [
"B"
]
},
"canOffScreenMovement"
]
}
],
"flashSuitChecked": true,
"blueSuitChecked": true
},
{
"id": 53,
"link": [
5,
4
],
"name": "Power Bomb the Chozo Statue",
"requires": [
"h_usePowerBomb",
{
"or": [
{
"obstaclesNotCleared": [
"B"
]
},
"canOffScreenMovement"
]
}
],
"clearsObstacles": [
"A"
],
"flashSuitChecked": true,
"blueSuitChecked": true
},
{
"id": 61,
"link": [
6,
1
],
"name": "Grapple Block, Crystal Flash, X-Ray Climb",
"requires": [
{
"notable": "Grapple Block Crystal Flash"
},
"canUseGrapple",
"canJumpIntoRespawningBlock",
"canTrickyJump",
{
"or": [
"HiJump",
"canTrickySpringBallJump",
{
"and": [
"canSpringBallJumpMidAir",
{
"not": "f_DefeatedPhantoon"
},
"canRiskPermanentLossOfAccess"
]
}
]
},
"h_bombThings",
"h_CrystalFlash",
"canXRayClimb",
{
"or": [
"h_fourTileJumpMorph",
"h_useSpringBall",
"canIBJ",
{
"getBlueSpeed": {
"usedTiles": 16,
"steepDownTiles": 4,
"openEnd": 0
}
},
{
"and": [
{
"not": "f_DefeatedPhantoon"
},
"canRiskPermanentLossOfAccess"
]
}
]
}
],
"exitCondition": {
"leaveNormally": {}
},
"unlocksDoors": [
{
"types": [
"ammo"
],
"requires": []
}
],
"flashSuitChecked": true,
"blueSuitChecked": true,
"note": [
"Jump or Spring Ball jump into a breakable Grapple block.",
"The timing is precise and it can help to break two Grapple blocks to use one as a cue.",
"Crystal Flash then X-ray climb to the region above (less than 1 screen).",
"There is a chance that Samus will not be able to Crystal Flash unless first placing a Bomb or Power Bomb."
],
"devNote": "FIXME: This may be possible with a spike hit and speedy jump."
},
{
"id": 62,
"link": [
6,
1
],
"name": "IBJ into Grapple Block, Crystal Flash, X-Ray Climb",
"requires": [
{
"notable": "Grapple Block Crystal Flash"
},
"canUseGrapple",
"canJumpIntoRespawningBlock",
"canInsaneJump",
"canJumpIntoIBJ",
"canDoubleBombJump",
{
"or": [
{
"spikeHits": 1
},
{
"and": [
{
"not": "f_DefeatedPhantoon"
},
"canRiskPermanentLossOfAccess"
]
}
]
},
"h_CrystalFlash",
"canXRayClimb"
],
"exitCondition": {
"leaveNormally": {}
},
"unlocksDoors": [
{
"types": [
"ammo"
],
"requires": []
}
],
"flashSuitChecked": true,
"blueSuitChecked": true,
"note": [
"IBJ into a breakable Grapple block.",
"The timing is very precise and requires a quick morph and ascent with precisely placed double bomb jumps.",
"Crystal Flash then X-ray climb to the region above (less than 1 screen).",
"There is a chance that Samus will not be able to Crystal Flash unless first placing a Bomb or Power Bomb."
],
"devNote": "FIXME: This may be possible without a spike hit."
},
{
"id": 71,
"link": [
6,
1
],
"name": "Grapple Fling into Grapple Block, Crystal Flash, X-Ray Climb",
"requires": [
{
"notable": "Grapple Block Crystal Flash"
},
"canPreciseGrapple",
"canJumpIntoRespawningBlock",
"canInsaneJump",
"h_bombThings",
"h_CrystalFlash",
"canXRayClimb",
{
"or": [
"h_fourTileJumpMorph",
"h_useSpringBall",
"canIBJ",
{
"getBlueSpeed": {
"usedTiles": 16,
"steepDownTiles": 4,
"openEnd": 0
}
},
{
"and": [
{
"not": "f_DefeatedPhantoon"
},
"canRiskPermanentLossOfAccess"
]
}
]
}
],
"exitCondition": {
"leaveNormally": {}
},
"unlocksDoors": [
{
"types": [
"ammo"
],
"requires": []
}
],
"flashSuitChecked": true,
"blueSuitChecked": true,
"note": [
"Use a Grapple fling to get stuck inside a breakable Grapple block.",
"It can help to break two or more Grapple blocks in a row.",
"Crystal Flash then X-ray climb to the region above (less than 1 screen).",
"There is a chance that Samus will not be able to Crystal Flash unless first placing a Bomb or Power Bomb."
]
},
{
"id": 72,
"link": [
6,
1
],
"name": "Shinespark Slope Clip X-Ray Climb (X-Mode)",
"requires": [
"canXMode",
"h_XModeSpikeHit",
"h_shinechargeMaxRunway",
"canShinechargeMovement",
{
"shinespark": {
"frames": 1,
"excessFrames": 1
}
},
"canShinesparkSlopeClip",
"canXRayClimb",
{
"or": [
{
"getBlueSpeed": {
"usedTiles": 16,
"steepDownTiles": 4,
"openEnd": 0
}
},
"can4HighMidAirMorph"
]
}
],
"exitCondition": {
"leaveNormally": {}
},
"unlocksDoors": [
{
"types": [
"ammo"
],
"requires": []
}
],
"flashSuitChecked": true,
"blueSuitChecked": true,
"note": [
"Use X-mode to gain a shinecharge near the Chozo statue.",
"Jump onto the Chozo statue, press against the wall, and shinespark into it to clip in, then X-Ray climb up."
],
"detailNote": [
"A second spike hit can be avoided by holding an angle button to turn around while in X-mode;",
"arm pump to move out of the spikes before activating the shinecharge and exiting X-mode."
],
"devNote": [
"The leaveNormally is to ensure it won't be required to do the Speed block moondance blind up there."
]
},
{
"id": 96,
"link": [
6,
1
],
"name": "Shinespark Slope Clip X-Ray Climb (Use Stored Spark)",
"requires": [
"h_storedSpark",
{
"shinespark": {
"frames": 1,
"excessFrames": 1
}
},
"canShinesparkSlopeClip",
"canXRayClimb",
{
"or": [
{
"getBlueSpeed": {
"usedTiles": 16,
"steepDownTiles": 4,
"openEnd": 0
}
},
"can4HighMidAirMorph"
]
}
],
"exitCondition": {
"leaveNormally": {}
},
"unlocksDoors": [
{
"types": [
"ammo"
],
"requires": []
}
],
"flashSuitChecked": true,
"blueSuitChecked": true,
"note": [
"Jump onto the Chozo statue, press against the wall, and shinespark into it to clip in, then X-Ray climb up.."
],
"devNote": [
"The leaveNormally is to ensure it won't be required to do the Speed block moondance blind up there."
]
},
{
"id": 54,
"link": [
6,
3
],
"name": "Bowling!",
"requires": [
"f_DefeatedPhantoon",
"Morph"
],
"clearsObstacles": [
"C"
],
"setsFlags": [
"f_UsedBowlingStatue"
],
"flashSuitChecked": true,
"blueSuitChecked": true
},
{
"id": 67,
"link": [
7,
2
],
"name": "G-Mode, Bowling Without Going Down",
"requires": [
"canComplexGMode",
{
"or": [
"h_artificialMorphBombThings",
{
"spikeHits": 1
}
]
},
{
"or": [
"canInsaneJump",
{
"spikeHits": 1
}
]
}
],
"setsFlags": [
"f_UsedBowlingStatue"
],
"flashSuitChecked": true,
"blueSuitChecked": true,
"note": [
"Quickly unmorph and jump to the left edge to take as few spike hits as possible.",
"It is also possible to place a bomb or Power Bomb just before being grabbed by the statue before the bowling ride.",
"Samus will experience the boost after the ride, which can boost her straight onto the statue."
]
},
{
"id": 68,
"link": [
7,
3
],
"name": "G-Mode, Bowling Then Go Down",
"requires": [
"canComplexGMode",
{
"or": [
"h_artificialMorphBombThings",
{
"spikeHits": 1
}
]
},
{
"or": [
"canInsaneJump",
{
"spikeHits": 1
}
]
}
],
"exitCondition": {
"leaveNormally": {}
},
"unlocksDoors": [
{
"types": [
"ammo"
],
"requires": []
}
],
"setsFlags": [
"f_UsedBowlingStatue"
],
"flashSuitChecked": true,
"blueSuitChecked": true,
"note": [
"Quickly unmorph and jump onto the bowling statue. Be careful not to jump below its hand and be pushed back down.",
"It is also possible to place a bomb or Power Bomb just before being grabbed by the statue before the bowling ride.",
"Samus will experience the boost after the ride, which can boost her straight onto the statue.",
"Exit G-mode then jump to the right into the spike pit, which will now have a section that is air. Go to the bottom door to exit the room and fix the camera."
],
"devNote": "FIXME: It is possible to go down and grab one or both items then return, but that is a difficult trek while blind, with the Workrobots awake."
}
],
"notables": [
{
"id": 1,
"name": "Speed Block Moondance",
"note": [
"Use SpeedBooster to construct a structure for Moondancing that has 2 top blocks intact, 2 middle blocks removed, and the bottom left block intact but the bottom right block removed.",
"Crystal Flash inside the middle hole to standup and then begin Moondancing.",
"After Samus sinks through the bottom tile, it is possible to wiggle right and then Turn-Around Aim Cancel to escape to the right."
]
},
{
"id": 2,
"name": "Ceiling Bomb Jump",
"note": "This is a very long ceiling bomb jump."
},
{
"id": 3,
"name": "X-Ray Climb",
"note": [
"Climb up about half a screen.",
"If Phantoon is dead, the last part of the climb should be done carefully to avoid triggering collision with the spikes:",
"Do not press forward or turn-around except while X-Ray is active.",
"For each X-ray stand-up, release the turn-around input quickly to make sure that it is not still held after X-Ray deactivates.",
"Once Samus is high enough, unequip X-Ray, jump up (from either standing or crouch) to clip past the spikes, and land, taking a single spike hit.",
"Then use the i-frames from the spike hit to run and jump to the left to make it to the door.",
"Samus is high enough after the top of her arm cannon first becomes visible at the bottom of the screen; or up to 3 additional climbs can be performed after that point.",
"In case of an accidental spike collision, it is possible to recover:",
"Unless Samus climbed higher than needed, she will still be stuck in the wall, will take a single spike hit, and be able to continue climbing.",
"With Grapple it is possible to swing on the Grapple blocks, avoiding all spike damage.",
"Spike damage can also be avoided with Space Jump, by doing a stationary turn-around spin jump, which is very precise."
]
},
{
"id": 4,
"name": "Missile Chozo Camera Unlock",
"note": [
"Break the shot blocks with Power Beam by first rolling into the morph tunnel to unlock camera scroll for this room.",
"The blocks can now be cleared from the left side by shooting and quickly scrolling the camera to the right a small amount.",
"A shot from crouch will reach the bottom block by following the shot as a ball, or wave beam works from the stairs.",
"Screw Attack or temp blue is still needed to clear the bomb blocks."
]
},
{
"id": 5,
"name": "Grapple Block Crystal Flash",
"note": [
"Jump into a breakable Grapple block. Crystal Flash then X-ray climb to the region above."
]
}
],
"nextStratId": 102,
"nextNotableId": 7
}