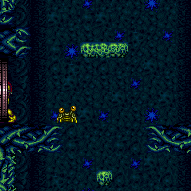
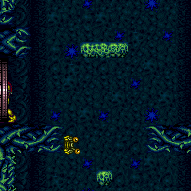
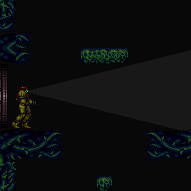
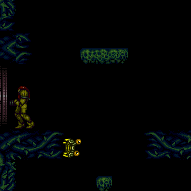
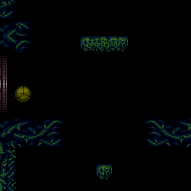
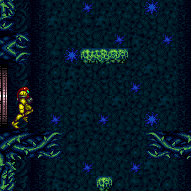
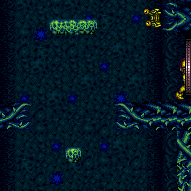
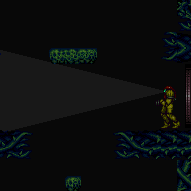
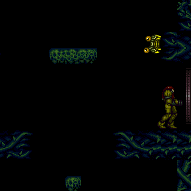
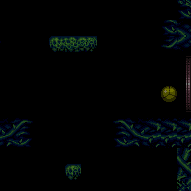
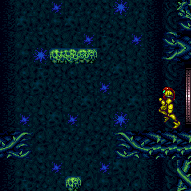
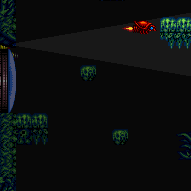
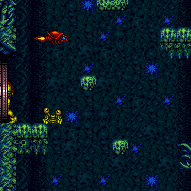
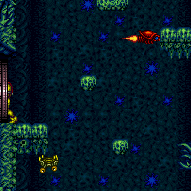
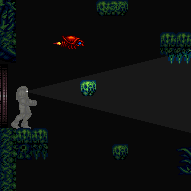
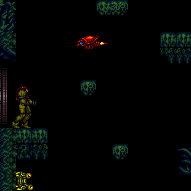
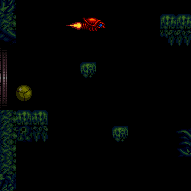
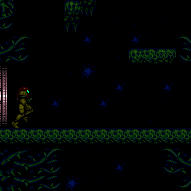
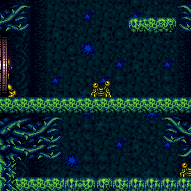
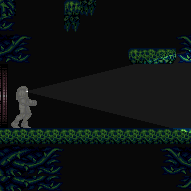
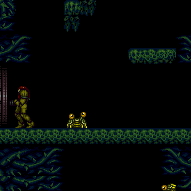
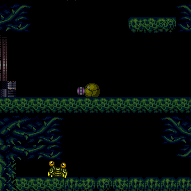
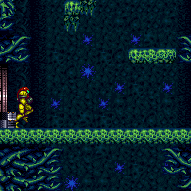
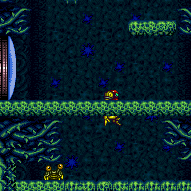
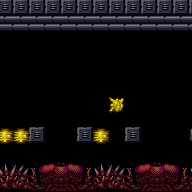
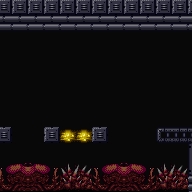
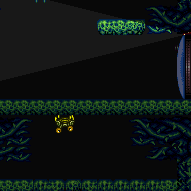
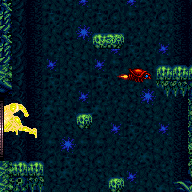
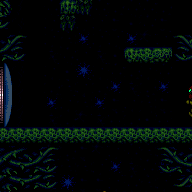
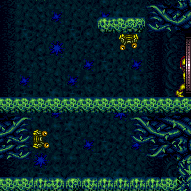
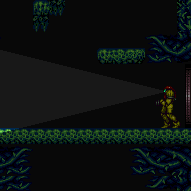
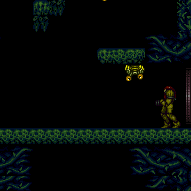
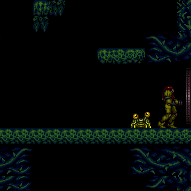
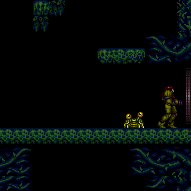
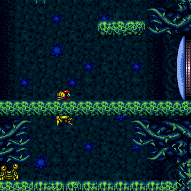
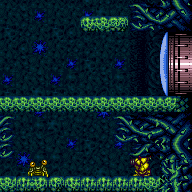
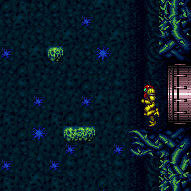
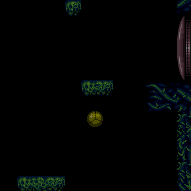
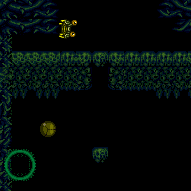
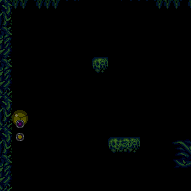
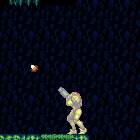
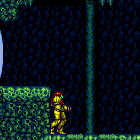
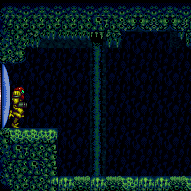
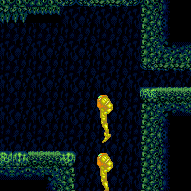
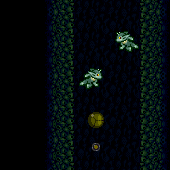
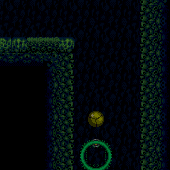
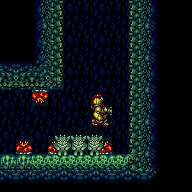
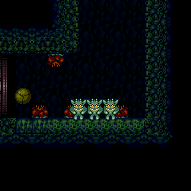
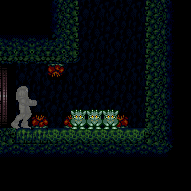
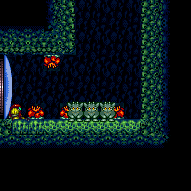
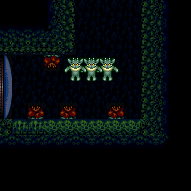
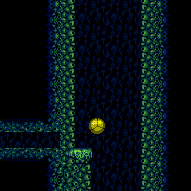
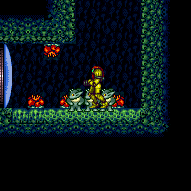
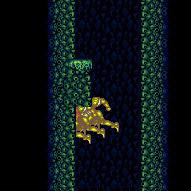
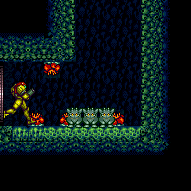
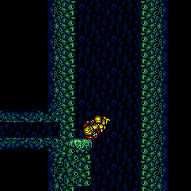
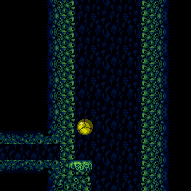
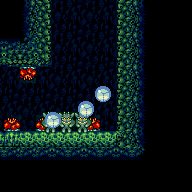
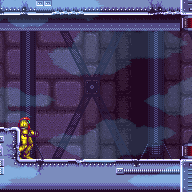
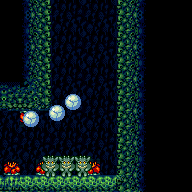
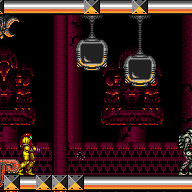
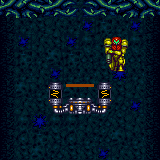
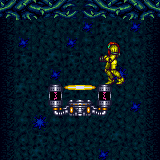
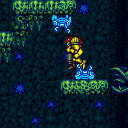
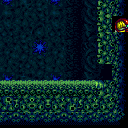
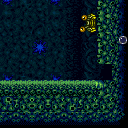
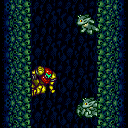
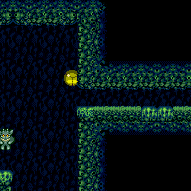
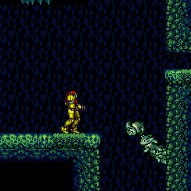
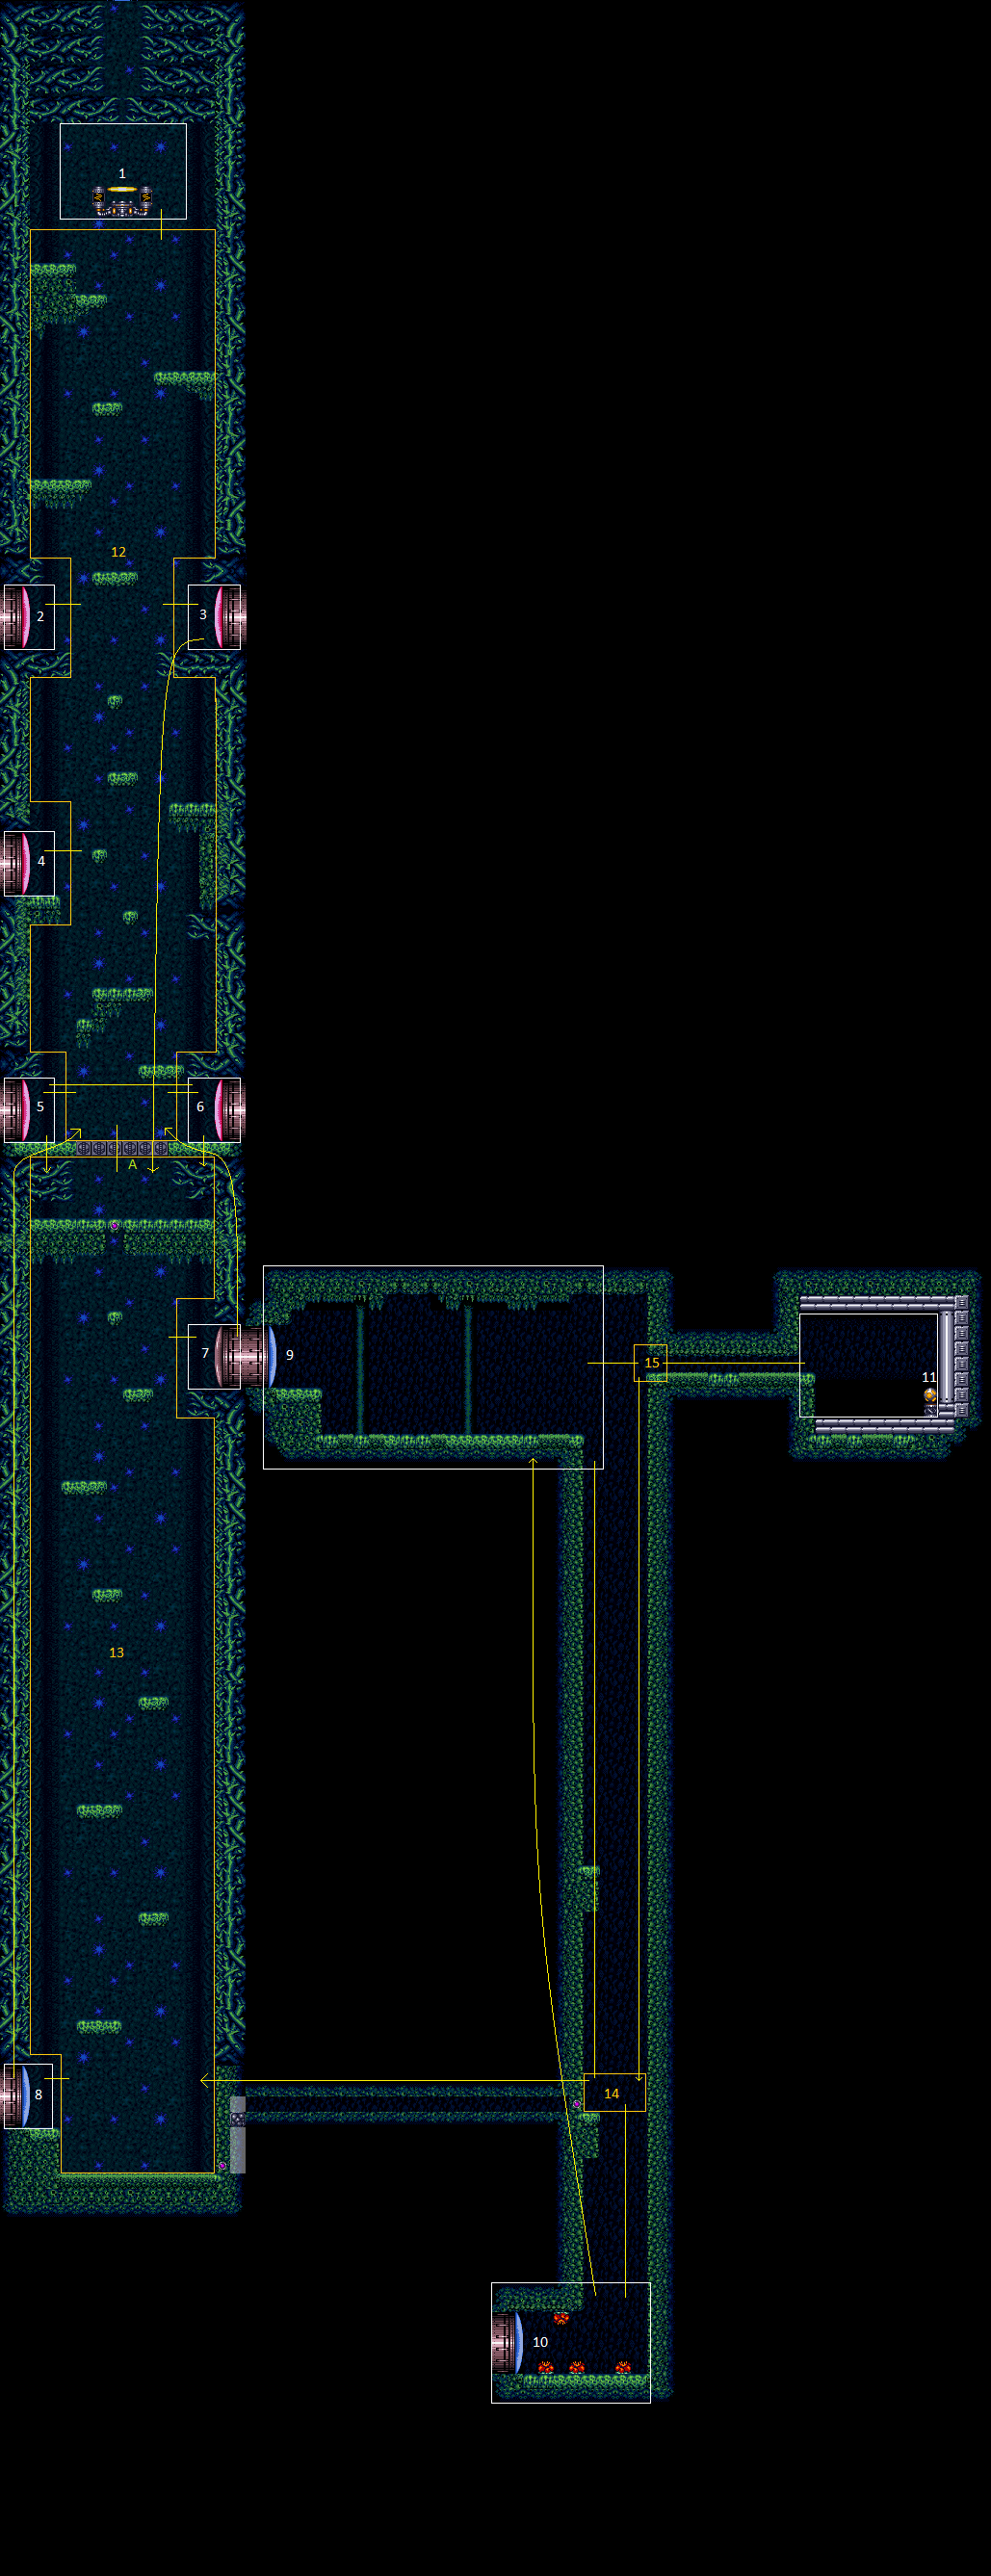
Green Brinstar Main Shaft
Room ID: 44
From: 1
Elevator
To: 12
Above Power Bomb Blocks - Main Junction
|
|
Entrance condition: {
"comeInWithGMode": {
"mode": "any",
"morphed": false
}
} |
From: 2
Above Power Bomb Blocks - Top Left Door
To: 2
Above Power Bomb Blocks - Top Left Door
Entrance condition: {
"comeInWithRMode": {}
}Clears obstacles: R-Mode |
From: 2
Above Power Bomb Blocks - Top Left Door
To: 2
Above Power Bomb Blocks - Top Left Door
Exit condition: {
"leaveWithRunway": {
"length": 4,
"openEnd": 1
}
} |
From: 2
Above Power Bomb Blocks - Top Left Door
To: 2
Above Power Bomb Blocks - Top Left Door
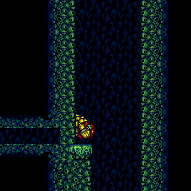
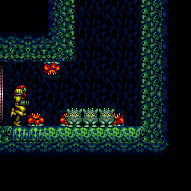
It is possible to save a lot of time by using a Super to knock the clockwise Zeela off the small platform above. Requires: "h_frozenEnemyRunway"
{
  "or": [
    "canBePatient",
    {
      "ammo": {
        "type": "Super",
        "count": 1
      }
    }
  ]
}
Exit condition: {
"leaveWithRunway": {
"length": 5,
"openEnd": 1
}
} |
From: 2
Above Power Bomb Blocks - Top Left Door
To: 2
Above Power Bomb Blocks - Top Left Door
Entrance condition: {
"comeInShinecharging": {
"length": 3,
"openEnd": 0
},
"comesInHeated": "no"
}Requires: "h_CrystalSpark" |
From: 2
Above Power Bomb Blocks - Top Left Door
To: 2
Above Power Bomb Blocks - Top Left Door
It is possible to save a lot of time by using a Super to knock the clockwise Zeela off the small platform above. Requires: {
"or": [
"canBePatient",
{
"ammo": {
"type": "Super",
"count": 1
}
}
]
}Exit condition: {
"leaveWithGModeSetup": {}
} |
From: 2
Above Power Bomb Blocks - Top Left Door
To: 2
Above Power Bomb Blocks - Top Left Door
It takes 80 seconds for the global Zeela to make it over here. A Super could speed this up, but it's likely to just get the Zeela stuck. Requires: "canBePatient"
{
"enemyDamage": {
"enemy": "Zeela",
"type": "contact",
"hits": 1
}
} |
From: 2
Above Power Bomb Blocks - Top Left Door
To: 3
Above Power Bomb Blocks - Top Right Door
Entrance condition: {
"comeInShinecharging": {
"length": 3,
"openEnd": 1
}
}Requires: "canShinechargeMovementComplex"
{
"shineChargeFrames": 90
}Exit condition: {
"leaveShinecharged": {}
}Unlocks doors: {"types":["super"],"requires":[]}
{"types":["missiles","powerbomb"],"requires":["never"]} |
From: 2
Above Power Bomb Blocks - Top Left Door
To: 3
Above Power Bomb Blocks - Top Right Door
Entrance condition: {
"comeInShinecharged": {}
}Requires: {
"shineChargeFrames": 90
}
"canShinechargeMovementComplex"Exit condition: {
"leaveShinecharged": {}
}Unlocks doors: {"types":["super"],"requires":[]}
{"types":["missiles","powerbomb"],"requires":["never"]} |
From: 2
Above Power Bomb Blocks - Top Left Door
To: 3
Above Power Bomb Blocks - Top Right Door
Entrance condition: {
"comeInShinecharged": {}
}Requires: {
"shineChargeFrames": 10
}
{
"shinespark": {
"frames": 21,
"excessFrames": 0
}
}Exit condition: {
"leaveWithSpark": {}
}Unlocks doors: {"types":["super"],"requires":[]}
{"types":["missiles","powerbomb"],"requires":["never"]} |
From: 2
Above Power Bomb Blocks - Top Left Door
To: 3
Above Power Bomb Blocks - Top Right Door
Entrance condition: {
"comeInShinecharging": {
"length": 3,
"openEnd": 0
}
}Requires: "canChainTemporaryBlue" Exit condition: {
"leaveWithTemporaryBlue": {}
}Unlocks doors: {"types":["ammo"],"requires":[]} |
From: 2
Above Power Bomb Blocks - Top Left Door
To: 4
Above Power Bomb Blocks - Middle Left Door
Entrance condition: {
"comeInShinecharging": {
"length": 3,
"openEnd": 1
}
}Requires: "canShinechargeMovementComplex"
{
"shineChargeFrames": 100
}Exit condition: {
"leaveShinecharged": {}
}Unlocks doors: {"types":["super"],"requires":[]}
{"types":["missiles","powerbomb"],"requires":["never"]} |
From: 2
Above Power Bomb Blocks - Top Left Door
To: 4
Above Power Bomb Blocks - Middle Left Door
Entrance condition: {
"comeInShinecharged": {}
}Requires: {
"shineChargeFrames": 110
}
"canShinechargeMovementComplex"Exit condition: {
"leaveShinecharged": {}
}Unlocks doors: {"types":["super"],"requires":[]}
{"types":["missiles","powerbomb"],"requires":["never"]} |
From: 2
Above Power Bomb Blocks - Top Left Door
To: 4
Above Power Bomb Blocks - Middle Left Door
Entrance condition: {
"comeInShinecharging": {
"length": 3,
"openEnd": 0
}
}Requires: "canChainTemporaryBlue" "canXRayTurnaround" Exit condition: {
"leaveWithTemporaryBlue": {}
}Unlocks doors: {"types":["ammo"],"requires":[]} |
From: 2
Above Power Bomb Blocks - Top Left Door
To: 5
Above Power Bomb Blocks - Bottom Left Door
Entrance condition: {
"comeInShinecharging": {
"length": 3,
"openEnd": 1
}
}Requires: "canShinechargeMovementComplex"
{
"shineChargeFrames": 155
}Exit condition: {
"leaveShinecharged": {}
}Unlocks doors: {"types":["super"],"requires":[]}
{"types":["missiles","powerbomb"],"requires":["never"]} |
From: 2
Above Power Bomb Blocks - Top Left Door
To: 5
Above Power Bomb Blocks - Bottom Left Door
Entrance condition: {
"comeInShinecharged": {}
}Requires: {
"shineChargeFrames": 160
}
"canShinechargeMovementComplex"Exit condition: {
"leaveShinecharged": {}
}Unlocks doors: {"types":["super"],"requires":[]}
{"types":["missiles","powerbomb"],"requires":["never"]} |
From: 2
Above Power Bomb Blocks - Top Left Door
To: 5
Above Power Bomb Blocks - Bottom Left Door
Entrance condition: {
"comeInShinecharged": {}
}Requires: {
"shineChargeFrames": 140
}
"canShinechargeMovementComplex"
{
"shinespark": {
"frames": 6,
"excessFrames": 0
}
}Exit condition: {
"leaveWithSpark": {}
}Unlocks doors: {"types":["super"],"requires":[]}
{"types":["missiles","powerbomb"],"requires":["never"]} |
From: 2
Above Power Bomb Blocks - Top Left Door
To: 6
Above Power Bomb Blocks - Bottom Right Door
Entrance condition: {
"comeInShinecharging": {
"length": 2,
"openEnd": 1
}
}Requires: "canShinechargeMovementComplex"
{
"shineChargeFrames": 170
}Exit condition: {
"leaveShinecharged": {}
}Unlocks doors: {"types":["super"],"requires":[]}
{"types":["missiles","powerbomb"],"requires":["never"]} |
From: 2
Above Power Bomb Blocks - Top Left Door
To: 6
Above Power Bomb Blocks - Bottom Right Door
Entrance condition: {
"comeInShinecharged": {}
}Requires: {
"shineChargeFrames": 140
}
"canShinechargeMovementComplex"
{
"shinespark": {
"frames": 17,
"excessFrames": 0
}
}Exit condition: {
"leaveWithSpark": {}
}Unlocks doors: {"types":["super"],"requires":[]}
{"types":["missiles","powerbomb"],"requires":["never"]} |
From: 2
Above Power Bomb Blocks - Top Left Door
To: 6
Above Power Bomb Blocks - Bottom Right Door
Entrance condition: {
"comeInShinecharging": {
"length": 3,
"openEnd": 0
}
}Requires: "canLongChainTemporaryBlue" "canXRayTurnaround" Exit condition: {
"leaveWithTemporaryBlue": {}
}Unlocks doors: {"types":["ammo"],"requires":[]} |
From: 2
Above Power Bomb Blocks - Top Left Door
To: 7
Below Power Bomb Blocks - Top Right Door
Entrance condition: {
"comeInShinecharging": {
"length": 3,
"openEnd": 0
}
}Requires: "canLongChainTemporaryBlue"
"canXRayTurnaround"
{
"ammo": {
"type": "PowerBomb",
"count": 1
}
}Exit condition: {
"leaveWithTemporaryBlue": {}
}Unlocks doors: {"types":["ammo"],"requires":[]} |
From: 2
Above Power Bomb Blocks - Top Left Door
To: 8
Below Power Bomb Blocks - Bottom Left Door
Entrance condition: {
"comeInShinecharging": {
"length": 3,
"openEnd": 0
}
}Requires: "canLongChainTemporaryBlue"
"canXRayTurnaround"
{
"ammo": {
"type": "PowerBomb",
"count": 1
}
}Exit condition: {
"leaveWithTemporaryBlue": {}
}Unlocks doors: {"types":["ammo"],"requires":[]} |
From: 2
Above Power Bomb Blocks - Top Left Door
To: 12
Above Power Bomb Blocks - Main Junction
|
From: 2
Above Power Bomb Blocks - Top Left Door
To: 13
Below Power Bomb Blocks - Main Junction
Entrance condition: {
"comeInWithGMode": {
"mode": "any",
"morphed": true
}
}Requires: "h_artificialMorphPowerBomb" Clears obstacles: A |
From: 2
Above Power Bomb Blocks - Top Left Door
To: 16
G-Mode Junction (Top Of Room)
Entrance condition: {
"comeInWithGMode": {
"mode": "any",
"morphed": false
}
} |
From: 3
Above Power Bomb Blocks - Top Right Door
To: 2
Above Power Bomb Blocks - Top Left Door
Entrance condition: {
"comeInShinecharging": {
"length": 4,
"openEnd": 1
}
}Requires: "canShinechargeMovementComplex"
{
"shineChargeFrames": 85
}Exit condition: {
"leaveShinecharged": {}
}Unlocks doors: {"types":["super"],"requires":[]}
{"types":["missiles","powerbomb"],"requires":["never"]} |
From: 3
Above Power Bomb Blocks - Top Right Door
To: 2
Above Power Bomb Blocks - Top Left Door
Entrance condition: {
"comeInShinecharged": {}
}Requires: {
"shineChargeFrames": 75
}
"canShinechargeMovementComplex"Exit condition: {
"leaveShinecharged": {}
}Unlocks doors: {"types":["super"],"requires":[]}
{"types":["missiles","powerbomb"],"requires":["never"]} |
From: 3
Above Power Bomb Blocks - Top Right Door
To: 2
Above Power Bomb Blocks - Top Left Door
Entrance condition: {
"comeInShinecharged": {}
}Requires: {
"shineChargeFrames": 10
}
"canShinechargeMovementComplex"
{
"shinespark": {
"frames": 21,
"excessFrames": 0
}
}Exit condition: {
"leaveWithSpark": {}
}Unlocks doors: {"types":["super"],"requires":[]}
{"types":["missiles","powerbomb"],"requires":["never"]} |
From: 3
Above Power Bomb Blocks - Top Right Door
To: 2
Above Power Bomb Blocks - Top Left Door
Entrance condition: {
"comeInShinecharging": {
"length": 4,
"openEnd": 0
}
}Requires: "canChainTemporaryBlue" Exit condition: {
"leaveWithTemporaryBlue": {}
}Unlocks doors: {"types":["ammo"],"requires":[]} |
From: 3
Above Power Bomb Blocks - Top Right Door
To: 3
Above Power Bomb Blocks - Top Right Door
Entrance condition: {
"comeInWithRMode": {}
}Clears obstacles: R-Mode |
From: 3
Above Power Bomb Blocks - Top Right Door
To: 3
Above Power Bomb Blocks - Top Right Door
Exit condition: {
"leaveWithRunway": {
"length": 5,
"openEnd": 1
}
} |
From: 3
Above Power Bomb Blocks - Top Right Door
To: 3
Above Power Bomb Blocks - Top Right Door
Requires: "h_frozenEnemyRunway" Exit condition: {
"leaveWithRunway": {
"length": 6,
"openEnd": 1
}
} |
From: 3
Above Power Bomb Blocks - Top Right Door
To: 3
Above Power Bomb Blocks - Top Right Door
Entrance condition: {
"comeInShinecharging": {
"length": 4,
"openEnd": 0
},
"comesInHeated": "no"
}Requires: "h_CrystalSpark" |
From: 3
Above Power Bomb Blocks - Top Right Door
To: 3
Above Power Bomb Blocks - Top Right Door
Exit condition: {
"leaveWithGModeSetup": {}
} |
From: 3
Above Power Bomb Blocks - Top Right Door
To: 3
Above Power Bomb Blocks - Top Right Door
Requires: {
"enemyDamage": {
"enemy": "Zeela",
"type": "contact",
"hits": 1
}
} |
From: 3
Above Power Bomb Blocks - Top Right Door
To: 4
Above Power Bomb Blocks - Middle Left Door
Entrance condition: {
"comeInShinecharging": {
"length": 4,
"openEnd": 1
}
}Requires: "canShinechargeMovementComplex"
{
"shineChargeFrames": 120
}Exit condition: {
"leaveShinecharged": {}
}Unlocks doors: {"types":["super"],"requires":[]}
{"types":["missiles","powerbomb"],"requires":["never"]} |
From: 3
Above Power Bomb Blocks - Top Right Door
To: 4
Above Power Bomb Blocks - Middle Left Door
Entrance condition: {
"comeInShinecharging": {
"length": 4,
"openEnd": 0
}
}Requires: "canShinechargeMovementComplex"
{
"shineChargeFrames": 105
}Exit condition: {
"leaveShinecharged": {}
}Unlocks doors: {"types":["super"],"requires":[]}
{"types":["missiles","powerbomb"],"requires":["never"]}Dev note: By using slightly less than the full length of runway, Samus can fall with enough horizontal speed to clear the single-tile platform. |
From: 3
Above Power Bomb Blocks - Top Right Door
To: 4
Above Power Bomb Blocks - Middle Left Door
Entrance condition: {
"comeInShinecharged": {}
}Requires: {
"shineChargeFrames": 115
}
"canShinechargeMovementComplex"Exit condition: {
"leaveShinecharged": {}
}Unlocks doors: {"types":["super"],"requires":[]}
{"types":["missiles","powerbomb"],"requires":["never"]} |
From: 3
Above Power Bomb Blocks - Top Right Door
To: 4
Above Power Bomb Blocks - Middle Left Door
Entrance condition: {
"comeInShinecharged": {}
}Requires: {
"shineChargeFrames": 100
}
"canShinechargeMovementComplex"
{
"shinespark": {
"frames": 2,
"excessFrames": 0
}
}Exit condition: {
"leaveWithSpark": {}
}Unlocks doors: {"types":["super"],"requires":[]}
{"types":["missiles","powerbomb"],"requires":["never"]} |
From: 3
Above Power Bomb Blocks - Top Right Door
To: 4
Above Power Bomb Blocks - Middle Left Door
Entrance condition: {
"comeInShinecharging": {
"length": 4,
"openEnd": 0
}
}Requires: "canChainTemporaryBlue" Exit condition: {
"leaveWithTemporaryBlue": {}
}Unlocks doors: {"types":["ammo"],"requires":[]} |
From: 3
Above Power Bomb Blocks - Top Right Door
To: 5
Above Power Bomb Blocks - Bottom Left Door
Entrance condition: {
"comeInShinecharging": {
"length": 4,
"openEnd": 1
}
}Requires: "canShinechargeMovementComplex"
{
"shinespark": {
"frames": 4,
"excessFrames": 0
}
}Exit condition: {
"leaveWithSpark": {}
}Unlocks doors: {"types":["super"],"requires":[]}
{"types":["missiles","powerbomb"],"requires":["never"]} |
From: 3
Above Power Bomb Blocks - Top Right Door
To: 5
Above Power Bomb Blocks - Bottom Left Door
Entrance condition: {
"comeInShinecharged": {}
}Requires: {
"shineChargeFrames": 150
}
"canShinechargeMovementComplex"
{
"shinespark": {
"frames": 6,
"excessFrames": 0
}
}Exit condition: {
"leaveWithSpark": {}
}Unlocks doors: {"types":["super"],"requires":[]}
{"types":["missiles","powerbomb"],"requires":["never"]} |
From: 3
Above Power Bomb Blocks - Top Right Door
To: 5
Above Power Bomb Blocks - Bottom Left Door
Entrance condition: {
"comeInShinecharging": {
"length": 4,
"openEnd": 0
}
}Requires: "canChainTemporaryBlue" Exit condition: {
"leaveWithTemporaryBlue": {}
}Unlocks doors: {"types":["ammo"],"requires":[]} |
From: 3
Above Power Bomb Blocks - Top Right Door
To: 6
Above Power Bomb Blocks - Bottom Right Door
Entrance condition: {
"comeInShinecharging": {
"length": 4,
"openEnd": 1
}
}Requires: "canShinechargeMovementComplex"
{
"shinespark": {
"frames": 17,
"excessFrames": 0
}
}Exit condition: {
"leaveWithSpark": {}
}Unlocks doors: {"types":["super"],"requires":[]}
{"types":["missiles","powerbomb"],"requires":["never"]} |
From: 3
Above Power Bomb Blocks - Top Right Door
To: 6
Above Power Bomb Blocks - Bottom Right Door
Entrance condition: {
"comeInShinecharged": {}
}Requires: {
"shineChargeFrames": 150
}
"canShinechargeMovementComplex"
{
"shinespark": {
"frames": 17,
"excessFrames": 0
}
}Exit condition: {
"leaveWithSpark": {}
}Unlocks doors: {"types":["super"],"requires":[]}
{"types":["missiles","powerbomb"],"requires":["never"]} |
From: 3
Above Power Bomb Blocks - Top Right Door
To: 6
Above Power Bomb Blocks - Bottom Right Door
Entrance condition: {
"comeInShinecharging": {
"length": 4,
"openEnd": 0
}
}Requires: "canLongChainTemporaryBlue" "canXRayTurnaround" Exit condition: {
"leaveWithTemporaryBlue": {}
}Unlocks doors: {"types":["ammo"],"requires":[]} |
From: 3
Above Power Bomb Blocks - Top Right Door
To: 7
Below Power Bomb Blocks - Top Right Door
Entrance condition: {
"comeInShinecharging": {
"length": 4,
"openEnd": 0
}
}Requires: "canLongChainTemporaryBlue"
"canXRayTurnaround"
{
"ammo": {
"type": "PowerBomb",
"count": 1
}
}Exit condition: {
"leaveWithTemporaryBlue": {}
}Unlocks doors: {"types":["ammo"],"requires":[]} |
From: 3
Above Power Bomb Blocks - Top Right Door
To: 8
Below Power Bomb Blocks - Bottom Left Door
Entrance condition: {
"comeInShinecharging": {
"length": 4,
"openEnd": 0
}
}Requires: "canLongChainTemporaryBlue"
"canXRayTurnaround"
{
"ammo": {
"type": "PowerBomb",
"count": 1
}
}Exit condition: {
"leaveWithTemporaryBlue": {}
}Unlocks doors: {"types":["ammo"],"requires":[]} |
From: 3
Above Power Bomb Blocks - Top Right Door
To: 12
Above Power Bomb Blocks - Main Junction
|
From: 3
Above Power Bomb Blocks - Top Right Door
To: 13
Below Power Bomb Blocks - Main Junction
Entrance condition: {
"comeInWithGMode": {
"mode": "any",
"morphed": true
}
}Requires: "h_artificialMorphPowerBomb" Clears obstacles: A |
From: 3
Above Power Bomb Blocks - Top Right Door
To: 13
Below Power Bomb Blocks - Main Junction
Entrance condition: {
"comeInWithStoredFallSpeed": {
"fallSpeedInTiles": 2
}
} |
From: 3
Above Power Bomb Blocks - Top Right Door
To: 16
G-Mode Junction (Top Of Room)
Entrance condition: {
"comeInWithGMode": {
"mode": "any",
"morphed": false
}
} |
From: 4
Above Power Bomb Blocks - Middle Left Door
To: 2
Above Power Bomb Blocks - Top Left Door
Enter with G-mode direct, back up to between 1 and 6 pixels from the door transition, and activate X-ray to get very deep stuck in the door. Climb up 1 screen, and perform a turnaround buffered spin-jump away from the door to trigger the transition, bypassing any lock on the door. Entrance condition: {
"comeInWithGMode": {
"mode": "direct",
"morphed": false
}
}Requires: "canGModeXRayClimb" Bypasses door shell: true |
From: 4
Above Power Bomb Blocks - Middle Left Door
To: 2
Above Power Bomb Blocks - Top Left Door
Entrance condition: {
"comeInShinecharging": {
"length": 2,
"openEnd": 0
}
}Requires: "HiJump"
"canShinechargeMovementComplex"
{
"shineChargeFrames": 120
}Exit condition: {
"leaveShinecharged": {}
}Unlocks doors: {"types":["super"],"requires":[]}
{"types":["missiles","powerbomb"],"requires":["never"]} |
From: 4
Above Power Bomb Blocks - Middle Left Door
To: 2
Above Power Bomb Blocks - Top Left Door
Entrance condition: {
"comeInShinecharging": {
"length": 2,
"openEnd": 0
}
}Requires: "canWallJump"
"canShinechargeMovementComplex"
{
"shineChargeFrames": 135
}Exit condition: {
"leaveShinecharged": {}
}Unlocks doors: {"types":["super"],"requires":[]}
{"types":["missiles","powerbomb"],"requires":["never"]} |
From: 4
Above Power Bomb Blocks - Middle Left Door
To: 2
Above Power Bomb Blocks - Top Left Door
Entrance condition: {
"comeInShinecharging": {
"length": 2,
"openEnd": 0
}
}Requires: "canShinechargeMovementTricky"
{
"shineChargeFrames": 170
}Exit condition: {
"leaveShinecharged": {}
}Unlocks doors: {"types":["super"],"requires":[]}
{"types":["missiles","powerbomb"],"requires":["never"]} |
From: 4
Above Power Bomb Blocks - Middle Left Door
To: 2
Above Power Bomb Blocks - Top Left Door
Entrance condition: {
"comeInShinecharged": {}
}Requires: {
"shineChargeFrames": 105
}
"HiJump"
"canWallJump"
"canShinechargeMovementComplex"Exit condition: {
"leaveShinecharged": {}
}Unlocks doors: {"types":["super"],"requires":[]}
{"types":["missiles","powerbomb"],"requires":["never"]} |
From: 4
Above Power Bomb Blocks - Middle Left Door
To: 2
Above Power Bomb Blocks - Top Left Door
Entrance condition: {
"comeInShinecharged": {}
}Requires: {
"shineChargeFrames": 130
}
"HiJump"
"canShinechargeMovementComplex"Exit condition: {
"leaveShinecharged": {}
}Unlocks doors: {"types":["super"],"requires":[]}
{"types":["missiles","powerbomb"],"requires":["never"]} |
From: 4
Above Power Bomb Blocks - Middle Left Door
To: 2
Above Power Bomb Blocks - Top Left Door
Entrance condition: {
"comeInShinecharged": {}
}Requires: {
"shineChargeFrames": 130
}
"canWallJump"
"canShinechargeMovementComplex"Exit condition: {
"leaveShinecharged": {}
}Unlocks doors: {"types":["super"],"requires":[]}
{"types":["missiles","powerbomb"],"requires":["never"]} |
From: 4
Above Power Bomb Blocks - Middle Left Door
To: 2
Above Power Bomb Blocks - Top Left Door
Entrance condition: {
"comeInShinecharged": {}
}Requires: {
"shineChargeFrames": 160
}
"canShinechargeMovementTricky"Exit condition: {
"leaveShinecharged": {}
}Unlocks doors: {"types":["super"],"requires":[]}
{"types":["missiles","powerbomb"],"requires":["never"]} |
From: 4
Above Power Bomb Blocks - Middle Left Door
To: 2
Above Power Bomb Blocks - Top Left Door
Entrance condition: {
"comeInShinecharged": {}
}Requires: {
"shineChargeFrames": 80
}
"HiJump"
"canWallJump"
"canShinechargeMovementComplex"
{
"shinespark": {
"frames": 7,
"excessFrames": 0
}
}Exit condition: {
"leaveWithSpark": {}
}Unlocks doors: {"types":["super"],"requires":[]}
{"types":["missiles","powerbomb"],"requires":["never"]} |
From: 4
Above Power Bomb Blocks - Middle Left Door
To: 2
Above Power Bomb Blocks - Top Left Door
Entrance condition: {
"comeInShinecharged": {}
}Requires: {
"shineChargeFrames": 95
}
"HiJump"
"canShinechargeMovementComplex"
{
"shinespark": {
"frames": 9,
"excessFrames": 0
}
}Exit condition: {
"leaveWithSpark": {}
}Unlocks doors: {"types":["super"],"requires":[]}
{"types":["missiles","powerbomb"],"requires":["never"]} |
From: 4
Above Power Bomb Blocks - Middle Left Door
To: 2
Above Power Bomb Blocks - Top Left Door
Entrance condition: {
"comeInShinecharged": {}
}Requires: {
"shineChargeFrames": 110
}
"canWallJump"
"canShinechargeMovementComplex"
{
"shinespark": {
"frames": 6,
"excessFrames": 0
}
}Exit condition: {
"leaveWithSpark": {}
}Unlocks doors: {"types":["super"],"requires":[]}
{"types":["missiles","powerbomb"],"requires":["never"]} |
From: 4
Above Power Bomb Blocks - Middle Left Door
To: 2
Above Power Bomb Blocks - Top Left Door
Entrance condition: {
"comeInShinecharged": {}
}Requires: {
"shineChargeFrames": 130
}
"canShinechargeMovementTricky"
{
"shinespark": {
"frames": 8,
"excessFrames": 0
}
}Exit condition: {
"leaveWithSpark": {}
}Unlocks doors: {"types":["super"],"requires":[]}
{"types":["missiles","powerbomb"],"requires":["never"]} |
From: 4
Above Power Bomb Blocks - Middle Left Door
To: 2
Above Power Bomb Blocks - Top Left Door
Entrance condition: {
"comeInShinecharging": {
"length": 3,
"openEnd": 0
}
}Requires: "canChainTemporaryBlue" "canXRayTurnaround" Exit condition: {
"leaveWithTemporaryBlue": {}
}Unlocks doors: {"types":["ammo"],"requires":[]} |
From: 4
Above Power Bomb Blocks - Middle Left Door
To: 3
Above Power Bomb Blocks - Top Right Door
Entrance condition: {
"comeInShinecharging": {
"length": 2,
"openEnd": 0
}
}Requires: "HiJump"
"canShinechargeMovementComplex"
{
"shineChargeFrames": 65
}Exit condition: {
"leaveShinecharged": {}
}Unlocks doors: {"types":["super"],"requires":[]}
{"types":["missiles","powerbomb"],"requires":["never"]} |
From: 4
Above Power Bomb Blocks - Middle Left Door
To: 3
Above Power Bomb Blocks - Top Right Door
Entrance condition: {
"comeInShinecharging": {
"length": 2,
"openEnd": 0
}
}Requires: "canShinechargeMovementComplex"
{
"shineChargeFrames": 160
}Exit condition: {
"leaveShinecharged": {}
}Unlocks doors: {"types":["super"],"requires":[]}
{"types":["missiles","powerbomb"],"requires":["never"]} |
From: 4
Above Power Bomb Blocks - Middle Left Door
To: 3
Above Power Bomb Blocks - Top Right Door
Entrance condition: {
"comeInShinecharging": {
"length": 2,
"openEnd": 0
}
}Requires: "canShinechargeMovementTricky"
{
"shinespark": {
"frames": 6,
"excessFrames": 0
}
}Exit condition: {
"leaveWithSpark": {}
}Unlocks doors: {"types":["super"],"requires":[]}
{"types":["missiles","powerbomb"],"requires":["never"]} |
From: 4
Above Power Bomb Blocks - Middle Left Door
To: 3
Above Power Bomb Blocks - Top Right Door
Entrance condition: {
"comeInShinecharged": {}
}Requires: {
"shineChargeFrames": 110
}
"HiJump"
"canShinechargeMovementComplex"Exit condition: {
"leaveShinecharged": {}
}Unlocks doors: {"types":["super"],"requires":[]}
{"types":["missiles","powerbomb"],"requires":["never"]} |
From: 4
Above Power Bomb Blocks - Middle Left Door
To: 3
Above Power Bomb Blocks - Top Right Door
Entrance condition: {
"comeInShinecharged": {}
}Requires: {
"shineChargeFrames": 145
}
"canWallJump"
"canShinechargeMovementComplex"Exit condition: {
"leaveShinecharged": {}
}Unlocks doors: {"types":["super"],"requires":[]}
{"types":["missiles","powerbomb"],"requires":["never"]} |
From: 4
Above Power Bomb Blocks - Middle Left Door
To: 3
Above Power Bomb Blocks - Top Right Door
Entrance condition: {
"comeInShinecharged": {}
}Requires: {
"shineChargeFrames": 160
}
"canShinechargeMovementTricky"Exit condition: {
"leaveShinecharged": {}
}Unlocks doors: {"types":["super"],"requires":[]}
{"types":["missiles","powerbomb"],"requires":["never"]} |
From: 4
Above Power Bomb Blocks - Middle Left Door
To: 3
Above Power Bomb Blocks - Top Right Door
Entrance condition: {
"comeInShinecharged": {}
}Requires: {
"shineChargeFrames": 80
}
"HiJump"
"canShinechargeMovementComplex"
{
"shinespark": {
"frames": 8,
"excessFrames": 0
}
}Exit condition: {
"leaveWithSpark": {}
}Unlocks doors: {"types":["super"],"requires":[]}
{"types":["missiles","powerbomb"],"requires":["never"]} |
From: 4
Above Power Bomb Blocks - Middle Left Door
To: 3
Above Power Bomb Blocks - Top Right Door
Entrance condition: {
"comeInShinecharged": {}
}Requires: {
"shineChargeFrames": 120
}
"canShinechargeMovementComplex"
{
"shinespark": {
"frames": 16,
"excessFrames": 0
}
}Exit condition: {
"leaveWithSpark": {}
}Unlocks doors: {"types":["super"],"requires":[]}
{"types":["missiles","powerbomb"],"requires":["never"]} |
From: 4
Above Power Bomb Blocks - Middle Left Door
To: 3
Above Power Bomb Blocks - Top Right Door
Entrance condition: {
"comeInShinecharged": {}
}Requires: {
"shineChargeFrames": 130
}
"canShinechargeMovementTricky"
{
"shinespark": {
"frames": 14,
"excessFrames": 0
}
}Exit condition: {
"leaveWithSpark": {}
}Unlocks doors: {"types":["super"],"requires":[]}
{"types":["missiles","powerbomb"],"requires":["never"]} |
From: 4
Above Power Bomb Blocks - Middle Left Door
To: 3
Above Power Bomb Blocks - Top Right Door
Entrance condition: {
"comeInShinecharging": {
"length": 3,
"openEnd": 0
}
}Requires: "canChainTemporaryBlue"
{
"or": [
"HiJump",
"canTrickySpringBallJump",
"canXRayTurnaround"
]
}Exit condition: {
"leaveWithTemporaryBlue": {}
}Unlocks doors: {"types":["ammo"],"requires":[]} |
From: 4
Above Power Bomb Blocks - Middle Left Door
To: 4
Above Power Bomb Blocks - Middle Left Door
Entrance condition: {
"comeInWithRMode": {}
}Clears obstacles: R-Mode |
From: 4
Above Power Bomb Blocks - Middle Left Door
To: 4
Above Power Bomb Blocks - Middle Left Door
Exit condition: {
"leaveWithRunway": {
"length": 3,
"openEnd": 1
}
} |
From: 4
Above Power Bomb Blocks - Middle Left Door
To: 4
Above Power Bomb Blocks - Middle Left Door
It is possible to save a lot of time by using a Super to knock the clockwise Zeela off the small platform above. Requires: "h_frozenEnemyRunway"
{
"or": [
"canBePatient",
{
"ammo": {
"type": "Super",
"count": 1
}
}
]
}Exit condition: {
"leaveWithRunway": {
"length": 4,
"openEnd": 1
}
} |
From: 4
Above Power Bomb Blocks - Middle Left Door
To: 4
Above Power Bomb Blocks - Middle Left Door
It is possible to save a lot of time by using a Super to knock the clockwise Zeela off the small platform above. Requires: {
"or": [
"canBePatient",
{
"ammo": {
"type": "Super",
"count": 1
}
}
]
}Exit condition: {
"leaveWithGModeSetup": {}
} |
From: 4
Above Power Bomb Blocks - Middle Left Door
To: 4
Above Power Bomb Blocks - Middle Left Door
It takes 70 seconds for the global Zeela to make it over here. A Super could speed this up, but it's likely to just get the Zeela stuck. Requires: "canBePatient"
{
"enemyDamage": {
"enemy": "Zeela",
"type": "contact",
"hits": 1
}
} |
From: 4
Above Power Bomb Blocks - Middle Left Door
To: 5
Above Power Bomb Blocks - Bottom Left Door
Entrance condition: {
"comeInShinecharging": {
"length": 2,
"openEnd": 1
}
}Requires: "canShinechargeMovementComplex"
{
"shineChargeFrames": 100
}Exit condition: {
"leaveShinecharged": {}
}Unlocks doors: {"types":["super"],"requires":[]}
{"types":["missiles","powerbomb"],"requires":["never"]} |
From: 4
Above Power Bomb Blocks - Middle Left Door
To: 5
Above Power Bomb Blocks - Bottom Left Door
Entrance condition: {
"comeInShinecharged": {}
}Requires: {
"shineChargeFrames": 110
}
"canShinechargeMovementComplex"Exit condition: {
"leaveShinecharged": {}
}Unlocks doors: {"types":["super"],"requires":[]}
{"types":["missiles","powerbomb"],"requires":["never"]} |
From: 4
Above Power Bomb Blocks - Middle Left Door
To: 5
Above Power Bomb Blocks - Bottom Left Door
Entrance condition: {
"comeInShinecharged": {}
}Requires: {
"shineChargeFrames": 90
}
"canShinechargeMovementComplex"
{
"shinespark": {
"frames": 5,
"excessFrames": 0
}
}Exit condition: {
"leaveWithSpark": {}
}Unlocks doors: {"types":["super"],"requires":[]}
{"types":["missiles","powerbomb"],"requires":["never"]} |
From: 4
Above Power Bomb Blocks - Middle Left Door
To: 5
Above Power Bomb Blocks - Bottom Left Door
Entrance condition: {
"comeInShinecharging": {
"length": 3,
"openEnd": 0
}
}Requires: "canChainTemporaryBlue" "canXRayTurnaround" Exit condition: {
"leaveWithTemporaryBlue": {}
}Unlocks doors: {"types":["ammo"],"requires":[]} |
From: 4
Above Power Bomb Blocks - Middle Left Door
To: 6
Above Power Bomb Blocks - Bottom Right Door
Entrance condition: {
"comeInShinecharging": {
"length": 2,
"openEnd": 1
}
}Requires: "canShinechargeMovementComplex"
{
"shineChargeFrames": 120
}Exit condition: {
"leaveShinecharged": {}
}Unlocks doors: {"types":["super"],"requires":[]}
{"types":["missiles","powerbomb"],"requires":["never"]} |
From: 4
Above Power Bomb Blocks - Middle Left Door
To: 6
Above Power Bomb Blocks - Bottom Right Door
Entrance condition: {
"comeInShinecharged": {}
}Requires: {
"shineChargeFrames": 125
}
"canShinechargeMovementComplex"Exit condition: {
"leaveShinecharged": {}
}Unlocks doors: {"types":["super"],"requires":[]}
{"types":["missiles","powerbomb"],"requires":["never"]} |
From: 4
Above Power Bomb Blocks - Middle Left Door
To: 6
Above Power Bomb Blocks - Bottom Right Door
Entrance condition: {
"comeInShinecharged": {}
}Requires: {
"shineChargeFrames": 85
}
"canShinechargeMovementComplex"
{
"shinespark": {
"frames": 17,
"excessFrames": 0
}
}Exit condition: {
"leaveWithSpark": {}
}Unlocks doors: {"types":["super"],"requires":[]}
{"types":["missiles","powerbomb"],"requires":["never"]} |
From: 4
Above Power Bomb Blocks - Middle Left Door
To: 6
Above Power Bomb Blocks - Bottom Right Door
Entrance condition: {
"comeInShinecharging": {
"length": 3,
"openEnd": 0
}
}Requires: "canLongChainTemporaryBlue" Exit condition: {
"leaveWithTemporaryBlue": {}
}Unlocks doors: {"types":["ammo"],"requires":[]} |
From: 4
Above Power Bomb Blocks - Middle Left Door
To: 7
Below Power Bomb Blocks - Top Right Door
Entrance condition: {
"comeInShinecharging": {
"length": 3,
"openEnd": 0
}
}Requires: "canLongChainTemporaryBlue"
{
"ammo": {
"type": "PowerBomb",
"count": 1
}
}Exit condition: {
"leaveWithTemporaryBlue": {}
}Unlocks doors: {"types":["ammo"],"requires":[]} |
From: 4
Above Power Bomb Blocks - Middle Left Door
To: 8
Below Power Bomb Blocks - Bottom Left Door
Entrance condition: {
"comeInShinecharging": {
"length": 3,
"openEnd": 0
}
}Requires: "canLongChainTemporaryBlue"
"canXRayTurnaround"
{
"ammo": {
"type": "PowerBomb",
"count": 1
}
}Exit condition: {
"leaveWithTemporaryBlue": {}
}Unlocks doors: {"types":["ammo"],"requires":[]} |
From: 4
Above Power Bomb Blocks - Middle Left Door
To: 12
Above Power Bomb Blocks - Main Junction
|
From: 4
Above Power Bomb Blocks - Middle Left Door
To: 13
Below Power Bomb Blocks - Main Junction
Entrance condition: {
"comeInWithGMode": {
"mode": "any",
"morphed": true
}
}Requires: "h_artificialMorphPowerBomb" Clears obstacles: A |
From: 4
Above Power Bomb Blocks - Middle Left Door
To: 16
G-Mode Junction (Top Of Room)
Entrance condition: {
"comeInWithGMode": {
"mode": "any",
"morphed": false
}
} |
From: 5
Above Power Bomb Blocks - Bottom Left Door
To: 2
Above Power Bomb Blocks - Top Left Door
Entrance condition: {
"comeInShinecharged": {}
}Requires: {
"shineChargeFrames": 165
}
"HiJump"
"canShinechargeMovementTricky"
{
"shinespark": {
"frames": 12,
"excessFrames": 0
}
}Exit condition: {
"leaveWithSpark": {}
}Unlocks doors: {"types":["super"],"requires":[]}
{"types":["missiles","powerbomb"],"requires":["never"]} |
From: 5
Above Power Bomb Blocks - Bottom Left Door
To: 2
Above Power Bomb Blocks - Top Left Door
Enter with G-mode direct, back up to between 1 and 6 pixels from the door transition, and activate X-ray to get very deep stuck in the door. Climb up 2 screens, and perform a turnaround buffered spin-jump away from the door to trigger the transition, bypassing any lock on the door. Entrance condition: {
"comeInWithGMode": {
"mode": "direct",
"morphed": false
}
}Requires: "canGModeXRayClimb" "canLongXRayClimb" Bypasses door shell: true |
From: 5
Above Power Bomb Blocks - Bottom Left Door
To: 2
Above Power Bomb Blocks - Top Left Door
Entrance condition: {
"comeInShinecharging": {
"length": 12,
"openEnd": 0
}
}Requires: "canLongChainTemporaryBlue" "canXRayTurnaround" Exit condition: {
"leaveWithTemporaryBlue": {}
}Unlocks doors: {"types":["ammo"],"requires":[]} |
From: 5
Above Power Bomb Blocks - Bottom Left Door
To: 3
Above Power Bomb Blocks - Top Right Door
Entrance condition: {
"comeInShinecharged": {}
}Requires: {
"shineChargeFrames": 165
}
"HiJump"
"canShinechargeMovementTricky"
{
"shinespark": {
"frames": 12,
"excessFrames": 0
}
}Exit condition: {
"leaveWithSpark": {}
}Unlocks doors: {"types":["super"],"requires":[]}
{"types":["missiles","powerbomb"],"requires":["never"]} |
From: 5
Above Power Bomb Blocks - Bottom Left Door
To: 3
Above Power Bomb Blocks - Top Right Door
Entrance condition: {
"comeInShinecharging": {
"length": 12,
"openEnd": 0
}
}Requires: "canLongChainTemporaryBlue" "canXRayTurnaround" Exit condition: {
"leaveWithTemporaryBlue": {}
}Unlocks doors: {"types":["ammo"],"requires":[]} |
From: 5
Above Power Bomb Blocks - Bottom Left Door
To: 4
Above Power Bomb Blocks - Middle Left Door
Enter with G-mode direct, back up to between 1 and 6 pixels from the door transition, and activate X-ray to get very deep stuck in the door. Climb up 1 screen, and perform a turnaround buffered spin-jump away from the door to trigger the transition, bypassing any lock on the door. Entrance condition: {
"comeInWithGMode": {
"mode": "direct",
"morphed": false
}
}Requires: "canGModeXRayClimb" Bypasses door shell: true |
From: 5
Above Power Bomb Blocks - Bottom Left Door
To: 4
Above Power Bomb Blocks - Middle Left Door
Entrance condition: {
"comeInShinecharging": {
"length": 12,
"openEnd": 0
}
}Requires: "HiJump"
"canShinechargeMovementComplex"
{
"shineChargeFrames": 140
}Exit condition: {
"leaveShinecharged": {}
}Unlocks doors: {"types":["super"],"requires":[]}
{"types":["missiles","powerbomb"],"requires":["never"]} |
From: 5
Above Power Bomb Blocks - Bottom Left Door
To: 4
Above Power Bomb Blocks - Middle Left Door
Entrance condition: {
"comeInShinecharging": {
"length": 12,
"openEnd": 0
}
}Requires: "canTrickyDashJump"
"canShinechargeMovementComplex"
{
"shineChargeFrames": 140
}Exit condition: {
"leaveShinecharged": {}
}Unlocks doors: {"types":["super"],"requires":[]}
{"types":["missiles","powerbomb"],"requires":["never"]} |
From: 5
Above Power Bomb Blocks - Bottom Left Door
To: 4
Above Power Bomb Blocks - Middle Left Door
Entrance condition: {
"comeInShinecharged": {}
}Requires: {
"shineChargeFrames": 95
}
"HiJump"
"canShinechargeMovementComplex"Exit condition: {
"leaveShinecharged": {}
}Unlocks doors: {"types":["super"],"requires":[]}
{"types":["missiles","powerbomb"],"requires":["never"]} |
From: 5
Above Power Bomb Blocks - Bottom Left Door
To: 4
Above Power Bomb Blocks - Middle Left Door
Entrance condition: {
"comeInShinecharged": {}
}Requires: {
"shineChargeFrames": 130
}
"canWallJump"
"canShinechargeMovementComplex"Exit condition: {
"leaveShinecharged": {}
}Unlocks doors: {"types":["super"],"requires":[]}
{"types":["missiles","powerbomb"],"requires":["never"]} |
From: 5
Above Power Bomb Blocks - Bottom Left Door
To: 4
Above Power Bomb Blocks - Middle Left Door
Entrance condition: {
"comeInShinecharged": {}
}Requires: {
"shineChargeFrames": 145
}
"canShinechargeMovementTricky"Exit condition: {
"leaveShinecharged": {}
}Unlocks doors: {"types":["super"],"requires":[]}
{"types":["missiles","powerbomb"],"requires":["never"]} |
From: 5
Above Power Bomb Blocks - Bottom Left Door
To: 4
Above Power Bomb Blocks - Middle Left Door
Entrance condition: {
"comeInShinecharged": {}
}Requires: {
"shineChargeFrames": 75
}
"canShinechargeMovementTricky"
{
"shinespark": {
"frames": 5,
"excessFrames": 0
}
}Exit condition: {
"leaveWithSpark": {}
}Unlocks doors: {"types":["super"],"requires":[]}
{"types":["missiles","powerbomb"],"requires":["never"]} |
From: 5
Above Power Bomb Blocks - Bottom Left Door
To: 4
Above Power Bomb Blocks - Middle Left Door
Entrance condition: {
"comeInShinecharged": {}
}Requires: {
"shineChargeFrames": 110
}
"canWallJump"
"canShinechargeMovementComplex"
{
"shinespark": {
"frames": 6,
"excessFrames": 0
}
}Exit condition: {
"leaveWithSpark": {}
}Unlocks doors: {"types":["super"],"requires":[]}
{"types":["missiles","powerbomb"],"requires":["never"]} |
From: 5
Above Power Bomb Blocks - Bottom Left Door
To: 4
Above Power Bomb Blocks - Middle Left Door
Entrance condition: {
"comeInShinecharged": {}
}Requires: {
"shineChargeFrames": 130
}
"canShinechargeMovementTricky"
{
"shinespark": {
"frames": 5,
"excessFrames": 0
}
}Exit condition: {
"leaveWithSpark": {}
}Unlocks doors: {"types":["super"],"requires":[]}
{"types":["missiles","powerbomb"],"requires":["never"]} |
From: 5
Above Power Bomb Blocks - Bottom Left Door
To: 4
Above Power Bomb Blocks - Middle Left Door
Entrance condition: {
"comeInShinecharging": {
"length": 12,
"openEnd": 0
}
}Requires: "canChainTemporaryBlue" "canXRayTurnaround" Exit condition: {
"leaveWithTemporaryBlue": {}
}Unlocks doors: {"types":["ammo"],"requires":[]} |
From: 5
Above Power Bomb Blocks - Bottom Left Door
To: 5
Above Power Bomb Blocks - Bottom Left Door
Requires: {
"obstaclesNotCleared": [
"A"
]
}
{
"or": [
{
"canShineCharge": {
"usedTiles": 12,
"openEnd": 0
}
},
{
"and": [
{
"or": [
{
"doorUnlockedAtNode": 5
},
{
"doorUnlockedAtNode": 6
}
]
},
{
"canShineCharge": {
"usedTiles": 13,
"openEnd": 0
}
}
]
},
{
"and": [
{
"doorUnlockedAtNode": 5
},
{
"doorUnlockedAtNode": 6
},
{
"canShineCharge": {
"usedTiles": 14,
"openEnd": 0
}
}
]
}
]
}
"h_CrystalSpark"Clears obstacles: A Unlocks doors: {"nodeId":5,"types":["ammo"],"requires":[]}
{"nodeId":6,"types":["ammo"],"requires":[]} |
From: 5
Above Power Bomb Blocks - Bottom Left Door
To: 5
Above Power Bomb Blocks - Bottom Left Door
Entrance condition: {
"comeInShinecharging": {
"length": 12,
"openEnd": 0
},
"comesInHeated": "no"
}Requires: "h_CrystalSpark" Clears obstacles: A |
From: 5
Above Power Bomb Blocks - Bottom Left Door
To: 5
Above Power Bomb Blocks - Bottom Left Door
Entrance condition: {
"comeInWithRMode": {}
}Clears obstacles: R-Mode |
From: 5
Above Power Bomb Blocks - Bottom Left Door
To: 5
Above Power Bomb Blocks - Bottom Left Door
Exit condition: {
"leaveWithRunway": {
"length": 4,
"openEnd": 1
}
} |
From: 5
Above Power Bomb Blocks - Bottom Left Door
To: 5
Above Power Bomb Blocks - Bottom Left Door
It is possible to save a lot of time by using a Super to knock the clockwise Zeela off the small near the top of the room. Requires: "h_frozenEnemyRunway"
{
"or": [
"canBeVeryPatient",
{
"ammo": {
"type": "Super",
"count": 1
}
}
]
}Exit condition: {
"leaveWithRunway": {
"length": 5,
"openEnd": 1
}
} |
From: 5
Above Power Bomb Blocks - Bottom Left Door
To: 5
Above Power Bomb Blocks - Bottom Left Door
Requires: {
"obstaclesNotCleared": [
"A"
]
}Exit condition: {
"leaveWithRunway": {
"length": 13,
"openEnd": 0
}
} |
From: 5
Above Power Bomb Blocks - Bottom Left Door
To: 5
Above Power Bomb Blocks - Bottom Left Door
Requires: {
"obstaclesNotCleared": [
"A"
]
}
{
"doorUnlockedAtNode": 6
}Exit condition: {
"leaveWithRunway": {
"length": 14,
"openEnd": 0
}
}Unlocks doors: {"nodeId":6,"types":["ammo"],"requires":[]} |
From: 5
Above Power Bomb Blocks - Bottom Left Door
To: 5
Above Power Bomb Blocks - Bottom Left Door
Exit condition: {
"leaveWithGModeSetup": {}
} |
From: 5
Above Power Bomb Blocks - Bottom Left Door
To: 5
Above Power Bomb Blocks - Bottom Left Door
It takes 60 seconds for the global Zeela to make it over here. A Super could speed this up, but it's likely to just get the Zeela stuck. Requires: {
"enemyDamage": {
"enemy": "Zeela",
"type": "contact",
"hits": 1
}
} |
From: 5
Above Power Bomb Blocks - Bottom Left Door
To: 6
Above Power Bomb Blocks - Bottom Right Door
Entrance condition: {
"comeInShinecharging": {
"length": 13,
"openEnd": 0
}
}Requires: {
"shineChargeFrames": 20
}Exit condition: {
"leaveShinecharged": {}
}Unlocks doors: {"types":["super"],"requires":[]}
{"types":["missiles","powerbomb"],"requires":["never"]} |
From: 5
Above Power Bomb Blocks - Bottom Left Door
To: 6
Above Power Bomb Blocks - Bottom Right Door
Entrance condition: {
"comeInShinecharged": {}
}Requires: {
"shineChargeFrames": 55
}Exit condition: {
"leaveShinecharged": {}
}Unlocks doors: {"types":["super"],"requires":[]}
{"types":["missiles","powerbomb"],"requires":["never"]} |
From: 5
Above Power Bomb Blocks - Bottom Left Door
To: 6
Above Power Bomb Blocks - Bottom Right Door
Entrance condition: {
"comeInShinecharged": {}
}Requires: {
"shineChargeFrames": 10
}
{
"shinespark": {
"frames": 21,
"excessFrames": 0
}
}Exit condition: {
"leaveWithSpark": {}
}Unlocks doors: {"types":["super"],"requires":[]}
{"types":["missiles","powerbomb"],"requires":["never"]} |
From: 5
Above Power Bomb Blocks - Bottom Left Door
To: 6
Above Power Bomb Blocks - Bottom Right Door
Entrance condition: {
"comeInShinecharging": {
"length": 12,
"openEnd": 0
}
}Exit condition: {
"leaveWithTemporaryBlue": {}
}Unlocks doors: {"types":["ammo"],"requires":[]} |
From: 5
Above Power Bomb Blocks - Bottom Left Door
To: 6
Above Power Bomb Blocks - Bottom Right Door
Entrance condition: {
"comeInWithStoredFallSpeed": {
"fallSpeedInTiles": 1
}
}Exit condition: {
"leaveWithStoredFallSpeed": {
"fallSpeedInTiles": 1
}
}Unlocks doors: {"types":["missiles","super"],"requires":[]}
{"types":["powerbomb"],"requires":["never"]} |
From: 5
Above Power Bomb Blocks - Bottom Left Door
To: 6
Above Power Bomb Blocks - Bottom Right Door
Entrance condition: {
"comeInWithStoredFallSpeed": {
"fallSpeedInTiles": 2
}
}Exit condition: {
"leaveWithStoredFallSpeed": {
"fallSpeedInTiles": 2
}
}Unlocks doors: {"types":["missiles","super"],"requires":[]}
{"types":["powerbomb"],"requires":["never"]} |
From: 5
Above Power Bomb Blocks - Bottom Left Door
To: 7
Below Power Bomb Blocks - Top Right Door
Entrance condition: {
"comeInShinecharging": {
"length": 12,
"openEnd": 0
}
}Requires: "canLongChainTemporaryBlue"
"canXRayTurnaround"
"can4HighMidAirMorph"
{
"ammo": {
"type": "PowerBomb",
"count": 1
}
}Exit condition: {
"leaveWithTemporaryBlue": {}
}Unlocks doors: {"types":["ammo"],"requires":[]} |
Come in Shinecharging, Leave With Temporary Blue (Partial Runway)
(Expert)
Green Brinstar Main Shaft
From: 5
Above Power Bomb Blocks - Bottom Left Door
To: 7
Below Power Bomb Blocks - Top Right Door
After falling through the shot block, bounce on the single-tile platform (rather than unmorphing onto it) to more easily reach the door. Entrance condition: {
"comeInShinecharging": {
"length": 5,
"openEnd": 0
}
}Requires: "canChainTemporaryBlue"
{
"ammo": {
"type": "PowerBomb",
"count": 1
}
}Exit condition: {
"leaveWithTemporaryBlue": {}
}Unlocks doors: {"types":["ammo"],"requires":[]} |
From: 5
Above Power Bomb Blocks - Bottom Left Door
To: 8
Below Power Bomb Blocks - Bottom Left Door
Entrance condition: {
"comeInShinecharging": {
"length": 12,
"openEnd": 0
}
}Requires: "canLongChainTemporaryBlue"
"can4HighMidAirMorph"
"canXRayTurnaround"
{
"ammo": {
"type": "PowerBomb",
"count": 1
}
}Exit condition: {
"leaveWithTemporaryBlue": {}
}Unlocks doors: {"types":["ammo"],"requires":[]} |
From: 5
Above Power Bomb Blocks - Bottom Left Door
To: 12
Above Power Bomb Blocks - Main Junction
|
From: 5
Above Power Bomb Blocks - Bottom Left Door
To: 13
Below Power Bomb Blocks - Main Junction
Entrance condition: {
"comeInWithGMode": {
"mode": "any",
"morphed": true
}
}Requires: "h_artificialMorphPowerBomb" Clears obstacles: A |
From: 5
Above Power Bomb Blocks - Bottom Left Door
To: 13
Below Power Bomb Blocks - Main Junction
Entrance condition: {
"comeInWithStoredFallSpeed": {
"fallSpeedInTiles": 1
}
} |
From: 5
Above Power Bomb Blocks - Bottom Left Door
To: 13
Below Power Bomb Blocks - Main Junction
Entrance condition: {
"comeInWithStoredFallSpeed": {
"fallSpeedInTiles": 2
}
} |
From: 5
Above Power Bomb Blocks - Bottom Left Door
To: 13
Below Power Bomb Blocks - Main Junction
Land in the right side of the leftmost Samus Eater of Alpha Power Bomb Room, or the second Samus Eater from the right of Hellway. Entrance condition: {
"comeInWithSamusEaterTeleport": {
"floorPositions": [
[
12,
13
],
[
13,
13
],
[
15,
13
]
],
"ceilingPositions": []
}
}Requires: "Morph" |
From: 5
Above Power Bomb Blocks - Bottom Left Door
To: 16
G-Mode Junction (Top Of Room)
Entrance condition: {
"comeInWithGMode": {
"mode": "any",
"morphed": false
}
} |
From: 6
Above Power Bomb Blocks - Bottom Right Door
To: 2
Above Power Bomb Blocks - Top Left Door
Entrance condition: {
"comeInShinecharging": {
"length": 12,
"openEnd": 0
}
}Requires: "HiJump"
"canShinechargeMovementComplex"
{
"shinespark": {
"frames": 10,
"excessFrames": 0
}
}Exit condition: {
"leaveWithSpark": {}
}Unlocks doors: {"types":["super"],"requires":[]}
{"types":["missiles","powerbomb"],"requires":["never"]} |
From: 6
Above Power Bomb Blocks - Bottom Right Door
To: 2
Above Power Bomb Blocks - Top Left Door
Entrance condition: {
"comeInShinecharging": {
"length": 12,
"openEnd": 0
}
}Requires: "canLongChainTemporaryBlue" "canXRayTurnaround" Exit condition: {
"leaveWithTemporaryBlue": {}
}Unlocks doors: {"types":["ammo"],"requires":[]} |
From: 6
Above Power Bomb Blocks - Bottom Right Door
To: 3
Above Power Bomb Blocks - Top Right Door
Enter with G-mode direct, back up to between 1 and 6 pixels from the door transition, and activate X-ray to get very deep stuck in the door. Climb up 2 screens, and perform a turnaround buffered spin-jump away from the door to trigger the transition, bypassing any lock on the door. Entrance condition: {
"comeInWithGMode": {
"mode": "direct",
"morphed": false
}
}Requires: "canGModeXRayClimb" "canLongXRayClimb" Bypasses door shell: true |
From: 6
Above Power Bomb Blocks - Bottom Right Door
To: 3
Above Power Bomb Blocks - Top Right Door
Entrance condition: {
"comeInShinecharging": {
"length": 12,
"openEnd": 0
}
}Requires: "HiJump"
"canShinechargeMovementComplex"
{
"shinespark": {
"frames": 9,
"excessFrames": 0
}
}Exit condition: {
"leaveWithSpark": {}
}Unlocks doors: {"types":["super"],"requires":[]}
{"types":["missiles","powerbomb"],"requires":["never"]} |
From: 6
Above Power Bomb Blocks - Bottom Right Door
To: 3
Above Power Bomb Blocks - Top Right Door
Entrance condition: {
"comeInShinecharging": {
"length": 12,
"openEnd": 0
}
}Requires: "canLongChainTemporaryBlue" "canXRayTurnaround" Exit condition: {
"leaveWithTemporaryBlue": {}
}Unlocks doors: {"types":["ammo"],"requires":[]} |
From: 6
Above Power Bomb Blocks - Bottom Right Door
To: 4
Above Power Bomb Blocks - Middle Left Door
Entrance condition: {
"comeInShinecharging": {
"length": 12,
"openEnd": 0
}
}Requires: "HiJump"
"canShinechargeMovementComplex"
{
  "shineChargeFrames": 100
}
Exit condition: {
"leaveShinecharged": {}
}Unlocks doors: {"types":["super"],"requires":[]}
{"types":["missiles","powerbomb"],"requires":["never"]} |
From: 6
Above Power Bomb Blocks - Bottom Right Door
To: 4
Above Power Bomb Blocks - Middle Left Door
Entrance condition: {
"comeInShinecharging": {
"length": 12,
"openEnd": 0
}
}Requires: "canWallJump"
"canShinechargeMovementComplex"
{
"shineChargeFrames": 125
}Exit condition: {
"leaveShinecharged": {}
}Unlocks doors: {"types":["super"],"requires":[]}
{"types":["missiles","powerbomb"],"requires":["never"]} |
From: 6
Above Power Bomb Blocks - Bottom Right Door
To: 4
Above Power Bomb Blocks - Middle Left Door
Entrance condition: {
"comeInShinecharging": {
"length": 12,
"openEnd": 0
}
}Requires: "canWallJump"
"canShinechargeMovementComplex"
{
"shineChargeFrames": 145
}Exit condition: {
"leaveShinecharged": {}
}Unlocks doors: {"types":["super"],"requires":[]}
{"types":["missiles","powerbomb"],"requires":["never"]} |
From: 6
Above Power Bomb Blocks - Bottom Right Door
To: 4
Above Power Bomb Blocks - Middle Left Door
Entrance condition: {
"comeInShinecharged": {}
}Requires: {
"shineChargeFrames": 125
}
"HiJump"
"canShinechargeMovementComplex"Exit condition: {
"leaveShinecharged": {}
}Unlocks doors: {"types":["super"],"requires":[]}
{"types":["missiles","powerbomb"],"requires":["never"]} |
From: 6
Above Power Bomb Blocks - Bottom Right Door
To: 4
Above Power Bomb Blocks - Middle Left Door
Entrance condition: {
"comeInShinecharged": {}
}Requires: {
"shineChargeFrames": 140
}
"canTrickyDashJump"
"canShinechargeMovementComplex"Exit condition: {
"leaveShinecharged": {}
}Unlocks doors: {"types":["super"],"requires":[]}
{"types":["missiles","powerbomb"],"requires":["never"]} |
From: 6
Above Power Bomb Blocks - Bottom Right Door
To: 4
Above Power Bomb Blocks - Middle Left Door
Entrance condition: {
"comeInShinecharged": {}
}Requires: {
"shineChargeFrames": 120
}
"canTrickyDashJump"
"canShinechargeMovementComplex"
{
"shinespark": {
"frames": 4,
"excessFrames": 0
}
}Exit condition: {
"leaveWithSpark": {}
}Unlocks doors: {"types":["super"],"requires":[]}
{"types":["missiles","powerbomb"],"requires":["never"]} |
From: 6
Above Power Bomb Blocks - Bottom Right Door
To: 4
Above Power Bomb Blocks - Middle Left Door
Entrance condition: {
"comeInShinecharging": {
"length": 12,
"openEnd": 0
}
}Requires: "canChainTemporaryBlue" "canXRayTurnaround" Exit condition: {
"leaveWithTemporaryBlue": {}
}Unlocks doors: {"types":["ammo"],"requires":[]} |
From: 6
Above Power Bomb Blocks - Bottom Right Door
To: 5
Above Power Bomb Blocks - Bottom Left Door
Entrance condition: {
"comeInShinecharging": {
"length": 13,
"openEnd": 0
}
}Requires: {
"shineChargeFrames": 20
}Exit condition: {
"leaveShinecharged": {}
}Unlocks doors: {"types":["super"],"requires":[]}
{"types":["missiles","powerbomb"],"requires":["never"]} |
From: 6
Above Power Bomb Blocks - Bottom Right Door
To: 5
Above Power Bomb Blocks - Bottom Left Door
Entrance condition: {
"comeInShinecharged": {}
}Requires: {
"shineChargeFrames": 55
}Exit condition: {
"leaveShinecharged": {}
}Unlocks doors: {"types":["super"],"requires":[]}
{"types":["missiles","powerbomb"],"requires":["never"]} |
From: 6
Above Power Bomb Blocks - Bottom Right Door
To: 5
Above Power Bomb Blocks - Bottom Left Door
Entrance condition: {
"comeInShinecharged": {}
}Requires: {
"shineChargeFrames": 10
}
{
"shinespark": {
"frames": 21,
"excessFrames": 0
}
}Exit condition: {
"leaveWithSpark": {}
}Unlocks doors: {"types":["super"],"requires":[]}
{"types":["missiles","powerbomb"],"requires":["never"]} |
From: 6
Above Power Bomb Blocks - Bottom Right Door
To: 5
Above Power Bomb Blocks - Bottom Left Door
Entrance condition: {
"comeInShinecharging": {
"length": 12,
"openEnd": 0
}
}Exit condition: {
"leaveWithTemporaryBlue": {}
}Unlocks doors: {"types":["ammo"],"requires":[]} |
From: 6
Above Power Bomb Blocks - Bottom Right Door
To: 5
Above Power Bomb Blocks - Bottom Left Door
Entrance condition: {
"comeInWithStoredFallSpeed": {
"fallSpeedInTiles": 1
}
}Exit condition: {
"leaveWithStoredFallSpeed": {
"fallSpeedInTiles": 1
}
}Unlocks doors: {"types":["missiles","super"],"requires":[]}
{"types":["powerbomb"],"requires":["never"]} |
From: 6
Above Power Bomb Blocks - Bottom Right Door
To: 5
Above Power Bomb Blocks - Bottom Left Door
Entrance condition: {
"comeInWithStoredFallSpeed": {
"fallSpeedInTiles": 2
}
}Exit condition: {
"leaveWithStoredFallSpeed": {
"fallSpeedInTiles": 2
}
}Unlocks doors: {"types":["missiles","super"],"requires":[]}
{"types":["powerbomb"],"requires":["never"]} |
From: 6
Above Power Bomb Blocks - Bottom Right Door
To: 6
Above Power Bomb Blocks - Bottom Right Door
Entrance condition: {
"comeInShinecharging": {
"length": 12,
"openEnd": 0
},
"comesInHeated": "no"
}Requires: "h_CrystalSpark" Clears obstacles: A |
From: 6
Above Power Bomb Blocks - Bottom Right Door
To: 6
Above Power Bomb Blocks - Bottom Right Door
Entrance condition: {
"comeInWithRMode": {}
}Clears obstacles: R-Mode |
From: 6
Above Power Bomb Blocks - Bottom Right Door
To: 6
Above Power Bomb Blocks - Bottom Right Door
Exit condition: {
"leaveWithRunway": {
"length": 4,
"openEnd": 1
}
} |
From: 6
Above Power Bomb Blocks - Bottom Right Door
To: 6
Above Power Bomb Blocks - Bottom Right Door
Requires: "h_frozenEnemyRunway" "canBePatient" Exit condition: {
"leaveWithRunway": {
"length": 5,
"openEnd": 1
}
} |
From: 6
Above Power Bomb Blocks - Bottom Right Door
To: 6
Above Power Bomb Blocks - Bottom Right Door
Requires: {
"obstaclesNotCleared": [
"A"
]
}Exit condition: {
"leaveWithRunway": {
"length": 13,
"openEnd": 0
}
} |
From: 6
Above Power Bomb Blocks - Bottom Right Door
To: 6
Above Power Bomb Blocks - Bottom Right Door
Requires: {
"obstaclesNotCleared": [
"A"
]
}
{
"doorUnlockedAtNode": 5
}Exit condition: {
"leaveWithRunway": {
"length": 13,
"openEnd": 0
}
}Unlocks doors: {"nodeId":5,"types":["ammo"],"requires":[]} |
From: 6
Above Power Bomb Blocks - Bottom Right Door
To: 6
Above Power Bomb Blocks - Bottom Right Door
Exit condition: {
"leaveWithGModeSetup": {}
} |
From: 6
Above Power Bomb Blocks - Bottom Right Door
To: 6
Above Power Bomb Blocks - Bottom Right Door
It takes 50 seconds for the global Zeela to make it over here. A Super could speed this up, but it's likely to just get the Zeela stuck. Requires: {
"enemyDamage": {
"enemy": "Zeela",
"type": "contact",
"hits": 1
}
} |
From: 6
Above Power Bomb Blocks - Bottom Right Door
To: 7
Below Power Bomb Blocks - Top Right Door
Entrance condition: {
"comeInShinecharging": {
"length": 12,
"openEnd": 0
}
}Requires: "canLongChainTemporaryBlue"
"canXRayTurnaround"
{
"ammo": {
"type": "PowerBomb",
"count": 1
}
}Exit condition: {
"leaveWithTemporaryBlue": {}
}Unlocks doors: {"types":["ammo"],"requires":[]} |
From: 6
Above Power Bomb Blocks - Bottom Right Door
To: 8
Below Power Bomb Blocks - Bottom Left Door
Entrance condition: {
"comeInShinecharging": {
"length": 12,
"openEnd": 0
}
}Requires: "canLongChainTemporaryBlue"
"canXRayTurnaround"
{
"ammo": {
"type": "PowerBomb",
"count": 1
}
}Exit condition: {
"leaveWithTemporaryBlue": {}
}Unlocks doors: {"types":["ammo"],"requires":[]} |
Come in Shinecharging, Leave With Temporary Blue (Partial Runway)
(Insane)
Green Brinstar Main Shaft
From: 6
Above Power Bomb Blocks - Bottom Right Door
To: 8
Below Power Bomb Blocks - Bottom Left Door
Entrance condition: {
"comeInShinecharging": {
"length": 6,
"openEnd": 0
}
}Requires: "canLongChainTemporaryBlue"
{
"ammo": {
"type": "PowerBomb",
"count": 1
}
}Exit condition: {
"leaveWithTemporaryBlue": {}
}Unlocks doors: {"types":["ammo"],"requires":[]} |
From: 6
Above Power Bomb Blocks - Bottom Right Door
To: 12
Above Power Bomb Blocks - Main Junction
|
From: 6
Above Power Bomb Blocks - Bottom Right Door
To: 13
Below Power Bomb Blocks - Main Junction
Entrance condition: {
"comeInWithGMode": {
"mode": "any",
"morphed": true
}
}Requires: "h_artificialMorphPowerBomb" Clears obstacles: A |
From: 6
Above Power Bomb Blocks - Bottom Right Door
To: 13
Below Power Bomb Blocks - Main Junction
Entrance condition: {
"comeInWithStoredFallSpeed": {
"fallSpeedInTiles": 1
}
} |
From: 6
Above Power Bomb Blocks - Bottom Right Door
To: 13
Below Power Bomb Blocks - Main Junction
Entrance condition: {
"comeInWithStoredFallSpeed": {
"fallSpeedInTiles": 2
}
} |
From: 6
Above Power Bomb Blocks - Bottom Right Door
To: 13
Below Power Bomb Blocks - Main Junction
Entrance condition: {
"comeInWithSamusEaterTeleport": {
"floorPositions": [
[
15,
13
],
[
1,
13
]
],
"ceilingPositions": []
}
}Requires: "Morph" |
From: 6
Above Power Bomb Blocks - Bottom Right Door
To: 13
Below Power Bomb Blocks - Main Junction
Entrance condition: {
"comeInWithSuperSink": {}
} |
From: 6
Above Power Bomb Blocks - Bottom Right Door
To: 16
G-Mode Junction (Top Of Room)
Entrance condition: {
"comeInWithGMode": {
"mode": "any",
"morphed": false
}
} |
From: 7
Below Power Bomb Blocks - Top Right Door
To: 2
Above Power Bomb Blocks - Top Left Door
Entrance condition: {
"comeInShinecharging": {
"length": 2,
"openEnd": 0
}
}Requires: "canLongChainTemporaryBlue"
"canXRayTurnaround"
{
"ammo": {
"type": "PowerBomb",
"count": 1
}
}Exit condition: {
"leaveWithTemporaryBlue": {}
}Unlocks doors: {"types":["ammo"],"requires":[]} |
From: 7
Below Power Bomb Blocks - Top Right Door
To: 3
Above Power Bomb Blocks - Top Right Door
Enter with G-mode direct, back up to between 1 and 6 pixels from the door transition, and activate X-ray to get very deep stuck in the door. Climb up 3 screens, and perform a turnaround buffered spin-jump away from the door to trigger the transition, bypassing any lock on the door. Entrance condition: {
"comeInWithGMode": {
"mode": "direct",
"morphed": false
}
}Requires: "canGModeXRayClimb" "canLongXRayClimb" "canBePatient" Bypasses door shell: true |
From: 7
Below Power Bomb Blocks - Top Right Door
To: 3
Above Power Bomb Blocks - Top Right Door
Entrance condition: {
"comeInShinecharging": {
"length": 2,
"openEnd": 0
}
}Requires: "canLongChainTemporaryBlue"
"canXRayTurnaround"
{
"ammo": {
"type": "PowerBomb",
"count": 1
}
}Exit condition: {
"leaveWithTemporaryBlue": {}
}Unlocks doors: {"types":["ammo"],"requires":[]} |
From: 7
Below Power Bomb Blocks - Top Right Door
To: 4
Above Power Bomb Blocks - Middle Left Door
Entrance condition: {
"comeInShinecharging": {
"length": 2,
"openEnd": 0
}
}Requires: "canLongChainTemporaryBlue"
"canXRayTurnaround"
{
"ammo": {
"type": "PowerBomb",
"count": 1
}
}Exit condition: {
"leaveWithTemporaryBlue": {}
}Unlocks doors: {"types":["ammo"],"requires":[]} |
From: 7
Below Power Bomb Blocks - Top Right Door
To: 5
Above Power Bomb Blocks - Bottom Left Door
Entrance condition: {
"comeInShinecharging": {
"length": 2,
"openEnd": 0
}
}Requires: "canChainTemporaryBlue"
{
"ammo": {
"type": "PowerBomb",
"count": 1
}
}Exit condition: {
"leaveWithTemporaryBlue": {}
}Unlocks doors: {"types":["ammo"],"requires":[]} |
From: 7
Below Power Bomb Blocks - Top Right Door
To: 6
Above Power Bomb Blocks - Bottom Right Door
Enter with G-mode direct, back up to between 1 and 6 pixels from the door transition, and activate X-ray to get very deep stuck in the door. Climb up 1 screen, and perform a turnaround buffered spin-jump away from the door to trigger the transition, bypassing any lock on the door. Entrance condition: {
"comeInWithGMode": {
"mode": "direct",
"morphed": false
}
}Requires: "canGModeXRayClimb" Bypasses door shell: true |
From: 7
Below Power Bomb Blocks - Top Right Door
To: 6
Above Power Bomb Blocks - Bottom Right Door
Entrance condition: {
"comeInShinecharging": {
"length": 2,
"openEnd": 0
}
}Requires: "canLongChainTemporaryBlue"
"canXRayTurnaround"
{
"ammo": {
"type": "PowerBomb",
"count": 1
}
}Exit condition: {
"leaveWithTemporaryBlue": {}
}Unlocks doors: {"types":["ammo"],"requires":[]} |
From: 7
Below Power Bomb Blocks - Top Right Door
To: 7
Below Power Bomb Blocks - Top Right Door
Entrance condition: {
"comeInWithRMode": {}
}Clears obstacles: R-Mode |
From: 7
Below Power Bomb Blocks - Top Right Door
To: 7
Below Power Bomb Blocks - Top Right Door
Exit condition: {
"leaveWithRunway": {
"length": 3,
"openEnd": 1
}
} |
From: 7
Below Power Bomb Blocks - Top Right Door
To: 7
Below Power Bomb Blocks - Top Right Door
If coming from above, let the Zeela below the Power Bomb blocks to circle until it is on the bottom right area, then go up and place the bomb on the bottom central platform to break the blocks without killing the Zeela. Then quickly shoot the shot block to direct it down to the lower section. Requires: "h_frozenEnemyRunway" Exit condition: {
"leaveWithRunway": {
"length": 4,
"openEnd": 1
}
} |
From: 7
Below Power Bomb Blocks - Top Right Door
To: 7
Below Power Bomb Blocks - Top Right Door
Exit condition: {
"leaveWithGModeSetup": {}
} |
From: 7
Below Power Bomb Blocks - Top Right Door
To: 8
Below Power Bomb Blocks - Bottom Left Door
Come in with a shinecharge, and perform a moonfall off the ledge. While falling, fire a shot at the door and immediately activate the shinespark wind-up, to horizontally spark through the door. Entrance condition: {
"comeInShinecharged": {}
}Requires: {
"shineChargeFrames": 140
}
{
"notable": "Main Shaft Moonfall Spark"
}
"canMoonfall"
"canShinechargeMovementTricky"
{
"shinespark": {
"frames": 12,
"excessFrames": 0
}
}Exit condition: {
"leaveWithSpark": {}
}Unlocks doors: {"types":["super"],"requires":[]}
{"types":["missiles","powerbomb"],"requires":["never"]}Dev note: This is more difficult than the one in the Etecoon Shaft since there is not time to activate the spark after landing. Instead it must be activated mid-air while falling at high speed. With the vanilla door connection, this strat doesn't seem possible, due to just barely not having enough shinecharge frames. |
From: 7
Below Power Bomb Blocks - Top Right Door
To: 8
Below Power Bomb Blocks - Bottom Left Door
Entrance condition: {
"comeInShinecharging": {
"length": 2,
"openEnd": 0
}
}Requires: "canChainTemporaryBlue" Exit condition: {
"leaveWithTemporaryBlue": {}
}Unlocks doors: {"types":["ammo"],"requires":[]} |
From: 7
Below Power Bomb Blocks - Top Right Door
To: 9
Right Etecoon Shaft - Top Left Door
Roll through the camera scroll blocks in front of the bomb block, then go through the morph tunnel and IBJ to the top. Samus can boost to the left when she is high enough. A visual cue is when she is vertically near the top half of the door on the correct screen. Entrance condition: {
"comeInWithGMode": {
"mode": "any",
"morphed": true
}
}Requires: "h_artificialMorphLongIBJ" "canOffScreenMovement" "canBeVeryPatient" |
From: 7
Below Power Bomb Blocks - Top Right Door
To: 10
Right Etecoon Shaft - Bottom Left Door
Roll through the camera scroll blocks in front of the bomb block, then go through the morph tunnel and exit g-mode. Entrance condition: {
"comeInWithGMode": {
"mode": "any",
"morphed": true
}
}Requires: "h_artificialMorphMovement" Exit condition: {
"leaveNormally": {}
}Unlocks doors: {"types":["ammo"],"requires":[]} |
From: 7
Below Power Bomb Blocks - Top Right Door
To: 10
Right Etecoon Shaft - Bottom Left Door
Roll through the camera scroll blocks in front of the bomb block, then go through the morph tunnel and exit g-mode. Entrance condition: {
"comeInWithGMode": {
"mode": "any",
"morphed": true
}
}Requires: "h_artificialMorphMovement" "canOffScreenMovement" Dev note: Staying in the room and doing more will require canOffScreenMovement. FIXME: Find a way to prevent needing to do things that are too unreasonable to do, even with canOffScreenMovement. |
From: 7
Below Power Bomb Blocks - Top Right Door
To: 11
Right Etecoon Shaft - Item
Roll through the camera scroll blocks in front of the bomb block, then go through the morph tunnel and IBJ to the top. Samus can boost to the right when she is high enough. A visual cue is when she is vertically at the top of the door on the correct screen. Entrance condition: {
"comeInWithGMode": {
"mode": "any",
"morphed": true
}
}Requires: "h_artificialMorphLongIBJ" "canOffScreenMovement" "canBeVeryPatient" Dev note: This is only useful if the item is Morph |
From: 7
Below Power Bomb Blocks - Top Right Door
To: 12
Above Power Bomb Blocks - Main Junction
Entrance condition: {
"comeInWithDoorStuckSetup": {}
}Requires: "canXRayClimb" |
From: 7
Below Power Bomb Blocks - Top Right Door
To: 12
Above Power Bomb Blocks - Main Junction
Place a Power Bomb while on the top single tile platform, then exit g-mode before the Power Bomb explodes in order to break the blocks above. Entrance condition: {
"comeInWithGMode": {
"mode": "any",
"morphed": true
}
}Requires: "h_artificialMorphMovement" "h_artificialMorphPowerBomb" Clears obstacles: A |
From: 7
Below Power Bomb Blocks - Top Right Door
To: 13
Below Power Bomb Blocks - Main Junction
|
From: 8
Below Power Bomb Blocks - Bottom Left Door
To: 2
Above Power Bomb Blocks - Top Left Door
Enter with G-mode direct, back up to between 1 and 6 pixels from the door transition, and activate X-ray to get very deep stuck in the door. Climb up 6 screens, and perform a turnaround buffered spin-jump away from the door to trigger the transition, bypassing any lock on the door. Entrance condition: {
"comeInWithGMode": {
"mode": "direct",
"morphed": false
}
}Requires: "canGModeXRayClimb" "canLongXRayClimb" "canBeVeryPatient" Bypasses door shell: true |
From: 8
Below Power Bomb Blocks - Bottom Left Door
To: 2
Above Power Bomb Blocks - Top Left Door
Entrance condition: {
"comeInShinecharging": {
"length": 2,
"openEnd": 0
}
}Requires: "canLongChainTemporaryBlue"
"canXRayTurnaround"
"canBeVeryPatient"
{
"ammo": {
"type": "PowerBomb",
"count": 1
}
}Exit condition: {
"leaveWithTemporaryBlue": {}
}Unlocks doors: {"types":["ammo"],"requires":[]} |
From: 8
Below Power Bomb Blocks - Bottom Left Door
To: 3
Above Power Bomb Blocks - Top Right Door
Entrance condition: {
"comeInShinecharging": {
"length": 2,
"openEnd": 0
}
}Requires: "canLongChainTemporaryBlue"
"canXRayTurnaround"
"canBeVeryPatient"
{
"ammo": {
"type": "PowerBomb",
"count": 1
}
}Exit condition: {
"leaveWithTemporaryBlue": {}
}Unlocks doors: {"types":["ammo"],"requires":[]} |
From: 8
Below Power Bomb Blocks - Bottom Left Door
To: 4
Above Power Bomb Blocks - Middle Left Door
Enter with G-mode direct, back up to between 1 and 6 pixels from the door transition, and activate X-ray to get very deep stuck in the door. Climb up 5 screens, and perform a turnaround buffered spin-jump away from the door to trigger the transition, bypassing any lock on the door. Entrance condition: {
"comeInWithGMode": {
"mode": "direct",
"morphed": false
}
}Requires: "canGModeXRayClimb" "canLongXRayClimb" "canBeVeryPatient" Bypasses door shell: true |
From: 8
Below Power Bomb Blocks - Bottom Left Door
To: 4
Above Power Bomb Blocks - Middle Left Door
Entrance condition: {
"comeInShinecharging": {
"length": 2,
"openEnd": 0
}
}Requires: "canLongChainTemporaryBlue"
"canXRayTurnaround"
"canBeVeryPatient"
{
"ammo": {
"type": "PowerBomb",
"count": 1
}
}Exit condition: {
"leaveWithTemporaryBlue": {}
}Unlocks doors: {"types":["ammo"],"requires":[]} |
From: 8
Below Power Bomb Blocks - Bottom Left Door
To: 5
Above Power Bomb Blocks - Bottom Left Door
Enter with G-mode direct, back up to between 1 and 6 pixels from the door transition, and activate X-ray to get very deep stuck in the door. Climb up 4 screens, and perform a turnaround buffered spin-jump away from the door to trigger the transition, bypassing any lock on the door. Entrance condition: {
"comeInWithGMode": {
"mode": "direct",
"morphed": false
}
}Requires: "canGModeXRayClimb" "canLongXRayClimb" "canBePatient" Bypasses door shell: true |
From: 8
Below Power Bomb Blocks - Bottom Left Door
To: 5
Above Power Bomb Blocks - Bottom Left Door
Entrance condition: {
"comeInShinecharging": {
"length": 2,
"openEnd": 0
}
}Requires: "canLongChainTemporaryBlue"
"canXRayTurnaround"
"canBeVeryPatient"
{
"ammo": {
"type": "PowerBomb",
"count": 1
}
}Exit condition: {
"leaveWithTemporaryBlue": {}
}Unlocks doors: {"types":["ammo"],"requires":[]} |
From: 8
Below Power Bomb Blocks - Bottom Left Door
To: 6
Above Power Bomb Blocks - Bottom Right Door
Entrance condition: {
"comeInShinecharging": {
"length": 2,
"openEnd": 0
}
}Requires: "canLongChainTemporaryBlue"
"canXRayTurnaround"
"canBeVeryPatient"
{
"ammo": {
"type": "PowerBomb",
"count": 1
}
}Exit condition: {
"leaveWithTemporaryBlue": {}
}Unlocks doors: {"types":["ammo"],"requires":[]} |
From: 8
Below Power Bomb Blocks - Bottom Left Door
To: 7
Below Power Bomb Blocks - Top Right Door
Entrance condition: {
"comeInShinecharging": {
"length": 3,
"openEnd": 0
}
}Requires: "canLongChainTemporaryBlue" "canXRayTurnaround" Exit condition: {
"leaveWithTemporaryBlue": {}
}Unlocks doors: {"types":["ammo"],"requires":[]} |
From: 8
Below Power Bomb Blocks - Bottom Left Door
To: 8
Below Power Bomb Blocks - Bottom Left Door
Entrance condition: {
"comeInWithRMode": {}
}Clears obstacles: R-Mode |
From: 8
Below Power Bomb Blocks - Bottom Left Door
To: 8
Below Power Bomb Blocks - Bottom Left Door
Exit condition: {
"leaveWithRunway": {
"length": 3,
"openEnd": 1
}
} |
From: 8
Below Power Bomb Blocks - Bottom Left Door
To: 8
Below Power Bomb Blocks - Bottom Left Door
If coming from above, let the Zeela below the Power Bomb blocks to circle until it is on the bottom right area, then go up and place the bomb on the bottom central platform to break the blocks without killing the Zeela. Then quickly shoot the shot block to direct it down to the lower section. Requires: "h_frozenEnemyRunway" "canBePatient" Exit condition: {
"leaveWithRunway": {
"length": 4,
"openEnd": 1
}
} |
From: 8
Below Power Bomb Blocks - Bottom Left Door
To: 8
Below Power Bomb Blocks - Bottom Left Door
Bring the Zeela from above. It is not global, so it will need to remain on camera for it to move. Using a Super once it's on the right wall below the door can save 20 seconds. Exit condition: {
"leaveWithGModeSetup": {}
} |
From: 8
Below Power Bomb Blocks - Bottom Left Door
To: 9
Right Etecoon Shaft - Top Left Door
Enter with G-Mode. Jump to the top of the shaft. Place a Power Bomb against the ceiling next to the shot block (do not touch the scroll block). Drop back to the bottom of the shaft, roll against the bomb block until Samus passes through. Jump through the crumble block and through the morph tunnel. Once Samus can stand up, do so and use X-Ray to switch to R-Mode: be sure to hold X-Ray until it fully widens. Bomb the block, roll back through the tunnel and stop next to the crumble block. Use a Power Bomb or Five-Bomb Drop to clear the lower bomb block. Wait next to the crumble block until the global Zeela is visible coming down the right wall. Wait until the last possible moment to touch the crumbe block and allow the Zeela through, and immediately roll away to avoid getting hit by it. Lead it back through the Morph tunnel. Jump up to the box with the item. Wait for the Zeela to leave if needed, then Crystal Flash inside. Damage back down using the Zeela. If this needs multiple laps, use a Super to knock it down off the right wall before it can enter the item box. Lead it back through the Morph tunnel and into the Etecoons shaft. Let the Zeela pass going up the left wall and wait until it has moved far enough up before using a Crystal Flash. Use the Zeela to damage back down, shinecharge on the runway, and jump into the Zeela to interrupt. Entrance condition: {
"comeInWithGMode": {
"mode": "direct",
"morphed": false
}
}Requires: "Morph"
"h_usePowerBomb"
"canMidAirMorph"
"h_bombThings"
{
"or": [
"h_usePowerBomb",
{
"and": [
"Charge",
"h_useMorphBombs"
]
}
]
}
"canBeVeryPatient"
"h_CrystalFlashForReserveEnergy"
{
"or": [
{
"disableEquipment": "ETank"
},
{
"resourceAtMost": [
{
"type": "ReserveEnergy",
"count": 5
}
]
}
]
}
{
"or": [
"canConsecutiveWallJump",
"canLongIBJ",
"SpaceJump"
]
}
{
"or": [
{
"disableEquipment": "ETank"
},
{
"ammo": {
"type": "Super",
"count": 3
}
}
]
}
{
"or": [
{
"canShineCharge": {
"usedTiles": 17,
"openEnd": 1
}
},
{
"and": [
"h_frozenEnemyRunway",
{
"ammo": {
"type": "Super",
"count": 1
}
},
{
"canShineCharge": {
"usedTiles": 18,
"openEnd": 1
}
}
]
}
]
}
{
"autoReserveTrigger": {}
}
"canRModeSparkInterrupt"Clears obstacles: A |
From: 8
Below Power Bomb Blocks - Bottom Left Door
To: 9
Right Etecoon Shaft - Top Left Door
Roll through the camera scroll blocks in front of the bomb block, then go through the morph tunnel and IBJ to the top. Samus can boost to the left when she is high enough. A visual cue is when she is vertically near the top half of the door on the correct screen. Entrance condition: {
"comeInWithGMode": {
"mode": "any",
"morphed": true
}
}Requires: "h_artificialMorphLongIBJ" "canOffScreenMovement" "canBeVeryPatient" |
From: 8
Below Power Bomb Blocks - Bottom Left Door
To: 10
Right Etecoon Shaft - Bottom Left Door
Roll through the camera scroll blocks in front of the bomb block, then go through the morph tunnel and exit g-mode. Entrance condition: {
"comeInWithGMode": {
"mode": "any",
"morphed": true
}
}Requires: "h_artificialMorphMovement" Exit condition: {
"leaveNormally": {}
}Unlocks doors: {"types":["ammo"],"requires":[]} |
From: 8
Below Power Bomb Blocks - Bottom Left Door
To: 10
Right Etecoon Shaft - Bottom Left Door
Roll through the camera scroll blocks in front of the bomb block, then go through the morph tunnel and exit g-mode. Entrance condition: {
"comeInWithGMode": {
"mode": "any",
"morphed": true
}
}Requires: "h_artificialMorphMovement" "canOffScreenMovement" Dev note: Staying in the room and doing more will require canOffScreenMovement. FIXME: Find a way to prevent needing to do things that are too unreasonable to do, even with canOffScreenMovement. |
From: 8
Below Power Bomb Blocks - Bottom Left Door
To: 11
Right Etecoon Shaft - Item
Roll through the camera scroll blocks in front of the bomb block, then go through the morph tunnel and IBJ to the top. Samus can boost to the right when she is high enough. A visual cue is when she is vertically at the top of the door on the correct screen. Entrance condition: {
"comeInWithGMode": {
"mode": "any",
"morphed": true
}
}Requires: "h_artificialMorphLongIBJ" "canOffScreenMovement" "canBeVeryPatient" Dev note: This is only useful if the item is Morph |
From: 8
Below Power Bomb Blocks - Bottom Left Door
To: 12
Above Power Bomb Blocks - Main Junction
Climb up 4 screens. Entrance condition: {
"comeInWithDoorStuckSetup": {}
}Requires: "canLongXRayClimb" "canBePatient" |
From: 8
Below Power Bomb Blocks - Bottom Left Door
To: 12
Above Power Bomb Blocks - Main Junction
Place a Power Bomb while on the top single tile platform, then exit g-mode before the Power Bomb explodes in order to break the blocks above. Entrance condition: {
"comeInWithGMode": {
"mode": "any",
"morphed": true
}
}Requires: "h_artificialMorphPowerBomb"
{
"or": [
"h_artificialMorphIBJ",
{
"and": [
"h_artificialMorphSpringBall",
"HiJump"
]
},
{
"and": [
"h_artificialMorphSpringBall",
{
"tech": "canSpringBallBombJump"
},
{
"ammo": {
"type": "PowerBomb",
"count": 6
}
}
]
}
]
}Clears obstacles: A |
From: 8
Below Power Bomb Blocks - Bottom Left Door
To: 13
Below Power Bomb Blocks - Main Junction
|
From: 9
Right Etecoon Shaft - Top Left Door
To: 9
Right Etecoon Shaft - Top Left Door
Entrance condition: {
"comeInWithRMode": {}
}Clears obstacles: R-Mode |
From: 9
Right Etecoon Shaft - Top Left Door
To: 9
Right Etecoon Shaft - Top Left Door
Exit condition: {
"leaveWithRunway": {
"length": 4,
"openEnd": 1
}
} |
From: 9
Right Etecoon Shaft - Top Left Door
To: 9
Right Etecoon Shaft - Top Left Door
Requires: {
"canShineCharge": {
"usedTiles": 17,
"openEnd": 1
}
}
"canShinechargeMovement"
{
"shineChargeFrames": 60
}Exit condition: {
"leaveShinecharged": {}
} |
From: 9
Right Etecoon Shaft - Top Left Door
To: 9
Right Etecoon Shaft - Top Left Door
Achieve a shinecharge before running into the wall, to be able to make it to the door faster. Requires: {
"canShineCharge": {
"usedTiles": 16,
"openEnd": 1
}
}
"canShinechargeMovement"
{
"shineChargeFrames": 45
}Exit condition: {
"leaveShinecharged": {}
} |
From: 9
Right Etecoon Shaft - Top Left Door
To: 9
Right Etecoon Shaft - Top Left Door
Requires: {
"obstaclesNotCleared": [
"R-Mode"
]
}
"h_CrystalFlash" |
From: 9
Right Etecoon Shaft - Top Left Door
To: 9
Right Etecoon Shaft - Top Left Door
Requires: {
"canShineCharge": {
"usedTiles": 17,
"openEnd": 1
}
}
"h_CrystalSpark" |
From: 9
Right Etecoon Shaft - Top Left Door
To: 9
Right Etecoon Shaft - Top Left Door
Entrance condition: {
"comeInShinecharging": {
"length": 3,
"openEnd": 0
},
"comesInHeated": "no"
}Requires: "h_CrystalSpark" |
From: 9
Right Etecoon Shaft - Top Left Door
To: 9
Right Etecoon Shaft - Top Left Door
Entrance condition: {
"comeInWithGMode": {
"mode": "direct",
"morphed": false
}
}Requires: "h_doorImmediatelyClosedFix" Exit condition: {
"leaveWithGMode": {
"morphed": false
}
} |
From: 9
Right Etecoon Shaft - Top Left Door
To: 9
Right Etecoon Shaft - Top Left Door
Entrance condition: {
"comeInWithGMode": {
"mode": "direct",
"morphed": true
}
}Requires: "h_doorImmediatelyClosedFix" Exit condition: {
"leaveWithGMode": {
"morphed": true
}
} |
From: 9
Right Etecoon Shaft - Top Left Door
To: 10
Right Etecoon Shaft - Bottom Left Door
Run from left to right to gain a shinecharge, then immediately moonfall down the shaft. There is just barely enough time to shoot the door open (if not already open) and spark out. Requires: {
"notable": "Etecoon Shaft Moonfall Spark"
}
{
"canShineCharge": {
"usedTiles": 17,
"openEnd": 0
}
}
"canMoonfall"
"canShinechargeMovementTricky"
{
"shinespark": {
"frames": 12,
"excessFrames": 0
}
}Exit condition: {
"leaveWithSpark": {}
}Unlocks doors: {"types":["missiles","powerbomb"],"requires":[{"or":["SpaceJump","canLongIBJ","canConsecutiveWallJump"]}]}
{"types":["super"],"requires":[]} |
From: 9
Right Etecoon Shaft - Top Left Door
To: 10
Right Etecoon Shaft - Bottom Left Door
Requires: {
"canShineCharge": {
"usedTiles": 17,
"openEnd": 0
}
}
"canLongChainTemporaryBlue"
"canXRayTurnaround"
Exit condition: {
"leaveWithTemporaryBlue": {}
}Unlocks doors: {"types":["ammo"],"requires":[]} |
From: 9
Right Etecoon Shaft - Top Left Door
To: 11
Right Etecoon Shaft - Item
Entrance condition: {
"comeInWithGMode": {
"mode": "any",
"morphed": true
}
}Requires: "h_artificialMorphMovement" |
From: 9
Right Etecoon Shaft - Top Left Door
To: 12
Above Power Bomb Blocks - Main Junction
Place bombs against the item Chozo ball to overload PLMs. Then go through the bomb blocks and tunnel. IBJ up the left side, blind, until getting on the top small platform. Place a Power Bomb and exit g-mode before the bomb goes off to break the blocks. Entrance condition: {
"comeInWithGMode": {
"mode": "any",
"morphed": true
}
}Requires: {
"itemNotCollectedAtNode": 11
}
"canRiskPermanentLossOfAccess"
"h_artificialMorphLongIBJ"
"h_artificialMorphPowerBomb"
"canBePatient"
"canOffScreenMovement"
"canTrickyGMode"Clears obstacles: A |
From: 9
Right Etecoon Shaft - Top Left Door
To: 12
Above Power Bomb Blocks - Main Junction
Fall down to the Morph tunnel and roll through the bomb block. Roll through the camera scroll blocks in the tunnel a few times to overload PLMs before continuing and touching the crumble block. Carefully climb the shaft with an IBJ. Note that the camera moves to the left once getting high enough, making this harder. Land on the top block, place a Power Bomb, then quickly exit G-mode before it explodes to break the blocks above. Entrance condition: {
"comeInWithGMode": {
"mode": "any",
"morphed": true
}
}Requires: "h_blueSuitGMode" "h_artificialMorphLongIBJ" "h_artificialMorphPowerBomb" "canBePatient" "canOffScreenMovement" "canTrickyGMode" Clears obstacles: A |
From: 9
Right Etecoon Shaft - Top Left Door
To: 13
Below Power Bomb Blocks - Main Junction
Place bombs against the item Chozo ball to overload PLMs. Then go through the bomb blocks and tunnel, then exit G-mode. Alternatively, with Spring Ball and a Power Bomb, place a Power Bomb 3 tiles in from the left opening to overload PLMs all at once. Entrance condition: {
"comeInWithGMode": {
"mode": "any",
"morphed": true
}
}Requires: {
"itemNotCollectedAtNode": 11
}
"canRiskPermanentLossOfAccess"
{
"or": [
"h_artificialMorphIBJ",
{
"and": [
"canPowerBombItemOverloadPLMs",
"h_artificialMorphSpringBall",
"h_artificialMorphPowerBomb"
]
}
]
} |
From: 9
Right Etecoon Shaft - Top Left Door
To: 13
Below Power Bomb Blocks - Main Junction
Fall down to the Morph tunnel and roll through the bomb block. Roll through the camera scroll blocks in the tunnel a few times to overload PLMs before continuing and touching the crumble block. Entrance condition: {
"comeInWithGMode": {
"mode": "any",
"morphed": true
}
}Requires: "h_blueSuitGMode" |
From: 9
Right Etecoon Shaft - Top Left Door
To: 14
Right Etecoon Shaft - Wall Jump Checkpoint
|
From: 9
Right Etecoon Shaft - Top Left Door
To: 15
Right Etecoon Shaft - Upper Tunnel Entrance
Requires: {
"or": [
"canMidAirMorph",
"h_useSpringBall",
{
"and": [
"canTrivialMidAirMorph",
{
"or": [
"SpaceJump",
"canConsecutiveWallJump"
]
}
]
},
{
"and": [
"canIBJ",
"canBombHorizontally"
]
}
]
}Dev note: Doable with just a very long IBJ, but if bombing horizontally is too hard, that will be too. |
From: 10
Right Etecoon Shaft - Bottom Left Door
To: 9
Right Etecoon Shaft - Top Left Door
Entrance condition: {
"comeInShinecharged": {}
}Requires: {
"shineChargeFrames": 30
}
{
"shinespark": {
"frames": 75,
"excessFrames": 5
}
} |
From: 10
Right Etecoon Shaft - Bottom Left Door
To: 9
Right Etecoon Shaft - Top Left Door
Entrance condition: {
"comeInShinecharging": {
"length": 8,
"openEnd": 0
}
}Requires: {
"or": [
{
"shinespark": {
"frames": 75,
"excessFrames": 5
}
},
{
"and": [
"canMidairShinespark",
{
"shinespark": {
"frames": 68,
"excessFrames": 8
}
}
]
},
{
"and": [
"HiJump",
"canMidairShinespark",
{
"shinespark": {
"frames": 64,
"excessFrames": 8
}
}
]
},
{
"and": [
"HiJump",
"canSpeedyJump",
"canMidairShinespark",
{
"shinespark": {
"frames": 60,
"excessFrames": 8
}
}
]
}
]
} |
From: 10
Right Etecoon Shaft - Bottom Left Door
To: 9
Right Etecoon Shaft - Top Left Door
Requires: "h_storedSpark"
{
"or": [
{
"shinespark": {
"frames": 68,
"excessFrames": 8
}
},
{
"and": [
"HiJump",
{
"shinespark": {
"frames": 64,
"excessFrames": 8
}
}
]
},
{
"and": [
"HiJump",
"canSpeedyJump",
{
"shinespark": {
"frames": 60,
"excessFrames": 8
}
}
]
}
]
} |
From: 10
Right Etecoon Shaft - Bottom Left Door
To: 9
Right Etecoon Shaft - Top Left Door
Entrance condition: {
"comeInWithGMode": {
"mode": "any",
"morphed": true
}
}Requires: "h_artificialMorphLongIBJ" |
From: 10
Right Etecoon Shaft - Bottom Left Door
To: 9
Right Etecoon Shaft - Top Left Door
Entrance condition: {
"comeInWithGrappleSwing": {
"blocks": [
{
"position": [
8,
3
],
"note": "Grapple Beam Room"
},
{
"position": [
7,
3
],
"note": "Colosseum"
}
]
}
}Requires: "canTrickyGrappleJump" Dev note: Aside from these two, other setup rooms do not appear to work. |
From: 10
Right Etecoon Shaft - Bottom Left Door
To: 10
Right Etecoon Shaft - Bottom Left Door
Exit condition: {
"leaveWithRunway": {
"length": 9,
"openEnd": 0
}
} |
From: 10
Right Etecoon Shaft - Bottom Left Door
To: 10
Right Etecoon Shaft - Bottom Left Door
Requires: {
"obstaclesNotCleared": [
"R-Mode"
]
}
"h_CrystalFlash" |
From: 10
Right Etecoon Shaft - Bottom Left Door
To: 10
Right Etecoon Shaft - Bottom Left Door
Entrance condition: {
"comeInShinecharging": {
"length": 8,
"openEnd": 0
},
"comesInHeated": "no"
}Requires: "h_CrystalSpark" |
From: 10
Right Etecoon Shaft - Bottom Left Door
To: 10
Right Etecoon Shaft - Bottom Left Door
Entrance condition: {
"comeInWithRMode": {}
}Clears obstacles: R-Mode |
From: 10
Right Etecoon Shaft - Bottom Left Door
To: 11
Right Etecoon Shaft - Item
Entrance condition: {
"comeInWithGMode": {
"mode": "any",
"morphed": true
}
}Requires: "h_artificialMorphLongIBJ" |
From: 10
Right Etecoon Shaft - Bottom Left Door
To: 12
Above Power Bomb Blocks - Main Junction
IBJ up and place bombs against the item Chozo ball to overload PLMs. Then go through the bomb blocks and tunnel. IBJ up again, blind, until getting on the top small platform. Place a Power Bomb and exit g-mode before the bomb goes off to break the blocks. Entrance condition: {
"comeInWithGMode": {
"mode": "any",
"morphed": true
}
}Requires: {
"itemNotCollectedAtNode": 11
}
"canRiskPermanentLossOfAccess"
"h_artificialMorphLongIBJ"
"h_artificialMorphPowerBomb"
"canBePatient"
"canOffScreenMovement"
"canTrickyGMode"Clears obstacles: A |
From: 10
Right Etecoon Shaft - Bottom Left Door
To: 12
Above Power Bomb Blocks - Main Junction
IBJ up and roll through the bomb block; be sure not to bomb it or it will remain solid. Roll through the camera scroll blocks in the tunnel a few times to overload PLMs before continuing and touching the crumble block. Carefully climb the shaft with an IBJ. Note that the camera moves to the left once getting high enough, making this harder. Land on the top block, place a Power Bomb, then quickly exit G-mode before it explodes to break the blocks above. Entrance condition: {
"comeInWithGMode": {
"mode": "any",
"morphed": true
}
}Requires: "h_blueSuitGMode" "h_artificialMorphLongIBJ" "h_artificialMorphPowerBomb" "canBePatient" "canOffScreenMovement" "canTrickyGMode" Clears obstacles: A |
From: 10
Right Etecoon Shaft - Bottom Left Door
To: 13
Below Power Bomb Blocks - Main Junction
Climb up 1 screen. Once Samus appears one tile above the bottom of the door, you will be unable to climb higher, and it is safe to morph at this point. Entrance condition: {
"comeInWithDoorStuckSetup": {}
}Requires: "canXRayClimb"
{
"or": [
"h_bombThings",
{
"haveBlueSuit": {}
}
]
}Dev note: This strat is useful in case wall jumping is not available, or to save a Power Bomb in case going around through the internal door at the top is not possible. |
From: 10
Right Etecoon Shaft - Bottom Left Door
To: 13
Below Power Bomb Blocks - Main Junction
IBJ up and place bombs against the item Chozo ball to overload PLMs. Then go down, through the bomb blocks and tunnel, then exit G-mode. Entrance condition: {
"comeInWithGMode": {
"mode": "any",
"morphed": true
}
}Requires: {
"itemNotCollectedAtNode": 11
}
"canRiskPermanentLossOfAccess"
"h_artificialMorphLongIBJ"
"canBePatient" |
From: 10
Right Etecoon Shaft - Bottom Left Door
To: 13
Below Power Bomb Blocks - Main Junction
IBJ up and roll through the bomb block; be sure not to bomb it or it will remain solid. Roll through the camera scroll blocks in the tunnel a few times to overload PLMs before continuing and touching the crumble block. Entrance condition: {
"comeInWithGMode": {
"mode": "any",
"morphed": true
}
}Requires: "h_blueSuitGMode" "h_artificialMorphLongIBJ" |
Direct G-Mode, Blue Suit Spark, Overload PLMs with Chozo Ball Item
(Expert+)
Green Brinstar Main Shaft
From: 10
Right Etecoon Shaft - Bottom Left Door
To: 13
Below Power Bomb Blocks - Main Junction
Spark up the shaft, then shoot the Chozo ball to overload PLMs. Then go down, through the bomb blocks and tunnel, then exit G-mode. Entrance condition: {
"comeInWithGMode": {
"mode": "direct",
"morphed": false
}
}Requires: "Morph"
{
"blueSuitShinecharge": {}
}
{
"or": [
{
"shinespark": {
"frames": 68,
"excessFrames": 8
}
},
{
"and": [
"HiJump",
{
"shinespark": {
"frames": 64,
"excessFrames": 8
}
}
]
},
{
"and": [
"HiJump",
"canSpeedyJump",
{
"shinespark": {
"frames": 60,
"excessFrames": 8
}
}
]
}
]
} |
From: 10
Right Etecoon Shaft - Bottom Left Door
To: 14
Right Etecoon Shaft - Wall Jump Checkpoint
Requires: {
"or": [
"canWallJump",
"SpaceJump",
"canLongIBJ",
{
"and": [
"HiJump",
"canSpringBallJumpMidAir"
]
}
]
} |
From: 10
Right Etecoon Shaft - Bottom Left Door
To: 14
Right Etecoon Shaft - Wall Jump Checkpoint
This is specifically for shinesparking on low energy, where the shinespark will end before reaching the top. Entrance condition: {
"comeInShinecharged": {}
}Requires: {
"shineChargeFrames": 30
}
"canShinechargeMovement"
{
"shinespark": {
"frames": 75,
"excessFrames": 56
}
} |
From: 10
Right Etecoon Shaft - Bottom Left Door
To: 14
Right Etecoon Shaft - Wall Jump Checkpoint
This is a diagonal shinespark into the underside of the left side middle ledge, minimizing energy usage. Needs HiJump to bonk at the right place without walljumping. Entrance condition: {
"comeInShinecharged": {}
}Requires: {
"shineChargeFrames": 60
}
"HiJump"
"canMidairShinespark"
{
"shinespark": {
"frames": 20,
"excessFrames": 11
}
} |
From: 10
Right Etecoon Shaft - Bottom Left Door
To: 14
Right Etecoon Shaft - Wall Jump Checkpoint
With HiJump, spark diagonally to the left in order to bonk and stop the spark early; otherwise a vertical spark is needed. Entrance condition: {
"comeInShinecharging": {
"length": 8,
"openEnd": 0
}
}Requires: {
"or": [
{
"shinespark": {
"frames": 75,
"excessFrames": 64
}
},
{
"and": [
"canMidairShinespark",
{
"shinespark": {
"frames": 68,
"excessFrames": 57
}
}
]
},
{
"and": [
"HiJump",
"canMidairShinespark",
{
"shinespark": {
"frames": 20,
"excessFrames": 13
}
}
]
},
{
"and": [
"HiJump",
"canSpeedyJump",
"canMidairShinespark",
{
"shinespark": {
"frames": 16,
"excessFrames": 13
}
}
]
}
]
} |
From: 10
Right Etecoon Shaft - Bottom Left Door
To: 14
Right Etecoon Shaft - Wall Jump Checkpoint
Run into the room and jump just before hitting the right wall. Requires at least 3 tiles (with no open end) in the adjacent room, but is easier with more. Entrance condition: {
"comeInRunning": {
"speedBooster": "yes",
"minTiles": 2.4375
}
}Requires: "canSpeedyJump" "canCarefulJump" "HiJump" |
From: 10
Right Etecoon Shaft - Bottom Left Door
To: 14
Right Etecoon Shaft - Wall Jump Checkpoint
Entrance condition: {
"comeInRunning": {
"speedBooster": "yes",
"minTiles": 3.4375
}
}Requires: "canSpeedyJump" "HiJump" |
From: 10
Right Etecoon Shaft - Bottom Left Door
To: 14
Right Etecoon Shaft - Wall Jump Checkpoint
Run a precise distance, to hit a peak of the speed vs height graph. With Samus' back against the closed door, jump about a tile before hitting the right wall. Requires: "canTrickyDashJump" "canTrickySpringBallJump" |
From: 10
Right Etecoon Shaft - Bottom Left Door
To: 14
Right Etecoon Shaft - Wall Jump Checkpoint
With a runway of at least 12 tiles in the adjacent room, Samus should always be able to jump high enough if she jumps just before hitting the right wall. Entrance condition: {
"comeInRunning": {
"speedBooster": "yes",
"minTiles": 12
}
}Requires: "canSpeedyJump" "canTrickySpringBallJump" |
From: 10
Right Etecoon Shaft - Bottom Left Door
To: 14
Right Etecoon Shaft - Wall Jump Checkpoint
Entrance condition: {
"comeInWithSpringBallBounce": {
"speedBooster": "yes",
"movementType": "any",
"remoteAndLandingMinTiles": [
[
42,
0
]
]
}
}Requires: "canTrickyJump" Dev note: This needs a minimum extra run speed of $6.D. Speeds of $6.0 or $6.1 can also work but wouldn't provide a benefit over the in-room 'canTrickyDashJump' spring ball jump strat. |
From: 10
Right Etecoon Shaft - Bottom Left Door
To: 14
Right Etecoon Shaft - Wall Jump Checkpoint
Entrance condition: {
"comeInWithSidePlatform": {
"platforms": [
{
"minHeight": 2,
"maxHeight": 2,
"minTiles": 45,
"speedBooster": "yes",
"obstructions": [
[
1,
0
]
],
"requires": [],
"note": "Applies to Halfie Climb Room."
},
{
"minHeight": 3,
"maxHeight": 3,
"minTiles": 39.4375,
"speedBooster": "yes",
"obstructions": [
[
3,
2
]
],
"requires": [],
"note": "Applies to Metal Pirates Room.",
"detailNote": [
"This has a 2-frame window for the jump,",
"then a 1-frame or 2-frame window for the morph (after the transition), depending on the jump,",
"with a last-frame jump giving a 2-frame morph window."
]
}
]
}
}Requires: "canInsaneJump" "canMomentumConservingMorph" "canTrickySpringBallJump" Dev note: This strat is not very useful, since the in-room tricky dash jump into spring ball jump is easier. |
From: 10
Right Etecoon Shaft - Bottom Left Door
To: 14
Right Etecoon Shaft - Wall Jump Checkpoint
Requires: "h_storedSpark"
{
"shinespark": {
"frames": 68,
"excessFrames": 57
}
} |
From: 10
Right Etecoon Shaft - Bottom Left Door
To: 14
Right Etecoon Shaft - Wall Jump Checkpoint
Requires: "HiJump"
"h_storedSpark"
{
"or": [
{
"shinespark": {
"frames": 20,
"excessFrames": 13
}
},
{
"and": [
"canSpeedyJump",
{
"shinespark": {
"frames": 16,
"excessFrames": 13
}
}
]
}
]
} |
From: 10
Right Etecoon Shaft - Bottom Left Door
To: 14
Right Etecoon Shaft - Wall Jump Checkpoint
With a runway of at least 4 tiles in the adjacent room, jump just before hitting the right wall then spark diagonally to the left at the top of the jump. Entrance condition: {
"comeInRunning": {
"speedBooster": "yes",
"minTiles": 3.4375
}
}Requires: "canSpeedyJump"
{
"useFlashSuit": {}
}
{
"shinespark": {
"frames": 21,
"excessFrames": 12
}
}Dev note: FIXME: This could be done with a blue suit but is not possible to model currently. |
From: 10
Right Etecoon Shaft - Bottom Left Door
To: 14
Right Etecoon Shaft - Wall Jump Checkpoint
Spring ball jump then bounce on a Power Bomb in order to be able to midair spark. It is easiest to wait to turn around until after the bomb boost. With a blue suit, this requires using dash after shinecharging to be able to boost on the Power Bomb. Requires: {
"or": [
{
"useFlashSuit": {}
},
{
"and": [
"canInsaneJump",
{
"blueSuitShinecharge": {}
}
]
}
]
}
"canDash"
"canSpringBallJumpMidAir"
"canUnmorphBombBoost"
{
"shinespark": {
"frames": 18,
"excessFrames": 13
}
} |
From: 11
Right Etecoon Shaft - Item
To: 15
Right Etecoon Shaft - Upper Tunnel Entrance
Requires: "Morph" |
From: 12
Above Power Bomb Blocks - Main Junction
To: 1
Elevator
|
From: 12
Above Power Bomb Blocks - Main Junction
To: 2
Above Power Bomb Blocks - Top Left Door
|
From: 12
Above Power Bomb Blocks - Main Junction
To: 3
Above Power Bomb Blocks - Top Right Door
|
From: 12
Above Power Bomb Blocks - Main Junction
To: 4
Above Power Bomb Blocks - Middle Left Door
|
From: 12
Above Power Bomb Blocks - Main Junction
To: 5
Above Power Bomb Blocks - Bottom Left Door
|
From: 12
Above Power Bomb Blocks - Main Junction
To: 6
Above Power Bomb Blocks - Bottom Right Door
|
From: 12
Above Power Bomb Blocks - Main Junction
To: 12
Above Power Bomb Blocks - Main Junction
Enter R-Mode using any door. Crystal Flash (away from the Power Bomb blocks!) or farm the upper section enemies, except for one. Tight 1-screen shortcharge between the bottom doors. Both shells need to be opened. If R-Mode is entered below the Power Bomb blocks, you'll need to use a clip to get to the upper section without destroying the barrier. Requires: {
"obstaclesCleared": [
"R-Mode"
]
}
{
"obstaclesNotCleared": [
"A"
]
}
{
"or": [
"h_CrystalFlashForReserveEnergy",
{
"and": [
{
"disableEquipment": "ETank"
},
{
"or": [
{
"resourceAvailable": [
{
"type": "Energy",
"count": 85
}
]
},
{
"and": [
{
"enemyKill": {
"enemies": [
[
"Ripper 2 (red)"
],
[
"Ripper 2 (red)"
]
],
"excludedWeapons": [
"Super"
]
}
},
{
"resourceAvailable": [
{
"type": "Energy",
"count": 40
}
]
}
]
}
]
},
{
"resourceMissingAtMost": [
{
"type": "Missile",
"count": 0
}
]
},
{
"resourceMissingAtMost": [
{
"type": "Super",
"count": 0
}
]
},
{
"partialRefill": {
"type": "ReserveEnergy",
"limit": 1
}
}
]
}
]
}
{
"or": [
{
"canShineCharge": {
"usedTiles": 12,
"openEnd": 0
}
},
{
"and": [
{
"doorUnlockedAtNode": 5
},
{
"canShineCharge": {
"usedTiles": 13,
"openEnd": 0
}
}
]
},
{
"and": [
{
"doorUnlockedAtNode": 6
},
{
"canShineCharge": {
"usedTiles": 13,
"openEnd": 0
}
}
]
},
{
"and": [
{
"doorUnlockedAtNode": 5
},
{
"doorUnlockedAtNode": 6
},
{
"canShineCharge": {
"usedTiles": 14,
"openEnd": 0
}
}
]
}
]
}
{
"autoReserveTrigger": {}
}
"canRModeSparkInterrupt"Resets obstacles: R-Mode Unlocks doors: {"nodeId":5,"types":["ammo"],"requires":[]}
{"nodeId":6,"types":["ammo"],"requires":[]} |
From: 12
Above Power Bomb Blocks - Main Junction
To: 12
Above Power Bomb Blocks - Main Junction
Requires: {
"or": [
{
"and": [
{
"resetRoom": {
"nodes": [
2,
3,
4
]
}
},
{
"cycleFrames": 660
}
]
},
{
"and": [
{
"resetRoom": {
"nodes": [
5,
6
]
}
},
{
"cycleFrames": 760
}
]
},
{
"and": [
{
"resetRoom": {
"nodes": [
1
]
}
},
{
"cycleFrames": 1700
}
]
}
]
}
{
"or": [
"Wave",
"Spazer",
"Plasma",
{
"cycleFrames": 120
}
]
}Resets obstacles: A, R-Mode Farm cycle drops: 4 Zeela |
From: 12
Above Power Bomb Blocks - Main Junction
To: 12
Above Power Bomb Blocks - Main Junction
Requires: {
"noBlueSuit": {}
}
"ScrewAttack"
{
"or": [
{
"and": [
{
"resetRoom": {
"nodes": [
2,
3
]
}
},
{
"cycleFrames": 375
}
]
},
{
"and": [
{
"resetRoom": {
"nodes": [
4
]
}
},
{
"cycleFrames": 445
}
]
},
{
"and": [
{
"resetRoom": {
"nodes": [
5,
6
]
}
},
{
"cycleFrames": 600
}
]
},
{
"and": [
{
"resetRoom": {
"nodes": [
1
]
}
},
{
"cycleFrames": 1530
}
]
}
]
}Resets obstacles: A, R-Mode Farm cycle drops: 2 Ripper 2 (red) |
From: 12
Above Power Bomb Blocks - Main Junction
To: 12
Above Power Bomb Blocks - Main Junction
Requires: {
"obstaclesNotCleared": [
"R-Mode"
]
}
"h_CrystalFlash" |
From: 12
Above Power Bomb Blocks - Main Junction
To: 13
Below Power Bomb Blocks - Main Junction
Requires: {
"or": [
"h_usePowerBomb",
{
"obstaclesCleared": [
"A"
]
}
]
}Clears obstacles: A |
From: 12
Above Power Bomb Blocks - Main Junction
To: 13
Below Power Bomb Blocks - Main Junction
Moonfall on the Green Brinstar Elevator Platform to build up enough speed to fall through the Power Bomb Blocks below. Moonfall so as to stay on the platform, break spin, and turnaround between 70 and 76 times total. Turns cannot be too fast or too slow. When falling, avoid the platform in the center of the room by falling towards the right. Clip through the bottom right platform by turning around at the correct time. Then hold down to clip through the Power Bomb Blocks. Requires: {
"notable": "TAS Dance"
}
"canMoonfall"Dev note: Moondance cannot be carried down an elevator. |
From: 12
Above Power Bomb Blocks - Main Junction
To: 13
Below Power Bomb Blocks - Main Junction
Freeze two Zeelas to perform an 'Enemy Stuck Moonfall' in order to clip through the Power Bomb blocks. Position one Zeela upside down on a ceiling, and another below it on the ground. The global Zeela paired with either the lowest Zeela, or the other perimeter Zeela can be used, but freezing them together is the hardest part. Freezing one and then unequipping Ice Beam to dispel the ice effect or manipulating the camera can be used to synchronize them. If the moonfall is initiated immediately after freezing both enemies, it is possible to gain enough speed to automatically clip through the enemy and the floor; in this case, hold an angle button to buffer a pose change. Alternatively, and more easily, when one of the enemies is about to thaw, hold backward in order to move forward and fall off the enemy with a buffered turnaround, which will clip through the floor without needing as much fall speed. From directly on top of the Power Bomb blocks, no pose change is needed. Two Super Missiles can speed up the Zeela setup greatly by knocking them off of the wall. Requires: "canEnemyStuckMoonfall"
"canTrickyUseFrozenEnemies"
{
"or": [
"canDisableEquipment",
"canCameraManip"
]
}
{
"or": [
"canBePatient",
{
"ammo": {
"type": "Super",
"count": 2
}
}
]
} |
From: 13
Below Power Bomb Blocks - Main Junction
To: 7
Below Power Bomb Blocks - Top Right Door
|
From: 13
Below Power Bomb Blocks - Main Junction
To: 8
Below Power Bomb Blocks - Bottom Left Door
|
From: 13
Below Power Bomb Blocks - Main Junction
To: 9
Right Etecoon Shaft - Top Left Door
Enter R-Mode using any door. Crystal Flash or farm the upper section enemies. Use 'Bottom Ice Clip' strat to regain access to the Etecoons Shaft, then wait on top of the crumble block to get the Zeela to follow you in. Shinecharge on top of the Etecoon Shaft and get hit by the Zeela to interrupt. Requires: {
"obstaclesCleared": [
"R-Mode"
]
}
{
"notable": "Bottom Ice Clip"
}
{
"or": [
"h_CrystalFlashForReserveEnergy",
{
"and": [
{
"obstaclesCleared": [
"A"
]
},
"h_RModeCanRefillReserves",
{
"resourceMissingAtMost": [
{
"type": "Missile",
"count": 0
}
]
},
{
"resourceMissingAtMost": [
{
"type": "Super",
"count": 0
}
]
},
{
"partialRefill": {
"type": "ReserveEnergy",
"limit": 20
}
}
]
}
]
}
"h_bombThings"
"h_additionalBomb"
"canTrickyJump"
"h_XRayMorphIceClip"
{
"or": [
"h_useSpringBall",
{
"and": [
"can4HighMidAirMorph",
"canInsaneJump"
]
}
]
}
"canBeVeryPatient"
{
"or": [
{
"canShineCharge": {
"usedTiles": 17,
"openEnd": 1
}
},
{
"and": [
"h_frozenEnemyRunway",
{
"canShineCharge": {
"usedTiles": 18,
"openEnd": 1
}
}
]
}
]
}
{
"autoReserveTrigger": {}
}
"canRModeSparkInterrupt"Resets obstacles: R-Mode |
From: 13
Below Power Bomb Blocks - Main Junction
To: 12
Above Power Bomb Blocks - Main Junction
Requires: {
"or": [
"h_usePowerBomb",
{
"obstaclesCleared": [
"A"
]
}
]
}Clears obstacles: A |
From: 13
Below Power Bomb Blocks - Main Junction
To: 12
Above Power Bomb Blocks - Main Junction
Freeze the wall crawler at a precise location in order to jump through the Power Bomb Blocks. The pixel window is larger and higher with Morph and an X-Ray Stand Up. Requires: "h_iceClip" |
From: 13
Below Power Bomb Blocks - Main Junction
To: 13
Below Power Bomb Blocks - Main Junction
Requires: {
"or": [
{
"and": [
{
"resetRoom": {
"nodes": [
7
]
}
},
{
"cycleFrames": 270
}
]
},
{
"and": [
{
"resetRoom": {
"nodes": [
8
]
}
},
{
"cycleFrames": 620
}
]
}
]
}Resets obstacles: A, R-Mode Farm cycle drops: 1 Zeela |
From: 13
Below Power Bomb Blocks - Main Junction
To: 13
Below Power Bomb Blocks - Main Junction
Requires: {
"obstaclesNotCleared": [
"R-Mode"
]
}
"h_CrystalFlash"Clears obstacles: A |
From: 13
Below Power Bomb Blocks - Main Junction
To: 14
Right Etecoon Shaft - Wall Jump Checkpoint
Break the bomb block at the bottom right of the main shaft. Bring a Zeela down to the bottom of the room. Morph inside the tunnel, take a Zeela hit, then jump, aim down, and shoot to freeze the Zeela as it starts to move up and while Samus is close to landing. Jump and aim down to get on top of the Zeela. If the Zeela is precisely positioned exactly 12 pixels above the ground, you can press up to make Samus stand; Otherwise, if you have X-ray, then the Zeela should be frozen lower, and you can morph and unmorph and use X-ray to force Samus to stand up; in this case there is a 6-pixel window over which it works, with the Zeela being between 4 and 9 pixels above the ground. In either case, after standing up on top of the Zeela, jump and aim down to break the crumble block. Then, before the crumble respawns, morph and use Spring Ball (if available) to jump back up and into the tunnel; without Spring Ball, a quick mid-air morph also works but is more difficult. Requires: {
"notable": "Bottom Ice Clip"
}
{
"noBlueSuit": {}
}
"h_bombThings"
"h_additionalBomb"
{
  "enemyDamage": {
    "enemy": "Zeela",
    "type": "contact",
    "hits": 1
  }
}
"canTrickyJump"
{
"or": [
"h_XRayMorphIceClip",
{
"and": [
"h_highPixelIceClip",
"canInsaneJump",
"canBeVeryPatient"
]
}
]
}
{
"or": [
"h_useSpringBall",
{
"and": [
"can4HighMidAirMorph",
"canInsaneJump"
]
}
]
}
{
"or": [
"canBePatient",
{
"obstaclesNotCleared": [
"A"
]
}
]
}Dev note: The mid-air morph is tighter than a normal can4HighMidAirMorph and you may only get one chance at it before having to reset the room. FIXME: canBeVeryPatient requirement is for difficulty (assumed large number of attempts required); a more specific tech could be used if one existed. FIXME: It might be possible to use two Zeelas to wall ice clip and X-ray climb to the door transition(s) above. FIXME: Or it might be possible to let a Zeela get past the crumble block to where it could be used to ice climb up the Etecoon shaft. FIXME: This might be doable with a blue suit. If nothing else, it could be used to break the first block and then lose the suit, to save a Power Bomb, but that isnt worth modeling. |
From: 14
Right Etecoon Shaft - Wall Jump Checkpoint
To: 9
Right Etecoon Shaft - Top Left Door
Requires: "canConsecutiveWallJump" |
From: 14
Right Etecoon Shaft - Wall Jump Checkpoint
To: 9
Right Etecoon Shaft - Top Left Door
Requires: "canLongIBJ" |
From: 14
Right Etecoon Shaft - Wall Jump Checkpoint
To: 9
Right Etecoon Shaft - Top Left Door
Requires: "SpaceJump" |
From: 14
Right Etecoon Shaft - Wall Jump Checkpoint
To: 9
Right Etecoon Shaft - Top Left Door
Requires: "h_storedSpark"
{
"or": [
{
"shinespark": {
"frames": 49,
"excessFrames": 8
}
},
{
"and": [
"HiJump",
{
"shinespark": {
"frames": 45,
"excessFrames": 7
}
}
]
},
{
"and": [
"HiJump",
"canSpeedyJump",
{
"shinespark": {
"frames": 43,
"excessFrames": 8
}
}
]
}
]
} |
From: 14
Right Etecoon Shaft - Wall Jump Checkpoint
To: 10
Right Etecoon Shaft - Bottom Left Door
|
From: 14
Right Etecoon Shaft - Wall Jump Checkpoint
To: 13
Below Power Bomb Blocks - Main Junction
Requires: "h_bombThings" "h_additionalBomb" |
From: 14
Right Etecoon Shaft - Wall Jump Checkpoint
To: 13
Below Power Bomb Blocks - Main Junction
Requires: {
"haveBlueSuit": {}
}
"Morph" |
From: 15
Right Etecoon Shaft - Upper Tunnel Entrance
To: 9
Right Etecoon Shaft - Top Left Door
Requires: "canMockball" |
From: 15
Right Etecoon Shaft - Upper Tunnel Entrance
To: 11
Right Etecoon Shaft - Item
Requires: "Morph" |
From: 15
Right Etecoon Shaft - Upper Tunnel Entrance
To: 14
Right Etecoon Shaft - Wall Jump Checkpoint
Requires: "Morph" |
From: 16
G-Mode Junction (Top Of Room)
To: 1
Elevator
Requires: "canGMode" Exit condition: {
"leaveWithGMode": {
"morphed": false
}
}Dev note: FIXME: It would also be possible to ice moonfall to get down to 13. |
{
"$schema": "../../../schema/m3-room.schema.json",
"id": 44,
"name": "Green Brinstar Main Shaft",
"area": "Brinstar",
"subarea": "Green",
"roomAddress": "0x79AD9",
"roomEnvironments": [
{
"heated": false
}
],
"mapTileMask": [
[
1,
0,
0,
0
],
[
1,
0,
0,
0
],
[
1,
0,
0,
0
],
[
1,
0,
0,
0
],
[
1,
0,
0,
0
],
[
1,
0,
0,
0
],
[
1,
0,
0,
0
],
[
1,
1,
1,
1
],
[
1,
0,
1,
0
],
[
1,
0,
1,
0
],
[
1,
1,
1,
0
],
[
0,
0,
1,
0
]
],
"nodes": [
{
"id": 1,
"name": "Elevator",
"nodeType": "door",
"nodeSubType": "elevator",
"nodeAddress": "0x0018ca6",
"doorOrientation": "up",
"useImplicitCarryGModeBackThrough": false,
"useImplicitCarryGModeMorphBackThrough": false,
"mapTileMask": [
[
2,
0,
0,
0
],
[
2,
0,
0,
0
],
[
2,
0,
0,
0
],
[
1,
0,
0,
0
],
[
1,
0,
0,
0
],
[
1,
0,
0,
0
],
[
1,
0,
0,
0
],
[
1,
1,
1,
1
],
[
1,
0,
1,
0
],
[
1,
0,
1,
0
],
[
1,
1,
1,
0
],
[
0,
0,
1,
0
]
]
},
{
"id": 2,
"name": "Above Power Bomb Blocks - Top Left Door",
"nodeType": "door",
"nodeSubType": "red",
"nodeAddress": "0x0018cb2",
"doorOrientation": "left",
"doorEnvironments": [
{
"physics": "air"
}
],
"mapTileMask": [
[
1,
0,
0,
0
],
[
1,
0,
0,
0
],
[
1,
0,
0,
0
],
[
1,
0,
0,
0
],
[
2,
0,
0,
0
],
[
1,
0,
0,
0
],
[
1,
0,
0,
0
],
[
1,
1,
1,
1
],
[
1,
0,
1,
0
],
[
1,
0,
1,
0
],
[
1,
1,
1,
0
],
[
0,
0,
1,
0
]
]
},
{
"id": 3,
"name": "Above Power Bomb Blocks - Top Right Door",
"nodeType": "door",
"nodeSubType": "red",
"nodeAddress": "0x0018cd6",
"doorOrientation": "right",
"doorEnvironments": [
{
"physics": "air"
}
],
"mapTileMask": [
[
1,
0,
0,
0
],
[
1,
0,
0,
0
],
[
1,
0,
0,
0
],
[
1,
0,
0,
0
],
[
2,
0,
0,
0
],
[
1,
0,
0,
0
],
[
1,
0,
0,
0
],
[
1,
1,
1,
1
],
[
1,
0,
1,
0
],
[
1,
0,
1,
0
],
[
1,
1,
1,
0
],
[
0,
0,
1,
0
]
]
},
{
"id": 4,
"name": "Above Power Bomb Blocks - Middle Left Door",
"nodeType": "door",
"nodeSubType": "red",
"nodeAddress": "0x0018d12",
"doorOrientation": "left",
"doorEnvironments": [
{
"physics": "air"
}
],
"mapTileMask": [
[
1,
0,
0,
0
],
[
1,
0,
0,
0
],
[
1,
0,
0,
0
],
[
1,
0,
0,
0
],
[
1,
0,
0,
0
],
[
2,
0,
0,
0
],
[
1,
0,
0,
0
],
[
1,
1,
1,
1
],
[
1,
0,
1,
0
],
[
1,
0,
1,
0
],
[
1,
1,
1,
0
],
[
0,
0,
1,
0
]
]
},
{
"id": 5,
"name": "Above Power Bomb Blocks - Bottom Left Door",
"nodeType": "door",
"nodeSubType": "red",
"nodeAddress": "0x0018cca",
"doorOrientation": "left",
"doorEnvironments": [
{
"physics": "air"
}
],
"mapTileMask": [
[
1,
0,
0,
0
],
[
1,
0,
0,
0
],
[
1,
0,
0,
0
],
[
1,
0,
0,
0
],
[
1,
0,
0,
0
],
[
1,
0,
0,
0
],
[
2,
0,
0,
0
],
[
1,
1,
1,
1
],
[
1,
0,
1,
0
],
[
1,
0,
1,
0
],
[
1,
1,
1,
0
],
[
0,
0,
1,
0
]
]
},
{
"id": 6,
"name": "Above Power Bomb Blocks - Bottom Right Door",
"nodeType": "door",
"nodeSubType": "red",
"nodeAddress": "0x0018ce2",
"doorOrientation": "right",
"doorEnvironments": [
{
"physics": "air"
}
],
"mapTileMask": [
[
1,
0,
0,
0
],
[
1,
0,
0,
0
],
[
1,
0,
0,
0
],
[
1,
0,
0,
0
],
[
1,
0,
0,
0
],
[
1,
0,
0,
0
],
[
2,
0,
0,
0
],
[
1,
1,
1,
1
],
[
1,
0,
1,
0
],
[
1,
0,
1,
0
],
[
1,
1,
1,
0
],
[
0,
0,
1,
0
]
]
},
{
"id": 7,
"name": "Below Power Bomb Blocks - Top Right Door",
"nodeType": "door",
"nodeSubType": "gray",
"nodeAddress": "0x0018cee",
"doorOrientation": "right",
"doorEnvironments": [
{
"physics": "air"
}
],
"locks": [
{
"name": "Etecoon Exit Gray Lock",
"lockType": "permanent",
"unlockStrats": [
{
"name": "Base",
"requires": [
"never"
],
"flashSuitChecked": true,
"blueSuitChecked": true
}
]
}
],
"mapTileMask": [
[
1,
0,
0,
0
],
[
1,
0,
0,
0
],
[
1,
0,
0,
0
],
[
1,
0,
0,
0
],
[
1,
0,
0,
0
],
[
1,
0,
0,
0
],
[
1,
0,
0,
0
],
[
2,
1,
1,
1
],
[
1,
0,
1,
0
],
[
1,
0,
1,
0
],
[
1,
1,
1,
0
],
[
0,
0,
1,
0
]
]
},
{
"id": 8,
"name": "Below Power Bomb Blocks - Bottom Left Door",
"nodeType": "door",
"nodeSubType": "blue",
"nodeAddress": "0x0018cbe",
"doorOrientation": "left",
"doorEnvironments": [
{
"physics": "air"
}
],
"mapTileMask": [
[
1,
0,
0,
0
],
[
1,
0,
0,
0
],
[
1,
0,
0,
0
],
[
1,
0,
0,
0
],
[
1,
0,
0,
0
],
[
1,
0,
0,
0
],
[
1,
0,
0,
0
],
[
1,
1,
1,
1
],
[
1,
0,
1,
0
],
[
1,
0,
1,
0
],
[
2,
1,
1,
0
],
[
0,
0,
1,
0
]
]
},
{
"id": 9,
"name": "Right Etecoon Shaft - Top Left Door",
"nodeType": "door",
"nodeSubType": "blue",
"nodeAddress": "0x0018d06",
"doorOrientation": "left",
"doorEnvironments": [
{
"physics": "air"
}
],
"isDoorImmediatelyClosed": true,
"mapTileMask": [
[
1,
0,
0,
0
],
[
1,
0,
0,
0
],
[
1,
0,
0,
0
],
[
1,
0,
0,
0
],
[
1,
0,
0,
0
],
[
1,
0,
0,
0
],
[
1,
0,
0,
0
],
[
1,
2,
2,
1
],
[
1,
0,
1,
0
],
[
1,
0,
1,
0
],
[
1,
1,
1,
0
],
[
0,
0,
1,
0
]
],
"devNote": [
"This door has a closing animation but it is wrongly placed a screen to the left."
]
},
{
"id": 10,
"name": "Right Etecoon Shaft - Bottom Left Door",
"nodeType": "door",
"nodeSubType": "blue",
"nodeAddress": "0x0018cfa",
"doorOrientation": "left",
"doorEnvironments": [
{
"physics": "air"
}
],
"mapTileMask": [
[
1,
0,
0,
0
],
[
1,
0,
0,
0
],
[
1,
0,
0,
0
],
[
1,
0,
0,
0
],
[
1,
0,
0,
0
],
[
1,
0,
0,
0
],
[
1,
0,
0,
0
],
[
1,
1,
1,
1
],
[
1,
0,
1,
0
],
[
1,
0,
1,
0
],
[
1,
1,
1,
0
],
[
0,
0,
2,
0
]
]
},
{
"id": 11,
"name": "Right Etecoon Shaft - Item",
"nodeType": "item",
"nodeSubType": "chozo",
"nodeItem": "PowerBomb",
"nodeAddress": "0x784AC",
"mapTileMask": [
[
1,
0,
0,
0
],
[
1,
0,
0,
0
],
[
1,
0,
0,
0
],
[
1,
0,
0,
0
],
[
1,
0,
0,
0
],
[
1,
0,
0,
0
],
[
1,
0,
0,
0
],
[
1,
1,
1,
2
],
[
1,
0,
1,
0
],
[
1,
0,
1,
0
],
[
1,
1,
1,
0
],
[
0,
0,
1,
0
]
],
"locks": [
{
"name": "Dummy Item Lock",
"lockType": "gameFlag",
"unlockStrats": [
{
"name": "Base (Collect Item)",
"notable": false,
"requires": [],
"flashSuitChecked": true,
"blueSuitChecked": true
}
]
}
]
},
{
"id": 12,
"name": "Above Power Bomb Blocks - Main Junction",
"nodeType": "junction",
"nodeSubType": "junction",
"mapTileMask": [
[
1,
0,
0,
0
],
[
1,
0,
0,
0
],
[
1,
0,
0,
0
],
[
2,
0,
0,
0
],
[
2,
0,
0,
0
],
[
2,
0,
0,
0
],
[
2,
0,
0,
0
],
[
1,
1,
1,
1
],
[
1,
0,
1,
0
],
[
1,
0,
1,
0
],
[
1,
1,
1,
0
],
[
0,
0,
1,
0
]
]
},
{
"id": 13,
"name": "Below Power Bomb Blocks - Main Junction",
"nodeType": "junction",
"nodeSubType": "junction",
"mapTileMask": [
[
1,
0,
0,
0
],
[
1,
0,
0,
0
],
[
1,
0,
0,
0
],
[
1,
0,
0,
0
],
[
1,
0,
0,
0
],
[
1,
0,
0,
0
],
[
1,
0,
0,
0
],
[
2,
1,
1,
1
],
[
2,
0,
1,
0
],
[
2,
0,
1,
0
],
[
2,
1,
1,
0
],
[
0,
0,
1,
0
]
]
},
{
"id": 14,
"name": "Right Etecoon Shaft - Wall Jump Checkpoint",
"nodeType": "junction",
"nodeSubType": "junction",
"mapTileMask": [
[
1,
0,
0,
0
],
[
1,
0,
0,
0
],
[
1,
0,
0,
0
],
[
1,
0,
0,
0
],
[
1,
0,
0,
0
],
[
1,
0,
0,
0
],
[
1,
0,
0,
0
],
[
1,
1,
1,
1
],
[
1,
0,
2,
0
],
[
1,
0,
2,
0
],
[
1,
2,
2,
0
],
[
0,
0,
1,
0
]
]
},
{
"id": 15,
"name": "Right Etecoon Shaft - Upper Tunnel Entrance",
"nodeType": "junction",
"nodeSubType": "junction",
"mapTileMask": [
[
1,
0,
0,
0
],
[
1,
0,
0,
0
],
[
1,
0,
0,
0
],
[
1,
0,
0,
0
],
[
1,
0,
0,
0
],
[
1,
0,
0,
0
],
[
1,
0,
0,
0
],
[
1,
1,
2,
1
],
[
1,
0,
1,
0
],
[
1,
0,
1,
0
],
[
1,
1,
1,
0
],
[
0,
0,
1,
0
]
]
},
{
"id": 16,
"name": "G-Mode Junction (Top Of Room)",
"nodeType": "junction",
"nodeSubType": "g-mode",
"mapTileMask": [
[
1,
0,
0,
0
],
[
1,
0,
0,
0
],
[
1,
0,
0,
0
],
[
2,
0,
0,
0
],
[
2,
0,
0,
0
],
[
2,
0,
0,
0
],
[
2,
0,
0,
0
],
[
1,
1,
1,
1
],
[
1,
0,
1,
0
],
[
1,
0,
1,
0
],
[
1,
1,
1,
0
],
[
0,
0,
1,
0
]
],
"note": "Represents being at the top half of the room with G-Mode"
}
],
"obstacles": [
{
"id": "A",
"name": "Power Bomb Blocks",
"obstacleType": "inanimate"
},
{
"id": "R-Mode",
"name": "Entered with R-Mode",
"obstacleType": "abstract"
}
],
"enemies": [
{
"id": "e1",
"groupName": "Green Shaft Top Zeelas",
"enemyName": "Zeela",
"quantity": 4,
"homeNodes": [
12
]
},
{
"id": "e2",
"groupName": "Green Shaft Ripper 2s",
"enemyName": "Ripper 2 (red)",
"quantity": 2,
"homeNodes": [
12
]
},
{
"id": "e3",
"groupName": "Green Shaft Bottom Zeela",
"enemyName": "Zeela",
"quantity": 1,
"homeNodes": [
13
]
}
],
"strats": [
{
"link": [
1,
1
],
"name": "Base (Unlock Door)",
"requires": [],
"unlocksDoors": [
{
"types": [
"ammo"
],
"requires": []
}
],
"flashSuitChecked": true,
"blueSuitChecked": true
},
{
"link": [
1,
1
],
"name": "Base (Come In Normally)",
"entranceCondition": {
"comeInNormally": {}
},
"requires": [],
"flashSuitChecked": true,
"blueSuitChecked": true
},
{
"link": [
2,
2
],
"name": "Base (Unlock Door)",
"requires": [],
"unlocksDoors": [
{
"types": [
"ammo"
],
"requires": []
}
],
"flashSuitChecked": true,
"blueSuitChecked": true
},
{
"link": [
2,
2
],
"name": "Base (Come In Normally)",
"entranceCondition": {
"comeInNormally": {}
},
"requires": [],
"flashSuitChecked": true,
"blueSuitChecked": true
},
{
"link": [
2,
2
],
"name": "Base (Come In With Mockball)",
"entranceCondition": {
"comeInWithMockball": {
"adjacentMinTiles": 0,
"remoteAndLandingMinTiles": [
[
0,
0
]
],
"speedBooster": "any"
}
},
"requires": [],
"flashSuitChecked": true,
"blueSuitChecked": true
},
{
"link": [
3,
3
],
"name": "Base (Unlock Door)",
"requires": [],
"unlocksDoors": [
{
"types": [
"ammo"
],
"requires": []
}
],
"flashSuitChecked": true,
"blueSuitChecked": true
},
{
"link": [
3,
3
],
"name": "Base (Come In Normally)",
"entranceCondition": {
"comeInNormally": {}
},
"requires": [],
"flashSuitChecked": true,
"blueSuitChecked": true
},
{
"link": [
3,
3
],
"name": "Base (Come In With Mockball)",
"entranceCondition": {
"comeInWithMockball": {
"adjacentMinTiles": 0,
"remoteAndLandingMinTiles": [
[
0,
0
]
],
"speedBooster": "any"
}
},
"requires": [],
"flashSuitChecked": true,
"blueSuitChecked": true
},
{
"link": [
4,
4
],
"name": "Base (Unlock Door)",
"requires": [],
"unlocksDoors": [
{
"types": [
"ammo"
],
"requires": []
}
],
"flashSuitChecked": true,
"blueSuitChecked": true
},
{
"link": [
4,
4
],
"name": "Base (Come In Normally)",
"entranceCondition": {
"comeInNormally": {}
},
"requires": [],
"flashSuitChecked": true,
"blueSuitChecked": true
},
{
"link": [
4,
4
],
"name": "Base (Come In With Mockball)",
"entranceCondition": {
"comeInWithMockball": {
"adjacentMinTiles": 0,
"remoteAndLandingMinTiles": [
[
0,
0
]
],
"speedBooster": "any"
}
},
"requires": [],
"flashSuitChecked": true,
"blueSuitChecked": true
},
{
"link": [
5,
5
],
"name": "Base (Unlock Door)",
"requires": [],
"unlocksDoors": [
{
"types": [
"ammo"
],
"requires": []
}
],
"flashSuitChecked": true,
"blueSuitChecked": true
},
{
"link": [
5,
5
],
"name": "Base (Come In Normally)",
"entranceCondition": {
"comeInNormally": {}
},
"requires": [],
"flashSuitChecked": true,
"blueSuitChecked": true
},
{
"link": [
5,
5
],
"name": "Base (Come In With Mockball)",
"entranceCondition": {
"comeInWithMockball": {
"adjacentMinTiles": 0,
"remoteAndLandingMinTiles": [
[
0,
0
]
],
"speedBooster": "any"
}
},
"requires": [],
"flashSuitChecked": true,
"blueSuitChecked": true
},
{
"link": [
6,
6
],
"name": "Base (Unlock Door)",
"requires": [],
"unlocksDoors": [
{
"types": [
"ammo"
],
"requires": []
}
],
"flashSuitChecked": true,
"blueSuitChecked": true
},
{
"link": [
6,
6
],
"name": "Base (Come In Normally)",
"entranceCondition": {
"comeInNormally": {}
},
"requires": [],
"flashSuitChecked": true,
"blueSuitChecked": true
},
{
"link": [
6,
6
],
"name": "Base (Come In With Mockball)",
"entranceCondition": {
"comeInWithMockball": {
"adjacentMinTiles": 0,
"remoteAndLandingMinTiles": [
[
0,
0
]
],
"speedBooster": "any"
}
},
"requires": [],
"flashSuitChecked": true,
"blueSuitChecked": true
},
{
"link": [
7,
7
],
"name": "Base (Unlock Door)",
"requires": [],
"unlocksDoors": [
{
"types": [
"ammo"
],
"requires": []
}
],
"flashSuitChecked": true,
"blueSuitChecked": true
},
{
"link": [
7,
7
],
"name": "Base (Come In Normally)",
"entranceCondition": {
"comeInNormally": {}
},
"requires": [],
"flashSuitChecked": true,
"blueSuitChecked": true
},
{
"link": [
7,
7
],
"name": "Base (Come In With Mockball)",
"entranceCondition": {
"comeInWithMockball": {
"adjacentMinTiles": 0,
"remoteAndLandingMinTiles": [
[
0,
0
]
],
"speedBooster": "any"
}
},
"requires": [],
"flashSuitChecked": true,
"blueSuitChecked": true
},
{
"link": [
8,
8
],
"name": "Base (Unlock Door)",
"requires": [],
"unlocksDoors": [
{
"types": [
"ammo"
],
"requires": []
}
],
"flashSuitChecked": true,
"blueSuitChecked": true
},
{
"link": [
8,
8
],
"name": "Base (Come In Normally)",
"entranceCondition": {
"comeInNormally": {}
},
"requires": [],
"flashSuitChecked": true,
"blueSuitChecked": true
},
{
"link": [
8,
8
],
"name": "Base (Come In With Mockball)",
"entranceCondition": {
"comeInWithMockball": {
"adjacentMinTiles": 0,
"remoteAndLandingMinTiles": [
[
0,
0
]
],
"speedBooster": "any"
}
},
"requires": [],
"flashSuitChecked": true,
"blueSuitChecked": true
},
{
"link": [
9,
9
],
"name": "Base (Unlock Door)",
"requires": [],
"unlocksDoors": [
{
"types": [
"ammo"
],
"requires": []
}
],
"flashSuitChecked": true,
"blueSuitChecked": true
},
{
"link": [
9,
9
],
"name": "Base (Come In Normally)",
"entranceCondition": {
"comeInNormally": {}
},
"requires": [],
"flashSuitChecked": true,
"blueSuitChecked": true
},
{
"link": [
9,
9
],
"name": "Base (Come In With Mockball)",
"entranceCondition": {
"comeInWithMockball": {
"adjacentMinTiles": 0,
"remoteAndLandingMinTiles": [
[
0,
0
]
],
"speedBooster": "any"
}
},
"requires": [],
"flashSuitChecked": true,
"blueSuitChecked": true
},
{
"link": [
10,
10
],
"name": "Base (Unlock Door)",
"requires": [],
"unlocksDoors": [
{
"types": [
"ammo"
],
"requires": []
}
],
"flashSuitChecked": true,
"blueSuitChecked": true
},
{
"link": [
10,
10
],
"name": "Base (Come In Normally)",
"entranceCondition": {
"comeInNormally": {}
},
"requires": [],
"flashSuitChecked": true,
"blueSuitChecked": true
},
{
"link": [
10,
10
],
"name": "Base (Come In With Mockball)",
"entranceCondition": {
"comeInWithMockball": {
"adjacentMinTiles": 0,
"remoteAndLandingMinTiles": [
[
0,
0
]
],
"speedBooster": "any"
}
},
"requires": [],
"flashSuitChecked": true,
"blueSuitChecked": true
},
{
"name": "Base (Collect Item)",
"notable": false,
"requires": [],
"flashSuitChecked": true,
"blueSuitChecked": true,
"link": [
11,
11
],
"collectsItems": [
11
]
},
{
"id": 1,
"link": [
1,
12
],
"name": "Base",
"requires": [],
"flashSuitChecked": true,
"blueSuitChecked": true
},
{
"id": 253,
"link": [
1,
16
],
"name": "G-Mode",
"entranceCondition": {
"comeInWithGMode": {
"mode": "any",
"morphed": false
}
},
"requires": [],
"flashSuitChecked": true,
"blueSuitChecked": true
},
{
"id": 266,
"link": [
2,
2
],
"name": "R-Mode Entry",
"entranceCondition": {
"comeInWithRMode": {}
},
"requires": [],
"clearsObstacles": [
"R-Mode"
],
"flashSuitChecked": true,
"blueSuitChecked": true
},
{
"id": 3,
"link": [
2,
2
],
"name": "Leave With Runway",
"requires": [],
"exitCondition": {
"leaveWithRunway": {
"length": 4,
"openEnd": 1
}
},
"flashSuitChecked": true,
"blueSuitChecked": true
},
{
"id": 4,
"link": [
2,
2
],
"name": "Leave With Runway - Frozen Zeela",
"requires": [
"h_frozenEnemyRunway",
{
"or": [
"canBePatient",
{
"ammo": {
"type": "Super",
"count": 1
}
}
]
}
],
"exitCondition": {
"leaveWithRunway": {
"length": 5,
"openEnd": 1
}
},
"flashSuitChecked": true,
"blueSuitChecked": true,
"note": "It is possible to save a lot of time by using a Super to knock the clockwise Zeela off the small platform above."
},
{
"id": 283,
"link": [
2,
2
],
"name": "Come in Shinecharging, Crystal Spark",
"entranceCondition": {
"comeInShinecharging": {
"length": 3,
"openEnd": 0
},
"comesInHeated": "no"
},
"requires": [
"h_CrystalSpark"
],
"flashSuitChecked": true,
"blueSuitChecked": true
},
{
"id": 5,
"link": [
2,
2
],
"name": "G-Mode Setup - Get Hit By Zeela",
"requires": [
{
"or": [
"canBePatient",
{
"ammo": {
"type": "Super",
"count": 1
}
}
]
}
],
"exitCondition": {
"leaveWithGModeSetup": {}
},
"flashSuitChecked": true,
"blueSuitChecked": true,
"note": "It is possible to save a lot of time by using a Super to knock the clockwise Zeela off the small platform above."
},
{
"id": 6,
"link": [
2,
2
],
"name": "G-Mode Regain Mobility",
"requires": [
"canBePatient",
{
"enemyDamage": {
"enemy": "Zeela",
"type": "contact",
"hits": 1
}
}
],
"gModeRegainMobility": {},
"flashSuitChecked": true,
"blueSuitChecked": true,
"note": "It takes 80 seconds for the global Zeela to make it over here. A Super could speed this up, but it's likely to just get the Zeela stuck."
},
{
"id": 7,
"link": [
2,
3
],
"name": "Come in Shinecharging, Leave Shinecharged",
"entranceCondition": {
"comeInShinecharging": {
"length": 3,
"openEnd": 1
}
},
"requires": [
"canShinechargeMovementComplex",
{
"shineChargeFrames": 90
}
],
"exitCondition": {
"leaveShinecharged": {}
},
"unlocksDoors": [
{
"types": [
"super"
],
"requires": []
},
{
"types": [
"missiles",
"powerbomb"
],
"requires": [
"never"
]
}
],
"flashSuitChecked": true,
"blueSuitChecked": true
},
{
"id": 8,
"link": [
2,
3
],
"name": "Carry Shinecharge",
"entranceCondition": {
"comeInShinecharged": {}
},
"requires": [
{
"shineChargeFrames": 90
},
"canShinechargeMovementComplex"
],
"exitCondition": {
"leaveShinecharged": {}
},
"unlocksDoors": [
{
"types": [
"super"
],
"requires": []
},
{
"types": [
"missiles",
"powerbomb"
],
"requires": [
"never"
]
}
],
"flashSuitChecked": true,
"blueSuitChecked": true
},
{
"id": 9,
"link": [
2,
3
],
"name": "Come In Shinecharged, Leave With Spark",
"entranceCondition": {
"comeInShinecharged": {}
},
"requires": [
{
"shineChargeFrames": 10
},
{
"shinespark": {
"frames": 21,
"excessFrames": 0
}
}
],
"exitCondition": {
"leaveWithSpark": {}
},
"unlocksDoors": [
{
"types": [
"super"
],
"requires": []
},
{
"types": [
"missiles",
"powerbomb"
],
"requires": [
"never"
]
}
],
"flashSuitChecked": true,
"blueSuitChecked": true
},
{
"id": 10,
"link": [
2,
3
],
"name": "Come in Shinecharging, Leave With Temporary Blue",
"entranceCondition": {
"comeInShinecharging": {
"length": 3,
"openEnd": 0
}
},
"requires": [
"canChainTemporaryBlue"
],
"exitCondition": {
"leaveWithTemporaryBlue": {}
},
"unlocksDoors": [
{
"types": [
"ammo"
],
"requires": []
}
],
"flashSuitChecked": true,
"blueSuitChecked": true
},
{
"id": 11,
"link": [
2,
4
],
"name": "Come in Shinecharging, Leave Shinecharged",
"entranceCondition": {
"comeInShinecharging": {
"length": 3,
"openEnd": 1
}
},
"requires": [
"canShinechargeMovementComplex",
{
"shineChargeFrames": 100
}
],
"exitCondition": {
"leaveShinecharged": {}
},
"unlocksDoors": [
{
"types": [
"super"
],
"requires": []
},
{
"types": [
"missiles",
"powerbomb"
],
"requires": [
"never"
]
}
],
"flashSuitChecked": true,
"blueSuitChecked": true
},
{
"id": 12,
"link": [
2,
4
],
"name": "Carry Shinecharge",
"entranceCondition": {
"comeInShinecharged": {}
},
"requires": [
{
"shineChargeFrames": 110
},
"canShinechargeMovementComplex"
],
"exitCondition": {
"leaveShinecharged": {}
},
"unlocksDoors": [
{
"types": [
"super"
],
"requires": []
},
{
"types": [
"missiles",
"powerbomb"
],
"requires": [
"never"
]
}
],
"flashSuitChecked": true,
"blueSuitChecked": true
},
{
"id": 13,
"link": [
2,
4
],
"name": "Come in Shinecharging, Leave With Temporary Blue",
"entranceCondition": {
"comeInShinecharging": {
"length": 3,
"openEnd": 0
}
},
"requires": [
"canChainTemporaryBlue",
"canXRayTurnaround"
],
"exitCondition": {
"leaveWithTemporaryBlue": {}
},
"unlocksDoors": [
{
"types": [
"ammo"
],
"requires": []
}
],
"flashSuitChecked": true,
"blueSuitChecked": true
},
{
"id": 14,
"link": [
2,
5
],
"name": "Come in Shinecharging, Leave Shinecharged",
"entranceCondition": {
"comeInShinecharging": {
"length": 3,
"openEnd": 1
}
},
"requires": [
"canShinechargeMovementComplex",
{
"shineChargeFrames": 155
}
],
"exitCondition": {
"leaveShinecharged": {}
},
"unlocksDoors": [
{
"types": [
"super"
],
"requires": []
},
{
"types": [
"missiles",
"powerbomb"
],
"requires": [
"never"
]
}
],
"flashSuitChecked": true,
"blueSuitChecked": true
},
{
"id": 15,
"link": [
2,
5
],
"name": "Carry Shinecharge",
"entranceCondition": {
"comeInShinecharged": {}
},
"requires": [
{
"shineChargeFrames": 160
},
"canShinechargeMovementComplex"
],
"exitCondition": {
"leaveShinecharged": {}
},
"unlocksDoors": [
{
"types": [
"super"
],
"requires": []
},
{
"types": [
"missiles",
"powerbomb"
],
"requires": [
"never"
]
}
],
"flashSuitChecked": true,
"blueSuitChecked": true
},
{
"id": 16,
"link": [
2,
5
],
"name": "Come in Shinecharged, Leave With Spark",
"entranceCondition": {
"comeInShinecharged": {}
},
"requires": [
{
"shineChargeFrames": 140
},
"canShinechargeMovementComplex",
{
"shinespark": {
"frames": 6,
"excessFrames": 0
}
}
],
"exitCondition": {
"leaveWithSpark": {}
},
"unlocksDoors": [
{
"types": [
"super"
],
"requires": []
},
{
"types": [
"missiles",
"powerbomb"
],
"requires": [
"never"
]
}
],
"flashSuitChecked": true,
"blueSuitChecked": true
},
{
"id": 17,
"link": [
2,
6
],
"name": "Come in Shinecharging, Leave Shinecharged",
"entranceCondition": {
"comeInShinecharging": {
"length": 2,
"openEnd": 1
}
},
"requires": [
"canShinechargeMovementComplex",
{
"shineChargeFrames": 170
}
],
"exitCondition": {
"leaveShinecharged": {}
},
"unlocksDoors": [
{
"types": [
"super"
],
"requires": []
},
{
"types": [
"missiles",
"powerbomb"
],
"requires": [
"never"
]
}
],
"flashSuitChecked": true,
"blueSuitChecked": true
},
{
"id": 18,
"link": [
2,
6
],
"name": "Come in Shinecharged, Leave With Spark",
"entranceCondition": {
"comeInShinecharged": {}
},
"requires": [
{
"shineChargeFrames": 140
},
"canShinechargeMovementComplex",
{
"shinespark": {
"frames": 17,
"excessFrames": 0
}
}
],
"exitCondition": {
"leaveWithSpark": {}
},
"unlocksDoors": [
{
"types": [
"super"
],
"requires": []
},
{
"types": [
"missiles",
"powerbomb"
],
"requires": [
"never"
]
}
],
"flashSuitChecked": true,
"blueSuitChecked": true
},
{
"id": 19,
"link": [
2,
6
],
"name": "Come in Shinecharging, Leave With Temporary Blue",
"entranceCondition": {
"comeInShinecharging": {
"length": 3,
"openEnd": 0
}
},
"requires": [
"canLongChainTemporaryBlue",
"canXRayTurnaround"
],
"exitCondition": {
"leaveWithTemporaryBlue": {}
},
"unlocksDoors": [
{
"types": [
"ammo"
],
"requires": []
}
],
"flashSuitChecked": true,
"blueSuitChecked": true
},
{
"id": 20,
"link": [
2,
7
],
"name": "Come in Shinecharging, Leave With Temporary Blue",
"entranceCondition": {
"comeInShinecharging": {
"length": 3,
"openEnd": 0
}
},
"requires": [
"canLongChainTemporaryBlue",
"canXRayTurnaround",
{
"ammo": {
"type": "PowerBomb",
"count": 1
}
}
],
"exitCondition": {
"leaveWithTemporaryBlue": {}
},
"unlocksDoors": [
{
"types": [
"ammo"
],
"requires": []
}
],
"flashSuitChecked": true,
"blueSuitChecked": true
},
{
"id": 21,
"link": [
2,
8
],
"name": "Come in Shinecharging, Leave With Temporary Blue",
"entranceCondition": {
"comeInShinecharging": {
"length": 3,
"openEnd": 0
}
},
"requires": [
"canLongChainTemporaryBlue",
"canXRayTurnaround",
{
"ammo": {
"type": "PowerBomb",
"count": 1
}
}
],
"exitCondition": {
"leaveWithTemporaryBlue": {}
},
"unlocksDoors": [
{
"types": [
"ammo"
],
"requires": []
}
],
"flashSuitChecked": true,
"blueSuitChecked": true
},
{
"id": 22,
"link": [
2,
12
],
"name": "Base",
"requires": [],
"flashSuitChecked": true,
"blueSuitChecked": true
},
{
"id": 23,
"link": [
2,
13
],
"name": "G-Mode Morph Power Bomb",
"entranceCondition": {
"comeInWithGMode": {
"mode": "any",
"morphed": true
}
},
"requires": [
"h_artificialMorphPowerBomb"
],
"clearsObstacles": [
"A"
],
"flashSuitChecked": true,
"blueSuitChecked": true,
"note": "Place a Power Bomb, then exit g-mode in order to break the Power Bomb blocks."
},
{
"id": 254,
"link": [
2,
16
],
"name": "G-Mode",
"entranceCondition": {
"comeInWithGMode": {
"mode": "any",
"morphed": false
}
},
"requires": [],
"flashSuitChecked": true,
"blueSuitChecked": true
},
{
"id": 24,
"link": [
3,
2
],
"name": "Come In Shinecharging, Leave Shinecharged",
"entranceCondition": {
"comeInShinecharging": {
"length": 4,
"openEnd": 1
}
},
"requires": [
"canShinechargeMovementComplex",
{
"shineChargeFrames": 85
}
],
"exitCondition": {
"leaveShinecharged": {}
},
"unlocksDoors": [
{
"types": [
"super"
],
"requires": []
},
{
"types": [
"missiles",
"powerbomb"
],
"requires": [
"never"
]
}
],
"flashSuitChecked": true,
"blueSuitChecked": true
},
{
"id": 25,
"link": [
3,
2
],
"name": "Carry Shinecharge",
"entranceCondition": {
"comeInShinecharged": {}
},
"requires": [
{
"shineChargeFrames": 75
},
"canShinechargeMovementComplex"
],
"exitCondition": {
"leaveShinecharged": {}
},
"unlocksDoors": [
{
"types": [
"super"
],
"requires": []
},
{
"types": [
"missiles",
"powerbomb"
],
"requires": [
"never"
]
}
],
"flashSuitChecked": true,
"blueSuitChecked": true
},
{
"id": 26,
"link": [
3,
2
],
"name": "Come In Shinecharged, Leave With Spark",
"entranceCondition": {
"comeInShinecharged": {}
},
"requires": [
{
"shineChargeFrames": 10
},
"canShinechargeMovementComplex",
{
"shinespark": {
"frames": 21,
"excessFrames": 0
}
}
],
"exitCondition": {
"leaveWithSpark": {}
},
"unlocksDoors": [
{
"types": [
"super"
],
"requires": []
},
{
"types": [
"missiles",
"powerbomb"
],
"requires": [
"never"
]
}
],
"flashSuitChecked": true,
"blueSuitChecked": true
},
{
"id": 27,
"link": [
3,
2
],
"name": "Come in Shinecharging, Leave With Temporary Blue",
"entranceCondition": {
"comeInShinecharging": {
"length": 4,
"openEnd": 0
}
},
"requires": [
"canChainTemporaryBlue"
],
"exitCondition": {
"leaveWithTemporaryBlue": {}
},
"unlocksDoors": [
{
"types": [
"ammo"
],
"requires": []
}
],
"flashSuitChecked": true,
"blueSuitChecked": true
},
{
"id": 267,
"link": [
3,
3
],
"name": "R-Mode Entry",
"entranceCondition": {
"comeInWithRMode": {}
},
"requires": [],
"clearsObstacles": [
"R-Mode"
],
"flashSuitChecked": true,
"blueSuitChecked": true
},
{
"id": 28,
"link": [
3,
3
],
"name": "Leave With Runway",
"requires": [],
"exitCondition": {
"leaveWithRunway": {
"length": 5,
"openEnd": 1
}
},
"flashSuitChecked": true,
"blueSuitChecked": true
},
{
"id": 29,
"link": [
3,
3
],
"name": "Leave With Runway - Frozen Zeela",
"requires": [
"h_frozenEnemyRunway"
],
"exitCondition": {
"leaveWithRunway": {
"length": 6,
"openEnd": 1
}
},
"flashSuitChecked": true,
"blueSuitChecked": true
},
{
"id": 284,
"link": [
3,
3
],
"name": "Come in Shinecharging, Crystal Spark",
"entranceCondition": {
"comeInShinecharging": {
"length": 4,
"openEnd": 0
},
"comesInHeated": "no"
},
"requires": [
"h_CrystalSpark"
],
"flashSuitChecked": true,
"blueSuitChecked": true
},
{
"id": 30,
"link": [
3,
3
],
"name": "G-Mode Setup - Get Hit By Zeela",
"requires": [],
"exitCondition": {
"leaveWithGModeSetup": {}
},
"flashSuitChecked": true,
"blueSuitChecked": true
},
{
"id": 31,
"link": [
3,
3
],
"name": "G-Mode Regain Mobility",
"requires": [
{
"enemyDamage": {
"enemy": "Zeela",
"type": "contact",
"hits": 1
}
}
],
"gModeRegainMobility": {},
"flashSuitChecked": true,
"blueSuitChecked": true,
"note": "Wait for the global Zeela."
},
{
"id": 32,
"link": [
3,
4
],
"name": "Come in Shinecharging, Leave Shinecharged",
"entranceCondition": {
"comeInShinecharging": {
"length": 4,
"openEnd": 1
}
},
"requires": [
"canShinechargeMovementComplex",
{
"shineChargeFrames": 120
}
],
"exitCondition": {
"leaveShinecharged": {}
},
"unlocksDoors": [
{
"types": [
"super"
],
"requires": []
},
{
"types": [
"missiles",
"powerbomb"
],
"requires": [
"never"
]
}
],
"flashSuitChecked": true,
"blueSuitChecked": true
},
{
"id": 33,
"link": [
3,
4
],
"name": "Come in Shinecharging, Leave Shinecharged (Shorter Runway)",
"entranceCondition": {
"comeInShinecharging": {
"length": 4,
"openEnd": 0
}
},
"requires": [
"canShinechargeMovementComplex",
{
"shineChargeFrames": 105
}
],
"exitCondition": {
"leaveShinecharged": {}
},
"unlocksDoors": [
{
"types": [
"super"
],
"requires": []
},
{
"types": [
"missiles",
"powerbomb"
],
"requires": [
"never"
]
}
],
"flashSuitChecked": true,
"blueSuitChecked": true,
"devNote": [
"By using slightly less than the full length of runway, Samus can fall with enough horizontal speed to clear the single-tile platform."
]
},
{
"id": 34,
"link": [
3,
4
],
"name": "Carry Shinecharge",
"entranceCondition": {
"comeInShinecharged": {}
},
"requires": [
{
"shineChargeFrames": 115
},
"canShinechargeMovementComplex"
],
"exitCondition": {
"leaveShinecharged": {}
},
"unlocksDoors": [
{
"types": [
"super"
],
"requires": []
},
{
"types": [
"missiles",
"powerbomb"
],
"requires": [
"never"
]
}
],
"flashSuitChecked": true,
"blueSuitChecked": true
},
{
"id": 35,
"link": [
3,
4
],
"name": "Come In Shinecharged, Leave With Spark",
"entranceCondition": {
"comeInShinecharged": {}
},
"requires": [
{
"shineChargeFrames": 100
},
"canShinechargeMovementComplex",
{
"shinespark": {
"frames": 2,
"excessFrames": 0
}
}
],
"exitCondition": {
"leaveWithSpark": {}
},
"unlocksDoors": [
{
"types": [
"super"
],
"requires": []
},
{
"types": [
"missiles",
"powerbomb"
],
"requires": [
"never"
]
}
],
"flashSuitChecked": true,
"blueSuitChecked": true
},
{
"id": 36,
"link": [
3,
4
],
"name": "Come in Shinecharging, Leave With Temporary Blue",
"entranceCondition": {
"comeInShinecharging": {
"length": 4,
"openEnd": 0
}
},
"requires": [
"canChainTemporaryBlue"
],
"exitCondition": {
"leaveWithTemporaryBlue": {}
},
"unlocksDoors": [
{
"types": [
"ammo"
],
"requires": []
}
],
"flashSuitChecked": true,
"blueSuitChecked": true
},
{
"id": 37,
"link": [
3,
5
],
"name": "Come In Shinecharging, Leave With Spark",
"entranceCondition": {
"comeInShinecharging": {
"length": 4,
"openEnd": 1
}
},
"requires": [
"canShinechargeMovementComplex",
{
"shinespark": {
"frames": 4,
"excessFrames": 0
}
}
],
"exitCondition": {
"leaveWithSpark": {}
},
"unlocksDoors": [
{
"types": [
"super"
],
"requires": []
},
{
"types": [
"missiles",
"powerbomb"
],
"requires": [
"never"
]
}
],
"flashSuitChecked": true,
"blueSuitChecked": true
},
{
"id": 38,
"link": [
3,
5
],
"name": "Come In Shinecharged, Leave With Spark",
"entranceCondition": {
"comeInShinecharged": {}
},
"requires": [
{
"shineChargeFrames": 150
},
"canShinechargeMovementComplex",
{
"shinespark": {
"frames": 6,
"excessFrames": 0
}
}
],
"exitCondition": {
"leaveWithSpark": {}
},
"unlocksDoors": [
{
"types": [
"super"
],
"requires": []
},
{
"types": [
"missiles",
"powerbomb"
],
"requires": [
"never"
]
}
],
"flashSuitChecked": true,
"blueSuitChecked": true
},
{
"id": 39,
"link": [
3,
5
],
"name": "Come in Shinecharging, Leave With Temporary Blue",
"entranceCondition": {
"comeInShinecharging": {
"length": 4,
"openEnd": 0
}
},
"requires": [
"canChainTemporaryBlue"
],
"exitCondition": {
"leaveWithTemporaryBlue": {}
},
"unlocksDoors": [
{
"types": [
"ammo"
],
"requires": []
}
],
"flashSuitChecked": true,
"blueSuitChecked": true
},
{
"id": 40,
"link": [
3,
6
],
"name": "Come In Shinecharging, Leave With Spark",
"entranceCondition": {
"comeInShinecharging": {
"length": 4,
"openEnd": 1
}
},
"requires": [
"canShinechargeMovementComplex",
{
"shinespark": {
"frames": 17,
"excessFrames": 0
}
}
],
"exitCondition": {
"leaveWithSpark": {}
},
"unlocksDoors": [
{
"types": [
"super"
],
"requires": []
},
{
"types": [
"missiles",
"powerbomb"
],
"requires": [
"never"
]
}
],
"flashSuitChecked": true,
"blueSuitChecked": true
},
{
"id": 41,
"link": [
3,
6
],
"name": "Come In Shinecharged, Leave With Spark",
"entranceCondition": {
"comeInShinecharged": {}
},
"requires": [
{
"shineChargeFrames": 150
},
"canShinechargeMovementComplex",
{
"shinespark": {
"frames": 17,
"excessFrames": 0
}
}
],
"exitCondition": {
"leaveWithSpark": {}
},
"unlocksDoors": [
{
"types": [
"super"
],
"requires": []
},
{
"types": [
"missiles",
"powerbomb"
],
"requires": [
"never"
]
}
],
"flashSuitChecked": true,
"blueSuitChecked": true
},
{
"id": 42,
"link": [
3,
6
],
"name": "Come in Shinecharging, Leave With Temporary Blue",
"entranceCondition": {
"comeInShinecharging": {
"length": 4,
"openEnd": 0
}
},
"requires": [
"canLongChainTemporaryBlue",
"canXRayTurnaround"
],
"exitCondition": {
"leaveWithTemporaryBlue": {}
},
"unlocksDoors": [
{
"types": [
"ammo"
],
"requires": []
}
],
"flashSuitChecked": true,
"blueSuitChecked": true
},
{
"id": 43,
"link": [
3,
7
],
"name": "Come in Shinecharging, Leave With Temporary Blue",
"entranceCondition": {
"comeInShinecharging": {
"length": 4,
"openEnd": 0
}
},
"requires": [
"canLongChainTemporaryBlue",
"canXRayTurnaround",
{
"ammo": {
"type": "PowerBomb",
"count": 1
}
}
],
"exitCondition": {
"leaveWithTemporaryBlue": {}
},
"unlocksDoors": [
{
"types": [
"ammo"
],
"requires": []
}
],
"flashSuitChecked": true,
"blueSuitChecked": true
},
{
"id": 44,
"link": [
3,
8
],
"name": "Come in Shinecharging, Leave With Temporary Blue",
"entranceCondition": {
"comeInShinecharging": {
"length": 4,
"openEnd": 0
}
},
"requires": [
"canLongChainTemporaryBlue",
"canXRayTurnaround",
{
"ammo": {
"type": "PowerBomb",
"count": 1
}
}
],
"exitCondition": {
"leaveWithTemporaryBlue": {}
},
"unlocksDoors": [
{
"types": [
"ammo"
],
"requires": []
}
],
"flashSuitChecked": true,
"blueSuitChecked": true
},
{
"id": 45,
"link": [
3,
12
],
"name": "Base",
"requires": [],
"flashSuitChecked": true,
"blueSuitChecked": true
},
{
"id": 46,
"link": [
3,
13
],
"name": "G-Mode Morph Power Bomb",
"entranceCondition": {
"comeInWithGMode": {
"mode": "any",
"morphed": true
}
},
"requires": [
"h_artificialMorphPowerBomb"
],
"clearsObstacles": [
"A"
],
"flashSuitChecked": true,
"blueSuitChecked": true,
"note": "Place a Power Bomb, then exit g-mode in order to break the Power Bomb blocks."
},
{
"id": 47,
"link": [
3,
13
],
"name": "Stored Moonfall Clip",
"entranceCondition": {
"comeInWithStoredFallSpeed": {
"fallSpeedInTiles": 2
}
},
"requires": [],
"flashSuitChecked": true,
"blueSuitChecked": true,
"note": "Moonfall towards the leftmost tile of the runway without breaking spin, then jump after landing."
},
{
"id": 255,
"link": [
3,
16
],
"name": "G-Mode",
"entranceCondition": {
"comeInWithGMode": {
"mode": "any",
"morphed": false
}
},
"requires": [],
"flashSuitChecked": true,
"blueSuitChecked": true
},
{
"id": 48,
"link": [
4,
2
],
"name": "Very Deep Stuck X-Ray Climb",
"entranceCondition": {
"comeInWithGMode": {
"mode": "direct",
"morphed": false
}
},
"requires": [
"canGModeXRayClimb"
],
"bypassesDoorShell": "yes",
"flashSuitChecked": true,
"blueSuitChecked": true,
"note": [
"Enter with G-mode direct, back up to between 1 and 6 pixels from the door transition, and activate X-ray to get very deep stuck in the door.",
"Climb up 1 screen, and perform a turnaround buffered spin-jump away from the door to trigger the transition, bypassing any lock on the door."
]
},
{
"id": 49,
"link": [
4,
2
],
"name": "Come in Shinecharging, Leave Shinecharged (HiJump)",
"entranceCondition": {
"comeInShinecharging": {
"length": 2,
"openEnd": 0
}
},
"requires": [
"HiJump",
"canShinechargeMovementComplex",
{
"shineChargeFrames": 120
}
],
"exitCondition": {
"leaveShinecharged": {}
},
"unlocksDoors": [
{
"types": [
"super"
],
"requires": []
},
{
"types": [
"missiles",
"powerbomb"
],
"requires": [
"never"
]
}
],
"flashSuitChecked": true,
"blueSuitChecked": true
},
{
"id": 50,
"link": [
4,
2
],
"name": "Come In Shinecharging, Leave Shinecharged (Wall Jump)",
"entranceCondition": {
"comeInShinecharging": {
"length": 2,
"openEnd": 0
}
},
"requires": [
"canWallJump",
"canShinechargeMovementComplex",
{
"shineChargeFrames": 135
}
],
"exitCondition": {
"leaveShinecharged": {}
},
"unlocksDoors": [
{
"types": [
"super"
],
"requires": []
},
{
"types": [
"missiles",
"powerbomb"
],
"requires": [
"never"
]
}
],
"flashSuitChecked": true,
"blueSuitChecked": true
},
{
"id": 51,
"link": [
4,
2
],
"name": "Come in Shinecharging, Leave Shinecharged (Ledge Grabs)",
"entranceCondition": {
"comeInShinecharging": {
"length": 2,
"openEnd": 0
}
},
"requires": [
"canShinechargeMovementTricky",
{
"shineChargeFrames": 170
}
],
"exitCondition": {
"leaveShinecharged": {}
},
"unlocksDoors": [
{
"types": [
"super"
],
"requires": []
},
{
"types": [
"missiles",
"powerbomb"
],
"requires": [
"never"
]
}
],
"flashSuitChecked": true,
"blueSuitChecked": true
},
{
"id": 52,
"link": [
4,
2
],
"name": "Carry Shinecharge (HiJump Wall Jump)",
"entranceCondition": {
"comeInShinecharged": {}
},
"requires": [
{
"shineChargeFrames": 105
},
"HiJump",
"canWallJump",
"canShinechargeMovementComplex"
],
"exitCondition": {
"leaveShinecharged": {}
},
"unlocksDoors": [
{
"types": [
"super"
],
"requires": []
},
{
"types": [
"missiles",
"powerbomb"
],
"requires": [
"never"
]
}
],
"flashSuitChecked": true,
"blueSuitChecked": true
},
{
"id": 53,
"link": [
4,
2
],
"name": "Carry Shinecharge (HiJump)",
"entranceCondition": {
"comeInShinecharged": {}
},
"requires": [
{
"shineChargeFrames": 130
},
"HiJump",
"canShinechargeMovementComplex"
],
"exitCondition": {
"leaveShinecharged": {}
},
"unlocksDoors": [
{
"types": [
"super"
],
"requires": []
},
{
"types": [
"missiles",
"powerbomb"
],
"requires": [
"never"
]
}
],
"flashSuitChecked": true,
"blueSuitChecked": true
},
{
"id": 54,
"link": [
4,
2
],
"name": "Carry Shinecharge (Wall Jump)",
"entranceCondition": {
"comeInShinecharged": {}
},
"requires": [
{
"shineChargeFrames": 130
},
"canWallJump",
"canShinechargeMovementComplex"
],
"exitCondition": {
"leaveShinecharged": {}
},
"unlocksDoors": [
{
"types": [
"super"
],
"requires": []
},
{
"types": [
"missiles",
"powerbomb"
],
"requires": [
"never"
]
}
],
"flashSuitChecked": true,
"blueSuitChecked": true
},
{
"id": 55,
"link": [
4,
2
],
"name": "Carry Shinecharge (Ledge Grabs)",
"entranceCondition": {
"comeInShinecharged": {}
},
"requires": [
{
"shineChargeFrames": 160
},
"canShinechargeMovementTricky"
],
"exitCondition": {
"leaveShinecharged": {}
},
"unlocksDoors": [
{
"types": [
"super"
],
"requires": []
},
{
"types": [
"missiles",
"powerbomb"
],
"requires": [
"never"
]
}
],
"flashSuitChecked": true,
"blueSuitChecked": true
},
{
"id": 56,
"link": [
4,
2
],
"name": "Come in Shinecharged, Leave With Spark (HiJump WallJump)",
"entranceCondition": {
"comeInShinecharged": {}
},
"requires": [
{
"shineChargeFrames": 80
},
"HiJump",
"canWallJump",
"canShinechargeMovementComplex",
{
"shinespark": {
"frames": 7,
"excessFrames": 0
}
}
],
"exitCondition": {
"leaveWithSpark": {}
},
"unlocksDoors": [
{
"types": [
"super"
],
"requires": []
},
{
"types": [
"missiles",
"powerbomb"
],
"requires": [
"never"
]
}
],
"flashSuitChecked": true,
"blueSuitChecked": true
},
{
"id": 57,
"link": [
4,
2
],
"name": "Come in Shinecharged, Leave With Spark (HiJump)",
"entranceCondition": {
"comeInShinecharged": {}
},
"requires": [
{
"shineChargeFrames": 95
},
"HiJump",
"canShinechargeMovementComplex",
{
"shinespark": {
"frames": 9,
"excessFrames": 0
}
}
],
"exitCondition": {
"leaveWithSpark": {}
},
"unlocksDoors": [
{
"types": [
"super"
],
"requires": []
},
{
"types": [
"missiles",
"powerbomb"
],
"requires": [
"never"
]
}
],
"flashSuitChecked": true,
"blueSuitChecked": true
},
{
"id": 58,
"link": [
4,
2
],
"name": "Come In Shinecharged, Leave With Spark (Wall Jump)",
"entranceCondition": {
"comeInShinecharged": {}
},
"requires": [
{
"shineChargeFrames": 110
},
"canWallJump",
"canShinechargeMovementComplex",
{
"shinespark": {
"frames": 6,
"excessFrames": 0
}
}
],
"exitCondition": {
"leaveWithSpark": {}
},
"unlocksDoors": [
{
"types": [
"super"
],
"requires": []
},
{
"types": [
"missiles",
"powerbomb"
],
"requires": [
"never"
]
}
],
"flashSuitChecked": true,
"blueSuitChecked": true
},
{
"id": 59,
"link": [
4,
2
],
"name": "Come in Shinecharged, Leave With Spark (Ledge Grabs)",
"entranceCondition": {
"comeInShinecharged": {}
},
"requires": [
{
"shineChargeFrames": 130
},
"canShinechargeMovementTricky",
{
"shinespark": {
"frames": 8,
"excessFrames": 0
}
}
],
"exitCondition": {
"leaveWithSpark": {}
},
"unlocksDoors": [
{
"types": [
"super"
],
"requires": []
},
{
"types": [
"missiles",
"powerbomb"
],
"requires": [
"never"
]
}
],
"flashSuitChecked": true,
"blueSuitChecked": true
},
{
"id": 60,
"link": [
4,
2
],
"name": "Come in Shinecharging, Leave With Temporary Blue",
"entranceCondition": {
"comeInShinecharging": {
"length": 3,
"openEnd": 0
}
},
"requires": [
"canChainTemporaryBlue",
"canXRayTurnaround"
],
"exitCondition": {
"leaveWithTemporaryBlue": {}
},
"unlocksDoors": [
{
"types": [
"ammo"
],
"requires": []
}
],
"flashSuitChecked": true,
"blueSuitChecked": true
},
{
"id": 61,
"link": [
4,
3
],
"name": "Come in Shinecharging, Leave Shinecharged (HiJump)",
"entranceCondition": {
"comeInShinecharging": {
"length": 2,
"openEnd": 0
}
},
"requires": [
"HiJump",
"canShinechargeMovementComplex",
{
"shineChargeFrames": 65
}
],
"exitCondition": {
"leaveShinecharged": {}
},
"unlocksDoors": [
{
"types": [
"super"
],
"requires": []
},
{
"types": [
"missiles",
"powerbomb"
],
"requires": [
"never"
]
}
],
"flashSuitChecked": true,
"blueSuitChecked": true
},
{
"id": 62,
"link": [
4,
3
],
"name": "Come in Shinecharging, Leave Shinecharged (Wall Jump)",
"entranceCondition": {
"comeInShinecharging": {
"length": 2,
"openEnd": 0
}
},
"requires": [
"canShinechargeMovementComplex",
{
"shineChargeFrames": 160
}
],
"exitCondition": {
"leaveShinecharged": {}
},
"unlocksDoors": [
{
"types": [
"super"
],
"requires": []
},
{
"types": [
"missiles",
"powerbomb"
],
"requires": [
"never"
]
}
],
"flashSuitChecked": true,
"blueSuitChecked": true
},
{
"id": 63,
"link": [
4,
3
],
"name": "Come in Shinecharging, Leave With Spark (Ledge Grabs)",
"entranceCondition": {
"comeInShinecharging": {
"length": 2,
"openEnd": 0
}
},
"requires": [
"canShinechargeMovementTricky",
{
"shinespark": {
"frames": 6,
"excessFrames": 0
}
}
],
"exitCondition": {
"leaveWithSpark": {}
},
"unlocksDoors": [
{
"types": [
"super"
],
"requires": []
},
{
"types": [
"missiles",
"powerbomb"
],
"requires": [
"never"
]
}
],
"flashSuitChecked": true,
"blueSuitChecked": true
},
{
"id": 64,
"link": [
4,
3
],
"name": "Carry Shinecharge (HiJump)",
"entranceCondition": {
"comeInShinecharged": {}
},
"requires": [
{
"shineChargeFrames": 110
},
"HiJump",
"canShinechargeMovementComplex"
],
"exitCondition": {
"leaveShinecharged": {}
},
"unlocksDoors": [
{
"types": [
"super"
],
"requires": []
},
{
"types": [
"missiles",
"powerbomb"
],
"requires": [
"never"
]
}
],
"flashSuitChecked": true,
"blueSuitChecked": true
},
{
"id": 65,
"link": [
4,
3
],
"name": "Carry Shinecharge (Wall Jump)",
"entranceCondition": {
"comeInShinecharged": {}
},
"requires": [
{
"shineChargeFrames": 145
},
"canWallJump",
"canShinechargeMovementComplex"
],
"exitCondition": {
"leaveShinecharged": {}
},
"unlocksDoors": [
{
"types": [
"super"
],
"requires": []
},
{
"types": [
"missiles",
"powerbomb"
],
"requires": [
"never"
]
}
],
"flashSuitChecked": true,
"blueSuitChecked": true
},
{
"id": 66,
"link": [
4,
3
],
"name": "Carry Shinecharge (Ledge Grabs)",
"entranceCondition": {
"comeInShinecharged": {}
},
"requires": [
{
"shineChargeFrames": 160
},
"canShinechargeMovementTricky"
],
"exitCondition": {
"leaveShinecharged": {}
},
"unlocksDoors": [
{
"types": [
"super"
],
"requires": []
},
{
"types": [
"missiles",
"powerbomb"
],
"requires": [
"never"
]
}
],
"flashSuitChecked": true,
"blueSuitChecked": true
},
{
"id": 67,
"link": [
4,
3
],
"name": "Come in Shinecharged, Leave With Spark (HiJump)",
"entranceCondition": {
"comeInShinecharged": {}
},
"requires": [
{
"shineChargeFrames": 80
},
"HiJump",
"canShinechargeMovementComplex",
{
"shinespark": {
"frames": 8,
"excessFrames": 0
}
}
],
"exitCondition": {
"leaveWithSpark": {}
},
"unlocksDoors": [
{
"types": [
"super"
],
"requires": []
},
{
"types": [
"missiles",
"powerbomb"
],
"requires": [
"never"
]
}
],
"flashSuitChecked": true,
"blueSuitChecked": true
},
{
"id": 68,
"link": [
4,
3
],
"name": "Come in Shinecharged, Leave With Spark (Wall Jump)",
"entranceCondition": {
"comeInShinecharged": {}
},
"requires": [
{
"shineChargeFrames": 120
},
"canShinechargeMovementComplex",
{
"shinespark": {
"frames": 16,
"excessFrames": 0
}
}
],
"exitCondition": {
"leaveWithSpark": {}
},
"unlocksDoors": [
{
"types": [
"super"
],
"requires": []
},
{
"types": [
"missiles",
"powerbomb"
],
"requires": [
"never"
]
}
],
"flashSuitChecked": true,
"blueSuitChecked": true
},
{
"id": 69,
"link": [
4,
3
],
"name": "Come in Shinecharged, Leave With Spark (Ledge Grabs)",
"entranceCondition": {
"comeInShinecharged": {}
},
"requires": [
{
"shineChargeFrames": 130
},
"canShinechargeMovementTricky",
{
"shinespark": {
"frames": 14,
"excessFrames": 0
}
}
],
"exitCondition": {
"leaveWithSpark": {}
},
"unlocksDoors": [
{
"types": [
"super"
],
"requires": []
},
{
"types": [
"missiles",
"powerbomb"
],
"requires": [
"never"
]
}
],
"flashSuitChecked": true,
"blueSuitChecked": true
},
{
"id": 70,
"link": [
4,
3
],
"name": "Come in Shinecharging, Leave With Temporary Blue",
"entranceCondition": {
"comeInShinecharging": {
"length": 3,
"openEnd": 0
}
},
"requires": [
"canChainTemporaryBlue",
{
"or": [
"HiJump",
"canTrickySpringBallJump",
"canXRayTurnaround"
]
}
],
"exitCondition": {
"leaveWithTemporaryBlue": {}
},
"unlocksDoors": [
{
"types": [
"ammo"
],
"requires": []
}
],
"flashSuitChecked": true,
"blueSuitChecked": true
},
{
"id": 268,
"link": [
4,
4
],
"name": "R-Mode Entry",
"entranceCondition": {
"comeInWithRMode": {}
},
"requires": [],
"clearsObstacles": [
"R-Mode"
],
"flashSuitChecked": true,
"blueSuitChecked": true
},
{
"id": 71,
"link": [
4,
4
],
"name": "Leave With Runway",
"requires": [],
"exitCondition": {
"leaveWithRunway": {
"length": 3,
"openEnd": 1
}
},
"flashSuitChecked": true,
"blueSuitChecked": true
},
{
"id": 72,
"link": [
4,
4
],
"name": "Leave With Runway - Frozen Zeela",
"requires": [
"h_frozenEnemyRunway",
{
"or": [
"canBePatient",
{
"ammo": {
"type": "Super",
"count": 1
}
}
]
}
],
"exitCondition": {
"leaveWithRunway": {
"length": 4,
"openEnd": 1
}
},
"flashSuitChecked": true,
"blueSuitChecked": true,
"note": "It is possible to save a lot of time by using a Super to knock the clockwise Zeela off the small platform above."
},
{
"id": 73,
"link": [
4,
4
],
"name": "G-Mode Setup - Get Hit By Zeela",
"requires": [
{
"or": [
"canBePatient",
{
"ammo": {
"type": "Super",
"count": 1
}
}
]
}
],
"exitCondition": {
"leaveWithGModeSetup": {}
},
"flashSuitChecked": true,
"blueSuitChecked": true,
"note": "It is possible to save a lot of time by using a Super to knock the clockwise Zeela off the small platform above."
},
{
"id": 74,
"link": [
4,
4
],
"name": "G-Mode Regain Mobility",
"requires": [
"canBePatient",
{
"enemyDamage": {
"enemy": "Zeela",
"type": "contact",
"hits": 1
}
}
],
"gModeRegainMobility": {},
"flashSuitChecked": true,
"blueSuitChecked": true,
"note": "It takes 70 seconds for the global Zeela to make it over here. A Super could speed this up, but it's likely to just get the Zeela stuck."
},
{
"id": 75,
"link": [
4,
5
],
"name": "Come in Shinecharging, Leave Shinecharged",
"entranceCondition": {
"comeInShinecharging": {
"length": 2,
"openEnd": 1
}
},
"requires": [
"canShinechargeMovementComplex",
{
"shineChargeFrames": 100
}
],
"exitCondition": {
"leaveShinecharged": {}
},
"unlocksDoors": [
{
"types": [
"super"
],
"requires": []
},
{
"types": [
"missiles",
"powerbomb"
],
"requires": [
"never"
]
}
],
"flashSuitChecked": true,
"blueSuitChecked": true
},
{
"id": 76,
"link": [
4,
5
],
"name": "Carry Shinecharge",
"entranceCondition": {
"comeInShinecharged": {}
},
"requires": [
{
"shineChargeFrames": 110
},
"canShinechargeMovementComplex"
],
"exitCondition": {
"leaveShinecharged": {}
},
"unlocksDoors": [
{
"types": [
"super"
],
"requires": []
},
{
"types": [
"missiles",
"powerbomb"
],
"requires": [
"never"
]
}
],
"flashSuitChecked": true,
"blueSuitChecked": true
},
{
"id": 77,
"link": [
4,
5
],
"name": "Come in Shinecharged, Leave With Spark",
"entranceCondition": {
"comeInShinecharged": {}
},
"requires": [
{
"shineChargeFrames": 90
},
"canShinechargeMovementComplex",
{
"shinespark": {
"frames": 5,
"excessFrames": 0
}
}
],
"exitCondition": {
"leaveWithSpark": {}
},
"unlocksDoors": [
{
"types": [
"super"
],
"requires": []
},
{
"types": [
"missiles",
"powerbomb"
],
"requires": [
"never"
]
}
],
"flashSuitChecked": true,
"blueSuitChecked": true
},
{
"id": 78,
"link": [
4,
5
],
"name": "Come in Shinecharging, Leave With Temporary Blue",
"entranceCondition": {
"comeInShinecharging": {
"length": 3,
"openEnd": 0
}
},
"requires": [
"canChainTemporaryBlue",
"canXRayTurnaround"
],
"exitCondition": {
"leaveWithTemporaryBlue": {}
},
"unlocksDoors": [
{
"types": [
"ammo"
],
"requires": []
}
],
"flashSuitChecked": true,
"blueSuitChecked": true
},
{
"id": 79,
"link": [
4,
6
],
"name": "Come In Shinecharging, Leave Shinecharged",
"entranceCondition": {
"comeInShinecharging": {
"length": 2,
"openEnd": 1
}
},
"requires": [
"canShinechargeMovementComplex",
{
"shineChargeFrames": 120
}
],
"exitCondition": {
"leaveShinecharged": {}
},
"unlocksDoors": [
{
"types": [
"super"
],
"requires": []
},
{
"types": [
"missiles",
"powerbomb"
],
"requires": [
"never"
]
}
],
"flashSuitChecked": true,
"blueSuitChecked": true
},
{
"id": 80,
"link": [
4,
6
],
"name": "Carry Shinecharge",
"entranceCondition": {
"comeInShinecharged": {}
},
"requires": [
{
"shineChargeFrames": 125
},
"canShinechargeMovementComplex"
],
"exitCondition": {
"leaveShinecharged": {}
},
"unlocksDoors": [
{
"types": [
"super"
],
"requires": []
},
{
"types": [
"missiles",
"powerbomb"
],
"requires": [
"never"
]
}
],
"flashSuitChecked": true,
"blueSuitChecked": true
},
{
"id": 81,
"link": [
4,
6
],
"name": "Come In Shinecharged, Leave With Spark",
"entranceCondition": {
"comeInShinecharged": {}
},
"requires": [
{
"shineChargeFrames": 85
},
"canShinechargeMovementComplex",
{
"shinespark": {
"frames": 17,
"excessFrames": 0
}
}
],
"exitCondition": {
"leaveWithSpark": {}
},
"unlocksDoors": [
{
"types": [
"super"
],
"requires": []
},
{
"types": [
"missiles",
"powerbomb"
],
"requires": [
"never"
]
}
],
"flashSuitChecked": true,
"blueSuitChecked": true
},
{
"id": 82,
"link": [
4,
6
],
"name": "Come in Shinecharging, Leave With Temporary Blue",
"entranceCondition": {
"comeInShinecharging": {
"length": 3,
"openEnd": 0
}
},
"requires": [
"canLongChainTemporaryBlue"
],
"exitCondition": {
"leaveWithTemporaryBlue": {}
},
"unlocksDoors": [
{
"types": [
"ammo"
],
"requires": []
}
],
"flashSuitChecked": true,
"blueSuitChecked": true
},
{
"id": 83,
"link": [
4,
7
],
"name": "Come in Shinecharging, Leave With Temporary Blue",
"entranceCondition": {
"comeInShinecharging": {
"length": 3,
"openEnd": 0
}
},
"requires": [
"canLongChainTemporaryBlue",
{
"ammo": {
"type": "PowerBomb",
"count": 1
}
}
],
"exitCondition": {
"leaveWithTemporaryBlue": {}
},
"unlocksDoors": [
{
"types": [
"ammo"
],
"requires": []
}
],
"flashSuitChecked": true,
"blueSuitChecked": true
},
{
"id": 84,
"link": [
4,
8
],
"name": "Come in Shinecharging, Leave With Temporary Blue",
"entranceCondition": {
"comeInShinecharging": {
"length": 3,
"openEnd": 0
}
},
"requires": [
"canLongChainTemporaryBlue",
"canXRayTurnaround",
{
"ammo": {
"type": "PowerBomb",
"count": 1
}
}
],
"exitCondition": {
"leaveWithTemporaryBlue": {}
},
"unlocksDoors": [
{
"types": [
"ammo"
],
"requires": []
}
],
"flashSuitChecked": true,
"blueSuitChecked": true
},
{
"id": 85,
"link": [
4,
12
],
"name": "Base",
"requires": [],
"flashSuitChecked": true,
"blueSuitChecked": true
},
{
"id": 86,
"link": [
4,
13
],
"name": "G-Mode Morph Power Bomb",
"entranceCondition": {
"comeInWithGMode": {
"mode": "any",
"morphed": true
}
},
"requires": [
"h_artificialMorphPowerBomb"
],
"clearsObstacles": [
"A"
],
"flashSuitChecked": true,
"blueSuitChecked": true,
"note": "Place a Power Bomb, then exit g-mode in order to break the Power Bomb blocks."
},
{
"id": 256,
"link": [
4,
16
],
"name": "G-Mode",
"entranceCondition": {
"comeInWithGMode": {
"mode": "any",
"morphed": false
}
},
"requires": [],
"flashSuitChecked": true,
"blueSuitChecked": true
},
{
"id": 87,
"link": [
5,
2
],
"name": "Come In Shinecharged, Leave With Spark",
"entranceCondition": {
"comeInShinecharged": {}
},
"requires": [
{
"shineChargeFrames": 165
},
"HiJump",
"canShinechargeMovementTricky",
{
"shinespark": {
"frames": 12,
"excessFrames": 0
}
}
],
"exitCondition": {
"leaveWithSpark": {}
},
"unlocksDoors": [
{
"types": [
"super"
],
"requires": []
},
{
"types": [
"missiles",
"powerbomb"
],
"requires": [
"never"
]
}
],
"flashSuitChecked": true,
"blueSuitChecked": true
},
{
"id": 88,
"link": [
5,
2
],
"name": "Very Deep Stuck X-Ray Climb",
"entranceCondition": {
"comeInWithGMode": {
"mode": "direct",
"morphed": false
}
},
"requires": [
"canGModeXRayClimb",
"canLongXRayClimb"
],
"bypassesDoorShell": "yes",
"flashSuitChecked": true,
"blueSuitChecked": true,
"note": [
"Enter with G-mode direct, back up to between 1 and 6 pixels from the door transition, and activate X-ray to get very deep stuck in the door.",
"Climb up 2 screens, and perform a turnaround buffered spin-jump away from the door to trigger the transition, bypassing any lock on the door."
]
},
{
"id": 89,
"link": [
5,
2
],
"name": "Come in Shinecharging, Leave With Temporary Blue",
"entranceCondition": {
"comeInShinecharging": {
"length": 12,
"openEnd": 0
}
},
"requires": [
"canLongChainTemporaryBlue",
"canXRayTurnaround"
],
"exitCondition": {
"leaveWithTemporaryBlue": {}
},
"unlocksDoors": [
{
"types": [
"ammo"
],
"requires": []
}
],
"flashSuitChecked": true,
"blueSuitChecked": true
},
{
"id": 90,
"link": [
5,
3
],
"name": "Come In Shinecharged, Leave With Spark",
"entranceCondition": {
"comeInShinecharged": {}
},
"requires": [
{
"shineChargeFrames": 165
},
"HiJump",
"canShinechargeMovementTricky",
{
"shinespark": {
"frames": 12,
"excessFrames": 0
}
}
],
"exitCondition": {
"leaveWithSpark": {}
},
"unlocksDoors": [
{
"types": [
"super"
],
"requires": []
},
{
"types": [
"missiles",
"powerbomb"
],
"requires": [
"never"
]
}
],
"flashSuitChecked": true,
"blueSuitChecked": true
},
{
"id": 91,
"link": [
5,
3
],
"name": "Come in Shinecharging, Leave With Temporary Blue",
"entranceCondition": {
"comeInShinecharging": {
"length": 12,
"openEnd": 0
}
},
"requires": [
"canLongChainTemporaryBlue",
"canXRayTurnaround"
],
"exitCondition": {
"leaveWithTemporaryBlue": {}
},
"unlocksDoors": [
{
"types": [
"ammo"
],
"requires": []
}
],
"flashSuitChecked": true,
"blueSuitChecked": true
},
{
"id": 92,
"link": [
5,
4
],
"name": "Very Deep Stuck X-Ray Climb",
"entranceCondition": {
"comeInWithGMode": {
"mode": "direct",
"morphed": false
}
},
"requires": [
"canGModeXRayClimb"
],
"bypassesDoorShell": "yes",
"flashSuitChecked": true,
"blueSuitChecked": true,
"note": [
"Enter with G-mode direct, back up to between 1 and 6 pixels from the door transition, and activate X-ray to get very deep stuck in the door.",
"Climb up 1 screen, and perform a turnaround buffered spin-jump away from the door to trigger the transition, bypassing any lock on the door."
]
},
{
"id": 93,
"link": [
5,
4
],
"name": "Come in Shinecharging, Leave Shinecharged (HiJump)",
"entranceCondition": {
"comeInShinecharging": {
"length": 12,
"openEnd": 0
}
},
"requires": [
"HiJump",
"canShinechargeMovementComplex",
{
"shineChargeFrames": 140
}
],
"exitCondition": {
"leaveShinecharged": {}
},
"unlocksDoors": [
{
"types": [
"super"
],
"requires": []
},
{
"types": [
"missiles",
"powerbomb"
],
"requires": [
"never"
]
}
],
"flashSuitChecked": true,
"blueSuitChecked": true
},
{
"id": 94,
"link": [
5,
4
],
"name": "Come in Shinecharging, Leave Shinecharged (Tricky Dash Jump)",
"entranceCondition": {
"comeInShinecharging": {
"length": 12,
"openEnd": 0
}
},
"requires": [
"canTrickyDashJump",
"canShinechargeMovementComplex",
{
"shineChargeFrames": 140
}
],
"exitCondition": {
"leaveShinecharged": {}
},
"unlocksDoors": [
{
"types": [
"super"
],
"requires": []
},
{
"types": [
"missiles",
"powerbomb"
],
"requires": [
"never"
]
}
],
"flashSuitChecked": true,
"blueSuitChecked": true
},
{
"id": 95,
"link": [
5,
4
],
"name": "Carry Shinecharge (HiJump)",
"entranceCondition": {
"comeInShinecharged": {}
},
"requires": [
{
"shineChargeFrames": 95
},
"HiJump",
"canShinechargeMovementComplex"
],
"exitCondition": {
"leaveShinecharged": {}
},
"unlocksDoors": [
{
"types": [
"super"
],
"requires": []
},
{
"types": [
"missiles",
"powerbomb"
],
"requires": [
"never"
]
}
],
"flashSuitChecked": true,
"blueSuitChecked": true
},
{
"id": 96,
"link": [
5,
4
],
"name": "Carry Shinecharge (Wall Jump)",
"entranceCondition": {
"comeInShinecharged": {}
},
"requires": [
{
"shineChargeFrames": 130
},
"canWallJump",
"canShinechargeMovementComplex"
],
"exitCondition": {
"leaveShinecharged": {}
},
"unlocksDoors": [
{
"types": [
"super"
],
"requires": []
},
{
"types": [
"missiles",
"powerbomb"
],
"requires": [
"never"
]
}
],
"flashSuitChecked": true,
"blueSuitChecked": true
},
{
"id": 97,
"link": [
5,
4
],
"name": "Carry Shinecharge (Ledge Grabs)",
"entranceCondition": {
"comeInShinecharged": {}
},
"requires": [
{
"shineChargeFrames": 145
},
"canShinechargeMovementTricky"
],
"exitCondition": {
"leaveShinecharged": {}
},
"unlocksDoors": [
{
"types": [
"super"
],
"requires": []
},
{
"types": [
"missiles",
"powerbomb"
],
"requires": [
"never"
]
}
],
"flashSuitChecked": true,
"blueSuitChecked": true
},
{
"id": 98,
"link": [
5,
4
],
"name": "Come in Shinecharged, Leave With Spark (HiJump)",
"entranceCondition": {
"comeInShinecharged": {}
},
"requires": [
{
"shineChargeFrames": 75
},
"canShinechargeMovementTricky",
{
"shinespark": {
"frames": 5,
"excessFrames": 0
}
}
],
"exitCondition": {
"leaveWithSpark": {}
},
"unlocksDoors": [
{
"types": [
"super"
],
"requires": []
},
{
"types": [
"missiles",
"powerbomb"
],
"requires": [
"never"
]
}
],
"flashSuitChecked": true,
"blueSuitChecked": true
},
{
"id": 99,
"link": [
5,
4
],
"name": "Come In Shinecharged, Leave With Spark (Wall Jump)",
"entranceCondition": {
"comeInShinecharged": {}
},
"requires": [
{
"shineChargeFrames": 110
},
"canWallJump",
"canShinechargeMovementComplex",
{
"shinespark": {
"frames": 6,
"excessFrames": 0
}
}
],
"exitCondition": {
"leaveWithSpark": {}
},
"unlocksDoors": [
{
"types": [
"super"
],
"requires": []
},
{
"types": [
"missiles",
"powerbomb"
],
"requires": [
"never"
]
}
],
"flashSuitChecked": true,
"blueSuitChecked": true
},
{
"id": 100,
"link": [
5,
4
],
"name": "Come in Shinecharged, Leave With Spark (Ledge Grabs)",
"entranceCondition": {
"comeInShinecharged": {}
},
"requires": [
{
"shineChargeFrames": 130
},
"canShinechargeMovementTricky",
{
"shinespark": {
"frames": 5,
"excessFrames": 0
}
}
],
"exitCondition": {
"leaveWithSpark": {}
},
"unlocksDoors": [
{
"types": [
"super"
],
"requires": []
},
{
"types": [
"missiles",
"powerbomb"
],
"requires": [
"never"
]
}
],
"flashSuitChecked": true,
"blueSuitChecked": true
},
{
"id": 101,
"link": [
5,
4
],
"name": "Come in Shinecharging, Leave With Temporary Blue",
"entranceCondition": {
"comeInShinecharging": {
"length": 12,
"openEnd": 0
}
},
"requires": [
"canChainTemporaryBlue",
"canXRayTurnaround"
],
"exitCondition": {
"leaveWithTemporaryBlue": {}
},
"unlocksDoors": [
{
"types": [
"ammo"
],
"requires": []
}
],
"flashSuitChecked": true,
"blueSuitChecked": true
},
{
"id": 285,
"link": [
5,
5
],
"name": "Crystal Spark",
"requires": [
{
"obstaclesNotCleared": [
"A"
]
},
{
"or": [
{
"canShineCharge": {
"usedTiles": 12,
"openEnd": 0
}
},
{
"and": [
{
"or": [
{
"doorUnlockedAtNode": 5
},
{
"doorUnlockedAtNode": 6
}
]
},
{
"canShineCharge": {
"usedTiles": 13,
"openEnd": 0
}
}
]
},
{
"and": [
{
"doorUnlockedAtNode": 5
},
{
"doorUnlockedAtNode": 6
},
{
"canShineCharge": {
"usedTiles": 14,
"openEnd": 0
}
}
]
}
]
},
"h_CrystalSpark"
],
"unlocksDoors": [
{
"nodeId": 5,
"types": [
"ammo"
],
"requires": []
},
{
"nodeId": 6,
"types": [
"ammo"
],
"requires": []
}
],
"clearsObstacles": [
"A"
],
"flashSuitChecked": true,
"blueSuitChecked": true
},
{
"id": 286,
"link": [
5,
5
],
"name": "Come in Shinecharging, Crystal Spark",
"entranceCondition": {
"comeInShinecharging": {
"length": 12,
"openEnd": 0
},
"comesInHeated": "no"
},
"requires": [
"h_CrystalSpark"
],
"clearsObstacles": [
"A"
],
"flashSuitChecked": true,
"blueSuitChecked": true
},
{
"id": 269,
"link": [
5,
5
],
"name": "R-Mode Entry",
"entranceCondition": {
"comeInWithRMode": {}
},
"requires": [],
"clearsObstacles": [
"R-Mode"
],
"flashSuitChecked": true,
"blueSuitChecked": true
},
{
"id": 102,
"link": [
5,
5
],
"name": "Leave With Runway",
"requires": [],
"exitCondition": {
"leaveWithRunway": {
"length": 4,
"openEnd": 1
}
},
"flashSuitChecked": true,
"blueSuitChecked": true
},
{
"id": 103,
"link": [
5,
5
],
"name": "Leave With Runway - Frozen Zeela",
"requires": [
"h_frozenEnemyRunway",
{
"or": [
"canBeVeryPatient",
{
"ammo": {
"type": "Super",
"count": 1
}
}
]
}
],
"exitCondition": {
"leaveWithRunway": {
"length": 5,
"openEnd": 1
}
},
"flashSuitChecked": true,
"blueSuitChecked": true,
"note": "It is possible to save a lot of time by using a Super to knock the clockwise Zeela off the small near the top of the room."
},
{
"id": 104,
"link": [
5,
5
],
"name": "Leave With Runway (Unbroken PB Blocks)",
"requires": [
{
"obstaclesNotCleared": [
"A"
]
}
],
"exitCondition": {
"leaveWithRunway": {
"length": 13,
"openEnd": 0
}
},
"flashSuitChecked": true,
"blueSuitChecked": true
},
{
"id": 105,
"link": [
5,
5
],
"name": "Leave With Runway (Unbroken PB Blocks, Open Door)",
"requires": [
{
"obstaclesNotCleared": [
"A"
]
},
{
"doorUnlockedAtNode": 6
}
],
"exitCondition": {
"leaveWithRunway": {
"length": 14,
"openEnd": 0
}
},
"unlocksDoors": [
{
"nodeId": 6,
"types": [
"ammo"
],
"requires": []
}
],
"flashSuitChecked": true,
"blueSuitChecked": true
},
{
"id": 106,
"link": [
5,
5
],
"name": "G-Mode Setup - Get Hit By Zeela",
"requires": [],
"exitCondition": {
"leaveWithGModeSetup": {}
},
"flashSuitChecked": true,
"blueSuitChecked": true
},
{
"id": 107,
"link": [
5,
5
],
"name": "G-Mode Regain Mobility",
"requires": [
{
"enemyDamage": {
"enemy": "Zeela",
"type": "contact",
"hits": 1
}
}
],
"gModeRegainMobility": {},
"flashSuitChecked": true,
"blueSuitChecked": true,
"note": "It takes 60 seconds for the global Zeela to make it over here. A Super could speed this up, but it's likely to just get the Zeela stuck."
},
{
"id": 108,
"link": [
5,
6
],
"name": "Come in Shinecharging, Leave Shinecharged",
"entranceCondition": {
"comeInShinecharging": {
"length": 13,
"openEnd": 0
}
},
"requires": [
{
"shineChargeFrames": 20
}
],
"exitCondition": {
"leaveShinecharged": {}
},
"unlocksDoors": [
{
"types": [
"super"
],
"requires": []
},
{
"types": [
"missiles",
"powerbomb"
],
"requires": [
"never"
]
}
],
"flashSuitChecked": true,
"blueSuitChecked": true
},
{
"id": 109,
"link": [
5,
6
],
"name": "Carry Shinecharge",
"entranceCondition": {
"comeInShinecharged": {}
},
"requires": [
{
"shineChargeFrames": 55
}
],
"exitCondition": {
"leaveShinecharged": {}
},
"unlocksDoors": [
{
"types": [
"super"
],
"requires": []
},
{
"types": [
"missiles",
"powerbomb"
],
"requires": [
"never"
]
}
],
"flashSuitChecked": true,
"blueSuitChecked": true
},
{
"id": 110,
"link": [
5,
6
],
"name": "Come In Shinecharged, Leave With Spark",
"entranceCondition": {
"comeInShinecharged": {}
},
"requires": [
{
"shineChargeFrames": 10
},
{
"shinespark": {
"frames": 21,
"excessFrames": 0
}
}
],
"exitCondition": {
"leaveWithSpark": {}
},
"unlocksDoors": [
{
"types": [
"super"
],
"requires": []
},
{
"types": [
"missiles",
"powerbomb"
],
"requires": [
"never"
]
}
],
"flashSuitChecked": true,
"blueSuitChecked": true
},
{
"id": 111,
"link": [
5,
6
],
"name": "Come in Shinecharging, Leave With Temporary Blue",
"entranceCondition": {
"comeInShinecharging": {
"length": 12,
"openEnd": 0
}
},
"requires": [],
"exitCondition": {
"leaveWithTemporaryBlue": {}
},
"unlocksDoors": [
{
"types": [
"ammo"
],
"requires": []
}
],
"flashSuitChecked": true,
"blueSuitChecked": true
},
{
"id": 112,
"link": [
5,
6
],
"name": "Transition with Stored Fall Speed",
"entranceCondition": {
"comeInWithStoredFallSpeed": {
"fallSpeedInTiles": 1
}
},
"requires": [],
"exitCondition": {
"leaveWithStoredFallSpeed": {
"fallSpeedInTiles": 1
}
},
"unlocksDoors": [
{
"types": [
"missiles",
"super"
],
"requires": []
},
{
"types": [
"powerbomb"
],
"requires": [
"never"
]
}
],
"flashSuitChecked": true,
"blueSuitChecked": true
},
{
"id": 113,
"link": [
5,
6
],
"name": "Transition with Stored Fall Speed (more speed)",
"entranceCondition": {
"comeInWithStoredFallSpeed": {
"fallSpeedInTiles": 2
}
},
"requires": [],
"exitCondition": {
"leaveWithStoredFallSpeed": {
"fallSpeedInTiles": 2
}
},
"unlocksDoors": [
{
"types": [
"missiles",
"super"
],
"requires": []
},
{
"types": [
"powerbomb"
],
"requires": [
"never"
]
}
],
"flashSuitChecked": true,
"blueSuitChecked": true
},
{
"id": 114,
"link": [
5,
7
],
"name": "Come in Shinecharging, Leave With Temporary Blue (Full Runway)",
"entranceCondition": {
"comeInShinecharging": {
"length": 12,
"openEnd": 0
}
},
"requires": [
"canLongChainTemporaryBlue",
"canXRayTurnaround",
"can4HighMidAirMorph",
{
"ammo": {
"type": "PowerBomb",
"count": 1
}
}
],
"exitCondition": {
"leaveWithTemporaryBlue": {}
},
"unlocksDoors": [
{
"types": [
"ammo"
],
"requires": []
}
],
"flashSuitChecked": true,
"blueSuitChecked": true
},
{
"id": 115,
"link": [
5,
7
],
"name": "Come in Shinecharging, Leave With Temporary Blue (Partial Runway)",
"entranceCondition": {
"comeInShinecharging": {
"length": 5,
"openEnd": 0
}
},
"requires": [
"canChainTemporaryBlue",
{
"ammo": {
"type": "PowerBomb",
"count": 1
}
}
],
"exitCondition": {
"leaveWithTemporaryBlue": {}
},
"unlocksDoors": [
{
"types": [
"ammo"
],
"requires": []
}
],
"flashSuitChecked": true,
"blueSuitChecked": true,
"note": "After falling through the shot block, bounce on the single-tile platform (rather than unmorphing onto it) to more easily reach the door."
},
{
"id": 116,
"link": [
5,
8
],
"name": "Come in Shinecharging, Leave With Temporary Blue",
"entranceCondition": {
"comeInShinecharging": {
"length": 12,
"openEnd": 0
}
},
"requires": [
"canLongChainTemporaryBlue",
"can4HighMidAirMorph",
"canXRayTurnaround",
{
"ammo": {
"type": "PowerBomb",
"count": 1
}
}
],
"exitCondition": {
"leaveWithTemporaryBlue": {}
},
"unlocksDoors": [
{
"types": [
"ammo"
],
"requires": []
}
],
"flashSuitChecked": true,
"blueSuitChecked": true
},
{
"id": 117,
"link": [
5,
12
],
"name": "Base",
"requires": [],
"flashSuitChecked": true,
"blueSuitChecked": true
},
{
"id": 118,
"link": [
5,
13
],
"name": "G-Mode Morph Power Bomb",
"entranceCondition": {
"comeInWithGMode": {
"mode": "any",
"morphed": true
}
},
"requires": [
"h_artificialMorphPowerBomb"
],
"clearsObstacles": [
"A"
],
"flashSuitChecked": true,
"blueSuitChecked": true,
"note": "Place a Power Bomb, then exit g-mode in order to break the Power Bomb blocks."
},
{
"id": 119,
"link": [
5,
13
],
"name": "Stored Moonfall Clip",
"entranceCondition": {
"comeInWithStoredFallSpeed": {
"fallSpeedInTiles": 1
}
},
"requires": [],
"flashSuitChecked": true,
"blueSuitChecked": true
},
{
"id": 120,
"link": [
5,
13
],
"name": "Stored Moonfall Clip (more speed)",
"entranceCondition": {
"comeInWithStoredFallSpeed": {
"fallSpeedInTiles": 2
}
},
"requires": [],
"flashSuitChecked": true,
"blueSuitChecked": true
},
{
"id": 249,
"link": [
5,
13
],
"name": "Samus Eater Teleport",
"entranceCondition": {
"comeInWithSamusEaterTeleport": {
"floorPositions": [
[
12,
13
],
[
13,
13
],
[
15,
13
]
],
"ceilingPositions": []
}
},
"requires": [
"Morph"
],
"flashSuitChecked": true,
"blueSuitChecked": true,
"note": [
"Land in the right side of the leftmost Samus Eater of Alpha Power Bomb Room, or the second Samus Eater from the right of Hellway."
]
},
{
"id": 257,
"link": [
5,
16
],
"name": "G-Mode",
"entranceCondition": {
"comeInWithGMode": {
"mode": "any",
"morphed": false
}
},
"requires": [],
"flashSuitChecked": true,
"blueSuitChecked": true
},
{
"id": 121,
"link": [
6,
2
],
"name": "Come in Shinecharging, Leave With Spark",
"entranceCondition": {
"comeInShinecharging": {
"length": 12,
"openEnd": 0
}
},
"requires": [
"HiJump",
"canShinechargeMovementComplex",
{
"shinespark": {
"frames": 10,
"excessFrames": 0
}
}
],
"exitCondition": {
"leaveWithSpark": {}
},
"unlocksDoors": [
{
"types": [
"super"
],
"requires": []
},
{
"types": [
"missiles",
"powerbomb"
],
"requires": [
"never"
]
}
],
"flashSuitChecked": true,
"blueSuitChecked": true
},
{
"id": 122,
"link": [
6,
2
],
"name": "Come in Shinecharging, Leave With Temporary Blue",
"entranceCondition": {
"comeInShinecharging": {
"length": 12,
"openEnd": 0
}
},
"requires": [
"canLongChainTemporaryBlue",
"canXRayTurnaround"
],
"exitCondition": {
"leaveWithTemporaryBlue": {}
},
"unlocksDoors": [
{
"types": [
"ammo"
],
"requires": []
}
],
"flashSuitChecked": true,
"blueSuitChecked": true
},
{
"id": 123,
"link": [
6,
3
],
"name": "Very Deep Stuck X-Ray Climb",
"entranceCondition": {
"comeInWithGMode": {
"mode": "direct",
"morphed": false
}
},
"requires": [
"canGModeXRayClimb",
"canLongXRayClimb"
],
"bypassesDoorShell": "yes",
"flashSuitChecked": true,
"blueSuitChecked": true,
"note": [
"Enter with G-mode direct, back up to between 1 and 6 pixels from the door transition, and activate X-ray to get very deep stuck in the door.",
"Climb up 2 screens, and perform a turnaround buffered spin-jump away from the door to trigger the transition, bypassing any lock on the door."
]
},
{
"id": 124,
"link": [
6,
3
],
"name": "Come in Shinecharging, Leave With Spark",
"entranceCondition": {
"comeInShinecharging": {
"length": 12,
"openEnd": 0
}
},
"requires": [
"HiJump",
"canShinechargeMovementComplex",
{
"shinespark": {
"frames": 9,
"excessFrames": 0
}
}
],
"exitCondition": {
"leaveWithSpark": {}
},
"unlocksDoors": [
{
"types": [
"super"
],
"requires": []
},
{
"types": [
"missiles",
"powerbomb"
],
"requires": [
"never"
]
}
],
"flashSuitChecked": true,
"blueSuitChecked": true
},
{
"id": 125,
"link": [
6,
3
],
"name": "Come in Shinecharging, Leave With Temporary Blue",
"entranceCondition": {
"comeInShinecharging": {
"length": 12,
"openEnd": 0
}
},
"requires": [
"canLongChainTemporaryBlue",
"canXRayTurnaround"
],
"exitCondition": {
"leaveWithTemporaryBlue": {}
},
"unlocksDoors": [
{
"types": [
"ammo"
],
"requires": []
}
],
"flashSuitChecked": true,
"blueSuitChecked": true
},
{
"id": 126,
"link": [
6,
4
],
"name": "Come in Shinecharging, Leave Shinecharged (HiJump)",
"entranceCondition": {
"comeInShinecharging": {
"length": 12,
"openEnd": 0
}
},
"requires": [
"HiJump",
"canShinechargeMovementComplex",
{
"shineChargeFrames": 100
}
],
"exitCondition": {
"leaveShinecharged": {}
},
"unlocksDoors": [
{
"types": [
"super"
],
"requires": []
},
{
"types": [
"missiles",
"powerbomb"
],
"requires": [
"never"
]
}
],
"flashSuitChecked": true,
"blueSuitChecked": true
},
{
"id": 127,
"link": [
6,
4
],
"name": "Come in Shinecharging, Leave Shinecharged (Wall Jump)",
"entranceCondition": {
"comeInShinecharging": {
"length": 12,
"openEnd": 0
}
},
"requires": [
"canWallJump",
"canShinechargeMovementComplex",
{
"shineChargeFrames": 125
}
],
"exitCondition": {
"leaveShinecharged": {}
},
"unlocksDoors": [
{
"types": [
"super"
],
"requires": []
},
{
"types": [
"missiles",
"powerbomb"
],
"requires": [
"never"
]
}
],
"flashSuitChecked": true,
"blueSuitChecked": true
},
{
"id": 128,
"link": [
6,
4
],
"name": "Come in Shinecharging, Leave Shinecharged (Ledge Grabs)",
"entranceCondition": {
"comeInShinecharging": {
"length": 12,
"openEnd": 0
}
},
"requires": [
"canWallJump",
"canShinechargeMovementComplex",
{
"shineChargeFrames": 145
}
],
"exitCondition": {
"leaveShinecharged": {}
},
"unlocksDoors": [
{
"types": [
"super"
],
"requires": []
},
{
"types": [
"missiles",
"powerbomb"
],
"requires": [
"never"
]
}
],
"flashSuitChecked": true,
"blueSuitChecked": true
},
{
"id": 129,
"link": [
6,
4
],
"name": "Carry Shinecharge (HiJump)",
"entranceCondition": {
"comeInShinecharged": {}
},
"requires": [
{
"shineChargeFrames": 125
},
"HiJump",
"canShinechargeMovementComplex"
],
"exitCondition": {
"leaveShinecharged": {}
},
"unlocksDoors": [
{
"types": [
"super"
],
"requires": []
},
{
"types": [
"missiles",
"powerbomb"
],
"requires": [
"never"
]
}
],
"flashSuitChecked": true,
"blueSuitChecked": true
},
{
"id": 130,
"link": [
6,
4
],
"name": "Carry Shinecharge (Tricky Dash Jump)",
"entranceCondition": {
"comeInShinecharged": {}
},
"requires": [
{
"shineChargeFrames": 140
},
"canTrickyDashJump",
"canShinechargeMovementComplex"
],
"exitCondition": {
"leaveShinecharged": {}
},
"unlocksDoors": [
{
"types": [
"super"
],
"requires": []
},
{
"types": [
"missiles",
"powerbomb"
],
"requires": [
"never"
]
}
],
"flashSuitChecked": true,
"blueSuitChecked": true
},
{
"id": 131,
"link": [
6,
4
],
"name": "Come in Shinecharged, Leave With Spark (Tricky Dash Jump)",
"entranceCondition": {
"comeInShinecharged": {}
},
"requires": [
{
"shineChargeFrames": 120
},
"canTrickyDashJump",
"canShinechargeMovementComplex",
{
"shinespark": {
"frames": 4,
"excessFrames": 0
}
}
],
"exitCondition": {
"leaveWithSpark": {}
},
"unlocksDoors": [
{
"types": [
"super"
],
"requires": []
},
{
"types": [
"missiles",
"powerbomb"
],
"requires": [
"never"
]
}
],
"flashSuitChecked": true,
"blueSuitChecked": true
},
{
"id": 132,
"link": [
6,
4
],
"name": "Come in Shinecharging, Leave With Temporary Blue",
"entranceCondition": {
"comeInShinecharging": {
"length": 12,
"openEnd": 0
}
},
"requires": [
"canChainTemporaryBlue",
"canXRayTurnaround"
],
"exitCondition": {
"leaveWithTemporaryBlue": {}
},
"unlocksDoors": [
{
"types": [
"ammo"
],
"requires": []
}
],
"flashSuitChecked": true,
"blueSuitChecked": true
},
{
"id": 133,
"link": [
6,
5
],
"name": "Come in Shinecharging, Leave Shinecharged",
"entranceCondition": {
"comeInShinecharging": {
"length": 13,
"openEnd": 0
}
},
"requires": [
{
"shineChargeFrames": 20
}
],
"exitCondition": {
"leaveShinecharged": {}
},
"unlocksDoors": [
{
"types": [
"super"
],
"requires": []
},
{
"types": [
"missiles",
"powerbomb"
],
"requires": [
"never"
]
}
],
"flashSuitChecked": true,
"blueSuitChecked": true
},
{
"id": 134,
"link": [
6,
5
],
"name": "Carry Shinecharge",
"entranceCondition": {
"comeInShinecharged": {}
},
"requires": [
{
"shineChargeFrames": 55
}
],
"exitCondition": {
"leaveShinecharged": {}
},
"unlocksDoors": [
{
"types": [
"super"
],
"requires": []
},
{
"types": [
"missiles",
"powerbomb"
],
"requires": [
"never"
]
}
],
"flashSuitChecked": true,
"blueSuitChecked": true
},
{
"id": 135,
"link": [
6,
5
],
"name": "Come In Shinecharged, Leave With Spark",
"entranceCondition": {
"comeInShinecharged": {}
},
"requires": [
{
"shineChargeFrames": 10
},
{
"shinespark": {
"frames": 21,
"excessFrames": 0
}
}
],
"exitCondition": {
"leaveWithSpark": {}
},
"unlocksDoors": [
{
"types": [
"super"
],
"requires": []
},
{
"types": [
"missiles",
"powerbomb"
],
"requires": [
"never"
]
}
],
"flashSuitChecked": true,
"blueSuitChecked": true
},
{
"id": 136,
"link": [
6,
5
],
"name": "Come in Shinecharging, Leave With Temporary Blue",
"entranceCondition": {
"comeInShinecharging": {
"length": 12,
"openEnd": 0
}
},
"requires": [],
"exitCondition": {
"leaveWithTemporaryBlue": {}
},
"unlocksDoors": [
{
"types": [
"ammo"
],
"requires": []
}
],
"flashSuitChecked": true,
"blueSuitChecked": true
},
{
"id": 137,
"link": [
6,
5
],
"name": "Transition with Stored Fall Speed",
"entranceCondition": {
"comeInWithStoredFallSpeed": {
"fallSpeedInTiles": 1
}
},
"requires": [],
"exitCondition": {
"leaveWithStoredFallSpeed": {
"fallSpeedInTiles": 1
}
},
"unlocksDoors": [
{
"types": [
"missiles",
"super"
],
"requires": []
},
{
"types": [
"powerbomb"
],
"requires": [
"never"
]
}
],
"flashSuitChecked": true,
"blueSuitChecked": true
},
{
"id": 138,
"link": [
6,
5
],
"name": "Transition with Stored Fall Speed (more speed)",
"entranceCondition": {
"comeInWithStoredFallSpeed": {
"fallSpeedInTiles": 2
}
},
"requires": [],
"exitCondition": {
"leaveWithStoredFallSpeed": {
"fallSpeedInTiles": 2
}
},
"unlocksDoors": [
{
"types": [
"missiles",
"super"
],
"requires": []
},
{
"types": [
"powerbomb"
],
"requires": [
"never"
]
}
],
"flashSuitChecked": true,
"blueSuitChecked": true
},
{
"id": 287,
"link": [
6,
6
],
"name": "Come in Shinecharging, Crystal Spark",
"entranceCondition": {
"comeInShinecharging": {
"length": 12,
"openEnd": 0
},
"comesInHeated": "no"
},
"requires": [
"h_CrystalSpark"
],
"clearsObstacles": [
"A"
],
"flashSuitChecked": true,
"blueSuitChecked": true
},
{
"id": 270,
"link": [
6,
6
],
"name": "R-Mode Entry",
"entranceCondition": {
"comeInWithRMode": {}
},
"requires": [],
"clearsObstacles": [
"R-Mode"
],
"flashSuitChecked": true,
"blueSuitChecked": true
},
{
"id": 139,
"link": [
6,
6
],
"name": "Leave With Runway",
"requires": [],
"exitCondition": {
"leaveWithRunway": {
"length": 4,
"openEnd": 1
}
},
"flashSuitChecked": true,
"blueSuitChecked": true
},
{
"id": 140,
"link": [
6,
6
],
"name": "Leave With Runway - Frozen Zeela",
"requires": [
"h_frozenEnemyRunway",
"canBePatient"
],
"exitCondition": {
"leaveWithRunway": {
"length": 5,
"openEnd": 1
}
},
"flashSuitChecked": true,
"blueSuitChecked": true
},
{
"id": 141,
"link": [
6,
6
],
"name": "Leave With Runway (Unbroken PB Blocks)",
"requires": [
{
"obstaclesNotCleared": [
"A"
]
}
],
"exitCondition": {
"leaveWithRunway": {
"length": 13,
"openEnd": 0
}
},
"flashSuitChecked": true,
"blueSuitChecked": true
},
{
"id": 142,
"link": [
6,
6
],
"name": "Leave With Runway (Unbroken PB Blocks, Open Door)",
"requires": [
{
"obstaclesNotCleared": [
"A"
]
},
{
"doorUnlockedAtNode": 5
}
],
"exitCondition": {
"leaveWithRunway": {
"length": 13,
"openEnd": 0
}
},
"unlocksDoors": [
{
"nodeId": 5,
"types": [
"ammo"
],
"requires": []
}
],
"flashSuitChecked": true,
"blueSuitChecked": true
},
{
"id": 143,
"link": [
6,
6
],
"name": "G-Mode Setup - Get Hit By Zeela",
"requires": [],
"exitCondition": {
"leaveWithGModeSetup": {}
},
"flashSuitChecked": true,
"blueSuitChecked": true
},
{
"id": 144,
"link": [
6,
6
],
"name": "G-Mode Regain Mobility",
"requires": [
{
"enemyDamage": {
"enemy": "Zeela",
"type": "contact",
"hits": 1
}
}
],
"gModeRegainMobility": {},
"flashSuitChecked": true,
"blueSuitChecked": true,
"note": "It takes 50 seconds for the global Zeela to make it over here. A Super could speed this up, but it's likely to just get the Zeela stuck."
},
{
"id": 145,
"link": [
6,
7
],
"name": "Come in Shinecharging, Leave With Temporary Blue",
"entranceCondition": {
"comeInShinecharging": {
"length": 12,
"openEnd": 0
}
},
"requires": [
"canLongChainTemporaryBlue",
"canXRayTurnaround",
{
"ammo": {
"type": "PowerBomb",
"count": 1
}
}
],
"exitCondition": {
"leaveWithTemporaryBlue": {}
},
"unlocksDoors": [
{
"types": [
"ammo"
],
"requires": []
}
],
"flashSuitChecked": true,
"blueSuitChecked": true
},
{
"id": 146,
"link": [
6,
8
],
"name": "Come in Shinecharging, Leave With Temporary Blue (Full Runway)",
"entranceCondition": {
"comeInShinecharging": {
"length": 12,
"openEnd": 0
}
},
"requires": [
"canLongChainTemporaryBlue",
"canXRayTurnaround",
{
"ammo": {
"type": "PowerBomb",
"count": 1
}
}
],
"exitCondition": {
"leaveWithTemporaryBlue": {}
},
"unlocksDoors": [
{
"types": [
"ammo"
],
"requires": []
}
],
"flashSuitChecked": true,
"blueSuitChecked": true
},
{
"id": 147,
"link": [
6,
8
],
"name": "Come in Shinecharging, Leave With Temporary Blue (Partial Runway)",
"entranceCondition": {
"comeInShinecharging": {
"length": 6,
"openEnd": 0
}
},
"requires": [
"canLongChainTemporaryBlue",
{
"ammo": {
"type": "PowerBomb",
"count": 1
}
}
],
"exitCondition": {
"leaveWithTemporaryBlue": {}
},
"unlocksDoors": [
{
"types": [
"ammo"
],
"requires": []
}
],
"flashSuitChecked": true,
"blueSuitChecked": true
},
{
"id": 148,
"link": [
6,
12
],
"name": "Base",
"requires": [],
"flashSuitChecked": true,
"blueSuitChecked": true
},
{
"id": 149,
"link": [
6,
13
],
"name": "G-Mode Morph Power Bomb",
"entranceCondition": {
"comeInWithGMode": {
"mode": "any",
"morphed": true
}
},
"requires": [
"h_artificialMorphPowerBomb"
],
"clearsObstacles": [
"A"
],
"flashSuitChecked": true,
"blueSuitChecked": true,
"note": "Place a Power Bomb, then exit g-mode in order to break the Power Bomb blocks."
},
{
"id": 150,
"link": [
6,
13
],
"name": "Stored Moonfall Clip",
"entranceCondition": {
"comeInWithStoredFallSpeed": {
"fallSpeedInTiles": 1
}
},
"requires": [],
"flashSuitChecked": true,
"blueSuitChecked": true
},
{
"id": 151,
"link": [
6,
13
],
"name": "Stored Moonfall Clip (more speed)",
"entranceCondition": {
"comeInWithStoredFallSpeed": {
"fallSpeedInTiles": 2
}
},
"requires": [],
"flashSuitChecked": true,
"blueSuitChecked": true
},
{
"id": 250,
"link": [
6,
13
],
"name": "Samus Eater Teleport",
"entranceCondition": {
"comeInWithSamusEaterTeleport": {
"floorPositions": [
[
15,
13
],
[
1,
13
]
],
"ceilingPositions": []
}
},
"requires": [
"Morph"
],
"flashSuitChecked": true,
"blueSuitChecked": true,
"note": [
"Land in the right side of the third Samus Eater on the floor of Hellway."
]
},
{
"id": 265,
"link": [
6,
13
],
"name": "Super Sink",
"entranceCondition": {
"comeInWithSuperSink": {}
},
"requires": [],
"flashSuitChecked": true,
"blueSuitChecked": true,
"note": [
"Enter the room with a super sink, and hold left, to clip down past the Power Bomb blocks."
]
},
{
"id": 258,
"link": [
6,
16
],
"name": "G-Mode",
"entranceCondition": {
"comeInWithGMode": {
"mode": "any",
"morphed": false
}
},
"requires": [],
"flashSuitChecked": true,
"blueSuitChecked": true
},
{
"id": 152,
"link": [
7,
2
],
"name": "Come in Shinecharging, Leave With Temporary Blue",
"entranceCondition": {
"comeInShinecharging": {
"length": 2,
"openEnd": 0
}
},
"requires": [
"canLongChainTemporaryBlue",
"canXRayTurnaround",
{
"ammo": {
"type": "PowerBomb",
"count": 1
}
}
],
"exitCondition": {
"leaveWithTemporaryBlue": {}
},
"unlocksDoors": [
{
"types": [
"ammo"
],
"requires": []
}
],
"flashSuitChecked": true,
"blueSuitChecked": true
},
{
"id": 153,
"link": [
7,
3
],
"name": "Very Deep Stuck X-Ray Climb",
"entranceCondition": {
"comeInWithGMode": {
"mode": "direct",
"morphed": false
}
},
"requires": [
"canGModeXRayClimb",
"canLongXRayClimb",
"canBePatient"
],
"bypassesDoorShell": "yes",
"flashSuitChecked": true,
"blueSuitChecked": true,
"note": [
"Enter with G-mode direct, back up to between 1 and 6 pixels from the door transition, and activate X-ray to get very deep stuck in the door.",
"Climb up 3 screens, and perform a turnaround buffered spin-jump away from the door to trigger the transition, bypassing any lock on the door."
]
},
{
"id": 154,
"link": [
7,
3
],
"name": "Come in Shinecharging, Leave With Temporary Blue",
"entranceCondition": {
"comeInShinecharging": {
"length": 2,
"openEnd": 0
}
},
"requires": [
"canLongChainTemporaryBlue",
"canXRayTurnaround",
{
"ammo": {
"type": "PowerBomb",
"count": 1
}
}
],
"exitCondition": {
"leaveWithTemporaryBlue": {}
},
"unlocksDoors": [
{
"types": [
"ammo"
],
"requires": []
}
],
"flashSuitChecked": true,
"blueSuitChecked": true
},
{
"id": 155,
"link": [
7,
4
],
"name": "Come in Shinecharging, Leave With Temporary Blue",
"entranceCondition": {
"comeInShinecharging": {
"length": 2,
"openEnd": 0
}
},
"requires": [
"canLongChainTemporaryBlue",
"canXRayTurnaround",
{
"ammo": {
"type": "PowerBomb",
"count": 1
}
}
],
"exitCondition": {
"leaveWithTemporaryBlue": {}
},
"unlocksDoors": [
{
"types": [
"ammo"
],
"requires": []
}
],
"flashSuitChecked": true,
"blueSuitChecked": true
},
{
"id": 156,
"link": [
7,
5
],
"name": "Come in Shinecharging, Leave With Temporary Blue",
"entranceCondition": {
"comeInShinecharging": {
"length": 2,
"openEnd": 0
}
},
"requires": [
"canChainTemporaryBlue",
{
"ammo": {
"type": "PowerBomb",
"count": 1
}
}
],
"exitCondition": {
"leaveWithTemporaryBlue": {}
},
"unlocksDoors": [
{
"types": [
"ammo"
],
"requires": []
}
],
"flashSuitChecked": true,
"blueSuitChecked": true
},
{
"id": 157,
"link": [
7,
6
],
"name": "Very Deep Stuck X-Ray Climb",
"entranceCondition": {
"comeInWithGMode": {
"mode": "direct",
"morphed": false
}
},
"requires": [
"canGModeXRayClimb"
],
"bypassesDoorShell": "yes",
"flashSuitChecked": true,
"blueSuitChecked": true,
"note": [
"Enter with G-mode direct, back up to between 1 and 6 pixels from the door transition, and activate X-ray to get very deep stuck in the door.",
"Climb up 1 screen, and perform a turnaround buffered spin-jump away from the door to trigger the transition, bypassing any lock on the door."
]
},
{
"id": 158,
"link": [
7,
6
],
"name": "Come in Shinecharging, Leave With Temporary Blue",
"entranceCondition": {
"comeInShinecharging": {
"length": 2,
"openEnd": 0
}
},
"requires": [
"canLongChainTemporaryBlue",
"canXRayTurnaround",
{
"ammo": {
"type": "PowerBomb",
"count": 1
}
}
],
"exitCondition": {
"leaveWithTemporaryBlue": {}
},
"unlocksDoors": [
{
"types": [
"ammo"
],
"requires": []
}
],
"flashSuitChecked": true,
"blueSuitChecked": true
},
{
"id": 271,
"link": [
7,
7
],
"name": "R-Mode Entry",
"entranceCondition": {
"comeInWithRMode": {}
},
"requires": [],
"clearsObstacles": [
"R-Mode"
],
"flashSuitChecked": true,
"blueSuitChecked": true
},
{
"id": 159,
"link": [
7,
7
],
"name": "Leave With Runway",
"requires": [],
"exitCondition": {
"leaveWithRunway": {
"length": 3,
"openEnd": 1
}
},
"flashSuitChecked": true,
"blueSuitChecked": true
},
{
"id": 160,
"link": [
7,
7
],
"name": "Leave With Runway - Frozen Zeela",
"requires": [
"h_frozenEnemyRunway"
],
"exitCondition": {
"leaveWithRunway": {
"length": 4,
"openEnd": 1
}
},
"flashSuitChecked": true,
"blueSuitChecked": true,
"note": [
"If coming from above, let the Zeela below the Power Bomb blocks to circle until it is on the bottom right area,",
"then go up and place the bomb on the bottom central platform to break the blocks without killing the Zeela.",
"Then quickly shoot the shot block to direct it down to the lower section."
]
},
{
"id": 161,
"link": [
7,
7
],
"name": "G-Mode Setup - Get Hit By Zeela",
"requires": [],
"exitCondition": {
"leaveWithGModeSetup": {}
},
"flashSuitChecked": true,
"blueSuitChecked": true,
"note": [
"Bring the Zeela from above. It is not global, so it will need to remain on camera for it to move."
]
},
{
"id": 162,
"link": [
7,
8
],
"name": "Main Shaft Moonfall Spark",
"entranceCondition": {
"comeInShinecharged": {}
},
"requires": [
{
"shineChargeFrames": 140
},
{
"notable": "Main Shaft Moonfall Spark"
},
"canMoonfall",
"canShinechargeMovementTricky",
{
"shinespark": {
"frames": 12,
"excessFrames": 0
}
}
],
"exitCondition": {
"leaveWithSpark": {}
},
"unlocksDoors": [
{
"types": [
"super"
],
"requires": []
},
{
"types": [
"missiles",
"powerbomb"
],
"requires": [
"never"
]
}
],
"flashSuitChecked": true,
"blueSuitChecked": true,
"note": [
"Come in with a shinecharge, and perform a moonfall off the ledge.",
"While falling, fire a shot at the door and immediately activate the shinespark wind-up, to horizontally spark through the door."
],
"devNote": [
"This is more difficult than the one in the Etecoon Shaft since there is not time to activate the spark after landing.",
"Instead it must be activated mid-air while falling at high speed.",
"With the vanilla door connection, this strat doesn't seem possible, due to just barely not having enough shinecharge frames."
]
},
{
"id": 163,
"link": [
7,
8
],
"name": "Come in Shinecharging, Leave With Temporary Blue",
"entranceCondition": {
"comeInShinecharging": {
"length": 2,
"openEnd": 0
}
},
"requires": [
"canChainTemporaryBlue"
],
"exitCondition": {
"leaveWithTemporaryBlue": {}
},
"unlocksDoors": [
{
"types": [
"ammo"
],
"requires": []
}
],
"flashSuitChecked": true,
"blueSuitChecked": true
},
{
"id": 164,
"link": [
7,
9
],
"name": "G-Mode Morph",
"entranceCondition": {
"comeInWithGMode": {
"mode": "any",
"morphed": true
}
},
"requires": [
"h_artificialMorphLongIBJ",
"canOffScreenMovement",
"canBeVeryPatient"
],
"flashSuitChecked": true,
"blueSuitChecked": true,
"note": [
"Roll through the camera scroll blocks in front of the bomb block, then go through the morph tunnel and IBJ to the top.",
"Samus can boost to the left when she is high enough. A visual cue is when she is vertically near the top half of the door on the correct screen."
]
},
{
"id": 165,
"link": [
7,
10
],
"name": "G-Mode Morph",
"entranceCondition": {
"comeInWithGMode": {
"mode": "any",
"morphed": true
}
},
"requires": [
"h_artificialMorphMovement"
],
"exitCondition": {
"leaveNormally": {}
},
"unlocksDoors": [
{
"types": [
"ammo"
],
"requires": []
}
],
"flashSuitChecked": true,
"blueSuitChecked": true,
"note": "Roll through the camera scroll blocks in front of the bomb block, then go through the morph tunnel and exit g-mode."
},
{
"id": 259,
"link": [
7,
10
],
"name": "G-Mode Morph, Stay in Room",
"entranceCondition": {
"comeInWithGMode": {
"mode": "any",
"morphed": true
}
},
"requires": [
"h_artificialMorphMovement",
"canOffScreenMovement"
],
"flashSuitChecked": true,
"blueSuitChecked": true,
"note": "Roll through the camera scroll blocks in front of the bomb block, then go through the morph tunnel and exit g-mode.",
"devNote": [
"Staying in the room and doing more will require canOffScreenMovement.",
"FIXME: Find a way to prevent needing to do things that are too unreasonable to do, even with canOffScreenMovement."
]
},
{
"id": 166,
"link": [
7,
11
],
"name": "G-Mode Morph",
"entranceCondition": {
"comeInWithGMode": {
"mode": "any",
"morphed": true
}
},
"requires": [
"h_artificialMorphLongIBJ",
"canOffScreenMovement",
"canBeVeryPatient"
],
"flashSuitChecked": true,
"blueSuitChecked": true,
"note": [
"Roll through the camera scroll blocks in front of the bomb block, then go through the morph tunnel and IBJ to the top.",
"Samus can boost to the right when she is high enough. A visual cue is when she is vertically at the top of the door on the correct screen."
],
"devNote": "This is only useful if the item is Morph"
},
{
"id": 167,
"link": [
7,
12
],
"name": "X-Ray Climb",
"entranceCondition": {
"comeInWithDoorStuckSetup": {}
},
"requires": [
"canXRayClimb"
],
"flashSuitChecked": true,
"blueSuitChecked": true,
"note": "Climb up 1 screen."
},
{
"id": 168,
"link": [
7,
12
],
"name": "G-Mode Morph Power Bomb",
"entranceCondition": {
"comeInWithGMode": {
"mode": "any",
"morphed": true
}
},
"requires": [
"h_artificialMorphMovement",
"h_artificialMorphPowerBomb"
],
"clearsObstacles": [
"A"
],
"flashSuitChecked": true,
"blueSuitChecked": true,
"note": "Place a Power Bomb while on the top single tile platform, then exit g-mode before the Power Bomb explodes in order to break the blocks above."
},
{
"id": 169,
"link": [
7,
13
],
"name": "Base",
"requires": [],
"flashSuitChecked": true,
"blueSuitChecked": true
},
{
"id": 170,
"link": [
8,
2
],
"name": "Very Deep Stuck X-Ray Climb",
"entranceCondition": {
"comeInWithGMode": {
"mode": "direct",
"morphed": false
}
},
"requires": [
"canGModeXRayClimb",
"canLongXRayClimb",
"canBeVeryPatient"
],
"bypassesDoorShell": "yes",
"flashSuitChecked": true,
"blueSuitChecked": true,
"note": [
"Enter with G-mode direct, back up to between 1 and 6 pixels from the door transition, and activate X-ray to get very deep stuck in the door.",
"Climb up 6 screens, and perform a turnaround buffered spin-jump away from the door to trigger the transition, bypassing any lock on the door."
]
},
{
"id": 171,
"link": [
8,
2
],
"name": "Come in Shinecharging, Leave With Temporary Blue",
"entranceCondition": {
"comeInShinecharging": {
"length": 2,
"openEnd": 0
}
},
"requires": [
"canLongChainTemporaryBlue",
"canXRayTurnaround",
"canBeVeryPatient",
{
"ammo": {
"type": "PowerBomb",
"count": 1
}
}
],
"exitCondition": {
"leaveWithTemporaryBlue": {}
},
"unlocksDoors": [
{
"types": [
"ammo"
],
"requires": []
}
],
"flashSuitChecked": true,
"blueSuitChecked": true
},
{
"id": 172,
"link": [
8,
3
],
"name": "Come in Shinecharging, Leave With Temporary Blue",
"entranceCondition": {
"comeInShinecharging": {
"length": 2,
"openEnd": 0
}
},
"requires": [
"canLongChainTemporaryBlue",
"canXRayTurnaround",
"canBeVeryPatient",
{
"ammo": {
"type": "PowerBomb",
"count": 1
}
}
],
"exitCondition": {
"leaveWithTemporaryBlue": {}
},
"unlocksDoors": [
{
"types": [
"ammo"
],
"requires": []
}
],
"flashSuitChecked": true,
"blueSuitChecked": true
},
{
"id": 173,
"link": [
8,
4
],
"name": "Very Deep Stuck X-Ray Climb",
"entranceCondition": {
"comeInWithGMode": {
"mode": "direct",
"morphed": false
}
},
"requires": [
"canGModeXRayClimb",
"canLongXRayClimb",
"canBeVeryPatient"
],
"bypassesDoorShell": "yes",
"flashSuitChecked": true,
"blueSuitChecked": true,
"note": [
"Enter with G-mode direct, back up to between 1 and 6 pixels from the door transition, and activate X-ray to get very deep stuck in the door.",
"Climb up 5 screens, and perform a turnaround buffered spin-jump away from the door to trigger the transition, bypassing any lock on the door."
]
},
{
"id": 174,
"link": [
8,
4
],
"name": "Come in Shinecharging, Leave With Temporary Blue",
"entranceCondition": {
"comeInShinecharging": {
"length": 2,
"openEnd": 0
}
},
"requires": [
"canLongChainTemporaryBlue",
"canXRayTurnaround",
"canBeVeryPatient",
{
"ammo": {
"type": "PowerBomb",
"count": 1
}
}
],
"exitCondition": {
"leaveWithTemporaryBlue": {}
},
"unlocksDoors": [
{
"types": [
"ammo"
],
"requires": []
}
],
"flashSuitChecked": true,
"blueSuitChecked": true
},
{
"id": 175,
"link": [
8,
5
],
"name": "Very Deep Stuck X-Ray Climb",
"entranceCondition": {
"comeInWithGMode": {
"mode": "direct",
"morphed": false
}
},
"requires": [
"canGModeXRayClimb",
"canLongXRayClimb",
"canBePatient"
],
"bypassesDoorShell": "yes",
"flashSuitChecked": true,
"blueSuitChecked": true,
"note": [
"Enter with G-mode direct, back up to between 1 and 6 pixels from the door transition, and activate X-ray to get very deep stuck in the door.",
"Climb up 4 screens, and perform a turnaround buffered spin-jump away from the door to trigger the transition, bypassing any lock on the door."
]
},
{
"id": 176,
"link": [
8,
5
],
"name": "Come in Shinecharging, Leave With Temporary Blue",
"entranceCondition": {
"comeInShinecharging": {
"length": 2,
"openEnd": 0
}
},
"requires": [
"canLongChainTemporaryBlue",
"canXRayTurnaround",
"canBeVeryPatient",
{
"ammo": {
"type": "PowerBomb",
"count": 1
}
}
],
"exitCondition": {
"leaveWithTemporaryBlue": {}
},
"unlocksDoors": [
{
"types": [
"ammo"
],
"requires": []
}
],
"flashSuitChecked": true,
"blueSuitChecked": true
},
{
"id": 177,
"link": [
8,
6
],
"name": "Come in Shinecharging, Leave With Temporary Blue",
"entranceCondition": {
"comeInShinecharging": {
"length": 2,
"openEnd": 0
}
},
"requires": [
"canLongChainTemporaryBlue",
"canXRayTurnaround",
"canBeVeryPatient",
{
"ammo": {
"type": "PowerBomb",
"count": 1
}
}
],
"exitCondition": {
"leaveWithTemporaryBlue": {}
},
"unlocksDoors": [
{
"types": [
"ammo"
],
"requires": []
}
],
"flashSuitChecked": true,
"blueSuitChecked": true
},
{
"id": 178,
"link": [
8,
7
],
"name": "Come in Shinecharging, Leave With Temporary Blue",
"entranceCondition": {
"comeInShinecharging": {
"length": 3,
"openEnd": 0
}
},
"requires": [
"canLongChainTemporaryBlue",
"canXRayTurnaround"
],
"exitCondition": {
"leaveWithTemporaryBlue": {}
},
"unlocksDoors": [
{
"types": [
"ammo"
],
"requires": []
}
],
"flashSuitChecked": true,
"blueSuitChecked": true
},
{
"id": 272,
"link": [
8,
8
],
"name": "R-Mode Entry",
"entranceCondition": {
"comeInWithRMode": {}
},
"requires": [],
"clearsObstacles": [
"R-Mode"
],
"flashSuitChecked": true,
"blueSuitChecked": true
},
{
"id": 179,
"link": [
8,
8
],
"name": "Leave With Runway",
"requires": [],
"exitCondition": {
"leaveWithRunway": {
"length": 3,
"openEnd": 1
}
},
"flashSuitChecked": true,
"blueSuitChecked": true
},
{
"id": 180,
"link": [
8,
8
],
"name": "Leave With Runway - Frozen Zeela",
"requires": [
"h_frozenEnemyRunway",
"canBePatient"
],
"exitCondition": {
"leaveWithRunway": {
"length": 4,
"openEnd": 1
}
},
"flashSuitChecked": true,
"blueSuitChecked": true,
"note": [
"If coming from above, let the Zeela below the Power Bomb blocks to circle until it is on the bottom right area,",
"then go up and place the bomb on the bottom central platform to break the blocks without killing the Zeela.",
"Then quickly shoot the shot block to direct it down to the lower section."
]
},
{
"id": 181,
"link": [
8,
8
],
"name": "G-Mode Setup - Get Hit By Zeela",
"requires": [],
"exitCondition": {
"leaveWithGModeSetup": {}
},
"flashSuitChecked": true,
"blueSuitChecked": true,
"note": [
"Bring the Zeela from above. It is not global, so it will need to remain on camera for it to move.",
"Using a Super once it's on the right wall below the door can save 20 seconds."
]
},
{
"id": 277,
"link": [
8,
9
],
"name": "Direct G-Mode Spark Interrupt",
"entranceCondition": {
"comeInWithGMode": {
"mode": "direct",
"morphed": false
}
},
"requires": [
"Morph",
"h_usePowerBomb",
"canMidAirMorph",
"h_bombThings",
{
"or": [
"h_usePowerBomb",
{
"and": [
"Charge",
"h_useMorphBombs"
]
}
]
},
"canBeVeryPatient",
"h_CrystalFlashForReserveEnergy",
{
"or": [
{
"disableEquipment": "ETank"
},
{
"resourceAtMost": [
{
"type": "ReserveEnergy",
"count": 5
}
]
}
]
},
{
"or": [
"canConsecutiveWallJump",
"canLongIBJ",
"SpaceJump"
]
},
{
"or": [
{
"disableEquipment": "ETank"
},
{
"ammo": {
"type": "Super",
"count": 3
}
}
]
},
{
"or": [
{
"canShineCharge": {
"usedTiles": 17,
"openEnd": 1
}
},
{
"and": [
"h_frozenEnemyRunway",
{
"ammo": {
"type": "Super",
"count": 1
}
},
{
"canShineCharge": {
"usedTiles": 18,
"openEnd": 1
}
}
]
}
]
},
{
"autoReserveTrigger": {}
},
"canRModeSparkInterrupt"
],
"clearsObstacles": [
"A"
],
"flashSuitChecked": true,
"blueSuitChecked": true,
"note": [
"Enter with G-Mode. Jump to the top of the shaft. Place a Power Bomb against the ceiling next to the shot block (do not touch the scroll block).",
"Drop back to the bottom of the shaft, roll against the bomb block until Samus passes through. Jump through the crumble block and through the morph tunnel.",
"Once Samus can stand up, do so and use X-Ray to switch to R-Mode: be sure to hold X-Ray until it fully widens.",
"Bomb the block, roll back through the tunnel and stop next to the crumble block.",
"Use a Power Bomb or Five-Bomb Drop to clear the lower bomb block. Wait next to the crumble block until the global Zeela is visible coming down the right wall.",
"Wait until the last possible moment to touch the crumbe block and allow the Zeela through, and immediately roll away to avoid getting hit by it.",
"Lead it back through the Morph tunnel. Jump up to the box with the item. Wait for the Zeela to leave if needed, then Crystal Flash inside.",
"Damage back down using the Zeela. If this needs multiple laps, use a Super to knock it down off the right wall before it can enter the item box.",
"Lead it back through the Morph tunnel and into the Etecoons shaft. Let the Zeela pass going up the left wall and wait until it has moved far",
"enough up before using a Crystal Flash. Use the Zeela to damage back down, shinecharge on the runway, and jump into the Zeela to interrupt."
]
},
{
"id": 182,
"link": [
8,
9
],
"name": "G-Mode Morph",
"entranceCondition": {
"comeInWithGMode": {
"mode": "any",
"morphed": true
}
},
"requires": [
"h_artificialMorphLongIBJ",
"canOffScreenMovement",
"canBeVeryPatient"
],
"flashSuitChecked": true,
"blueSuitChecked": true,
"note": [
"Roll through the camera scroll blocks in front of the bomb block, then go through the morph tunnel and IBJ to the top.",
"Samus can boost to the left when she is high enough. A visual cue is when she is vertically near the top half of the door on the correct screen."
]
},
{
"id": 183,
"link": [
8,
10
],
"name": "G-Mode Morph",
"entranceCondition": {
"comeInWithGMode": {
"mode": "any",
"morphed": true
}
},
"requires": [
"h_artificialMorphMovement"
],
"exitCondition": {
"leaveNormally": {}
},
"unlocksDoors": [
{
"types": [
"ammo"
],
"requires": []
}
],
"flashSuitChecked": true,
"blueSuitChecked": true,
"note": "Roll through the camera scroll blocks in front of the bomb block, then go through the morph tunnel and exit g-mode."
},
{
"id": 260,
"link": [
8,
10
],
"name": "G-Mode Morph, Stay in Room",
"entranceCondition": {
"comeInWithGMode": {
"mode": "any",
"morphed": true
}
},
"requires": [
"h_artificialMorphMovement",
"canOffScreenMovement"
],
"flashSuitChecked": true,
"blueSuitChecked": true,
"note": "Roll through the camera scroll blocks in front of the bomb block, then go through the morph tunnel and exit g-mode.",
"devNote": [
"Staying in the room and doing more will require canOffScreenMovement.",
"FIXME: Find a way to prevent needing to do things that are too unreasonable to do, even with canOffScreenMovement."
]
},
{
"id": 184,
"link": [
8,
11
],
"name": "G-Mode Morph",
"entranceCondition": {
"comeInWithGMode": {
"mode": "any",
"morphed": true
}
},
"requires": [
"h_artificialMorphLongIBJ",
"canOffScreenMovement",
"canBeVeryPatient"
],
"flashSuitChecked": true,
"blueSuitChecked": true,
"note": [
"Roll through the camera scroll blocks in front of the bomb block, then go through the morph tunnel and IBJ to the top.",
"Samus can boost to the right when she is high enough. A visual cue is when she is vertically at the top of the door on the correct screen."
],
"devNote": "This is only useful if the item is Morph"
},
{
"id": 185,
"link": [
8,
12
],
"name": "Left-Side X-Ray Climb",
"entranceCondition": {
"comeInWithDoorStuckSetup": {}
},
"requires": [
"canLongXRayClimb",
"canBePatient"
],
"flashSuitChecked": true,
"blueSuitChecked": true,
"note": "Climb up 4 screens."
},
{
"id": 186,
"link": [
8,
12
],
"name": "G-Mode Morph Power Bomb",
"entranceCondition": {
"comeInWithGMode": {
"mode": "any",
"morphed": true
}
},
"requires": [
"h_artificialMorphPowerBomb",
{
"or": [
"h_artificialMorphIBJ",
{
"and": [
"h_artificialMorphSpringBall",
"HiJump"
]
},
{
"and": [
"h_artificialMorphSpringBall",
{
"tech": "canSpringBallBombJump"
},
{
"ammo": {
"type": "PowerBomb",
"count": 6
}
}
]
}
]
}
],
"clearsObstacles": [
"A"
],
"flashSuitChecked": true,
"blueSuitChecked": true,
"note": "Place a Power Bomb while on the top single tile platform, then exit g-mode before the Power Bomb explodes in order to break the blocks above."
},
{
"id": 187,
"link": [
8,
13
],
"name": "Base",
"requires": [],
"flashSuitChecked": true,
"blueSuitChecked": true
},
{
"id": 273,
"link": [
9,
9
],
"name": "R-Mode Entry",
"entranceCondition": {
"comeInWithRMode": {}
},
"requires": [],
"clearsObstacles": [
"R-Mode"
],
"flashSuitChecked": true,
"blueSuitChecked": true
},
{
"id": 188,
"link": [
9,
9
],
"name": "Leave With Runway",
"requires": [],
"exitCondition": {
"leaveWithRunway": {
"length": 4,
"openEnd": 1
}
},
"flashSuitChecked": true,
"blueSuitChecked": true
},
{
"id": 189,
"link": [
9,
9
],
"name": "Leave Shinecharged",
"requires": [
{
"canShineCharge": {
"usedTiles": 17,
"openEnd": 1
}
},
"canShinechargeMovement",
{
"shineChargeFrames": 60
}
],
"exitCondition": {
"leaveShinecharged": {}
},
"flashSuitChecked": true,
"blueSuitChecked": true
},
{
"id": 190,
"link": [
9,
9
],
"name": "Leave Shinecharged (Shorter Runway)",
"requires": [
{
"canShineCharge": {
"usedTiles": 16,
"openEnd": 1
}
},
"canShinechargeMovement",
{
"shineChargeFrames": 45
}
],
"exitCondition": {
"leaveShinecharged": {}
},
"flashSuitChecked": true,
"blueSuitChecked": true,
"note": "Achieve a shinecharge before running into the wall, to be able to make it to the door faster."
},
{
"id": 191,
"link": [
9,
9
],
"name": "Crystal Flash",
"requires": [
{
"obstaclesNotCleared": [
"R-Mode"
]
},
"h_CrystalFlash"
],
"flashSuitChecked": true,
"blueSuitChecked": true
},
{
"id": 288,
"link": [
9,
9
],
"name": "Crystal Spark",
"requires": [
{
"canShineCharge": {
"usedTiles": 17,
"openEnd": 1
}
},
"h_CrystalSpark"
],
"flashSuitChecked": true,
"blueSuitChecked": true
},
{
"id": 289,
"link": [
9,
9
],
"name": "Come in Shinecharging, Crystal Spark",
"entranceCondition": {
"comeInShinecharging": {
"length": 3,
"openEnd": 0
},
"comesInHeated": "no"
},
"requires": [
"h_CrystalSpark"
],
"flashSuitChecked": true,
"blueSuitChecked": true
},
{
"id": 192,
"link": [
9,
9
],
"name": "Carry G-Mode Back through the Door",
"entranceCondition": {
"comeInWithGMode": {
"mode": "direct",
"morphed": false
}
},
"requires": [
"h_doorImmediatelyClosedFix"
],
"exitCondition": {
"leaveWithGMode": {
"morphed": false
}
},
"bypassesDoorShell": "free",
"flashSuitChecked": true,
"blueSuitChecked": true
},
{
"id": 193,
"link": [
9,
9
],
"name": "Carry G-Mode Morph Back through the Door",
"entranceCondition": {
"comeInWithGMode": {
"mode": "direct",
"morphed": true
}
},
"requires": [
"h_doorImmediatelyClosedFix"
],
"exitCondition": {
"leaveWithGMode": {
"morphed": true
}
},
"bypassesDoorShell": "free",
"flashSuitChecked": true,
"blueSuitChecked": true
},
{
"id": 194,
"link": [
9,
10
],
"name": "Etecoon Shaft Moonfall Spark",
"requires": [
{
"notable": "Etecoon Shaft Moonfall Spark"
},
{
"canShineCharge": {
"usedTiles": 17,
"openEnd": 0
}
},
"canMoonfall",
"canShinechargeMovementTricky",
{
"shinespark": {
"frames": 12,
"excessFrames": 0
}
}
],
"exitCondition": {
"leaveWithSpark": {}
},
"unlocksDoors": [
{
"types": [
"missiles",
"powerbomb"
],
"requires": [
{
"or": [
"SpaceJump",
"canLongIBJ",
"canConsecutiveWallJump"
]
}
]
},
{
"types": [
"super"
],
"requires": []
}
],
"flashSuitChecked": true,
"blueSuitChecked": true,
"note": [
"Run from left to right to gain a shinecharge, then immediately moonfall down the shaft.",
"There is just barely enough time to shoot the door open (if not already open) and spark out."
]
},
{
"id": 195,
"link": [
9,
10
],
"name": "Leave With Temporary Blue",
"requires": [
{
"canShineCharge": {
"usedTiles": 17,
"openEnd": 0
}
},
"canLongChainTemporaryBlue",
"canXRayTurnaround"
],
"exitCondition": {
"leaveWithTemporaryBlue": {}
},
"unlocksDoors": [
{
"types": [
"ammo"
],
"requires": []
}
],
"flashSuitChecked": true,
"blueSuitChecked": true
},
{
"id": 196,
"link": [
9,
11
],
"name": "G-Mode Morph",
"entranceCondition": {
"comeInWithGMode": {
"mode": "any",
"morphed": true
}
},
"requires": [
"h_artificialMorphMovement"
],
"flashSuitChecked": true,
"blueSuitChecked": true,
"note": "This is only useful if the item is Morph."
},
{
"id": 197,
"link": [
9,
12
],
"name": "G-Mode Morph Bombs and Power Bomb",
"entranceCondition": {
"comeInWithGMode": {
"mode": "any",
"morphed": true
}
},
"requires": [
{
"itemNotCollectedAtNode": 11
},
"canRiskPermanentLossOfAccess",
"h_artificialMorphLongIBJ",
"h_artificialMorphPowerBomb",
"canBePatient",
"canOffScreenMovement",
"canTrickyGMode"
],
"clearsObstacles": [
"A"
],
"flashSuitChecked": true,
"blueSuitChecked": true,
"note": [
"Place bombs against the item Chozo ball to overload PLMs. Then go through the bomb blocks and tunnel.",
"IBJ up the left side, blind, until getting on the top small platform. Place a Power Bomb and exit g-mode before the bomb goes off to break the blocks."
]
},
{
"id": 279,
"link": [
9,
12
],
"name": "G-Mode Morph with Blue Suit",
"entranceCondition": {
"comeInWithGMode": {
"mode": "any",
"morphed": true
}
},
"requires": [
"h_blueSuitGMode",
"h_artificialMorphLongIBJ",
"h_artificialMorphPowerBomb",
"canBePatient",
"canOffScreenMovement",
"canTrickyGMode"
],
"clearsObstacles": [
"A"
],
"flashSuitChecked": true,
"blueSuitChecked": true,
"note": [
"Fall down to the Morph tunnel and roll through the bomb block.",
"Roll through the camera scroll blocks in the tunnel a few times to overload PLMs before continuing and touching the crumble block.",
"Carefully climb the shaft with an IBJ. Note that the camera moves to the left once getting high enough, making this harder.",
"Land on the top block, place a Power Bomb, then quickly exit G-mode before it explodes to break the blocks above."
]
},
{
"id": 198,
"link": [
9,
13
],
"name": "G-Mode Morph",
"entranceCondition": {
"comeInWithGMode": {
"mode": "any",
"morphed": true
}
},
"requires": [
{
"itemNotCollectedAtNode": 11
},
"canRiskPermanentLossOfAccess",
{
"or": [
"h_artificialMorphIBJ",
{
"and": [
"canPowerBombItemOverloadPLMs",
"h_artificialMorphSpringBall",
"h_artificialMorphPowerBomb"
]
}
]
}
],
"flashSuitChecked": true,
"blueSuitChecked": true,
"note": [
"Place bombs against the item Chozo ball to overload PLMs. Then go through the bomb blocks and tunnel, then exit G-mode.",
"Alternatively, with Spring Ball and a Power Bomb, place a Power Bomb 3 tiles in from the left opening to overload PLMs all at once."
]
},
{
"id": 280,
"link": [
9,
13
],
"name": "G-Mode Morph with Blue Suit",
"entranceCondition": {
"comeInWithGMode": {
"mode": "any",
"morphed": true
}
},
"requires": [
"h_blueSuitGMode"
],
"flashSuitChecked": true,
"blueSuitChecked": true,
"note": [
"Fall down to the Morph tunnel and roll through the bomb block.",
"Roll through the camera scroll blocks in the tunnel a few times to overload PLMs before continuing and touching the crumble block."
]
},
{
"id": 199,
"link": [
9,
14
],
"name": "Base",
"requires": [],
"flashSuitChecked": true,
"blueSuitChecked": true
},
{
"id": 200,
"link": [
9,
15
],
"name": "Base",
"requires": [
{
"or": [
"canMidAirMorph",
"h_useSpringBall",
{
"and": [
"canTrivialMidAirMorph",
{
"or": [
"SpaceJump",
"canConsecutiveWallJump"
]
}
]
},
{
"and": [
"canIBJ",
"canBombHorizontally"
]
}
]
}
],
"flashSuitChecked": true,
"blueSuitChecked": true,
"devNote": "Doable with just a very long IBJ, but if bombing horizontally is too hard, that will be too."
},
{
"id": 201,
"link": [
10,
9
],
"name": "Shinespark",
"entranceCondition": {
"comeInShinecharged": {}
},
"requires": [
{
"shineChargeFrames": 30
},
{
"shinespark": {
"frames": 75,
"excessFrames": 5
}
}
],
"flashSuitChecked": true,
"blueSuitChecked": true
},
{
"id": 292,
"link": [
10,
9
],
"name": "Come In Shinecharging, Shinespark",
"entranceCondition": {
"comeInShinecharging": {
"length": 8,
"openEnd": 0
}
},
"requires": [
{
"or": [
{
"shinespark": {
"frames": 75,
"excessFrames": 5
}
},
{
"and": [
"canMidairShinespark",
{
"shinespark": {
"frames": 68,
"excessFrames": 8
}
}
]
},
{
"and": [
"HiJump",
"canMidairShinespark",
{
"shinespark": {
"frames": 64,
"excessFrames": 8
}
}
]
},
{
"and": [
"HiJump",
"canSpeedyJump",
"canMidairShinespark",
{
"shinespark": {
"frames": 60,
"excessFrames": 8
}
}
]
}
]
}
],
"flashSuitChecked": true,
"blueSuitChecked": true
},
{
"id": 202,
"link": [
10,
9
],
"name": "Use Stored Spark",
"requires": [
"h_storedSpark",
{
"or": [
{
"shinespark": {
"frames": 68,
"excessFrames": 8
}
},
{
"and": [
"HiJump",
{
"shinespark": {
"frames": 64,
"excessFrames": 8
}
}
]
},
{
"and": [
"HiJump",
"canSpeedyJump",
{
"shinespark": {
"frames": 60,
"excessFrames": 8
}
}
]
}
]
}
],
"flashSuitChecked": true,
"blueSuitChecked": true
},
{
"id": 203,
"link": [
10,
9
],
"name": "G-Mode Morph",
"entranceCondition": {
"comeInWithGMode": {
"mode": "any",
"morphed": true
}
},
"requires": [
"h_artificialMorphLongIBJ"
],
"flashSuitChecked": true,
"blueSuitChecked": true
},
{
"id": 251,
"link": [
10,
9
],
"name": "Tricky Grapple Jump",
"entranceCondition": {
"comeInWithGrappleSwing": {
"blocks": [
{
"position": [
8,
3
],
"note": "Grapple Beam Room"
},
{
"position": [
7,
3
],
"note": "Colosseum"
}
]
}
},
"requires": [
"canTrickyGrappleJump"
],
"flashSuitChecked": false,
"blueSuitChecked": true,
"devNote": [
"Aside from these two, other setup rooms do not appear to work."
]
},
{
"id": 204,
"link": [
10,
10
],
"name": "Leave With Runway",
"requires": [],
"exitCondition": {
"leaveWithRunway": {
"length": 9,
"openEnd": 0
}
},
"flashSuitChecked": true,
"blueSuitChecked": true
},
{
"id": 205,
"link": [
10,
10
],
"name": "Crystal Flash",
"requires": [
{
"obstaclesNotCleared": [
"R-Mode"
]
},
"h_CrystalFlash"
],
"flashSuitChecked": true,
"blueSuitChecked": true
},
{
"id": 290,
"link": [
10,
10
],
"name": "Come in Shinecharging, Crystal Spark",
"entranceCondition": {
"comeInShinecharging": {
"length": 8,
"openEnd": 0
},
"comesInHeated": "no"
},
"requires": [
"h_CrystalSpark"
],
"flashSuitChecked": true,
"blueSuitChecked": true
},
{
"id": 274,
"link": [
10,
10
],
"name": "R-Mode Entry",
"entranceCondition": {
"comeInWithRMode": {}
},
"requires": [],
"clearsObstacles": [
"R-Mode"
],
"flashSuitChecked": true,
"blueSuitChecked": true
},
{
"id": 206,
"link": [
10,
11
],
"name": "G-Mode Morph",
"entranceCondition": {
"comeInWithGMode": {
"mode": "any",
"morphed": true
}
},
"requires": [
"h_artificialMorphLongIBJ"
],
"flashSuitChecked": true,
"blueSuitChecked": true,
"note": "This is only useful if the item is Morph."
},
{
"id": 207,
"link": [
10,
12
],
"name": "G-Mode Morph Bombs and Power Bomb",
"entranceCondition": {
"comeInWithGMode": {
"mode": "any",
"morphed": true
}
},
"requires": [
{
"itemNotCollectedAtNode": 11
},
"canRiskPermanentLossOfAccess",
"h_artificialMorphLongIBJ",
"h_artificialMorphPowerBomb",
"canBePatient",
"canOffScreenMovement",
"canTrickyGMode"
],
"clearsObstacles": [
"A"
],
"flashSuitChecked": true,
"blueSuitChecked": true,
"note": [
"IBJ up and place bombs against the item Chozo ball to overload PLMs. Then go through the bomb blocks and tunnel.",
"IBJ up again, blind, until getting on the top small platform. Place a Power Bomb and exit g-mode before the bomb goes off to break the blocks."
]
},
{
"id": 281,
"link": [
10,
12
],
"name": "G-Mode Morph with Blue Suit",
"entranceCondition": {
"comeInWithGMode": {
"mode": "any",
"morphed": true
}
},
"requires": [
"h_blueSuitGMode",
"h_artificialMorphLongIBJ",
"h_artificialMorphPowerBomb",
"canBePatient",
"canOffScreenMovement",
"canTrickyGMode"
],
"clearsObstacles": [
"A"
],
"flashSuitChecked": true,
"blueSuitChecked": true,
"note": [
"IBJ up and roll through the bomb block; be sure not to bomb it or it will remain solid.",
"Roll through the camera scroll blocks in the tunnel a few times to overload PLMs before continuing and touching the crumble block.",
"Carefully climb the shaft with an IBJ. Note that the camera moves to the left once getting high enough, making this harder.",
"Land on the top block, place a Power Bomb, then quickly exit G-mode before it explodes to break the blocks above."
]
},
{
"id": 208,
"link": [
10,
13
],
"name": "X-Ray Climb Into Tunnel",
"entranceCondition": {
"comeInWithDoorStuckSetup": {}
},
"requires": [
"canXRayClimb",
{
"or": [
"h_bombThings",
{
"haveBlueSuit": {}
}
]
}
],
"flashSuitChecked": true,
"blueSuitChecked": true,
"note": [
"Climb up 1 screen.",
"Once Samus appears one tile above the bottom of the door, you will be unable to climb higher, and it is safe to morph at this point."
],
"devNote": "This strat is useful in case wall jumping is not available, or to save a Power Bomb in case going around through the internal door at the top is not possible."
},
{
"id": 209,
"link": [
10,
13
],
"name": "G-Mode Morph",
"entranceCondition": {
"comeInWithGMode": {
"mode": "any",
"morphed": true
}
},
"requires": [
{
"itemNotCollectedAtNode": 11
},
"canRiskPermanentLossOfAccess",
"h_artificialMorphLongIBJ",
"canBePatient"
],
"flashSuitChecked": true,
"blueSuitChecked": true,
"note": "IBJ up and place bombs against the item Chozo ball to overload PLMs. Then go down, through the bomb blocks and tunnel, then exit G-mode."
},
{
"id": 282,
"link": [
10,
13
],
"name": "G-Mode Morph with Blue Suit",
"entranceCondition": {
"comeInWithGMode": {
"mode": "any",
"morphed": true
}
},
"requires": [
"h_blueSuitGMode",
"h_artificialMorphLongIBJ"
],
"flashSuitChecked": true,
"blueSuitChecked": true,
"note": [
"IBJ up and roll through the bomb block; be sure not to bomb it or it will remain solid.",
"Roll through the camera scroll blocks in the tunnel a few times to overload PLMs before continuing and touching the crumble block."
]
},
{
"id": 291,
"link": [
10,
13
],
"name": "Direct G-Mode, Blue Suit Spark, Overload PLMs with Chozo Ball Item",
"entranceCondition": {
"comeInWithGMode": {
"mode": "direct",
"morphed": false
}
},
"requires": [
"Morph",
{
"blueSuitShinecharge": {}
},
{
"or": [
{
"shinespark": {
"frames": 68,
"excessFrames": 8
}
},
{
"and": [
"HiJump",
{
"shinespark": {
"frames": 64,
"excessFrames": 8
}
}
]
},
{
"and": [
"HiJump",
"canSpeedyJump",
{
"shinespark": {
"frames": 60,
"excessFrames": 8
}
}
]
}
]
}
],
"flashSuitChecked": true,
"blueSuitChecked": true,
"note": [
"Spark up the shaft, then shoot the Chozo ball to overload PLMs. Then go down, through the bomb blocks and tunnel, then exit G-mode."
]
},
{
"id": 210,
"link": [
10,
14
],
"name": "Base",
"requires": [
{
"or": [
"canWallJump",
"SpaceJump",
"canLongIBJ",
{
"and": [
"HiJump",
"canSpringBallJumpMidAir"
]
}
]
}
],
"flashSuitChecked": true,
"blueSuitChecked": true
},
{
"id": 211,
"link": [
10,
14
],
"name": "Shinespark",
"entranceCondition": {
"comeInShinecharged": {}
},
"requires": [
{
"shineChargeFrames": 30
},
"canShinechargeMovement",
{
"shinespark": {
"frames": 75,
"excessFrames": 56
}
}
],
"flashSuitChecked": true,
"blueSuitChecked": true,
"note": [
"This is specifically for shinesparking on low energy, where the shinespark will end before reaching the top."
]
},
{
"id": 212,
"link": [
10,
14
],
"name": "Shinespark With HiJump",
"entranceCondition": {
"comeInShinecharged": {}
},
"requires": [
{
"shineChargeFrames": 60
},
"HiJump",
"canMidairShinespark",
{
"shinespark": {
"frames": 20,
"excessFrames": 11
}
}
],
"flashSuitChecked": true,
"blueSuitChecked": true,
"note": [
"This is a diagonal shinespark into the underside of the left side middle ledge, minimizing energy usage.",
"Needs HiJump to bonk at the right place without walljumping."
]
},
{
"id": 293,
"link": [
10,
14
],
"name": "Come In Shinecharging, Shinespark",
"entranceCondition": {
"comeInShinecharging": {
"length": 8,
"openEnd": 0
}
},
"requires": [
{
"or": [
{
"shinespark": {
"frames": 75,
"excessFrames": 64
}
},
{
"and": [
"canMidairShinespark",
{
"shinespark": {
"frames": 68,
"excessFrames": 57
}
}
]
},
{
"and": [
"HiJump",
"canMidairShinespark",
{
"shinespark": {
"frames": 20,
"excessFrames": 13
}
}
]
},
{
"and": [
"HiJump",
"canSpeedyJump",
"canMidairShinespark",
{
"shinespark": {
"frames": 16,
"excessFrames": 13
}
}
]
}
]
}
],
"flashSuitChecked": true,
"blueSuitChecked": true,
"note": [
"With HiJump, spark diagonally to the left in order to bonk and stop the spark early; otherwise a vertical spark is needed."
]
},
{
"id": 213,
"link": [
10,
14
],
"name": "Speedy HiJump",
"entranceCondition": {
"comeInRunning": {
"speedBooster": "yes",
"minTiles": 2.4375
}
},
"requires": [
"canSpeedyJump",
"canCarefulJump",
"HiJump"
],
"flashSuitChecked": true,
"blueSuitChecked": true,
"note": [
"Run into the room and jump just before hitting the right wall.",
"Requires at least 3 tiles (with no open end) in the adjacent room, but is easier with more."
]
},
{
"id": 214,
"link": [
10,
14
],
"name": "Speedy HiJump (Lenient)",
"entranceCondition": {
"comeInRunning": {
"speedBooster": "yes",
"minTiles": 3.4375
}
},
"requires": [
"canSpeedyJump",
"HiJump"
],
"flashSuitChecked": true,
"blueSuitChecked": true
},
{
"id": 215,
"link": [
10,
14
],
"name": "In-Room Tricky Speedy Spring Ball Jump",
"requires": [
"canTrickyDashJump",
"canTrickySpringBallJump"
],
"flashSuitChecked": true,
"blueSuitChecked": true,
"note": [
"Run a precise distance, to hit a peak of the speed vs height graph.",
"With Samus' back against the closed door, jump about a tile before hitting the right wall."
]
},
{
"id": 216,
"link": [
10,
14
],
"name": "Cross-Room Speedy Spring Ball Jump",
"entranceCondition": {
"comeInRunning": {
"speedBooster": "yes",
"minTiles": 12
}
},
"requires": [
"canSpeedyJump",
"canTrickySpringBallJump"
],
"flashSuitChecked": true,
"blueSuitChecked": true,
"note": "With a runway of at least 12 tiles in the adjacent room, Samus should always be able to jump high enough if she jumps just before hitting the right wall."
},
{
"id": 261,
"link": [
10,
14
],
"name": "Cross-Room Spring Ball Bounce",
"entranceCondition": {
"comeInWithSpringBallBounce": {
"speedBooster": "yes",
"movementType": "any",
"remoteAndLandingMinTiles": [
[
42,
0
]
]
}
},
"requires": [
"canTrickyJump"
],
"flashSuitChecked": true,
"blueSuitChecked": true,
"devNote": [
"This needs a minimum extra run speed of $6.D.",
"Speeds of $6.0 or $6.1 can also work but wouldn't provide a benefit over the in-room 'canTrickyDashJump' spring ball jump strat."
]
},
{
"id": 252,
"link": [
10,
14
],
"name": "Side Platform Cross Room Jump",
"entranceCondition": {
"comeInWithSidePlatform": {
"platforms": [
{
"minHeight": 2,
"maxHeight": 2,
"minTiles": 45,
"speedBooster": "yes",
"obstructions": [
[
1,
0
]
],
"requires": [],
"note": "Applies to Halfie Climb Room."
},
{
"minHeight": 3,
"maxHeight": 3,
"minTiles": 39.4375,
"speedBooster": "yes",
"obstructions": [
[
3,
2
]
],
"requires": [],
"note": "Applies to Metal Pirates Room.",
"detailNote": [
"This has a 2-frame window for the jump,",
"then a 1-frame or 2-frame window for the morph (after the transition), depending on the jump,",
"with a last-frame jump giving a 2-frame morph window."
]
}
]
}
},
"requires": [
"canInsaneJump",
"canMomentumConservingMorph",
"canTrickySpringBallJump"
],
"wallJumpAvoid": true,
"flashSuitChecked": true,
"blueSuitChecked": true,
"devNote": [
"This strat is not very useful, since the in-room tricky dash jump into spring ball jump is easier."
]
},
{
"id": 217,
"link": [
10,
14
],
"name": "Use Stored Spark",
"requires": [
"h_storedSpark",
{
"shinespark": {
"frames": 68,
"excessFrames": 57
}
}
],
"flashSuitChecked": true,
"blueSuitChecked": true
},
{
"id": 218,
"link": [
10,
14
],
"name": "Use Stored Spark, Diagonal Spark",
"requires": [
"HiJump",
"h_storedSpark",
{
"or": [
{
"shinespark": {
"frames": 20,
"excessFrames": 13
}
},
{
"and": [
"canSpeedyJump",
{
"shinespark": {
"frames": 16,
"excessFrames": 13
}
}
]
}
]
}
],
"flashSuitChecked": true,
"blueSuitChecked": true
},
{
"id": 219,
"link": [
10,
14
],
"name": "Cross-Room Speedy Jump, Use Flash Suit, Diagonal Spark",
"entranceCondition": {
"comeInRunning": {
"speedBooster": "yes",
"minTiles": 3.4375
}
},
"requires": [
"canSpeedyJump",
{
"useFlashSuit": {}
},
{
"shinespark": {
"frames": 21,
"excessFrames": 12
}
}
],
"flashSuitChecked": true,
"blueSuitChecked": true,
"note": "With a runway of at least 4 tiles in the adjacent room, jump just before hitting the right wall then spark diagonally to the left at the top of the jump.",
"devNote": "FIXME: This could be done with a blue suit but is not possible to model currently."
},
{
"id": 220,
"link": [
10,
14
],
"name": "Spring Ball Bomb Boost, Use Stored Spark, Diagonal Spark",
"requires": [
{
"or": [
{
"useFlashSuit": {}
},
{
"and": [
"canInsaneJump",
{
"blueSuitShinecharge": {}
}
]
}
]
},
"canDash",
"canSpringBallJumpMidAir",
"canUnmorphBombBoost",
{
"shinespark": {
"frames": 18,
"excessFrames": 13
}
}
],
"flashSuitChecked": true,
"blueSuitChecked": true,
"note": [
"Spring ball jump then bounce on a Power Bomb in order to be able to midair spark.",
"It is easiest to wait to turn around until after the bomb boost.",
"With a blue suit, this requires using dash after shinecharging to be able to boost on the Power Bomb."
]
},
{
"id": 221,
"link": [
11,
15
],
"name": "Base",
"requires": [
"Morph"
],
"flashSuitChecked": true,
"blueSuitChecked": true
},
{
"id": 222,
"link": [
12,
1
],
"name": "Base",
"requires": [],
"flashSuitChecked": true,
"blueSuitChecked": true
},
{
"id": 223,
"link": [
12,
2
],
"name": "Base",
"requires": [],
"flashSuitChecked": true,
"blueSuitChecked": true
},
{
"id": 224,
"link": [
12,
3
],
"name": "Base",
"requires": [],
"flashSuitChecked": true,
"blueSuitChecked": true
},
{
"id": 225,
"link": [
12,
4
],
"name": "Base",
"requires": [],
"flashSuitChecked": true,
"blueSuitChecked": true
},
{
"id": 226,
"link": [
12,
5
],
"name": "Base",
"requires": [],
"flashSuitChecked": true,
"blueSuitChecked": true
},
{
"id": 227,
"link": [
12,
6
],
"name": "Base",
"requires": [],
"flashSuitChecked": true,
"blueSuitChecked": true
},
{
"id": 275,
"link": [
12,
12
],
"name": "R-Mode Spark Interrupt",
"requires": [
{
"obstaclesCleared": [
"R-Mode"
]
},
{
"obstaclesNotCleared": [
"A"
]
},
{
"or": [
"h_CrystalFlashForReserveEnergy",
{
"and": [
{
"disableEquipment": "ETank"
},
{
"or": [
{
"resourceAvailable": [
{
"type": "Energy",
"count": 85
}
]
},
{
"and": [
{
"enemyKill": {
"enemies": [
[
"Ripper 2 (red)"
],
[
"Ripper 2 (red)"
]
],
"excludedWeapons": [
"Super"
]
}
},
{
"resourceAvailable": [
{
"type": "Energy",
"count": 40
}
]
}
]
}
]
},
{
"resourceMissingAtMost": [
{
"type": "Missile",
"count": 0
}
]
},
{
"resourceMissingAtMost": [
{
"type": "Super",
"count": 0
}
]
},
{
"partialRefill": {
"type": "ReserveEnergy",
"limit": 1
}
}
]
}
]
},
{
"or": [
{
"canShineCharge": {
"usedTiles": 12,
"openEnd": 0
}
},
{
"and": [
{
"doorUnlockedAtNode": 5
},
{
"canShineCharge": {
"usedTiles": 13,
"openEnd": 0
}
}
]
},
{
"and": [
{
"doorUnlockedAtNode": 6
},
{
"canShineCharge": {
"usedTiles": 13,
"openEnd": 0
}
}
]
},
{
"and": [
{
"doorUnlockedAtNode": 5
},
{
"doorUnlockedAtNode": 6
},
{
"canShineCharge": {
"usedTiles": 14,
"openEnd": 0
}
}
]
}
]
},
{
"autoReserveTrigger": {}
},
"canRModeSparkInterrupt"
],
"unlocksDoors": [
{
"nodeId": 5,
"types": [
"ammo"
],
"requires": []
},
{
"nodeId": 6,
"types": [
"ammo"
],
"requires": []
}
],
"resetsObstacles": [
"R-Mode"
],
"flashSuitChecked": true,
"blueSuitChecked": true,
"note": [
"Enter R-Mode using any door. Crystal Flash (away from the Power Bomb blocks!) or farm the upper section enemies, except for one.",
"Tight 1-screen shortcharge between the bottom doors. Both shells need to be opened.",
"If R-Mode is entered below the Power Bomb blocks, you'll need to use a clip to get to the upper section without destroying the barrier."
]
},
{
"id": 228,
"link": [
12,
12
],
"name": "Zeela Farm",
"requires": [
{
"or": [
{
"and": [
{
"resetRoom": {
"nodes": [
2,
3,
4
]
}
},
{
"cycleFrames": 660
}
]
},
{
"and": [
{
"resetRoom": {
"nodes": [
5,
6
]
}
},
{
"cycleFrames": 760
}
]
},
{
"and": [
{
"resetRoom": {
"nodes": [
1
]
}
},
{
"cycleFrames": 1700
}
]
}
]
},
{
"or": [
"Wave",
"Spazer",
"Plasma",
{
"cycleFrames": 120
}
]
}
],
"resetsObstacles": [
"A",
"R-Mode"
],
"farmCycleDrops": [
{
"enemy": "Zeela",
"count": 4
}
],
"flashSuitChecked": true,
"blueSuitChecked": true
},
{
"id": 263,
"link": [
12,
12
],
"name": "Ripper Farm",
"requires": [
{
"noBlueSuit": {}
},
"ScrewAttack",
{
"or": [
{
"and": [
{
"resetRoom": {
"nodes": [
2,
3
]
}
},
{
"cycleFrames": 375
}
]
},
{
"and": [
{
"resetRoom": {
"nodes": [
4
]
}
},
{
"cycleFrames": 445
}
]
},
{
"and": [
{
"resetRoom": {
"nodes": [
5,
6
]
}
},
{
"cycleFrames": 600
}
]
},
{
"and": [
{
"resetRoom": {
"nodes": [
1
]
}
},
{
"cycleFrames": 1530
}
]
}
]
}
],
"resetsObstacles": [
"A",
"R-Mode"
],
"farmCycleDrops": [
{
"enemy": "Ripper 2 (red)",
"count": 2
}
],
"flashSuitChecked": true,
"blueSuitChecked": true
},
{
"id": 229,
"link": [
12,
12
],
"name": "Crystal Flash",
"requires": [
{
"obstaclesNotCleared": [
"R-Mode"
]
},
"h_CrystalFlash"
],
"flashSuitChecked": true,
"blueSuitChecked": true
},
{
"id": 230,
"link": [
12,
13
],
"name": "Base",
"requires": [
{
"or": [
"h_usePowerBomb",
{
"obstaclesCleared": [
"A"
]
}
]
}
],
"clearsObstacles": [
"A"
],
"flashSuitChecked": true,
"blueSuitChecked": true
},
{
"id": 231,
"link": [
12,
13
],
"name": "TAS Dance",
"requires": [
{
"notable": "TAS Dance"
},
"canMoonfall"
],
"flashSuitChecked": true,
"blueSuitChecked": true,
"note": [
"Moonfall on the Green Brinstar Elevator Platform to build up enough speed to fall through the Power Bomb Blocks below.",
"Moonfall so as to stay on the platform, break spin, and turnaround between 70 and 76 times total.",
"Turns cannot be too fast or too slow.",
"When falling, avoid the platform in the center of the room by falling towards the right.",
"Clip through the bottom right platform by turning around at the correct time.",
"Then hold down to clip through the Power Bomb Blocks."
],
"devNote": "Moondance cannot be carried down an elevator."
},
{
"id": 232,
"link": [
12,
13
],
"name": "Zeela Stuck Moonfall",
"requires": [
"canEnemyStuckMoonfall",
"canTrickyUseFrozenEnemies",
{
"or": [
"canDisableEquipment",
"canCameraManip"
]
},
{
"or": [
"canBePatient",
{
"ammo": {
"type": "Super",
"count": 2
}
}
]
}
],
"flashSuitChecked": true,
"blueSuitChecked": true,
"note": [
"Freeze two Zeelas to perform an 'Enemy Stuck Moonfall' in order to clip through the Power Bomb blocks.",
"Position one Zeela upside down on a ceiling, and another below it on the ground.",
"The global Zeela paired with either the lowest Zeela, or the other perimeter Zeela can be used, but freezing them together is the hardest part.",
"Freezing one and then unequipping Ice Beam to dispel the ice effect or manipulating the camera can be used to synchronize them.",
"If the moonfall is initiated immediately after freezing both enemies, it is possible to gain enough speed to automatically clip through the enemy and the floor; in this case, hold an angle button to buffer a pose change.",
"Alternatively, and more easily, when one of the enemies is about to thaw, hold backward in order to move forward and fall off the enemy with a buffered turnaround, which will clip through the floor without needing as much fall speed.",
"From directly on top of the Power Bomb blocks, no pose change is needed.",
"Two Super Missiles can speed up the Zeela setup greatly by knocking them off of the wall."
]
},
{
"id": 233,
"link": [
13,
7
],
"name": "Base",
"requires": [],
"flashSuitChecked": true,
"blueSuitChecked": true
},
{
"id": 234,
"link": [
13,
8
],
"name": "Base",
"requires": [],
"flashSuitChecked": true,
"blueSuitChecked": true
},
{
"id": 276,
"link": [
13,
9
],
"name": "R-Mode Spark Interrupt",
"requires": [
{
"obstaclesCleared": [
"R-Mode"
]
},
{
"notable": "Bottom Ice Clip"
},
{
"or": [
"h_CrystalFlashForReserveEnergy",
{
"and": [
{
"obstaclesCleared": [
"A"
]
},
"h_RModeCanRefillReserves",
{
"resourceMissingAtMost": [
{
"type": "Missile",
"count": 0
}
]
},
{
"resourceMissingAtMost": [
{
"type": "Super",
"count": 0
}
]
},
{
"partialRefill": {
"type": "ReserveEnergy",
"limit": 20
}
}
]
}
]
},
"h_bombThings",
"h_additionalBomb",
"canTrickyJump",
"h_XRayMorphIceClip",
{
"or": [
"h_useSpringBall",
{
"and": [
"can4HighMidAirMorph",
"canInsaneJump"
]
}
]
},
"canBeVeryPatient",
{
"or": [
{
"canShineCharge": {
"usedTiles": 17,
"openEnd": 1
}
},
{
"and": [
"h_frozenEnemyRunway",
{
"canShineCharge": {
"usedTiles": 18,
"openEnd": 1
}
}
]
}
]
},
{
"autoReserveTrigger": {}
},
"canRModeSparkInterrupt"
],
"resetsObstacles": [
"R-Mode"
],
"flashSuitChecked": true,
"blueSuitChecked": true,
"note": [
"Enter R-Mode using any door. Crystal Flash or farm the upper section enemies. Use 'Bottom Ice Clip' strat to regain access to the Etecoons Shaft, then",
"wait on top of the crumble block to get the Zeela to follow you in. Shinecharge on top of the Etecoon Shaft and get hit by the Zeela to interrupt."
]
},
{
"id": 235,
"link": [
13,
12
],
"name": "Base",
"requires": [
{
"or": [
"h_usePowerBomb",
{
"obstaclesCleared": [
"A"
]
}
]
}
],
"clearsObstacles": [
"A"
],
"flashSuitChecked": true,
"blueSuitChecked": true
},
{
"id": 236,
"link": [
13,
12
],
"name": "Ice Clip",
"requires": [
"h_iceClip"
],
"flashSuitChecked": true,
"blueSuitChecked": true,
"note": [
"Freeze the wall crawler at a precise location in order to jump through the Power Bomb Blocks.",
"The pixel window is larger and higher with Morph and an X-Ray Stand Up."
]
},
{
"id": 264,
"link": [
13,
13
],
"name": "Zeela Farm",
"requires": [
{
"or": [
{
"and": [
{
"resetRoom": {
"nodes": [
7
]
}
},
{
"cycleFrames": 270
}
]
},
{
"and": [
{
"resetRoom": {
"nodes": [
8
]
}
},
{
"cycleFrames": 620
}
]
}
]
}
],
"resetsObstacles": [
"A",
"R-Mode"
],
"farmCycleDrops": [
{
"enemy": "Zeela",
"count": 1
}
],
"flashSuitChecked": true,
"blueSuitChecked": true
},
{
"id": 237,
"link": [
13,
13
],
"name": "Crystal Flash",
"requires": [
{
"obstaclesNotCleared": [
"R-Mode"
]
},
"h_CrystalFlash"
],
"clearsObstacles": [
"A"
],
"flashSuitChecked": true,
"blueSuitChecked": true
},
{
"id": 238,
"link": [
13,
14
],
"name": "Bottom Ice Clip",
"requires": [
{
"notable": "Bottom Ice Clip"
},
{
"noBlueSuit": {}
},
"h_bombThings",
"h_additionalBomb",
{
"enemyDamage": {
"enemy": "Zeela",
"type": "contact",
"hits": 1
}
},
"canTrickyJump",
{
"or": [
"h_XRayMorphIceClip",
{
"and": [
"h_highPixelIceClip",
"canInsaneJump",
"canBeVeryPatient"
]
}
]
},
{
"or": [
"h_useSpringBall",
{
"and": [
"can4HighMidAirMorph",
"canInsaneJump"
]
}
]
},
{
"or": [
"canBePatient",
{
"obstaclesNotCleared": [
"A"
]
}
]
}
],
"flashSuitChecked": false,
"blueSuitChecked": true,
"note": [
"Break the bomb block at the bottom right of the main shaft.",
"Bring a Zeela down to the bottom of the room.",
"Morph inside the tunnel, take a Zeela hit, then jump, aim down, and shoot to freeze the Zeela as it starts to move up and while Samus is close to landing.",
"Jump and aim down to get on top of the Zeela.",
"If the Zeela is precisely positioned exactly 12 pixels above the ground, you can press up to make Samus stand;",
"Otherwise, if you have X-ray, then the Zeela should be frozen lower, and you can morph and unmorph and use X-ray to force Samus to stand up;",
"in this case there is a 6-pixel window over which it works, with the Zeela being between 4 and 9 pixels above the ground.",
"In either case, after standing up on top of the Zeela, jump and aim down to break the crumble block.",
"Then, before the crumble respawns, morph and use Spring Ball (if available) to jump back up and into the tunnel;",
"without Spring Ball, a quick mid-air morph also works but is more difficult."
],
"devNote": [
"The mid-air morph is tighter than a normal can4HighMidAirMorph and you may only get one chance at it before having to reset the room.",
"FIXME: canBeVeryPatient requirement is for difficulty (assumed large number of attempts required); a more specific tech could be used if one existed.",
"FIXME: It might be possible to use two Zeelas to wall ice clip and X-ray climb to the door transition(s) above.",
"FIXME: Or it might be possible to let a Zeela get past the crumble block to where it could be used to ice climb up the Etecoon shaft.",
"FIXME: This might be doable with a blue suit. If nothing else, it could be used to break the first block and then lose the suit, to save a Power Bomb, but that isnt worth modeling."
]
},
{
"id": 239,
"link": [
14,
9
],
"name": "Full Etecoon Wall Jump Climb",
"requires": [
"canConsecutiveWallJump"
],
"flashSuitChecked": true,
"blueSuitChecked": true,
"note": "Not quite the full climb, but close enough."
},
{
"id": 240,
"link": [
14,
9
],
"name": "Full Etecoon IBJ",
"requires": [
"canLongIBJ"
],
"flashSuitChecked": true,
"blueSuitChecked": true,
"note": "This is the full climb, since you have to drop down to 10 and start there."
},
{
"id": 241,
"link": [
14,
9
],
"name": "Space Jump",
"requires": [
"SpaceJump"
],
"flashSuitChecked": true,
"blueSuitChecked": true
},
{
"id": 242,
"link": [
14,
9
],
"name": "Use Stored Spark",
"requires": [
"h_storedSpark",
{
"or": [
{
"shinespark": {
"frames": 49,
"excessFrames": 8
}
},
{
"and": [
"HiJump",
{
"shinespark": {
"frames": 45,
"excessFrames": 7
}
}
]
},
{
"and": [
"HiJump",
"canSpeedyJump",
{
"shinespark": {
"frames": 43,
"excessFrames": 8
}
}
]
}
]
}
],
"flashSuitChecked": true,
"blueSuitChecked": true
},
{
"id": 243,
"link": [
14,
10
],
"name": "Base",
"requires": [],
"flashSuitChecked": true,
"blueSuitChecked": true
},
{
"id": 244,
"link": [
14,
13
],
"name": "Base",
"requires": [
"h_bombThings",
"h_additionalBomb"
],
"flashSuitChecked": true,
"blueSuitChecked": true
},
{
"id": 278,
"link": [
14,
13
],
"name": "Blue Suit",
"requires": [
{
"haveBlueSuit": {}
},
"Morph"
],
"flashSuitChecked": true,
"blueSuitChecked": true
},
{
"id": 245,
"link": [
15,
9
],
"name": "Mockball",
"requires": [
"canMockball"
],
"flashSuitChecked": true,
"blueSuitChecked": true,
"note": "The Mockball is set up at 11."
},
{
"id": 246,
"link": [
15,
11
],
"name": "Base",
"requires": [
"Morph"
],
"flashSuitChecked": true,
"blueSuitChecked": true
},
{
"id": 247,
"link": [
15,
14
],
"name": "Base",
"requires": [
"Morph"
],
"flashSuitChecked": true,
"blueSuitChecked": true
},
{
"id": 262,
"link": [
16,
1
],
"name": "G-Mode Up the Elevator",
"requires": [
"canGMode"
],
"exitCondition": {
"leaveWithGMode": {
"morphed": false
}
},
"flashSuitChecked": true,
"blueSuitChecked": true,
"devNote": "FIXME: It would also be possible to ice moonfall to get down to 13."
}
],
"notables": [
{
"id": 1,
"name": "Main Shaft Moonfall Spark",
"note": [
"Come in with a shinecharge, and perform a moonfall off the ledge.",
"While falling, fire a shot at the door and immediately activate the shinespark wind-up, to horizontally spark through the door."
]
},
{
"id": 2,
"name": "Etecoon Shaft Moonfall Spark",
"note": [
"Run from left to right to gain a shinecharge, then immediately moonfall down the shaft.",
"There is just barely enough time to shoot the door open (if not already open) and spark out."
]
},
{
"id": 3,
"name": "TAS Dance",
"note": [
"Moonfall on the Green Brinstar Elevator Platform to build up enough speed to fall through the Power Bomb Blocks below.",
"Moonfall so as to stay on the platform, break spin, and turnaround between 70 and 76 times total.",
"Turns cannot be too fast or too slow.",
"When falling, avoid the platform in the center of the room by falling towards the right.",
"Clip through the bottom right platform by turning around at the correct time.",
"Then hold down to clip through the Power Bomb Blocks."
]
},
{
"id": 4,
"name": "Bottom Ice Clip",
"note": [
"Break the bomb block at the bottom right of the main shaft.",
"Bring a Zeela down to the bottom of the room.",
"Morph inside the tunnel, take a Zeela hit, then jump, aim down, and shoot to freeze the Zeela as it starts to move up and while Samus is close to landing.",
"Jump and aim down to get on top of the Zeela.",
"If the Zeela is precisely positioned exactly 12 pixels above the ground, you can press up to make Samus stand;",
"Otherwise, if you have X-ray, then the Zeela should be frozen lower, and you can morph and unmorph and use X-ray to force Samus to stand up;",
"in this case there is a 6-pixel window over which it works, with the Zeela being between 4 and 9 pixels above the ground.",
"In either case, after standing up on top of the Zeela, jump and aim down to break the crumble block.",
"Then, before the crumble respawns, morph and use Spring Ball (if available) to jump back up and into the tunnel;",
"without Spring Ball, a quick mid-air morph also works but is more difficult."
]
}
],
"nextStratId": 294,
"nextNotableId": 5
}


