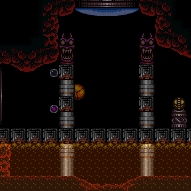
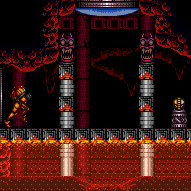
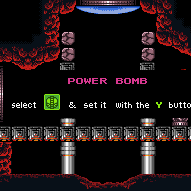
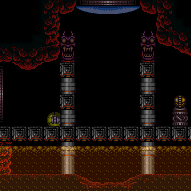
The Jail
Room ID: 147
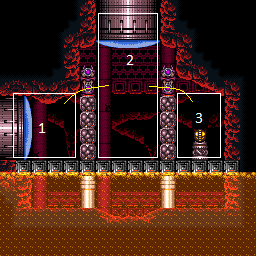
|
Exit condition: {
"leaveWithRunway": {
"length": 4,
"openEnd": 0
}
} |
|
Requires: "h_heatedCrystalFlash" |
|
Entrance condition: {
"comeInShinecharging": {
"length": 3,
"openEnd": 0
}
}Requires: "h_heatedCrystalSpark" |
|
Use 17 Power Bombs while pressed against the crumble blocks to overload PLMs and go through the crumble blocks. With Morph, exit G-mode near the item then return to the left, without, exit in the middle of the room to break the crumble blocks. Anywhere else in the left section of the room requires one more Power Bomb. Entrance condition: {
"comeInWithGMode": {
"mode": "direct",
"morphed": true
}
}Requires: "canComplexGMode"
"h_heatedGMode"
"canPowerBombItemOverloadPLMs"
{
"ammo": {
"type": "PowerBomb",
"count": 18
}
}
{
"heatFrames": 240
}Collects items: 3 Dev note: Returning to the left avoids canRiskPermanentLossOfAccess. This might be useful with a crystal flash. |
|
Stand next to the Crumble Blocks and jump into a Crystal Flash Clip to briefly clip into the ceiling above those blocks. Hold down exiting the Crystal Flash to shrink Samus' hitbox and on the next frame press forward to move above the Crumble blocks. Holding down and mashing forward sometimes works, or X-Ray can be used at the end of the Crystal Flash to more easily time the inputs. Requires: {
"notable": "Crystal Flash Clip"
}
"h_heatProof"
"h_jumpIntoCrystalFlashClip"
"canTrickyJump" |
|
Entrance condition: {
"comeInWithGMode": {
"mode": "any",
"morphed": true
}
}Requires: "h_heatedGMode"
"h_artificialMorphBombs"
{
"heatFrames": 50
}Dev note: It is possible to go to 3, but then it takes extra heat frames to get out, being almost the same as ending at 2 and going to 3. |
|
Use 17 Power Bombs while pressed against the crumble blocks to overload PLMs and go through the crumble blocks. Anywhere else in the left section of the room requires one more Power Bomb. Entrance condition: {
"comeInWithGMode": {
"mode": "direct",
"morphed": true
}
}Requires: "h_heatedGMode"
"canPowerBombItemOverloadPLMs"
{
"itemNotCollectedAtNode": 3
}
"canRiskPermanentLossOfAccess"
{
"ammo": {
"type": "PowerBomb",
"count": 17
}
}
{
"heatFrames": 50
}Dev note: It is possible to go to 3, but then it takes extra heat frames to get out, being almost the same as ending at 2 and going to 3. |
|
In the previous room, avoid triggering the transition too deeply (position $EE), otherwise Samus ends up stuck too far right in the wall. After teleporting, Samus should be standing inside the wall. Wait a moment for the acid to lower, then retract Grapple by pressing up, which will pull Samus left and down. Hold left, and release Grapple while still holding left. Perform a turn-around spin jump (to the right). Then morph and roll out to the left. Entrance condition: {
"comeInWithGrappleTeleport": {
"blockPositions": [
[
12,
12
],
[
12,
13
]
]
}
}Requires: {
"tech": "canGrappleTeleportWallEscape"
}
"Morph"
{
"heatFrames": 220
}Dev note: This includes extra heat frames to account for the longer time needed to get out of the right chamber, due to being on the right side of the item, and since the shot block and crumble blocks will be unbroken. FIXME: this could be slightly inaccurate in case the item is an E-Tank. The X-Ray climb variant of `canGrappleTeleportWallEscape` doesn't work, because Samus can't get through the space above the crumbles without Morph. |
|
Requires: {
"heatFrames": 105
}
{
"or": [
"canQuickDrop",
{
"heatFrames": 30
}
]
}
{
"or": [
"canDash",
{
"heatFrames": 5
}
]
} |
|
Requires: "canDash"
{
"heatFrames": 90
}
{
"or": [
"canQuickDrop",
{
"heatFrames": 30
}
]
}Exit condition: {
"leaveWithRunway": {
"length": 5,
"openEnd": 0
}
}Unlocks doors: {"types":["missiles"],"requires":[{"heatFrames":50}]}
{"types":["super"],"requires":[]}
{"types":["powerbomb"],"requires":[{"heatFrames":50}]} |
|
Requires: "canDash"
{
"heatFrames": 135
}
{
"or": [
"canQuickDrop",
{
"heatFrames": 30
}
]
}Exit condition: {
"leaveWithRunway": {
"length": 9,
"openEnd": 0
}
}Unlocks doors: {"types":["missiles"],"requires":[{"heatFrames":50}]}
{"types":["super"],"requires":[]}
{"types":["powerbomb"],"requires":[{"heatFrames":50}]} |
|
Requires: "canDash"
{
"heatFrames": 210
}
{
"or": [
"canQuickDrop",
{
"heatFrames": 60
}
]
}Exit condition: {
"leaveWithRunway": {
"length": 11,
"openEnd": 0
}
}Unlocks doors: {"types":["missiles"],"requires":[{"heatFrames":50}]}
{"types":["super"],"requires":[]}
{"types":["powerbomb"],"requires":[{"heatFrames":50}]} |
From: 2
Top Door
To: 1
Left Door
Entrance condition: {
"comeInShinecharged": {},
"comesThroughToilet": "any"
}Requires: {
"shineChargeFrames": 95
}
"canShinechargeMovementComplex"
"canQuickDrop"
{
"heatFrames": 120
}
{
"shinespark": {
"frames": 6,
"excessFrames": 0
}
}Exit condition: {
"leaveWithSpark": {}
}Unlocks doors: {"types":["super"],"requires":[]}
{"types":["missiles","powerbomb"],"requires":["never"]} |
|
Entrance condition: {
"comeInShinecharged": {},
"comesThroughToilet": "any"
}Requires: {
"shineChargeFrames": 105
}
"canShinechargeMovementComplex"
"canQuickDrop"
{
"heatFrames": 105
}Exit condition: {
"leaveShinecharged": {}
}Unlocks doors: {"types":["super"],"requires":[]}
{"types":["missiles","powerbomb"],"requires":["never"]} |
|
Bomb the side of the crumble blocks to overload PLMs and go through to the left door. Entrance condition: {
"comeInWithGMode": {
"mode": "any",
"morphed": true
},
"comesThroughToilet": "any"
}Requires: "h_heatedGMode" "h_artificialMorphBombs" "h_heatedGModeOpenDifferentDoor" Dev note: FIXME: This and a few other variant could go to 3, but then it takes extra heat frames to get out, which is about the same overall, but the item could be Varia, Gravity, or an E-Tank making it possible when entering with less Energy. |
|
Use 9 Power Bombs against the right crumble blocks to overload PLMs and roll through the crumble blocks on the left. Entrance condition: {
"comeInWithGMode": {
"mode": "direct",
"morphed": true
},
"comesThroughToilet": "any"
}Requires: "canComplexGMode"
"h_heatedGMode"
"canPowerBombItemOverloadPLMs"
{
"itemNotCollectedAtNode": 3
}
"canRiskPermanentLossOfAccess"
{
"ammo": {
"type": "PowerBomb",
"count": 9
}
}
"h_heatedGModeOpenDifferentDoor" |
|
Requires: {
"heatFrames": 70
}Exit condition: {
"leaveWithDoorFrameBelow": {
"height": 2
}
} |
|
Requires: {
"heatFrames": 70
}Exit condition: {
"leaveWithPlatformBelow": {
"height": 9,
"leftPosition": -2,
"rightPosition": 2
}
} |
|
Requires: {
"heatFrames": 200
}Exit condition: {
"leaveWithPlatformBelow": {
"height": 9,
"leftPosition": -6,
"rightPosition": 2
}
}Dev note: This applies to getting onto the ledge in Red Fish Room, or onto the bottom ledge on the right side of Mt. Everest. It does not require opening the left door. An additional tile could be used by opening the door, but that does not yet appear to have an application. |
|
Entrance condition: {
"comeInWithGMode": {
"mode": "direct",
"morphed": false
},
"comesThroughToilet": "any"
}Exit condition: {
"leaveWithGMode": {
"morphed": false
}
} |
|
It is possible to get back up with Spring Ball alone with a foosball off of the crumble block. Entrance condition: {
"comeInWithGMode": {
"mode": "direct",
"morphed": true
},
"comesThroughToilet": "any"
}Requires: {
"or": [
"h_artificialMorphIBJ",
"h_artificialMorphSpringBallBombJump",
{
"and": [
"HiJump",
"h_artificialMorphSpringBall"
]
},
{
"and": [
"canTrickyJump",
"h_artificialMorphSpringBall"
]
}
]
}Exit condition: {
"leaveWithGMode": {
"morphed": true
}
}Dev note: This is one of the easier foosballs because it is free to retry, because there is no heat damage in G-Mode. |
|
Requires: {
"heatFrames": 90
}
{
"or": [
"canQuickDrop",
{
"heatFrames": 30
}
]
}Dev note: This assumes landing on the ground before touching the item. |
|
Requires: {
"heatFrames": 50
}Dev note: This is enough frames to reach the door transition, not just the platform below. |
|
Requires: {
"heatFrames": 90
}Exit condition: {
"leaveWithDoorFrameBelow": {
"height": 2
}
}Unlocks doors: {"types":["missiles"],"requires":[{"heatFrames":50}]}
{"types":["super"],"requires":[]}
{"types":["powerbomb"],"requires":[{"heatFrames":110}]} |
|
Requires: {
"heatFrames": 90
}Exit condition: {
"leaveWithPlatformBelow": {
"height": 9,
"leftPosition": -2,
"rightPosition": 2
}
}Unlocks doors: {"types":["missiles"],"requires":[{"heatFrames":50}]}
{"types":["super"],"requires":[]}
{"types":["powerbomb"],"requires":[{"heatFrames":110}]} |
|
Requires: "h_heatedCrystalFlash" |
{
"$schema": "../../../schema/m3-room.schema.json",
"id": 147,
"name": "The Jail",
"area": "Norfair",
"subarea": "Lower",
"subsubarea": "East",
"roomAddress": "0x7B55A",
"roomEnvironments": [
{
"heated": true
}
],
"mapTileMask": [
[
1
]
],
"nodes": [
{
"id": 1,
"name": "Left Door",
"nodeType": "door",
"nodeSubType": "blue",
"nodeAddress": "0x00199d2",
"doorOrientation": "left",
"doorEnvironments": [
{
"physics": "air"
}
],
"mapTileMask": [
[
2
]
]
},
{
"id": 2,
"name": "Top Door",
"nodeType": "door",
"nodeSubType": "blue",
"nodeAddress": "0x00199de",
"doorOrientation": "up",
"doorEnvironments": [
{
"physics": "air"
}
],
"mapTileMask": [
[
2
]
]
},
{
"id": 3,
"name": "Item",
"nodeType": "item",
"nodeSubType": "visible",
"nodeItem": "PowerBomb",
"nodeAddress": "0x78FD2",
"mapTileMask": [
[
2
]
],
"locks": [
{
"name": "Dummy Item Lock",
"lockType": "gameFlag",
"unlockStrats": [
{
"name": "Base (Collect Item)",
"notable": false,
"requires": [],
"flashSuitChecked": true,
"blueSuitChecked": true
}
]
}
]
}
],
"enemies": [],
"strats": [
{
"link": [
1,
1
],
"name": "Base (Unlock Door)",
"requires": [],
"unlocksDoors": [
{
"types": [
"missiles"
],
"requires": [
{
"heatFrames": 50
}
]
},
{
"types": [
"super"
],
"requires": []
},
{
"types": [
"powerbomb"
],
"requires": [
{
"heatFrames": 110
}
]
}
],
"flashSuitChecked": true,
"blueSuitChecked": true
},
{
"link": [
1,
1
],
"name": "Base (Come In Normally)",
"entranceCondition": {
"comeInNormally": {}
},
"requires": [],
"flashSuitChecked": true,
"blueSuitChecked": true
},
{
"link": [
1,
1
],
"name": "Base (Come In With Mockball)",
"entranceCondition": {
"comeInWithMockball": {
"adjacentMinTiles": 0,
"remoteAndLandingMinTiles": [
[
0,
0
]
],
"speedBooster": "any"
}
},
"requires": [
{
"heatFrames": 10
}
],
"flashSuitChecked": true,
"blueSuitChecked": true
},
{
"link": [
2,
2
],
"name": "Base (Unlock Door)",
"requires": [],
"unlocksDoors": [
{
"types": [
"missiles"
],
"requires": [
{
"heatFrames": 50
}
]
},
{
"types": [
"super"
],
"requires": []
},
{
"types": [
"powerbomb"
],
"requires": [
{
"heatFrames": 110
}
]
}
],
"flashSuitChecked": true,
"blueSuitChecked": true
},
{
"link": [
2,
2
],
"name": "Base (Come In Normally)",
"entranceCondition": {
"comeInNormally": {}
},
"requires": [],
"flashSuitChecked": true,
"blueSuitChecked": true
},
{
"name": "Base (Collect Item)",
"notable": false,
"requires": [],
"flashSuitChecked": true,
"blueSuitChecked": true,
"link": [
3,
3
],
"collectsItems": [
3
]
},
{
"id": 1,
"link": [
1,
1
],
"name": "Leave With Runway",
"requires": [],
"exitCondition": {
"leaveWithRunway": {
"length": 4,
"openEnd": 0
}
},
"flashSuitChecked": true,
"blueSuitChecked": true
},
{
"id": 2,
"link": [
1,
1
],
"name": "Crystal Flash",
"requires": [
"h_heatedCrystalFlash"
],
"flashSuitChecked": true,
"blueSuitChecked": true
},
{
"id": 26,
"link": [
1,
1
],
"name": "Come in Shinecharging, Crystal Spark",
"entranceCondition": {
"comeInShinecharging": {
"length": 3,
"openEnd": 0
}
},
"requires": [
"h_heatedCrystalSpark"
],
"flashSuitChecked": true,
"blueSuitChecked": true
},
{
"id": 18,
"link": [
1,
1
],
"name": "Direct G-Mode Morph, Power Bomb the Item",
"entranceCondition": {
"comeInWithGMode": {
"mode": "direct",
"morphed": true
}
},
"requires": [
"canComplexGMode",
"h_heatedGMode",
"canPowerBombItemOverloadPLMs",
{
"ammo": {
"type": "PowerBomb",
"count": 18
}
},
{
"heatFrames": 240
}
],
"collectsItems": [
3
],
"flashSuitChecked": true,
"blueSuitChecked": true,
"note": [
"Use 17 Power Bombs while pressed against the crumble blocks to overload PLMs and go through the crumble blocks.",
"With Morph, exit G-mode near the item then return to the left, without, exit in the middle of the room to break the crumble blocks."
],
"detailNote": "Anywhere else in the left section of the room requires one more Power Bomb.",
"devNote": "Returning to the left avoids canRiskPermanentLossOfAccess. This might be useful with a crystal flash."
},
{
"id": 3,
"link": [
1,
2
],
"name": "Crystal Flash Clip",
"requires": [
{
"notable": "Crystal Flash Clip"
},
"h_heatProof",
"h_jumpIntoCrystalFlashClip",
"canTrickyJump"
],
"flashSuitChecked": true,
"blueSuitChecked": true,
"note": [
"Stand next to the Crumble Blocks and jump into a Crystal Flash Clip to briefly clip into the ceiling above those blocks.",
"Hold down exiting the Crystal Flash to shrink Samus' hitbox and on the next frame press forward to move above the Crumble blocks.",
"Holding down and mashing forward sometimes works, or X-Ray can be used at the end of the Crystal Flash to more easily time the inputs."
]
},
{
"id": 19,
"link": [
1,
2
],
"name": "G-Mode, Bomb the Crumble Blocks",
"entranceCondition": {
"comeInWithGMode": {
"mode": "any",
"morphed": true
}
},
"requires": [
"h_heatedGMode",
"h_artificialMorphBombs",
{
"heatFrames": 50
}
],
"flashSuitChecked": true,
"blueSuitChecked": true,
"note": "Bomb the side of the crumble blocks to overload PLMs and go through to the middle of the room.",
"devNote": "It is possible to go to 3, but then it takes extra heat frames to get out, being almost the same as ending at 2 and going to 3."
},
{
"id": 20,
"link": [
1,
2
],
"name": "Direct G-Mode Morph, Power Bomb the Item",
"entranceCondition": {
"comeInWithGMode": {
"mode": "direct",
"morphed": true
}
},
"requires": [
"h_heatedGMode",
"canPowerBombItemOverloadPLMs",
{
"itemNotCollectedAtNode": 3
},
"canRiskPermanentLossOfAccess",
{
"ammo": {
"type": "PowerBomb",
"count": 17
}
},
{
"heatFrames": 50
}
],
"flashSuitChecked": true,
"blueSuitChecked": true,
"note": "Use 17 Power Bombs while pressed against the crumble blocks to overload PLMs and go through the crumble blocks.",
"detailNote": "Anywhere else in the left section of the room requires one more Power Bomb.",
"devNote": "It is possible to go to 3, but then it takes extra heat frames to get out, being almost the same as ending at 2 and going to 3."
},
{
"id": 4,
"link": [
1,
3
],
"name": "Grapple Teleport Inside Wall",
"entranceCondition": {
"comeInWithGrappleTeleport": {
"blockPositions": [
[
12,
12
],
[
12,
13
]
]
}
},
"requires": [
{
"tech": "canGrappleTeleportWallEscape"
},
"Morph",
{
"heatFrames": 220
}
],
"flashSuitChecked": true,
"blueSuitChecked": true,
"note": [
"In the previous room, avoid triggering the transition too deeply (position $EE), otherwise Samus ends up stuck too far right in the wall.",
"After teleporting, Samus should be standing inside the wall.",
"Wait a moment for the acid to lower, then retract Grapple by pressing up, which will pull Samus left and down.",
"Hold left, and release Grapple while still holding left.",
"Perform a turn-around spin jump (to the right).",
"Then morph and roll out to the left."
],
"devNote": [
"This includes extra heat frames to account for the longer time needed to get out of the right chamber,",
"due to being on the right side of the item, and since the shot block and crumble blocks will be unbroken.",
"FIXME: this could be slightly inaccurate in case the item is an E-Tank.",
"The X-Ray climb variant of `canGrappleTeleportWallEscape` doesn't work,",
"because Samus can't get through the space above the crumbles without Morph."
]
},
{
"id": 5,
"link": [
2,
1
],
"name": "Base",
"requires": [
{
"heatFrames": 105
},
{
"or": [
"canQuickDrop",
{
"heatFrames": 30
}
]
},
{
"or": [
"canDash",
{
"heatFrames": 5
}
]
}
],
"flashSuitChecked": true,
"blueSuitChecked": true
},
{
"id": 23,
"link": [
2,
1
],
"name": "Leave With Runway (Short Runway)",
"requires": [
"canDash",
{
"heatFrames": 90
},
{
"or": [
"canQuickDrop",
{
"heatFrames": 30
}
]
}
],
"exitCondition": {
"leaveWithRunway": {
"length": 5,
"openEnd": 0
}
},
"unlocksDoors": [
{
"types": [
"missiles"
],
"requires": [
{
"heatFrames": 50
}
]
},
{
"types": [
"super"
],
"requires": []
},
{
"types": [
"powerbomb"
],
"requires": [
{
"heatFrames": 50
}
]
}
],
"flashSuitChecked": true,
"blueSuitChecked": true
},
{
"id": 24,
"link": [
2,
1
],
"name": "Leave With Runway (Medium Runway)",
"requires": [
"canDash",
{
"heatFrames": 135
},
{
"or": [
"canQuickDrop",
{
"heatFrames": 30
}
]
}
],
"exitCondition": {
"leaveWithRunway": {
"length": 9,
"openEnd": 0
}
},
"unlocksDoors": [
{
"types": [
"missiles"
],
"requires": [
{
"heatFrames": 50
}
]
},
{
"types": [
"super"
],
"requires": []
},
{
"types": [
"powerbomb"
],
"requires": [
{
"heatFrames": 50
}
]
}
],
"flashSuitChecked": true,
"blueSuitChecked": true
},
{
"id": 25,
"link": [
2,
1
],
"name": "Leave With Runway (Full Runway)",
"requires": [
"canDash",
{
"heatFrames": 210
},
{
"or": [
"canQuickDrop",
{
"heatFrames": 60
}
]
}
],
"exitCondition": {
"leaveWithRunway": {
"length": 11,
"openEnd": 0
}
},
"unlocksDoors": [
{
"types": [
"missiles"
],
"requires": [
{
"heatFrames": 50
}
]
},
{
"types": [
"super"
],
"requires": []
},
{
"types": [
"powerbomb"
],
"requires": [
{
"heatFrames": 50
}
]
}
],
"flashSuitChecked": true,
"blueSuitChecked": true
},
{
"id": 16,
"link": [
2,
1
],
"name": "Come In Shinecharged, Leave With Spark (Quick Drop)",
"entranceCondition": {
"comeInShinecharged": {},
"comesThroughToilet": "any"
},
"requires": [
{
"shineChargeFrames": 95
},
"canShinechargeMovementComplex",
"canQuickDrop",
{
"heatFrames": 120
},
{
"shinespark": {
"frames": 6,
"excessFrames": 0
}
}
],
"exitCondition": {
"leaveWithSpark": {}
},
"unlocksDoors": [
{
"types": [
"super"
],
"requires": []
},
{
"types": [
"missiles",
"powerbomb"
],
"requires": [
"never"
]
}
],
"flashSuitChecked": true,
"blueSuitChecked": true
},
{
"id": 17,
"link": [
2,
1
],
"name": "Carry Shinecharge (Quick Drop)",
"entranceCondition": {
"comeInShinecharged": {},
"comesThroughToilet": "any"
},
"requires": [
{
"shineChargeFrames": 105
},
"canShinechargeMovementComplex",
"canQuickDrop",
{
"heatFrames": 105
}
],
"exitCondition": {
"leaveShinecharged": {}
},
"unlocksDoors": [
{
"types": [
"super"
],
"requires": []
},
{
"types": [
"missiles",
"powerbomb"
],
"requires": [
"never"
]
}
],
"flashSuitChecked": true,
"blueSuitChecked": true
},
{
"id": 21,
"link": [
2,
1
],
"name": "G-Mode, Bomb the Crumble Blocks",
"entranceCondition": {
"comeInWithGMode": {
"mode": "any",
"morphed": true
},
"comesThroughToilet": "any"
},
"requires": [
"h_heatedGMode",
"h_artificialMorphBombs",
"h_heatedGModeOpenDifferentDoor"
],
"flashSuitChecked": true,
"blueSuitChecked": true,
"note": "Bomb the side of the crumble blocks to overload PLMs and go through to the left door.",
"devNote": [
"FIXME: This and a few other variant could go to 3, but then it takes extra heat frames to get out, which is about the same overall,",
"but the item could be Varia, Gravity, or an E-Tank making it possible when entering with less Energy."
]
},
{
"id": 22,
"link": [
2,
1
],
"name": "Direct G-Mode Morph, Power Bomb the Item",
"entranceCondition": {
"comeInWithGMode": {
"mode": "direct",
"morphed": true
},
"comesThroughToilet": "any"
},
"requires": [
"canComplexGMode",
"h_heatedGMode",
"canPowerBombItemOverloadPLMs",
{
"itemNotCollectedAtNode": 3
},
"canRiskPermanentLossOfAccess",
{
"ammo": {
"type": "PowerBomb",
"count": 9
}
},
"h_heatedGModeOpenDifferentDoor"
],
"flashSuitChecked": true,
"blueSuitChecked": true,
"note": "Use 9 Power Bombs against the right crumble blocks to overload PLMs and roll through the crumble blocks on the left."
},
{
"id": 6,
"link": [
2,
2
],
"name": "Leave With Door Frame Below",
"requires": [
{
  "heatFrames": 70
}
],
"exitCondition": {
"leaveWithDoorFrameBelow": {
"height": 2
}
},
"flashSuitChecked": true,
"blueSuitChecked": true
},
{
"id": 7,
"link": [
2,
2
],
"name": "Leave With Platform Below - Basic Platform",
"requires": [
{
  "heatFrames": 70
}
],
"exitCondition": {
"leaveWithPlatformBelow": {
"height": 9,
"leftPosition": -2,
"rightPosition": 2
}
},
"flashSuitChecked": true,
"blueSuitChecked": true
},
{
"id": 8,
"link": [
2,
2
],
"name": "Leave With Platform Below - Left Pillar Broken",
"requires": [
{
  "heatFrames": 200
}
],
"exitCondition": {
"leaveWithPlatformBelow": {
"height": 9,
"leftPosition": -6,
"rightPosition": 2
}
},
"flashSuitChecked": true,
"blueSuitChecked": true,
"devNote": [
"This applies to getting onto the ledge in Red Fish Room, or onto the bottom ledge on the right side of Mt. Everest.",
"It does not require opening the left door.",
"An additional tile could be used by opening the door, but that does not yet appear to have an application."
]
},
{
"id": 9,
"link": [
2,
2
],
"name": "Carry G-Mode Back Up",
"entranceCondition": {
"comeInWithGMode": {
"mode": "direct",
"morphed": false
},
"comesThroughToilet": "any"
},
"requires": [],
"exitCondition": {
"leaveWithGMode": {
"morphed": false
}
},
"bypassesDoorShell": "free",
"flashSuitChecked": true,
"blueSuitChecked": true
},
{
"id": 10,
"link": [
2,
2
],
"name": "Carry G-Mode Morph Back Up",
"entranceCondition": {
"comeInWithGMode": {
"mode": "direct",
"morphed": true
},
"comesThroughToilet": "any"
},
"requires": [
{
  "or": [
    "h_artificialMorphIBJ",
    "h_artificialMorphSpringBallBombJump",
    {
      "and": [
        "HiJump",
        "h_artificialMorphSpringBall"
      ]
    },
    {
      "and": [
        "canTrickyJump",
        "h_artificialMorphSpringBall"
      ]
    }
  ]
}
],
"exitCondition": {
"leaveWithGMode": {
"morphed": true
}
},
"bypassesDoorShell": "free",
"flashSuitChecked": true,
"blueSuitChecked": true,
"note": "It is possible to get back up with Spring Ball alone with a foosball off of the crumble block.",
"devNote": "This is one of the easier foosballs because it is free to retry, because there is no heat damage in G-Mode."
},
{
"id": 11,
"link": [
2,
3
],
"name": "Base",
"requires": [
{
"heatFrames": 90
},
{
"or": [
"canQuickDrop",
{
"heatFrames": 30
}
]
}
],
"flashSuitChecked": true,
"blueSuitChecked": true,
"devNote": [
"This assumes landing on the ground before touching the item."
]
},
{
"id": 12,
"link": [
3,
2
],
"name": "Base",
"requires": [
{
  "heatFrames": 50
}
],
"flashSuitChecked": true,
"blueSuitChecked": true,
"devNote": [
"This is enough frames to reach the door transition, not just the platform below."
]
},
{
"id": 13,
"link": [
3,
2
],
"name": "Leave With Door Frame Below",
"requires": [
{
  "heatFrames": 90
}
],
"exitCondition": {
"leaveWithDoorFrameBelow": {
"height": 2
}
},
"unlocksDoors": [
{
"types": [
"missiles"
],
"requires": [
{
"heatFrames": 50
}
]
},
{
"types": [
"super"
],
"requires": []
},
{
"types": [
"powerbomb"
],
"requires": [
{
"heatFrames": 110
}
]
}
],
"flashSuitChecked": true,
"blueSuitChecked": true
},
{
"id": 14,
"link": [
3,
2
],
"name": "Leave With Platform Below",
"requires": [
{
  "heatFrames": 90
}
],
"exitCondition": {
"leaveWithPlatformBelow": {
"height": 9,
"leftPosition": -2,
"rightPosition": 2
}
},
"unlocksDoors": [
{
"types": [
"missiles"
],
"requires": [
{
"heatFrames": 50
}
]
},
{
"types": [
"super"
],
"requires": []
},
{
"types": [
"powerbomb"
],
"requires": [
{
"heatFrames": 110
}
]
}
],
"flashSuitChecked": true,
"blueSuitChecked": true
},
{
"id": 15,
"link": [
3,
3
],
"name": "Crystal Flash",
"requires": [
"h_heatedCrystalFlash"
],
"flashSuitChecked": true,
"blueSuitChecked": true
}
],
"notables": [
{
"id": 1,
"name": "Crystal Flash Clip",
"note": [
"Stand next to the Crumble Blocks and jump into a Crystal Flash Clip to briefly clip into the ceiling above those blocks.",
"Hold down exiting the Crystal Flash to shrink Samus' hitbox and on the next frame press forward to move above the Crumble blocks.",
"Holding down and mashing forward sometimes works, or X-Ray can be used at the end of the Crystal Flash to more easily time the inputs."
]
}
],
"nextStratId": 27,
"nextNotableId": 3
}


