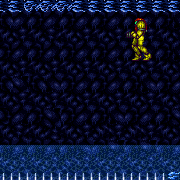
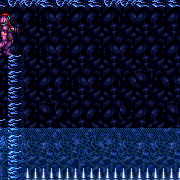
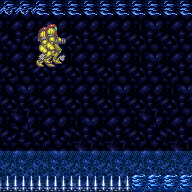
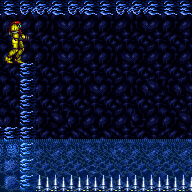
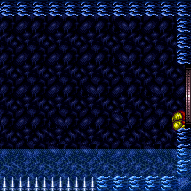
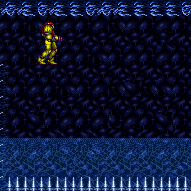
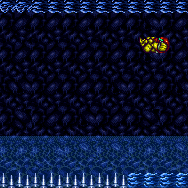
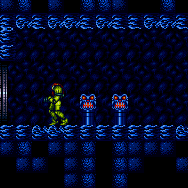
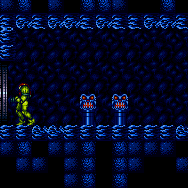
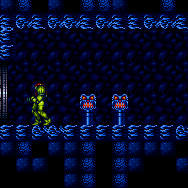
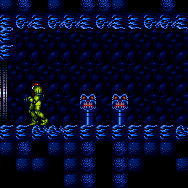
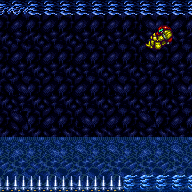
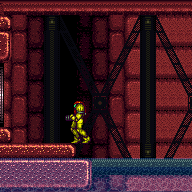
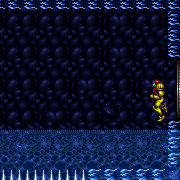
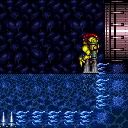
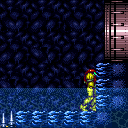
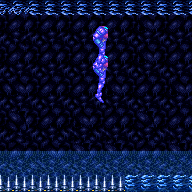
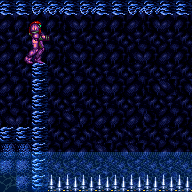
Blue Brinstar Boulder Room
Room ID: 42
|
Exit condition: {
"leaveWithRunway": {
"length": 3,
"openEnd": 0
}
} |
|
Requires: {
"canShineCharge": {
"usedTiles": 19,
"openEnd": 2
}
}
{
"shineChargeFrames": 40
}Exit condition: {
"leaveShinecharged": {}
} |
|

Requires: {
"canShineCharge": {
"usedTiles": 19,
"openEnd": 1
}
}
"canChainTemporaryBlue"Exit condition: {
"leaveWithTemporaryBlue": {}
} |
|

Exit condition: {
"leaveWithMockball": {
"remoteRunway": {
"length": 13,
"openEnd": 1
},
"landingRunway": {
"length": 0,
"openEnd": 1
},
"maxExtraRunSpeed": "$1.0"
}
} |
|
Requires: {
"obstaclesNotCleared": [
"R-Mode"
]
}
"h_CrystalFlash" |
|
Requires: {
"canShineCharge": {
"usedTiles": 19,
"openEnd": 1
}
}
"h_CrystalSpark" |
|
Crystal Flash required. Must have no E-Tanks (disable or don't collect). Disable suits and use two boulders to damage down. Shinecharge and spark quickly under the rightmost boulder to get the interrupt. Entrance condition: {
"comeInWithRMode": {}
}Requires: {
"disableEquipment": "ETank"
}
"h_CrystalFlashForReserveEnergy"
{
"disableEquipment": "Varia"
}
{
"disableEquipment": "Gravity"
}
{
"canShineCharge": {
"usedTiles": 16,
"openEnd": 1
}
}
{
"autoReserveTrigger": {}
}
"canRModeSparkInterrupt" |
From: 1
Left Door
To: 1
Left Door
Crystal Flash required. Damage down using spikes or the first two boulders. Shinecharge and spark quickly under the leftmost boulder to get the interrupt. Requires: {
"obstaclesCleared": [
"R-Mode"
]
}
"h_CrystalFlashForReserveEnergy"
"canTrickyJump"
{
"canShineCharge": {
"usedTiles": 14,
"openEnd": 1
}
}
{
"autoReserveTrigger": {}
}
"canRModeSparkInterrupt"Resets obstacles: R-Mode |
|
Requires: "SpaceJump" Unlocks doors: {"types":["missiles"],"requires":[{"ammo":{"type":"Missile","count":2}}]}
{"types":["super"],"requires":[{"ammo":{"type":"Super","count":1}}]}
{"types":["powerbomb"],"requires":[]}Dev note: Some missed shots are expected for missile and super doors at this difficulty. |
|


It is possible to shoot open the door and jump through it without going into the water below. Requires: "canCarefulJump" Unlocks doors: {"types":["ammo"],"requires":[]} |
From: 1
Left Door
To: 2
Right Door

Requires: {
"canShineCharge": {
"usedTiles": 19,
"openEnd": 2
}
}
"canShinechargeMovement"
"Gravity"
{
"shineChargeFrames": 80
}Exit condition: {
"leaveShinecharged": {}
}Unlocks doors: {"types":["ammo"],"requires":[]} |
From: 1
Left Door
To: 2
Right Door
Shoot the bridge to see where it ends. Opening the door requires a shot that is fired while Samus has some momentum from running to the right. Charge a spark running left then run off right into a preopened door. Requires: {
"canShineCharge": {
"usedTiles": 19,
"openEnd": 1
}
}
"canShinechargeMovement"
"canCarefulJump"
{
"shineChargeFrames": 120
}Exit condition: {
"leaveShinecharged": {}
}Unlocks doors: {"types":["powerbomb"],"requires":[]}
{"types":["missiles","super"],"requires":["canTrickyJump"]}Dev note: Using the second openEnd means you cannot make it to the door in time. Could attach `canMomentumShot` tech if that gets added. Emphasis on Careful. There is no jump. |
From: 1
Left Door
To: 2
Right Door
Gain a shinecharge running left to right, leaving about 3 tiles of runway to gain speed to jump directly into the doorway. Requires: {
"canShineCharge": {
"usedTiles": 16,
"openEnd": 1
}
}
"canShinechargeMovementTricky"
"canTrickyJump"
{
"shineChargeFrames": 80
}Exit condition: {
"leaveShinecharged": {}
}Unlocks doors: {"types":["ammo"],"requires":[]} |
|
Requires: "canTrickyJump" Exit condition: {
"leaveWithMockball": {
"remoteRunway": {
"length": 16,
"openEnd": 1
},
"landingRunway": {
"length": 1,
"openEnd": 1
},
"minExtraRunSpeed": "$1.2",
"maxExtraRunSpeed": "$3.9"
}
}Unlocks doors: {"types":["ammo"],"requires":[]} |
From: 1
Left Door
To: 2
Right Door

Requires: "canTrickyJump" Exit condition: {
"leaveWithSpringBallBounce": {
"remoteRunway": {
"length": 16,
"openEnd": 1
},
"landingRunway": {
"length": 1,
"openEnd": 1
},
"minExtraRunSpeed": "$1.2",
"maxExtraRunSpeed": "$3.9",
"movementType": "uncontrolled"
}
}Unlocks doors: {"types":["ammo"],"requires":[]} |
|
Requires: "canPreciseSpaceJump" Exit condition: {
"leaveSpaceJumping": {
"remoteRunway": {
"length": 16,
"openEnd": 1
},
"minExtraRunSpeed": "$1.5",
"maxExtraRunSpeed": "$3.9"
}
}Unlocks doors: {"types":["ammo"],"requires":[]} |
|
With blue speed, run and jump across the water, morphing and unmorphing (while holding an angle button) to gain temporary blue without a shinecharge. Requires: {
"getBlueSpeed": {
"usedTiles": 16,
"openEnd": 1
}
}
"canChainTemporaryBlue"Exit condition: {
"leaveWithTemporaryBlue": {}
}Unlocks doors: {"types":["ammo"],"requires":[]} |
|
|
|
Requires: "SpaceJump" |
|


Entrance condition: {
"comeInNormally": {}
}Requires: "canPrepareForNextRoom" "SpaceJump" Dev note: Requires a jumping entry, but any runway length and environment is fine. |
|
Entrance condition: {
"comeInJumping": {
"speedBooster": "any",
"minTiles": 3
}
}Requires: "canCarefulJump" Dev note: This is a lenient version of the strat, with an extra tile of runway. |
From: 2
Right Door
To: 1
Left Door
A doorsill with an open end is really all the room that's needed on the other side. Entrance condition: {
"comeInJumping": {
"speedBooster": "any",
"minTiles": 1
}
}Requires: "canTrickyJump" "canPreciseWallJump" |
|
Entrance condition: {
"comeInJumping": {
"speedBooster": "any",
"minTiles": 2
}
}Requires: "canCarefulJump" "canLateralMidAirMorph" Dev note: This is a lenient version of the strat, with an extra tile of runway. |
From: 2
Right Door
To: 1
Left Door
With two tiles of runway and no wall jump or items, a last-frame jump is needed to make it. Entrance condition: {
"comeInJumping": {
"speedBooster": "any",
"minTiles": 2
}
}Requires: "canTrickyJump" |
From: 2
Right Door
To: 1
Left Door

With only one tile of runway, a last-frame jump is needed to make it. Entrance condition: {
"comeInJumping": {
"speedBooster": "any",
"minTiles": 1
}
}Requires: "canTrickyJump" "canLateralMidAirMorph" |
|


It's not necessary to jump through the door, the in-room doorsill gives enough running room to make it up. Requires: "canDash"
"canPreciseWallJump"
"canTrickyJump"
{
"or": [
{
"spikeHits": 1
},
"h_backIntoCorner"
]
} |
|
Requires waiting until the last moment before SpringBall jumping. Requires: "canSpringBallBombJump" |
|

Requires: "canSpeedyJump" "canLateralMidAirMorph" "canCarefulJump" |
From: 2
Right Door
To: 1
Left Door

Sparking only to the edge of the invisible platform helps prevent taking a boulder hit. If sparking early, a down-back can help with reaching the platform. Entrance condition: {
"comeInShinecharged": {}
}Requires: {
"shineChargeFrames": 15
}
"canMidairShinespark"
{
"shinespark": {
"frames": 7,
"excessFrames": 1
}
}
{
"or": [
"canTrickyJump",
{
"enemyDamage": {
"enemy": "Boulder",
"type": "contact",
"hits": 1
}
}
]
} |
From: 2
Right Door
To: 1
Left Door
Entrance condition: {
"comeInWithSidePlatform": {
"platforms": [
{
"minHeight": 1,
"maxHeight": 1,
"minTiles": 4,
"speedBooster": "any",
"obstructions": [
[
1,
0
]
],
"note": [
"This applies to Skree Boost Room, Screw Attack Room, and Lava Dive."
]
},
{
"minHeight": 2,
"maxHeight": 2,
"minTiles": 2,
"speedBooster": "any",
"obstructions": [
[
1,
0
]
],
"requires": [
"canTrickyJump"
],
"note": [
"This applies to Metal Pirates Room (Small Ledge)."
],
"detailNote": [
"With this short of runway, a frame-perfect jump is required."
]
},
{
"minHeight": 2,
"maxHeight": 2,
"minTiles": 4,
"speedBooster": "any",
"obstructions": [
[
1,
0
]
],
"note": [
"This applies to Early Supers Room, Shaktool Room, Tourian Hopper Room, Bowling Alley (bottom), Dust Torizo Room, and Noob Bridge."
],
"detailNote": [
"With this longer amount of runway, the jump has a 2-frame window."
]
},
{
"minHeight": 3,
"maxHeight": 3,
"minTiles": 9.4375,
"speedBooster": "any",
"obstructions": [
[
1,
0
]
],
"note": [
"This applies to Bomb Torizo Room, Pink Brinstar Wave Gate Room, Phantoon's Room, Big Boy Room, and Double Chamber."
]
}
]
}
}Dev note: Setups having more than a 1-tile runway at the door are not considered here, because in that case a regular cross-room jump is possible. Likewise, doing a ceiling mockball through the transition is not considered, since if Morph is available then an airball can be done with just 1 tile of door runway. |
From: 2
Right Door
To: 1
Left Door
Jump and diagonally spark to the invisible platform. There is a small pixel range which lands on the platform and does not touch the boulder. It is possible to do this even below 29 Energy. It requires a last frame jump and then 4 frame spark window. It is more lenient with SpeedBooster. Requires: "h_storedSpark"
{
"or": [
{
"shinespark": {
"frames": 2,
"excessFrames": 0
}
},
{
"and": [
{
"shinespark": {
"frames": 2,
"excessFrames": 2
}
},
{
"or": [
"canMoonwalk",
"canMorphTurnaround"
]
},
{
"or": [
{
"and": [
"canTrickyJump",
"canSpeedyJump"
]
},
"canInsaneJump"
]
}
]
}
]
} |
|

In direct G-mode, the door will not close, and the in-room doorsill gives enough running room to make it up to the invisible ledge. Entrance condition: {
"comeInWithGMode": {
"mode": "direct",
"morphed": false
}
}Requires: "canPreciseWallJump"
"canTrickyJump"
{
"or": [
{
"spikeHits": 1
},
"canMorphTurnaround",
"canMoonwalk",
{
"and": [
"canArtificialMorph",
{
"tech": "canMorphTurnaround"
}
]
}
]
} |
From: 2
Right Door
To: 1
Left Door

Starting an IBJ from spring ball with no other items is not very precise, it just takes a bit of an odd timing. Entrance condition: {
"comeInWithGMode": {
"mode": "any",
"morphed": true
}
}Requires: "h_artificialMorphJumpIntoIBJ" "h_artificialMorphBombHorizontally" |
From: 2
Right Door
To: 1
Left Door
Artificial morph on entry to land on the doorsill. From the left edge, pause then press left and jump just before the pause fully triggers. Disable Spring Ball in order to get a large horizontal boost. Entrance condition: {
"comeInWithGMode": {
"mode": "direct",
"morphed": false
}
}Requires: "canArtificialMorph"
"h_artificialMorphSpringFling"
{
"disableEquipment": "HiJump"
} |
|
Entrance condition: {
"comeInWithGrappleSwing": {
"blocks": [
{
"position": [
13,
5
],
"environment": "water",
"note": "Mt. Everest"
}
]
}
}Requires: "canPreciseGrappleJump" Dev note: This can work from other setup rooms, but it would have no purpose coming from an air room, since you could just do a running jump through the door and airball. |
From: 2
Right Door
To: 1
Left Door


Entrance condition: {
"comeInWithGrappleTeleport": {
"blockPositions": [
[
3,
12
],
[
3,
13
]
]
}
}Requires: {
"or": [
"canGrappleTeleportWallEscape",
{
"doorUnlockedAtNode": 1
}
]
}Unlocks doors: {"types":["ammo"],"requires":[]} |
From: 2
Right Door
To: 1
Left Door


Entrance condition: {
"comeInWithGrappleTeleport": {
"blockPositions": [
[
3,
12
],
[
3,
13
]
]
}
}Bypasses door shell: true |
From: 2
Right Door
To: 1
Left Door
Entrance condition: {
"comeInWithGrappleTeleport": {
"blockPositions": [
[
3,
12
]
]
}
}Exit condition: {
"leaveWithGrappleTeleport": {
"blockPositions": [
[
3,
12
]
]
}
}Bypasses door shell: true |
From: 2
Right Door
To: 1
Left Door
Entrance condition: {
"comeInWithGrappleTeleport": {
"blockPositions": [
[
3,
13
]
]
}
}Exit condition: {
"leaveWithGrappleTeleport": {
"blockPositions": [
[
3,
13
]
]
}
}Bypasses door shell: true |
|
Exit condition: {
"leaveWithRunway": {
"length": 1,
"openEnd": 1
}
} |
|
Requires: "Gravity" Exit condition: {
"leaveWithSidePlatform": {
"height": 3,
"runway": {
"length": 5,
"openEnd": 0
},
"obstruction": [
1,
0
]
}
}Dev note: Max extra run speed $1.2 with spin, or $1.3 with a quick aim-down. |
From: 2
Right Door
To: 2
Right Door
Run and jump to the left, turning around right before landing on the spikes. Continue holding right, gaining speed to jump out through the door. Requires: "Gravity"
{
"spikeHits": 1
}
"canUseIFrames"
{
"or": [
{
"spikeHits": 2
},
"canInsaneJump"
]
}Exit condition: {
"leaveWithSidePlatform": {
"height": 3,
"runway": {
"length": 16,
"openEnd": 0
},
"obstruction": [
1,
0
]
}
}Dev note: Max extra run speed $3.3 with spin, or $3.4 with a quick aim-down. This would not be logically valid for gaining blue speed, so we have to be sure it can't be used that way. |
|
Requires: {
"obstaclesNotCleared": [
"R-Mode"
]
}
"h_CrystalFlash" |
From: 2
Right Door
To: 3
Right Door, In the Water
Entrance condition: {
"comeInNormally": {}
} |
From: 2
Right Door
To: 3
Right Door, In the Water
Entrance condition: {
"comeInWithMockball": {
"speedBooster": "any",
"adjacentMinTiles": 0,
"remoteAndLandingMinTiles": [
[
0,
0
]
]
}
} |
From: 2
Right Door
To: 3
Right Door, In the Water
Entrance condition: {
"comeInWithRMode": {}
}Clears obstacles: R-Mode |
|
Requires: "Gravity" |
|
Requires: "SpaceJump"
{
"or": [
"canWallJump",
{
"and": [
"canSpaceJumpWaterEscape",
"HiJump"
]
}
]
}Dev note: Space Jump with HiJump alone is enough if the door can be opened. |
|


It helps to begin jumping when the water level is high. Requires: "canSuitlessMaridia" "canTrickySpringBallJump" |
From: 3
Right Door, In the Water
To: 1
Left Door


Requires: "canWallJumpBombBoost" |
From: 3
Right Door, In the Water
To: 1
Left Door


It's a delayed walljump while the water is low, followed by a tight walljump off the bridge. This strat is easily bypassed by jumping through the door, or if the door can be opened. Requires: "canSuitlessMaridia" "canInsaneWallJump" |
From: 3
Right Door, In the Water
To: 1
Left Door
When the water is high, jump and place a Bomb on the descent just above the water, then very quickly crouch jump to hit the Bomb and IBJ. Requires: "canBombJumpWaterEscape" "canJumpIntoIBJ" Dev note: The crouch jump is not necessary, but is helpful. Preserving a flash suit is still difficult without the crouch jump. |
From: 3
Right Door, In the Water
To: 1
Left Door
There is a small pixel range which lands on the platform and does not touch the boulder. Requires: "h_storedSpark"
{
"shinespark": {
"frames": 7,
"excessFrames": 2
}
} |
|
It is possible to escape the water with a wall jump when the water is low, or a crouch jump and down grab when it is high. Requires: {
"doorUnlockedAtNode": 2
}
{
"or": [
"canDownGrab",
"canWallJump",
"Gravity",
"HiJump",
"canTrickySpringBallJump"
]
}Unlocks doors: {"types":["ammo"],"requires":[]}Dev note: The crouch jump is not actually necessary but helps slightly. It is also possible to use the crouch jump while maintaining the flash suit. |
From: 3
Right Door, In the Water
To: 3
Right Door, In the Water
Requires: "Gravity"
{
"canShineCharge": {
"usedTiles": 19,
"openEnd": 2
}
}
{
"spikeHits": 1
}
"h_spikeSuitSpikeHitLeniency"
"canSpikeSuit"
{
"shinespark": {
"frames": 6,
"excessFrames": 6
}
} |
From: 3
Right Door, In the Water
To: 3
Right Door, In the Water

Requires: "Gravity"
{
"canShineCharge": {
"usedTiles": 19,
"openEnd": 2
}
}
"h_spikeXModeBlueSuit"
{
"shinespark": {
"frames": 2
}
} |
{
"$schema": "../../../schema/m3-room.schema.json",
"id": 42,
"name": "Blue Brinstar Boulder Room",
"area": "Brinstar",
"subarea": "Blue",
"roomAddress": "0x7A1AD",
"roomEnvironments": [
{
"heated": false
}
],
"mapTileMask": [
[
1,
1
]
],
"nodes": [
{
"id": 1,
"name": "Left Door",
"nodeType": "door",
"nodeSubType": "blue",
"nodeAddress": "0x0018fee",
"doorOrientation": "left",
"doorEnvironments": [
{
"physics": "air"
}
],
"mapTileMask": [
[
2,
1
]
]
},
{
"id": 2,
"name": "Right Door",
"nodeType": "door",
"nodeSubType": "blue",
"nodeAddress": "0x0018fe2",
"doorOrientation": "right",
"doorEnvironments": [
{
"physics": "air"
}
],
"useImplicitComeInNormally": false,
"useImplicitComeInWithMockball": false,
"mapTileMask": [
[
1,
2
]
],
"devNote": "Defined as being on the door ledge, above the water."
},
{
"id": 3,
"name": "Right Door, In the Water",
"nodeType": "junction",
"nodeSubType": "junction",
"mapTileMask": [
[
1,
2
]
]
}
],
"obstacles": [
{
"id": "R-Mode",
"name": "Entered with R-Mode",
"obstacleType": "abstract"
}
],
"enemies": [
{
"id": "e1",
"groupName": "Boulder Room Boulders",
"enemyName": "Boulder",
"quantity": 3,
"homeNodes": [
1
]
}
],
"strats": [
{
"link": [
1,
1
],
"name": "Base (Unlock Door)",
"requires": [],
"unlocksDoors": [
{
"types": [
"ammo"
],
"requires": []
}
],
"flashSuitChecked": true,
"blueSuitChecked": true
},
{
"link": [
1,
1
],
"name": "Base (Come In Normally)",
"entranceCondition": {
"comeInNormally": {}
},
"requires": [],
"flashSuitChecked": true,
"blueSuitChecked": true
},
{
"link": [
1,
1
],
"name": "Base (Come In With Mockball)",
"entranceCondition": {
"comeInWithMockball": {
"adjacentMinTiles": 0,
"remoteAndLandingMinTiles": [
[
0,
0
]
],
"speedBooster": "any"
}
},
"requires": [],
"flashSuitChecked": true,
"blueSuitChecked": true
},
{
"link": [
2,
2
],
"name": "Base (Unlock Door)",
"requires": [],
"unlocksDoors": [
{
"types": [
"ammo"
],
"requires": []
}
],
"flashSuitChecked": true,
"blueSuitChecked": true
},
{
"id": 1,
"link": [
1,
1
],
"name": "Leave with Runway",
"requires": [],
"exitCondition": {
"leaveWithRunway": {
"length": 3,
"openEnd": 0
}
},
"flashSuitChecked": true,
"blueSuitChecked": true
},
{
"id": 2,
"link": [
1,
1
],
"name": "Leave Shinecharged",
"requires": [
{
"canShineCharge": {
"usedTiles": 19,
"openEnd": 2
}
},
{
"shineChargeFrames": 40
}
],
"exitCondition": {
"leaveShinecharged": {}
},
"flashSuitChecked": true,
"blueSuitChecked": true
},
{
"id": 3,
"link": [
1,
1
],
"name": "Leave With Temporary Blue",
"requires": [
{
"canShineCharge": {
"usedTiles": 19,
"openEnd": 1
}
},
"canChainTemporaryBlue"
],
"exitCondition": {
"leaveWithTemporaryBlue": {}
},
"flashSuitChecked": true,
"blueSuitChecked": true
},
{
"id": 4,
"link": [
1,
1
],
"name": "Leave With Mockball",
"requires": [],
"exitCondition": {
"leaveWithMockball": {
"remoteRunway": {
"length": 13,
"openEnd": 1
},
"landingRunway": {
"length": 0,
"openEnd": 1
},
"maxExtraRunSpeed": "$1.0"
}
},
"flashSuitChecked": true,
"blueSuitChecked": true
},
{
"id": 5,
"link": [
1,
1
],
"name": "Crystal Flash",
"requires": [
{
"obstaclesNotCleared": [
"R-Mode"
]
},
"h_CrystalFlash"
],
"flashSuitChecked": true,
"blueSuitChecked": true
},
{
"id": 58,
"link": [
1,
1
],
"name": "Crystal Spark",
"requires": [
{
"canShineCharge": {
"usedTiles": 19,
"openEnd": 1
}
},
"h_CrystalSpark"
],
"flashSuitChecked": true,
"blueSuitChecked": true
},
{
"id": 54,
"link": [
1,
1
],
"name": "R-Mode Spark Interrupt",
"entranceCondition": {
"comeInWithRMode": {}
},
"requires": [
{
"disableEquipment": "ETank"
},
"h_CrystalFlashForReserveEnergy",
{
"disableEquipment": "Varia"
},
{
"disableEquipment": "Gravity"
},
{
"canShineCharge": {
"usedTiles": 16,
"openEnd": 1
}
},
{
"autoReserveTrigger": {}
},
"canRModeSparkInterrupt"
],
"flashSuitChecked": true,
"blueSuitChecked": true,
"note": [
"Crystal Flash required. Must have no E-Tanks (disable or don't collect).",
"Disable suits and use two boulders to damage down.",
"Shinecharge and spark quickly under the rightmost boulder to get the interrupt."
]
},
{
"id": 55,
"link": [
1,
1
],
"name": "R-Mode Spark Interrupt from Right Door",
"requires": [
{
"obstaclesCleared": [
"R-Mode"
]
},
"h_CrystalFlashForReserveEnergy",
"canTrickyJump",
{
"canShineCharge": {
"usedTiles": 14,
"openEnd": 1
}
},
{
"autoReserveTrigger": {}
},
"canRModeSparkInterrupt"
],
"resetsObstacles": [
"R-Mode"
],
"flashSuitChecked": true,
"blueSuitChecked": true,
"note": [
"Crystal Flash required. Damage down using spikes or the first two boulders.",
"Shinecharge and spark quickly under the leftmost boulder to get the interrupt."
]
},
{
"id": 6,
"link": [
1,
2
],
"name": "Base",
"requires": [
"SpaceJump"
],
"unlocksDoors": [
{
"types": [
"missiles"
],
"requires": [
{
"ammo": {
"type": "Missile",
"count": 2
}
}
]
},
{
"types": [
"super"
],
"requires": [
{
"ammo": {
"type": "Super",
"count": 1
}
}
]
},
{
"types": [
"powerbomb"
],
"requires": []
}
],
"flashSuitChecked": true,
"blueSuitChecked": true,
"devNote": "Some missed shots are expected for missile and super doors at this difficulty."
},
{
"id": 7,
"link": [
1,
2
],
"name": "Careful Jump",
"requires": [
"canCarefulJump"
],
"unlocksDoors": [
{
"types": [
"ammo"
],
"requires": []
}
],
"flashSuitChecked": true,
"blueSuitChecked": true,
"note": "It is possible to shoot open the door and jump through it without going into the water below."
},
{
"id": 8,
"link": [
1,
2
],
"name": "Leave Shinecharged (with Gravity)",
"requires": [
{
"canShineCharge": {
"usedTiles": 19,
"openEnd": 2
}
},
"canShinechargeMovement",
"Gravity",
{
"shineChargeFrames": 80
}
],
"exitCondition": {
"leaveShinecharged": {}
},
"unlocksDoors": [
{
"types": [
"ammo"
],
"requires": []
}
],
"flashSuitChecked": true,
"blueSuitChecked": true
},
{
"id": 9,
"link": [
1,
2
],
"name": "Leave Shinecharged (Suitless)",
"requires": [
{
"canShineCharge": {
"usedTiles": 19,
"openEnd": 1
}
},
"canShinechargeMovement",
"canCarefulJump",
{
"shineChargeFrames": 120
}
],
"exitCondition": {
"leaveShinecharged": {}
},
"unlocksDoors": [
{
"types": [
"powerbomb"
],
"requires": []
},
{
"types": [
"missiles",
"super"
],
"requires": [
"canTrickyJump"
]
}
],
"flashSuitChecked": true,
"blueSuitChecked": true,
"note": [
"Shoot the bridge to see where it ends.",
"Opening the door requires a shot that is fired while Samus has some momentum from running to the right.",
"Charge a spark running left then run off right into a preopened door."
],
"devNote": [
"Using the second openEnd means you cannot make it to the door in time.",
"Could attach `canMomentumShot` tech if that gets added.",
"Emphasis on Careful. There is no jump."
]
},
{
"id": 42,
"link": [
1,
2
],
"name": "Leave Shinecharged (Shorter Shortcharge)",
"requires": [
{
"canShineCharge": {
"usedTiles": 16,
"openEnd": 1
}
},
"canShinechargeMovementTricky",
"canTrickyJump",
{
"shineChargeFrames": 80
}
],
"exitCondition": {
"leaveShinecharged": {}
},
"unlocksDoors": [
{
"types": [
"ammo"
],
"requires": []
}
],
"flashSuitChecked": true,
"blueSuitChecked": true,
"note": [
"Gain a shinecharge running left to right, leaving about 3 tiles of runway to gain speed to jump directly into the doorway."
]
},
{
"id": 10,
"link": [
1,
2
],
"name": "Leave With Mockball",
"requires": [
"canTrickyJump"
],
"exitCondition": {
"leaveWithMockball": {
"remoteRunway": {
"length": 16,
"openEnd": 1
},
"landingRunway": {
"length": 1,
"openEnd": 1
},
"minExtraRunSpeed": "$1.2",
"maxExtraRunSpeed": "$3.9"
}
},
"unlocksDoors": [
{
"types": [
"ammo"
],
"requires": []
}
],
"flashSuitChecked": true,
"blueSuitChecked": true
},
{
"id": 11,
"link": [
1,
2
],
"name": "Leave With Spring Ball Bounce",
"requires": [
"canTrickyJump"
],
"exitCondition": {
"leaveWithSpringBallBounce": {
"remoteRunway": {
"length": 16,
"openEnd": 1
},
"landingRunway": {
"length": 1,
"openEnd": 1
},
"minExtraRunSpeed": "$1.2",
"maxExtraRunSpeed": "$3.9",
"movementType": "uncontrolled"
}
},
"unlocksDoors": [
{
"types": [
"ammo"
],
"requires": []
}
],
"flashSuitChecked": true,
"blueSuitChecked": true
},
{
"id": 12,
"link": [
1,
2
],
"name": "Leave Space Jumping",
"requires": [
"canPreciseSpaceJump"
],
"exitCondition": {
"leaveSpaceJumping": {
"remoteRunway": {
"length": 16,
"openEnd": 1
},
"minExtraRunSpeed": "$1.5",
"maxExtraRunSpeed": "$3.9"
}
},
"unlocksDoors": [
{
"types": [
"ammo"
],
"requires": []
}
],
"flashSuitChecked": true,
"blueSuitChecked": true
},
{
"id": 13,
"link": [
1,
2
],
"name": "Leave With Temporary Blue",
"requires": [
{
"getBlueSpeed": {
"usedTiles": 16,
"openEnd": 1
}
},
"canChainTemporaryBlue"
],
"exitCondition": {
"leaveWithTemporaryBlue": {}
},
"unlocksDoors": [
{
"types": [
"ammo"
],
"requires": []
}
],
"flashSuitChecked": true,
"blueSuitChecked": true,
"note": "With blue speed, run and jump across the water, morphing and unmorphing (while holding an angle button) to gain temporary blue without a shinecharge."
},
{
"id": 14,
"link": [
1,
3
],
"name": "Base",
"requires": [],
"flashSuitChecked": true,
"blueSuitChecked": true
},
{
"id": 15,
"link": [
2,
1
],
"name": "Space Jump",
"requires": [
"SpaceJump"
],
"flashSuitChecked": true,
"blueSuitChecked": true
},
{
"id": 44,
"link": [
2,
1
],
"name": "Space Jump Jumping Entry",
"entranceCondition": {
"comeInNormally": {}
},
"requires": [
"canPrepareForNextRoom",
"SpaceJump"
],
"flashSuitChecked": true,
"blueSuitChecked": true,
"devNote": "Requires a jumping entry, but any runway length and environment is fine."
},
{
"id": 16,
"link": [
2,
1
],
"name": "Jump Through the Door",
"entranceCondition": {
"comeInJumping": {
"speedBooster": "any",
"minTiles": 3
}
},
"requires": [
"canCarefulJump"
],
"flashSuitChecked": true,
"blueSuitChecked": true,
"devNote": "This is a lenient version of the strat, with an extra tile of runway."
},
{
"id": 17,
"link": [
2,
1
],
"name": "Jump Through the Door Wall Jump",
"entranceCondition": {
"comeInJumping": {
"speedBooster": "any",
"minTiles": 1
}
},
"requires": [
"canTrickyJump",
"canPreciseWallJump"
],
"flashSuitChecked": true,
"blueSuitChecked": true,
"note": "A doorsill with an open end is really all the room that's needed on the other side."
},
{
"id": 18,
"link": [
2,
1
],
"name": "Jump Through the Door Air Ball",
"entranceCondition": {
"comeInJumping": {
"speedBooster": "any",
"minTiles": 2
}
},
"requires": [
"canCarefulJump",
"canLateralMidAirMorph"
],
"flashSuitChecked": true,
"blueSuitChecked": true,
"devNote": "This is a lenient version of the strat, with an extra tile of runway."
},
{
"id": 19,
"link": [
2,
1
],
"name": "Tricky Jump Through the Door",
"entranceCondition": {
"comeInJumping": {
"speedBooster": "any",
"minTiles": 2
}
},
"requires": [
"canTrickyJump"
],
"flashSuitChecked": true,
"blueSuitChecked": true,
"note": "With two tiles of runway and no wall jump or items, a last-frame jump is needed to make it."
},
{
"id": 20,
"link": [
2,
1
],
"name": "Jump Through the Door Tricky Air Ball",
"entranceCondition": {
"comeInJumping": {
"speedBooster": "any",
"minTiles": 1
}
},
"requires": [
"canTrickyJump",
"canLateralMidAirMorph"
],
"flashSuitChecked": true,
"blueSuitChecked": true,
"note": "With only one tile of runway, a last-frame jump is needed to make it."
},
{
"id": 21,
"link": [
2,
1
],
"name": "Doorsill Jump",
"requires": [
"canDash",
"canPreciseWallJump",
"canTrickyJump",
{
"or": [
{
"spikeHits": 1
},
"h_backIntoCorner"
]
}
],
"flashSuitChecked": true,
"blueSuitChecked": true,
"note": "It's not necessary to jump through the door, the in-room doorsill gives enough running room to make it up."
},
{
"id": 22,
"link": [
2,
1
],
"name": "Spring Ball Bomb Jump",
"requires": [
"canSpringBallBombJump"
],
"flashSuitChecked": true,
"blueSuitChecked": true,
"note": "Requires waiting until the last moment before SpringBall jumping."
},
{
"id": 23,
"link": [
2,
1
],
"name": "Speedy Airball",
"requires": [
"canSpeedyJump",
"canLateralMidAirMorph",
"canCarefulJump"
],
"flashSuitChecked": true,
"blueSuitChecked": true
},
{
"id": 51,
"link": [
2,
1
],
"name": "Come in Shinecharged, Shinespark",
"entranceCondition": {
"comeInShinecharged": {}
},
"requires": [
{
"shineChargeFrames": 15
},
"canMidairShinespark",
{
"shinespark": {
"frames": 7,
"excessFrames": 1
}
},
{
"or": [
"canTrickyJump",
{
"enemyDamage": {
"enemy": "Boulder",
"type": "contact",
"hits": 1
}
}
]
}
],
"flashSuitChecked": true,
"blueSuitChecked": true,
"note": [
"Sparking only to the edge of the invisible platform helps prevent taking a boulder hit.",
"If sparking early, a down-back can help with reaching the platform."
]
},
{
"id": 52,
"link": [
2,
1
],
"name": "Side Platform Cross Room Jump",
"entranceCondition": {
"comeInWithSidePlatform": {
"platforms": [
{
"minHeight": 1,
"maxHeight": 1,
"minTiles": 4,
"speedBooster": "any",
"obstructions": [
[
1,
0
]
],
"note": [
"This applies to Skree Boost Room, Screw Attack Room, and Lava Dive."
]
},
{
"minHeight": 2,
"maxHeight": 2,
"minTiles": 2,
"speedBooster": "any",
"obstructions": [
[
1,
0
]
],
"requires": [
"canTrickyJump"
],
"note": [
"This applies to Metal Pirates Room (Small Ledge)."
],
"detailNote": [
"With this short of runway, a frame-perfect jump is required."
]
},
{
"minHeight": 2,
"maxHeight": 2,
"minTiles": 4,
"speedBooster": "any",
"obstructions": [
[
1,
0
]
],
"note": [
"This applies to Early Supers Room, Shaktool Room, Tourian Hopper Room, Bowling Alley (bottom), Dust Torizo Room, and Noob Bridge."
],
"detailNote": [
"With this longer amount of runway, the jump has a 2-frame window."
]
},
{
"minHeight": 3,
"maxHeight": 3,
"minTiles": 9.4375,
"speedBooster": "any",
"obstructions": [
[
1,
0
]
],
"note": [
"This applies to Bomb Torizo Room, Pink Brinstar Wave Gate Room, Phantoon's Room, Big Boy Room, and Double Chamber."
]
}
]
}
},
"requires": [],
"flashSuitChecked": true,
"blueSuitChecked": true,
"devNote": [
"Setups having more than a 1-tile runway at the door are not considered here,",
"because in that case a regular cross-room jump is possible.",
"Likewise, doing a ceiling mockball through the transition is not considered,",
"since if Morph is available then an airball can be done with just 1 tile of door runway."
]
},
{
"id": 24,
"link": [
2,
1
],
"name": "Use Stored Spark, Jump From the Doorsill",
"requires": [
"h_storedSpark",
{
"or": [
{
"shinespark": {
"frames": 2,
"excessFrames": 0
}
},
{
"and": [
{
"shinespark": {
"frames": 2,
"excessFrames": 2
}
},
{
"or": [
"canMoonwalk",
"canMorphTurnaround"
]
},
{
"or": [
{
"and": [
"canTrickyJump",
"canSpeedyJump"
]
},
"canInsaneJump"
]
}
]
}
]
}
],
"flashSuitChecked": true,
"blueSuitChecked": true,
"note": [
"Jump and diagonally spark to the invisible platform.",
"There is a small pixel range which lands on the platform and does not touch the boulder.",
"It is possible to do this even below 29 Energy. It requires a last frame jump and then 4 frame spark window. It is more lenient with SpeedBooster."
]
},
{
"id": 25,
"link": [
2,
1
],
"name": "G-Mode Direct Doorsill Jump",
"entranceCondition": {
"comeInWithGMode": {
"mode": "direct",
"morphed": false
}
},
"requires": [
"canPreciseWallJump",
"canTrickyJump",
{
"or": [
{
"spikeHits": 1
},
"canMorphTurnaround",
"canMoonwalk",
{
"and": [
"canArtificialMorph",
{
"tech": "canMorphTurnaround"
}
]
}
]
}
],
"flashSuitChecked": true,
"blueSuitChecked": true,
"note": "In direct G-mode, the door will not close, and the in-room doorsill gives enough running room to make it up to the invisible ledge."
},
{
"id": 26,
"link": [
2,
1
],
"name": "G-Mode Morph Spring Ball IBJ",
"entranceCondition": {
"comeInWithGMode": {
"mode": "any",
"morphed": true
}
},
"requires": [
"h_artificialMorphJumpIntoIBJ",
"h_artificialMorphBombHorizontally"
],
"flashSuitChecked": true,
"blueSuitChecked": true,
"note": "Starting an IBJ from spring ball with no other items is not very precise, it just takes a bit of an odd timing."
},
{
"id": 59,
"link": [
2,
1
],
"name": "Direct G-Mode Morph Spring Fling",
"entranceCondition": {
"comeInWithGMode": {
"mode": "direct",
"morphed": false
}
},
"requires": [
"canArtificialMorph",
"h_artificialMorphSpringFling",
{
"disableEquipment": "HiJump"
}
],
"flashSuitChecked": true,
"blueSuitChecked": true,
"note": [
"Artificial morph on entry to land on the doorsill.",
"From the left edge, pause then press left and jump just before the pause fully triggers.",
"Disable Spring Ball in order to get a large horizontal boost."
]
},
{
"id": 47,
"link": [
2,
1
],
"name": "Precise Grapple Jump",
"entranceCondition": {
"comeInWithGrappleSwing": {
"blocks": [
{
"position": [
13,
5
],
"environment": "water",
"note": "Mt. Everest"
}
]
}
},
"requires": [
"canPreciseGrappleJump"
],
"flashSuitChecked": true,
"blueSuitChecked": true,
"devNote": [
"This can work from other setup rooms, but it would have no purpose coming from an air room,",
"since you could just do a running jump through the door and airball."
]
},
{
"id": 53,
"link": [
2,
1
],
"name": "Grapple Teleport Door Escape",
"entranceCondition": {
"comeInWithGrappleTeleport": {
"blockPositions": [
[
3,
12
],
[
3,
13
]
]
}
},
"requires": [
{
  "or": [
    "canGrappleTeleportWallEscape",
    {
      "doorUnlockedAtNode": 1
    }
  ]
}
],
"unlocksDoors": [
{
"types": [
"ammo"
],
"requires": []
}
],
"flashSuitChecked": true,
"blueSuitChecked": true
},
{
"id": 27,
"link": [
2,
1
],
"name": "Grapple Teleport Door Lock Skip",
"entranceCondition": {
"comeInWithGrappleTeleport": {
"blockPositions": [
[
3,
12
],
[
3,
13
]
]
}
},
"requires": [],
"bypassesDoorShell": "yes",
"flashSuitChecked": true,
"blueSuitChecked": true
},
{
"id": 28,
"link": [
2,
1
],
"name": "Carry Grapple Teleport (Top Position)",
"entranceCondition": {
"comeInWithGrappleTeleport": {
"blockPositions": [
[
3,
12
]
]
}
},
"requires": [],
"exitCondition": {
"leaveWithGrappleTeleport": {
"blockPositions": [
[
3,
12
]
]
}
},
"bypassesDoorShell": "yes",
"flashSuitChecked": true,
"blueSuitChecked": true
},
{
"id": 29,
"link": [
2,
1
],
"name": "Carry Grapple Teleport (Bottom Position)",
"entranceCondition": {
"comeInWithGrappleTeleport": {
"blockPositions": [
[
3,
13
]
]
}
},
"requires": [],
"exitCondition": {
"leaveWithGrappleTeleport": {
"blockPositions": [
[
3,
13
]
]
}
},
"bypassesDoorShell": "yes",
"flashSuitChecked": true,
"blueSuitChecked": true
},
{
"id": 30,
"link": [
2,
2
],
"name": "Leave with Runway",
"requires": [],
"exitCondition": {
"leaveWithRunway": {
"length": 1,
"openEnd": 1
}
},
"flashSuitChecked": true,
"blueSuitChecked": true
},
{
"id": 48,
"link": [
2,
2
],
"name": "Leave With Side Platform",
"requires": [
"Gravity"
],
"exitCondition": {
"leaveWithSidePlatform": {
"height": 3,
"runway": {
"length": 5,
"openEnd": 0
},
"obstruction": [
1,
0
]
}
},
"flashSuitChecked": true,
"blueSuitChecked": true,
"devNote": [
"Max extra run speed $1.2 with spin, or $1.3 with a quick aim-down."
]
},
{
"id": 49,
"link": [
2,
2
],
"name": "Leave With Side Platform (Spike I-frames)",
"requires": [
"Gravity",
{
"spikeHits": 1
},
"canUseIFrames",
{
"or": [
{
"spikeHits": 2
},
"canInsaneJump"
]
}
],
"exitCondition": {
"leaveWithSidePlatform": {
"height": 3,
"runway": {
"length": 16,
"openEnd": 0
},
"obstruction": [
1,
0
]
}
},
"flashSuitChecked": true,
"blueSuitChecked": true,
"note": [
"Run and jump to the left, turning around right before landing on the spikes.",
"Continue holding right, gaining speed to jump out through the door."
],
"devNote": [
"Max extra run speed $3.3 with spin, or $3.4 with a quick aim-down.",
"This would not be logically valid for gaining blue speed, so we have to be sure it can't be used that way."
]
},
{
"id": 32,
"link": [
2,
2
],
"name": "Crystal Flash",
"requires": [
{
"obstaclesNotCleared": [
"R-Mode"
]
},
"h_CrystalFlash"
],
"flashSuitChecked": true,
"blueSuitChecked": true
},
{
"id": 45,
"link": [
2,
3
],
"name": "Fall Into Water",
"entranceCondition": {
"comeInNormally": {}
},
"requires": [],
"flashSuitChecked": true,
"blueSuitChecked": true
},
{
"id": 46,
"link": [
2,
3
],
"name": "Fall Into Room With Mockball",
"entranceCondition": {
"comeInWithMockball": {
"speedBooster": "any",
"adjacentMinTiles": 0,
"remoteAndLandingMinTiles": [
[
0,
0
]
]
}
},
"requires": [],
"flashSuitChecked": true,
"blueSuitChecked": true
},
{
"id": 56,
"link": [
2,
3
],
"name": "R-Mode Right Door Entry for Spark Interrupt",
"entranceCondition": {
"comeInWithRMode": {}
},
"requires": [],
"clearsObstacles": [
"R-Mode"
],
"flashSuitChecked": true,
"blueSuitChecked": true
},
{
"id": 35,
"link": [
3,
1
],
"name": "Base",
"requires": [
"Gravity"
],
"flashSuitChecked": true,
"blueSuitChecked": true
},
{
"id": 36,
"link": [
3,
1
],
"name": "Space Jump",
"requires": [
"SpaceJump",
{
"or": [
"canWallJump",
{
"and": [
"canSpaceJumpWaterEscape",
"HiJump"
]
}
]
}
],
"flashSuitChecked": true,
"blueSuitChecked": true,
"devNote": "Space Jump with HiJump alone is enough if the door can be opened."
},
{
"id": 37,
"link": [
3,
1
],
"name": "Spring Ball Jump",
"requires": [
"canSuitlessMaridia",
"canTrickySpringBallJump"
],
"flashSuitChecked": true,
"blueSuitChecked": true,
"note": "It helps to begin jumping when the water level is high."
},
{
"id": 38,
"link": [
3,
1
],
"name": "WallJump Bomb Boost",
"requires": [
"canWallJumpBombBoost"
],
"flashSuitChecked": true,
"blueSuitChecked": true
},
{
"id": 39,
"link": [
3,
1
],
"name": "Naked Walljump",
"requires": [
"canSuitlessMaridia",
"canInsaneWallJump"
],
"flashSuitChecked": true,
"blueSuitChecked": true,
"note": [
"It's a delayed walljump while the water is low, followed by a tight walljump off the bridge.",
"This strat is easily bypassed by jumping through the door, or if the door can be opened."
]
},
{
"id": 43,
"link": [
3,
1
],
"name": "Bomb Boost Water Escape Into IBJ",
"requires": [
"canBombJumpWaterEscape",
"canJumpIntoIBJ"
],
"flashSuitChecked": true,
"blueSuitChecked": true,
"note": "When the water is high, jump and place a Bomb on the descent just above the water, then very quickly crouch jump to hit the Bomb and IBJ.",
"devNote": "The crouch jump is not necessary, but is helpful. Preserving a flash suit is still difficult without the crouch jump."
},
{
"id": 40,
"link": [
3,
1
],
"name": "Use Stored Spark",
"requires": [
"h_storedSpark",
{
"shinespark": {
"frames": 7,
"excessFrames": 2
}
}
],
"flashSuitChecked": true,
"blueSuitChecked": true,
"note": "There is a small pixel range which lands on the platform and does not touch the boulder."
},
{
"id": 41,
"link": [
3,
2
],
"name": "Base",
"requires": [
{
"doorUnlockedAtNode": 2
},
{
"or": [
"canDownGrab",
"canWallJump",
"Gravity",
"HiJump",
"canTrickySpringBallJump"
]
}
],
"unlocksDoors": [
{
"types": [
"ammo"
],
"requires": []
}
],
"flashSuitChecked": true,
"blueSuitChecked": true,
"note": "It is possible to escape the water with a wall jump when the water is low, or a crouch jump and down grab when it is high.",
"devNote": "The crouch jump is not actually necessary but helps slightly. It is also possible to use the crouch jump while maintaining the flash suit."
},
{
"id": 50,
"link": [
3,
3
],
"name": "Gain Flash Suit (Spikesuit)",
"requires": [
"Gravity",
{
"canShineCharge": {
"usedTiles": 19,
"openEnd": 2
}
},
{
"spikeHits": 1
},
"h_spikeSuitSpikeHitLeniency",
"canSpikeSuit",
{
"shinespark": {
"frames": 6,
"excessFrames": 6
}
}
],
"flashSuitChecked": true,
"blueSuitChecked": true
},
{
"id": 57,
"link": [
3,
3
],
"name": "Gain Blue Suit (X-Mode)",
"requires": [
"Gravity",
{
"canShineCharge": {
"usedTiles": 19,
"openEnd": 2
}
},
"h_spikeXModeBlueSuit",
{
"shinespark": {
"frames": 2
}
}
],
"flashSuitChecked": true,
"blueSuitChecked": true
}
],
"notables": [],
"nextStratId": 60,
"nextNotableId": 1
}