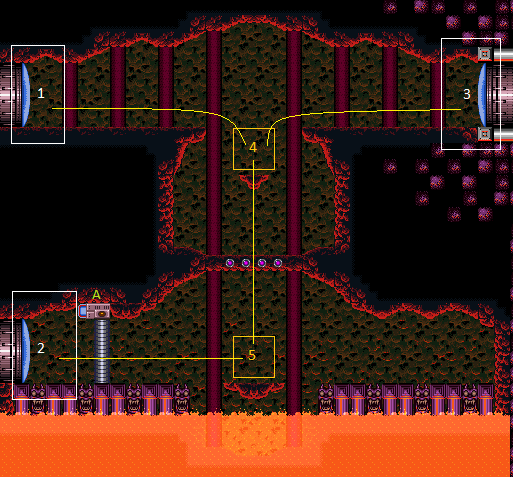
Upper Norfair Farming Room
Room ID: 94
|
Exit condition: "leaveWithRunway": {
"length": 12,
"openEnd": 1
} |
|
Requires: {"obstaclesNotCleared": ["R-Mode"]},
"h_heatedCrystalFlash" |
From: 1
Top Left Door
To: 1
Top Left Door
Entrance condition: "comeInShinecharging": {
"length": 11,
"openEnd": 0
}Requires: {"or": [
{"and": [
"h_enemyDrops",
"h_heatedCrystalSparkWithoutLenience"
]},
"h_heatedCrystalSpark"
]}Dev note: No lenience, since the Gamets are a good Power Bomb farm. Since this can not be done with a flash suit, it is implicitly assumed Samus can crouch jump and down grab. |
|
Entrance condition: "comeInWithRMode": {}Clears obstacles: R-Mode |
From: 1
Top Left Door
To: 2
Bottom Left Door
Entrance condition: "comeInShinecharging": {
"length": 11,
"openEnd": 1
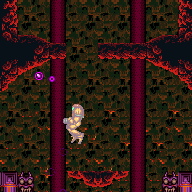

}Requires: "Wave", "canShinechargeMovementTricky", {"heatFrames": 160}, {"shineChargeFrames": 160} Exit condition: "leaveShinecharged": {}Unlocks doors: {"types": ["ammo"], "requires": ["never"]} |
From: 1
Top Left Door
To: 2
Bottom Left Door


Requires: {"or": [
"Wave",
{"obstaclesCleared": ["A"]}
]},
{"or": [
{"canShineCharge": {"usedTiles": 11, "openEnd": 1}},
{"and": [
{"canShineCharge": {"usedTiles": 12, "openEnd": 1}},
{"doorUnlockedAtNode": 1}
]}
]},
"canShinechargeMovementTricky",
{"heatFrames": 250},
{"shineChargeFrames": 160}Exit condition: "leaveShinecharged": {}Unlocks doors: {
"types": ["ammo"],
"requires": [{"obstaclesCleared": ["A"]}]
} |
From: 1
Top Left Door
To: 2
Bottom Left Door
Entrance condition: "comeInShinecharging": {
"length": 11,
"openEnd": 0
}Requires: "Wave",
{"or": [
"canXRayCancelShinecharge",
{"heatFrames": 160}
]},
"canXRayTurnaround",
"canLongChainTemporaryBlue",
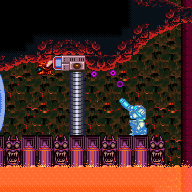
{"heatFrames": 560}Exit condition: "leaveWithTemporaryBlue": {}Unlocks doors: {"types": ["super", "powerbomb"], "requires": []},
{
"types": ["missiles"],
"requires": [{"heatFrames": 50}]
} |
|
Requires: "canDash", {"heatFrames": 125} |
|


Entrance condition: "comeInShinecharged": {}Requires: {"shineChargeFrames": 120},
"canShinechargeMovementComplex",
{"heatFrames": 120}Exit condition: "leaveShinecharged": {}Unlocks doors: {"types": ["super"], "requires": []},
{"types": ["missiles", "powerbomb"], "requires": ["never"]} |
From: 1
Top Left Door
To: 3
Top Right Door


Entrance condition: "comeInShinecharged": {}Requires: {"shineChargeFrames": 80},
"canShinechargeMovementComplex",
{"heatFrames": 100},
{"shinespark": {"frames": 19, "excessFrames": 0}}Exit condition: "leaveWithSpark": {}Unlocks doors: {"types": ["super"], "requires": []},
{"types": ["missiles", "powerbomb"], "requires": ["never"]} |
From: 1
Top Left Door
To: 3
Top Right Door


Entrance condition: "comeInShinecharged": {}Requires: {"shineChargeFrames": 35},
"canShinechargeMovementTricky",
"canHeroShot",
{"heatFrames": 85},
{"shinespark": {"frames": 37, "excessFrames": 0}}Exit condition: "leaveWithSpark": {}Unlocks doors: {"types": ["super"], "requires": []},
{"types": ["missiles", "powerbomb"], "requires": ["never"]} |
From: 1
Top Left Door
To: 3
Top Right Door


Entrance condition: "comeInShinecharging": {
"length": 11,
"openEnd": 1
}Requires: "canShinechargeMovementComplex", {"heatFrames": 155}, {"shineChargeFrames": 115} Exit condition: "leaveShinecharged": {}Unlocks doors: {"types": ["super"], "requires": []},
{"types": ["missiles", "powerbomb"], "requires": ["never"]} |
From: 1
Top Left Door
To: 3
Top Right Door


Entrance condition: "comeInGettingBlueSpeed": {
"length": 11,
"openEnd": 1
}Requires: "canChainTemporaryBlue", {"heatFrames": 140} Exit condition: "leaveWithTemporaryBlue": {}Unlocks doors: {
"types": ["missiles"],
"requires": [{"heatFrames": 50}]
},
{"types": ["super"], "requires": []},
{
"types": ["powerbomb"],
"requires": [{"heatFrames": 50}]
} |
|
Entrance condition: "comeInWithGMode": {
"mode": "any",
"morphed": false
}Requires: "h_heatedGModeOpenDifferentDoor" Dev note: Going to the central junction is ignored, as it is likely not very useful. FIXME: It is be possible to get to the farm with a second, frame perfect, pause abuse. |
|
Requires: {"heatFrames": 75},
{"or": [
"canDash",
{"heatFrames": 25}
]} |
From: 2
Bottom Left Door
To: 1
Top Left Door
Entrance condition: "comeInShinecharging": {
"length": 4,
"openEnd": 0
}Requires: {"or": [
"canXRayCancelShinecharge",
{"heatFrames": 160}
]},
"canLongChainTemporaryBlue",
"canXRayTurnaround",
{"or": [
{"and": [
"HiJump",
{"heatFrames": 690}
]},
{"and": [
"canTrickySpringBallJump",
{"heatFrames": 745}
]}
]}Exit condition: "leaveWithTemporaryBlue": {}Unlocks doors: {"types": ["super", "powerbomb"], "requires": []},
{
"types": ["missiles"],
"requires": [{"heatFrames": 50}]
} |
From: 2
Bottom Left Door
To: 2
Bottom Left Door
Exit condition: "leaveWithRunway": {
"length": 5,
"openEnd": 0
} |
From: 2
Bottom Left Door
To: 2
Bottom Left Door
Requires: "canDash", {"or": [ {"obstaclesCleared": ["A"]}, {"heatFrames": 60} ]} Exit condition: "leaveWithRunway": {
"length": 11,
"openEnd": 1
} |
From: 2
Bottom Left Door
To: 2
Bottom Left Door
Entrance condition: "comeInShinecharging": {
"length": 4,
"openEnd": 0
}Requires: {"or": [
{"and": [
"h_enemyDrops",
"h_heatedCrystalSparkWithoutLenience"
]},
"h_heatedCrystalSpark"
]}Dev note: No lenience, since the Gamets are a good Power Bomb farm. Since this can not be done with a flash suit, it is implicitly assumed Samus can crouch jump and down grab. |
|
Entrance condition: "comeInWithRMode": {}Clears obstacles: R-Mode |
From: 2
Bottom Left Door
To: 3
Top Right Door
Entrance condition: "comeInShinecharging": {
"length": 4,
"openEnd": 0
}Requires: {"or": [
"canXRayCancelShinecharge",
{"heatFrames": 160}
]},
"canLongChainTemporaryBlue",
{"or": [
{"and": [
"HiJump",
{"heatFrames": 680}
]},
{"and": [
"canTrickySpringBallJump",
"canXRayTurnaround",
{"heatFrames": 775}
]}
]}Exit condition: "leaveWithTemporaryBlue": {}Unlocks doors: {"types": ["super", "powerbomb"], "requires": []},
{
"types": ["missiles"],
"requires": [{"heatFrames": 50}]
} |
From: 2
Bottom Left Door
To: 5
Bottom Floating Platform Junction
Requires: {"heatFrames": 70},
{"or": [
{"heatFrames": 30},
{"obstaclesCleared": ["A"]}
]},
{"or": [
"canDash",
{"heatFrames": 30}
]}Clears obstacles: A |
From: 2
Bottom Left Door
To: 5
Bottom Floating Platform Junction

Kill the Gamets where Samus can grab the drops. Exit G-mode, then pause abuse to pick them up without dying. Entrance condition: "comeInWithGMode": {
"mode": "indirect",
"morphed": false
}Requires: "h_heatedGMode", {"or": [ "h_heatedGModePauseAbuse", {"heatFrames": 40} ]} Dev note: Ice clipping through the shot blocks is not considered reasonable, as Samus can't use X-ray, kill any Gamets, or likely take a hit. |
|
Requires: "canDash", {"heatFrames": 125} |
|


Entrance condition: "comeInShinecharged": {}Requires: {"shineChargeFrames": 120},
"canShinechargeMovementComplex",
{"heatFrames": 120}Exit condition: "leaveShinecharged": {}Unlocks doors: {"types": ["super"], "requires": []},
{"types": ["missiles", "powerbomb"], "requires": ["never"]} |
From: 3
Top Right Door
To: 1
Top Left Door


Entrance condition: "comeInShinecharged": {}Requires: {"shineChargeFrames": 80},
"canShinechargeMovementComplex",
{"heatFrames": 100},
{"shinespark": {"frames": 19, "excessFrames": 0}}Exit condition: "leaveWithSpark": {}Unlocks doors: {"types": ["super"], "requires": []},
{"types": ["missiles", "powerbomb"], "requires": ["never"]} |
From: 3
Top Right Door
To: 1
Top Left Door


Entrance condition: "comeInShinecharged": {}Requires: {"shineChargeFrames": 35},
"canShinechargeMovementTricky",
"canHeroShot",
{"heatFrames": 85},
{"shinespark": {"frames": 37, "excessFrames": 0}}Exit condition: "leaveWithSpark": {}Unlocks doors: {"types": ["super"], "requires": []},
{"types": ["missiles", "powerbomb"], "requires": ["never"]} |
From: 3
Top Right Door
To: 1
Top Left Door


Entrance condition: "comeInShinecharging": {
"length": 11,
"openEnd": 1
}Requires: "canShinechargeMovementComplex", {"heatFrames": 155}, {"shineChargeFrames": 115} Exit condition: "leaveShinecharged": {}Unlocks doors: {"types": ["super"], "requires": []},
{"types": ["missiles", "powerbomb"], "requires": ["never"]} |
From: 3
Top Right Door
To: 1
Top Left Door


Entrance condition: "comeInGettingBlueSpeed": {
"length": 11,
"openEnd": 1
}Requires: "canChainTemporaryBlue", {"heatFrames": 140} Exit condition: "leaveWithTemporaryBlue": {}Unlocks doors: {
"types": ["missiles"],
"requires": [{"heatFrames": 50}]
},
{"types": ["super"], "requires": []},
{
"types": ["powerbomb"],
"requires": [{"heatFrames": 50}]
} |
|
Entrance condition: "comeInWithGMode": {
"mode": "any",
"morphed": false
}Requires: "h_heatedGModeOpenDifferentDoor" Dev note: Going to the central junction is ignored, as it is likely not very useful. FIXME: It is be possible to get to the farm with a second, frame perfect, pause abuse. |
From: 3
Top Right Door
To: 1
Top Left Door


Entrance condition: "comeInWithGrappleTeleport": {
"blockPositions": [[3, 12], [3, 13]]
}Bypasses door shell: true |
From: 3
Top Right Door
To: 1
Top Left Door
Entrance condition: "comeInWithGrappleTeleport": {
"blockPositions": [[3, 12]]
}Exit condition: "leaveWithGrappleTeleport": {
"blockPositions": [[3, 12]]
}Bypasses door shell: true |
From: 3
Top Right Door
To: 1
Top Left Door
Entrance condition: "comeInWithGrappleTeleport": {
"blockPositions": [[3, 13]]
}Exit condition: "leaveWithGrappleTeleport": {
"blockPositions": [[3, 13]]
}Bypasses door shell: true |
From: 3
Top Right Door
To: 1
Top Left Door
Exit the previous room with Samus in a standing pose (while grappled) with a horizontal position of 21 (as far right as possible). After teleporting, press right to release Grapple while staying standing (not being forced into a crouch). Then X-ray climb 1 screen to get to the door transition above, without needing to open the door. Samus will not be visible during the climb. At the beginning of the climb, avoid pressing left without X-Ray being held, to prevent triggering the transition of the bottom door. Entrance condition: "comeInWithGrappleTeleport": {
"blockPositions": [[2, 18], [2, 19], [2, 28], [2, 29]]
}Requires: "canXRayClimb", {"heatFrames": 1600} Bypasses door shell: true |
From: 3
Top Right Door
To: 2
Bottom Left Door
Entrance condition: "comeInShinecharging": {
"length": 11,
"openEnd": 1
}Requires: "Wave", "canShinechargeMovementTricky", {"heatFrames": 160}, {"shineChargeFrames": 160} Exit condition: "leaveShinecharged": {}Unlocks doors: {"types": ["ammo"], "requires": ["never"]} |
From: 3
Top Right Door
To: 2
Bottom Left Door


Requires: {"or": [
"Wave",
{"obstaclesCleared": ["A"]}
]},
{"or": [
{"canShineCharge": {"usedTiles": 11, "openEnd": 1}},
{"and": [
{"canShineCharge": {"usedTiles": 12, "openEnd": 1}},
{"doorUnlockedAtNode": 2}
]}
]},
"canShinechargeMovementTricky",
{"heatFrames": 255},
{"shineChargeFrames": 160}Exit condition: "leaveShinecharged": {}Unlocks doors: {
"types": ["ammo"],
"requires": [{"obstaclesCleared": ["A"]}]
} |
From: 3
Top Right Door
To: 2
Bottom Left Door
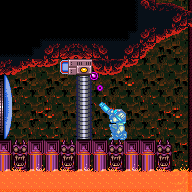

Entrance condition: "comeInShinecharging": {
"length": 11,
"openEnd": 0
}Requires: "Wave",
{"or": [
"canXRayCancelShinecharge",
{"heatFrames": 160}
]},
"canLongChainTemporaryBlue",
{"heatFrames": 460}Exit condition: "leaveWithTemporaryBlue": {}Unlocks doors: {"types": ["super", "powerbomb"], "requires": []},
{
"types": ["missiles"],
"requires": [{"heatFrames": 50}]
} |
From: 3
Top Right Door
To: 2
Bottom Left Door
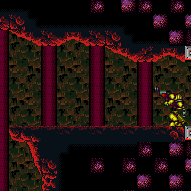

Entrance condition: "comeInWithGrappleTeleport": {
"blockPositions": [[2, 18], [2, 19], [2, 28], [2, 29]]
}Bypasses door shell: true |
From: 3
Top Right Door
To: 2
Bottom Left Door
Entrance condition: "comeInWithGrappleTeleport": {
"blockPositions": [[2, 18]]
}Exit condition: "leaveWithGrappleTeleport": {
"blockPositions": [[2, 18]]
}Bypasses door shell: true |
From: 3
Top Right Door
To: 2
Bottom Left Door
Entrance condition: "comeInWithGrappleTeleport": {
"blockPositions": [[2, 19]]
}Exit condition: "leaveWithGrappleTeleport": {
"blockPositions": [[2, 19]]
}Bypasses door shell: true |
From: 3
Top Right Door
To: 2
Bottom Left Door
Entrance condition: "comeInWithGrappleTeleport": {
"blockPositions": [[2, 28]]
}Exit condition: "leaveWithGrappleTeleport": {
"blockPositions": [[2, 28]]
}Bypasses door shell: true |
From: 3
Top Right Door
To: 2
Bottom Left Door
Entrance condition: "comeInWithGrappleTeleport": {
"blockPositions": [[2, 29]]
}Exit condition: "leaveWithGrappleTeleport": {
"blockPositions": [[2, 29]]
}Bypasses door shell: true |
|
Exit condition: "leaveWithRunway": {
"length": 12,
"openEnd": 1
} |
|
Requires: {"obstaclesNotCleared": ["R-Mode"]},
"h_heatedCrystalFlash" |
From: 3
Top Right Door
To: 3
Top Right Door
Entrance condition: "comeInShinecharging": {
"length": 11,
"openEnd": 0
}Requires: {"or": [
{"and": [
"h_enemyDrops",
"h_heatedCrystalSparkWithoutLenience"
]},
"h_heatedCrystalSpark"
]}Dev note: No lenience, since the Gamets are a good Power Bomb farm. Since this can not be done with a flash suit, it is implicitly assumed Samus can crouch jump and down grab. |
|
Entrance condition: "comeInWithRMode": {}Clears obstacles: R-Mode |
|
Requires: {"heatFrames": 75},
{"or": [
"canDash",
{"heatFrames": 25}
]} |
|
Requires: {"heatFrames": 75},
{"or": [
"canDash",
{"heatFrames": 25}
]}Unlocks doors: {
"types": ["missiles"],
"requires": [{"heatFrames": 10}]
} |
From: 4
Top Floating Platform Junction
To: 1
Top Left Door
Requires: "canDash", {"heatFrames": 30} Exit condition: "leaveWithRunway": {
"length": 12,
"openEnd": 1
}Unlocks doors: {
"types": ["missiles"],
"requires": [{"heatFrames": 50}]
},
{"types": ["super"], "requires": []},
{
"types": ["powerbomb"],
"requires": [{"heatFrames": 110}]
} |
|
Requires: {"heatFrames": 75},
{"or": [
"canDash",
{"heatFrames": 25}
]}Unlocks doors: {
"types": ["missiles"],
"requires": [{"heatFrames": 10}]
} |
From: 4
Top Floating Platform Junction
To: 3
Top Right Door
Requires: "canDash", {"heatFrames": 30} Exit condition: "leaveWithRunway": {
"length": 12,
"openEnd": 1
}Unlocks doors: {
"types": ["missiles"],
"requires": [{"heatFrames": 50}]
},
{"types": ["super"], "requires": []},
{
"types": ["powerbomb"],
"requires": [{"heatFrames": 110}]
} |
From: 4
Top Floating Platform Junction
To: 4
Top Floating Platform Junction
Requires: "h_heatedCrystalFlash" |
From: 4
Top Floating Platform Junction
To: 5
Bottom Floating Platform Junction
Requires: {"heatFrames": 20} |
From: 5
Bottom Floating Platform Junction
To: 1
Top Left Door
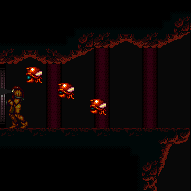

Requires: "canComplexGMode", {"heatFrames": 480}, {"or": [ "canWallJump", "HiJump", "SpaceJump", "h_crouchJumpDownGrab" ]}, {"or": [ "canTrickyUseFrozenEnemies", "canMoonwalk", "canInsaneJump" ]}, {"or": [ "canDash", "canTrickyGMode" ]} Exit condition: "leaveWithDamage": {
"enemy": "Gamet"
}Unlocks doors: {"types": ["super"], "requires": []},
{"types": ["missiles", "powerbomb"], "requires": ["never"]}Dev note: FIXME: the frozen enemy option should use extra heat frames (e.g. with pausing to turn off ice). |
From: 5
Bottom Floating Platform Junction
To: 2
Bottom Left Door
Requires: {"heatFrames": 85},
{"obstaclesCleared": ["A"]},
{"or": [
"canDash",
{"heatFrames": 35}
]}Unlocks doors: {"types": ["ammo"], "requires": []}Dev note: The unlocksDoors has no heatFrames since you could farm back up after unlocking. |
From: 5
Bottom Floating Platform Junction
To: 2
Bottom Left Door
Requires: "canDash", {"heatFrames": 45}, {"obstaclesCleared": ["A"]} Exit condition: "leaveWithRunway": {
"length": 11,
"openEnd": 1
}Unlocks doors: {"types": ["ammo"], "requires": []}Dev note: The unlocksDoors has no heatFrames since you could farm back up after unlocking. |
From: 5
Bottom Floating Platform Junction
To: 2
Bottom Left Door
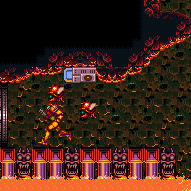

Requires: {"obstaclesCleared": ["A"]},
{"heatFrames": 280}Exit condition: "leaveWithDamage": {
"enemy": "Gamet"
}Unlocks doors: {"types": ["super"], "requires": []},
{"types": ["missiles", "powerbomb"], "requires": ["never"]} |
From: 5
Bottom Floating Platform Junction
To: 3
Top Right Door
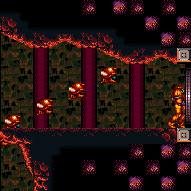

Requires: {"or": [
"canWallJump",
"HiJump",
"SpaceJump",
"h_crouchJumpDownGrab"
]},
{"heatFrames": 390}Exit condition: "leaveWithDamage": {
"enemy": "Gamet"
}Unlocks doors: {"types": ["super"], "requires": []},
{"types": ["missiles", "powerbomb"], "requires": ["never"]} |
From: 5
Bottom Floating Platform Junction
To: 4
Top Floating Platform Junction
Requires: {"or": [
{"and": [
"canWallJump",
{"heatFrames": 85}
]},
{"and": [
"HiJump",
{"heatFrames": 55}
]},
{"and": [
"SpaceJump",
{"heatFrames": 110}
]}
]} |
From: 5
Bottom Floating Platform Junction
To: 4
Top Floating Platform Junction
Requires: "h_crouchJumpDownGrab", {"heatFrames": 85} |
From: 5
Bottom Floating Platform Junction
To: 4
Top Floating Platform Junction


If starting the IBJ from the ground, first kill a Gamet and don't pick up its drops, so that they won't spawn while performing the IBJ. Requires: "canIBJ", {"or": [ {"and": [ "h_runOverRespawningEnemies", {"heatFrames": 680} ]}, {"and": [ "canJumpIntoIBJ", {"heatFrames": 200} ]} ]} Dev note: The helper h_runOverRespawningEnemies is not an exact match; if a tech is ever added for leaving drops uncollected, we can use that. |
From: 5
Bottom Floating Platform Junction
To: 4
Top Floating Platform Junction
Requires: "canUnmorphBombBoost", {"heatFrames": 160} |
From: 5
Bottom Floating Platform Junction
To: 4
Top Floating Platform Junction
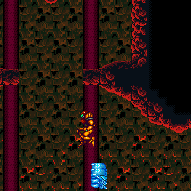

Requires: "canUseFrozenEnemies", {"heatFrames": 220} |
From: 5
Bottom Floating Platform Junction
To: 4
Top Floating Platform Junction
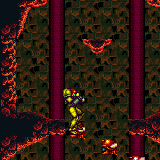

Requires: "canNeutralDamageBoost", {"enemyDamage": {"enemy": "Gamet", "type": "contact", "hits": 1}}, {"heatFrames": 350} Dev note: A damage boost allows getting up without a crouch jump, e.g. to preserve a flash suit. |
From: 5
Bottom Floating Platform Junction
To: 4
Top Floating Platform Junction
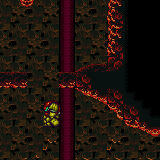

Requires: "canSpringBallJumpMidAir", {"heatFrames": 120} |
From: 5
Bottom Floating Platform Junction
To: 4
Top Floating Platform Junction
Bring up the Gamets to the platform above, in order to delay farming them. If not enough big energy drops spawn, go back down, farm up, and try again. Requires: "canFarmWhileShooting", "canBePatient", {"or": [ "canWallJump", {"and": [ "HiJump", "canCameraManip", "canInsaneJump" ]}, "SpaceJump", "h_crouchJumpDownGrab", "canTrickySpringBallJump", {"and": [ "h_useMorphBombs", {"tech": "canUnmorphBombBoost"} ]} ]}, {"heatFrames": 35} |
From: 5
Bottom Floating Platform Junction
To: 5
Bottom Floating Platform Junction
Requires: {"heatFrames": 60},
"Wave"Clears obstacles: A |
From: 5
Bottom Floating Platform Junction
To: 5
Bottom Floating Platform Junction


Requires: {"heatFrames": 135},
"h_heatedBlueGateGlitch"Clears obstacles: A |
From: 5
Bottom Floating Platform Junction
To: 5
Bottom Floating Platform Junction


Farm before, during, and after the gate glitch in order to open the gate without wasting ammo or Energy. Requires: {"notable": "Gate Glitch With Farming"},
{"heatFrames": 300},
"h_gateGlitch",
{"or": [
{"ammo": {"type": "Missile", "count": 1}},
{"ammo": {"type": "Super", "count": 1}}
]},
{"or": [
"h_heatResistant",
"canTrickyJump",
{"resourceCapacity": [{"type": "RegularEnergy", "count": 199}]}
]}Clears obstacles: A Dev note: There is still some leniency built in, so that perfect execution is not required, but Samus ends without losing resources. Without leniency, this can be done with about 235 heatFrames. |
From: 5
Bottom Floating Platform Junction
To: 5
Bottom Floating Platform Junction
Fill up on the Gamets and kill the Fune to the right. Freeze a Gamet in perfect pixel position to bridge the runway between the center platform and right ledge. Run across and shinecharge, then use a Gamet to interrupt. Requires: {"obstaclesCleared": ["R-Mode"]},
{"heatFrames": 60},
{"refill": ["Energy"]},
{"enemyKill": {
"enemies": [["Fune"]]
}},
"h_trickyFrozenEnemyRunway",
{"canShineCharge": {"usedTiles": 17, "openEnd": 1}},
{"autoReserveTrigger": {}},
"canRModeSparkInterrupt"Resets obstacles: R-Mode |
From: 5
Bottom Floating Platform Junction
To: 5
Bottom Floating Platform Junction
Regain some energy in order to use the Gamet Farm. Requires: {"or": [
{"and": [
{"heatFrames": 0},
"canPauseAbuse"
]},
{"heatFrames": 60}
]},
{"partialRefill": {"type": "RegularEnergy", "limit": 50}} |
From: 5
Bottom Floating Platform Junction
To: 5
Bottom Floating Platform Junction
Requires: {"simpleHeatFrames": 80},
{"heatFrames": 30},
{"simpleCycleFrames": 80},
{"cycleFrames": 30}Farm cycle drops: 5 Gamet |