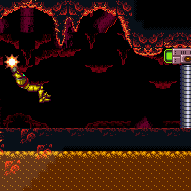
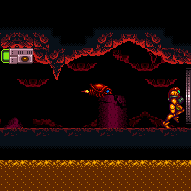
Fast Ripper Room
Room ID: 153

From: 1
Left Door
To: 1
Left Door
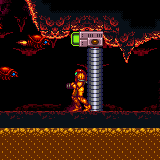
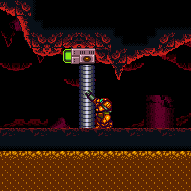
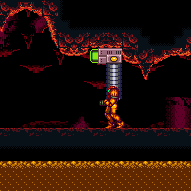
Requires about 150-180 Reserve at R-Mode entry to be able to correctly time the Crystal Flash. The correct timing to place the power bomb is on taking 97 (53-83 energy left) energy worth of heat. The Power Bomb explosion kills all six Rippers near the door, placing their energy drops in easy reach to grab them and fill Reserve Energy. Run to the green gate and wait until 69 energy is left and start running. Shinecharge at the end of the runway, then use quick, speedy jumps back across the platforms towards the left door. You should be able to make it to the left high platform (2nd from the door) before you need to windup and interrupt. Shoot the door open and you can make it out. Entrance condition: {
"comeInWithRMode": {}
}Requires: {
"resourceAvailable": [
{
"type": "RegularEnergy",
"count": 150
}
]
}
{
"resourceAtMost": [
{
"type": "RegularEnergy",
"count": 180
}
]
}
{
"resourceMissingAtMost": [
{
"type": "Super",
"count": 0
}
]
}
{
"disableEquipment": "HiJump"
}
{
"heatFrames": 388
}
"h_heatedCrystalFlash"
{
"partialRefill": {
"type": "ReserveEnergy",
"limit": 30
}
}
{
"canShineCharge": {
"usedTiles": 18,
"openEnd": 0
}
}
"h_heatTriggerRModeSparkInterrupt"
"canTrickyJump"
{
"heatFrames": 92
}Clears obstacles: B Dev note: This strat makes a suitless CF with max E-Tanks viable without needing disable E-Tanks. |
|
Requires: {
"heatFrames": 20
}
{
"doorUnlockedAtNode": 1
}Clears obstacles: C Unlocks doors: {"types":["missiles"],"requires":[{"heatFrames":50}]}
{"types":["super"],"requires":[]}
{"types":["powerbomb"],"requires":[{"heatFrames":110}]} |
|
Requires: {
"heatFrames": 120
}
{
"or": [
"Morph",
"Ice",
"ScrewAttack",
{
"ammo": {
"type": "Super",
"count": 2
}
},
{
  "enemyDamage": {
    "enemy": "Ripper 2 (red)",
    "type": "contact",
    "hits": 1
  }
}
]
}Exit condition: {
"leaveWithRunway": {
"length": 5,
"openEnd": 1
}
}Dev note: This assumes we must wait for the Rippers to pass (or freeze or kill them). |
|
Requires: {
"noBlueSuit": {}
}
"ScrewAttack"
{
"resetRoom": {
"nodes": [
1
]
}
}
{
"heatFrames": 215
}
{
"cycleFrames": 215
}
{
"or": [
"canInsaneJump",
{
"and": [
"canFarmWhileShooting",
{
"heatFrames": 45
},
{
"cycleFrames": 45
}
]
},
{
"and": [
{
"heatFrames": 360
},
{
"cycleFrames": 360
}
]
}
]
}Resets obstacles: A, B, C Farm cycle drops: 5 Ripper 2 (red) |
|
Entrance condition: {
"comeInNormally": {}
}Requires: {
"noBlueSuit": {}
}
"ScrewAttack"
"canDodgeWhileShooting"
{
"heatFrames": 200
}
{
"resourceAvailable": [
{
"type": "Energy",
"count": 50
}
]
}
{
"partialRefill": {
"type": "Super",
"limit": 5
}
}
{
"heatFrames": 80
} |
|


If Supers are not full, time the collection of energy to force further Energy drops. Entrance condition: {
"comeInNormally": {}
}Requires: {
"noBlueSuit": {}
}
"ScrewAttack"
"canFarmWhileShooting"
{
"or": [
{
"and": [
"canPauseAbuse",
"canInsaneJump",
{
"heatFrames": 60
}
]
},
{
"heatFrames": 120
}
]
}
{
"or": [
{
"and": [
{
"resourceMissingAtMost": [
{
"type": "Super",
"count": 0
}
]
},
{
"partialRefill": {
"type": "Energy",
"limit": 100
}
}
]
},
{
"partialRefill": {
"type": "Energy",
"limit": 70
}
}
]
}
{
"heatFrames": 60
} |
|
Requires: "h_heatedCrystalFlash" |
|
Entrance condition: {
"comeInNormally": {}
}Requires: "canHorizontalDamageBoost"
"canTrickyJump"
{
"enemyDamage": {
"enemy": "Ripper 2 (red)",
"type": "contact",
"hits": 2
}
}
{
"canShineCharge": {
"usedTiles": 18,
"openEnd": 0
}
}
{
"heatFrames": 525
}
{
"shinespark": {
"frames": 43,
"excessFrames": 0
}
}Exit condition: {
"leaveWithSpark": {
"position": "top"
}
}Unlocks doors: {"types":["ammo"],"requires":[]} |
From: 1
Left Door
To: 1
Left Door
Entrance condition: {
"comeInNormally": {}
}Requires: "h_usePowerBomb"
{
"canShineCharge": {
"usedTiles": 18,
"openEnd": 0
}
}
{
"heatFrames": 630
}
{
"shinespark": {
"frames": 43,
"excessFrames": 0
}
}Exit condition: {
"leaveWithSpark": {
"position": "top"
}
}Unlocks doors: {"types":["ammo"],"requires":[]} |
|


Entrance condition: {
"comeInNormally": {}
}Requires: "ScrewAttack"
{
"canShineCharge": {
"usedTiles": 18,
"openEnd": 0
}
}
{
"heatFrames": 585
}
{
"or": [
"canTrickyJump",
{
"heatFrames": 200
}
]
}
{
"shinespark": {
"frames": 43,
"excessFrames": 0
}
}Exit condition: {
"leaveWithSpark": {
"position": "top"
}
}Unlocks doors: {"types":["ammo"],"requires":[]} |
From: 1
Left Door
To: 1
Left Door


Entrance condition: {
"comeInNormally": {}
}Requires: {
"ammo": {
"type": "Super",
"count": 2
}
}
{
"or": [
{
"canShineCharge": {
"usedTiles": 18,
"openEnd": 0
}
},
{
"and": [
{
"ammo": {
"type": "Super",
"count": 1
}
},
{
"canShineCharge": {
"usedTiles": 28,
"openEnd": 0
}
},
{
"heatFrames": 100
}
]
}
]
}
{
"heatFrames": 645
}
{
"or": [
"canTrickyJump",
{
"and": [
{
"heatFrames": 200
},
{
"enemyDamage": {
"enemy": "Ripper 2 (red)",
"type": "contact",
"hits": 2
}
}
]
}
]
}
{
"or": [
{
"shinespark": {
"frames": 43,
"excessFrames": 0
}
},
{
"and": [
"canShinechargeMovementComplex",
{
"shinespark": {
"frames": 27,
"excessFrames": 0
}
},
{
"heatFrames": 10
}
]
},
{
"and": [
"canShinechargeMovementTricky",
{
"shinespark": {
"frames": 17,
"excessFrames": 0
}
},
{
"heatFrames": 135
}
]
}
]
}Exit condition: {
"leaveWithSpark": {
"position": "top"
}
}Unlocks doors: {"types":["ammo"],"requires":[]} |
From: 1
Left Door
To: 1
Left Door


Use Supers to kill all the Rippers and open the green gate. From the right door, run right-to-left to gain a shinecharge; use the remaining runway (at least about 10 tiles) to gain speed to jump to the left and cross the room quickly. Entrance condition: {
"comeInNormally": {}
}Requires: {
"ammo": {
"type": "Super",
"count": 2
}
}
{
"canShineCharge": {
"usedTiles": 17,
"openEnd": 1
}
}
"canShinechargeMovementTricky"
"h_speedJump"
{
"heatFrames": 870
}
{
"shineChargeFrames": 175
}
{
"shinespark": {
"frames": 15,
"excessFrames": 0
}
}Exit condition: {
"leaveWithSpark": {}
}Unlocks doors: {"types":["ammo"],"requires":[]} |
|
Requires: {
"enemyDamage": {
"enemy": "Ripper 2 (red)",
"type": "contact",
"hits": 1
}
} |
|
Entrance condition: {
"comeInNormally": {}
}Requires: {
"heatFrames": 95
}Exit condition: {
"leaveWithGModeSetup": {}
}Unlocks doors: {"types":["super"],"requires":[]}
{
"types": [
"missiles",
"powerbomb"
],
"requires": [
{
"heatFrames": 385
},
{
"or": [
"Morph",
"canInsaneJump",
{
"enemyDamage": {
"enemy": "Ripper 2 (red)",
"type": "contact",
"hits": 1
}
}
]
}
]
} |
|


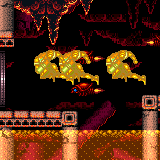
With Crystal Flash the best option is to wait for the rippers to start going off screen. Then the two bottom ones will be destroyed by the light orb and drop Supers for opening the gate. With Screw Attack, you'll want to tag the top Ripper of the first pair to appear, then the three that come in behind them, and grab the second Ripper of the first pair on the way down from the jump. Then jump into the last Ripper on the way across to the platform, pausing to get its energy. You can also lay an immediate Power Bomb. Roll off of it (or time a morph/unmorph to avoid a bomb jump) and then collect the drops from the five supers that get hit. Jump past the last ripper on the way to the platform. The drops give a lot of Reserve if collected quickly - manually draw some of it to have enough energy to shinecharge. Open the gate and go back to the left side to start running right. If you have Varia, you can afford to spare a Ripper of choice and use it to interrupt. Do so close to the right door and the Ripper won't make it back in time to hit you again even with a 400-point Reserve fill. Otherwise, you will use a heat interrupt: shoot the door as you approach during the run and shinecharge before you reach it. With Varia you can afford to go back and use Power Bombs or Supers to farm any remaining Rippers, but Screw Attack will no longer destroy them while you have blue suit. Entrance condition: {
"comeInWithRMode": {}
}Requires: {
"or": [
{
"and": [
{
"heatFrames": 150
},
"h_heatedCrystalFlashForReserveEnergy",
{
"partialRefill": {
"type": "Super",
"limit": 1
}
}
]
},
{
"and": [
"h_RModeCanRefillReserves",
"ScrewAttack",
{
"heatFramesWithEnergyDrops": {
"frames": 350,
"drops": [
{
"enemy": "Ripper 2 (red)",
"count": 4
}
]
}
},
{
"or": [
{
"and": [
"h_heatProof",
{
"resourceMissingAtMost": [
{
"type": "Super",
"count": 4
}
]
}
]
},
{
"resourceMissingAtMost": [
{
"type": "Super",
"count": 0
}
]
}
]
},
{
"partialRefill": {
"type": "ReserveEnergy",
"limit": 20
}
}
]
},
{
"and": [
"h_RModeCanRefillReserves",
{
"enemyKill": {
"enemies": [
[
"Ripper 2 (red)",
"Ripper 2 (red)"
]
],
"explicitWeapons": [
"PowerBomb"
]
}
},
{
"heatFrames": 236
},
{
"or": [
{
"and": [
"h_heatProof",
{
"resourceMissingAtMost": [
{
"type": "Super",
"count": 4
}
]
}
]
},
{
"resourceMissingAtMost": [
{
"type": "Super",
"count": 0
}
]
}
]
},
{
"partialRefill": {
"type": "ReserveEnergy",
"limit": 50
}
}
]
}
]
}
{
"ammo": {
"type": "Super",
"count": 1
}
}
{
"heatFrames": 144
}
{
"canShineCharge": {
"usedTiles": 28,
"openEnd": 0
}
}
{
"or": [
{
"and": [
"h_heatProof",
{
"autoReserveTrigger": {}
},
"canRModeSparkInterrupt"
]
},
"h_heatTriggerRModeSparkInterrupt"
]
}
{
"heatFrames": 10
}Clears obstacles: A, B |
|
Despawn the gate in indirect G-mode then cross the room while killing, freezing, dodging, or tanking the Rippers. Dodging the Rippers without Morph, requires crouching under the first two then jumping and aiming down over the next two; it also requires jumping over all three lower Rippers when most of the way across the room. It is possible to kill a Ripper near the right door and pause abuse to collect its drop on G-mode exit. Entrance condition: {
"comeInWithGMode": {
"mode": "indirect",
"morphed": false
}
}Requires: {
"or": [
"canInsaneJump",
{
"haveBlueSuit": {}
},
"ScrewAttack",
"canUseFrozenEnemies",
{
"and": [
"canTrickyDodgeEnemies",
"Morph"
]
},
{
"ammo": {
"type": "Super",
"count": 2
}
},
{
"enemyDamage": {
"enemy": "Ripper 2 (red)",
"type": "contact",
"hits": 2
}
}
]
}
{
"or": [
"h_heatedGModeOpenDifferentDoor",
{
"and": [
"h_heatedGModePauseAbuse",
"ScrewAttack"
]
},
{
"and": [
"h_heatedGModePauseAbuse",
{
"ammo": {
"type": "Super",
"count": 1
}
}
]
}
]
} |
|
Despawn the gate in indirect G-mode then Power Bomb the Rippers and cross the room. It is possible to kill a Ripper near the right door and pause abuse to collect its drop on G-mode exit. Timing the Power Bomb to kill some but not all of the lower three Rippers is necessary if farming on the right side of the room. Entrance condition: {
"comeInWithGMode": {
"mode": "indirect",
"morphed": true
}
}Requires: {
"or": [
"h_artificialMorphPowerBomb",
{
"enemyDamage": {
"enemy": "Ripper 2 (red)",
"type": "contact",
"hits": 1
}
}
]
}
{
"or": [
"h_heatedGModeOpenDifferentDoor",
{
"and": [
"canTrickyJump",
"h_heatedGModePauseAbuse",
{
"ammo": {
"type": "Super",
"count": 1
}
}
]
}
]
} |
From: 1
Left Door
To: 2
Right Door
Despawn the gate in indirect G-mode then exit G-mode while under it to open the gate without a Super. This requires killing, freezing, dodging, or tanking the Rippers. Dodging the Rippers without Morph, requires crouching under the first two then jumping and aiming down over the next two; it also requires jumping over all three lower Rippers when most of the way across the room. Then exiting G-mode while on the right side of the gate tile as the first Ripper approaches, so it hits the gate while it's opening. Then run towards the door and jump and aim down over the Ripper that makes it through, before quickly using the runway. Entrance condition: {
"comeInWithGMode": {
"mode": "indirect",
"morphed": false
}
}Requires: {
"or": [
"canInsaneJump",
{
"haveBlueSuit": {}
},
"ScrewAttack",
"canUseFrozenEnemies",
{
"and": [
"canTrickyDodgeEnemies",
"Morph"
]
},
{
"enemyDamage": {
"enemy": "Ripper 2 (red)",
"type": "contact",
"hits": 3
}
}
]
}
{
"heatFrames": 110
}Clears obstacles: A |
From: 1
Left Door
To: 2
Right Door
Despawn the gate in indirect G-mode then Power Bomb the Rippers and exit G-mode while under the gate to open it without a Super. Entrance condition: {
"comeInWithGMode": {
"mode": "indirect",
"morphed": true
}
}Requires: {
"or": [
"h_artificialMorphPowerBomb",
{
"enemyDamage": {
"enemy": "Ripper 2 (red)",
"type": "contact",
"hits": 2
}
}
]
}
{
"heatFrames": 110
}Clears obstacles: A |
From: 1
Left Door
To: 3
Junction Left of Green Gate


With Crystal Flash the best option is to wait for the rippers to start going off screen. Then the two bottom ones will be destroyed by the light orb and drop Supers for opening the gate. With Screw Attack, you'll want to tag the top Ripper of the first pair to appear, then the three that come in behind them, and grab the second Ripper of the first pair on the way down from the jump. Then jump into the last Ripper on the way across to the platform, pausing to get its energy. You can also lay an immediate Power Bomb. Roll off of it (or time a morph/unmorph to avoid a bomb jump) and then collect the drops from the five supers that get hit. Jump past the last ripper on the way to the platform. The drops give a lot of Reserve if collected quickly - manually draw some of it to have enough energy to shinecharge. With Varia, you can spare one Ripper of your choice. For high reserve after Crystal Flash, the best is any of the bottom three as they have the longest cycle. Run left to right and shinecharge near the gate, and take the interrupt hit with the Ripper moving right. Otherwise, use a heat interrupt, and run right to left so that you're closer to the left door for less energy used to escape. If any rippers remain, you can farm them with Power Bombs (or Supers at low health) but Screw Attack will no longer destroy them while you have blue suit. Entrance condition: {
"comeInWithRMode": {}
}Requires: {
"or": [
{
"and": [
{
"heatFrames": 150
},
"h_heatedCrystalFlashForReserveEnergy",
{
"partialRefill": {
"type": "Super",
"limit": 1
}
}
]
},
{
"and": [
"h_RModeCanRefillReserves",
"ScrewAttack",
{
"heatFramesWithEnergyDrops": {
"frames": 350,
"drops": [
{
"enemy": "Ripper 2 (red)",
"count": 4
}
]
}
},
{
"or": [
{
"and": [
"h_heatProof",
{
"resourceMissingAtMost": [
{
"type": "Super",
"count": 4
}
]
}
]
},
{
"resourceMissingAtMost": [
{
"type": "Super",
"count": 0
}
]
}
]
},
{
"partialRefill": {
"type": "ReserveEnergy",
"limit": 20
}
}
]
},
{
"and": [
"h_RModeCanRefillReserves",
{
"enemyKill": {
"enemies": [
[
"Ripper 2 (red)",
"Ripper 2 (red)"
]
],
"explicitWeapons": [
"PowerBomb"
]
}
},
{
"heatFrames": 236
},
{
"or": [
{
"and": [
"h_heatProof",
{
"resourceMissingAtMost": [
{
"type": "Super",
"count": 4
}
]
}
]
},
{
"resourceMissingAtMost": [
{
"type": "Super",
"count": 0
}
]
}
]
},
{
"partialRefill": {
"type": "ReserveEnergy",
"limit": 50
}
}
]
}
]
}
{
"heatFrames": 64
}
{
"canShineCharge": {
"usedTiles": 18,
"openEnd": 0
}
}
{
"or": [
{
"autoReserveTrigger": {
"maxReserveEnergy": 300
}
},
{
"and": [
{
"autoReserveTrigger": {}
},
{
"enemyDamage": {
"enemy": "Ripper 2 (red)",
"type": "contact",
"hits": 1
}
}
]
}
]
}
{
"or": [
{
"and": [
"h_heatProof",
{
"or": [
{
"autoReserveTrigger": {
"maxReserveEnergy": 300
}
},
{
"and": [
{
"autoReserveTrigger": {}
},
{
"enemyDamage": {
"enemy": "Ripper 2 (red)",
"type": "contact",
"hits": 1
}
}
]
}
]
},
"canRModeSparkInterrupt"
]
},
"h_heatTriggerRModeSparkInterrupt"
]
}Clears obstacles: B |
|
Requires: "canDash"
{
"heatFrames": 450
}
{
"enemyDamage": {
"enemy": "Ripper 2 (red)",
"type": "contact",
"hits": 3
}
} |
From: 1
Left Door
To: 3
Junction Left of Green Gate


Entrance condition: {
"comeInNormally": {}
}Requires: "canDash"
{
"enemyDamage": {
"enemy": "Ripper 2 (red)",
"type": "contact",
"hits": 1
}
}
"canHorizontalDamageBoost"
{
"heatFrames": 250
}
{
"or": [
"canTrickyDodgeEnemies",
{
"and": [
{
"enemyDamage": {
"enemy": "Ripper 2 (red)",
"type": "contact",
"hits": 1
}
},
{
"heatFrames": 20
}
]
}
]
} |
|
Requires: "canDash"
{
"heatFrames": 270
}
"ScrewAttack"Clears obstacles: B |
|
Requires: {
"haveBlueSuit": {}
}
{
"heatFrames": 420
} |
From: 1
Left Door
To: 3
Junction Left of Green Gate
Requires: "canDash"
{
"heatFrames": 400
}
"h_usePowerBomb"Clears obstacles: B |
|


Requires: "canDash"
{
"or": [
"canTrickyDodgeEnemies",
{
"and": [
"canDodgeWhileShooting",
{
"enemyDamage": {
"enemy": "Ripper 2 (red)",
"type": "contact",
"hits": 2
}
}
]
},
{
"enemyDamage": {
"enemy": "Ripper 2 (red)",
"type": "contact",
"hits": 4
}
}
]
}
{
"resourceAvailable": [
{
"type": "Energy",
"count": 50
},
{
"type": "Super",
"count": 3
}
]
}
{
"heatFrames": 340
}
{
"or": [
{
"ammo": {
"type": "Super",
"count": 1
}
},
{
"heatFrames": 10
}
]
}Clears obstacles: B Dev note: This accounts for collecting Super drops while crossing, with an assumption that one of the drops may be abandoned to save time/energy. |
From: 1
Left Door
To: 3
Junction Left of Green Gate
Requires: "canDash"
"canTrickyDodgeEnemies"
{
"resourceAvailable": [
{
"type": "Super",
"count": 2
}
]
}
{
"heatFrames": 265
}Dev note: This accounts for collecting Super drops while crossing and killing two of the Rippers. |
From: 1
Left Door
To: 3
Junction Left of Green Gate


Requires: "canDash"
"canFarmWhileShooting"
{
"resourceMissingAtMost": [
{
"type": "Super",
"count": 0
}
]
}
{
"enemyKill": {
"enemies": [
[
"Ripper 2 (red)",
"Ripper 2 (red)"
]
],
"explicitWeapons": [
"PowerBomb",
"ScrewAttack"
]
}
}
{
"heatFramesWithEnergyDrops": {
"frames": 280,
"drops": [
{
"enemy": "Ripper 2 (red)",
"count": 5
}
]
}
}
{
"heatFrames": 170
}Clears obstacles: B |
From: 1
Left Door
To: 3
Junction Left of Green Gate


Requires: "canDash"
"canFarmWhileShooting"
{
"resourceMissingAtMost": [
{
"type": "Super",
"count": 0
}
]
}
{
"enemyDamage": {
"enemy": "Ripper 2 (red)",
"type": "contact",
"hits": 1
}
}
"canHorizontalDamageBoost"
"h_usePowerBomb"
{
"heatFramesWithEnergyDrops": {
"frames": 400,
"drops": [
{
"enemy": "Ripper 2 (red)",
"count": 5
}
]
}
}
{
"heatFrames": 85
}Clears obstacles: B |
From: 1
Left Door
To: 3
Junction Left of Green Gate
Requires: "canDash"
"canFarmWhileShooting"
{
"resourceAtMost": [
{
"type": "Energy",
"count": 99
}
]
}
{
"enemyDamage": {
"enemy": "Ripper 2 (red)",
"type": "contact",
"hits": 1
}
}
"canHorizontalDamageBoost"
"h_usePowerBomb"
{
"heatFramesWithEnergyDrops": {
"frames": 390,
"drops": [
{
"enemy": "Ripper 2 (red)",
"count": 5
}
]
}
}
{
"heatFrames": 25
}Clears obstacles: B |
From: 1
Left Door
To: 3
Junction Left of Green Gate


Requires: "canDash"
"canFarmWhileShooting"
{
"resourceMissingAtMost": [
{
"type": "Super",
"count": 0
}
]
}
{
"enemyDamage": {
"enemy": "Ripper 2 (red)",
"type": "contact",
"hits": 1
}
}
"canHorizontalDamageBoost"
"ScrewAttack"
{
"heatFramesWithEnergyDrops": {
"frames": 300,
"drops": [
{
"enemy": "Ripper 2 (red)",
"count": 5
}
]
}
}
{
"ammo": {
"type": "Super",
"count": 1
}
}
{
"heatFrames": 100
}Clears obstacles: A, B Dev note: FIXME: A variation of this may be possible with a blue suit. |
From: 1
Left Door
To: 3
Junction Left of Green Gate
Requires: {
"haveBlueSuit": {}
}
"h_usePowerBomb"
{
"or": [
{
"resourceAtMost": [
{
"type": "Energy",
"count": 120
}
]
},
{
"resourceMissingAtMost": [
{
"type": "Super",
"count": 0
}
]
}
]
}
{
"heatFramesWithEnergyDrops": {
"frames": 380,
"drops": [
{
"enemy": "Ripper 2 (red)",
"count": 5
}
]
}
}
{
"ammo": {
"type": "Super",
"count": 1
}
}
{
"heatFrames": 180
}Clears obstacles: A, B |
|
The room is a bit trickier to cross in direct G-mode because the Ripper cycle with the gate. Cross the room while killing, freezing, dodging, or tanking the Rippers. Dodging the Rippers without Morph, requires crouching under the first two then jumping and aiming down over the next two; either way, it also requires a precise jump over all three lower Rippers when most of the way across the room, or a morph under the first and quick jump over the next two. Entrance condition: {
"comeInWithGMode": {
"mode": "direct",
"morphed": false
}
}Requires: "h_heatedGMode"
{
"or": [
"canInsaneJump",
{
"haveBlueSuit": {}
},
"ScrewAttack",
"canUseFrozenEnemies",
{
"ammo": {
"type": "Super",
"count": 2
}
},
{
"enemyDamage": {
"enemy": "Ripper 2 (red)",
"type": "contact",
"hits": 2
}
}
]
}
{
"heatFrames": 0
} |
|
The room is a bit trickier to cross in direct G-mode because the Ripper cycle with the gate. Power Bomb the Rippers on entry then cross the room. Entrance condition: {
"comeInWithGMode": {
"mode": "direct",
"morphed": true
}
}Requires: "h_heatedGMode"
{
"or": [
"h_artificialMorphPowerBomb",
{
"enemyDamage": {
"enemy": "Ripper 2 (red)",
"type": "contact",
"hits": 1
}
}
]
}
{
"heatFrames": 0
} |
From: 1
Left Door
To: 3
Junction Left of Green Gate
This strat just saves one Ripper hit when tanking the Rippers because of the i-frames when taking the hit to regain mobility. Entrance condition: {
"comeInWithGMode": {
"mode": "direct",
"morphed": false,
"mobility": "immobile"
}
}Requires: "h_heatedGMode"
"canDash"
{
"enemyDamage": {
"enemy": "Ripper 2 (red)",
"type": "contact",
"hits": 1
}
}
{
"heatFrames": 0
} |
From: 2
Right Door
To: 1
Left Door
Requires: {
"obstaclesCleared": [
"A",
"B",
"C"
]
}
"canDash"
"h_heatedRemoteRunwaySpaceJump"
{
"heatFrames": 200
}Exit condition: {
"leaveSpinning": {
"remoteRunway": {
"length": 28,
"openEnd": 1
},
"minExtraRunSpeed": "$4.0"
}
}Unlocks doors: {"types":["ammo"],"requires":[],"useImplicitRequires":false} |
From: 2
Right Door
To: 1
Left Door
Requires: {
"obstaclesCleared": [
"A",
"B"
]
}
"canDash"
"h_heatedRemoteRunwaySpaceJump"
{
"heatFrames": 200
}Exit condition: {
"leaveWithMockball": {
"remoteRunway": {
"length": 28,
"openEnd": 1
},
"landingRunway": {
"length": 5,
"openEnd": 1
},
"minExtraRunSpeed": "$4.0"
}
}Unlocks doors: {"types":["super"],"requires":[]}
{"types":["missiles","powerbomb"],"requires":[]}Dev note: If coming from the right, the Ripper on the left may still be alive, but it is not too hard to avoid. |
From: 2
Right Door
To: 1
Left Door
Requires: {
"obstaclesCleared": [
"A",
"B"
]
}
"canDash"
"h_heatedRemoteRunwaySpaceJump"
{
"heatFrames": 200
}Exit condition: {
"leaveWithSpringBallBounce": {
"remoteRunway": {
"length": 28,
"openEnd": 1
},
"landingRunway": {
"length": 5,
"openEnd": 1
},
"minExtraRunSpeed": "$4.0",
"movementType": "uncontrolled"
}
}Unlocks doors: {"types":["super"],"requires":[]}
{"types":["missiles","powerbomb"],"requires":[]}Dev note: If coming from the right, the Ripper on the left may still be alive, but it is not too hard to avoid. |
From: 2
Right Door
To: 1
Left Door
Requires: {
"obstaclesCleared": [
"A",
"B",
"C"
]
}
"canDash"
"h_heatedRemoteRunwayTrickySpringBall"
{
"heatFrames": 205
}Exit condition: {
"leaveWithSpringBallBounce": {
"remoteRunway": {
"length": 18,
"openEnd": 1
},
"landingRunway": {
"length": 5,
"openEnd": 1
},
"minExtraRunSpeed": "$4.0",
"movementType": "controlled"
}
}Unlocks doors: {"types":["ammo"],"requires":[],"useImplicitRequires":false} |
|
Requires: {
"obstaclesCleared": [
"A",
"B",
"C"
]
}
"canDash"
"h_heatedRemoteRunwayPreciseSpaceJump"
{
"heatFrames": 200
}Exit condition: {
"leaveSpaceJumping": {
"remoteRunway": {
"length": 28,
"openEnd": 1
},
"minExtraRunSpeed": "$4.0"
}
}Unlocks doors: {"types":["ammo"],"requires":[],"useImplicitRequires":false} |
|
Despawn the gate in indirect G-mode then cross the room while killing, freezing, or tanking the Rippers. Without Morph, killing the lowest Ripper with a Super will make it possible but difficult to cross the room damageless. It is possible to kill a Ripper near the left door and pause abuse to collect its drop on G-mode exit. Entrance condition: {
"comeInWithGMode": {
"mode": "indirect",
"morphed": false
}
}Requires: {
"or": [
"ScrewAttack",
{
"haveBlueSuit": {}
},
"canUseFrozenEnemies",
{
"and": [
"canDash",
"canInsaneJump",
{
"ammo": {
"type": "Super",
"count": 1
}
}
]
},
{
"ammo": {
"type": "Super",
"count": 3
}
},
{
"enemyDamage": {
"enemy": "Ripper 2 (red)",
"type": "contact",
"hits": 2
}
}
]
}
{
"or": [
"h_heatedGModeOpenDifferentDoor",
{
"and": [
"h_heatedGModePauseAbuse",
"ScrewAttack"
]
},
{
"and": [
"h_heatedGModePauseAbuse",
{
"ammo": {
"type": "Super",
"count": 1
}
}
]
}
]
} |
From: 2
Right Door
To: 1
Left Door
Despawn the gate in indirect G-mode then cross the room while dodging the Rippers. It is possible to cross the room damageless without any items. Crouch under the first Rippers then jump with a precise timing to go over the next without hitting the highest ones. With two small forward spin jumps, jump over the three Rippers that come from behind. Move to the first platform and jump over them again. Cross the rest of the room while weaving through the Rippers to get to the left side. It is possible to kill a Ripper near the left door and pause abuse to collect its drop on G-mode exit. Entrance condition: {
"comeInWithGMode": {
"mode": "indirect",
"morphed": false
}
}Requires: "canDash"
"canTrickyGMode"
{
"or": [
"h_heatedGModeOpenDifferentDoor",
{
"and": [
"h_heatedGModePauseAbuse",
{
"ammo": {
"type": "Super",
"count": 1
}
}
]
}
]
} |
|
Despawn the gate in indirect G-mode then cross the room by either rolling under the Rippers then unmorphing and dodging them while while crossing the room, or place a Power Bomb to kill all or most of them and cross the room. It is possible to kill a Ripper near the left door and pause abuse to collect its drop on G-mode exit. Entrance condition: {
"comeInWithGMode": {
"mode": "indirect",
"morphed": true
}
}Requires: {
"or": [
{
"and": [
"canDash",
"canInsaneJump"
]
},
"h_artificialMorphPowerBomb"
]
}
{
"or": [
"h_heatedGModeOpenDifferentDoor",
{
"and": [
"h_heatedGModePauseAbuse",
{
"ammo": {
"type": "Super",
"count": 1
}
}
]
}
]
} |
|
Entrance condition: {
"comeInWithGrappleTeleport": {
"blockPositions": [
[
5,
3
],
[
7,
2
]
]
}
}Requires: {
"heatFrames": 45
} |
|
Entrance condition: {
"comeInWithGrappleTeleport": {
"blockPositions": [
[
3,
12
],
[
3,
13
]
]
}
}Bypasses door shell: true |
|
Entrance condition: {
"comeInWithGrappleTeleport": {
"blockPositions": [
[
3,
12
]
]
}
}Exit condition: {
"leaveWithGrappleTeleport": {
"blockPositions": [
[
3,
12
]
]
}
}Bypasses door shell: true |
From: 2
Right Door
To: 1
Left Door
Entrance condition: {
"comeInWithGrappleTeleport": {
"blockPositions": [
[
3,
13
]
]
}
}Exit condition: {
"leaveWithGrappleTeleport": {
"blockPositions": [
[
3,
13
]
]
}
}Bypasses door shell: true |
|
Use a Power Bomb to kill the Rippers after the first attempt at the gate glitch, or wait a couple of seconds and use the Power Bomb before beginning gate glitch attempts. Requires: "h_usePowerBomb"
"canTrickyDodgeEnemies"
{
"heatFrames": 50
}
{
"or": [
{
"notable": "First-Try Gate Glitch"
},
{
"heatFrames": 130
}
]
}Clears obstacles: B |
|
Requires: {
"obstaclesNotCleared": [
"A"
]
}Exit condition: {
"leaveWithRunway": {
"length": 10,
"openEnd": 0
}
} |
|
Requires: {
"or": [
"h_heatedGreenGateGlitch",
{
"obstaclesCleared": [
"A"
]
}
]
}
{
"enemyDamage": {
"enemy": "Ripper 2 (red)",
"type": "contact",
"hits": 2
}
}Exit condition: {
"leaveWithRunway": {
"length": 29,
"openEnd": 1
}
} |
|
Requires: "h_heatedCrystalFlash" |
|
Entrance condition: {
"comeInShinecharging": {
"length": 9,
"openEnd": 0
}
}Requires: "h_heatedCrystalSpark" |
|
Entrance condition: {
"comeInNormally": {}
}Requires: {
"heatFrames": 470
}
{
"obstaclesCleared": [
"A"
]
}Exit condition: {
"leaveWithGModeSetup": {}
}Unlocks doors: {"types":["ammo"],"requires":[]}Dev note: FIXME: These heatFrames are the worst case scenario, otherwise the entire room would need to be modeled. |
From: 2
Right Door
To: 2
Right Door
Despawn the gate in indirect G-mode then exit G-mode while under it to open the gate without a Super. This requires killing, freezing, dodging, or tanking the Rippers. Dodging the Rippers without Morph, requires exiting G-mode while on the right side of the gate tile as the first Ripper approaches, so it hits the gate while it's opening. Then run towards the door and jump and aim down over the Ripper that makes it through, before quickly using the runway. Entrance condition: {
"comeInWithGMode": {
"mode": "indirect",
"morphed": false
}
}Requires: {
"or": [
{
"and": [
"canDash",
"canInsaneJump"
]
},
{
"haveBlueSuit": {}
},
"ScrewAttack",
"canUseFrozenEnemies",
"Morph",
{
"enemyDamage": {
"enemy": "Ripper 2 (red)",
"type": "contact",
"hits": 1
}
}
]
}
{
"heatFrames": 110
}Clears obstacles: A |
From: 2
Right Door
To: 2
Right Door
Despawn the gate in indirect G-mode then Power Bomb the Rippers and exit G-mode while under the gate to open it without a Super. Entrance condition: {
"comeInWithGMode": {
"mode": "indirect",
"morphed": true
}
}Requires: "h_artificialMorphPowerBomb"
{
"heatFrames": 110
}Clears obstacles: A Dev note: FIXME: It would be possible to enter in direct G-mode and use a power bomb then gate glitch and cross the room without the Rippers. |
|

You can Crystal Flash first, then open the gate, dodge the bottom most rippers that come across the platform, and pick up their Super drops when they hit the light orb. Alternatively, open the gate first, farm the bottom two Rippers with Power Bombs or Screw Attack to get your Supers back and Crystal Flash afterwards. The runway is now clear to shinecharge. Alternatively, you can farm with Screw Attack or Power Bombs. Kill the bottom two Rippers first, then the one bouncing between platforms. Keep the third Ripper from the top alive for the best interrupt. With high reserve energy, take the interrupt close to the right door and with the Ripper moving right - it will not come back in time to hit you again. Once you have blue suit, you cannot kill any more Rippers with Screw Attack, but you are still invulnerable to contact hits. Entrance condition: {
"comeInWithRMode": {}
}Requires: "h_heatedGreenGateGlitch"
{
"or": [
{
"and": [
{
"or": [
{
"resourceAvailable": [
{
"type": "Super",
"count": 10
}
]
},
{
"and": [
{
"resourceAvailable": [
{
"type": "Super",
"count": 8
}
]
},
{
"resourceAvailable": [
{
"type": "Energy",
"count": 51
}
]
},
{
"or": [
"ScrewAttack",
{
"enemyKill": {
"enemies": [
[
"Ripper 2 (red)",
"Ripper 2 (red)"
]
],
"explicitWeapons": [
"PowerBomb"
]
}
}
]
},
{
"heatFrames": 600
},
{
"partialRefill": {
"type": "Super",
"limit": 10
}
}
]
}
]
},
"h_heatedCrystalFlashForReserveEnergy"
]
},
{
"and": [
{
"or": [
"ScrewAttack",
{
"enemyKill": {
"enemies": [
[
"Ripper 2 (red)",
"Ripper 2 (red)"
],
[
"Ripper 2 (red)"
]
],
"explicitWeapons": [
"PowerBomb"
]
}
}
]
},
"h_heatProof",
"h_RModeCanRefillReserves",
{
"resourceMissingAtMost": [
{
"type": "Super",
"count": 2
}
]
},
{
"partialRefill": {
"type": "ReserveEnergy",
"limit": 60
}
}
]
},
{
"and": [
{
"or": [
"ScrewAttack",
{
"enemyKill": {
"enemies": [
[
"Ripper 2 (red)"
]
],
"explicitWeapons": [
"PowerBomb"
]
}
}
]
},
"h_heatProof",
"h_RModeCanRefillReserves",
{
"resourceMissingAtMost": [
{
"type": "Super",
"count": 4
}
]
},
{
"partialRefill": {
"type": "ReserveEnergy",
"limit": 20
}
}
]
}
]
}
{
"canShineCharge": {
"usedTiles": 28,
"openEnd": 0
}
}
{
"autoReserveTrigger": {}
}
{
"or": [
{
"and": [
"h_heatProof",
{
"autoReserveTrigger": {}
},
"canRModeSparkInterrupt"
]
},
"h_heatTriggerRModeSparkInterrupt"
]
}Clears obstacles: A, B |
|
Requires: {
"or": [
"h_heatedGreenGateGlitch",
{
"obstaclesCleared": [
"A"
]
}
]
}
{
"heatFrames": 50
}
{
"or": [
"canDash",
{
"heatFrames": 15
}
]
}Clears obstacles: A Dev note: FIXME: A strat could be added that runs into the room and shoots directly at the gate, instead of stopping in front of it. |
From: 2
Right Door
To: 3
Junction Left of Green Gate


Enter the room with between about 75 and 110 energy. Perform the gate glitch on the first attempt. Then lay a Power Bomb as soon as possible when Samus' energy is below 60. After collecting the first one or two drops, wait a moment before collecting the rest, to ensure that Samus remains in health bomb range until all drops have spawned. Requires: {
"notable": "First-Try Gate Glitch"
}
{
"resourceAtMost": [
{
"type": "Energy",
"count": 110
}
]
}
{
"tech": "canGateGlitch"
}
{
"noFlashSuit": {}
}
"h_usePowerBomb"
{
"heatFramesWithEnergyDrops": {
"frames": 300,
"drops": [
{
"enemy": "Ripper 2 (red)",
"count": 5
}
]
}
}
{
"ammo": {
"type": "Super",
"count": 1
}
}
{
"heatFrames": 20
}Clears obstacles: A, B Dev note: FIXME: This strat logically ends at the gate but could be refined to end about a screen to the left, if we added a new node there. |
From: 2
Right Door
To: 3
Junction Left of Green Gate


Enter the room with full Supers. Wait for a couple of seconds and lay a Power Bomb by the gate. Wait for the Rippers to be destroyed and for their drops to spawn. Then perform the gate glitch and collect the drops, which should all be big energy. Requires: {
"notable": "First-Try Gate Glitch"
}
{
"resourceMissingAtMost": [
{
"type": "Super",
"count": 0
}
]
}
{
"tech": "canGateGlitch"
}
{
"noFlashSuit": {}
}
"h_usePowerBomb"
{
"heatFramesWithEnergyDrops": {
"frames": 430,
"drops": [
{
"enemy": "Ripper 2 (red)",
"count": 5
}
]
}
}
{
"ammo": {
"type": "Super",
"count": 1
}
}
{
"heatFrames": 40
}Clears obstacles: A, B Dev note: This strat could be adapted to work with more than one try of the gate glitch, but the requirements would be awkward to represent. FIXME: This strat logically ends at the gate but could be refined to end about a screen to the left, if we added a new node there. |
|
Requires: {
"obstaclesCleared": [
"B"
]
}
"canDash"
{
"or": [
{
"heatFrames": 270
},
{
"and": [
"h_speedJump",
"canWallJump",
{
"heatFrames": 225
}
]
}
]
} |
|
Requires: "canDash"
{
"heatFrames": 330
}
{
"enemyDamage": {
"enemy": "Ripper 2 (red)",
"type": "contact",
"hits": 2
}
}
{
"or": [
"canTrickyDodgeEnemies",
{
"and": [
{
"enemyDamage": {
"enemy": "Ripper 2 (red)",
"type": "contact",
"hits": 1
}
},
{
"heatFrames": 100
}
]
}
]
} |
|


Requires: {
"notable": "First-Try Gate Glitch"
}
"canDash"
{
"enemyDamage": {
"enemy": "Ripper 2 (red)",
"type": "contact",
"hits": 1
}
}
"canHorizontalDamageBoost"
{
"heatFrames": 280
}Dev note: The First-Try Gate Glitch is to ensure that the Rippers are in a consistent state. |
|
Requires: {
"haveBlueSuit": {}
}
{
"heatFrames": 420
} |
|


Requires: {
"notable": "First-Try Gate Glitch"
}
"canDash"
"ScrewAttack"
{
"or": [
{
"heatFrames": 300
},
{
"and": [
"h_speedJump",
"canWallJump",
{
"heatFrames": 225
}
]
}
]
}Dev note: FIXME: A variant that farms the Rippers using Screw Attack should be added. |
From: 3
Junction Left of Green Gate
To: 1
Left Door


Requires: "canDash"
"canTrickyDodgeEnemies"
{
"or": [
{
"heatFrames": 270
},
{
"and": [
"h_speedJump",
"canWallJump",
{
"heatFrames": 225
}
]
}
]
}
{
"ammo": {
"type": "Super",
"count": 1
}
}
{
"or": [
{
"notable": "First-Try Gate Glitch"
},
{
"ammo": {
"type": "Super",
"count": 2
}
}
]
}Dev note: This is chaotic because the gate glitch's unreliability makes the room more variable: with a first-try gate glitch a single Super is enough, but otherwise, you would likely want to have three. |
From: 3
Junction Left of Green Gate
To: 1
Left Door
Requires: {
"obstaclesCleared": [
"B",
"C"
]
}
"canDash"
"h_heatedRemoteRunwaySpaceJump"
{
"heatFrames": 230
}Exit condition: {
"leaveSpinning": {
"remoteRunway": {
"length": 18,
"openEnd": 1
},
"minExtraRunSpeed": "$2.0"
}
}Unlocks doors: {"types":["ammo"],"requires":[],"useImplicitRequires":false} |
From: 3
Junction Left of Green Gate
To: 1
Left Door
Requires: {
"obstaclesCleared": [
"B"
]
}
"canDash"
"h_heatedRemoteRunwaySpaceJump"
{
"heatFrames": 230
}Exit condition: {
"leaveWithMockball": {
"remoteRunway": {
"length": 18,
"openEnd": 1
},
"landingRunway": {
"length": 5,
"openEnd": 1
},
"minExtraRunSpeed": "$2.0"
}
}Unlocks doors: {"types":["super"],"requires":[]}
{"types":["missiles","powerbomb"],"requires":[]}Dev note: If coming from the right, the Ripper on the left may still be alive, but it is not too hard to avoid. |
From: 3
Junction Left of Green Gate
To: 1
Left Door
Requires: {
"obstaclesCleared": [
"B"
]
}
"canDash"
"h_heatedRemoteRunwaySpaceJump"
{
"heatFrames": 230
}Exit condition: {
"leaveWithSpringBallBounce": {
"remoteRunway": {
"length": 18,
"openEnd": 1
},
"landingRunway": {
"length": 5,
"openEnd": 1
},
"minExtraRunSpeed": "$2.0",
"movementType": "uncontrolled"
}
}Unlocks doors: {"types":["super"],"requires":[]}
{"types":["missiles","powerbomb"],"requires":[]}Dev note: If coming from the right, the Ripper on the left may still be alive, but it is not too hard to avoid. |
From: 3
Junction Left of Green Gate
To: 1
Left Door
Requires: {
"obstaclesCleared": [
"B",
"C"
]
}
"canDash"
"h_heatedRemoteRunwayTrickySpringBall"
{
"heatFrames": 240
}Exit condition: {
"leaveWithSpringBallBounce": {
"remoteRunway": {
"length": 18,
"openEnd": 1
},
"landingRunway": {
"length": 5,
"openEnd": 1
},
"minExtraRunSpeed": "$2.0",
"movementType": "controlled"
}
}Unlocks doors: {"types":["ammo"],"requires":[],"useImplicitRequires":false} |
From: 3
Junction Left of Green Gate
To: 1
Left Door
Requires: {
"obstaclesCleared": [
"B",
"C"
]
}
"canDash"
"h_heatedRemoteRunwayPreciseSpaceJump"
{
"heatFrames": 230
}Exit condition: {
"leaveSpaceJumping": {
"remoteRunway": {
"length": 18,
"openEnd": 1
},
"minExtraRunSpeed": "$2.0"
}
}Unlocks doors: {"types":["ammo"],"requires":[],"useImplicitRequires":false} |
|
Requires: {
"or": [
{
"and": [
{
"heatFrames": 120
},
{
"ammo": {
"type": "Super",
"count": 1
}
}
]
},
{
"and": [
{
"heatFrames": 50
},
{
"ammo": {
"type": "Super",
"count": 1
}
},
"canHeroShot"
]
},
{
"and": [
{
"obstaclesCleared": [
"A"
]
},
{
"heatFrames": 40
}
]
}
]
}
{
"or": [
"canDash",
{
"heatFrames": 25
}
]
}Clears obstacles: A Unlocks doors: {"types":["missiles"],"requires":[{"heatFrames":20}]}
{"types":["super"],"requires":[]}
{"types":["powerbomb"],"requires":[{"heatFrames":40}]}Dev note: This includes an option to open the gate from a distance while approaching from the left. In this case (as well as in the case where the gate is already open), it is assumed you have momentum running through this junction. |
From: 3
Junction Left of Green Gate
To: 3
Junction Left of Green Gate
Requires: "h_heatedCrystalFlash" |
From: 3
Junction Left of Green Gate
To: 3
Junction Left of Green Gate
Requires: {
"obstaclesCleared": [
"B"
]
}
{
"or": [
{
"and": [
{
"obstaclesCleared": [
"A"
]
},
{
"canShineCharge": {
"usedTiles": 28,
"openEnd": 1
}
}
]
},
{
"canShineCharge": {
"usedTiles": 18,
"openEnd": 1
}
}
]
}
"h_heatedCrystalSpark" |
{
"$schema": "../../../schema/m3-room.schema.json",
"id": 153,
"name": "Fast Ripper Room",
"area": "Norfair",
"subarea": "Lower",
"subsubarea": "West",
"roomAddress": "0x7B2DA",
"roomEnvironments": [
{
"heated": true
}
],
"mapTileMask": [
[
1,
1,
1,
1
]
],
"nodes": [
{
"id": 1,
"name": "Left Door",
"nodeType": "door",
"nodeSubType": "blue",
"nodeAddress": "0x001988e",
"doorOrientation": "left",
"doorEnvironments": [
{
"physics": "air"
}
],
"mapTileMask": [
[
2,
2,
1,
1
]
]
},
{
"id": 2,
"name": "Right Door",
"nodeType": "door",
"nodeSubType": "blue",
"nodeAddress": "0x001989a",
"doorOrientation": "right",
"doorEnvironments": [
{
"physics": "air"
}
],
"mapTileMask": [
[
1,
1,
1,
2
]
]
},
{
"id": 3,
"name": "Junction Left of Green Gate",
"nodeType": "junction",
"nodeSubType": "junction",
"mapTileMask": [
[
1,
1,
2,
1
]
]
}
],
"obstacles": [
{
"id": "A",
"name": "Green Gate",
"obstacleType": "inanimate"
},
{
"id": "B",
"name": "Rippers",
"obstacleType": "enemies"
},
{
"id": "C",
"name": "Left Door Open",
"obstacleType": "inanimate"
}
],
"enemies": [
{
"id": "e1",
"groupName": "Fast Rippers",
"enemyName": "Ripper 2 (red)",
"quantity": 6,
"homeNodes": [
1
]
}
],
"strats": [
{
"link": [
1,
1
],
"name": "Base (Unlock Door)",
"requires": [],
"unlocksDoors": [
{
"types": [
"missiles"
],
"requires": [
{
"heatFrames": 50
}
]
},
{
"types": [
"super"
],
"requires": []
},
{
"types": [
"powerbomb"
],
"requires": [
{
"heatFrames": 110
}
]
}
],
"flashSuitChecked": true,
"blueSuitChecked": true
},
{
"link": [
1,
1
],
"name": "Base (Come In Normally)",
"entranceCondition": {
"comeInNormally": {}
},
"requires": [],
"flashSuitChecked": true,
"blueSuitChecked": true
},
{
"link": [
1,
1
],
"name": "Base (Come In With Mockball)",
"entranceCondition": {
"comeInWithMockball": {
"adjacentMinTiles": 0,
"remoteAndLandingMinTiles": [
[
0,
0
]
],
"speedBooster": "any"
}
},
"requires": [
{
"heatFrames": 10
}
],
"flashSuitChecked": true,
"blueSuitChecked": true
},
{
"link": [
2,
2
],
"name": "Base (Unlock Door)",
"requires": [],
"unlocksDoors": [
{
"types": [
"missiles"
],
"requires": [
{
"heatFrames": 50
}
]
},
{
"types": [
"super"
],
"requires": []
},
{
"types": [
"powerbomb"
],
"requires": [
{
"heatFrames": 110
}
]
}
],
"flashSuitChecked": true,
"blueSuitChecked": true
},
{
"link": [
2,
2
],
"name": "Base (Come In Normally)",
"entranceCondition": {
"comeInNormally": {}
},
"requires": [],
"flashSuitChecked": true,
"blueSuitChecked": true
},
{
"link": [
2,
2
],
"name": "Base (Come In With Mockball)",
"entranceCondition": {
"comeInWithMockball": {
"adjacentMinTiles": 0,
"remoteAndLandingMinTiles": [
[
0,
0
]
],
"speedBooster": "any"
}
},
"requires": [
{
"heatFrames": 10
}
],
"flashSuitChecked": true,
"blueSuitChecked": true
},
{
"id": 65,
"link": [
1,
1
],
"name": "Timed Heated Crystal Flash, R-Mode Spark Interrupt",
"entranceCondition": {
"comeInWithRMode": {}
},
"requires": [
{
"resourceAvailable": [
{
"type": "RegularEnergy",
"count": 150
}
]
},
{
"resourceAtMost": [
{
"type": "RegularEnergy",
"count": 180
}
]
},
{
"resourceMissingAtMost": [
{
"type": "Super",
"count": 0
}
]
},
{
"disableEquipment": "HiJump"
},
{
"heatFrames": 388
},
"h_heatedCrystalFlash",
{
"partialRefill": {
"type": "ReserveEnergy",
"limit": 30
}
},
{
"canShineCharge": {
"usedTiles": 18,
"openEnd": 0
}
},
"h_heatTriggerRModeSparkInterrupt",
"canTrickyJump",
{
"heatFrames": 92
}
],
"clearsObstacles": [
"B"
],
"flashSuitChecked": true,
"blueSuitChecked": true,
"note": [
"Requires about 150-180 Reserve at R-Mode entry to be able to correctly time the Crystal Flash.",
"The correct timing to place the power bomb is on taking 97 (53-83 energy left) energy worth of heat.",
"The Power Bomb explosion kills all six Rippers near the door, placing their",
"energy drops in easy reach to grab them and fill Reserve Energy.",
"Run to the green gate and wait until 69 energy is left and start running. Shinecharge at the end",
"of the runway, then use quick, speedy jumps back across the platforms towards the left door. You should",
"be able to make it to the left high platform (2nd from the door) before you need to windup and interrupt.",
"Shoot the door open and you can make it out."
],
"devNote": "This strat makes a suitless CF with max E-Tanks viable without needing disable E-Tanks."
},
{
"id": 43,
"link": [
1,
1
],
"name": "Open Door",
"requires": [
{
"heatFrames": 20
},
{
"doorUnlockedAtNode": 1
}
],
"unlocksDoors": [
{
"types": [
"missiles"
],
"requires": [
{
"heatFrames": 50
}
]
},
{
"types": [
"super"
],
"requires": []
},
{
"types": [
"powerbomb"
],
"requires": [
{
"heatFrames": 110
}
]
}
],
"clearsObstacles": [
"C"
],
"flashSuitChecked": true,
"blueSuitChecked": true
},
{
"id": 1,
"link": [
1,
1
],
"name": "Leave With Runway",
"requires": [
{
"heatFrames": 120
},
{
"or": [
"Morph",
"Ice",
"ScrewAttack",
{
"ammo": {
"type": "Super",
"count": 2
}
},
{
"enemyDamage": {
"enemy": "Ripper 2 (red)",
"type": "contact",
"hits": 1
}
}
]
}
],
"exitCondition": {
"leaveWithRunway": {
"length": 5,
"openEnd": 1
}
},
"flashSuitChecked": true,
"blueSuitChecked": true,
"devNote": "This assumes we must wait for the Rippers to pass (or freeze or kill them)."
},
{
"id": 2,
"link": [
1,
1
],
"name": "Ripper Farm",
"requires": [
{
"noBlueSuit": {}
},
"ScrewAttack",
{
"resetRoom": {
"nodes": [
1
]
}
},
{
"heatFrames": 215
},
{
"cycleFrames": 215
},
{
"or": [
"canInsaneJump",
{
"and": [
"canFarmWhileShooting",
{
"heatFrames": 45
},
{
"cycleFrames": 45
}
]
},
{
"and": [
{
"heatFrames": 360
},
{
"cycleFrames": 360
}
]
}
]
}
],
"resetsObstacles": [
"A",
"B",
"C"
],
"farmCycleDrops": [
{
"enemy": "Ripper 2 (red)",
"count": 5
}
],
"flashSuitChecked": true,
"blueSuitChecked": true
},
{
"id": 41,
"link": [
1,
1
],
"name": "Partial Ripper Farm (Supers)",
"entranceCondition": {
"comeInNormally": {}
},
"requires": [
{
"noBlueSuit": {}
},
"ScrewAttack",
"canDodgeWhileShooting",
{
"heatFrames": 200
},
{
"resourceAvailable": [
{
"type": "Energy",
"count": 50
}
]
},
{
"partialRefill": {
"type": "Super",
"limit": 5
}
},
{
"heatFrames": 80
}
],
"flashSuitChecked": true,
"blueSuitChecked": true
},
{
"id": 42,
"link": [
1,
1
],
"name": "Partial Ripper Farm (Energy)",
"entranceCondition": {
"comeInNormally": {}
},
"requires": [
{
"noBlueSuit": {}
},
"ScrewAttack",
"canFarmWhileShooting",
{
"or": [
{
"and": [
"canPauseAbuse",
"canInsaneJump",
{
"heatFrames": 60
}
]
},
{
"heatFrames": 120
}
]
},
{
"or": [
{
"and": [
{
"resourceMissingAtMost": [
{
"type": "Super",
"count": 0
}
]
},
{
"partialRefill": {
"type": "Energy",
"limit": 100
}
}
]
},
{
"partialRefill": {
"type": "Energy",
"limit": 70
}
}
]
},
{
"heatFrames": 60
}
],
"flashSuitChecked": true,
"blueSuitChecked": true,
"note": "If Supers are not full, time the collection of energy to force further Energy drops."
},
{
"id": 3,
"link": [
1,
1
],
"name": "Crystal Flash",
"requires": [
"h_heatedCrystalFlash"
],
"flashSuitChecked": true,
"blueSuitChecked": true
},
{
"id": 21,
"link": [
1,
1
],
"name": "Leave With Spark (Tank the Rippers)",
"entranceCondition": {
"comeInNormally": {}
},
"requires": [
"canHorizontalDamageBoost",
"canTrickyJump",
{
"enemyDamage": {
"enemy": "Ripper 2 (red)",
"type": "contact",
"hits": 2
}
},
{
"canShineCharge": {
"usedTiles": 18,
"openEnd": 0
}
},
{
"heatFrames": 525
},
{
"shinespark": {
"frames": 43,
"excessFrames": 0
}
}
],
"exitCondition": {
"leaveWithSpark": {
"position": "top"
}
},
"unlocksDoors": [
{
"types": [
"ammo"
],
"requires": []
}
],
"flashSuitChecked": true,
"blueSuitChecked": true
},
{
"id": 22,
"link": [
1,
1
],
"name": "Leave With Spark (Power Bomb Ripper Kill)",
"entranceCondition": {
"comeInNormally": {}
},
"requires": [
"h_usePowerBomb",
{
"canShineCharge": {
"usedTiles": 18,
"openEnd": 0
}
},
{
"heatFrames": 630
},
{
"shinespark": {
"frames": 43,
"excessFrames": 0
}
}
],
"exitCondition": {
"leaveWithSpark": {
"position": "top"
}
},
"unlocksDoors": [
{
"types": [
"ammo"
],
"requires": []
}
],
"flashSuitChecked": true,
"blueSuitChecked": true
},
{
"id": 23,
"link": [
1,
1
],
"name": "Leave With Spark (Screw Ripper Kill)",
"entranceCondition": {
"comeInNormally": {}
},
"requires": [
"ScrewAttack",
{
"canShineCharge": {
"usedTiles": 18,
"openEnd": 0
}
},
{
"heatFrames": 585
},
{
"or": [
"canTrickyJump",
{
"heatFrames": 200
}
]
},
{
"shinespark": {
"frames": 43,
"excessFrames": 0
}
}
],
"exitCondition": {
"leaveWithSpark": {
"position": "top"
}
},
"unlocksDoors": [
{
"types": [
"ammo"
],
"requires": []
}
],
"flashSuitChecked": true,
"blueSuitChecked": true
},
{
"id": 24,
"link": [
1,
1
],
"name": "Leave With Spark (Super Ripper Kill, Top Position)",
"entranceCondition": {
"comeInNormally": {}
},
"requires": [
{
"ammo": {
"type": "Super",
"count": 2
}
},
{
"or": [
{
"canShineCharge": {
"usedTiles": 18,
"openEnd": 0
}
},
{
"and": [
{
"ammo": {
"type": "Super",
"count": 1
}
},
{
"canShineCharge": {
"usedTiles": 28,
"openEnd": 0
}
},
{
"heatFrames": 100
}
]
}
]
},
{
"heatFrames": 645
},
{
"or": [
"canTrickyJump",
{
"and": [
{
"heatFrames": 200
},
{
"enemyDamage": {
"enemy": "Ripper 2 (red)",
"type": "contact",
"hits": 2
}
}
]
}
]
},
{
"or": [
{
"shinespark": {
"frames": 43,
"excessFrames": 0
}
},
{
"and": [
"canShinechargeMovementComplex",
{
"shinespark": {
"frames": 27,
"excessFrames": 0
}
},
{
"heatFrames": 10
}
]
},
{
"and": [
"canShinechargeMovementTricky",
{
"shinespark": {
"frames": 17,
"excessFrames": 0
}
},
{
"heatFrames": 135
}
]
}
]
}
],
"exitCondition": {
"leaveWithSpark": {
"position": "top"
}
},
"unlocksDoors": [
{
"types": [
"ammo"
],
"requires": []
}
],
"flashSuitChecked": true,
"blueSuitChecked": true
},
{
"id": 25,
"link": [
1,
1
],
"name": "Leave With Spark (Super Ripper Kill, Open Gate, Any Position)",
"entranceCondition": {
"comeInNormally": {}
},
"requires": [
{
"ammo": {
"type": "Super",
"count": 2
}
},
{
"canShineCharge": {
"usedTiles": 17,
"openEnd": 1
}
},
"canShinechargeMovementTricky",
"h_speedJump",
{
"heatFrames": 870
},
{
"shineChargeFrames": 175
},
{
"shinespark": {
"frames": 15,
"excessFrames": 0
}
}
],
"exitCondition": {
"leaveWithSpark": {}
},
"unlocksDoors": [
{
"types": [
"ammo"
],
"requires": []
}
],
"flashSuitChecked": true,
"blueSuitChecked": true,
"note": [
"Use Supers to kill all the Rippers and open the green gate.",
"From the right door, run right-to-left to gain a shinecharge;",
"use the remaining runway (at least about 10 tiles) to gain speed to jump to the left and cross the room quickly."
]
},
{
"id": 4,
"link": [
1,
1
],
"name": "G-Mode Regain Mobility",
"requires": [
{
"enemyDamage": {
"enemy": "Ripper 2 (red)",
"type": "contact",
"hits": 1
}
}
],
"gModeRegainMobility": {},
"flashSuitChecked": true,
"blueSuitChecked": true
},
{
"id": 26,
"link": [
1,
1
],
"name": "G-Mode Setup - Get Hit By Ripper",
"entranceCondition": {
"comeInNormally": {}
},
"requires": [
{
  "heatFrames": 95
}
],
"exitCondition": {
"leaveWithGModeSetup": {}
},
"unlocksDoors": [
{
"types": [
"super"
],
"requires": []
},
{
"types": [
"missiles",
"powerbomb"
],
"requires": [
{
"heatFrames": 385
},
{
"or": [
"Morph",
"canInsaneJump",
{
"enemyDamage": {
"enemy": "Ripper 2 (red)",
"type": "contact",
"hits": 1
}
}
]
}
]
}
],
"flashSuitChecked": true,
"blueSuitChecked": true
},
{
"id": 66,
"link": [
1,
2
],
"name": "R-Mode Spark Interrupt",
"entranceCondition": {
"comeInWithRMode": {}
},
"requires": [
{
"or": [
{
"and": [
{
"heatFrames": 150
},
"h_heatedCrystalFlashForReserveEnergy",
{
"partialRefill": {
"type": "Super",
"limit": 1
}
}
]
},
{
"and": [
"h_RModeCanRefillReserves",
"ScrewAttack",
{
"heatFramesWithEnergyDrops": {
"frames": 350,
"drops": [
{
"enemy": "Ripper 2 (red)",
"count": 4
}
]
}
},
{
"or": [
{
"and": [
"h_heatProof",
{
"resourceMissingAtMost": [
{
"type": "Super",
"count": 4
}
]
}
]
},
{
"resourceMissingAtMost": [
{
"type": "Super",
"count": 0
}
]
}
]
},
{
"partialRefill": {
"type": "ReserveEnergy",
"limit": 20
}
}
]
},
{
"and": [
"h_RModeCanRefillReserves",
{
"enemyKill": {
"enemies": [
[
"Ripper 2 (red)",
"Ripper 2 (red)"
]
],
"explicitWeapons": [
"PowerBomb"
]
}
},
{
"heatFrames": 236
},
{
"or": [
{
"and": [
"h_heatProof",
{
"resourceMissingAtMost": [
{
"type": "Super",
"count": 4
}
]
}
]
},
{
"resourceMissingAtMost": [
{
"type": "Super",
"count": 0
}
]
}
]
},
{
"partialRefill": {
"type": "ReserveEnergy",
"limit": 50
}
}
]
}
]
},
{
"ammo": {
"type": "Super",
"count": 1
}
},
{
"heatFrames": 144
},
{
"canShineCharge": {
"usedTiles": 28,
"openEnd": 0
}
},
{
"or": [
{
"and": [
"h_heatProof",
{
"autoReserveTrigger": {}
},
"canRModeSparkInterrupt"
]
},
"h_heatTriggerRModeSparkInterrupt"
]
},
{
"heatFrames": 10
}
],
"clearsObstacles": [
"A",
"B"
],
"flashSuitChecked": true,
"blueSuitChecked": true,
"note": [
"With Crystal Flash the best option is to wait for the rippers to start going off screen. Then",
"the two bottom ones will be destroyed by the light orb and drop Supers for opening the gate.",
"With Screw Attack, you'll want to tag the top Ripper of the first pair to appear, then the three",
"that come in behind them, and grab the second Ripper of the first pair on the way down from the",
"jump. Then jump into the last Ripper on the way across to the platform, pausing to get its energy.",
"You can also lay an immediate Power Bomb. Roll off of it (or time a morph/unmorph to avoid a bomb jump)",
"and then collect the drops from the five supers that get hit. Jump past the last ripper on the way to",
"the platform. The drops give a lot of Reserve if collected quickly - manually draw some of it to have",
"enough energy to shinecharge.",
"Open the gate and go back to the left side to start running right. If you have Varia, you can afford",
"to spare a Ripper of choice and use it to interrupt. Do so close to the right door and the Ripper won't",
"make it back in time to hit you again even with a 400-point Reserve fill. Otherwise, you will use a heat",
"interrupt: shoot the door as you approach during the run and shinecharge before you reach it.",
"With Varia you can afford to go back and use Power Bombs or Supers to farm any remaining Rippers, but",
"Screw Attack will no longer destroy them while you have blue suit."
]
},
{
"id": 28,
"link": [
1,
2
],
"name": "Indirect G-Mode, Despawn Gate",
"entranceCondition": {
"comeInWithGMode": {
"mode": "indirect",
"morphed": false
}
},
"requires": [
{
"or": [
"canInsaneJump",
{
"haveBlueSuit": {}
},
"ScrewAttack",
"canUseFrozenEnemies",
{
"and": [
"canTrickyDodgeEnemies",
"Morph"
]
},
{
"ammo": {
"type": "Super",
"count": 2
}
},
{
"enemyDamage": {
"enemy": "Ripper 2 (red)",
"type": "contact",
"hits": 2
}
}
]
},
{
"or": [
"h_heatedGModeOpenDifferentDoor",
{
"and": [
"h_heatedGModePauseAbuse",
"ScrewAttack"
]
},
{
"and": [
"h_heatedGModePauseAbuse",
{
"ammo": {
"type": "Super",
"count": 1
}
}
]
}
]
}
],
"flashSuitChecked": true,
"blueSuitChecked": true,
"note": [
"Despawn the gate in indirect G-mode then cross the room while killing, freezing, dodging, or tanking the Rippers.",
"Dodging the Rippers without Morph, requires crouching under the first two then jumping and aiming down over the next two;",
"it also requires jumping over all three lower Rippers when most of the way across the room.",
"It is possible to kill a Ripper near the right door and pause abuse to collect its drop on G-mode exit."
]
},
{
"id": 29,
"link": [
1,
2
],
"name": "Indirect G-Mode Morph, Despawn Gate",
"entranceCondition": {
"comeInWithGMode": {
"mode": "indirect",
"morphed": true
}
},
"requires": [
{
"or": [
"h_artificialMorphPowerBomb",
{
"enemyDamage": {
"enemy": "Ripper 2 (red)",
"type": "contact",
"hits": 1
}
}
]
},
{
"or": [
"h_heatedGModeOpenDifferentDoor",
{
"and": [
"canTrickyJump",
"h_heatedGModePauseAbuse",
{
"ammo": {
"type": "Super",
"count": 1
}
}
]
}
]
}
],
"flashSuitChecked": true,
"blueSuitChecked": true,
"note": [
"Despawn the gate in indirect G-mode then Power Bomb the Rippers and cross the room.",
"It is possible to kill a Ripper near the right door and pause abuse to collect its drop on G-mode exit.",
"Timing the Power Bomb to kill some but not all of the lower three Rippers is necessary if farming on the right side of the room."
]
},
{
"id": 30,
"link": [
1,
2
],
"name": "Indirect G-Mode, Despawn Gate, Open Gate",
"entranceCondition": {
"comeInWithGMode": {
"mode": "indirect",
"morphed": false
}
},
"requires": [
{
"or": [
"canInsaneJump",
{
"haveBlueSuit": {}
},
"ScrewAttack",
"canUseFrozenEnemies",
{
"and": [
"canTrickyDodgeEnemies",
"Morph"
]
},
{
"enemyDamage": {
"enemy": "Ripper 2 (red)",
"type": "contact",
"hits": 3
}
}
]
},
{
"heatFrames": 110
}
],
"clearsObstacles": [
"A"
],
"flashSuitChecked": true,
"blueSuitChecked": true,
"note": [
"Despawn the gate in indirect G-mode then exit G-mode while under it to open the gate without a Super.",
"This requires killing, freezing, dodging, or tanking the Rippers.",
"Dodging the Rippers without Morph, requires crouching under the first two then jumping and aiming down over the next two;",
"it also requires jumping over all three lower Rippers when most of the way across the room.",
"Then exiting G-mode while on the right side of the gate tile as the first Ripper approaches, so it hits the gate while it's opening.",
"Then run towards the door and jump and aim down over the Ripper that makes it through, before quickly using the runway."
]
},
{
"id": 31,
"link": [
1,
2
],
"name": "Indirect G-Mode Morph, Despawn Gate, Open Gate",
"entranceCondition": {
"comeInWithGMode": {
"mode": "indirect",
"morphed": true
}
},
"requires": [
{
"or": [
"h_artificialMorphPowerBomb",
{
"enemyDamage": {
"enemy": "Ripper 2 (red)",
"type": "contact",
"hits": 2
}
}
]
},
{
"heatFrames": 110
}
],
"clearsObstacles": [
"A"
],
"flashSuitChecked": true,
"blueSuitChecked": true,
"note": "Despawn the gate in indirect G-mode then Power Bomb the Rippers and exit G-mode while under the gate to open it without a Super."
},
{
"id": 67,
"link": [
1,
3
],
"name": "R-Mode Spark Interrupt",
"entranceCondition": {
"comeInWithRMode": {}
},
"requires": [
{
"or": [
{
"and": [
{
"heatFrames": 150
},
"h_heatedCrystalFlashForReserveEnergy",
{
"partialRefill": {
"type": "Super",
"limit": 1
}
}
]
},
{
"and": [
"h_RModeCanRefillReserves",
"ScrewAttack",
{
"heatFramesWithEnergyDrops": {
"frames": 350,
"drops": [
{
"enemy": "Ripper 2 (red)",
"count": 4
}
]
}
},
{
"or": [
{
"and": [
"h_heatProof",
{
"resourceMissingAtMost": [
{
"type": "Super",
"count": 4
}
]
}
]
},
{
"resourceMissingAtMost": [
{
"type": "Super",
"count": 0
}
]
}
]
},
{
"partialRefill": {
"type": "ReserveEnergy",
"limit": 20
}
}
]
},
{
"and": [
"h_RModeCanRefillReserves",
{
"enemyKill": {
"enemies": [
[
"Ripper 2 (red)",
"Ripper 2 (red)"
]
],
"explicitWeapons": [
"PowerBomb"
]
}
},
{
"heatFrames": 236
},
{
"or": [
{
"and": [
"h_heatProof",
{
"resourceMissingAtMost": [
{
"type": "Super",
"count": 4
}
]
}
]
},
{
"resourceMissingAtMost": [
{
"type": "Super",
"count": 0
}
]
}
]
},
{
"partialRefill": {
"type": "ReserveEnergy",
"limit": 50
}
}
]
}
]
},
{
"heatFrames": 64
},
{
"canShineCharge": {
"usedTiles": 18,
"openEnd": 0
}
},
{
"or": [
{
"autoReserveTrigger": {
"maxReserveEnergy": 300
}
},
{
"and": [
{
"autoReserveTrigger": {}
},
{
"enemyDamage": {
"enemy": "Ripper 2 (red)",
"type": "contact",
"hits": 1
}
}
]
}
]
},
{
"or": [
{
"and": [
"h_heatProof",
{
"or": [
{
"autoReserveTrigger": {
"maxReserveEnergy": 300
}
},
{
"and": [
{
"autoReserveTrigger": {}
},
{
"enemyDamage": {
"enemy": "Ripper 2 (red)",
"type": "contact",
"hits": 1
}
}
]
}
]
},
"canRModeSparkInterrupt"
]
},
"h_heatTriggerRModeSparkInterrupt"
]
}
],
"clearsObstacles": [
"B"
],
"flashSuitChecked": true,
"blueSuitChecked": true,
"note": [
"With Crystal Flash the best option is to wait for the rippers to start going off screen. Then",
"the two bottom ones will be destroyed by the light orb and drop Supers for opening the gate.",
"With Screw Attack, you'll want to tag the top Ripper of the first pair to appear, then the three",
"that come in behind them, and grab the second Ripper of the first pair on the way down from the",
"jump. Then jump into the last Ripper on the way across to the platform, pausing to get its energy.",
"You can also lay an immediate Power Bomb. Roll off of it (or time a morph/unmorph to avoid a bomb jump)",
"and then collect the drops from the five supers that get hit. Jump past the last ripper on the way to",
"the platform. The drops give a lot of Reserve if collected quickly - manually draw some of it to have",
"enough energy to shinecharge.",
"With Varia, you can spare one Ripper of your choice. For high reserve after Crystal Flash, the best is any",
"of the bottom three as they have the longest cycle. Run left to right and shinecharge near the gate, and",
"take the interrupt hit with the Ripper moving right.",
"Otherwise, use a heat interrupt, and run right to left so that you're closer to the left door for less energy",
"used to escape.",
"If any rippers remain, you can farm them with Power Bombs (or Supers at low health) but Screw Attack will no",
"longer destroy them while you have blue suit."
]
},
{
"id": 5,
"link": [
1,
3
],
"name": "Tank the Rippers",
"requires": [
"canDash",
{
"heatFrames": 450
},
{
"enemyDamage": {
"enemy": "Ripper 2 (red)",
"type": "contact",
"hits": 3
}
}
],
"flashSuitChecked": true,
"blueSuitChecked": true
},
{
"id": 44,
"link": [
1,
3
],
"name": "Ripper Damage Boost",
"entranceCondition": {
"comeInNormally": {}
},
"requires": [
"canDash",
{
"enemyDamage": {
"enemy": "Ripper 2 (red)",
"type": "contact",
"hits": 1
}
},
"canHorizontalDamageBoost",
{
"heatFrames": 250
},
{
"or": [
"canTrickyDodgeEnemies",
{
"and": [
{
"enemyDamage": {
"enemy": "Ripper 2 (red)",
"type": "contact",
"hits": 1
}
},
{
"heatFrames": 20
}
]
}
]
}
],
"flashSuitChecked": true,
"blueSuitChecked": true
},
{
"id": 6,
"link": [
1,
3
],
"name": "Screw Attack",
"requires": [
"canDash",
{
"heatFrames": 270
},
"ScrewAttack"
],
"clearsObstacles": [
"B"
],
"flashSuitChecked": true,
"blueSuitChecked": true
},
{
"id": 69,
"link": [
1,
3
],
"name": "Blue Suit",
"requires": [
{
"haveBlueSuit": {}
},
{
"heatFrames": 420
}
],
"flashSuitChecked": true,
"blueSuitChecked": true
},
{
"id": 7,
"link": [
1,
3
],
"name": "Kill Rippers (Power Bomb)",
"requires": [
"canDash",
{
"heatFrames": 400
},
"h_usePowerBomb"
],
"clearsObstacles": [
"B"
],
"flashSuitChecked": true,
"blueSuitChecked": true
},
{
"id": 45,
"link": [
1,
3
],
"name": "Kill Rippers (Supers)",
"requires": [
"canDash",
{
"or": [
"canTrickyDodgeEnemies",
{
"and": [
"canDodgeWhileShooting",
{
"enemyDamage": {
"enemy": "Ripper 2 (red)",
"type": "contact",
"hits": 2
}
}
]
},
{
"enemyDamage": {
"enemy": "Ripper 2 (red)",
"type": "contact",
"hits": 4
}
}
]
},
{
"resourceAvailable": [
{
"type": "Energy",
"count": 50
},
{
"type": "Super",
"count": 3
}
]
},
{
"heatFrames": 340
},
{
"or": [
{
"ammo": {
"type": "Super",
"count": 1
}
},
{
"heatFrames": 10
}
]
}
],
"clearsObstacles": [
"B"
],
"flashSuitChecked": true,
"blueSuitChecked": true,
"devNote": [
"This accounts for collecting Super drops while crossing,",
"with an assumption that one of the drops may be abandoned to save time/energy."
]
},
{
"id": 46,
"link": [
1,
3
],
"name": "Partial Kill Rippers (Supers)",
"requires": [
"canDash",
"canTrickyDodgeEnemies",
{
"resourceAvailable": [
{
"type": "Super",
"count": 2
}
]
},
{
"heatFrames": 265
}
],
"flashSuitChecked": true,
"blueSuitChecked": true,
"devNote": [
"This accounts for collecting Super drops while crossing and killing two of the Rippers."
]
},
{
"id": 39,
"link": [
1,
3
],
"name": "Farm Rippers and Cross Room",
"requires": [
"canDash",
"canFarmWhileShooting",
{
"resourceMissingAtMost": [
{
"type": "Super",
"count": 0
}
]
},
{
"enemyKill": {
"enemies": [
[
"Ripper 2 (red)",
"Ripper 2 (red)"
]
],
"explicitWeapons": [
"PowerBomb",
"ScrewAttack"
]
}
},
{
"heatFramesWithEnergyDrops": {
"frames": 280,
"drops": [
{
"enemy": "Ripper 2 (red)",
"count": 5
}
]
}
},
{
"heatFrames": 170
}
],
"clearsObstacles": [
"B"
],
"flashSuitChecked": true,
"blueSuitChecked": true
},
{
"id": 47,
"link": [
1,
3
],
"name": "Cross Room and Delay Farming Rippers (Power Bomb, Full Supers)",
"requires": [
"canDash",
"canFarmWhileShooting",
{
"resourceMissingAtMost": [
{
"type": "Super",
"count": 0
}
]
},
{
"enemyDamage": {
"enemy": "Ripper 2 (red)",
"type": "contact",
"hits": 1
}
},
"canHorizontalDamageBoost",
"h_usePowerBomb",
{
"heatFramesWithEnergyDrops": {
"frames": 400,
"drops": [
{
"enemy": "Ripper 2 (red)",
"count": 5
}
]
}
},
{
"heatFrames": 85
}
],
"clearsObstacles": [
"B"
],
"flashSuitChecked": true,
"blueSuitChecked": true
},
{
"id": 48,
"link": [
1,
3
],
"name": "Cross Room and Delay Farming Rippers (Power Bomb, Health Bomb)",
"requires": [
"canDash",
"canFarmWhileShooting",
{
"resourceAtMost": [
{
"type": "Energy",
"count": 99
}
]
},
{
"enemyDamage": {
"enemy": "Ripper 2 (red)",
"type": "contact",
"hits": 1
}
},
"canHorizontalDamageBoost",
"h_usePowerBomb",
{
"heatFramesWithEnergyDrops": {
"frames": 390,
"drops": [
{
"enemy": "Ripper 2 (red)",
"count": 5
}
]
}
},
{
"heatFrames": 25
}
],
"clearsObstacles": [
"B"
],
"flashSuitChecked": true,
"blueSuitChecked": true
},
{
"id": 49,
"link": [
1,
3
],
"name": "Cross Room and Delay Farming Rippers (Screw Attack)",
"requires": [
"canDash",
"canFarmWhileShooting",
{
"resourceMissingAtMost": [
{
"type": "Super",
"count": 0
}
]
},
{
"enemyDamage": {
"enemy": "Ripper 2 (red)",
"type": "contact",
"hits": 1
}
},
"canHorizontalDamageBoost",
"ScrewAttack",
{
"heatFramesWithEnergyDrops": {
"frames": 300,
"drops": [
{
"enemy": "Ripper 2 (red)",
"count": 5
}
]
}
},
{
"ammo": {
"type": "Super",
"count": 1
}
},
{
"heatFrames": 100
}
],
"clearsObstacles": [
"A",
"B"
],
"flashSuitChecked": true,
"blueSuitChecked": true,
"devNote": [
"FIXME: A variation of this may be possible with a blue suit."
]
},
{
"id": 70,
"link": [
1,
3
],
"name": "Cross Room While Farming, With Blue Suit",
"requires": [
{
"haveBlueSuit": {}
},
"h_usePowerBomb",
{
"or": [
{
"resourceAtMost": [
{
"type": "Energy",
"count": 120
}
]
},
{
"resourceMissingAtMost": [
{
"type": "Super",
"count": 0
}
]
}
]
},
{
"heatFramesWithEnergyDrops": {
"frames": 380,
"drops": [
{
"enemy": "Ripper 2 (red)",
"count": 5
}
]
}
},
{
"ammo": {
"type": "Super",
"count": 1
}
},
{
"heatFrames": 180
}
],
"clearsObstacles": [
"A",
"B"
],
"flashSuitChecked": true,
"blueSuitChecked": true
},
{
"id": 32,
"link": [
1,
3
],
"name": "Direct G-Mode",
"entranceCondition": {
"comeInWithGMode": {
"mode": "direct",
"morphed": false
}
},
"requires": [
"h_heatedGMode",
{
"or": [
"canInsaneJump",
{
"haveBlueSuit": {}
},
"ScrewAttack",
"canUseFrozenEnemies",
{
"ammo": {
"type": "Super",
"count": 2
}
},
{
"enemyDamage": {
"enemy": "Ripper 2 (red)",
"type": "contact",
"hits": 2
}
}
]
},
{
"heatFrames": 0
}
],
"flashSuitChecked": true,
"blueSuitChecked": true,
"note": [
"The room is a bit trickier to cross in direct G-mode because the Ripper cycle with the gate.",
"Cross the room while killing, freezing, dodging, or tanking the Rippers.",
"Dodging the Rippers without Morph, requires crouching under the first two then jumping and aiming down over the next two;",
"either way, it also requires a precise jump over all three lower Rippers when most of the way across the room, or a morph under the first and quick jump over the next two."
]
},
{
"id": 33,
"link": [
1,
3
],
"name": "Direct G-Mode Morph",
"entranceCondition": {
"comeInWithGMode": {
"mode": "direct",
"morphed": true
}
},
"requires": [
"h_heatedGMode",
{
"or": [
"h_artificialMorphPowerBomb",
{
"enemyDamage": {
"enemy": "Ripper 2 (red)",
"type": "contact",
"hits": 1
}
}
]
},
{
"heatFrames": 0
}
],
"flashSuitChecked": true,
"blueSuitChecked": true,
"note": [
"The room is a bit trickier to cross in direct G-mode because the Ripper cycle with the gate.",
"Power Bomb the Rippers on entry then cross the room."
]
},
{
"id": 34,
"link": [
1,
3
],
"name": "Direct G-Mode, Immobile",
"entranceCondition": {
"comeInWithGMode": {
"mode": "direct",
"morphed": false,
"mobility": "immobile"
}
},
"requires": [
"h_heatedGMode",
"canDash",
{
"enemyDamage": {
"enemy": "Ripper 2 (red)",
"type": "contact",
"hits": 1
}
},
{
"heatFrames": 0
}
],
"flashSuitChecked": true,
"blueSuitChecked": true,
"note": "This strat just saves one Ripper hit when tanking the Rippers because of the i-frames when taking the hit to regain mobility."
},
{
"id": 50,
"link": [
2,
1
],
"name": "Leave Spinning (Full Runway, Space Jump)",
"requires": [
{
"obstaclesCleared": [
"A",
"B",
"C"
]
},
"canDash",
"h_heatedRemoteRunwaySpaceJump",
{
"heatFrames": 200
}
],
"exitCondition": {
"leaveSpinning": {
"remoteRunway": {
"length": 28,
"openEnd": 1
},
"minExtraRunSpeed": "$4.0"
}
},
"unlocksDoors": [
{
"types": [
"ammo"
],
"requires": [],
"useImplicitRequires": false
}
],
"flashSuitChecked": true,
"blueSuitChecked": true
},
{
"id": 51,
"link": [
2,
1
],
"name": "Leave With Mockball (Full Runway, Space Jump)",
"requires": [
{
"obstaclesCleared": [
"A",
"B"
]
},
"canDash",
"h_heatedRemoteRunwaySpaceJump",
{
"heatFrames": 200
}
],
"exitCondition": {
"leaveWithMockball": {
"remoteRunway": {
"length": 28,
"openEnd": 1
},
"landingRunway": {
"length": 5,
"openEnd": 1
},
"minExtraRunSpeed": "$4.0"
}
},
"unlocksDoors": [
{
"types": [
"super"
],
"requires": []
},
{
"types": [
"missiles",
"powerbomb"
],
"requires": []
}
],
"flashSuitChecked": true,
"blueSuitChecked": true,
"devNote": [
"If coming from the right, the Ripper on the left may still be alive,",
"but it is not too hard to avoid."
]
},
{
"id": 52,
"link": [
2,
1
],
"name": "Leave With Spring Ball Bounce (Full Runway, Space Jump)",
"requires": [
{
"obstaclesCleared": [
"A",
"B"
]
},
"canDash",
"h_heatedRemoteRunwaySpaceJump",
{
"heatFrames": 200
}
],
"exitCondition": {
"leaveWithSpringBallBounce": {
"remoteRunway": {
"length": 28,
"openEnd": 1
},
"landingRunway": {
"length": 5,
"openEnd": 1
},
"minExtraRunSpeed": "$4.0",
"movementType": "uncontrolled"
}
},
"unlocksDoors": [
{
"types": [
"super"
],
"requires": []
},
{
"types": [
"missiles",
"powerbomb"
],
"requires": []
}
],
"flashSuitChecked": true,
"blueSuitChecked": true,
"devNote": [
"If coming from the right, the Ripper on the left may still be alive,",
"but it is not too hard to avoid."
]
},
{
"id": 53,
"link": [
2,
1
],
"name": "Leave With Controlled Spring Ball Bounce (Full Runway)",
"requires": [
{
"obstaclesCleared": [
"A",
"B",
"C"
]
},
"canDash",
"h_heatedRemoteRunwayTrickySpringBall",
{
"heatFrames": 205
}
],
"exitCondition": {
"leaveWithSpringBallBounce": {
"remoteRunway": {
"length": 18,
"openEnd": 1
},
"landingRunway": {
"length": 5,
"openEnd": 1
},
"minExtraRunSpeed": "$4.0",
"movementType": "controlled"
}
},
"unlocksDoors": [
{
"types": [
"ammo"
],
"requires": [],
"useImplicitRequires": false
}
],
"flashSuitChecked": true,
"blueSuitChecked": true
},
{
"id": 54,
"link": [
2,
1
],
"name": "Leave Space Jumping (Full Runway)",
"requires": [
{
"obstaclesCleared": [
"A",
"B",
"C"
]
},
"canDash",
"h_heatedRemoteRunwayPreciseSpaceJump",
{
"heatFrames": 200
}
],
"exitCondition": {
"leaveSpaceJumping": {
"remoteRunway": {
"length": 28,
"openEnd": 1
},
"minExtraRunSpeed": "$4.0"
}
},
"unlocksDoors": [
{
"types": [
"ammo"
],
"requires": [],
"useImplicitRequires": false
}
],
"flashSuitChecked": true,
"blueSuitChecked": true
},
{
"id": 35,
"link": [
2,
1
],
"name": "Indirect G-Mode, Despawn Gate",
"entranceCondition": {
"comeInWithGMode": {
"mode": "indirect",
"morphed": false
}
},
"requires": [
{
"or": [
"ScrewAttack",
{
"haveBlueSuit": {}
},
"canUseFrozenEnemies",
{
"and": [
"canDash",
"canInsaneJump",
{
"ammo": {
"type": "Super",
"count": 1
}
}
]
},
{
"ammo": {
"type": "Super",
"count": 3
}
},
{
"enemyDamage": {
"enemy": "Ripper 2 (red)",
"type": "contact",
"hits": 2
}
}
]
},
{
"or": [
"h_heatedGModeOpenDifferentDoor",
{
"and": [
"h_heatedGModePauseAbuse",
"ScrewAttack"
]
},
{
"and": [
"h_heatedGModePauseAbuse",
{
"ammo": {
"type": "Super",
"count": 1
}
}
]
}
]
}
],
"flashSuitChecked": true,
"blueSuitChecked": true,
"note": [
"Despawn the gate in indirect G-mode then cross the room while killing, freezing, or tanking the Rippers.",
"Without Morph, killing the lowest Ripper with a Super will make it possible but difficult to cross the room damageless.",
"It is possible to kill a Ripper near the left door and pause abuse to collect its drop on G-mode exit."
]
},
{
"id": 40,
"link": [
2,
1
],
"name": "Indirect G-Mode, Despawn Gate, Naked Ripper Weave",
"entranceCondition": {
"comeInWithGMode": {
"mode": "indirect",
"morphed": false
}
},
"requires": [
"canDash",
"canTrickyGMode",
{
"or": [
"h_heatedGModeOpenDifferentDoor",
{
"and": [
"h_heatedGModePauseAbuse",
{
"ammo": {
"type": "Super",
"count": 1
}
}
]
}
]
}
],
"flashSuitChecked": true,
"blueSuitChecked": true,
"note": [
"Despawn the gate in indirect G-mode then cross the room while dodging the Rippers.",
"It is possible to cross the room damageless without any items.",
"Crouch under the first Rippers then jump with a precise timing to go over the next without hitting the highest ones.",
"With two small forward spin jumps, jump over the three Rippers that come from behind. Move to the first platform and jump over them again.",
"Cross the rest of the room while weaving through the Rippers to get to the left side.",
"It is possible to kill a Ripper near the left door and pause abuse to collect its drop on G-mode exit."
]
},
{
"id": 36,
"link": [
2,
1
],
"name": "Indirect G-Mode Morph, Despawn Gate",
"entranceCondition": {
"comeInWithGMode": {
"mode": "indirect",
"morphed": true
}
},
"requires": [
{
"or": [
{
"and": [
"canDash",
"canInsaneJump"
]
},
"h_artificialMorphPowerBomb"
]
},
{
"or": [
"h_heatedGModeOpenDifferentDoor",
{
"and": [
"h_heatedGModePauseAbuse",
{
"ammo": {
"type": "Super",
"count": 1
}
}
]
}
]
}
],
"flashSuitChecked": true,
"blueSuitChecked": true,
"note": [
"Despawn the gate in indirect G-mode then cross the room by either rolling under the Rippers then unmorphing and dodging them while while crossing the room,",
"or place a Power Bomb to kill all or most of them and cross the room.",
"It is possible to kill a Ripper near the left door and pause abuse to collect its drop on G-mode exit."
]
},
{
"id": 8,
"link": [
2,
1
],
"name": "Grapple Teleport",
"entranceCondition": {
"comeInWithGrappleTeleport": {
"blockPositions": [
[
5,
3
],
[
7,
2
]
]
}
},
"requires": [
{
  "heatFrames": 45
}
],
"flashSuitChecked": true,
"blueSuitChecked": true
},
{
"id": 9,
"link": [
2,
1
],
"name": "Grapple Teleport Door Lock Skip",
"entranceCondition": {
"comeInWithGrappleTeleport": {
"blockPositions": [
[
3,
12
],
[
3,
13
]
]
}
},
"requires": [],
"bypassesDoorShell": "yes",
"flashSuitChecked": true,
"blueSuitChecked": true
},
{
"id": 10,
"link": [
2,
1
],
"name": "Carry Grapple Teleport (Top Position)",
"entranceCondition": {
"comeInWithGrappleTeleport": {
"blockPositions": [
[
3,
12
]
]
}
},
"requires": [],
"exitCondition": {
"leaveWithGrappleTeleport": {
"blockPositions": [
[
3,
12
]
]
}
},
"bypassesDoorShell": "yes",
"flashSuitChecked": true,
"blueSuitChecked": true
},
{
"id": 11,
"link": [
2,
1
],
"name": "Carry Grapple Teleport (Bottom Position)",
"entranceCondition": {
"comeInWithGrappleTeleport": {
"blockPositions": [
[
3,
13
]
]
}
},
"requires": [],
"exitCondition": {
"leaveWithGrappleTeleport": {
"blockPositions": [
[
3,
13
]
]
}
},
"bypassesDoorShell": "yes",
"flashSuitChecked": true,
"blueSuitChecked": true
},
{
"id": 55,
"link": [
2,
2
],
"name": "Kill Rippers (Power Bomb)",
"requires": [
"h_usePowerBomb",
"canTrickyDodgeEnemies",
{
"heatFrames": 50
},
{
"or": [
{
"notable": "First-Try Gate Glitch"
},
{
"heatFrames": 130
}
]
}
],
"clearsObstacles": [
"B"
],
"flashSuitChecked": true,
"blueSuitChecked": true,
"note": [
"Use a Power Bomb to kill the Rippers after the first attempt at the gate glitch,",
"or wait a couple of seconds and use the Power Bomb before beginning gate glitch attempts."
]
},
{
"id": 12,
"link": [
2,
2
],
"name": "Leave With Runway (Gate Closed)",
"requires": [
{
  "obstaclesNotCleared": [
    "A"
  ]
}
],
"exitCondition": {
"leaveWithRunway": {
"length": 10,
"openEnd": 0
}
},
"flashSuitChecked": true,
"blueSuitChecked": true
},
{
"id": 13,
"link": [
2,
2
],
"name": "Leave With Runway (Gate Open)",
"requires": [
{
"or": [
"h_heatedGreenGateGlitch",
{
"obstaclesCleared": [
"A"
]
}
]
},
{
"enemyDamage": {
"enemy": "Ripper 2 (red)",
"type": "contact",
"hits": 2
}
}
],
"exitCondition": {
"leaveWithRunway": {
"length": 29,
"openEnd": 1
}
},
"flashSuitChecked": true,
"blueSuitChecked": true
},
{
"id": 14,
"link": [
2,
2
],
"name": "Crystal Flash",
"requires": [
"h_heatedCrystalFlash"
],
"flashSuitChecked": true,
"blueSuitChecked": true
},
{
"id": 72,
"link": [
2,
2
],
"name": "Come in Shinecharging, Crystal Spark",
"entranceCondition": {
"comeInShinecharging": {
"length": 9,
"openEnd": 0
}
},
"requires": [
"h_heatedCrystalSpark"
],
"flashSuitChecked": true,
"blueSuitChecked": true
},
{
"id": 27,
"link": [
2,
2
],
"name": "G-Mode Setup - Get Hit By Ripper",
"entranceCondition": {
"comeInNormally": {}
},
"requires": [
{
"heatFrames": 470
},
{
"obstaclesCleared": [
"A"
]
}
],
"exitCondition": {
"leaveWithGModeSetup": {}
},
"unlocksDoors": [
{
"types": [
"ammo"
],
"requires": []
}
],
"flashSuitChecked": true,
"blueSuitChecked": true,
"devNote": "FIXME: These heatFrames are the worst case scenario, otherwise the entire room would need to be modeled."
},
{
"id": 37,
"link": [
2,
2
],
"name": "Indirect G-Mode, Despawn Gate, Open Gate",
"entranceCondition": {
"comeInWithGMode": {
"mode": "indirect",
"morphed": false
}
},
"requires": [
{
"or": [
{
"and": [
"canDash",
"canInsaneJump"
]
},
{
"haveBlueSuit": {}
},
"ScrewAttack",
"canUseFrozenEnemies",
"Morph",
{
"enemyDamage": {
"enemy": "Ripper 2 (red)",
"type": "contact",
"hits": 1
}
}
]
},
{
"heatFrames": 110
}
],
"clearsObstacles": [
"A"
],
"flashSuitChecked": true,
"blueSuitChecked": true,
"note": [
"Despawn the gate in indirect G-mode then exit G-mode while under it to open the gate without a Super.",
"This requires killing, freezing, dodging, or tanking the Rippers.",
"Dodging the Rippers without Morph, requires exiting G-mode while on the right side of the gate tile as the first Ripper approaches, so it hits the gate while it's opening.",
"Then run towards the door and jump and aim down over the Ripper that makes it through, before quickly using the runway."
]
},
{
"id": 38,
"link": [
2,
2
],
"name": "Indirect G-Mode Morph, Despawn Gate, Open Gate",
"entranceCondition": {
"comeInWithGMode": {
"mode": "indirect",
"morphed": true
}
},
"requires": [
"h_artificialMorphPowerBomb",
{
"heatFrames": 110
}
],
"clearsObstacles": [
"A"
],
"flashSuitChecked": true,
"blueSuitChecked": true,
"note": "Despawn the gate in indirect G-mode then Power Bomb the Rippers and exit G-mode while under the gate to open it without a Super.",
"devNote": "FIXME: It would be possible to enter in direct G-mode and use a power bomb then gate glitch and cross the room without the Rippers."
},
{
"id": 68,
"link": [
2,
2
],
"name": "R-Mode Spark Interrupt",
"entranceCondition": {
"comeInWithRMode": {}
},
"requires": [
"h_heatedGreenGateGlitch",
{
"or": [
{
"and": [
{
"or": [
{
"resourceAvailable": [
{
"type": "Super",
"count": 10
}
]
},
{
"and": [
{
"resourceAvailable": [
{
"type": "Super",
"count": 8
}
]
},
{
"resourceAvailable": [
{
"type": "Energy",
"count": 51
}
]
},
{
"or": [
"ScrewAttack",
{
"enemyKill": {
"enemies": [
[
"Ripper 2 (red)",
"Ripper 2 (red)"
]
],
"explicitWeapons": [
"PowerBomb"
]
}
}
]
},
{
"heatFrames": 600
},
{
"partialRefill": {
"type": "Super",
"limit": 10
}
}
]
}
]
},
"h_heatedCrystalFlashForReserveEnergy"
]
},
{
"and": [
{
"or": [
"ScrewAttack",
{
"enemyKill": {
"enemies": [
[
"Ripper 2 (red)",
"Ripper 2 (red)"
],
[
"Ripper 2 (red)"
]
],
"explicitWeapons": [
"PowerBomb"
]
}
}
]
},
"h_heatProof",
"h_RModeCanRefillReserves",
{
"resourceMissingAtMost": [
{
"type": "Super",
"count": 2
}
]
},
{
"partialRefill": {
"type": "ReserveEnergy",
"limit": 60
}
}
]
},
{
"and": [
{
"or": [
"ScrewAttack",
{
"enemyKill": {
"enemies": [
[
"Ripper 2 (red)"
]
],
"explicitWeapons": [
"PowerBomb"
]
}
}
]
},
"h_heatProof",
"h_RModeCanRefillReserves",
{
"resourceMissingAtMost": [
{
"type": "Super",
"count": 4
}
]
},
{
"partialRefill": {
"type": "ReserveEnergy",
"limit": 20
}
}
]
}
]
},
{
"canShineCharge": {
"usedTiles": 28,
"openEnd": 0
}
},
{
"autoReserveTrigger": {}
},
{
"or": [
{
"and": [
"h_heatProof",
{
"autoReserveTrigger": {}
},
"canRModeSparkInterrupt"
]
},
"h_heatTriggerRModeSparkInterrupt"
]
}
],
"clearsObstacles": [
"A",
"B"
],
"flashSuitChecked": true,
"blueSuitChecked": true,
"note": [
"You can Crystal Flash first, then open the gate, dodge the bottom most rippers that come across",
"the platform, and pick up their Super drops when they hit the light orb.",
"Alternatively, open the gate first, farm the bottom two Rippers with Power Bombs or Screw Attack",
"to get your Supers back and Crystal Flash afterwards.",
"The runway is now clear to shinecharge.",
"Alternatively, you can farm with Screw Attack or Power Bombs. Kill the bottom two Rippers first,",
"then the one bouncing between platforms. Keep the third Ripper from the top alive for",
"the best interrupt.",
"With high reserve energy, take the interrupt close to the right door and with the Ripper moving",
"right - it will not come back in time to hit you again.",
"Once you have blue suit, you cannot kill any more Rippers with Screw Attack, but you are still",
"invulnerable to contact hits."
]
},
{
"id": 15,
"link": [
2,
3
],
"name": "Gate Glitch",
"requires": [
{
"or": [
"h_heatedGreenGateGlitch",
{
"obstaclesCleared": [
"A"
]
}
]
},
{
"heatFrames": 50
},
{
"or": [
"canDash",
{
"heatFrames": 15
}
]
}
],
"clearsObstacles": [
"A"
],
"flashSuitChecked": true,
"blueSuitChecked": true,
"devNote": [
"FIXME: A strat could be added that runs into the room and shoots directly at the gate,",
"instead of stopping in front of it."
]
},
{
"id": 56,
"link": [
2,
3
],
"name": "First-Try Gate Glitch Farm (Health Bomb)",
"requires": [
{
"notable": "First-Try Gate Glitch"
},
{
"resourceAtMost": [
{
"type": "Energy",
"count": 110
}
]
},
{
"tech": "canGateGlitch"
},
{
"noFlashSuit": {}
},
"h_usePowerBomb",
{
"heatFramesWithEnergyDrops": {
"frames": 300,
"drops": [
{
"enemy": "Ripper 2 (red)",
"count": 5
}
]
}
},
{
"ammo": {
"type": "Super",
"count": 1
}
},
{
"heatFrames": 20
}
],
"clearsObstacles": [
"A",
"B"
],
"flashSuitChecked": true,
"blueSuitChecked": true,
"note": [
"Enter the room with between about 75 and 110 energy.",
"Perform the gate glitch on the first attempt.",
"Then lay a Power Bomb as soon as possible when Samus' energy is below 60.",
"After collecting the first one or two drops, wait a moment before collecting the rest,",
"to ensure that Samus remains in health bomb range until all drops have spawned."
],
"devNote": [
"FIXME: This strat logically ends at the gate but could be refined to end about a screen to the left,",
"if we added a new node there."
]
},
{
"id": 57,
"link": [
2,
3
],
"name": "First-Try Gate Glitch Farm (Full Supers)",
"requires": [
{
"notable": "First-Try Gate Glitch"
},
{
"resourceMissingAtMost": [
{
"type": "Super",
"count": 0
}
]
},
{
"tech": "canGateGlitch"
},
{
"noFlashSuit": {}
},
"h_usePowerBomb",
{
"heatFramesWithEnergyDrops": {
"frames": 430,
"drops": [
{
"enemy": "Ripper 2 (red)",
"count": 5
}
]
}
},
{
"ammo": {
"type": "Super",
"count": 1
}
},
{
"heatFrames": 40
}
],
"clearsObstacles": [
"A",
"B"
],
"flashSuitChecked": true,
"blueSuitChecked": true,
"note": [
"Enter the room with full Supers.",
"Wait for a couple of seconds and lay a Power Bomb by the gate.",
"Wait for the Rippers to be destroyed and for their drops to spawn.",
"Then perform the gate glitch and collect the drops,",
"which should all be big energy."
],
"devNote": [
"This strat could be adapted to work with more than one try of the gate glitch,",
"but the requirements would be awkward to represent.",
"FIXME: This strat logically ends at the gate but could be refined to end about a screen to the left,",
"if we added a new node there."
]
},
{
"id": 58,
"link": [
3,
1
],
"name": "Rippers Already Dead",
"requires": [
{
"obstaclesCleared": [
"B"
]
},
"canDash",
{
"or": [
{
"heatFrames": 270
},
{
"and": [
"h_speedJump",
"canWallJump",
{
"heatFrames": 225
}
]
}
]
}
],
"flashSuitChecked": true,
"blueSuitChecked": true
},
{
"id": 16,
"link": [
3,
1
],
"name": "Tank the Rippers",
"requires": [
"canDash",
{
"heatFrames": 330
},
{
"enemyDamage": {
"enemy": "Ripper 2 (red)",
"type": "contact",
"hits": 2
}
},
{
"or": [
"canTrickyDodgeEnemies",
{
"and": [
{
"enemyDamage": {
"enemy": "Ripper 2 (red)",
"type": "contact",
"hits": 1
}
},
{
"heatFrames": 100
}
]
}
]
}
],
"flashSuitChecked": true,
"blueSuitChecked": true
},
{
"id": 59,
"link": [
3,
1
],
"name": "Ripper Damage Boost",
"requires": [
{
"notable": "First-Try Gate Glitch"
},
"canDash",
{
"enemyDamage": {
"enemy": "Ripper 2 (red)",
"type": "contact",
"hits": 1
}
},
"canHorizontalDamageBoost",
{
"heatFrames": 280
}
],
"flashSuitChecked": true,
"blueSuitChecked": true,
"devNote": [
"The First-Try Gate Glitch is to ensure that the Rippers are in a consistent state."
]
},
{
"id": 71,
"link": [
3,
1
],
"name": "Blue Suit",
"requires": [
{
"haveBlueSuit": {}
},
{
"heatFrames": 420
}
],
"flashSuitChecked": true,
"blueSuitChecked": true
},
{
"id": 17,
"link": [
3,
1
],
"name": "Screw Attack",
"requires": [
{
"notable": "First-Try Gate Glitch"
},
"canDash",
"ScrewAttack",
{
"or": [
{
"heatFrames": 300
},
{
"and": [
"h_speedJump",
"canWallJump",
{
"heatFrames": 225
}
]
}
]
}
],
"flashSuitChecked": true,
"blueSuitChecked": true,
"devNote": [
"FIXME: A variant that farms the Rippers using Screw Attack should be added."
]
},
{
"id": 18,
"link": [
3,
1
],
"name": "Kill Some Rippers (Supers)",
"requires": [
"canDash",
"canTrickyDodgeEnemies",
{
"or": [
{
"heatFrames": 270
},
{
"and": [
"h_speedJump",
"canWallJump",
{
"heatFrames": 225
}
]
}
]
},
{
"ammo": {
"type": "Super",
"count": 1
}
},
{
"or": [
{
"notable": "First-Try Gate Glitch"
},
{
"ammo": {
"type": "Super",
"count": 2
}
}
]
}
],
"flashSuitChecked": true,
"blueSuitChecked": true,
"devNote": [
"This is chaotic because the gate glitch's unreliability makes the room more variable:",
"with a first-try gate glitch a single Super is enough,",
"but otherwise, you would likely want to have three."
]
},
{
"id": 60,
"link": [
3,
1
],
"name": "Leave Spinning (Short Runway, Space Jump)",
"requires": [
{
"obstaclesCleared": [
"B",
"C"
]
},
"canDash",
"h_heatedRemoteRunwaySpaceJump",
{
"heatFrames": 230
}
],
"exitCondition": {
"leaveSpinning": {
"remoteRunway": {
"length": 18,
"openEnd": 1
},
"minExtraRunSpeed": "$2.0"
}
},
"unlocksDoors": [
{
"types": [
"ammo"
],
"requires": [],
"useImplicitRequires": false
}
],
"flashSuitChecked": true,
"blueSuitChecked": true
},
{
"id": 61,
"link": [
3,
1
],
"name": "Leave With Mockball (Short Runway, Space Jump)",
"requires": [
{
"obstaclesCleared": [
"B"
]
},
"canDash",
"h_heatedRemoteRunwaySpaceJump",
{
"heatFrames": 230
}
],
"exitCondition": {
"leaveWithMockball": {
"remoteRunway": {
"length": 18,
"openEnd": 1
},
"landingRunway": {
"length": 5,
"openEnd": 1
},
"minExtraRunSpeed": "$2.0"
}
},
"unlocksDoors": [
{
"types": [
"super"
],
"requires": []
},
{
"types": [
"missiles",
"powerbomb"
],
"requires": []
}
],
"flashSuitChecked": true,
"blueSuitChecked": true,
"devNote": [
"If coming from the right, the Ripper on the left may still be alive,",
"but it is not too hard to avoid."
]
},
{
"id": 62,
"link": [
3,
1
],
"name": "Leave With Spring Ball Bounce (Short Runway, Space Jump)",
"requires": [
{
"obstaclesCleared": [
"B"
]
},
"canDash",
"h_heatedRemoteRunwaySpaceJump",
{
"heatFrames": 230
}
],
"exitCondition": {
"leaveWithSpringBallBounce": {
"remoteRunway": {
"length": 18,
"openEnd": 1
},
"landingRunway": {
"length": 5,
"openEnd": 1
},
"minExtraRunSpeed": "$2.0",
"movementType": "uncontrolled"
}
},
"unlocksDoors": [
{
"types": [
"super"
],
"requires": []
},
{
"types": [
"missiles",
"powerbomb"
],
"requires": []
}
],
"flashSuitChecked": true,
"blueSuitChecked": true,
"devNote": [
"If coming from the right, the Ripper on the left may still be alive,",
"but it is not too hard to avoid."
]
},
{
"id": 63,
"link": [
3,
1
],
"name": "Leave With Controlled Spring Ball Bounce (Short Runway)",
"requires": [
{
"obstaclesCleared": [
"B",
"C"
]
},
"canDash",
"h_heatedRemoteRunwayTrickySpringBall",
{
"heatFrames": 240
}
],
"exitCondition": {
"leaveWithSpringBallBounce": {
"remoteRunway": {
"length": 18,
"openEnd": 1
},
"landingRunway": {
"length": 5,
"openEnd": 1
},
"minExtraRunSpeed": "$2.0",
"movementType": "controlled"
}
},
"unlocksDoors": [
{
"types": [
"ammo"
],
"requires": [],
"useImplicitRequires": false
}
],
"flashSuitChecked": true,
"blueSuitChecked": true
},
{
"id": 64,
"link": [
3,
1
],
"name": "Leave Space Jumping (Short Runway)",
"requires": [
{
"obstaclesCleared": [
"B",
"C"
]
},
"canDash",
"h_heatedRemoteRunwayPreciseSpaceJump",
{
"heatFrames": 230
}
],
"exitCondition": {
"leaveSpaceJumping": {
"remoteRunway": {
"length": 18,
"openEnd": 1
},
"minExtraRunSpeed": "$2.0"
}
},
"unlocksDoors": [
{
"types": [
"ammo"
],
"requires": [],
"useImplicitRequires": false
}
],
"flashSuitChecked": true,
"blueSuitChecked": true
},
{
"id": 19,
"link": [
3,
2
],
"name": "Base",
"requires": [
{
"or": [
{
"and": [
{
"heatFrames": 120
},
{
"ammo": {
"type": "Super",
"count": 1
}
}
]
},
{
"and": [
{
"heatFrames": 50
},
{
"ammo": {
"type": "Super",
"count": 1
}
},
"canHeroShot"
]
},
{
"and": [
{
"obstaclesCleared": [
"A"
]
},
{
"heatFrames": 40
}
]
}
]
},
{
"or": [
"canDash",
{
"heatFrames": 25
}
]
}
],
"unlocksDoors": [
{
"types": [
"missiles"
],
"requires": [
{
"heatFrames": 20
}
]
},
{
"types": [
"super"
],
"requires": []
},
{
"types": [
"powerbomb"
],
"requires": [
{
"heatFrames": 40
}
]
}
],
"clearsObstacles": [
"A"
],
"flashSuitChecked": true,
"blueSuitChecked": true,
"devNote": [
"This includes an option to open the gate from a distance while approaching from the left.",
"In this case (as well as in the case where the gate is already open), it is assumed you",
"have momentum running through this junction."
]
},
{
"id": 20,
"link": [
3,
3
],
"name": "Crystal Flash",
"requires": [
"h_heatedCrystalFlash"
],
"flashSuitChecked": true,
"blueSuitChecked": true
},
{
"id": 73,
"link": [
3,
3
],
"name": "Crystal Spark",
"requires": [
{
"obstaclesCleared": [
"B"
]
},
{
"or": [
{
"and": [
{
"obstaclesCleared": [
"A"
]
},
{
"canShineCharge": {
"usedTiles": 28,
"openEnd": 1
}
}
]
},
{
"canShineCharge": {
"usedTiles": 18,
"openEnd": 1
}
}
]
},
"h_heatedCrystalSpark"
],
"flashSuitChecked": true,
"blueSuitChecked": true
}
],
"notables": [
{
"id": 1,
"name": "First-Try Gate Glitch",
"note": [
"Perform the gate glitch on the first try.",
"This allows control over the Ripper cycle to do the rest of the room more efficiently.",
"For example, with either a Power Bomb or Speed Booster,",
"it makes it possible to cross the room suitless right-to-left with no tanks."
]
}
],
"nextStratId": 74,
"nextNotableId": 2
}