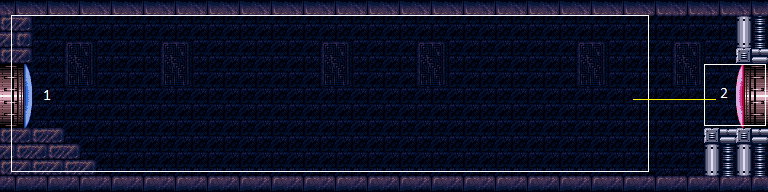
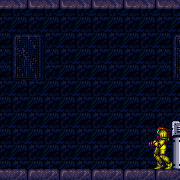
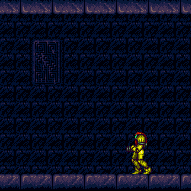
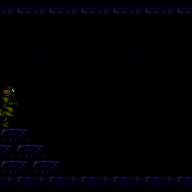
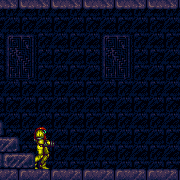
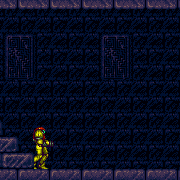
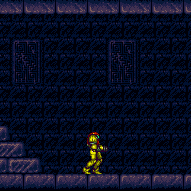
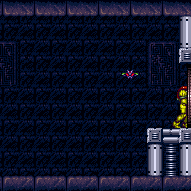
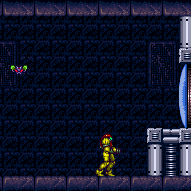
Flyway
Room ID: 13
|
Exit condition: {
"leaveWithRunway": {
"length": 3,
"openEnd": 1
}
} |
|

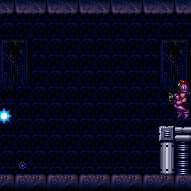
Leaving with upward momentum is possible in three ways: 1) Most easily, with a momentum-conserving morph against the ceiling through the transition, 2) With a momentum-conserving turnaround through the transition, or 3) Jumping specifically with a extra run speed $5.2 or $5.3 and aiming down through the transition. For the first two methods, back into the corner at the start of runway. Requires: "h_speedJump"
{
"or": [
"canMomentumConservingMorph",
"canInsaneJump"
]
}Exit condition: {
"leaveWithSidePlatform": {
"height": 3,
"runway": {
"length": 38,
"openEnd": 0
},
"obstruction": [
5,
2
]
}
}Dev note: Max extra run speed $6.5. Using the full runway, the momentum-conserving morph has a 4-frame window for the jump, and between a 2-frame and 5-frame window for the morph depending on the jump timing (with later jumps giving a bigger window for the morph); these windows can be more narrow depending on what is required in the next room. The momentum-conserving turnaround has a 2-frame window for the jump, and either a 3-frame or 5-frame for the turnaround (with the last-frame jump giving the larger window for the turnaround); again the windows can be more narrow depending on what is required in the next room. The aim-down method requires specific positioning to ensure Samus barely clears the door ledge with a frame-perfect jump. |
|


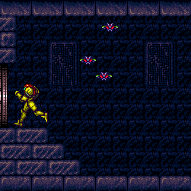
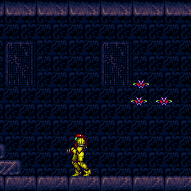
There are many mellows for farming. Leave one alive to spark interrupt. If entry energy is poor, damage down to 29 energy before farming to activate health bias, then quickly kill many Mellows with Plasma Beam or Power Bombs before collecting their drops. Entrance condition: {
"comeInWithRMode": {}
}Requires: {
"not": "f_ZebesSetAblaze"
}
{
"or": [
"h_CrystalFlashForReserveEnergy",
{
"and": [
{
"resourceMissingAtMost": [
{
"type": "Missile",
"count": 0
}
]
},
{
"or": [
{
"and": [
{
"resourceAvailable": [
{
"type": "RegularEnergy",
"count": 19
}
]
},
{
"disableEquipment": "ETank"
},
{
"partialRefill": {
"type": "ReserveEnergy",
"limit": 100
}
}
]
},
{
"and": [
{
"resourceMissingAtMost": [
{
"type": "RegularEnergy",
"count": 0
}
]
},
"canRiskPermanentLossOfAccess",
{
"partialRefill": {
"type": "ReserveEnergy",
"limit": 100
}
}
]
}
]
}
]
}
]
}
{
"canShineCharge": {
"usedTiles": 37,
"openEnd": 0
}
}
{
"autoReserveTrigger": {}
}
"canRModeSparkInterrupt"Dev note: FIXME: Other weapon options for fast Mellow farming while abusing healthbomb state. Needs to be fast to not risk drops timing out. |
|
Requires: "canShinechargeMovement"
{
"canShineCharge": {
"usedTiles": 37,
"openEnd": 0
}
}
{
"shineChargeFrames": 60
}Exit condition: {
"leaveShinecharged": {}
} |
|
Exit condition: {
"leaveSpinning": {
"remoteRunway": {
"length": 37,
"openEnd": 0
}
}
} |
|

Exit condition: {
"leaveWithMockball": {
"remoteRunway": {
"length": 35,
"openEnd": 0
},
"landingRunway": {
"length": 3,
"openEnd": 1
}
}
} |
|


Exit condition: {
"leaveWithSpringBallBounce": {
"remoteRunway": {
"length": 31,
"openEnd": 0
},
"landingRunway": {
"length": 3,
"openEnd": 1
},
"movementType": "uncontrolled"
}
} |
|


Exit condition: {
"leaveSpaceJumping": {
"remoteRunway": {
"length": 27,
"openEnd": 0
}
}
} |
|
Requires: {
"canShineCharge": {
"usedTiles": 37,
"openEnd": 0
}
}
"canChainTemporaryBlue"Exit condition: {
"leaveWithTemporaryBlue": {}
} |
|
Requires: {
"or": [
{
"resetRoom": {
"nodes": [
1
]
}
},
{
"and": [
{
"resetRoom": {
"nodes": [
2
]
}
},
{
"cycleFrames": 50
}
]
}
]
}
{
"or": [
{
"and": [
{
"or": [
"ScrewAttack",
"Plasma"
]
},
{
"cycleFrames": 420
}
]
},
{
"and": [
{
"or": [
"canDodgeWhileShooting",
"Spazer",
"Wave"
]
},
{
"cycleFrames": 610
}
]
},
{
"and": [
{
"cycleFrames": 800
},
{
"enemyDamage": {
"enemy": "Mellow",
"type": "contact",
"hits": 2
}
}
]
}
]
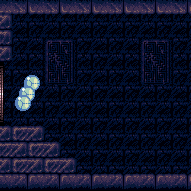
}Farm cycle drops: 12 Mellow |
|
Requires: "h_CrystalFlash" |
|
Requires: {
"canShineCharge": {
"usedTiles": 38,
"openEnd": 0
}
}
"h_CrystalSpark" |
|
Exit condition: {
"leaveWithGModeSetup": {}
} |
|
|
|
|
|
Entrance condition: {
"comeInWithGrappleTeleport": {
"blockPositions": [
[
3,
12
],
[
3,
13
]
]
}
}Bypasses door shell: true |
|
Entrance condition: {
"comeInWithGrappleTeleport": {
"blockPositions": [
[
3,
12
]
]
}
}Exit condition: {
"leaveWithGrappleTeleport": {
"blockPositions": [
[
3,
12
]
]
}
}Bypasses door shell: true |
|
Entrance condition: {
"comeInWithGrappleTeleport": {
"blockPositions": [
[
3,
13
]
]
}
}Exit condition: {
"leaveWithGrappleTeleport": {
"blockPositions": [
[
3,
13
]
]
}
}Bypasses door shell: true |
|
Exit condition: {
"leaveWithRunway": {
"length": 3,
"openEnd": 1
}
} |
|

Leaving with upward momentum is possible in three ways: 1) Most easily, with a momentum-conserving morph against the ceiling through the transition, 2) With a momentum-conserving turnaround through the transition, or 3) Jumping specifically with a extra run speed $5.2 or $5.3 and aiming down through the transition. For the first two methods, avoid backing into the corner at the start of runway; instead press against it and turn around, to put Samus into a better position. An even better position is obtained by backing up an additional 8 to 12 pixels from the runway start (again, pressing forward into the corner, not backing into it), or equivalently, pressing and releasing an angle button 4 to 6 times to arm pump while running. Requires: "h_speedJump"
{
"or": [
"canMomentumConservingMorph",
"canInsaneJump"
]
}Exit condition: {
"leaveWithSidePlatform": {
"height": 3,
"runway": {
"length": 38,
"openEnd": 0
},
"obstruction": [
3,
0
]
}
}Dev note: Max extra run speed $6.1. Using the full runway (either backing into the corner or turning around from it), the momentum-conserving morph has a 5-frame window for the jump, and either a 2-frame window or 3-frame window for the morph depending on the jump timing; these windows can be more narrow depending on what is required in the next room. The momentum-conserving turnaround requires a frame-perfect (last-frame) jump and a frame-perfect turnaround. The aim-down method requires specific positioning to ensure Samus barely clears the door ledge with a frame-perfect jump. |
|
There are many mellows for farming. Leave one alive to spark interrupt. If entry energy is poor, damage down to 29 energy before farming to activate health bias, then quickly kill many Mellows with Plasma Beam or Power Bombs before collecting their drops. Entrance condition: {
"comeInWithRMode": {}
}Requires: {
"not": "f_ZebesSetAblaze"
}
{
"or": [
"h_CrystalFlashForReserveEnergy",
{
"and": [
{
"resourceMissingAtMost": [
{
"type": "Missile",
"count": 0
}
]
},
{
"or": [
{
"and": [
{
"resourceAvailable": [
{
"type": "RegularEnergy",
"count": 99
}
]
},
{
"disableEquipment": "ETank"
},
{
"partialRefill": {
"type": "ReserveEnergy",
"limit": 100
}
}
]
},
{
"and": [
{
"resourceAvailable": [
{
"type": "RegularEnergy",
"count": 19
}
]
},
{
"or": [
"Plasma",
"h_usePowerBomb"
]
},
{
"disableEquipment": "ETank"
},
{
"partialRefill": {
"type": "ReserveEnergy",
"limit": 100
}
}
]
},
{
"and": [
{
"resourceMissingAtMost": [
{
"type": "RegularEnergy",
"count": 0
}
]
},
"canRiskPermanentLossOfAccess",
{
"partialRefill": {
"type": "ReserveEnergy",
"limit": 100
}
}
]
}
]
}
]
}
]
}
{
"canShineCharge": {
"usedTiles": 37,
"openEnd": 0
}
}
{
"autoReserveTrigger": {}
}
"canRModeSparkInterrupt"Dev note: FIXME: Other weapon options for fast Mellow farming while abusing healthbomb state. Needs to be fast to not risk drops timing out. |
|
Requires: "canShinechargeMovement"
{
"canShineCharge": {
"usedTiles": 36,
"openEnd": 1
}
}
{
"shineChargeFrames": 40
}Exit condition: {
"leaveShinecharged": {}
} |
|
Exit condition: {
"leaveSpinning": {
"remoteRunway": {
"length": 35,
"openEnd": 0
}
}
} |
|


Exit condition: {
"leaveWithMockball": {
"remoteRunway": {
"length": 35,
"openEnd": 0
},
"landingRunway": {
"length": 3,
"openEnd": 1
}
}
} |
|

Exit condition: {
"leaveWithSpringBallBounce": {
"remoteRunway": {
"length": 31,
"openEnd": 0
},
"landingRunway": {
"length": 3,
"openEnd": 1
},
"movementType": "uncontrolled"
}
} |
|

Exit condition: {
"leaveSpaceJumping": {
"remoteRunway": {
"length": 27,
"openEnd": 0
}
}
} |
|
Requires: {
"canShineCharge": {
"usedTiles": 37,
"openEnd": 0
}
}
"canChainTemporaryBlue"Exit condition: {
"leaveWithTemporaryBlue": {}
} |
|
Exit condition: {
"leaveWithGModeSetup": {}
} |
{
"$schema": "../../../schema/m3-room.schema.json",
"id": 13,
"name": "Flyway",
"area": "Crateria",
"subarea": "Central",
"roomAddress": "0x79879",
"roomEnvironments": [
{
"heated": false
}
],
"mapTileMask": [
[
1,
1,
1
]
],
"nodes": [
{
"id": 1,
"name": "Left Door",
"nodeType": "door",
"nodeSubType": "blue",
"nodeAddress": "0x0018bb6",
"doorOrientation": "left",
"doorEnvironments": [
{
"physics": "air"
}
],
"mapTileMask": [
[
2,
2,
1
]
]
},
{
"id": 2,
"name": "Right Door",
"nodeType": "door",
"nodeSubType": "red",
"nodeAddress": "0x0018bc2",
"doorOrientation": "right",
"doorEnvironments": [
{
"physics": "air"
}
],
"locks": [
{
"name": "Flyway Red Lock (to Bomb Torizo)",
"lockType": "coloredDoor",
"unlockStrats": [
{
"name": "Base",
"requires": [
{
"or": [
"h_openRedDoor",
"f_ZebesSetAblaze"
]
}
],
"flashSuitChecked": true,
"blueSuitChecked": true,
"note": "The end game sequence overrides the color lock."
}
]
}
],
"mapTileMask": [
[
1,
1,
2
]
]
}
],
"enemies": [
{
"id": "e1",
"groupName": "Flyway Mellows",
"enemyName": "Mellow",
"quantity": 12,
"homeNodes": [
1,
2
],
"stopSpawn": [
"f_ZebesSetAblaze"
]
}
],
"strats": [
{
"link": [
1,
1
],
"name": "Base (Unlock Door)",
"requires": [],
"unlocksDoors": [
{
"types": [
"ammo"
],
"requires": []
}
],
"flashSuitChecked": true,
"blueSuitChecked": true
},
{
"link": [
1,
1
],
"name": "Base (Come In Normally)",
"entranceCondition": {
"comeInNormally": {}
},
"requires": [],
"flashSuitChecked": true,
"blueSuitChecked": true
},
{
"link": [
1,
1
],
"name": "Base (Come In With Mockball)",
"entranceCondition": {
"comeInWithMockball": {
"adjacentMinTiles": 0,
"remoteAndLandingMinTiles": [
[
0,
0
]
],
"speedBooster": "any"
}
},
"requires": [],
"flashSuitChecked": true,
"blueSuitChecked": true
},
{
"link": [
2,
2
],
"name": "Base (Unlock Door)",
"requires": [],
"unlocksDoors": [
{
"types": [
"ammo"
],
"requires": []
}
],
"flashSuitChecked": true,
"blueSuitChecked": true
},
{
"link": [
2,
2
],
"name": "Base (Come In Normally)",
"entranceCondition": {
"comeInNormally": {}
},
"requires": [],
"flashSuitChecked": true,
"blueSuitChecked": true
},
{
"link": [
2,
2
],
"name": "Base (Come In With Mockball)",
"entranceCondition": {
"comeInWithMockball": {
"adjacentMinTiles": 0,
"remoteAndLandingMinTiles": [
[
0,
0
]
],
"speedBooster": "any"
}
},
"requires": [],
"flashSuitChecked": true,
"blueSuitChecked": true
},
{
"id": 1,
"link": [
1,
1
],
"name": "Leave with Runway",
"requires": [],
"exitCondition": {
"leaveWithRunway": {
"length": 3,
"openEnd": 1
}
},
"flashSuitChecked": true,
"blueSuitChecked": true
},
{
"id": 24,
"link": [
1,
1
],
"name": "Leave With Side Platform",
"requires": [
"h_speedJump",
{
"or": [
"canMomentumConservingMorph",
"canInsaneJump"
]
}
],
"exitCondition": {
"leaveWithSidePlatform": {
"height": 3,
"runway": {
"length": 38,
"openEnd": 0
},
"obstruction": [
5,
2
]
}
},
"flashSuitChecked": true,
"blueSuitChecked": true,
"note": [
"Leaving with upward momentum is possible in three ways:",
"1) Most easily, with a momentum-conserving morph against the ceiling through the transition,",
"2) With a momentum-conserving turnaround through the transition, or",
"3) Jumping specifically with a extra run speed $5.2 or $5.3 and aiming down through the transition.",
"For the first two methods, back into the corner at the start of runway."
],
"devNote": [
"Max extra run speed $6.5.",
"Using the full runway, the momentum-conserving morph has a 4-frame window for the jump,",
"and between a 2-frame and 5-frame window for the morph depending on the jump timing (with later jumps giving a bigger window for the morph);",
"these windows can be more narrow depending on what is required in the next room.",
"The momentum-conserving turnaround has a 2-frame window for the jump,",
"and either a 3-frame or 5-frame for the turnaround (with the last-frame jump giving the larger window for the turnaround);",
"again the windows can be more narrow depending on what is required in the next room.",
"The aim-down method requires specific positioning to ensure Samus barely clears the door ledge with a frame-perfect jump."
]
},
{
"id": 27,
"link": [
1,
1
],
"name": "R-Mode Spark Interrupt",
"entranceCondition": {
"comeInWithRMode": {}
},
"requires": [
{
"not": "f_ZebesSetAblaze"
},
{
"or": [
"h_CrystalFlashForReserveEnergy",
{
"and": [
{
"resourceMissingAtMost": [
{
"type": "Missile",
"count": 0
}
]
},
{
"or": [
{
"and": [
{
"resourceAvailable": [
{
"type": "RegularEnergy",
"count": 19
}
]
},
{
"disableEquipment": "ETank"
},
{
"partialRefill": {
"type": "ReserveEnergy",
"limit": 100
}
}
]
},
{
"and": [
{
"resourceMissingAtMost": [
{
"type": "RegularEnergy",
"count": 0
}
]
},
"canRiskPermanentLossOfAccess",
{
"partialRefill": {
"type": "ReserveEnergy",
"limit": 100
}
}
]
}
]
}
]
}
]
},
{
"canShineCharge": {
"usedTiles": 37,
"openEnd": 0
}
},
{
"autoReserveTrigger": {}
},
"canRModeSparkInterrupt"
],
"flashSuitChecked": true,
"blueSuitChecked": true,
"note": [
"There are many mellows for farming. Leave one alive to spark interrupt.",
"If entry energy is poor, damage down to 29 energy before farming to activate health bias, then quickly kill",
"many Mellows with Plasma Beam or Power Bombs before collecting their drops."
],
"devNote": [
"FIXME: Other weapon options for fast Mellow farming while abusing healthbomb state. Needs to be fast to not risk",
"drops timing out."
]
},
{
"id": 2,
"link": [
1,
1
],
"name": "Leave Shinecharged",
"requires": [
"canShinechargeMovement",
{
"canShineCharge": {
"usedTiles": 37,
"openEnd": 0
}
},
{
"shineChargeFrames": 60
}
],
"exitCondition": {
"leaveShinecharged": {}
},
"flashSuitChecked": true,
"blueSuitChecked": true
},
{
"id": 3,
"link": [
1,
1
],
"name": "Leave Spinning",
"requires": [],
"exitCondition": {
"leaveSpinning": {
"remoteRunway": {
"length": 37,
"openEnd": 0
}
}
},
"flashSuitChecked": true,
"blueSuitChecked": true
},
{
"id": 4,
"link": [
1,
1
],
"name": "Leave With Mockball",
"requires": [],
"exitCondition": {
"leaveWithMockball": {
"remoteRunway": {
"length": 35,
"openEnd": 0
},
"landingRunway": {
"length": 3,
"openEnd": 1
}
}
},
"flashSuitChecked": true,
"blueSuitChecked": true
},
{
"id": 5,
"link": [
1,
1
],
"name": "Leave With Spring Ball Bounce",
"requires": [],
"exitCondition": {
"leaveWithSpringBallBounce": {
"remoteRunway": {
"length": 31,
"openEnd": 0
},
"landingRunway": {
"length": 3,
"openEnd": 1
},
"movementType": "uncontrolled"
}
},
"flashSuitChecked": true,
"blueSuitChecked": true
},
{
"id": 6,
"link": [
1,
1
],
"name": "Leave Space Jumping",
"requires": [],
"exitCondition": {
"leaveSpaceJumping": {
"remoteRunway": {
"length": 27,
"openEnd": 0
}
}
},
"flashSuitChecked": true,
"blueSuitChecked": true
},
{
"id": 7,
"link": [
1,
1
],
"name": "Leave With Temporary Blue",
"requires": [
{
"canShineCharge": {
"usedTiles": 37,
"openEnd": 0
}
},
"canChainTemporaryBlue"
],
"exitCondition": {
"leaveWithTemporaryBlue": {}
},
"flashSuitChecked": true,
"blueSuitChecked": true
},
{
"id": 8,
"link": [
1,
1
],
"name": "Mellow Farm",
"requires": [
{
"or": [
{
"resetRoom": {
"nodes": [
1
]
}
},
{
"and": [
{
"resetRoom": {
"nodes": [
2
]
}
},
{
"cycleFrames": 50
}
]
}
]
},
{
"or": [
{
"and": [
{
"or": [
"ScrewAttack",
"Plasma"
]
},
{
"cycleFrames": 420
}
]
},
{
"and": [
{
"or": [
"canDodgeWhileShooting",
"Spazer",
"Wave"
]
},
{
"cycleFrames": 610
}
]
},
{
"and": [
{
"cycleFrames": 800
},
{
"enemyDamage": {
"enemy": "Mellow",
"type": "contact",
"hits": 2
}
}
]
}
]
}
],
"farmCycleDrops": [
{
"enemy": "Mellow",
"count": 12
}
],
"flashSuitChecked": true,
"blueSuitChecked": true
},
{
"id": 9,
"link": [
1,
1
],
"name": "Crystal Flash",
"requires": [
"h_CrystalFlash"
],
"flashSuitChecked": true,
"blueSuitChecked": true
},
{
"id": 26,
"link": [
1,
1
],
"name": "Crystal Spark",
"requires": [
{
"canShineCharge": {
"usedTiles": 38,
"openEnd": 0
}
},
"h_CrystalSpark"
],
"flashSuitChecked": true,
"blueSuitChecked": true
},
{
"id": 10,
"link": [
1,
1
],
"name": "G-Mode Setup - Get Hit By Mellow",
"requires": [],
"exitCondition": {
"leaveWithGModeSetup": {}
},
"flashSuitChecked": true,
"blueSuitChecked": true
},
{
"id": 11,
"link": [
1,
2
],
"name": "Base",
"requires": [],
"flashSuitChecked": true,
"blueSuitChecked": true
},
{
"id": 12,
"link": [
2,
1
],
"name": "Base",
"requires": [],
"flashSuitChecked": true,
"blueSuitChecked": true
},
{
"id": 13,
"link": [
2,
1
],
"name": "Grapple Teleport Door Lock Skip",
"entranceCondition": {
"comeInWithGrappleTeleport": {
"blockPositions": [
[
3,
12
],
[
3,
13
]
]
}
},
"requires": [],
"bypassesDoorShell": "yes",
"flashSuitChecked": true,
"blueSuitChecked": true
},
{
"id": 14,
"link": [
2,
1
],
"name": "Carry Grapple Teleport (Top Position)",
"entranceCondition": {
"comeInWithGrappleTeleport": {
"blockPositions": [
[
3,
12
]
]
}
},
"requires": [],
"exitCondition": {
"leaveWithGrappleTeleport": {
"blockPositions": [
[
3,
12
]
]
}
},
"bypassesDoorShell": "yes",
"flashSuitChecked": true,
"blueSuitChecked": true
},
{
"id": 15,
"link": [
2,
1
],
"name": "Carry Grapple Teleport (Bottom Position)",
"entranceCondition": {
"comeInWithGrappleTeleport": {
"blockPositions": [
[
3,
13
]
]
}
},
"requires": [],
"exitCondition": {
"leaveWithGrappleTeleport": {
"blockPositions": [
[
3,
13
]
]
}
},
"bypassesDoorShell": "yes",
"flashSuitChecked": true,
"blueSuitChecked": true
},
{
"id": 16,
"link": [
2,
2
],
"name": "Leave with Runway",
"requires": [],
"exitCondition": {
"leaveWithRunway": {
"length": 3,
"openEnd": 1
}
},
"flashSuitChecked": true,
"blueSuitChecked": true
},
{
"id": 25,
"link": [
2,
2
],
"name": "Leave With Side Platform",
"requires": [
"h_speedJump",
{
"or": [
"canMomentumConservingMorph",
"canInsaneJump"
]
}
],
"exitCondition": {
"leaveWithSidePlatform": {
"height": 3,
"runway": {
"length": 38,
"openEnd": 0
},
"obstruction": [
3,
0
]
}
},
"flashSuitChecked": true,
"blueSuitChecked": true,
"note": [
"Leaving with upward momentum is possible in three ways:",
"1) Most easily, with a momentum-conserving morph against the ceiling through the transition,",
"2) With a momentum-conserving turnaround through the transition, or",
"3) Jumping specifically with a extra run speed $5.2 or $5.3 and aiming down through the transition.",
"For the first two methods, avoid backing into the corner at the start of runway;",
"instead press against it and turn around, to put Samus into a better position.",
"An even better position is obtained by backing up an additional 8 to 12 pixels from the runway start",
"(again, pressing forward into the corner, not backing into it),",
"or equivalently, pressing and releasing an angle button 4 to 6 times to arm pump while running."
],
"devNote": [
"Max extra run speed $6.1.",
"Using the full runway (either backing into the corner or turning around from it), the momentum-conserving morph has a 5-frame window for the jump,",
"and either a 2-frame window or 3-frame window for the morph depending on the jump timing;",
"these windows can be more narrow depending on what is required in the next room.",
"The momentum-conserving turnaround requires a frame-perfect (last-frame) jump and a frame-perfect turnaround.",
"The aim-down method requires specific positioning to ensure Samus barely clears the door ledge with a frame-perfect jump."
]
},
{
"id": 28,
"link": [
2,
2
],
"name": "R-Mode Spark Interrupt",
"entranceCondition": {
"comeInWithRMode": {}
},
"requires": [
{
"not": "f_ZebesSetAblaze"
},
{
"or": [
"h_CrystalFlashForReserveEnergy",
{
"and": [
{
"resourceMissingAtMost": [
{
"type": "Missile",
"count": 0
}
]
},
{
"or": [
{
"and": [
{
"resourceAvailable": [
{
"type": "RegularEnergy",
"count": 99
}
]
},
{
"disableEquipment": "ETank"
},
{
"partialRefill": {
"type": "ReserveEnergy",
"limit": 100
}
}
]
},
{
"and": [
{
"resourceAvailable": [
{
"type": "RegularEnergy",
"count": 19
}
]
},
{
"or": [
"Plasma",
"h_usePowerBomb"
]
},
{
"disableEquipment": "ETank"
},
{
"partialRefill": {
"type": "ReserveEnergy",
"limit": 100
}
}
]
},
{
"and": [
{
"resourceMissingAtMost": [
{
"type": "RegularEnergy",
"count": 0
}
]
},
"canRiskPermanentLossOfAccess",
{
"partialRefill": {
"type": "ReserveEnergy",
"limit": 100
}
}
]
}
]
}
]
}
]
},
{
"canShineCharge": {
"usedTiles": 37,
"openEnd": 0
}
},
{
"autoReserveTrigger": {}
},
"canRModeSparkInterrupt"
],
"flashSuitChecked": true,
"blueSuitChecked": true,
"note": [
"There are many mellows for farming. Leave one alive to spark interrupt.",
"If entry energy is poor, damage down to 29 energy before farming to activate health bias, then quickly kill",
"many Mellows with Plasma Beam or Power Bombs before collecting their drops."
],
"devNote": [
"FIXME: Other weapon options for fast Mellow farming while abusing healthbomb state. Needs to be fast to not risk",
"drops timing out."
]
},
{
"id": 17,
"link": [
2,
2
],
"name": "Leave Shinecharged",
"requires": [
"canShinechargeMovement",
{
"canShineCharge": {
"usedTiles": 36,
"openEnd": 1
}
},
{
"shineChargeFrames": 40
}
],
"exitCondition": {
"leaveShinecharged": {}
},
"flashSuitChecked": true,
"blueSuitChecked": true
},
{
"id": 18,
"link": [
2,
2
],
"name": "Leave Spinning",
"requires": [],
"exitCondition": {
"leaveSpinning": {
"remoteRunway": {
"length": 35,
"openEnd": 0
}
}
},
"flashSuitChecked": true,
"blueSuitChecked": true
},
{
"id": 19,
"link": [
2,
2
],
"name": "Leave With Mockball",
"requires": [],
"exitCondition": {
"leaveWithMockball": {
"remoteRunway": {
"length": 35,
"openEnd": 0
},
"landingRunway": {
"length": 3,
"openEnd": 1
}
}
},
"flashSuitChecked": true,
"blueSuitChecked": true
},
{
"id": 20,
"link": [
2,
2
],
"name": "Leave With Spring Ball Bounce",
"requires": [],
"exitCondition": {
"leaveWithSpringBallBounce": {
"remoteRunway": {
"length": 31,
"openEnd": 0
},
"landingRunway": {
"length": 3,
"openEnd": 1
},
"movementType": "uncontrolled"
}
},
"flashSuitChecked": true,
"blueSuitChecked": true
},
{
"id": 21,
"link": [
2,
2
],
"name": "Leave Space Jumping",
"requires": [],
"exitCondition": {
"leaveSpaceJumping": {
"remoteRunway": {
"length": 27,
"openEnd": 0
}
}
},
"flashSuitChecked": true,
"blueSuitChecked": true
},
{
"id": 22,
"link": [
2,
2
],
"name": "Leave With Temporary Blue",
"requires": [
{
"canShineCharge": {
"usedTiles": 37,
"openEnd": 0
}
},
"canChainTemporaryBlue"
],
"exitCondition": {
"leaveWithTemporaryBlue": {}
},
"flashSuitChecked": true,
"blueSuitChecked": true
},
{
"id": 23,
"link": [
2,
2
],
"name": "G-Mode Setup - Get Hit By Mellow",
"requires": [],
"exitCondition": {
"leaveWithGModeSetup": {}
},
"flashSuitChecked": true,
"blueSuitChecked": true
}
],
"notables": [],
"nextStratId": 29,
"nextNotableId": 1
}