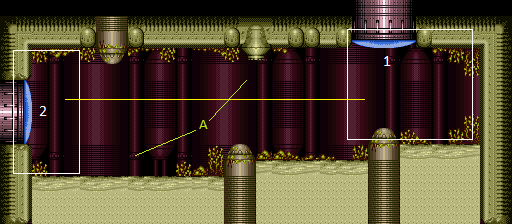

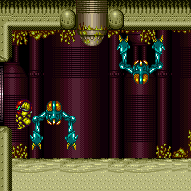

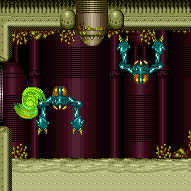

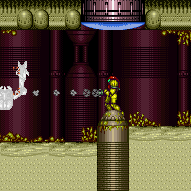

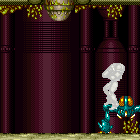
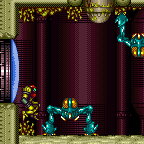

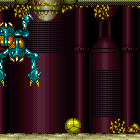


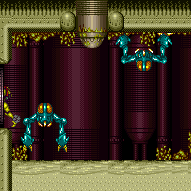

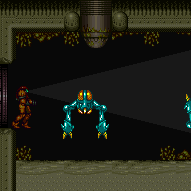

Room ID: 230
|
Exit condition: {
"leaveWithDoorFrameBelow": {
"height": 3
}
} |
|
Exit condition: {
"leaveWithPlatformBelow": {
"height": 8.5,
"leftPosition": -1.5,
"rightPosition": 1.5
}
}Dev note: Additional platforms could be added, but they don't yet appear to have applications. |
|
Requires: {
"enemyDamage": {
"enemy": "Blue Sidehopper",
"type": "contact",
"hits": 1
}
} |
|
Entrance condition: {
"comeInWithGMode": {
"mode": "direct",
"morphed": false
},
"comesThroughToilet": "any"
}Exit condition: {
"leaveWithGMode": {
"morphed": false
}
} |
From: 1
Top Right Door
To: 1
Top Right Door
Entrance condition: {
"comeInWithGMode": {
"mode": "direct",
"morphed": true
},
"comesThroughToilet": "any"
}Requires: "h_artificialMorphSpringBall" "HiJump" Exit condition: {
"leaveWithGMode": {
"morphed": true
}
}Dev note: FIXME: This could be possible with Bombs by luring the hoppers to the left. |
From: 1
Top Right Door
To: 1
Top Right Door
Immediately on entry Spring Ball Bomb Jump. Be sure not to land left of the pillar below the door or it is harder to get up in time. Entrance condition: {
"comeInWithGMode": {
"mode": "direct",
"morphed": true,
"mobility": "mobile"
},
"comesThroughToilet": "any"
}Requires: "canTrickyJump" "h_artificialMorphSpringBallBombJump" Exit condition: {
"leaveWithGMode": {
"morphed": true
}
}Dev note: FIXME: This is possible with Bombs by luring the hoppers to the left, but it is dependent on hopper RNG. |
|
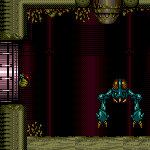


Enter through the far left side of the door. Wait for the top hopper to move right to start running. Run under the right Hopper and jump over the left Hopper to avoid all damage. Jump when Samus reaches the leftmost lump in the ground to avoid the left hopper. It helps to keep the camera scrolled to the right. Entrance condition: {
"comeInNormally": {},
"comesThroughToilet": "no"
}Requires: {
"notable": "Hopper Dodge"
}
"canDash"
"canTrickyDodgeEnemies"
{
"or": [
"canPrepareForNextRoom",
{
"and": [
"canCameraManip",
"canMoonwalk",
"canInsaneJump"
]
}
]
}Unlocks doors: {"types":["super"],"requires":[]}
{"types":["missiles","powerbomb"],"requires":[{"enemyDamage":{"enemy":"Blue Sidehopper","type":"contact","hits":1}}]} |
|
Try to scroll the camera to the right to keep the left Hopper off-camera for longer. Wait for the top hopper to move right to start running. Run under the right Hopper and jump over the left Hopper to avoid all damage. Jump when Samus reaches the leftmost lump in the ground to avoid the left hopper. Entrance condition: {
"comeInNormally": {},
"comesThroughToilet": "any"
}Requires: {
"notable": "Hopper Dodge"
}
"canDash"
"canCameraManip"
"canMoonwalk"
"canInsaneJump"Unlocks doors: {"types":["super"],"requires":[]}
{"types":["missiles","powerbomb"],"requires":[{"enemyDamage":{"enemy":"Blue Sidehopper","type":"contact","hits":1}}]} |
|
Wait for the top hopper to move right, then jump through the left hopper. The left hopper may be harder to dodge if the camera is scrolled to the left. Requires: "canDash"
"ScrewAttack"
"canCarefulJump"
{
"or": [
"canTrickyJump",
"SpaceJump",
{
"enemyDamage": {
"enemy": "Blue Sidehopper",
"type": "contact",
"hits": 1
}
}
]
}Unlocks doors: {"types":["super"],"requires":[]}
{"types":["missiles","powerbomb"],"requires":[{"enemyDamage":{"enemy":"Blue Sidehopper","type":"contact","hits":1}}]} |
|
Be careful not to land on the ground while touching a hopper. Requires: {
"haveBlueSuit": {}
}
"canTrickyDodgeEnemies"Unlocks doors: {"types":["ammo"],"requires":[]} |
|
Requires: {
"obstaclesCleared": [
"A"
]
}Unlocks doors: {"types":["ammo"],"requires":[]} |
|

Kill the top hopper quickly; the left hopper is more random. To be safe, plan to retreat right while attacking. It also helps to attempt to move the hopper off camera between attacks. Requires: "canDodgeWhileShooting"
"canTrickyJump"
"canCameraManip"
{
"enemyKill": {
"enemies": [
[
"Blue Sidehopper",
"Blue Sidehopper"
]
]
}
}Clears obstacles: A Unlocks doors: {"types":["ammo"],"requires":[]} |
|
Wait for the left hopper to move right so it does not follow Samus as i-frames run out. A damage boost using the top hopper also moves through the room fast enough to be safe. Requires: {
"or": [
{
"enemyDamage": {
"enemy": "Blue Sidehopper",
"type": "contact",
"hits": 1
}
},
"h_pauseAbuseMinimalReserveRefill"
]
}
{
"or": [
{
"and": [
"canTrickyJump",
"canUseIFrames"
]
},
{
"enemyDamage": {
"enemy": "Blue Sidehopper",
"type": "contact",
"hits": 1
}
}
]
}Unlocks doors: {"types":["super"],"requires":[]}
{"types":["missiles","powerbomb"],"requires":[{"enemyDamage":{"enemy":"Blue Sidehopper","type":"contact","hits":1}}]} |
From: 1
Top Right Door
To: 2
Left Door
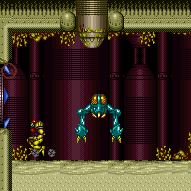
Requires: {
"enemyDamage": {
"enemy": "Blue Sidehopper",
"type": "contact",
"hits": 1
}
}Exit condition: {
"leaveWithDamage": {
"enemy": "Blue Sidehopper"
}
}Unlocks doors: {"types":["super"],"requires":[]}
{"types":["missiles","powerbomb"],"requires":[{"enemyDamage":{"enemy":"Blue Sidehopper","type":"contact","hits":1}}]} |
From: 1
Top Right Door
To: 2
Left Door

Entrance condition: {
"comeInNormally": {},
"comesThroughToilet": "no"
}Requires: {
"or": [
"ScrewAttack",
"canTrickyJump",
{
"and": [
"canDodgeWhileShooting",
"canCameraManip",
{
"enemyKill": {
"enemies": [
[
"Blue Sidehopper"
]
]
}
}
]
}
]
}Exit condition: {
"leaveWithDamage": {
"enemy": "Blue Sidehopper"
}
}Unlocks doors: {"types":["super"],"requires":[]}
{"types":["missiles","powerbomb"],"requires":[{"enemyDamage":{"enemy":"Blue Sidehopper","type":"contact","hits":1}}]}Dev note: FIXME: add a Toilet entry version of this |
From: 1
Top Right Door
To: 2
Left Door
Entrance condition: {
"comeInShinecharged": {},
"comesThroughToilet": "no"
}Requires: {
"shineChargeFrames": 95
}
"canShinechargeMovementTricky"
{
"or": [
{
"enemyDamage": {
"enemy": "Blue Sidehopper",
"type": "contact",
"hits": 1
}
},
"h_pauseAbuseMinimalReserveRefill"
]
}
{
"shinespark": {
"frames": 21,
"excessFrames": 0
}
}Exit condition: {
"leaveWithSpark": {}
}Unlocks doors: {"types":["super"],"requires":[]}
{"types":["missiles","powerbomb"],"requires":["never"]} |
|
Spin jump into the room with Screw Attack, holding left through the transition to land near the door. Do a turn-around spin jump to the right, bonking the ceiling and overhang and then falling straight down. Then run and spin jump to the right through the Hoppers, to make it to the door without taking damage. Entrance condition: {
"comeInNormally": {}
}Requires: {
"notable": "Screw Attack Jumps"
}
"canDash"
"canPrepareForNextRoom"
"ScrewAttack"
"canTrickyJump"
"canTrickyDodgeEnemies" |
|
Press against the left wall while entering the room, until Samus lands. Then walk to the right to pass through the hoppers safely. Requires: {
"haveBlueSuit": {}
}
"canTrickyDodgeEnemies"Unlocks doors: {"types":["ammo"],"requires":[]} |
From: 2
Left Door
To: 1
Top Right Door
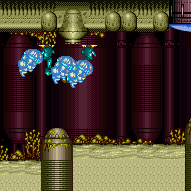
Entrance condition: {
"comeInWithSpark": {
"position": "top"
}
}Requires: {
"shinespark": {
"frames": 43,
"excessFrames": 19
}
} |
From: 2
Left Door
To: 1
Top Right Door

Entrance condition: {
"comeInWithSpark": {
"position": "bottom"
}
}Requires: {
"shinespark": {
"frames": 32,
"excessFrames": 8
}
} |
|
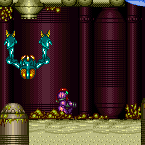
Time Samus' movement carefully to roll underneath a Tourian Hopper and also race it to the far door. Enter the room morphed and let the hoppers jump against the wall a couple of times. After the lower hopper has long enough time between jumps, roll under and run to the door. Entrance condition: {
"comeInNormally": {}
}Requires: {
"notable": "Roll Under Hoppers"
}
"Morph"
"canPrepareForNextRoom"
"canTrickyDodgeEnemies"
"canDash"
"h_complexToCarryFlashSuit" |
|
Use at least 4 tiles of runway to gain speed, running through the transition. Hold down during and after the transition in order to aim down and squeeze under the Hopper. Then immediately run to the right to make it to the door without taking damage. Entrance condition: {
"comeInRunning": {
"speedBooster": "any",
"minTiles": 4
}
}Requires: {
"notable": "Squeeze Under Hoppers"
}
"canPrepareForNextRoom"
"canTwoTileSqueeze"
"h_complexToCarryFlashSuit" |
|
Use an enemy or other damage source in the previous room to obtain i-frames, to be able to run through the Sidehoppers without taking a hit. Entrance condition: {
"comeInWithIFrames": {
"iFramesNeeded": 52
}
}Requires: "canDash" "canTrickyDodgeEnemies" "h_complexToCarryFlashSuit" |
|
Use an enemy or other damage source in the previous room to damage boost through the transition, to be able to run through the Sidehoppers without taking a hit. If Samus crosses the room too quickly, the top Hopper will hop right, which can make it harder to avoid. By ending the damage boost early enough, or delaying briefly after landing, it can be manipulated to hop left. Entrance condition: {
"comeInWithDamageBoost": {
"iFramesNeeded": 5
}
}Requires: "canDash" "canTrickyDodgeEnemies" "h_complexToCarryFlashSuit" |
From: 2
Left Door
To: 1
Top Right Door
Gain as much speed as possible, using a remote runway to spin jump precisely through the transition. Samus needs to be low enough to fit under the first Hopper, but high enough (and low enough fall speed) to make the required horizontal distance before landing, to be clear of the Hopper. If Samus hits the transition relatively high, aiming down through the transition can help to squeeze under the Hopper. If Samus hits the transition relatively low, do not aim down; remaining in spin helps Samus cover the horizontal distance. Entrance condition: {
"comeInSpinning": {
"speedBooster": "any",
"unusableTiles": 0,
"minExtraRunSpeed": "$2.0"
}
}Requires: {
"notable": "Squeeze Under Hoppers"
}
"canInsaneJump"
"h_complexToCarryFlashSuit" |
From: 2
Left Door
To: 1
Top Right Door
Entrance condition: {
"comeInWithSidePlatform": {
"platforms": [
{
"minHeight": -4,
"maxHeight": -4,
"minTiles": 19,
"speedBooster": "yes",
"obstructions": [
[
8,
-4
]
],
"note": "This applies to Blue Brinstar Boulder Room."
},
{
"minHeight": 2,
"maxHeight": 2,
"minTiles": 9.4375,
"speedBooster": "any",
"obstructions": [
[
2,
0
]
],
"note": "This applies to Early Supers Room."
},
{
"minHeight": 1,
"maxHeight": 1,
"minTiles": 18.4375,
"speedBooster": "yes",
"obstructions": [
[
6,
-1
]
],
"note": "This applies to Big Pink."
},
{
"minHeight": 2,
"maxHeight": 2,
"minTiles": 15.4375,
"speedBooster": "yes",
"obstructions": [
[
13,
2
]
],
"note": "This applies to Mission Impossible Room."
},
{
"minHeight": 8,
"maxHeight": 8,
"minTiles": 7.4375,
"speedBooster": "any",
"obstructions": [
[
1,
0
]
],
"requires": [
"HiJump"
],
"note": [
"This applies to Screw Attack Room."
]
},
{
"minHeight": 3,
"maxHeight": 3,
"minTiles": 15.4375,
"speedBooster": "yes",
"obstructions": [
[
13,
2
]
],
"note": [
"This applies to Botwoon's Room."
]
}
]
}
}Requires: {
"notable": "Squeeze Under Hoppers"
}
"canInsaneJump"
"h_complexToCarryFlashSuit" |
|
Requires: {
"obstaclesCleared": [
"A"
]
} |
|
Enter the room while morphed and let the hoppers jump against the wall a couple of times. Between hops, unmorph and shoot the lower hopper. Roll under the top hopper until it goes off camera to the left. Entrance condition: {
"comeInNormally": {}
}Requires: "Morph"
"canPrepareForNextRoom"
{
"enemyKill": {
"enemies": [
[
"Blue Sidehopper"
]
]
}
}
"canCameraManip"Unlocks doors: {"nodeId":1,"types":["ammo"],"requires":[]} |
|
Requires: {
"enemyDamage": {
"enemy": "Blue Sidehopper",
"type": "contact",
"hits": 1
}
}
"h_complexToCarryFlashSuit" |
|
Requires: "canDash" "canCarefulJump" "h_complexToCarryFlashSuit" |
From: 2
Left Door
To: 1
Top Right Door
Entrance condition: {
"comeInGettingBlueSpeed": {
"length": 0,
"openEnd": 0
}
}Requires: "h_blueJump"
"canPrepareForNextRoom"
{
"or": [
"SpaceJump",
"canCarefulJump"
]
}
"h_complexToCarryFlashSuit"Dev note: This is not the level of precision that would call for canBlueSpaceJump. |
From: 2
Left Door
To: 1
Top Right Door
Entrance condition: {
"comeInShinecharged": {}
}Requires: {
"shineChargeFrames": 160
}
"canShinechargeMovementTricky"
{
"enemyDamage": {
"enemy": "Blue Sidehopper",
"type": "contact",
"hits": 1
}
}Exit condition: {
"leaveShinecharged": {}
}Unlocks doors: {"types":["super"],"requires":[]}
{"types":["missiles","powerbomb"],"requires":["never"]} |
|
Enter the room from the left door, morph, and wait at the left wall. After 6 hops, the bottom Hopper will do three big hops in a row. Roll under the Hopper while it does the third of those three big hops. Quickly unmorph and run to the right side of the room. If successful, both Hoppers will remain off-camera, so you can safely Crystal Flash. Entrance condition: {
"comeInNormally": {}
}Requires: {
"notable": "Crystal Flash"
}
"canTrickyDodgeEnemies"
"h_CrystalFlash"
"canCameraManip" |
|
Entrance condition: {
"comeInNormally": {}
}Requires: {
"or": [
{
"enemyDamage": {
"enemy": "Blue Sidehopper",
"type": "contact",
"hits": 1
}
},
"h_pauseAbuseMinimalReserveRefill"
]
}Unlocks doors: {"types":["super"],"requires":[]}
{"types":["missiles","powerbomb"],"requires":["never"]} |
From: 2
Left Door
To: 2
Left Door
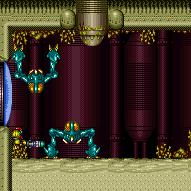
Entrance condition: {
"comeInWithMockball": {
"speedBooster": "any",
"adjacentMinTiles": 0,
"remoteAndLandingMinTiles": [
[
0,
0
]
]
}
}Requires: {
"or": [
{
"enemyDamage": {
"enemy": "Blue Sidehopper",
"type": "contact",
"hits": 1
}
},
"h_pauseAbuseMinimalReserveRefill"
]
}Unlocks doors: {"types":["super"],"requires":[]}
{"types":["missiles","powerbomb"],"requires":["never"]}Dev note: This is used to fulfill the requirement on exiting the previous room. FIXME: The hopper hit can be avoided depending on the entry speed and canPrepareForNextRoom. |
|
Entrance condition: {
"comeInNormally": {}
}Requires: "canPrepareForNextRoom" "ScrewAttack" "SpaceJump" "canCarefulJump" Unlocks doors: {"types":["super"],"requires":[]}
{"types":["missiles","powerbomb"],"requires":["never"]} |
|
Enter the room morphed to avoid a hopper hit on entry. Roll under the bottom hopper to lead it to the right, and then roll back to reach the door safely. Entrance condition: {
"comeInNormally": {}
}Requires: "canPrepareForNextRoom" "Morph" "canTrickyJump" Unlocks doors: {"types":["super"],"requires":[]}
{"types":["missiles","powerbomb"],"requires":["never"]} |
From: 2
Left Door
To: 2
Left Door

Entrance condition: {
"comeInNormally": {}
}Requires: "canPrepareForNextRoom"
"Morph"
"canDodgeWhileShooting"
{
"enemyKill": {
"enemies": [
[
"Blue Sidehopper"
]
]
}
}Unlocks doors: {"types":["ammo"],"requires":[]} |
From: 2
Left Door
To: 2
Left Door
Enter with a spin jump, ideally as low and with as much fall speed as possible, and hold left against the wall. After landing, shoot up to open the door, then jump straight up and hold left to exit. Entrance condition: {
"comeInNormally": {}
}Requires: "canTrickyDodgeEnemies" "canInsaneJump" "h_trickyToCarryFlashSuit" Exit condition: {
"leaveNormally": {}
}Unlocks doors: {"types":["ammo"],"requires":["never"]}Dev note: This can be logically useful to respawn the Super block in Mission Impossible Room, or the shot block in Mickey Mouse Room. |
|
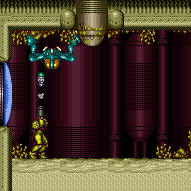
Enter the room in ball mode and let the hoppers jump against the wall a couple of times. Between hops, unmorph and shoot the lower hopper. Entrance condition: {
"comeInNormally": {}
}Requires: "Morph"
"canPrepareForNextRoom"
{
"enemyKill": {
"enemies": [
[
"Blue Sidehopper",
"Blue Sidehopper"
]
]
}
}Clears obstacles: A Unlocks doors: {"types":["ammo"],"requires":[]}Dev note: The ceiling hopper can be moved off camera instead of killed, but there's not an obstacle to represent that yet. |
|
Requires: {
"obstaclesCleared": [
"A"
]
}Exit condition: {
"leaveWithRunway": {
"length": 1,
"openEnd": 1
}
}Unlocks doors: {"types":["ammo"],"requires":[]}Dev note: FIXME: An alternative strat may be possible where the enemies are lured off-camera to the right instead of killed. |
From: 2
Left Door
To: 2
Left Door
Requires: {
"or": [
{
"obstaclesCleared": [
"A"
]
},
{
"and": [
{
"enemyDamage": {
"enemy": "Blue Sidehopper",
"type": "contact",
"hits": 2
}
},
"canUseIFrames"
]
}
]
}Exit condition: {
"leaveWithSidePlatform": {
"height": 2,
"runway": {
"length": 12,
"openEnd": 0
},
"obstruction": [
1,
0
]
}
}Unlocks doors: {"types":["super"],"requires":[]}
{"types":["missiles","powerbomb"],"requires":["never"]}Dev note: Max extra run speed $2.B. |
From: 2
Left Door
To: 2
Left Door
Requires: {
"enemyDamage": {
"enemy": "Blue Sidehopper",
"type": "contact",
"hits": 1
}
}
"canUseIFrames"
"canTrickyDodgeEnemies"Exit condition: {
"leaveWithSidePlatform": {
"height": 2,
"runway": {
"length": 10,
"openEnd": 0
},
"obstruction": [
1,
0
]
}
}Unlocks doors: {"types":["super"],"requires":[]}
{"types":["missiles","powerbomb"],"requires":["never"]}Dev note: Max extra run speed $2.4. |
|
Requires: {
"obstaclesCleared": [
"A"
]
}Exit condition: {
"leaveSpinning": {
"remoteRunway": {
"length": 9,
"openEnd": 1
}
}
}Unlocks doors: {"types":["ammo"],"requires":[]} |
From: 2
Left Door
To: 2
Left Door
Requires: {
"obstaclesCleared": [
"A"
]
}Exit condition: {
"leaveWithMockball": {
"remoteRunway": {
"length": 9,
"openEnd": 1
},
"landingRunway": {
"length": 1,
"openEnd": 1
}
}
}Unlocks doors: {"types":["ammo"],"requires":[]} |
From: 2
Left Door
To: 2
Left Door
Requires: {
"obstaclesCleared": [
"A"
]
}Exit condition: {
"leaveWithSpringBallBounce": {
"remoteRunway": {
"length": 7,
"openEnd": 0
},
"landingRunway": {
"length": 1,
"openEnd": 1
},
"movementType": "uncontrolled"
}
}Unlocks doors: {"types":["ammo"],"requires":[]} |
From: 2
Left Door
To: 2
Left Door
For higher speed, use the farther-away runway in the middle of the room. Requires: {
"obstaclesCleared": [
"A"
]
}Exit condition: {
"leaveSpaceJumping": {
"remoteRunway": {
"length": 6,
"openEnd": 1
}
}
}Unlocks doors: {"types":["ammo"],"requires":[]} |
|
Requires: {
"obstaclesNotCleared": [
"A"
]
}Exit condition: {
"leaveWithDamage": {
"enemy": "Blue Sidehopper"
}
}Unlocks doors: {"types":["super"],"requires":[]}
{"types":["missiles","powerbomb"],"requires":["never"]} |
|
Requires: {
"enemyDamage": {
"enemy": "Blue Sidehopper",
"type": "contact",
"hits": 1
}
} |
|
Samus can use i-frames and return through the door without taking a hit. Entrance condition: {
"comeInWithGMode": {
"mode": "direct",
"morphed": false
}
}Exit condition: {
"leaveWithGMode": {
"morphed": false
}
} |
|
Samus can use i-frames and return through the door without taking a hit. Entrance condition: {
"comeInWithGMode": {
"mode": "direct",
"morphed": true
}
}Exit condition: {
"leaveWithGMode": {
"morphed": true
}
} |
{
"$schema": "../../../schema/m3-room.schema.json",
"id": 230,
"name": "Tourian Hopper Room",
"area": "Tourian",
"subarea": "Main",
"roomAddress": "0x7DC19",
"roomEnvironments": [
{
"heated": false
}
],
"mapTileMask": [
[
1,
1
]
],
"nodes": [
{
"id": 1,
"name": "Top Right Door",
"nodeType": "door",
"nodeSubType": "blue",
"nodeAddress": "0x001aa08",
"doorOrientation": "up",
"doorEnvironments": [
{
"physics": "air"
}
],
"mapTileMask": [
[
1,
2
]
]
},
{
"id": 2,
"name": "Left Door",
"nodeType": "door",
"nodeSubType": "blue",
"nodeAddress": "0x001aa14",
"doorOrientation": "left",
"doorEnvironments": [
{
"physics": "air"
}
],
"useImplicitComeInNormally": false,
"useImplicitComeInWithMockball": false,
"useImplicitDoorUnlocks": false,
"mapTileMask": [
[
2,
1
]
]
}
],
"obstacles": [
{
"id": "A",
"name": "Both Sidehoppers",
"obstacleType": "enemies",
"devNote": "This is currently only cleared if both Sidehoppers are killed, but having them lured off camera could be equivalent in many instances."
}
],
"enemies": [
{
"id": "e1",
"groupName": "Tourian Hoppers",
"enemyName": "Blue Sidehopper",
"quantity": 2,
"homeNodes": [
1,
2
]
}
],
"strats": [
{
"link": [
1,
1
],
"name": "Base (Unlock Door)",
"requires": [],
"unlocksDoors": [
{
"types": [
"ammo"
],
"requires": []
}
],
"flashSuitChecked": true,
"blueSuitChecked": true
},
{
"link": [
1,
1
],
"name": "Base (Come In Normally)",
"entranceCondition": {
"comeInNormally": {}
},
"requires": [],
"flashSuitChecked": true,
"blueSuitChecked": true
},
{
"id": 1,
"link": [
1,
1
],
"name": "Leave With Door Frame Below",
"requires": [],
"exitCondition": {
"leaveWithDoorFrameBelow": {
"height": 3
}
},
"flashSuitChecked": true,
"blueSuitChecked": true
},
{
"id": 2,
"link": [
1,
1
],
"name": "Leave With Platform Below",
"requires": [],
"exitCondition": {
"leaveWithPlatformBelow": {
"height": 8.5,
"leftPosition": -1.5,
"rightPosition": 1.5
}
},
"flashSuitChecked": true,
"blueSuitChecked": true,
"devNote": "Additional platforms could be added, but they don't yet appear to have applications."
},
{
"id": 3,
"link": [
1,
1
],
"name": "G-Mode Regain Mobility",
"requires": [
{
"enemyDamage": {
"enemy": "Blue Sidehopper",
"type": "contact",
"hits": 1
}
}
],
"gModeRegainMobility": {},
"flashSuitChecked": true,
"blueSuitChecked": true
},
{
"id": 4,
"link": [
1,
1
],
"name": "Carry G-Mode Back Up",
"entranceCondition": {
"comeInWithGMode": {
"mode": "direct",
"morphed": false
},
"comesThroughToilet": "any"
},
"requires": [],
"exitCondition": {
"leaveWithGMode": {
"morphed": false
}
},
"bypassesDoorShell": "free",
"flashSuitChecked": true,
"blueSuitChecked": true
},
{
"id": 5,
"link": [
1,
1
],
"name": "Carry G-Mode Morph Back Up",
"entranceCondition": {
"comeInWithGMode": {
"mode": "direct",
"morphed": true
},
"comesThroughToilet": "any"
},
"requires": [
"h_artificialMorphSpringBall",
"HiJump"
],
"exitCondition": {
"leaveWithGMode": {
"morphed": true
}
},
"bypassesDoorShell": "free",
"flashSuitChecked": true,
"blueSuitChecked": true,
"devNote": "FIXME: This could be possible with Bombs by luring the hoppers to the left."
},
{
"id": 6,
"link": [
1,
1
],
"name": "Carry G-Mode Morph Back Up, Spring Ball Bomb Jump",
"entranceCondition": {
"comeInWithGMode": {
"mode": "direct",
"morphed": true,
"mobility": "mobile"
},
"comesThroughToilet": "any"
},
"requires": [
"canTrickyJump",
"h_artificialMorphSpringBallBombJump"
],
"exitCondition": {
"leaveWithGMode": {
"morphed": true
}
},
"bypassesDoorShell": "free",
"flashSuitChecked": true,
"blueSuitChecked": true,
"note": "Immediately on entry Spring Ball Bomb Jump. Be sure not to land left of the pillar below the door or it is harder to get up in time.",
"devNote": "FIXME: This is possible with Bombs by luring the hoppers to the left, but it is dependent on hopper RNG."
},
{
"id": 7,
"link": [
1,
2
],
"name": "Hopper Dodge (Normal Entry)",
"entranceCondition": {
"comeInNormally": {},
"comesThroughToilet": "no"
},
"requires": [
{
"notable": "Hopper Dodge"
},
"canDash",
"canTrickyDodgeEnemies",
{
"or": [
"canPrepareForNextRoom",
{
"and": [
"canCameraManip",
"canMoonwalk",
"canInsaneJump"
]
}
]
}
],
"unlocksDoors": [
{
"types": [
"super"
],
"requires": []
},
{
"types": [
"missiles",
"powerbomb"
],
"requires": [
{
"enemyDamage": {
"enemy": "Blue Sidehopper",
"type": "contact",
"hits": 1
}
}
]
}
],
"flashSuitChecked": true,
"blueSuitChecked": true,
"note": [
"Enter through the far left side of the door.",
"Wait for the top hopper to move right to start running.",
"Run under the right Hopper and jump over the left Hopper to avoid all damage.",
"Jump when Samus reaches the leftmost lump in the ground to avoid the left hopper.",
"It helps to keep the camera scrolled to the right."
]
},
{
"id": 8,
"link": [
1,
2
],
"name": "Hopper Dodge (Toilet Entry)",
"entranceCondition": {
"comeInNormally": {},
"comesThroughToilet": "any"
},
"requires": [
{
"notable": "Hopper Dodge"
},
"canDash",
"canCameraManip",
"canMoonwalk",
"canInsaneJump"
],
"unlocksDoors": [
{
"types": [
"super"
],
"requires": []
},
{
"types": [
"missiles",
"powerbomb"
],
"requires": [
{
"enemyDamage": {
"enemy": "Blue Sidehopper",
"type": "contact",
"hits": 1
}
}
]
}
],
"flashSuitChecked": true,
"blueSuitChecked": true,
"note": [
"Try to scroll the camera to the right to keep the left Hopper off-camera for longer.",
"Wait for the top hopper to move right to start running.",
"Run under the right Hopper and jump over the left Hopper to avoid all damage.",
"Jump when Samus reaches the leftmost lump in the ground to avoid the left hopper."
]
},
{
"id": 9,
"link": [
1,
2
],
"name": "Screw Attack",
"requires": [
"canDash",
"ScrewAttack",
"canCarefulJump",
{
"or": [
"canTrickyJump",
"SpaceJump",
{
"enemyDamage": {
"enemy": "Blue Sidehopper",
"type": "contact",
"hits": 1
}
}
]
}
],
"unlocksDoors": [
{
"types": [
"super"
],
"requires": []
},
{
"types": [
"missiles",
"powerbomb"
],
"requires": [
{
"enemyDamage": {
"enemy": "Blue Sidehopper",
"type": "contact",
"hits": 1
}
}
]
}
],
"flashSuitChecked": true,
"blueSuitChecked": true,
"note": [
"Wait for the top hopper to move right, then jump through the left hopper.",
"The left hopper may be harder to dodge if the camera is scrolled to the left."
]
},
{
"id": 45,
"link": [
1,
2
],
"name": "Blue Suit",
"requires": [
{
"haveBlueSuit": {}
},
"canTrickyDodgeEnemies"
],
"unlocksDoors": [
{
"types": [
"ammo"
],
"requires": []
}
],
"flashSuitChecked": true,
"blueSuitChecked": true,
"note": [
"Be careful not to land on the ground while touching a hopper."
]
},
{
"id": 38,
"link": [
1,
2
],
"name": "Sidehoppers Already Killed",
"requires": [
{
"obstaclesCleared": [
"A"
]
}
],
"unlocksDoors": [
{
"types": [
"ammo"
],
"requires": []
}
],
"flashSuitChecked": true,
"blueSuitChecked": true
},
{
"id": 10,
"link": [
1,
2
],
"name": "Kill the Enemies",
"requires": [
"canDodgeWhileShooting",
"canTrickyJump",
"canCameraManip",
{
"enemyKill": {
"enemies": [
[
"Blue Sidehopper",
"Blue Sidehopper"
]
]
}
}
],
"unlocksDoors": [
{
"types": [
"ammo"
],
"requires": []
}
],
"clearsObstacles": [
"A"
],
"flashSuitChecked": true,
"blueSuitChecked": true,
"note": [
"Kill the top hopper quickly; the left hopper is more random.",
"To be safe, plan to retreat right while attacking.",
"It also helps to attempt to move the hopper off camera between attacks."
]
},
{
"id": 16,
"link": [
1,
2
],
"name": "Take the Damage",
"requires": [
{
"or": [
{
"enemyDamage": {
"enemy": "Blue Sidehopper",
"type": "contact",
"hits": 1
}
},
"h_pauseAbuseMinimalReserveRefill"
]
},
{
"or": [
{
"and": [
"canTrickyJump",
"canUseIFrames"
]
},
{
"enemyDamage": {
"enemy": "Blue Sidehopper",
"type": "contact",
"hits": 1
}
}
]
}
],
"unlocksDoors": [
{
"types": [
"super"
],
"requires": []
},
{
"types": [
"missiles",
"powerbomb"
],
"requires": [
{
"enemyDamage": {
"enemy": "Blue Sidehopper",
"type": "contact",
"hits": 1
}
}
]
}
],
"flashSuitChecked": true,
"blueSuitChecked": true,
"note": [
"Wait for the left hopper to move right so it does not follow Samus as i-frames run out.",
"A damage boost using the top hopper also moves through the room fast enough to be safe."
]
},
{
"id": 17,
"link": [
1,
2
],
"name": "Leave with Damage - Blue Sidehopper (Tank Extra Hit)",
"requires": [
{
"enemyDamage": {
"enemy": "Blue Sidehopper",
"type": "contact",
"hits": 1
}
}
],
"exitCondition": {
"leaveWithDamage": {
"enemy": "Blue Sidehopper"
}
},
"unlocksDoors": [
{
"types": [
"super"
],
"requires": []
},
{
"types": [
"missiles",
"powerbomb"
],
"requires": [
{
"enemyDamage": {
"enemy": "Blue Sidehopper",
"type": "contact",
"hits": 1
}
}
]
}
],
"flashSuitChecked": true,
"blueSuitChecked": true
},
{
"id": 18,
"link": [
1,
2
],
"name": "Leave with Damage - Blue Sidehopper (Prepared Dodge)",
"entranceCondition": {
"comeInNormally": {},
"comesThroughToilet": "no"
},
"requires": [
{
"or": [
"ScrewAttack",
"canTrickyJump",
{
"and": [
"canDodgeWhileShooting",
"canCameraManip",
{
"enemyKill": {
"enemies": [
[
"Blue Sidehopper"
]
]
}
}
]
}
]
}
],
"exitCondition": {
"leaveWithDamage": {
"enemy": "Blue Sidehopper"
}
},
"unlocksDoors": [
{
"types": [
"super"
],
"requires": []
},
{
"types": [
"missiles",
"powerbomb"
],
"requires": [
{
"enemyDamage": {
"enemy": "Blue Sidehopper",
"type": "contact",
"hits": 1
}
}
]
}
],
"flashSuitChecked": true,
"blueSuitChecked": true,
"devNote": "FIXME: add a Toilet entry version of this"
},
{
"id": 19,
"link": [
1,
2
],
"name": "Come in Shinecharged, Leave With Spark (Tank the Damage)",
"entranceCondition": {
"comeInShinecharged": {},
"comesThroughToilet": "no"
},
"requires": [
{
"shineChargeFrames": 95
},
"canShinechargeMovementTricky",
{
"or": [
{
"enemyDamage": {
"enemy": "Blue Sidehopper",
"type": "contact",
"hits": 1
}
},
"h_pauseAbuseMinimalReserveRefill"
]
},
{
"shinespark": {
"frames": 21,
"excessFrames": 0
}
}
],
"exitCondition": {
"leaveWithSpark": {}
},
"unlocksDoors": [
{
"types": [
"super"
],
"requires": []
},
{
"types": [
"missiles",
"powerbomb"
],
"requires": [
"never"
]
}
],
"flashSuitChecked": true,
"blueSuitChecked": true
},
{
"id": 20,
"link": [
2,
1
],
"name": "Screw Attack Jumps",
"entranceCondition": {
"comeInNormally": {}
},
"requires": [
{
"notable": "Screw Attack Jumps"
},
"canDash",
"canPrepareForNextRoom",
"ScrewAttack",
"canTrickyJump",
"canTrickyDodgeEnemies"
],
"flashSuitChecked": true,
"blueSuitChecked": true,
"note": [
"Spin jump into the room with Screw Attack, holding left through the transition to land near the door.",
"Do a turn-around spin jump to the right, bonking the ceiling and overhang and then falling straight down.",
"Then run and spin jump to the right through the Hoppers, to make it to the door without taking damage."
]
},
{
"id": 46,
"link": [
2,
1
],
"name": "Blue Suit",
"requires": [
{
"haveBlueSuit": {}
},
"canTrickyDodgeEnemies"
],
"unlocksDoors": [
{
"types": [
"ammo"
],
"requires": []
}
],
"flashSuitChecked": true,
"blueSuitChecked": true,
"note": [
"Press against the left wall while entering the room, until Samus lands.",
"Then walk to the right to pass through the hoppers safely."
]
},
{
"id": 44,
"link": [
2,
1
],
"name": "Come in With Spark (Top Position)",
"entranceCondition": {
"comeInWithSpark": {
"position": "top"
}
},
"requires": [
{
"shinespark": {
"frames": 43,
"excessFrames": 19
}
}
],
"flashSuitChecked": true,
"blueSuitChecked": true
},
{
"id": 21,
"link": [
2,
1
],
"name": "Come in With Spark (Bottom Position)",
"entranceCondition": {
"comeInWithSpark": {
"position": "bottom"
}
},
"requires": [
{
"shinespark": {
"frames": 32,
"excessFrames": 8
}
}
],
"flashSuitChecked": true,
"blueSuitChecked": true
},
{
"id": 22,
"link": [
2,
1
],
"name": "Roll Under Hoppers",
"entranceCondition": {
"comeInNormally": {}
},
"requires": [
{
"notable": "Roll Under Hoppers"
},
"Morph",
"canPrepareForNextRoom",
"canTrickyDodgeEnemies",
"canDash",
"h_complexToCarryFlashSuit"
],
"flashSuitChecked": true,
"blueSuitChecked": true,
"note": [
"Time Samus' movement carefully to roll underneath a Tourian Hopper and also race it to the far door.",
"Enter the room morphed and let the hoppers jump against the wall a couple of times.",
"After the lower hopper has long enough time between jumps, roll under and run to the door."
]
},
{
"id": 23,
"link": [
2,
1
],
"name": "Squeeze Under Hoppers",
"entranceCondition": {
"comeInRunning": {
"speedBooster": "any",
"minTiles": 4
}
},
"requires": [
{
"notable": "Squeeze Under Hoppers"
},
"canPrepareForNextRoom",
"canTwoTileSqueeze",
"h_complexToCarryFlashSuit"
],
"flashSuitChecked": true,
"blueSuitChecked": true,
"note": [
"Use at least 4 tiles of runway to gain speed, running through the transition.",
"Hold down during and after the transition in order to aim down and squeeze under the Hopper.",
"Then immediately run to the right to make it to the door without taking damage."
]
},
{
"id": 47,
"link": [
2,
1
],
"name": "Come In With I-Frames",
"entranceCondition": {
"comeInWithIFrames": {
"iFramesNeeded": 52
}
},
"requires": [
"canDash",
"canTrickyDodgeEnemies",
"h_complexToCarryFlashSuit"
],
"flashSuitChecked": true,
"blueSuitChecked": true,
"note": [
"Use an enemy or other damage source in the previous room to obtain i-frames,",
"to be able to run through the Sidehoppers without taking a hit."
]
},
{
"id": 48,
"link": [
2,
1
],
"name": "Come In With Damage Boost",
"entranceCondition": {
"comeInWithDamageBoost": {
"iFramesNeeded": 5
}
},
"requires": [
"canDash",
"canTrickyDodgeEnemies",
"h_complexToCarryFlashSuit"
],
"flashSuitChecked": true,
"blueSuitChecked": true,
"note": [
"Use an enemy or other damage source in the previous room to damage boost through the transition,",
"to be able to run through the Sidehoppers without taking a hit."
],
"detailNote": [
"If Samus crosses the room too quickly, the top Hopper will hop right, which can make it harder to avoid.",
"By ending the damage boost early enough, or delaying briefly after landing, it can be manipulated to hop left."
]
},
{
"id": 49,
"link": [
2,
1
],
"name": "Come in Spinning, Squeeze Under Hoppers",
"entranceCondition": {
"comeInSpinning": {
"speedBooster": "any",
"unusableTiles": 0,
"minExtraRunSpeed": "$2.0"
}
},
"requires": [
{
"notable": "Squeeze Under Hoppers"
},
"canInsaneJump",
"h_complexToCarryFlashSuit"
],
"flashSuitChecked": true,
"blueSuitChecked": true,
"note": [
"Gain as much speed as possible, using a remote runway to spin jump precisely through the transition.",
"Samus needs to be low enough to fit under the first Hopper,",
"but high enough (and low enough fall speed) to make the required horizontal distance before landing, to be clear of the Hopper."
],
"detailNote": [
"If Samus hits the transition relatively high, aiming down through the transition can help to squeeze under the Hopper.",
"If Samus hits the transition relatively low, do not aim down; remaining in spin helps Samus cover the horizontal distance."
]
},
{
"id": 50,
"link": [
2,
1
],
"name": "Come in With Side Platform Jump, Squeeze Under Hoppers",
"entranceCondition": {
"comeInWithSidePlatform": {
"platforms": [
{
"minHeight": -4,
"maxHeight": -4,
"minTiles": 19,
"speedBooster": "yes",
"obstructions": [
[
8,
-4
]
],
"note": "This applies to Blue Brinstar Boulder Room."
},
{
"minHeight": 2,
"maxHeight": 2,
"minTiles": 9.4375,
"speedBooster": "any",
"obstructions": [
[
2,
0
]
],
"note": "This applies to Early Supers Room."
},
{
"minHeight": 1,
"maxHeight": 1,
"minTiles": 18.4375,
"speedBooster": "yes",
"obstructions": [
[
6,
-1
]
],
"note": "This applies to Big Pink."
},
{
"minHeight": 2,
"maxHeight": 2,
"minTiles": 15.4375,
"speedBooster": "yes",
"obstructions": [
[
13,
2
]
],
"note": "This applies to Mission Impossible Room."
},
{
"minHeight": 8,
"maxHeight": 8,
"minTiles": 7.4375,
"speedBooster": "any",
"obstructions": [
[
1,
0
]
],
"requires": [
"HiJump"
],
"note": [
"This applies to Screw Attack Room."
]
},
{
"minHeight": 3,
"maxHeight": 3,
"minTiles": 15.4375,
"speedBooster": "yes",
"obstructions": [
[
13,
2
]
],
"note": [
"This applies to Botwoon's Room."
]
}
]
}
},
"requires": [
{
"notable": "Squeeze Under Hoppers"
},
"canInsaneJump",
"h_complexToCarryFlashSuit"
],
"flashSuitChecked": true,
"blueSuitChecked": true
},
{
"id": 39,
"link": [
2,
1
],
"name": "Sidehoppers Already Killed",
"requires": [
{
"obstaclesCleared": [
"A"
]
}
],
"flashSuitChecked": true,
"blueSuitChecked": true
},
{
"id": 24,
"link": [
2,
1
],
"name": "Kill Hopper",
"entranceCondition": {
"comeInNormally": {}
},
"requires": [
"Morph",
"canPrepareForNextRoom",
{
"enemyKill": {
"enemies": [
[
"Blue Sidehopper"
]
]
}
},
"canCameraManip"
],
"unlocksDoors": [
{
"nodeId": 1,
"types": [
"ammo"
],
"requires": []
}
],
"flashSuitChecked": true,
"blueSuitChecked": true,
"note": [
"Enter the room while morphed and let the hoppers jump against the wall a couple of times.",
"Between hops, unmorph and shoot the lower hopper.",
"Roll under the top hopper until it goes off camera to the left."
]
},
{
"id": 25,
"link": [
2,
1
],
"name": "Take Another Hit",
"requires": [
{
"enemyDamage": {
"enemy": "Blue Sidehopper",
"type": "contact",
"hits": 1
}
},
"h_complexToCarryFlashSuit"
],
"flashSuitChecked": true,
"blueSuitChecked": true
},
{
"id": 26,
"link": [
2,
1
],
"name": "Avoid Another Hit",
"requires": [
"canDash",
"canCarefulJump",
"h_complexToCarryFlashSuit"
],
"flashSuitChecked": true,
"blueSuitChecked": true
},
{
"id": 27,
"link": [
2,
1
],
"name": "Blue Speed Jump through Hoppers",
"entranceCondition": {
"comeInGettingBlueSpeed": {
"length": 0,
"openEnd": 0
}
},
"requires": [
"h_blueJump",
"canPrepareForNextRoom",
{
"or": [
"SpaceJump",
"canCarefulJump"
]
},
"h_complexToCarryFlashSuit"
],
"flashSuitChecked": true,
"blueSuitChecked": true,
"note": "Jump far enough to land on the first floor pillar.",
"devNote": "This is not the level of precision that would call for canBlueSpaceJump."
},
{
"id": 28,
"link": [
2,
1
],
"name": "Carry Shinecharge (Tank the Damage)",
"entranceCondition": {
"comeInShinecharged": {}
},
"requires": [
{
"shineChargeFrames": 160
},
"canShinechargeMovementTricky",
{
"enemyDamage": {
"enemy": "Blue Sidehopper",
"type": "contact",
"hits": 1
}
}
],
"exitCondition": {
"leaveShinecharged": {}
},
"unlocksDoors": [
{
"types": [
"super"
],
"requires": []
},
{
"types": [
"missiles",
"powerbomb"
],
"requires": [
"never"
]
}
],
"flashSuitChecked": true,
"blueSuitChecked": true
},
{
"id": 29,
"link": [
2,
1
],
"name": "Crystal Flash",
"entranceCondition": {
"comeInNormally": {}
},
"requires": [
{
"notable": "Crystal Flash"
},
"canTrickyDodgeEnemies",
"h_CrystalFlash",
"canCameraManip"
],
"flashSuitChecked": true,
"blueSuitChecked": true,
"note": [
"Enter the room from the left door, morph, and wait at the left wall.",
"After 6 hops, the bottom Hopper will do three big hops in a row.",
"Roll under the Hopper while it does the third of those three big hops.",
"Quickly unmorph and run to the right side of the room.",
"If successful, both Hoppers will remain off-camera, so you can safely Crystal Flash."
]
},
{
"id": 34,
"link": [
2,
2
],
"name": "Sidehopper Hit on Entry",
"entranceCondition": {
"comeInNormally": {}
},
"requires": [
{
"or": [
{
"enemyDamage": {
"enemy": "Blue Sidehopper",
"type": "contact",
"hits": 1
}
},
"h_pauseAbuseMinimalReserveRefill"
]
}
],
"unlocksDoors": [
{
"types": [
"super"
],
"requires": []
},
{
"types": [
"missiles",
"powerbomb"
],
"requires": [
"never"
]
}
],
"flashSuitChecked": true,
"blueSuitChecked": true
},
{
"id": 41,
"link": [
2,
2
],
"name": "Sidehopper Hit on Entry, Mockball Entry",
"entranceCondition": {
"comeInWithMockball": {
"speedBooster": "any",
"adjacentMinTiles": 0,
"remoteAndLandingMinTiles": [
[
0,
0
]
]
}
},
"requires": [
{
"or": [
{
"enemyDamage": {
"enemy": "Blue Sidehopper",
"type": "contact",
"hits": 1
}
},
"h_pauseAbuseMinimalReserveRefill"
]
}
],
"unlocksDoors": [
{
"types": [
"super"
],
"requires": []
},
{
"types": [
"missiles",
"powerbomb"
],
"requires": [
"never"
]
}
],
"flashSuitChecked": true,
"blueSuitChecked": true,
"devNote": [
"This is used to fulfill the requirement on exiting the previous room.",
"FIXME: The hopper hit can be avoided depending on the entry speed and canPrepareForNextRoom."
]
},
{
"id": 35,
"link": [
2,
2
],
"name": "Sidehopper Prepared Screw Dodge",
"entranceCondition": {
"comeInNormally": {}
},
"requires": [
"canPrepareForNextRoom",
"ScrewAttack",
"SpaceJump",
"canCarefulJump"
],
"unlocksDoors": [
{
"types": [
"super"
],
"requires": []
},
{
"types": [
"missiles",
"powerbomb"
],
"requires": [
"never"
]
}
],
"flashSuitChecked": true,
"blueSuitChecked": true
},
{
"id": 36,
"link": [
2,
2
],
"name": "Sidehopper Prepared Morph Dodge",
"entranceCondition": {
"comeInNormally": {}
},
"requires": [
"canPrepareForNextRoom",
"Morph",
"canTrickyJump"
],
"unlocksDoors": [
{
"types": [
"super"
],
"requires": []
},
{
"types": [
"missiles",
"powerbomb"
],
"requires": [
"never"
]
}
],
"flashSuitChecked": true,
"blueSuitChecked": true,
"note": [
"Enter the room morphed to avoid a hopper hit on entry.",
"Roll under the bottom hopper to lead it to the right, and then roll back to reach the door safely."
]
},
{
"id": 37,
"link": [
2,
2
],
"name": "Sidehopper Prepared Morph Dodge Hopper Kill",
"entranceCondition": {
"comeInNormally": {}
},
"requires": [
"canPrepareForNextRoom",
"Morph",
"canDodgeWhileShooting",
{
"enemyKill": {
"enemies": [
[
"Blue Sidehopper"
]
]
}
}
],
"unlocksDoors": [
{
"types": [
"ammo"
],
"requires": []
}
],
"flashSuitChecked": true,
"blueSuitChecked": true,
"note": "Enter the room morphed to avoid a hopper hit on entry."
},
{
"id": 51,
"link": [
2,
2
],
"name": "Sidehopper Tricky Dodge Enter and Exit",
"entranceCondition": {
"comeInNormally": {}
},
"requires": [
"canTrickyDodgeEnemies",
"canInsaneJump",
"h_trickyToCarryFlashSuit"
],
"exitCondition": {
"leaveNormally": {}
},
"unlocksDoors": [
{
"types": [
"ammo"
],
"requires": [
"never"
]
}
],
"flashSuitChecked": true,
"blueSuitChecked": true,
"note": [
"Enter with a spin jump, ideally as low and with as much fall speed as possible, and hold left against the wall.",
"After landing, shoot up to open the door, then jump straight up and hold left to exit."
],
"devNote": [
"This can be logically useful to respawn the Super block in Mission Impossible Room,",
"or the shot block in Mickey Mouse Room."
]
},
{
"id": 40,
"link": [
2,
2
],
"name": "Kill Both Hoppers",
"entranceCondition": {
"comeInNormally": {}
},
"requires": [
"Morph",
"canPrepareForNextRoom",
{
"enemyKill": {
"enemies": [
[
"Blue Sidehopper",
"Blue Sidehopper"
]
]
}
}
],
"unlocksDoors": [
{
"types": [
"ammo"
],
"requires": []
}
],
"clearsObstacles": [
"A"
],
"flashSuitChecked": true,
"blueSuitChecked": true,
"note": [
"Enter the room in ball mode and let the hoppers jump against the wall a couple of times.",
"Between hops, unmorph and shoot the lower hopper."
],
"devNote": "The ceiling hopper can be moved off camera instead of killed, but there's not an obstacle to represent that yet."
},
{
"id": 11,
"link": [
2,
2
],
"name": "Sidehoppers Killed, Leave With Runway",
"requires": [
{
"obstaclesCleared": [
"A"
]
}
],
"exitCondition": {
"leaveWithRunway": {
"length": 1,
"openEnd": 1
}
},
"unlocksDoors": [
{
"types": [
"ammo"
],
"requires": []
}
],
"flashSuitChecked": true,
"blueSuitChecked": true,
"devNote": "FIXME: An alternative strat may be possible where the enemies are lured off-camera to the right instead of killed."
},
{
"id": 42,
"link": [
2,
2
],
"name": "Leave With Side Platform (Full Runway)",
"requires": [
{
"or": [
{
"obstaclesCleared": [
"A"
]
},
{
"and": [
{
"enemyDamage": {
"enemy": "Blue Sidehopper",
"type": "contact",
"hits": 2
}
},
"canUseIFrames"
]
}
]
}
],
"exitCondition": {
"leaveWithSidePlatform": {
"height": 2,
"runway": {
"length": 12,
"openEnd": 0
},
"obstruction": [
1,
0
]
}
},
"unlocksDoors": [
{
"types": [
"super"
],
"requires": []
},
{
"types": [
"missiles",
"powerbomb"
],
"requires": [
"never"
]
}
],
"flashSuitChecked": true,
"blueSuitChecked": true,
"devNote": [
"Max extra run speed $2.B."
]
},
{
"id": 43,
"link": [
2,
2
],
"name": "Leave With Side Platform (Partial Runway)",
"requires": [
{
"enemyDamage": {
"enemy": "Blue Sidehopper",
"type": "contact",
"hits": 1
}
},
"canUseIFrames",
"canTrickyDodgeEnemies"
],
"exitCondition": {
"leaveWithSidePlatform": {
"height": 2,
"runway": {
"length": 10,
"openEnd": 0
},
"obstruction": [
1,
0
]
}
},
"unlocksDoors": [
{
"types": [
"super"
],
"requires": []
},
{
"types": [
"missiles",
"powerbomb"
],
"requires": [
"never"
]
}
],
"flashSuitChecked": true,
"blueSuitChecked": true,
"devNote": [
"Max extra run speed $2.4."
]
},
{
"id": 12,
"link": [
2,
2
],
"name": "Sidehoppers Killed, Leave Spinning",
"requires": [
{
"obstaclesCleared": [
"A"
]
}
],
"exitCondition": {
"leaveSpinning": {
"remoteRunway": {
"length": 9,
"openEnd": 1
}
}
},
"unlocksDoors": [
{
"types": [
"ammo"
],
"requires": []
}
],
"flashSuitChecked": true,
"blueSuitChecked": true
},
{
"id": 13,
"link": [
2,
2
],
"name": "Sidehoppers Killed, Leave With Mockball",
"requires": [
{
"obstaclesCleared": [
"A"
]
}
],
"exitCondition": {
"leaveWithMockball": {
"remoteRunway": {
"length": 9,
"openEnd": 1
},
"landingRunway": {
"length": 1,
"openEnd": 1
}
}
},
"unlocksDoors": [
{
"types": [
"ammo"
],
"requires": []
}
],
"flashSuitChecked": true,
"blueSuitChecked": true
},
{
"id": 14,
"link": [
2,
2
],
"name": "Sidehoppers Killed, Leave With Spring Ball Bounce",
"requires": [
{
"obstaclesCleared": [
"A"
]
}
],
"exitCondition": {
"leaveWithSpringBallBounce": {
"remoteRunway": {
"length": 7,
"openEnd": 0
},
"landingRunway": {
"length": 1,
"openEnd": 1
},
"movementType": "uncontrolled"
}
},
"unlocksDoors": [
{
"types": [
"ammo"
],
"requires": []
}
],
"flashSuitChecked": true,
"blueSuitChecked": true
},
{
"id": 15,
"link": [
2,
2
],
"name": "Sidehoppers Killed, Leave Space Jumping",
"requires": [
{
"obstaclesCleared": [
"A"
]
}
],
"exitCondition": {
"leaveSpaceJumping": {
"remoteRunway": {
"length": 6,
"openEnd": 1
}
}
},
"unlocksDoors": [
{
"types": [
"ammo"
],
"requires": []
}
],
"flashSuitChecked": true,
"blueSuitChecked": true,
"note": "For higher speed, use the farther-away runway in the middle of the room."
},
{
"id": 30,
"link": [
2,
2
],
"name": "Leave with Damage - Blue Sidehopper",
"requires": [
{
"obstaclesNotCleared": [
"A"
]
}
],
"exitCondition": {
"leaveWithDamage": {
"enemy": "Blue Sidehopper"
}
},
"unlocksDoors": [
{
"types": [
"super"
],
"requires": []
},
{
"types": [
"missiles",
"powerbomb"
],
"requires": [
"never"
]
}
],
"flashSuitChecked": true,
"blueSuitChecked": true
},
{
"id": 31,
"link": [
2,
2
],
"name": "G-Mode Regain Mobility",
"requires": [
{
"enemyDamage": {
"enemy": "Blue Sidehopper",
"type": "contact",
"hits": 1
}
}
],
"gModeRegainMobility": {},
"flashSuitChecked": true,
"blueSuitChecked": true
},
{
"id": 32,
"link": [
2,
2
],
"name": "Carry G-Mode Back Through",
"entranceCondition": {
"comeInWithGMode": {
"mode": "direct",
"morphed": false
}
},
"requires": [],
"exitCondition": {
"leaveWithGMode": {
"morphed": false
}
},
"bypassesDoorShell": "free",
"flashSuitChecked": true,
"blueSuitChecked": true,
"note": "Samus can use i-frames and return through the door without taking a hit."
},
{
"id": 33,
"link": [
2,
2
],
"name": "Carry G-Mode Morph Back Through",
"entranceCondition": {
"comeInWithGMode": {
"mode": "direct",
"morphed": true
}
},
"requires": [],
"exitCondition": {
"leaveWithGMode": {
"morphed": true
}
},
"bypassesDoorShell": "free",
"flashSuitChecked": true,
"blueSuitChecked": true,
"note": "Samus can use i-frames and return through the door without taking a hit."
}
],
"notables": [
{
"id": 1,
"name": "Hopper Dodge",
"note": [
"Enter through the far left side of the door.",
"Wait for the top hopper to move right to start running.",
"Run under the right Hopper and jump over the left Hopper to avoid all damage.",
"Jump when Samus reaches the leftmost lump in the ground to avoid the left hopper.",
"It helps to keep the camera scrolled to the right."
]
},
{
"id": 2,
"name": "Screw Attack Jumps",
"note": [
"Spin jump into the room with Screw Attack, holding left through the transition to land near the door.",
"Do a turn-around spin jump to the right, bonking the ceiling and overhang and then falling straight down.",
"Then run and spin jump to the right through the Hoppers, to make it to the door without taking damage."
]
},
{
"id": 3,
"name": "Roll Under Hoppers",
"note": [
"Time Samus' movement carefully to roll underneath a Tourian Hopper and also race it to the far door.",
"Enter the room morphed and let the hoppers jump against the wall a couple of times.",
"After the lower hopper has long enough time between jumps, roll under and run to the door."
]
},
{
"id": 4,
"name": "Squeeze Under Hoppers",
"note": [
"Use at least 4 tiles of runway to gain speed, running through the transition.",
"Hold down during and after the transition in order to aim down and squeeze under the Hopper.",
"Then immediately run to the right to make it to the door without taking damage."
]
},
{
"id": 5,
"name": "Crystal Flash",
"note": [
"Enter the room from the left door, morph, and wait at the left wall.",
"After 6 hops, the bottom Hopper will do three big hops in a row.",
"Roll under the Hopper while it does the third of those three big hops.",
"Quickly unmorph and run to the right side of the room.",
"If successful, both Hoppers will remain off-camera, so you can safely Crystal Flash."
]
}
],
"nextStratId": 52,
"nextNotableId": 6,
"devNote": [
"FIXME: This room could use obstacles indicating if each door is free of hoppers, allowing opening the door with missiles or a power bomb.",
"and to ensure hoppers are still alive to use for G-Mode setups."
]
}