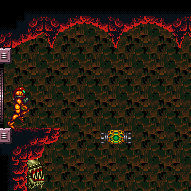
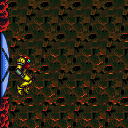
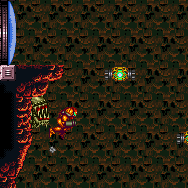
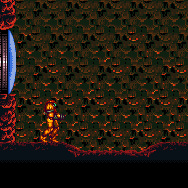
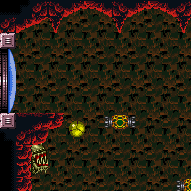
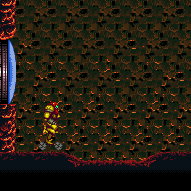
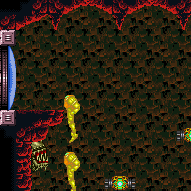
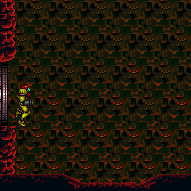
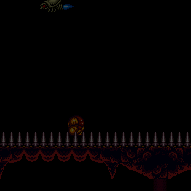
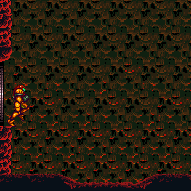
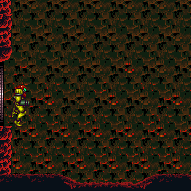
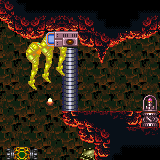
Double Chamber
Room ID: 104
|
Exit condition: {
"leaveWithRunway": {
"length": 4,
"openEnd": 1
}
} |
|
Requires: {
"obstaclesNotCleared": [
"R-Mode"
]
}
"h_heatedCrystalFlash" |
|
Requires: "h_heatProof"
"SpaceJump"
"ScrewAttack"
{
"noBlueSuit": {}
}
{
"or": [
{
"and": [
{
"resetRoom": {
"nodes": [
1
]
}
},
{
"cycleFrames": 660
}
]
},
{
"and": [
{
"resetRoom": {
"nodes": [
2
]
}
},
{
"cycleFrames": 810
}
]
}
]
}Resets obstacles: A, R-Mode Farm cycle drops: 1 Ripper 2 (green) |
|
Requires: "h_heatedRemoteRunwaySpaceJump"
{
"heatFrames": 470
}Exit condition: {
"leaveSpinning": {
"remoteRunway": {
"length": 12,
"openEnd": 1
},
"minExtraRunSpeed": "$2.0"
}
}Dev note: This uses the runway in the middle of the room but logically starts at the door, to ensure it can be opened. |
|
Requires: "h_heatedRemoteRunwayPreciseSpaceJump"
{
"heatFrames": 470
}Exit condition: {
"leaveSpaceJumping": {
"remoteRunway": {
"length": 12,
"openEnd": 1
},
"minExtraRunSpeed": "$2.0"
}
}Dev note: This uses the runway in the middle of the room but logically starts at the door, to ensure it can be opened. |
|
Requires: "h_heatedRemoteRunwaySpringBall"
{
"heatFrames": 530
}Exit condition: {
"leaveWithSpringBallBounce": {
"remoteRunway": {
"length": 12,
"openEnd": 1
},
"landingRunway": {
"length": 6,
"openEnd": 1
},
"minExtraRunSpeed": "$2.0",
"movementType": "any"
}
}Dev note: This uses the runway in the middle of the room but logically starts at the door, to ensure it can be opened. |
From: 1
Top Left Door
To: 1
Top Left Door
Entrance condition: {
"comeInShinecharging": {
"length": 3,
"openEnd": 0
}
}Requires: "h_heatedCrystalSpark" |
|
Entrance condition: {
"comeInWithRMode": {}
}Clears obstacles: R-Mode |
|
Requires: {
"heatFrames": 135
} |
|


Entrance condition: {
"comeInShinecharging": {
"length": 3,
"openEnd": 1
}
}Requires: "canShinechargeMovement"
{
"heatFrames": 150
}
{
"shineChargeFrames": 135
}Exit condition: {
"leaveShinecharged": {}
}Unlocks doors: {"types":["super"],"requires":[]}
{"types":["missiles","powerbomb"],"requires":["never"]} |
From: 1
Top Left Door
To: 2
Bottom Left Door
Entrance condition: {
"comeInShinecharging": {
"length": 3,
"openEnd": 0
}
}Requires: "canChainTemporaryBlue"
{
"or": [
"canXRayCancelShinecharge",
{
"heatFrames": 160
}
]
}
"canXRayTurnaround"
{
"heatFrames": 350
}Exit condition: {
"leaveWithTemporaryBlue": {}
}Unlocks doors: {"types":["super","powerbomb"],"requires":[]}
{"types":["missiles"],"requires":[{"heatFrames":50}]} |
|
Entrance condition: {
"comeInWithGMode": {
"mode": "any",
"morphed": false
}
}Requires: "h_heatedGModeOpenDifferentDoor" |
|
With Grapple, a running jump then single Grapple swing can be used before PLMs are overloaded, alternatively jump on the crumble blocks and Grapple the Ripper. Entrance condition: {
"comeInWithGMode": {
"mode": "indirect",
"morphed": false
}
}Requires: {
"or": [
"SpaceJump",
"canTrickySpringBallJump",
{
"and": [
"canWallJump",
{
"or": [
"canDash",
"HiJump",
{
"and": [
"canBlueSuitSpikeJump",
{
"spikeHits": 1
}
]
}
]
}
]
},
{
"and": [
"HiJump",
"canSpeedyJump"
]
},
{
"and": [
"canPreciseGrapple",
{
"or": [
"canDash",
"canUseEnemies",
"canInsaneJump"
]
}
]
}
]
}
"h_heatedGModeOpenDifferentDoor" |
From: 1
Top Left Door
To: 3
Right Door
Bomb boost onto the crumble blocks in the middle of the spike pit, then on the right side, move the Ripper off camera and IBJ. If the camera gets shifted so that the Ripper stays on camera, shift it back to the right by IBJng up a bit on the left side of the 4 crumbles then move to the right as Samus falls. Entrance condition: {
"comeInWithGMode": {
"mode": "indirect",
"morphed": true
}
}Requires: "h_artificialMorphIBJ" "h_artificialMorphBombHorizontally" "canCameraManip" "canTrickyJump" "h_heatedGModeOpenDifferentDoor" |
|
Overload PLMs by shooting the gate, then go through the crumble blocks below and get to the door. Entrance condition: {
"comeInWithGMode": {
"mode": "direct",
"morphed": false
}
}Requires: "Morph"
{
"or": [
"SpaceJump",
{
"and": [
"canPreciseGrapple",
"canUseEnemies"
]
},
{
"and": [
"HiJump",
"canSpringBallJumpMidAir"
]
},
{
"and": [
"canDash",
"HiJump",
"canWallJump",
"canTrickyJump"
]
},
{
"and": [
"canWallJump",
"canUseIFrames",
{
"spikeHits": 1
},
"h_spikeJumpWithActiveEnemies"
]
},
{
"and": [
"h_IBJFromSpikes",
"h_spikeJumpWithActiveEnemies"
]
}
]
}
"h_heatedGModeOpenDifferentDoor" |
From: 1
Top Left Door
To: 3
Right Door
Overload PLMs by bombing the gate or crumble blocks, then go through the crumble blocks below and get to the door. IBJ past the Ripper or kill it. The Kago bugs will not spawn until Samus exits G-mode, so it is fine to kill it or IBJ from on top of it. Entrance condition: {
"comeInWithGMode": {
"mode": "any",
"morphed": true
}
}Requires: {
"or": [
"h_artificialMorphLongIBJ",
"h_artificialMorphJumpIntoIBJ"
]
}
"h_artificialMorphBombHorizontally"
{
"or": [
"h_artificialMorphPowerBomb",
{
"and": [
"Morph",
{
"ammo": {
"type": "Missile",
"count": 2
}
}
]
},
{
"and": [
"Morph",
{
"ammo": {
"type": "Super",
"count": 1
}
}
]
},
{
"and": [
"h_artificialMorphDoubleBombJump",
"h_artificialMorphStaggeredIBJ"
]
}
]
}
"h_heatedGModeOpenDifferentDoor" |
|
Requires: {
"heatFrames": 220
}
{
"or": [
{
"noFlashSuit": {}
},
"canComplexCarryFlashSuit",
"Ice",
"Wave",
"Spazer",
"Plasma",
{
"heatFrames": 300
}
]
}
{
"or": [
"canDash",
{
"heatFrames": 90
}
]
}Clears obstacles: A |
|
Entrance condition: {
"comeInWithGMode": {
"mode": "indirect",
"morphed": false
}
}Requires: {
"heatFrames": 0
} |
|
Stand under where the gate will spawn when exiting G-mode to open it before grabbing the item. Entrance condition: {
"comeInWithGMode": {
"mode": "indirect",
"morphed": false
}
}Requires: {
"heatFrames": 25
}Clears obstacles: A |
|
Overload PLMs by shooting the gate, then go through the crumble blocks below and get to the item. Entrance condition: {
"comeInWithGMode": {
"mode": "direct",
"morphed": false
}
}Requires: "Morph"
{
"or": [
"SpaceJump",
{
"and": [
"canPreciseGrapple",
"canUseEnemies"
]
},
{
"and": [
"HiJump",
"canSpringBallJumpMidAir"
]
},
"canInsaneWallJump",
{
"and": [
"HiJump",
"canUseIFrames",
{
"noBlueSuit": {}
},
{
"enemyDamage": {
"enemy": "Ripper 2 (green)",
"type": "contact",
"hits": 1
}
},
{
"or": [
"canWallJump",
"canSpeedyJump"
]
}
]
},
"h_IBJFromSpikes"
]
}
{
"heatFrames": 0
} |
From: 1
Top Left Door
To: 4
Item
Overload PLMs by bombing the gate or crumble blocks, then go through the crumble blocks below and get to the item. IBJ past the Ripper or kill it. The Kago bugs will not spawn until Samus exits G-mode, so it is fine to kill it or IBJ from on top of it. Entrance condition: {
"comeInWithGMode": {
"mode": "direct",
"morphed": true
}
}Requires: {
"or": [
"h_artificialMorphLongIBJ",
"h_artificialMorphJumpIntoIBJ"
]
}
"h_artificialMorphBombHorizontally"
{
"or": [
"h_artificialMorphPowerBomb",
{
"and": [
"Morph",
{
"ammo": {
"type": "Missile",
"count": 2
}
}
]
},
{
"and": [
"Morph",
{
"ammo": {
"type": "Super",
"count": 1
}
}
]
},
{
"and": [
"h_artificialMorphDoubleBombJump",
"h_artificialMorphStaggeredIBJ"
]
}
]
}
{
"heatFrames": 0
} |
|
Entrance condition: {
"comeInWithGMode": {
"mode": "any",
"morphed": false
}
}Requires: "Morph"
{
"heatFrames": 0
} |
|
Wall jump up the left wall and then on the moving platform (Kamer) while avoiding the Fune's fireball. The Kamers will temporarily move down if Samus is below them, so it is best to walk under the first Kamer before climbing the wall. It is possible to freeze or kill the Fune with a Super or Power Bomb to make things easier. Requires: {
"notable": "Walljump Climb Using the Kamer"
}
"canTrickyWallJump"
"canConsecutiveWallJump"
"canUseEnemies"
{
"or": [
{
"and": [
"canDodgeWhileShooting",
{
"heatFrames": 360
}
]
},
{
"and": [
"canTrickyJump",
{
"heatFrames": 240
}
]
},
{
"and": [
{
"or": [
"canUseFrozenEnemies",
{
"ammo": {
"type": "Super",
"count": 1
}
}
]
},
{
"heatFrames": 432
}
]
},
{
"and": [
{
"ammo": {
"type": "PowerBomb",
"count": 1
}
},
{
"heatFrames": 456
}
]
}
]
}
{
"or": [
"canDash",
{
"heatFrames": 20
}
]
} |
From: 2
Bottom Left Door
To: 1
Top Left Door
Wall jump up the left wall and then on the moving platform (Kamer) while avoiding the Fune's fireball. The Kamers will temporarily move down if Samus is below them, so it is best to walk under the first Kamer before climbing the wall. Requires: {
"notable": "Walljump Climb Using the Kamer"
}
"HiJump"
"canUseEnemies"
"canPreciseWallJump"
{
"or": [
{
"heatFrames": 360
},
{
"and": [
"canTrickyJump",
{
"heatFrames": 230
}
]
}
]
}
{
"or": [
"canDodgeWhileShooting",
{
"enemyDamage": {
"enemy": "Fune",
"type": "fireball",
"hits": 1
}
},
{
"and": [
"canUseFrozenEnemies",
{
"heatFrames": 70
}
]
},
{
"and": [
{
"ammo": {
"type": "Super",
"count": 1
}
},
{
"heatFrames": 70
}
]
},
{
"and": [
{
"ammo": {
"type": "PowerBomb",
"count": 1
}
},
{
"heatFrames": 90
}
]
}
]
}
{
"or": [
"canDash",
{
"heatFrames": 20
}
]
} |
|
Wall jump up the left wall, perform a delayed wall jump on the Fune to reach the door. Requires: "canTrickyWallJump"
"canConsecutiveWallJump"
"canTrickyJump"
"canUseEnemies"
{
"or": [
{
"heatFrames": 190
},
{
"and": [
"canPrepareForNextRoom",
{
  "heatFrames": 135
}
]
}
]
}
{
"or": [
"canDash",
{
"heatFrames": 5
}
]
} |
|
Wall jump up the left wall, perform a delayed wall jump on the Fune to reach the door. Entrance condition: {
"comeInJumping": {
"speedBooster": "any",
"minTiles": 0
}
}Requires: "canPrepareForNextRoom"
"canTrickyWallJump"
"canConsecutiveWallJump"
"canTrickyJump"
"canFastWallJumpClimb"
"canUseEnemies"
{
"heatFrames": 120
}
{
"or": [
"canDash",
{
"heatFrames": 5
}
]
}Dev note: This differs from the canPrepareForNextRoom option of the previous strat only in requiring an air entry. FIXME: canFastWallJumpClimb is for difficulty placement. |
|
Requires: "SpaceJump"
{
"heatFrames": 220
}
{
"or": [
"canPrepareForNextRoom",
{
"heatFrames": 100
}
]
}
{
"or": [
"canDash",
{
"heatFrames": 15
}
]
} |
|
Entrance condition: {
"comeInJumping": {
"speedBooster": "any",
"minTiles": 0
}
}Requires: "canPrepareForNextRoom"
"SpaceJump"
{
"heatFrames": 200
}
{
"or": [
"canDash",
{
"heatFrames": 15
}
]
}Dev note: This differs from the canPrepareForNextRoom option of the previous strat only in requiring an air entry. |
|
Requires: "HiJump"
"SpaceJump"
{
"heatFrames": 150
}
{
"or": [
"canPrepareForNextRoom",
{
"heatFrames": 70
}
]
}
{
"or": [
"canDash",
{
"heatFrames": 5
}
]
} |
From: 2
Bottom Left Door
To: 1
Top Left Door
Entrance condition: {
"comeInJumping": {
"speedBooster": "any",
"minTiles": 0
}
}Requires: "canPrepareForNextRoom"
"HiJump"
"SpaceJump"
{
"heatFrames": 120
}
{
"or": [
"canDash",
{
"heatFrames": 5
}
]
}Dev note: This differs from the canPrepareForNextRoom option of the previous strat only in requiring an air entry. |
|
Requires: "HiJump"
"canSpringBallJumpMidAir"
{
"heatFrames": 160
}
{
"or": [
"canDash",
{
"heatFrames": 5
}
]
} |
|


Requires: {
"or": [
{
"and": [
"canLongIBJ",
{
"heatFrames": 1450
}
]
},
{
"and": [
"canJumpIntoIBJ",
{
"heatFrames": 960
}
]
},
{
"and": [
"HiJump",
"canJumpIntoIBJ",
{
"heatFrames": 620
}
]
},
{
"and": [
"canDoubleBombJump",
{
"heatFrames": 560
}
]
},
{
"and": [
"HiJump",
"canDoubleBombJump",
{
"heatFrames": 490
}
]
}
]
}
{
"or": [
"canDash",
{
"heatFrames": 30
}
]
} |
|
Requires: {
"canShineCharge": {
"usedTiles": 28,
"gentleUpTiles": 3,
"gentleDownTiles": 3,
"openEnd": 0
}
}
{
"or": [
{
"shinespark": {
"frames": 27,
"excessFrames": 4
}
},
{
"and": [
"canMidairShinespark",
{
"shinespark": {
"frames": 17,
"excessFrames": 4
}
}
]
}
]
}
{
"heatFrames": 380
} |
From: 2
Bottom Left Door
To: 1
Top Left Door
Climb up 1 screen. Entrance condition: {
"comeInShinecharged": {}
}Requires: {
"shineChargeFrames": 1
}
{
"shinespark": {
"frames": 1,
"excessFrames": 1
}
}
"canShinesparkDeepStuck"
"canXRayClimb"
"canBePatient"
{
"heatFrames": 1600
} |
|
Climb up 1 screen. Entrance condition: {
"comeInWithGMode": {
"mode": "direct",
"morphed": false
}
}Requires: "canGModeXRayClimb" "h_heatProof" |
|
Enter with G-mode direct, back up to between 1 and 6 pixels from the door transition, and activate X-ray to get very deep stuck in the door. Climb up 1 screen, and perform a turnaround buffered spin-jump away from the door to trigger the transition, bypassing any lock on the door. Entrance condition: {
"comeInWithGMode": {
"mode": "direct",
"morphed": false
}
}Requires: "canGModeXRayClimb" "h_heatProof" Bypasses door shell: true |
From: 2
Bottom Left Door
To: 1
Top Left Door


Entrance condition: {
"comeInShinecharged": {}
}Requires: {
"shineChargeFrames": 40
}
{
"shinespark": {
"frames": 27,
"excessFrames": 4
}
}
{
"heatFrames": 200
} |
|


Run from the right wall to 2/3 of the way across the room and jump up onto the moving platforms. Requires: "canSpeedyJump"
"HiJump"
{
"heatFrames": 350
} |
|


Run under the second moving platform from the right to trigger it to move down. Then run back to the left wall, run again to the right, and jump when on the center of the mound just to the right below the platform. Requires: "canTrickyDashJump"
{
"heatFrames": 450
} |
From: 2
Bottom Left Door
To: 1
Top Left Door

Spin jump into the room with at least 1 tile of run speed. Then perform a mid-air Spring Ball jump to reach the ledge above. Entrance condition: {
"comeInJumping": {
"speedBooster": "any",
"minTiles": 0
}
}Requires: "HiJump"
"canPrepareForNextRoom"
"canSpringBallJumpMidAir"
{
"heatFrames": 110
}
{
"or": [
"canDash",
{
"heatFrames": 10
}
]
} |
From: 2
Bottom Left Door
To: 1
Top Left Door
Requires: "canTrickySpringBallJump"
"canTrickyJump"
{
"doorUnlockedAtNode": 2
}
{
"heatFrames": 265
} |
From: 2
Bottom Left Door
To: 1
Top Left Door
Spin jump into the room with at least 1 tile of run speed. Perform a lateral mid-air morph into a spring ball jump. Press against the left side of the first moving platform to gain enough height to get on top of it. Entrance condition: {
"comeInJumping": {
"speedBooster": "any",
"minTiles": 1
}
}Requires: "canPrepareForNextRoom"
"canLateralMidAirMorph"
"canTrickySpringBallJump"
"canTrickyJump"
{
"heatFrames": 160
} |
|
Requires: "canShinechargeMovementComplex"
"HiJump"
{
"or": [
"SpaceJump",
{
"and": [
"canPreciseWallJump",
"canTrickyJump"
]
}
]
}
{
"heatFrames": 400
}
{
"canShineCharge": {
"usedTiles": 28,
"gentleUpTiles": 3,
"gentleDownTiles": 3,
"openEnd": 0
}
}
{
"shineChargeFrames": 150
}Exit condition: {
"leaveShinecharged": {}
}Unlocks doors: {"types":["missiles"],"requires":[{"heatFrames":240}]}
{"types":["super"],"requires":[]}
{"types":["powerbomb"],"requires":[{"heatFrames":100}]} |
From: 2
Bottom Left Door
To: 1
Top Left Door
Entrance condition: {
"comeInGettingBlueSpeed": {
"length": 0,
"openEnd": 1
}
}Requires: "HiJump"
"canSpringBallJumpMidAir"
{
"canShineCharge": {
"usedTiles": 19,
"gentleUpTiles": 2,
"gentleDownTiles": 2,
"openEnd": 1
}
}
"canPauseRemorphTemporaryBlue"
{
"heatFrames": 550
}
{
"or": [
"canXRayCancelShinecharge",
{
"heatFrames": 160
}
]
}Exit condition: {
"leaveWithTemporaryBlue": {}
}Unlocks doors: {"types":["super","powerbomb"],"requires":[]}
{"types":["missiles"],"requires":[{"heatFrames":50}]} |
Blue Cross-Room Jump, Leave With Temporary Blue (HiJump, Spring Ball Jump)
(Extreme+)
Double Chamber
From: 2
Bottom Left Door
To: 1
Top Left Door

Entrance condition: {
"comeInGettingBlueSpeed": {
"length": 0,
"openEnd": 1
}
}Requires: "HiJump"
"canXRayTurnaround"
"canSpringBallJumpMidAir"
"canPauseRemorphTemporaryBlue"
{
"heatFrames": 380
}Exit condition: {
"leaveWithTemporaryBlue": {}
}Unlocks doors: {"types":["super","powerbomb"],"requires":[]}
{"types":["missiles"],"requires":[{"heatFrames":50}]} |
From: 2
Bottom Left Door
To: 1
Top Left Door

Entrance condition: {
"comeInGettingBlueSpeed": {
"length": 0,
"openEnd": 1,
"minExtraRunSpeed": "$2.0"
}
}Requires: "HiJump"
"canSpeedyJump"
"canLateralMidAirMorph"
"canInsaneJump"
"canPauseRemorphTemporaryBlue"
"canXRayTurnaround"
{
"heatFrames": 360
}Exit condition: {
"leaveWithTemporaryBlue": {}
}Unlocks doors: {"types":["super","powerbomb"],"requires":[]}
{"types":["missiles"],"requires":[{"heatFrames":50}]} |
Blue Cross-Room Jump, Leave With Temporary Blue (Speedy Jump, Spring Ball Jump)
(Extreme+)
Double Chamber
From: 2
Bottom Left Door
To: 1
Top Left Door


Entrance condition: {
"comeInGettingBlueSpeed": {
"length": 0,
"openEnd": 1,
"minExtraRunSpeed": "$2.0"
}
}Requires: "canSpeedyJump"
"canLateralMidAirMorph"
"canTrickySpringBallJump"
"canInsaneJump"
"canPauseRemorphTemporaryBlue"
"canXRayTurnaround"
{
"heatFrames": 440
}Exit condition: {
"leaveWithTemporaryBlue": {}
}Unlocks doors: {"types":["super","powerbomb"],"requires":[]}
{"types":["missiles"],"requires":[{"heatFrames":50}]} |
|

Entrance condition: {
"comeInWithGrappleSwing": {
"blocks": [
{
"position": [
-1,
5
],
"environment": "water",
"note": "Mt. Everest"
},
{
"position": [
8,
3
],
"note": "Grapple Beam Room"
},
{
"position": [
7,
3
],
"note": "Colosseum"
},
{
"position": [
6,
4
],
"note": "Grapple Tutorial Room 2"
},
{
"position": [
6,
2
],
"note": "Lava Grapple Tunnel"
},
{
"position": [
5,
2
],
"note": "The Moat, Double Chamber, Wrecked Ship Energy Tank Room"
},
{
"position": [
2.375,
4.5625
],
"note": "Post Crocomire Farming Room"
}
]
}
}Requires: "canTrickyGrappleJump" "h_heatProof" Dev note: The Kamers make this tricky since it's easy to bonk on them. |
|
Speedy jump to farm a Fune or Morph over to the Kago. Shinecharge at the bottom left, then jump back up and heat interrupt at the top left door before leaving. Requires: {
"obstaclesCleared": [
"R-Mode"
]
}
"HiJump"
{
"or": [
"SpaceJump",
{
"and": [
"canPreciseWallJump",
"canTrickyJump"
]
}
]
}
{
"or": [
"h_heatedCrystalFlashForReserveEnergy",
{
"and": [
"h_RModeCanRefillReserves",
{
"or": [
{
"and": [
"h_heatProof",
{
"enemyKill": {
"enemies": [
[
"Fune"
],
[
"Fune"
]
]
}
},
{
"resourceMissingAtMost": [
{
"type": "Missile",
"count": 0
}
]
},
{
"partialRefill": {
"type": "ReserveEnergy",
"limit": 20
}
}
]
},
{
"and": [
"Morph",
{
"heatFrames": 560
},
{
"or": [
{
"disableEquipment": "ETank"
},
"h_heatProof"
]
},
{
"partialRefill": {
"type": "ReserveEnergy",
"limit": 100
}
},
{
"heatFrames": 160
}
]
}
]
}
]
}
]
}
{
"heatFrames": 400
}
{
"canShineCharge": {
"usedTiles": 28,
"gentleUpTiles": 3,
"gentleDownTiles": 3,
"openEnd": 0
}
}
"h_heatTriggerRModeSparkInterrupt"
{
"heatFrames": 10
}Resets obstacles: R-Mode |
|
It is possible to climb the left side of the room with SpeedBooster alone, with either a tricky dash jump or a vertical shinespark. Entrance condition: {
"comeInWithGMode": {
"mode": "any",
"morphed": false
}
}Requires: {
"or": [
"SpaceJump",
"canWallJump",
{
"and": [
"HiJump",
"canSpeedyJump"
]
},
"canTrickyDashJump",
{
"and": [
{
"canShineCharge": {
"usedTiles": 28,
"gentleUpTiles": 3,
"gentleDownTiles": 3,
"openEnd": 0
}
},
{
"or": [
{
"shinespark": {
"frames": 18,
"excessFrames": 8
}
},
{
"and": [
"canSpeedyJump",
{
"shinespark": {
"frames": 16,
"excessFrames": 10
}
}
]
}
]
}
]
}
]
}
"h_heatedGModeOpenDifferentDoor"Dev note: This is only for strats without Morph, otherwise the strats can stop at 7 first. |
|
Entrance condition: {
"comeInWithGMode": {
"mode": "any",
"morphed": true
}
}Requires: "h_artificialMorphIBJ" "h_heatedGModeOpenDifferentDoor" |
|
Exit condition: {
"leaveWithRunway": {
"length": 1,
"openEnd": 1
}
} |
|

Requires: {
"heatFrames": 320
}Exit condition: {
"leaveWithSidePlatform": {
"height": 3,
"runway": {
"length": 28,
"openEnd": 0,
"gentleUpTiles": 3,
"gentleDownTiles": 3
},
"obstruction": [
1,
0
]
}
}Dev note: Max extra run speed $5.0 |
|
Requires: {
"obstaclesNotCleared": [
"R-Mode"
]
}
"h_heatedCrystalFlash" |
|
Requires: "canShinechargeMovement"
{
"heatFrames": 250
}
{
"canShineCharge": {
"usedTiles": 28,
"gentleUpTiles": 3,
"gentleDownTiles": 3,
"openEnd": 0
}
}
{
"shineChargeFrames": 40
}Exit condition: {
"leaveShinecharged": {}
} |
|
Requires: {
"heatFrames": 260
}Exit condition: {
"leaveSpinning": {
"remoteRunway": {
"length": 22,
"openEnd": 0,
"gentleUpTiles": 3,
"gentleDownTiles": 3
}
}
} |
|
Requires: {
"heatFrames": 260
}Exit condition: {
"leaveWithMockball": {
"remoteRunway": {
"length": 22,
"openEnd": 0,
"gentleUpTiles": 3,
"gentleDownTiles": 3
},
"landingRunway": {
"length": 1,
"openEnd": 1
}
}
} |
From: 2
Bottom Left Door
To: 2
Bottom Left Door
Requires: {
"heatFrames": 275
}Exit condition: {
"leaveWithSpringBallBounce": {
"remoteRunway": {
"length": 18,
"openEnd": 0,
"gentleUpTiles": 3,
"gentleDownTiles": 3
},
"landingRunway": {
"length": 1,
"openEnd": 1
},
"movementType": "any"
}
} |
|
Requires: "h_heatedRemoteRunwaySpaceJump"
{
"heatFrames": 290
}Exit condition: {
"leaveSpaceJumping": {
"remoteRunway": {
"length": 15,
"openEnd": 0,
"gentleUpTiles": 3,
"gentleDownTiles": 3
}
}
} |
From: 2
Bottom Left Door
To: 2
Bottom Left Door
Requires: {
"canShineCharge": {
"usedTiles": 28,
"gentleUpTiles": 3,
"gentleDownTiles": 3,
"openEnd": 0
}
}
{
"heatFrames": 320
}
{
"or": [
"canXRayCancelShinecharge",
{
"heatFrames": 160
}
]
}Exit condition: {
"leaveWithTemporaryBlue": {}
} |
|
Requires: {
"canShineCharge": {
"usedTiles": 28,
"gentleUpTiles": 3,
"gentleDownTiles": 3,
"openEnd": 0
}
}
{
"or": [
{
"and": [
"h_enemyDrops",
"h_heatedCrystalSparkWithoutLenience"
]
},
"h_heatedCrystalSpark"
]
}Dev note: No lenience, since the Kagos is a reasonable enough Power Bomb farm. |
|
Entrance condition: {
"comeInWithRMode": {}
}Clears obstacles: R-Mode |
|


Speedy jump to farm a Fune or Morph over to the Kago. Shinecharge at the bottom left, then heat interrupt in the door and quickly leave. Requires: {
"obstaclesCleared": [
"R-Mode"
]
}
{
"or": [
"h_heatedCrystalFlashForReserveEnergy",
{
"and": [
"h_RModeCanRefillReserves",
{
"or": [
{
"and": [
"h_heatProof",
{
"enemyKill": {
"enemies": [
[
"Fune"
],
[
"Fune"
]
]
}
},
{
"resourceMissingAtMost": [
{
"type": "Missile",
"count": 0
}
]
},
{
"partialRefill": {
"type": "ReserveEnergy",
"limit": 20
}
}
]
},
{
"and": [
"Morph",
{
"heatFrames": 560
},
{
"or": [
{
"disableEquipment": "ETank"
},
"h_heatProof"
]
},
{
"partialRefill": {
"type": "ReserveEnergy",
"limit": 100
}
},
{
"heatFrames": 160
}
]
}
]
}
]
}
]
}
{
"heatFrames": 300
}
{
"canShineCharge": {
"usedTiles": 28,
"gentleUpTiles": 3,
"gentleDownTiles": 3,
"openEnd": 0
}
}
"h_heatTriggerRModeSparkInterrupt"
{
"heatFrames": 10
}Resets obstacles: R-Mode |
|
It is possible to climb the left side of the room with SpeedBooster alone, with either a tricky dash jump or a vertical shinespark, then Grapple the Ripper or ceiling blocks. With Grapple, a running jump then single Grapple swing can be used before PLMs are overloaded, alternatively jump on the crumble blocks and Grapple the Ripper. Entrance condition: {
"comeInWithGMode": {
"mode": "indirect",
"morphed": false
}
}Requires: {
"or": [
"SpaceJump",
"canTrickySpringBallJump",
{
"and": [
"canWallJump",
{
"or": [
"canDash",
"HiJump",
{
"and": [
"canBlueSuitSpikeJump",
{
"spikeHits": 1
}
]
}
]
}
]
},
{
"and": [
"HiJump",
"canSpeedyJump"
]
},
{
"and": [
"canTrickyDashJump",
"canPreciseGrapple"
]
},
{
"and": [
"canPreciseGrapple",
{
"canShineCharge": {
"usedTiles": 28,
"gentleUpTiles": 3,
"gentleDownTiles": 3,
"openEnd": 0
}
},
{
"or": [
{
"shinespark": {
"frames": 18,
"excessFrames": 8
}
},
{
"and": [
"canSpeedyJump",
{
"shinespark": {
"frames": 16,
"excessFrames": 10
}
}
]
}
]
}
]
}
]
}
"h_heatedGModeOpenDifferentDoor" |
From: 2
Bottom Left Door
To: 3
Right Door
Bomb boost onto the crumble blocks in the middle of the spike pit, then on the right side, move the Ripper off camera and IBJ. If the camera gets shifted so that the Ripper stays on camera, shift it back to the right by IBJng up a bit on the left side of the 4 crumbles then move to the right as Samus falls. Entrance condition: {
"comeInWithGMode": {
"mode": "indirect",
"morphed": true
}
}Requires: "h_artificialMorphIBJ" "h_artificialMorphBombHorizontally" "canCameraManip" "canTrickyJump" "h_heatedGModeOpenDifferentDoor" |
From: 2
Bottom Left Door
To: 3
Right Door
Overload PLMs by shooting the gate, then go through the crumble blocks below and get to the door. The gate can be shot while precisely positioned from below without requiring any items. The positioning is precise and off camera; while facing left, position Samus front foot barely on the flat part after the slope. Entrance condition: {
"comeInWithGMode": {
"mode": "direct",
"morphed": false
}
}Requires: "Morph"
{
"or": [
"SpaceJump",
{
"and": [
"canPreciseGrapple",
{
"or": [
"canDash",
"canUseEnemies",
"canInsaneJump"
]
}
]
},
{
"and": [
"HiJump",
"canSpringBallJumpMidAir"
]
},
{
"and": [
"canDash",
"HiJump",
"canWallJump",
"canTrickyJump"
]
},
{
"and": [
"canWallJump",
"canUseIFrames",
{
"spikeHits": 1
},
"h_spikeJumpWithActiveEnemies"
]
},
{
"and": [
"h_IBJFromSpikes",
"h_spikeJumpWithActiveEnemies"
]
}
]
}
"h_heatedGModeOpenDifferentDoor" |
From: 2
Bottom Left Door
To: 3
Right Door
Overload PLMs by bombing the gate or crumble blocks, then go through the crumble blocks below and get to the door. IBJ past the Ripper or kill it. The Kago bugs will not spawn until Samus exits G-mode, so it is fine to kill it or IBJ from on top of it. Entrance condition: {
"comeInWithGMode": {
"mode": "any",
"morphed": true
}
}Requires: {
"or": [
"h_artificialMorphLongIBJ",
"h_artificialMorphJumpIntoIBJ"
]
}
"h_artificialMorphBombHorizontally"
{
"or": [
"h_artificialMorphPowerBomb",
{
"and": [
"Morph",
{
"ammo": {
"type": "Missile",
"count": 2
}
}
]
},
{
"and": [
"Morph",
{
"ammo": {
"type": "Super",
"count": 1
}
}
]
},
{
"and": [
"h_artificialMorphDoubleBombJump",
"h_artificialMorphStaggeredIBJ"
]
}
]
}
"h_heatedGModeOpenDifferentDoor" |
|


Enter with R-Mode, disable any E-Tanks and farm the Kago to put Energy into reserves. Get into postion under the top blocks and disable Varia. Time a down jump to reach the apex as reserves trigger. Release down during the reserve refill. A mid air morph increases the frame window Samus can clip through the blocks. Entrance condition: {
"comeInWithRMode": {}
}Requires: "h_heatProof"
"canMidAirMorph"
"canRModeStandupClip"
"h_RModeCanRefillReserves"
{
"partialRefill": {
"type": "ReserveEnergy",
"limit": 100
}
}
{
"disableEquipment": "Varia"
}
{
"autoReserveTrigger": {
"implicitHeatFrames": "suitless"
}
}
{
"suitlessHeatFrames": 30
}Dev note: FIXME: Add suitless version. |
From: 2
Bottom Left Door
To: 3
Right Door


Come in with G-Mode Morph, after passing through the morph tunnel unmorph and exit G-Mode. Disable any E-Tanks and farm the Kago to put Energy into reserves. Get into postion under the top blocks and disable Varia. Time a down jump to reach the apex as reserves trigger. Release down during the reserve refil. Entrance condition: {
"comeInWithGMode": {
"mode": "direct",
"morphed": true
}
}Requires: "canArtificialMorph"
"h_heatProof"
"canRModeStandupClip"
"canBeVeryPatient"
"h_RModeCanRefillReserves"
{
"partialRefill": {
"type": "ReserveEnergy",
"limit": 100
}
}
{
"disableEquipment": "Varia"
}
{
"autoReserveTrigger": {
"implicitHeatFrames": "suitless"
}
}
{
"suitlessHeatFrames": 30
}Dev note: FIXME: Add suitless version. |
|
Wall jump up the left wall, perform a delayed wall jump on the Fune. Requires: "canTrickyWallJump"
"canConsecutiveWallJump"
"canTrickyJump"
"canUseEnemies"
"canPrepareForNextRoom"
{
"heatFrames": 315
}
{
"or": [
{
"noFlashSuit": {}
},
"canComplexCarryFlashSuit",
"Ice",
"Wave",
"Spazer",
"Plasma",
{
"heatFrames": 300
}
]
}
{
"or": [
"canDash",
{
"heatFrames": 50
}
]
} |
|
Wall jump up the left wall, perform a delayed wall jump on the Fune. Entrance condition: {
"comeInJumping": {
"speedBooster": "any",
"minTiles": 0
}
}Requires: "canPrepareForNextRoom"
"canTrickyWallJump"
"canConsecutiveWallJump"
"canTrickyJump"
"canUseEnemies"
"canPrepareForNextRoom"
{
"heatFrames": 300
}
{
"or": [
{
"noFlashSuit": {}
},
"canComplexCarryFlashSuit",
"Ice",
"Wave",
"Spazer",
"Plasma",
{
"heatFrames": 300
}
]
}
{
"or": [
"canDash",
{
"heatFrames": 50
}
]
}Dev note: This differs from the canPrepareForNextRoom option of the previous strat only in requiring an air entry. |
|


Requires: "HiJump"
"canSpeedyJump"
{
"heatFrames": 220
}
{
"or": [
{
"noFlashSuit": {}
},
{
"and": [
{
"heatFrames": 20
},
{
"or": [
"Wave",
"canTrickyCarryFlashSuit"
]
}
]
},
{
"and": [
{
"heatFrames": 50
},
{
"or": [
"canComplexCarryFlashSuit",
"Ice",
"Spazer",
"Plasma"
]
}
]
},
{
"heatFrames": 300
}
]
}Clears obstacles: A |
|
Requires: "HiJump"
"SpaceJump"
{
"heatFrames": 250
}
{
"or": [
{
"noFlashSuit": {}
},
{
"and": [
{
"heatFrames": 30
},
{
"or": [
"canComplexCarryFlashSuit",
"Ice",
"Wave",
"Spazer",
"Plasma"
]
}
]
},
{
"heatFrames": 300
}
]
}
{
"or": [
"canDash",
{
"heatFrames": 50
}
]
}Clears obstacles: A |
|
Requires: "SpaceJump"
{
"heatFrames": 310
}
{
"or": [
{
"noFlashSuit": {}
},
{
"and": [
{
"heatFrames": 60
},
{
"or": [
"canComplexCarryFlashSuit",
"Ice",
"Wave",
"Spazer",
"Plasma"
]
}
]
},
{
"heatFrames": 300
}
]
}
{
"or": [
"canDash",
{
"heatFrames": 20
}
]
}Clears obstacles: A |
|

Run to the right, wait a moment for the platforms to come down, then wall jump off the second platform from the right. Alternatively, wall jump off the wall to the right to reach the platform sooner, to wall jump off of it. Requires: "HiJump"
"canWallJump"
"canTrickyJump"
{
"or": [
{
"and": [
"canHeroShot",
{
"heatFrames": 270
},
"canInsaneWallJump",
"h_trickyToCarryFlashSuit",
"canBeVeryPatient"
]
},
{
"and": [
{
"heatFrames": 360
},
{
"or": [
"h_complexToCarryFlashSuit",
"Ice",
"Wave",
"Spazer",
"Plasma",
{
"heatFrames": 300
}
]
}
]
}
]
}
{
"or": [
"canDash",
{
"heatFrames": 120
}
]
}Clears obstacles: A |
|


Requires: "HiJump"
"canSpringBallJumpMidAir"
{
"heatFrames": 250
}
{
"or": [
"canDash",
{
"heatFrames": 40
}
]
}Clears obstacles: A |
|


Run under the furthest right moving platform to trigger it to move down. Then run back to the left wall, run again to the right, and jump when on the center of the mound just to the left below the platform. Shoot straight up to open the gate on the way up. Requires: "canTrickyDashJump"
{
"heatFrames": 380
}
{
"or": [
{
"noFlashSuit": {}
},
{
"and": [
{
"heatFrames": 70
},
{
"or": [
"canComplexCarryFlashSuit",
"Ice",
"Wave",
"Spazer",
"Plasma"
]
}
]
},
{
"heatFrames": 300
}
]
}Clears obstacles: A |
|


Starting from the left wall, run to the right and jump when on the center of the mound just to the right of the second moving platform from the right. Wall jump off of the platform as it moves down. Requires: "canTrickyDashJump"
"canWallJump"
{
"heatFrames": 300
}
{
"or": [
{
"noFlashSuit": {}
},
{
"and": [
{
"heatFrames": 60
},
{
"or": [
"canComplexCarryFlashSuit",
"Ice",
"Wave",
"Spazer",
"Plasma"
]
}
]
},
{
"heatFrames": 300
}
]
}Clears obstacles: A |
|

Requires: {
"canShineCharge": {
"usedTiles": 28,
"gentleUpTiles": 3,
"gentleDownTiles": 3,
"openEnd": 0
}
}
{
"shinespark": {
"frames": 24,
"excessFrames": 8
}
}
{
"heatFrames": 300
}
{
"or": [
"canHeroShot",
{
"heatFrames": 100
}
]
}Clears obstacles: A |
|


Entrance condition: {
"comeInJumping": {
"speedBooster": "yes",
"minTiles": 4
}
}Requires: "HiJump"
"canSpeedyJump"
{
"heatFrames": 220
}
{
"or": [
{
"noFlashSuit": {}
},
"canComplexCarryFlashSuit",
"Ice",
"Wave",
"Spazer",
"Plasma",
{
"heatFrames": 300
}
]
}Clears obstacles: A |
|


Jump through the door transition, and wall jump off the second moving platform to get on top. Entrance condition: {
"comeInJumping": {
"speedBooster": "any",
"minTiles": 1
}
}Requires: "canPrepareForNextRoom"
"HiJump"
"canWallJump"
"canTrickyJump"
{
"heatFrames": 260
}
{
"or": [
{
"noFlashSuit": {}
},
"canComplexCarryFlashSuit",
"Ice",
"Wave",
"Spazer",
"Plasma",
{
"heatFrames": 300
}
]
}Clears obstacles: A |
|


Spin jump into the room with at least 2 tiles of run speed. Perform a lateral mid-air morph into a spring ball jump. Land on the second moving platform. Entrance condition: {
"comeInJumping": {
"speedBooster": "any",
"minTiles": 2
}
}Requires: "canPrepareForNextRoom"
"canLateralMidAirMorph"
"canTrickySpringBallJump"
"canTrickyJump"
{
"heatFrames": 280
}
{
"or": [
{
"noFlashSuit": {}
},
"canComplexCarryFlashSuit",
"Ice",
"Wave",
"Spazer",
"Plasma",
{
"heatFrames": 300
}
]
}Clears obstacles: A |
|
It is possible to climb the left side of the room with SpeedBooster alone, with either a tricky dash jump or a vertical shinespark. Entrance condition: {
"comeInWithGMode": {
"mode": "indirect",
"morphed": false
}
}Requires: {
"or": [
"SpaceJump",
"canSpringBallJumpMidAir",
"canWallJump",
{
"and": [
"HiJump",
"canSpeedyJump"
]
},
"canTrickyDashJump",
{
"and": [
{
"canShineCharge": {
"usedTiles": 28,
"gentleUpTiles": 3,
"gentleDownTiles": 3,
"openEnd": 0
}
},
{
"or": [
{
"shinespark": {
"frames": 18,
"excessFrames": 8
}
},
{
"and": [
"canSpeedyJump",
{
"shinespark": {
"frames": 16,
"excessFrames": 10
}
}
]
}
]
}
]
}
]
}
{
  "heatFrames": 0
} |
|
Entrance condition: {
"comeInWithGMode": {
"mode": "indirect",
"morphed": true
}
}Requires: "h_artificialMorphIBJ"
{
"heatFrames": 0
} |
From: 2
Bottom Left Door
To: 4
Item
Stand under where the gate will spawn when exiting G-mode to open it before grabbing the item. Entrance condition: {
"comeInWithGMode": {
"mode": "indirect",
"morphed": false
}
}Requires: {
"or": [
"SpaceJump",
"canSpringBallJumpMidAir",
"canWallJump",
{
"and": [
"HiJump",
"canSpeedyJump"
]
},
"canTrickyDashJump",
{
"and": [
{
"canShineCharge": {
"usedTiles": 28,
"gentleUpTiles": 3,
"gentleDownTiles": 3,
"openEnd": 0
}
},
{
"or": [
{
"shinespark": {
"frames": 18,
"excessFrames": 8
}
},
{
"and": [
"canSpeedyJump",
{
"shinespark": {
"frames": 16,
"excessFrames": 10
}
}
]
}
]
}
]
}
]
}
{
  "heatFrames": 25
}
Clears obstacles: A |
From: 2
Bottom Left Door
To: 4
Item
Stand under where the gate will spawn when exiting G-mode to open it before grabbing the item. Entrance condition: {
"comeInWithGMode": {
"mode": "indirect",
"morphed": true
}
}Requires: "h_artificialMorphIBJ"
{
"heatFrames": 25
}Clears obstacles: A |
|
Overload PLMs by shooting the gate, then go through the crumble blocks below and get to the item. The gate can be shot while precisely positioned from below without requiring any items. The positioning is precise and off camera; while facing left, position Samus front foot barely on the flat part after the slope. Entrance condition: {
"comeInWithGMode": {
"mode": "direct",
"morphed": false
}
}Requires: "Morph"
{
"or": [
"SpaceJump",
{
"and": [
"canPreciseGrapple",
"canUseEnemies"
]
},
{
"and": [
"HiJump",
"canSpringBallJumpMidAir"
]
},
"canInsaneWallJump",
{
"and": [
"HiJump",
"canUseIFrames",
{
"noBlueSuit": {}
},
{
"enemyDamage": {
"enemy": "Ripper 2 (green)",
"type": "contact",
"hits": 1
}
},
{
"or": [
"canWallJump",
"canSpeedyJump"
]
}
]
},
"h_IBJFromSpikes"
]
}
{
"heatFrames": 0
} |
From: 2
Bottom Left Door
To: 4
Item
Overload PLMs by bombing the gate or crumble blocks, then go through the crumble blocks below and get to the item. IBJ past the Ripper or kill it. The Kago bugs will not spawn until Samus exits G-mode, so it is fine to kill it or IBJ from on top of it. Entrance condition: {
"comeInWithGMode": {
"mode": "direct",
"morphed": true
}
}Requires: {
"or": [
"h_artificialMorphLongIBJ",
"h_artificialMorphJumpIntoIBJ"
]
}
"h_artificialMorphBombHorizontally"
{
"or": [
"h_artificialMorphPowerBomb",
{
"and": [
"Morph",
{
"ammo": {
"type": "Missile",
"count": 2
}
}
]
},
{
"and": [
"Morph",
{
"ammo": {
"type": "Super",
"count": 1
}
}
]
},
{
"and": [
"h_artificialMorphDoubleBombJump",
"h_artificialMorphStaggeredIBJ"
]
}
]
}
{
"heatFrames": 0
} |
|
Requires: "Morph"
{
"heatFrames": 160
}
{
"or": [
"canMockball",
{
"heatFrames": 45
}
]
} |
|
Entrance condition: {
"comeInWithGMode": {
"mode": "any",
"morphed": false
}
}Requires: "Morph"
{
"heatFrames": 0
} |
|
Entrance condition: {
"comeInWithGrappleTeleport": {
"blockPositions": [
[
5,
3
],
[
7,
2
]
]
}
}Requires: {
"heatFrames": 50
} |
|
Exit the previous room with Samus in a standing pose (while grappled) with a horizontal position of 21 (as far right as possible). After teleporting, press right to release Grapple while staying standing (not being forced into a crouch). Then X-ray climb 1 screen to get up to the door transition, without needing to open the door. Samus will not be visible during the climb. At the beginning of the climb, avoid pressing left without X-Ray being held, to prevent triggering the transition of the bottom door. Entrance condition: {
"comeInWithGrappleTeleport": {
"blockPositions": [
[
2,
29
]
]
}
}Requires: "canXRayClimb"
{
"heatFrames": 1600
}Bypasses door shell: true |
|
Bomb horizontally on room entry to jump over the Ripper and land on the crumble blocks, or use a Power Bomb to kill the Ripper. Avoid touching all 6 crumbles, so Samus can use the item to overload PLMs and go through one of the crumbles to get to the left side of the room. If the item has already been obtained, Samus can shoot or Bomb the gate many times to overload PLMs. Entrance condition: {
"comeInWithGMode": {
"mode": "direct",
"morphed": true
}
}Requires: "canRemoteAcquire"
{
"or": [
"h_artificialMorphCeilingBombJump",
{
"and": [
"h_artificialMorphBombHorizontally",
"h_artificialMorphIBJ",
"h_artificialMorphPowerBomb"
]
},
{
"and": [
"h_artificialMorphBombHorizontally",
"canTrickyDodgeEnemies",
"h_artificialMorphDoubleBombJump",
"h_artificialMorphStaggeredIBJ"
]
}
]
}
"h_heatedGModeOpenDifferentDoor"Collects items: 4 |
|

Jump onto the crumble blocks to make them solid, then use them as a platform to cross the room. With Grapple, a running jump then single Grapple swing can be used before PLMs are overloaded, alternatively jump on the crumble blocks and Grapple the Ripper. Entrance condition: {
"comeInWithGMode": {
"mode": "indirect",
"morphed": false
}
}Requires: {
"or": [
"SpaceJump",
{
"and": [
"canPreciseGrapple",
{
"or": [
"canDash",
"canUseEnemies",
"canInsaneJump"
]
}
]
},
"canInsaneWallJump",
{
"and": [
"HiJump",
"canWallJump"
]
},
{
"and": [
"HiJump",
"canSpeedyJump"
]
}
]
}
"h_heatedGModeOpenDifferentDoor"Dev note: This is only for strats that can't go to 7 - variants without Morph, or without a way to get back up after going down. |
From: 3
Right Door
To: 1
Top Left Door

Bomb horizontally on room entry to jump over the Ripper and land on the crumble blocks, or use a Power Bomb to kill the Ripper. Entrance condition: {
"comeInWithGMode": {
"mode": "indirect",
"morphed": true
}
}Requires: {
"or": [
"h_artificialMorphCeilingBombJump",
{
"and": [
"h_artificialMorphBombHorizontally",
"h_artificialMorphIBJ",
"h_artificialMorphPowerBomb"
]
},
{
"and": [
"h_artificialMorphBombHorizontally",
"canTrickyDodgeEnemies",
"h_artificialMorphDoubleBombJump",
"h_artificialMorphStaggeredIBJ"
]
}
]
}
"h_heatedGModeOpenDifferentDoor" |
|


Entrance condition: {
"comeInWithGrappleTeleport": {
"blockPositions": [
[
2,
29
]
]
}
}Bypasses door shell: true |
|
Entrance condition: {
"comeInWithGrappleTeleport": {
"blockPositions": [
[
2,
29
]
]
}
}Exit condition: {
"leaveWithGrappleTeleport": {
"blockPositions": [
[
2,
29
]
]
}
}Bypasses door shell: true |
From: 3
Right Door
To: 2
Bottom Left Door
Bomb horizontally on room entry to jump over the Ripper and land on the crumble blocks, or use a Power Bomb to kill the Ripper. Avoid touching all 6 crumbles, so Samus can use the item to overload PLMs and go through one of the crumbles to get to the left side of the room. If the item has already been obtained, Samus can shoot or Bomb the gate many times to overload PLMs. Entrance condition: {
"comeInWithGMode": {
"mode": "direct",
"morphed": true
}
}Requires: "canRemoteAcquire"
{
"or": [
"h_artificialMorphCeilingBombJump",
{
"and": [
"h_artificialMorphBombHorizontally",
"h_artificialMorphIBJ",
"h_artificialMorphPowerBomb"
]
},
{
"and": [
"h_artificialMorphBombHorizontally",
"canTrickyDodgeEnemies",
"h_artificialMorphDoubleBombJump",
"h_artificialMorphStaggeredIBJ"
]
}
]
}
"h_heatedGModeOpenDifferentDoor"Collects items: 4 |
From: 3
Right Door
To: 2
Bottom Left Door
Jump onto the crumble blocks to make them solid, then use them as a platform to cross the room. With Grapple, a running jump then single Grapple swing can be used before PLMs are overloaded, alternatively jump on the crumble blocks and Grapple the Ripper. Entrance condition: {
"comeInWithGMode": {
"mode": "indirect",
"morphed": false
}
}Requires: {
"or": [
"SpaceJump",
{
"and": [
"canPreciseGrapple",
{
"or": [
"canDash",
"canUseEnemies",
"canInsaneJump"
]
}
]
},
"canInsaneWallJump",
{
"and": [
"HiJump",
"canWallJump"
]
},
{
"and": [
"HiJump",
"canSpeedyJump"
]
}
]
}
"h_heatedGModeOpenDifferentDoor"Dev note: This is only for strats that can't go to 7 - variants without Morph. |
From: 3
Right Door
To: 2
Bottom Left Door
Bomb horizontally on room entry to jump over the Ripper and land on the crumble blocks, or use a Power Bomb to kill the Ripper. Entrance condition: {
"comeInWithGMode": {
"mode": "indirect",
"morphed": true
}
}Requires: {
"or": [
"h_artificialMorphCeilingBombJump",
{
"and": [
"h_artificialMorphBombHorizontally",
"h_artificialMorphIBJ",
"h_artificialMorphPowerBomb"
]
},
{
"and": [
"h_artificialMorphBombHorizontally",
"canTrickyDodgeEnemies",
"h_artificialMorphDoubleBombJump",
"h_artificialMorphStaggeredIBJ"
]
}
]
}
"h_heatedGModeOpenDifferentDoor" |
|
Exit condition: {
"leaveWithRunway": {
"length": 6,
"openEnd": 1
}
} |
|


Requires: "h_heatProof" Exit condition: {
"leaveWithGrappleSwing": {
"blocks": [
{
"position": [
5,
2
],
"note": "Closest Grapple block to the door"
}
]
}
} |
|
Requires: {
"obstaclesNotCleared": [
"R-Mode"
]
}
"h_heatedCrystalFlash" |
|
Requires: "h_heatProof"
"SpaceJump"
"ScrewAttack"
{
"noBlueSuit": {}
}
{
"resetRoom": {
"nodes": [
3
]
}
}
{
"cycleFrames": 230
}Resets obstacles: A, R-Mode Farm cycle drops: 1 Ripper 2 (green) Dev note: FIXME: It is possible but risky to farm using hijump, walljump, and crumble jumps. |
|
Charge a spark along the bottom of the room and use it to spark through the right side door. Requires opening the door and shutter first. Requires: "canShinechargeMovementComplex"
"HiJump"
{
"or": [
"SpaceJump",
"Grapple"
]
}
{
"or": [
{
"obstaclesCleared": [
"A"
]
},
"Wave",
{
"and": [
"h_heatedBlueGateGlitch",
{
"heatFrames": 60
}
]
}
]
}
{
"or": [
{
"and": [
"canTrickyDashJump",
"canWallJump"
]
},
"SpaceJump"
]
}
{
"canShineCharge": {
"usedTiles": 28,
"gentleUpTiles": 3,
"gentleDownTiles": 3,
"openEnd": 0
}
}
{
"heatFrames": 780
}
{
"shinespark": {
"frames": 57,
"excessFrames": 0
}
}Exit condition: {
"leaveWithSpark": {}
}Dev note: A hero shot variation of this strat might be possible, starting from a node to the left; if nothing else it could be done with a shortcharge on the 12-tile platform to the left. |
From: 3
Right Door
To: 3
Right Door
Charge a spark along the bottom of the room and use it to spark through the right side door. Requires opening the door and shutter first. Requires: "canShinechargeMovementComplex"
"HiJump"
"Morph"
{
"or": [
{
"obstaclesCleared": [
"A"
]
},
{
"heatFrames": 240
}
]
}
{
"or": [
{
"and": [
"canTrickyDashJump",
"canWallJump"
]
},
"SpaceJump"
]
}
{
"canShineCharge": {
"usedTiles": 28,
"gentleUpTiles": 3,
"gentleDownTiles": 3,
"openEnd": 0
}
}
{
"heatFrames": 780
}
{
"shinespark": {
"frames": 57,
"excessFrames": 0
}
}Exit condition: {
"leaveWithSpark": {}
}Dev note: FIXME: This would be a lot cleaner with an obstacle for the door, also the 'Through Crumbles' is misleading. |
|
Requires: "h_heatedRemoteRunwaySpaceJump"
{
"heatFrames": 370
}Exit condition: {
"leaveSpinning": {
"remoteRunway": {
"length": 11,
"openEnd": 1
},
"minExtraRunSpeed": "$2.0"
}
}Dev note: This uses the runway in the middle of the room but logically starts at the door, to ensure it can be opened. |
|
Requires: "h_heatedRemoteRunwayPreciseSpaceJump"
{
"heatFrames": 370
}Exit condition: {
"leaveSpaceJumping": {
"remoteRunway": {
"length": 11,
"openEnd": 1
},
"minExtraRunSpeed": "$2.0"
}
}Dev note: This uses the runway in the middle of the room but logically starts at the door, to ensure it can be opened. |
|
Entrance condition: {
"comeInShinecharging": {
"length": 5,
"openEnd": 0
}
}Requires: "h_heatedCrystalSpark" |
|
Requires: "h_spikeXModeShinecharge"
"canWallJump"
{
"heatFrames": 540
}
{
"shinespark": {
"frames": 5
}
}Exit condition: {
"leaveWithSpark": {}
}Dev note: Two spike hits are expected per attempt (with any additional leniency hits being multiplied by this amount). |
|
Requires: "h_spikeXModeShinecharge"
{
"or": [
{
"and": [
{
"heatFrames": 480
},
{
"shineChargeFrames": 140
},
"HiJump"
]
},
{
"and": [
{
"heatFrames": 540
},
"canWallJump",
"canShinechargeMovementTricky",
{
"shineChargeFrames": 160
}
]
}
]
}Exit condition: {
"leaveShinecharged": {}
}Dev note: Two spike hits are expected per attempt (with any additional leniency hits being multiplied by this amount). |
|
Entrance condition: {
"comeInWithRMode": {}
}Clears obstacles: R-Mode |
|
Jump onto the crumble blocks to make them solid, then use them as a platform to cross the room. Entrance condition: {
"comeInWithGMode": {
"mode": "direct",
"morphed": false
}
}Requires: "canRemoteAcquire"
{
"or": [
"SpaceJump",
{
"and": [
"canPreciseGrapple",
"canUseEnemies"
]
},
"canSpringBallJumpMidAir",
"canInsaneWallJump",
{
"and": [
"HiJump",
"canWallJump"
]
},
{
"and": [
"HiJump",
"canSpeedyJump"
]
},
{
"and": [
"canStaggeredIBJ",
"canDoubleBombJump",
"canBombHorizontally"
]
},
{
"and": [
"h_IBJFromSpikes",
"h_IBJFromSpikes"
]
},
{
"and": [
"h_IBJFromSpikes",
"canCameraManip",
"canMoonwalk"
]
}
]
}
"h_heatedDirectGModeLeaveSameDoor"Collects items: 4 |
From: 3
Right Door
To: 3
Right Door
Jump onto the crumble blocks to make them solid, then use them as a platform to cross the room. Entrance condition: {
"comeInWithGMode": {
"mode": "direct",
"morphed": false
}
}Requires: "canRemoteAcquire"
{
"or": [
"ScrewAttack",
"h_usePowerBomb",
{
"ammo": {
"type": "Missile",
"count": 2
}
},
{
"ammo": {
"type": "Super",
"count": 1
}
}
]
}
"canIBJ"
"canBombHorizontally"
"h_heatedDirectGModeLeaveSameDoor"Collects items: 4 |
From: 3
Right Door
To: 3
Right Door


Bomb horizontally on room entry to jump over the Ripper and land on the crumble blocks, or use a Power Bomb to kill the Ripper. Entrance condition: {
"comeInWithGMode": {
"mode": "direct",
"morphed": true
}
}Requires: "canRemoteAcquire"
{
"or": [
"h_artificialMorphLongCeilingBombJump",
{
"and": [
"h_artificialMorphBombHorizontally",
"h_artificialMorphIBJ",
"h_artificialMorphPowerBomb"
]
},
{
"and": [
"h_artificialMorphBombHorizontally",
"canTrickyDodgeEnemies",
"h_artificialMorphDoubleBombJump",
"h_artificialMorphStaggeredIBJ"
]
}
]
}
"h_heatedDirectGModeLeaveSameDoor"Collects items: 4 |
|
Requires: "Grapple"
{
"heatFrames": 155
}
{
"or": [
{
"noFlashSuit": {}
},
{
"and": [
"canMidAirMorph",
{
"heatFrames": 35
}
]
},
{
"heatFrames": 80
}
]
}
{
"or": [
"canDash",
{
"heatFrames": 15
}
]
} |
|
Requires: "SpaceJump"
{
"heatFrames": 160
}
{
"or": [
"canDash",
{
"heatFrames": 135
}
]
} |
|
Requires: "canDash"
"h_heatedIBJFromSpikes"
{
"or": [
{
"heatFrames": 730
},
{
"and": [
"canDoubleBombJump",
{
"heatFrames": 550
}
]
}
]
}Dev note: FIXME: A crumble jump into IBJ is also possible. |
|
Requires: "canDash"
"canUseIFrames"
{
"or": [
{
"spikeHits": 1
},
{
"and": [
"canTrickyJump",
{
"enemyDamage": {
"enemy": "Ripper 2 (green)",
"type": "contact",
"hits": 1
}
},
{
"heatFrames": 20
}
]
}
]
}
"canSpringBallJumpMidAir"
{
"heatFrames": 240
} |
|


Pause while crumble jumping, and quickly mid-air morph and equip Spring Ball, to obtain a boost in horizontal speed before mid-air Spring Ball jumping. Requires: "canCrumbleJump"
"canTrickySpringBallJump"
"canSpringFling"
"h_trickyToCarryFlashSuit"
{
"heatFrames": 270
}
{
"or": [
"canDash",
{
"and": [
{
"haveBlueSuit": {}
},
"canInsaneJump",
{
"heatFrames": 190
}
]
}
]
} |
|
A running jump over the pit without a wall jump requires a runway in the previous room of 12 tiles with a last-frame jump. Entrance condition: {
"comeInRunning": {
"speedBooster": "yes",
"minTiles": 11.4375
}
}Requires: "canSpeedyJump"
"canTrickyJump"
{
"heatFrames": 100
}Dev note: This becomes easier with a very long runway, but probably not easy enough to remove the canTrickyJump, since a missed jump likely means death. |
|
Entrance condition: {
"comeInRunning": {
"speedBooster": "yes",
"minTiles": 8
}
}Requires: "canSpeedyJump"
"canInsaneJump"
{
"or": [
{
"and": [
"canPreciseWallJump",
{
"heatFrames": 150
}
]
},
{
"and": [
"canLateralMidAirMorph",
{
"heatFrames": 110
}
]
}
]
}Dev note: A running jump over the pit requires a runway in the previous room of 8 tiles with an open end, with a last-frame jump into a very precise air ball or wall jump. |
|

Entrance condition: {
"comeInRunning": {
"speedBooster": "yes",
"minTiles": 3
}
}Requires: "h_speedJump"
"canMomentumConservingMorph"
"canSpringFling"
"h_unpauseKeepMomentum"
{
"heatFrames": 140
}Dev note: The momentum-conserving morph is not strictly required (particularly with longer runways) but makes it easier. |
|


Entrance condition: {
"comeInWithMockball": {
"speedBooster": "any",
"remoteAndLandingMinTiles": [
[
6.4375,
0
]
]
}
}Requires: "canSpringBallBounce"
"canSpringFling"
{
"heatFrames": 140
} |
|


Entrance condition: {
"comeInWithMockball": {
"speedBooster": "yes",
"remoteAndLandingMinTiles": [
[
5,
0
]
]
}
}Requires: "canSpringBallBounce"
"canSpringFling"
{
"heatFrames": 150
} |
|


Pause immediately on room entry, and bounce just before Samus would roll off the runway. Unequip Spring Ball, then pause again as soon as possible and re-equip Spring Ball. In the case of entering with minimal extra run speed ($1.7): The bounce should be done on the last possible frame; otherwise the timing for the first pause is frame-perfect (with a 2-frame window for the second pause). With a first-frame pause and last-frame bounce, the second pause has a 4-frame window. With a second-frame pause and last-frame bounce, the second pause has a 3-frame window. With a third-frame pause and last-frame bounce, the second pause is frame-perfect. Entrance condition: {
"comeInWithMockball": {
"speedBooster": "yes",
"remoteAndLandingMinTiles": [
[
4,
0
]
]
}
}Requires: "canSpringBallBounce"
"canSpringFling"
"canInsaneJump"
"canBeVeryPatient"
{
"heatFrames": 145
} |
|
Requires: "canDash"
"canUseIFrames"
{
"or": [
{
"spikeHits": 1
},
{
"and": [
"canTrickyJump",
{
"enemyDamage": {
"enemy": "Ripper 2 (green)",
"type": "contact",
"hits": 1
}
},
{
"heatFrames": 20
}
]
}
]
}
"canWallJump"
"HiJump"
{
"heatFrames": 230
} |
|


Requires: "canDash"
"HiJump"
"canInsaneJump"
"canCrumbleJump"
"canWallJump"
{
"heatFrames": 340
} |
|

Entrance condition: {
"comeInShinecharging": {
"length": 5,
"openEnd": 0
}
}Requires: "canHorizontalShinespark"
{
"heatFrames": 140
}
{
"shinespark": {
"frames": 45,
"excessFrames": 14
}
} |
|

Entrance condition: {
"comeInWithSpark": {}
}Requires: {
"heatFrames": 140
}
{
"shinespark": {
"frames": 51,
"excessFrames": 14
}
}Collects items: 4 Dev note: The item will not be forced to be collected if the spark was in the top position. |
|

Requires: "canUseIFrames"
{
"or": [
{
"spikeHits": 1
},
{
"and": [
"canTrickyJump",
{
"enemyDamage": {
"enemy": "Ripper 2 (green)",
"type": "contact",
"hits": 1
}
},
{
"heatFrames": 20
}
]
}
]
}
"canSpeedyJump"
"HiJump"
{
"heatFrames": 200
} |
|
Position Samus into the bottom right corner, using i-frames to run and jump from the crumble blocks, and then wall jump to make it onto the ledge. If using a spike hit to gain i-frames, be sure to be holding forward (left) when landing, in order to get pushed back into the corner. If using the Ripper to gain i-frames, perform a damage boost from a relatively low position, in order to land quickly enough to reach the crumble blocks before i-frames run out. The extra run speed values that work are $2.0, $2.1, $3.0, and $3.1. Values of $2.0 and $3.0 give a lower jump that is only barely high enough, requiring a very precise wall jump to get up. Run speeds $3.0 and $3.1 correspond to jumping as Samus reaches the end of the crumble blocks. Run speeds $2.0 and $2.1 correspond to jumping a little more than a tile before reaching the crumble blocks. With the damage boost method, the Ripper will normally be blocking the path if jumping at speed $2.0 or $2.1; whereas jumping at the end of the crumble blocks (at speeds $3.0 and $3.1) will always works. Requires: {
"notable": "Hijumpless Spike Tricky Dash Jump"
}
{
"or": [
{
"spikeHits": 1
},
{
"and": [
{
"enemyDamage": {
"enemy": "Ripper 2 (green)",
"type": "contact",
"hits": 1
}
},
"canHorizontalDamageBoost",
"canInsaneJump",
{
"heatFrames": 25
}
]
}
]
}
"canUseIFrames"
"canTrickyDashJump"
"canPreciseWallJump"
{
"heatFrames": 260
} |
|
A short hop from the door can bounce on the crumbles. Just be careful of being pushed back onto the crumble blocks by the spikes. Requires: "h_spikeXModeShinecharge"
"canTrickyJump"
{
"heatFrames": 400
}
{
"shinespark": {
"frames": 12,
"excessFrames": 4
}
}Dev note: Two spike hits are expected per attempt (with any additional leniency hits being multiplied by this amount). |
|
Jump into the spike pit, hitting the Ripper to avoid spike damage. Climb the left wall while avoiding falling onto the spikes or through the crumble blocks. The ledge is the same size of that in writg. Requires: "canDash"
{
"notable": "HiJumpless Wall Jump"
}
"h_heatProof"
"canInsaneWallJump"
"canHorizontalDamageBoost"
{
"or": [
"canUseIFrames",
"canCrumbleJump"
]
}
{
"enemyDamage": {
"enemy": "Ripper 2 (green)",
"type": "contact",
"hits": 1
}
}Dev note: FIXME: a blue suit version of this could be possible, but would probably need to take spike hits. |
|
Samus can ceiling bomb jump up gentle slopes. Going down gentle slopes is also possible but harder, instead an unmorph to reset fall speed is recommended here. Requires: "h_heatProof" "canCeilingBombJump" "canResetFallSpeed" |
|
Jump onto the crumble blocks to make them solid, then use them as a platform to cross the room. With Grapple, a running jump then single Grapple swing can be used before PLMs are overloaded, alternatively jump on the crumble blocks and Grapple the Ripper. Entrance condition: {
"comeInWithGMode": {
"mode": "any",
"morphed": false
}
}Requires: {
"or": [
"SpaceJump",
{
"and": [
"canStaggeredIBJ",
"canDoubleBombJump",
"canBombHorizontally"
]
},
{
"and": [
"canDash",
{
"or": [
"canTrickySpringBallJump",
"canInsaneWallJump",
{
"and": [
"HiJump",
"canWallJump"
]
},
{
"and": [
"HiJump",
"canSpeedyJump"
]
},
"h_IBJFromSpikes"
]
}
]
},
{
"and": [
"canPreciseGrapple",
{
"or": [
"canDash",
"canUseEnemies",
"canInsaneJump"
]
}
]
}
]
}
{
"heatFrames": 0
}Dev note: FIXME: some more of these options may be possible with a blue suit, with greater difficulty. |
|
Jump onto the crumble blocks to make them solid, then use them as a platform to cross the room. Entrance condition: {
"comeInWithGMode": {
"mode": "any",
"morphed": false
}
}Requires: {
"or": [
{
"and": [
"ScrewAttack",
{
"noBlueSuit": {}
}
]
},
"h_usePowerBomb",
{
"ammo": {
"type": "Missile",
"count": 2
}
},
{
"ammo": {
"type": "Super",
"count": 1
}
}
]
}
"canIBJ"
"canBombHorizontally"
{
"heatFrames": 0
} |
|
Bomb horizontally on room entry to jump over the Ripper and land on the crumble blocks, or use a Power Bomb to kill the Ripper. Entrance condition: {
"comeInWithGMode": {
"mode": "any",
"morphed": true
}
}Requires: {
"or": [
"h_artificialMorphCeilingBombJump",
{
"and": [
"h_artificialMorphBombHorizontally",
"h_artificialMorphIBJ",
"h_artificialMorphPowerBomb"
]
},
{
"and": [
"h_artificialMorphBombHorizontally",
"canTrickyDodgeEnemies",
"h_artificialMorphDoubleBombJump",
"h_artificialMorphStaggeredIBJ"
]
}
]
}
{
"heatFrames": 0
} |
|

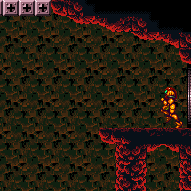
Jump onto the crumble blocks to make them solid, then use them as a platform to cross the room. With Grapple, a running jump then single Grapple swing can be used before PLMs are overloaded, alternatively jump on the crumble blocks and Grapple the Ripper. In indirect G-mode, stand where the gate will spawn and exit G-mode to open the gate. In direct G-mode, overload PLMs by shooting the gate then position Samus a few pixels away from the gate to where upward diagonal shots go through it. Crouch then shoot diagonally and quickly exit G-mode (3-7 frames later) to open the gate on G-mode exit. Entrance condition: {
"comeInWithGMode": {
"mode": "any",
"morphed": false
}
}Requires: "canComplexGMode"
"h_heatedGMode"
{
"or": [
"SpaceJump",
{
"and": [
"canStaggeredIBJ",
"canDoubleBombJump",
"canBombHorizontally"
]
},
{
"and": [
"canDash",
{
"or": [
"canTrickySpringBallJump",
"canInsaneWallJump",
{
"and": [
"HiJump",
"canWallJump"
]
},
{
"and": [
"HiJump",
"canSpeedyJump"
]
},
"h_IBJFromSpikes"
]
}
]
},
{
"and": [
"canPreciseGrapple",
{
"or": [
"canDash",
"canUseEnemies",
"canInsaneJump"
]
}
]
}
]
}
{
"heatFrames": 35
}Clears obstacles: A Dev note: The canComplexGMode is only used here to describe opening the gate in direct G-mode without gate glitching. However, the indirect variant still requires canHeatedGMode or Varia - with Varia, indirect strats can instead be used to go to the top left door and return. FIXME: some more of these options may be possible with a blue suit, with greater difficulty. |
|
Jump onto the crumble blocks to make them solid, then use them as a platform to cross the room. In indirect G-mode, stand where the gate will spawn and exit G-mode to open the gate. In direct G-mode, overload PLMs by shooting the gate then position Samus a few pixels away from the gate to where upward diagonal shots go through it. Crouch then shoot diagonally and quickly exit G-mode (3-7 frames later) to open the gate on G-mode exit. Entrance condition: {
"comeInWithGMode": {
"mode": "any",
"morphed": false
}
}Requires: "canComplexGMode"
"h_heatedGMode"
{
"or": [
{
"and": [
"ScrewAttack",
{
"noBlueSuit": {}
}
]
},
"h_usePowerBomb",
{
"ammo": {
"type": "Missile",
"count": 2
}
},
{
"ammo": {
"type": "Super",
"count": 1
}
}
]
}
"canIBJ"
"canBombHorizontally"
{
"heatFrames": 35
}Clears obstacles: A Dev note: The canComplexGMode is only used here to describe opening the gate in direct G-mode without gate glitching. However, the indirect variant still requires canHeatedGMode or Varia - with Varia, indirect strats can instead be used to go to the top left door and return. |
|
Bomb horizontally on room entry to jump over the Ripper and land on the crumble blocks, or use a Power Bomb to kill the Ripper. In indirect G-mode, stand where the gate will spawn and exit G-mode to open the gate. In direct G-mode, overload PLMs by shooting the gate then position Samus a few pixels away from the gate to where upward diagonal shots go through it. Crouch then shoot diagonally and quickly exit G-mode (3-7 frames later) to open the gate on G-mode exit. Entrance condition: {
"comeInWithGMode": {
"mode": "any",
"morphed": true
}
}Requires: "canComplexGMode"
"h_heatedGMode"
{
"or": [
"h_artificialMorphCeilingBombJump",
{
"and": [
"h_artificialMorphBombHorizontally",
"h_artificialMorphIBJ",
"h_artificialMorphPowerBomb"
]
},
{
"and": [
"h_artificialMorphBombHorizontally",
"canTrickyDodgeEnemies",
"h_artificialMorphDoubleBombJump",
"h_artificialMorphStaggeredIBJ"
]
}
]
}
{
"heatFrames": 35
}Clears obstacles: A Dev note: Artificial morph strats can be useful, for instance, in indirect G-mode without heat protection, where Samus needs to collect the item. The canComplexGMode is only used here to describe opening the gate in direct G-mode without gate glitching. However, the indirect variant still requires canHeatedGMode or Varia - with Varia, indirect strats can instead be used to go to the top left door and return. |
|
Requires: {
"heatFrames": 180
}
{
"or": [
"canDash",
{
"heatFrames": 100
}
]
}
{
"or": [
{
"spikeHits": 1
},
{
"and": [
"canTrickyJump",
{
"or": [
"canDash",
{
"disableEquipment": "HiJump"
}
]
}
]
},
"canInsaneJump"
]
} |
From: 3
Right Door
To: 6
G-Mode, Remote Acquire Junction (Bottom Right)
Jump onto the crumble blocks to make them solid, then use them as a platform to get to the item. With Grapple, a running jump then single Grapple swing can be used before PLMs are overloaded, alternatively jump on the crumble blocks and Grapple the Ripper. Avoid touching all 6 crumbles, so Samus can use the item to overload PLMs and go through one of the crumbles to get to the left side of the room. If the item has already been obtained, Samus can shoot the gate many times to overload PLMs. Entrance condition: {
"comeInWithGMode": {
"mode": "direct",
"morphed": false
}
}Requires: "canRemoteAcquire"
{
"or": [
"SpaceJump",
"canCeilingBombJump",
{
"and": [
"canBombHorizontally",
"canIBJ",
"h_usePowerBomb"
]
},
{
"and": [
"canStaggeredIBJ",
"canDoubleBombJump",
"canBombHorizontally"
]
},
{
"and": [
"canPreciseGrapple",
"canUseEnemies"
]
},
{
"and": [
"canDash",
{
"or": [
"canTrickySpringBallJump",
"canInsaneWallJump",
{
"and": [
"HiJump",
"canWallJump"
]
},
{
"and": [
"HiJump",
"canSpeedyJump"
]
},
"h_IBJFromSpikes"
]
}
]
}
]
}
{
"heatFrames": 0
} |
From: 3
Right Door
To: 6
G-Mode, Remote Acquire Junction (Bottom Right)
Jump onto the crumble blocks to make them solid, then use them as a platform to get to the item. Avoid touching all 6 crumbles, so Samus can use the item to overload PLMs and go through one of the crumbles to get to the left side of the room. If the item has already been obtained, Samus can shoot the gate many times to overload PLMs. Entrance condition: {
"comeInWithGMode": {
"mode": "direct",
"morphed": false
}
}Requires: "canRemoteAcquire"
{
"or": [
{
"and": [
"ScrewAttack",
{
"noBlueSuit": {}
}
]
},
"h_usePowerBomb",
{
"ammo": {
"type": "Missile",
"count": 2
}
},
{
"ammo": {
"type": "Super",
"count": 1
}
}
]
}
"canIBJ"
"canBombHorizontally"
{
"heatFrames": 0
} |
From: 3
Right Door
To: 6
G-Mode, Remote Acquire Junction (Bottom Right)
Bomb horizontally on room entry to jump over the Ripper and land on the crumble blocks, or use a Power Bomb to kill the Ripper. Avoid touching all 6 crumbles, so Samus can use the item to overload PLMs and go through one of the crumbles to get to the left side of the room. If the item has already been obtained, Samus can shoot or Bomb the gate many times to overload PLMs. Entrance condition: {
"comeInWithGMode": {
"mode": "direct",
"morphed": true
}
}Requires: "canRemoteAcquire"
{
"or": [
"h_artificialMorphCeilingBombJump",
{
"and": [
"h_artificialMorphBombHorizontally",
"h_artificialMorphIBJ",
"h_artificialMorphPowerBomb"
]
},
{
"and": [
"h_artificialMorphBombHorizontally",
"canTrickyDodgeEnemies",
"h_artificialMorphDoubleBombJump",
"h_artificialMorphStaggeredIBJ"
]
}
]
}
{
"heatFrames": 0
}Dev note: This is only useful if the item is Morph, because with Morph, another strat would have been used. |
From: 3
Right Door
To: 7
G-Mode Junction (Bottom Right)
Jump onto the crumble blocks to make them solid, then use them as a platform to cross the room. With Grapple, a running jump then single Grapple swing can be used before PLMs are overloaded, alternatively jump on the crumble blocks and Grapple the Ripper. Entrance condition: {
"comeInWithGMode": {
"mode": "indirect",
"morphed": false
}
}Requires: "Morph"
{
"or": [
"SpaceJump",
"canCeilingBombJump",
{
"and": [
"canStaggeredIBJ",
"canDoubleBombJump",
"canBombHorizontally"
]
},
{
"and": [
"canBombHorizontally",
"canIBJ",
"h_usePowerBomb"
]
},
{
"and": [
"canDash",
{
"or": [
"canTrickySpringBallJump",
"canInsaneWallJump",
{
"and": [
"HiJump",
"canWallJump"
]
},
{
"and": [
"HiJump",
"canSpeedyJump"
]
},
"h_IBJFromSpikes"
]
}
]
},
{
"and": [
"canPreciseGrapple",
{
"or": [
"canDash",
"canUseEnemies",
"canInsaneJump"
]
}
]
}
]
}
{
"heatFrames": 0
}Dev note: With Grapple, Morph isn't needed, but there's no reason to go there without Morph. |
From: 3
Right Door
To: 7
G-Mode Junction (Bottom Right)
Jump onto the crumble blocks to make them solid, then use them as a platform to cross the room. Entrance condition: {
"comeInWithGMode": {
"mode": "indirect",
"morphed": false
}
}Requires: {
"or": [
{
"and": [
"ScrewAttack",
{
"noBlueSuit": {}
}
]
},
"h_usePowerBomb",
{
"ammo": {
"type": "Missile",
"count": 2
}
},
{
"ammo": {
"type": "Super",
"count": 1
}
}
]
}
"canIBJ"
"canBombHorizontally"
{
"heatFrames": 0
} |
|


Requires: {
"heatFrames": 215
}
{
"or": [
{
"and": [
"Wave",
{
"heatFrames": 35
}
]
},
{
"obstaclesCleared": [
"A"
]
}
]
}
{
"or": [
"canDash",
{
"heatFrames": 85
}
]
}Clears obstacles: A |
|
Requires: {
"heatFrames": 250
}
"h_heatedBlueGateGlitch"
{
"or": [
"canDash",
{
"heatFrames": 85
}
]
}Clears obstacles: A |
|
Requires: {
"obstaclesCleared": [
"A"
]
}
"h_heatedRemoteRunwaySpaceJump"
{
"heatFrames": 215
}Exit condition: {
"leaveWithMockball": {
"remoteRunway": {
"length": 12,
"openEnd": 1
},
"landingRunway": {
"length": 6,
"openEnd": 1
},
"minExtraRunSpeed": "$2.0"
}
}Unlocks doors: {"types":["super"],"requires":[]}
{"types":["missiles","powerbomb"],"requires":["never"]} |
|
Requires: "h_heatedRemoteRunwaySpaceJump"
{
"heatFrames": 215
}Exit condition: {
"leaveWithSpringBallBounce": {
"remoteRunway": {
"length": 11,
"openEnd": 1
},
"landingRunway": {
"length": 6,
"openEnd": 1
},
"minExtraRunSpeed": "$2.0",
"movementType": "uncontrolled"
}
}Unlocks doors: {"types":["super"],"requires":[]}
{"types":["missiles","powerbomb"],"requires":["never"]} |
|
Requires: {
"heatFrames": 155
}
{
"or": [
{
"and": [
"Wave",
{
"heatFrames": 60
}
]
},
{
"obstaclesCleared": [
"A"
]
}
]
}
{
"or": [
"canDash",
{
"heatFrames": 100
}
]
}Clears obstacles: A |
|
Requires: "canDash"
"canWallJump"
{
"heatFrames": 225
}Collects items: 4 |
|
Requires: "canCrumbleJump"
"canBlueSuitSpikeJump"
{
"spikeHits": 1
}
"canWallJump"
{
"heatFrames": 420
} |
|


Requires: "Grapple"
{
"heatFrames": 165
}
{
"or": [
{
"noFlashSuit": {}
},
{
"and": [
"canMidAirMorph",
{
"heatFrames": 20
}
]
},
{
"heatFrames": 90
}
]
}
{
"or": [
"canDash",
{
"heatFrames": 20
}
]
} |
|
Requires: "SpaceJump"
{
"heatFrames": 160
}
{
"or": [
"canDash",
{
"heatFrames": 140
}
]
} |
|
Requires: "canDash"
"canWallJump"
{
"heatFrames": 205
}Exit condition: {
"leaveWithRunway": {
"length": 6,
"openEnd": 1
}
}Collects items: 4 Unlocks doors: {"types":["missiles"],"requires":[{"heatFrames":50}]}
{"types":["super"],"requires":[]}
{"types":["powerbomb"],"requires":[{"heatFrames":110}]} |
|
Requires: "canDash"
"Grapple"
{
"heatFrames": 145
}
{
"or": [
{
"noFlashSuit": {}
},
{
"and": [
"canMidAirMorph",
{
"heatFrames": 20
}
]
},
{
"heatFrames": 90
}
]
}Exit condition: {
"leaveWithRunway": {
"length": 6,
"openEnd": 1
}
}Unlocks doors: {"types":["missiles"],"requires":[{"heatFrames":50}]}
{"types":["super"],"requires":[]}
{"types":["powerbomb"],"requires":[{"heatFrames":110}]} |
|
Requires: "canDash"
"SpaceJump"
{
"heatFrames": 140
}Exit condition: {
"leaveWithRunway": {
"length": 6,
"openEnd": 1
}
}Unlocks doors: {"types":["missiles"],"requires":[{"heatFrames":50}]}
{"types":["super"],"requires":[]}
{"types":["powerbomb"],"requires":[{"heatFrames":110}]} |
|


Requires: "canDash"
"h_heatedIBJFromSpikes"
{
"or": [
{
"heatFrames": 730
},
{
"and": [
"canDoubleBombJump",
{
"heatFrames": 550
}
]
}
]
}Dev note: FIXME: A crumble jump into IBJ is also possible. |
|
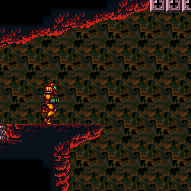
Requires: "canDash"
"canUseIFrames"
{
"or": [
{
"spikeHits": 1
},
{
"and": [
"canTrickyJump",
{
"enemyDamage": {
"enemy": "Ripper 2 (green)",
"type": "contact",
"hits": 1
}
},
{
"heatFrames": 10
}
]
}
]
}
"canSpringBallJumpMidAir"
{
"heatFrames": 260
} |
|


Requires: "h_speedJump"
"canMomentumConservingMorph"
"canSpringFling"
{
"heatFrames": 190
} |
|


Pause while crumble jumping, and quickly mid-air morph and equip Spring Ball, to obtain a boost in horizontal speed before mid-air Spring Ball jumping. Requires: "canCrumbleJump"
"canTrickySpringBallJump"
"canSpringFling"
"canInsaneJump"
"h_trickyToCarryFlashSuit"
{
"heatFrames": 280
}
{
"or": [
"canDash",
{
"heatFrames": 80
}
]
}Dev note: Compared to the other direction, this direction requires traveling one more tile horizontally, which makes it more difficult. |
|
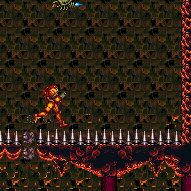
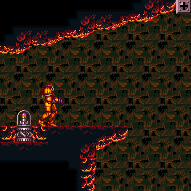
Requires: "canUseIFrames"
{
"or": [
{
"spikeHits": 1
},
{
"and": [
"canTrickyJump",
{
"enemyDamage": {
"enemy": "Ripper 2 (green)",
"type": "contact",
"hits": 1
}
}
]
}
]
}
"HiJump"
"canSpeedyJump"
{
"heatFrames": 250
}Collects items: 4 |
|

A short hop from the ledge can bounce on the crumbles and into the spikes. Just be careful of being pushed back onto the crumble blocks by the spikes. Requires: "h_spikeXModeShinecharge"
"canTrickyJump"
"canUseIFrames"
{
"heatFrames": 480
}
{
"shinespark": {
"frames": 11,
"excessFrames": 4
}
}Dev note: Two spike hits are expected per attempt (with any additional leniency hits being multiplied by this amount). |
|
Samus can ceiling bomb jump up gentle slopes. Going down gentle slopes is also possible but harder, instead an unmorph to reset fall speed is recommended here. Requires: "h_heatProof" "canCeilingBombJump" "canResetFallSpeed" |
|
Requires: "h_heatedRemoteRunwaySpaceJump"
{
"heatFrames": 185
}Exit condition: {
"leaveWithMockball": {
"remoteRunway": {
"length": 11,
"openEnd": 1
},
"landingRunway": {
"length": 6,
"openEnd": 1
},
"minExtraRunSpeed": "$2.0"
}
}Unlocks doors: {"types":["super"],"requires":[]}
{"types":["missiles","powerbomb"],"requires":["never"]} |
|
Requires: "h_heatedRemoteRunwaySpaceJump"
{
"heatFrames": 185
}Exit condition: {
"leaveWithSpringBallBounce": {
"remoteRunway": {
"length": 11,
"openEnd": 1
},
"landingRunway": {
"length": 6,
"openEnd": 1
},
"minExtraRunSpeed": "$2.0",
"movementType": "uncontrolled"
}
}Unlocks doors: {"types":["super"],"requires":[]}
{"types":["missiles","powerbomb"],"requires":["never"]} |
|


Requires: "h_heatedCrystalFlash" |
|
Requires: {
"heatFrames": 135
}
{
"or": [
"canDash",
{
"heatFrames": 20
}
]
}
{
"or": [
"canCarefulJump",
{
"spikeHits": 1
}
]
} |
|
Requires: "Morph"
{
"heatFrames": 170
}
{
"or": [
"canDash",
{
"heatFrames": 45
}
]
} |
|
Jump from below the respawning shot block into a Crystal Flash. Use Grappling Beam as the Crystal Flash finishes to be placed next to the door. Do not aim down as the Crystal Flash finishes. Requires: "h_heatProof" "h_jumpIntoCrystalFlashClip" "Grapple" |
|
Requires: "h_heatProof"
"Morph"
{
"or": [
{
"and": [
{
"resetRoom": {
"nodes": [
1
]
}
},
{
"or": [
{
"and": [
"SpaceJump",
{
"cycleFrames": 1060
}
]
},
{
"and": [
"HiJump",
"canSpeedyJump",
{
"cycleFrames": 940
}
]
}
]
}
]
},
{
"and": [
{
"resetRoom": {
"nodes": [
2
]
}
},
{
"cycleFrames": 830
}
]
},
{
"and": [
{
"resetRoom": {
"nodes": [
3
]
}
},
{
"or": [
{
"and": [
"SpaceJump",
{
"cycleFrames": 1160
}
]
},
{
"and": [
"HiJump",
"canSpeedyJump",
{
"or": [
"Grapple",
"canWallJump"
]
},
{
"cycleFrames": 1190
}
]
}
]
}
]
}
]
}
{
"or": [
"canDash",
{
"cycleFrames": 120
}
]
}Resets obstacles: A, R-Mode Farm cycle drops: 1 Kago Dev note: FIXME: There are more possible item combinations. |
|
Requires: "h_heatedCrystalFlash" |
From: 6
G-Mode, Remote Acquire Junction (Bottom Right)
To: 1
Top Left Door
It is possible to climb the left side of the room with SpeedBooster alone, with either a tricky dash jump or a vertical shinespark. Requires: "canRemoteAcquire"
"Morph"
{
"or": [
"SpaceJump",
"canSpringBallJumpMidAir",
"canWallJump",
{
"and": [
"HiJump",
"canSpeedyJump"
]
},
"canIBJ",
"canTrickyDashJump",
{
"and": [
{
"canShineCharge": {
"usedTiles": 28,
"gentleUpTiles": 3,
"gentleDownTiles": 3,
"openEnd": 0
}
},
{
"or": [
{
"shinespark": {
"frames": 18,
"excessFrames": 8
}
},
{
"and": [
"canSpeedyJump",
{
"shinespark": {
"frames": 16,
"excessFrames": 10
}
}
]
}
]
}
]
}
]
}
"h_heatedGModeOpenDifferentDoor"Collects items: 4 |
From: 6
G-Mode, Remote Acquire Junction (Bottom Right)
To: 1
Top Left Door
With Plasma and a pause abuse, it is possible to kill the Kago and exit G-mode while killing the Kago bugs and make it to the door with a small amount of Energy remaining. Shoot Plasma and quickly exit G-Mode, so that the bugs die immediately. Avoid having spent much time on the left side of the room, as the Fune fireballs will reduce the number of drops obtained. Note that it is possible to climb the left side of the room with SpeedBooster alone, with either a tricky dash jump or a vertical shinespark. Requires: "canComplexGMode"
"canRemoteAcquire"
"Morph"
{
"or": [
"SpaceJump",
"canSpringBallJumpMidAir",
"canWallJump",
{
"and": [
"HiJump",
"canSpeedyJump"
]
},
"canIBJ",
"canTrickyDashJump",
{
"and": [
{
"canShineCharge": {
"usedTiles": 28,
"gentleUpTiles": 3,
"gentleDownTiles": 3,
"openEnd": 0
}
},
{
"or": [
{
"shinespark": {
"frames": 18,
"excessFrames": 8
}
},
{
"and": [
"canSpeedyJump",
{
"shinespark": {
"frames": 16,
"excessFrames": 10
}
}
]
}
]
}
]
}
]
}
"Plasma"
"h_heatedGModePauseAbuse"
"canInsaneJump"Collects items: 4 Dev note: All of these methods are fast enough to be able to escape after obtaining the drops. The shinespark is longer than 1 frame, but is modeled this way because the drops aren't properly modeled. FIXME: The item that was remote acquired could be Morph, one of the items needed to climb the room, or maybe Plasma. |
From: 6
G-Mode, Remote Acquire Junction (Bottom Right)
To: 2
Bottom Left Door
Requires: "canRemoteAcquire" "Morph" "h_heatedGModeOpenDifferentDoor" Collects items: 4 |
From: 6
G-Mode, Remote Acquire Junction (Bottom Right)
To: 2
Bottom Left Door
With Plasma and a pause abuse, it is possible to kill the Kago and exit G-mode while killing the Kago bugs and make it to the door with a small amount of Energy remaining. Shoot Plasma and quickly exit G-Mode, so that the bugs die immediately. Avoid having spent much time on the left side of the room, as the Fune fireballs will reduce the number of drops obtained. Requires: "canComplexGMode" "canRemoteAcquire" "Morph" "Plasma" "h_heatedGModePauseAbuse" Collects items: 4 Dev note: FIXME: The item that was remote acquired could be Morph or maybe Plasma. |
|
It is possible to climb the left side of the room with SpeedBooster alone, with either a tricky dash jump or a vertical shinespark. Requires: "Morph"
{
"or": [
"SpaceJump",
"canSpringBallJumpMidAir",
"canWallJump",
{
"and": [
"HiJump",
"canSpeedyJump"
]
},
"canIBJ",
"canTrickyDashJump",
{
"and": [
{
"canShineCharge": {
"usedTiles": 28,
"gentleUpTiles": 3,
"gentleDownTiles": 3,
"openEnd": 0
}
},
{
"or": [
{
"shinespark": {
"frames": 18,
"excessFrames": 8
}
},
{
"and": [
"canSpeedyJump",
{
"shinespark": {
"frames": 16,
"excessFrames": 10
}
}
]
}
]
}
]
}
]
}
"h_heatedGModeOpenDifferentDoor" |
From: 7
G-Mode Junction (Bottom Right)
To: 1
Top Left Door
With Plasma and a pause abuse, it is possible to kill the Kago and exit G-mode while killing the Kago bugs and make it to the door with a small amount of Energy remaining. Shoot Plasma and quickly exit G-Mode, so that the bugs die immediately. Avoid having spent much time on the left side of the room, as the Fune fireballs will reduce the number of drops obtained. Note that it is possible to climb the left side of the room with SpeedBooster alone, with either a tricky dash jump or a vertical shinespark. Requires: "Morph"
{
"or": [
"SpaceJump",
"canSpringBallJumpMidAir",
"canWallJump",
{
"and": [
"HiJump",
"canSpeedyJump"
]
},
"canTrickyDashJump",
{
"and": [
{
"canShineCharge": {
"usedTiles": 28,
"gentleUpTiles": 3,
"gentleDownTiles": 3,
"openEnd": 0
}
},
{
"or": [
{
"shinespark": {
"frames": 18,
"excessFrames": 8
}
},
{
"and": [
"canSpeedyJump",
{
"shinespark": {
"frames": 16,
"excessFrames": 10
}
}
]
}
]
}
]
}
]
}
"Plasma"
"h_heatedGModePauseAbuse"
"canInsaneJump"
"canDash"Dev note: All of these methods are fast enough to be able to escape after obtaining the drops. The shinespark is longer than 1 frame, but is modeled this way because the drops aren't properly modeled. |
|
Requires: "Morph" "h_heatedGModeOpenDifferentDoor" |
From: 7
G-Mode Junction (Bottom Right)
To: 2
Bottom Left Door
With Plasma and a pause abuse, it is possible to kill the Kago and exit G-mode while killing the Kago bugs and make it to the door with a small amount of Energy remaining. Shoot Plasma and quickly exit G-Mode, so that the bugs die immediately. Avoid having spent much time on the left side of the room, as the Fune fireballs will reduce the number of drops obtained. Requires: "Morph" "Plasma" "h_heatedGModePauseAbuse" |
{
"$schema": "../../../schema/m3-room.schema.json",
"id": 104,
"name": "Double Chamber",
"area": "Norfair",
"subarea": "Upper",
"subsubarea": "East",
"roomAddress": "0x7ADAD",
"roomEnvironments": [
{
"heated": true
}
],
"mapTileMask": [
[
1,
1,
1,
1
],
[
1,
1,
1,
1
]
],
"nodes": [
{
"id": 1,
"name": "Top Left Door",
"nodeType": "door",
"nodeSubType": "blue",
"nodeAddress": "0x0019606",
"doorOrientation": "left",
"doorEnvironments": [
{
"physics": "air"
}
],
"mapTileMask": [
[
2,
1,
1,
1
],
[
1,
1,
1,
1
]
]
},
{
"id": 2,
"name": "Bottom Left Door",
"nodeType": "door",
"nodeSubType": "blue",
"nodeAddress": "0x0019612",
"doorOrientation": "left",
"doorEnvironments": [
{
"physics": "air"
}
],
"mapTileMask": [
[
1,
1,
1,
1
],
[
2,
2,
1,
1
]
]
},
{
"id": 3,
"name": "Right Door",
"nodeType": "door",
"nodeSubType": "red",
"nodeAddress": "0x001961e",
"doorOrientation": "right",
"doorEnvironments": [
{
"physics": "air"
}
],
"mapTileMask": [
[
1,
1,
1,
2
],
[
1,
1,
1,
1
]
]
},
{
"id": 4,
"name": "Item",
"nodeType": "item",
"nodeSubType": "visible",
"nodeItem": "Missile",
"nodeAddress": "0x78CBC",
"mapTileMask": [
[
1,
2,
2,
1
],
[
1,
1,
1,
1
]
],
"locks": [
{
"name": "Dummy Item Lock",
"lockType": "gameFlag",
"unlockStrats": [
{
"name": "Base (Collect Item)",
"notable": false,
"requires": [],
"flashSuitChecked": true,
"blueSuitChecked": true
}
]
}
]
},
{
"id": 5,
"name": "Junction Below Spikes",
"nodeType": "junction",
"nodeSubType": "junction",
"mapTileMask": [
[
1,
1,
1,
1
],
[
1,
1,
2,
2
]
]
},
{
"id": 6,
"name": "G-Mode, Remote Acquire Junction (Bottom Right)",
"nodeType": "junction",
"nodeSubType": "g-mode",
"mapTileMask": [
[
1,
1,
1,
1
],
[
1,
1,
2,
2
]
],
"note": "Represents being at the bottom right with G-Mode and overloaded PLMs. The item must have been touched or previously been collected."
},
{
"id": 7,
"name": "G-Mode Junction (Bottom Right)",
"nodeType": "junction",
"nodeSubType": "g-mode",
"mapTileMask": [
[
1,
1,
1,
1
],
[
1,
1,
2,
2
]
],
"note": "Represents being at the bottom right with G-Mode and Morph.",
"devNote": "This can only be used for strats that can be done with either indirect or direct and PLMs overloaded or not."
}
],
"obstacles": [
{
"id": "A",
"name": "Blue Gate",
"obstacleType": "inanimate"
},
{
"id": "R-Mode",
"name": "Entered with R-Mode",
"obstacleType": "abstract"
}
],
"enemies": [
{
"id": "e1",
"groupName": "Double Chamber Funes",
"enemyName": "Fune",
"quantity": 2,
"betweenNodes": [
1,
2
]
},
{
"id": "e2",
"groupName": "Double Chamber Ripper 2",
"enemyName": "Ripper 2 (green)",
"quantity": 1,
"betweenNodes": [
3,
5
]
},
{
"id": "e3",
"groupName": "Double Chamber Kago",
"enemyName": "Kago",
"quantity": 1,
"homeNodes": [
5
]
}
],
"strats": [
{
"link": [
1,
1
],
"name": "Base (Unlock Door)",
"requires": [],
"unlocksDoors": [
{
"types": [
"missiles"
],
"requires": [
{
"heatFrames": 50
}
]
},
{
"types": [
"super"
],
"requires": []
},
{
"types": [
"powerbomb"
],
"requires": [
{
"heatFrames": 110
}
]
}
],
"flashSuitChecked": true,
"blueSuitChecked": true
},
{
"link": [
1,
1
],
"name": "Base (Come In Normally)",
"entranceCondition": {
"comeInNormally": {}
},
"requires": [],
"flashSuitChecked": true,
"blueSuitChecked": true
},
{
"link": [
1,
1
],
"name": "Base (Come In With Mockball)",
"entranceCondition": {
"comeInWithMockball": {
"adjacentMinTiles": 0,
"remoteAndLandingMinTiles": [
[
0,
0
]
],
"speedBooster": "any"
}
},
"requires": [
{
"heatFrames": 10
}
],
"flashSuitChecked": true,
"blueSuitChecked": true
},
{
"link": [
2,
2
],
"name": "Base (Unlock Door)",
"requires": [],
"unlocksDoors": [
{
"types": [
"missiles"
],
"requires": [
{
"heatFrames": 50
}
]
},
{
"types": [
"super"
],
"requires": []
},
{
"types": [
"powerbomb"
],
"requires": [
{
"heatFrames": 110
}
]
}
],
"flashSuitChecked": true,
"blueSuitChecked": true
},
{
"link": [
2,
2
],
"name": "Base (Come In Normally)",
"entranceCondition": {
"comeInNormally": {}
},
"requires": [],
"flashSuitChecked": true,
"blueSuitChecked": true
},
{
"link": [
2,
2
],
"name": "Base (Come In With Mockball)",
"entranceCondition": {
"comeInWithMockball": {
"adjacentMinTiles": 0,
"remoteAndLandingMinTiles": [
[
0,
0
]
],
"speedBooster": "any"
}
},
"requires": [
{
"heatFrames": 10
}
],
"flashSuitChecked": true,
"blueSuitChecked": true
},
{
"link": [
3,
3
],
"name": "Base (Unlock Door)",
"requires": [],
"unlocksDoors": [
{
"types": [
"missiles"
],
"requires": [
{
"heatFrames": 50
}
]
},
{
"types": [
"super"
],
"requires": []
},
{
"types": [
"powerbomb"
],
"requires": [
{
"heatFrames": 110
}
]
}
],
"flashSuitChecked": true,
"blueSuitChecked": true
},
{
"link": [
3,
3
],
"name": "Base (Come In Normally)",
"entranceCondition": {
"comeInNormally": {}
},
"requires": [],
"flashSuitChecked": true,
"blueSuitChecked": true
},
{
"link": [
3,
3
],
"name": "Base (Come In With Mockball)",
"entranceCondition": {
"comeInWithMockball": {
"adjacentMinTiles": 0,
"remoteAndLandingMinTiles": [
[
0,
0
]
],
"speedBooster": "any"
}
},
"requires": [
{
"heatFrames": 10
}
],
"flashSuitChecked": true,
"blueSuitChecked": true
},
{
"name": "Base (Collect Item)",
"notable": false,
"requires": [],
"flashSuitChecked": true,
"blueSuitChecked": true,
"link": [
4,
4
],
"collectsItems": [
4
]
},
{
"id": 1,
"link": [
1,
1
],
"name": "Leave With Runway",
"requires": [],
"exitCondition": {
"leaveWithRunway": {
"length": 4,
"openEnd": 1
}
},
"flashSuitChecked": true,
"blueSuitChecked": true
},
{
"id": 2,
"link": [
1,
1
],
"name": "Crystal Flash",
"requires": [
{
"obstaclesNotCleared": [
"R-Mode"
]
},
"h_heatedCrystalFlash"
],
"flashSuitChecked": true,
"blueSuitChecked": true
},
{
"id": 142,
"link": [
1,
1
],
"name": "Ripper Farm",
"requires": [
"h_heatProof",
"SpaceJump",
"ScrewAttack",
{
"noBlueSuit": {}
},
{
"or": [
{
"and": [
{
"resetRoom": {
"nodes": [
1
]
}
},
{
"cycleFrames": 660
}
]
},
{
"and": [
{
"resetRoom": {
"nodes": [
2
]
}
},
{
"cycleFrames": 810
}
]
}
]
}
],
"resetsObstacles": [
"A",
"R-Mode"
],
"farmCycleDrops": [
{
"enemy": "Ripper 2 (green)",
"count": 1
}
],
"flashSuitChecked": true,
"blueSuitChecked": true
},
{
"id": 144,
"link": [
1,
1
],
"name": "Leave Spinning (Space Jump)",
"requires": [
"h_heatedRemoteRunwaySpaceJump",
{
"heatFrames": 470
}
],
"exitCondition": {
"leaveSpinning": {
"remoteRunway": {
"length": 12,
"openEnd": 1
},
"minExtraRunSpeed": "$2.0"
}
},
"flashSuitChecked": true,
"blueSuitChecked": true,
"devNote": [
"This uses the runway in the middle of the room but logically starts at the door, to ensure it can be opened."
]
},
{
"id": 145,
"link": [
1,
1
],
"name": "Leave Space Jumping",
"requires": [
"h_heatedRemoteRunwayPreciseSpaceJump",
{
"heatFrames": 470
}
],
"exitCondition": {
"leaveSpaceJumping": {
"remoteRunway": {
"length": 12,
"openEnd": 1
},
"minExtraRunSpeed": "$2.0"
}
},
"flashSuitChecked": true,
"blueSuitChecked": true,
"devNote": [
"This uses the runway in the middle of the room but logically starts at the door, to ensure it can be opened."
]
},
{
"id": 146,
"link": [
1,
1
],
"name": "Leave With Spring Ball Bounce",
"requires": [
"h_heatedRemoteRunwaySpringBall",
{
"heatFrames": 530
}
],
"exitCondition": {
"leaveWithSpringBallBounce": {
"remoteRunway": {
"length": 12,
"openEnd": 1
},
"landingRunway": {
"length": 6,
"openEnd": 1
},
"minExtraRunSpeed": "$2.0",
"movementType": "any"
}
},
"flashSuitChecked": true,
"blueSuitChecked": true,
"devNote": [
"This uses the runway in the middle of the room but logically starts at the door, to ensure it can be opened."
]
},
{
"id": 179,
"link": [
1,
1
],
"name": "Come in Shinecharging, Crystal Spark",
"entranceCondition": {
"comeInShinecharging": {
"length": 3,
"openEnd": 0
}
},
"requires": [
"h_heatedCrystalSpark"
],
"flashSuitChecked": true,
"blueSuitChecked": true
},
{
"id": 168,
"link": [
1,
1
],
"name": "R-Mode Entry",
"entranceCondition": {
"comeInWithRMode": {}
},
"requires": [],
"clearsObstacles": [
"R-Mode"
],
"flashSuitChecked": true,
"blueSuitChecked": true
},
{
"id": 3,
"link": [
1,
2
],
"name": "Base",
"requires": [
{
"heatFrames": 135
}
],
"flashSuitChecked": true,
"blueSuitChecked": true
},
{
"id": 4,
"link": [
1,
2
],
"name": "Leave Shinecharged",
"entranceCondition": {
"comeInShinecharging": {
"length": 3,
"openEnd": 1
}
},
"requires": [
"canShinechargeMovement",
{
"heatFrames": 150
},
{
"shineChargeFrames": 135
}
],
"exitCondition": {
"leaveShinecharged": {}
},
"unlocksDoors": [
{
"types": [
"super"
],
"requires": []
},
{
"types": [
"missiles",
"powerbomb"
],
"requires": [
"never"
]
}
],
"flashSuitChecked": true,
"blueSuitChecked": true
},
{
"id": 79,
"link": [
1,
2
],
"name": "Come in Shinecharging, Leave With Temporary Blue",
"entranceCondition": {
"comeInShinecharging": {
"length": 3,
"openEnd": 0
}
},
"requires": [
"canChainTemporaryBlue",
{
"or": [
"canXRayCancelShinecharge",
{
"heatFrames": 160
}
]
},
"canXRayTurnaround",
{
"heatFrames": 350
}
],
"exitCondition": {
"leaveWithTemporaryBlue": {}
},
"unlocksDoors": [
{
"types": [
"super",
"powerbomb"
],
"requires": []
},
{
"types": [
"missiles"
],
"requires": [
{
"heatFrames": 50
}
]
}
],
"flashSuitChecked": true,
"blueSuitChecked": true
},
{
"id": 91,
"link": [
1,
2
],
"name": "G-Mode",
"entranceCondition": {
"comeInWithGMode": {
"mode": "any",
"morphed": false
}
},
"requires": [
"h_heatedGModeOpenDifferentDoor"
],
"flashSuitChecked": true,
"blueSuitChecked": true
},
{
"id": 92,
"link": [
1,
3
],
"name": "Indirect G-Mode, Despawn Gate",
"entranceCondition": {
"comeInWithGMode": {
"mode": "indirect",
"morphed": false
}
},
"requires": [
{
"or": [
"SpaceJump",
"canTrickySpringBallJump",
{
"and": [
"canWallJump",
{
"or": [
"canDash",
"HiJump",
{
"and": [
"canBlueSuitSpikeJump",
{
"spikeHits": 1
}
]
}
]
}
]
},
{
"and": [
"HiJump",
"canSpeedyJump"
]
},
{
"and": [
"canPreciseGrapple",
{
"or": [
"canDash",
"canUseEnemies",
"canInsaneJump"
]
}
]
}
]
},
"h_heatedGModeOpenDifferentDoor"
],
"flashSuitChecked": true,
"blueSuitChecked": true,
"note": "With Grapple, a running jump then single Grapple swing can be used before PLMs are overloaded, alternatively jump on the crumble blocks and Grapple the Ripper."
},
{
"id": 93,
"link": [
1,
3
],
"name": "Indirect G-Mode Morph, Despawn Gate, IBJ",
"entranceCondition": {
"comeInWithGMode": {
"mode": "indirect",
"morphed": true
}
},
"requires": [
"h_artificialMorphIBJ",
"h_artificialMorphBombHorizontally",
"canCameraManip",
"canTrickyJump",
"h_heatedGModeOpenDifferentDoor"
],
"flashSuitChecked": true,
"blueSuitChecked": true,
"note": [
"Bomb boost onto the crumble blocks in the middle of the spike pit, then on the right side, move the Ripper off camera and IBJ.",
"If the camera gets shifted so that the Ripper stays on camera, shift it back to the right by IBJng up a bit on the left side of the 4 crumbles then move to the right as Samus falls."
]
},
{
"id": 94,
"link": [
1,
3
],
"name": "Direct G-Mode, Through the Crumbles",
"entranceCondition": {
"comeInWithGMode": {
"mode": "direct",
"morphed": false
}
},
"requires": [
"Morph",
{
"or": [
"SpaceJump",
{
"and": [
"canPreciseGrapple",
"canUseEnemies"
]
},
{
"and": [
"HiJump",
"canSpringBallJumpMidAir"
]
},
{
"and": [
"canDash",
"HiJump",
"canWallJump",
"canTrickyJump"
]
},
{
"and": [
"canWallJump",
"canUseIFrames",
{
"spikeHits": 1
},
"h_spikeJumpWithActiveEnemies"
]
},
{
"and": [
"h_IBJFromSpikes",
"h_spikeJumpWithActiveEnemies"
]
}
]
},
"h_heatedGModeOpenDifferentDoor"
],
"flashSuitChecked": true,
"blueSuitChecked": true,
"note": "Overload PLMs by shooting the gate, then go through the crumble blocks below and get to the door."
},
{
"id": 95,
"link": [
1,
3
],
"name": "G-Mode Morph, Through the Crumbles, IBJ",
"entranceCondition": {
"comeInWithGMode": {
"mode": "any",
"morphed": true
}
},
"requires": [
{
"or": [
"h_artificialMorphLongIBJ",
"h_artificialMorphJumpIntoIBJ"
]
},
"h_artificialMorphBombHorizontally",
{
"or": [
"h_artificialMorphPowerBomb",
{
"and": [
"Morph",
{
"ammo": {
"type": "Missile",
"count": 2
}
}
]
},
{
"and": [
"Morph",
{
"ammo": {
"type": "Super",
"count": 1
}
}
]
},
{
"and": [
"h_artificialMorphDoubleBombJump",
"h_artificialMorphStaggeredIBJ"
]
}
]
},
"h_heatedGModeOpenDifferentDoor"
],
"flashSuitChecked": true,
"blueSuitChecked": true,
"note": [
"Overload PLMs by bombing the gate or crumble blocks, then go through the crumble blocks below and get to the door.",
"IBJ past the Ripper or kill it. The Kago bugs will not spawn until Samus exits G-mode, so it is fine to kill it or IBJ from on top of it."
]
},
{
"id": 5,
"link": [
1,
4
],
"name": "Base",
"requires": [
{
"heatFrames": 220
},
{
"or": [
{
"noFlashSuit": {}
},
"canComplexCarryFlashSuit",
"Ice",
"Wave",
"Spazer",
"Plasma",
{
"heatFrames": 300
}
]
},
{
"or": [
"canDash",
{
"heatFrames": 90
}
]
}
],
"clearsObstacles": [
"A"
],
"flashSuitChecked": true,
"blueSuitChecked": true
},
{
"id": 96,
"link": [
1,
4
],
"name": "Indirect G-Mode, Despawn Gate",
"entranceCondition": {
"comeInWithGMode": {
"mode": "indirect",
"morphed": false
}
},
"requires": [
{
"heatFrames": 0
}
],
"flashSuitChecked": true,
"blueSuitChecked": true
},
{
"id": 97,
"link": [
1,
4
],
"name": "Indirect G-Mode, Despawn Gate, Open Gate",
"entranceCondition": {
"comeInWithGMode": {
"mode": "indirect",
"morphed": false
}
},
"requires": [
{
"heatFrames": 25
}
],
"clearsObstacles": [
"A"
],
"flashSuitChecked": true,
"blueSuitChecked": true,
"note": "Stand under where the gate will spawn when exiting G-mode to open it before grabbing the item."
},
{
"id": 98,
"link": [
1,
4
],
"name": "Direct G-Mode, Through the Crumbles",
"entranceCondition": {
"comeInWithGMode": {
"mode": "direct",
"morphed": false
}
},
"requires": [
"Morph",
{
"or": [
"SpaceJump",
{
"and": [
"canPreciseGrapple",
"canUseEnemies"
]
},
{
"and": [
"HiJump",
"canSpringBallJumpMidAir"
]
},
"canInsaneWallJump",
{
"and": [
"HiJump",
"canUseIFrames",
{
"noBlueSuit": {}
},
{
"enemyDamage": {
"enemy": "Ripper 2 (green)",
"type": "contact",
"hits": 1
}
},
{
"or": [
"canWallJump",
"canSpeedyJump"
]
}
]
},
"h_IBJFromSpikes"
]
},
{
"heatFrames": 0
}
],
"flashSuitChecked": true,
"blueSuitChecked": true,
"note": "Overload PLMs by shooting the gate, then go through the crumble blocks below and get to the item."
},
{
"id": 99,
"link": [
1,
4
],
"name": "Direct G-Mode Morph, Through the Crumbles, IBJ",
"entranceCondition": {
"comeInWithGMode": {
"mode": "direct",
"morphed": true
}
},
"requires": [
{
"or": [
"h_artificialMorphLongIBJ",
"h_artificialMorphJumpIntoIBJ"
]
},
"h_artificialMorphBombHorizontally",
{
"or": [
"h_artificialMorphPowerBomb",
{
"and": [
"Morph",
{
"ammo": {
"type": "Missile",
"count": 2
}
}
]
},
{
"and": [
"Morph",
{
"ammo": {
"type": "Super",
"count": 1
}
}
]
},
{
"and": [
"h_artificialMorphDoubleBombJump",
"h_artificialMorphStaggeredIBJ"
]
}
]
},
{
"heatFrames": 0
}
],
"flashSuitChecked": true,
"blueSuitChecked": true,
"note": [
"Overload PLMs by bombing the gate or crumble blocks, then go through the crumble blocks below and get to the item.",
"IBJ past the Ripper or kill it. The Kago bugs will not spawn until Samus exits G-mode, so it is fine to kill it or IBJ from on top of it."
]
},
{
"id": 100,
"link": [
1,
7
],
"name": "G-Mode",
"entranceCondition": {
"comeInWithGMode": {
"mode": "any",
"morphed": false
}
},
"requires": [
"Morph",
{
"heatFrames": 0
}
],
"flashSuitChecked": true,
"blueSuitChecked": true
},
{
"id": 6,
"link": [
2,
1
],
"name": "Walljump Climb Using the Kamer",
"requires": [
{
"notable": "Walljump Climb Using the Kamer"
},
"canTrickyWallJump",
"canConsecutiveWallJump",
"canUseEnemies",
{
"or": [
{
"and": [
"canDodgeWhileShooting",
{
"heatFrames": 360
}
]
},
{
"and": [
"canTrickyJump",
{
"heatFrames": 240
}
]
},
{
"and": [
{
"or": [
"canUseFrozenEnemies",
{
"ammo": {
"type": "Super",
"count": 1
}
}
]
},
{
"heatFrames": 432
}
]
},
{
"and": [
{
"ammo": {
"type": "PowerBomb",
"count": 1
}
},
{
"heatFrames": 456
}
]
}
]
},
{
"or": [
"canDash",
{
"heatFrames": 20
}
]
}
],
"flashSuitChecked": true,
"blueSuitChecked": true,
"note": [
"Wall jump up the left wall and then on the moving platform (Kamer) while avoiding the Fune's fireball.",
"The Kamers will temporarily move down if Samus is below them, so it is best to walk under the first Kamer before climbing the wall.",
"It is possible to freeze or kill the Fune with a Super or Power Bomb to make things easier."
]
},
{
"id": 7,
"link": [
2,
1
],
"name": "Walljump Climb Using the Kamer with HiJump",
"requires": [
{
"notable": "Walljump Climb Using the Kamer"
},
"HiJump",
"canUseEnemies",
"canPreciseWallJump",
{
"or": [
{
"heatFrames": 360
},
{
"and": [
"canTrickyJump",
{
"heatFrames": 230
}
]
}
]
},
{
"or": [
"canDodgeWhileShooting",
{
"enemyDamage": {
"enemy": "Fune",
"type": "fireball",
"hits": 1
}
},
{
"and": [
"canUseFrozenEnemies",
{
"heatFrames": 70
}
]
},
{
"and": [
{
"ammo": {
"type": "Super",
"count": 1
}
},
{
"heatFrames": 70
}
]
},
{
"and": [
{
"ammo": {
"type": "PowerBomb",
"count": 1
}
},
{
"heatFrames": 90
}
]
}
]
},
{
"or": [
"canDash",
{
"heatFrames": 20
}
]
}
],
"flashSuitChecked": true,
"blueSuitChecked": true,
"note": [
"Wall jump up the left wall and then on the moving platform (Kamer) while avoiding the Fune's fireball.",
"The Kamers will temporarily move down if Samus is below them, so it is best to walk under the first Kamer before climbing the wall."
]
},
{
"id": 8,
"link": [
2,
1
],
"name": "Delayed Wall Jump",
"requires": [
"canTrickyWallJump",
"canConsecutiveWallJump",
"canTrickyJump",
"canUseEnemies",
{
"or": [
{
"heatFrames": 190
},
{
"and": [
"canPrepareForNextRoom",
{
"heatFrames": 135
}
]
}
]
},
{
"or": [
"canDash",
{
"heatFrames": 5
}
]
}
],
"flashSuitChecked": true,
"blueSuitChecked": true,
"note": "Wall jump up the left wall, perform a delayed wall jump on the Fune to reach the door."
},
{
"id": 173,
"link": [
2,
1
],
"name": "Cross Room Delayed Wall Jump",
"entranceCondition": {
"comeInJumping": {
"speedBooster": "any",
"minTiles": 0
}
},
"requires": [
"canPrepareForNextRoom",
"canTrickyWallJump",
"canConsecutiveWallJump",
"canTrickyJump",
"canFastWallJumpClimb",
"canUseEnemies",
{
"heatFrames": 120
},
{
"or": [
"canDash",
{
"heatFrames": 5
}
]
}
],
"flashSuitChecked": true,
"blueSuitChecked": true,
"note": "Wall jump up the left wall, perform a delayed wall jump on the Fune to reach the door.",
"devNote": [
"This differs from the canPrepareForNextRoom option of the previous strat only in requiring an air entry.",
"FIXME: canFastWallJumpClimb is for difficulty placement."
]
},
{
"id": 9,
"link": [
2,
1
],
"name": "Space Jump",
"requires": [
"SpaceJump",
{
"heatFrames": 220
},
{
"or": [
"canPrepareForNextRoom",
{
"heatFrames": 100
}
]
},
{
"or": [
"canDash",
{
"heatFrames": 15
}
]
}
],
"flashSuitChecked": true,
"blueSuitChecked": true
},
{
"id": 174,
"link": [
2,
1
],
"name": "Cross Room Space Jump",
"entranceCondition": {
"comeInJumping": {
"speedBooster": "any",
"minTiles": 0
}
},
"requires": [
"canPrepareForNextRoom",
"SpaceJump",
{
"heatFrames": 200
},
{
"or": [
"canDash",
{
"heatFrames": 15
}
]
}
],
"flashSuitChecked": true,
"blueSuitChecked": true,
"devNote": [
"This differs from the canPrepareForNextRoom option of the previous strat only in requiring an air entry."
]
},
{
"id": 10,
"link": [
2,
1
],
"name": "HiJump Space Jump",
"requires": [
"HiJump",
"SpaceJump",
{
"heatFrames": 150
},
{
"or": [
"canPrepareForNextRoom",
{
"heatFrames": 70
}
]
},
{
"or": [
"canDash",
{
"heatFrames": 5
}
]
}
],
"flashSuitChecked": true,
"blueSuitChecked": true
},
{
"id": 175,
"link": [
2,
1
],
"name": "Cross Room HiJump Space Jump",
"entranceCondition": {
"comeInJumping": {
"speedBooster": "any",
"minTiles": 0
}
},
"requires": [
"canPrepareForNextRoom",
"HiJump",
"SpaceJump",
{
"heatFrames": 120
},
{
"or": [
"canDash",
{
"heatFrames": 5
}
]
}
],
"flashSuitChecked": true,
"blueSuitChecked": true,
"devNote": [
"This differs from the canPrepareForNextRoom option of the previous strat only in requiring an air entry."
]
},
{
"id": 11,
"link": [
2,
1
],
"name": "HiJump Spring Ball Jump",
"requires": [
"HiJump",
"canSpringBallJumpMidAir",
{
"heatFrames": 160
},
{
"or": [
"canDash",
{
"heatFrames": 5
}
]
}
],
"flashSuitChecked": true,
"blueSuitChecked": true
},
{
"id": 12,
"link": [
2,
1
],
"name": "IBJ",
"requires": [
{
"or": [
{
"and": [
"canLongIBJ",
{
"heatFrames": 1450
}
]
},
{
"and": [
"canJumpIntoIBJ",
{
"heatFrames": 960
}
]
},
{
"and": [
"HiJump",
"canJumpIntoIBJ",
{
"heatFrames": 620
}
]
},
{
"and": [
"canDoubleBombJump",
{
"heatFrames": 560
}
]
},
{
"and": [
"HiJump",
"canDoubleBombJump",
{
"heatFrames": 490
}
]
}
]
},
{
"or": [
"canDash",
{
"heatFrames": 30
}
]
}
],
"flashSuitChecked": true,
"blueSuitChecked": true
},
{
"id": 13,
"link": [
2,
1
],
"name": "Shinespark (In-Room)",
"requires": [
{
"canShineCharge": {
"usedTiles": 28,
"gentleUpTiles": 3,
"gentleDownTiles": 3,
"openEnd": 0
}
},
{
"or": [
{
"shinespark": {
"frames": 27,
"excessFrames": 4
}
},
{
"and": [
"canMidairShinespark",
{
"shinespark": {
"frames": 17,
"excessFrames": 4
}
}
]
}
]
},
{
"heatFrames": 380
}
],
"flashSuitChecked": true,
"blueSuitChecked": true
},
{
"id": 14,
"link": [
2,
1
],
"name": "Shinespark Deep Stuck X-Ray Climb",
"entranceCondition": {
"comeInShinecharged": {}
},
"requires": [
{
"shineChargeFrames": 1
},
{
"shinespark": {
"frames": 1,
"excessFrames": 1
}
},
"canShinesparkDeepStuck",
"canXRayClimb",
"canBePatient",
{
"heatFrames": 1600
}
],
"flashSuitChecked": true,
"blueSuitChecked": true,
"note": "Climb up 1 screen."
},
{
"id": 15,
"link": [
2,
1
],
"name": "G-Mode Deep Stuck X-Ray Climb",
"entranceCondition": {
"comeInWithGMode": {
"mode": "direct",
"morphed": false
}
},
"requires": [
"canGModeXRayClimb",
"h_heatProof"
],
"flashSuitChecked": true,
"blueSuitChecked": true,
"note": "Climb up 1 screen."
},
{
"id": 16,
"link": [
2,
1
],
"name": "Very Deep Stuck X-Ray Climb",
"entranceCondition": {
"comeInWithGMode": {
"mode": "direct",
"morphed": false
}
},
"requires": [
"canGModeXRayClimb",
"h_heatProof"
],
"bypassesDoorShell": "yes",
"flashSuitChecked": true,
"blueSuitChecked": true,
"note": [
"Enter with G-mode direct, back up to between 1 and 6 pixels from the door transition, and activate X-ray to get very deep stuck in the door.",
"Climb up 1 screen, and perform a turnaround buffered spin-jump away from the door to trigger the transition, bypassing any lock on the door."
]
},
{
"id": 17,
"link": [
2,
1
],
"name": "Come in Shinecharged, Shinespark",
"entranceCondition": {
"comeInShinecharged": {}
},
"requires": [
{
"shineChargeFrames": 40
},
{
"shinespark": {
"frames": 27,
"excessFrames": 4
}
},
{
"heatFrames": 200
}
],
"flashSuitChecked": true,
"blueSuitChecked": true
},
{
"id": 18,
"link": [
2,
1
],
"name": "Speedy Jump",
"requires": [
"canSpeedyJump",
"HiJump",
{
"heatFrames": 350
}
],
"flashSuitChecked": true,
"blueSuitChecked": true,
"note": "Run from the right wall to 2/3 of the way across the room and jump up onto the moving platforms."
},
{
"id": 19,
"link": [
2,
1
],
"name": "Tricky Dash Jump",
"requires": [
"canTrickyDashJump",
{
"heatFrames": 450
}
],
"flashSuitChecked": true,
"blueSuitChecked": true,
"note": [
"Run under the second moving platform from the right to trigger it to move down.",
"Then run back to the left wall, run again to the right, and jump when on the center of the mound just to the right below the platform."
]
},
{
"id": 20,
"link": [
2,
1
],
"name": "Cross Room HiJump Spring Ball Jump",
"entranceCondition": {
"comeInJumping": {
"speedBooster": "any",
"minTiles": 0
}
},
"requires": [
"HiJump",
"canPrepareForNextRoom",
"canSpringBallJumpMidAir",
{
"heatFrames": 110
},
{
"or": [
"canDash",
{
"heatFrames": 10
}
]
}
],
"flashSuitChecked": true,
"blueSuitChecked": true,
"note": [
"Spin jump into the room with at least 1 tile of run speed.",
"Then perform a mid-air Spring Ball jump to reach the ledge above."
]
},
{
"id": 176,
"link": [
2,
1
],
"name": "Door Ledge Spring Ball Jump onto Kamer",
"requires": [
"canTrickySpringBallJump",
"canTrickyJump",
{
"doorUnlockedAtNode": 2
},
{
"heatFrames": 265
}
],
"flashSuitChecked": true,
"blueSuitChecked": true
},
{
"id": 21,
"link": [
2,
1
],
"name": "Cross Room Tricky Spring Ball Jump",
"entranceCondition": {
"comeInJumping": {
"speedBooster": "any",
"minTiles": 1
}
},
"requires": [
"canPrepareForNextRoom",
"canLateralMidAirMorph",
"canTrickySpringBallJump",
"canTrickyJump",
{
"heatFrames": 160
}
],
"flashSuitChecked": true,
"blueSuitChecked": true,
"note": [
"Spin jump into the room with at least 1 tile of run speed.",
"Perform a lateral mid-air morph into a spring ball jump.",
"Press against the left side of the first moving platform to gain enough height to get on top of it."
]
},
{
"id": 22,
"link": [
2,
1
],
"name": "Leave Shinecharged",
"requires": [
"canShinechargeMovementComplex",
"HiJump",
{
"or": [
"SpaceJump",
{
"and": [
"canPreciseWallJump",
"canTrickyJump"
]
}
]
},
{
"heatFrames": 400
},
{
"canShineCharge": {
"usedTiles": 28,
"gentleUpTiles": 3,
"gentleDownTiles": 3,
"openEnd": 0
}
},
{
"shineChargeFrames": 150
}
],
"exitCondition": {
"leaveShinecharged": {}
},
"unlocksDoors": [
{
"types": [
"missiles"
],
"requires": [
{
"heatFrames": 240
}
]
},
{
"types": [
"super"
],
"requires": []
},
{
"types": [
"powerbomb"
],
"requires": [
{
"heatFrames": 100
}
]
}
],
"flashSuitChecked": true,
"blueSuitChecked": true
},
{
"id": 80,
"link": [
2,
1
],
"name": "Leave With Temporary Blue (HiJump, Spring Ball Jump)",
"entranceCondition": {
"comeInGettingBlueSpeed": {
"length": 0,
"openEnd": 1
}
},
"requires": [
"HiJump",
"canSpringBallJumpMidAir",
{
"canShineCharge": {
"usedTiles": 19,
"gentleUpTiles": 2,
"gentleDownTiles": 2,
"openEnd": 1
}
},
"canPauseRemorphTemporaryBlue",
{
"heatFrames": 550
},
{
"or": [
"canXRayCancelShinecharge",
{
"heatFrames": 160
}
]
}
],
"exitCondition": {
"leaveWithTemporaryBlue": {}
},
"unlocksDoors": [
{
"types": [
"super",
"powerbomb"
],
"requires": []
},
{
"types": [
"missiles"
],
"requires": [
{
"heatFrames": 50
}
]
}
],
"flashSuitChecked": true,
"blueSuitChecked": true
},
{
"id": 81,
"link": [
2,
1
],
"name": "Blue Cross-Room Jump, Leave With Temporary Blue (HiJump, Spring Ball Jump)",
"entranceCondition": {
"comeInGettingBlueSpeed": {
"length": 0,
"openEnd": 1
}
},
"requires": [
"HiJump",
"canXRayTurnaround",
"canSpringBallJumpMidAir",
"canPauseRemorphTemporaryBlue",
{
"heatFrames": 380
}
],
"exitCondition": {
"leaveWithTemporaryBlue": {}
},
"unlocksDoors": [
{
"types": [
"super",
"powerbomb"
],
"requires": []
},
{
"types": [
"missiles"
],
"requires": [
{
"heatFrames": 50
}
]
}
],
"flashSuitChecked": true,
"blueSuitChecked": true
},
{
"id": 82,
"link": [
2,
1
],
"name": "Blue Cross-Room Jump, Leave With Temporary Blue (Speedy Jump, HiJump)",
"entranceCondition": {
"comeInGettingBlueSpeed": {
"length": 0,
"openEnd": 1,
"minExtraRunSpeed": "$2.0"
}
},
"requires": [
"HiJump",
"canSpeedyJump",
"canLateralMidAirMorph",
"canInsaneJump",
"canPauseRemorphTemporaryBlue",
"canXRayTurnaround",
{
"heatFrames": 360
}
],
"exitCondition": {
"leaveWithTemporaryBlue": {}
},
"unlocksDoors": [
{
"types": [
"super",
"powerbomb"
],
"requires": []
},
{
"types": [
"missiles"
],
"requires": [
{
"heatFrames": 50
}
]
}
],
"flashSuitChecked": true,
"blueSuitChecked": true
},
{
"id": 83,
"link": [
2,
1
],
"name": "Blue Cross-Room Jump, Leave With Temporary Blue (Speedy Jump, Spring Ball Jump)",
"entranceCondition": {
"comeInGettingBlueSpeed": {
"length": 0,
"openEnd": 1,
"minExtraRunSpeed": "$2.0"
}
},
"requires": [
"canSpeedyJump",
"canLateralMidAirMorph",
"canTrickySpringBallJump",
"canInsaneJump",
"canPauseRemorphTemporaryBlue",
"canXRayTurnaround",
{
"heatFrames": 440
}
],
"exitCondition": {
"leaveWithTemporaryBlue": {}
},
"unlocksDoors": [
{
"types": [
"super",
"powerbomb"
],
"requires": []
},
{
"types": [
"missiles"
],
"requires": [
{
"heatFrames": 50
}
]
}
],
"flashSuitChecked": true,
"blueSuitChecked": true
},
{
"id": 87,
"link": [
2,
1
],
"name": "Tricky Grapple Jump",
"entranceCondition": {
"comeInWithGrappleSwing": {
"blocks": [
{
"position": [
-1,
5
],
"environment": "water",
"note": "Mt. Everest"
},
{
"position": [
8,
3
],
"note": "Grapple Beam Room"
},
{
"position": [
7,
3
],
"note": "Colosseum"
},
{
"position": [
6,
4
],
"note": "Grapple Tutorial Room 2"
},
{
"position": [
6,
2
],
"note": "Lava Grapple Tunnel"
},
{
"position": [
5,
2
],
"note": "The Moat, Double Chamber, Wrecked Ship Energy Tank Room"
},
{
"position": [
2.375,
4.5625
],
"note": "Post Crocomire Farming Room"
}
]
}
},
"requires": [
"canTrickyGrappleJump",
"h_heatProof"
],
"flashSuitChecked": false,
"blueSuitChecked": true,
"devNote": [
"The Kamers make this tricky since it's easy to bonk on them."
]
},
{
"id": 169,
"link": [
2,
1
],
"name": "R-Mode Spark Interrupt",
"requires": [
{
"obstaclesCleared": [
"R-Mode"
]
},
"HiJump",
{
"or": [
"SpaceJump",
{
"and": [
"canPreciseWallJump",
"canTrickyJump"
]
}
]
},
{
"or": [
"h_heatedCrystalFlashForReserveEnergy",
{
"and": [
"h_RModeCanRefillReserves",
{
"or": [
{
"and": [
"h_heatProof",
{
"enemyKill": {
"enemies": [
[
"Fune"
],
[
"Fune"
]
]
}
},
{
"resourceMissingAtMost": [
{
"type": "Missile",
"count": 0
}
]
},
{
"partialRefill": {
"type": "ReserveEnergy",
"limit": 20
}
}
]
},
{
"and": [
"Morph",
{
"heatFrames": 560
},
{
"or": [
{
"disableEquipment": "ETank"
},
"h_heatProof"
]
},
{
"partialRefill": {
"type": "ReserveEnergy",
"limit": 100
}
},
{
"heatFrames": 160
}
]
}
]
}
]
}
]
},
{
"heatFrames": 400
},
{
"canShineCharge": {
"usedTiles": 28,
"gentleUpTiles": 3,
"gentleDownTiles": 3,
"openEnd": 0
}
},
"h_heatTriggerRModeSparkInterrupt",
{
"heatFrames": 10
}
],
"resetsObstacles": [
"R-Mode"
],
"flashSuitChecked": true,
"blueSuitChecked": true,
"note": [
"Speedy jump to farm a Fune or Morph over to the Kago. Shinecharge at the bottom left, then jump back up and",
"heat interrupt at the top left door before leaving."
]
},
{
"id": 101,
"link": [
2,
1
],
"name": "G-Mode",
"entranceCondition": {
"comeInWithGMode": {
"mode": "any",
"morphed": false
}
},
"requires": [
{
"or": [
"SpaceJump",
"canWallJump",
{
"and": [
"HiJump",
"canSpeedyJump"
]
},
"canTrickyDashJump",
{
"and": [
{
"canShineCharge": {
"usedTiles": 28,
"gentleUpTiles": 3,
"gentleDownTiles": 3,
"openEnd": 0
}
},
{
"or": [
{
"shinespark": {
"frames": 18,
"excessFrames": 8
}
},
{
"and": [
"canSpeedyJump",
{
"shinespark": {
"frames": 16,
"excessFrames": 10
}
}
]
}
]
}
]
}
]
},
"h_heatedGModeOpenDifferentDoor"
],
"flashSuitChecked": true,
"blueSuitChecked": true,
"note": "It is possible to climb the left side of the room with SpeedBooster alone, with either a tricky dash jump or a vertical shinespark.",
"devNote": "This is only for strats without Morph, otherwise the strats can stop at 7 first."
},
{
"id": 102,
"link": [
2,
1
],
"name": "G-Mode Morph",
"entranceCondition": {
"comeInWithGMode": {
"mode": "any",
"morphed": true
}
},
"requires": [
"h_artificialMorphIBJ",
"h_heatedGModeOpenDifferentDoor"
],
"flashSuitChecked": true,
"blueSuitChecked": true
},
{
"id": 23,
"link": [
2,
2
],
"name": "Leave With Runway",
"requires": [],
"exitCondition": {
"leaveWithRunway": {
"length": 1,
"openEnd": 1
}
},
"flashSuitChecked": true,
"blueSuitChecked": true
},
{
"id": 90,
"link": [
2,
2
],
"name": "Leave With Side Platform",
"requires": [
{
  "heatFrames": 320
}
],
"exitCondition": {
"leaveWithSidePlatform": {
"height": 3,
"runway": {
"length": 28,
"openEnd": 0,
"gentleUpTiles": 3,
"gentleDownTiles": 3
},
"obstruction": [
1,
0
]
}
},
"flashSuitChecked": true,
"blueSuitChecked": true,
"devNote": [
"Max extra run speed $5.0"
]
},
{
"id": 24,
"link": [
2,
2
],
"name": "Crystal Flash",
"requires": [
{
"obstaclesNotCleared": [
"R-Mode"
]
},
"h_heatedCrystalFlash"
],
"flashSuitChecked": true,
"blueSuitChecked": true
},
{
"id": 25,
"link": [
2,
2
],
"name": "Leave Shinecharged",
"requires": [
"canShinechargeMovement",
{
"heatFrames": 250
},
{
"canShineCharge": {
"usedTiles": 28,
"gentleUpTiles": 3,
"gentleDownTiles": 3,
"openEnd": 0
}
},
{
"shineChargeFrames": 40
}
],
"exitCondition": {
"leaveShinecharged": {}
},
"flashSuitChecked": true,
"blueSuitChecked": true
},
{
"id": 147,
"link": [
2,
2
],
"name": "Leave Spinning",
"requires": [
{
  "heatFrames": 260
}
],
"exitCondition": {
"leaveSpinning": {
"remoteRunway": {
"length": 22,
"openEnd": 0,
"gentleUpTiles": 3,
"gentleDownTiles": 3
}
}
},
"flashSuitChecked": true,
"blueSuitChecked": true
},
{
"id": 148,
"link": [
2,
2
],
"name": "Leave With Mockball",
"requires": [
{
  "heatFrames": 260
}
],
"exitCondition": {
"leaveWithMockball": {
"remoteRunway": {
"length": 22,
"openEnd": 0,
"gentleUpTiles": 3,
"gentleDownTiles": 3
},
"landingRunway": {
"length": 1,
"openEnd": 1
}
}
},
"flashSuitChecked": true,
"blueSuitChecked": true
},
{
"id": 149,
"link": [
2,
2
],
"name": "Leave With Spring Ball Bounce",
"requires": [
{
  "heatFrames": 275
}
],
"exitCondition": {
"leaveWithSpringBallBounce": {
"remoteRunway": {
"length": 18,
"openEnd": 0,
"gentleUpTiles": 3,
"gentleDownTiles": 3
},
"landingRunway": {
"length": 1,
"openEnd": 1
},
"movementType": "any"
}
},
"flashSuitChecked": true,
"blueSuitChecked": true
},
{
"id": 150,
"link": [
2,
2
],
"name": "Leave Space Jumping",
"requires": [
"h_heatedRemoteRunwaySpaceJump",
{
"heatFrames": 290
}
],
"exitCondition": {
"leaveSpaceJumping": {
"remoteRunway": {
"length": 15,
"openEnd": 0,
"gentleUpTiles": 3,
"gentleDownTiles": 3
}
}
},
"flashSuitChecked": true,
"blueSuitChecked": true
},
{
"id": 84,
"link": [
2,
2
],
"name": "Leave With Temporary Blue",
"requires": [
{
"canShineCharge": {
"usedTiles": 28,
"gentleUpTiles": 3,
"gentleDownTiles": 3,
"openEnd": 0
}
},
{
"heatFrames": 320
},
{
"or": [
"canXRayCancelShinecharge",
{
"heatFrames": 160
}
]
}
],
"exitCondition": {
"leaveWithTemporaryBlue": {}
},
"flashSuitChecked": true,
"blueSuitChecked": true
},
{
"id": 180,
"link": [
2,
2
],
"name": "Crystal Spark",
"requires": [
{
"canShineCharge": {
"usedTiles": 28,
"gentleUpTiles": 3,
"gentleDownTiles": 3,
"openEnd": 0
}
},
{
"or": [
{
"and": [
"h_enemyDrops",
"h_heatedCrystalSparkWithoutLenience"
]
},
"h_heatedCrystalSpark"
]
}
],
"flashSuitChecked": true,
"blueSuitChecked": true,
"devNote": [
"No lenience, since the Kagos is a reasonable enough Power Bomb farm."
]
},
{
"id": 170,
"link": [
2,
2
],
"name": "R-Mode Entry",
"entranceCondition": {
"comeInWithRMode": {}
},
"requires": [],
"clearsObstacles": [
"R-Mode"
],
"flashSuitChecked": true,
"blueSuitChecked": true
},
{
"id": 171,
"link": [
2,
2
],
"name": "R-Mode Spark Interrupt",
"requires": [
{
"obstaclesCleared": [
"R-Mode"
]
},
{
"or": [
"h_heatedCrystalFlashForReserveEnergy",
{
"and": [
"h_RModeCanRefillReserves",
{
"or": [
{
"and": [
"h_heatProof",
{
"enemyKill": {
"enemies": [
[
"Fune"
],
[
"Fune"
]
]
}
},
{
"resourceMissingAtMost": [
{
"type": "Missile",
"count": 0
}
]
},
{
"partialRefill": {
"type": "ReserveEnergy",
"limit": 20
}
}
]
},
{
"and": [
"Morph",
{
"heatFrames": 560
},
{
"or": [
{
"disableEquipment": "ETank"
},
"h_heatProof"
]
},
{
"partialRefill": {
"type": "ReserveEnergy",
"limit": 100
}
},
{
"heatFrames": 160
}
]
}
]
}
]
}
]
},
{
"heatFrames": 300
},
{
"canShineCharge": {
"usedTiles": 28,
"gentleUpTiles": 3,
"gentleDownTiles": 3,
"openEnd": 0
}
},
"h_heatTriggerRModeSparkInterrupt",
{
"heatFrames": 10
}
],
"resetsObstacles": [
"R-Mode"
],
"flashSuitChecked": true,
"blueSuitChecked": true,
"note": [
"Speedy jump to farm a Fune or Morph over to the Kago. Shinecharge at the bottom left, then heat interrupt in the",
"door and quickly leave."
]
},
{
"id": 103,
"link": [
2,
3
],
"name": "Indirect G-Mode, Despawn Gate",
"entranceCondition": {
"comeInWithGMode": {
"mode": "indirect",
"morphed": false
}
},
"requires": [
{
"or": [
"SpaceJump",
"canTrickySpringBallJump",
{
"and": [
"canWallJump",
{
"or": [
"canDash",
"HiJump",
{
"and": [
"canBlueSuitSpikeJump",
{
"spikeHits": 1
}
]
}
]
}
]
},
{
"and": [
"HiJump",
"canSpeedyJump"
]
},
{
"and": [
"canTrickyDashJump",
"canPreciseGrapple"
]
},
{
"and": [
"canPreciseGrapple",
{
"canShineCharge": {
"usedTiles": 28,
"gentleUpTiles": 3,
"gentleDownTiles": 3,
"openEnd": 0
}
},
{
"or": [
{
"shinespark": {
"frames": 18,
"excessFrames": 8
}
},
{
"and": [
"canSpeedyJump",
{
"shinespark": {
"frames": 16,
"excessFrames": 10
}
}
]
}
]
}
]
}
]
},
"h_heatedGModeOpenDifferentDoor"
],
"flashSuitChecked": true,
"blueSuitChecked": true,
"note": [
"It is possible to climb the left side of the room with SpeedBooster alone, with either a tricky dash jump or a vertical shinespark, then Grapple the Ripper or ceiling blocks.",
"With Grapple, a running jump then single Grapple swing can be used before PLMs are overloaded, alternatively jump on the crumble blocks and Grapple the Ripper."
]
},
{
"id": 104,
"link": [
2,
3
],
"name": "Indirect G-Mode Morph, Despawn Gate, IBJ",
"entranceCondition": {
"comeInWithGMode": {
"mode": "indirect",
"morphed": true
}
},
"requires": [
"h_artificialMorphIBJ",
"h_artificialMorphBombHorizontally",
"canCameraManip",
"canTrickyJump",
"h_heatedGModeOpenDifferentDoor"
],
"flashSuitChecked": true,
"blueSuitChecked": true,
"note": [
"Bomb boost onto the crumble blocks in the middle of the spike pit, then on the right side, move the Ripper off camera and IBJ.",
"If the camera gets shifted so that the Ripper stays on camera, shift it back to the right by IBJng up a bit on the left side of the 4 crumbles then move to the right as Samus falls."
]
},
{
"id": 105,
"link": [
2,
3
],
"name": "Direct G-Mode, Through the Crumbles",
"entranceCondition": {
"comeInWithGMode": {
"mode": "direct",
"morphed": false
}
},
"requires": [
"Morph",
{
"or": [
"SpaceJump",
{
"and": [
"canPreciseGrapple",
{
"or": [
"canDash",
"canUseEnemies",
"canInsaneJump"
]
}
]
},
{
"and": [
"HiJump",
"canSpringBallJumpMidAir"
]
},
{
"and": [
"canDash",
"HiJump",
"canWallJump",
"canTrickyJump"
]
},
{
"and": [
"canWallJump",
"canUseIFrames",
{
"spikeHits": 1
},
"h_spikeJumpWithActiveEnemies"
]
},
{
"and": [
"h_IBJFromSpikes",
"h_spikeJumpWithActiveEnemies"
]
}
]
},
"h_heatedGModeOpenDifferentDoor"
],
"flashSuitChecked": true,
"blueSuitChecked": true,
"note": [
"Overload PLMs by shooting the gate, then go through the crumble blocks below and get to the door.",
"The gate can be shot while precisely positioned from below without requiring any items.",
"The positioning is precise and off camera; while facing left, position Samus front foot barely on the flat part after the slope."
]
},
{
"id": 106,
"link": [
2,
3
],
"name": "G-Mode Morph, Through the Crumbles, IBJ",
"entranceCondition": {
"comeInWithGMode": {
"mode": "any",
"morphed": true
}
},
"requires": [
{
"or": [
"h_artificialMorphLongIBJ",
"h_artificialMorphJumpIntoIBJ"
]
},
"h_artificialMorphBombHorizontally",
{
"or": [
"h_artificialMorphPowerBomb",
{
"and": [
"Morph",
{
"ammo": {
"type": "Missile",
"count": 2
}
}
]
},
{
"and": [
"Morph",
{
"ammo": {
"type": "Super",
"count": 1
}
}
]
},
{
"and": [
"h_artificialMorphDoubleBombJump",
"h_artificialMorphStaggeredIBJ"
]
}
]
},
"h_heatedGModeOpenDifferentDoor"
],
"flashSuitChecked": true,
"blueSuitChecked": true,
"note": [
"Overload PLMs by bombing the gate or crumble blocks, then go through the crumble blocks below and get to the door.",
"IBJ past the Ripper or kill it. The Kago bugs will not spawn until Samus exits G-mode, so it is fine to kill it or IBJ from on top of it."
]
},
{
"id": 166,
"link": [
2,
3
],
"name": "R-Mode Standup Clip",
"entranceCondition": {
"comeInWithRMode": {}
},
"requires": [
"h_heatProof",
"canMidAirMorph",
"canRModeStandupClip",
"h_RModeCanRefillReserves",
{
"partialRefill": {
"type": "ReserveEnergy",
"limit": 100
}
},
{
"disableEquipment": "Varia"
},
{
"autoReserveTrigger": {
"implicitHeatFrames": "suitless"
}
},
{
"suitlessHeatFrames": 30
}
],
"flashSuitChecked": true,
"blueSuitChecked": true,
"note": [
"Enter with R-Mode, disable any E-Tanks and farm the Kago to put Energy into reserves.",
"Get into postion under the top blocks and disable Varia. Time a down jump to reach the apex as reserves trigger.",
"Release down during the reserve refill. A mid air morph increases the frame window Samus can clip through the blocks."
],
"devNote": "FIXME: Add suitless version."
},
{
"id": 167,
"link": [
2,
3
],
"name": "Direct G-Mode Morph, R-Mode Standup Clip",
"entranceCondition": {
"comeInWithGMode": {
"mode": "direct",
"morphed": true
}
},
"requires": [
"canArtificialMorph",
"h_heatProof",
"canRModeStandupClip",
"canBeVeryPatient",
"h_RModeCanRefillReserves",
{
"partialRefill": {
"type": "ReserveEnergy",
"limit": 100
}
},
{
"disableEquipment": "Varia"
},
{
"autoReserveTrigger": {
"implicitHeatFrames": "suitless"
}
},
{
"suitlessHeatFrames": 30
}
],
"flashSuitChecked": true,
"blueSuitChecked": true,
"note": [
"Come in with G-Mode Morph, after passing through the morph tunnel unmorph and exit G-Mode.",
"Disable any E-Tanks and farm the Kago to put Energy into reserves.",
"Get into postion under the top blocks and disable Varia. Time a down jump to reach the apex as reserves trigger.",
"Release down during the reserve refil."
],
"devNote": "FIXME: Add suitless version."
},
{
"id": 151,
"link": [
2,
4
],
"name": "Delayed Wall Jump",
"requires": [
"canTrickyWallJump",
"canConsecutiveWallJump",
"canTrickyJump",
"canUseEnemies",
"canPrepareForNextRoom",
{
"heatFrames": 315
},
{
"or": [
{
"noFlashSuit": {}
},
"canComplexCarryFlashSuit",
"Ice",
"Wave",
"Spazer",
"Plasma",
{
"heatFrames": 300
}
]
},
{
"or": [
"canDash",
{
  "heatFrames": 50
}
]
}
],
"flashSuitChecked": true,
"blueSuitChecked": true,
"note": "Wall jump up the left wall, perform a delayed wall jump on the Fune."
},
{
"id": 177,
"link": [
2,
4
],
"name": "Cross Room Delayed Wall Jump",
"entranceCondition": {
"comeInJumping": {
"speedBooster": "any",
"minTiles": 0
}
},
"requires": [
"canPrepareForNextRoom",
"canTrickyWallJump",
"canConsecutiveWallJump",
"canTrickyJump",
"canUseEnemies",
"canPrepareForNextRoom",
{
"heatFrames": 300
},
{
"or": [
{
"noFlashSuit": {}
},
"canComplexCarryFlashSuit",
"Ice",
"Wave",
"Spazer",
"Plasma",
{
"heatFrames": 300
}
]
},
{
"or": [
"canDash",
{
"heatFrames": 50
}
]
}
],
"flashSuitChecked": true,
"blueSuitChecked": true,
"note": "Wall jump up the left wall, perform a delayed wall jump on the Fune.",
"devNote": [
"This differs from the canPrepareForNextRoom option of the previous strat only in requiring an air entry."
]
},
{
"id": 26,
"link": [
2,
4
],
"name": "HiJump Speed Jump",
"requires": [
"HiJump",
"canSpeedyJump",
{
"heatFrames": 220
},
{
"or": [
{
"noFlashSuit": {}
},
{
"and": [
{
"heatFrames": 20
},
{
"or": [
"Wave",
"canTrickyCarryFlashSuit"
]
}
]
},
{
"and": [
{
"heatFrames": 50
},
{
"or": [
"canComplexCarryFlashSuit",
"Ice",
"Spazer",
"Plasma"
]
}
]
},
{
"heatFrames": 300
}
]
}
],
"clearsObstacles": [
"A"
],
"flashSuitChecked": true,
"blueSuitChecked": true
},
{
"id": 27,
"link": [
2,
4
],
"name": "HiJump Space Jump",
"requires": [
"HiJump",
"SpaceJump",
{
"heatFrames": 250
},
{
"or": [
{
"noFlashSuit": {}
},
{
"and": [
{
"heatFrames": 30
},
{
"or": [
"canComplexCarryFlashSuit",
"Ice",
"Wave",
"Spazer",
"Plasma"
]
}
]
},
{
"heatFrames": 300
}
]
},
{
"or": [
"canDash",
{
"heatFrames": 50
}
]
}
],
"clearsObstacles": [
"A"
],
"flashSuitChecked": true,
"blueSuitChecked": true
},
{
"id": 28,
"link": [
2,
4
],
"name": "Space Jump",
"requires": [
"SpaceJump",
{
"heatFrames": 310
},
{
"or": [
{
"noFlashSuit": {}
},
{
"and": [
{
"heatFrames": 60
},
{
"or": [
"canComplexCarryFlashSuit",
"Ice",
"Wave",
"Spazer",
"Plasma"
]
}
]
},
{
"heatFrames": 300
}
]
},
{
"or": [
"canDash",
{
"heatFrames": 20
}
]
}
],
"clearsObstacles": [
"A"
],
"flashSuitChecked": true,
"blueSuitChecked": true
},
{
"id": 29,
"link": [
2,
4
],
"name": "HiJump Wall Jump",
"requires": [
"HiJump",
"canWallJump",
"canTrickyJump",
{
"or": [
{
"and": [
"canHeroShot",
{
"heatFrames": 270
},
"canInsaneWallJump",
"h_trickyToCarryFlashSuit",
"canBeVeryPatient"
]
},
{
"and": [
{
"heatFrames": 360
},
{
"or": [
"h_complexToCarryFlashSuit",
"Ice",
"Wave",
"Spazer",
"Plasma",
{
"heatFrames": 300
}
]
}
]
}
]
},
{
"or": [
"canDash",
{
"heatFrames": 120
}
]
}
],
"clearsObstacles": [
"A"
],
"flashSuitChecked": true,
"blueSuitChecked": true,
"note": [
"Run to the right, wait a moment for the platforms to come down, then wall jump off the second platform from the right.",
"Alternatively, wall jump off the wall to the right to reach the platform sooner, to wall jump off of it."
]
},
{
"id": 30,
"link": [
2,
4
],
"name": "HiJump Spring Ball Jump",
"requires": [
"HiJump",
"canSpringBallJumpMidAir",
{
"heatFrames": 250
},
{
"or": [
"canDash",
{
"heatFrames": 40
}
]
}
],
"clearsObstacles": [
"A"
],
"flashSuitChecked": true,
"blueSuitChecked": true
},
{
"id": 31,
"link": [
2,
4
],
"name": "Tricky Dash Jump",
"requires": [
"canTrickyDashJump",
{
"heatFrames": 380
},
{
"or": [
{
"noFlashSuit": {}
},
{
"and": [
{
"heatFrames": 70
},
{
"or": [
"canComplexCarryFlashSuit",
"Ice",
"Wave",
"Spazer",
"Plasma"
]
}
]
},
{
"heatFrames": 300
}
]
}
],
"clearsObstacles": [
"A"
],
"flashSuitChecked": true,
"blueSuitChecked": true,
"note": [
"Run under the furthest right moving platform to trigger it to move down.",
"Then run back to the left wall, run again to the right, and jump when on the center of the mound just to the left below the platform.",
"Shoot straight up to open the gate on the way up."
]
},
{
"id": 32,
"link": [
2,
4
],
"name": "Tricky Dash Jump Wall Jump",
"requires": [
"canTrickyDashJump",
"canWallJump",
{
"heatFrames": 300
},
{
"or": [
{
"noFlashSuit": {}
},
{
"and": [
{
"heatFrames": 60
},
{
"or": [
"canComplexCarryFlashSuit",
"Ice",
"Wave",
"Spazer",
"Plasma"
]
}
]
},
{
"heatFrames": 300
}
]
}
],
"clearsObstacles": [
"A"
],
"flashSuitChecked": true,
"blueSuitChecked": true,
"note": [
"Starting from the left wall, run to the right and jump when on the center of the mound just to the right of the second moving platform from the right.",
"Wall jump off of the platform as it moves down."
]
},
{
"id": 33,
"link": [
2,
4
],
"name": "Shinespark (In-Room)",
"requires": [
{
"canShineCharge": {
"usedTiles": 28,
"gentleUpTiles": 3,
"gentleDownTiles": 3,
"openEnd": 0
}
},
{
"shinespark": {
"frames": 24,
"excessFrames": 8
}
},
{
"heatFrames": 300
},
{
"or": [
"canHeroShot",
{
"heatFrames": 100
}
]
}
],
"clearsObstacles": [
"A"
],
"flashSuitChecked": true,
"blueSuitChecked": true
},
{
"id": 34,
"link": [
2,
4
],
"name": "Cross Room HiJump Speedy Jump",
"entranceCondition": {
"comeInJumping": {
"speedBooster": "yes",
"minTiles": 4
}
},
"requires": [
"HiJump",
"canSpeedyJump",
{
"heatFrames": 220
},
{
"or": [
{
"noFlashSuit": {}
},
"canComplexCarryFlashSuit",
"Ice",
"Wave",
"Spazer",
"Plasma",
{
"heatFrames": 300
}
]
}
],
"clearsObstacles": [
"A"
],
"flashSuitChecked": true,
"blueSuitChecked": true
},
{
"id": 35,
"link": [
2,
4
],
"name": "Cross Room HiJump Wall Jump",
"entranceCondition": {
"comeInJumping": {
"speedBooster": "any",
"minTiles": 1
}
},
"requires": [
"canPrepareForNextRoom",
"HiJump",
"canWallJump",
"canTrickyJump",
{
"heatFrames": 260
},
{
"or": [
{
"noFlashSuit": {}
},
"canComplexCarryFlashSuit",
"Ice",
"Wave",
"Spazer",
"Plasma",
{
"heatFrames": 300
}
]
}
],
"clearsObstacles": [
"A"
],
"flashSuitChecked": true,
"blueSuitChecked": true,
"note": "Jump through the door transition, and wall jump off the second moving platform to get on top."
},
{
"id": 36,
"link": [
2,
4
],
"name": "Cross Room Tricky Spring Ball Jump",
"entranceCondition": {
"comeInJumping": {
"speedBooster": "any",
"minTiles": 2
}
},
"requires": [
"canPrepareForNextRoom",
"canLateralMidAirMorph",
"canTrickySpringBallJump",
"canTrickyJump",
{
"heatFrames": 280
},
{
"or": [
{
"noFlashSuit": {}
},
"canComplexCarryFlashSuit",
"Ice",
"Wave",
"Spazer",
"Plasma",
{
"heatFrames": 300
}
]
}
],
"clearsObstacles": [
"A"
],
"flashSuitChecked": true,
"blueSuitChecked": true,
"note": [
"Spin jump into the room with at least 2 tiles of run speed.",
"Perform a lateral mid-air morph into a spring ball jump.",
"Land on the second moving platform."
]
},
{
"id": 107,
"link": [
2,
4
],
"name": "Indirect G-Mode, Despawn Gate",
"entranceCondition": {
"comeInWithGMode": {
"mode": "indirect",
"morphed": false
}
},
"requires": [
{
"or": [
"SpaceJump",
"canSpringBallJumpMidAir",
"canWallJump",
{
"and": [
"HiJump",
"canSpeedyJump"
]
},
"canTrickyDashJump",
{
"and": [
{
"canShineCharge": {
"usedTiles": 28,
"gentleUpTiles": 3,
"gentleDownTiles": 3,
"openEnd": 0
}
},
{
"or": [
{
"shinespark": {
"frames": 18,
"excessFrames": 8
}
},
{
"and": [
"canSpeedyJump",
{
"shinespark": {
"frames": 16,
"excessFrames": 10
}
}
]
}
]
}
]
}
]
},
{
"heatFrames": 0
}
],
"flashSuitChecked": true,
"blueSuitChecked": true,
"note": "It is possible to climb the left side of the room with SpeedBooster alone, with either a tricky dash jump or a vertical shinespark."
},
{
"id": 108,
"link": [
2,
4
],
"name": "Indirect G-Mode Morph, Despawn Gate",
"entranceCondition": {
"comeInWithGMode": {
"mode": "indirect",
"morphed": true
}
},
"requires": [
"h_artificialMorphIBJ",
{
"heatFrames": 0
}
],
"flashSuitChecked": true,
"blueSuitChecked": true
},
{
"id": 109,
"link": [
2,
4
],
"name": "Indirect G-Mode, Despawn Gate, Open Gate",
"entranceCondition": {
"comeInWithGMode": {
"mode": "indirect",
"morphed": false
}
},
"requires": [
{
"or": [
"SpaceJump",
"canSpringBallJumpMidAir",
"canWallJump",
{
"and": [
"HiJump",
"canSpeedyJump"
]
},
"canTrickyDashJump",
{
"and": [
{
"canShineCharge": {
"usedTiles": 28,
"gentleUpTiles": 3,
"gentleDownTiles": 3,
"openEnd": 0
}
},
{
"or": [
{
"shinespark": {
"frames": 18,
"excessFrames": 8
}
},
{
"and": [
"canSpeedyJump",
{
"shinespark": {
"frames": 16,
"excessFrames": 10
}
}
]
}
]
}
]
}
]
},
{
"heatFrames": 25
}
],
"clearsObstacles": [
"A"
],
"flashSuitChecked": true,
"blueSuitChecked": true,
"note": "Stand under where the gate will spawn when exiting G-mode to open it before grabbing the item."
},
{
"id": 110,
"link": [
2,
4
],
"name": "Indirect G-Mode Morph, Despawn Gate, Open Gate",
"entranceCondition": {
"comeInWithGMode": {
"mode": "indirect",
"morphed": true
}
},
"requires": [
"h_artificialMorphIBJ",
{
"heatFrames": 25
}
],
"clearsObstacles": [
"A"
],
"flashSuitChecked": true,
"blueSuitChecked": true,
"note": "Stand under where the gate will spawn when exiting G-mode to open it before grabbing the item."
},
{
"id": 111,
"link": [
2,
4
],
"name": "Direct G-Mode, Through the Crumbles",
"entranceCondition": {
"comeInWithGMode": {
"mode": "direct",
"morphed": false
}
},
"requires": [
"Morph",
{
"or": [
"SpaceJump",
{
"and": [
"canPreciseGrapple",
"canUseEnemies"
]
},
{
"and": [
"HiJump",
"canSpringBallJumpMidAir"
]
},
"canInsaneWallJump",
{
"and": [
"HiJump",
"canUseIFrames",
{
"noBlueSuit": {}
},
{
"enemyDamage": {
"enemy": "Ripper 2 (green)",
"type": "contact",
"hits": 1
}
},
{
"or": [
"canWallJump",
"canSpeedyJump"
]
}
]
},
"h_IBJFromSpikes"
]
},
{
"heatFrames": 0
}
],
"flashSuitChecked": true,
"blueSuitChecked": true,
"note": [
"Overload PLMs by shooting the gate, then go through the crumble blocks below and get to the item.",
"The gate can be shot while precisely positioned from below without requiring any items.",
"The positioning is precise and off camera; while facing left, position Samus front foot barely on the flat part after the slope."
]
},
{
"id": 112,
"link": [
2,
4
],
"name": "Direct G-Mode Morph, Through the Crumbles, IBJ",
"entranceCondition": {
"comeInWithGMode": {
"mode": "direct",
"morphed": true
}
},
"requires": [
{
"or": [
"h_artificialMorphLongIBJ",
"h_artificialMorphJumpIntoIBJ"
]
},
"h_artificialMorphBombHorizontally",
{
"or": [
"h_artificialMorphPowerBomb",
{
"and": [
"Morph",
{
"ammo": {
"type": "Missile",
"count": 2
}
}
]
},
{
"and": [
"Morph",
{
"ammo": {
"type": "Super",
"count": 1
}
}
]
},
{
"and": [
"h_artificialMorphDoubleBombJump",
"h_artificialMorphStaggeredIBJ"
]
}
]
},
{
"heatFrames": 0
}
],
"flashSuitChecked": true,
"blueSuitChecked": true,
"note": [
"Overload PLMs by bombing the gate or crumble blocks, then go through the crumble blocks below and get to the item.",
"IBJ past the Ripper or kill it. The Kago bugs will not spawn until Samus exits G-mode, so it is fine to kill it or IBJ from on top of it."
]
},
{
"id": 37,
"link": [
2,
5
],
"name": "Base",
"requires": [
"Morph",
{
"heatFrames": 160
},
{
"or": [
"canMockball",
{
"heatFrames": 45
}
]
}
],
"flashSuitChecked": true,
"blueSuitChecked": true
},
{
"id": 113,
"link": [
2,
7
],
"name": "G-Mode",
"entranceCondition": {
"comeInWithGMode": {
"mode": "any",
"morphed": false
}
},
"requires": [
"Morph",
{
"heatFrames": 0
}
],
"flashSuitChecked": true,
"blueSuitChecked": true
},
{
"id": 38,
"link": [
3,
1
],
"name": "Grapple Teleport",
"entranceCondition": {
"comeInWithGrappleTeleport": {
"blockPositions": [
[
5,
3
],
[
7,
2
]
]
}
},
"requires": [
{
"heatFrames": 50
}
],
"flashSuitChecked": true,
"blueSuitChecked": true
},
{
"id": 39,
"link": [
3,
1
],
"name": "Grapple Teleport X-Ray Climb",
"entranceCondition": {
"comeInWithGrappleTeleport": {
"blockPositions": [
[
2,
29
]
]
}
},
"requires": [
"canXRayClimb",
{
"heatFrames": 1600
}
],
"bypassesDoorShell": "yes",
"flashSuitChecked": true,
"blueSuitChecked": true,
"note": [
"Exit the previous room with Samus in a standing pose (while grappled) with a horizontal position of 21 (as far right as possible).",
"After teleporting, press right to release Grapple while staying standing (not being forced into a crouch).",
"Then X-ray climb 1 screen to get up to the door transition, without needing to open the door.",
"Samus will not be visible during the climb.",
"At the beginning of the climb, avoid pressing left without X-Ray being held, to prevent triggering the transition of the bottom door."
]
},
{
"id": 114,
"link": [
3,
1
],
"name": "Direct G-Mode Morph, Remote Acquire",
"entranceCondition": {
"comeInWithGMode": {
"mode": "direct",
"morphed": true
}
},
"requires": [
"canRemoteAcquire",
{
"or": [
"h_artificialMorphCeilingBombJump",
{
"and": [
"h_artificialMorphBombHorizontally",
"h_artificialMorphIBJ",
"h_artificialMorphPowerBomb"
]
},
{
"and": [
"h_artificialMorphBombHorizontally",
"canTrickyDodgeEnemies",
"h_artificialMorphDoubleBombJump",
"h_artificialMorphStaggeredIBJ"
]
}
]
},
"h_heatedGModeOpenDifferentDoor"
],
"collectsItems": [
4
],
"flashSuitChecked": true,
"blueSuitChecked": true,
"note": [
"Bomb horizontally on room entry to jump over the Ripper and land on the crumble blocks, or use a Power Bomb to kill the Ripper.",
"Avoid touching all 6 crumbles, so Samus can use the item to overload PLMs and go through one of the crumbles to get to the left side of the room.",
"If the item has already been obtained, Samus can shoot or Bomb the gate many times to overload PLMs."
]
},
{
"id": 115,
"link": [
3,
1
],
"name": "Indirect G-Mode, Despawn the Gate",
"entranceCondition": {
"comeInWithGMode": {
"mode": "indirect",
"morphed": false
}
},
"requires": [
{
"or": [
"SpaceJump",
{
"and": [
"canPreciseGrapple",
{
"or": [
"canDash",
"canUseEnemies",
"canInsaneJump"
]
}
]
},
"canInsaneWallJump",
{
"and": [
"HiJump",
"canWallJump"
]
},
{
"and": [
"HiJump",
"canSpeedyJump"
]
}
]
},
"h_heatedGModeOpenDifferentDoor"
],
"flashSuitChecked": true,
"blueSuitChecked": true,
"note": [
"Jump onto the crumble blocks to make them solid, then use them as a platform to cross the room.",
"With Grapple, a running jump then single Grapple swing can be used before PLMs are overloaded, alternatively jump on the crumble blocks and Grapple the Ripper."
],
"devNote": "This is only for strats that can't go to 7 - variants without Morph, or without a way to get back up after going down."
},
{
"id": 116,
"link": [
3,
1
],
"name": "Indirect G-Mode Morph, Despawn the Gate",
"entranceCondition": {
"comeInWithGMode": {
"mode": "indirect",
"morphed": true
}
},
"requires": [
{
"or": [
"h_artificialMorphCeilingBombJump",
{
"and": [
"h_artificialMorphBombHorizontally",
"h_artificialMorphIBJ",
"h_artificialMorphPowerBomb"
]
},
{
"and": [
"h_artificialMorphBombHorizontally",
"canTrickyDodgeEnemies",
"h_artificialMorphDoubleBombJump",
"h_artificialMorphStaggeredIBJ"
]
}
]
},
"h_heatedGModeOpenDifferentDoor"
],
"flashSuitChecked": true,
"blueSuitChecked": true,
"note": "Bomb horizontally on room entry to jump over the Ripper and land on the crumble blocks, or use a Power Bomb to kill the Ripper."
},
{
"id": 40,
"link": [
3,
2
],
"name": "Grapple Teleport Door Lock Skip",
"entranceCondition": {
"comeInWithGrappleTeleport": {
"blockPositions": [
[
2,
29
]
]
}
},
"requires": [],
"bypassesDoorShell": "yes",
"flashSuitChecked": true,
"blueSuitChecked": true
},
{
"id": 41,
"link": [
3,
2
],
"name": "Carry Grapple Teleport",
"entranceCondition": {
"comeInWithGrappleTeleport": {
"blockPositions": [
[
2,
29
]
]
}
},
"requires": [],
"exitCondition": {
"leaveWithGrappleTeleport": {
"blockPositions": [
[
2,
29
]
]
}
},
"bypassesDoorShell": "yes",
"flashSuitChecked": true,
"blueSuitChecked": true
},
{
"id": 117,
"link": [
3,
2
],
"name": "Direct G-Mode Morph, Remote Acquire",
"entranceCondition": {
"comeInWithGMode": {
"mode": "direct",
"morphed": true
}
},
"requires": [
"canRemoteAcquire",
{
"or": [
"h_artificialMorphCeilingBombJump",
{
"and": [
"h_artificialMorphBombHorizontally",
"h_artificialMorphIBJ",
"h_artificialMorphPowerBomb"
]
},
{
"and": [
"h_artificialMorphBombHorizontally",
"canTrickyDodgeEnemies",
"h_artificialMorphDoubleBombJump",
"h_artificialMorphStaggeredIBJ"
]
}
]
},
"h_heatedGModeOpenDifferentDoor"
],
"collectsItems": [
4
],
"flashSuitChecked": true,
"blueSuitChecked": true,
"note": [
"Bomb horizontally on room entry to jump over the Ripper and land on the crumble blocks, or use a Power Bomb to kill the Ripper.",
"Avoid touching all 6 crumbles, so Samus can use the item to overload PLMs and go through one of the crumbles to get to the left side of the room.",
"If the item has already been obtained, Samus can shoot or Bomb the gate many times to overload PLMs."
]
},
{
"id": 118,
"link": [
3,
2
],
"name": "Indirect G-Mode, Despawn the Gate",
"entranceCondition": {
"comeInWithGMode": {
"mode": "indirect",
"morphed": false
}
},
"requires": [
{
"or": [
"SpaceJump",
{
"and": [
"canPreciseGrapple",
{
"or": [
"canDash",
"canUseEnemies",
"canInsaneJump"
]
}
]
},
"canInsaneWallJump",
{
"and": [
"HiJump",
"canWallJump"
]
},
{
"and": [
"HiJump",
"canSpeedyJump"
]
}
]
},
"h_heatedGModeOpenDifferentDoor"
],
"flashSuitChecked": true,
"blueSuitChecked": true,
"note": [
"Jump onto the crumble blocks to make them solid, then use them as a platform to cross the room.",
"With Grapple, a running jump then single Grapple swing can be used before PLMs are overloaded, alternatively jump on the crumble blocks and Grapple the Ripper."
],
"devNote": "This is only for strats that can't go to 7 - variants without Morph."
},
{
"id": 119,
"link": [
3,
2
],
"name": "Indirect G-Mode Morph, Despawn the Gate",
"entranceCondition": {
"comeInWithGMode": {
"mode": "indirect",
"morphed": true
}
},
"requires": [
{
"or": [
"h_artificialMorphCeilingBombJump",
{
"and": [
"h_artificialMorphBombHorizontally",
"h_artificialMorphIBJ",
"h_artificialMorphPowerBomb"
]
},
{
"and": [
"h_artificialMorphBombHorizontally",
"canTrickyDodgeEnemies",
"h_artificialMorphDoubleBombJump",
"h_artificialMorphStaggeredIBJ"
]
}
]
},
"h_heatedGModeOpenDifferentDoor"
],
"flashSuitChecked": true,
"blueSuitChecked": true,
"note": "Bomb horizontally on room entry to jump over the Ripper and land on the crumble blocks, or use a Power Bomb to kill the Ripper."
},
{
"id": 42,
"link": [
3,
3
],
"name": "Leave With Runway",
"requires": [],
"exitCondition": {
"leaveWithRunway": {
"length": 6,
"openEnd": 1
}
},
"flashSuitChecked": true,
"blueSuitChecked": true
},
{
"id": 88,
"link": [
3,
3
],
"name": "Leave With Grapple Swing",
"requires": [
"h_heatProof"
],
"exitCondition": {
"leaveWithGrappleSwing": {
"blocks": [
{
"position": [
5,
2
],
"note": "Closest Grapple block to the door"
}
]
}
},
"flashSuitChecked": true,
"blueSuitChecked": true
},
{
"id": 43,
"link": [
3,
3
],
"name": "Crystal Flash",
"requires": [
{
"obstaclesNotCleared": [
"R-Mode"
]
},
"h_heatedCrystalFlash"
],
"flashSuitChecked": true,
"blueSuitChecked": true
},
{
"id": 143,
"link": [
3,
3
],
"name": "Ripper Farm",
"requires": [
"h_heatProof",
"SpaceJump",
"ScrewAttack",
{
"noBlueSuit": {}
},
{
"resetRoom": {
"nodes": [
3
]
}
},
{
"cycleFrames": 230
}
],
"resetsObstacles": [
"A",
"R-Mode"
],
"farmCycleDrops": [
{
"enemy": "Ripper 2 (green)",
"count": 1
}
],
"flashSuitChecked": true,
"blueSuitChecked": true,
"devNote": "FIXME: It is possible but risky to farm using hijump, walljump, and crumble jumps."
},
{
"id": 44,
"link": [
3,
3
],
"name": "Leave with Shinespark (Top Path)",
"requires": [
"canShinechargeMovementComplex",
"HiJump",
{
"or": [
"SpaceJump",
"Grapple"
]
},
{
"or": [
{
"obstaclesCleared": [
"A"
]
},
"Wave",
{
"and": [
"h_heatedBlueGateGlitch",
{
"heatFrames": 60
}
]
}
]
},
{
"or": [
{
"and": [
"canTrickyDashJump",
"canWallJump"
]
},
"SpaceJump"
]
},
{
"canShineCharge": {
"usedTiles": 28,
"gentleUpTiles": 3,
"gentleDownTiles": 3,
"openEnd": 0
}
},
{
"heatFrames": 780
},
{
"shinespark": {
"frames": 57,
"excessFrames": 0
}
}
],
"exitCondition": {
"leaveWithSpark": {}
},
"flashSuitChecked": true,
"blueSuitChecked": true,
"note": [
"Charge a spark along the bottom of the room and use it to spark through the right side door.",
"Requires opening the door and shutter first."
],
"devNote": [
"A hero shot variation of this strat might be possible, starting from a node to the left;",
"if nothing else it could be done with a shortcharge on the 12-tile platform to the left."
]
},
{
"id": 45,
"link": [
3,
3
],
"name": "Leave with Shinespark (Through Crumbles)",
"requires": [
"canShinechargeMovementComplex",
"HiJump",
"Morph",
{
"or": [
{
"obstaclesCleared": [
"A"
]
},
{
"heatFrames": 240
}
]
},
{
"or": [
{
"and": [
"canTrickyDashJump",
"canWallJump"
]
},
"SpaceJump"
]
},
{
"canShineCharge": {
"usedTiles": 28,
"gentleUpTiles": 3,
"gentleDownTiles": 3,
"openEnd": 0
}
},
{
"heatFrames": 780
},
{
"shinespark": {
"frames": 57,
"excessFrames": 0
}
}
],
"exitCondition": {
"leaveWithSpark": {}
},
"flashSuitChecked": true,
"blueSuitChecked": true,
"note": [
"Charge a spark along the bottom of the room and use it to spark through the right side door.",
"Requires opening the door and shutter first."
],
"devNote": "FIXME: This would be a lot cleaner with an obstacle for the door, also the 'Through Crumbles' is misleading."
},
{
"id": 152,
"link": [
3,
3
],
"name": "Leave Spinning (Space Jump)",
"requires": [
"h_heatedRemoteRunwaySpaceJump",
{
"heatFrames": 370
}
],
"exitCondition": {
"leaveSpinning": {
"remoteRunway": {
"length": 11,
"openEnd": 1
},
"minExtraRunSpeed": "$2.0"
}
},
"flashSuitChecked": true,
"blueSuitChecked": true,
"devNote": [
"This uses the runway in the middle of the room but logically starts at the door, to ensure it can be opened."
]
},
{
"id": 153,
"link": [
3,
3
],
"name": "Leave Space Jumping",
"requires": [
"h_heatedRemoteRunwayPreciseSpaceJump",
{
"heatFrames": 370
}
],
"exitCondition": {
"leaveSpaceJumping": {
"remoteRunway": {
"length": 11,
"openEnd": 1
},
"minExtraRunSpeed": "$2.0"
}
},
"flashSuitChecked": true,
"blueSuitChecked": true,
"devNote": [
"This uses the runway in the middle of the room but logically starts at the door, to ensure it can be opened."
]
},
{
"id": 181,
"link": [
3,
3
],
"name": "Come in Shinecharging, Crystal Spark",
"entranceCondition": {
"comeInShinecharging": {
"length": 5,
"openEnd": 0
}
},
"requires": [
"h_heatedCrystalSpark"
],
"flashSuitChecked": true,
"blueSuitChecked": true
},
{
"id": 46,
"link": [
3,
3
],
"name": "X-Mode with Walljump",
"requires": [
"h_spikeXModeShinecharge",
"canWallJump",
{
"heatFrames": 540
},
{
"shinespark": {
"frames": 5
}
}
],
"exitCondition": {
"leaveWithSpark": {}
},
"flashSuitChecked": true,
"blueSuitChecked": true,
"devNote": "Two spike hits are expected per attempt (with any additional leniency hits being multiplied by this amount)."
},
{
"id": 47,
"link": [
3,
3
],
"name": "X-Mode, Leave Shinecharged",
"requires": [
"h_spikeXModeShinecharge",
{
"or": [
{
"and": [
{
"heatFrames": 480
},
{
"shineChargeFrames": 140
},
"HiJump"
]
},
{
"and": [
{
"heatFrames": 540
},
"canWallJump",
"canShinechargeMovementTricky",
{
"shineChargeFrames": 160
}
]
}
]
}
],
"exitCondition": {
"leaveShinecharged": {}
},
"flashSuitChecked": true,
"blueSuitChecked": true,
"devNote": [
"Two spike hits are expected per attempt (with any additional leniency hits being multiplied by this amount)."
]
},
{
"id": 172,
"link": [
3,
3
],
"name": "R-Mode Entry",
"entranceCondition": {
"comeInWithRMode": {}
},
"requires": [],
"clearsObstacles": [
"R-Mode"
],
"flashSuitChecked": true,
"blueSuitChecked": true
},
{
"id": 120,
"link": [
3,
3
],
"name": "Direct G-Mode, Remote Acquire Item",
"entranceCondition": {
"comeInWithGMode": {
"mode": "direct",
"morphed": false
}
},
"requires": [
"canRemoteAcquire",
{
"or": [
"SpaceJump",
{
"and": [
"canPreciseGrapple",
"canUseEnemies"
]
},
"canSpringBallJumpMidAir",
"canInsaneWallJump",
{
"and": [
"HiJump",
"canWallJump"
]
},
{
"and": [
"HiJump",
"canSpeedyJump"
]
},
{
"and": [
"canStaggeredIBJ",
"canDoubleBombJump",
"canBombHorizontally"
]
},
{
"and": [
"h_IBJFromSpikes",
"h_IBJFromSpikes"
]
},
{
"and": [
"h_IBJFromSpikes",
"canCameraManip",
"canMoonwalk"
]
}
]
},
"h_heatedDirectGModeLeaveSameDoor"
],
"collectsItems": [
4
],
"flashSuitChecked": true,
"blueSuitChecked": true,
"note": "Jump onto the crumble blocks to make them solid, then use them as a platform to cross the room."
},
{
"id": 121,
"link": [
3,
3
],
"name": "Direct G-Mode, Remote Acquire Item, Kill the Ripper then IBJ",
"entranceCondition": {
"comeInWithGMode": {
"mode": "direct",
"morphed": false
}
},
"requires": [
"canRemoteAcquire",
{
"or": [
"ScrewAttack",
"h_usePowerBomb",
{
"ammo": {
"type": "Missile",
"count": 2
}
},
{
"ammo": {
"type": "Super",
"count": 1
}
}
]
},
"canIBJ",
"canBombHorizontally",
"h_heatedDirectGModeLeaveSameDoor"
],
"collectsItems": [
4
],
"flashSuitChecked": true,
"blueSuitChecked": true,
"note": "Jump onto the crumble blocks to make them solid, then use them as a platform to cross the room."
},
{
"id": 122,
"link": [
3,
3
],
"name": "Direct G-Mode Morph, Remote Acquire Item",
"entranceCondition": {
"comeInWithGMode": {
"mode": "direct",
"morphed": true
}
},
"requires": [
"canRemoteAcquire",
{
"or": [
"h_artificialMorphLongCeilingBombJump",
{
"and": [
"h_artificialMorphBombHorizontally",
"h_artificialMorphIBJ",
"h_artificialMorphPowerBomb"
]
},
{
"and": [
"h_artificialMorphBombHorizontally",
"canTrickyDodgeEnemies",
"h_artificialMorphDoubleBombJump",
"h_artificialMorphStaggeredIBJ"
]
}
]
},
"h_heatedDirectGModeLeaveSameDoor"
],
"collectsItems": [
4
],
"flashSuitChecked": true,
"blueSuitChecked": true,
"note": "Bomb horizontally on room entry to jump over the Ripper and land on the crumble blocks, or use a Power Bomb to kill the Ripper."
},
{
"id": 48,
"link": [
3,
4
],
"name": "Grapple",
"requires": [
"Grapple",
{
"heatFrames": 155
},
{
"or": [
{
"noFlashSuit": {}
},
{
"and": [
"canMidAirMorph",
{
"heatFrames": 35
}
]
},
{
"heatFrames": 80
}
]
},
{
"or": [
"canDash",
{
"heatFrames": 15
}
]
}
],
"flashSuitChecked": true,
"blueSuitChecked": true
},
{
"id": 49,
"link": [
3,
4
],
"name": "Space Jump",
"requires": [
"SpaceJump",
{
"heatFrames": 160
},
{
"or": [
"canDash",
{
"heatFrames": 135
}
]
}
],
"flashSuitChecked": true,
"blueSuitChecked": true
},
{
"id": 50,
"link": [
3,
4
],
"name": "Spike IBJ",
"requires": [
"canDash",
"h_heatedIBJFromSpikes",
{
"or": [
{
"heatFrames": 730
},
{
"and": [
"canDoubleBombJump",
{
"heatFrames": 550
}
]
}
]
}
],
"flashSuitChecked": true,
"blueSuitChecked": true,
"devNote": [
"FIXME: A crumble jump into IBJ is also possible."
]
},
{
"id": 51,
"link": [
3,
4
],
"name": "Spring Ball Jump (Spike or Ripper I-Frames)",
"requires": [
"canDash",
"canUseIFrames",
{
"or": [
{
"spikeHits": 1
},
{
"and": [
"canTrickyJump",
{
"enemyDamage": {
"enemy": "Ripper 2 (green)",
"type": "contact",
"hits": 1
}
},
{
"heatFrames": 20
}
]
}
]
},
"canSpringBallJumpMidAir",
{
"heatFrames": 240
}
],
"flashSuitChecked": true,
"blueSuitChecked": true
},
{
"id": 154,
"link": [
3,
4
],
"name": "Crumble Jump Spring Fling",
"requires": [
"canCrumbleJump",
"canTrickySpringBallJump",
"canSpringFling",
"h_trickyToCarryFlashSuit",
{
"heatFrames": 270
},
{
"or": [
"canDash",
{
"and": [
{
"haveBlueSuit": {}
},
"canInsaneJump",
{
"heatFrames": 190
}
]
}
]
}
],
"flashSuitChecked": true,
"blueSuitChecked": true,
"note": [
"Pause while crumble jumping, and quickly mid-air morph and equip Spring Ball,",
"to obtain a boost in horizontal speed before mid-air Spring Ball jumping."
]
},
{
"id": 182,
"link": [
3,
4
],
"name": "Speedy Jump over the Spikes",
"entranceCondition": {
"comeInRunning": {
"speedBooster": "yes",
"minTiles": 11.4375
}
},
"requires": [
"canSpeedyJump",
"canTrickyJump",
{
"heatFrames": 100
}
],
"flashSuitChecked": true,
"blueSuitChecked": true,
"note": "A running jump over the pit without a wall jump requires a runway in the previous room of 12 tiles with a last-frame jump.",
"devNote": "This becomes easier with a very long runway, but probably not easy enough to remove the canTrickyJump, since a missed jump likely means death."
},
{
"id": 183,
"link": [
3,
4
],
"name": "Speedy Jump over the Spikes, With Assist",
"entranceCondition": {
"comeInRunning": {
"speedBooster": "yes",
"minTiles": 8
}
},
"requires": [
"canSpeedyJump",
"canInsaneJump",
{
"or": [
{
"and": [
"canPreciseWallJump",
{
"heatFrames": 150
}
]
},
{
"and": [
"canLateralMidAirMorph",
{
"heatFrames": 110
}
]
}
]
}
],
"flashSuitChecked": true,
"blueSuitChecked": true,
"devNote": "A running jump over the pit requires a runway in the previous room of 8 tiles with an open end, with a last-frame jump into a very precise air ball or wall jump."
},
{
"id": 52,
"link": [
3,
4
],
"name": "Spring Fling over the Spikes",
"entranceCondition": {
"comeInRunning": {
"speedBooster": "yes",
"minTiles": 3
}
},
"requires": [
"h_speedJump",
"canMomentumConservingMorph",
"canSpringFling",
"h_unpauseKeepMomentum",
{
"heatFrames": 140
}
],
"flashSuitChecked": true,
"blueSuitChecked": true,
"devNote": [
"The momentum-conserving morph is not strictly required (particularly with longer runways) but makes it easier."
]
},
{
"id": 155,
"link": [
3,
4
],
"name": "Spring Ball Bounce Spring Fling",
"entranceCondition": {
"comeInWithMockball": {
"speedBooster": "any",
"remoteAndLandingMinTiles": [
[
6.4375,
0
]
]
}
},
"requires": [
"canSpringBallBounce",
"canSpringFling",
{
"heatFrames": 140
}
],
"flashSuitChecked": true,
"blueSuitChecked": true
},
{
"id": 156,
"link": [
3,
4
],
"name": "Speedy Spring Ball Bounce Spring Fling",
"entranceCondition": {
"comeInWithMockball": {
"speedBooster": "yes",
"remoteAndLandingMinTiles": [
[
5,
0
]
]
}
},
"requires": [
"canSpringBallBounce",
"canSpringFling",
{
"heatFrames": 150
}
],
"flashSuitChecked": true,
"blueSuitChecked": true
},
{
"id": 157,
"link": [
3,
4
],
"name": "Speedy Spring Ball Bounce Double Spring Fling",
"entranceCondition": {
"comeInWithMockball": {
"speedBooster": "yes",
"remoteAndLandingMinTiles": [
[
4,
0
]
]
}
},
"requires": [
"canSpringBallBounce",
"canSpringFling",
"canInsaneJump",
"canBeVeryPatient",
{
"heatFrames": 145
}
],
"flashSuitChecked": true,
"blueSuitChecked": true,
"note": [
"Pause immediately on room entry, and bounce just before Samus would roll off the runway.",
"Unequip Spring Ball, then pause again as soon as possible and re-equip Spring Ball."
],
"detailNote": [
"In the case of entering with minimal extra run speed ($1.7):",
"The bounce should be done on the last possible frame;",
"otherwise the timing for the first pause is frame-perfect (with a 2-frame window for the second pause).",
"With a first-frame pause and last-frame bounce, the second pause has a 4-frame window.",
"With a second-frame pause and last-frame bounce, the second pause has a 3-frame window.",
"With a third-frame pause and last-frame bounce, the second pause is frame-perfect."
]
},
{
"id": 53,
"link": [
3,
4
],
"name": "HiJump Wall Jump (Spike or Ripper I-Frames)",
"requires": [
"canDash",
"canUseIFrames",
{
"or": [
{
"spikeHits": 1
},
{
"and": [
"canTrickyJump",
{
"enemyDamage": {
"enemy": "Ripper 2 (green)",
"type": "contact",
"hits": 1
}
},
{
"heatFrames": 20
}
]
}
]
},
"canWallJump",
"HiJump",
{
"heatFrames": 230
}
],
"flashSuitChecked": true,
"blueSuitChecked": true
},
{
"id": 158,
"link": [
3,
4
],
"name": "Crumble Jump HiJump Wall Jump",
"requires": [
"canDash",
"HiJump",
"canInsaneJump",
"canCrumbleJump",
"canWallJump",
{
"heatFrames": 340
}
],
"flashSuitChecked": true,
"blueSuitChecked": true
},
{
"id": 54,
"link": [
3,
4
],
"name": "Shinespark (Come In Shinecharging)",
"entranceCondition": {
"comeInShinecharging": {
"length": 5,
"openEnd": 0
}
},
"requires": [
"canHorizontalShinespark",
{
"heatFrames": 140
},
{
"shinespark": {
"frames": 45,
"excessFrames": 14
}
}
],
"flashSuitChecked": true,
"blueSuitChecked": true
},
{
"id": 55,
"link": [
3,
4
],
"name": "Shinespark (Come in with Spark)",
"entranceCondition": {
"comeInWithSpark": {}
},
"requires": [
{
"heatFrames": 140
},
{
"shinespark": {
"frames": 51,
"excessFrames": 14
}
}
],
"collectsItems": [
4
],
"flashSuitChecked": true,
"blueSuitChecked": true,
"devNote": "The item will not be forced to be collected if the spark was in the top position."
},
{
"id": 56,
"link": [
3,
4
],
"name": "HiJump Speedy Jump (Spike or Ripper I-Frames)",
"requires": [
"canUseIFrames",
{
"or": [
{
"spikeHits": 1
},
{
"and": [
"canTrickyJump",
{
"enemyDamage": {
"enemy": "Ripper 2 (green)",
"type": "contact",
"hits": 1
}
},
{
"heatFrames": 20
}
]
}
]
},
"canSpeedyJump",
"HiJump",
{
"heatFrames": 200
}
],
"flashSuitChecked": true,
"blueSuitChecked": true
},
{
"id": 57,
"link": [
3,
4
],
"name": "Hijumpless Spike Tricky Dash Jump",
"requires": [
{
"notable": "Hijumpless Spike Tricky Dash Jump"
},
{
"or": [
{
"spikeHits": 1
},
{
"and": [
{
"enemyDamage": {
"enemy": "Ripper 2 (green)",
"type": "contact",
"hits": 1
}
},
"canHorizontalDamageBoost",
"canInsaneJump",
{
"heatFrames": 25
}
]
}
]
},
"canUseIFrames",
"canTrickyDashJump",
"canPreciseWallJump",
{
"heatFrames": 260
}
],
"flashSuitChecked": true,
"blueSuitChecked": true,
"failures": [
{
"name": "Crumble Fall",
"leadsToNode": 5,
"note": "Falls down into node 5 with no possiblity of quick crumble escape."
}
],
"note": [
"Position Samus into the bottom right corner, using i-frames to run and jump from the crumble blocks,",
"and then wall jump to make it onto the ledge.",
"If using a spike hit to gain i-frames, be sure to be holding forward (left) when landing, in order to get pushed back into the corner.",
"If using the Ripper to gain i-frames, perform a damage boost from a relatively low position,",
"in order to land quickly enough to reach the crumble blocks before i-frames run out."
],
"detailNote": [
"The extra run speed values that work are $2.0, $2.1, $3.0, and $3.1.",
"Values of $2.0 and $3.0 give a lower jump that is only barely high enough, requiring a very precise wall jump to get up.",
"Run speeds $3.0 and $3.1 correspond to jumping as Samus reaches the end of the crumble blocks.",
"Run speeds $2.0 and $2.1 correspond to jumping a little more than a tile before reaching the crumble blocks.",
"With the damage boost method, the Ripper will normally be blocking the path if jumping at speed $2.0 or $2.1;",
"whereas jumping at the end of the crumble blocks (at speeds $3.0 and $3.1) will always works."
]
},
{
"id": 58,
"link": [
3,
4
],
"name": "X-Mode Shinespark",
"requires": [
"h_spikeXModeShinecharge",
"canTrickyJump",
{
"heatFrames": 400
},
{
"shinespark": {
"frames": 12,
"excessFrames": 4
}
}
],
"flashSuitChecked": true,
"blueSuitChecked": true,
"note": "A short hop from the door can bounce on the crumbles. Just be careful of being pushed back onto the crumble blocks by the spikes.",
"devNote": "Two spike hits are expected per attempt (with any additional leniency hits being multiplied by this amount)."
},
{
"id": 59,
"link": [
3,
4
],
"name": "HiJumpless Wall Jump",
"requires": [
"canDash",
{
"notable": "HiJumpless Wall Jump"
},
"h_heatProof",
"canInsaneWallJump",
"canHorizontalDamageBoost",
{
"or": [
"canUseIFrames",
"canCrumbleJump"
]
},
{
"enemyDamage": {
"enemy": "Ripper 2 (green)",
"type": "contact",
"hits": 1
}
}
],
"flashSuitChecked": true,
"blueSuitChecked": true,
"note": [
"Jump into the spike pit, hitting the Ripper to avoid spike damage.",
"Climb the left wall while avoiding falling onto the spikes or through the crumble blocks. The ledge is the same size of that in writg."
],
"devNote": [
"FIXME: a blue suit version of this could be possible, but would probably need to take spike hits."
]
},
{
"id": 85,
"link": [
3,
4
],
"name": "Ceiling Bomb Jump Over Spikes",
"requires": [
"h_heatProof",
"canCeilingBombJump",
"canResetFallSpeed"
],
"flashSuitChecked": true,
"blueSuitChecked": true,
"note": [
"Samus can ceiling bomb jump up gentle slopes.",
"Going down gentle slopes is also possible but harder, instead an unmorph to reset fall speed is recommended here."
]
},
{
"id": 123,
"link": [
3,
4
],
"name": "G-Mode",
"entranceCondition": {
"comeInWithGMode": {
"mode": "any",
"morphed": false
}
},
"requires": [
{
"or": [
"SpaceJump",
{
"and": [
"canStaggeredIBJ",
"canDoubleBombJump",
"canBombHorizontally"
]
},
{
"and": [
"canDash",
{
"or": [
"canTrickySpringBallJump",
"canInsaneWallJump",
{
"and": [
"HiJump",
"canWallJump"
]
},
{
"and": [
"HiJump",
"canSpeedyJump"
]
},
"h_IBJFromSpikes"
]
}
]
},
{
"and": [
"canPreciseGrapple",
{
"or": [
"canDash",
"canUseEnemies",
"canInsaneJump"
]
}
]
}
]
},
{
"heatFrames": 0
}
],
"flashSuitChecked": true,
"blueSuitChecked": true,
"note": [
"Jump onto the crumble blocks to make them solid, then use them as a platform to cross the room.",
"With Grapple, a running jump then single Grapple swing can be used before PLMs are overloaded, alternatively jump on the crumble blocks and Grapple the Ripper."
],
"devNote": [
"FIXME: some more of these options may be possible with a blue suit, with greater difficulty."
]
},
{
"id": 124,
"link": [
3,
4
],
"name": "G-Mode, Kill the Ripper then IBJ",
"entranceCondition": {
"comeInWithGMode": {
"mode": "any",
"morphed": false
}
},
"requires": [
{
"or": [
{
"and": [
"ScrewAttack",
{
"noBlueSuit": {}
}
]
},
"h_usePowerBomb",
{
"ammo": {
"type": "Missile",
"count": 2
}
},
{
"ammo": {
"type": "Super",
"count": 1
}
}
]
},
"canIBJ",
"canBombHorizontally",
{
"heatFrames": 0
}
],
"flashSuitChecked": true,
"blueSuitChecked": true,
"note": "Jump onto the crumble blocks to make them solid, then use them as a platform to cross the room."
},
{
"id": 125,
"link": [
3,
4
],
"name": "G-Mode Morph",
"entranceCondition": {
"comeInWithGMode": {
"mode": "any",
"morphed": true
}
},
"requires": [
{
"or": [
"h_artificialMorphCeilingBombJump",
{
"and": [
"h_artificialMorphBombHorizontally",
"h_artificialMorphIBJ",
"h_artificialMorphPowerBomb"
]
},
{
"and": [
"h_artificialMorphBombHorizontally",
"canTrickyDodgeEnemies",
"h_artificialMorphDoubleBombJump",
"h_artificialMorphStaggeredIBJ"
]
}
]
},
{
"heatFrames": 0
}
],
"flashSuitChecked": true,
"blueSuitChecked": true,
"note": "Bomb horizontally on room entry to jump over the Ripper and land on the crumble blocks, or use a Power Bomb to kill the Ripper."
},
{
"id": 139,
"link": [
3,
4
],
"name": "G-Mode, Open Gate",
"entranceCondition": {
"comeInWithGMode": {
"mode": "any",
"morphed": false
}
},
"requires": [
"canComplexGMode",
"h_heatedGMode",
{
"or": [
"SpaceJump",
{
"and": [
"canStaggeredIBJ",
"canDoubleBombJump",
"canBombHorizontally"
]
},
{
"and": [
"canDash",
{
"or": [
"canTrickySpringBallJump",
"canInsaneWallJump",
{
"and": [
"HiJump",
"canWallJump"
]
},
{
"and": [
"HiJump",
"canSpeedyJump"
]
},
"h_IBJFromSpikes"
]
}
]
},
{
"and": [
"canPreciseGrapple",
{
"or": [
"canDash",
"canUseEnemies",
"canInsaneJump"
]
}
]
}
]
},
{
"heatFrames": 35
}
],
"clearsObstacles": [
"A"
],
"flashSuitChecked": true,
"blueSuitChecked": true,
"note": [
"Jump onto the crumble blocks to make them solid, then use them as a platform to cross the room.",
"With Grapple, a running jump then single Grapple swing can be used before PLMs are overloaded, alternatively jump on the crumble blocks and Grapple the Ripper.",
"In indirect G-mode, stand where the gate will spawn and exit G-mode to open the gate.",
"In direct G-mode, overload PLMs by shooting the gate then position Samus a few pixels away from the gate to where upward diagonal shots go through it.",
"Crouch then shoot diagonally and quickly exit G-mode (3-7 frames later) to open the gate on G-mode exit."
],
"devNote": [
"The canComplexGMode is only used here to describe opening the gate in direct G-mode without gate glitching.",
"However, the indirect variant still requires canHeatedGMode or Varia - with Varia, indirect strats can instead be used to go to the top left door and return.",
"FIXME: some more of these options may be possible with a blue suit, with greater difficulty."
]
},
{
"id": 140,
"link": [
3,
4
],
"name": "G-Mode, Kill the Ripper then IBJ, Open Gate",
"entranceCondition": {
"comeInWithGMode": {
"mode": "any",
"morphed": false
}
},
"requires": [
"canComplexGMode",
"h_heatedGMode",
{
"or": [
{
"and": [
"ScrewAttack",
{
"noBlueSuit": {}
}
]
},
"h_usePowerBomb",
{
"ammo": {
"type": "Missile",
"count": 2
}
},
{
"ammo": {
"type": "Super",
"count": 1
}
}
]
},
"canIBJ",
"canBombHorizontally",
{
"heatFrames": 35
}
],
"clearsObstacles": [
"A"
],
"flashSuitChecked": true,
"blueSuitChecked": true,
"note": [
"Jump onto the crumble blocks to make them solid, then use them as a platform to cross the room.",
"In indirect G-mode, stand where the gate will spawn and exit G-mode to open the gate.",
"In direct G-mode, overload PLMs by shooting the gate then position Samus a few pixels away from the gate to where upward diagonal shots go through it.",
"Crouch then shoot diagonally and quickly exit G-mode (3-7 frames later) to open the gate on G-mode exit."
],
"devNote": [
"The canComplexGMode is only used here to describe opening the gate in direct G-mode without gate glitching.",
"However, the indirect variant still requires canHeatedGMode or Varia - with Varia, indirect strats can instead be used to go to the top left door and return."
]
},
{
"id": 141,
"link": [
3,
4
],
"name": "G-Mode Morph, Open Gate",
"entranceCondition": {
"comeInWithGMode": {
"mode": "any",
"morphed": true
}
},
"requires": [
"canComplexGMode",
"h_heatedGMode",
{
"or": [
"h_artificialMorphCeilingBombJump",
{
"and": [
"h_artificialMorphBombHorizontally",
"h_artificialMorphIBJ",
"h_artificialMorphPowerBomb"
]
},
{
"and": [
"h_artificialMorphBombHorizontally",
"canTrickyDodgeEnemies",
"h_artificialMorphDoubleBombJump",
"h_artificialMorphStaggeredIBJ"
]
}
]
},
{
"heatFrames": 35
}
],
"clearsObstacles": [
"A"
],
"flashSuitChecked": true,
"blueSuitChecked": true,
"note": [
"Bomb horizontally on room entry to jump over the Ripper and land on the crumble blocks, or use a Power Bomb to kill the Ripper.",
"In indirect G-mode, stand where the gate will spawn and exit G-mode to open the gate.",
"In direct G-mode, overload PLMs by shooting the gate then position Samus a few pixels away from the gate to where upward diagonal shots go through it.",
"Crouch then shoot diagonally and quickly exit G-mode (3-7 frames later) to open the gate on G-mode exit."
],
"devNote": [
"Artificial morph strats can be useful, for instance, in indirect G-mode without heat protection, where Samus needs to collect the item.",
"The canComplexGMode is only used here to describe opening the gate in direct G-mode without gate glitching.",
"However, the indirect variant still requires canHeatedGMode or Varia - with Varia, indirect strats can instead be used to go to the top left door and return."
]
},
{
"id": 60,
"link": [
3,
5
],
"name": "Base",
"requires": [
{
"heatFrames": 180
},
{
"or": [
"canDash",
{
"heatFrames": 100
}
]
},
{
"or": [
{
"spikeHits": 1
},
{
"and": [
"canTrickyJump",
{
"or": [
"canDash",
{
"disableEquipment": "HiJump"
}
]
}
]
},
"canInsaneJump"
]
}
],
"flashSuitChecked": true,
"blueSuitChecked": true
},
{
"id": 126,
"link": [
3,
6
],
"name": "Direct G-Mode, Prepared Remote Acquire",
"entranceCondition": {
"comeInWithGMode": {
"mode": "direct",
"morphed": false
}
},
"requires": [
"canRemoteAcquire",
{
"or": [
"SpaceJump",
"canCeilingBombJump",
{
"and": [
"canBombHorizontally",
"canIBJ",
"h_usePowerBomb"
]
},
{
"and": [
"canStaggeredIBJ",
"canDoubleBombJump",
"canBombHorizontally"
]
},
{
"and": [
"canPreciseGrapple",
"canUseEnemies"
]
},
{
"and": [
"canDash",
{
"or": [
"canTrickySpringBallJump",
"canInsaneWallJump",
{
"and": [
"HiJump",
"canWallJump"
]
},
{
"and": [
"HiJump",
"canSpeedyJump"
]
},
"h_IBJFromSpikes"
]
}
]
}
]
},
{
"heatFrames": 0
}
],
"flashSuitChecked": true,
"blueSuitChecked": true,
"note": [
"Jump onto the crumble blocks to make them solid, then use them as a platform to get to the item.",
"With Grapple, a running jump then single Grapple swing can be used before PLMs are overloaded, alternatively jump on the crumble blocks and Grapple the Ripper.",
"Avoid touching all 6 crumbles, so Samus can use the item to overload PLMs and go through one of the crumbles to get to the left side of the room.",
"If the item has already been obtained, Samus can shoot the gate many times to overload PLMs."
]
},
{
"id": 127,
"link": [
3,
6
],
"name": "Direct G-Mode, Kill the Ripper then IBJ, Prepared Remote Acquire",
"entranceCondition": {
"comeInWithGMode": {
"mode": "direct",
"morphed": false
}
},
"requires": [
"canRemoteAcquire",
{
"or": [
{
"and": [
"ScrewAttack",
{
"noBlueSuit": {}
}
]
},
"h_usePowerBomb",
{
"ammo": {
"type": "Missile",
"count": 2
}
},
{
"ammo": {
"type": "Super",
"count": 1
}
}
]
},
"canIBJ",
"canBombHorizontally",
{
"heatFrames": 0
}
],
"flashSuitChecked": true,
"blueSuitChecked": true,
"note": [
"Jump onto the crumble blocks to make them solid, then use them as a platform to get to the item.",
"Avoid touching all 6 crumbles, so Samus can use the item to overload PLMs and go through one of the crumbles to get to the left side of the room.",
"If the item has already been obtained, Samus can shoot the gate many times to overload PLMs."
]
},
{
"id": 128,
"link": [
3,
6
],
"name": "Direct G-Mode Morph, Prepared Remote Acquire",
"entranceCondition": {
"comeInWithGMode": {
"mode": "direct",
"morphed": true
}
},
"requires": [
"canRemoteAcquire",
{
"or": [
"h_artificialMorphCeilingBombJump",
{
"and": [
"h_artificialMorphBombHorizontally",
"h_artificialMorphIBJ",
"h_artificialMorphPowerBomb"
]
},
{
"and": [
"h_artificialMorphBombHorizontally",
"canTrickyDodgeEnemies",
"h_artificialMorphDoubleBombJump",
"h_artificialMorphStaggeredIBJ"
]
}
]
},
{
"heatFrames": 0
}
],
"flashSuitChecked": true,
"blueSuitChecked": true,
"note": [
"Bomb horizontally on room entry to jump over the Ripper and land on the crumble blocks, or use a Power Bomb to kill the Ripper.",
"Avoid touching all 6 crumbles, so Samus can use the item to overload PLMs and go through one of the crumbles to get to the left side of the room.",
"If the item has already been obtained, Samus can shoot or Bomb the gate many times to overload PLMs."
],
"devNote": "This is only useful if the item is Morph, because with Morph, another strat would have been used."
},
{
"id": 129,
"link": [
3,
7
],
"name": "Indirect G-Mode, Despawn the Gate",
"entranceCondition": {
"comeInWithGMode": {
"mode": "indirect",
"morphed": false
}
},
"requires": [
"Morph",
{
"or": [
"SpaceJump",
"canCeilingBombJump",
{
"and": [
"canStaggeredIBJ",
"canDoubleBombJump",
"canBombHorizontally"
]
},
{
"and": [
"canBombHorizontally",
"canIBJ",
"h_usePowerBomb"
]
},
{
"and": [
"canDash",
{
"or": [
"canTrickySpringBallJump",
"canInsaneWallJump",
{
"and": [
"HiJump",
"canWallJump"
]
},
{
"and": [
"HiJump",
"canSpeedyJump"
]
},
"h_IBJFromSpikes"
]
}
]
},
{
"and": [
"canPreciseGrapple",
{
"or": [
"canDash",
"canUseEnemies",
"canInsaneJump"
]
}
]
}
]
},
{
"heatFrames": 0
}
],
"flashSuitChecked": true,
"blueSuitChecked": true,
"note": [
"Jump onto the crumble blocks to make them solid, then use them as a platform to cross the room.",
"With Grapple, a running jump then single Grapple swing can be used before PLMs are overloaded, alternatively jump on the crumble blocks and Grapple the Ripper."
],
"devNote": "With Grapple, Morph isn't needed, but there's no reason to go there without Morph."
},
{
"id": 130,
"link": [
3,
7
],
"name": "Indirect G-Mode, Despawn the Gate, Kill the Ripper then IBJ",
"entranceCondition": {
"comeInWithGMode": {
"mode": "indirect",
"morphed": false
}
},
"requires": [
{
"or": [
{
"and": [
"ScrewAttack",
{
"noBlueSuit": {}
}
]
},
"h_usePowerBomb",
{
"ammo": {
"type": "Missile",
"count": 2
}
},
{
"ammo": {
"type": "Super",
"count": 1
}
}
]
},
"canIBJ",
"canBombHorizontally",
{
"heatFrames": 0
}
],
"flashSuitChecked": true,
"blueSuitChecked": true,
"note": "Jump onto the crumble blocks to make them solid, then use them as a platform to cross the room."
},
{
"id": 61,
"link": [
4,
1
],
"name": "Base",
"requires": [
{
"heatFrames": 215
},
{
"or": [
{
"and": [
"Wave",
{
"heatFrames": 35
}
]
},
{
"obstaclesCleared": [
"A"
]
}
]
},
{
"or": [
"canDash",
{
"heatFrames": 85
}
]
}
],
"clearsObstacles": [
"A"
],
"flashSuitChecked": true,
"blueSuitChecked": true
},
{
"id": 62,
"link": [
4,
1
],
"name": "Gate Glitch",
"requires": [
{
"heatFrames": 250
},
"h_heatedBlueGateGlitch",
{
"or": [
"canDash",
{
"heatFrames": 85
}
]
}
],
"clearsObstacles": [
"A"
],
"flashSuitChecked": true,
"blueSuitChecked": true
},
{
"id": 159,
"link": [
4,
1
],
"name": "Leave With Mockball (Space Jump)",
"requires": [
{
"obstaclesCleared": [
"A"
]
},
"h_heatedRemoteRunwaySpaceJump",
{
"heatFrames": 215
}
],
"exitCondition": {
"leaveWithMockball": {
"remoteRunway": {
"length": 12,
"openEnd": 1
},
"landingRunway": {
"length": 6,
"openEnd": 1
},
"minExtraRunSpeed": "$2.0"
}
},
"unlocksDoors": [
{
"types": [
"super"
],
"requires": []
},
{
"types": [
"missiles",
"powerbomb"
],
"requires": [
"never"
]
}
],
"flashSuitChecked": true,
"blueSuitChecked": true
},
{
"id": 160,
"link": [
4,
1
],
"name": "Leave With Spring Ball Bounce",
"requires": [
"h_heatedRemoteRunwaySpaceJump",
{
"heatFrames": 215
}
],
"exitCondition": {
"leaveWithSpringBallBounce": {
"remoteRunway": {
"length": 11,
"openEnd": 1
},
"landingRunway": {
"length": 6,
"openEnd": 1
},
"minExtraRunSpeed": "$2.0",
"movementType": "uncontrolled"
}
},
"unlocksDoors": [
{
"types": [
"super"
],
"requires": []
},
{
"types": [
"missiles",
"powerbomb"
],
"requires": [
"never"
]
}
],
"flashSuitChecked": true,
"blueSuitChecked": true
},
{
"id": 161,
"link": [
4,
2
],
"name": "Base",
"requires": [
{
"heatFrames": 155
},
{
"or": [
{
"and": [
"Wave",
{
"heatFrames": 60
}
]
},
{
"obstaclesCleared": [
"A"
]
}
]
},
{
"or": [
"canDash",
{
"heatFrames": 100
}
]
}
],
"clearsObstacles": [
"A"
],
"flashSuitChecked": true,
"blueSuitChecked": true
},
{
"id": 63,
"link": [
4,
3
],
"name": "Walljump",
"requires": [
"canDash",
"canWallJump",
{
"heatFrames": 225
}
],
"collectsItems": [
4
],
"flashSuitChecked": true,
"blueSuitChecked": true
},
{
"id": 178,
"link": [
4,
3
],
"name": "Blue Suit Spike Spin Jump Wall Jump",
"requires": [
"canCrumbleJump",
"canBlueSuitSpikeJump",
{
"spikeHits": 1
},
"canWallJump",
{
"heatFrames": 420
}
],
"flashSuitChecked": true,
"blueSuitChecked": true
},
{
"id": 64,
"link": [
4,
3
],
"name": "Grapple",
"requires": [
"Grapple",
{
"heatFrames": 165
},
{
"or": [
{
"noFlashSuit": {}
},
{
"and": [
"canMidAirMorph",
{
"heatFrames": 20
}
]
},
{
"heatFrames": 90
}
]
},
{
"or": [
"canDash",
{
"heatFrames": 20
}
]
}
],
"flashSuitChecked": true,
"blueSuitChecked": true
},
{
"id": 65,
"link": [
4,
3
],
"name": "Space Jump",
"requires": [
"SpaceJump",
{
"heatFrames": 160
},
{
"or": [
"canDash",
{
"heatFrames": 140
}
]
}
],
"flashSuitChecked": true,
"blueSuitChecked": true
},
{
"id": 66,
"link": [
4,
3
],
"name": "Wall Jump Leave with Runway",
"requires": [
"canDash",
"canWallJump",
{
"heatFrames": 205
}
],
"exitCondition": {
"leaveWithRunway": {
"length": 6,
"openEnd": 1
}
},
"unlocksDoors": [
{
"types": [
"missiles"
],
"requires": [
{
"heatFrames": 50
}
]
},
{
"types": [
"super"
],
"requires": []
},
{
"types": [
"powerbomb"
],
"requires": [
{
"heatFrames": 110
}
]
}
],
"collectsItems": [
4
],
"flashSuitChecked": true,
"blueSuitChecked": true
},
{
"id": 67,
"link": [
4,
3
],
"name": "Grapple Leave with Runway",
"requires": [
"canDash",
"Grapple",
{
"heatFrames": 145
},
{
"or": [
{
"noFlashSuit": {}
},
{
"and": [
"canMidAirMorph",
{
"heatFrames": 20
}
]
},
{
"heatFrames": 90
}
]
}
],
"exitCondition": {
"leaveWithRunway": {
"length": 6,
"openEnd": 1
}
},
"unlocksDoors": [
{
"types": [
"missiles"
],
"requires": [
{
"heatFrames": 50
}
]
},
{
"types": [
"super"
],
"requires": []
},
{
"types": [
"powerbomb"
],
"requires": [
{
"heatFrames": 110
}
]
}
],
"flashSuitChecked": true,
"blueSuitChecked": true
},
{
"id": 68,
"link": [
4,
3
],
"name": "Space Jump Leave with Runway",
"requires": [
"canDash",
"SpaceJump",
{
"heatFrames": 140
}
],
"exitCondition": {
"leaveWithRunway": {
"length": 6,
"openEnd": 1
}
},
"unlocksDoors": [
{
"types": [
"missiles"
],
"requires": [
{
"heatFrames": 50
}
]
},
{
"types": [
"super"
],
"requires": []
},
{
"types": [
"powerbomb"
],
"requires": [
{
"heatFrames": 110
}
]
}
],
"flashSuitChecked": true,
"blueSuitChecked": true
},
{
"id": 69,
"link": [
4,
3
],
"name": "Spike IBJ",
"requires": [
"canDash",
"h_heatedIBJFromSpikes",
{
"or": [
{
"heatFrames": 730
},
{
"and": [
"canDoubleBombJump",
{
"heatFrames": 550
}
]
}
]
}
],
"flashSuitChecked": true,
"blueSuitChecked": true,
"devNote": [
"FIXME: A crumble jump into IBJ is also possible."
]
},
{
"id": 70,
"link": [
4,
3
],
"name": "Spring Ball Jump (Spike or Ripper I-Frames)",
"requires": [
"canDash",
"canUseIFrames",
{
"or": [
{
"spikeHits": 1
},
{
"and": [
"canTrickyJump",
{
"enemyDamage": {
"enemy": "Ripper 2 (green)",
"type": "contact",
"hits": 1
}
},
{
"heatFrames": 10
}
]
}
]
},
"canSpringBallJumpMidAir",
{
"heatFrames": 260
}
],
"flashSuitChecked": true,
"blueSuitChecked": true
},
{
"id": 162,
"link": [
4,
3
],
"name": "Speed Jump Spring Fling",
"requires": [
"h_speedJump",
"canMomentumConservingMorph",
"canSpringFling",
{
"heatFrames": 190
}
],
"flashSuitChecked": true,
"blueSuitChecked": true
},
{
"id": 163,
"link": [
4,
3
],
"name": "Crumble Jump Spring Fling",
"requires": [
"canCrumbleJump",
"canTrickySpringBallJump",
"canSpringFling",
"canInsaneJump",
"h_trickyToCarryFlashSuit",
{
"heatFrames": 280
},
{
"or": [
"canDash",
{
"heatFrames": 80
}
]
}
],
"flashSuitChecked": true,
"blueSuitChecked": true,
"note": [
"Pause while crumble jumping, and quickly mid-air morph and equip Spring Ball,",
"to obtain a boost in horizontal speed before mid-air Spring Ball jumping."
],
"devNote": [
"Compared to the other direction, this direction requires traveling one more tile horizontally,",
"which makes it more difficult."
]
},
{
"id": 71,
"link": [
4,
3
],
"name": "HiJump, Speedy Jump from the Spikes",
"requires": [
"canUseIFrames",
{
"or": [
{
"spikeHits": 1
},
{
"and": [
"canTrickyJump",
{
"enemyDamage": {
"enemy": "Ripper 2 (green)",
"type": "contact",
"hits": 1
}
}
]
}
]
},
"HiJump",
"canSpeedyJump",
{
"heatFrames": 250
}
],
"collectsItems": [
4
],
"flashSuitChecked": true,
"blueSuitChecked": true
},
{
"id": 72,
"link": [
4,
3
],
"name": "X-Mode Shinespark",
"requires": [
"h_spikeXModeShinecharge",
"canTrickyJump",
"canUseIFrames",
{
"heatFrames": 480
},
{
"shinespark": {
"frames": 11,
"excessFrames": 4
}
}
],
"flashSuitChecked": true,
"blueSuitChecked": true,
"note": "A short hop from the ledge can bounce on the crumbles and into the spikes. Just be careful of being pushed back onto the crumble blocks by the spikes.",
"devNote": "Two spike hits are expected per attempt (with any additional leniency hits being multiplied by this amount)."
},
{
"id": 86,
"link": [
4,
3
],
"name": "Ceiling Bomb Jump Over Spikes",
"requires": [
"h_heatProof",
"canCeilingBombJump",
"canResetFallSpeed"
],
"flashSuitChecked": true,
"blueSuitChecked": true,
"note": [
"Samus can ceiling bomb jump up gentle slopes.",
"Going down gentle slopes is also possible but harder, instead an unmorph to reset fall speed is recommended here."
]
},
{
"id": 164,
"link": [
4,
3
],
"name": "Leave With Mockball (Space Jump)",
"requires": [
"h_heatedRemoteRunwaySpaceJump",
{
"heatFrames": 185
}
],
"exitCondition": {
"leaveWithMockball": {
"remoteRunway": {
"length": 11,
"openEnd": 1
},
"landingRunway": {
"length": 6,
"openEnd": 1
},
"minExtraRunSpeed": "$2.0"
}
},
"unlocksDoors": [
{
"types": [
"super"
],
"requires": []
},
{
"types": [
"missiles",
"powerbomb"
],
"requires": [
"never"
]
}
],
"flashSuitChecked": true,
"blueSuitChecked": true
},
{
"id": 165,
"link": [
4,
3
],
"name": "Leave With Spring Ball Bounce",
"requires": [
"h_heatedRemoteRunwaySpaceJump",
{
"heatFrames": 185
}
],
"exitCondition": {
"leaveWithSpringBallBounce": {
"remoteRunway": {
"length": 11,
"openEnd": 1
},
"landingRunway": {
"length": 6,
"openEnd": 1
},
"minExtraRunSpeed": "$2.0",
"movementType": "uncontrolled"
}
},
"unlocksDoors": [
{
"types": [
"super"
],
"requires": []
},
{
"types": [
"missiles",
"powerbomb"
],
"requires": [
"never"
]
}
],
"flashSuitChecked": true,
"blueSuitChecked": true
},
{
"id": 73,
"link": [
4,
4
],
"name": "Crystal Flash",
"requires": [
"h_heatedCrystalFlash"
],
"flashSuitChecked": true,
"blueSuitChecked": true
},
{
"id": 74,
"link": [
4,
5
],
"name": "Base",
"requires": [
{
"heatFrames": 135
},
{
"or": [
"canDash",
{
"heatFrames": 20
}
]
},
{
"or": [
"canCarefulJump",
{
"spikeHits": 1
}
]
}
],
"flashSuitChecked": true,
"blueSuitChecked": true
},
{
"id": 75,
"link": [
5,
2
],
"name": "Base",
"requires": [
"Morph",
{
"heatFrames": 170
},
{
"or": [
"canDash",
{
"heatFrames": 45
}
]
}
],
"flashSuitChecked": true,
"blueSuitChecked": true
},
{
"id": 76,
"link": [
5,
3
],
"name": "Crystal Flash Clip",
"requires": [
"h_heatProof",
"h_jumpIntoCrystalFlashClip",
"Grapple"
],
"flashSuitChecked": true,
"blueSuitChecked": true,
"note": [
"Jump from below the respawning shot block into a Crystal Flash.",
"Use Grappling Beam as the Crystal Flash finishes to be placed next to the door.",
"Do not aim down as the Crystal Flash finishes."
]
},
{
"id": 77,
"link": [
5,
5
],
"name": "Kago Farm",
"requires": [
"h_heatProof",
"Morph",
{
"or": [
{
"and": [
{
"resetRoom": {
"nodes": [
1
]
}
},
{
"or": [
{
"and": [
"SpaceJump",
{
"cycleFrames": 1060
}
]
},
{
"and": [
"HiJump",
"canSpeedyJump",
{
"cycleFrames": 940
}
]
}
]
}
]
},
{
"and": [
{
"resetRoom": {
"nodes": [
2
]
}
},
{
"cycleFrames": 830
}
]
},
{
"and": [
{
"resetRoom": {
"nodes": [
3
]
}
},
{
"or": [
{
"and": [
"SpaceJump",
{
"cycleFrames": 1160
}
]
},
{
"and": [
"HiJump",
"canSpeedyJump",
{
"or": [
"Grapple",
"canWallJump"
]
},
{
"cycleFrames": 1190
}
]
}
]
}
]
}
]
},
{
"or": [
"canDash",
{
"cycleFrames": 120
}
]
}
],
"resetsObstacles": [
"A",
"R-Mode"
],
"farmCycleDrops": [
{
"enemy": "Kago",
"count": 1
}
],
"flashSuitChecked": true,
"blueSuitChecked": true,
"devNote": "FIXME: There are more possible item combinations."
},
{
"id": 78,
"link": [
5,
5
],
"name": "Crystal Flash",
"requires": [
"h_heatedCrystalFlash"
],
"flashSuitChecked": true,
"blueSuitChecked": true
},
{
"id": 131,
"link": [
6,
1
],
"name": "Direct G-Mode, Remote Acquire Item",
"requires": [
"canRemoteAcquire",
"Morph",
{
"or": [
"SpaceJump",
"canSpringBallJumpMidAir",
"canWallJump",
{
"and": [
"HiJump",
"canSpeedyJump"
]
},
"canIBJ",
"canTrickyDashJump",
{
"and": [
{
"canShineCharge": {
"usedTiles": 28,
"gentleUpTiles": 3,
"gentleDownTiles": 3,
"openEnd": 0
}
},
{
"or": [
{
"shinespark": {
"frames": 18,
"excessFrames": 8
}
},
{
"and": [
"canSpeedyJump",
{
"shinespark": {
"frames": 16,
"excessFrames": 10
}
}
]
}
]
}
]
}
]
},
"h_heatedGModeOpenDifferentDoor"
],
"collectsItems": [
4
],
"flashSuitChecked": true,
"blueSuitChecked": true,
"note": "It is possible to climb the left side of the room with SpeedBooster alone, with either a tricky dash jump or a vertical shinespark."
},
{
"id": 132,
"link": [
6,
1
],
"name": "Direct G-Mode, Remote Acquire Item, Kago Farm",
"requires": [
"canComplexGMode",
"canRemoteAcquire",
"Morph",
{
"or": [
"SpaceJump",
"canSpringBallJumpMidAir",
"canWallJump",
{
"and": [
"HiJump",
"canSpeedyJump"
]
},
"canIBJ",
"canTrickyDashJump",
{
"and": [
{
"canShineCharge": {
"usedTiles": 28,
"gentleUpTiles": 3,
"gentleDownTiles": 3,
"openEnd": 0
}
},
{
"or": [
{
"shinespark": {
"frames": 18,
"excessFrames": 8
}
},
{
"and": [
"canSpeedyJump",
{
"shinespark": {
"frames": 16,
"excessFrames": 10
}
}
]
}
]
}
]
}
]
},
"Plasma",
"h_heatedGModePauseAbuse",
"canInsaneJump"
],
"collectsItems": [
4
],
"flashSuitChecked": true,
"blueSuitChecked": true,
"note": [
"With Plasma and a pause abuse, it is possible to kill the Kago and exit G-mode while killing the Kago bugs and make it to the door with a small amount of Energy remaining.",
"Shoot Plasma and quickly exit G-Mode, so that the bugs die immediately. Avoid having spent much time on the left side of the room, as the Fune fireballs will reduce the number of drops obtained.",
"Note that it is possible to climb the left side of the room with SpeedBooster alone, with either a tricky dash jump or a vertical shinespark."
],
"devNote": [
"All of these methods are fast enough to be able to escape after obtaining the drops. The shinespark is longer than 1 frame, but is modeled this way because the drops aren't properly modeled.",
"FIXME: The item that was remote acquired could be Morph, one of the items needed to climb the room, or maybe Plasma."
]
},
{
"id": 133,
"link": [
6,
2
],
"name": "Direct G-Mode, Remote Acquire Item",
"requires": [
"canRemoteAcquire",
"Morph",
"h_heatedGModeOpenDifferentDoor"
],
"collectsItems": [
4
],
"flashSuitChecked": true,
"blueSuitChecked": true
},
{
"id": 134,
"link": [
6,
2
],
"name": "Direct G-Mode, Remote Acquire Item, Kago Farm",
"requires": [
"canComplexGMode",
"canRemoteAcquire",
"Morph",
"Plasma",
"h_heatedGModePauseAbuse"
],
"collectsItems": [
4
],
"flashSuitChecked": true,
"blueSuitChecked": true,
"note": [
"With Plasma and a pause abuse, it is possible to kill the Kago and exit G-mode while killing the Kago bugs and make it to the door with a small amount of Energy remaining.",
"Shoot Plasma and quickly exit G-Mode, so that the bugs die immediately. Avoid having spent much time on the left side of the room, as the Fune fireballs will reduce the number of drops obtained."
],
"devNote": "FIXME: The item that was remote acquired could be Morph or maybe Plasma."
},
{
"id": 135,
"link": [
7,
1
],
"name": "G-Mode",
"requires": [
"Morph",
{
"or": [
"SpaceJump",
"canSpringBallJumpMidAir",
"canWallJump",
{
"and": [
"HiJump",
"canSpeedyJump"
]
},
"canIBJ",
"canTrickyDashJump",
{
"and": [
{
"canShineCharge": {
"usedTiles": 28,
"gentleUpTiles": 3,
"gentleDownTiles": 3,
"openEnd": 0
}
},
{
"or": [
{
"shinespark": {
"frames": 18,
"excessFrames": 8
}
},
{
"and": [
"canSpeedyJump",
{
"shinespark": {
"frames": 16,
"excessFrames": 10
}
}
]
}
]
}
]
}
]
},
"h_heatedGModeOpenDifferentDoor"
],
"flashSuitChecked": true,
"blueSuitChecked": true,
"note": "It is possible to climb the left side of the room with SpeedBooster alone, with either a tricky dash jump or a vertical shinespark."
},
{
"id": 136,
"link": [
7,
1
],
"name": "G-Mode, Kago Farm",
"requires": [
"Morph",
{
"or": [
"SpaceJump",
"canSpringBallJumpMidAir",
"canWallJump",
{
"and": [
"HiJump",
"canSpeedyJump"
]
},
"canTrickyDashJump",
{
"and": [
{
"canShineCharge": {
"usedTiles": 28,
"gentleUpTiles": 3,
"gentleDownTiles": 3,
"openEnd": 0
}
},
{
"or": [
{
"shinespark": {
"frames": 18,
"excessFrames": 8
}
},
{
"and": [
"canSpeedyJump",
{
"shinespark": {
"frames": 16,
"excessFrames": 10
}
}
]
}
]
}
]
}
]
},
"Plasma",
"h_heatedGModePauseAbuse",
"canInsaneJump",
"canDash"
],
"flashSuitChecked": true,
"blueSuitChecked": true,
"note": [
"With Plasma and a pause abuse, it is possible to kill the Kago and exit G-mode while killing the Kago bugs and make it to the door with a small amount of Energy remaining.",
"Shoot Plasma and quickly exit G-Mode, so that the bugs die immediately. Avoid having spent much time on the left side of the room, as the Fune fireballs will reduce the number of drops obtained.",
"Note that it is possible to climb the left side of the room with SpeedBooster alone, with either a tricky dash jump or a vertical shinespark."
],
"devNote": "All of these methods are fast enough to be able to escape after obtaining the drops. The shinespark is longer than 1 frame, but is modeled this way because the drops aren't properly modeled."
},
{
"id": 137,
"link": [
7,
2
],
"name": "G-Mode",
"requires": [
"Morph",
"h_heatedGModeOpenDifferentDoor"
],
"flashSuitChecked": true,
"blueSuitChecked": true
},
{
"id": 138,
"link": [
7,
2
],
"name": "G-Mode, Kago Farm",
"requires": [
"Morph",
"Plasma",
"h_heatedGModePauseAbuse"
],
"flashSuitChecked": true,
"blueSuitChecked": true,
"note": [
"With Plasma and a pause abuse, it is possible to kill the Kago and exit G-mode while killing the Kago bugs and make it to the door with a small amount of Energy remaining.",
"Shoot Plasma and quickly exit G-Mode, so that the bugs die immediately. Avoid having spent much time on the left side of the room, as the Fune fireballs will reduce the number of drops obtained."
]
}
],
"notables": [
{
"id": 1,
"name": "Walljump Climb Using the Kamer",
"note": [
"Wall jump up the left wall and then on the moving platform (Kamer) while avoiding the Fune's fireball.",
"The Kamers will temporarily move down if Samus is below them, so it is best to walk under the first Kamer before climbing the wall.",
"It is possible to freeze or kill the Fune with a Super or Power Bomb to make things easier."
]
},
{
"id": 3,
"name": "Hijumpless Spike Tricky Dash Jump",
"note": [
"Position Samus into the bottom right corner, using invulnerability frames run then jump while on the crumble blocks.",
"It is possible to use a damage boost on the Ripper to save energy and position Samus into the corner."
]
},
{
"id": 4,
"name": "HiJumpless Wall Jump",
"note": [
"Jump into the spike pit, hitting the Ripper to avoid spike damage.",
"Climb the left wall while avoiding falling onto the spikes or through the crumble blocks. The ledge is the same size of that in writg."
]
}
],
"nextStratId": 184,
"nextNotableId": 5,
"devNote": [
"FIXME: Heat frames could be tightened by adding 5->1 strats:",
"More 5->2 strats could also be added, e.g. Leave Shinecharged or Leave With Temporary Blue;",
"FIXME: It's possible to use a crumble jump to carry temp blue out through node 3.",
"FIXME: Add stored spark strats."
]
}