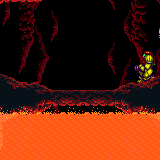
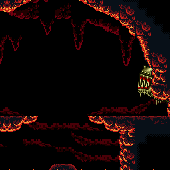
Volcano Room
Room ID: 116
|
Exit condition: {
"leaveWithRunway": {
"length": 8,
"openEnd": 1,
"heated": false
}
}Unlocks doors: {"types":["ammo"],"requires":[]} |
|
Entrance condition: {
"comeInNormally": {}
}Requires: {
"resetRoom": {
"nodes": [
1
]
}
}
"h_CrystalFlash"Dev note: The comeInNormally entrance condition ensures that there is no heat. |
From: 1
Top Left Door
To: 1
Top Left Door
Entrance condition: {
"comeInShinecharging": {
"length": 7,
"openEnd": 0
},
"comesInHeated": "no"
}Requires: "h_CrystalSpark" |
|
Requires: "Gravity"
"Morph"
{
"or": [
{
"and": [
"canMockball",
{
"disableEquipment": "SpeedBooster"
},
"canTrickyJump",
{
"lavaFrames": 80
}
]
},
{
"lavaFrames": 100
}
]
}
{
"or": [
{
"lavaFrames": 140
},
{
"and": [
"canDash",
{
"disableEquipment": "SpeedBooster"
},
{
"lavaFrames": 110
}
]
},
{
"and": [
"SpaceJump",
{
"lavaFrames": 40
}
]
}
]
}Exit condition: {
"leaveNormally": {}
}Unlocks doors: {"types":["missiles"],"requires":[{"lavaFrames":80}]}
{"types":["super"],"requires":[]}
{"types":["powerbomb"],"requires":[{"lavaFrames":60}]}Dev note: FIXME: A leaveWithRunway variation could be added, but it would require Speed Booster to be disabled, which would need new schema support in order to properly match entrance conditions in the next room. |
|
Requires: "canSuitlessLavaDive"
"Morph"
{
"or": [
{
"and": [
"canTrickyJump",
{
"disableEquipment": "SpeedBooster"
},
"canMockball",
{
"lavaFrames": 155
}
]
},
{
"lavaFrames": 200
}
]
}
{
"or": [
{
"and": [
"canSpaceJumpWaterBounce",
{
"or": [
{
"and": [
"canPreciseSpaceJump",
{
"lavaFrames": 35
}
]
},
{
"lavaFrames": 60
}
]
}
]
},
{
"lavaFrames": 150
}
]
}Exit condition: {
"leaveNormally": {}
}Unlocks doors: {"types":["missiles"],"requires":[{"lavaFrames":80}]}
{"types":["super"],"requires":[]}
{"types":["powerbomb"],"requires":[{"lavaFrames":150}]} |
From: 1
Top Left Door
To: 2
Bottom Left Door
Requires: "canSuitlessLavaDive"
"canFarmWhileShooting"
{
"enemyKill": {
"enemies": [
[
"Fune",
"Fune"
]
],
"explicitWeapons": [
"PowerBomb"
]
}
}
{
"or": [
{
"and": [
"canTrickyJump",
{
"disableEquipment": "SpeedBooster"
},
"canMockball",
{
"lavaFramesWithEnergyDrops": {
"frames": 120,
"drops": [
{
"enemy": "Fune",
"count": 1
}
]
}
}
]
},
{
"lavaFramesWithEnergyDrops": {
"frames": 165,
"drops": [
{
"enemy": "Fune",
"count": 1
}
]
}
}
]
}
{
"lavaFrames": 35
}
{
"or": [
{
"and": [
"canSpaceJumpWaterBounce",
{
"or": [
{
"and": [
"canPreciseSpaceJump",
{
"lavaFrames": 35
}
]
},
{
"lavaFrames": 60
}
]
}
]
},
{
"lavaFrames": 150
}
]
}Exit condition: {
"leaveNormally": {}
}Unlocks doors: {"types":["missiles"],"requires":[{"lavaFrames":80}]}
{"types":["super"],"requires":[]}
{"types":["powerbomb"],"requires":[{"lavaFrames":150}]}Dev note: FIXME: a Gravity version of this could be added. |
|
Requires: "Morph"
{
"or": [
"canMockball",
{
"and": [
"canDash",
{
"heatFrames": 35
}
]
},
{
"heatFrames": 200
}
]
}
{
"heatFrames": 420
}Exit condition: {
"leaveNormally": {}
}Unlocks doors: {"types":["missiles"],"requires":[{"heatFrames":20}]}
{"types":["super"],"requires":[]}
{"types":["powerbomb"],"requires":[{"heatFrames":60}]} |
|
Requires: "canDash"
"Morph"
{
"or": [
"canMockball",
{
"heatFrames": 35
}
]
}
{
"heatFrames": 380
}Exit condition: {
"leaveWithRunway": {
"length": 8,
"openEnd": 1,
"heated": true
}
}Unlocks doors: {"types":["missiles"],"requires":[{"heatFrames":50}]}
{"types":["super"],"requires":[]}
{"types":["powerbomb"],"requires":[{"heatFrames":60}]} |
|
Requires: "canDash"
"Morph"
"SpaceJump"
{
"or": [
"canMockball",
{
"heatFrames": 35
}
]
}
{
"heatFrames": 405
}Exit condition: {
"leaveNormally": {}
}Unlocks doors: {"types":["missiles"],"requires":[{"heatFrames":20}]}
{"types":["super"],"requires":[]}
{"types":["powerbomb"],"requires":[{"heatFrames":60}]} |
|
Entrance condition: {
"comeInRunning": {
"speedBooster": "any",
"minTiles": 2
}
}Requires: "Morph"
"SpaceJump"
"canMockball"
{
"heatFrames": 390
}Exit condition: {
"leaveNormally": {}
}Unlocks doors: {"types":["missiles"],"requires":[{"heatFrames":20}]}
{"types":["super"],"requires":[]}
{"types":["powerbomb"],"requires":[{"heatFrames":60}]} |
|


Requires: {
"heatFrames": 180
}
"h_heatedCrystalFlash"
{
"heatFrames": 250
}Dev note: FIXME: by adding a junction here, we could account for more ways of entering the room; but a junction would complicate how the heated/unheated state of the room is tracked. A dashless variant could also be included. |
From: 2
Bottom Left Door
To: 1
Top Left Door
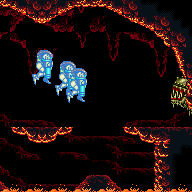
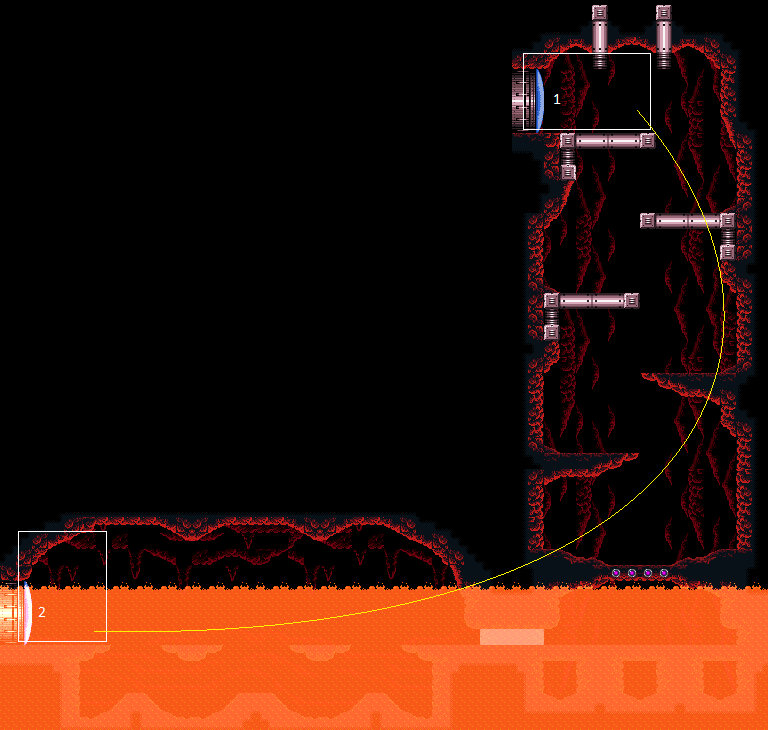
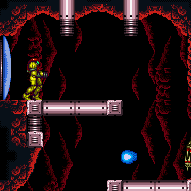
Move quickly (when X-Ray is not active) to climb the shaft before the Fune fireballs would reach Samus. Entrance condition: {
"comeInGettingBlueSpeed": {
"length": 4,
"openEnd": 1,
"minExtraRunSpeed": "$4.7"
}
}Requires: "canLongChainTemporaryBlue"
"canXRayTurnaround"
{
"heatFrames": 760
}Exit condition: {
"leaveWithTemporaryBlue": {}
}Unlocks doors: {"types":["super","powerbomb"],"requires":[]}
{"types":["missiles"],"requires":[{"heatFrames":50}]}Dev note: The last runway tile is considered unusable, as Samus is likely to clip down through it. |
From: 2
Bottom Left Door
To: 1
Top Left Door
Move quickly (when X-Ray is not active) to climb the shaft before the Fune fireballs would reach Samus. Entrance condition: {
"comeInGettingBlueSpeed": {
"length": 5,
"openEnd": 1
}
}Requires: "canTrickySpringBallBounce"
"canLongChainTemporaryBlue"
"canXRayTurnaround"
{
"heatFrames": 1020
}Exit condition: {
"leaveWithTemporaryBlue": {}
}Unlocks doors: {"types":["super","powerbomb"],"requires":[]}
{"types":["missiles"],"requires":[{"heatFrames":50}]} |
|

Enter the morph tunnel then exit G-mode. Shooting the shot block off screen can be done by jumping and shooting up or with Grapple or a Power Bomb. Getting positioned under the shot block can be done by walking into the camera scroll block and then walking against the right wall, jump to the left and walk a little more (about one more tile). This will also give some visibility of Samus. Without heat damage, it is recommended to jump up past the shot block and wait for it to respawn; with the block intact, Samus can't accidentally touch the lava. Entrance condition: {
"comeInWithGMode": {
"mode": "any",
"morphed": true
}
}Requires: "h_heatedGMode"
"canComplexGMode"
"canOffScreenMovement"
{
"or": [
"h_artificialMorphMovement",
{
"ammo": {
"type": "PowerBomb",
"count": 3
}
}
]
}
{
"or": [
"canInsaneJump",
{
"and": [
"canTrickyJump",
"h_heatProof"
]
},
{
"and": [
"h_heatProof",
"h_lavaProof",
{
"or": [
"Gravity",
"HiJump"
]
}
]
}
]
}
{
"heatFrames": 1000
}
{
"or": [
"canTrickyGMode",
{
"heatFrames": 500
}
]
}Exit condition: {
"leaveNormally": {}
}Unlocks doors: {"types":["missiles"],"requires":[{"heatFrames":20}]}
{"types":["super"],"requires":[]}
{"types":["powerbomb"],"requires":[{"heatFrames":60}]}Dev note: These heat frames are not very tight, as the room is difficult to do consistently. |
|
Entrance condition: {
"comeInNormally": {}
}Exit condition: {
"leaveWithRunway": {
"length": 6,
"openEnd": 1,
"heated": true
}
}Unlocks doors: {"types":["ammo"],"requires":[]} |
|
Entrance condition: {
"comeInNormally": {}
}Requires: "h_heatedCrystalFlash" |
From: 2
Bottom Left Door
To: 2
Bottom Left Door
Entrance condition: {
"comeInShinecharging": {
"length": 5,
"openEnd": 0
}
}Requires: "h_heatedCrystalSpark" |
{
"$schema": "../../../schema/m3-room.schema.json",
"id": 116,
"name": "Volcano Room",
"area": "Norfair",
"subarea": "Upper",
"subsubarea": "East",
"roomAddress": "0x7AE32",
"roomEnvironments": [
{
"heated": false,
"entranceNodes": [
1
],
"note": "This room is not heated when entering from the top"
},
{
"heated": true,
"entranceNodes": [
2
],
"note": "This room is only heated when entering from the bottom"
}
],
"mapTileMask": [
[
0,
0,
1
],
[
0,
0,
1
],
[
1,
1,
1
]
],
"nodes": [
{
"id": 1,
"name": "Top Left Door",
"nodeType": "door",
"nodeSubType": "blue",
"nodeAddress": "0x001964e",
"doorOrientation": "left",
"doorEnvironments": [
{
"physics": "air"
}
],
"mapTileMask": [
[
0,
0,
2
],
[
0,
0,
2
],
[
1,
1,
2
]
]
},
{
"id": 2,
"name": "Bottom Left Door",
"nodeType": "door",
"nodeSubType": "blue",
"nodeAddress": "0x001965a",
"doorOrientation": "left",
"doorEnvironments": [
{
"physics": "lava",
"entranceNodes": [
1
],
"note": "There is always lava at this door if entering from node 1"
},
{
"physics": "air",
"entranceNodes": [
2
],
"note": "Lava can eventually rise up to this door entering from node 2, but it's possible to have air physics"
}
],
"mapTileMask": [
[
0,
0,
1
],
[
0,
0,
1
],
[
2,
2,
1
]
]
}
],
"enemies": [
{
"id": "e1",
"groupName": "Volcano Room Top Funes",
"enemyName": "Fune",
"quantity": 5,
"homeNodes": [
1
]
},
{
"id": "e2",
"groupName": "Volcano Room Bottom Fune",
"enemyName": "Fune",
"quantity": 1,
"homeNodes": [
2
]
}
],
"strats": [
{
"link": [
1,
1
],
"name": "Base (Unlock Door)",
"requires": [],
"unlocksDoors": [
{
"types": [
"ammo"
],
"requires": []
}
],
"flashSuitChecked": true,
"blueSuitChecked": true
},
{
"link": [
1,
1
],
"name": "Base (Come In Normally)",
"entranceCondition": {
"comeInNormally": {}
},
"requires": [],
"flashSuitChecked": true,
"blueSuitChecked": true
},
{
"link": [
1,
1
],
"name": "Base (Come In With Mockball)",
"entranceCondition": {
"comeInWithMockball": {
"adjacentMinTiles": 0,
"remoteAndLandingMinTiles": [
[
0,
0
]
],
"speedBooster": "any"
}
},
"requires": [],
"flashSuitChecked": true,
"blueSuitChecked": true
},
{
"link": [
2,
2
],
"name": "Base (Unlock Door)",
"requires": [],
"unlocksDoors": [
{
"types": [
"missiles"
],
"requires": [
{
"heatFrames": 50
}
]
},
{
"types": [
"super"
],
"requires": []
},
{
"types": [
"powerbomb"
],
"requires": [
{
"heatFrames": 110
}
]
}
],
"flashSuitChecked": true,
"blueSuitChecked": true
},
{
"link": [
2,
2
],
"name": "Base (Come In Normally)",
"entranceCondition": {
"comeInNormally": {}
},
"requires": [],
"flashSuitChecked": true,
"blueSuitChecked": true
},
{
"link": [
2,
2
],
"name": "Base (Come In With Mockball)",
"entranceCondition": {
"comeInWithMockball": {
"adjacentMinTiles": 0,
"remoteAndLandingMinTiles": [
[
0,
0
]
],
"speedBooster": "any"
}
},
"requires": [
{
"heatFrames": 10
}
],
"flashSuitChecked": true,
"blueSuitChecked": true
},
{
"id": 1,
"link": [
1,
1
],
"name": "Leave with Runway",
"requires": [],
"exitCondition": {
"leaveWithRunway": {
"length": 8,
"openEnd": 1,
"heated": false
}
},
"unlocksDoors": [
{
"types": [
"ammo"
],
"requires": []
}
],
"flashSuitChecked": true,
"blueSuitChecked": true
},
{
"id": 2,
"link": [
1,
1
],
"name": "Crystal Flash",
"entranceCondition": {
"comeInNormally": {}
},
"requires": [
{
"resetRoom": {
"nodes": [
1
]
}
},
"h_CrystalFlash"
],
"flashSuitChecked": true,
"blueSuitChecked": true,
"devNote": "The comeInNormally entrance condition ensures that there is no heat."
},
{
"id": 16,
"link": [
1,
1
],
"name": "Come in Shinecharging, Crystal Spark",
"entranceCondition": {
"comeInShinecharging": {
"length": 7,
"openEnd": 0
},
"comesInHeated": "no"
},
"requires": [
"h_CrystalSpark"
],
"flashSuitChecked": true,
"blueSuitChecked": true
},
{
"id": 3,
"link": [
1,
2
],
"name": "Base",
"requires": [
"Gravity",
"Morph",
{
"or": [
{
"and": [
"canMockball",
{
"disableEquipment": "SpeedBooster"
},
"canTrickyJump",
{
"lavaFrames": 80
}
]
},
{
"lavaFrames": 100
}
]
},
{
"or": [
{
"lavaFrames": 140
},
{
"and": [
"canDash",
{
"disableEquipment": "SpeedBooster"
},
{
"lavaFrames": 110
}
]
},
{
"and": [
"SpaceJump",
{
"lavaFrames": 40
}
]
}
]
}
],
"exitCondition": {
"leaveNormally": {}
},
"unlocksDoors": [
{
"types": [
"missiles"
],
"requires": [
{
"lavaFrames": 80
}
]
},
{
"types": [
"super"
],
"requires": []
},
{
"types": [
"powerbomb"
],
"requires": [
{
"lavaFrames": 60
}
]
}
],
"flashSuitChecked": true,
"blueSuitChecked": true,
"devNote": [
"FIXME: A leaveWithRunway variation could be added, but it would require Speed Booster to be disabled,",
"which would need new schema support in order to properly match entrance conditions in the next room."
]
},
{
"id": 4,
"link": [
1,
2
],
"name": "Suitless Lava Dive",
"requires": [
"canSuitlessLavaDive",
"Morph",
{
"or": [
{
"and": [
"canTrickyJump",
{
"disableEquipment": "SpeedBooster"
},
"canMockball",
{
"lavaFrames": 155
}
]
},
{
"lavaFrames": 200
}
]
},
{
"or": [
{
"and": [
"canSpaceJumpWaterBounce",
{
"or": [
{
"and": [
"canPreciseSpaceJump",
{
"lavaFrames": 35
}
]
},
{
"lavaFrames": 60
}
]
}
]
},
{
"lavaFrames": 150
}
]
}
],
"exitCondition": {
"leaveNormally": {}
},
"unlocksDoors": [
{
"types": [
"missiles"
],
"requires": [
{
"lavaFrames": 80
}
]
},
{
"types": [
"super"
],
"requires": []
},
{
"types": [
"powerbomb"
],
"requires": [
{
"lavaFrames": 150
}
]
}
],
"flashSuitChecked": true,
"blueSuitChecked": true
},
{
"id": 13,
"link": [
1,
2
],
"name": "Farm Funes and Suitless Lava Dive",
"requires": [
"canSuitlessLavaDive",
"canFarmWhileShooting",
{
"enemyKill": {
"enemies": [
[
"Fune",
"Fune"
]
],
"explicitWeapons": [
"PowerBomb"
]
}
},
{
"or": [
{
"and": [
"canTrickyJump",
{
"disableEquipment": "SpeedBooster"
},
"canMockball",
{
"lavaFramesWithEnergyDrops": {
"frames": 120,
"drops": [
{
"enemy": "Fune",
"count": 1
}
]
}
}
]
},
{
"lavaFramesWithEnergyDrops": {
"frames": 165,
"drops": [
{
"enemy": "Fune",
"count": 1
}
]
}
}
]
},
{
"lavaFrames": 35
},
{
"or": [
{
"and": [
"canSpaceJumpWaterBounce",
{
"or": [
{
"and": [
"canPreciseSpaceJump",
{
"lavaFrames": 35
}
]
},
{
"lavaFrames": 60
}
]
}
]
},
{
"lavaFrames": 150
}
]
}
],
"exitCondition": {
"leaveNormally": {}
},
"unlocksDoors": [
{
"types": [
"missiles"
],
"requires": [
{
"lavaFrames": 80
}
]
},
{
"types": [
"super"
],
"requires": []
},
{
"types": [
"powerbomb"
],
"requires": [
{
"lavaFrames": 150
}
]
}
],
"flashSuitChecked": true,
"blueSuitChecked": true,
"devNote": "FIXME: a Gravity version of this could be added."
},
{
"id": 5,
"link": [
2,
1
],
"name": "Base",
"requires": [
"Morph",
{
"or": [
"canMockball",
{
"and": [
"canDash",
{
"heatFrames": 35
}
]
},
{
"heatFrames": 200
}
]
},
{
"heatFrames": 420
}
],
"exitCondition": {
"leaveNormally": {}
},
"unlocksDoors": [
{
"types": [
"missiles"
],
"requires": [
{
"heatFrames": 20
}
]
},
{
"types": [
"super"
],
"requires": []
},
{
"types": [
"powerbomb"
],
"requires": [
{
"heatFrames": 60
}
]
}
],
"flashSuitChecked": true,
"blueSuitChecked": true
},
{
"id": 6,
"link": [
2,
1
],
"name": "Leave with Runway",
"requires": [
"canDash",
"Morph",
{
"or": [
"canMockball",
{
"heatFrames": 35
}
]
},
{
"heatFrames": 380
}
],
"exitCondition": {
"leaveWithRunway": {
"length": 8,
"openEnd": 1,
"heated": true
}
},
"unlocksDoors": [
{
"types": [
"missiles"
],
"requires": [
{
"heatFrames": 50
}
]
},
{
"types": [
"super"
],
"requires": []
},
{
"types": [
"powerbomb"
],
"requires": [
{
"heatFrames": 60
}
]
}
],
"flashSuitChecked": true,
"blueSuitChecked": true
},
{
"id": 7,
"link": [
2,
1
],
"name": "Space Jump",
"requires": [
"canDash",
"Morph",
"SpaceJump",
{
"or": [
"canMockball",
{
"heatFrames": 35
}
]
},
{
"heatFrames": 405
}
],
"exitCondition": {
"leaveNormally": {}
},
"unlocksDoors": [
{
"types": [
"missiles"
],
"requires": [
{
"heatFrames": 20
}
]
},
{
"types": [
"super"
],
"requires": []
},
{
"types": [
"powerbomb"
],
"requires": [
{
"heatFrames": 60
}
]
}
],
"flashSuitChecked": true,
"blueSuitChecked": true
},
{
"id": 14,
"link": [
2,
1
],
"name": "Come in Running, Space Jump",
"entranceCondition": {
"comeInRunning": {
"speedBooster": "any",
"minTiles": 2
}
},
"requires": [
"Morph",
"SpaceJump",
"canMockball",
{
"heatFrames": 390
}
],
"exitCondition": {
"leaveNormally": {}
},
"unlocksDoors": [
{
"types": [
"missiles"
],
"requires": [
{
"heatFrames": 20
}
]
},
{
"types": [
"super"
],
"requires": []
},
{
"types": [
"powerbomb"
],
"requires": [
{
"heatFrames": 60
}
]
}
],
"flashSuitChecked": true,
"blueSuitChecked": true
},
{
"id": 15,
"link": [
2,
1
],
"name": "Crystal Flash below Shot Blocks",
"requires": [
{
"heatFrames": 180
},
"h_heatedCrystalFlash",
{
"heatFrames": 250
}
],
"flashSuitChecked": true,
"blueSuitChecked": true,
"devNote": [
"FIXME: by adding a junction here, we could account for more ways of entering the room;",
"but a junction would complicate how the heated/unheated state of the room is tracked.",
"A dashless variant could also be included."
]
},
{
"id": 10,
"link": [
2,
1
],
"name": "Come In Getting Blue Speed, Leave With Temporary Blue (Big Jump)",
"entranceCondition": {
"comeInGettingBlueSpeed": {
"length": 4,
"openEnd": 1,
"minExtraRunSpeed": "$4.7"
}
},
"requires": [
"canLongChainTemporaryBlue",
"canXRayTurnaround",
{
"heatFrames": 760
}
],
"exitCondition": {
"leaveWithTemporaryBlue": {}
},
"unlocksDoors": [
{
"types": [
"super",
"powerbomb"
],
"requires": []
},
{
"types": [
"missiles"
],
"requires": [
{
"heatFrames": 50
}
]
}
],
"flashSuitChecked": true,
"blueSuitChecked": true,
"note": [
"Move quickly (when X-Ray is not active) to climb the shaft before the Fune fireballs would reach Samus."
],
"devNote": [
"The last runway tile is considered unusable, as Samus is likely to clip down through it."
]
},
{
"id": 11,
"link": [
2,
1
],
"name": "Come In Getting Blue Speed, Leave With Temporary Blue (Spring Ball Bounce)",
"entranceCondition": {
"comeInGettingBlueSpeed": {
"length": 5,
"openEnd": 1
}
},
"requires": [
"canTrickySpringBallBounce",
"canLongChainTemporaryBlue",
"canXRayTurnaround",
{
"heatFrames": 1020
}
],
"exitCondition": {
"leaveWithTemporaryBlue": {}
},
"unlocksDoors": [
{
"types": [
"super",
"powerbomb"
],
"requires": []
},
{
"types": [
"missiles"
],
"requires": [
{
"heatFrames": 50
}
]
}
],
"flashSuitChecked": true,
"blueSuitChecked": true,
"note": [
"Move quickly (when X-Ray is not active) to climb the shaft before the Fune fireballs would reach Samus."
]
},
{
"id": 12,
"link": [
2,
1
],
"name": "G-Mode Morph, Blind Movement",
"entranceCondition": {
"comeInWithGMode": {
"mode": "any",
"morphed": true
}
},
"requires": [
"h_heatedGMode",
"canComplexGMode",
"canOffScreenMovement",
{
"or": [
"h_artificialMorphMovement",
{
"ammo": {
"type": "PowerBomb",
"count": 3
}
}
]
},
{
"or": [
"canInsaneJump",
{
"and": [
"canTrickyJump",
"h_heatProof"
]
},
{
"and": [
"h_heatProof",
"h_lavaProof",
{
"or": [
"Gravity",
"HiJump"
]
}
]
}
]
},
{
"heatFrames": 1000
},
{
"or": [
"canTrickyGMode",
{
"heatFrames": 500
}
]
}
],
"exitCondition": {
"leaveNormally": {}
},
"unlocksDoors": [
{
"types": [
"missiles"
],
"requires": [
{
"heatFrames": 20
}
]
},
{
"types": [
"super"
],
"requires": []
},
{
"types": [
"powerbomb"
],
"requires": [
{
"heatFrames": 60
}
]
}
],
"flashSuitChecked": true,
"blueSuitChecked": true,
"note": [
"Enter the morph tunnel then exit G-mode. Shooting the shot block off screen can be done by jumping and shooting up or with Grapple or a Power Bomb.",
"Getting positioned under the shot block can be done by walking into the camera scroll block and then walking against the right wall,",
"jump to the left and walk a little more (about one more tile). This will also give some visibility of Samus.",
"Without heat damage, it is recommended to jump up past the shot block and wait for it to respawn; with the block intact, Samus can't accidentally touch the lava."
],
"devNote": "These heat frames are not very tight, as the room is difficult to do consistently."
},
{
"id": 8,
"link": [
2,
2
],
"name": "Leave with Runway",
"entranceCondition": {
"comeInNormally": {}
},
"requires": [],
"exitCondition": {
"leaveWithRunway": {
"length": 6,
"openEnd": 1,
"heated": true
}
},
"unlocksDoors": [
{
"types": [
"ammo"
],
"requires": []
}
],
"flashSuitChecked": true,
"blueSuitChecked": true
},
{
"id": 9,
"link": [
2,
2
],
"name": "Crystal Flash",
"entranceCondition": {
"comeInNormally": {}
},
"requires": [
"h_heatedCrystalFlash"
],
"flashSuitChecked": true,
"blueSuitChecked": true
},
{
"id": 17,
"link": [
2,
2
],
"name": "Come in Shinecharging, Crystal Spark",
"entranceCondition": {
"comeInShinecharging": {
"length": 5,
"openEnd": 0
}
},
"requires": [
"h_heatedCrystalSpark"
],
"flashSuitChecked": true,
"blueSuitChecked": true
}
],
"notables": [],
"nextStratId": 18,
"nextNotableId": 1
}