Gauntlet Energy Tank Room
Room ID: 31

|
Exit condition: "leaveWithRunway": {
"length": 4,
"openEnd": 1
} |
|
Involves leaving some drops hanging after killing the enemies so they don't respawn. Requires: "h_runOverRespawningEnemies" Exit condition: "leaveWithRunway": {
"length": 15,
"openEnd": 0,
"steepUpTiles": 1,
"steepDownTiles": 1
} |
From: 1
Left Door
To: 1
Left Door
Involves leaving some drops hanging after killing the enemies so they don't respawn. Requires: "h_runOverRespawningEnemies", {"or": [ "h_destroyBombWalls", {"obstaclesCleared": ["B"]} ]} Exit condition: "leaveWithRunway": {
"length": 19,
"openEnd": 1,
"steepUpTiles": 1,
"steepDownTiles": 1
} |
From: 1
Left Door
To: 1
Left Door
Involves leaving some drops hanging after killing the enemies so they don't respawn. Requires: "h_runOverRespawningEnemies", {"obstaclesCleared": ["C"]} Exit condition: "leaveWithRunway": {
"length": 17,
"openEnd": 0,
"steepUpTiles": 1,
"steepDownTiles": 1
}Dev note: This situation can only be usefully created with G-Mode. |
|
Requires: {"cycleFrames": 140}Farm cycle drops: 1 Zebbo Dev note: We use cycleFrames here rather than simpleCycleFrames because of how the acid (and Yapping Maw) complicates the farm. |
|
Entrance condition: "comeInGettingBlueSpeed": {
"length": 5,
"openEnd": 0,
"steepUpTiles": 0,
"steepDownTiles": 1
}Clears obstacles: B |
From: 1
Left Door
To: 1
Left Door


To use the full runway, kill the Zebbo with Wave. Entrance condition: "comeInGettingBlueSpeed": {
"length": 14,
"openEnd": 0,
"steepUpTiles": 1,
"steepDownTiles": 1
}Requires: "Wave",
{"acidFrames": 11},
{"or": [
"Gravity",
{"acidFrames": 5}
]}Clears obstacles: B Dev note: FIXME: Running through acid doesn't stop a shinecharge, but does inhibit tapping without gravity. And the acid frame count may change slightly with speed. |
From: 1
Left Door
To: 1
Left Door


Requires: {"or": [
{"getBlueSpeed": {
"usedTiles": 14,
"steepUpTiles": 1,
"steepDownTiles": 1,
"openEnd": 0
}},
{"and": [
{"getBlueSpeed": {
"usedTiles": 15,
"steepUpTiles": 1,
"steepDownTiles": 1,
"openEnd": 0
}},
{"doorUnlockedAtNode": 1}
]},
{"and": [
{"getBlueSpeed": {
"usedTiles": 16,
"steepUpTiles": 1,
"steepDownTiles": 1,
"openEnd": 0
}},
{"obstaclesCleared": ["C"]}
]},
{"and": [
{"getBlueSpeed": {
"usedTiles": 17,
"steepUpTiles": 1,
"steepDownTiles": 1,
"openEnd": 0
}},
{"obstaclesCleared": ["C"]},
{"doorUnlockedAtNode": 1}
]}
]}Clears obstacles: B |
|
Requires: {"obstaclesCleared": ["B"]},
{"or": [
{"canShineCharge": {
"usedTiles": 18,
"steepUpTiles": 1,
"steepDownTiles": 1,
"openEnd": 1
}},
{"and": [
{"canShineCharge": {
"usedTiles": 19,
"steepUpTiles": 1,
"steepDownTiles": 1,
"openEnd": 1
}},
{"doorUnlockedAtNode": 1}
]}
]},
"h_CrystalSpark" |
From: 1
Left Door
To: 1
Left Door
Entrance condition: "comeInGettingBlueSpeed": {
"length": 6,
"openEnd": 0,
"steepDownTiles": 1
},
"comesInHeated": "no"Requires: "h_shinechargeMaxRunway", "h_CrystalSpark" |
From: 1
Left Door
To: 1
Left Door
Entrance condition: "comeInShinecharging": {
"length": 14,
"openEnd": 0,
"steepUpTiles": 1,
"steepDownTiles": 1
},
"comesInHeated": "no"Requires: "Wave", "h_CrystalSpark" |
|
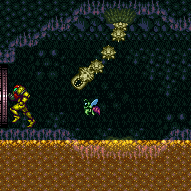

Exit condition: "leaveWithDamage": {
"enemy": "Zebbo"
} |
From: 1
Left Door
To: 1
Left Door
Place a Power Bomb to the left of the Zebbo, then exit G-Mode, to break the bomb wall to the right. Entrance condition: "comeInWithGMode": {
"mode": "any",
"morphed": true
}Requires: "h_artificialMorphPowerBomb" Clears obstacles: B |
|
Carefully kill the Zebbo, then place two bombs against the right wall to break the left half of the wall to slightly increase the length of the runway. Entrance condition: "comeInWithGMode": {
"mode": "any",
"morphed": true
}Requires: "h_artificialMorphBombs" Clears obstacles: C |
|
In R-Mode, fill your Reserves at the farm. Damage down again so that Samus is within 1 Zebbo hit from triggering Reserves. Gain a shinecharge in-room without gaining more energy. It is possible to time the despawn of a drop with the acid if no ammo is owned. Shinespark vertically, such that a Zebbo can hit Samus in the wind-up to cause a reserve trigger, giving a blue suit. Entrance condition: "comeInWithRMode": {}Requires: {"refill": ["Energy"]},
{"or": [
{"canShineCharge": {
"usedTiles": 14,
"steepUpTiles": 1,
"steepDownTiles": 1,
"openEnd": 0
}},
{"and": [
{"canShineCharge": {
"usedTiles": 15,
"steepUpTiles": 1,
"steepDownTiles": 1,
"openEnd": 0
}},
{"doorUnlockedAtNode": 1}
]},
{"and": [
{"canShineCharge": {
"usedTiles": 18,
"steepUpTiles": 1,
"steepDownTiles": 1,
"openEnd": 1
}},
"h_destroyBombWalls"
]},
{"and": [
{"canShineCharge": {
"usedTiles": 19,
"steepUpTiles": 1,
"steepDownTiles": 1,
"openEnd": 1
}},
"h_destroyBombWalls",
{"doorUnlockedAtNode": 1}
]}
]},
{"autoReserveTrigger": {}},
"canRModeSparkInterrupt"Clears obstacles: B Unlocks doors: {"types": ["ammo"], "requires": []} |
|
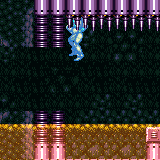

Gain a spike suit and shinespark vertically into the spikes, being careful not to turn around or move forward until Samus falls far enough, to avoid additional spike hits. Position the spark as far left as possible, to be able to land on the ledge and avoid acid damage in case of failure. After gaining the spike suit successfully, for extra safety the shinespark can be delayed to wait for the acid tide to go low. Requires: {"obstaclesCleared": ["B"]},
{"or": [
{"and": [
{"doorUnlockedAtNode": 1},
{"canShineCharge": {
"usedTiles": 19,
"steepUpTiles": 1,
"steepDownTiles": 1,
"openEnd": 0
}}
]},
{"canShineCharge": {
"usedTiles": 18,
"steepUpTiles": 1,
"steepDownTiles": 1,
"openEnd": 0
}}
]},
"h_runOverRespawningEnemies",
{"spikeHits": 1},
"canSpikeSuit",
{"shinespark": {"frames": 1, "excessFrames": 1}}Dev note: Leniency is not included, because there is a farm available. |
|
Entrance condition: "comeInWithRMode": {}Clears obstacles: R-Mode |
From: 1
Left Door
To: 1
Left Door
Crystal Flashing on the Zebbo spawner will usually not deal enough damage to Samus to trigger reserves. One way to make this fairly reliable is to kill the Yapping Maw then take a Zebbo hit while on its spawner, and then place the Power Bomb such that it explodes and kills a Zebbo shortly after it spawns. Samus will then pick up the drop and start Crystal Flashing where her refill is usually in a good rhythm for the Zebbo to be able to trigger reserves. There is an approximate 2/3 chance of success. This can only be done suitless and with no E-Tanks. Requires: {"obstaclesCleared": ["R-Mode"]},
"canComplexRModeCrystalFlashInterrupt",
{"ammo": {"type": "Missile", "count": 10}},
{"ammo": {"type": "Super", "count": 10}},
"canBeLucky"Resets obstacles: R-Mode Dev note: This can not be done in G-mode, because the Power Bomb will kill the Zebbo and prevent more from spawning. |
From: 1
Left Door
To: 2
Right Door
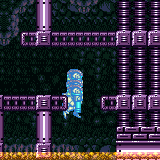

Requires: {"obstaclesCleared": ["B"]},
{"getBlueSpeed": {
"usedTiles": 15,
"steepUpTiles": 1,
"steepDownTiles": 1,
"openEnd": 1
}},
"h_blueJump",
"canInsaneJump",
"canTrickySpringBallBounce",
"canChainTemporaryBlue"Clears obstacles: A, E Dev note: This assumes getting blue speed using significantly less than the available runway, because at higher speed it would be more difficult to bounce across the room. |
|


Buffering a jump during the reserve fill and performing a backwards spinjump onto the item pedestal will minimize acid frames Requires: {"obstaclesCleared": ["R-Mode"]},
"Morph",
{"partialRefill": {"type": "ReserveEnergy", "limit": 99}},
{"or": [
"ScrewAttack",
{"and": [
{"canShineCharge": {
"usedTiles": 15,
"steepUpTiles": 1,
"steepDownTiles": 1,
"openEnd": 0
}},
{"doorUnlockedAtNode": 1},
{"shinespark": {"frames": 52, "excessFrames": 0}}
]}
]},
{"autoReserveTrigger": {}},
{"acidFrames": 16} |
From: 1
Left Door
To: 4
Middle Junction (Left of Morph Tunnel)
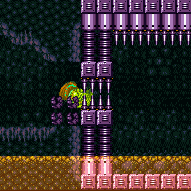

Requires: "canDash", {"or": [ "canCarefulJump", {"acidFrames": 35} ]}, {"or": [ "h_avoidScrewStuck", {"obstaclesCleared": ["A", "B"]} ]} Clears obstacles: A, B |
From: 1
Left Door
To: 4
Middle Junction (Left of Morph Tunnel)


Carefully walk through the room. It is possible but tricky to do so damageless, but it is always possible to go back and farm if needed. Requires: {"haveBlueSuit": {}},
{"or": [
"canTrickyJump",
{"acidFrames": 20}
]}Clears obstacles: A, B |
From: 1
Left Door
To: 4
Middle Junction (Left of Morph Tunnel)
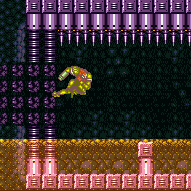

Sparking through the bottom of the door will save Energy. Entrance condition: "comeInWithSpark": {}Requires: {"shinespark": {"frames": 90, "excessFrames": 17}}Clears obstacles: A, B |
From: 1
Left Door
To: 4
Middle Junction (Left of Morph Tunnel)
Sparking through the bottom of the door will save Energy. Entrance condition: "comeInWithSpark": {
"position": "bottom"
}Requires: {"shinespark": {"frames": 73, "excessFrames": 0}}Clears obstacles: A, B Dev note: Starting crouched will break all of the blocks while a true bottom position will require Morph to get through. Morph is already going to be required to progress through, this would only make it so Samus can't go view the item with a bottom spark and no Morph. |
From: 1
Left Door
To: 4
Middle Junction (Left of Morph Tunnel)
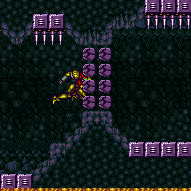

Charge the Shinespark just before getting to the bug, then Shinespark while on the ground to save Energy. If Samus sparks from the raised ground while crouched, all the blocks will break, otherwise Morph will be needed to get through the last wall. Entrance condition: "comeInShinecharging": {
"length": 5,
"openEnd": 0,
"steepUpTiles": 0,
"steepDownTiles": 1
}Requires: "canHorizontalShinespark", "canShinechargeMovement", {"shinespark": {"frames": 59, "excessFrames": 0}} Clears obstacles: A, B |
From: 1
Left Door
To: 4
Middle Junction (Left of Morph Tunnel)
To use the full runway, kill the Zebbo with Wave, then Shinespark while on the ground or jump and spark low to save Energy. If Samus sparks from the raised ground while crouched, all the blocks will break, otherwise Morph will be needed to get through the last wall. Entrance condition: "comeInShinecharging": {
"length": 14,
"openEnd": 0,
"steepUpTiles": 1,
"steepDownTiles": 1
}Requires: "Wave",
{"acidFrames": 11},
{"or": [
"Gravity",
{"acidFrames": 5}
]},
"canShinechargeMovement",
"canHorizontalShinespark",
{"or": [
{"shinespark": {"frames": 55, "excessFrames": 0}},
{"and": [
"canShinechargeMovementComplex",
{"shinespark": {"frames": 45, "excessFrames": 0}}
]}
]}Clears obstacles: A, B Dev note: FIXME: Running through acid doesn't stop a shinecharge, but does inhibit tapping without gravity. And the acid frame count may change slightly with speed. |
From: 1
Left Door
To: 4
Middle Junction (Left of Morph Tunnel)
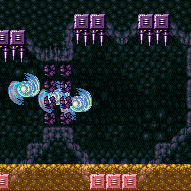

Entrance condition: "comeInGettingBlueSpeed": {
"length": 5,
"openEnd": 0,
"steepUpTiles": 0,
"steepDownTiles": 1
}Requires: "canBlueSpaceJump" Clears obstacles: A, B |
Come In Getting Blue Speed, Blue Space Jump, Kill Zebo on Entry
(Very Hard)
Gauntlet Energy Tank Room
From: 1
Left Door
To: 4
Middle Junction (Left of Morph Tunnel)
Entrance condition: "comeInGettingBlueSpeed": {
"length": 14,
"openEnd": 0,
"steepUpTiles": 1,
"steepDownTiles": 1
}Requires: "Wave",
{"acidFrames": 11},
{"or": [
"Gravity",
{"acidFrames": 5}
]},
"canBlueSpaceJump"Clears obstacles: A, B |
From: 1
Left Door
To: 4
Middle Junction (Left of Morph Tunnel)


Requires: {"obstaclesCleared": ["B"]},
{"or": [
{"getBlueSpeed": {
"usedTiles": 14,
"steepUpTiles": 1,
"steepDownTiles": 1,
"openEnd": 0
}},
{"and": [
{"getBlueSpeed": {
"usedTiles": 15,
"steepUpTiles": 1,
"steepDownTiles": 1,
"openEnd": 0
}},
{"doorUnlockedAtNode": 1}
]}
]},
"canBlueSpaceJump"Clears obstacles: A |
From: 1
Left Door
To: 4
Middle Junction (Left of Morph Tunnel)


Entrance condition: "comeInBlueSpinning": {
"unusableTiles": 0
}Requires: "canBlueSpaceJump" Clears obstacles: A, B |
From: 1
Left Door
To: 4
Middle Junction (Left of Morph Tunnel)
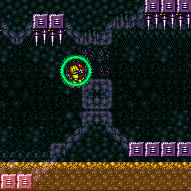

When taking too much acid damage, it is always possible to return to the left and farm. Requires: "canDash", {"or": [ "canCarefulJump", {"acidFrames": 35} ]}, "h_useMorphBombs" Clears obstacles: A, B |
From: 1
Left Door
To: 4
Middle Junction (Left of Morph Tunnel)
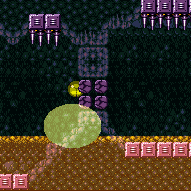

When taking too much acid damage, it is always possible to return to the left and farm. Requires: "canDash", {"or": [ "canCarefulJump", {"acidFrames": 35} ]}, {"or": [ {"and": [ "Morph", {"ammo": {"type": "PowerBomb", "count": 2}} ]}, {"obstaclesCleared": ["A"]} ]}, {"or": [ "h_usePowerBomb", {"obstaclesCleared": ["B"]} ]} Clears obstacles: A, B |
From: 1
Left Door
To: 4
Middle Junction (Left of Morph Tunnel)
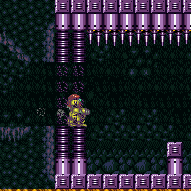

Shinespark while on the ground or jump and spark low to save Energy. If Samus sparks from the raised ground while crouched, all the blocks will break, otherwise Morph will be needed to get through the last wall. Requires: {"obstaclesCleared": ["B"]},
{"or": [
{"canShineCharge": {
"usedTiles": 14,
"steepUpTiles": 1,
"steepDownTiles": 1,
"openEnd": 0
}},
{"and": [
{"canShineCharge": {
"usedTiles": 15,
"steepUpTiles": 1,
"steepDownTiles": 1,
"openEnd": 0
}},
{"doorUnlockedAtNode": 1}
]}
]},
"canShinechargeMovement",
"canHorizontalShinespark",
{"or": [
{"shinespark": {"frames": 55, "excessFrames": 0}},
{"and": [
"canShinechargeMovementComplex",
{"shinespark": {"frames": 45, "excessFrames": 0}}
]}
]}Clears obstacles: A |
From: 1
Left Door
To: 4
Middle Junction (Left of Morph Tunnel)
Requires: {"useFlashSuit": {}},
{"shinespark": {"frames": 59, "excessFrames": 0}}Clears obstacles: A, B |
From: 1
Left Door
To: 4
Middle Junction (Left of Morph Tunnel)
Requires: "h_usePowerBomb", "canDash", {"useFlashSuit": {}}, {"or": [ {"shinespark": {"frames": 29, "excessFrames": 0}}, {"and": [ "h_additionalBomb", {"shinespark": {"frames": 1, "excessFrames": 1}} ]} ]} Clears obstacles: A, B |
|
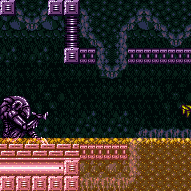

Entrance condition: "comeInWithGrappleTeleport": {
"blockPositions": [[5, 3], [7, 2]]
} |
|
Entrance condition: "comeInWithGrappleTeleport": {
"blockPositions": [[3, 12], [3, 13]]
}Requires: {"or": [
"canGrappleTeleportWallEscape",
{"doorUnlockedAtNode": 1}
]}Unlocks doors: {"types": ["ammo"], "requires": []} |
From: 2
Right Door
To: 1
Left Door
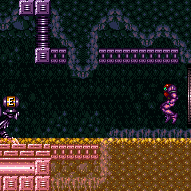

Entrance condition: "comeInWithGrappleTeleport": {
"blockPositions": [[3, 12], [3, 13]]
}Bypasses door shell: true |
From: 2
Right Door
To: 1
Left Door
Entrance condition: "comeInWithGrappleTeleport": {
"blockPositions": [[3, 12]]
}Exit condition: "leaveWithGrappleTeleport": {
"blockPositions": [[3, 12]]
}Bypasses door shell: true |
From: 2
Right Door
To: 1
Left Door
Entrance condition: "comeInWithGrappleTeleport": {
"blockPositions": [[3, 13]]
}Exit condition: "leaveWithGrappleTeleport": {
"blockPositions": [[3, 13]]
}Bypasses door shell: true |
|
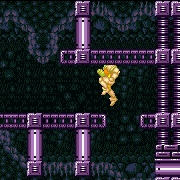

Use SpeedBooster to break the runway Bomb block and then to shinespark across the room, saving Power Bombs. One Power Bomb is still needed to break the tunnel block. The shinespark timer is very tight and breaking the runway block while storing the Shinespark is required as it saves movement frames. Entrance condition: "comeInShinecharging": {
"length": 8,
"openEnd": 0
}Requires: {"notable": "Spark Master"},
"canSlowShortCharge",
"canShinechargeMovementTricky",
"h_usePowerBomb",
"HiJump",
"Gravity",
{"acidFrames": 16},
"canInsaneJump",
{"shinespark": {"frames": 93, "excessFrames": 15}}Dev note: There are variations with Screw or Bombs that wouldn't need Gravity. But then you can cross the room normally. |
From: 2
Right Door
To: 1
Left Door
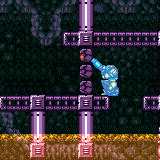

Carry temporary blue across the room, breaking the bomb blocks along the way. Use Spring Ball to bounce through the morph tunnel at the beginning, and across the final stretch at the end. Entrance condition: "comeInShinecharging": {
"length": 4,
"openEnd": 1
}Requires: "canLongChainTemporaryBlue", "canTrickySpringBallBounce", {"acidFrames": 5}, {"or": [ "canInsaneJump", {"acidFrames": 30} ]} Clears obstacles: A, B |
From: 2
Right Door
To: 1
Left Door
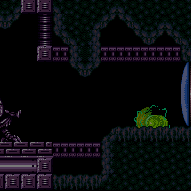

Roll through the item to overload PLMs then quickly fall into the morph tunnel, unmorph at the correct spot and jump out before the acid touches Samus. With a careful, blind, Space Jump with Screw Attack, move through the bomb walls while avoiding the spikes. Entrance condition: "comeInWithGMode": {
"mode": "direct",
"morphed": true
}Requires: "canComplexGMode", "canRemoteAcquire", {"itemNotCollectedAtNode": 3}, "canRiskPermanentLossOfAccess", "h_artificialMorphMovement", "canInsaneJump", "canOffScreenMovement", "SpaceJump", "ScrewAttack" Exit condition: "leaveNormally": {}Collects items: 3 Unlocks doors: {"types": ["ammo"], "requires": []}Dev note: This strat leaves the room, as it would be unreasonable and may not be possible to do anything at 1 with the broken camera movement. With a blue suit, there is no need to overload PLMs, so the camera will not be broken and the requirements could be relaxed; but it is covered by a 2->4 strat. |
|
Exit condition: "leaveWithRunway": {
"length": 11,
"openEnd": 0,
"steepUpTiles": 1
} |
|
Requires: "h_CrystalFlash", {"obstaclesNotCleared": ["R-Mode"]} |
|
Entrance condition: "comeInWithRMode": {}Clears obstacles: R-Mode |
|


After clearing the wall blocks and the columns, lure a Zebbo over to near the door by repeatedly freezing it and moving forward. Power Bombs can be used to clear the final bomb block by making sure the Zebbo is frozen far enough away from the explosion to not be killed. Requires: {"or": [
{"and": [
"Morph",
{"haveBlueSuit": {}},
{"acidFrames": 35}
]},
{"and": [
"h_bombThings",
{"obstaclesCleared": ["A", "B"]}
]}
]},
"canTrickyUseFrozenEnemies",
"canTrickyGMode"Exit condition: "leaveWithDamage": {
"enemy": "Zebbo"
} |
From: 2
Right Door
To: 2
Right Door
Shinecharge before touching the acid. Entrance condition: "comeInShinecharging": {
"length": 4,
"openEnd": 1
},
"comesInHeated": "no"Requires: "h_CrystalSpark" Dev note: FIXME: A variant could be added which dips into the acid, but we are not including first-try Crystal Sparks. |
|
|
From: 2
Right Door
To: 4
Middle Junction (Left of Morph Tunnel)
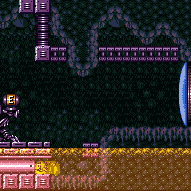

Entrance condition: "comeInGettingBlueSpeed": {
"length": 1,
"openEnd": 0
}Requires: "canSpeedball", "canCarefulJump", "canSlowShortCharge", {"acidFrames": 60} Dev note: There are 9 unusable tiles in this runway. |
From: 2
Right Door
To: 4
Middle Junction (Left of Morph Tunnel)
Entrance condition: "comeInShinecharging": {
"length": 5,
"openEnd": 0
}Requires: "canTemporaryBlue", "canLateralMidAirMorph", {"acidFrames": 200} Dev note: There are 5 unusable tiles in this runway. |
From: 2
Right Door
To: 4
Middle Junction (Left of Morph Tunnel)
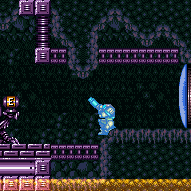

A quick jump morph from the top of the slope will bounce into the tunnel and avoid acid damage. Entrance condition: "comeInShinecharging": {
"length": 4,
"openEnd": 0
}Requires: "canTemporaryBlue", "canLateralMidAirMorph", {"or": [ "canChainTemporaryBlue", "can4HighMidAirMorph" ]} Dev note: There are 6 unusable tiles in this runway. |
From: 2
Right Door
To: 4
Middle Junction (Left of Morph Tunnel)
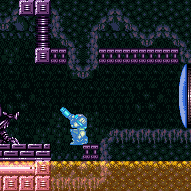

Entrance condition: "comeInShinecharging": {
"length": 9,
"openEnd": 0
}Requires: "canXRayTurnaround", "canChainTemporaryBlue", {"acidFrames": 27} Dev note: There is 1 unusable tile in this runway. |
From: 2
Right Door
To: 4
Middle Junction (Left of Morph Tunnel)
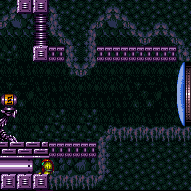

Moonfall against the Chozo statue to clip into the Morph Tunnel, past the Bomb block. Entrance condition: "comeInWithStoredFallSpeed": {
"fallSpeedInTiles": 1
}Requires: {"noBlueSuit": {}},
"Morph",
"canMoonfall"Dev note: The fact that this doesn't work with a blue suit is irrelevant, since reaching node 4 is free with a blue suit and Morph. But we include a `noBlueSuit` requirement anyway, to be correct. |
From: 2
Right Door
To: 4
Middle Junction (Left of Morph Tunnel)
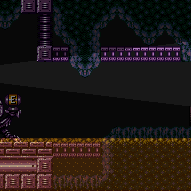

Roll through the item to overload PLMs then fall into the morph tunnel, unmorph at the correct spot and quickly jump out before the acid touches Samus. Exit G-mode and roll back into the tunnel to fix the camera and return avoiding the acid again. Entrance condition: "comeInWithGMode": {
"mode": "direct",
"morphed": true
}Requires: "canComplexGMode", "canRemoteAcquire", {"itemNotCollectedAtNode": 3}, "canRiskPermanentLossOfAccess", "Morph", "canInsaneJump", "canOffScreenMovement" Collects items: 3 Dev note: Acid damage wasn't considered, as Samus needs to be in direct G-mode FIXME: This could be done with a CF after overloading PLMs with the item. |
From: 2
Right Door
To: 4
Middle Junction (Left of Morph Tunnel)


Enter with artificial morph, and use a blue suit to fall into the morph tunnel, unmorph at the correct spot and quickly jump out before the acid touches Samus. Exit G-mode to fix the camera. Entrance condition: "comeInWithGMode": {
"mode": "any",
"morphed": true
}Requires: "h_blueSuitGMode", "canOffScreenMovement" |
|
|
|
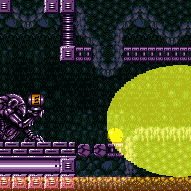

Requires: "h_usePowerBomb" |
From: 3
Item
To: 4
Middle Junction (Left of Morph Tunnel)
Requires: {"haveBlueSuit": {}},
"Morph" |
|
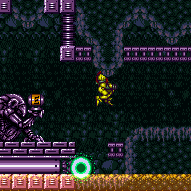

Delay breaking the runway block so that it will not respawn too quickly. Wait for the acid to be rising to break the tunnel block, and then go through the tunnel on the next cycle. Requires: "h_useMorphBombs", {"or": [ "canCarefulJump", {"acidFrames": 40} ]} |
From: 3
Item
To: 4
Middle Junction (Left of Morph Tunnel)
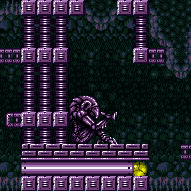

Grab the item and quickly return through the blocks before they respawn. Requires: "canTrickyJump", {"obstaclesCleared": ["E"]} Resets obstacles: E Dev note: This does not require the item to be there, but there is no reason to go through the tunnel twice if it's not. |
From: 4
Middle Junction (Left of Morph Tunnel)
To: 1
Left Door
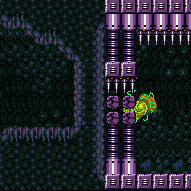

Requires: "canDash", {"or": [ "canCarefulJump", {"acidFrames": 35} ]}, {"or": [ "h_avoidScrewStuck", {"and": [ {"obstaclesCleared": ["A"]}, {"obstaclesCleared": ["B"]} ]} ]} Clears obstacles: A, B |
From: 4
Middle Junction (Left of Morph Tunnel)
To: 1
Left Door


Carefully walk through the room. It is possible but tricky to do so damageless. Requires: {"haveBlueSuit": {}},
{"or": [
"canTrickyJump",
{"acidFrames": 10}
]}Clears obstacles: A, B |
From: 4
Middle Junction (Left of Morph Tunnel)
To: 1
Left Door
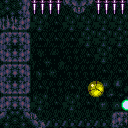

After destroying a single bomb block, Samus can spin jump into its spot to quickly escape the acid. To avoid the acid completely, morph quickly at the right height and place a bomb. Requires: "canDash", {"or": [ "canCarefulJump", {"acidFrames": 35} ]}, "h_useMorphBombs", {"or": [ "canTrickyJump", {"and": [ "canCarefulJump", "canBombHorizontally", {"acidFrames": 35} ]}, {"acidFrames": 100} ]}, {"or": [ {"and": [ "canTrickyJump", "canTrickyWallJump" ]}, {"and": [ "canCarefulJump", {"acidFrames": 35} ]}, {"acidFrames": 100} ]}, "h_complexToCarryFlashSuit" Clears obstacles: A, B |
From: 4
Middle Junction (Left of Morph Tunnel)
To: 1
Left Door
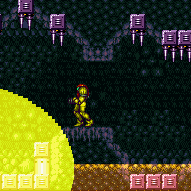

Requires: "canDash", {"or": [ "canCarefulJump", {"acidFrames": 35} ]}, "Morph", {"ammo": {"type": "PowerBomb", "count": 3}} Clears obstacles: A, B |
From: 4
Middle Junction (Left of Morph Tunnel)
To: 1
Left Door


Requires: {"useFlashSuit": {}},
{"shinespark": {"frames": 76, "excessFrames": 18}}Clears obstacles: A, B |
From: 4
Middle Junction (Left of Morph Tunnel)
To: 1
Left Door
Requires: "h_usePowerBomb", {"useFlashSuit": {}}, {"or": [ {"shinespark": {"frames": 58, "excessFrames": 21}}, {"and": [ "h_additionalBomb", "canDash", {"shinespark": {"frames": 30, "excessFrames": 27}} ]} ]} Clears obstacles: A, B |
From: 4
Middle Junction (Left of Morph Tunnel)
To: 3
Item
While in the morph tunnel, simply unmorph to break the bomb blocks overhead. Requires: {"haveBlueSuit": {}},
"Morph" |
From: 4
Middle Junction (Left of Morph Tunnel)
To: 3
Item
Requires: "h_usePowerBomb", {"or": [ "canCarefulJump", "h_useSpringBall", {"acidFrames": 5} ]} Clears obstacles: E |
|
Break the tunnel block with a Bomb and then return to safety. Break the runway block on the next cycle. SpringBall helps avoid acid damage. Bombing Samus up through the runway with a second Bomb can help, or it can trap Samus in the acid if liquid physics take effect. Requires: "h_useMorphBombs", {"or": [ "h_useSpringBall", {"acidFrames": 10} ]}, {"or": [ "canInsaneJump", {"and": [ "canTrickyJump", {"acidFrames": 10} ]}, {"and": [ "canCarefulJump", {"acidFrames": 120} ]}, {"acidFrames": 200} ]} Dev note: Damageless is possible without SpringBall but it is very likely you end up taking more damage by attempting it. |