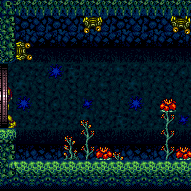
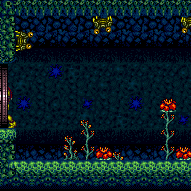
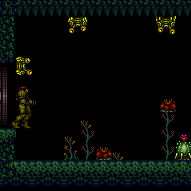
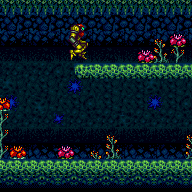
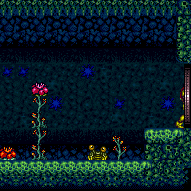
Noob Bridge
Room ID: 55

|


Farm Zeelas and two Cacatacs or else Crystal Flash for Reserves. Cacatac projectile can provide spark interrupt. Entrance condition: {
"comeInWithRMode": {}
}Requires: {
"or": [
"h_CrystalFlashForReserveEnergy",
{
"and": [
"h_RModeCanRefillReserves",
{
"resourceMissingAtMost": [
{
"type": "Super",
"count": 1
}
]
},
{
"partialRefill": {
"type": "ReserveEnergy",
"limit": 20
}
}
]
}
]
}
"h_shinechargeMaxRunway"
{
"autoReserveTrigger": {}
}
"canRModeSparkInterrupt" |
|
Exit condition: {
"leaveWithRunway": {
"length": 1,
"openEnd": 1
}
} |
|
Wait for the slow global Zeelas. They take almost 4 minutes to get there. Requires: "h_frozenEnemyRunway" "canBeVeryPatient" Exit condition: {
"leaveWithRunway": {
"length": 2,
"openEnd": 1
}
} |
|


Exit condition: {
"leaveWithSidePlatform": {
"height": 2,
"runway": {
"length": 45,
"openEnd": 1
},
"obstruction": [
1,
0
]
}
}Dev note: Max extra run speed $7.0. |
|


Requires: "h_shinechargeMaxRunway"
"canShinechargeMovement"
{
"shineChargeFrames": 30
}Exit condition: {
"leaveShinecharged": {}
} |
|
Exit condition: {
"leaveSpinning": {
"remoteRunway": {
"length": 45,
"openEnd": 1
}
}
} |
|
Exit condition: {
"leaveWithMockball": {
"remoteRunway": {
"length": 45,
"openEnd": 1
},
"landingRunway": {
"length": 1,
"openEnd": 1
}
}
} |
|
Exit condition: {
"leaveWithSpringBallBounce": {
"remoteRunway": {
"length": 45,
"openEnd": 1
},
"landingRunway": {
"length": 1,
"openEnd": 1
},
"movementType": "uncontrolled"
}
} |
|
Exit condition: {
"leaveSpaceJumping": {
"remoteRunway": {
"length": 45,
"openEnd": 1
},
"maxExtraRunSpeed": "$6.0"
}
} |
|


Requires: "h_shinechargeMaxRunway" "canChainTemporaryBlue" Exit condition: {
"leaveWithTemporaryBlue": {}
} |
|
Requires: {
"resetRoom": {
"nodes": [
1
]
}
}
{
"cycleFrames": 560
}
{
"or": [
"canDash",
{
"cycleFrames": 300
}
]
}
{
"or": [
"Plasma",
"Spazer",
"Wave",
"Grapple",
{
"and": [
"ScrewAttack",
{
"cycleFrames": 200
}
]
},
{
"and": [
{
"haveBlueSuit": {}
},
{
"cycleFrames": 200
}
]
},
{
"cycleFrames": 370
}
]
}Farm cycle drops: 4 Zeela, 3 Cacatac |
|
Requires: "h_CrystalFlash" |
|
Requires: "h_shinechargeMaxRunway" "h_CrystalSpark" |
|
Wait for the slow global Zeelas. They take almost 4 minutes to get there. Requires: "canBeVeryPatient" Exit condition: {
"leaveWithGModeSetup": {}
} |
|

Wait for the slow global Zeelas. They take almost 4 minutes to get there. Requires: {
"enemyDamage": {
"enemy": "Zeela",
"type": "contact",
"hits": 1
}
}
"canBeVeryPatient" |
|

If the enemies are still alive, Power Bomb lag can delay the spikesuit timing. The quickdrop setup requires a small jump of 3 frames or less above the crumbles. Requires: "h_shinechargeMaxRunway"
{
"or": [
"h_useMorphBombs",
"SpringBall",
{
"ammo": {
"type": "PowerBomb",
"count": "n_spikeSuitAttempts"
}
},
{
"and": [
"HiJump",
"canInsaneJump",
"canQuickDrop"
]
}
]
}
{
"or": [
{
"spikeHits": "n_spikeSuitAttempts"
},
{
"and": [
"canPatientSpikeSuit",
{
"spikeHits": 1
},
{
"resetRoom": {
"nodes": [
1,
2
]
}
}
]
}
]
}
"canTrickySpikeSuit"
{
"shinespark": {
"frames": 1,
"excessFrames": 1
}
} |
|


Requires: "canDash" |
|
Perform a long sequence of quick drops to make it past the crumbles without dashing. It is possible to hold jump the entire time, doing buffered turnaround spin jumps to the right. With each quick drop, it is recommended to center Samus over the edge between two crumble blocks, to break both of them at once. Requires: {
"notable": "Dashless Quick Drops"
}
{
"disableEquipment": "HiJump"
}
"canQuickDrop" |
|
Either use a long chain of controlled, short spring ball bounces to make it past the crumbles without touching the spikes, or simply hold jump and forward and take 7 spike hits. Requires: "h_useSpringBall"
{
"or": [
{
"tech": "canTrickySpringBallBounce"
},
{
"spikeHits": 7
}
]
}Dev note: This is a dashless strat. |
|
|
|


Entrance condition: {
"comeInWithGrappleTeleport": {
"blockPositions": [
[
3,
12
],
[
3,
13
]
]
}
}Bypasses door shell: true |
|
Entrance condition: {
"comeInWithGrappleTeleport": {
"blockPositions": [
[
3,
12
]
]
}
}Exit condition: {
"leaveWithGrappleTeleport": {
"blockPositions": [
[
3,
12
]
]
}
}Bypasses door shell: true |
|
Entrance condition: {
"comeInWithGrappleTeleport": {
"blockPositions": [
[
3,
13
]
]
}
}Exit condition: {
"leaveWithGrappleTeleport": {
"blockPositions": [
[
3,
13
]
]
}
}Bypasses door shell: true |
|
Farm Zeelas and two Cacatacs or else Crystal Flash for Reserves. Cacatac projectile can provide spark interrupt. Entrance condition: {
"comeInWithRMode": {}
}Requires: {
"or": [
"h_CrystalFlashForReserveEnergy",
{
"and": [
"h_RModeCanRefillReserves",
{
"resourceMissingAtMost": [
{
"type": "Super",
"count": 1
}
]
},
{
"partialRefill": {
"type": "ReserveEnergy",
"limit": 20
}
}
]
}
]
}
"h_shinechargeMaxRunway"
{
"autoReserveTrigger": {}
}
"canRModeSparkInterrupt" |
|
Requires: "canDash"
{
"resetRoom": {
"nodes": [
2
]
}
}
{
"cycleFrames": 1000
}
{
"or": [
"Plasma",
"Spazer",
"Wave",
{
"and": [
"Grapple",
{
"cycleFrames": 60
}
]
},
{
"and": [
"ScrewAttack",
{
"cycleFrames": 200
}
]
},
{
"cycleFrames": 370
}
]
}Farm cycle drops: 4 Zeela, 4 Cacatac |
|
Exit condition: {
"leaveWithRunway": {
"length": 3,
"openEnd": 1
}
} |
|
Wait for the slow global Zeelas. They take almost 2 minutes to get there. Requires: "h_frozenEnemyRunway" "canBePatient" Exit condition: {
"leaveWithRunway": {
"length": 4,
"openEnd": 1
}
} |
|
Requires: "h_speedJump" "canMomentumConservingMorph" Exit condition: {
"leaveWithSidePlatform": {
"height": 2,
"runway": {
"length": 20,
"openEnd": 0
},
"obstruction": [
3,
0
]
}
}Dev note: Max extra run speed $3.F. |
|


Requires: "h_shinechargeMaxRunway"
"canShinechargeMovement"
{
"shineChargeFrames": 130
}Exit condition: {
"leaveShinecharged": {}
} |
|
Exit condition: {
"leaveWithMockball": {
"remoteRunway": {
"length": 45,
"openEnd": 1
},
"landingRunway": {
"length": 3,
"openEnd": 1
},
"minExtraRunSpeed": "$6.2"
}
} |
From: 2
Right Door
To: 2
Right Door
Depending on the speed needed, first speedball from the bridge onto the floor and then bounce onto the ledge in front of the door. Exit condition: {
"leaveWithSpringBallBounce": {
"remoteRunway": {
"length": 45,
"openEnd": 1
},
"landingRunway": {
"length": 3,
"openEnd": 1
},
"minExtraRunSpeed": "$1.4",
"movementType": "controlled"
}
} |
|
Exit condition: {
"leaveSpaceJumping": {
"remoteRunway": {
"length": 45,
"openEnd": 1
},
"minExtraRunSpeed": "$7.0"
}
} |
|


Requires: {
"canShineCharge": {
"usedTiles": 20,
"openEnd": 0
}
}
"canShinechargeMovement"
{
"shineChargeFrames": 40
}Exit condition: {
"leaveShinecharged": {}
} |
|
Exit condition: {
"leaveSpinning": {
"remoteRunway": {
"length": 18,
"openEnd": 0
}
}
} |
|
Exit condition: {
"leaveWithMockball": {
"remoteRunway": {
"length": 16,
"openEnd": 0
},
"landingRunway": {
"length": 3,
"openEnd": 1
}
}
} |
From: 2
Right Door
To: 2
Right Door
Exit condition: {
"leaveWithSpringBallBounce": {
"remoteRunway": {
"length": 14,
"openEnd": 0
},
"landingRunway": {
"length": 3,
"openEnd": 1
},
"movementType": "uncontrolled"
}
} |
|
Exit condition: {
"leaveSpaceJumping": {
"remoteRunway": {
"length": 12,
"openEnd": 1
}
}
} |
|
Requires: {
"canShineCharge": {
"usedTiles": 19,
"openEnd": 0
}
}
"canChainTemporaryBlue"Exit condition: {
"leaveWithTemporaryBlue": {}
} |
|
Requires: {
"or": [
{
"canShineCharge": {
"usedTiles": 20,
"openEnd": 0
}
},
{
"and": [
"h_shinechargeMaxRunway",
"can4HighMidAirMorph",
"canInsaneJump"
]
}
]
}
"h_CrystalSpark" |
|

Wait for the slow global Zeelas. They take almost 2 minutes to get there. Requires: "canBePatient" Exit condition: {
"leaveWithGModeSetup": {}
} |
|
Wait for the slow global Zeelas. They take almost 2 minutes to get there. Requires: {
"enemyDamage": {
"enemy": "Zeela",
"type": "contact",
"hits": 1
}
}
"canBePatient" |
{
"$schema": "../../../schema/m3-room.schema.json",
"id": 55,
"name": "Noob Bridge",
"area": "Brinstar",
"subarea": "Green",
"roomAddress": "0x79FBA",
"roomEnvironments": [
{
"heated": false
}
],
"mapTileMask": [
[
1,
1,
1,
1,
1,
1
]
],
"nodes": [
{
"id": 1,
"name": "Left Door",
"nodeType": "door",
"nodeSubType": "blue",
"nodeAddress": "0x0018efe",
"doorOrientation": "left",
"doorEnvironments": [
{
"physics": "air"
}
],
"mapTileMask": [
[
2,
2,
2,
2,
1,
1
]
]
},
{
"id": 2,
"name": "Right Door",
"nodeType": "door",
"nodeSubType": "green",
"nodeAddress": "0x0018f0a",
"doorOrientation": "right",
"doorEnvironments": [
{
"physics": "air"
}
],
"mapTileMask": [
[
1,
1,
1,
1,
2,
2
]
]
}
],
"enemies": [
{
"id": "e1",
"groupName": "Noob Bridge Left Cacatacs",
"enemyName": "Cacatac",
"quantity": 3,
"homeNodes": [
1
]
},
{
"id": "e2",
"groupName": "Noob Bridge Right Cacatac",
"enemyName": "Cacatac",
"quantity": 1,
"homeNodes": [
2
]
},
{
"id": "e3",
"groupName": "Noob Bridge Zeelas",
"enemyName": "Zeela",
"quantity": 4,
"homeNodes": [
1,
2
]
}
],
"strats": [
{
"link": [
1,
1
],
"name": "Base (Unlock Door)",
"requires": [],
"unlocksDoors": [
{
"types": [
"ammo"
],
"requires": []
}
],
"flashSuitChecked": true,
"blueSuitChecked": true
},
{
"link": [
1,
1
],
"name": "Base (Come In Normally)",
"entranceCondition": {
"comeInNormally": {}
},
"requires": [],
"flashSuitChecked": true,
"blueSuitChecked": true
},
{
"link": [
1,
1
],
"name": "Base (Come In With Mockball)",
"entranceCondition": {
"comeInWithMockball": {
"adjacentMinTiles": 0,
"remoteAndLandingMinTiles": [
[
0,
0
]
],
"speedBooster": "any"
}
},
"requires": [],
"flashSuitChecked": true,
"blueSuitChecked": true
},
{
"link": [
2,
2
],
"name": "Base (Unlock Door)",
"requires": [],
"unlocksDoors": [
{
"types": [
"ammo"
],
"requires": []
}
],
"flashSuitChecked": true,
"blueSuitChecked": true
},
{
"link": [
2,
2
],
"name": "Base (Come In Normally)",
"entranceCondition": {
"comeInNormally": {}
},
"requires": [],
"flashSuitChecked": true,
"blueSuitChecked": true
},
{
"link": [
2,
2
],
"name": "Base (Come In With Mockball)",
"entranceCondition": {
"comeInWithMockball": {
"adjacentMinTiles": 0,
"remoteAndLandingMinTiles": [
[
0,
0
]
],
"speedBooster": "any"
}
},
"requires": [],
"flashSuitChecked": true,
"blueSuitChecked": true
},
{
"id": 34,
"link": [
1,
1
],
"name": "R-Mode Spark Interrupt",
"entranceCondition": {
"comeInWithRMode": {}
},
"requires": [
{
"or": [
"h_CrystalFlashForReserveEnergy",
{
"and": [
"h_RModeCanRefillReserves",
{
"resourceMissingAtMost": [
{
"type": "Super",
"count": 1
}
]
},
{
"partialRefill": {
"type": "ReserveEnergy",
"limit": 20
}
}
]
}
]
},
"h_shinechargeMaxRunway",
{
"autoReserveTrigger": {}
},
"canRModeSparkInterrupt"
],
"flashSuitChecked": true,
"blueSuitChecked": true,
"note": [
"Farm Zeelas and two Cacatacs or else Crystal Flash for Reserves. Cacatac projectile can provide spark interrupt."
]
},
{
"id": 1,
"link": [
1,
1
],
"name": "Leave With Runway",
"requires": [],
"exitCondition": {
"leaveWithRunway": {
"length": 1,
"openEnd": 1
}
},
"flashSuitChecked": true,
"blueSuitChecked": true
},
{
"id": 2,
"link": [
1,
1
],
"name": "Leave With Runway - Frozen Zeela",
"requires": [
"h_frozenEnemyRunway",
"canBeVeryPatient"
],
"exitCondition": {
"leaveWithRunway": {
"length": 2,
"openEnd": 1
}
},
"flashSuitChecked": true,
"blueSuitChecked": true,
"note": "Wait for the slow global Zeelas. They take almost 4 minutes to get there."
},
{
"id": 31,
"link": [
1,
1
],
"name": "Leave With Side Platform",
"requires": [],
"exitCondition": {
"leaveWithSidePlatform": {
"height": 2,
"runway": {
"length": 45,
"openEnd": 1
},
"obstruction": [
1,
0
]
}
},
"flashSuitChecked": true,
"blueSuitChecked": true,
"devNote": "Max extra run speed $7.0."
},
{
"id": 3,
"link": [
1,
1
],
"name": "Leave Shinecharged",
"requires": [
"h_shinechargeMaxRunway",
"canShinechargeMovement",
{
"shineChargeFrames": 30
}
],
"exitCondition": {
"leaveShinecharged": {}
},
"flashSuitChecked": true,
"blueSuitChecked": true
},
{
"id": 4,
"link": [
1,
1
],
"name": "Leave Spinning",
"requires": [],
"exitCondition": {
"leaveSpinning": {
"remoteRunway": {
"length": 45,
"openEnd": 1
}
}
},
"flashSuitChecked": true,
"blueSuitChecked": true
},
{
"id": 5,
"link": [
1,
1
],
"name": "Leave With Mockball",
"requires": [],
"exitCondition": {
"leaveWithMockball": {
"remoteRunway": {
"length": 45,
"openEnd": 1
},
"landingRunway": {
"length": 1,
"openEnd": 1
}
}
},
"flashSuitChecked": true,
"blueSuitChecked": true
},
{
"id": 6,
"link": [
1,
1
],
"name": "Leave With Spring Ball Bounce",
"requires": [],
"exitCondition": {
"leaveWithSpringBallBounce": {
"remoteRunway": {
"length": 45,
"openEnd": 1
},
"landingRunway": {
"length": 1,
"openEnd": 1
},
"movementType": "uncontrolled"
}
},
"flashSuitChecked": true,
"blueSuitChecked": true
},
{
"id": 7,
"link": [
1,
1
],
"name": "Leave Space Jumping",
"requires": [],
"exitCondition": {
"leaveSpaceJumping": {
"remoteRunway": {
"length": 45,
"openEnd": 1
},
"maxExtraRunSpeed": "$6.0"
}
},
"flashSuitChecked": true,
"blueSuitChecked": true
},
{
"id": 8,
"link": [
1,
1
],
"name": "Leave With Temporary Blue",
"requires": [
"h_shinechargeMaxRunway",
"canChainTemporaryBlue"
],
"exitCondition": {
"leaveWithTemporaryBlue": {}
},
"flashSuitChecked": true,
"blueSuitChecked": true
},
{
"id": 9,
"link": [
1,
1
],
"name": "Cacatac and Zeela Farm",
"requires": [
{
"resetRoom": {
"nodes": [
1
]
}
},
{
"cycleFrames": 560
},
{
"or": [
"canDash",
{
"cycleFrames": 300
}
]
},
{
"or": [
"Plasma",
"Spazer",
"Wave",
"Grapple",
{
"and": [
"ScrewAttack",
{
"cycleFrames": 200
}
]
},
{
"and": [
{
"haveBlueSuit": {}
},
{
"cycleFrames": 200
}
]
},
{
"cycleFrames": 370
}
]
}
],
"farmCycleDrops": [
{
"enemy": "Zeela",
"count": 4
},
{
"enemy": "Cacatac",
"count": 3
}
],
"flashSuitChecked": true,
"blueSuitChecked": true
},
{
"id": 10,
"link": [
1,
1
],
"name": "Crystal Flash",
"requires": [
"h_CrystalFlash"
],
"flashSuitChecked": true,
"blueSuitChecked": true
},
{
"id": 37,
"link": [
1,
1
],
"name": "Crystal Spark",
"requires": [
"h_shinechargeMaxRunway",
"h_CrystalSpark"
],
"flashSuitChecked": true,
"blueSuitChecked": true
},
{
"id": 11,
"link": [
1,
1
],
"name": "G-Mode Setup - Get Hit By Zeela",
"requires": [
"canBeVeryPatient"
],
"exitCondition": {
"leaveWithGModeSetup": {}
},
"flashSuitChecked": true,
"blueSuitChecked": true,
"note": "Wait for the slow global Zeelas. They take almost 4 minutes to get there."
},
{
"id": 12,
"link": [
1,
1
],
"name": "G-Mode Regain Mobility",
"requires": [
{
"enemyDamage": {
"enemy": "Zeela",
"type": "contact",
"hits": 1
}
},
"canBeVeryPatient"
],
"gModeRegainMobility": {},
"flashSuitChecked": true,
"blueSuitChecked": true,
"note": "Wait for the slow global Zeelas. They take almost 4 minutes to get there."
},
{
"id": 35,
"link": [
1,
1
],
"name": "Gain Flash Suit (Spikesuit)",
"requires": [
"h_shinechargeMaxRunway",
{
"or": [
"h_useMorphBombs",
"SpringBall",
{
"ammo": {
"type": "PowerBomb",
"count": "n_spikeSuitAttempts"
}
},
{
"and": [
"HiJump",
"canInsaneJump",
"canQuickDrop"
]
}
]
},
{
"or": [
{
"spikeHits": "n_spikeSuitAttempts"
},
{
"and": [
"canPatientSpikeSuit",
{
"spikeHits": 1
},
{
"resetRoom": {
"nodes": [
1,
2
]
}
}
]
}
]
},
"canTrickySpikeSuit",
{
"shinespark": {
"frames": 1,
"excessFrames": 1
}
}
],
"flashSuitChecked": true,
"blueSuitChecked": true,
"note": [
"If the enemies are still alive, Power Bomb lag can delay the spikesuit timing.",
"The quickdrop setup requires a small jump of 3 frames or less above the crumbles."
]
},
{
"id": 13,
"link": [
1,
2
],
"name": "Base",
"requires": [
"canDash"
],
"flashSuitChecked": true,
"blueSuitChecked": true
},
{
"id": 39,
"link": [
1,
2
],
"name": "Dashless Quick Drops",
"requires": [
{
"notable": "Dashless Quick Drops"
},
{
"disableEquipment": "HiJump"
},
"canQuickDrop"
],
"flashSuitChecked": true,
"blueSuitChecked": true,
"note": [
"Perform a long sequence of quick drops to make it past the crumbles without dashing.",
"It is possible to hold jump the entire time, doing buffered turnaround spin jumps to the right.",
"With each quick drop, it is recommended to center Samus over the edge between two crumble blocks,",
"to break both of them at once."
]
},
{
"id": 40,
"link": [
1,
2
],
"name": "Spring Ball Bounce",
"requires": [
"h_useSpringBall",
{
"or": [
{
"tech": "canTrickySpringBallBounce"
},
{
"spikeHits": 7
}
]
}
],
"flashSuitChecked": true,
"blueSuitChecked": true,
"note": [
"Either use a long chain of controlled, short spring ball bounces to make it past the crumbles without touching the spikes,",
"or simply hold jump and forward and take 7 spike hits."
],
"devNote": "This is a dashless strat."
},
{
"id": 14,
"link": [
2,
1
],
"name": "Base",
"requires": [],
"flashSuitChecked": true,
"blueSuitChecked": true
},
{
"id": 15,
"link": [
2,
1
],
"name": "Grapple Teleport Door Lock Skip",
"entranceCondition": {
"comeInWithGrappleTeleport": {
"blockPositions": [
[
3,
12
],
[
3,
13
]
]
}
},
"requires": [],
"bypassesDoorShell": "yes",
"flashSuitChecked": true,
"blueSuitChecked": true
},
{
"id": 16,
"link": [
2,
1
],
"name": "Carry Grapple Teleport (Top Position)",
"entranceCondition": {
"comeInWithGrappleTeleport": {
"blockPositions": [
[
3,
12
]
]
}
},
"requires": [],
"exitCondition": {
"leaveWithGrappleTeleport": {
"blockPositions": [
[
3,
12
]
]
}
},
"bypassesDoorShell": "yes",
"flashSuitChecked": true,
"blueSuitChecked": true
},
{
"id": 17,
"link": [
2,
1
],
"name": "Carry Grapple Teleport (Bottom Position)",
"entranceCondition": {
"comeInWithGrappleTeleport": {
"blockPositions": [
[
3,
13
]
]
}
},
"requires": [],
"exitCondition": {
"leaveWithGrappleTeleport": {
"blockPositions": [
[
3,
13
]
]
}
},
"bypassesDoorShell": "yes",
"flashSuitChecked": true,
"blueSuitChecked": true
},
{
"id": 36,
"link": [
2,
2
],
"name": "R-Mode Spark Interrupt",
"entranceCondition": {
"comeInWithRMode": {}
},
"requires": [
{
"or": [
"h_CrystalFlashForReserveEnergy",
{
"and": [
"h_RModeCanRefillReserves",
{
"resourceMissingAtMost": [
{
"type": "Super",
"count": 1
}
]
},
{
"partialRefill": {
"type": "ReserveEnergy",
"limit": 20
}
}
]
}
]
},
"h_shinechargeMaxRunway",
{
"autoReserveTrigger": {}
},
"canRModeSparkInterrupt"
],
"flashSuitChecked": true,
"blueSuitChecked": true,
"note": [
"Farm Zeelas and two Cacatacs or else Crystal Flash for Reserves. Cacatac projectile can provide spark interrupt."
]
},
{
"id": 33,
"link": [
2,
2
],
"name": "Cacatac and Zeela Farm",
"requires": [
"canDash",
{
"resetRoom": {
"nodes": [
2
]
}
},
{
"cycleFrames": 1000
},
{
"or": [
"Plasma",
"Spazer",
"Wave",
{
"and": [
"Grapple",
{
"cycleFrames": 60
}
]
},
{
"and": [
"ScrewAttack",
{
"cycleFrames": 200
}
]
},
{
"cycleFrames": 370
}
]
}
],
"farmCycleDrops": [
{
"enemy": "Zeela",
"count": 4
},
{
"enemy": "Cacatac",
"count": 4
}
],
"flashSuitChecked": true,
"blueSuitChecked": true
},
{
"id": 18,
"link": [
2,
2
],
"name": "Leave With Runway",
"requires": [],
"exitCondition": {
"leaveWithRunway": {
"length": 3,
"openEnd": 1
}
},
"flashSuitChecked": true,
"blueSuitChecked": true
},
{
"id": 19,
"link": [
2,
2
],
"name": "Leave With Runway - Frozen Zeela",
"requires": [
"h_frozenEnemyRunway",
"canBePatient"
],
"exitCondition": {
"leaveWithRunway": {
"length": 4,
"openEnd": 1
}
},
"flashSuitChecked": true,
"blueSuitChecked": true,
"note": "Wait for the slow global Zeelas. They take almost 2 minutes to get there."
},
{
"id": 32,
"link": [
2,
2
],
"name": "Leave With Side Platform",
"requires": [
"h_speedJump",
"canMomentumConservingMorph"
],
"exitCondition": {
"leaveWithSidePlatform": {
"height": 2,
"runway": {
"length": 20,
"openEnd": 0
},
"obstruction": [
3,
0
]
}
},
"flashSuitChecked": true,
"blueSuitChecked": true,
"devNote": "Max extra run speed $3.F."
},
{
"id": 20,
"link": [
2,
2
],
"name": "Leave Shinecharged (Bridge Runway)",
"requires": [
"h_shinechargeMaxRunway",
"canShinechargeMovement",
{
"shineChargeFrames": 130
}
],
"exitCondition": {
"leaveShinecharged": {}
},
"flashSuitChecked": true,
"blueSuitChecked": true
},
{
"id": 21,
"link": [
2,
2
],
"name": "Leave With Mockball (Bridge Runway)",
"requires": [],
"exitCondition": {
"leaveWithMockball": {
"remoteRunway": {
"length": 45,
"openEnd": 1
},
"landingRunway": {
"length": 3,
"openEnd": 1
},
"minExtraRunSpeed": "$6.2"
}
},
"flashSuitChecked": true,
"blueSuitChecked": true
},
{
"id": 22,
"link": [
2,
2
],
"name": "Leave With Controlled Spring Ball Bounce (Bridge Runway)",
"requires": [],
"exitCondition": {
"leaveWithSpringBallBounce": {
"remoteRunway": {
"length": 45,
"openEnd": 1
},
"landingRunway": {
"length": 3,
"openEnd": 1
},
"minExtraRunSpeed": "$1.4",
"movementType": "controlled"
}
},
"flashSuitChecked": true,
"blueSuitChecked": true,
"note": "Depending on the speed needed, first speedball from the bridge onto the floor and then bounce onto the ledge in front of the door."
},
{
"id": 23,
"link": [
2,
2
],
"name": "Leave Space Jumping (Bridge Runway)",
"requires": [],
"exitCondition": {
"leaveSpaceJumping": {
"remoteRunway": {
"length": 45,
"openEnd": 1
},
"minExtraRunSpeed": "$7.0"
}
},
"flashSuitChecked": true,
"blueSuitChecked": true
},
{
"id": 24,
"link": [
2,
2
],
"name": "Leave Shinecharged (Floor Runway)",
"requires": [
{
"canShineCharge": {
"usedTiles": 20,
"openEnd": 0
}
},
"canShinechargeMovement",
{
"shineChargeFrames": 40
}
],
"exitCondition": {
"leaveShinecharged": {}
},
"flashSuitChecked": true,
"blueSuitChecked": true
},
{
"id": 25,
"link": [
2,
2
],
"name": "Leave Spinning (Floor Runway)",
"requires": [],
"exitCondition": {
"leaveSpinning": {
"remoteRunway": {
"length": 18,
"openEnd": 0
}
}
},
"flashSuitChecked": true,
"blueSuitChecked": true
},
{
"id": 26,
"link": [
2,
2
],
"name": "Leave With Mockball (Floor Runway)",
"requires": [],
"exitCondition": {
"leaveWithMockball": {
"remoteRunway": {
"length": 16,
"openEnd": 0
},
"landingRunway": {
"length": 3,
"openEnd": 1
}
}
},
"flashSuitChecked": true,
"blueSuitChecked": true
},
{
"id": 27,
"link": [
2,
2
],
"name": "Leave With Spring Ball Bounce (Floor Runway)",
"requires": [],
"exitCondition": {
"leaveWithSpringBallBounce": {
"remoteRunway": {
"length": 14,
"openEnd": 0
},
"landingRunway": {
"length": 3,
"openEnd": 1
},
"movementType": "uncontrolled"
}
},
"flashSuitChecked": true,
"blueSuitChecked": true
},
{
"id": 28,
"link": [
2,
2
],
"name": "Leave Space Jumping (Floor Runway)",
"requires": [],
"exitCondition": {
"leaveSpaceJumping": {
"remoteRunway": {
"length": 12,
"openEnd": 1
}
}
},
"flashSuitChecked": true,
"blueSuitChecked": true
},
{
"id": 41,
"link": [
2,
2
],
"name": "Leave With Temporary Blue",
"requires": [
{
"canShineCharge": {
"usedTiles": 19,
"openEnd": 0
}
},
"canChainTemporaryBlue"
],
"exitCondition": {
"leaveWithTemporaryBlue": {}
},
"flashSuitChecked": true,
"blueSuitChecked": true
},
{
"id": 38,
"link": [
2,
2
],
"name": "Crystal Spark",
"requires": [
{
"or": [
{
"canShineCharge": {
"usedTiles": 20,
"openEnd": 0
}
},
{
"and": [
"h_shinechargeMaxRunway",
"can4HighMidAirMorph",
"canInsaneJump"
]
}
]
},
"h_CrystalSpark"
],
"flashSuitChecked": true,
"blueSuitChecked": true
},
{
"id": 29,
"link": [
2,
2
],
"name": "G-Mode Setup - Get Hit By Zeela",
"requires": [
"canBePatient"
],
"exitCondition": {
"leaveWithGModeSetup": {}
},
"flashSuitChecked": true,
"blueSuitChecked": true,
"note": "Wait for the slow global Zeelas. They take almost 2 minutes to get there."
},
{
"id": 30,
"link": [
2,
2
],
"name": "G-Mode Regain Mobility",
"requires": [
{
"enemyDamage": {
"enemy": "Zeela",
"type": "contact",
"hits": 1
}
},
"canBePatient"
],
"gModeRegainMobility": {},
"flashSuitChecked": true,
"blueSuitChecked": true,
"note": "Wait for the slow global Zeelas. They take almost 2 minutes to get there."
}
],
"notables": [
{
"id": 1,
"name": "Dashless Quick Drops",
"note": [
"Perform a long sequence of quick drops to make it past the crumbles without dashing.",
"It is possible to hold jump the entire time, doing buffered turnaround spin jumps to the right."
]
}
],
"nextStratId": 42,
"nextNotableId": 2
}