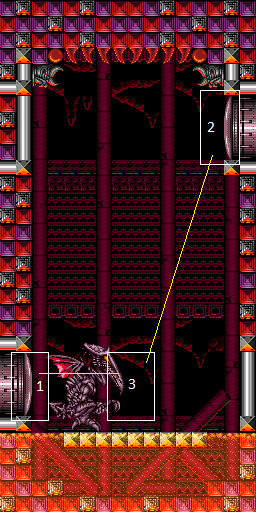
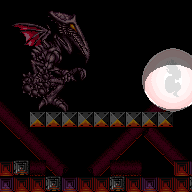
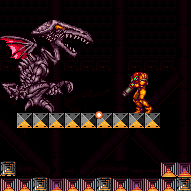
Ridley's Room
Room ID: 142
|
Exit condition: {
"leaveWithRunway": {
"length": 1,
"openEnd": 1
}
} |
|


Requires: {
"heatFrames": 210
}
"canMomentumConservingMorph"
"canInsaneJump"Exit condition: {
"leaveWithSidePlatform": {
"height": 1,
"runway": {
"length": 9,
"openEnd": 2
},
"obstruction": [
2,
1
]
}
}Dev note: Max extra run speed $2.9 This strat is included for completeness, though it apparently doesn't have any applications. |
|
Requires: {
"not": "f_DefeatedRidley"
}
"canRiskPermanentLossOfAccess"
{
"enemyDamage": {
"enemy": "Ridley",
"type": "contact",
"hits": 1
}
} |
|
Get into position and Ridley will hit Samus shorly after starting to move. Requires: {
"heatFrames": 500
}
{
"not": "f_DefeatedRidley"
}
"canRiskPermanentLossOfAccess"Exit condition: {
"leaveWithGModeSetup": {}
}Dev note: Not likely to be possible, as it requires canRiskPermanentLossOfAccess and Ridley alive with the door unlocked. |
|


Buffer a diagonal shinespark to activate immediately on room entry. Entrance condition: {
"comeInShinecharged": {}
}Requires: {
"shineChargeFrames": 1
}
{
"heatFrames": 20
}
{
"shinespark": {
"frames": 20,
"excessFrames": 2
}
}
{
"heatFrames": 110
}Clears obstacles: door_1 |
|


Requires: {
"heatFrames": 65
}
{
"useFlashSuit": {}
}
{
"or": [
{
"and": [
{
"heatFrames": 14
},
{
"shinespark": {
"frames": 14,
"excessFrames": 2
}
}
]
},
{
"and": [
"HiJump",
{
"heatFrames": 11
},
{
"shinespark": {
"frames": 11,
"excessFrames": 2
}
}
]
}
]
}
{
"heatFrames": 110
} |
|

Entrance condition: {
"comeInWithSidePlatform": {
"platforms": [
{
"minHeight": 1,
"maxHeight": 1,
"minTiles": 17,
"speedBooster": "yes",
"obstructions": [
[
1,
0
]
],
"requires": [
{
"or": [
{
"and": [
"HiJump",
{
"heatFrames": 90
}
]
},
{
"and": [
"canTrickyDashJump",
"canTrickySpringBallJump",
{
"heatFrames": 115
}
]
}
]
}
],
"note": [
"This applies to Warehouse Entrance."
],
"detailNote": [
"For the spring ball jump, retain forward momentum until the pause hits,",
"in order for the mid-air jump to also get the 'tricky dash' boost in height."
]
},
{
"minHeight": 2,
"maxHeight": 2,
"minTiles": 11.4375,
"speedBooster": "yes",
"obstructions": [
[
1,
0
]
],
"requires": [
"canTrickyDashJump",
"canTrickySpringBallJump",
{
"heatFrames": 100
}
],
"note": [
"This applies to Ridley Tank Room, Halfie Climb Room, and Dust Torizo Room."
],
"detailNote": [
"Retain forward momentum until the pause hits,",
"in order for the mid-air jump to also get the 'tricky dash' boost in height."
]
},
{
"minHeight": 2,
"maxHeight": 2,
"minTiles": 12.4375,
"speedBooster": "yes",
"obstructions": [
[
1,
0
]
],
"requires": [
"HiJump",
{
"heatFrames": 95
}
],
"note": [
"This applies to Dust Torizo Room and Halfie Climb Room."
]
},
{
"minHeight": 3,
"maxHeight": 3,
"minTiles": 10.4375,
"speedBooster": "yes",
"obstructions": [
[
1,
0
]
],
"requires": [
"canTrickyDashJump",
"canTrickySpringBallJump",
{
"heatFrames": 120
}
],
"note": [
"This applies to Big Boy Room and Mickey Mouse Room."
],
"detailNote": [
"For the spring ball jump, retain forward momentum until the pause hits,",
"in order for the mid-air jump to also get the 'tricky dash' boost in height."
]
},
{
"minHeight": 2,
"maxHeight": 2,
"minTiles": 45,
"speedBooster": "yes",
"obstructions": [
[
2,
0
]
],
"requires": [
"canInsaneJump",
{
"heatFrames": 85
}
],
"note": [
"This applies to Waterway Energy Tank Room."
]
},
{
"minHeight": 2,
"maxHeight": 2,
"minTiles": 45,
"speedBooster": "yes",
"obstructions": [
[
3,
0
]
],
"requires": [
"canInsaneJump",
"canMomentumConservingMorph",
{
"or": [
{
"and": [
"HiJump",
"canInsaneMidAirMorph",
{
"heatFrames": 80
}
]
},
{
"and": [
"canTrickySpringBallJump",
{
"heatFrames": 100
}
]
}
]
}
],
"note": [
"This applies to Statues Hallway."
]
},
{
"minHeight": 3,
"maxHeight": 3,
"minTiles": 37.4375,
"speedBooster": "yes",
"obstructions": [
[
3,
0
]
],
"requires": [
"canInsaneJump",
"canMomentumConservingMorph",
{
"or": [
{
"and": [
"HiJump",
{
"heatFrames": 85
}
]
},
{
"and": [
"canTrickySpringBallJump",
{
"heatFrames": 100
}
]
}
]
}
],
"note": [
"This applies to Flyway."
]
},
{
"minHeight": 2,
"maxHeight": 2,
"minTiles": 45,
"speedBooster": "yes",
"obstructions": [
[
4,
0
]
],
"requires": [
"canInsaneJump",
"canMomentumConservingMorph",
"canInsaneMidAirMorph",
"canTrickySpringBallJump",
{
"heatFrames": 100
}
],
"note": [
"This applies to Baby Kraid Room."
]
},
{
"minHeight": 3,
"maxHeight": 3,
"minTiles": 39.4375,
"speedBooster": "yes",
"obstructions": [
[
3,
2
]
],
"requires": [
"canTrickyJump",
{
"or": [
{
"and": [
"HiJump",
{
"heatFrames": 75
}
]
},
{
"and": [
"canTrickySpringBallJump",
{
"heatFrames": 115
}
]
}
]
}
],
"note": [
"This applies to Metal Pirates Room."
]
}
]
}
}Requires: "canSpeedyJump" Clears obstacles: door_1 Dev note: FIXME: Many of the spring ball jump variants can be done more easily with a spring ball bounce, which should be added as a separate strat. |
|

Entrance condition: {
"comeInWithGrappleSwing": {
"blocks": [
{
"position": [
-1,
5
],
"environment": "water",
"note": "Mt. Everest"
},
{
"position": [
8,
3
],
"note": "Grapple Beam Room"
},
{
"position": [
7,
3
],
"note": "Colosseum"
}
]
}
}Requires: "h_heatProof" "canPreciseGrappleJump" Clears obstacles: door_1 |
|

Entrance condition: {
"comeInWithGrappleSwing": {
"blocks": [
{
"position": [
6,
4
],
"note": "Grapple Tutorial Room 2"
},
{
"position": [
6,
2
],
"note": "Lava Grapple Tunnel"
},
{
"position": [
5,
2
],
"note": "The Moat, Double Chamber, Wrecked Ship Energy Tank Room"
},
{
"position": [
2.375,
4.5625
],
"note": "Post Crocomire Farming Room"
}
]
}
}Requires: "h_heatProof" "canTrickyGrappleJump" Clears obstacles: door_1 |
|


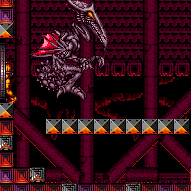
Manipulate Ridley into a pogo pattern facing left. Morph and position near the center of the leftmost tile of the platform. When Ridley is descending above Samus and about to pound the ground with his tail, place a Power Bomb and immediately unmorph. If successful, Samus will get grabbed, triggering auto-reserves before the Power Bomb explodes. Ridley will fly away from the Power Bomb explosion, carrying Samus to the top right into the door transition. Requires: {
"notable": "Ridley Grab Door Lock Skip"
}
"canUseEnemies"
{
"heatFrames": 745
}
"h_usePowerBomb"
{
"autoReserveTrigger": {}
}
{
"enemyDamage": {
"enemy": "Ridley",
"type": "contact",
"hits": 2
}
}
{
"heatFrames": 310
}
{
"or": [
{
"and": [
{
"not": "f_DefeatedRidley"
},
"canRiskPermanentLossOfAccess"
]
},
"canWallJump",
"SpaceJump",
{
"and": [
"HiJump",
"canSpringBallJumpMidAir"
]
},
{
"and": [
"HiJump",
"canSpeedyJump",
"canTrickyJump"
]
},
"canJumpIntoIBJ"
]
}Bypasses door shell: true |
|
Requires: {
"heatFrames": 45
} |
|
Fight Ridley without immunity to heat damage. Requires: {
"notable": "Ridley without Heat Protection"
}
{
"heatFrames": 0
}
{
"ridleyKill": {}
}
"h_RidleyDrops"Clears obstacles: f_DefeatedRidley Sets flags: f_DefeatedRidley Dev note: Heat frames are accounted for as part of the enemyKill. |
|
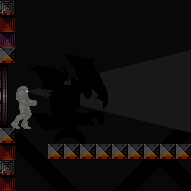
Enter the room in G-mode, perform a Crystal Flash, then lay an additional Power Bomb, preferably at the top of the room. The Power Bomb will not explode but will continually force Ridley into a corner of the room. If the Power Bomb is laid near the top of the room, then Ridley will be forced into the bottom of the room, making it easy to damage Ridley at the highest possible rate; if the Power Bomb is laid lower, Ridley will be forced to the top of room, and Samus will have to jump repeatedly to bring it on camera. in which case Ridley can still be damaged but more slowly and with some caution needed to avoid invisible fireballs. After reducing Ridley's health to zero, take damage from Ridley or an invisible fireball to trigger auto-reserves and exit G-mode. Then get grabbed by Ridley to finish the fight. Entrance condition: {
"comeInWithGMode": {
"mode": "any",
"morphed": false,
"mobility": "mobile"
}
}Requires: {
"notable": "G-Mode Crystal Flash Stuck Ridley"
}
"canComplexGMode"
"h_heatedGMode"
"h_CrystalFlash"
"h_usePowerBomb"
{
"or": [
{
"and": [
{
"or": [
"canWallJump",
"HiJump",
"canSpringBallJumpMidAir",
"SpaceJump"
]
},
{
"ridleyKill": {
"powerBombs": false,
"gMode": true,
"stuck": "bottom"
}
}
]
},
{
"ridleyKill": {
"powerBombs": false,
"gMode": true,
"stuck": "top"
}
}
]
}
{
"autoReserveTrigger": {}
}
{
"heatFrames": 520
}
{
"partialRefill": {
"type": "Energy",
"limit": 100
}
}Clears obstacles: f_DefeatedRidley, door_1 Sets flags: f_DefeatedRidley |
|
Enter the room in G-mode and quickly kill Ridley with 30 Supers. G-mode protects against heat damage but also causes Ridley's fireballs to be invisible and not move. As long as Ridley is swooping, not many fireballs will be placed, so delaying Ridley from pogoing can be helpful. Once Ridley begins pogoing, it generally becomes unsafe for Samus to jump high because of the risk of touching a fireball. By the end of the fight, projectiles will probably be overloaded, causing Ridley's drops not to spawn; they can be collected by exiting G-mode just before drops spawn, and pause abusing if necessary. Entrance condition: {
"comeInWithGMode": {
"mode": "any",
"morphed": false,
"mobility": "mobile"
}
}Requires: {
"notable": "G-Mode Ridley with 30 Supers"
}
"canTrickyGMode"
"h_heatedGMode"
{
"heatFrames": 0
}
{
"ammo": {
"type": "Super",
"count": 30
}
}
{
"or": [
{
"and": [
"h_heatedGModePauseAbuse",
{
"resourceAtMost": [
{
"type": "Energy",
"count": 1
}
]
},
{
"partialRefill": {
"type": "Energy",
"limit": 100
}
}
]
},
"free"
]
}
{
"noFlashSuit": {}
}Clears obstacles: f_DefeatedRidley, door_1 Sets flags: f_DefeatedRidley Dev note: FIXME: Leaving back through the open door while still in G-Mode is also possible, and free to do. |
|
Exit condition: {
"leaveWithRunway": {
"length": 1,
"openEnd": 1
}
} |
|
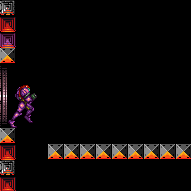
Entrance condition: {
"comeInNormally": {}
}Requires: "canPrepareForNextRoom"
"canInsaneJump"
{
"heatFrames": 55
}
{
"doorUnlockedAtNode": 2
}Clears obstacles: door_2 Unlocks doors: {"types":["super"],"requires":[]}
{"types":["missiles","powerbomb"],"requires":["never"]} |
|
Entrance condition: {
"comeInWithDoorStuckSetup": {}
}Requires: "canPrepareForNextRoom"
{
"heatFrames": 55
}
{
"doorUnlockedAtNode": 2
}Clears obstacles: door_2 Unlocks doors: {"types":["ammo"],"requires":[]} |
|
Entrance condition: {
"comeInNormally": {}
}Requires: "canPrepareForNextRoom"
{
"or": [
"SpaceJump",
"canWallJump"
]
}
{
"heatFrames": 80
}
{
"doorUnlockedAtNode": 2
}Clears obstacles: door_2 Unlocks doors: {"types":["super"],"requires":["canTrickyJump"]}
{"types":["missiles","powerbomb"],"requires":["never"]} |
|

Requires: {
"not": "f_DefeatedRidley"
}
"canRiskPermanentLossOfAccess"
{
"enemyDamage": {
"enemy": "Ridley",
"type": "contact",
"hits": 1
}
}Dev note: FIXME: Ridley could also be used to set up G-mode, but the chaos of the fight makes this difficult. |
|
It is much more common for Ridley to hit Samus when Ridley is facing left. One way to get Ridley to turn around is when it pogos on the right side of the room, stationary spin jump and break spin. The fireballs can be tricky to deal with in the door frame, but can be done by dropping down and quickly wall jumping back up or by kagoing them. Requires: {
"heatFrames": 900
}
{
"or": [
"canTrickyGMode",
{
"heatFrames": 180
}
]
}
"canComplexGMode"
{
"or": [
"SpaceJump",
"canWallJump",
{
"and": [
"HiJump",
"canSpringBallJumpMidAir"
]
}
]
}
{
"not": "f_DefeatedRidley"
}
"canRiskPermanentLossOfAccess"Exit condition: {
"leaveWithGModeSetup": {}
}Dev note: Not likely to be possible, as it requires canRiskPermanentLossOfAccess and Ridley alive with the door unlocked. The extra heat frames are a leniency to account for randomness. |
|
Entrance condition: {
"comeInWithGMode": {
"mode": "direct",
"morphed": false
}
}Requires: {
"or": [
"SpaceJump",
"canWallJump",
{
"and": [
"canJumpIntoIBJ",
"canInsaneJump",
{
"or": [
"HiJump",
{
"and": [
"canLongIBJ",
"canDoubleBombJump"
]
}
]
}
]
},
{
"and": [
{
"or": [
"f_DefeatedRidley",
{
"obstaclesCleared": [
"f_DefeatedRidley"
]
}
]
},
{
"or": [
"canLongIBJ",
{
"and": [
"canJumpIntoIBJ",
"HiJump"
]
}
]
}
]
},
{
"and": [
"HiJump",
"canSpringBallJumpMidAir"
]
},
{
"and": [
"HiJump",
"canSpeedyJump",
"canTrickyJump",
{
"or": [
"canInsaneJump",
{
"or": [
"f_DefeatedRidley",
{
"obstaclesCleared": [
"f_DefeatedRidley"
]
}
]
}
]
}
]
}
]
}Exit condition: {
"leaveWithGMode": {
"morphed": false
}
}Clears obstacles: door_2 |
|
Entrance condition: {
"comeInWithGMode": {
"mode": "direct",
"morphed": true
}
}Requires: "canArtificialMorph" Exit condition: {
"leaveWithGMode": {
"morphed": true
}
}Clears obstacles: door_2 Dev note: Artificial morph will allow Samus not to fall; real Morph is not sufficient. |
|
Entrance condition: {
"comeInNormally": {}
}Requires: {
"simpleHeatFrames": 85
}Clears obstacles: door_2 |
|
Entrance condition: {
"comeInWithMockball": {
"speedBooster": "any",
"adjacentMinTiles": 0,
"remoteAndLandingMinTiles": [
[
0,
0
]
]
}
}Requires: {
"heatFrames": 85
}Clears obstacles: door_2 |
|


Fight Ridley without immunity to heat damage. Requires: {
"notable": "Ridley without Heat Protection"
}
{
"heatFrames": 0
}
{
"ridleyKill": {}
}
"h_RidleyDrops"Clears obstacles: f_DefeatedRidley Sets flags: f_DefeatedRidley Dev note: Heat frames are accounted for as part of the enemyKill. |
|
Enter the room in G-mode, perform a Crystal Flash, then lay an additional Power Bomb, preferably at the top of the room. The Power Bomb will not explode but will continually force Ridley into a corner of the room. If the Power Bomb is laid near the top of the room, then Ridley will be forced into the bottom of the room, making it easy to damage Ridley at the highest possible rate; if the Power Bomb is laid lower, Ridley will be forced to the top of room, and Samus will have to jump repeatedly to bring it on camera. in which case Ridley can still be damaged but more slowly and with some caution needed to avoid invisible fireballs. After reducing Ridley's health to zero, take damage from Ridley or an invisible fireball to trigger auto-reserves and exit G-mode. Then get grabbed by Ridley to finish the fight. Entrance condition: {
"comeInWithGMode": {
"mode": "any",
"morphed": false,
"mobility": "mobile"
}
}Requires: {
"notable": "G-Mode Crystal Flash Stuck Ridley"
}
"canComplexGMode"
"h_heatedGMode"
"h_CrystalFlash"
"h_usePowerBomb"
{
"or": [
{
"and": [
{
"or": [
"canWallJump",
"HiJump",
"canSpringBallJumpMidAir",
"SpaceJump"
]
},
{
"ridleyKill": {
"powerBombs": false,
"gMode": true,
"stuck": "bottom"
}
}
]
},
{
"ridleyKill": {
"powerBombs": false,
"gMode": true,
"stuck": "top"
}
}
]
}
{
"autoReserveTrigger": {}
}
{
"heatFrames": 520
}
"h_RidleyDrops"Clears obstacles: f_DefeatedRidley, door_2 Sets flags: f_DefeatedRidley Dev note: FIXME: artificial morph with direct G-mode is another option for laying a Power Bomb at the top of the room, by landing on the door ledge on entry (the Morph item would still be needed since the Crystal Flash forces Samus out of being morphed). |
|
Enter the room in G-mode and quickly kill Ridley with 30 Supers. G-mode protects against heat damage but also causes Ridley's fireballs to be invisible and not move. As long as Ridley is swooping, not many fireballs will be placed, so delaying Ridley from pogoing can be helpful. Once Ridley begins pogoing, it generally becomes unsafe for Samus to jump high because of the risk of touching a fireball. By the end of the fight, projectiles will probably be overloaded, causing Ridley's drops not to spawn; they can be collected by exiting G-mode just before drops spawn, and pause abusing if necessary. Entrance condition: {
"comeInWithGMode": {
"mode": "any",
"morphed": false,
"mobility": "mobile"
}
}Requires: {
"notable": "G-Mode Ridley with 30 Supers"
}
"canTrickyGMode"
"h_heatedGMode"
{
"heatFrames": 0
}
{
"ammo": {
"type": "Super",
"count": 30
}
}
{
"or": [
{
"and": [
"h_heatedGModePauseAbuse",
{
"resourceAtMost": [
{
"type": "Energy",
"count": 1
}
]
},
{
"partialRefill": {
"type": "Energy",
"limit": 100
}
}
]
},
"free"
]
}Clears obstacles: f_DefeatedRidley, door_2 Sets flags: f_DefeatedRidley Dev note: FIXME: Leaving back through the open door while still in G-Mode is also possible, but difficult to do without touching an invisible fireball. |
|
Requires: {
"heatFrames": 35
}
{
"or": [
"canDash",
{
"heatFrames": 15
}
]
} |
|


Requires: "canWallJump"
{
"or": [
{
"and": [
"HiJump",
{
"heatFrames": 110
}
]
},
{
"heatFrames": 140
}
]
}
{
"or": [
"canDash",
{
"heatFrames": 20
}
]
} |
|


Requires: "SpaceJump"
{
"or": [
{
"and": [
"HiJump",
{
"heatFrames": 135
}
]
},
{
"heatFrames": 210
}
]
} |
|


Requires: {
"heatFrames": 25
}
{
"or": [
"canDash",
{
"heatFrames": 10
}
]
}
{
"or": [
{
"and": [
"canDoubleBombJump",
{
"heatFrames": 560
}
]
},
{
"and": [
"canDoubleBombJump",
"HiJump",
{
"heatFrames": 420
}
]
},
{
"and": [
{
"or": [
"f_DefeatedRidley",
{
"obstaclesCleared": [
"f_DefeatedRidley"
]
}
]
},
"canJumpIntoIBJ",
{
"or": [
"canLongIBJ",
"HiJump"
]
},
{
"heatFrames": 1000
}
]
}
]
} |
|

Requires: "HiJump"
"canSpringBallJumpMidAir"
{
"heatFrames": 120
} |
|
Requires starting on one of the last three pixels and then performing a last frame jump to get enough height. Requires: "HiJump"
"canSpeedyJump"
"canTrickyJump"
{
"heatFrames": 220
}
{
"or": [
"canInsaneJump",
{
"heatFrames": 300
}
]
}Dev note: This gives one leniency attempt without canInsaneJump. |
|

Requires: "h_heatProof"
{
"ridleyKill": {}
}Clears obstacles: f_DefeatedRidley Sets flags: f_DefeatedRidley |
|
Requires: "h_heatedCrystalFlash" |
{
"$schema": "../../../schema/m3-room.schema.json",
"id": 142,
"name": "Ridley's Room",
"area": "Norfair",
"subarea": "Lower",
"subsubarea": "East",
"roomAddress": "0x7B32E",
"roomEnvironments": [
{
"heated": true
}
],
"mapTileMask": [
[
1
],
[
1
]
],
"nodes": [
{
"id": 1,
"name": "Left Door",
"nodeType": "door",
"nodeSubType": "gray",
"nodeAddress": "0x00198b2",
"doorOrientation": "left",
"doorEnvironments": [
{
"physics": "air"
}
],
"locks": [
{
"name": "Ridley Room Left Gray Lock (to E-Tank)",
"lockType": "gameFlag",
"unlockStrats": [
{
"name": "Base",
"requires": [
{
"or": [
"f_DefeatedRidley",
{
"obstaclesCleared": [
"f_DefeatedRidley"
]
}
]
}
],
"flashSuitChecked": true,
"blueSuitChecked": true
}
]
}
],
"mapTileMask": [
[
1
],
[
2
]
]
},
{
"id": 2,
"name": "Right Door",
"nodeType": "door",
"nodeSubType": "gray",
"nodeAddress": "0x00198be",
"doorOrientation": "right",
"doorEnvironments": [
{
"physics": "air"
}
],
"useImplicitComeInNormally": false,
"useImplicitComeInWithMockball": false,
"useImplicitCarryGModeBackThrough": false,
"useImplicitCarryGModeMorphBackThrough": false,
"locks": [
{
"name": "Ridley Room Right Gray Lock (to Farming Room)",
"lockType": "gameFlag",
"unlockStrats": [
{
"name": "Base",
"requires": [
{
"or": [
"f_DefeatedRidley",
{
"obstaclesCleared": [
"f_DefeatedRidley"
]
}
]
}
],
"flashSuitChecked": true,
"blueSuitChecked": true
}
]
}
],
"mapTileMask": [
[
2
],
[
1
]
]
},
{
"id": 3,
"name": "Ridley",
"nodeType": "junction",
"nodeSubType": "junction",
"mapTileMask": [
[
2
],
[
2
]
],
"devNote": "The position where Samus lands when holding left after walking into the room from the right."
}
],
"enemies": [
{
"id": "e1",
"groupName": "Ridley",
"enemyName": "Ridley",
"quantity": 1,
"homeNodes": [
3
],
"stopSpawn": [
"f_DefeatedRidley"
]
}
],
"strats": [
{
"link": [
1,
1
],
"name": "Base (Unlock Door)",
"requires": [],
"unlocksDoors": [
{
"types": [
"missiles"
],
"requires": [
{
"heatFrames": 50
}
]
},
{
"types": [
"super"
],
"requires": []
},
{
"types": [
"powerbomb"
],
"requires": [
{
"heatFrames": 110
}
]
}
],
"flashSuitChecked": true,
"blueSuitChecked": true
},
{
"link": [
1,
1
],
"name": "Base (Come In Normally)",
"entranceCondition": {
"comeInNormally": {}
},
"requires": [],
"flashSuitChecked": true,
"blueSuitChecked": true,
"clearsObstacles": [
"door_1"
]
},
{
"link": [
1,
1
],
"name": "Base (Come In With Mockball)",
"entranceCondition": {
"comeInWithMockball": {
"adjacentMinTiles": 0,
"remoteAndLandingMinTiles": [
[
0,
0
]
],
"speedBooster": "any"
}
},
"requires": [
{
"heatFrames": 10
}
],
"flashSuitChecked": true,
"blueSuitChecked": true,
"clearsObstacles": [
"door_1"
]
},
{
"link": [
2,
2
],
"name": "Base (Unlock Door)",
"requires": [],
"unlocksDoors": [
{
"types": [
"missiles"
],
"requires": [
{
"heatFrames": 50
}
]
},
{
"types": [
"super"
],
"requires": []
},
{
"types": [
"powerbomb"
],
"requires": [
{
"heatFrames": 110
}
]
}
],
"flashSuitChecked": true,
"blueSuitChecked": true
},
{
"id": 1,
"link": [
1,
1
],
"name": "Leave With Runway",
"requires": [],
"exitCondition": {
"leaveWithRunway": {
"length": 1,
"openEnd": 1
}
},
"flashSuitChecked": true,
"blueSuitChecked": true
},
{
"id": 25,
"link": [
1,
1
],
"name": "Leave With Side Platform",
"requires": [
{
"heatFrames": 210
},
"canMomentumConservingMorph",
"canInsaneJump"
],
"exitCondition": {
"leaveWithSidePlatform": {
"height": 1,
"runway": {
"length": 9,
"openEnd": 2
},
"obstruction": [
2,
1
]
}
},
"flashSuitChecked": true,
"blueSuitChecked": true,
"devNote": [
"Max extra run speed $2.9",
"This strat is included for completeness, though it apparently doesn't have any applications."
]
},
{
"id": 2,
"link": [
1,
1
],
"name": "G-Mode Regain Mobility",
"requires": [
{
"not": "f_DefeatedRidley"
},
"canRiskPermanentLossOfAccess",
{
"enemyDamage": {
"enemy": "Ridley",
"type": "contact",
"hits": 1
}
}
],
"gModeRegainMobility": {},
"flashSuitChecked": true,
"blueSuitChecked": true
},
{
"id": 31,
"link": [
1,
1
],
"name": "G-Mode Setup - Get Hit By Ridley",
"requires": [
{
"heatFrames": 500
},
{
"not": "f_DefeatedRidley"
},
"canRiskPermanentLossOfAccess"
],
"exitCondition": {
"leaveWithGModeSetup": {}
},
"flashSuitChecked": true,
"blueSuitChecked": true,
"note": "Get into position and Ridley will hit Samus shorly after starting to move.",
"devNote": "Not likely to be possible, as it requires canRiskPermanentLossOfAccess and Ridley alive with the door unlocked."
},
{
"id": 33,
"link": [
1,
2
],
"name": "Instant Diagonal Shinespark",
"entranceCondition": {
"comeInShinecharged": {}
},
"requires": [
{
"shineChargeFrames": 1
},
{
"heatFrames": 20
},
{
"shinespark": {
"frames": 20,
"excessFrames": 2
}
},
{
"heatFrames": 110
}
],
"flashSuitChecked": true,
"blueSuitChecked": true,
"note": [
"Buffer a diagonal shinespark to activate immediately on room entry."
],
"clearsObstacles": [
"door_1"
]
},
{
"id": 34,
"link": [
1,
2
],
"name": "Use Flash Suit",
"requires": [
{
"heatFrames": 65
},
{
"useFlashSuit": {}
},
{
"or": [
{
"and": [
{
"heatFrames": 14
},
{
"shinespark": {
"frames": 14,
"excessFrames": 2
}
}
]
},
{
"and": [
"HiJump",
{
"heatFrames": 11
},
{
"shinespark": {
"frames": 11,
"excessFrames": 2
}
}
]
}
]
},
{
"heatFrames": 110
}
],
"flashSuitChecked": true,
"blueSuitChecked": true
},
{
"id": 26,
"link": [
1,
2
],
"name": "Side Platform Cross Room Speedy Jump",
"entranceCondition": {
"comeInWithSidePlatform": {
"platforms": [
{
"minHeight": 1,
"maxHeight": 1,
"minTiles": 17,
"speedBooster": "yes",
"obstructions": [
[
1,
0
]
],
"requires": [
{
"or": [
{
"and": [
"HiJump",
{
"heatFrames": 90
}
]
},
{
"and": [
"canTrickyDashJump",
"canTrickySpringBallJump",
{
"heatFrames": 115
}
]
}
]
}
],
"note": [
"This applies to Warehouse Entrance."
],
"detailNote": [
"For the spring ball jump, retain forward momentum until the pause hits,",
"in order for the mid-air jump to also get the 'tricky dash' boost in height."
]
},
{
"minHeight": 2,
"maxHeight": 2,
"minTiles": 11.4375,
"speedBooster": "yes",
"obstructions": [
[
1,
0
]
],
"requires": [
"canTrickyDashJump",
"canTrickySpringBallJump",
{
"heatFrames": 100
}
],
"note": [
"This applies to Ridley Tank Room, Halfie Climb Room, and Dust Torizo Room."
],
"detailNote": [
"Retain forward momentum until the pause hits,",
"in order for the mid-air jump to also get the 'tricky dash' boost in height."
]
},
{
"minHeight": 2,
"maxHeight": 2,
"minTiles": 12.4375,
"speedBooster": "yes",
"obstructions": [
[
1,
0
]
],
"requires": [
"HiJump",
{
"heatFrames": 95
}
],
"note": [
"This applies to Dust Torizo Room and Halfie Climb Room."
]
},
{
"minHeight": 3,
"maxHeight": 3,
"minTiles": 10.4375,
"speedBooster": "yes",
"obstructions": [
[
1,
0
]
],
"requires": [
"canTrickyDashJump",
"canTrickySpringBallJump",
{
"heatFrames": 120
}
],
"note": [
"This applies to Big Boy Room and Mickey Mouse Room."
],
"detailNote": [
"For the spring ball jump, retain forward momentum until the pause hits,",
"in order for the mid-air jump to also get the 'tricky dash' boost in height."
]
},
{
"minHeight": 2,
"maxHeight": 2,
"minTiles": 45,
"speedBooster": "yes",
"obstructions": [
[
2,
0
]
],
"requires": [
"canInsaneJump",
{
"heatFrames": 85
}
],
"note": [
"This applies to Waterway Energy Tank Room."
]
},
{
"minHeight": 2,
"maxHeight": 2,
"minTiles": 45,
"speedBooster": "yes",
"obstructions": [
[
3,
0
]
],
"requires": [
"canInsaneJump",
"canMomentumConservingMorph",
{
"or": [
{
"and": [
"HiJump",
"canInsaneMidAirMorph",
{
"heatFrames": 80
}
]
},
{
"and": [
"canTrickySpringBallJump",
{
"heatFrames": 100
}
]
}
]
}
],
"note": [
"This applies to Statues Hallway."
]
},
{
"minHeight": 3,
"maxHeight": 3,
"minTiles": 37.4375,
"speedBooster": "yes",
"obstructions": [
[
3,
0
]
],
"requires": [
"canInsaneJump",
"canMomentumConservingMorph",
{
"or": [
{
"and": [
"HiJump",
{
"heatFrames": 85
}
]
},
{
"and": [
"canTrickySpringBallJump",
{
"heatFrames": 100
}
]
}
]
}
],
"note": [
"This applies to Flyway."
]
},
{
"minHeight": 2,
"maxHeight": 2,
"minTiles": 45,
"speedBooster": "yes",
"obstructions": [
[
4,
0
]
],
"requires": [
"canInsaneJump",
"canMomentumConservingMorph",
"canInsaneMidAirMorph",
"canTrickySpringBallJump",
{
"heatFrames": 100
}
],
"note": [
"This applies to Baby Kraid Room."
]
},
{
"minHeight": 3,
"maxHeight": 3,
"minTiles": 39.4375,
"speedBooster": "yes",
"obstructions": [
[
3,
2
]
],
"requires": [
"canTrickyJump",
{
"or": [
{
"and": [
"HiJump",
{
"heatFrames": 75
}
]
},
{
"and": [
"canTrickySpringBallJump",
{
"heatFrames": 115
}
]
}
]
}
],
"note": [
"This applies to Metal Pirates Room."
]
}
]
}
},
"requires": [
"canSpeedyJump"
],
"flashSuitChecked": true,
"blueSuitChecked": true,
"devNote": [
"FIXME: Many of the spring ball jump variants can be done more easily with a spring ball bounce,",
"which should be added as a separate strat."
],
"clearsObstacles": [
"door_1"
]
},
{
"id": 23,
"link": [
1,
2
],
"name": "Precise Grapple Jump",
"entranceCondition": {
"comeInWithGrappleSwing": {
"blocks": [
{
"position": [
-1,
5
],
"environment": "water",
"note": "Mt. Everest"
},
{
"position": [
8,
3
],
"note": "Grapple Beam Room"
},
{
"position": [
7,
3
],
"note": "Colosseum"
}
]
}
},
"requires": [
"h_heatProof",
"canPreciseGrappleJump"
],
"flashSuitChecked": false,
"blueSuitChecked": true,
"clearsObstacles": [
"door_1"
]
},
{
"id": 24,
"link": [
1,
2
],
"name": "Tricky Grapple Jump",
"entranceCondition": {
"comeInWithGrappleSwing": {
"blocks": [
{
"position": [
6,
4
],
"note": "Grapple Tutorial Room 2"
},
{
"position": [
6,
2
],
"note": "Lava Grapple Tunnel"
},
{
"position": [
5,
2
],
"note": "The Moat, Double Chamber, Wrecked Ship Energy Tank Room"
},
{
"position": [
2.375,
4.5625
],
"note": "Post Crocomire Farming Room"
}
]
}
},
"requires": [
"h_heatProof",
"canTrickyGrappleJump"
],
"flashSuitChecked": false,
"blueSuitChecked": true,
"clearsObstacles": [
"door_1"
]
},
{
"id": 35,
"link": [
1,
2
],
"name": "Ridley Grab Door Lock Skip",
"requires": [
{
"notable": "Ridley Grab Door Lock Skip"
},
"canUseEnemies",
{
"heatFrames": 745
},
"h_usePowerBomb",
{
"autoReserveTrigger": {}
},
{
"enemyDamage": {
"enemy": "Ridley",
"type": "contact",
"hits": 2
}
},
{
"heatFrames": 310
},
{
"or": [
{
"and": [
{
"not": "f_DefeatedRidley"
},
"canRiskPermanentLossOfAccess"
]
},
"canWallJump",
"SpaceJump",
{
"and": [
"HiJump",
"canSpringBallJumpMidAir"
]
},
{
"and": [
"HiJump",
"canSpeedyJump",
"canTrickyJump"
]
},
"canJumpIntoIBJ"
]
}
],
"bypassesDoorShell": "yes",
"flashSuitChecked": true,
"blueSuitChecked": true,
"note": [
"Manipulate Ridley into a pogo pattern facing left.",
"Morph and position near the center of the leftmost tile of the platform.",
"When Ridley is descending above Samus and about to pound the ground with his tail,",
"place a Power Bomb and immediately unmorph.",
"If successful, Samus will get grabbed, triggering auto-reserves before the Power Bomb explodes.",
"Ridley will fly away from the Power Bomb explosion,",
"carrying Samus to the top right into the door transition."
]
},
{
"id": 3,
"link": [
1,
3
],
"name": "Base",
"requires": [
{
  "heatFrames": 45
}
],
"flashSuitChecked": true,
"blueSuitChecked": true
},
{
"id": 36,
"link": [
1,
3
],
"name": "Ridley without Heat Protection",
"requires": [
{
"notable": "Ridley without Heat Protection"
},
{
"heatFrames": 0
},
{
"ridleyKill": {}
},
"h_RidleyDrops"
],
"setsFlags": [
"f_DefeatedRidley"
],
"flashSuitChecked": false,
"blueSuitChecked": true,
"note": "Fight Ridley without immunity to heat damage.",
"devNote": [
"Heat frames are accounted for as part of the enemyKill."
],
"clearsObstacles": [
"f_DefeatedRidley"
]
},
{
"id": 27,
"link": [
1,
3
],
"name": "G-Mode Crystal Flash Stuck Ridley",
"entranceCondition": {
"comeInWithGMode": {
"mode": "any",
"morphed": false,
"mobility": "mobile"
}
},
"requires": [
{
"notable": "G-Mode Crystal Flash Stuck Ridley"
},
"canComplexGMode",
"h_heatedGMode",
"h_CrystalFlash",
"h_usePowerBomb",
{
"or": [
{
"and": [
{
"or": [
"canWallJump",
"HiJump",
"canSpringBallJumpMidAir",
"SpaceJump"
]
},
{
"ridleyKill": {
"powerBombs": false,
"gMode": true,
"stuck": "bottom"
}
}
]
},
{
"ridleyKill": {
"powerBombs": false,
"gMode": true,
"stuck": "top"
}
}
]
},
{
"autoReserveTrigger": {}
},
{
"heatFrames": 520
},
{
"partialRefill": {
"type": "Energy",
"limit": 100
}
}
],
"setsFlags": [
"f_DefeatedRidley"
],
"flashSuitChecked": true,
"blueSuitChecked": true,
"note": [
"Enter the room in G-mode, perform a Crystal Flash, then lay an additional Power Bomb, preferably at the top of the room.",
"The Power Bomb will not explode but will continually force Ridley into a corner of the room.",
"If the Power Bomb is laid near the top of the room, then Ridley will be forced into the bottom of the room,",
"making it easy to damage Ridley at the highest possible rate;",
"if the Power Bomb is laid lower, Ridley will be forced to the top of room, and Samus will have to jump repeatedly to bring it on camera.",
"in which case Ridley can still be damaged but more slowly and with some caution needed to avoid invisible fireballs.",
"After reducing Ridley's health to zero, take damage from Ridley or an invisible fireball to trigger auto-reserves and exit G-mode.",
"Then get grabbed by Ridley to finish the fight."
],
"clearsObstacles": [
"f_DefeatedRidley",
"door_1"
]
},
{
"id": 28,
"link": [
1,
3
],
"name": "G-Mode Ridley with 30 Supers",
"entranceCondition": {
"comeInWithGMode": {
"mode": "any",
"morphed": false,
"mobility": "mobile"
}
},
"requires": [
{
"notable": "G-Mode Ridley with 30 Supers"
},
"canTrickyGMode",
"h_heatedGMode",
{
"heatFrames": 0
},
{
"ammo": {
"type": "Super",
"count": 30
}
},
{
"or": [
{
"and": [
"h_heatedGModePauseAbuse",
{
"resourceAtMost": [
{
"type": "Energy",
"count": 1
}
]
},
{
"partialRefill": {
"type": "Energy",
"limit": 100
}
}
]
},
"free"
]
},
{
"noFlashSuit": {}
}
],
"setsFlags": [
"f_DefeatedRidley"
],
"flashSuitChecked": true,
"blueSuitChecked": true,
"note": [
"Enter the room in G-mode and quickly kill Ridley with 30 Supers.",
"G-mode protects against heat damage but also causes Ridley's fireballs to be invisible and not move.",
"As long as Ridley is swooping, not many fireballs will be placed, so delaying Ridley from pogoing can be helpful.",
"Once Ridley begins pogoing, it generally becomes unsafe for Samus to jump high because of the risk of touching a fireball.",
"By the end of the fight, projectiles will probably be overloaded, causing Ridley's drops not to spawn;",
"they can be collected by exiting G-mode just before drops spawn, and pause abusing if necessary."
],
"devNote": [
"FIXME: Leaving back through the open door while still in G-Mode is also possible, and free to do."
],
"clearsObstacles": [
"f_DefeatedRidley",
"door_1"
]
},
{
"id": 4,
"link": [
2,
2
],
"name": "Leave With Runway",
"requires": [],
"exitCondition": {
"leaveWithRunway": {
"length": 1,
"openEnd": 1
}
},
"flashSuitChecked": true,
"blueSuitChecked": true
},
{
"id": 20,
"link": [
2,
2
],
"name": "Land in Door Frame",
"entranceCondition": {
"comeInNormally": {}
},
"requires": [
"canPrepareForNextRoom",
"canInsaneJump",
{
"heatFrames": 55
},
{
"doorUnlockedAtNode": 2
}
],
"unlocksDoors": [
{
"types": [
"super"
],
"requires": []
},
{
"types": [
"missiles",
"powerbomb"
],
"requires": [
"never"
]
}
],
"flashSuitChecked": true,
"blueSuitChecked": true,
"clearsObstacles": [
"door_2"
]
},
{
"id": 21,
"link": [
2,
2
],
"name": "Door Stuck, Open Door",
"entranceCondition": {
"comeInWithDoorStuckSetup": {}
},
"requires": [
"canPrepareForNextRoom",
{
"heatFrames": 55
},
{
"doorUnlockedAtNode": 2
}
],
"unlocksDoors": [
{
"types": [
"ammo"
],
"requires": []
}
],
"flashSuitChecked": true,
"blueSuitChecked": true,
"clearsObstacles": [
"door_2"
]
},
{
"id": 14,
"link": [
2,
2
],
"name": "Prepared Return Without Falling",
"entranceCondition": {
"comeInNormally": {}
},
"requires": [
"canPrepareForNextRoom",
{
"or": [
"SpaceJump",
"canWallJump"
]
},
{
"heatFrames": 80
},
{
"doorUnlockedAtNode": 2
}
],
"unlocksDoors": [
{
"types": [
"super"
],
"requires": [
"canTrickyJump"
]
},
{
"types": [
"missiles",
"powerbomb"
],
"requires": [
"never"
]
}
],
"flashSuitChecked": true,
"blueSuitChecked": true,
"clearsObstacles": [
"door_2"
]
},
{
"id": 5,
"link": [
2,
2
],
"name": "G-Mode Regain Mobility",
"requires": [
{
"not": "f_DefeatedRidley"
},
"canRiskPermanentLossOfAccess",
{
"enemyDamage": {
"enemy": "Ridley",
"type": "contact",
"hits": 1
}
}
],
"gModeRegainMobility": {},
"flashSuitChecked": true,
"blueSuitChecked": true,
"devNote": "FIXME: Ridley could also be used to set up G-mode, but the chaos of the fight makes this difficult."
},
{
"id": 32,
"link": [
2,
2
],
"name": "G-Mode Setup - Get Hit By Ridley",
"requires": [
{
"heatFrames": 900
},
{
"or": [
"canTrickyGMode",
{
"heatFrames": 180
}
]
},
"canComplexGMode",
{
"or": [
"SpaceJump",
"canWallJump",
{
"and": [
"HiJump",
"canSpringBallJumpMidAir"
]
}
]
},
{
"not": "f_DefeatedRidley"
},
"canRiskPermanentLossOfAccess"
],
"exitCondition": {
"leaveWithGModeSetup": {}
},
"flashSuitChecked": true,
"blueSuitChecked": true,
"note": [
"It is much more common for Ridley to hit Samus when Ridley is facing left.",
"One way to get Ridley to turn around is when it pogos on the right side of the room, stationary spin jump and break spin.",
"The fireballs can be tricky to deal with in the door frame, but can be done by dropping down and quickly wall jumping back up or by kagoing them."
],
"devNote": [
"Not likely to be possible, as it requires canRiskPermanentLossOfAccess and Ridley alive with the door unlocked.",
"The extra heat frames are a leniency to account for randomness."
]
},
{
"id": 6,
"link": [
2,
2
],
"name": "Carry G-Mode Back Through",
"entranceCondition": {
"comeInWithGMode": {
"mode": "direct",
"morphed": false
}
},
"requires": [
{
  "or": [
    "SpaceJump",
    "canWallJump",
    {
      "and": [
        "canJumpIntoIBJ",
        "canInsaneJump",
        {
          "or": [
            "HiJump",
            {
              "and": [
                "canLongIBJ",
                "canDoubleBombJump"
              ]
            }
          ]
        }
      ]
    },
    {
      "and": [
        {
          "or": [
            "f_DefeatedRidley",
            {
              "obstaclesCleared": [
                "f_DefeatedRidley"
              ]
            }
          ]
        },
        {
          "or": [
            "canLongIBJ",
            {
              "and": [
                "canJumpIntoIBJ",
                "HiJump"
              ]
            }
          ]
        }
      ]
    },
    {
      "and": [
        "HiJump",
        "canSpringBallJumpMidAir"
      ]
    },
    {
      "and": [
        "HiJump",
        "canSpeedyJump",
        "canTrickyJump",
        {
          "or": [
            "canInsaneJump",
            {
              "or": [
                "f_DefeatedRidley",
                {
                  "obstaclesCleared": [
                    "f_DefeatedRidley"
                  ]
                }
              ]
            }
          ]
        }
      ]
    }
  ]
}
],
"exitCondition": {
"leaveWithGMode": {
"morphed": false
}
},
"bypassesDoorShell": "free",
"flashSuitChecked": true,
"blueSuitChecked": true,
"clearsObstacles": [
"door_2"
]
},
{
"id": 7,
"link": [
2,
2
],
"name": "Carry G-Mode Morph Back Through",
"entranceCondition": {
"comeInWithGMode": {
"mode": "direct",
"morphed": true
}
},
"requires": [
"canArtificialMorph"
],
"exitCondition": {
"leaveWithGMode": {
"morphed": true
}
},
"bypassesDoorShell": "free",
"flashSuitChecked": true,
"blueSuitChecked": true,
"devNote": "Artificial morph will allow Samus not to fall; real Morph is not sufficient.",
"clearsObstacles": [
"door_2"
]
},
{
"id": 8,
"link": [
2,
3
],
"name": "Base",
"entranceCondition": {
"comeInNormally": {}
},
"requires": [
{
  "simpleHeatFrames": 85
}
],
"flashSuitChecked": true,
"blueSuitChecked": true,
"clearsObstacles": [
"door_2"
]
},
{
"id": 22,
"link": [
2,
3
],
"name": "Fall Into Room With Mockball",
"entranceCondition": {
"comeInWithMockball": {
"speedBooster": "any",
"adjacentMinTiles": 0,
"remoteAndLandingMinTiles": [
[
0,
0
]
]
}
},
"requires": [
{
  "heatFrames": 85
}
],
"flashSuitChecked": true,
"blueSuitChecked": true,
"clearsObstacles": [
"door_2"
]
},
{
"id": 17,
"link": [
2,
3
],
"name": "Ridley without Heat Protection",
"requires": [
{
"notable": "Ridley without Heat Protection"
},
{
"heatFrames": 0
},
{
"ridleyKill": {}
},
"h_RidleyDrops"
],
"setsFlags": [
"f_DefeatedRidley"
],
"flashSuitChecked": false,
"blueSuitChecked": true,
"note": "Fight Ridley without immunity to heat damage.",
"devNote": [
"Heat frames are accounted for as part of the enemyKill."
],
"clearsObstacles": [
"f_DefeatedRidley"
]
},
{
"id": 29,
"link": [
2,
3
],
"name": "G-Mode Crystal Flash Stuck Ridley",
"entranceCondition": {
"comeInWithGMode": {
"mode": "any",
"morphed": false,
"mobility": "mobile"
}
},
"requires": [
{
"notable": "G-Mode Crystal Flash Stuck Ridley"
},
"canComplexGMode",
"h_heatedGMode",
"h_CrystalFlash",
"h_usePowerBomb",
{
"or": [
{
"and": [
{
"or": [
"canWallJump",
"HiJump",
"canSpringBallJumpMidAir",
"SpaceJump"
]
},
{
"ridleyKill": {
"powerBombs": false,
"gMode": true,
"stuck": "bottom"
}
}
]
},
{
"ridleyKill": {
"powerBombs": false,
"gMode": true,
"stuck": "top"
}
}
]
},
{
"autoReserveTrigger": {}
},
{
"heatFrames": 520
},
"h_RidleyDrops"
],
"setsFlags": [
"f_DefeatedRidley"
],
"flashSuitChecked": true,
"blueSuitChecked": true,
"note": [
"Enter the room in G-mode, perform a Crystal Flash, then lay an additional Power Bomb, preferably at the top of the room.",
"The Power Bomb will not explode but will continually force Ridley into a corner of the room.",
"If the Power Bomb is laid near the top of the room, then Ridley will be forced into the bottom of the room,",
"making it easy to damage Ridley at the highest possible rate;",
"if the Power Bomb is laid lower, Ridley will be forced to the top of room, and Samus will have to jump repeatedly to bring it on camera.",
"in which case Ridley can still be damaged but more slowly and with some caution needed to avoid invisible fireballs.",
"After reducing Ridley's health to zero, take damage from Ridley or an invisible fireball to trigger auto-reserves and exit G-mode.",
"Then get grabbed by Ridley to finish the fight."
],
"devNote": [
"FIXME: artificial morph with direct G-mode is another option for laying a Power Bomb at the top of the room,",
"by landing on the door ledge on entry (the Morph item would still be needed since the Crystal Flash forces Samus out of being morphed)."
],
"clearsObstacles": [
"f_DefeatedRidley",
"door_2"
]
},
{
"id": 30,
"link": [
2,
3
],
"name": "G-Mode Ridley with 30 Supers",
"entranceCondition": {
"comeInWithGMode": {
"mode": "any",
"morphed": false,
"mobility": "mobile"
}
},
"requires": [
{
"notable": "G-Mode Ridley with 30 Supers"
},
"canTrickyGMode",
"h_heatedGMode",
{
"heatFrames": 0
},
{
"ammo": {
"type": "Super",
"count": 30
}
},
{
"or": [
{
"and": [
"h_heatedGModePauseAbuse",
{
"resourceAtMost": [
{
"type": "Energy",
"count": 1
}
]
},
{
"partialRefill": {
"type": "Energy",
"limit": 100
}
}
]
},
"free"
]
}
],
"setsFlags": [
"f_DefeatedRidley"
],
"flashSuitChecked": true,
"blueSuitChecked": true,
"note": [
"Enter the room in G-mode and quickly kill Ridley with 30 Supers.",
"G-mode protects against heat damage but also causes Ridley's fireballs to be invisible and not move.",
"As long as Ridley is swooping, not many fireballs will be placed, so delaying Ridley from pogoing can be helpful.",
"Once Ridley begins pogoing, it generally becomes unsafe for Samus to jump high because of the risk of touching a fireball.",
"By the end of the fight, projectiles will probably be overloaded, causing Ridley's drops not to spawn;",
"they can be collected by exiting G-mode just before drops spawn, and pause abusing if necessary."
],
"devNote": [
"FIXME: Leaving back through the open door while still in G-Mode is also possible,",
"but difficult to do without touching an invisible fireball."
],
"clearsObstacles": [
"f_DefeatedRidley",
"door_2"
]
},
{
"id": 9,
"link": [
3,
1
],
"name": "Base",
"requires": [
{
"heatFrames": 35
},
{
"or": [
"canDash",
{
"heatFrames": 15
}
]
}
],
"flashSuitChecked": true,
"blueSuitChecked": true
},
{
"id": 10,
"link": [
3,
2
],
"name": "Wall Jump",
"requires": [
"canWallJump",
{
"or": [
{
"and": [
"HiJump",
{
"heatFrames": 110
}
]
},
{
"heatFrames": 140
}
]
},
{
"or": [
"canDash",
{
"heatFrames": 20
}
]
}
],
"flashSuitChecked": true,
"blueSuitChecked": true
},
{
"id": 11,
"link": [
3,
2
],
"name": "Space Jump",
"requires": [
"SpaceJump",
{
"or": [
{
"and": [
"HiJump",
{
"heatFrames": 135
}
]
},
{
"heatFrames": 210
}
]
}
],
"flashSuitChecked": true,
"blueSuitChecked": true
},
{
"id": 12,
"link": [
3,
2
],
"name": "IBJ",
"requires": [
{
"heatFrames": 25
},
{
"or": [
"canDash",
{
"heatFrames": 10
}
]
},
{
"or": [
{
"and": [
"canDoubleBombJump",
{
"heatFrames": 560
}
]
},
{
"and": [
"canDoubleBombJump",
"HiJump",
{
"heatFrames": 420
}
]
},
{
"and": [
{
"or": [
"f_DefeatedRidley",
{
"obstaclesCleared": [
"f_DefeatedRidley"
]
}
]
},
"canJumpIntoIBJ",
{
"or": [
"canLongIBJ",
"HiJump"
]
},
{
"heatFrames": 1000
}
]
}
]
}
],
"flashSuitChecked": true,
"blueSuitChecked": true
},
{
"id": 18,
"link": [
3,
2
],
"name": "HiJump Spring Ball",
"requires": [
"HiJump",
"canSpringBallJumpMidAir",
{
"heatFrames": 120
}
],
"flashSuitChecked": true,
"blueSuitChecked": true
},
{
"id": 19,
"link": [
3,
2
],
"name": "Speedy HiJump",
"requires": [
"HiJump",
"canSpeedyJump",
"canTrickyJump",
{
"heatFrames": 220
},
{
"or": [
"canInsaneJump",
{
"heatFrames": 300
}
]
}
],
"flashSuitChecked": true,
"blueSuitChecked": true,
"note": "Requires starting on one of the last three pixels and then performing a last frame jump to get enough height.",
"devNote": "This gives one leniency attempt without canInsaneJump."
},
{
"id": 16,
"link": [
3,
3
],
"name": "Heat Proof Ridley",
"requires": [
"h_heatProof",
{
"ridleyKill": {}
}
],
"setsFlags": [
"f_DefeatedRidley"
],
"flashSuitChecked": false,
"blueSuitChecked": true,
"clearsObstacles": [
"f_DefeatedRidley"
]
},
{
"id": 13,
"link": [
3,
3
],
"name": "Crystal Flash",
"requires": [
"h_heatedCrystalFlash"
],
"flashSuitChecked": true,
"blueSuitChecked": true
}
],
"notables": [
{
"id": 1,
"name": "Ridley without Heat Protection",
"note": "Fight Ridley without immunity to heat damage."
},
{
"id": 2,
"name": "G-Mode Crystal Flash Stuck Ridley",
"note": [
"In G-mode, use a Crystal Flash and an additional Power Bomb to get Ridley stuck in a corner of the room.",
"To end the fight, exit G-mode by using damage from Ridley to trigger auto-reserves."
]
},
{
"id": 3,
"name": "G-Mode Ridley with 30 Supers",
"note": [
"In G-Mode, use 30 Supers to end the fight quickly, carefully avoiding the invisible fireballs that Ridley spawns.",
"Use X-Ray to exit G-Mode precisely at the end of the fight just before drops spawn."
]
},
{
"id": 4,
"name": "Ridley Grab Door Lock Skip",
"note": [
"Use a Power Bomb explosion and auto-reserve trigger to manipulate Ridley into grabbing Samus and carrying her through the top right door."
]
}
],
"nextStratId": 37,
"nextNotableId": 5,
"obstacles": [
{
"id": "door_1",
"name": "door_1"
},
{
"id": "door_2",
"name": "door_2"
},
{
"id": "f_DefeatedRidley",
"name": "f_DefeatedRidley"
}
]
}