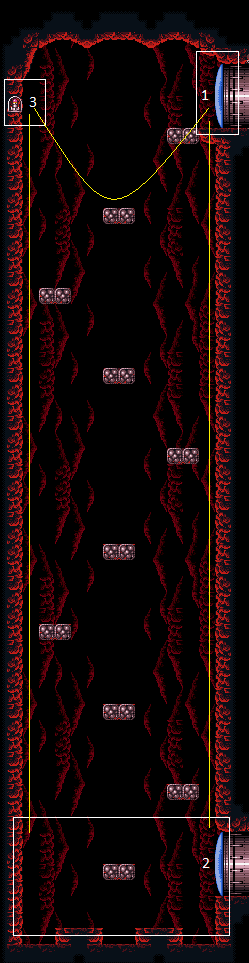
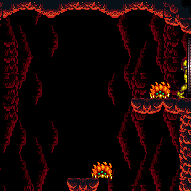
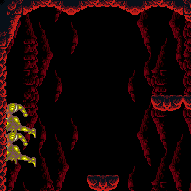
Crumble Shaft
Room ID: 111
|
Exit condition: {
"leaveWithRunway": {
"length": 2,
"openEnd": 1
}
} |
|
Requires: "h_heatedCrystalFlash" |
|
Break each of the crumble platforms to group the Sovas at the bottom of the room. Requires: "h_heatProof"
"canDodgeWhileShooting"
{
"or": [
{
"and": [
"canConsecutiveWallJump",
{
"or": [
"canCrumbleJump",
"SpaceJump",
"canPreciseWallJump"
]
},
{
"cycleFrames": 930
}
]
},
{
"and": [
"h_useSpringBall",
{
"cycleFrames": 1200
}
]
},
{
"and": [
"SpaceJump",
{
"cycleFrames": 1320
}
]
},
{
"and": [
"canDoubleBombJump",
"canLongIBJ",
{
"cycleFrames": 2340
}
]
},
{
"and": [
"canJumpIntoIBJ",
"canLongIBJ",
"canBePatient",
{
"cycleFrames": 4640
}
]
}
]
}
{
"or": [
"canCrumbleJump",
{
"cycleFrames": 300
}
]
}
{
"resetRoom": {
"nodes": [
1,
2
]
}
}
{
"or": [
{
"haveBlueSuit": {}
},
"Wave",
"Spazer",
"Plasma",
"Grapple",
{
"cycleFrames": 120
}
]
}
{
"or": [
"canDash",
{
"cycleFrames": 90
}
]
}Resets obstacles: A Farm cycle drops: 6 Sova Dev note: Climb from 2 to 1 if resetting with 2. |
|
Jump and aim down to bring the Sova on camera. Farm with Grapple while crouched and touching the crumble platform. Requires: "h_heatProof"
"canUseGrapple"
"canCameraManip"
{
"resetRoom": {
"nodes": [
1
]
}
}
{
"simpleCycleFrames": 105
}
{
"cycleFrames": 25
}Resets obstacles: A Farm cycle drops: 1 Sova |
|
Falling down the right side of the room is safe. Requires: {
"simpleHeatFrames": 120
}
{
"heatFrames": 75
} |
|


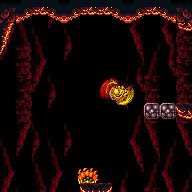
Move forward far enough to trigger the crumble block, then quickly moonfall before it respawns. It can help to perform the moonfall facing left (backing up to the right), then quickly turn back left to clear the platform. Press against the wall, aim down, and shoot open the door while falling. It is possible to delay the moonfall enough to land on the doorframe, by turning around back and forth once mid-air. Requires: "canMoonfall"
"canTrickyJump"
{
"simpleHeatFrames": 100
}
{
"heatFrames": 60
} |
From: 1
Top Right Door
To: 2
Bottom Right Door
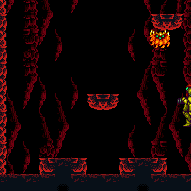
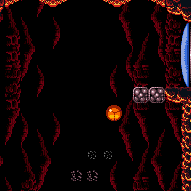
Fall into the room and land on the bottom right crumble platform to bring the Sova to the door. Entrance condition: {
"comeInNormally": {}
}Requires: {
"heatFrames": 405
}Exit condition: {
"leaveWithGModeSetup": {}
}Unlocks doors: {"types":["missiles","super"],"requires":[]}
{"types":["powerbomb"],"requires":["never"]} |
From: 1
Top Right Door
To: 2
Bottom Right Door
Entrance condition: {
"comeInShinecharging": {
"length": 1,
"openEnd": 0
}
}Requires: "canChainTemporaryBlue"
"canXRayTurnaround"
{
"heatFrames": 375
}
{
"or": [
"canXRayCancelShinecharge",
{
"heatFrames": 160
}
]
}Exit condition: {
"leaveWithTemporaryBlue": {}
}Unlocks doors: {"types":["super"],"requires":[]}
{"types":["powerbomb"],"requires":["canInsaneJump"]}
{"types":["missiles"],"requires":[{"heatFrames":50}]} |
|
Climb down using the solid crumble blocks. It is possible to use a Super to knock a Sova off and kill it by the door and pause abuse to grab its Energy drop on G-mode exit with a very precise positioning jump or large Energy drop. With a second Super it is recommended to bring down the other clockwise Sova as well (at the top of the room), and stack their drops. It is also possible to do it without a Super if the Sova drops a large Energy drop. There is a way to do this with two Sova, and if either drops a large Energy, Samus can survive: kill both of the bottom two Sova at the bottom right corner of their platforms, stand on the middle of the platform with the second lowest Sova, and hold right when exiting G-mode. Entrance condition: {
"comeInWithGMode": {
"mode": "any",
"morphed": false
}
}Requires: "h_heatedGMode"
{
"or": [
{
"heatFrames": 45
},
{
"and": [
"h_heatedGModePauseAbuse",
{
"or": [
"canTrickyGMode",
{
"ammo": {
"type": "Super",
"count": 2
}
}
]
}
]
}
]
} |
|
Shoot the shot block, then crumble jump on the middle platform. Requires: "canCrumbleJump"
{
"heatFrames": 130
}
{
"or": [
"canDash",
{
"heatFrames": 20
}
]
} |
|
Shoot the shot block, then crumble spin jump on the middle platform. Requires: "canCrumbleJump"
"canTrickyJump"
{
"heatFrames": 115
}
{
"or": [
"canDash",
{
"heatFrames": 20
}
]
}Clears obstacles: A |
|


Requires: "SpaceJump"
{
"heatFrames": 100
}
{
"or": [
"canDash",
{
"heatFrames": 30
}
]
}Clears obstacles: A |
|

Entrance condition: {
"comeInShinecharged": {}
}Requires: {
"shineChargeFrames": 60
}
"canHorizontalShinespark"
{
"shinespark": {
"frames": 20,
"excessFrames": 4
}
}
{
"heatFrames": 175
} |
|

Jump and aim down to lower the camera so the middle platform Sova starts moving. Then shoot the shot block and walljump off the left side of the middle platform to reach the item. Requires: "canDash"
"canTrickyWallJump"
"canTrickyJump"
"canCameraManip"
{
"heatFrames": 230
}Clears obstacles: A |
|
Jump and aim down to lower the camera so the middle platform Sova starts moving. Then freeze it by aiming down, shoot the shot block, and use the Sova as a stable platform. Requires: "canDash"
{
"notable": "Top Item Frozen Sova"
}
"canTrickyUseFrozenEnemies"
"canCarefulJump"
"canCameraManip"
{
"heatFrames": 220
}Clears obstacles: A Dev note: Wall jumping and using the same frozen Sova, or falling onto the Sova just below the item and then jumping to the top Sova could be added, but this would require an obstacle to ensure they haven't fallen or died, and is not really easier than a crumble jump. |
|

Shoot the shot block, then Spring Ball on the middle platform. Requires: "h_useSpringBall"
{
"or": [
{
"and": [
{
"or": [
"HiJump",
"canCarefulJump"
]
},
{
"heatFrames": 185
}
]
},
{
"and": [
"canTrickyJump",
{
"heatFrames": 170
}
]
},
{
"and": [
"canLateralMidAirMorph",
{
"heatFrames": 120
}
]
}
]
} |
|
Enter with a spin jump, and wall jump up the right side; at the end, walljump off the top-middle crumble platform then off the top-right one. Requires: "canPreciseWallJump"
"canConsecutiveWallJump"
{
"or": [
{
"and": [
"HiJump",
{
"heatFrames": 270
}
]
},
{
"heatFrames": 340
}
]
}
{
"or": [
"canDodgeWhileShooting",
{
"heatFrames": 300
}
]
}
{
"or": [
"canTrickyJump",
{
"heatFrames": 300
}
]
} |
From: 2
Bottom Right Door
To: 1
Top Right Door


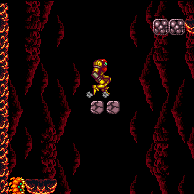
Do 9 successive crumble jumps up the platforms. If Hi-Jump is available, then it is possible to skip 4 of the crumble platforms, using only the center platforms, in which case it is recommended to down-grab the 3rd center platform, though doing a crumble spin jump onto it is also an option. Requires: "canCrumbleJump"
"canTrickyJump"
"canTrickyDodgeEnemies"
{
"or": [
{
"and": [
"HiJump",
"canInsaneJump",
{
"heatFrames": 370
}
]
},
{
"heatFrames": 630
}
]
} |
|

Hold jump to easily do 9 successive spring ball bounces up the platforms. Requires: "h_useSpringBall"
{
"heatFrames": 720
} |
|
Wall jump up the right, then use Space Jump at the top. Requires: "SpaceJump"
"canConsecutiveWallJump"
{
"or": [
{
"and": [
"HiJump",
{
"heatFrames": 270
}
]
},
{
"heatFrames": 340
}
]
}
{
"or": [
"canDodgeWhileShooting",
{
"heatFrames": 300
}
]
} |
|
Use Space Jump to get to the top. Requires: "SpaceJump"
{
"or": [
{
"and": [
"HiJump",
{
"heatFrames": 450
}
]
},
{
"heatFrames": 720
}
]
} |
|
Kill the Sova on the bottom-right platform, then IBJ right next to the left of the platform. Samus can align with the left side of the platform by jumping into it. Changing the IBJ speed may be necessary to get past the second Sova. Requires: "canLongIBJ"
"canStaggeredIBJ"
{
"heatFrames": 4000
} |
|

Kill the Sova on the bottom-right platform, then IBJ right next to the left of the platform. Samus can align with the left side of the platform by jumping into it. Place bombs to kill the second Sova. Drop to the bottom and restart if necessary. Requires: "h_heatProof" "canLongIBJ" "canBePatient" |
|


It has to be setup really close to the left side of the right platforms, otherwise it also requires a crumble jump at the top. Entrance condition: {
"comeInShinecharged": {}
}Requires: {
"shineChargeFrames": 35
}
{
"shinespark": {
"frames": 59,
"excessFrames": 2
}
}
{
"heatFrames": 220
} |
|


Use the Sovas as platforms to climb the room. Requires: "HiJump"
"canTrickyUseFrozenEnemies"
{
"heatFrames": 630
} |
|
Climb up 3 screens. Entrance condition: {
"comeInWithDoorStuckSetup": {}
}Requires: "canLongXRayClimb"
{
"heatFrames": 4000
}
"canBePatient" |
|
Enter with G-mode direct, back up to between 1 and 6 pixels from the door transition, and activate X-ray to get very deep stuck in the door. Climb up 3 screens, and perform a turnaround buffered spin-jump away from the door to trigger the transition, bypassing any lock on the door. Entrance condition: {
"comeInWithGMode": {
"mode": "direct",
"morphed": false
}
}Requires: "canGModeXRayClimb" "h_heatProof" "canLongXRayClimb" "canBePatient" Bypasses door shell: true |
From: 2
Bottom Right Door
To: 1
Top Right Door

Lure a Sova from the bottom to top of the room. If wall jumping, it may be easiest to follow behind the Sova and pass it at the top of the room. Requires: {
"heatFrames": 2070
}
{
"or": [
"h_useSpringBall",
{
"and": [
"canTrickyWallJump",
{
"heatFrames": 100
}
]
},
{
"and": [
"SpaceJump",
{
"heatFrames": 100
}
]
},
{
"and": [
"canCrumbleJump",
"canInsaneJump"
]
}
]
}Exit condition: {
"leaveWithGModeSetup": {}
}Unlocks doors: {"types":["missiles","super"],"requires":[]}
{"types":["powerbomb"],"requires":["h_heatProof"]}Dev note: FIXME: This could be doable with an X-Ray climb and then carefully and slowly returning the camera. |
|
Climb the solid crumble blocks. It is possible to use a Super to knock one or two Sova off and follow it to the door and pause abuse to grab its Energy drop on G-mode exit. Entrance condition: {
"comeInWithGMode": {
"mode": "any",
"morphed": false
}
}Requires: {
"or": [
"h_heatedGModeOpenDifferentDoor",
{
"and": [
{
"ammo": {
"type": "Super",
"count": 1
}
},
"h_heatedGModePauseAbuse"
]
}
]
}Dev note: FIXME: It is possible to use grapple to grab the drop from the top Sova from the doorway, but it is fairly precise and requires a large Energy drop. |
From: 2
Bottom Right Door
To: 1
Top Right Door
After the teleport, immediately press down to extend Grapple to avoid bonking on the ceiling overhang; note that buffering the down input through the transition will not work. Then swing over to the door. Crumble jump in case the swing does not make it all the way to the door. Samus will be visible but off-camera; swinging back and forth to fix the camera is possible, at the cost of additional heat damage. Entrance condition: {
"comeInWithGrappleTeleport": {
"blockPositions": [
[
5,
3
]
]
}
}Requires: {
"heatFrames": 120
}
{
"or": [
"canOffScreenMovement",
{
"heatFrames": 180
}
]
} |
|
After the teleport, immediately press down to extend Grapple to avoid bonking on the ceiling overhang; note that buffering the down input through the transition will not work. Then swing over to the door. Samus will be visible but off-camera; swinging back and forth to fix the camera is possible, at the cost of additional heat damage. Entrance condition: {
"comeInWithGrappleTeleport": {
"blockPositions": [
[
7,
2
]
]
}
}Requires: {
"heatFrames": 80
} |
|
Exit condition: {
"leaveWithRunway": {
"length": 1,
"openEnd": 1
}
} |
From: 2
Bottom Right Door
To: 2
Bottom Right Door


To minimize heat frames, briefly wait for the Sova to be on the top right of the platform before knocking it off to shorten its path to the door. Requires: "h_frozenEnemyRunway"
{
"heatFrames": 360
}
{
"or": [
"canCrumbleJump",
"HiJump",
"canWallJump"
]
}Exit condition: {
"leaveWithRunway": {
"length": 2,
"openEnd": 1
}
}Dev note: There are more alternatives to the single canCrumbleJump, but it is basically assumed at this difficulty. |
|
Requires: {
"heatFrames": 140
}Exit condition: {
"leaveSpinning": {
"remoteRunway": {
"length": 3,
"openEnd": 2
}
}
} |
|
Requires: {
"heatFrames": 140
}Exit condition: {
"leaveWithMockball": {
"remoteRunway": {
"length": 3,
"openEnd": 0
},
"landingRunway": {
"length": 1,
"openEnd": 1
}
}
} |
From: 2
Bottom Right Door
To: 2
Bottom Right Door
Requires: {
"heatFrames": 140
}Exit condition: {
"leaveWithSpringBallBounce": {
"remoteRunway": {
"length": 2,
"openEnd": 1
},
"landingRunway": {
"length": 1,
"openEnd": 1
},
"movementType": "uncontrolled"
}
} |
From: 2
Bottom Right Door
To: 2
Bottom Right Door


Requires: {
"heatFrames": 140
}
"canTrickyJump"Exit condition: {
"leaveWithSidePlatform": {
"height": 2,
"runway": {
"length": 3,
"openEnd": 2
},
"obstruction": [
3,
2
]
}
}Dev note: Max extra run speed $1.5 |
|
Requires: "h_heatProof"
"canUseGrapple"
{
"resetRoom": {
"nodes": [
2
]
}
}
{
"cycleFrames": 250
}
{
"or": [
{
"noFlashSuit": {}
},
{
"and": [
"canMidAirMorph",
{
"cycleFrames": 30
}
]
}
]
}Resets obstacles: A Farm cycle drops: 2 Sova |
|
Requires: "h_heatProof"
{
"resetRoom": {
"nodes": [
2
]
}
}
{
"cycleFrames": 160
}Resets obstacles: A Farm cycle drops: 1 Sova |
|
Requires: {
"heatFrames": 20
}
"h_heatedCrystalFlash"
{
"heatFrames": 20
} |
|


Use a Super to knock off the Sova to regain mobility. Requires: {
"ammo": {
"type": "Super",
"count": 1
}
}
{
"enemyDamage": {
"enemy": "Sova",
"type": "contact",
"hits": 1
}
} |
From: 2
Bottom Right Door
To: 2
Bottom Right Door

Land on the crumble platform just above the door to release the Sova. Entrance condition: {
"comeInNormally": {}
}Requires: {
"heatFrames": 370
}
{
"or": [
"HiJump",
"SpaceJump",
"canWallJump",
"h_useSpringBall",
"canCrumbleJump",
"canTrickyJump",
{
"ammo": {
"type": "Super",
"count": 1
}
},
{
"and": [
"canJumpIntoIBJ",
{
"heatFrames": 80
}
]
}
]
}Exit condition: {
"leaveWithGModeSetup": {}
}Unlocks doors: {"types":["missiles","super"],"requires":[]}
{"types":["powerbomb"],"requires":["never"]}Dev note: It is possible to jump into the room if it is dry, but these options are easy enough to ignore adding that. Opening the door with missiles will usually not add any heat frames, but will if using IBJ or a doorframe jump. |
|
If entering from the bottom door, a Sova will be in the way in the top left: either wall jump in place while waiting for it, or wall jump around it using two crumble platforms to the right. Requires: "canConsecutiveWallJump"
{
"or": [
"canDash",
{
"heatFrames": 30
}
]
}
{
"or": [
{
"and": [
"HiJump",
{
"heatFrames": 290
},
{
"or": [
"canCrumbleJump",
{
"heatFrames": 30
}
]
}
]
},
{
"heatFrames": 360
}
]
}
{
"or": [
"ScrewAttack",
{
"haveBlueSuit": {}
},
{
"and": [
"canPreciseWallJump",
"canTrickyJump",
{
"heatFrames": 30
}
]
},
{
"and": [
"canTrickyWallJump",
{
"heatFrames": 80
}
]
},
{
"heatFrames": 330
}
]
}
{
"or": [
"canDodgeWhileShooting",
{
"heatFrames": 300
}
]
} |
|
IBJ against the left-most wall. Changing the IBJ speed may be necessary to get past the Sova. Requires: "canLongIBJ"
"canStaggeredIBJ"
{
"heatFrames": 4000
} |
|
IBJ against the left-most wall. Place bombs to kill the Sova. Drop to the bottom and restart if necessary. Requires: "h_heatProof" "canLongIBJ" "canBePatient" |
|
It is easiest to do a diagonal shinespark up the left wall, then hold left, angle down, and spam shoot to easily grab the item. Entrance condition: {
"comeInShinecharged": {}
}Requires: {
"shineChargeFrames": 30
}
{
"shinespark": {
"frames": 57,
"excessFrames": 2
}
}
{
"heatFrames": 180
} |
|
Requires: "canCrumbleJump"
{
"heatFrames": 155
} |
|
Requires: "h_useSpringBall"
{
"heatFrames": 215
} |
|
Must have grabbed the item with a spinjump still active. Requires: "SpaceJump"
{
"obstaclesCleared": [
"A"
]
}
{
"heatFrames": 145
} |
|

Walljump off the sides of the crumble block platforms to reach the door. Requires: {
"obstaclesCleared": [
"A"
]
}
"canPreciseWallJump"
"canTrickyJump"
{
"heatFrames": 210
} |
|
Requires: {
"heatFrames": 200
} |
{
"$schema": "../../../schema/m3-room.schema.json",
"id": 111,
"name": "Crumble Shaft",
"area": "Norfair",
"subarea": "Upper",
"subsubarea": "West",
"roomAddress": "0x7A8F8",
"roomEnvironments": [
{
"heated": true
}
],
"mapTileMask": [
[
1
],
[
1
],
[
1
],
[
1
]
],
"nodes": [
{
"id": 1,
"name": "Top Right Door",
"nodeType": "door",
"nodeSubType": "blue",
"nodeAddress": "0x001938a",
"doorOrientation": "right",
"doorEnvironments": [
{
"physics": "air"
}
],
"mapTileMask": [
[
2
],
[
2
],
[
1
],
[
1
]
]
},
{
"id": 2,
"name": "Bottom Right Door",
"nodeType": "door",
"nodeSubType": "blue",
"nodeAddress": "0x0019396",
"doorOrientation": "right",
"doorEnvironments": [
{
"physics": "air"
}
],
"mapTileMask": [
[
1
],
[
1
],
[
2
],
[
2
]
]
},
{
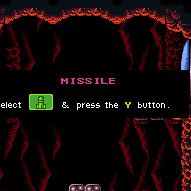
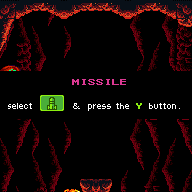
"id": 3,
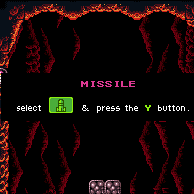
"name": "Hidden Item",
"nodeType": "item",
"nodeSubType": "hidden",
"nodeItem": "Missile",
"nodeAddress": "0x78B46",
"mapTileMask": [
[
2
],
[
2
],
[
1
],
[
1
]
],
"locks": [
{
"name": "Dummy Item Lock",
"lockType": "gameFlag",
"unlockStrats": [
{
"name": "Base (Collect Item)",
"notable": false,
"requires": [],
"flashSuitChecked": true,
"blueSuitChecked": true
}
]
}
]
}
],
"obstacles": [
{
"id": "A",
"name": "Obtain the Item while in a Spin Jump State",
"obstacleType": "abstract"
}
],
"enemies": [
{
"id": "e1",
"groupName": "Crumble Shaft Sovas",
"enemyName": "Sova",
"quantity": 6,
"homeNodes": [
1,
2
]
}
],
"strats": [
{
"link": [
1,
1
],
"name": "Base (Unlock Door)",
"requires": [],
"unlocksDoors": [
{
"types": [
"missiles"
],
"requires": [
{
"heatFrames": 50
}
]
},
{
"types": [
"super"
],
"requires": []
},
{
"types": [
"powerbomb"
],
"requires": [
{
"heatFrames": 110
}
]
}
],
"flashSuitChecked": true,
"blueSuitChecked": true
},
{
"link": [
1,
1
],
"name": "Base (Come In Normally)",
"entranceCondition": {
"comeInNormally": {}
},
"requires": [],
"flashSuitChecked": true,
"blueSuitChecked": true
},
{
"link": [
1,
1
],
"name": "Base (Come In With Mockball)",
"entranceCondition": {
"comeInWithMockball": {
"adjacentMinTiles": 0,
"remoteAndLandingMinTiles": [
[
0,
0
]
],
"speedBooster": "any"
}
},
"requires": [
{
"heatFrames": 10
}
],
"flashSuitChecked": true,
"blueSuitChecked": true
},
{
"link": [
2,
2
],
"name": "Base (Unlock Door)",
"requires": [],
"unlocksDoors": [
{
"types": [
"missiles"
],
"requires": [
{
"heatFrames": 50
}
]
},
{
"types": [
"super"
],
"requires": []
},
{
"types": [
"powerbomb"
],
"requires": [
{
"heatFrames": 110
}
]
}
],
"flashSuitChecked": true,
"blueSuitChecked": true
},
{
"link": [
2,
2
],
"name": "Base (Come In Normally)",
"entranceCondition": {
"comeInNormally": {}
},
"requires": [],
"flashSuitChecked": true,
"blueSuitChecked": true
},
{
"link": [
2,
2
],
"name": "Base (Come In With Mockball)",
"entranceCondition": {
"comeInWithMockball": {
"adjacentMinTiles": 0,
"remoteAndLandingMinTiles": [
[
0,
0
]
],
"speedBooster": "any"
}
},
"requires": [
{
"heatFrames": 10
}
],
"flashSuitChecked": true,
"blueSuitChecked": true
},
{
"name": "Base (Collect Item)",
"notable": false,
"requires": [],
"flashSuitChecked": true,
"blueSuitChecked": true,
"link": [
3,
3
],
"collectsItems": [
3
]
},
{
"id": 1,
"link": [
1,
1
],
"name": "Leave with Runway",
"requires": [],
"exitCondition": {
"leaveWithRunway": {
"length": 2,
"openEnd": 1
}
},
"flashSuitChecked": true,
"blueSuitChecked": true
},
{
"id": 2,
"link": [
1,
1
],
"name": "Crystal Flash",
"requires": [
"h_heatedCrystalFlash"
],
"flashSuitChecked": true,
"blueSuitChecked": true
},
{
"id": 29,
"link": [
1,
1
],
"name": "Sova Farm",
"requires": [
"h_heatProof",
"canDodgeWhileShooting",
{
"or": [
{
"and": [
"canConsecutiveWallJump",
{
"or": [
"canCrumbleJump",
"SpaceJump",
"canPreciseWallJump"
]
},
{
"cycleFrames": 930
}
]
},
{
"and": [
"h_useSpringBall",
{
"cycleFrames": 1200
}
]
},
{
"and": [
"SpaceJump",
{
"cycleFrames": 1320
}
]
},
{
"and": [
"canDoubleBombJump",
"canLongIBJ",
{
"cycleFrames": 2340
}
]
},
{
"and": [
"canJumpIntoIBJ",
"canLongIBJ",
"canBePatient",
{
"cycleFrames": 4640
}
]
}
]
},
{
"or": [
"canCrumbleJump",
{
"cycleFrames": 300
}
]
},
{
"resetRoom": {
"nodes": [
1,
2
]
}
},
{
"or": [
{
"haveBlueSuit": {}
},
"Wave",
"Spazer",
"Plasma",
"Grapple",
{
"cycleFrames": 120
}
]
},
{
"or": [
"canDash",
{
"cycleFrames": 90
}
]
}
],
"resetsObstacles": [
"A"
],
"farmCycleDrops": [
{
"enemy": "Sova",
"count": 6
}
],
"flashSuitChecked": true,
"blueSuitChecked": true,
"note": "Break each of the crumble platforms to group the Sovas at the bottom of the room.",
"devNote": "Climb from 2 to 1 if resetting with 2."
},
{
"id": 49,
"link": [
1,
1
],
"name": "Sova Grapple Farm",
"requires": [
"h_heatProof",
"canUseGrapple",
"canCameraManip",
{
"resetRoom": {
"nodes": [
1
]
}
},
{
"simpleCycleFrames": 105
},
{
"cycleFrames": 25
}
],
"resetsObstacles": [
"A"
],
"farmCycleDrops": [
{
"enemy": "Sova",
"count": 1
}
],
"flashSuitChecked": true,
"blueSuitChecked": true,
"note": [
"Jump and aim down to bring the Sova on camera.",
"Farm with Grapple while crouched and touching the crumble platform."
]
},
{
"id": 3,
"link": [
1,
2
],
"name": "Base",
"requires": [
{
"simpleHeatFrames": 120
},
{
"heatFrames": 75
}
],
"flashSuitChecked": true,
"blueSuitChecked": true,
"note": [
"Falling down the right side of the room is safe."
]
},
{
"id": 52,
"link": [
1,
2
],
"name": "Moonfall",
"requires": [
"canMoonfall",
"canTrickyJump",
{
"simpleHeatFrames": 100
},
{
"heatFrames": 60
}
],
"flashSuitChecked": true,
"blueSuitChecked": true,
"note": [
"Move forward far enough to trigger the crumble block, then quickly moonfall before it respawns.",
"It can help to perform the moonfall facing left (backing up to the right),",
"then quickly turn back left to clear the platform.",
"Press against the wall, aim down, and shoot open the door while falling.",
"It is possible to delay the moonfall enough to land on the doorframe,",
"by turning around back and forth once mid-air."
]
},
{
"id": 42,
"link": [
1,
2
],
"name": "G-Mode Setup - Get Hit By Sova",
"entranceCondition": {
"comeInNormally": {}
},
"requires": [
{
  "heatFrames": 405
}
],
"exitCondition": {
"leaveWithGModeSetup": {}
},
"unlocksDoors": [
{
"types": [
"missiles",
"super"
],
"requires": []
},
{
"types": [
"powerbomb"
],
"requires": [
"never"
]
}
],
"flashSuitChecked": true,
"blueSuitChecked": true,
"note": "Fall into the room and land on the bottom right crumble platform to bring the Sova to the door."
},
{
"id": 48,
"link": [
1,
2
],
"name": "Come in Shinecharging, Leave With Temporary Blue",
"entranceCondition": {
"comeInShinecharging": {
"length": 1,
"openEnd": 0
}
},
"requires": [
"canChainTemporaryBlue",
"canXRayTurnaround",
{
"heatFrames": 375
},
{
"or": [
"canXRayCancelShinecharge",
{
"heatFrames": 160
}
]
}
],
"exitCondition": {
"leaveWithTemporaryBlue": {}
},
"unlocksDoors": [
{
"types": [
"super"
],
"requires": []
},
{
"types": [
"powerbomb"
],
"requires": [
"canInsaneJump"
]
},
{
"types": [
"missiles"
],
"requires": [
{
"heatFrames": 50
}
]
}
],
"flashSuitChecked": true,
"blueSuitChecked": true
},
{
"id": 45,
"link": [
1,
2
],
"name": "G-Mode",
"entranceCondition": {
"comeInWithGMode": {
"mode": "any",
"morphed": false
}
},
"requires": [
"h_heatedGMode",
{
"or": [
{
"heatFrames": 45
},
{
"and": [
"h_heatedGModePauseAbuse",
{
"or": [
"canTrickyGMode",
{
"ammo": {
"type": "Super",
"count": 2
}
}
]
}
]
}
]
}
],
"flashSuitChecked": true,
"blueSuitChecked": true,
"note": [
"Climb down using the solid crumble blocks.",
"It is possible to use a Super to knock a Sova off and kill it by the door and pause abuse to grab its Energy drop on G-mode exit with a very precise positioning jump or large Energy drop.",
"With a second Super it is recommended to bring down the other clockwise Sova as well (at the top of the room), and stack their drops.",
"It is also possible to do it without a Super if the Sova drops a large Energy drop. There is a way to do this with two Sova, and if either drops a large Energy, Samus can survive:",
"kill both of the bottom two Sova at the bottom right corner of their platforms, stand on the middle of the platform with the second lowest Sova, and hold right when exiting G-mode."
]
},
{
"id": 4,
"link": [
1,
3
],
"name": "Top Item Crumble Jump",
"requires": [
"canCrumbleJump",
{
"heatFrames": 130
},
{
"or": [
"canDash",
{
"heatFrames": 20
}
]
}
],
"flashSuitChecked": true,
"blueSuitChecked": true,
"note": "Shoot the shot block, then crumble jump on the middle platform."
},
{
"id": 5,
"link": [
1,
3
],
"name": "Top Item Crumble Spin Jump",
"requires": [
"canCrumbleJump",
"canTrickyJump",
{
"heatFrames": 115
},
{
"or": [
"canDash",
{
"heatFrames": 20
}
]
}
],
"clearsObstacles": [
"A"
],
"flashSuitChecked": true,
"blueSuitChecked": true,
"note": "Shoot the shot block, then crumble spin jump on the middle platform."
},
{
"id": 6,
"link": [
1,
3
],
"name": "Space Jump",
"requires": [
"SpaceJump",
{
"heatFrames": 100
},
{
"or": [
"canDash",
{
"heatFrames": 30
}
]
}
],
"clearsObstacles": [
"A"
],
"flashSuitChecked": true,
"blueSuitChecked": true
},
{
"id": 7,
"link": [
1,
3
],
"name": "Come in Shinecharged, Shinespark",
"entranceCondition": {
"comeInShinecharged": {}
},
"requires": [
{
"shineChargeFrames": 60
},
"canHorizontalShinespark",
{
"shinespark": {
"frames": 20,
"excessFrames": 4
}
},
{
"heatFrames": 175
}
],
"flashSuitChecked": true,
"blueSuitChecked": true
},
{
"id": 8,
"link": [
1,
3
],
"name": "Tricky Wall Jump",
"requires": [
"canDash",
"canTrickyWallJump",
"canTrickyJump",
"canCameraManip",
{
"heatFrames": 230
}
],
"clearsObstacles": [
"A"
],
"flashSuitChecked": true,
"blueSuitChecked": true,
"note": [
"Jump and aim down to lower the camera so the middle platform Sova starts moving.",
"Then shoot the shot block and walljump off the left side of the middle platform to reach the item."
]
},
{
"id": 9,
"link": [
1,
3
],
"name": "Top Item Frozen Sova",
"requires": [
"canDash",
{
"notable": "Top Item Frozen Sova"
},
"canTrickyUseFrozenEnemies",
"canCarefulJump",
"canCameraManip",
{
"heatFrames": 220
}
],
"clearsObstacles": [
"A"
],
"flashSuitChecked": true,
"blueSuitChecked": true,
"note": [
"Jump and aim down to lower the camera so the middle platform Sova starts moving.",
"Then freeze it by aiming down, shoot the shot block, and use the Sova as a stable platform."
],
"devNote": [
"Wall jumping and using the same frozen Sova, or falling onto the Sova just below the item and then jumping to the top Sova could be added,",
"but this would require an obstacle to ensure they haven't fallen or died, and is not really easier than a crumble jump."
]
},
{
"id": 10,
"link": [
1,
3
],
"name": "Spring Ball",
"requires": [
"h_useSpringBall",
{
"or": [
{
"and": [
{
"or": [
"HiJump",
"canCarefulJump"
]
},
{
"heatFrames": 185
}
]
},
{
"and": [
"canTrickyJump",
{
"heatFrames": 170
}
]
},
{
"and": [
"canLateralMidAirMorph",
{
"heatFrames": 120
}
]
}
]
}
],
"flashSuitChecked": true,
"blueSuitChecked": true,
"note": "Shoot the shot block, then Spring Ball on the middle platform."
},
{
"id": 12,
"link": [
2,
1
],
"name": "Wall Jump Climb",
"requires": [
"canPreciseWallJump",
"canConsecutiveWallJump",
{
"or": [
{
"and": [
"HiJump",
{
"heatFrames": 270
}
]
},
{
"heatFrames": 340
}
]
},
{
"or": [
"canDodgeWhileShooting",
{
"heatFrames": 300
}
]
},
{
"or": [
"canTrickyJump",
{
"heatFrames": 300
}
]
}
],
"flashSuitChecked": true,
"blueSuitChecked": true,
"note": [
"Enter with a spin jump, and wall jump up the right side;",
"at the end, walljump off the top-middle crumble platform then off the top-right one."
]
},
{
"id": 13,
"link": [
2,
1
],
"name": "Consecutive Crumble Jump Climb",
"requires": [
"canCrumbleJump",
"canTrickyJump",
"canTrickyDodgeEnemies",
{
"or": [
{
"and": [
"HiJump",
"canInsaneJump",
{
"heatFrames": 370
}
]
},
{
"heatFrames": 630
}
]
}
],
"wallJumpAvoid": true,
"flashSuitChecked": true,
"blueSuitChecked": true,
"note": [
"Do 9 successive crumble jumps up the platforms.",
"If Hi-Jump is available, then it is possible to skip 4 of the crumble platforms, using only the center platforms,",
"in which case it is recommended to down-grab the 3rd center platform, though doing a crumble spin jump onto it is also an option."
]
},
{
"id": 15,
"link": [
2,
1
],
"name": "Spring Ball",
"requires": [
"h_useSpringBall",
{
"heatFrames": 720
}
],
"flashSuitChecked": true,
"blueSuitChecked": true,
"note": "Hold jump to easily do 9 successive spring ball bounces up the platforms."
},
{
"id": 16,
"link": [
2,
1
],
"name": "Wall Jump with Space Jump",
"requires": [
"SpaceJump",
"canConsecutiveWallJump",
{
"or": [
{
"and": [
"HiJump",
{
"heatFrames": 270
}
]
},
{
"heatFrames": 340
}
]
},
{
"or": [
"canDodgeWhileShooting",
{
"heatFrames": 300
}
]
}
],
"flashSuitChecked": true,
"blueSuitChecked": true,
"note": "Wall jump up the right, then use Space Jump at the top."
},
{
"id": 17,
"link": [
2,
1
],
"name": "Space Jump",
"requires": [
"SpaceJump",
{
"or": [
{
"and": [
"HiJump",
{
"heatFrames": 450
}
]
},
{
"heatFrames": 720
}
]
}
],
"flashSuitChecked": true,
"blueSuitChecked": true,
"note": "Use Space Jump to get to the top."
},
{
"id": 18,
"link": [
2,
1
],
"name": "IBJ (Right)",
"requires": [
"canLongIBJ",
"canStaggeredIBJ",
{
"heatFrames": 4000
}
],
"flashSuitChecked": true,
"blueSuitChecked": true,
"note": [
"Kill the Sova on the bottom-right platform, then IBJ right next to the left of the platform.",
"Samus can align with the left side of the platform by jumping into it.",
"Changing the IBJ speed may be necessary to get past the second Sova."
]
},
{
"id": 19,
"link": [
2,
1
],
"name": "Heatproof IBJ",
"requires": [
"h_heatProof",
"canLongIBJ",
"canBePatient"
],
"flashSuitChecked": true,
"blueSuitChecked": true,
"note": [
"Kill the Sova on the bottom-right platform, then IBJ right next to the left of the platform.",
"Samus can align with the left side of the platform by jumping into it.",
"Place bombs to kill the second Sova. Drop to the bottom and restart if necessary."
]
},
{
"id": 21,
"link": [
2,
1
],
"name": "Shinespark Climb",
"entranceCondition": {
"comeInShinecharged": {}
},
"requires": [
{
"shineChargeFrames": 35
},
{
"shinespark": {
"frames": 59,
"excessFrames": 2
}
},
{
"heatFrames": 220
}
],
"flashSuitChecked": true,
"blueSuitChecked": true,
"note": "It has to be setup really close to the left side of the right platforms, otherwise it also requires a crumble jump at the top."
},
{
"id": 53,
"link": [
2,
1
],
"name": "Frozen Sova Hi-Jump Climb",
"requires": [
"HiJump",
"canTrickyUseFrozenEnemies",
{
"heatFrames": 630
}
],
"flashSuitChecked": true,
"blueSuitChecked": true,
"note": [
"Use the Sovas as platforms to climb the room."
]
},
{
"id": 23,
"link": [
2,
1
],
"name": "X-Ray Climb",
"entranceCondition": {
"comeInWithDoorStuckSetup": {}
},
"requires": [
"canLongXRayClimb",
{
"heatFrames": 4000
},
"canBePatient"
],
"flashSuitChecked": true,
"blueSuitChecked": true,
"note": "Climb up 3 screens."
},
{
"id": 24,
"link": [
2,
1
],
"name": "Very Deep Stuck X-Ray Climb",
"entranceCondition": {
"comeInWithGMode": {
"mode": "direct",
"morphed": false
}
},
"requires": [
"canGModeXRayClimb",
"h_heatProof",
"canLongXRayClimb",
"canBePatient"
],
"bypassesDoorShell": "yes",
"flashSuitChecked": true,
"blueSuitChecked": true,
"note": [
"Enter with G-mode direct, back up to between 1 and 6 pixels from the door transition, and activate X-ray to get very deep stuck in the door.",
"Climb up 3 screens, and perform a turnaround buffered spin-jump away from the door to trigger the transition, bypassing any lock on the door."
]
},
{
"id": 43,
"link": [
2,
1
],
"name": "G-Mode Setup - Get Hit By Sova",
"requires": [
{
"heatFrames": 2070
},
{
"or": [
"h_useSpringBall",
{
"and": [
"canTrickyWallJump",
{
"heatFrames": 100
}
]
},
{
"and": [
"SpaceJump",
{
"heatFrames": 100
}
]
},
{
"and": [
"canCrumbleJump",
"canInsaneJump"
]
}
]
}
],
"exitCondition": {
"leaveWithGModeSetup": {}
},
"unlocksDoors": [
{
"types": [
"missiles",
"super"
],
"requires": []
},
{
"types": [
"powerbomb"
],
"requires": [
"h_heatProof"
]
}
],
"flashSuitChecked": true,
"blueSuitChecked": true,
"note": [
"Lure a Sova from the bottom to top of the room.",
"If wall jumping, it may be easiest to follow behind the Sova and pass it at the top of the room."
],
"devNote": [
"FIXME: This could be doable with an X-Ray climb and then carefully and slowly returning the camera."
]
},
{
"id": 46,
"link": [
2,
1
],
"name": "G-Mode",
"entranceCondition": {
"comeInWithGMode": {
"mode": "any",
"morphed": false
}
},
"requires": [
{
  "or": [
    "h_heatedGModeOpenDifferentDoor",
    {
      "and": [
        {
          "ammo": {
            "type": "Super",
            "count": 1
          }
        },
        "h_heatedGModePauseAbuse"
      ]
    }
  ]
}
],
"flashSuitChecked": true,
"blueSuitChecked": true,
"note": [
"Climb the solid crumble blocks.",
"It is possible to use a Super to knock one or two Sova off and follow it to the door and pause abuse to grab its Energy drop on G-mode exit."
],
"devNote": "FIXME: It is possible to use grapple to grab the drop from the top Sova from the doorway, but it is fairly precise and requires a large Energy drop."
},
{
"id": 25,
"link": [
2,
1
],
"name": "Grapple Teleport (from Red Brinstar Firefleas)",
"entranceCondition": {
"comeInWithGrappleTeleport": {
"blockPositions": [
[
5,
3
]
]
}
},
"requires": [
{
"heatFrames": 120
},
{
"or": [
"canOffScreenMovement",
{
"heatFrames": 180
}
]
}
],
"flashSuitChecked": true,
"blueSuitChecked": true,
"note": [
"After the teleport, immediately press down to extend Grapple to avoid bonking on the ceiling overhang;",
"note that buffering the down input through the transition will not work.",
"Then swing over to the door.",
"Crumble jump in case the swing does not make it all the way to the door.",
"Samus will be visible but off-camera; swinging back and forth to fix the camera is possible, at the cost of additional heat damage."
]
},
{
"id": 26,
"link": [
2,
1
],
"name": "Grapple Teleport (from Moat)",
"entranceCondition": {
"comeInWithGrappleTeleport": {
"blockPositions": [
[
7,
2
]
]
}
},
"requires": [
{
  "heatFrames": 80
}
],
"flashSuitChecked": true,
"blueSuitChecked": true,
"note": [
"After the teleport, immediately press down to extend Grapple to avoid bonking on the ceiling overhang;",
"note that buffering the down input through the transition will not work.",
"Then swing over to the door.",
"Samus will be visible but off-camera; swinging back and forth to fix the camera is possible, at the cost of additional heat damage."
]
},
{
"id": 27,
"link": [
2,
2
],
"name": "Leave with Runway",
"requires": [],
"exitCondition": {
"leaveWithRunway": {
"length": 1,
"openEnd": 1
}
},
"flashSuitChecked": true,
"blueSuitChecked": true
},
{
"id": 28,
"link": [
2,
2
],
"name": "Leave With Runway - Frozen Sova",
"requires": [
"h_frozenEnemyRunway",
{
"heatFrames": 360
},
{
"or": [
"canCrumbleJump",
"HiJump",
"canWallJump"
]
}
],
"exitCondition": {
"leaveWithRunway": {
"length": 2,
"openEnd": 1
}
},
"flashSuitChecked": true,
"blueSuitChecked": true,
"note": "To minimize heat frames, briefly wait for the Sova to be on the top right of the platform before knocking it off to shorten its path to the door.",
"devNote": "There are more alternatives to the single canCrumbleJump, but it is basically assumed at this difficulty."
},
{
"id": 54,
"link": [
2,
2
],
"name": "Leave Spinning",
"requires": [
{
  "heatFrames": 140
}
],
"exitCondition": {
"leaveSpinning": {
"remoteRunway": {
"length": 3,
"openEnd": 2
}
}
},
"flashSuitChecked": true,
"blueSuitChecked": true
},
{
"id": 55,
"link": [
2,
2
],
"name": "Leave With Mockball",
"requires": [
{
  "heatFrames": 140
}
],
"exitCondition": {
"leaveWithMockball": {
"remoteRunway": {
"length": 3,
"openEnd": 0
},
"landingRunway": {
"length": 1,
"openEnd": 1
}
}
},
"flashSuitChecked": true,
"blueSuitChecked": true
},
{
"id": 56,
"link": [
2,
2
],
"name": "Leave With Spring Ball Bounce",
"requires": [
{
  "heatFrames": 140
}
],
"exitCondition": {
"leaveWithSpringBallBounce": {
"remoteRunway": {
"length": 2,
"openEnd": 1
},
"landingRunway": {
"length": 1,
"openEnd": 1
},
"movementType": "uncontrolled"
}
},
"flashSuitChecked": true,
"blueSuitChecked": true
},
{
"id": 47,
"link": [
2,
2
],
"name": "Leave With Side Platform",
"requires": [
{
"heatFrames": 140
},
"canTrickyJump"
],
"exitCondition": {
"leaveWithSidePlatform": {
"height": 2,
"runway": {
"length": 3,
"openEnd": 2
},
"obstruction": [
3,
2
]
}
},
"flashSuitChecked": true,
"blueSuitChecked": true,
"devNote": "Max extra run speed $1.5"
},
{
"id": 50,
"link": [
2,
2
],
"name": "Sova Grapple Farm",
"requires": [
"h_heatProof",
"canUseGrapple",
{
"resetRoom": {
"nodes": [
2
]
}
},
{
"cycleFrames": 250
},
{
"or": [
{
"noFlashSuit": {}
},
{
"and": [
"canMidAirMorph",
{
"cycleFrames": 30
}
]
}
]
}
],
"resetsObstacles": [
"A"
],
"farmCycleDrops": [
{
"enemy": "Sova",
"count": 2
}
],
"flashSuitChecked": true,
"blueSuitChecked": true
},
{
"id": 51,
"link": [
2,
2
],
"name": "Sova Single Farm",
"requires": [
"h_heatProof",
{
"resetRoom": {
"nodes": [
2
]
}
},
{
"cycleFrames": 160
}
],
"resetsObstacles": [
"A"
],
"farmCycleDrops": [
{
"enemy": "Sova",
"count": 1
}
],
"flashSuitChecked": true,
"blueSuitChecked": true
},
{
"id": 30,
"link": [
2,
2
],
"name": "Crystal Flash",
"requires": [
{
"heatFrames": 20
},
"h_heatedCrystalFlash",
{
"heatFrames": 20
}
],
"flashSuitChecked": true,
"blueSuitChecked": true
},
{
"id": 31,
"link": [
2,
2
],
"name": "G-Mode Regain Mobility",
"requires": [
{
"ammo": {
"type": "Super",
"count": 1
}
},
{
"enemyDamage": {
"enemy": "Sova",
"type": "contact",
"hits": 1
}
}
],
"gModeRegainMobility": {},
"flashSuitChecked": true,
"blueSuitChecked": true,
"note": "Use a Super to knock off the Sova to regain mobility."
},
{
"id": 44,
"link": [
2,
2
],
"name": "G-Mode Setup - Get Hit By Sova",
"entranceCondition": {
"comeInNormally": {}
},
"requires": [
{
"heatFrames": 370
},
{
"or": [
"HiJump",
"SpaceJump",
"canWallJump",
"h_useSpringBall",
"canCrumbleJump",
"canTrickyJump",
{
"ammo": {
"type": "Super",
"count": 1
}
},
{
"and": [
"canJumpIntoIBJ",
{
"heatFrames": 80
}
]
}
]
}
],
"exitCondition": {
"leaveWithGModeSetup": {}
},
"unlocksDoors": [
{
"types": [
"missiles",
"super"
],
"requires": []
},
{
"types": [
"powerbomb"
],
"requires": [
"never"
]
}
],
"flashSuitChecked": true,
"blueSuitChecked": true,
"note": "Land on the crumble platform just above the door to release the Sova.",
"devNote": [
"It is possible to jump into the room if it is dry, but these options are easy enough to ignore adding that.",
"Opening the door with missiles will usually not add any heat frames, but will if using IBJ or a doorframe jump."
]
},
{
"id": 32,
"link": [
2,
3
],
"name": "Base",
"requires": [
"canConsecutiveWallJump",
{
"or": [
"canDash",
{
"heatFrames": 30
}
]
},
{
"or": [
{
"and": [
"HiJump",
{
"heatFrames": 290
},
{
"or": [
"canCrumbleJump",
{
"heatFrames": 30
}
]
}
]
},
{
"heatFrames": 360
}
]
},
{
"or": [
"ScrewAttack",
{
"haveBlueSuit": {}
},
{
"and": [
"canPreciseWallJump",
"canTrickyJump",
{
"heatFrames": 30
}
]
},
{
"and": [
"canTrickyWallJump",
{
"heatFrames": 80
}
]
},
{
"heatFrames": 330
}
]
},
{
"or": [
"canDodgeWhileShooting",
{
"heatFrames": 300
}
]
}
],
"flashSuitChecked": true,
"blueSuitChecked": true,
"note": [
"If entering from the bottom door, a Sova will be in the way in the top left:",
"either wall jump in place while waiting for it, or wall jump around it using two crumble platforms to the right."
]
},
{
"id": 33,
"link": [
2,
3
],
"name": "IBJ (Left)",
"requires": [
"canLongIBJ",
"canStaggeredIBJ",
{
"heatFrames": 4000
}
],
"flashSuitChecked": true,
"blueSuitChecked": true,
"note": "IBJ against the left-most wall. Changing the IBJ speed may be necessary to get past the Sova."
},
{
"id": 34,
"link": [
2,
3
],
"name": "Heatproof IBJ",
"requires": [
"h_heatProof",
"canLongIBJ",
"canBePatient"
],
"flashSuitChecked": true,
"blueSuitChecked": true,
"note": "IBJ against the left-most wall. Place bombs to kill the Sova. Drop to the bottom and restart if necessary."
},
{
"id": 35,
"link": [
2,
3
],
"name": "Shinespark Climb",
"entranceCondition": {
"comeInShinecharged": {}
},
"requires": [
{
"shineChargeFrames": 30
},
{
"shinespark": {
"frames": 57,
"excessFrames": 2
}
},
{
"heatFrames": 180
}
],
"flashSuitChecked": true,
"blueSuitChecked": true,
"note": "It is easiest to do a diagonal shinespark up the left wall, then hold left, angle down, and spam shoot to easily grab the item."
},
{
"id": 36,
"link": [
3,
1
],
"name": "Top Door Crumble Jump",
"requires": [
"canCrumbleJump",
{
"heatFrames": 155
}
],
"flashSuitChecked": true,
"blueSuitChecked": true
},
{
"id": 38,
"link": [
3,
1
],
"name": "Spring Ball",
"requires": [
"h_useSpringBall",
{
"heatFrames": 215
}
],
"flashSuitChecked": true,
"blueSuitChecked": true
},
{
"id": 39,
"link": [
3,
1
],
"name": "Space Jump",
"requires": [
"SpaceJump",
{
"obstaclesCleared": [
"A"
]
},
{
"heatFrames": 145
}
],
"flashSuitChecked": true,
"blueSuitChecked": true,
"note": "Must have grabbed the item with a spinjump still active."
},
{
"id": 40,
"link": [
3,
1
],
"name": "Precise Walljump",
"requires": [
{
"obstaclesCleared": [
"A"
]
},
"canPreciseWallJump",
"canTrickyJump",
{
"heatFrames": 210
}
],
"flashSuitChecked": true,
"blueSuitChecked": true,
"note": [
"Walljump off the sides of the crumble block platforms to reach the door."
]
},
{
"id": 41,
"link": [
3,
2
],
"name": "Base",
"requires": [
{
  "heatFrames": 200
}
],
"flashSuitChecked": true,
"blueSuitChecked": true
}
],
"notables": [
{
"id": 1,
"name": "Top Item Frozen Sova",
"note": [
"Jump and aim down to lower the camera so the middle platform Sova starts moving.",
"Then freeze it by aiming down, shoot the shot block, and use the Sova as a stable platform."
]
}
],
"nextStratId": 57,
"nextNotableId": 2
}