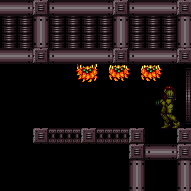
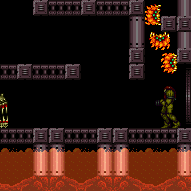
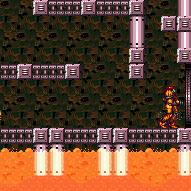
Ice Beam Snake Room
Room ID: 108
|
Requires: {
"heatFrames": 5
}Exit condition: {
"leaveWithRunway": {
"length": 1,
"openEnd": 1
}
} |
From: 1
Top Right Door
To: 1
Top Right Door
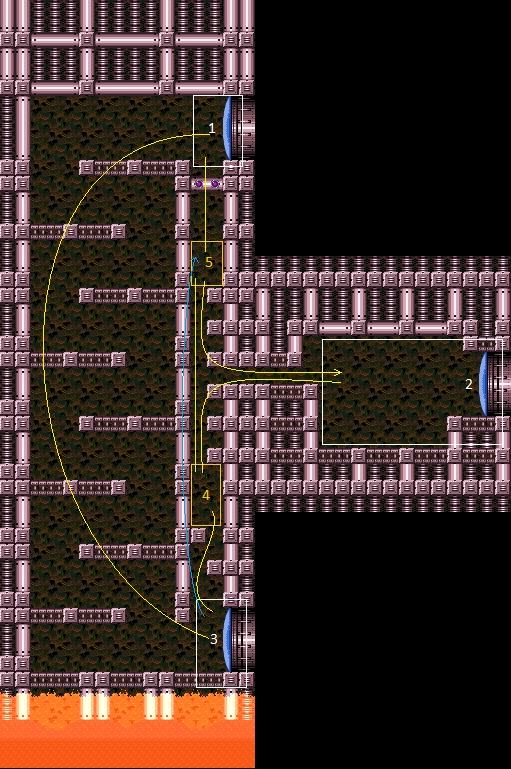
Wait 80 seconds for the Sova to get into position, then freeze it to bridge the gap and significantly extend the runway. The other Sovas can be farmed or used as a backup. Requires: "h_frozenEnemyRunway"
"canBePatient"
{
"heatFrames": 4800
}Exit condition: {
"leaveWithRunway": {
"length": 10,
"openEnd": 1
}
}Dev note: Because the Sovas are global, strats could be added that start from the other doors to tighten the total frame count, but it will typically require heatProof either way. |
|
Requires: {
"heatFrames": 180
}Exit condition: {
"leaveSpinning": {
"remoteRunway": {
"length": 7,
"openEnd": 2
}
}
} |
|
Requires: {
"heatFrames": 180
}Exit condition: {
"leaveWithMockball": {
"remoteRunway": {
"length": 7,
"openEnd": 0
},
"landingRunway": {
"length": 1,
"openEnd": 1
}
}
} |
From: 1
Top Right Door
To: 1
Top Right Door
Requires: {
"heatFrames": 180
}Exit condition: {
"leaveWithSpringBallBounce": {
"remoteRunway": {
"length": 6,
"openEnd": 0
},
"landingRunway": {
"length": 1,
"openEnd": 1
},
"movementType": "uncontrolled"
}
} |
|
Requires: "h_heatedRemoteRunwaySpaceJump"
{
"heatFrames": 180
}Exit condition: {
"leaveSpaceJumping": {
"remoteRunway": {
"length": 4,
"openEnd": 1
}
}
} |
From: 1
Top Right Door
To: 1
Top Right Door
Requires: {
"heatFrames": 105
}Exit condition: {
"leaveWithSidePlatform": {
"height": 1,
"runway": {
"length": 2,
"openEnd": 0
},
"obstruction": [
1,
0
]
}
}Dev note: Max extra run speed $0.B |
|
Requires: {
"heatFrames": 40
}
"h_heatedCrystalFlash" |
|
Requires: "h_heatProof"
{
"resetRoom": {
"nodes": [
1
]
}
}
{
"or": [
"canWallJump",
{
"and": [
"HiJump",
"canSpringBallJumpMidAir",
"h_doubleEquipmentScreenCycleFrames",
{
"cycleFrames": 40
}
]
},
{
"and": [
"Morph",
{
"cycleFrames": 380
}
]
}
]
}
{
"or": [
{
"and": [
"canMidAirMorph",
"Plasma",
"canTrickyJump",
{
"cycleFrames": 600
}
]
},
{
"and": [
"canMidAirMorph",
"Plasma",
"canInsaneJump",
{
"cycleFrames": 520
}
]
},
{
"and": [
{
"or": [
"Wave",
"Spazer",
"Plasma",
"Grapple",
{
"cycleFrames": 45
}
]
},
{
"cycleFrames": 700
}
]
}
]
}
{
"or": [
{
"noFlashSuit": {}
},
{
"cycleFrames": 150
}
]
}Farm cycle drops: 3 Sova |
|
It takes about 1.5 minutes for the Sova to get to this door and hit Samus. Requires: "canBePatient"
{
"enemyDamage": {
"enemy": "Sova",
"type": "contact",
"hits": 1
}
} |
From: 1
Top Right Door
To: 1
Top Right Door
Wait for the Sovas to wind around the room and reach the top door. This takes about 1 minute and 15 seconds. Entrance condition: {
"comeInNormally": {}
}Requires: {
"heatFrames": 4600
}
"canBePatient"Exit condition: {
"leaveWithGModeSetup": {}
}Unlocks doors: {"types":["ammo"],"requires":[]} |
From: 1
Top Right Door
To: 1
Top Right Door

Use a Super to knock a Sova off as it exits the morph tunnel, then shoot the shot block in time to let it pass. Use another Super to knock it off the top runway so it can climb the left wall and reach the door. Entrance condition: {
"comeInNormally": {}
}Requires: {
"heatFrames": 2200
}
{
"ammo": {
"type": "Super",
"count": 2
}
}Exit condition: {
"leaveWithGModeSetup": {}
}Unlocks doors: {"types":["missiles","powerbomb"],"requires":[]}
{"types":["super"],"requires":[],"useImplicitRequires":false} |
From: 1
Top Right Door
To: 2
Middle Right Door

Entrance condition: {
"comeInShinecharging": {
"length": 0,
"openEnd": 1
}
}Requires: "canShinechargeMovementTricky"
"canTrivialMidAirMorph"
{
"or": [
"canUsePowerBombLag",
{
"and": [
"canInsaneJump",
"canOffScreenMovement"
]
}
]
}
{
"heatFrames": 200
}
{
"shinespark": {
"frames": 17,
"excessFrames": 0
}
}Exit condition: {
"leaveWithSpark": {}
}Unlocks doors: {"types":["super"],"requires":[]}
{"types":["missiles","powerbomb"],"requires":["never"]}Dev note: Technically Samus isn't moving off-camera but is close to the edge; 'canOffScreenMovement' is for the difficulty of timing the unmorph, given limited visibility of the end of the passage and the Sova. If a Power Bomb is available, then lag from the explosion can make the movement much easier. |
From: 1
Top Right Door
To: 2
Middle Right Door
Entrance condition: {
"comeInWithGMode": {
"mode": "any",
"morphed": false
}
}Requires: "Morph"
{
"or": [
"HiJump",
"canWallJump",
"canSpringBallJumpMidAir",
"SpaceJump",
"canIBJ",
"canTrickyUseFrozenEnemies"
]
}
"h_heatedGModeOffCameraDoor"Dev note: It is probably possible to farm the Sovas at this door, but it would be difficult and slow and isn't expected. |
From: 1
Top Right Door
To: 2
Middle Right Door

Entrance condition: {
"comeInWithGMode": {
"mode": "any",
"morphed": true
}
}Requires: {
"or": [
"h_artificialMorphIBJ",
{
"and": [
"HiJump",
"h_artificialMorphSpringBall"
]
},
{
"and": [
"h_artificialMorphSpringBallBombJump",
"h_additionalBomb"
]
}
]
}
"h_heatedGModeOffCameraDoor"Dev note: It is probably possible to farm the Sovas at this door, but it would be difficult and slow and isn't expected. |
|
Requires: "canDash"
{
"heatFrames": 680
}
{
"or": [
"canDodgeWhileShooting",
{
"enemyDamage": {
"enemy": "Fune",
"type": "fireball",
"hits": 2
}
}
]
}Unlocks doors: {"types":["powerbomb"],"requires":[]} |
|
Use the blue suit invulnerability to pass through the Fune fireballs. Requires: {
"haveBlueSuit": {}
}
{
"heatFrames": 580
}Unlocks doors: {"types":["powerbomb"],"requires":[]} |
|


Requires: "canDash"
"ScrewAttack"
{
"heatFrames": 525
}Unlocks doors: {"types":["powerbomb"],"requires":[]}Dev note: The bottom Fune shoots a fireball which wastes all of the time save of a Leave with Runway strat. |
|


Requires: "canDash"
"canPseudoScrew"
{
"heatFrames": 540
}Unlocks doors: {"types":["powerbomb"],"requires":[]} |
|


Requires: "canDash"
"Wave"
"Ice"
{
"heatFrames": 530
}Unlocks doors: {"types":["powerbomb"],"requires":[]} |
From: 1
Top Right Door
To: 3
Bottom Right Door
Requires: "canDash"
"Wave"
"Ice"
{
"heatFrames": 525
}Exit condition: {
"leaveWithRunway": {
"length": 12,
"openEnd": 0
}
}Unlocks doors: {"types":["missiles"],"requires":[{"heatFrames":50}]}
{"types":["super"],"requires":[]}
{"types":["powerbomb"],"requires":["never"]} |
From: 1
Top Right Door
To: 3
Bottom Right Door
Requires: "canDash"
"Wave"
"Ice"
{
"ammo": {
"type": "Super",
"count": 1
}
}
{
"heatFrames": 545
}Exit condition: {
"leaveWithRunway": {
"length": 13,
"openEnd": 0
}
}Unlocks doors: {"types":["missiles"],"requires":[{"heatFrames":50}]}
{"types":["super","powerbomb"],"requires":[]} |
|
Kill the Funes first, then the Sovas. Shinecharge at the bottom and use heat damage to interrupt. Entrance condition: {
"comeInWithRMode": {}
}Requires: {
"or": [
{
"and": [
{
"heatFrames": 30
},
"h_heatedCrystalFlashForReserveEnergy",
{
"heatFrames": 170
}
]
},
{
"and": [
"h_heatProof",
"h_RModeCanRefillReserves",
{
"enemyKill": {
"enemies": [
[
"Fune",
"Fune"
],
[
"Fune"
]
]
}
},
{
"partialRefill": {
"type": "ReserveEnergy",
"limit": 40
}
}
]
}
]
}
{
"enemyKill": {
"enemies": [
[
"Fune"
]
]
}
}
{
"or": [
{
"canShineCharge": {
"usedTiles": 12,
"openEnd": 0
}
},
{
"and": [
{
"doorUnlockedAtNode": 3
},
{
"canShineCharge": {
"usedTiles": 13,
"openEnd": 0
}
}
]
}
]
}
"h_heatTriggerRModeSparkInterrupt"
{
"heatFrames": 10
}Unlocks doors: {"nodeId":3,"types":["ammo"],"requires":[]} |
From: 1
Top Right Door
To: 3
Bottom Right Door
Avoid the fireballs while waiting for the Sovas. If the fireball is going to be at a bad cycle, it can help to kill the first Sova. Entrance condition: {
"comeInNormally": {}
}Requires: {
"heatFrames": 1200
}Exit condition: {
"leaveWithGModeSetup": {}
}Unlocks doors: {"types":["missiles","super"],"requires":[]}
{"types":["powerbomb"],"requires":["never"]} |
|
Entrance condition: {
"comeInWithGMode": {
"mode": "any",
"morphed": false
}
}Requires: "h_heatedGModeOpenDifferentDoor" |
|
It is possible to kill the Sovas and pick up their drops during a pause abuse. Entrance condition: {
"comeInWithGMode": {
"mode": "any",
"morphed": false
}
}Requires: "h_heatedGModePauseAbuse" "canFarmWhileShooting" Dev note: The Sovas will not give drops if there are too many fireballs, but this shouldn't be a problem when leaving through the bottom door. |
|
Requires: {
"heatFrames": 50
} |
|
To minimize heat damage, immediately after landing use Grapple to open the door while running towards it, then jump over the gap and through the door. If the door is grappled too late, it may interfere with the jump. Entrance condition: {
"comeInWithGrappleTeleport": {
"blockPositions": [
[
5,
3
],
[
7,
2
]
]
}
}Requires: {
"heatFrames": 75
}
{
"or": [
"canDash",
{
"heatFrames": 35
}
]
} |
From: 2
Middle Right Door
To: 1
Top Right Door

Wait for the Sovas to wind around the room and reach the top door. This takes about 1 minute and 15 seconds. Entrance condition: {
"comeInNormally": {}
}Requires: {
"heatFrames": 4600
}
"Morph"
"canBePatient"Exit condition: {
"leaveWithGModeSetup": {}
}Unlocks doors: {"types":["ammo"],"requires":[]} |
From: 2
Middle Right Door
To: 1
Top Right Door
Use a Super to knock a Sova off as it exits the morph tunnel, get to and shoot the shot block in time to let it pass. Use another Super to knock it off the top runway so it can climb the left wall and reach the door. There is enough time to go around the left side of the room if Samus can't climb the right side. Entrance condition: {
"comeInNormally": {}
}Requires: {
"heatFrames": 2200
}
"Morph"
{
"ammo": {
"type": "Super",
"count": 2
}
}Exit condition: {
"leaveWithGModeSetup": {}
}Unlocks doors: {"types":["missiles"],"requires":[]}
{"types":["super"],"requires":[],"useImplicitRequires":false}
{"types":["powerbomb"],"requires":["never"]} |
From: 2
Middle Right Door
To: 1
Top Right Door

Kill the Sovas or wait at around 25 seconds for them to get out of the way before going down and passing them while climbing to the top door. It is possible to wait 2.5 minutes for the Sovas to return on camera to be sure Samus won't touch them. Entrance condition: {
"comeInWithGMode": {
"mode": "any",
"morphed": true
}
}Requires: "h_artificialMorphMovement" "canOffScreenMovement" "h_heatedGModeOffCameraDoor" Dev note: The single tile ledge at this door doesn't seem to make it any slower to exit. It is probably possible to farm the Sovas at this door, but it would be difficult and isn't expected. |
|
Exit condition: {
"leaveWithRunway": {
"length": 3,
"openEnd": 1
}
} |
From: 2
Middle Right Door
To: 2
Middle Right Door


Wait 3 minutes for the Sova to get into position, or 100 seconds with Morph by going ahead of them to break the shot blocks as they get there. This can be further reduced to 45 seconds with a Super by knocking a Sova off after it exits the morph tunnel. The other Sovas can be farmed or used as a backup. Requires: "h_frozenEnemyRunway"
{
"or": [
{
"and": [
"h_heatProof",
"canBeVeryPatient"
]
},
{
"and": [
"h_heatProof",
"canBePatient",
"Morph"
]
},
{
"and": [
{
"ammo": {
"type": "Super",
"count": 1
}
},
{
"heatFrames": 2600
}
]
}
]
}Exit condition: {
"leaveWithRunway": {
"length": 4,
"openEnd": 1
}
}Dev note: Because the Sovas are global, strats could be added that start from the other doors to tighten the total frame count, but it will typically require heatProof either way. |
|
Requires: {
"heatFrames": 220
}Exit condition: {
"leaveSpinning": {
"remoteRunway": {
"length": 6,
"openEnd": 0
}
}
} |
|
Requires: {
"heatFrames": 220
}Exit condition: {
"leaveWithMockball": {
"remoteRunway": {
"length": 5,
"openEnd": 1
},
"landingRunway": {
"length": 3,
"openEnd": 1
}
}
} |
From: 2
Middle Right Door
To: 2
Middle Right Door
Requires: {
"heatFrames": 220
}Exit condition: {
"leaveWithSpringBallBounce": {
"remoteRunway": {
"length": 5,
"openEnd": 1
},
"landingRunway": {
"length": 3,
"openEnd": 1
},
"movementType": "uncontrolled"
}
} |
From: 2
Middle Right Door
To: 2
Middle Right Door
Requires: "h_heatedRemoteRunwaySpaceJump"
{
"heatFrames": 220
}Exit condition: {
"leaveSpaceJumping": {
"remoteRunway": {
"length": 3,
"openEnd": 1
}
}
} |
|
Requires: "h_heatProof"
{
"resetRoom": {
"nodes": [
2
]
}
}
{
"cycleFrames": 120
}
{
"or": [
{
"and": [
"canDash",
{
"or": [
"Wave",
"Spazer",
"Plasma",
{
"and": [
"ScrewAttack",
{
"cycleFrames": 35
}
]
},
{
"and": [
"Grapple",
{
"cycleFrames": 25
}
]
},
{
"cycleFrames": 60
}
]
}
]
},
{
"and": [
{
"haveBlueSuit": {}
},
{
"cycleFrames": 180
}
]
}
]
}Farm cycle drops: 3 Sova |
|
Requires: "h_heatedCrystalFlash" |
From: 2
Middle Right Door
To: 2
Middle Right Door
It takes about 2.5 minutes for the Sova to get to this door and hit Samus. Alternatively, use a Super as the third Sova has started going off screen to speed it up to 40 seconds. Requires: {
"or": [
{
"ammo": {
"type": "Super",
"count": 1
}
},
"canBePatient"
]
}
{
"enemyDamage": {
"enemy": "Sova",
"type": "contact",
"hits": 1
}
} |
From: 2
Middle Right Door
To: 2
Middle Right Door

It takes about 2.5 minutes for the Sova to get to this door and hit Samus. With Morph, Samus can shoot the shot block as the Sova is coming down to save some time. Alternatively, use a Super as the third Sova has started going off screen to speed it up to 40 seconds. Entrance condition: {
"comeInNormally": {}
}Requires: {
"or": [
{
"and": [
{
"heatFrames": 2340
},
{
"ammo": {
"type": "Super",
"count": 1
}
}
]
},
{
"and": [
"h_heatProof",
"canBePatient"
]
},
{
"and": [
"Morph",
"canBePatient",
{
"heatFrames": 5925
}
]
}
]
}Exit condition: {
"leaveWithGModeSetup": {}
}Unlocks doors: {"types":["ammo"],"requires":[]} |
From: 2
Middle Right Door
To: 3
Bottom Right Door
Kill the Funes first, then the Sovas. Shinecharge at the bottom and use heat damage to interrupt. Entrance condition: {
"comeInWithRMode": {}
}Requires: {
"enemyKill": {
"enemies": [
[
"Fune"
]
]
}
}
{
"or": [
{
"and": [
"h_heatedCrystalFlashForReserveEnergy",
{
"heatFrames": 280
}
]
},
{
"and": [
"Morph",
"h_heatProof",
"h_RModeCanRefillReserves",
{
"enemyKill": {
"enemies": [
[
"Fune",
"Fune"
],
[
"Fune"
]
]
}
},
{
"partialRefill": {
"type": "ReserveEnergy",
"limit": 40
}
}
]
}
]
}
{
"or": [
{
"canShineCharge": {
"usedTiles": 12,
"openEnd": 0
}
},
{
"and": [
{
"doorUnlockedAtNode": 3
},
{
"canShineCharge": {
"usedTiles": 13,
"openEnd": 0
}
}
]
}
]
}
"h_heatTriggerRModeSparkInterrupt"
{
"heatFrames": 10
}Unlocks doors: {"nodeId":3,"types":["ammo"],"requires":[]} |
From: 2
Middle Right Door
To: 3
Bottom Right Door
Avoid the fireballs while waiting for the Sovas. If the fireball is going to be at a bad cycle, it can help to kill the first Sova. Entrance condition: {
"comeInNormally": {}
}Requires: {
"heatFrames": 1200
}
"Morph"Exit condition: {
"leaveWithGModeSetup": {}
}Unlocks doors: {"types":["missiles","super"],"requires":[]}
{"types":["powerbomb"],"requires":["never"]} |
From: 2
Middle Right Door
To: 3
Bottom Right Door
Kill the Sovas or wait at least 20 seconds for them to get out of the way before going to the bottom door. It is slightly safer but very slow to wait 2.5 minutes for the Sovas to return on camera to be sure Samus won't touch them. Entrance condition: {
"comeInWithGMode": {
"mode": "any",
"morphed": true
}
}Requires: "h_artificialMorphMovement" "h_heatedGModeOffCameraDoor" Dev note: It is probably possible to farm the Sovas at this door, but it would be difficult and isn't expected. |
|
Requires: "Morph"
{
"heatFrames": 180
}
{
"or": [
"canDash",
{
"heatFrames": 20
}
]
} |
From: 2
Middle Right Door
To: 4
Junction Below Morph Tunnel
Kill the Sovas or wait at around 25 seconds for them to get out of the way before going down. Exit G-mode on the first ledge on the left, then jump and press against the right wall to touch the camera scroll block and fix the camera. Entrance condition: {
"comeInWithGMode": {
"mode": "any",
"morphed": true
}
}Requires: "h_heatedGMode"
"h_artificialMorphMovement"
{
"heatFrames": 120
} |
|
Requires: {
"heatFrames": 390
}
{
"or": [
"canDash",
{
"heatFrames": 100
}
]
}Unlocks doors: {"types":["missiles"],"requires":[{"heatFrames":25}]}
{"types":["super"],"requires":[]}
{"types":["powerbomb"],"requires":[{"heatFrames":40}]} |
From: 3
Bottom Right Door
To: 1
Top Right Door
Entrance condition: {
"comeInShinecharged": {}
}Requires: {
"shineChargeFrames": 85
}
{
"doorUnlockedAtNode": 1
}
"canMidAirMorph"
"h_crouchJumpDownGrab"
"canShinechargeMovementTricky"
{
"shinespark": {
"frames": 20,
"excessFrames": 0
}
}
{
"heatFrames": 285
}Unlocks doors: {"types":["ammo"],"requires":["never"]}Dev note: Unlocking the door would be possible but would require more than the default amount of heat frames, which would need testing. |
From: 3
Bottom Right Door
To: 1
Top Right Door

Entrance condition: {
"comeInShinecharging": {
"length": 11,
"openEnd": 0
}
}Requires: {
"doorUnlockedAtNode": 1
}
"canShinechargeMovementTricky"
"canMidAirMorph"
"h_crouchJumpDownGrab"
{
"shinespark": {
"frames": 19,
"excessFrames": 0
}
}
{
"heatFrames": 370
}Unlocks doors: {"types":["ammo"],"requires":["never"]}Dev note: Unlocking the door would be possible but would require more than the default amount of heat frames, which would need testing. |
From: 3
Bottom Right Door
To: 1
Top Right Door
Wait for the Sovas to wind around the room and reach the top door. This takes about 1 minute and 15 seconds. Entrance condition: {
"comeInNormally": {}
}Requires: {
"heatFrames": 4600
}
"canBePatient"Exit condition: {
"leaveWithGModeSetup": {}
}Unlocks doors: {"types":["ammo"],"requires":[]} |
From: 3
Bottom Right Door
To: 1
Top Right Door

Use a Super to knock a Sova off as it exits the morph tunnel, get to and shoot the shot block in time to let it pass. Use another Super to knock it off the top runway so it can climb the left wall and reach the door. Entrance condition: {
"comeInNormally": {}
}Requires: {
"heatFrames": 2200
}
{
"ammo": {
"type": "Super",
"count": 2
}
}Exit condition: {
"leaveWithGModeSetup": {}
}Unlocks doors: {"types":["missiles"],"requires":[]}
{"types":["super"],"requires":[],"useImplicitRequires":false}
{"types":["powerbomb"],"requires":["canTrickyJump"]} |
|


To minimize heat damage, immediately after landing use Grapple to open the door while running towards it, then jump over the gap and through the door. If the door is grappled too late, it may interfere with the jump. Entrance condition: {
"comeInWithGrappleTeleport": {
"blockPositions": [
[
5,
3
],
[
7,
2
]
]
}
}Requires: {
"heatFrames": 75
}
{
"or": [
"canDash",
{
"heatFrames": 35
}
]
} |
|
Entrance condition: {
"comeInWithGMode": {
"mode": "any",
"morphed": false
}
}Requires: "h_heatedGModeOpenDifferentDoor" Dev note: The single tile ledge at this door doesn't seem to make it any slower to exit. |
|
It is possible to kill the Sovas and pick up their drops during a pause abuse, but they will only give drops if there are not too many Fune fireballs. With a ledge grab onto the top platform, it is possible to get all the Funes off camera. Alternatively, it is possible to kill or repeatedly freeze them. Entrance condition: {
"comeInWithGMode": {
"mode": "any",
"morphed": false
}
}Requires: "canBePatient"
"h_heatedGModePauseAbuse"
"canFarmWhileShooting"
{
"or": [
"canTrickyJump",
"canTrickyUseFrozenEnemies",
{
"ammo": {
"type": "Super",
"count": 1
}
},
"h_usePowerBomb"
]
}Dev note: The single tile ledge at this door doesn't seem to make it any slower to exit. The Power Bomb kill could be done with artificial morph, but it's not worth modeling. |
From: 3
Bottom Right Door
To: 2
Middle Right Door
Entrance condition: {
"comeInShinecharged": {}
}Requires: {
"shineChargeFrames": 85
}
"canShinechargeMovementTricky"
"canMidAirMorph"
{
"shinespark": {
"frames": 20,
"excessFrames": 0
}
}
{
"enemyDamage": {
"enemy": "Sova",
"type": "contact",
"hits": 1
}
}
{
"heatFrames": 395
} |
From: 3
Bottom Right Door
To: 2
Middle Right Door


Entrance condition: {
"comeInShinecharged": {}
}Requires: {
"shineChargeFrames": 85
}
"canShinechargeMovementTricky"
"canMidAirMorph"
{
"shinespark": {
"frames": 20,
"excessFrames": 0
}
}
"h_usePowerBomb"
{
"heatFrames": 385
} |
From: 3
Bottom Right Door
To: 2
Middle Right Door
Entrance condition: {
"comeInShinecharging": {
"length": 11,
"openEnd": 0
}
}Requires: "canShinechargeMovementTricky"
"canMidAirMorph"
{
"shinespark": {
"frames": 19,
"excessFrames": 0
}
}
{
"enemyDamage": {
"enemy": "Sova",
"type": "contact",
"hits": 1
}
}
{
"heatFrames": 475
} |
From: 3
Bottom Right Door
To: 2
Middle Right Door
Entrance condition: {
"comeInShinecharging": {
"length": 11,
"openEnd": 0
}
}Requires: "canShinechargeMovementTricky"
"canMidAirMorph"
{
"shinespark": {
"frames": 19,
"excessFrames": 0
}
}
"h_usePowerBomb"
{
"heatFrames": 465
} |
From: 3
Bottom Right Door
To: 2
Middle Right Door
Jump into the second ceiling Samus Eater in Hellway. After teleporting and passing through the transition, X-Ray climb to reach the space above, to the right of the morph tunnel. Samus will be off-camera, so it may not be easy to tell when the climb is done. Entrance condition: {
"comeInWithSamusEaterTeleport": {
"floorPositions": [],
"ceilingPositions": [
[
10,
3
]
]
}
}Requires: "h_heatProof" "canXRayClimb" "canOffScreenMovement" Dev note: Other Samus Eaters can also probably work. |
From: 3
Bottom Right Door
To: 2
Middle Right Door
Entrance condition: {
"comeInWithGMode": {
"mode": "any",
"morphed": false
}
}Requires: "Morph"
{
"or": [
"HiJump",
"canWallJump",
"canSpringBallJumpMidAir",
"SpaceJump",
"canIBJ",
"canTrickyUseFrozenEnemies"
]
}
"h_heatedGModeOffCameraDoor"Dev note: It is probably possible to farm the Sovas at this door, but it would be difficult and slow and isn't expected. |
From: 3
Bottom Right Door
To: 2
Middle Right Door
Entrance condition: {
"comeInWithGMode": {
"mode": "any",
"morphed": true
}
}Requires: {
"or": [
"h_artificialMorphIBJ",
{
"and": [
"HiJump",
"h_artificialMorphSpringBall"
]
},
{
"and": [
"h_artificialMorphSpringBallBombJump",
"h_additionalBomb"
]
}
]
}
"h_heatedGModeOffCameraDoor"Dev note: It is probably possible to farm the Sovas at this door, but it would be difficult and slow and isn't expected. |
From: 3
Bottom Right Door
To: 3
Bottom Right Door
Exit condition: {
"leaveWithRunway": {
"length": 12,
"openEnd": 0
}
} |
From: 3
Bottom Right Door
To: 3
Bottom Right Door


Requires: {
"or": [
{
"ammo": {
"type": "Super",
"count": 1
}
},
{
"and": [
"h_usePowerBomb",
{
"heatFrames": 190
}
]
}
]
}Exit condition: {
"leaveWithRunway": {
"length": 13,
"openEnd": 0
}
} |
|
Kill the Fune before Crystal Flashing. Requires: {
"ammo": {
"type": "Super",
"count": 1
}
}
{
"heatFrames": 20
}
"h_heatedCrystalFlash" |
|
Requires: "h_heatProof"
{
"resetRoom": {
"nodes": [
3
]
}
}
{
"or": [
{
"and": [
"canMidAirMorph",
"canTrickyJump",
{
"or": [
"HiJump",
"canWallJump"
]
},
"Plasma",
{
"cycleFrames": 540
}
]
},
{
"and": [
"canMidAirMorph",
{
"or": [
"Wave",
"Spazer",
"Plasma",
"Grapple",
{
"cycleFrames": 45
}
]
},
{
"cycleFrames": 690
}
]
},
{
"and": [
"canDodgeWhileShooting",
{
"cycleFrames": 1140
}
]
}
]
}Farm cycle drops: 3 Sova |
From: 3
Bottom Right Door
To: 3
Bottom Right Door
Kill the Funes first, then the Sovas. Shinecharge at the bottom and use heat damage to interrupt. Entrance condition: {
"comeInWithRMode": {}
}Requires: {
"enemyKill": {
"enemies": [
[
"Fune"
]
]
}
}
{
"or": [
"h_heatedCrystalFlashForReserveEnergy",
{
"and": [
"h_heatProof",
"h_RModeCanRefillReserves",
{
"enemyKill": {
"enemies": [
[
"Fune",
"Fune"
],
[
"Fune"
]
]
}
},
{
"partialRefill": {
"type": "ReserveEnergy",
"limit": 40
}
}
]
}
]
}
{
"or": [
{
"canShineCharge": {
"usedTiles": 12,
"openEnd": 0
}
},
{
"and": [
{
"doorUnlockedAtNode": 3
},
{
"canShineCharge": {
"usedTiles": 13,
"openEnd": 0
}
}
]
}
]
}
"h_heatTriggerRModeSparkInterrupt"
{
"heatFrames": 10
}Unlocks doors: {"nodeId":3,"types":["ammo"],"requires":[]} |
From: 3
Bottom Right Door
To: 3
Bottom Right Door
It takes about 20 seconds for the Sova to get to this door and hit Samus. Requires: {
"enemyDamage": {
"enemy": "Sova",
"type": "contact",
"hits": 1
}
} |
From: 3
Bottom Right Door
To: 3
Bottom Right Door

Avoid the fireballs while waiting for the Sovas. If the fireball is going to be at a bad cycle, it can help to kill the first Sova. Entrance condition: {
"comeInNormally": {}
}Requires: {
"heatFrames": 1140
}Exit condition: {
"leaveWithGModeSetup": {}
}Unlocks doors: {"types":["ammo"],"requires":[]} |
|
Requires: {
"or": [
"canTrivialMidAirMorph",
{
"and": [
"h_useSpringBall",
"HiJump"
]
}
]
}
{
"heatFrames": 80
} |
From: 3
Bottom Right Door
To: 5
Junction Above Morph Tunnel
Reaching the Morph hole can be tricky with SpeedBooster but no HiJump. Entrance condition: {
"comeInShinecharged": {}
}Requires: {
"shineChargeFrames": 70
}
"canMidAirMorph"
"canShinechargeMovementComplex"
{
"heatFrames": 210
}
{
"shinespark": {
"frames": 23,
"excessFrames": 3
}
} |
|
Requires: "canDash"
{
"or": [
{
"and": [
"HiJump",
{
"or": [
"canTrivialMidAirMorph",
"h_useSpringBall"
]
}
]
},
{
"and": [
"SpaceJump",
"canTrivialMidAirMorph",
{
"heatFrames": 40
}
]
},
{
"and": [
"canWallJump",
"canTrivialMidAirMorph"
]
},
"canSpringBallJumpMidAir",
{
"and": [
"canJumpIntoIBJ",
{
"heatFrames": 240
}
]
},
{
"and": [
"canJumpIntoIBJ",
"canDoubleBombJump",
{
"heatFrames": 120
}
]
},
{
"and": [
"canDoubleBombJump",
{
"heatFrames": 300
}
]
}
]
}
{
"heatFrames": 180
}
{
"enemyDamage": {
"enemy": "Sova",
"type": "contact",
"hits": 1
}
}Dev note: Base IBJ should kill the Sovas or go around. |
|


Either use a Power Bomb or Wave + Plasma to kill all the Sovas off-camera, or if heat protection is available, wait for all the Sovas to come out of the tunnel. Requires: {
"or": [
{
"and": [
"HiJump",
{
"or": [
"canTrivialMidAirMorph",
"h_useSpringBall"
]
}
]
},
{
"and": [
"SpaceJump",
"canTrivialMidAirMorph",
{
"heatFrames": 40
}
]
},
{
"and": [
"canWallJump",
"canTrivialMidAirMorph"
]
},
"canSpringBallJumpMidAir",
{
"and": [
"canIBJ",
{
"heatFrames": 900
}
]
},
{
"and": [
"canJumpIntoIBJ",
{
"heatFrames": 520
}
]
},
{
"and": [
"canJumpIntoIBJ",
"canDoubleBombJump",
{
"heatFrames": 400
}
]
}
]
}
{
"or": [
"h_heatProof",
{
"and": [
"canDash",
{
"or": [
"h_usePowerBomb",
{
"and": [
"Wave",
"Plasma",
"canTrickyJump",
{
"heatFrames": 80
}
]
}
]
}
]
},
{
"and": [
{
"haveBlueSuit": {}
},
{
"heatFrames": 40
}
]
}
]
}
{
"or": [
{
"heatFrames": 180
},
{
"and": [
"canFarmWhileShooting",
{
"heatFramesWithEnergyDrops": {
"frames": 115,
"drops": [
{
"enemy": "Sova",
"count": 3
}
]
}
},
{
"heatFrames": 65
}
]
}
]
} |
From: 4
Junction Below Morph Tunnel
To: 2
Middle Right Door
Smoothly jump into the morph tunnel while shooting the first Sova. Unmorph at the end of the tunnel to clear more Sovas as needed. Requires: "canMidAirMorph"
"canTrickyDodgeEnemies"
{
"or": [
"canPreciseWallJump",
"HiJump"
]
}
{
"enemyKill": {
"enemies": [
[
"Sova"
]
],
"explicitWeapons": [
"Wave",
"Spazer",
"Plasma"
]
}
}
"canFarmWhileShooting"
{
"heatFramesWithEnergyDrops": {
"frames": 100,
"drops": [
{
"enemy": "Sova",
"count": 3
}
]
}
}
"canDash"
{
"heatFrames": 120
} |
|


Wait for the Sova to leave the tunnel and jump morph into them to bounce up into the hole. Requires: "canCrouchJump"
"canMidAirMorph"
{
"tech": "canNeutralDamageBoost"
}
{
"enemyDamage": {
"enemy": "Sova",
"type": "contact",
"hits": 1
}
}
{
"heatFrames": 470
}
{
"or": [
"canDash",
{
"heatFrames": 20
}
]
} |
|
Freeze a Sova once it enters one of the slots on the wall and then use it as a platform. Requires: "canMidAirMorph"
"canTrickyUseFrozenEnemies"
{
"or": [
{
"heatFrames": 780
},
{
"and": [
"canFarmWhileShooting",
{
"heatFramesWithEnergyDrops": {
"frames": 680,
"drops": [
{
"enemy": "Sova",
"count": 3
}
]
}
},
{
"heatFrames": 100
}
]
}
]
}
{
"or": [
"canDash",
{
"heatFrames": 20
}
]
} |
|
Requires: "Morph"
{
"heatFrames": 100
}Unlocks doors: {"types":["powerbomb"],"requires":[{"heatFrames":50}]} |
From: 4
Junction Below Morph Tunnel
To: 3
Bottom Right Door
Requires: "canDash"
"Morph"
{
"heatFrames": 140
}Exit condition: {
"leaveWithRunway": {
"length": 12,
"openEnd": 0
}
}Unlocks doors: {"types":["missiles"],"requires":[{"heatFrames":50}]}
{"types":["super"],"requires":[]}
{"types":["powerbomb"],"requires":[{"heatFrames":30}]} |
From: 4
Junction Below Morph Tunnel
To: 3
Bottom Right Door
Requires: "canDash"
"Morph"
{
"or": [
{
"and": [
{
"ammo": {
"type": "Super",
"count": 1
}
},
{
"heatFrames": 145
}
]
},
{
"and": [
{
"ammo": {
"type": "PowerBomb",
"count": 1
}
},
{
"heatFrames": 180
}
]
}
]
}Exit condition: {
"leaveWithRunway": {
"length": 13,
"openEnd": 0
}
}Unlocks doors: {"types":["missiles"],"requires":[{"heatFrames":50}]}
{"types":["super"],"requires":[]}
{"types":["powerbomb"],"requires":[]}Dev note: FIXME: unlocksDoors: powerbomb would not have an ammo cost as one is used as part of the strat. |
From: 4
Junction Below Morph Tunnel
To: 4
Junction Below Morph Tunnel
Requires: "h_heatedCrystalFlash" |
From: 4
Junction Below Morph Tunnel
To: 5
Junction Above Morph Tunnel
Requires: {
"or": [
{
"and": [
"canWallJump",
{
"heatFrames": 80
}
]
},
{
"and": [
"HiJump",
"canSpringBallJumpMidAir",
{
"heatFrames": 160
}
]
},
{
"and": [
"SpaceJump",
{
"heatFrames": 180
}
]
},
{
"and": [
"SpaceJump",
"HiJump",
{
"heatFrames": 120
}
]
}
]
}Dev note: It is faster to go around than to climb with Ice. |
|
Requires: {
"or": [
{
"and": [
"canWallJump",
{
"heatFrames": 60
}
]
},
{
"and": [
"h_crouchJumpDownGrab",
{
"heatFrames": 70
}
]
}
]
} |
|
The Sovas should be killed if you are heat proof. Requires: "Morph"
{
"heatFrames": 200
}
{
"or": [
"h_heatProof",
{
"enemyDamage": {
"enemy": "Sova",
"type": "contact",
"hits": 1
}
}
]
} |
|
Requires: "h_usePowerBomb"
{
"heatFrames": 215
}
{
"or": [
"canDash",
{
"heatFrames": 20
}
]
} |
From: 5
Junction Above Morph Tunnel
To: 2
Middle Right Door


Requires: "h_usePowerBomb"
"canFarmWhileShooting"
{
"heatFramesWithEnergyDrops": {
"frames": 150,
"drops": [
{
"enemy": "Sova",
"count": 3
}
]
}
}
{
"heatFrames": 65
}
{
"or": [
"canDash",
{
"heatFrames": 20
}
]
} |
|
Requires: {
"haveBlueSuit": {}
}
"Morph"
{
"or": [
{
"heatFrames": 200
},
{
"and": [
"canFarmWhileShooting",
{
"heatFramesWithEnergyDrops": {
"frames": 175,
"drops": [
{
"enemy": "Sova",
"count": 3
}
]
}
},
{
"heatFrames": 85
}
]
}
]
} |
From: 5
Junction Above Morph Tunnel
To: 4
Junction Below Morph Tunnel
Requires: {
"heatFrames": 50
} |
From: 5
Junction Above Morph Tunnel
To: 5
Junction Above Morph Tunnel
Requires: "h_heatedCrystalFlash" |
{
"$schema": "../../../schema/m3-room.schema.json",
"id": 108,
"name": "Ice Beam Snake Room",
"area": "Norfair",
"subarea": "Upper",
"subsubarea": "West",
"roomAddress": "0x7A8B9",
"roomEnvironments": [
{
"heated": true
}
],
"mapTileMask": [
[
1,
0
],
[
1,
1
],
[
1,
0
]
],
"nodes": [
{
"id": 1,
"name": "Top Right Door",
"nodeType": "door",
"nodeSubType": "blue",
"nodeAddress": "0x0019372",
"doorOrientation": "right",
"doorEnvironments": [
{
"physics": "air"
}
],
"mapTileMask": [
[
2,
0
],
[
1,
1
],
[
1,
0
]
]
},
{
"id": 2,
"name": "Middle Right Door",
"nodeType": "door",
"nodeSubType": "blue",
"nodeAddress": "0x001937e",
"doorOrientation": "right",
"doorEnvironments": [
{
"physics": "air"
}
],
"mapTileMask": [
[
1,
0
],
[
1,
2
],
[
1,
0
]
]
},
{
"id": 3,
"name": "Bottom Right Door",
"nodeType": "door",
"nodeSubType": "blue",
"nodeAddress": "0x0019366",
"doorOrientation": "right",
"doorEnvironments": [
{
"physics": "air"
}
],
"mapTileMask": [
[
1,
0
],
[
1,
1
],
[
2,
0
]
]
},
{
"id": 4,
"name": "Junction Below Morph Tunnel",
"nodeType": "junction",
"nodeSubType": "junction",
"mapTileMask": [
[
1,
0
],
[
2,
1
],
[
1,
0
]
]
},
{
"id": 5,
"name": "Junction Above Morph Tunnel",
"nodeType": "junction",
"nodeSubType": "junction",
"mapTileMask": [
[
1,
0
],
[
2,
1
],
[
1,
0
]
]
}
],
"enemies": [
{
"id": "e1",
"groupName": "Ice Beam Snake Room Funes",
"enemyName": "Fune",
"quantity": 4,
"betweenNodes": [
1,
3
]
},
{
"id": "e2",
"groupName": "Ice Beam Snake Room Sovas",
"enemyName": "Sova",
"quantity": 3,
"homeNodes": [
2,
3,
4
]
}
],
"strats": [
{
"link": [
1,
1
],
"name": "Base (Unlock Door)",
"requires": [],
"unlocksDoors": [
{
"types": [
"missiles"
],
"requires": [
{
"heatFrames": 50
}
]
},
{
"types": [
"super"
],
"requires": []
},
{
"types": [
"powerbomb"
],
"requires": [
{
"heatFrames": 110
}
]
}
],
"flashSuitChecked": true,
"blueSuitChecked": true
},
{
"link": [
1,
1
],
"name": "Base (Come In Normally)",
"entranceCondition": {
"comeInNormally": {}
},
"requires": [],
"flashSuitChecked": true,
"blueSuitChecked": true
},
{
"link": [
1,
1
],
"name": "Base (Come In With Mockball)",
"entranceCondition": {
"comeInWithMockball": {
"adjacentMinTiles": 0,
"remoteAndLandingMinTiles": [
[
0,
0
]
],
"speedBooster": "any"
}
},
"requires": [
{
"heatFrames": 10
}
],
"flashSuitChecked": true,
"blueSuitChecked": true
},
{
"link": [
2,
2
],
"name": "Base (Unlock Door)",
"requires": [],
"unlocksDoors": [
{
"types": [
"missiles"
],
"requires": [
{
"heatFrames": 50
}
]
},
{
"types": [
"super"
],
"requires": []
},
{
"types": [
"powerbomb"
],
"requires": [
{
"heatFrames": 110
}
]
}
],
"flashSuitChecked": true,
"blueSuitChecked": true
},
{
"link": [
2,
2
],
"name": "Base (Come In Normally)",
"entranceCondition": {
"comeInNormally": {}
},
"requires": [],
"flashSuitChecked": true,
"blueSuitChecked": true
},
{
"link": [
2,
2
],
"name": "Base (Come In With Mockball)",
"entranceCondition": {
"comeInWithMockball": {
"adjacentMinTiles": 0,
"remoteAndLandingMinTiles": [
[
0,
0
]
],
"speedBooster": "any"
}
},
"requires": [
{
"heatFrames": 10
}
],
"flashSuitChecked": true,
"blueSuitChecked": true
},
{
"link": [
3,
3
],
"name": "Base (Unlock Door)",
"requires": [],
"unlocksDoors": [
{
"types": [
"missiles"
],
"requires": [
{
"heatFrames": 50
}
]
},
{
"types": [
"super"
],
"requires": []
},
{
"types": [
"powerbomb"
],
"requires": [
{
"heatFrames": 110
}
]
}
],
"flashSuitChecked": true,
"blueSuitChecked": true
},
{
"link": [
3,
3
],
"name": "Base (Come In Normally)",
"entranceCondition": {
"comeInNormally": {}
},
"requires": [],
"flashSuitChecked": true,
"blueSuitChecked": true
},
{
"link": [
3,
3
],
"name": "Base (Come In With Mockball)",
"entranceCondition": {
"comeInWithMockball": {
"adjacentMinTiles": 0,
"remoteAndLandingMinTiles": [
[
0,
0
]
],
"speedBooster": "any"
}
},
"requires": [
{
"heatFrames": 10
}
],
"flashSuitChecked": true,
"blueSuitChecked": true
},
{
"id": 1,
"link": [
1,
1
],
"name": "Leave with Runway",
"requires": [
{
  "heatFrames": 5
}
],
"exitCondition": {
"leaveWithRunway": {
"length": 1,
"openEnd": 1
}
},
"flashSuitChecked": true,
"blueSuitChecked": true
},
{
"id": 2,
"link": [
1,
1
],
"name": "Leave With Runway - Frozen Sova",
"requires": [
"h_frozenEnemyRunway",
"canBePatient",
{
"heatFrames": 4800
}
],
"exitCondition": {
"leaveWithRunway": {
"length": 10,
"openEnd": 1
}
},
"flashSuitChecked": true,
"blueSuitChecked": true,
"note": [
"Wait 80 seconds for the Sova to get into position, then freeze it to bridge the gap and significantly extend the runway.",
"The other Sovas can be farmed or used as a backup."
],
"devNote": "Because the Sovas are global, strats could be added that start from the other doors to tighten the total frame count, but it will typically require heatProof either way."
},
{
"id": 75,
"link": [
1,
1
],
"name": "Leave Spinning",
"requires": [
{
  "heatFrames": 180
}
],
"exitCondition": {
"leaveSpinning": {
"remoteRunway": {
"length": 7,
"openEnd": 2
}
}
},
"flashSuitChecked": true,
"blueSuitChecked": true
},
{
"id": 76,
"link": [
1,
1
],
"name": "Leave With Mockball",
"requires": [
{
  "heatFrames": 180
}
],
"exitCondition": {
"leaveWithMockball": {
"remoteRunway": {
"length": 7,
"openEnd": 0
},
"landingRunway": {
"length": 1,
"openEnd": 1
}
}
},
"flashSuitChecked": true,
"blueSuitChecked": true
},
{
"id": 77,
"link": [
1,
1
],
"name": "Leave With Spring Ball Bounce",
"requires": [
{
  "heatFrames": 180
}
],
"exitCondition": {
"leaveWithSpringBallBounce": {
"remoteRunway": {
"length": 6,
"openEnd": 0
},
"landingRunway": {
"length": 1,
"openEnd": 1
},
"movementType": "uncontrolled"
}
},
"flashSuitChecked": true,
"blueSuitChecked": true
},
{
"id": 78,
"link": [
1,
1
],
"name": "Leave Space Jumping",
"requires": [
"h_heatedRemoteRunwaySpaceJump",
{
"heatFrames": 180
}
],
"exitCondition": {
"leaveSpaceJumping": {
"remoteRunway": {
"length": 4,
"openEnd": 1
}
}
},
"flashSuitChecked": true,
"blueSuitChecked": true
},
{
"id": 69,
"link": [
1,
1
],
"name": "Leave With Side Platform",
"requires": [
{
  "heatFrames": 105
}
],
"exitCondition": {
"leaveWithSidePlatform": {
"height": 1,
"runway": {
"length": 2,
"openEnd": 0
},
"obstruction": [
1,
0
]
}
},
"flashSuitChecked": true,
"blueSuitChecked": true,
"devNote": "Max extra run speed $0.B"
},
{
"id": 3,
"link": [
1,
1
],
"name": "Crystal Flash",
"requires": [
{
"heatFrames": 40
},
"h_heatedCrystalFlash"
],
"flashSuitChecked": true,
"blueSuitChecked": true
},
{
"id": 71,
"link": [
1,
1
],
"name": "Sova Farm",
"requires": [
"h_heatProof",
{
"resetRoom": {
"nodes": [
1
]
}
},
{
"or": [
"canWallJump",
{
"and": [
"HiJump",
"canSpringBallJumpMidAir",
"h_doubleEquipmentScreenCycleFrames",
{
"cycleFrames": 40
}
]
},
{
"and": [
"Morph",
{
"cycleFrames": 380
}
]
}
]
},
{
"or": [
{
"and": [
"canMidAirMorph",
"Plasma",
"canTrickyJump",
{
"cycleFrames": 600
}
]
},
{
"and": [
"canMidAirMorph",
"Plasma",
"canInsaneJump",
{
"cycleFrames": 520
}
]
},
{
"and": [
{
"or": [
"Wave",
"Spazer",
"Plasma",
"Grapple",
{
"cycleFrames": 45
}
]
},
{
"cycleFrames": 700
}
]
}
]
},
{
"or": [
{
"noFlashSuit": {}
},
{
"cycleFrames": 150
}
]
}
],
"farmCycleDrops": [
{
"enemy": "Sova",
"count": 3
}
],
"flashSuitChecked": true,
"blueSuitChecked": true
},
{
"id": 4,
"link": [
1,
1
],
"name": "G-Mode Regain Mobility",
"requires": [
"canBePatient",
{
"enemyDamage": {
"enemy": "Sova",
"type": "contact",
"hits": 1
}
}
],
"gModeRegainMobility": {},
"flashSuitChecked": true,
"blueSuitChecked": true,
"note": "It takes about 1.5 minutes for the Sova to get to this door and hit Samus."
},
{
"id": 48,
"link": [
1,
1
],
"name": "G-Mode Setup - Get Hit By Sova",
"entranceCondition": {
"comeInNormally": {}
},
"requires": [
{
"heatFrames": 4600
},
"canBePatient"
],
"exitCondition": {
"leaveWithGModeSetup": {}
},
"unlocksDoors": [
{
"types": [
"ammo"
],
"requires": []
}
],
"flashSuitChecked": true,
"blueSuitChecked": true,
"note": "Wait for the Sovas to wind around the room and reach the top door. This takes about 1 minute and 15 seconds."
},
{
"id": 49,
"link": [
1,
1
],
"name": "G-Mode Setup - Get Hit By Sova, Two Supers",
"entranceCondition": {
"comeInNormally": {}
},
"requires": [
{
"heatFrames": 2200
},
{
"ammo": {
"type": "Super",
"count": 2
}
}
],
"exitCondition": {
"leaveWithGModeSetup": {}
},
"unlocksDoors": [
{
"types": [
"missiles",
"powerbomb"
],
"requires": []
},
{
"types": [
"super"
],
"requires": [],
"useImplicitRequires": false
}
],
"flashSuitChecked": true,
"blueSuitChecked": true,
"note": [
"Use a Super to knock a Sova off as it exits the morph tunnel, then shoot the shot block in time to let it pass.",
"Use another Super to knock it off the top runway so it can climb the left wall and reach the door."
]
},
{
"id": 41,
"link": [
1,
2
],
"name": "Come In Shinecharging, Leave With Spark",
"entranceCondition": {
"comeInShinecharging": {
"length": 0,
"openEnd": 1
}
},
"requires": [
"canShinechargeMovementTricky",
"canTrivialMidAirMorph",
{
"or": [
"canUsePowerBombLag",
{
"and": [
"canInsaneJump",
"canOffScreenMovement"
]
}
]
},
{
"heatFrames": 200
},
{
"shinespark": {
"frames": 17,
"excessFrames": 0
}
}
],
"exitCondition": {
"leaveWithSpark": {}
},
"unlocksDoors": [
{
"types": [
"super"
],
"requires": []
},
{
"types": [
"missiles",
"powerbomb"
],
"requires": [
"never"
]
}
],
"flashSuitChecked": true,
"blueSuitChecked": true,
"devNote": [
"Technically Samus isn't moving off-camera but is close to the edge;",
"'canOffScreenMovement' is for the difficulty of timing the unmorph, given limited visibility of the end of the passage and the Sova.",
"If a Power Bomb is available, then lag from the explosion can make the movement much easier."
]
},
{
"id": 59,
"link": [
1,
2
],
"name": "G-Mode, Simple Blind Movement",
"entranceCondition": {
"comeInWithGMode": {
"mode": "any",
"morphed": false
}
},
"requires": [
"Morph",
{
"or": [
"HiJump",
"canWallJump",
"canSpringBallJumpMidAir",
"SpaceJump",
"canIBJ",
"canTrickyUseFrozenEnemies"
]
},
"h_heatedGModeOffCameraDoor"
],
"flashSuitChecked": true,
"blueSuitChecked": true,
"devNote": "It is probably possible to farm the Sovas at this door, but it would be difficult and slow and isn't expected."
},
{
"id": 60,
"link": [
1,
2
],
"name": "G-Mode Morph, Simple Blind Movement",
"entranceCondition": {
"comeInWithGMode": {
"mode": "any",
"morphed": true
}
},
"requires": [
{
"or": [
"h_artificialMorphIBJ",
{
"and": [
"HiJump",
"h_artificialMorphSpringBall"
]
},
{
"and": [
"h_artificialMorphSpringBallBombJump",
"h_additionalBomb"
]
}
]
},
"h_heatedGModeOffCameraDoor"
],
"flashSuitChecked": true,
"blueSuitChecked": true,
"devNote": "It is probably possible to farm the Sovas at this door, but it would be difficult and slow and isn't expected."
},
{
"id": 5,
"link": [
1,
3
],
"name": "Base",
"requires": [
"canDash",
{
"heatFrames": 680
},
{
"or": [
"canDodgeWhileShooting",
{
"enemyDamage": {
"enemy": "Fune",
"type": "fireball",
"hits": 2
}
}
]
}
],
"unlocksDoors": [
{
"types": [
"powerbomb"
],
"requires": []
}
],
"flashSuitChecked": true,
"blueSuitChecked": true
},
{
"id": 86,
"link": [
1,
3
],
"name": "Blue Suit",
"requires": [
{
"haveBlueSuit": {}
},
{
"heatFrames": 580
}
],
"unlocksDoors": [
{
"types": [
"powerbomb"
],
"requires": []
}
],
"flashSuitChecked": true,
"blueSuitChecked": true,
"note": "Use the blue suit invulnerability to pass through the Fune fireballs."
},
{
"id": 6,
"link": [
1,
3
],
"name": "Screw Attack",
"requires": [
"canDash",
"ScrewAttack",
{
"heatFrames": 525
}
],
"unlocksDoors": [
{
"types": [
"powerbomb"
],
"requires": []
}
],
"flashSuitChecked": true,
"blueSuitChecked": true,
"devNote": "The bottom Fune shoots a fireball which wastes all of the time save of a Leave with Runway strat."
},
{
"id": 7,
"link": [
1,
3
],
"name": "Pseudo Screw",
"requires": [
"canDash",
"canPseudoScrew",
{
"heatFrames": 540
}
],
"unlocksDoors": [
{
"types": [
"powerbomb"
],
"requires": []
}
],
"flashSuitChecked": true,
"blueSuitChecked": true
},
{
"id": 8,
"link": [
1,
3
],
"name": "Frozen Funes",
"requires": [
"canDash",
"Wave",
"Ice",
{
"heatFrames": 530
}
],
"unlocksDoors": [
{
"types": [
"powerbomb"
],
"requires": []
}
],
"flashSuitChecked": true,
"blueSuitChecked": true
},
{
"id": 9,
"link": [
1,
3
],
"name": "Frozen Funes Leave with Runway",
"requires": [
"canDash",
"Wave",
"Ice",
{
"heatFrames": 525
}
],
"exitCondition": {
"leaveWithRunway": {
"length": 12,
"openEnd": 0
}
},
"unlocksDoors": [
{
"types": [
"missiles"
],
"requires": [
{
"heatFrames": 50
}
]
},
{
"types": [
"super"
],
"requires": []
},
{
"types": [
"powerbomb"
],
"requires": [
"never"
]
}
],
"flashSuitChecked": true,
"blueSuitChecked": true
},
{
"id": 10,
"link": [
1,
3
],
"name": "Frozen Funes Leave with Runway - Kill Fune",
"requires": [
"canDash",
"Wave",
"Ice",
{
"ammo": {
"type": "Super",
"count": 1
}
},
{
"heatFrames": 545
}
],
"exitCondition": {
"leaveWithRunway": {
"length": 13,
"openEnd": 0
}
},
"unlocksDoors": [
{
"types": [
"missiles"
],
"requires": [
{
"heatFrames": 50
}
]
},
{
"types": [
"super",
"powerbomb"
],
"requires": []
}
],
"flashSuitChecked": true,
"blueSuitChecked": true
},
{
"id": 83,
"link": [
1,
3
],
"name": "R-Mode Spark Interrupt",
"entranceCondition": {
"comeInWithRMode": {}
},
"requires": [
{
"or": [
{
"and": [
{
"heatFrames": 30
},
"h_heatedCrystalFlashForReserveEnergy",
{
"heatFrames": 170
}
]
},
{
"and": [
"h_heatProof",
"h_RModeCanRefillReserves",
{
"enemyKill": {
"enemies": [
[
"Fune",
"Fune"
],
[
"Fune"
]
]
}
},
{
"partialRefill": {
"type": "ReserveEnergy",
"limit": 40
}
}
]
}
]
},
{
"enemyKill": {
"enemies": [
[
"Fune"
]
]
}
},
{
"or": [
{
"canShineCharge": {
"usedTiles": 12,
"openEnd": 0
}
},
{
"and": [
{
"doorUnlockedAtNode": 3
},
{
"canShineCharge": {
"usedTiles": 13,
"openEnd": 0
}
}
]
}
]
},
"h_heatTriggerRModeSparkInterrupt",
{
"heatFrames": 10
}
],
"unlocksDoors": [
{
"nodeId": 3,
"types": [
"ammo"
],
"requires": []
}
],
"flashSuitChecked": true,
"blueSuitChecked": true,
"note": [
"Kill the Funes first, then the Sovas. Shinecharge at the bottom and use heat damage to interrupt."
]
},
{
"id": 50,
"link": [
1,
3
],
"name": "G-Mode Setup - Get Hit By Sova",
"entranceCondition": {
"comeInNormally": {}
},
"requires": [
{
  "heatFrames": 1200
}
],
"exitCondition": {
"leaveWithGModeSetup": {}
},
"unlocksDoors": [
{
"types": [
"missiles",
"super"
],
"requires": []
},
{
"types": [
"powerbomb"
],
"requires": [
"never"
]
}
],
"flashSuitChecked": true,
"blueSuitChecked": true,
"note": "Avoid the fireballs while waiting for the Sovas. If the fireball is going to be at a bad cycle, it can help to kill the first Sova."
},
{
"id": 61,
"link": [
1,
3
],
"name": "G-Mode",
"entranceCondition": {
"comeInWithGMode": {
"mode": "any",
"morphed": false
}
},
"requires": [
"h_heatedGModeOpenDifferentDoor"
],
"flashSuitChecked": true,
"blueSuitChecked": true
},
{
"id": 62,
"link": [
1,
3
],
"name": "G-Mode, Sova Farm",
"entranceCondition": {
"comeInWithGMode": {
"mode": "any",
"morphed": false
}
},
"requires": [
"h_heatedGModePauseAbuse",
"canFarmWhileShooting"
],
"flashSuitChecked": true,
"blueSuitChecked": true,
"note": "It is possible to kill the Sovas and pick up their drops during a pause abuse.",
"devNote": "The Sovas will not give drops if there are too many fireballs, but this shouldn't be a problem when leaving through the bottom door."
},
{
"id": 11,
"link": [
1,
5
],
"name": "Base",
"requires": [
{
  "heatFrames": 50
}
],
"flashSuitChecked": true,
"blueSuitChecked": true
},
{
"id": 12,
"link": [
2,
1
],
"name": "Grapple Teleport",
"entranceCondition": {
"comeInWithGrappleTeleport": {
"blockPositions": [
[
5,
3
],
[
7,
2
]
]
}
},
"requires": [
{
"heatFrames": 75
},
{
"or": [
"canDash",
{
"heatFrames": 35
}
]
}
],
"flashSuitChecked": true,
"blueSuitChecked": true,
"note": [
"To minimize heat damage, immediately after landing use Grapple to open the door while running towards it, then jump over the gap and through the door.",
"If the door is grappled too late, it may interfere with the jump."
]
},
{
"id": 51,
"link": [
2,
1
],
"name": "G-Mode Setup - Get Hit By Sova",
"entranceCondition": {
"comeInNormally": {}
},
"requires": [
{
"heatFrames": 4600
},
"Morph",
"canBePatient"
],
"exitCondition": {
"leaveWithGModeSetup": {}
},
"unlocksDoors": [
{
"types": [
"ammo"
],
"requires": []
}
],
"flashSuitChecked": true,
"blueSuitChecked": true,
"note": "Wait for the Sovas to wind around the room and reach the top door. This takes about 1 minute and 15 seconds."
},
{
"id": 52,
"link": [
2,
1
],
"name": "G-Mode Setup - Get Hit By Sova, Two Supers",
"entranceCondition": {
"comeInNormally": {}
},
"requires": [
{
"heatFrames": 2200
},
"Morph",
{
"ammo": {
"type": "Super",
"count": 2
}
}
],
"exitCondition": {
"leaveWithGModeSetup": {}
},
"unlocksDoors": [
{
"types": [
"missiles"
],
"requires": []
},
{
"types": [
"super"
],
"requires": [],
"useImplicitRequires": false
},
{
"types": [
"powerbomb"
],
"requires": [
"never"
]
}
],
"flashSuitChecked": true,
"blueSuitChecked": true,
"note": [
"Use a Super to knock a Sova off as it exits the morph tunnel, get to and shoot the shot block in time to let it pass.",
"Use another Super to knock it off the top runway so it can climb the left wall and reach the door.",
"There is enough time to go around the left side of the room if Samus can't climb the right side."
]
},
{
"id": 63,
"link": [
2,
1
],
"name": "G-Mode Morph, Blind Movement",
"entranceCondition": {
"comeInWithGMode": {
"mode": "any",
"morphed": true
}
},
"requires": [
"h_artificialMorphMovement",
"canOffScreenMovement",
"h_heatedGModeOffCameraDoor"
],
"flashSuitChecked": true,
"blueSuitChecked": true,
"note": "Kill the Sovas or wait at around 25 seconds for them to get out of the way before going down and passing them while climbing to the top door.",
"detailNote": "It is possible to wait 2.5 minutes for the Sovas to return on camera to be sure Samus won't touch them.",
"devNote": [
"The single tile ledge at this door doesn't seem to make it any slower to exit.",
"It is probably possible to farm the Sovas at this door, but it would be difficult and isn't expected."
]
},
{
"id": 13,
"link": [
2,
2
],
"name": "Leave with Runway",
"requires": [],
"exitCondition": {
"leaveWithRunway": {
"length": 3,
"openEnd": 1
}
},
"flashSuitChecked": true,
"blueSuitChecked": true
},
{
"id": 14,
"link": [
2,
2
],
"name": "Leave With Runway - Frozen Sova",
"requires": [
"h_frozenEnemyRunway",
{
"or": [
{
"and": [
"h_heatProof",
"canBeVeryPatient"
]
},
{
"and": [
"h_heatProof",
"canBePatient",
"Morph"
]
},
{
"and": [
{
"ammo": {
"type": "Super",
"count": 1
}
},
{
"heatFrames": 2600
}
]
}
]
}
],
"exitCondition": {
"leaveWithRunway": {
"length": 4,
"openEnd": 1
}
},
"flashSuitChecked": true,
"blueSuitChecked": true,
"note": [
"Wait 3 minutes for the Sova to get into position, or 100 seconds with Morph by going ahead of them to break the shot blocks as they get there.",
"This can be further reduced to 45 seconds with a Super by knocking a Sova off after it exits the morph tunnel.",
"The other Sovas can be farmed or used as a backup."
],
"devNote": "Because the Sovas are global, strats could be added that start from the other doors to tighten the total frame count, but it will typically require heatProof either way."
},
{
"id": 79,
"link": [
2,
2
],
"name": "Leave Spinning",
"requires": [
{
  "heatFrames": 220
}
],
"exitCondition": {
"leaveSpinning": {
"remoteRunway": {
"length": 6,
"openEnd": 0
}
}
},
"flashSuitChecked": true,
"blueSuitChecked": true
},
{
"id": 80,
"link": [
2,
2
],
"name": "Leave With Mockball",
"requires": [
{
  "heatFrames": 220
}
],
"exitCondition": {
"leaveWithMockball": {
"remoteRunway": {
"length": 5,
"openEnd": 1
},
"landingRunway": {
"length": 3,
"openEnd": 1
}
}
},
"flashSuitChecked": true,
"blueSuitChecked": true
},
{
"id": 81,
"link": [
2,
2
],
"name": "Leave With Spring Ball Bounce",
"requires": [
{
  "heatFrames": 220
}
],
"exitCondition": {
"leaveWithSpringBallBounce": {
"remoteRunway": {
"length": 5,
"openEnd": 1
},
"landingRunway": {
"length": 3,
"openEnd": 1
},
"movementType": "uncontrolled"
}
},
"flashSuitChecked": true,
"blueSuitChecked": true
},
{
"id": 82,
"link": [
2,
2
],
"name": "Leave Space Jumping",
"requires": [
"h_heatedRemoteRunwaySpaceJump",
{
"heatFrames": 220
}
],
"exitCondition": {
"leaveSpaceJumping": {
"remoteRunway": {
"length": 3,
"openEnd": 1
}
}
},
"flashSuitChecked": true,
"blueSuitChecked": true
},
{
"id": 15,
"link": [
2,
2
],
"name": "Sova Farm",
"requires": [
"h_heatProof",
{
"resetRoom": {
"nodes": [
2
]
}
},
{
"cycleFrames": 120
},
{
"or": [
{
"and": [
"canDash",
{
"or": [
"Wave",
"Spazer",
"Plasma",
{
"and": [
"ScrewAttack",
{
"cycleFrames": 35
}
]
},
{
"and": [
"Grapple",
{
"cycleFrames": 25
}
]
},
{
"cycleFrames": 60
}
]
}
]
},
{
"and": [
{
"haveBlueSuit": {}
},
{
"cycleFrames": 180
}
]
}
]
}
],
"farmCycleDrops": [
{
"enemy": "Sova",
"count": 3
}
],
"flashSuitChecked": true,
"blueSuitChecked": true
},
{
"id": 16,
"link": [
2,
2
],
"name": "Crystal Flash",
"requires": [
"h_heatedCrystalFlash"
],
"flashSuitChecked": true,
"blueSuitChecked": true
},
{
"id": 17,
"link": [
2,
2
],
"name": "G-Mode Regain Mobility",
"requires": [
{
"or": [
{
"ammo": {
"type": "Super",
"count": 1
}
},
"canBePatient"
]
},
{
"enemyDamage": {
"enemy": "Sova",
"type": "contact",
"hits": 1
}
}
],
"gModeRegainMobility": {},
"flashSuitChecked": true,
"blueSuitChecked": true,
"note": [
"It takes about 2.5 minutes for the Sova to get to this door and hit Samus.",
"Alternatively, use a Super as the third Sova has started going off screen to speed it up to 40 seconds."
]
},
{
"id": 53,
"link": [
2,
2
],
"name": "G-Mode Setup - Get Hit By Sova",
"entranceCondition": {
"comeInNormally": {}
},
"requires": [
{
  "or": [
    {
      "and": [
        {
          "heatFrames": 2340
        },
        {
          "ammo": {
            "type": "Super",
            "count": 1
          }
        }
      ]
    },
    {
      "and": [
        "h_heatProof",
        "canBePatient"
      ]
    },
    {
      "and": [
        "Morph",
        "canBePatient",
        {
          "heatFrames": 5925
        }
      ]
    }
  ]
}
],
"exitCondition": {
"leaveWithGModeSetup": {}
},
"unlocksDoors": [
{
"types": [
"ammo"
],
"requires": []
}
],
"flashSuitChecked": true,
"blueSuitChecked": true,
"note": [
"It takes about 2.5 minutes for the Sova to get to this door and hit Samus.",
"With Morph, Samus can shoot the shot block as the Sova is coming down to save some time.",
"Alternatively, use a Super as the third Sova has started going off screen to speed it up to 40 seconds."
]
},
{
"id": 84,
"link": [
2,
3
],
"name": "R-Mode Spark Interrupt",
"entranceCondition": {
"comeInWithRMode": {}
},
"requires": [
{
"enemyKill": {
"enemies": [
[
"Fune"
]
]
}
},
{
"or": [
{
"and": [
"h_heatedCrystalFlashForReserveEnergy",
{
"heatFrames": 280
}
]
},
{
"and": [
"Morph",
"h_heatProof",
"h_RModeCanRefillReserves",
{
"enemyKill": {
"enemies": [
[
"Fune",
"Fune"
],
[
"Fune"
]
]
}
},
{
"partialRefill": {
"type": "ReserveEnergy",
"limit": 40
}
}
]
}
]
},
{
"or": [
{
"canShineCharge": {
"usedTiles": 12,
"openEnd": 0
}
},
{
"and": [
{
"doorUnlockedAtNode": 3
},
{
"canShineCharge": {
"usedTiles": 13,
"openEnd": 0
}
}
]
}
]
},
"h_heatTriggerRModeSparkInterrupt",
{
"heatFrames": 10
}
],
"unlocksDoors": [
{
"nodeId": 3,
"types": [
"ammo"
],
"requires": []
}
],
"flashSuitChecked": true,
"blueSuitChecked": true,
"note": [
"Kill the Funes first, then the Sovas. Shinecharge at the bottom and use heat damage to interrupt."
]
},
{
"id": 54,
"link": [
2,
3
],
"name": "G-Mode Setup - Get Hit By Sova",
"entranceCondition": {
"comeInNormally": {}
},
"requires": [
{
"heatFrames": 1200
},
"Morph"
],
"exitCondition": {
"leaveWithGModeSetup": {}
},
"unlocksDoors": [
{
"types": [
"missiles",
"super"
],
"requires": []
},
{
"types": [
"powerbomb"
],
"requires": [
"never"
]
}
],
"flashSuitChecked": true,
"blueSuitChecked": true,
"note": "Avoid the fireballs while waiting for the Sovas. If the fireball is going to be at a bad cycle, it can help to kill the first Sova."
},
{
"id": 64,
"link": [
2,
3
],
"name": "G-Mode Morph, Simple Blind Movement",
"entranceCondition": {
"comeInWithGMode": {
"mode": "any",
"morphed": true
}
},
"requires": [
"h_artificialMorphMovement",
"h_heatedGModeOffCameraDoor"
],
"flashSuitChecked": true,
"blueSuitChecked": true,
"note": "Kill the Sovas or wait at least 20 seconds for them to get out of the way before going to the bottom door.",
"detailNote": "It is slightly safer but very slow to wait 2.5 minutes for the Sovas to return on camera to be sure Samus won't touch them.",
"devNote": "It is probably possible to farm the Sovas at this door, but it would be difficult and isn't expected."
},
{
"id": 18,
"link": [
2,
4
],
"name": "Base",
"requires": [
"Morph",
{
"heatFrames": 180
},
{
"or": [
"canDash",
{
"heatFrames": 20
}
]
}
],
"flashSuitChecked": true,
"blueSuitChecked": true
},
{
"id": 70,
"link": [
2,
4
],
"name": "G-Mode Morph, Blind Camera Fix",
"entranceCondition": {
"comeInWithGMode": {
"mode": "any",
"morphed": true
}
},
"requires": [
"h_heatedGMode",
"h_artificialMorphMovement",
{
"heatFrames": 120
}
],
"flashSuitChecked": true,
"blueSuitChecked": true,
"note": [
"Kill the Sovas or wait at around 25 seconds for them to get out of the way before going down.",
"Exit G-mode on the first ledge on the left, then jump and press against the right wall to touch the camera scroll block and fix the camera."
]
},
{
"id": 19,
"link": [
3,
1
],
"name": "Base",
"requires": [
{
"heatFrames": 390
},
{
"or": [
"canDash",
{
"heatFrames": 100
}
]
}
],
"unlocksDoors": [
{
"types": [
"missiles"
],
"requires": [
{
"heatFrames": 25
}
]
},
{
"types": [
"super"
],
"requires": []
},
{
"types": [
"powerbomb"
],
"requires": [
{
"heatFrames": 40
}
]
}
],
"flashSuitChecked": true,
"blueSuitChecked": true
},
{
"id": 42,
"link": [
3,
1
],
"name": "Come In Shinecharged, Shinespark",
"entranceCondition": {
"comeInShinecharged": {}
},
"requires": [
{
"shineChargeFrames": 85
},
{
"doorUnlockedAtNode": 1
},
"canMidAirMorph",
"h_crouchJumpDownGrab",
"canShinechargeMovementTricky",
{
"shinespark": {
"frames": 20,
"excessFrames": 0
}
},
{
"heatFrames": 285
}
],
"unlocksDoors": [
{
"types": [
"ammo"
],
"requires": [
"never"
]
}
],
"flashSuitChecked": true,
"blueSuitChecked": true,
"devNote": [
"Unlocking the door would be possible but would require more than the default amount of heat frames, which would need testing."
]
},
{
"id": 43,
"link": [
3,
1
],
"name": "Come In Shinecharging, Shinespark",
"entranceCondition": {
"comeInShinecharging": {
"length": 11,
"openEnd": 0
}
},
"requires": [
{
"doorUnlockedAtNode": 1
},
"canShinechargeMovementTricky",
"canMidAirMorph",
"h_crouchJumpDownGrab",
{
"shinespark": {
"frames": 19,
"excessFrames": 0
}
},
{
"heatFrames": 370
}
],
"unlocksDoors": [
{
"types": [
"ammo"
],
"requires": [
"never"
]
}
],
"flashSuitChecked": true,
"blueSuitChecked": true,
"devNote": [
"Unlocking the door would be possible but would require more than the default amount of heat frames, which would need testing."
]
},
{
"id": 55,
"link": [
3,
1
],
"name": "G-Mode Setup - Get Hit By Sova",
"entranceCondition": {
"comeInNormally": {}
},
"requires": [
{
"heatFrames": 4600
},
"canBePatient"
],
"exitCondition": {
"leaveWithGModeSetup": {}
},
"unlocksDoors": [
{
"types": [
"ammo"
],
"requires": []
}
],
"flashSuitChecked": true,
"blueSuitChecked": true,
"note": "Wait for the Sovas to wind around the room and reach the top door. This takes about 1 minute and 15 seconds."
},
{
"id": 56,
"link": [
3,
1
],
"name": "G-Mode Setup - Get Hit By Sova, Two Supers",
"entranceCondition": {
"comeInNormally": {}
},
"requires": [
{
"heatFrames": 2200
},
{
"ammo": {
"type": "Super",
"count": 2
}
}
],
"exitCondition": {
"leaveWithGModeSetup": {}
},
"unlocksDoors": [
{
"types": [
"missiles"
],
"requires": []
},
{
"types": [
"super"
],
"requires": [],
"useImplicitRequires": false
},
{
"types": [
"powerbomb"
],
"requires": [
"canTrickyJump"
]
}
],
"flashSuitChecked": true,
"blueSuitChecked": true,
"note": [
"Use a Super to knock a Sova off as it exits the morph tunnel, get to and shoot the shot block in time to let it pass.",
"Use another Super to knock it off the top runway so it can climb the left wall and reach the door."
]
},
{
"id": 20,
"link": [
3,
1
],
"name": "Grapple Teleport",
"entranceCondition": {
"comeInWithGrappleTeleport": {
"blockPositions": [
[
5,
3
],
[
7,
2
]
]
}
},
"requires": [
{
"heatFrames": 75
},
{
"or": [
"canDash",
{
"heatFrames": 35
}
]
}
],
"flashSuitChecked": true,
"blueSuitChecked": true,
"note": [
"To minimize heat damage, immediately after landing use Grapple to open the door while running towards it, then jump over the gap and through the door.",
"If the door is grappled too late, it may interfere with the jump."
]
},
{
"id": 65,
"link": [
3,
1
],
"name": "G-Mode",
"entranceCondition": {
"comeInWithGMode": {
"mode": "any",
"morphed": false
}
},
"requires": [
"h_heatedGModeOpenDifferentDoor"
],
"flashSuitChecked": true,
"blueSuitChecked": true,
"devNote": "The single tile ledge at this door doesn't seem to make it any slower to exit."
},
{
"id": 66,
"link": [
3,
1
],
"name": "G-Mode, Sova Farm",
"entranceCondition": {
"comeInWithGMode": {
"mode": "any",
"morphed": false
}
},
"requires": [
"canBePatient",
"h_heatedGModePauseAbuse",
"canFarmWhileShooting",
{
"or": [
"canTrickyJump",
"canTrickyUseFrozenEnemies",
{
"ammo": {
"type": "Super",
"count": 1
}
},
"h_usePowerBomb"
]
}
],
"flashSuitChecked": true,
"blueSuitChecked": true,
"note": [
"It is possible to kill the Sovas and pick up their drops during a pause abuse, but they will only give drops if there are not too many Fune fireballs.",
"With a ledge grab onto the top platform, it is possible to get all the Funes off camera. Alternatively, it is possible to kill or repeatedly freeze them."
],
"devNote": [
"The single tile ledge at this door doesn't seem to make it any slower to exit.",
"The Power Bomb kill could be done with artificial morph, but it's not worth modeling."
]
},
{
"id": 44,
"link": [
3,
2
],
"name": "Come In Shinecharged, Shinespark (Tank Sova)",
"entranceCondition": {
"comeInShinecharged": {}
},
"requires": [
{
"shineChargeFrames": 85
},
"canShinechargeMovementTricky",
"canMidAirMorph",
{
"shinespark": {
"frames": 20,
"excessFrames": 0
}
},
{
"enemyDamage": {
"enemy": "Sova",
"type": "contact",
"hits": 1
}
},
{
"heatFrames": 395
}
],
"flashSuitChecked": true,
"blueSuitChecked": true
},
{
"id": 45,
"link": [
3,
2
],
"name": "Come In Shinecharged, Shinespark (Power Bomb Sovas)",
"entranceCondition": {
"comeInShinecharged": {}
},
"requires": [
{
"shineChargeFrames": 85
},
"canShinechargeMovementTricky",
"canMidAirMorph",
{
"shinespark": {
"frames": 20,
"excessFrames": 0
}
},
"h_usePowerBomb",
{
"heatFrames": 385
}
],
"flashSuitChecked": true,
"blueSuitChecked": true
},
{
"id": 46,
"link": [
3,
2
],
"name": "Come In Shinecharging, Shinespark (Tank Sova)",
"entranceCondition": {
"comeInShinecharging": {
"length": 11,
"openEnd": 0
}
},
"requires": [
"canShinechargeMovementTricky",
"canMidAirMorph",
{
"shinespark": {
"frames": 19,
"excessFrames": 0
}
},
{
"enemyDamage": {
"enemy": "Sova",
"type": "contact",
"hits": 1
}
},
{
"heatFrames": 475
}
],
"flashSuitChecked": true,
"blueSuitChecked": true
},
{
"id": 47,
"link": [
3,
2
],
"name": "Come In Shinecharging, Shinespark (Power Bomb Sovas)",
"entranceCondition": {
"comeInShinecharging": {
"length": 11,
"openEnd": 0
}
},
"requires": [
"canShinechargeMovementTricky",
"canMidAirMorph",
{
"shinespark": {
"frames": 19,
"excessFrames": 0
}
},
"h_usePowerBomb",
{
"heatFrames": 465
}
],
"flashSuitChecked": true,
"blueSuitChecked": true
},
{
"id": 58,
"link": [
3,
2
],
"name": "Samus Eater Teleport, X-Ray Climb",
"entranceCondition": {
"comeInWithSamusEaterTeleport": {
"floorPositions": [],
"ceilingPositions": [
[
10,
3
]
]
}
},
"requires": [
"h_heatProof",
"canXRayClimb",
"canOffScreenMovement"
],
"flashSuitChecked": true,
"blueSuitChecked": true,
"note": [
"Jump into the second ceiling Samus Eater in Hellway.",
"After teleporting and passing through the transition, X-Ray climb to reach the space above, to the right of the morph tunnel.",
"Samus will be off-camera, so it may not be easy to tell when the climb is done."
],
"devNote": [
"Other Samus Eaters can also probably work."
]
},
{
"id": 67,
"link": [
3,
2
],
"name": "G-Mode, Simple Blind Movement",
"entranceCondition": {
"comeInWithGMode": {
"mode": "any",
"morphed": false
}
},
"requires": [
"Morph",
{
"or": [
"HiJump",
"canWallJump",
"canSpringBallJumpMidAir",
"SpaceJump",
"canIBJ",
"canTrickyUseFrozenEnemies"
]
},
"h_heatedGModeOffCameraDoor"
],
"flashSuitChecked": true,
"blueSuitChecked": true,
"devNote": "It is probably possible to farm the Sovas at this door, but it would be difficult and slow and isn't expected."
},
{
"id": 68,
"link": [
3,
2
],
"name": "G-Mode Morph, Simple Blind Movement",
"entranceCondition": {
"comeInWithGMode": {
"mode": "any",
"morphed": true
}
},
"requires": [
{
"or": [
"h_artificialMorphIBJ",
{
"and": [
"HiJump",
"h_artificialMorphSpringBall"
]
},
{
"and": [
"h_artificialMorphSpringBallBombJump",
"h_additionalBomb"
]
}
]
},
"h_heatedGModeOffCameraDoor"
],
"flashSuitChecked": true,
"blueSuitChecked": true,
"devNote": "It is probably possible to farm the Sovas at this door, but it would be difficult and slow and isn't expected."
},
{
"id": 21,
"link": [
3,
3
],
"name": "Leave with Runway - Fune Alive",
"requires": [],
"exitCondition": {
"leaveWithRunway": {
"length": 12,
"openEnd": 0
}
},
"flashSuitChecked": true,
"blueSuitChecked": true
},
{
"id": 22,
"link": [
3,
3
],
"name": "Leave with Runway - Fune Killed",
"requires": [
{
  "or": [
    {
      "ammo": {
        "type": "Super",
        "count": 1
      }
    },
    {
      "and": [
        "h_usePowerBomb",
        {
          "heatFrames": 190
        }
      ]
    }
  ]
}
],
"exitCondition": {
"leaveWithRunway": {
"length": 13,
"openEnd": 0
}
},
"flashSuitChecked": true,
"blueSuitChecked": true
},
{
"id": 23,
"link": [
3,
3
],
"name": "Crystal Flash",
"requires": [
{
"ammo": {
"type": "Super",
"count": 1
}
},
{
"heatFrames": 20
},
"h_heatedCrystalFlash"
],
"flashSuitChecked": true,
"blueSuitChecked": true,
"note": "Kill the Fune before Crystal Flashing."
},
{
"id": 72,
"link": [
3,
3
],
"name": "Sova Farm",
"requires": [
"h_heatProof",
{
"resetRoom": {
"nodes": [
3
]
}
},
{
"or": [
{
"and": [
"canMidAirMorph",
"canTrickyJump",
{
"or": [
"HiJump",
"canWallJump"
]
},
"Plasma",
{
"cycleFrames": 540
}
]
},
{
"and": [
"canMidAirMorph",
{
"or": [
"Wave",
"Spazer",
"Plasma",
"Grapple",
{
"cycleFrames": 45
}
]
},
{
"cycleFrames": 690
}
]
},
{
"and": [
"canDodgeWhileShooting",
{
"cycleFrames": 1140
}
]
}
]
}
],
"farmCycleDrops": [
{
"enemy": "Sova",
"count": 3
}
],
"flashSuitChecked": true,
"blueSuitChecked": true
},
{
"id": 85,
"link": [
3,
3
],
"name": "R-Mode Spark Interrupt",
"entranceCondition": {
"comeInWithRMode": {}
},
"requires": [
{
"enemyKill": {
"enemies": [
[
"Fune"
]
]
}
},
{
"or": [
"h_heatedCrystalFlashForReserveEnergy",
{
"and": [
"h_heatProof",
"h_RModeCanRefillReserves",
{
"enemyKill": {
"enemies": [
[
"Fune",
"Fune"
],
[
"Fune"
]
]
}
},
{
"partialRefill": {
"type": "ReserveEnergy",
"limit": 40
}
}
]
}
]
},
{
"or": [
{
"canShineCharge": {
"usedTiles": 12,
"openEnd": 0
}
},
{
"and": [
{
"doorUnlockedAtNode": 3
},
{
"canShineCharge": {
"usedTiles": 13,
"openEnd": 0
}
}
]
}
]
},
"h_heatTriggerRModeSparkInterrupt",
{
"heatFrames": 10
}
],
"unlocksDoors": [
{
"nodeId": 3,
"types": [
"ammo"
],
"requires": []
}
],
"flashSuitChecked": true,
"blueSuitChecked": true,
"note": [
"Kill the Funes first, then the Sovas. Shinecharge at the bottom and use heat damage to interrupt."
]
},
{
"id": 24,
"link": [
3,
3
],
"name": "G-Mode Regain Mobility",
"requires": [
{
  "enemyDamage": {
    "enemy": "Sova",
    "type": "contact",
    "hits": 1
  }
}
],
"gModeRegainMobility": {},
"flashSuitChecked": true,
"blueSuitChecked": true,
"note": "It takes about 20 seconds for the Sova to get to this door and hit Samus."
},
{
"id": 57,
"link": [
3,
3
],
"name": "G-Mode Setup - Get Hit By Sova",
"entranceCondition": {
"comeInNormally": {}
},
"requires": [
{
  "heatFrames": 1140
}
],
"exitCondition": {
"leaveWithGModeSetup": {}
},
"unlocksDoors": [
{
"types": [
"ammo"
],
"requires": []
}
],
"flashSuitChecked": true,
"blueSuitChecked": true,
"note": "Avoid the fireballs while waiting for the Sovas. If the fireball is going to be at a bad cycle, it can help to kill the first Sova."
},
{
"id": 25,
"link": [
3,
4
],
"name": "Base",
"requires": [
{
"or": [
"canTrivialMidAirMorph",
{
"and": [
"h_useSpringBall",
"HiJump"
]
}
]
},
{
"heatFrames": 80
}
],
"flashSuitChecked": true,
"blueSuitChecked": true
},
{
"id": 26,
"link": [
3,
5
],
"name": "Come in Shinecharged",
"entranceCondition": {
"comeInShinecharged": {}
},
"requires": [
{
"shineChargeFrames": 70
},
"canMidAirMorph",
"canShinechargeMovementComplex",
{
"heatFrames": 210
},
{
"shinespark": {
"frames": 23,
"excessFrames": 3
}
}
],
"flashSuitChecked": true,
"blueSuitChecked": true,
"note": "Reaching the Morph hole can be tricky with SpeedBooster but no HiJump."
},
{
"id": 27,
"link": [
4,
2
],
"name": "Tank Damage",
"requires": [
"canDash",
{
"or": [
{
"and": [
"HiJump",
{
"or": [
"canTrivialMidAirMorph",
"h_useSpringBall"
]
}
]
},
{
"and": [
"SpaceJump",
"canTrivialMidAirMorph",
{
"heatFrames": 40
}
]
},
{
"and": [
"canWallJump",
"canTrivialMidAirMorph"
]
},
"canSpringBallJumpMidAir",
{
"and": [
"canJumpIntoIBJ",
{
"heatFrames": 240
}
]
},
{
"and": [
"canJumpIntoIBJ",
"canDoubleBombJump",
{
"heatFrames": 120
}
]
},
{
"and": [
"canDoubleBombJump",
{
"heatFrames": 300
}
]
}
]
},
{
"heatFrames": 180
},
{
"enemyDamage": {
"enemy": "Sova",
"type": "contact",
"hits": 1
}
}
],
"flashSuitChecked": true,
"blueSuitChecked": true,
"devNote": "Base IBJ should kill the Sovas or go around."
},
{
"id": 28,
"link": [
4,
2
],
"name": "Kill Sovas",
"requires": [
{
"or": [
{
"and": [
"HiJump",
{
"or": [
"canTrivialMidAirMorph",
"h_useSpringBall"
]
}
]
},
{
"and": [
"SpaceJump",
"canTrivialMidAirMorph",
{
"heatFrames": 40
}
]
},
{
"and": [
"canWallJump",
"canTrivialMidAirMorph"
]
},
"canSpringBallJumpMidAir",
{
"and": [
"canIBJ",
{
"heatFrames": 900
}
]
},
{
"and": [
"canJumpIntoIBJ",
{
"heatFrames": 520
}
]
},
{
"and": [
"canJumpIntoIBJ",
"canDoubleBombJump",
{
"heatFrames": 400
}
]
}
]
},
{
"or": [
"h_heatProof",
{
"and": [
"canDash",
{
"or": [
"h_usePowerBomb",
{
"and": [
"Wave",
"Plasma",
"canTrickyJump",
{
"heatFrames": 80
}
]
}
]
}
]
},
{
"and": [
{
"haveBlueSuit": {}
},
{
"heatFrames": 40
}
]
}
]
},
{
"or": [
{
"heatFrames": 180
},
{
"and": [
"canFarmWhileShooting",
{
"heatFramesWithEnergyDrops": {
"frames": 115,
"drops": [
{
"enemy": "Sova",
"count": 3
}
]
}
},
{
"heatFrames": 65
}
]
}
]
}
],
"flashSuitChecked": true,
"blueSuitChecked": true,
"note": [
"Either use a Power Bomb or Wave + Plasma to kill all the Sovas off-camera,",
"or if heat protection is available, wait for all the Sovas to come out of the tunnel."
]
},
{
"id": 29,
"link": [
4,
2
],
"name": "Speedrun Ice Beam Entry",
"requires": [
"canMidAirMorph",
"canTrickyDodgeEnemies",
{
"or": [
"canPreciseWallJump",
"HiJump"
]
},
{
"enemyKill": {
"enemies": [
[
"Sova"
]
],
"explicitWeapons": [
"Wave",
"Spazer",
"Plasma"
]
}
},
"canFarmWhileShooting",
{
"heatFramesWithEnergyDrops": {
"frames": 100,
"drops": [
{
"enemy": "Sova",
"count": 3
}
]
}
},
"canDash",
{
"heatFrames": 120
}
],
"flashSuitChecked": true,
"blueSuitChecked": true,
"note": [
"Smoothly jump into the morph tunnel while shooting the first Sova.",
"Unmorph at the end of the tunnel to clear more Sovas as needed."
]
},
{
"id": 30,
"link": [
4,
2
],
"name": "Damage Boost",
"requires": [
"canCrouchJump",
"canMidAirMorph",
{
"tech": "canNeutralDamageBoost"
},
{
"enemyDamage": {
"enemy": "Sova",
"type": "contact",
"hits": 1
}
},
{
"heatFrames": 470
},
{
"or": [
"canDash",
{
"heatFrames": 20
}
]
}
],
"flashSuitChecked": true,
"blueSuitChecked": true,
"note": "Wait for the Sova to leave the tunnel and jump morph into them to bounce up into the hole."
},
{
"id": 31,
"link": [
4,
2
],
"name": "Sova Freeze",
"requires": [
"canMidAirMorph",
"canTrickyUseFrozenEnemies",
{
"or": [
{
"heatFrames": 780
},
{
"and": [
"canFarmWhileShooting",
{
"heatFramesWithEnergyDrops": {
"frames": 680,
"drops": [
{
"enemy": "Sova",
"count": 3
}
]
}
},
{
"heatFrames": 100
}
]
}
]
},
{
"or": [
"canDash",
{
"heatFrames": 20
}
]
}
],
"flashSuitChecked": true,
"blueSuitChecked": true,
"note": "Freeze a Sova once it enters one of the slots on the wall and then use it as a platform."
},
{
"id": 32,
"link": [
4,
3
],
"name": "Base",
"requires": [
"Morph",
{
"heatFrames": 100
}
],
"unlocksDoors": [
{
"types": [
"powerbomb"
],
"requires": [
{
"heatFrames": 50
}
]
}
],
"flashSuitChecked": true,
"blueSuitChecked": true
},
{
"id": 33,
"link": [
4,
3
],
"name": "Leave with Runway",
"requires": [
"canDash",
"Morph",
{
"heatFrames": 140
}
],
"exitCondition": {
"leaveWithRunway": {
"length": 12,
"openEnd": 0
}
},
"unlocksDoors": [
{
"types": [
"missiles"
],
"requires": [
{
"heatFrames": 50
}
]
},
{
"types": [
"super"
],
"requires": []
},
{
"types": [
"powerbomb"
],
"requires": [
{
"heatFrames": 30
}
]
}
],
"flashSuitChecked": true,
"blueSuitChecked": true
},
{
"id": 34,
"link": [
4,
3
],
"name": "Leave with Runway - Dead Fune",
"requires": [
"canDash",
"Morph",
{
"or": [
{
"and": [
{
"ammo": {
"type": "Super",
"count": 1
}
},
{
"heatFrames": 145
}
]
},
{
"and": [
{
"ammo": {
"type": "PowerBomb",
"count": 1
}
},
{
"heatFrames": 180
}
]
}
]
}
],
"exitCondition": {
"leaveWithRunway": {
"length": 13,
"openEnd": 0
}
},
"unlocksDoors": [
{
"types": [
"missiles"
],
"requires": [
{
"heatFrames": 50
}
]
},
{
"types": [
"super"
],
"requires": []
},
{
"types": [
"powerbomb"
],
"requires": []
}
],
"flashSuitChecked": true,
"blueSuitChecked": true,
"devNote": "FIXME: unlocksDoors: powerbomb would not have an ammo cost as one is used as part of the strat."
},
{
"id": 35,
"link": [
4,
4
],
"name": "Crystal Flash",
"requires": [
"h_heatedCrystalFlash"
],
"flashSuitChecked": true,
"blueSuitChecked": true
},
{
"id": 36,
"link": [
4,
5
],
"name": "Base",
"requires": [
{
  "or": [
    {
      "and": [
        "canWallJump",
        {
          "heatFrames": 80
        }
      ]
    },
    {
      "and": [
        "HiJump",
        "canSpringBallJumpMidAir",
        {
          "heatFrames": 160
        }
      ]
    },
    {
      "and": [
        "SpaceJump",
        {
          "heatFrames": 180
        }
      ]
    },
    {
      "and": [
        "SpaceJump",
        "HiJump",
        {
          "heatFrames": 120
        }
      ]
    }
  ]
}
],
"flashSuitChecked": true,
"blueSuitChecked": true,
"devNote": "It is faster to go around than to climb with Ice."
},
{
"id": 37,
"link": [
5,
1
],
"name": "Base",
"requires": [
{
  "or": [
    {
      "and": [
        "canWallJump",
        {
          "heatFrames": 60
        }
      ]
    },
    {
      "and": [
        "h_crouchJumpDownGrab",
        {
          "heatFrames": 70
        }
      ]
    }
  ]
}
],
"flashSuitChecked": true,
"blueSuitChecked": true
},
{
"id": 38,
"link": [
5,
2
],
"name": "Tank Damage",
"requires": [
"Morph",
{
"heatFrames": 200
},
{
"or": [
"h_heatProof",
{
"enemyDamage": {
"enemy": "Sova",
"type": "contact",
"hits": 1
}
}
]
}
],
"flashSuitChecked": true,
"blueSuitChecked": true,
"note": "The Sovas should be killed if you are heat proof."
},
{
"id": 39,
"link": [
5,
2
],
"name": "Power Bomb",
"requires": [
"h_usePowerBomb",
{
"heatFrames": 215
},
{
"or": [
"canDash",
{
"heatFrames": 20
}
]
}
],
"flashSuitChecked": true,
"blueSuitChecked": true
},
{
"id": 74,
"link": [
5,
2
],
"name": "Power Bomb with Sova Farm",
"requires": [
"h_usePowerBomb",
"canFarmWhileShooting",
{
"heatFramesWithEnergyDrops": {
"frames": 150,
"drops": [
{
"enemy": "Sova",
"count": 3
}
]
}
},
{
"heatFrames": 65
},
{
"or": [
"canDash",
{
"heatFrames": 20
}
]
}
],
"flashSuitChecked": true,
"blueSuitChecked": true
},
{
"id": 87,
"link": [
5,
2
],
"name": "Blue Suit",
"requires": [
{
"haveBlueSuit": {}
},
"Morph",
{
"or": [
{
"heatFrames": 200
},
{
"and": [
"canFarmWhileShooting",
{
"heatFramesWithEnergyDrops": {
"frames": 175,
"drops": [
{
"enemy": "Sova",
"count": 3
}
]
}
},
{
"heatFrames": 85
}
]
}
]
}
],
"flashSuitChecked": true,
"blueSuitChecked": true
},
{
"id": 40,
"link": [
5,
4
],
"name": "Base",
"requires": [
{
  "heatFrames": 50
}
],
"flashSuitChecked": true,
"blueSuitChecked": true
},
{
"id": 73,
"link": [
5,
5
],
"name": "Crystal Flash",
"requires": [
"h_heatedCrystalFlash"
],
"flashSuitChecked": true,
"blueSuitChecked": true
}
],
"notables": [],
"nextStratId": 88,
"nextNotableId": 1
}