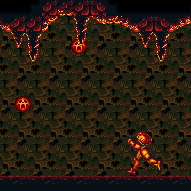
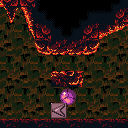
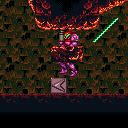
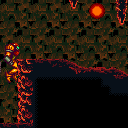
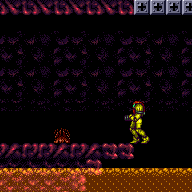
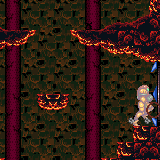
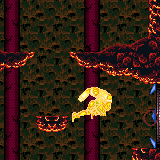
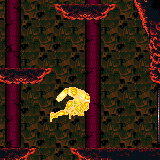
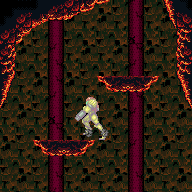
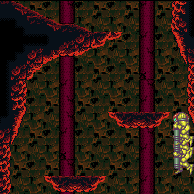
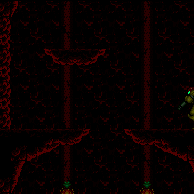
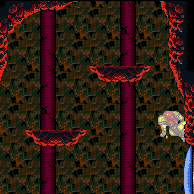
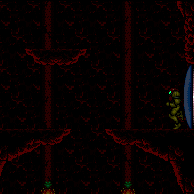
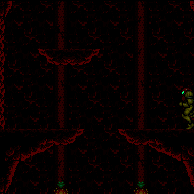
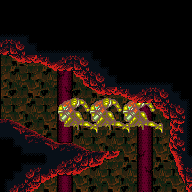
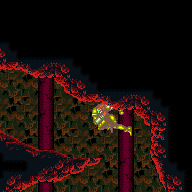
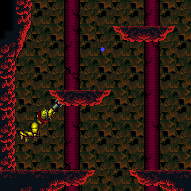
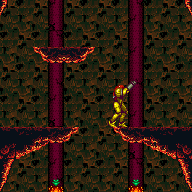
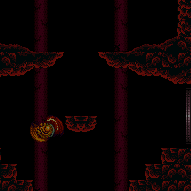
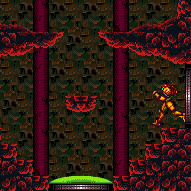
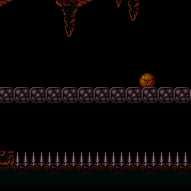
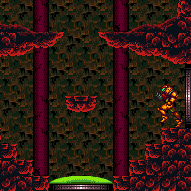
Crocomire Speedway
Room ID: 120

From: 1
Top of the Shaft Left Door
To: 1
Top of the Shaft Left Door
Exit condition: {
"leaveWithRunway": {
"length": 8,
"openEnd": 1,
"gentleUpTiles": 4
}
} |
From: 1
Top of the Shaft Left Door
To: 1
Top of the Shaft Left Door
Requires: "h_heatedCrystalFlash" |
From: 1
Top of the Shaft Left Door
To: 1
Top of the Shaft Left Door
Entrance condition: {
"comeInShinecharging": {
"length": 7,
"openEnd": 0,
"gentleDownTiles": 4
}
}Requires: "h_heatedCrystalSpark" |
|
Requires: {
"heatFrames": 125
}
{
"or": [
"canDash",
{
"heatFrames": 25
}
]
} |
From: 1
Top of the Shaft Left Door
To: 5
Top Right Door
Entrance condition: {
"comeInShinecharging": {
"length": 0,
"openEnd": 1
}
}Requires: {
"heatFrames": 120
}
{
"shineChargeFrames": 95
}Exit condition: {
"leaveShinecharged": {}
}Unlocks doors: {"types":["super"],"requires":[]}
{"types":["missiles","powerbomb"],"requires":["never"]}Dev note: FIXME: Entering with too little run speed causes Samus to 'trip', so the runway cannot reliably be used for short shortcharges. |
From: 1
Top of the Shaft Left Door
To: 5
Top Right Door
Entrance condition: {
"comeInShinecharged": {}
}Requires: {
"shineChargeFrames": 125
}
"canShinechargeMovementComplex"
{
"heatFrames": 125
}Exit condition: {
"leaveShinecharged": {}
}Unlocks doors: {"types":["super"],"requires":[]}
{"types":["missiles","powerbomb"],"requires":["never"]} |
From: 1
Top of the Shaft Left Door
To: 5
Top Right Door
Entrance condition: {
"comeInShinecharged": {}
}Requires: {
"shineChargeFrames": 105
}
{
"heatFrames": 130
}
{
"shinespark": {
"frames": 2,
"excessFrames": 0
}
}Exit condition: {
"leaveWithSpark": {
"position": "top"
}
}Unlocks doors: {"types":["super"],"requires":[]}
{"types":["missiles","powerbomb"],"requires":["never"]} |
From: 1
Top of the Shaft Left Door
To: 5
Top Right Door
Entrance condition: {
"comeInShinecharged": {}
}Requires: {
"shineChargeFrames": 110
}
{
"heatFrames": 130
}
{
"shinespark": {
"frames": 2,
"excessFrames": 0
}
}Exit condition: {
"leaveWithSpark": {
"position": "bottom"
}
}Unlocks doors: {"types":["super"],"requires":[]}
{"types":["missiles","powerbomb"],"requires":["never"]} |
From: 1
Top of the Shaft Left Door
To: 7
G-Mode, Bottom Right (Started at Right)
Jump over the Cacatacs. Their projectiles remain inside of them and their hitbox is a bit smaller than it appears. Entrance condition: {
"comeInWithGMode": {
"mode": "any",
"morphed": false
}
}Requires: {
"heatFrames": 0
} |
From: 1
Top of the Shaft Left Door
To: 10
Direct G-Mode, Bottom Right (Started at Right)
Jump over the Cacatacs. Their projectiles remain inside of them and their hitbox is a bit smaller than it appears. Entrance condition: {
"comeInWithGMode": {
"mode": "direct",
"morphed": false
}
}Requires: {
"heatFrames": 0
} |
|
Exit condition: {
"leaveWithRunway": {
"length": 45,
"openEnd": 1,
"steepUpTiles": 6
}
}Dev note: 45 tiles is roughly in front of the first red pirate. |
|
Requires: "h_heatedCrystalFlash" |
|
Requires: "h_shinechargeMaxRunway" "h_heatedCrystalSpark" |
|
Requires: "h_heatProof"
"h_shinechargeMaxRunway"
{
"enemyDamage": {
"enemy": "Multiviola",
"type": "contact",
"hits": 1
}
}
"canSlopeSpark"
{
"shinespark": {
"frames": 7,
"excessFrames": 7
}
}Dev note: FIXME: Could add a suitless version here |
|
Run through all the Pirates and all but the first Multiviola. Run back to the door and use the Multiviola to interrupt. Entrance condition: {
"comeInWithRMode": {}
}Requires: {
"or": [
{
"and": [
"h_heatedCrystalFlashForReserveEnergy",
{
"simpleHeatFrames": 600
},
{
"heatFrames": 180
}
]
},
{
"and": [
"h_heatProof",
"h_RModeCanRefillReserves",
{
"resourceMissingAtMost": [
{
"type": "Missile",
"count": 0
}
]
},
{
"partialRefill": {
"type": "ReserveEnergy",
"limit": 20
}
}
]
}
]
}
"h_shinechargeMaxRunway"
{
"autoReserveTrigger": {}
}
"canRModeSparkInterrupt"
{
"heatFrames": 30
} |
From: 2
Far Left Door
To: 2
Far Left Door
Requires: {
"heatFrames": 600
}
{
"or": [
"h_speedDash",
{
"and": [
"canDash",
{
"heatFrames": 65
}
]
},
{
"heatFrames": 200
}
]
}
{
"or": [
{
"haveBlueSuit": {}
},
"h_speedDash",
"Plasma",
"ScrewAttack",
{
"ammo": {
"type": "Missile",
"count": 2
}
},
{
"ammo": {
"type": "Super",
"count": 2
}
},
{
"and": [
"Ice",
"Wave",
"Spazer"
]
},
{
"and": [
"canDodgeWhileShooting",
{
"or": [
{
"and": [
"Ice",
"Wave"
]
},
{
"and": [
"Ice",
"Spazer"
]
},
{
"and": [
"Wave",
"Spazer"
]
}
]
}
]
}
]
}Exit condition: {
"leaveWithGModeSetup": {}
} |
From: 2
Far Left Door
To: 2
Far Left Door
Lure the second Multiviola to the left door. The first one will require more time and heat damage. Jump over the first pirate and into the second, then jump over the again on the return. Requires: "canDash"
{
"heatFrames": 720
}
{
"enemyDamage": {
"enemy": "Red Space Pirate (standing)",
"type": "contact",
"hits": 1
}
}Exit condition: {
"leaveWithGModeSetup": {}
} |
From: 2
Far Left Door
To: 2
Far Left Door
Lure the second Multiviola to the left door. The first one will require more time and heat damage. Jump over the pirates and under the first Multiviola, then return fast enough to avoid pirate lasers and contact with the second Multiviola. Requires: "canDash"
{
"heatFrames": 765
}
"canTrickyDodgeEnemies"Exit condition: {
"leaveWithGModeSetup": {}
} |
From: 2
Far Left Door
To: 2
Far Left Door
Use SpeedBooster to construct a structure for Moondancing that has 1 chest height block and 1 head height block to the right of it and no other Speed blocks. Crystal Flash below the lower block, exactly pixel aligned with its right side, to standup and then begin Moondancing. After Samus sinks through the bottom tile, it is possible to use Grapple to return to a crouch and wiggle right and then Turn-Around Aim Cancel to escape to the right. Without Grapple, count to 174 Moonfalls and delicately Moonfall so as to remain crouched and then wiggle to the right. Finally, use SpeedBooster if needed to break the remaining Speed blocks and reach the door. Requires: {
"notable": "Speed Block Moondance"
}
"h_heatProof"
"h_getBlueSpeedMaxRunway"
"h_CrystalFlash"
"canTrickyJump"
"canTurnaroundAimCancel"
"canTemporaryBlue"
"canMoondance"
"canSpeedball"
{
"or": [
"canCount",
"Grapple"
]
}Exit condition: {
"leaveWithStoredFallSpeed": {
"fallSpeedInTiles": 1
}
}Dev note: FIXME: R-Mode can be used instead of a Crystal Flash but that depends on having more Reserve Energy than Regular Energy. With a different Speed block structure (more difficult to set up), it is possible to avoid needing to count, without Grapple. |
From: 2
Far Left Door
To: 2
Far Left Door
Use SpeedBooster to construct a structure for Moondancing that has 1 chest height block and 1 head height block to the right of it and no other Speed blocks. Crystal Flash below the lower block, exactly pixel aligned with its right side, to standup and then begin Moondancing. After Samus sinks through the floor tiles, use Grapple to return to a standing position and count an additional 145 moonfalls. Then use Grapple to return to a crouch and wiggle right and Turn-Around Aim Cancel to escape to the right. Finally, use SpeedBooster if needed to break the remaining Speed blocks and reach the door. Requires: {
"notable": "Speed Block Moondance"
}
"h_heatProof"
"h_getBlueSpeedMaxRunway"
"h_CrystalFlash"
"canTrickyJump"
"canTurnaroundAimCancel"
"canTemporaryBlue"
"canExtendedMoondance"
"canSpeedball"Exit condition: {
"leaveWithStoredFallSpeed": {
"fallSpeedInTiles": 2
}
}Dev note: FIXME: R-Mode can be used instead of a Crystal Flash but that depends on having more Reserve Energy than Regular Energy. |
|
Requires: "h_heatProof"
{
"resetRoom": {
"nodes": [
2
]
}
}
{
"or": [
{
"and": [
"canDash",
{
"cycleFrames": 1200
},
{
"or": [
"Plasma",
{
"and": [
"Wave",
{
"cycleFrames": 120
}
]
},
{
"and": [
"Spazer",
{
"cycleFrames": 300
}
]
},
{
"and": [
"canPseudoScrew",
{
"cycleFrames": 220
}
]
}
]
}
]
},
{
"and": [
{
"haveBlueSuit": {}
},
{
"cycleFrames": 1620
}
]
}
]
}Resets obstacles: A Farm cycle drops: 4 Multiviola, 3 Red Space Pirate (standing) |
From: 2
Far Left Door
To: 2
Far Left Door
Drops do not linger long enough to kill every single Pirate. Requires: "h_heatProof"
{
"resetRoom": {
"nodes": [
2
]
}
}
{
"cycleFrames": 60
}
{
"simpleCycleFrames": 560
}
"h_speedDash"
"h_getBlueSpeedMaxRunway"Resets obstacles: A Farm cycle drops: 1 Multiviola, 4 Red Space Pirate (standing) |
|
Requires: "h_heatProof"
"h_speedDash"
"h_getBlueSpeedMaxRunway"
{
"resetRoom": {
"nodes": [
2
]
}
}
{
"cycleFrames": 350
}
{
"simpleCycleFrames": 800
}
{
"or": [
"Plasma",
{
"and": [
"Wave",
{
"cycleFrames": 30
}
]
},
{
"and": [
"Spazer",
{
"cycleFrames": 30
}
]
},
{
"and": [
"Grapple",
{
"cycleFrames": 45
}
]
},
{
"cycleFrames": 120
}
]
}Clears obstacles: A Farm cycle drops: 2 Cacatac Dev note: Some frames added to account for spike RNG. |
|
Requires: "h_getBlueSpeedMaxRunway"
{
"simpleHeatFrames": 300
}
{
"heatFrames": 90
}
{
"or": [
"h_speedDash",
{
"and": [
"h_speedButSlow",
{
"simpleHeatFrames": 325
}
]
}
]
}
{
"or": [
"Wave",
{
"heatFrames": 30
}
]
}Clears obstacles: A |
|
Run through Pirates and Multiviolas to farm. Then run through to the end and shinecharge at the speed blocks. Use heat damage to interrupt. Entrance condition: {
"comeInWithRMode": {}
}Requires: {
"or": [
{
"and": [
"h_heatedCrystalFlashForReserveEnergy",
{
"simpleHeatFrames": 300
},
{
"heatFrames": 90
},
{
"or": [
"h_speedDash",
{
"and": [
"h_speedButSlow",
{
"simpleHeatFrames": 325
}
]
}
]
}
]
},
{
"and": [
"h_heatProof",
"h_RModeCanRefillReserves",
{
"resourceMissingAtMost": [
{
"type": "Missile",
"count": 0
}
]
},
{
"partialRefill": {
"type": "ReserveEnergy",
"limit": 20
}
}
]
}
]
}
"h_shinechargeMaxRunway"
"h_heatTriggerRModeSparkInterrupt"Clears obstacles: A |
|
Requires: "h_getBlueSpeedMaxRunway"
{
"simpleHeatFrames": 300
}
{
"heatFrames": 80
}
{
"or": [
"h_speedDash",
{
"and": [
"h_speedButSlow",
{
"simpleHeatFrames": 380
}
]
}
]
}
{
"or": [
"Wave",
{
"heatFrames": 20
}
]
}Clears obstacles: A Dev note: FIXME: it can be possible to get through tankless without Wave, with enough arm pumping, or a cross-room runway. |
From: 2
Far Left Door
To: 4
Bottom Right Door
Requires: "canDash"
"canTrickyJump"
{
"heatFrames": 605
}
{
"useFlashSuit": {}
}
{
"or": [
{
"and": [
"h_heatProof",
{
"shinespark": {
"frames": 114,
"excessFrames": 15
}
}
]
},
{
"shinespark": {
"frames": 114,
"excessFrames": 5
}
}
]
}
{
"heatFrames": 105
} |
From: 2
Far Left Door
To: 4
Bottom Right Door
Use Morph (and either Spring Ball, Bombs, or Power Bombs) to navigate the space above the first set of Speed blocks. Either kill or carefully jump over the Pirates; their hitbox is much smaller when they are not looking around. Then use a flash suit to shinespark through the second set of Speed blocks. Requires: "canTrickyJump"
{
"heatFrames": 855
}
{
"or": [
{
"and": [
"canLateralMidAirMorph",
"canTrickyDodgeEnemies",
{
"heatFrames": 120
}
]
},
{
"enemyKill": {
"enemies": [
[
"Red Space Pirate (standing)"
],
[
"Red Space Pirate (standing)"
]
],
"explicitWeapons": [
"Missile",
"Super",
"ScrewAttack"
]
}
},
"h_PlasmaHitbox"
]
}
{
"or": [
"h_useSpringBall",
{
"and": [
"h_bombThings",
{
"heatFrames": 120
}
]
}
]
}
{
"useFlashSuit": {}
}
{
"or": [
{
"and": [
"h_heatProof",
{
"shinespark": {
"frames": 55,
"excessFrames": 16
}
}
]
},
{
"shinespark": {
"frames": 55,
"excessFrames": 5
}
}
]
}
{
"heatFrames": 105
}Dev note: This strat is only useful with heat protection; otherwise it would be better to spark from left of the bridge. |
From: 2
Far Left Door
To: 4
Bottom Right Door
Use a complex lure to get the right-most Multiviola (which is initially moving to the left) to the bottom right door. Break a specific set of the speed blocks and let the Multiviola bounce off of them before breaking the rest. There are multiple ways to get the Multiviola to the right door, all of which require breaking the speed blocks to the left of the crumble bridge and some to them to the right. Break the speed blocks in one of the following ways: 1. The first 2 columns. 2. The first 8 columns. 3. The entire first chunk (10 columns). 4. The first chunk and all but the last column of the second (leaving an isolated block). 5. The first two chunks and all but the last column of the third (leaving an isolated stack of two blocks). Then let the Multiviola bounce several times until it is in a consistent pattern before breaking the rest. Note that option number 3 puts the Multiviola into an odd pattern where it has two distinct alternating cycles; wait for it to hit the right of the right stalactite, then the wall, then break the remaining blocks. Requires: "canTrickyGMode" "h_heatProof" "canBePatient" "canCameraManip" "h_getBlueSpeedMaxRunway" Exit condition: {
"leaveWithGModeSetup": {}
}Unlocks doors: {"types":["ammo"],"requires":[]}Dev note: It appears that there is no way to get the multiviola to get to one of the upper doors on the shaft; There are two known cycles to get it to start going up, but both get stuck in the same location. The first three Multiviolas aren't able to make it to the right shaft, regardless of how the door and speed blocks are manipulated. The fourth was tested by removing a single column of speed blocks at a time and clearing the rest before and after it gets to its cycle. The bottom door is rarely hit, but opening it during the cycle was not always tested thoroughly. It doesn't appear to be possible to lure it higher, but other things to try include: breaking speed blocks less than a column at a time, breaking some of the blocks then some more (not all of the remaining), or precisely timing the breaking of the crumble blocks. FIXME: This could probably be done with a blue suit. |
|
Requires: "h_getBlueSpeedMaxRunway"
{
"simpleHeatFrames": 300
}
{
"heatFrames": 80
}
{
"or": [
"h_speedDash",
{
"and": [
"h_speedButSlow",
{
"simpleHeatFrames": 330
}
]
}
]
}Clears obstacles: A |
From: 2
Far Left Door
To: 8
G-Mode, Bottom Right (Started at Left)
Run through the speed blocks then carefully cross the crumble bridge, as it will mostly be air. Alternatively, a speedball will prevent PLMs from overloading and Samus can roll over the bridge. Kill the pirate after the bridge before it places its invisible lasers, preventing Samus from getting through damageless. Samus can simply run to the right and fall through the bridge to safety below the pirate and kill it from below. It is also possible to perform one precise jump to cross most of the bridge and kill the pirate while blue. Entrance condition: {
"comeInWithGMode": {
"mode": "any",
"morphed": false
}
}Requires: "h_getBlueSpeedMaxRunway"
{
"or": [
"canSpeedball",
{
"and": [
"h_blueJump",
"canInsaneJump"
]
},
"h_hasBeamUpgrade",
{
"enemyKill": {
"enemies": [
[
"Red Space Pirate (standing)"
]
],
"explicitWeapons": [
"Missile",
"Super",
"ScrewAttack"
]
}
},
{
"enemyDamage": {
"enemy": "Red Space Pirate (standing)",
"type": "contact",
"hits": 1
}
}
]
}
{
  "heatFrames": 0
}Dev note: It is possible to shinecharge before the bridge and spark vertically above it, then move the camera to kill the pirate with speed echoes, but this isn't really easier. |
From: 2
Far Left Door
To: 8
G-Mode, Bottom Right (Started at Left)
Jump over as many Speed blocks as possible, to minimize PLMs overloaded. Walk part way across the crumble bridge, then jump across the last part, to avoid falling through onto the spikes as the crumble blocks finish overloading PLMs. Entrance condition: {
"comeInWithGMode": {
"mode": "any",
"morphed": false
}
}Requires: {
"haveBlueSuit": {}
}
"canInsaneJump" |
From: 2
Far Left Door
To: 8
G-Mode, Bottom Right (Started at Left)
Carefully dodge or kill the enemies in the first half of the room. With Morph, go over the first set of Speed Blocks, then kill the first Red Pirate or air ball over it. It is also possible to kill or jump over the second pirate, but be careful to prevent it from shooting invisible lasers. Entrance condition: {
"comeInWithGMode": {
"mode": "any",
"morphed": false
}
}Requires: "canDash"
{
"or": [
"canTrickyDodgeEnemies",
"h_usePowerBomb",
"ScrewAttack",
"h_hasBeamUpgrade",
{
"ammo": {
"type": "Missile",
"count": 2
}
},
{
"ammo": {
"type": "Super",
"count": 2
}
},
{
"enemyDamage": {
"enemy": "Red Space Pirate (standing)",
"type": "contact",
"hits": 1
}
}
]
}
{
"or": [
"canTrickyJump",
{
"enemyDamage": {
"enemy": "Multiviola",
"type": "contact",
"hits": 1
}
}
]
}
"Morph"
{
"or": [
"h_usePowerBomb",
{
"and": [
{
"or": [
"h_useSpringBall",
"h_useMorphBombs"
]
},
{
"or": [
"canLateralMidAirMorph",
"h_hasBeamUpgrade",
{
"enemyKill": {
"enemies": [
[
"Red Space Pirate (standing)"
]
],
"explicitWeapons": [
"Missile",
"Super",
"ScrewAttack"
]
}
},
{
"enemyDamage": {
"enemy": "Red Space Pirate (standing)",
"type": "contact",
"hits": 1
}
}
]
}
]
}
]
}
{
  "heatFrames": 0
} |
From: 2
Far Left Door
To: 8
G-Mode, Bottom Right (Started at Left)
While artificially morphed, carefully dodge or kill the enemies in the first half of the room. Go over the first set of Speed Blocks, then kill the first Red Pirate with a Power Bomb or after unmorphing. It is possible to kill or jump over the second pirate, but be careful to prevent it from shooting invisible lasers. Without any Power Bombs, this requires precise movement with Spring Ball or very precise movement with just Bombs. Entrance condition: {
"comeInWithGMode": {
"mode": "any",
"morphed": true
}
}Requires: "canDash"
"canTrickyDodgeEnemies"
{
"or": [
{
"ammo": {
"type": "PowerBomb",
"count": 6
}
},
{
"and": [
"h_artificialMorphMovement",
{
"or": [
"canInsaneJump",
"h_artificialMorphPowerBomb"
]
},
{
"or": [
"h_artificialMorphPowerBomb",
"h_hasBeamUpgrade",
{
"enemyKill": {
"enemies": [
[
"Red Space Pirate (standing)"
]
],
"explicitWeapons": [
"Missile",
"Super",
"ScrewAttack"
]
}
},
{
"enemyDamage": {
"enemy": "Red Space Pirate (standing)",
"type": "contact",
"hits": 1
}
}
]
}
]
}
]
}
{
"heatFrames": 0
}Dev note: It is possible to jump over the left bridge pirate, but it is incredibly precise and not expected. |
From: 2
Far Left Door
To: 9
Right of Crumble Bridge, Left of Main Shaft Speed Blocks
Requires: "h_getBlueSpeedMaxRunway"
{
"simpleHeatFrames": 330
}
{
"or": [
"h_speedDash",
{
"and": [
"h_speedButSlow",
{
"simpleHeatFrames": 250
}
]
}
]
} |
From: 2
Far Left Door
To: 9
Right of Crumble Bridge, Left of Main Shaft Speed Blocks
Requires: {
"haveBlueSuit": {}
}
"canCrumbleJump"
"canInsaneJump"
{
"heatFrames": 1120
} |
|
Spark left through the speed blocks, then run to the right and back to get speed to go through the rest. If performing the spark with low energy, there is a risk of ending the spark above the spikes or in front of the Pirate; to be safe, assuming Samus has heat protection and begins sparking about 3 tiles from the Speed blocks, start with between 72 and 87 energy or at least 105 energy; with a buffered crumble jump to the right, up to 93 energy can work. Entrance condition: {
"comeInShinecharged": {},
"comesThroughToilet": "any"
}Requires: {
"shineChargeFrames": 35
}
{
"notable": "Reverse Spark"
}
"canShinechargeMovement"
"canHorizontalShinespark"
{
"or": [
{
"shinespark": {
"frames": 87,
"excessFrames": 10
}
},
{
"and": [
"h_heatProof",
"canControlShinesparkEnd",
{
"shinespark": {
"frames": 87,
"excessFrames": 44
}
}
]
}
]
}
{
"heatFrames": 675
}
{
"or": [
"h_speedDash",
{
"and": [
"h_speedButSlow",
{
"heatFrames": 270
}
]
}
]
}
"h_getBlueSpeedMaxRunway"
{
"or": [
"canSpeedball",
{
"heatFrames": 15
}
]
}Clears obstacles: A Dev note: FIXME: This should be split into 3->9 and 9->2 strats. |
|
Enter the room with between 93 and 102 energy and quickly mid-air spark to the left through the Speed blocks. After the shinespark ends, run left and press pause before reaching zero energy, tanking the Pirate hit while at zero energy. Refill some energy (at least 11), and continue running to the left, using i-frames to pass through the next Pirate. Continue to pause abuse several more times. Arm pumping may be used but is not required and has little benefit; in any case, arm pumping should not be used until beginning to run through the Speed blocks, otherwise Samus will not obtain blue speed in time and will bonk into them. Entrance condition: {
"comeInShinecharged": {},
"comesThroughToilet": "any"
}Requires: {
"shineChargeFrames": 35
}
{
"notable": "Reverse Spark With Pause Abuse"
}
"canShinechargeMovementTricky"
"canTrickyJump"
"canControlShinesparkEnd"
"canPauseAbuse"
{
"resourceAvailable": [
{
"type": "RegularEnergy",
"count": 93
}
]
}
{
"shinespark": {
"frames": 0,
"excessFrames": 0
}
}
{
"resourceConsumed": [
{
"type": "ReserveEnergy",
"count": 61
}
]
}
"h_speedDash"
"h_getBlueSpeedMaxRunway"
{
"or": [
"canPreciseReserveRefill",
{
"resourceConsumed": [
{
"type": "ReserveEnergy",
"count": 15
}
]
}
]
}
{
"resourceAtMost": [
{
"type": "RegularEnergy",
"count": 1
}
]
}
{
"heatFrames": 0
}Clears obstacles: A Dev note: The zero shinespark requirement is to satisfy the tests, by marking that the shinecharge is used; the actual shinespark energy usage is accounted for in the resourceConsumed. This could possibly be rewritten to express the energy usage in the normal way. We don't include a `h_ShinesparksCostEnergy` requirement here, because even if shinesparks don't cost energy, it is still possible to use heat damage to make the shinespark stop in the correct place. FIXME: the regular energy required could be reduced in that case. FIXME: This should be split into 3->9 and 9->2 strats. FIXME: A h_speedButSlow variant could be added. |
From: 3
Bottom Door
To: 2
Far Left Door
Entrance condition: {
"comeInWithPlatformBelow": {
"minHeight": 9,
"maxHeight": 10,
"maxLeftPosition": 0,
"minRightPosition": 22
},
"comesThroughToilet": "any"
}Requires: "HiJump"
{
"getBlueSpeed": {
"usedTiles": 18,
"openEnd": 1
}
}
"canTrickyJump"
"canSpeedball"
{
"heatFrames": 505
}Dev note: This strat is applicable only with Crocomire's Room and Indiana Jones Room. |
From: 3
Bottom Door
To: 2
Far Left Door
In the room below, gain a precise amount of speed (extra run speed $6.0 or $6.1) then jump and aim down. After the transition, perform a speedball to cross the room. With a precisely timed unmorph and a buffered shot to open the door, it is possible to just barely make it through with no tanks. After unmorphing, walk instead of running, to avoid bonking the door. Coming from Crocomire's Room below, it works to use the full available runway length. Entrance condition: {
"comeInWithPlatformBelow": {
"minHeight": 10,
"maxHeight": 10,
"maxLeftPosition": 0,
"minRightPosition": 41.5
},
"comesThroughToilet": "any"
}Requires: "h_getBlueSpeedMaxRunway"
"canTrickyDashJump"
"canSpeedball"
{
"heatFrames": 392
}Dev note: This strat is applicable only with Crocomire's Room. |
|
Entrance condition: {
"comeInWithSpark": {},
"comesThroughToilet": "any"
}Requires: {
"shinespark": {
"frames": 6,
"excessFrames": 6
}
}
{
"heatFrames": 120
}Dev note: This strat is not useful in-room, but can satisfy a strat in the room before with an exit shinespark. |
|
Requires: "h_heatedCrystalFlash" |
|
Entrance condition: {
"comeInShinecharged": {},
"comesThroughToilet": "any"
}Requires: {
"shineChargeFrames": 70
}
"canShinechargeMovementComplex"
{
"heatFrames": 70
}Exit condition: {
"leaveShinecharged": {}
}Unlocks doors: {"types":["super"],"requires":[]}
{"types":["missiles","powerbomb"],"requires":["never"]} |
From: 3
Bottom Door
To: 4
Bottom Right Door
Entrance condition: {
"comeInShinecharged": {},
"comesThroughToilet": "any"
}Requires: {
"shineChargeFrames": 40
}
"canShinechargeMovementComplex"
{
"heatFrames": 70
}
{
"shinespark": {
"frames": 8,
"excessFrames": 0
}
}Exit condition: {
"leaveWithSpark": {}
}Unlocks doors: {"types":["super"],"requires":[]}
{"types":["missiles","powerbomb"],"requires":["never"]} |
|
Requires: {
"heatFrames": 50
} |
|
Entrance condition: {
"comeInWithSpark": {},
"comesThroughToilet": "no"
}Requires: {
"shinespark": {
"frames": 6,
"excessFrames": 2
}
}
{
"heatFrames": 85
}Dev note: This strat is not useful in-room, but can satisfy a strat in the room before with an exit shinespark. |
From: 3
Bottom Door
To: 7
G-Mode, Bottom Right (Started at Right)
Entrance condition: {
"comeInWithGMode": {
"mode": "any",
"morphed": false
},
"comesThroughToilet": "any"
}Requires: {
"heatFrames": 0
} |
From: 3
Bottom Door
To: 10
Direct G-Mode, Bottom Right (Started at Right)
Entrance condition: {
"comeInWithGMode": {
"mode": "direct",
"morphed": false
},
"comesThroughToilet": "any"
}Requires: {
"heatFrames": 0
} |
From: 4
Bottom Right Door
To: 2
Far Left Door
Break the speed blocks by jumping over the gap with blue speed and continuing through the room with a speedball. If entering with low speed, unmorph after killing the last Pirate at the bottom of the sloped section, in order to run and gain more speed for the rest of the room. Entrance condition: {
"comeInGettingBlueSpeed": {
"length": 1,
"openEnd": 0,
"minExtraRunSpeed": "$2.4"
}
}Requires: {
"notable": "Reverse Speedball"
}
"canSpeedball"
{
"heatFrames": 570
}Clears obstacles: A Dev note: A run speed of $2.3 can also work but with greater difficulty. FIXME: add strats for cross-room spring ball bounce (with momentum or temp blue) and Space Jump |
From: 4
Bottom Right Door
To: 2
Far Left Door
Gain max run speed using a runway in the neighboring room, and jump through the door. With this amount of speed, it is possible to make it across without any tanks. Entrance condition: {
"comeInBlueSpinning": {
"minExtraRunSpeed": "$7.0",
"unusableTiles": 1
}
}Requires: {
"notable": "Reverse Speedball"
}
"canTrickyJump"
"canSpeedball"
{
"heatFrames": 370
} |
From: 4
Bottom Right Door
To: 2
Far Left Door
Gain high run speed using a runway in the neighboring room, and jump through the door. With a precisely timed unmorph and a buffered shot to open the door, it is possible to just barely make it through with no tanks. After unmorphing, walk instead of running, to avoid bonking the door. Entrance condition: {
"comeInBlueSpinning": {
"minExtraRunSpeed": "$6.5",
"unusableTiles": 1
}
}Requires: {
"notable": "Reverse Speedball"
}
"canInsaneJump"
"canSpeedball"
{
"heatFrames": 392
} |
From: 4
Bottom Right Door
To: 2
Far Left Door
Spark left through the speed blocks, then run to the right and back to get speed to go through the rest. If performing the spark with low energy, there is a risk of ending the spark above the spikes or in front of the Pirate; to be safe, assuming Samus has heat protection, begin the shinespark at the Speed blocks with between 68 and 84 energy, or at least 101 energy; with a buffered crumble jump to the right, up to 89 energy can work. Entrance condition: {
"comeInShinecharged": {}
}Requires: {
"shineChargeFrames": 85
}
{
"notable": "Reverse Spark"
}
"canShinechargeMovement"
"canHorizontalShinespark"
{
"or": [
{
"shinespark": {
"frames": 84,
"excessFrames": 10
}
},
{
"and": [
"h_heatProof",
"canControlShinesparkEnd",
{
"shinespark": {
"frames": 84,
"excessFrames": 45
}
}
]
}
]
}
{
"heatFrames": 715
}
{
"or": [
"h_speedDash",
{
"and": [
"h_speedButSlow",
{
"heatFrames": 270
}
]
}
]
}
"h_getBlueSpeedMaxRunway"
{
"or": [
"canSpeedball",
{
"heatFrames": 15
}
]
}Clears obstacles: A |
|
Spark left through the speed blocks, then run to the right and back to get speed to go through the rest. If performing the spark with low energy, there is a risk of ending the spark above the spikes or in front of the Pirate; to be safe, assuming Samus has heat protection, begin the shinespark at the door (in either this or the other room) with between 81 and 96 energy, or at least 113 energy; with a buffered crumble jump to the right, up to 102 energy can work. Entrance condition: {
"comeInWithSpark": {
"position": "bottom"
}
}Requires: {
"notable": "Reverse Spark"
}
{
"or": [
{
"shinespark": {
"frames": 94,
"excessFrames": 10
}
},
{
"and": [
"h_heatProof",
"canControlShinesparkEnd",
{
"shinespark": {
"frames": 94,
"excessFrames": 42
}
}
]
}
]
}
"h_getBlueSpeedMaxRunway"
{
"heatFrames": 650
}
{
"or": [
"h_speedDash",
{
"and": [
"h_speedButSlow",
{
"heatFrames": 270
}
]
}
]
}Clears obstacles: A Dev note: FIXME: This should be split into 4->9 and 9->2 strats. |
From: 4
Bottom Right Door
To: 2
Far Left Door
Start a shinespark on the other side of the door with between 94 and 103 energy. After the shinespark ends, run left and press pause before reaching zero energy, tanking the Pirate hit while at zero energy. Refill some energy (at least 11), and continue running to the left, using i-frames to pass through the next Pirate. Continue to pause abuse several more times. Arm pumping may be used but is not required and has little benefit; in any case, arm pumping should not be used until beginning to run through the Speed blocks, otherwise Samus will not obtain blue speed in time and will bonk into them. Entrance condition: {
"comeInWithSpark": {
"position": "bottom"
}
}Requires: {
"notable": "Reverse Spark With Pause Abuse"
}
"canShinechargeMovementTricky"
"canTrickyJump"
"canControlShinesparkEnd"
"canPauseAbuse"
{
"resourceAvailable": [
{
"type": "RegularEnergy",
"count": 94
}
]
}
{
"shinespark": {
"frames": 0,
"excessFrames": 0
}
}
{
"resourceConsumed": [
{
"type": "ReserveEnergy",
"count": 61
}
]
}
"h_speedDash"
"h_getBlueSpeedMaxRunway"
{
"or": [
"canPreciseReserveRefill",
{
"resourceConsumed": [
{
"type": "ReserveEnergy",
"count": 15
}
]
}
]
}
{
"resourceAtMost": [
{
"type": "RegularEnergy",
"count": 1
}
]
}
{
"heatFrames": 0
}Clears obstacles: A Dev note: The zero shinespark requirement is to satisfy the tests, by marking that the shinecharge is used; the actual shinespark energy usage is accounted for in the resourceConsumed. This could possibly be rewritten to express the energy usage in the normal way. We don't include a `h_ShinesparksCostEnergy` requirement here, because even if shinesparks don't cost energy, it is still possible to use heat damage to make the shinespark stop in the correct place. FIXME: the regular energy required could be reduced in that case. FIXME: This should be split into 4->9 and 9->2 strats. FIXME: A h_speedButSlow variant could be added. |
|
Use a stored spark (flash suit or blue suit) to spark left through the Speed blocks. If Speed Booster is available, run to the right and back to get blue speed to go through the rest of the Speed blocks. Otherwise use Morph with either Spring Ball, Bombs, or Power Bombs to navigate above them. If performing the spark with low energy, there is a risk of ending the spark above the spikes or in front of the Pirate; to be safe, assuming Samus has heat protection, begin the shinespark at the door (in either this or the other room) with between 81 and 96 energy, or at least 113 energy; with a buffered crumble jump to the right, up to 102 energy can work. Requires: {
"notable": "Reverse Spark"
}
"h_storedSpark"
{
"or": [
{
"shinespark": {
"frames": 94,
"excessFrames": 10
}
},
{
"and": [
"h_heatProof",
"canControlShinesparkEnd",
{
"shinespark": {
"frames": 84,
"excessFrames": 45
}
}
]
}
]
}
{
"or": [
{
"and": [
"h_getBlueSpeedMaxRunway",
{
"heatFrames": 650
},
{
"or": [
"h_speedDash",
{
"and": [
"h_speedButSlow",
{
"heatFrames": 270
}
]
}
]
}
]
},
{
"and": [
"h_useSpringBall",
"canTrickyDodgeEnemies",
{
"heatFrames": 1120
}
]
},
{
"and": [
"h_bombThings",
"canTrickyDodgeEnemies",
{
"heatFrames": 1140
}
]
}
]
}Clears obstacles: A Dev note: FIXME: This should be split into 4->9 and 9->2 strats. |
|
Entrance condition: {
"comeInWithGrappleTeleport": {
"blockPositions": [
[
5,
3
],
[
7,
2
]
]
}
}Requires: {
"heatFrames": 50
} |
From: 4
Bottom Right Door
To: 2
Far Left Door
Entrance condition: {
"comeInWithGrappleTeleport": {
"blockPositions": [
[
3,
12
],
[
3,
13
]
]
}
}Bypasses door shell: true |
From: 4
Bottom Right Door
To: 2
Far Left Door
Entrance condition: {
"comeInWithGrappleTeleport": {
"blockPositions": [
[
3,
12
]
]
}
}Exit condition: {
"leaveWithGrappleTeleport": {
"blockPositions": [
[
3,
12
]
]
}
}Bypasses door shell: true |
From: 4
Bottom Right Door
To: 2
Far Left Door
Entrance condition: {
"comeInWithGrappleTeleport": {
"blockPositions": [
[
3,
13
]
]
}
}Exit condition: {
"leaveWithGrappleTeleport": {
"blockPositions": [
[
3,
13
]
]
}
}Bypasses door shell: true |
From: 4
Bottom Right Door
To: 2
Far Left Door
Exit the previous room with Samus in a standing pose (while grappled). After teleporting, press right to release Grapple while staying standing (not being forced into a crouch). Then X-ray climb 1 screen to get up to the door transition, without needing to open the door. Entrance condition: {
"comeInWithGrappleTeleport": {
"blockPositions": [
[
2,
18
],
[
2,
19
],
[
2,
28
],
[
2,
29
]
]
}
}Requires: "canXRayClimb"
{
"heatFrames": 1600
}Bypasses door shell: true |
From: 4
Bottom Right Door
To: 2
Far Left Door
Exit the previous room with Samus in a standing pose (while grappled). After teleporting, press right to release Grapple while staying standing (not being forced into a crouch). Then X-ray climb 2 screens to get up to the door transition, without needing to open the door. Entrance condition: {
"comeInWithGrappleTeleport": {
"blockPositions": [
[
2,
34
]
]
}
}Requires: "canLongXRayClimb"
{
"heatFrames": 2800
}Bypasses door shell: true |
|
Entrance condition: {
"comeInShinecharged": {}
}Requires: {
"shineChargeFrames": 55
}
"canShinechargeMovementComplex"
{
"heatFrames": 55
}Exit condition: {
"leaveShinecharged": {}
}Unlocks doors: {"types":["super"],"requires":[]}
{"types":["missiles","powerbomb"],"requires":["never"]} |
|
Exit condition: {
"leaveWithRunway": {
"length": 2,
"openEnd": 1
}
} |
|
Requires: "h_heatedCrystalFlash" |
From: 4
Bottom Right Door
To: 5
Top Right Door
Entrance condition: {
"comeInShinecharging": {
"length": 1,
"openEnd": 1
}
}Requires: "canShinechargeMovementTricky"
"canInsaneJump"
"canBePatient"
{
"or": [
{
"enemyDamage": {
"enemy": "Cacatac",
"type": "contact",
"hits": 1
}
},
"Plasma",
{
"and": [
"Wave",
"Spazer"
]
}
]
}
{
"shineChargeFrames": 177
}
{
"shinespark": {
"frames": 10,
"excessFrames": 0
}
}
{
"heatFrames": 220
}Exit condition: {
"leaveWithSpark": {}
}Unlocks doors: {"types":["super"],"requires":[]}
{"types":["missiles","powerbomb"],"requires":["never"]}Dev note: The canBePatient requirement represents the possible need to retry in case bad RNG causes a Cac spike hit to mess up the strat. |
|
Requires: {
"heatFrames": 50
} |
From: 4
Bottom Right Door
To: 7
G-Mode, Bottom Right (Started at Right)
Entrance condition: {
"comeInWithGMode": {
"mode": "any",
"morphed": false
}
}Requires: {
"heatFrames": 0
} |
From: 4
Bottom Right Door
To: 10
Direct G-Mode, Bottom Right (Started at Right)
Entrance condition: {
"comeInWithGMode": {
"mode": "direct",
"morphed": false
}
}Requires: {
"heatFrames": 0
} |
|
Requires: {
"heatFrames": 145
}
{
"or": [
"canDash",
{
"heatFrames": 25
}
]
}Unlocks doors: {"types":["missiles"],"requires":[{"heatFrames":30}]}
{"types":["super"],"requires":[]}
{"types":["powerbomb"],"requires":[{"heatFrames":70}]} |
From: 5
Top Right Door
To: 1
Top of the Shaft Left Door
Requires: "canDash"
{
"heatFrames": 130
}Exit condition: {
"leaveWithRunway": {
"length": 8,
"openEnd": 1,
"gentleUpTiles": 4
}
}Unlocks doors: {"types":["missiles"],"requires":[{"heatFrames":50}]}
{"types":["super"],"requires":[]}
{"types":["powerbomb"],"requires":[{"heatFrames":70}]} |
From: 5
Top Right Door
To: 1
Top of the Shaft Left Door
Requires: "canTrickyJump"
{
"or": [
{
"and": [
"HiJump",
{
"heatFrames": 120
}
]
},
{
"and": [
"canPreciseWallJump",
{
"heatFrames": 130
}
]
}
]
}
{
"or": [
"canDash",
{
"heatFrames": 15
}
]
}Unlocks doors: {"types":["missiles"],"requires":[{"heatFrames":30}]}
{"types":["super"],"requires":[]}
{"types":["powerbomb"],"requires":[{"heatFrames":70}]} |
From: 5
Top Right Door
To: 1
Top of the Shaft Left Door
Entrance condition: {
"comeInShinecharging": {
"length": 5,
"openEnd": 0
}
}Requires: "canShinechargeMovementComplex"
{
"heatFrames": 160
}
{
"shineChargeFrames": 140
}Exit condition: {
"leaveShinecharged": {}
}Unlocks doors: {"types":["super"],"requires":[]}
{"types":["missiles","powerbomb"],"requires":["never"]} |
From: 5
Top Right Door
To: 1
Top of the Shaft Left Door
Entrance condition: {
"comeInShinecharged": {}
}Requires: {
"shineChargeFrames": 120
}
"HiJump"
"canShinechargeMovementComplex"
{
"heatFrames": 120
}Exit condition: {
"leaveShinecharged": {}
}Unlocks doors: {"types":["super"],"requires":[]}
{"types":["missiles","powerbomb"],"requires":["never"]} |
From: 5
Top Right Door
To: 1
Top of the Shaft Left Door
Entrance condition: {
"comeInShinecharged": {}
}Requires: {
"shineChargeFrames": 130
}
"canWallJump"
"canShinechargeMovementComplex"
{
"heatFrames": 130
}Exit condition: {
"leaveShinecharged": {}
}Unlocks doors: {"types":["super"],"requires":[]}
{"types":["missiles","powerbomb"],"requires":["never"]} |
From: 5
Top Right Door
To: 1
Top of the Shaft Left Door
Entrance condition: {
"comeInShinecharged": {}
}Requires: {
"shineChargeFrames": 145
}
"canShinechargeMovementComplex"
{
"heatFrames": 145
}Exit condition: {
"leaveShinecharged": {}
}Unlocks doors: {"types":["super"],"requires":[]}
{"types":["missiles","powerbomb"],"requires":["never"]} |
From: 5
Top Right Door
To: 1
Top of the Shaft Left Door
Entrance condition: {
"comeInShinecharged": {}
}Requires: {
"shineChargeFrames": 65
}
"HiJump"
"canShinechargeMovementComplex"
{
"heatFrames": 100
}
{
"shinespark": {
"frames": 18,
"excessFrames": 0
}
}Exit condition: {
"leaveWithSpark": {
"position": "bottom"
}
}Unlocks doors: {"types":["super"],"requires":[]}
{"types":["missiles","powerbomb"],"requires":["never"]} |
From: 5
Top Right Door
To: 1
Top of the Shaft Left Door
Entrance condition: {
"comeInShinecharged": {}
}Requires: {
"shineChargeFrames": 80
}
"canWallJump"
"canShinechargeMovementComplex"
{
"heatFrames": 120
}
{
"shinespark": {
"frames": 17,
"excessFrames": 0
}
}Exit condition: {
"leaveWithSpark": {
"position": "bottom"
}
}Unlocks doors: {"types":["super"],"requires":[]}
{"types":["missiles","powerbomb"],"requires":["never"]} |
Come In Shinecharged, Leave With Spark (Ledge Grabs, Bottom Position)
(Very Hard)
Crocomire Speedway
From: 5
Top Right Door
To: 1
Top of the Shaft Left Door
Entrance condition: {
"comeInShinecharged": {}
}Requires: {
"shineChargeFrames": 100
}
"canShinechargeMovementComplex"
{
"heatFrames": 135
}
{
"shinespark": {
"frames": 16,
"excessFrames": 0
}
}Exit condition: {
"leaveWithSpark": {
"position": "bottom"
}
}Unlocks doors: {"types":["super"],"requires":[]}
{"types":["missiles","powerbomb"],"requires":["never"]} |
|
Either jump over a Cacatac or tank a spike hit. Perform a mid-air spark through the speed blocks. Then run to the right and back to get speed to go through the rest. If performing the spark with low energy, there is a risk of ending the spark above the spikes or in front of the Pirate; to be safe, assuming Samus has heat protection, begin the shinespark with between 73 and 88 energy, or at least 106 energy; with a buffered crumble jump to the right, up to 94 energy can work. Entrance condition: {
"comeInShinecharging": {
"length": 5,
"openEnd": 1
}
}Requires: {
"notable": "Reverse Spark"
}
"canShinechargeMovementTricky"
"canTrickyJump"
{
"or": [
{
"enemyDamage": {
"enemy": "Cacatac",
"type": "spike",
"hits": 1
}
},
"canBePatient"
]
}
{
"or": [
{
"shinespark": {
"frames": 88,
"excessFrames": 11
}
},
{
"and": [
"h_heatProof",
"canControlShinesparkEnd",
{
"shinespark": {
"frames": 88,
"excessFrames": 44
}
}
]
}
]
}
{
"heatFrames": 825
}
{
"or": [
"h_speedDash",
{
"and": [
"h_speedButSlow",
{
"heatFrames": 270
}
]
}
]
}
"h_getBlueSpeedMaxRunway"
{
"or": [
"canSpeedball",
{
"heatFrames": 15
}
]
}Clears obstacles: A Dev note: The canBePatient represents retrying until RNG works out to be able to jump over one of the Cacatacs without taking a hit. There is a possibility of getting a lucky drop from one of the two Pirates; but since it is low probability, we don't model it. The speedball exit is technically not a valid way to leave normally (e.g. in case the next room is heated and Samus needs to jump); but if necessary, it is possible to unmorph near the transition. FIXME: This should be split into 5->9 and 9->2 strats. |
From: 5
Top Right Door
To: 2
Far Left Door
Either jump over a Cacatac, tank a spike hit, or farm it if possible. While preparing to spark left through the speed blocks, press pause so that the pause hits during the shinespark wind-up Using reserves, try to refill to exactly 84 energy, the minimum amount needed to reliably break through the Speed blocks (assuming no heat protection). Hold jump and left while unpausing, to buffer activating the horizontal shinespark. After the shinespark ends, run left and press pause before reaching zero energy, tanking the Pirate hit while at zero energy. Refill to between about 11 and 13 energy, and continue running to the left, using i-frames to pass through the next Pirate. Continue to pause abuse 4 more times, trying to refill to between 11 and 13 energy each time except for the last. Arm pumping may be used but is not required and has little benefit; in any case, arm pumping should not be used until beginning to run through the Speed blocks, otherwise Samus will not obtain blue speed in time and will bonk into them. Entrance condition: {
"comeInShinecharging": {
"length": 5,
"openEnd": 1
}
}Requires: {
"notable": "Reverse Spark With Pause Abuse"
}
"canShinechargeMovementTricky"
"canTrickyJump"
"canControlShinesparkEnd"
"canPauseAbuse"
{
"resourceAvailable": [
{
"type": "RegularEnergy",
"count": 99
}
]
}
{
"shinespark": {
"frames": 0,
"excessFrames": 0
}
}
{
"resourceConsumed": [
{
"type": "ReserveEnergy",
"count": 80
}
]
}
"h_speedDash"
"h_getBlueSpeedMaxRunway"
{
"or": [
{
"resourceConsumed": [
{
"type": "ReserveEnergy",
"count": 20
}
]
},
{
"and": [
{
"resourceMissingAtMost": [
{
"type": "Super",
"count": 0
}
]
},
{
"or": [
{
"ammo": {
"type": "Missile",
"count": 1
}
},
"Grapple",
"Plasma",
{
"and": [
"Wave",
"Spazer"
]
}
]
}
]
}
]
}
{
"or": [
"canPreciseReserveRefill",
{
"resourceConsumed": [
{
"type": "ReserveEnergy",
"count": 15
}
]
}
]
}
{
"resourceAtMost": [
{
"type": "RegularEnergy",
"count": 1
}
]
}
{
"heatFrames": 0
}Clears obstacles: A Dev note: The zero shinespark requirement is to satisfy the tests, by marking that the shinecharge is used; the actual shinespark energy usage is accounted for in the resourceConsumed. This could possibly be rewritten to express the energy usage in the normal way. We don't include a `h_ShinesparksCostEnergy` requirement here, because even if shinesparks don't cost energy, it is still possible to use heat damage to make the shinespark stop in the correct place. FIXME: the regular energy required could be reduced in that case. FIXME: This should be split into 5->9 and 9->2 strats. FIXME: A h_speedButSlow variant could be added. |
|
Entrance condition: {
"comeInWithGrappleTeleport": {
"blockPositions": [
[
5,
3
],
[
7,
2
]
]
}
}Requires: {
"heatFrames": 50
} |
From: 5
Top Right Door
To: 2
Far Left Door
Entrance condition: {
"comeInWithGrappleTeleport": {
"blockPositions": [
[
3,
12
],
[
3,
13
]
]
}
}Bypasses door shell: true |
From: 5
Top Right Door
To: 2
Far Left Door
Entrance condition: {
"comeInWithGrappleTeleport": {
"blockPositions": [
[
3,
12
]
]
}
}Exit condition: {
"leaveWithGrappleTeleport": {
"blockPositions": [
[
3,
12
]
]
}
}Bypasses door shell: true |
From: 5
Top Right Door
To: 2
Far Left Door
Entrance condition: {
"comeInWithGrappleTeleport": {
"blockPositions": [
[
3,
13
]
]
}
}Exit condition: {
"leaveWithGrappleTeleport": {
"blockPositions": [
[
3,
13
]
]
}
}Bypasses door shell: true |
From: 5
Top Right Door
To: 2
Far Left Door
Exit the previous room with Samus in a standing pose (while grappled). After teleporting, press right to release Grapple while staying standing (not being forced into a crouch). Then X-ray climb 1 screen to get up to the door transition, without needing to open the door. Entrance condition: {
"comeInWithGrappleTeleport": {
"blockPositions": [
[
2,
18
],
[
2,
19
],
[
2,
28
],
[
2,
29
]
]
}
}Requires: "canXRayClimb"
{
"heatFrames": 1600
}Bypasses door shell: true |
From: 5
Top Right Door
To: 2
Far Left Door
Exit the previous room with Samus in a standing pose (while grappled). After teleporting, press right to release Grapple while staying standing (not being forced into a crouch). Then X-ray climb to get up to the door transition, without needing to open the door. Entrance condition: {
"comeInWithGrappleTeleport": {
"blockPositions": [
[
2,
34
]
]
}
}Requires: "canLongXRayClimb"
{
"heatFrames": 2800
}Bypasses door shell: true |
From: 5
Top Right Door
To: 3
Bottom Door
Setup a moondance such that Samus will fall through 2 tiles. Perform a moonfall near the edge of the ledge, then quickly aim down and turn around to the right. Use caution to avoid being hit by a Cacatac spike. The horizontal position for performing the moonfall is lenient: it does not need to be done at the very edge, just far enough left to avoid the Cac below. Entrance condition: {
"comeInWithStoredFallSpeed": {
"fallSpeedInTiles": 2
}
}Requires: {
"heatFrames": 70
}
"canFreeFallClip" |
From: 5
Top Right Door
To: 4
Bottom Right Door
Entrance condition: {
"comeInShinecharging": {
"length": 5,
"openEnd": 1
}
}Requires: "canShinechargeMovementTricky"
"canTrickyJump"
{
"or": [
{
"enemyDamage": {
"enemy": "Cacatac",
"type": "spike",
"hits": 1
}
},
"canBePatient"
]
}
{
"shinespark": {
"frames": 10,
"excessFrames": 0
}
}
{
"heatFrames": 210
}Exit condition: {
"leaveWithSpark": {}
}Unlocks doors: {"types":["super"],"requires":[]}
{"types":["missiles","powerbomb"],"requires":["never"]}Dev note: The canBePatient represents retrying until RNG works out to be able to jump over one of the Cacatacs without taking a hit. |
|
Exit condition: {
"leaveWithRunway": {
"length": 6,
"openEnd": 1
}
} |
|
Requires: "h_heatProof"
{
"or": [
{
"and": [
{
"resetRoom": {
"nodes": [
1
]
}
},
{
"cycleFrames": 450
}
]
},
{
"and": [
{
"resetRoom": {
"nodes": [
3
]
}
},
{
"cycleFrames": 300
}
]
},
{
"and": [
{
"resetRoom": {
"nodes": [
4
]
}
},
{
"cycleFrames": 360
}
]
},
{
"and": [
{
"resetRoom": {
"nodes": [
5
]
}
},
{
"cycleFrames": 200
}
]
}
]
}
{
"or": [
{
"and": [
"canDash",
{
"or": [
"Plasma",
{
"and": [
"Wave",
{
"cycleFrames": 30
}
]
},
{
"and": [
"Spazer",
{
"cycleFrames": 30
}
]
},
{
"and": [
"Grapple",
{
"cycleFrames": 45
}
]
},
{
"cycleFrames": 120
}
]
}
]
},
{
"and": [
{
"haveBlueSuit": {}
},
{
"cycleFrames": 40
}
]
}
]
}Resets obstacles: A Farm cycle drops: 2 Cacatac Dev note: Some frames added to account for spike RNG. |
|
Requires: "h_heatedCrystalFlash" |
From: 5
Top Right Door
To: 5
Top Right Door
Entrance condition: {
"comeInWithGMode": {
"mode": "direct",
"morphed": false
}
}Requires: "h_doorImmediatelyClosedFix" Exit condition: {
"leaveWithGMode": {
"morphed": false
}
} |
From: 5
Top Right Door
To: 5
Top Right Door
Entrance condition: {
"comeInWithGMode": {
"mode": "direct",
"morphed": true
}
}Requires: "h_doorImmediatelyClosedFix" Exit condition: {
"leaveWithGMode": {
"morphed": true
}
} |
From: 5
Top Right Door
To: 6
Bottom Right Junction
Try to jump over the Cacatacs without taking damage. With unlucky RNG, a spike hit may be unavoidable. Requires: {
"heatFrames": 180
}
{
"or": [
"canInsaneJump",
{
"and": [
{
"enemyDamage": {
"enemy": "Cacatac",
"type": "spike",
"hits": 1
}
},
{
"heatFrames": 20
}
]
}
]
}
{
"or": [
"canDash",
{
"heatFrames": 20
}
]
} |
From: 5
Top Right Door
To: 6
Bottom Right Junction
Kill a Cacatac and collect its drop along the way. There will be a risk of a spike hit unless the Cacatac is safely killed from above. Requires: "canDash"
{
"or": [
"canInsaneJump",
{
"and": [
{
"enemyDamage": {
"enemy": "Cacatac",
"type": "spike",
"hits": 1
}
},
{
"heatFrames": 20
}
]
},
{
"and": [
"canDodgeWhileShooting",
{
"heatFrames": 40
}
]
}
]
}
{
"or": [
{
"and": [
"Wave",
{
"heatFramesWithEnergyDrops": {
"frames": 85,
"drops": [
{
"enemy": "Cacatac",
"count": 1
}
]
}
}
]
},
{
"and": [
{
"ammo": {
"type": "Missile",
"count": 1
}
},
{
"heatFramesWithEnergyDrops": {
"frames": 90,
"drops": [
{
"enemy": "Cacatac",
"count": 1
}
]
}
}
]
},
{
"and": [
{
"resourceAvailable": [
{
"type": "Super",
"count": 1
}
]
},
{
"heatFrames": 90
}
]
},
{
"and": [
"Plasma",
{
"heatFramesWithEnergyDrops": {
"frames": 90,
"drops": [
{
"enemy": "Cacatac",
"count": 1
}
]
}
}
]
},
{
"and": [
"Spazer",
{
"heatFramesWithEnergyDrops": {
"frames": 95,
"drops": [
{
"enemy": "Cacatac",
"count": 1
}
]
}
}
]
},
{
"and": [
"Grapple",
{
"heatFramesWithEnergyDrops": {
"frames": 100,
"drops": [
{
"enemy": "Cacatac",
"count": 1
}
]
}
}
]
},
{
"and": [
"ScrewAttack",
{
"heatFramesWithEnergyDrops": {
"frames": 100,
"drops": [
{
"enemy": "Cacatac",
"count": 1
}
]
}
}
]
},
{
"heatFramesWithEnergyDrops": {
"frames": 135,
"drops": [
{
"enemy": "Cacatac",
"count": 1
}
]
}
}
]
}
{
"heatFrames": 95
} |
From: 5
Top Right Door
To: 6
Bottom Right Junction
Requires: {
"haveBlueSuit": {}
}
{
"heatFramesWithEnergyDrops": {
"frames": 115,
"drops": [
{
"enemy": "Cacatac",
"count": 1
}
]
}
}
{
"heatFrames": 115
} |
From: 5
Top Right Door
To: 6
Bottom Right Junction
Kill both Cacatacs and collect their drops along the way. There will be a risk of a spike hit unless the first Cacatac is safely killed from above. Requires: "canDash"
{
"or": [
"canInsaneJump",
{
"and": [
{
"enemyDamage": {
"enemy": "Cacatac",
"type": "spike",
"hits": 1
}
},
{
"heatFrames": 20
}
]
},
{
"and": [
"canDodgeWhileShooting",
{
"heatFrames": 40
}
]
}
]
}
{
"or": [
{
"and": [
"Wave",
{
"or": [
"Spazer",
"Plasma"
]
},
{
"heatFramesWithEnergyDrops": {
"frames": 105,
"drops": [
{
"enemy": "Cacatac",
"count": 2
}
]
}
}
]
},
{
"and": [
"Plasma",
{
"heatFramesWithEnergyDrops": {
"frames": 115,
"drops": [
{
"enemy": "Cacatac",
"count": 2
}
]
}
}
]
},
{
"and": [
"canUseGrapple",
{
"heatFramesWithEnergyDrops": {
"frames": 125,
"drops": [
{
"enemy": "Cacatac",
"count": 2
}
]
}
}
]
},
{
"and": [
"Wave",
{
"heatFramesWithEnergyDrops": {
"frames": 135,
"drops": [
{
"enemy": "Cacatac",
"count": 2
}
]
}
}
]
},
{
"and": [
{
"ammo": {
"type": "Missile",
"count": 2
}
},
{
"heatFramesWithEnergyDrops": {
"frames": 135,
"drops": [
{
"enemy": "Cacatac",
"count": 2
}
]
}
}
]
},
{
"and": [
"Spazer",
{
"heatFramesWithEnergyDrops": {
"frames": 145,
"drops": [
{
"enemy": "Cacatac",
"count": 2
}
]
}
}
]
},
{
"and": [
"ScrewAttack",
{
"heatFramesWithEnergyDrops": {
"frames": 175,
"drops": [
{
"enemy": "Cacatac",
"count": 2
}
]
}
}
]
},
{
"heatFramesWithEnergyDrops": {
"frames": 205,
"drops": [
{
"enemy": "Cacatac",
"count": 2
}
]
}
}
]
}
{
"heatFrames": 95
} |
From: 5
Top Right Door
To: 6
Bottom Right Junction
Requires: {
"haveBlueSuit": {}
}
{
"heatFramesWithEnergyDrops": {
"frames": 160,
"drops": [
{
"enemy": "Cacatac",
"count": 2
}
]
}
}
{
"heatFrames": 140
} |
From: 5
Top Right Door
To: 6
Bottom Right Junction
Use a Power Bomb to safely kill both Cacatacs, and collect their drops along the way. Requires: "canDash"
"h_usePowerBomb"
{
"heatFramesWithEnergyDrops": {
"frames": 180,
"drops": [
{
"enemy": "Cacatac",
"count": 2
}
]
}
}
{
"heatFrames": 95
} |
From: 5
Top Right Door
To: 7
G-Mode, Bottom Right (Started at Right)
Jump over the Cacatacs. Their projectiles remain inside of them and their hitbox is a bit smaller than it appears. Entrance condition: {
"comeInWithGMode": {
"mode": "any",
"morphed": false
}
}Requires: {
"heatFrames": 0
} |
From: 5
Top Right Door
To: 10
Direct G-Mode, Bottom Right (Started at Right)
Jump over the Cacatacs. Their projectiles remain inside of them and their hitbox is a bit smaller than it appears. Entrance condition: {
"comeInWithGMode": {
"mode": "direct",
"morphed": false
}
}Requires: {
"heatFrames": 0
} |
|
Requires: {
"obstaclesCleared": [
"A"
]
}
"h_getBlueSpeedMaxRunway"
{
"heatFrames": 500
}
{
"or": [
"h_speedDash",
{
"and": [
"h_speedButSlow",
{
"heatFrames": 330
}
]
}
]
}Dev note: The blocks will already be broken, the blue speed is to kill the enemies. |
|
Requires: {
"heatFrames": 50
}Unlocks doors: {"types":["missiles"],"requires":[{"heatFrames":50}]}
{"types":["super"],"requires":[]}
{"types":["powerbomb"],"requires":[{"heatFrames":70}]} |
|
Requires: "canShinechargeMovementComplex"
{
"obstaclesCleared": [
"A"
]
}
"h_shinechargeMaxRunway"
{
"heatFrames": 330
}
{
"shineChargeFrames": 55
}Exit condition: {
"leaveShinecharged": {}
}Unlocks doors: {"types":["missiles"],"requires":[{"heatFrames":50}]}
{"types":["super"],"requires":[]}
{"types":["powerbomb"],"requires":[{"heatFrames":70}]} |
|
Requires: {
"heatFrames": 50
}Unlocks doors: {"types":["missiles"],"requires":[{"heatFrames":30}]}
{"types":["super"],"requires":[]}
{"types":["powerbomb"],"requires":[{"heatFrames":70}]} |
From: 6
Bottom Right Junction
To: 4
Bottom Right Door
Enabled by coming in from the left and breaking the speed blocks on the way, or coming in charged and opening the path to the left. Requires: {
"obstaclesCleared": [
"A"
]
}
{
"canShineCharge": {
"usedTiles": 37,
"gentleDownTiles": 2,
"openEnd": 2
}
}
"canShinechargeMovementComplex"
{
"heatFrames": 360
}
{
"shineChargeFrames": 100
}Exit condition: {
"leaveShinecharged": {}
}Unlocks doors: {"types":["missiles"],"requires":[{"heatFrames":50}]}
{"types":["super"],"requires":[]}
{"types":["powerbomb"],"requires":[{"heatFrames":70}]}Dev note: FIXME: This should be changed to start at node 9. |
|
Requires: {
"obstaclesCleared": [
"A"
]
}
"h_heatedRemoteRunway"
{
"heatFrames": 360
}Exit condition: {
"leaveSpinning": {
"remoteRunway": {
"length": 37,
"openEnd": 2,
"gentleDownTiles": 2
},
"minExtraRunSpeed": "$5.2",
"blue": "yes"
}
}Unlocks doors: {"types":["missiles"],"requires":[{"heatFrames":50}]}
{"types":["super"],"requires":[]}
{"types":["powerbomb"],"requires":[{"heatFrames":70}]}Dev note: FIXME: This should be changed to start at node 9. |
|
Requires: {
"obstaclesCleared": [
"A"
]
}
"h_heatedRemoteRunway"
{
"heatFrames": 360
}Exit condition: {
"leaveWithMockball": {
"remoteRunway": {
"length": 37,
"openEnd": 2,
"gentleDownTiles": 2
},
"landingRunway": {
"length": 2,
"openEnd": 1
},
"minExtraRunSpeed": "$2.6"
}
}Unlocks doors: {"types":["missiles"],"requires":[{"heatFrames":50}]}
{"types":["super"],"requires":[]}
{"types":["powerbomb"],"requires":[{"heatFrames":70}]}Dev note: FIXME: This should be changed to start at node 9. |
From: 6
Bottom Right Junction
To: 4
Bottom Right Door
Requires: {
"obstaclesCleared": [
"A"
]
}
"h_heatedRemoteRunwaySpringBall"
{
"heatFrames": 360
}Exit condition: {
"leaveWithSpringBallBounce": {
"remoteRunway": {
"length": 37,
"openEnd": 2,
"gentleDownTiles": 2
},
"landingRunway": {
"length": 2,
"openEnd": 1
},
"minExtraRunSpeed": "$3.2",
"movementType": "uncontrolled"
}
}Unlocks doors: {"types":["missiles"],"requires":[{"heatFrames":50}]}
{"types":["super"],"requires":[]}
{"types":["powerbomb"],"requires":[{"heatFrames":70}]}Dev note: FIXME: This should be changed to start at node 9. |
From: 6
Bottom Right Junction
To: 4
Bottom Right Door
Requires: {
"obstaclesCleared": [
"A"
]
}
"h_heatedRemoteRunwayPreciseSpaceJump"
{
"heatFrames": 360
}Exit condition: {
"leaveSpaceJumping": {
"remoteRunway": {
"length": 19,
"openEnd": 1
},
"minExtraRunSpeed": "$2.E"
}
}Unlocks doors: {"types":["missiles"],"requires":[{"heatFrames":50}]}
{"types":["super"],"requires":[]}
{"types":["powerbomb"],"requires":[{"heatFrames":70}]}Dev note: FIXME: This should be changed to start at node 9. |
From: 6
Bottom Right Junction
To: 4
Bottom Right Door
Requires: {
"obstaclesCleared": [
"A"
]
}
"h_heatedRemoteRunway"
{
"getBlueSpeed": {
"usedTiles": 37,
"gentleDownTiles": 2,
"openEnd": 2
}
}
{
"heatFrames": 360
}Exit condition: {
"leaveWithTemporaryBlue": {}
}Unlocks doors: {"types":["missiles"],"requires":[{"heatFrames":50}]}
{"types":["super"],"requires":[]}
{"types":["powerbomb"],"requires":[{"heatFrames":70}]}Dev note: FIXME: This should be changed to start at node 9. |
From: 6
Bottom Right Junction
To: 5
Top Right Door
Try to jump over the Cacatacs without taking damage. With unlucky RNG, a spike hit may be unavoidable. Requires: "canDash"
{
"or": [
"canInsaneJump",
{
"and": [
"canTrickyJump",
{
"enemyDamage": {
"enemy": "Cacatac",
"type": "spike",
"hits": 1
}
},
{
"heatFrames": 20
}
]
},
{
"and": [
{
"enemyDamage": {
"enemy": "Cacatac",
"type": "contact",
"hits": 1
}
},
{
"heatFrames": 20
}
]
}
]
}
{
"heatFrames": 170
} |
|
The two-tile floating platform will be destroyed by blue suit, so Samus cannot stand on it. Requires: {
"haveBlueSuit": {}
}
{
"heatFrames": 210
}
{
"or": [
"HiJump",
{
"and": [
"canWallJump",
{
"heatFrames": 10
}
]
},
{
"and": [
"canSpringBallJumpMidAir",
{
"heatFrames": 10
}
]
},
{
"and": [
"SpaceJump",
{
"heatFrames": 50
}
]
}
]
} |
From: 6
Bottom Right Junction
To: 5
Top Right Door
Kill a Cacatac and collect its drop along the way. There will be a risk of a spike hit unless the first Cacatac is safely killed from below. Requires: "canDash"
{
"or": [
"canInsaneJump",
{
"and": [
{
"enemyDamage": {
"enemy": "Cacatac",
"type": "spike",
"hits": 1
}
},
{
"heatFrames": 20
}
]
},
{
"and": [
"canDodgeWhileShooting",
{
"heatFrames": 40
}
]
}
]
}
{
"or": [
{
"and": [
{
"ammo": {
"type": "Missile",
"count": 1
}
},
{
"heatFramesWithEnergyDrops": {
"frames": 90,
"drops": [
{
"enemy": "Cacatac",
"count": 1
}
]
}
}
]
},
{
"and": [
{
"resourceAvailable": [
{
"type": "Super",
"count": 1
}
]
},
{
"heatFrames": 90
}
]
},
{
"and": [
"Plasma",
{
"heatFramesWithEnergyDrops": {
"frames": 90,
"drops": [
{
"enemy": "Cacatac",
"count": 1
}
]
}
}
]
},
{
"and": [
"Grapple",
{
"heatFramesWithEnergyDrops": {
"frames": 105,
"drops": [
{
"enemy": "Cacatac",
"count": 1
}
]
}
}
]
},
{
"and": [
"ScrewAttack",
{
"heatFramesWithEnergyDrops": {
"frames": 105,
"drops": [
{
"enemy": "Cacatac",
"count": 1
}
]
}
}
]
},
{
"and": [
"Wave",
{
"heatFramesWithEnergyDrops": {
"frames": 105,
"drops": [
{
"enemy": "Cacatac",
"count": 1
}
]
}
}
]
},
{
"and": [
"Spazer",
{
"heatFramesWithEnergyDrops": {
"frames": 105,
"drops": [
{
"enemy": "Cacatac",
"count": 1
}
]
}
}
]
},
{
"heatFramesWithEnergyDrops": {
"frames": 120,
"drops": [
{
"enemy": "Cacatac",
"count": 1
}
]
}
}
]
}
{
"heatFrames": 60
} |
From: 6
Bottom Right Junction
To: 5
Top Right Door
Requires: {
"haveBlueSuit": {}
}
{
"or": [
"HiJump",
{
"and": [
"canWallJump",
{
"heatFrames": 10
}
]
},
{
"and": [
"canSpringBallJumpMidAir",
{
"heatFrames": 10
}
]
},
{
"and": [
"SpaceJump",
{
"heatFrames": 50
}
]
}
]
}
{
"heatFramesWithEnergyDrops": {
"frames": 160,
"drops": [
{
"enemy": "Cacatac",
"count": 1
}
]
}
}
{
"heatFrames": 70
} |
From: 6
Bottom Right Junction
To: 5
Top Right Door
Kill both Cacatacs and collect their drops along the way. There will be a risk of a spike hit unless the first Cacatac is safely killed from below. Requires: "canDash"
{
"or": [
"canInsaneJump",
{
"and": [
{
"enemyDamage": {
"enemy": "Cacatac",
"type": "spike",
"hits": 1
}
},
{
"heatFrames": 20
}
]
},
{
"and": [
"canDodgeWhileShooting",
{
"heatFrames": 40
}
]
}
]
}
{
"or": [
{
"and": [
"Plasma",
{
"heatFramesWithEnergyDrops": {
"frames": 115,
"drops": [
{
"enemy": "Cacatac",
"count": 2
}
]
}
}
]
},
{
"and": [
{
"ammo": {
"type": "Missile",
"count": 1
}
},
{
"heatFramesWithEnergyDrops": {
"frames": 135,
"drops": [
{
"enemy": "Cacatac",
"count": 2
}
]
}
}
]
},
{
"and": [
"Grapple",
{
"heatFramesWithEnergyDrops": {
"frames": 135,
"drops": [
{
"enemy": "Cacatac",
"count": 2
}
]
}
}
]
},
{
"and": [
"Wave",
{
"heatFramesWithEnergyDrops": {
"frames": 145,
"drops": [
{
"enemy": "Cacatac",
"count": 2
}
]
}
}
]
},
{
"and": [
"Spazer",
{
"heatFramesWithEnergyDrops": {
"frames": 145,
"drops": [
{
"enemy": "Cacatac",
"count": 2
}
]
}
}
]
},
{
"and": [
"ScrewAttack",
{
"heatFramesWithEnergyDrops": {
"frames": 165,
"drops": [
{
"enemy": "Cacatac",
"count": 2
}
]
}
}
]
},
{
"and": [
{
"heatFramesWithEnergyDrops": {
"frames": 195,
"drops": [
{
"enemy": "Cacatac",
"count": 2
}
]
}
},
{
"or": [
"canBeVeryPatient",
{
"enemyDamage": {
"enemy": "Cacatac",
"type": "spike",
"hits": 1
}
},
{
"heatFrames": 30
}
]
}
]
}
]
}
{
"heatFrames": 65
} |
From: 6
Bottom Right Junction
To: 5
Top Right Door
Use a Power Bomb to safely kill both Cacatacs from below, and collect their drops along the way. Requires: "canDash"
"h_usePowerBomb"
{
"heatFramesWithEnergyDrops": {
"frames": 170,
"drops": [
{
"enemy": "Cacatac",
"count": 2
}
]
}
}
{
"heatFrames": 65
} |
From: 6
Bottom Right Junction
To: 5
Top Right Door
Requires: {
"haveBlueSuit": {}
}
{
"or": [
"HiJump",
{
"and": [
"canWallJump",
{
"heatFrames": 10
}
]
},
{
"and": [
"canSpringBallJumpMidAir",
{
"heatFrames": 10
}
]
},
{
"and": [
"SpaceJump",
{
"heatFrames": 50
}
]
}
]
}
{
"heatFramesWithEnergyDrops": {
"frames": 200,
"drops": [
{
"enemy": "Cacatac",
"count": 2
}
]
}
}
{
"heatFrames": 120
} |
|
Move very quickly to bring a shinespark from the speedway up to the Save Room door. Preclear the Cacatacs, and it may help to not run while platforming if HiJump is not available. Requires: "h_heatProof"
{
"obstaclesCleared": [
"A"
]
}
"canShinechargeMovementTricky"
"h_shinechargeMaxRunway"
{
"shinespark": {
"frames": 12,
"excessFrames": 0
}
}Exit condition: {
"leaveWithSpark": {}
}Unlocks doors: {"types":["ammo"],"requires":[]}Dev note: FIXME: This could be done without heat proof. FIXME: This should be changed to start at node 9. |
From: 6
Bottom Right Junction
To: 9
Right of Crumble Bridge, Left of Main Shaft Speed Blocks
Requires: {
"obstaclesCleared": [
"A"
]
}
{
"heatFrames": 150
}
{
"or": [
"h_speedDash",
{
"heatFrames": 20
}
]
} |
From: 6
Bottom Right Junction
To: 9
Right of Crumble Bridge, Left of Main Shaft Speed Blocks
Requires: {
"haveBlueSuit": {}
}
{
"heatFrames": 260
}Clears obstacles: A |
From: 7
G-Mode, Bottom Right (Started at Right)
To: 1
Top of the Shaft Left Door
Jump over the Cacatacs. Their projectiles remain inside of them and their hitbox is a bit smaller than it appears. Requires: {
"or": [
{
"noBlueSuit": {}
},
"canWallJump",
"SpaceJump",
"HiJump",
"canSpringBallJumpMidAir"
]
}
"h_heatedGModeOpenDifferentDoor" |
From: 7
G-Mode, Bottom Right (Started at Right)
To: 2
Far Left Door
The crumble bridge will be air. Either tank a spike hit, carefully Space Jump over it, or with SpeedBooster, use the full runway to run over the pit. Note that there is a slight incline just before the bridge, which can be used as an indicator for where to Space Jump. Requires: {
"or": [
{
"and": [
"canTrickyJump",
"SpaceJump"
]
},
"h_speedJump",
{
"spikeHits": 1
}
]
}
"h_heatedGModeOffCameraDoor"Exit condition: {
"leaveNormally": {}
}Unlocks doors: {"types":["missiles"],"requires":[{"heatFrames":50}]}
{"types":["super"],"requires":[]}
{"types":["powerbomb"],"requires":[{"heatFrames":110}]}Dev note: Requires leaving the room, as Samus is off camera and shouldn't be expected to do more in-room. |
From: 7
G-Mode, Bottom Right (Started at Right)
To: 2
Far Left Door
Exit G-mode before the crumble bridge, this is when the floor starts sloping up slightly. Without a way to kill the pirates, touch the camera scroll block briefly before the bridge, then run over the bridge and through the pirates before fixing the camera, to not have to deal with the pirates. Otherwise, it may be worth killing the pirates for some Energy to be able to tank a hit later. Use a Bomb, Power Bomb, or Spring Ball to get over the Speed blocks. Then carefully avoid or kill the remaining enemies. Requires: "canGMode"
"h_heatProof"
"canDash"
{
"or": [
"h_bombThings",
"h_useSpringBall"
]
}
{
"or": [
"h_usePowerBomb",
"h_hasBeamUpgrade",
"ScrewAttack",
{
"ammo": {
"type": "Missile",
"count": 3
}
},
{
"ammo": {
"type": "Super",
"count": 3
}
},
"canComplexGMode"
]
} |
From: 7
G-Mode, Bottom Right (Started at Right)
To: 2
Far Left Door
Exit G-mode before the crumble bridge, this is when the floor starts sloping up slightly. Run over the bridge and through the pirates without fixing the camera, to safely run through the pirates. Requires: "canComplexGMode"
"h_heatedGMode"
"h_getBlueSpeedMaxRunway"
{
"heatFrames": 375
} |
From: 7
G-Mode, Bottom Right (Started at Right)
To: 3
Bottom Door
Requires: "h_heatedGModeOpenDifferentDoor" |
From: 7
G-Mode, Bottom Right (Started at Right)
To: 4
Bottom Right Door
Requires: "h_heatedGModeOpenDifferentDoor" |
From: 7
G-Mode, Bottom Right (Started at Right)
To: 5
Top Right Door
Jump over the Cacatacs. Their projectiles remain inside of them and their hitbox is a bit smaller than it appears. Requires: {
"or": [
{
"noBlueSuit": {}
},
"canWallJump",
"SpaceJump",
"HiJump",
"canSpringBallJumpMidAir"
]
}
"h_heatedGModeOpenDifferentDoor" |
From: 8
G-Mode, Bottom Right (Started at Left)
To: 1
Top of the Shaft Left Door
The speed block platform above the bottom door will not be usable, so Samus must blindly wall jump up the first ledge or use some assist. There is some visibility on the left side of the screen, which is useful in determining which ledge she is on. The Cacatacs will not be able to damage Samus off screen. Requires: "canOffScreenMovement"
{
"or": [
"canWallJump",
"HiJump",
"canSpringBallJumpMidAir",
"SpaceJump"
]
}
"h_heatedGModeOffCameraDoor"Exit condition: {
"leaveNormally": {}
}Unlocks doors: {"types":["missiles"],"requires":[{"heatFrames":50}]}
{"types":["super"],"requires":[]}
{"types":["powerbomb"],"requires":[{"heatFrames":110}]}Dev note: Requires leaving the room, as Samus is off camera and shouldn't be expected to do more in-room. FIXME: It is possible to X-Ray climb from inside the speed blocks. Count shots to determine Samus' position. |
From: 8
G-Mode, Bottom Right (Started at Left)
To: 3
Bottom Door
Walk back and forth until it is obvious Samus is on the doorshell. Use X-Ray, jump, and shoot down at the bottom of the jump, this may take a couple attempts. For a faster exit, place a Bomb on the door, then quickly unmorph and use X-Ray. With Grapple it is faster still; use X-Ray while crouched, then quickly use Grapple while angling down. Requires: "h_heatedGMode"
{
"or": [
{
"heatFrames": 160
},
{
"and": [
"h_useMorphBombs",
{
"heatFrames": 85
}
]
},
{
"and": [
"canUseGrapple",
{
"heatFrames": 50
}
]
}
]
}Exit condition: {
"leaveNormally": {}
}Unlocks doors: {"types":["missiles"],"requires":[{"heatFrames":50}]}
{"types":["super"],"requires":[]}
{"types":["powerbomb"],"requires":[{"heatFrames":110}]}Dev note: Requires leaving the room, as Samus is off camera and shouldn't be expected to do more in-room. It's possible to use a Bomb while still artificially morphed, but that only saves a few heat frames and is ignored. |
From: 8
G-Mode, Bottom Right (Started at Left)
To: 4
Bottom Right Door
Requires: "h_heatedGModeOffCameraDoor" Exit condition: {
"leaveNormally": {}
}Unlocks doors: {"types":["missiles"],"requires":[{"heatFrames":50}]}
{"types":["super"],"requires":[]}
{"types":["powerbomb"],"requires":[{"heatFrames":110}]}Dev note: Requires leaving the room, as Samus is off camera and shouldn't be expected to do more in-room. |
From: 8
G-Mode, Bottom Right (Started at Left)
To: 5
Top Right Door
The speed block platform above the bottom door will not be usable, so Samus must blindly wall jump up the first ledge or use some assist. There is some visibility on the left side of the screen, which is useful in determining which ledge she is on. The Cacatacs will not be able to damage Samus off screen. Requires: "canOffScreenMovement"
{
"or": [
"canWallJump",
"HiJump",
"canSpringBallJumpMidAir",
"SpaceJump"
]
}
"h_heatedGModeOffCameraDoor"Exit condition: {
"leaveNormally": {}
}Unlocks doors: {"types":["missiles"],"requires":[{"heatFrames":50}]}
{"types":["super"],"requires":[]}
{"types":["powerbomb"],"requires":[{"heatFrames":110}]}Dev note: Requires leaving the room, as Samus is off camera and shouldn't be expected to do more in-room. |
From: 8
G-Mode, Bottom Right (Started at Left)
To: 6
Bottom Right Junction
Exit G-Mode and jump back and forth to fix the camera. If Samus exits G-Mode while in the camera scroll block next to the speed blocks, the camera won't fix. Requires: "h_heatedGMode"
{
"heatFrames": 250
} |
From: 9
Right of Crumble Bridge, Left of Main Shaft Speed Blocks
To: 2
Far Left Door
Run right and back to kill the pirates while blue. Requires: {
"obstaclesCleared": [
"A"
]
}
"h_getBlueSpeedMaxRunway"
{
"heatFrames": 480
}
{
"or": [
"h_speedDash",
{
"and": [
"h_speedButSlow",
{
"simpleHeatFrames": 320
}
]
}
]
} |
From: 9
Right of Crumble Bridge, Left of Main Shaft Speed Blocks
To: 2
Far Left Door
Requires: {
"haveBlueSuit": {}
}
"canCrumbleJump"
"canInsaneJump"
{
"heatFrames": 1120
} |
From: 9
Right of Crumble Bridge, Left of Main Shaft Speed Blocks
To: 2
Far Left Door
Kill the pirates while running left and gaining blue speed. Requires: "h_getBlueSpeedMaxRunway"
{
"or": [
"Plasma",
{
"ammo": {
"type": "Missile",
"count": 2
}
},
{
"ammo": {
"type": "Super",
"count": 2
}
},
{
"and": [
"Ice",
"Wave",
"Spazer"
]
},
{
"and": [
"Ice",
"Spazer",
{
"heatFrames": 30
}
]
},
{
"and": [
"Ice",
"Wave",
{
"heatFrames": 30
}
]
},
{
"and": [
"Wave",
"Spazer",
{
"heatFrames": 30
}
]
},
{
"and": [
"Wave",
{
"heatFrames": 50
}
]
}
]
}
{
"heatFrames": 350
}
{
"or": [
"h_speedDash",
{
"and": [
"h_speedButSlow",
{
"simpleHeatFrames": 260
}
]
}
]
} |
From: 9
Right of Crumble Bridge, Left of Main Shaft Speed Blocks
To: 2
Far Left Door
Run left and press pause before reaching zero energy, tanking the Pirate hit while at zero energy. Refill, and continue running to the left, using i-frames to pass through the next Pirate. Requires: "canPauseAbuse"
{
"resourceAtMost": [
{
"type": "RegularEnergy",
"count": 1
}
]
}
{
"resourceConsumed": [
{
"type": "ReserveEnergy",
"count": 1
}
]
}
"h_getBlueSpeedMaxRunway"
"h_speedDash"
{
"heatFrames": 335
}Dev note: FIXME: A h_speedButSlow variant could be added. |
From: 9
Right of Crumble Bridge, Left of Main Shaft Speed Blocks
To: 2
Far Left Door
Kill the first pirate, then jump over or kill the second. It is possible to jump straight into the first morph tunnel. Without a way to kill the pirates, it is instead possible to tank or pause abuse a hit and then Samus will have i-frames when running through the second one. Cross the speed blocks with Bombs, a Power Bomb, Spring Ball, or by tanking a pirate laser hit and boosting up. The rest of the room can be tricky to cross damageless, particularly if Samus has no way to kill the enemies. Carefully avoid the Multiviola in the middle of the sloped section by slowing down, and kill the last Multiviola to prevent it hitting Samus in the transition. Requires: "canDash"
"canMidAirMorph"
"canTrickyJump"
{
"or": [
{
"enemyDamage": {
"enemy": "Red Space Pirate (standing)",
"type": "contact",
"hits": 1
}
},
"Plasma",
{
"ammo": {
"type": "Missile",
"count": 1
}
},
{
"ammo": {
"type": "Super",
"count": 1
}
},
{
"and": [
"Ice",
"Wave",
"Spazer"
]
},
{
"and": [
"Ice",
"Spazer",
{
"heatFrames": 30
}
]
},
{
"and": [
"Ice",
"Wave",
{
"heatFrames": 30
}
]
},
{
"and": [
"Wave",
"Spazer",
{
"heatFrames": 30
}
]
},
{
"and": [
{
"or": [
"Ice",
"Wave",
"Spazer",
"ScrewAttack"
]
},
{
"heatFrames": 50
}
]
},
{
"and": [
"canPseudoScrew",
{
"heatFrames": 85
}
]
},
{
"and": [
"canPauseAbuse",
{
"resourceAtMost": [
{
"type": "RegularEnergy",
"count": 1
}
]
},
{
"resourceConsumed": [
{
"type": "ReserveEnergy",
"count": 1
}
]
}
]
}
]
}
{
"or": [
"h_useSpringBall",
{
"and": [
"h_bombThings",
{
"heatFrames": 60
}
]
},
{
"and": [
"canNeutralDamageBoost",
{
"enemyDamage": {
"enemy": "Red Space Pirate (standing)",
"type": "laser",
"hits": 1
}
},
{
"heatFrames": 120
}
]
}
]
}
{
"or": [
"h_heatProof",
"canTrickyDodgeEnemies",
{
"enemyDamage": {
"enemy": "Multiviola",
"type": "contact",
"hits": 1
}
}
]
}
{
"or": [
"Plasma",
"ScrewAttack",
{
"ammo": {
"type": "Missile",
"count": 5
}
},
{
"ammo": {
"type": "Super",
"count": 5
}
},
{
"heatFrames": 150
}
]
}
{
"heatFrames": 970
}Dev note: canTrickyJump is used to simplify the logic, as there is no feasible way to get to this node without SpeedBooster without this skill level. |
From: 9
Right of Crumble Bridge, Left of Main Shaft Speed Blocks
To: 2
Far Left Door
Kill the two pirates while in health bomb range, to force Energy drops. It is possible to jump over the second pirate to then fight it on solid ground. Samus needs a large Energy drop with 75% damage reduction, or both large Energy drops otherwise. Cross the speed blocks by tanking a pirate laser hit and boosting up. Requires: "canDash"
"h_heatProof"
{
"or": [
"h_hasBeamUpgrade",
{
"ammo": {
"type": "Missile",
"count": 2
}
},
{
"ammo": {
"type": "Super",
"count": 2
}
},
"ScrewAttack"
]
}
{
"resourceAtMost": [
{
"type": "Energy",
"count": 29
}
]
}
"h_partialEnemyDamageReduction"
{
"or": [
"h_fullEnemyDamageReduction",
"canBeVeryLucky"
]
}
"canMidAirMorph"
"canNeutralDamageBoost" |
From: 9
Right of Crumble Bridge, Left of Main Shaft Speed Blocks
To: 6
Bottom Right Junction
Requires: "canDash"
{
"obstaclesCleared": [
"A"
]
}
{
"heatFrames": 120
}
{
"or": [
"h_speedDash",
{
"heatFrames": 30
}
]
}Dev note: FIXME: Could have separate strats with tighter heat frames for going down or right. |
From: 9
Right of Crumble Bridge, Left of Main Shaft Speed Blocks
To: 6
Bottom Right Junction
Requires: {
"haveBlueSuit": {}
}
{
"heatFrames": 240
}Clears obstacles: A |
From: 9
Right of Crumble Bridge, Left of Main Shaft Speed Blocks
To: 9
Right of Crumble Bridge, Left of Main Shaft Speed Blocks
Requires: {
"obstaclesCleared": [
"A"
]
}
"h_shinechargeMaxRunway"
"h_heatedCrystalSpark" |
From: 10
Direct G-Mode, Bottom Right (Started at Right)
To: 2
Far Left Door
Stop before the crumble bridge, this is when the floor starts sloping up slightly. Activate X-Ray and hold until full width to exit G-Mode and remain in R-Mode. Bring the first pirate on screen, then Crystal Flash to kill it. Back up against the speed barrier and run left over the crumble blocks and then through the remaining pirates. Stop at the end, and leave the leftmost Multviola near the door, running right to trap it off-screen in that area. Use the other two Multviola - or the spikes - to damage down. Run back to the door, shinecharge, and get hit by the Multiviola to interrupt. Requires: "canComplexGMode"
"h_heatProof"
{
"disableEquipment": "ETank"
}
"h_CrystalFlashForReserveEnergy"
{
"canShineCharge": {
"usedTiles": 28,
"gentleUpTiles": 2,
"openEnd": 0
}
}
{
"autoReserveTrigger": {}
}
"canRModeSparkInterrupt" |
From: 10
Direct G-Mode, Bottom Right (Started at Right)
To: 7
G-Mode, Bottom Right (Started at Right)
Requires: "canGMode" |
{
"$schema": "../../../schema/m3-room.schema.json",
"id": 120,
"name": "Crocomire Speedway",
"area": "Norfair",
"subarea": "Upper",
"subsubarea": "West",
"roomAddress": "0x7A923",
"roomEnvironments": [
{
"heated": true
}
],
"mapTileMask": [
[
1,
1,
1,
1,
1,
0,
0,
0,
0,
0,
0,
0,
1
],
[
0,
0,
0,
1,
1,
1,
1,
0,
0,
0,
0,
0,
1
],
[
0,
0,
0,
0,
1,
1,
1,
1,
1,
1,
1,
1,
1
]
],
"nodes": [
{
"id": 1,
"name": "Top of the Shaft Left Door",
"nodeType": "door",
"nodeSubType": "blue",
"nodeAddress": "0x00193ae",
"doorOrientation": "left",
"doorEnvironments": [
{
"physics": "air"
}
],
"mapTileMask": [
[
1,
1,
1,
1,
1,
0,
0,
0,
0,
0,
0,
0,
2
],
[
0,
0,
0,
1,
1,
1,
1,
0,
0,
0,
0,
0,
1
],
[
0,
0,
0,
0,
1,
1,
1,
1,
1,
1,
1,
1,
1
]
]
},
{
"id": 2,
"name": "Far Left Door",
"nodeType": "door",
"nodeSubType": "blue",
"nodeAddress": "0x00193a2",
"doorOrientation": "left",
"doorEnvironments": [
{
"physics": "air"
}
],
"mapTileMask": [
[
2,
2,
2,
2,
2,
0,
0,
0,
0,
0,
0,
0,
1
],
[
0,
0,
0,
2,
2,
2,
2,
0,
0,
0,
0,
0,
1
],
[
0,
0,
0,
0,
2,
2,
2,
2,
2,
2,
2,
2,
1
]
]
},
{
"id": 3,
"name": "Bottom Door",
"nodeType": "door",
"nodeSubType": "green",
"nodeAddress": "0x00193d2",
"doorOrientation": "down",
"doorEnvironments": [
{
"physics": "air"
}
],
"mapTileMask": [
[
1,
1,
1,
1,
1,
0,
0,
0,
0,
0,
0,
0,
1
],
[
0,
0,
0,
1,
1,
1,
1,
0,
0,
0,
0,
0,
1
],
[
0,
0,
0,
0,
1,
1,
1,
1,
1,
1,
1,
1,
2
]
]
},
{
"id": 4,
"name": "Bottom Right Door",
"nodeType": "door",
"nodeSubType": "blue",
"nodeAddress": "0x00193c6",
"doorOrientation": "right",
"doorEnvironments": [
{
"physics": "air"
}
],
"mapTileMask": [
[
1,
1,
1,
1,
1,
0,
0,
0,
0,
0,
0,
0,
1
],
[
0,
0,
0,
1,
1,
1,
1,
0,
0,
0,
0,
0,
1
],
[
0,
0,
0,
0,
1,
1,
1,
1,
1,
1,
1,
1,
2
]
]
},
{
"id": 5,
"name": "Top Right Door",
"nodeType": "door",
"nodeSubType": "blue",
"nodeAddress": "0x00193ba",
"doorOrientation": "right",
"doorEnvironments": [
{
"physics": "air"
}
],
"isDoorImmediatelyClosed": true,
"mapTileMask": [
[
1,
1,
1,
1,
1,
0,
0,
0,
0,
0,
0,
0,
1
],
[
0,
0,
0,
1,
1,
1,
1,
0,
0,
0,
0,
0,
2
],
[
0,
0,
0,
0,
1,
1,
1,
1,
1,
1,
1,
1,
1
]
]
},
{
"id": 6,
"name": "Bottom Right Junction",
"nodeType": "junction",
"nodeSubType": "junction",
"mapTileMask": [
[
1,
1,
1,
1,
1,
0,
0,
0,
0,
0,
0,
0,
1
],
[
0,
0,
0,
1,
1,
1,
1,
0,
0,
0,
0,
0,
1
],
[
0,
0,
0,
0,
1,
1,
1,
1,
1,
1,
1,
1,
2
]
]
},
{
"id": 7,
"name": "G-Mode, Bottom Right (Started at Right)",
"nodeType": "junction",
"nodeSubType": "g-mode",
"mapTileMask": [
[
1,
1,
1,
1,
1,
0,
0,
0,
0,
0,
0,
0,
1
],
[
0,
0,
0,
1,
1,
1,
1,
0,
0,
0,
0,
0,
1
],
[
0,
0,
0,
0,
1,
1,
1,
1,
1,
1,
1,
1,
2
]
],
"note": "Represents being at the bottom of the right shaft with G-Mode and having entered the room from a door on the right shaft"
},
{
"id": 8,
"name": "G-Mode, Bottom Right (Started at Left)",
"nodeType": "junction",
"nodeSubType": "g-mode",
"mapTileMask": [
[
1,
1,
1,
1,
1,
0,
0,
0,
0,
0,
0,
0,
1
],
[
0,
0,
0,
1,
1,
1,
1,
0,
0,
0,
0,
0,
1
],
[
0,
0,
0,
0,
1,
1,
1,
1,
1,
1,
1,
1,
2
]
],
"note": "Represents being at the bottom of the right shaft with G-Mode and having entered the room from the left side, PLMs are overloaded, and Samus is off screen"
},
{
"id": 9,
"name": "Right of Crumble Bridge, Left of Main Shaft Speed Blocks",
"nodeType": "junction",
"nodeSubType": "junction",
"mapTileMask": [
[
1,
1,
1,
1,
1,
0,
0,
0,
0,
0,
0,
0,
1
],
[
0,
0,
0,
1,
1,
1,
1,
0,
0,
0,
0,
0,
1
],
[
0,
0,
0,
0,
1,
1,
1,
1,
1,
1,
2,
1,
1
]
],
"note": "Represents being in the speedway, on the left side of the right most speed blocks."
},
{
"id": 10,
"name": "Direct G-Mode, Bottom Right (Started at Right)",
"nodeType": "junction",
"nodeSubType": "g-mode",
"mapTileMask": [
[
1,
1,
1,
1,
1,
0,
0,
0,
0,
0,
0,
0,
1
],
[
0,
0,
0,
1,
1,
1,
1,
0,
0,
0,
0,
0,
1
],
[
0,
0,
0,
0,
1,
1,
1,
1,
1,
1,
1,
1,
2
]
],
"note": "Represents being at the bottom of the right shaft with Direct G-Mode and having entered the room from a door on the right shaft"
}
],
"obstacles": [
{
"id": "A",
"name": "Right-side Speed Blocks",
"obstacleType": "inanimate",
"note": "The speed blocks on the right side of the speedway. Breaking those is needed for some leaveShinecharged strats."
}
],
"enemies": [
{
"id": "e1",
"groupName": "Crocomire Speedway Left Pirates",
"enemyName": "Red Space Pirate (standing)",
"quantity": 3,
"homeNodes": [
2
]
},
{
"id": "e2",
"groupName": "Crocomire Speedway Multiviolas",
"enemyName": "Multiviola",
"quantity": 4,
"homeNodes": [
2
]
},
{
"id": "e3",
"groupName": "Crocomire Speedway Right Pirates",
"enemyName": "Red Space Pirate (standing)",
"quantity": 2,
"betweenNodes": [
2,
6
]
},
{
"id": "e4",
"groupName": "Crocomire Speedway Cacatacs",
"enemyName": "Cacatac",
"quantity": 2,
"betweenNodes": [
5,
6
]
}
],
"strats": [
{
"link": [
1,
1
],
"name": "Base (Unlock Door)",
"requires": [],
"unlocksDoors": [
{
"types": [
"missiles"
],
"requires": [
{
  "heatFrames": 50
}
]
},
{
"types": [
"super"
],
"requires": []
},
{
"types": [
"powerbomb"
],
"requires": [
{
"heatFrames": 110
}
]
}
],
"flashSuitChecked": true,
"blueSuitChecked": true
},
{
"link": [
1,
1
],
"name": "Base (Come In Normally)",
"entranceCondition": {
"comeInNormally": {}
},
"requires": [],
"flashSuitChecked": true,
"blueSuitChecked": true
},
{
"link": [
1,
1
],
"name": "Base (Come In With Mockball)",
"entranceCondition": {
"comeInWithMockball": {
"adjacentMinTiles": 0,
"remoteAndLandingMinTiles": [
[
0,
0
]
],
"speedBooster": "any"
}
},
"requires": [
{
"heatFrames": 10
}
],
"flashSuitChecked": true,
"blueSuitChecked": true
},
{
"link": [
2,
2
],
"name": "Base (Unlock Door)",
"requires": [],
"unlocksDoors": [
{
"types": [
"missiles"
],
"requires": [
{
"heatFrames": 50
}
]
},
{
"types": [
"super"
],
"requires": []
},
{
"types": [
"powerbomb"
],
"requires": [
{
"heatFrames": 110
}
]
}
],
"flashSuitChecked": true,
"blueSuitChecked": true
},
{
"link": [
2,
2
],
"name": "Base (Come In Normally)",
"entranceCondition": {
"comeInNormally": {}
},
"requires": [],
"flashSuitChecked": true,
"blueSuitChecked": true
},
{
"link": [
2,
2
],
"name": "Base (Come In With Mockball)",
"entranceCondition": {
"comeInWithMockball": {
"adjacentMinTiles": 0,
"remoteAndLandingMinTiles": [
[
0,
0
]
],
"speedBooster": "any"
}
},
"requires": [
{
"heatFrames": 10
}
],
"flashSuitChecked": true,
"blueSuitChecked": true
},
{
"link": [
3,
3
],
"name": "Base (Unlock Door)",
"requires": [],
"unlocksDoors": [
{
"types": [
"missiles"
],
"requires": [
{
"heatFrames": 50
}
]
},
{
"types": [
"super"
],
"requires": []
},
{
"types": [
"powerbomb"
],
"requires": [
{
"heatFrames": 110
}
]
}
],
"flashSuitChecked": true,
"blueSuitChecked": true
},
{
"link": [
3,
3
],
"name": "Base (Come In Normally)",
"entranceCondition": {
"comeInNormally": {}
},
"requires": [],
"flashSuitChecked": true,
"blueSuitChecked": true
},
{
"link": [
3,
3
],
"name": "Base (Come In With Grapple Jump)",
"entranceCondition": {
"comeInWithGrappleJump": {
"position": "any"
}
},
"requires": [],
"flashSuitChecked": true,
"blueSuitChecked": true
},
{
"link": [
4,
4
],
"name": "Base (Unlock Door)",
"requires": [],
"unlocksDoors": [
{
"types": [
"missiles"
],
"requires": [
{
"heatFrames": 50
}
]
},
{
"types": [
"super"
],
"requires": []
},
{
"types": [
"powerbomb"
],
"requires": [
{
"heatFrames": 110
}
]
}
],
"flashSuitChecked": true,
"blueSuitChecked": true
},
{
"link": [
4,
4
],
"name": "Base (Come In Normally)",
"entranceCondition": {
"comeInNormally": {}
},
"requires": [],
"flashSuitChecked": true,
"blueSuitChecked": true
},
{
"link": [
4,
4
],
"name": "Base (Come In With Mockball)",
"entranceCondition": {
"comeInWithMockball": {
"adjacentMinTiles": 0,
"remoteAndLandingMinTiles": [
[
0,
0
]
],
"speedBooster": "any"
}
},
"requires": [
{
"heatFrames": 10
}
],
"flashSuitChecked": true,
"blueSuitChecked": true
},
{
"link": [
5,
5
],
"name": "Base (Unlock Door)",
"requires": [],
"unlocksDoors": [
{
"types": [
"missiles"
],
"requires": [
{
"heatFrames": 50
}
]
},
{
"types": [
"super"
],
"requires": []
},
{
"types": [
"powerbomb"
],
"requires": [
{
"heatFrames": 110
}
]
}
],
"flashSuitChecked": true,
"blueSuitChecked": true
},
{
"link": [
5,
5
],
"name": "Base (Come In Normally)",
"entranceCondition": {
"comeInNormally": {}
},
"requires": [],
"flashSuitChecked": true,
"blueSuitChecked": true
},
{
"link": [
5,
5
],
"name": "Base (Come In With Mockball)",
"entranceCondition": {
"comeInWithMockball": {
"adjacentMinTiles": 0,
"remoteAndLandingMinTiles": [
[
0,
0
]
],
"speedBooster": "any"
}
},
"requires": [
{
"heatFrames": 10
}
],
"flashSuitChecked": true,
"blueSuitChecked": true
},
{
"id": 1,
"link": [
1,
1
],
"name": "Leave with Runway",
"requires": [],
"exitCondition": {
"leaveWithRunway": {
"length": 8,
"openEnd": 1,
"gentleUpTiles": 4
}
},
"flashSuitChecked": true,
"blueSuitChecked": true
},
{
"id": 2,
"link": [
1,
1
],
"name": "Crystal Flash",
"requires": [
"h_heatedCrystalFlash"
],
"flashSuitChecked": true,
"blueSuitChecked": true
},
{
"id": 144,
"link": [
1,
1
],
"name": "Come in Shinecharging, Crystal Spark",
"entranceCondition": {
"comeInShinecharging": {
"length": 7,
"openEnd": 0,
"gentleDownTiles": 4
}
},
"requires": [
"h_heatedCrystalSpark"
],
"flashSuitChecked": true,
"blueSuitChecked": true
},
{
"id": 3,
"link": [
1,
5
],
"name": "Base",
"requires": [
{
"heatFrames": 125
},
{
"or": [
"canDash",
{
"heatFrames": 25
}
]
}
],
"flashSuitChecked": true,
"blueSuitChecked": true
},
{
"id": 4,
"link": [
1,
5
],
"name": "Come In Shinecharging, Leave Shinecharged",
"entranceCondition": {
"comeInShinecharging": {
"length": 0,
"openEnd": 1
}
},
"requires": [
{
"heatFrames": 120
},
{
"shineChargeFrames": 95
}
],
"exitCondition": {
"leaveShinecharged": {}
},
"unlocksDoors": [
{
"types": [
"super"
],
"requires": []
},
{
"types": [
"missiles",
"powerbomb"
],
"requires": [
"never"
]
}
],
"flashSuitChecked": true,
"blueSuitChecked": true,
"devNote": "FIXME: Entering with too little run speed causes Samus to 'trip', so the runway cannot reliably be used for short shortcharges."
},
{
"id": 50,
"link": [
1,
5
],
"name": "Carry Shinecharge",
"entranceCondition": {
"comeInShinecharged": {}
},
"requires": [
{
"shineChargeFrames": 125
},
"canShinechargeMovementComplex",
{
"heatFrames": 125
}
],
"exitCondition": {
"leaveShinecharged": {}
},
"unlocksDoors": [
{
"types": [
"super"
],
"requires": []
},
{
"types": [
"missiles",
"powerbomb"
],
"requires": [
"never"
]
}
],
"flashSuitChecked": true,
"blueSuitChecked": true
},
{
"id": 51,
"link": [
1,
5
],
"name": "Come In Shinecharged, Leave With Spark (Top Position)",
"entranceCondition": {
"comeInShinecharged": {}
},
"requires": [
{
"shineChargeFrames": 105
},
{
"heatFrames": 130
},
{
"shinespark": {
"frames": 2,
"excessFrames": 0
}
}
],
"exitCondition": {
"leaveWithSpark": {
"position": "top"
}
},
"unlocksDoors": [
{
"types": [
"super"
],
"requires": []
},
{
"types": [
"missiles",
"powerbomb"
],
"requires": [
"never"
]
}
],
"flashSuitChecked": true,
"blueSuitChecked": true
},
{
"id": 52,
"link": [
1,
5
],
"name": "Come In Shinecharged, Leave With Spark (Bottom Position)",
"entranceCondition": {
"comeInShinecharged": {}
},
"requires": [
{
"shineChargeFrames": 110
},
{
"heatFrames": 130
},
{
"shinespark": {
"frames": 2,
"excessFrames": 0
}
}
],
"exitCondition": {
"leaveWithSpark": {
"position": "bottom"
}
},
"unlocksDoors": [
{
"types": [
"super"
],
"requires": []
},
{
"types": [
"missiles",
"powerbomb"
],
"requires": [
"never"
]
}
],
"flashSuitChecked": true,
"blueSuitChecked": true
},
{
"id": 76,
"link": [
1,
7
],
"name": "G-Mode",
"entranceCondition": {
"comeInWithGMode": {
"mode": "any",
"morphed": false
}
},
"requires": [
{
  "heatFrames": 0
}
],
"flashSuitChecked": true,
"blueSuitChecked": true,
"note": "Jump over the Cacatacs. Their projectiles remain inside of them and their hitbox is a bit smaller than it appears."
},
{
"id": 124,
"link": [
1,
10
],
"name": "Direct G-Mode",
"entranceCondition": {
"comeInWithGMode": {
"mode": "direct",
"morphed": false
}
},
"requires": [
{
  "heatFrames": 0
}
],
"flashSuitChecked": true,
"blueSuitChecked": true,
"note": "Jump over the Cacatacs. Their projectiles remain inside of them and their hitbox is a bit smaller than it appears."
},
{
"id": 5,
"link": [
2,
2
],
"name": "Leave with Runway",
"requires": [],
"exitCondition": {
"leaveWithRunway": {
"length": 45,
"openEnd": 1,
"steepUpTiles": 6
}
},
"flashSuitChecked": true,
"blueSuitChecked": true,
"devNote": "45 tiles is roughly in front of the first red pirate."
},
{
"id": 6,
"link": [
2,
2
],
"name": "Crystal Flash",
"requires": [
"h_heatedCrystalFlash"
],
"flashSuitChecked": true,
"blueSuitChecked": true
},
{
"id": 145,
"link": [
2,
2
],
"name": "Crystal Spark",
"requires": [
"h_shinechargeMaxRunway",
"h_heatedCrystalSpark"
],
"flashSuitChecked": true,
"blueSuitChecked": true
},
{
"id": 130,
"link": [
2,
2
],
"name": "Gain Flash Suit (Slopespark)",
"requires": [
"h_heatProof",
"h_shinechargeMaxRunway",
{
"enemyDamage": {
"enemy": "Multiviola",
"type": "contact",
"hits": 1
}
},
"canSlopeSpark",
{
"shinespark": {
"frames": 7,
"excessFrames": 7
}
}
],
"flashSuitChecked": true,
"blueSuitChecked": true,
"devNote": "FIXME: Could add a suitless version here"
},
{
"id": 115,
"link": [
2,
2
],
"name": "R-Mode Spark Interrupt",
"entranceCondition": {
"comeInWithRMode": {}
},
"requires": [
{
"or": [
{
"and": [
"h_heatedCrystalFlashForReserveEnergy",
{
"simpleHeatFrames": 600
},
{
"heatFrames": 180
}
]
},
{
"and": [
"h_heatProof",
"h_RModeCanRefillReserves",
{
"resourceMissingAtMost": [
{
"type": "Missile",
"count": 0
}
]
},
{
"partialRefill": {
"type": "ReserveEnergy",
"limit": 20
}
}
]
}
]
},
"h_shinechargeMaxRunway",
{
"autoReserveTrigger": {}
},
"canRModeSparkInterrupt",
{
"heatFrames": 30
}
],
"flashSuitChecked": true,
"blueSuitChecked": true,
"note": [
"Run through all the Pirates and all but the first Multiviola. Run back to the door and use the Multiviola to interrupt."
]
},
{
"id": 72,
"link": [
2,
2
],
"name": "G-Mode Setup - Get Hit By Multiviola, Kill Pirates",
"requires": [
{
"heatFrames": 600
},
{
"or": [
"h_speedDash",
{
"and": [
"canDash",
{
"heatFrames": 65
}
]
},
{
"heatFrames": 200
}
]
},
{
"or": [
{
"haveBlueSuit": {}
},
"h_speedDash",
"Plasma",
"ScrewAttack",
{
"ammo": {
"type": "Missile",
"count": 2
}
},
{
"ammo": {
"type": "Super",
"count": 2
}
},
{
"and": [
"Ice",
"Wave",
"Spazer"
]
},
{
"and": [
"canDodgeWhileShooting",
{
"or": [
{
"and": [
"Ice",
"Wave"
]
},
{
"and": [
"Ice",
"Spazer"
]
},
{
"and": [
"Wave",
"Spazer"
]
}
]
}
]
}
]
}
],
"exitCondition": {
"leaveWithGModeSetup": {}
},
"flashSuitChecked": true,
"blueSuitChecked": true,
"note": "Lure the second Multiviola to the left door. The first one will require more time and heat damage."
},
{
"id": 73,
"link": [
2,
2
],
"name": "G-Mode Setup - Get Hit By Multiviola, Pirate Tank",
"requires": [
"canDash",
{
"heatFrames": 720
},
{
"enemyDamage": {
"enemy": "Red Space Pirate (standing)",
"type": "contact",
"hits": 1
}
}
],
"exitCondition": {
"leaveWithGModeSetup": {}
},
"flashSuitChecked": true,
"blueSuitChecked": true,
"note": [
"Lure the second Multiviola to the left door. The first one will require more time and heat damage.",
"Jump over the first pirate and into the second, then jump over the again on the return."
]
},
{
"id": 74,
"link": [
2,
2
],
"name": "G-Mode Setup - Get Hit By Multiviola, Dodge Pirates",
"requires": [
"canDash",
{
"heatFrames": 765
},
"canTrickyDodgeEnemies"
],
"exitCondition": {
"leaveWithGModeSetup": {}
},
"flashSuitChecked": true,
"blueSuitChecked": true,
"note": [
"Lure the second Multiviola to the left door. The first one will require more time and heat damage.",
"Jump over the pirates and under the first Multiviola, then return fast enough to avoid pirate lasers and contact with the second Multiviola."
]
},
{
"id": 7,
"link": [
2,
2
],
"name": "Speed Block Moondance (Leave with Stored Fall Speed)",
"requires": [
{
"notable": "Speed Block Moondance"
},
"h_heatProof",
"h_getBlueSpeedMaxRunway",
"h_CrystalFlash",
"canTrickyJump",
"canTurnaroundAimCancel",
"canTemporaryBlue",
"canMoondance",
"canSpeedball",
{
"or": [
"canCount",
"Grapple"
]
}
],
"exitCondition": {
"leaveWithStoredFallSpeed": {
"fallSpeedInTiles": 1
}
},
"flashSuitChecked": true,
"blueSuitChecked": true,
"note": [
"Use SpeedBooster to construct a structure for Moondancing that has 1 chest height block and 1 head height block to the right of it and no other Speed blocks.",
"Crystal Flash below the lower block, exactly pixel aligned with its right side, to standup and then begin Moondancing.",
"After Samus sinks through the bottom tile, it is possible to use Grapple to return to a crouch and wiggle right and then Turn-Around Aim Cancel to escape to the right.",
"Without Grapple, count to 174 Moonfalls and delicately Moonfall so as to remain crouched and then wiggle to the right.",
"Finally, use SpeedBooster if needed to break the remaining Speed blocks and reach the door."
],
"devNote": [
"FIXME: R-Mode can be used instead of a Crystal Flash but that depends on having more Reserve Energy than Regular Energy.",
"With a different Speed block structure (more difficult to set up), it is possible to avoid needing to count, without Grapple."
]
},
{
"id": 8,
"link": [
2,
2
],
"name": "Speed Block Moondance (Leave with More Stored Fall Speed)",
"requires": [
{
"notable": "Speed Block Moondance"
},
"h_heatProof",
"h_getBlueSpeedMaxRunway",
"h_CrystalFlash",
"canTrickyJump",
"canTurnaroundAimCancel",
"canTemporaryBlue",
"canExtendedMoondance",
"canSpeedball"
],
"exitCondition": {
"leaveWithStoredFallSpeed": {
"fallSpeedInTiles": 2
}
},
"flashSuitChecked": true,
"blueSuitChecked": true,
"note": [
"Use SpeedBooster to construct a structure for Moondancing that has 1 chest height block and 1 head height block to the right of it and no other Speed blocks.",
"Crystal Flash below the lower block, exactly pixel aligned with its right side, to standup and then begin Moondancing.",
"After Samus sinks through the floor tiles, use Grapple to return to a standing position and count an additional 145 moonfalls.",
"Then use Grapple to return to a crouch and wiggle right and Turn-Around Aim Cancel to escape to the right.",
"Finally, use SpeedBooster if needed to break the remaining Speed blocks and reach the door."
],
"devNote": "FIXME: R-Mode can be used instead of a Crystal Flash but that depends on having more Reserve Energy than Regular Energy."
},
{
"id": 96,
"link": [
2,
2
],
"name": "Multiviola Pirate Farm",
"requires": [
"h_heatProof",
{
"resetRoom": {
"nodes": [
2
]
}
},
{
"or": [
{
"and": [
"canDash",
{
"cycleFrames": 1200
},
{
"or": [
"Plasma",
{
"and": [
"Wave",
{
"cycleFrames": 120
}
]
},
{
"and": [
"Spazer",
{
"cycleFrames": 300
}
]
},
{
"and": [
"canPseudoScrew",
{
"cycleFrames": 220
}
]
}
]
}
]
},
{
"and": [
{
"haveBlueSuit": {}
},
{
"cycleFrames": 1620
}
]
}
]
}
],
"resetsObstacles": [
"A"
],
"farmCycleDrops": [
{
"enemy": "Multiviola",
"count": 4
},
{
"enemy": "Red Space Pirate (standing)",
"count": 3
}
],
"flashSuitChecked": true,
"blueSuitChecked": true
},
{
"id": 97,
"link": [
2,
2
],
"name": "Multiviola Pirate Blue Speed Farm",
"requires": [
"h_heatProof",
{
"resetRoom": {
"nodes": [
2
]
}
},
{
"cycleFrames": 60
},
{
"simpleCycleFrames": 560
},
"h_speedDash",
"h_getBlueSpeedMaxRunway"
],
"resetsObstacles": [
"A"
],
"farmCycleDrops": [
{
"enemy": "Multiviola",
"count": 1
},
{
"enemy": "Red Space Pirate (standing)",
"count": 4
}
],
"flashSuitChecked": true,
"blueSuitChecked": true,
"note": "Drops do not linger long enough to kill every single Pirate."
},
{
"id": 98,
"link": [
2,
2
],
"name": "Cacatac Farm",
"requires": [
"h_heatProof",
"h_speedDash",
"h_getBlueSpeedMaxRunway",
{
"resetRoom": {
"nodes": [
2
]
}
},
{
"cycleFrames": 350
},
{
"simpleCycleFrames": 800
},
{
"or": [
"Plasma",
{
"and": [
"Wave",
{
"cycleFrames": 30
}
]
},
{
"and": [
"Spazer",
{
"cycleFrames": 30
}
]
},
{
"and": [
"Grapple",
{
"cycleFrames": 45
}
]
},
{
"cycleFrames": 120
}
]
}
],
"clearsObstacles": [
"A"
],
"farmCycleDrops": [
{
"enemy": "Cacatac",
"count": 2
}
],
"flashSuitChecked": true,
"blueSuitChecked": true,
"devNote": "Some frames added to account for spike RNG."
},
{
"id": 99,
"link": [
2,
3
],
"name": "Base",
"requires": [
"h_getBlueSpeedMaxRunway",
{
"simpleHeatFrames": 300
},
{
"heatFrames": 90
},
{
"or": [
"h_speedDash",
{
"and": [
"h_speedButSlow",
{
"simpleHeatFrames": 325
}
]
}
]
},
{
"or": [
"Wave",
{
"heatFrames": 30
}
]
}
],
"clearsObstacles": [
"A"
],
"flashSuitChecked": true,
"blueSuitChecked": true
},
{
"id": 116,
"link": [
2,
3
],
"name": "R-Mode Spark Interrupt",
"entranceCondition": {
"comeInWithRMode": {}
},
"requires": [
{
"or": [
{
"and": [
"h_heatedCrystalFlashForReserveEnergy",
{
"simpleHeatFrames": 300
},
{
"heatFrames": 90
},
{
"or": [
"h_speedDash",
{
"and": [
"h_speedButSlow",
{
"simpleHeatFrames": 325
}
]
}
]
}
]
},
{
"and": [
"h_heatProof",
"h_RModeCanRefillReserves",
{
"resourceMissingAtMost": [
{
"type": "Missile",
"count": 0
}
]
},
{
"partialRefill": {
"type": "ReserveEnergy",
"limit": 20
}
}
]
}
]
},
"h_shinechargeMaxRunway",
"h_heatTriggerRModeSparkInterrupt"
],
"clearsObstacles": [
"A"
],
"flashSuitChecked": true,
"blueSuitChecked": true,
"note": [
"Run through Pirates and Multiviolas to farm. Then run through to the end and shinecharge at the speed blocks.",
"Use heat damage to interrupt."
]
},
{
"id": 100,
"link": [
2,
4
],
"name": "Base",
"requires": [
"h_getBlueSpeedMaxRunway",
{
"simpleHeatFrames": 300
},
{
"heatFrames": 80
},
{
"or": [
"h_speedDash",
{
"and": [
"h_speedButSlow",
{
"simpleHeatFrames": 380
}
]
}
]
},
{
"or": [
"Wave",
{
"heatFrames": 20
}
]
}
],
"clearsObstacles": [
"A"
],
"flashSuitChecked": true,
"blueSuitChecked": true,
"devNote": [
"FIXME: it can be possible to get through tankless without Wave, with enough arm pumping, or a cross-room runway."
]
},
{
"id": 112,
"link": [
2,
4
],
"name": "Use Flash Suit (From Left of Bridge)",
"requires": [
"canDash",
"canTrickyJump",
{
"heatFrames": 605
},
{
"useFlashSuit": {}
},
{
"or": [
{
"and": [
"h_heatProof",
{
"shinespark": {
"frames": 114,
"excessFrames": 15
}
}
]
},
{
"shinespark": {
"frames": 114,
"excessFrames": 5
}
}
]
},
{
"heatFrames": 105
}
],
"flashSuitChecked": true,
"blueSuitChecked": true,
"note": "Press against the leftmost Speed block before using a flash suit to shinespark."
},
{
"id": 113,
"link": [
2,
4
],
"name": "Use Flash Suit (From Right of Bridge)",
"requires": [
"canTrickyJump",
{
"heatFrames": 855
},
{
"or": [
{
"and": [
"canLateralMidAirMorph",
"canTrickyDodgeEnemies",
{
"heatFrames": 120
}
]
},
{
"enemyKill": {
"enemies": [
[
"Red Space Pirate (standing)"
],
[
"Red Space Pirate (standing)"
]
],
"explicitWeapons": [
"Missile",
"Super",
"ScrewAttack"
]
}
},
"h_PlasmaHitbox"
]
},
{
"or": [
"h_useSpringBall",
{
"and": [
"h_bombThings",
{
"heatFrames": 120
}
]
}
]
},
{
"useFlashSuit": {}
},
{
"or": [
{
"and": [
"h_heatProof",
{
"shinespark": {
"frames": 55,
"excessFrames": 16
}
}
]
},
{
"shinespark": {
"frames": 55,
"excessFrames": 5
}
}
]
},
{
"heatFrames": 105
}
],
"flashSuitChecked": true,
"blueSuitChecked": true,
"note": [
"Use Morph (and either Spring Ball, Bombs, or Power Bombs) to navigate the space above the first set of Speed blocks.",
"Either kill or carefully jump over the Pirates; their hitbox is much smaller when they are not looking around.",
"Then use a flash suit to shinespark through the second set of Speed blocks."
],
"devNote": [
"This strat is only useful with heat protection; otherwise it would be better to spark from left of the bridge."
]
},
{
"id": 75,
"link": [
2,
4
],
"name": "G-Mode Setup - Get Hit By Multiviola, Complex Manipulation",
"requires": [
"canTrickyGMode",
"h_heatProof",
"canBePatient",
"canCameraManip",
"h_getBlueSpeedMaxRunway"
],
"exitCondition": {
"leaveWithGModeSetup": {}
},
"unlocksDoors": [
{
"types": [
"ammo"
],
"requires": []
}
],
"flashSuitChecked": true,
"blueSuitChecked": true,
"note": [
"Use a complex lure to get the right-most Multiviola (which is initially moving to the left) to the bottom right door.",
"Break a specific set of the speed blocks and let the Multiviola bounce off of them before breaking the rest.",
"There are multiple ways to get the Multiviola to the right door, all of which require breaking the speed blocks to the left of the crumble bridge and some to them to the right.",
"Break the speed blocks in one of the following ways:",
"1. The first 2 columns. 2. The first 8 columns.",
"3. The entire first chunk (10 columns). 4. The first chunk and all but the last column of the second (leaving an isolated block).",
"5. The first two chunks and all but the last column of the third (leaving an isolated stack of two blocks).",
"Then let the Multiviola bounce several times until it is in a consistent pattern before breaking the rest.",
"Note that option number 3 puts the Multiviola into an odd pattern where it has two distinct alternating cycles; wait for it to hit the right of the right stalactite, then the wall, then break the remaining blocks."
],
"devNote": [
"It appears that there is no way to get the multiviola to get to one of the upper doors on the shaft;",
"There are two known cycles to get it to start going up, but both get stuck in the same location.",
"The first three Multiviolas aren't able to make it to the right shaft, regardless of how the door and speed blocks are manipulated.",
"The fourth was tested by removing a single column of speed blocks at a time and clearing the rest before and after it gets to its cycle.",
"The bottom door is rarely hit, but opening it during the cycle was not always tested thoroughly.",
"It doesn't appear to be possible to lure it higher, but other things to try include:",
"breaking speed blocks less than a column at a time, breaking some of the blocks then some more (not all of the remaining), or precisely timing the breaking of the crumble blocks.",
"FIXME: This could probably be done with a blue suit."
]
},
{
"id": 9,
"link": [
2,
6
],
"name": "Base",
"requires": [
"h_getBlueSpeedMaxRunway",
{
"simpleHeatFrames": 300
},
{
"heatFrames": 80
},
{
"or": [
"h_speedDash",
{
"and": [
"h_speedButSlow",
{
"simpleHeatFrames": 330
}
]
}
]
}
],
"clearsObstacles": [
"A"
],
"flashSuitChecked": true,
"blueSuitChecked": true
},
{
"id": 77,
"link": [
2,
8
],
"name": "G-Mode with Blue Speed",
"entranceCondition": {
"comeInWithGMode": {
"mode": "any",
"morphed": false
}
},
"requires": [
"h_getBlueSpeedMaxRunway",
{
"or": [
"canSpeedball",
{
"and": [
"h_blueJump",
"canInsaneJump"
]
},
"h_hasBeamUpgrade",
{
"enemyKill": {
"enemies": [
[
"Red Space Pirate (standing)"
]
],
"explicitWeapons": [
"Missile",
"Super",
"ScrewAttack"
]
}
},
{
"enemyDamage": {
"enemy": "Red Space Pirate (standing)",
"type": "contact",
"hits": 1
}
}
]
},
{
"heatFrames": 0
}
],
"flashSuitChecked": true,
"blueSuitChecked": true,
"note": [
"Run through the speed blocks then carefully cross the crumble bridge, as it will mostly be air.",
"Alternatively, a speedball will prevent PLMs from overloading and Samus can roll over the bridge.",
"Kill the pirate after the bridge before it places its invisible lasers, preventing Samus from getting through damageless.",
"Samus can simply run to the right and fall through the bridge to safety below the pirate and kill it from below.",
"It is also possible to perform one precise jump to cross most of the bridge and kill the pirate while blue."
],
"devNote": "It is possible to shinecharge before the bridge and spark vertically above it, then move the camera to kill the pirate with speed echoes, but this isn't really easier."
},
{
"id": 131,
"link": [
2,
8
],
"name": "G-Mode Blue Suit",
"entranceCondition": {
"comeInWithGMode": {
"mode": "any",
"morphed": false
}
},
"requires": [
{
"haveBlueSuit": {}
},
"canInsaneJump"
],
"flashSuitChecked": true,
"blueSuitChecked": true,
"note": [
"Jump over as many Speed blocks as possible, to minimize PLMs overloaded.",
"Walk part way across the crumble bridge, then jump across the last part,",
"to avoid falling through onto the spikes as the crumble blocks finish overloading PLMs."
]
},
{
"id": 78,
"link": [
2,
8
],
"name": "G-Mode with Morph",
"entranceCondition": {
"comeInWithGMode": {
"mode": "any",
"morphed": false
}
},
"requires": [
"canDash",
{
"or": [
"canTrickyDodgeEnemies",
"h_usePowerBomb",
"ScrewAttack",
"h_hasBeamUpgrade",
{
"ammo": {
"type": "Missile",
"count": 2
}
},
{
"ammo": {
"type": "Super",
"count": 2
}
},
{
"enemyDamage": {
"enemy": "Red Space Pirate (standing)",
"type": "contact",
"hits": 1
}
}
]
},
{
"or": [
"canTrickyJump",
{
"enemyDamage": {
"enemy": "Multiviola",
"type": "contact",
"hits": 1
}
}
]
},
"Morph",
{
"or": [
"h_usePowerBomb",
{
"and": [
{
"or": [
"h_useSpringBall",
"h_useMorphBombs"
]
},
{
"or": [
"canLateralMidAirMorph",
"h_hasBeamUpgrade",
{
"enemyKill": {
"enemies": [
[
"Red Space Pirate (standing)"
]
],
"explicitWeapons": [
"Missile",
"Super",
"ScrewAttack"
]
}
},
{
"enemyDamage": {
"enemy": "Red Space Pirate (standing)",
"type": "contact",
"hits": 1
}
}
]
}
]
}
]
},
{
"heatFrames": 0
}
],
"flashSuitChecked": true,
"blueSuitChecked": true,
"note": [
"Carefully dodge or kill the enemies in the first half of the room.",
"With Morph, go over the first set of Speed Blocks, then kill the first Red Pirate or air ball over it.",
"It is also possible to kill or jump over the second pirate, but be careful to prevent it from shooting invisible lasers."
]
},
{
"id": 79,
"link": [
2,
8
],
"name": "G-Mode Morph",
"entranceCondition": {
"comeInWithGMode": {
"mode": "any",
"morphed": true
}
},
"requires": [
"canDash",
"canTrickyDodgeEnemies",
{
"or": [
{
"ammo": {
"type": "PowerBomb",
"count": 6
}
},
{
"and": [
"h_artificialMorphMovement",
{
"or": [
"canInsaneJump",
"h_artificialMorphPowerBomb"
]
},
{
"or": [
"h_artificialMorphPowerBomb",
"h_hasBeamUpgrade",
{
"enemyKill": {
"enemies": [
[
"Red Space Pirate (standing)"
]
],
"explicitWeapons": [
"Missile",
"Super",
"ScrewAttack"
]
}
},
{
"enemyDamage": {
"enemy": "Red Space Pirate (standing)",
"type": "contact",
"hits": 1
}
}
]
}
]
}
]
},
{
"heatFrames": 0
}
],
"flashSuitChecked": true,
"blueSuitChecked": true,
"note": [
"While artificially morphed, carefully dodge or kill the enemies in the first half of the room.",
"Go over the first set of Speed Blocks, then kill the first Red Pirate with a Power Bomb or after unmorphing.",
"It is possible to kill or jump over the second pirate, but be careful to prevent it from shooting invisible lasers.",
"Without any Power Bombs, this requires precise movement with Spring Ball or very precise movement with just Bombs."
],
"devNote": "It is possible to jump over the left bridge pirate, but it is incredibly precise and not expected."
},
{
"id": 132,
"link": [
2,
9
],
"name": "Base",
"requires": [
"h_getBlueSpeedMaxRunway",
{
"simpleHeatFrames": 330
},
{
"or": [
"h_speedDash",
{
"and": [
"h_speedButSlow",
{
"simpleHeatFrames": 250
}
]
}
]
}
],
"flashSuitChecked": true,
"blueSuitChecked": true
},
{
"id": 133,
"link": [
2,
9
],
"name": "Blue Suit",
"requires": [
{
"haveBlueSuit": {}
},
"canCrumbleJump",
"canInsaneJump",
{
"heatFrames": 1120
}
],
"flashSuitChecked": true,
"blueSuitChecked": true
},
{
"id": 10,
"link": [
3,
2
],
"name": "Reverse Spark",
"entranceCondition": {
"comeInShinecharged": {},
"comesThroughToilet": "any"
},
"requires": [
{
"shineChargeFrames": 35
},
{
"notable": "Reverse Spark"
},
"canShinechargeMovement",
"canHorizontalShinespark",
{
"or": [
{
"shinespark": {
"frames": 87,
"excessFrames": 10
}
},
{
"and": [
"h_heatProof",
"canControlShinesparkEnd",
{
"shinespark": {
"frames": 87,
"excessFrames": 44
}
}
]
}
]
},
{
"heatFrames": 675
},
{
"or": [
"h_speedDash",
{
"and": [
"h_speedButSlow",
{
"heatFrames": 270
}
]
}
]
},
"h_getBlueSpeedMaxRunway",
{
"or": [
"canSpeedball",
{
"heatFrames": 15
}
]
}
],
"clearsObstacles": [
"A"
],
"flashSuitChecked": true,
"blueSuitChecked": true,
"note": [
"Spark left through the speed blocks, then run to the right and back to get speed to go through the rest.",
"If performing the spark with low energy, there is a risk of ending the spark above the spikes or in front of the Pirate;",
"to be safe, assuming Samus has heat protection and begins sparking about 3 tiles from the Speed blocks, start with between 72 and 87 energy or at least 105 energy;",
"with a buffered crumble jump to the right, up to 93 energy can work."
],
"devNote": [
"FIXME: This should be split into 3->9 and 9->2 strats."
]
},
{
"id": 53,
"link": [
3,
2
],
"name": "Reverse Spark With Pause Abuse",
"entranceCondition": {
"comeInShinecharged": {},
"comesThroughToilet": "any"
},
"requires": [
{
"shineChargeFrames": 35
},
{
"notable": "Reverse Spark With Pause Abuse"
},
"canShinechargeMovementTricky",
"canTrickyJump",
"canControlShinesparkEnd",
"canPauseAbuse",
{
"resourceAvailable": [
{
"type": "RegularEnergy",
"count": 93
}
]
},
{
"shinespark": {
"frames": 0,
"excessFrames": 0
}
},
{
"resourceConsumed": [
{
"type": "ReserveEnergy",
"count": 61
}
]
},
"h_speedDash",
"h_getBlueSpeedMaxRunway",
{
"or": [
"canPreciseReserveRefill",
{
"resourceConsumed": [
{
"type": "ReserveEnergy",
"count": 15
}
]
}
]
},
{
"resourceAtMost": [
{
"type": "RegularEnergy",
"count": 1
}
]
},
{
"heatFrames": 0
}
],
"clearsObstacles": [
"A"
],
"flashSuitChecked": true,
"blueSuitChecked": true,
"note": [
"Enter the room with between 93 and 102 energy and quickly mid-air spark to the left through the Speed blocks.",
"After the shinespark ends, run left and press pause before reaching zero energy, tanking the Pirate hit while at zero energy.",
"Refill some energy (at least 11), and continue running to the left, using i-frames to pass through the next Pirate.",
"Continue to pause abuse several more times.",
"Arm pumping may be used but is not required and has little benefit;",
"in any case, arm pumping should not be used until beginning to run through the Speed blocks, otherwise Samus will not obtain blue speed in time and will bonk into them."
],
"devNote": [
"The zero shinespark requirement is to satisfy the tests, by marking that the shinecharge is used;",
"the actual shinespark energy usage is accounted for in the resourceConsumed.",
"This could possibly be rewritten to express the energy usage in the normal way.",
"We don't include a `h_ShinesparksCostEnergy` requirement here, because even if shinesparks don't cost energy, it is still possible to use heat damage to make the shinespark stop in the correct place.",
"FIXME: the regular energy required could be reduced in that case.",
"FIXME: This should be split into 3->9 and 9->2 strats.",
"FIXME: A h_speedButSlow variant could be added."
]
},
{
"id": 68,
"link": [
3,
2
],
"name": "Cross Room Jump Into Speedball (HiJump)",
"entranceCondition": {
"comeInWithPlatformBelow": {
"minHeight": 9,
"maxHeight": 10,
"maxLeftPosition": 0,
"minRightPosition": 22
},
"comesThroughToilet": "any"
},
"requires": [
"HiJump",
{
"getBlueSpeed": {
"usedTiles": 18,
"openEnd": 1
}
},
"canTrickyJump",
"canSpeedball",
{
"heatFrames": 505
}
],
"flashSuitChecked": true,
"blueSuitChecked": true,
"devNote": [
"This strat is applicable only with Crocomire's Room and Indiana Jones Room."
]
},
{
"id": 69,
"link": [
3,
2
],
"name": "Cross Room Jump Into Speedball (Tricky Dash Jump)",
"entranceCondition": {
"comeInWithPlatformBelow": {
"minHeight": 10,
"maxHeight": 10,
"maxLeftPosition": 0,
"minRightPosition": 41.5
},
"comesThroughToilet": "any"
},
"requires": [
"h_getBlueSpeedMaxRunway",
"canTrickyDashJump",
"canSpeedball",
{
"heatFrames": 392
}
],
"flashSuitChecked": true,
"blueSuitChecked": true,
"note": [
"In the room below, gain a precise amount of speed (extra run speed $6.0 or $6.1) then jump and aim down.",
"After the transition, perform a speedball to cross the room.",
"With a precisely timed unmorph and a buffered shot to open the door, it is possible to just barely make it through with no tanks.",
"After unmorphing, walk instead of running, to avoid bonking the door.",
"Coming from Crocomire's Room below, it works to use the full available runway length."
],
"devNote": [
"This strat is applicable only with Crocomire's Room."
]
},
{
"id": 12,
"link": [
3,
3
],
"name": "Shinespark",
"entranceCondition": {
"comeInWithSpark": {},
"comesThroughToilet": "any"
},
"requires": [
{
"shinespark": {
"frames": 6,
"excessFrames": 6
}
},
{
"heatFrames": 120
}
],
"flashSuitChecked": true,
"blueSuitChecked": true,
"devNote": "This strat is not useful in-room, but can satisfy a strat in the room before with an exit shinespark."
},
{
"id": 13,
"link": [
3,
3
],
"name": "Crystal Flash",
"requires": [
"h_heatedCrystalFlash"
],
"flashSuitChecked": true,
"blueSuitChecked": true
},
{
"id": 54,
"link": [
3,
4
],
"name": "Carry Shinecharge",
"entranceCondition": {
"comeInShinecharged": {},
"comesThroughToilet": "any"
},
"requires": [
{
"shineChargeFrames": 70
},
"canShinechargeMovementComplex",
{
"heatFrames": 70
}
],
"exitCondition": {
"leaveShinecharged": {}
},
"unlocksDoors": [
{
"types": [
"super"
],
"requires": []
},
{
"types": [
"missiles",
"powerbomb"
],
"requires": [
"never"
]
}
],
"flashSuitChecked": true,
"blueSuitChecked": true
},
{
"id": 55,
"link": [
3,
4
],
"name": "Come In Shinecharged, Leave With Spark",
"entranceCondition": {
"comeInShinecharged": {},
"comesThroughToilet": "any"
},
"requires": [
{
"shineChargeFrames": 40
},
"canShinechargeMovementComplex",
{
"heatFrames": 70
},
{
"shinespark": {
"frames": 8,
"excessFrames": 0
}
}
],
"exitCondition": {
"leaveWithSpark": {}
},
"unlocksDoors": [
{
"types": [
"super"
],
"requires": []
},
{
"types": [
"missiles",
"powerbomb"
],
"requires": [
"never"
]
}
],
"flashSuitChecked": true,
"blueSuitChecked": true
},
{
"id": 14,
"link": [
3,
6
],
"name": "Base",
"requires": [
{
  "heatFrames": 50
}
],
"flashSuitChecked": true,
"blueSuitChecked": true
},
{
"id": 15,
"link": [
3,
6
],
"name": "Shinespark",
"entranceCondition": {
"comeInWithSpark": {},
"comesThroughToilet": "no"
},
"requires": [
{
"shinespark": {
"frames": 6,
"excessFrames": 2
}
},
{
"heatFrames": 85
}
],
"flashSuitChecked": true,
"blueSuitChecked": true,
"devNote": "This strat is not useful in-room, but can satisfy a strat in the room before with an exit shinespark."
},
{
"id": 80,
"link": [
3,
7
],
"name": "G-Mode",
"entranceCondition": {
"comeInWithGMode": {
"mode": "any",
"morphed": false
},
"comesThroughToilet": "any"
},
"requires": [
{
"heatFrames": 0
}
],
"flashSuitChecked": true,
"blueSuitChecked": true
},
{
"id": 125,
"link": [
3,
10
],
"name": "Direct G-Mode",
"entranceCondition": {
"comeInWithGMode": {
"mode": "direct",
"morphed": false
},
"comesThroughToilet": "any"
},
"requires": [
{
"heatFrames": 0
}
],
"flashSuitChecked": true,
"blueSuitChecked": true
},
{
"id": 16,
"link": [
4,
2
],
"name": "Low Speed Reverse Speedball",
"entranceCondition": {
"comeInGettingBlueSpeed": {
"length": 1,
"openEnd": 0,
"minExtraRunSpeed": "$2.4"
}
},
"requires": [
{
"notable": "Reverse Speedball"
},
"canSpeedball",
{
"heatFrames": 570
}
],
"clearsObstacles": [
"A"
],
"flashSuitChecked": true,
"blueSuitChecked": true,
"note": [
"Break the speed blocks by jumping over the gap with blue speed and continuing through the room with a speedball.",
"If entering with low speed, unmorph after killing the last Pirate at the bottom of the sloped section,",
"in order to run and gain more speed for the rest of the room."
],
"devNote": [
"A run speed of $2.3 can also work but with greater difficulty.",
"FIXME: add strats for cross-room spring ball bounce (with momentum or temp blue) and Space Jump"
]
},
{
"id": 70,
"link": [
4,
2
],
"name": "Full Speed Reverse Speedball",
"entranceCondition": {
"comeInBlueSpinning": {
"minExtraRunSpeed": "$7.0",
"unusableTiles": 1
}
},
"requires": [
{
"notable": "Reverse Speedball"
},
"canTrickyJump",
"canSpeedball",
{
"heatFrames": 370
}
],
"flashSuitChecked": true,
"blueSuitChecked": true,
"note": [
"Gain max run speed using a runway in the neighboring room, and jump through the door.",
"With this amount of speed, it is possible to make it across without any tanks."
]
},
{
"id": 71,
"link": [
4,
2
],
"name": "High Speed Reverse Speedball",
"entranceCondition": {
"comeInBlueSpinning": {
"minExtraRunSpeed": "$6.5",
"unusableTiles": 1
}
},
"requires": [
{
"notable": "Reverse Speedball"
},
"canInsaneJump",
"canSpeedball",
{
"heatFrames": 392
}
],
"flashSuitChecked": true,
"blueSuitChecked": true,
"note": [
"Gain high run speed using a runway in the neighboring room, and jump through the door.",
"With a precisely timed unmorph and a buffered shot to open the door, it is possible to just barely make it through with no tanks.",
"After unmorphing, walk instead of running, to avoid bonking the door."
]
},
{
"id": 17,
"link": [
4,
2
],
"name": "Reverse Spark Near Speed Blocks",
"entranceCondition": {
"comeInShinecharged": {}
},
"requires": [
{
"shineChargeFrames": 85
},
{
"notable": "Reverse Spark"
},
"canShinechargeMovement",
"canHorizontalShinespark",
{
"or": [
{
"shinespark": {
"frames": 84,
"excessFrames": 10
}
},
{
"and": [
"h_heatProof",
"canControlShinesparkEnd",
{
"shinespark": {
"frames": 84,
"excessFrames": 45
}
}
]
}
]
},
{
"heatFrames": 715
},
{
"or": [
"h_speedDash",
{
"and": [
"h_speedButSlow",
{
"heatFrames": 270
}
]
}
]
},
"h_getBlueSpeedMaxRunway",
{
"or": [
"canSpeedball",
{
"heatFrames": 15
}
]
}
],
"clearsObstacles": [
"A"
],
"flashSuitChecked": true,
"blueSuitChecked": true,
"note": [
"Spark left through the speed blocks, then run to the right and back to get speed to go through the rest.",
"If performing the spark with low energy, there is a risk of ending the spark above the spikes or in front of the Pirate;",
"to be safe, assuming Samus has heat protection, begin the shinespark at the Speed blocks with between 68 and 84 energy, or at least 101 energy;",
"with a buffered crumble jump to the right, up to 89 energy can work."
]
},
{
"id": 18,
"link": [
4,
2
],
"name": "Reverse Spark Through Door",
"entranceCondition": {
"comeInWithSpark": {
"position": "bottom"
}
},
"requires": [
{
"notable": "Reverse Spark"
},
{
"or": [
{
"shinespark": {
"frames": 94,
"excessFrames": 10
}
},
{
"and": [
"h_heatProof",
"canControlShinesparkEnd",
{
"shinespark": {
"frames": 94,
"excessFrames": 42
}
}
]
}
]
},
"h_getBlueSpeedMaxRunway",
{
"heatFrames": 650
},
{
"or": [
"h_speedDash",
{
"and": [
"h_speedButSlow",
{
"heatFrames": 270
}
]
}
]
}
],
"clearsObstacles": [
"A"
],
"flashSuitChecked": true,
"blueSuitChecked": true,
"note": [
"Spark left through the speed blocks, then run to the right and back to get speed to go through the rest.",
"If performing the spark with low energy, there is a risk of ending the spark above the spikes or in front of the Pirate;",
"to be safe, assuming Samus has heat protection, begin the shinespark at the door (in either this or the other room) with between 81 and 96 energy, or at least 113 energy;",
"with a buffered crumble jump to the right, up to 102 energy can work."
],
"devNote": [
"FIXME: This should be split into 4->9 and 9->2 strats."
]
},
{
"id": 56,
"link": [
4,
2
],
"name": "Reverse Spark With Pause Abuse",
"entranceCondition": {
"comeInWithSpark": {
"position": "bottom"
}
},
"requires": [
{
"notable": "Reverse Spark With Pause Abuse"
},
"canShinechargeMovementTricky",
"canTrickyJump",
"canControlShinesparkEnd",
"canPauseAbuse",
{
"resourceAvailable": [
{
"type": "RegularEnergy",
"count": 94
}
]
},
{
"shinespark": {
"frames": 0,
"excessFrames": 0
}
},
{
"resourceConsumed": [
{
"type": "ReserveEnergy",
"count": 61
}
]
},
"h_speedDash",
"h_getBlueSpeedMaxRunway",
{
"or": [
"canPreciseReserveRefill",
{
"resourceConsumed": [
{
"type": "ReserveEnergy",
"count": 15
}
]
}
]
},
{
"resourceAtMost": [
{
"type": "RegularEnergy",
"count": 1
}
]
},
{
"heatFrames": 0
}
],
"clearsObstacles": [
"A"
],
"flashSuitChecked": true,
"blueSuitChecked": true,
"note": [
"Start a shinespark on the other side of the door with between 94 and 103 energy.",
"After the shinespark ends, run left and press pause before reaching zero energy, tanking the Pirate hit while at zero energy.",
"Refill some energy (at least 11), and continue running to the left, using i-frames to pass through the next Pirate.",
"Continue to pause abuse several more times.",
"Arm pumping may be used but is not required and has little benefit;",
"in any case, arm pumping should not be used until beginning to run through the Speed blocks, otherwise Samus will not obtain blue speed in time and will bonk into them."
],
"devNote": [
"The zero shinespark requirement is to satisfy the tests, by marking that the shinecharge is used;",
"the actual shinespark energy usage is accounted for in the resourceConsumed.",
"This could possibly be rewritten to express the energy usage in the normal way.",
"We don't include a `h_ShinesparksCostEnergy` requirement here, because even if shinesparks don't cost energy, it is still possible to use heat damage to make the shinespark stop in the correct place.",
"FIXME: the regular energy required could be reduced in that case.",
"FIXME: This should be split into 4->9 and 9->2 strats.",
"FIXME: A h_speedButSlow variant could be added."
]
},
{
"id": 114,
"link": [
4,
2
],
"name": "Use Stored Spark",
"requires": [
{
"notable": "Reverse Spark"
},
"h_storedSpark",
{
"or": [
{
"shinespark": {
"frames": 94,
"excessFrames": 10
}
},
{
"and": [
"h_heatProof",
"canControlShinesparkEnd",
{
"shinespark": {
"frames": 84,
"excessFrames": 45
}
}
]
}
]
},
{
"or": [
{
"and": [
"h_getBlueSpeedMaxRunway",
{
"heatFrames": 650
},
{
"or": [
"h_speedDash",
{
"and": [
"h_speedButSlow",
{
"heatFrames": 270
}
]
}
]
}
]
},
{
"and": [
"h_useSpringBall",
"canTrickyDodgeEnemies",
{
"heatFrames": 1120
}
]
},
{
"and": [
"h_bombThings",
"canTrickyDodgeEnemies",
{
"heatFrames": 1140
}
]
}
]
}
],
"clearsObstacles": [
"A"
],
"flashSuitChecked": true,
"blueSuitChecked": true,
"note": [
"Use a stored spark (flash suit or blue suit) to spark left through the Speed blocks.",
"If Speed Booster is available, run to the right and back to get blue speed to go through the rest of the Speed blocks.",
"Otherwise use Morph with either Spring Ball, Bombs, or Power Bombs to navigate above them."
],
"detailNote": [
"If performing the spark with low energy, there is a risk of ending the spark above the spikes or in front of the Pirate;",
"to be safe, assuming Samus has heat protection, begin the shinespark at the door (in either this or the other room) with between 81 and 96 energy, or at least 113 energy;",
"with a buffered crumble jump to the right, up to 102 energy can work."
],
"devNote": [
"FIXME: This should be split into 4->9 and 9->2 strats."
]
},
{
"id": 19,
"link": [
4,
2
],
"name": "Grapple Teleport",
"entranceCondition": {
"comeInWithGrappleTeleport": {
"blockPositions": [
[
5,
3
],
[
7,
2
]
]
}
},
"requires": [
{
  "heatFrames": 50
}
],
"flashSuitChecked": true,
"blueSuitChecked": true
},
{
"id": 20,
"link": [
4,
2
],
"name": "Grapple Teleport Door Lock Skip",
"entranceCondition": {
"comeInWithGrappleTeleport": {
"blockPositions": [
[
3,
12
],
[
3,
13
]
]
}
},
"requires": [],
"bypassesDoorShell": "yes",
"flashSuitChecked": true,
"blueSuitChecked": true
},
{
"id": 21,
"link": [
4,
2
],
"name": "Carry Grapple Teleport (Top Position)",
"entranceCondition": {
"comeInWithGrappleTeleport": {
"blockPositions": [
[
3,
12
]
]
}
},
"requires": [],
"exitCondition": {
"leaveWithGrappleTeleport": {
"blockPositions": [
[
3,
12
]
]
}
},
"bypassesDoorShell": "yes",
"flashSuitChecked": true,
"blueSuitChecked": true
},
{
"id": 22,
"link": [
4,
2
],
"name": "Carry Grapple Teleport (Bottom Position)",
"entranceCondition": {
"comeInWithGrappleTeleport": {
"blockPositions": [
[
3,
13
]
]
}
},
"requires": [],
"exitCondition": {
"leaveWithGrappleTeleport": {
"blockPositions": [
[
3,
13
]
]
}
},
"bypassesDoorShell": "yes",
"flashSuitChecked": true,
"blueSuitChecked": true
},
{
"id": 23,
"link": [
4,
2
],
"name": "Grapple Teleport X-Ray Climb (1 Screen)",
"entranceCondition": {
"comeInWithGrappleTeleport": {
"blockPositions": [
[
2,
18
],
[
2,
19
],
[
2,
28
],
[
2,
29
]
]
}
},
"requires": [
"canXRayClimb",
{
"heatFrames": 1600
}
],
"bypassesDoorShell": "yes",
"flashSuitChecked": true,
"blueSuitChecked": true,
"note": [
"Exit the previous room with Samus in a standing pose (while grappled).",
"After teleporting, press right to release Grapple while staying standing (not being forced into a crouch).",
"Then X-ray climb 1 screen to get up to the door transition, without needing to open the door."
]
},
{
"id": 24,
"link": [
4,
2
],
"name": "Grapple Teleport X-Ray Climb (2 Screens)",
"entranceCondition": {
"comeInWithGrappleTeleport": {
"blockPositions": [
[
2,
34
]
]
}
},
"requires": [
"canLongXRayClimb",
{
"heatFrames": 2800
}
],
"bypassesDoorShell": "yes",
"flashSuitChecked": true,
"blueSuitChecked": true,
"note": [
"Exit the previous room with Samus in a standing pose (while grappled).",
"After teleporting, press right to release Grapple while staying standing (not being forced into a crouch).",
"Then X-ray climb 2 screens to get up to the door transition, without needing to open the door."
]
},
{
"id": 57,
"link": [
4,
3
],
"name": "Carry Shinecharge",
"entranceCondition": {
"comeInShinecharged": {}
},
"requires": [
{
"shineChargeFrames": 55
},
"canShinechargeMovementComplex",
{
"heatFrames": 55
}
],
"exitCondition": {
"leaveShinecharged": {}
},
"unlocksDoors": [
{
"types": [
"super"
],
"requires": []
},
{
"types": [
"missiles",
"powerbomb"
],
"requires": [
"never"
]
}
],
"flashSuitChecked": true,
"blueSuitChecked": true
},
{
"id": 25,
"link": [
4,
4
],
"name": "Leave with Runway",
"requires": [],
"exitCondition": {
"leaveWithRunway": {
"length": 2,
"openEnd": 1
}
},
"flashSuitChecked": true,
"blueSuitChecked": true
},
{
"id": 26,
"link": [
4,
4
],
"name": "Crystal Flash",
"requires": [
"h_heatedCrystalFlash"
],
"flashSuitChecked": true,
"blueSuitChecked": true
},
{
"id": 58,
"link": [
4,
5
],
"name": "Come In Shinecharging, Leave With Spark",
"entranceCondition": {
"comeInShinecharging": {
"length": 1,
"openEnd": 1
}
},
"requires": [
"canShinechargeMovementTricky",
"canInsaneJump",
"canBePatient",
{
"or": [
{
"enemyDamage": {
"enemy": "Cacatac",
"type": "contact",
"hits": 1
}
},
"Plasma",
{
"and": [
"Wave",
"Spazer"
]
}
]
},
{
"shineChargeFrames": 177
},
{
"shinespark": {
"frames": 10,
"excessFrames": 0
}
},
{
"heatFrames": 220
}
],
"exitCondition": {
"leaveWithSpark": {}
},
"unlocksDoors": [
{
"types": [
"super"
],
"requires": []
},
{
"types": [
"missiles",
"powerbomb"
],
"requires": [
"never"
]
}
],
"flashSuitChecked": true,
"blueSuitChecked": true,
"devNote": [
"The canBePatient requirement represents the possible need to retry in case bad RNG causes a Cac spike hit to mess up the strat."
]
},
{
"id": 27,
"link": [
4,
6
],
"name": "Base",
"requires": [
{
"heatFrames": 50
}
],
"flashSuitChecked": true,
"blueSuitChecked": true
},
{
"id": 81,
"link": [
4,
7
],
"name": "G-Mode",
"entranceCondition": {
"comeInWithGMode": {
"mode": "any",
"morphed": false
}
},
"requires": [
{
  "heatFrames": 0
}
],
"flashSuitChecked": true,
"blueSuitChecked": true
},
{
"id": 126,
"link": [
4,
10
],
"name": "Direct G-Mode",
"entranceCondition": {
"comeInWithGMode": {
"mode": "direct",
"morphed": false
}
},
"requires": [
{
  "heatFrames": 0
}
],
"flashSuitChecked": true,
"blueSuitChecked": true
},
{
"id": 28,
"link": [
5,
1
],
"name": "Base",
"requires": [
{
"heatFrames": 145
},
{
"or": [
"canDash",
{
"heatFrames": 25
}
]
}
],
"unlocksDoors": [
{
"types": [
"missiles"
],
"requires": [
{
"heatFrames": 30
}
]
},
{
"types": [
"super"
],
"requires": []
},
{
"types": [
"powerbomb"
],
"requires": [
{
"heatFrames": 70
}
]
}
],
"flashSuitChecked": true,
"blueSuitChecked": true
},
{
"id": 29,
"link": [
5,
1
],
"name": "Leave with Runway",
"requires": [
"canDash",
{
"heatFrames": 130
}
],
"exitCondition": {
"leaveWithRunway": {
"length": 8,
"openEnd": 1,
"gentleUpTiles": 4
}
},
"unlocksDoors": [
{
"types": [
"missiles"
],
"requires": [
{
  "heatFrames": 50
}
]
},
{
"types": [
"super"
],
"requires": []
},
{
"types": [
"powerbomb"
],
"requires": [
{
"heatFrames": 70
}
]
}
],
"flashSuitChecked": true,
"blueSuitChecked": true
},
{
"id": 30,
"link": [
5,
1
],
"name": "Right Side Climb",
"requires": [
"canTrickyJump",
{
"or": [
{
"and": [
"HiJump",
{
"heatFrames": 120
}
]
},
{
"and": [
"canPreciseWallJump",
{
"heatFrames": 130
}
]
}
]
},
{
"or": [
"canDash",
{
"heatFrames": 15
}
]
}
],
"unlocksDoors": [
{
"types": [
"missiles"
],
"requires": [
{
"heatFrames": 30
}
]
},
{
"types": [
"super"
],
"requires": []
},
{
"types": [
"powerbomb"
],
"requires": [
{
"heatFrames": 70
}
]
}
],
"flashSuitChecked": true,
"blueSuitChecked": true
},
{
"id": 31,
"link": [
5,
1
],
"name": "Come In Shinecharging, Leave Shinecharged",
"entranceCondition": {
"comeInShinecharging": {
"length": 5,
"openEnd": 0
}
},
"requires": [
"canShinechargeMovementComplex",
{
"heatFrames": 160
},
{
"shineChargeFrames": 140
}
],
"exitCondition": {
"leaveShinecharged": {}
},
"unlocksDoors": [
{
"types": [
"super"
],
"requires": []
},
{
"types": [
"missiles",
"powerbomb"
],
"requires": [
"never"
]
}
],
"flashSuitChecked": true,
"blueSuitChecked": true
},
{
"id": 59,
"link": [
5,
1
],
"name": "Carry Shinecharge (HiJump)",
"entranceCondition": {
"comeInShinecharged": {}
},
"requires": [
{
"shineChargeFrames": 120
},
"HiJump",
"canShinechargeMovementComplex",
{
"heatFrames": 120
}
],
"exitCondition": {
"leaveShinecharged": {}
},
"unlocksDoors": [
{
"types": [
"super"
],
"requires": []
},
{
"types": [
"missiles",
"powerbomb"
],
"requires": [
"never"
]
}
],
"flashSuitChecked": true,
"blueSuitChecked": true
},
{
"id": 60,
"link": [
5,
1
],
"name": "Carry Shinecharge (Wall Jump)",
"entranceCondition": {
"comeInShinecharged": {}
},
"requires": [
{
"shineChargeFrames": 130
},
"canWallJump",
"canShinechargeMovementComplex",
{
"heatFrames": 130
}
],
"exitCondition": {
"leaveShinecharged": {}
},
"unlocksDoors": [
{
"types": [
"super"
],
"requires": []
},
{
"types": [
"missiles",
"powerbomb"
],
"requires": [
"never"
]
}
],
"flashSuitChecked": true,
"blueSuitChecked": true
},
{
"id": 61,
"link": [
5,
1
],
"name": "Carry Shinecharge (Ledge Grabs)",
"entranceCondition": {
"comeInShinecharged": {}
},
"requires": [
{
"shineChargeFrames": 145
},
"canShinechargeMovementComplex",
{
"heatFrames": 145
}
],
"exitCondition": {
"leaveShinecharged": {}
},
"unlocksDoors": [
{
"types": [
"super"
],
"requires": []
},
{
"types": [
"missiles",
"powerbomb"
],
"requires": [
"never"
]
}
],
"flashSuitChecked": true,
"blueSuitChecked": true
},
{
"id": 62,
"link": [
5,
1
],
"name": "Come In Shinecharged, Leave With Spark (HiJump, Bottom Position)",
"entranceCondition": {
"comeInShinecharged": {}
},
"requires": [
{
"shineChargeFrames": 65
},
"HiJump",
"canShinechargeMovementComplex",
{
"heatFrames": 100
},
{
"shinespark": {
"frames": 18,
"excessFrames": 0
}
}
],
"exitCondition": {
"leaveWithSpark": {
"position": "bottom"
}
},
"unlocksDoors": [
{
"types": [
"super"
],
"requires": []
},
{
"types": [
"missiles",
"powerbomb"
],
"requires": [
"never"
]
}
],
"flashSuitChecked": true,
"blueSuitChecked": true
},
{
"id": 63,
"link": [
5,
1
],
"name": "Come In Shinecharged, Leave With Spark (Wall Jump, Bottom Position)",
"entranceCondition": {
"comeInShinecharged": {}
},
"requires": [
{
"shineChargeFrames": 80
},
"canWallJump",
"canShinechargeMovementComplex",
{
"heatFrames": 120
},
{
"shinespark": {
"frames": 17,
"excessFrames": 0
}
}
],
"exitCondition": {
"leaveWithSpark": {
"position": "bottom"
}
},
"unlocksDoors": [
{
"types": [
"super"
],
"requires": []
},
{
"types": [
"missiles",
"powerbomb"
],
"requires": [
"never"
]
}
],
"flashSuitChecked": true,
"blueSuitChecked": true
},
{
"id": 64,
"link": [
5,
1
],
"name": "Come In Shinecharged, Leave With Spark (Ledge Grabs, Bottom Position)",
"entranceCondition": {
"comeInShinecharged": {}
},
"requires": [
{
"shineChargeFrames": 100
},
"canShinechargeMovementComplex",
{
"heatFrames": 135
},
{
"shinespark": {
"frames": 16,
"excessFrames": 0
}
}
],
"exitCondition": {
"leaveWithSpark": {
"position": "bottom"
}
},
"unlocksDoors": [
{
"types": [
"super"
],
"requires": []
},
{
"types": [
"missiles",
"powerbomb"
],
"requires": [
"never"
]
}
],
"flashSuitChecked": true,
"blueSuitChecked": true
},
{
"id": 32,
"link": [
5,
2
],
"name": "Reverse Spark",
"entranceCondition": {
"comeInShinecharging": {
"length": 5,
"openEnd": 1
}
},
"requires": [
{
"notable": "Reverse Spark"
},
"canShinechargeMovementTricky",
"canTrickyJump",
{
"or": [
{
"enemyDamage": {
"enemy": "Cacatac",
"type": "spike",
"hits": 1
}
},
"canBePatient"
]
},
{
"or": [
{
"shinespark": {
"frames": 88,
"excessFrames": 11
}
},
{
"and": [
"h_heatProof",
"canControlShinesparkEnd",
{
"shinespark": {
"frames": 88,
"excessFrames": 44
}
}
]
}
]
},
{
"heatFrames": 825
},
{
"or": [
"h_speedDash",
{
"and": [
"h_speedButSlow",
{
"heatFrames": 270
}
]
}
]
},
"h_getBlueSpeedMaxRunway",
{
"or": [
"canSpeedball",
{
"heatFrames": 15
}
]
}
],
"clearsObstacles": [
"A"
],
"flashSuitChecked": true,
"blueSuitChecked": true,
"note": [
"Either jump over a Cacatac or tank a spike hit.",
"Perform a mid-air spark through the speed blocks.",
"Then run to the right and back to get speed to go through the rest.",
"If performing the spark with low energy, there is a risk of ending the spark above the spikes or in front of the Pirate;",
"to be safe, assuming Samus has heat protection, begin the shinespark with between 73 and 88 energy, or at least 106 energy;",
"with a buffered crumble jump to the right, up to 94 energy can work."
],
"devNote": [
"The canBePatient represents retrying until RNG works out to be able to jump over one of the Cacatacs without taking a hit.",
"There is a possibility of getting a lucky drop from one of the two Pirates;",
"but since it is low probability, we don't model it.",
"The speedball exit is technically not a valid way to leave normally (e.g. in case the next room is heated and Samus needs to jump);",
"but if necessary, it is possible to unmorph near the transition.",
"FIXME: This should be split into 5->9 and 9->2 strats."
]
},
{
"id": 65,
"link": [
5,
2
],
"name": "Reverse Spark With Pause Abuse",
"entranceCondition": {
"comeInShinecharging": {
"length": 5,
"openEnd": 1
}
},
"requires": [
{
"notable": "Reverse Spark With Pause Abuse"
},
"canShinechargeMovementTricky",
"canTrickyJump",
"canControlShinesparkEnd",
"canPauseAbuse",
{
"resourceAvailable": [
{
"type": "RegularEnergy",
"count": 99
}
]
},
{
"shinespark": {
"frames": 0,
"excessFrames": 0
}
},
{
"resourceConsumed": [
{
"type": "ReserveEnergy",
"count": 80
}
]
},
"h_speedDash",
"h_getBlueSpeedMaxRunway",
{
"or": [
{
"resourceConsumed": [
{
"type": "ReserveEnergy",
"count": 20
}
]
},
{
"and": [
{
"resourceMissingAtMost": [
{
"type": "Super",
"count": 0
}
]
},
{
"or": [
{
"ammo": {
"type": "Missile",
"count": 1
}
},
"Grapple",
"Plasma",
{
"and": [
"Wave",
"Spazer"
]
}
]
}
]
}
]
},
{
"or": [
"canPreciseReserveRefill",
{
"resourceConsumed": [
{
"type": "ReserveEnergy",
"count": 15
}
]
}
]
},
{
"resourceAtMost": [
{
"type": "RegularEnergy",
"count": 1
}
]
},
{
  "heatFrames": 0
}
],
"clearsObstacles": [
"A"
],
"flashSuitChecked": true,
"blueSuitChecked": true,
"note": [
"Either jump over a Cacatac, tank a spike hit, or farm it if possible.",
"While preparing to spark left through the speed blocks, press pause so that the pause hits during the shinespark wind-up",
"Using reserves, try to refill to exactly 84 energy, the minimum amount needed to reliably break through the Speed blocks (assuming no heat protection).",
"Hold jump and left while unpausing, to buffer activating the horizontal shinespark.",
"After the shinespark ends, run left and press pause before reaching zero energy, tanking the Pirate hit while at zero energy.",
"Refill to between about 11 and 13 energy, and continue running to the left, using i-frames to pass through the next Pirate.",
"Continue to pause abuse 4 more times, trying to refill to between 11 and 13 energy each time except for the last.",
"Arm pumping may be used but is not required and has little benefit;",
"in any case, arm pumping should not be used until beginning to run through the Speed blocks, otherwise Samus will not obtain blue speed in time and will bonk into them."
],
"devNote": [
"The zero shinespark requirement is to satisfy the tests, by marking that the shinecharge is used;",
"the actual shinespark energy usage is accounted for in the resourceConsumed.",
"This could possibly be rewritten to express the energy usage in the normal way.",
"We don't include a `h_ShinesparksCostEnergy` requirement here, because even if shinesparks don't cost energy, it is still possible to use heat damage to make the shinespark stop in the correct place.",
"FIXME: the regular energy required could be reduced in that case.",
"FIXME: This should be split into 5->9 and 9->2 strats.",
"FIXME: A h_speedButSlow variant could be added."
]
},
{
"id": 33,
"link": [
5,
2
],
"name": "Grapple Teleport",
"entranceCondition": {
"comeInWithGrappleTeleport": {
"blockPositions": [
[
5,
3
],
[
7,
2
]
]
}
},
"requires": [
{
"heatFrames": 50
}
],
"flashSuitChecked": true,
"blueSuitChecked": true
},
{
"id": 34,
"link": [
5,
2
],
"name": "Grapple Teleport Door Lock Skip",
"entranceCondition": {
"comeInWithGrappleTeleport": {
"blockPositions": [
[
3,
12
],
[
3,
13
]
]
}
},
"requires": [],
"bypassesDoorShell": "yes",
"flashSuitChecked": true,
"blueSuitChecked": true
},
{
"id": 35,
"link": [
5,
2
],
"name": "Carry Grapple Teleport (Top Position)",
"entranceCondition": {
"comeInWithGrappleTeleport": {
"blockPositions": [
[
3,
12
]
]
}
},
"requires": [],
"exitCondition": {
"leaveWithGrappleTeleport": {
"blockPositions": [
[
3,
12
]
]
}
},
"bypassesDoorShell": "yes",
"flashSuitChecked": true,
"blueSuitChecked": true
},
{
"id": 36,
"link": [
5,
2
],
"name": "Carry Grapple Teleport (Bottom Position)",
"entranceCondition": {
"comeInWithGrappleTeleport": {
"blockPositions": [
[
3,
13
]
]
}
},
"requires": [],
"exitCondition": {
"leaveWithGrappleTeleport": {
"blockPositions": [
[
3,
13
]
]
}
},
"bypassesDoorShell": "yes",
"flashSuitChecked": true,
"blueSuitChecked": true
},
{
"id": 37,
"link": [
5,
2
],
"name": "Grapple Teleport X-Ray Climb (1 Screen)",
"entranceCondition": {
"comeInWithGrappleTeleport": {
"blockPositions": [
[
2,
18
],
[
2,
19
],
[
2,
28
],
[
2,
29
]
]
}
},
"requires": [
"canXRayClimb",
{
"heatFrames": 1600
}
],
"bypassesDoorShell": "yes",
"flashSuitChecked": true,
"blueSuitChecked": true,
"note": [
"Exit the previous room with Samus in a standing pose (while grappled).",
"After teleporting, press right to release Grapple while staying standing (not being forced into a crouch).",
"Then X-ray climb 1 screen to get up to the door transition, without needing to open the door."
]
},
{
"id": 38,
"link": [
5,
2
],
"name": "Grapple Teleport X-Ray Climb (2 Screens)",
"entranceCondition": {
"comeInWithGrappleTeleport": {
"blockPositions": [
[
2,
34
]
]
}
},
"requires": [
"canLongXRayClimb",
{
"heatFrames": 2800
}
],
"bypassesDoorShell": "yes",
"flashSuitChecked": true,
"blueSuitChecked": true,
"note": [
"Exit the previous room with Samus in a standing pose (while grappled).",
"After teleporting, press right to release Grapple while staying standing (not being forced into a crouch).",
"Then X-ray climb to get up to the door transition, without needing to open the door."
]
},
{
"id": 93,
"link": [
5,
3
],
"name": "Extended Stored Moonfall Door Lock Skip",
"entranceCondition": {
"comeInWithStoredFallSpeed": {
"fallSpeedInTiles": 2
}
},
"requires": [
{
"heatFrames": 70
},
"canFreeFallClip"
],
"flashSuitChecked": true,
"blueSuitChecked": true,
"note": [
"Setup a moondance such that Samus will fall through 2 tiles.",
"Perform a moonfall near the edge of the ledge, then quickly aim down and turn around to the right.",
"Use caution to avoid being hit by a Cacatac spike."
],
"detailNote": [
"The horizontal position for performing the moonfall is lenient:",
"it does not need to be done at the very edge, just far enough left to avoid the Cac below."
]
},
{
"id": 66,
"link": [
5,
4
],
"name": "Come In Shinecharging, Leave With Spark",
"entranceCondition": {
"comeInShinecharging": {
"length": 5,
"openEnd": 1
}
},
"requires": [
"canShinechargeMovementTricky",
"canTrickyJump",
{
"or": [
{
"enemyDamage": {
"enemy": "Cacatac",
"type": "spike",
"hits": 1
}
},
"canBePatient"
]
},
{
"shinespark": {
"frames": 10,
"excessFrames": 0
}
},
{
"heatFrames": 210
}
],
"exitCondition": {
"leaveWithSpark": {}
},
"unlocksDoors": [
{
"types": [
"super"
],
"requires": []
},
{
"types": [
"missiles",
"powerbomb"
],
"requires": [
"never"
]
}
],
"flashSuitChecked": true,
"blueSuitChecked": true,
"devNote": [
"The canBePatient represents retrying until RNG works out to be able to jump over one of the Cacatacs without taking a hit."
]
},
{
"id": 39,
"link": [
5,
5
],
"name": "Leave with Runway",
"requires": [],
"exitCondition": {
"leaveWithRunway": {
"length": 6,
"openEnd": 1
}
},
"flashSuitChecked": true,
"blueSuitChecked": true
},
{
"id": 40,
"link": [
5,
5
],
"name": "Cacatac Farm",
"requires": [
"h_heatProof",
{
"or": [
{
"and": [
{
"resetRoom": {
"nodes": [
1
]
}
},
{
"cycleFrames": 450
}
]
},
{
"and": [
{
"resetRoom": {
"nodes": [
3
]
}
},
{
"cycleFrames": 300
}
]
},
{
"and": [
{
"resetRoom": {
"nodes": [
4
]
}
},
{
"cycleFrames": 360
}
]
},
{
"and": [
{
"resetRoom": {
"nodes": [
5
]
}
},
{
"cycleFrames": 200
}
]
}
]
},
{
"or": [
{
"and": [
"canDash",
{
"or": [
"Plasma",
{
"and": [
"Wave",
{
"cycleFrames": 30
}
]
},
{
"and": [
"Spazer",
{
"cycleFrames": 30
}
]
},
{
"and": [
"Grapple",
{
"cycleFrames": 45
}
]
},
{
"cycleFrames": 120
}
]
}
]
},
{
"and": [
{
"haveBlueSuit": {}
},
{
"cycleFrames": 40
}
]
}
]
}
],
"resetsObstacles": [
"A"
],
"farmCycleDrops": [
{
"enemy": "Cacatac",
"count": 2
}
],
"flashSuitChecked": true,
"blueSuitChecked": true,
"devNote": "Some frames added to account for spike RNG."
},
{
"id": 41,
"link": [
5,
5
],
"name": "Crystal Flash",
"requires": [
"h_heatedCrystalFlash"
],
"flashSuitChecked": true,
"blueSuitChecked": true
},
{
"id": 142,
"link": [
5,
5
],
"name": "Carry G-Mode Back through the Door",
"entranceCondition": {
"comeInWithGMode": {
"mode": "direct",
"morphed": false
}
},
"requires": [
"h_doorImmediatelyClosedFix"
],
"exitCondition": {
"leaveWithGMode": {
"morphed": false
}
},
"bypassesDoorShell": "free",
"flashSuitChecked": true,
"blueSuitChecked": true
},
{
"id": 143,
"link": [
5,
5
],
"name": "Carry G-Mode Morph Back through the Door",
"entranceCondition": {
"comeInWithGMode": {
"mode": "direct",
"morphed": true
}
},
"requires": [
"h_doorImmediatelyClosedFix"
],
"exitCondition": {
"leaveWithGMode": {
"morphed": true
}
},
"bypassesDoorShell": "free",
"flashSuitChecked": true,
"blueSuitChecked": true
},
{
"id": 42,
"link": [
5,
6
],
"name": "Tank or Dodge Cacatacs",
"requires": [
{
"heatFrames": 180
},
{
"or": [
"canInsaneJump",
{
"and": [
{
"enemyDamage": {
"enemy": "Cacatac",
"type": "spike",
"hits": 1
}
},
{
"heatFrames": 20
}
]
}
]
},
{
"or": [
"canDash",
{
"heatFrames": 20
}
]
}
],
"flashSuitChecked": true,
"blueSuitChecked": true,
"note": [
"Try to jump over the Cacatacs without taking damage.",
"With unlucky RNG, a spike hit may be unavoidable."
]
},
{
"id": 101,
"link": [
5,
6
],
"name": "Cross While Farming (1 Cacatac)",
"requires": [
"canDash",
{
"or": [
"canInsaneJump",
{
"and": [
{
"enemyDamage": {
"enemy": "Cacatac",
"type": "spike",
"hits": 1
}
},
{
"heatFrames": 20
}
]
},
{
"and": [
"canDodgeWhileShooting",
{
"heatFrames": 40
}
]
}
]
},
{
"or": [
{
"and": [
"Wave",
{
"heatFramesWithEnergyDrops": {
"frames": 85,
"drops": [
{
"enemy": "Cacatac",
"count": 1
}
]
}
}
]
},
{
"and": [
{
"ammo": {
"type": "Missile",
"count": 1
}
},
{
"heatFramesWithEnergyDrops": {
"frames": 90,
"drops": [
{
"enemy": "Cacatac",
"count": 1
}
]
}
}
]
},
{
"and": [
{
"resourceAvailable": [
{
"type": "Super",
"count": 1
}
]
},
{
"heatFrames": 90
}
]
},
{
"and": [
"Plasma",
{
"heatFramesWithEnergyDrops": {
"frames": 90,
"drops": [
{
"enemy": "Cacatac",
"count": 1
}
]
}
}
]
},
{
"and": [
"Spazer",
{
"heatFramesWithEnergyDrops": {
"frames": 95,
"drops": [
{
"enemy": "Cacatac",
"count": 1
}
]
}
}
]
},
{
"and": [
"Grapple",
{
"heatFramesWithEnergyDrops": {
"frames": 100,
"drops": [
{
"enemy": "Cacatac",
"count": 1
}
]
}
}
]
},
{
"and": [
"ScrewAttack",
{
"heatFramesWithEnergyDrops": {
"frames": 100,
"drops": [
{
"enemy": "Cacatac",
"count": 1
}
]
}
}
]
},
{
"heatFramesWithEnergyDrops": {
"frames": 135,
"drops": [
{
"enemy": "Cacatac",
"count": 1
}
]
}
}
]
},
{
"heatFrames": 95
}
],
"flashSuitChecked": true,
"blueSuitChecked": true,
"note": [
"Kill a Cacatac and collect its drop along the way.",
"There will be a risk of a spike hit unless the Cacatac is safely killed from above."
]
},
{
"id": 134,
"link": [
5,
6
],
"name": "Cross While Farming (1 Cacatac, Blue Suit)",
"requires": [
{
"haveBlueSuit": {}
},
{
"heatFramesWithEnergyDrops": {
"frames": 115,
"drops": [
{
"enemy": "Cacatac",
"count": 1
}
]
}
},
{
"heatFrames": 115
}
],
"flashSuitChecked": true,
"blueSuitChecked": true
},
{
"id": 102,
"link": [
5,
6
],
"name": "Cross While Farming (2 Cacatacs)",
"requires": [
"canDash",
{
"or": [
"canInsaneJump",
{
"and": [
{
"enemyDamage": {
"enemy": "Cacatac",
"type": "spike",
"hits": 1
}
},
{
"heatFrames": 20
}
]
},
{
"and": [
"canDodgeWhileShooting",
{
"heatFrames": 40
}
]
}
]
},
{
"or": [
{
"and": [
"Wave",
{
"or": [
"Spazer",
"Plasma"
]
},
{
"heatFramesWithEnergyDrops": {
"frames": 105,
"drops": [
{
"enemy": "Cacatac",
"count": 2
}
]
}
}
]
},
{
"and": [
"Plasma",
{
"heatFramesWithEnergyDrops": {
"frames": 115,
"drops": [
{
"enemy": "Cacatac",
"count": 2
}
]
}
}
]
},
{
"and": [
"canUseGrapple",
{
"heatFramesWithEnergyDrops": {
"frames": 125,
"drops": [
{
"enemy": "Cacatac",
"count": 2
}
]
}
}
]
},
{
"and": [
"Wave",
{
"heatFramesWithEnergyDrops": {
"frames": 135,
"drops": [
{
"enemy": "Cacatac",
"count": 2
}
]
}
}
]
},
{
"and": [
{
"ammo": {
"type": "Missile",
"count": 2
}
},
{
"heatFramesWithEnergyDrops": {
"frames": 135,
"drops": [
{
"enemy": "Cacatac",
"count": 2
}
]
}
}
]
},
{
"and": [
"Spazer",
{
"heatFramesWithEnergyDrops": {
"frames": 145,
"drops": [
{
"enemy": "Cacatac",
"count": 2
}
]
}
}
]
},
{
"and": [
"ScrewAttack",
{
"heatFramesWithEnergyDrops": {
"frames": 175,
"drops": [
{
"enemy": "Cacatac",
"count": 2
}
]
}
}
]
},
{
"heatFramesWithEnergyDrops": {
"frames": 205,
"drops": [
{
"enemy": "Cacatac",
"count": 2
}
]
}
}
]
},
{
"heatFrames": 95
}
],
"flashSuitChecked": true,
"blueSuitChecked": true,
"note": [
"Kill both Cacatacs and collect their drops along the way.",
"There will be a risk of a spike hit unless the first Cacatac is safely killed from above."
]
},
{
"id": 135,
"link": [
5,
6
],
"name": "Cross While Farming (2 Cacatacs, Blue Suit)",
"requires": [
{
"haveBlueSuit": {}
},
{
"heatFramesWithEnergyDrops": {
"frames": 160,
"drops": [
{
"enemy": "Cacatac",
"count": 2
}
]
}
},
{
"heatFrames": 140
}
],
"flashSuitChecked": true,
"blueSuitChecked": true
},
{
"id": 103,
"link": [
5,
6
],
"name": "Cross While Farming (2 Cacatacs, Power Bomb)",
"requires": [
"canDash",
"h_usePowerBomb",
{
"heatFramesWithEnergyDrops": {
"frames": 180,
"drops": [
{
"enemy": "Cacatac",
"count": 2
}
]
}
},
{
"heatFrames": 95
}
],
"flashSuitChecked": true,
"blueSuitChecked": true,
"note": [
"Use a Power Bomb to safely kill both Cacatacs, and collect their drops along the way."
]
},
{
"id": 82,
"link": [
5,
7
],
"name": "G-Mode",
"entranceCondition": {
"comeInWithGMode": {
"mode": "any",
"morphed": false
}
},
"requires": [
{
  "heatFrames": 0
}
],
"flashSuitChecked": true,
"blueSuitChecked": true,
"note": "Jump over the Cacatacs. Their projectiles remain inside of them and their hitbox is a bit smaller than it appears."
},
{
"id": 127,
"link": [
5,
10
],
"name": "Direct G-Mode",
"entranceCondition": {
"comeInWithGMode": {
"mode": "direct",
"morphed": false
}
},
"requires": [
{
"heatFrames": 0
}
],
"flashSuitChecked": true,
"blueSuitChecked": true,
"note": "Jump over the Cacatacs. Their projectiles remain inside of them and their hitbox is a bit smaller than it appears."
},
{
"id": 43,
"link": [
6,
2
],
"name": "Base",
"requires": [
{
"obstaclesCleared": [
"A"
]
},
"h_getBlueSpeedMaxRunway",
{
"heatFrames": 500
},
{
"or": [
"h_speedDash",
{
"and": [
"h_speedButSlow",
{
"heatFrames": 330
}
]
}
]
}
],
"flashSuitChecked": true,
"blueSuitChecked": true,
"devNote": "The blocks will already be broken, the blue speed is to kill the enemies."
},
{
"id": 44,
"link": [
6,
3
],
"name": "Base",
"requires": [
{
  "heatFrames": 50
}
],
"unlocksDoors": [
{
"types": [
"missiles"
],
"requires": [
{
"heatFrames": 50
}
]
},
{
"types": [
"super"
],
"requires": []
},
{
"types": [
"powerbomb"
],
"requires": [
{
"heatFrames": 70
}
]
}
],
"flashSuitChecked": true,
"blueSuitChecked": true
},
{
"id": 45,
"link": [
6,
3
],
"name": "Leave Shinecharged",
"requires": [
"canShinechargeMovementComplex",
{
"obstaclesCleared": [
"A"
]
},
"h_shinechargeMaxRunway",
{
"heatFrames": 330
},
{
"shineChargeFrames": 55
}
],
"exitCondition": {
"leaveShinecharged": {}
},
"unlocksDoors": [
{
"types": [
"missiles"
],
"requires": [
{
"heatFrames": 50
}
]
},
{
"types": [
"super"
],
"requires": []
},
{
"types": [
"powerbomb"
],
"requires": [
{
"heatFrames": 70
}
]
}
],
"flashSuitChecked": true,
"blueSuitChecked": true
},
{
"id": 46,
"link": [
6,
4
],
"name": "Base",
"requires": [
{
"heatFrames": 50
}
],
"unlocksDoors": [
{
"types": [
"missiles"
],
"requires": [
{
"heatFrames": 30
}
]
},
{
"types": [
"super"
],
"requires": []
},
{
"types": [
"powerbomb"
],
"requires": [
{
"heatFrames": 70
}
]
}
],
"flashSuitChecked": true,
"blueSuitChecked": true
},
{
"id": 47,
"link": [
6,
4
],
"name": "Leave Shinecharged",
"requires": [
{
"obstaclesCleared": [
"A"
]
},
{
"canShineCharge": {
"usedTiles": 37,
"gentleDownTiles": 2,
"openEnd": 2
}
},
"canShinechargeMovementComplex",
{
"heatFrames": 360
},
{
"shineChargeFrames": 100
}
],
"exitCondition": {
"leaveShinecharged": {}
},
"unlocksDoors": [
{
"types": [
"missiles"
],
"requires": [
{
"heatFrames": 50
}
]
},
{
"types": [
"super"
],
"requires": []
},
{
"types": [
"powerbomb"
],
"requires": [
{
"heatFrames": 70
}
]
}
],
"flashSuitChecked": true,
"blueSuitChecked": true,
"note": "Enabled by coming in from the left and breaking the speed blocks on the way, or coming in charged and opening the path to the left.",
"devNote": [
"FIXME: This should be changed to start at node 9."
]
},
{
"id": 107,
"link": [
6,
4
],
"name": "Leave Spinning",
"requires": [
{
"obstaclesCleared": [
"A"
]
},
"h_heatedRemoteRunway",
{
"heatFrames": 360
}
],
"exitCondition": {
"leaveSpinning": {
"remoteRunway": {
"length": 37,
"openEnd": 2,
"gentleDownTiles": 2
},
"minExtraRunSpeed": "$5.2",
"blue": "yes"
}
},
"unlocksDoors": [
{
"types": [
"missiles"
],
"requires": [
{
"heatFrames": 50
}
]
},
{
"types": [
"super"
],
"requires": []
},
{
"types": [
"powerbomb"
],
"requires": [
{
"heatFrames": 70
}
]
}
],
"flashSuitChecked": true,
"blueSuitChecked": true,
"devNote": [
"FIXME: This should be changed to start at node 9."
]
},
{
"id": 108,
"link": [
6,
4
],
"name": "Leave With Mockball",
"requires": [
{
"obstaclesCleared": [
"A"
]
},
"h_heatedRemoteRunway",
{
"heatFrames": 360
}
],
"exitCondition": {
"leaveWithMockball": {
"remoteRunway": {
"length": 37,
"openEnd": 2,
"gentleDownTiles": 2
},
"landingRunway": {
"length": 2,
"openEnd": 1
},
"minExtraRunSpeed": "$2.6"
}
},
"unlocksDoors": [
{
"types": [
"missiles"
],
"requires": [
{
"heatFrames": 50
}
]
},
{
"types": [
"super"
],
"requires": []
},
{
"types": [
"powerbomb"
],
"requires": [
{
"heatFrames": 70
}
]
}
],
"flashSuitChecked": true,
"blueSuitChecked": true,
"devNote": [
"FIXME: This should be changed to start at node 9."
]
},
{
"id": 109,
"link": [
6,
4
],
"name": "Leave With Spring Ball Bounce",
"requires": [
{
"obstaclesCleared": [
"A"
]
},
"h_heatedRemoteRunwaySpringBall",
{
"heatFrames": 360
}
],
"exitCondition": {
"leaveWithSpringBallBounce": {
"remoteRunway": {
"length": 37,
"openEnd": 2,
"gentleDownTiles": 2
},
"landingRunway": {
"length": 2,
"openEnd": 1
},
"minExtraRunSpeed": "$3.2",
"movementType": "uncontrolled"
}
},
"unlocksDoors": [
{
"types": [
"missiles"
],
"requires": [
{
"heatFrames": 50
}
]
},
{
"types": [
"super"
],
"requires": []
},
{
"types": [
"powerbomb"
],
"requires": [
{
"heatFrames": 70
}
]
}
],
"flashSuitChecked": true,
"blueSuitChecked": true,
"devNote": [
"FIXME: This should be changed to start at node 9."
]
},
{
"id": 110,
"link": [
6,
4
],
"name": "Leave Space Jumping",
"requires": [
{
"obstaclesCleared": [
"A"
]
},
"h_heatedRemoteRunwayPreciseSpaceJump",
{
"heatFrames": 360
}
],
"exitCondition": {
"leaveSpaceJumping": {
"remoteRunway": {
"length": 19,
"openEnd": 1
},
"minExtraRunSpeed": "$2.E"
}
},
"unlocksDoors": [
{
"types": [
"missiles"
],
"requires": [
{
"heatFrames": 50
}
]
},
{
"types": [
"super"
],
"requires": []
},
{
"types": [
"powerbomb"
],
"requires": [
{
"heatFrames": 70
}
]
}
],
"flashSuitChecked": true,
"blueSuitChecked": true,
"devNote": [
"FIXME: This should be changed to start at node 9."
]
},
{
"id": 111,
"link": [
6,
4
],
"name": "Leave With Temporary Blue",
"requires": [
{
"obstaclesCleared": [
"A"
]
},
"h_heatedRemoteRunway",
{
"getBlueSpeed": {
"usedTiles": 37,
"gentleDownTiles": 2,
"openEnd": 2
}
},
{
"heatFrames": 360
}
],
"exitCondition": {
"leaveWithTemporaryBlue": {}
},
"unlocksDoors": [
{
"types": [
"missiles"
],
"requires": [
{
"heatFrames": 50
}
]
},
{
"types": [
"super"
],
"requires": []
},
{
"types": [
"powerbomb"
],
"requires": [
{
"heatFrames": 70
}
]
}
],
"flashSuitChecked": true,
"blueSuitChecked": true,
"devNote": [
"FIXME: This should be changed to start at node 9."
]
},
{
"id": 48,
"link": [
6,
5
],
"name": "Tank or Dodge Cacatacs",
"requires": [
"canDash",
{
"or": [
"canInsaneJump",
{
"and": [
"canTrickyJump",
{
"enemyDamage": {
"enemy": "Cacatac",
"type": "spike",
"hits": 1
}
},
{
"heatFrames": 20
}
]
},
{
"and": [
{
"enemyDamage": {
"enemy": "Cacatac",
"type": "contact",
"hits": 1
}
},
{
"heatFrames": 20
}
]
}
]
},
{
"heatFrames": 170
}
],
"flashSuitChecked": true,
"blueSuitChecked": true,
"note": [
"Try to jump over the Cacatacs without taking damage.",
"With unlucky RNG, a spike hit may be unavoidable."
]
},
{
"id": 136,
"link": [
6,
5
],
"name": "Blue Suit",
"requires": [
{
"haveBlueSuit": {}
},
{
"heatFrames": 210
},
{
"or": [
"HiJump",
{
"and": [
"canWallJump",
{
"heatFrames": 10
}
]
},
{
"and": [
"canSpringBallJumpMidAir",
{
"heatFrames": 10
}
]
},
{
"and": [
"SpaceJump",
{
"heatFrames": 50
}
]
}
]
}
],
"flashSuitChecked": true,
"blueSuitChecked": true,
"note": [
"The two-tile floating platform will be destroyed by blue suit, so Samus cannot stand on it."
]
},
{
"id": 104,
"link": [
6,
5
],
"name": "Cross While Farming (1 Cacatac)",
"requires": [
"canDash",
{
"or": [
"canInsaneJump",
{
"and": [
{
"enemyDamage": {
"enemy": "Cacatac",
"type": "spike",
"hits": 1
}
},
{
"heatFrames": 20
}
]
},
{
"and": [
"canDodgeWhileShooting",
{
"heatFrames": 40
}
]
}
]
},
{
"or": [
{
"and": [
{
"ammo": {
"type": "Missile",
"count": 1
}
},
{
"heatFramesWithEnergyDrops": {
"frames": 90,
"drops": [
{
"enemy": "Cacatac",
"count": 1
}
]
}
}
]
},
{
"and": [
{
"resourceAvailable": [
{
"type": "Super",
"count": 1
}
]
},
{
"heatFrames": 90
}
]
},
{
"and": [
"Plasma",
{
"heatFramesWithEnergyDrops": {
"frames": 90,
"drops": [
{
"enemy": "Cacatac",
"count": 1
}
]
}
}
]
},
{
"and": [
"Grapple",
{
"heatFramesWithEnergyDrops": {
"frames": 105,
"drops": [
{
"enemy": "Cacatac",
"count": 1
}
]
}
}
]
},
{
"and": [
"ScrewAttack",
{
"heatFramesWithEnergyDrops": {
"frames": 105,
"drops": [
{
"enemy": "Cacatac",
"count": 1
}
]
}
}
]
},
{
"and": [
"Wave",
{
"heatFramesWithEnergyDrops": {
"frames": 105,
"drops": [
{
"enemy": "Cacatac",
"count": 1
}
]
}
}
]
},
{
"and": [
"Spazer",
{
"heatFramesWithEnergyDrops": {
"frames": 105,
"drops": [
{
"enemy": "Cacatac",
"count": 1
}
]
}
}
]
},
{
"heatFramesWithEnergyDrops": {
"frames": 120,
"drops": [
{
"enemy": "Cacatac",
"count": 1
}
]
}
}
]
},
{
"heatFrames": 60
}
],
"flashSuitChecked": true,
"blueSuitChecked": true,
"note": [
"Kill a Cacatac and collect its drop along the way.",
"There will be a risk of a spike hit unless the first Cacatac is safely killed from below."
]
},
{
"id": 137,
"link": [
6,
5
],
"name": "Cross While Farming (1 Cacatac, Blue Suit)",
"requires": [
{
"haveBlueSuit": {}
},
{
"or": [
"HiJump",
{
"and": [
"canWallJump",
{
"heatFrames": 10
}
]
},
{
"and": [
"canSpringBallJumpMidAir",
{
"heatFrames": 10
}
]
},
{
"and": [
"SpaceJump",
{
"heatFrames": 50
}
]
}
]
},
{
"heatFramesWithEnergyDrops": {
"frames": 160,
"drops": [
{
"enemy": "Cacatac",
"count": 1
}
]
}
},
{
"heatFrames": 70
}
],
"flashSuitChecked": true,
"blueSuitChecked": true
},
{
"id": 105,
"link": [
6,
5
],
"name": "Cross While Farming (2 Cacatacs)",
"requires": [
"canDash",
{
"or": [
"canInsaneJump",
{
"and": [
{
"enemyDamage": {
"enemy": "Cacatac",
"type": "spike",
"hits": 1
}
},
{
"heatFrames": 20
}
]
},
{
"and": [
"canDodgeWhileShooting",
{
"heatFrames": 40
}
]
}
]
},
{
"or": [
{
"and": [
"Plasma",
{
"heatFramesWithEnergyDrops": {
"frames": 115,
"drops": [
{
"enemy": "Cacatac",
"count": 2
}
]
}
}
]
},
{
"and": [
{
"ammo": {
"type": "Missile",
"count": 1
}
},
{
"heatFramesWithEnergyDrops": {
"frames": 135,
"drops": [
{
"enemy": "Cacatac",
"count": 2
}
]
}
}
]
},
{
"and": [
"Grapple",
{
"heatFramesWithEnergyDrops": {
"frames": 135,
"drops": [
{
"enemy": "Cacatac",
"count": 2
}
]
}
}
]
},
{
"and": [
"Wave",
{
"heatFramesWithEnergyDrops": {
"frames": 145,
"drops": [
{
"enemy": "Cacatac",
"count": 2
}
]
}
}
]
},
{
"and": [
"Spazer",
{
"heatFramesWithEnergyDrops": {
"frames": 145,
"drops": [
{
"enemy": "Cacatac",
"count": 2
}
]
}
}
]
},
{
"and": [
"ScrewAttack",
{
"heatFramesWithEnergyDrops": {
"frames": 165,
"drops": [
{
"enemy": "Cacatac",
"count": 2
}
]
}
}
]
},
{
"and": [
{
"heatFramesWithEnergyDrops": {
"frames": 195,
"drops": [
{
"enemy": "Cacatac",
"count": 2
}
]
}
},
{
"or": [
"canBeVeryPatient",
{
"enemyDamage": {
"enemy": "Cacatac",
"type": "spike",
"hits": 1
}
},
{
"heatFrames": 30
}
]
}
]
}
]
},
{
"heatFrames": 65
}
],
"flashSuitChecked": true,
"blueSuitChecked": true,
"note": [
"Kill both Cacatacs and collect their drops along the way.",
"There will be a risk of a spike hit unless the first Cacatac is safely killed from below."
]
},
{
"id": 106,
"link": [
6,
5
],
"name": "Cross While Farming (2 Cacatacs, Power Bomb)",
"requires": [
"canDash",
"h_usePowerBomb",
{
"heatFramesWithEnergyDrops": {
"frames": 170,
"drops": [
{
"enemy": "Cacatac",
"count": 2
}
]
}
},
{
"heatFrames": 65
}
],
"flashSuitChecked": true,
"blueSuitChecked": true,
"note": [
"Use a Power Bomb to safely kill both Cacatacs from below, and collect their drops along the way."
]
},
{
"id": 138,
"link": [
6,
5
],
"name": "Cross While Farming (2 Cacatacs, Blue Suit)",
"requires": [
{
"haveBlueSuit": {}
},
{
"or": [
"HiJump",
{
"and": [
"canWallJump",
{
"heatFrames": 10
}
]
},
{
"and": [
"canSpringBallJumpMidAir",
{
"heatFrames": 10
}
]
},
{
"and": [
"SpaceJump",
{
"heatFrames": 50
}
]
}
]
},
{
"heatFramesWithEnergyDrops": {
"frames": 200,
"drops": [
{
"enemy": "Cacatac",
"count": 2
}
]
}
},
{
"heatFrames": 120
}
],
"flashSuitChecked": true,
"blueSuitChecked": true
},
{
"id": 49,
"link": [
6,
5
],
"name": "Leave With Spark",
"requires": [
"h_heatProof",
{
"obstaclesCleared": [
"A"
]
},
"canShinechargeMovementTricky",
"h_shinechargeMaxRunway",
{
"shinespark": {
"frames": 12,
"excessFrames": 0
}
}
],
"exitCondition": {
"leaveWithSpark": {}
},
"unlocksDoors": [
{
"types": [
"ammo"
],
"requires": []
}
],
"flashSuitChecked": true,
"blueSuitChecked": true,
"note": [
"Move very quickly to bring a shinespark from the speedway up to the Save Room door.",
"Preclear the Cacatacs, and it may help to not run while platforming if HiJump is not available."
],
"devNote": [
"FIXME: This could be done without heat proof.",
"FIXME: This should be changed to start at node 9."
]
},
{
"id": 117,
"link": [
6,
9
],
"name": "Base",
"requires": [
{
"obstaclesCleared": [
"A"
]
},
{
"heatFrames": 150
},
{
"or": [
"h_speedDash",
{
"heatFrames": 20
}
]
}
],
"flashSuitChecked": true,
"blueSuitChecked": true
},
{
"id": 139,
"link": [
6,
9
],
"name": "Blue Suit",
"requires": [
{
"haveBlueSuit": {}
},
{
"heatFrames": 260
}
],
"clearsObstacles": [
"A"
],
"flashSuitChecked": true,
"blueSuitChecked": true
},
{
"id": 83,
"link": [
7,
1
],
"name": "G-Mode",
"requires": [
{
"or": [
{
"noBlueSuit": {}
},
"canWallJump",
"SpaceJump",
"HiJump",
"canSpringBallJumpMidAir"
]
},
"h_heatedGModeOpenDifferentDoor"
],
"flashSuitChecked": true,
"blueSuitChecked": true,
"note": "Jump over the Cacatacs. Their projectiles remain inside of them and their hitbox is a bit smaller than it appears."
},
{
"id": 84,
"link": [
7,
2
],
"name": "G-Mode, Simple Blind Movement",
"requires": [
{
"or": [
{
"and": [
"canTrickyJump",
"SpaceJump"
]
},
"h_speedJump",
{
"spikeHits": 1
}
]
},
"h_heatedGModeOffCameraDoor"
],
"exitCondition": {
"leaveNormally": {}
},
"unlocksDoors": [
{
"types": [
"missiles"
],
"requires": [
{
"heatFrames": 50
}
]
},
{
"types": [
"super"
],
"requires": []
},
{
"types": [
"powerbomb"
],
"requires": [
{
"heatFrames": 110
}
]
}
],
"flashSuitChecked": true,
"blueSuitChecked": true,
"note": [
"The crumble bridge will be air. Either tank a spike hit, carefully Space Jump over it, or with SpeedBooster, use the full runway to run over the pit.",
"Note that there is a slight incline just before the bridge, which can be used as an indicator for where to Space Jump."
],
"devNote": "Requires leaving the room, as Samus is off camera and shouldn't be expected to do more in-room."
},
{
"id": 94,
"link": [
7,
2
],
"name": "G-Mode, Heatproof, Fix Camera",
"requires": [
"canGMode",
"h_heatProof",
"canDash",
{
"or": [
"h_bombThings",
"h_useSpringBall"
]
},
{
"or": [
"h_usePowerBomb",
"h_hasBeamUpgrade",
"ScrewAttack",
{
"ammo": {
"type": "Missile",
"count": 3
}
},
{
"ammo": {
"type": "Super",
"count": 3
}
},
"canComplexGMode"
]
}
],
"flashSuitChecked": true,
"blueSuitChecked": true,
"note": [
"Exit G-mode before the crumble bridge, this is when the floor starts sloping up slightly.",
"Without a way to kill the pirates, touch the camera scroll block briefly before the bridge, then run over the bridge and through the pirates before fixing the camera, to not have to deal with the pirates.",
"Otherwise, it may be worth killing the pirates for some Energy to be able to tank a hit later.",
"Use a Bomb, Power Bomb, or Spring Ball to get over the Speed blocks. Then carefully avoid or kill the remaining enemies."
]
},
{
"id": 95,
"link": [
7,
2
],
"name": "G-Mode, Fix Camera, Speedy Exit",
"requires": [
"canComplexGMode",
"h_heatedGMode",
"h_getBlueSpeedMaxRunway",
{
"heatFrames": 375
}
],
"flashSuitChecked": true,
"blueSuitChecked": true,
"note": [
"Exit G-mode before the crumble bridge, this is when the floor starts sloping up slightly.",
"Run over the bridge and through the pirates without fixing the camera, to safely run through the pirates."
]
},
{
"id": 85,
"link": [
7,
3
],
"name": "G-Mode",
"requires": [
"h_heatedGModeOpenDifferentDoor"
],
"flashSuitChecked": true,
"blueSuitChecked": true
},
{
"id": 86,
"link": [
7,
4
],
"name": "G-Mode",
"requires": [
"h_heatedGModeOpenDifferentDoor"
],
"flashSuitChecked": true,
"blueSuitChecked": true
},
{
"id": 87,
"link": [
7,
5
],
"name": "G-Mode",
"requires": [
{
"or": [
{
"noBlueSuit": {}
},
"canWallJump",
"SpaceJump",
"HiJump",
"canSpringBallJumpMidAir"
]
},
"h_heatedGModeOpenDifferentDoor"
],
"flashSuitChecked": true,
"blueSuitChecked": true,
"note": "Jump over the Cacatacs. Their projectiles remain inside of them and their hitbox is a bit smaller than it appears."
},
{
"id": 88,
"link": [
8,
1
],
"name": "G-Mode, Blind Movement",
"requires": [
"canOffScreenMovement",
{
"or": [
"canWallJump",
"HiJump",
"canSpringBallJumpMidAir",
"SpaceJump"
]
},
"h_heatedGModeOffCameraDoor"
],
"exitCondition": {
"leaveNormally": {}
},
"unlocksDoors": [
{
"types": [
"missiles"
],
"requires": [
{
"heatFrames": 50
}
]
},
{
"types": [
"super"
],
"requires": []
},
{
"types": [
"powerbomb"
],
"requires": [
{
"heatFrames": 110
}
]
}
],
"flashSuitChecked": true,
"blueSuitChecked": true,
"note": [
"The speed block platform above the bottom door will not be usable, so Samus must blindly wall jump up the first ledge or use some assist.",
"There is some visibility on the left side of the screen, which is useful in determining which ledge she is on.",
"The Cacatacs will not be able to damage Samus off screen."
],
"devNote": [
"Requires leaving the room, as Samus is off camera and shouldn't be expected to do more in-room.",
"FIXME: It is possible to X-Ray climb from inside the speed blocks. Count shots to determine Samus' position."
]
},
{
"id": 89,
"link": [
8,
3
],
"name": "G-Mode, Simple Blind Movement",
"requires": [
"h_heatedGMode",
{
"or": [
{
"heatFrames": 160
},
{
"and": [
"h_useMorphBombs",
{
"heatFrames": 85
}
]
},
{
"and": [
"canUseGrapple",
{
"heatFrames": 50
}
]
}
]
}
],
"exitCondition": {
"leaveNormally": {}
},
"unlocksDoors": [
{
"types": [
"missiles"
],
"requires": [
{
"heatFrames": 50
}
]
},
{
"types": [
"super"
],
"requires": []
},
{
"types": [
"powerbomb"
],
"requires": [
{
"heatFrames": 110
}
]
}
],
"flashSuitChecked": true,
"blueSuitChecked": true,
"note": [
"Walk back and forth until it is obvious Samus is on the doorshell.",
"Use X-Ray, jump, and shoot down at the bottom of the jump, this may take a couple attempts.",
"For a faster exit, place a Bomb on the door, then quickly unmorph and use X-Ray.",
"With Grapple it is faster still; use X-Ray while crouched, then quickly use Grapple while angling down. "
],
"devNote": [
"Requires leaving the room, as Samus is off camera and shouldn't be expected to do more in-room.",
"It's possible to use a Bomb while still artificially morphed, but that only saves a few heat frames and is ignored."
]
},
{
"id": 90,
"link": [
8,
4
],
"name": "G-Mode, Simple Blind Movement",
"requires": [
"h_heatedGModeOffCameraDoor"
],
"exitCondition": {
"leaveNormally": {}
},
"unlocksDoors": [
{
"types": [
"missiles"
],
"requires": [
{
"heatFrames": 50
}
]
},
{
"types": [
"super"
],
"requires": []
},
{
"types": [
"powerbomb"
],
"requires": [
{
"heatFrames": 110
}
]
}
],
"flashSuitChecked": true,
"blueSuitChecked": true,
"devNote": "Requires leaving the room, as Samus is off camera and shouldn't be expected to do more in-room."
},
{
"id": 91,
"link": [
8,
5
],
"name": "G-Mode, Blind Movement",
"requires": [
"canOffScreenMovement",
{
"or": [
"canWallJump",
"HiJump",
"canSpringBallJumpMidAir",
"SpaceJump"
]
},
"h_heatedGModeOffCameraDoor"
],
"exitCondition": {
"leaveNormally": {}
},
"unlocksDoors": [
{
"types": [
"missiles"
],
"requires": [
{
"heatFrames": 50
}
]
},
{
"types": [
"super"
],
"requires": []
},
{
"types": [
"powerbomb"
],
"requires": [
{
"heatFrames": 110
}
]
}
],
"flashSuitChecked": true,
"blueSuitChecked": true,
"note": [
"The speed block platform above the bottom door will not be usable, so Samus must blindly wall jump up the first ledge or use some assist.",
"There is some visibility on the left side of the screen, which is useful in determining which ledge she is on.",
"The Cacatacs will not be able to damage Samus off screen."
],
"devNote": "Requires leaving the room, as Samus is off camera and shouldn't be expected to do more in-room."
},
{
"id": 92,
"link": [
8,
6
],
"name": "Exit G-Mode, Fix Camera",
"requires": [
"h_heatedGMode",
{
"heatFrames": 250
}
],
"flashSuitChecked": true,
"blueSuitChecked": true,
"note": [
"Exit G-Mode and jump back and forth to fix the camera. If Samus exits G-Mode while in the camera scroll block next to the speed blocks, the camera won't fix."
]
},
{
"id": 118,
"link": [
9,
2
],
"name": "Base",
"requires": [
{
"obstaclesCleared": [
"A"
]
},
"h_getBlueSpeedMaxRunway",
{
"heatFrames": 480
},
{
"or": [
"h_speedDash",
{
"and": [
"h_speedButSlow",
{
"simpleHeatFrames": 320
}
]
}
]
}
],
"flashSuitChecked": true,
"blueSuitChecked": true,
"note": "Run right and back to kill the pirates while blue."
},
{
"id": 140,
"link": [
9,
2
],
"name": "Blue Suit",
"requires": [
{
"haveBlueSuit": {}
},
"canCrumbleJump",
"canInsaneJump",
{
"heatFrames": 1120
}
],
"flashSuitChecked": true,
"blueSuitChecked": true
},
{
"id": 119,
"link": [
9,
2
],
"name": "Quick Pirate Kill",
"requires": [
"h_getBlueSpeedMaxRunway",
{
"or": [
"Plasma",
{
"ammo": {
"type": "Missile",
"count": 2
}
},
{
"ammo": {
"type": "Super",
"count": 2
}
},
{
"and": [
"Ice",
"Wave",
"Spazer"
]
},
{
"and": [
"Ice",
"Spazer",
{
"heatFrames": 30
}
]
},
{
"and": [
"Ice",
"Wave",
{
"heatFrames": 30
}
]
},
{
"and": [
"Wave",
"Spazer",
{
"heatFrames": 30
}
]
},
{
"and": [
"Wave",
{
"heatFrames": 50
}
]
}
]
},
{
"heatFrames": 350
},
{
"or": [
"h_speedDash",
{
"and": [
"h_speedButSlow",
{
"simpleHeatFrames": 260
}
]
}
]
}
],
"flashSuitChecked": true,
"blueSuitChecked": true,
"note": "Kill the pirates while running left and gaining blue speed."
},
{
"id": 120,
"link": [
9,
2
],
"name": "Pirate Pause Abuse",
"requires": [
"canPauseAbuse",
{
"resourceAtMost": [
{
"type": "RegularEnergy",
"count": 1
}
]
},
{
"resourceConsumed": [
{
"type": "ReserveEnergy",
"count": 1
}
]
},
"h_getBlueSpeedMaxRunway",
"h_speedDash",
{
"heatFrames": 335
}
],
"flashSuitChecked": true,
"blueSuitChecked": true,
"note": [
"Run left and press pause before reaching zero energy, tanking the Pirate hit while at zero energy.",
"Refill, and continue running to the left, using i-frames to pass through the next Pirate."
],
"devNote": [
"FIXME: A h_speedButSlow variant could be added."
]
},
{
"id": 121,
"link": [
9,
2
],
"name": "Speedless Traversal",
"requires": [
"canDash",
"canMidAirMorph",
"canTrickyJump",
{
"or": [
{
"enemyDamage": {
"enemy": "Red Space Pirate (standing)",
"type": "contact",
"hits": 1
}
},
"Plasma",
{
"ammo": {
"type": "Missile",
"count": 1
}
},
{
"ammo": {
"type": "Super",
"count": 1
}
},
{
"and": [
"Ice",
"Wave",
"Spazer"
]
},
{
"and": [
"Ice",
"Spazer",
{
"heatFrames": 30
}
]
},
{
"and": [
"Ice",
"Wave",
{
"heatFrames": 30
}
]
},
{
"and": [
"Wave",
"Spazer",
{
"heatFrames": 30
}
]
},
{
"and": [
{
"or": [
"Ice",
"Wave",
"Spazer",
"ScrewAttack"
]
},
{
"heatFrames": 50
}
]
},
{
"and": [
"canPseudoScrew",
{
"heatFrames": 85
}
]
},
{
"and": [
"canPauseAbuse",
{
"resourceAtMost": [
{
"type": "RegularEnergy",
"count": 1
}
]
},
{
"resourceConsumed": [
{
"type": "ReserveEnergy",
"count": 1
}
]
}
]
}
]
},
{
"or": [
"h_useSpringBall",
{
"and": [
"h_bombThings",
{
"heatFrames": 60
}
]
},
{
"and": [
"canNeutralDamageBoost",
{
"enemyDamage": {
"enemy": "Red Space Pirate (standing)",
"type": "laser",
"hits": 1
}
},
{
"heatFrames": 120
}
]
}
]
},
{
"or": [
"h_heatProof",
"canTrickyDodgeEnemies",
{
"enemyDamage": {
"enemy": "Multiviola",
"type": "contact",
"hits": 1
}
}
]
},
{
"or": [
"Plasma",
"ScrewAttack",
{
"ammo": {
"type": "Missile",
"count": 5
}
},
{
"ammo": {
"type": "Super",
"count": 5
}
},
{
"heatFrames": 150
}
]
},
{
"heatFrames": 970
}
],
"flashSuitChecked": true,
"blueSuitChecked": true,
"note": [
"Kill the first pirate, then jump over or kill the second. It is possible to jump straight into the first morph tunnel.",
"Without a way to kill the pirates, it is instead possible to tank or pause abuse a hit and then Samus will have i-frames when running through the second one.",
"Cross the speed blocks with Bombs, a Power Bomb, Spring Ball, or by tanking a pirate laser hit and boosting up.",
"The rest of the room can be tricky to cross damageless, particularly if Samus has no way to kill the enemies.",
"Carefully avoid the Multiviola in the middle of the sloped section by slowing down, and kill the last Multiviola to prevent it hitting Samus in the transition."
],
"devNote": "canTrickyJump is used to simplify the logic, as there is no feasible way to get to this node without SpeedBooster without this skill level."
},
{
"id": 122,
"link": [
9,
2
],
"name": "Speedless Heat Proof Traversal, Farm with Damage Boost",
"requires": [
"canDash",
"h_heatProof",
{
"or": [
"h_hasBeamUpgrade",
{
"ammo": {
"type": "Missile",
"count": 2
}
},
{
"ammo": {
"type": "Super",
"count": 2
}
},
"ScrewAttack"
]
},
{
"resourceAtMost": [
{
"type": "Energy",
"count": 29
}
]
},
"h_partialEnemyDamageReduction",
{
"or": [
"h_fullEnemyDamageReduction",
"canBeVeryLucky"
]
},
"canMidAirMorph",
"canNeutralDamageBoost"
],
"flashSuitChecked": true,
"blueSuitChecked": true,
"note": [
"Kill the two pirates while in health bomb range, to force Energy drops. It is possible to jump over the second pirate to then fight it on solid ground.",
"Samus needs a large Energy drop with 75% damage reduction, or both large Energy drops otherwise.",
"Cross the speed blocks by tanking a pirate laser hit and boosting up."
]
},
{
"id": 123,
"link": [
9,
6
],
"name": "Base",
"requires": [
"canDash",
{
"obstaclesCleared": [
"A"
]
},
{
"heatFrames": 120
},
{
"or": [
"h_speedDash",
{
"heatFrames": 30
}
]
}
],
"flashSuitChecked": true,
"blueSuitChecked": true,
"devNote": "FIXME: Could have separate strats with tighter heat frames for going down or right."
},
{
"id": 141,
"link": [
9,
6
],
"name": "Blue Suit",
"requires": [
{
"haveBlueSuit": {}
},
{
"heatFrames": 240
}
],
"clearsObstacles": [
"A"
],
"flashSuitChecked": true,
"blueSuitChecked": true
},
{
"id": 146,
"link": [
9,
9
],
"name": "Crystal Spark",
"requires": [
{
"obstaclesCleared": [
"A"
]
},
"h_shinechargeMaxRunway",
"h_heatedCrystalSpark"
],
"flashSuitChecked": true,
"blueSuitChecked": true
},
{
"id": 128,
"link": [
10,
2
],
"name": "Direct G-Mode, Heatproof, Fix Camera, R-Mode Spark Interrupt",
"requires": [
"canComplexGMode",
"h_heatProof",
{
"disableEquipment": "ETank"
},
"h_CrystalFlashForReserveEnergy",
{
"canShineCharge": {
"usedTiles": 28,
"gentleUpTiles": 2,
"openEnd": 0
}
},
{
"autoReserveTrigger": {}
},
"canRModeSparkInterrupt"
],
"flashSuitChecked": true,
"blueSuitChecked": true,
"note": [
"Stop before the crumble bridge, this is when the floor starts sloping up slightly. Activate X-Ray and hold until full width to exit G-Mode and remain in R-Mode.",
"Bring the first pirate on screen, then Crystal Flash to kill it. Back up against the speed barrier and run left over the crumble blocks and then through the remaining pirates.",
"Stop at the end, and leave the leftmost Multviola near the door, running right to trap it off-screen in that area. Use the other two Multviola - or the spikes - to damage down.",
"Run back to the door, shinecharge, and get hit by the Multiviola to interrupt."
]
},
{
"id": 129,
"link": [
10,
7
],
"name": "Base",
"requires": [
"canGMode"
],
"flashSuitChecked": true,
"blueSuitChecked": true
}
],
"notables": [
{
"id": 1,
"name": "Reverse Spark",
"note": "Spark left through the speed blocks, then run to the right and back to get speed to go through the rest."
},
{
"id": 2,
"name": "Speed Block Moondance",
"note": [
"Use SpeedBooster to construct a structure for Moondancing that has 2 top blocks intact, 2 middle blocks removed, and the bottom left block intact but the bottom right block removed.",
"Clear the other unused Speed blocks and enemies.",
"Crystal Flash inside the middle hole to standup and then begin Moondancing.",
"After Samus sinks through the bottom tile, it is possible to wiggle right and then Turn-Around Aim Cancel to escape to the right."
]
},
{
"id": 3,
"name": "Reverse Speedball",
"note": "Break the speed blocks by jumping over the gap with blue speed and continuing through the room with a speedball."
},
{
"id": 4,
"name": "Reverse Spark With Pause Abuse",
"note": [
"Spark left through the speed blocks with low energy, so that the spark stops before the first Pirate.",
"Then use a sequence of pause abuses with reserves to cross the room.",
"This can be done with a single Reserve Tank (no Energy Tanks), from any of the three doors on the right side of the room."
]
}
],
"nextStratId": 147,
"nextNotableId": 5,
"devNote": [
"FIXME: A moonfall using Multiviolas might be possible to bypass the door shell below."
]
}
