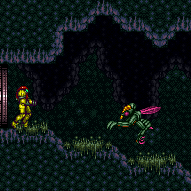
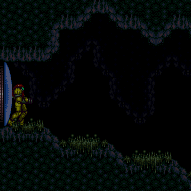
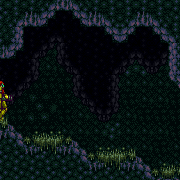
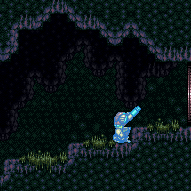
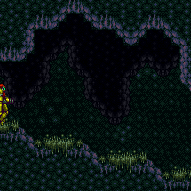
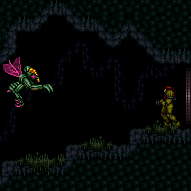
Crateria Kihunter Room
Room ID: 24
|
Exit condition: {
"leaveWithRunway": {
"length": 34,
"openEnd": 0,
"steepUpTiles": 5,
"steepDownTiles": 2
}
} |
|
Requires: {
"canShineCharge": {
"usedTiles": 19,
"steepUpTiles": 1,
"steepDownTiles": 3,
"openEnd": 0
}
}
{
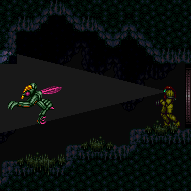
"enemyDamage": {
"enemy": "Kihunter (green)",
"type": "contact",
"hits": 1
}
}
"canSlopeSpark"
{
"shinespark": {
"frames": 8,
"excessFrames": 8
}
} |
|
Requires: {
"canShineCharge": {
"usedTiles": 33,
"steepUpTiles": 2,
"steepDownTiles": 5,
"openEnd": 0
}
}
{
"or": [
"h_CrystalSpark",
{
"and": [
"h_enemyDrops",
"canBePatient",
"h_CrystalSparkWithoutLenience"
]
}
]
}Dev note: No lenience, because Power Bombs can be farmed from the Scisers. |
From: 1
Left Door
To: 1
Left Door
Exit condition: {
"leaveWithGModeSetup": {}
} |
|
Requires: {
"enemyDamage": {
"enemy": "Kihunter (green)",
"type": "contact",
"hits": 1
}
} |
|


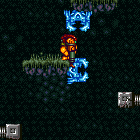
Farm two Scisers in the bottom section (manipulate camera to see where they are) and left Kihunter. Shinecharge and get interrupted by the right Kihunter. Entrance condition: {
"comeInWithRMode": {}
}Requires: {
"or": [
"canCameraManip",
{
"enemyDamage": {
"enemy": "Sciser",
"type": "contact",
"hits": 1
}
}
]
}
{
"or": [
"h_CrystalFlashForReserveEnergy",
{
"and": [
"h_RModeCanRefillReserves",
{
"resourceMissingAtMost": [
{
"type": "PowerBomb",
"count": 0
}
]
},
{
"partialRefill": {
"type": "ReserveEnergy",
"limit": 20
}
}
]
}
]
}
{
"canShineCharge": {
"usedTiles": 33,
"steepUpTiles": 2,
"steepDownTiles": 5,
"openEnd": 0
}
}
{
"autoReserveTrigger": {
"maxReserveEnergy": 95
}
}
"canRModeSparkInterrupt" |
|
|
|
|
|


Entrance condition: {
"comeInWithGrappleTeleport": {
"blockPositions": [
[
3,
12
],
[
3,
13
]
]
}
}Bypasses door shell: true |
From: 2
Right Door
To: 1
Left Door
Entrance condition: {
"comeInWithGrappleTeleport": {
"blockPositions": [
[
3,
12
]
]
}
}Exit condition: {
"leaveWithGrappleTeleport": {
"blockPositions": [
[
3,
12
]
]
}
}Bypasses door shell: true |
From: 2
Right Door
To: 1
Left Door
Entrance condition: {
"comeInWithGrappleTeleport": {
"blockPositions": [
[
3,
13
]
]
}
}Exit condition: {
"leaveWithGrappleTeleport": {
"blockPositions": [
[
3,
13
]
]
}
}Bypasses door shell: true |
From: 2
Right Door
To: 1
Left Door


Exit the previous room with Samus in a standing pose (while grappled). After teleporting, press right to release Grapple while staying standing (not being forced into a crouch). Then X-ray climb 1 screen to get up to the door transition, without needing to open the door. Entrance condition: {
"comeInWithGrappleTeleport": {
"blockPositions": [
[
2,
18
],
[
2,
19
],
[
2,
28
],
[
2,
29
]
]
}
}Requires: "canXRayClimb" Bypasses door shell: true |
From: 2
Right Door
To: 1
Left Door
Exit the previous room with Samus in a standing pose (while grappled). After teleporting, press right to release Grapple while staying standing (not being forced into a crouch). Then X-ray climb 2 screens to get up to the door transition, without needing to open the door. Entrance condition: {
"comeInWithGrappleTeleport": {
"blockPositions": [
[
2,
34
]
]
}
}Requires: "canLongXRayClimb" Bypasses door shell: true |
|

Farm two Scisers in the bottom section (manipulate camera to see where they are) and left Kihunter. Shinecharge and get interrupted by the right Kihunter. Entrance condition: {
"comeInWithRMode": {}
}Requires: {
"or": [
"canCameraManip",
{
"enemyDamage": {
"enemy": "Sciser",
"type": "contact",
"hits": 1
}
}
]
}
{
"or": [
"h_CrystalFlashForReserveEnergy",
{
"and": [
"h_RModeCanRefillReserves",
{
"resourceMissingAtMost": [
{
"type": "PowerBomb",
"count": 0
}
]
},
{
"partialRefill": {
"type": "ReserveEnergy",
"limit": 20
}
}
]
}
]
}
{
"canShineCharge": {
"usedTiles": 33,
"steepUpTiles": 2,
"steepDownTiles": 5,
"openEnd": 0
}
}
{
"autoReserveTrigger": {
"maxReserveEnergy": 95
}
}
"canRModeSparkInterrupt" |
|
Exit condition: {
"leaveWithRunway": {
"length": 4,
"openEnd": 1
}
} |
|

Requires: "canShinechargeMovement"
{
"canShineCharge": {
"usedTiles": 33,
"steepUpTiles": 2,
"steepDownTiles": 5,
"openEnd": 0
}
}
{
"shineChargeFrames": 115
}Exit condition: {
"leaveShinecharged": {}
} |
|
Exit condition: {
"leaveSpinning": {
"remoteRunway": {
"length": 32,
"openEnd": 1,
"gentleUpTiles": 2,
"steepDownTiles": 4
},
"minExtraRunSpeed": "$3.E"
}
} |
|


Exit condition: {
"leaveWithMockball": {
"remoteRunway": {
"length": 32,
"openEnd": 1,
"gentleUpTiles": 2,
"steepDownTiles": 4
},
"landingRunway": {
"length": 4,
"openEnd": 1
},
"minExtraRunSpeed": "$0.8"
}
} |
From: 2
Right Door
To: 2
Right Door
Exit condition: {
"leaveWithSpringBallBounce": {
"remoteRunway": {
"length": 30,
"openEnd": 1,
"gentleUpTiles": 2,
"steepDownTiles": 4
},
"landingRunway": {
"length": 1,
"openEnd": 1
},
"minExtraRunSpeed": "$1.9",
"movementType": "uncontrolled"
}
} |
|


Exit condition: {
"leaveSpaceJumping": {
"remoteRunway": {
"length": 25,
"openEnd": 1,
"gentleUpTiles": 2,
"steepDownTiles": 2
}
}
}Dev note: FIXME: A longer runway could be used if getting blue speed. |
|
Requires: {
"canShineCharge": {
"usedTiles": 33,
"steepUpTiles": 2,
"steepDownTiles": 5,
"openEnd": 0
}
}
"canChainTemporaryBlue"Exit condition: {
"leaveWithTemporaryBlue": {}
} |
|
Requires: {
"or": [
{
"and": [
{
"resetRoom": {
"nodes": [
1,
2
]
}
},
"canCameraManip"
]
},
{
"resetRoom": {
"nodes": [
3
]
}
}
]
}
{
"or": [
{
"and": [
"canDash",
{
"or": [
{
"and": [
"ScrewAttack",
{
"cycleFrames": 720
}
]
},
{
"and": [
"Plasma",
{
"cycleFrames": 770
}
]
},
{
"and": [
"canPseudoScrew",
{
"cycleFrames": 1000
}
]
},
{
"and": [
"canUseGrapple",
{
"cycleFrames": 1020
}
]
},
{
"and": [
"Wave",
{
"cycleFrames": 1050
}
]
},
{
"and": [
"Spazer",
{
"cycleFrames": 1080
}
]
},
{
"and": [
"Ice",
{
"cycleFrames": 1170
}
]
},
{
"and": [
"canDodgeWhileShooting",
{
"cycleFrames": 1440
}
]
}
]
}
]
},
{
"and": [
{
"haveBlueSuit": {}
},
{
"cycleFrames": 1010
}
]
}
]
}Farm cycle drops: 2 Sciser, 2 Kihunter (green) |
From: 2
Right Door
To: 2
Right Door
Exit condition: {
"leaveWithGModeSetup": {}
} |
|
Requires: {
"enemyDamage": {
"enemy": "Kihunter (green)",
"type": "contact",
"hits": 1
}
} |
|
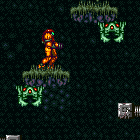
Jump and aim down to lower the camera to see where the crabs are. Alternatively use a Power Bomb to kill them or risk tanking a hit. Requires: {
"or": [
"canCameraManip",
"h_usePowerBomb",
{
"enemyDamage": {
"enemy": "Sciser",
"type": "contact",
"hits": 1
}
}
]
} |
|
Farm two Scisers in the bottom section and left Kihunter. Shinecharge and get interrupted by the right Kihunter. Entrance condition: {
"comeInWithRMode": {},
"comesThroughToilet": "no"
}Requires: {
"or": [
"h_CrystalFlashForReserveEnergy",
{
"and": [
"h_RModeCanRefillReserves",
{
"resourceMissingAtMost": [
{
"type": "PowerBomb",
"count": 0
}
]
},
{
"partialRefill": {
"type": "ReserveEnergy",
"limit": 20
}
}
]
}
]
}
{
"canShineCharge": {
"usedTiles": 33,
"steepUpTiles": 2,
"steepDownTiles": 5,
"openEnd": 0
}
}
{
"autoReserveTrigger": {
"maxReserveEnergy": 95
}
}
"canRModeSparkInterrupt" |
|
|
|

Requires: {
"canShineCharge": {
"usedTiles": 33,
"steepUpTiles": 2,
"steepDownTiles": 5,
"openEnd": 0
}
}
"canLongChainTemporaryBlue"
"canXRayTurnaround"Exit condition: {
"leaveWithTemporaryBlue": {
"direction": "any"
}
} |
|
Freeze the two Scisers to set up a moonfall between them, and aim down. Hold left to move to the right at the correct time, which will set up an automatic turn-around, allowing Samus to clip past the floating platform below, past the door shell, and through the transition. The amount of speed required is highly precise. Requires: {
"notable": "Ice Moonfall Door Lock Skip"
}
"canEnemyStuckMoonfall"
"canFreeFallClip"
"canTrickyUseFrozenEnemies"Bypasses door shell: true |
|
Enter on the right side of the doorway to reduce the amount of energy used. Entrance condition: {
"comeInWithSpark": {},
"comesThroughToilet": "any"
}Requires: {
"shinespark": {
"frames": 2,
"excessFrames": 2
}
}Dev note: This strat is not useful in-room, but can satisfy a strat in the room before with an exit shinespark. |
|
Requires: "h_CrystalFlash" |
From: 3
Bottom Door
To: 3
Bottom Door

Run from the ledge into the open doorway while hitting the frozen crab and the door transition simultaneously, just as the crab thaws and touches Samus during the transition. Note that this requires a precise freeze (2 pixel window), a small pixel starting window (approximately 2 pixel window), precise thaw timing, and a 50% success rate due to collision oscillation. The positioning of the crab is where its hitbox is one or two pixels away from the edge of the door frame, so that Samus can clip into the wall and stand as she touches the transition. Requires: "canWallIceClip"
"canDownwardGModeSetup"
{
"ammo": {
"type": "Super",
"count": 1
}
}Exit condition: {
"leaveWithGModeSetup": {}
} |
|
Shoot a Super at the wall, while the Sciser is directly above Samus. If Samus is on the right side of the door, it will require two Supers, one to knock it down to the platform above her, then another to drop it on her. Requires: {
"enemyDamage": {
"enemy": "Sciser",
"type": "contact",
"hits": 1
}
}
"h_ZebesIsAwake"
{
"ammo": {
"type": "Super",
"count": 2
}
}Dev note: This is just requiring 2 Supers, since the horizontal positioning of Samus is not modeled. |
{
"$schema": "../../../schema/m3-room.schema.json",
"id": 24,
"name": "Crateria Kihunter Room",
"area": "Crateria",
"subarea": "East",
"roomAddress": "0x7948C",
"roomEnvironments": [
{
"heated": false
}
],
"mapTileMask": [
[
1,
1,
1
],
[
0,
1,
0
],
[
0,
1,
0
]
],
"nodes": [
{
"id": 1,
"name": "Left Door",
"nodeType": "door",
"nodeSubType": "blue",
"nodeAddress": "0x0018a2a",
"doorOrientation": "left",
"doorEnvironments": [
{
"physics": "air"
}
],
"mapTileMask": [
[
2,
1,
1
],
[
0,
1,
0
],
[
0,
1,
0
]
]
},
{
"id": 2,
"name": "Right Door",
"nodeType": "door",
"nodeSubType": "yellow",
"nodeAddress": "0x0018a36",
"doorOrientation": "right",
"doorEnvironments": [
{
"physics": "air"
}
],
"mapTileMask": [
[
1,
2,
2
],
[
0,
1,
0
],
[
0,
1,
0
]
]
},
{
"id": 3,
"name": "Bottom Door",
"nodeType": "door",
"nodeSubType": "yellow",
"nodeAddress": "0x0018a42",
"doorOrientation": "down",
"doorEnvironments": [
{
"physics": "air"
}
],
"mapTileMask": [
[
1,
1,
1
],
[
0,
2,
0
],
[
0,
2,
0
]
]
}
],
"enemies": [
{
"id": "e1",
"groupName": "Crateria Kihunters",
"enemyName": "Kihunter (green)",
"quantity": 2,
"homeNodes": [
1,
2
]
},
{
"id": "e2",
"groupName": "Crateria Kihunter Room Scisers",
"enemyName": "Sciser",
"quantity": 2,
"homeNodes": [
3
]
}
],
"strats": [
{
"link": [
1,
1
],
"name": "Base (Unlock Door)",
"requires": [],
"unlocksDoors": [
{
"types": [
"ammo"
],
"requires": []
}
],
"flashSuitChecked": true,
"blueSuitChecked": true
},
{
"link": [
1,
1
],
"name": "Base (Come In Normally)",
"entranceCondition": {
"comeInNormally": {}
},
"requires": [],
"flashSuitChecked": true,
"blueSuitChecked": true
},
{
"link": [
1,
1
],
"name": "Base (Come In With Mockball)",
"entranceCondition": {
"comeInWithMockball": {
"adjacentMinTiles": 0,
"remoteAndLandingMinTiles": [
[
0,
0
]
],
"speedBooster": "any"
}
},
"requires": [],
"flashSuitChecked": true,
"blueSuitChecked": true
},
{
"link": [
2,
2
],
"name": "Base (Unlock Door)",
"requires": [],
"unlocksDoors": [
{
"types": [
"ammo"
],
"requires": []
}
],
"flashSuitChecked": true,
"blueSuitChecked": true
},
{
"link": [
2,
2
],
"name": "Base (Come In Normally)",
"entranceCondition": {
"comeInNormally": {}
},
"requires": [],
"flashSuitChecked": true,
"blueSuitChecked": true
},
{
"link": [
2,
2
],
"name": "Base (Come In With Mockball)",
"entranceCondition": {
"comeInWithMockball": {
"adjacentMinTiles": 0,
"remoteAndLandingMinTiles": [
[
0,
0
]
],
"speedBooster": "any"
}
},
"requires": [],
"flashSuitChecked": true,
"blueSuitChecked": true
},
{
"link": [
3,
3
],
"name": "Base (Unlock Door)",
"requires": [],
"unlocksDoors": [
{
"types": [
"ammo"
],
"requires": []
}
],
"flashSuitChecked": true,
"blueSuitChecked": true
},
{
"link": [
3,
3
],
"name": "Base (Come In Normally)",
"entranceCondition": {
"comeInNormally": {}
},
"requires": [],
"flashSuitChecked": true,
"blueSuitChecked": true
},
{
"link": [
3,
3
],
"name": "Base (Come In With Grapple Jump)",
"entranceCondition": {
"comeInWithGrappleJump": {
"position": "any"
}
},
"requires": [],
"flashSuitChecked": true,
"blueSuitChecked": true
},
{
"id": 1,
"link": [
1,
1
],
"name": "Leave with Runway",
"requires": [],
"exitCondition": {
"leaveWithRunway": {
"length": 34,
"openEnd": 0,
"steepUpTiles": 5,
"steepDownTiles": 2
}
},
"flashSuitChecked": true,
"blueSuitChecked": true
},
{
"id": 35,
"link": [
1,
1
],
"name": "Gain Flash Suit (Slopespark)",
"requires": [
{
"canShineCharge": {
"usedTiles": 19,
"steepUpTiles": 1,
"steepDownTiles": 3,
"openEnd": 0
}
},
{
  "enemyDamage": {
    "enemy": "Kihunter (green)",
    "type": "contact",
    "hits": 1
  }
},
"canSlopeSpark",
{
"shinespark": {
"frames": 8,
"excessFrames": 8
}
}
],
"flashSuitChecked": true,
"blueSuitChecked": true
},
{
"id": 34,
"link": [
1,
1
],
"name": "In-Room Crystal Spark",
"requires": [
{
"canShineCharge": {
"usedTiles": 33,
"steepUpTiles": 2,
"steepDownTiles": 5,
"openEnd": 0
}
},
{
"or": [
"h_CrystalSpark",
{
"and": [
"h_enemyDrops",
"canBePatient",
"h_CrystalSparkWithoutLenience"
]
}
]
}
],
"flashSuitChecked": true,
"blueSuitChecked": true,
"devNote": [
"No lenience, because Power Bombs can be farmed from the Scisers."
]
},
{
"id": 2,
"link": [
1,
1
],
"name": "G-Mode Setup - Get Hit by Kihunter",
"requires": [],
"exitCondition": {
"leaveWithGModeSetup": {}
},
"flashSuitChecked": true,
"blueSuitChecked": true
},
{
"id": 3,
"link": [
1,
1
],
"name": "G-Mode Regain Mobility",
"requires": [
{
"enemyDamage": {
"enemy": "Kihunter (green)",
"type": "contact",
"hits": 1
}
}
],
"gModeRegainMobility": {},
"flashSuitChecked": true,
"blueSuitChecked": true
},
{
"id": 31,
"link": [
1,
2
],
"name": "R-Mode Spark Interrupt",
"entranceCondition": {
"comeInWithRMode": {}
},
"requires": [
{
"or": [
"canCameraManip",
{
"enemyDamage": {
"enemy": "Sciser",
"type": "contact",
"hits": 1
}
}
]
},
{
"or": [
"h_CrystalFlashForReserveEnergy",
{
"and": [
"h_RModeCanRefillReserves",
{
"resourceMissingAtMost": [
{
"type": "PowerBomb",
"count": 0
}
]
},
{
"partialRefill": {
"type": "ReserveEnergy",
"limit": 20
}
}
]
}
]
},
{
"canShineCharge": {
"usedTiles": 33,
"steepUpTiles": 2,
"steepDownTiles": 5,
"openEnd": 0
}
},
{
"autoReserveTrigger": {
"maxReserveEnergy": 95
}
},
"canRModeSparkInterrupt"
],
"flashSuitChecked": true,
"blueSuitChecked": true,
"note": [
"Farm two Scisers in the bottom section (manipulate camera to see where they are) and left Kihunter.",
"Shinecharge and get interrupted by the right Kihunter."
]
},
{
"id": 4,
"link": [
1,
2
],
"name": "Base",
"requires": [],
"flashSuitChecked": true,
"blueSuitChecked": true
},
{
"id": 5,
"link": [
2,
1
],
"name": "Base",
"requires": [],
"flashSuitChecked": true,
"blueSuitChecked": true
},
{
"id": 6,
"link": [
2,
1
],
"name": "Grapple Teleport Door Lock Skip",
"entranceCondition": {
"comeInWithGrappleTeleport": {
"blockPositions": [
[
3,
12
],
[
3,
13
]
]
}
},
"requires": [],
"bypassesDoorShell": "yes",
"flashSuitChecked": true,
"blueSuitChecked": true
},
{
"id": 7,
"link": [
2,
1
],
"name": "Carry Grapple Teleport (Top Position)",
"entranceCondition": {
"comeInWithGrappleTeleport": {
"blockPositions": [
[
3,
12
]
]
}
},
"requires": [],
"exitCondition": {
"leaveWithGrappleTeleport": {
"blockPositions": [
[
3,
12
]
]
}
},
"bypassesDoorShell": "yes",
"flashSuitChecked": true,
"blueSuitChecked": true
},
{
"id": 8,
"link": [
2,
1
],
"name": "Carry Grapple Teleport (Bottom Position)",
"entranceCondition": {
"comeInWithGrappleTeleport": {
"blockPositions": [
[
3,
13
]
]
}
},
"requires": [],
"exitCondition": {
"leaveWithGrappleTeleport": {
"blockPositions": [
[
3,
13
]
]
}
},
"bypassesDoorShell": "yes",
"flashSuitChecked": true,
"blueSuitChecked": true
},
{
"id": 9,
"link": [
2,
1
],
"name": "Grapple Teleport X-Ray Climb (1 Screen)",
"entranceCondition": {
"comeInWithGrappleTeleport": {
"blockPositions": [
[
2,
18
],
[
2,
19
],
[
2,
28
],
[
2,
29
]
]
}
},
"requires": [
"canXRayClimb"
],
"bypassesDoorShell": "yes",
"flashSuitChecked": true,
"blueSuitChecked": true,
"note": [
"Exit the previous room with Samus in a standing pose (while grappled).",
"After teleporting, press right to release Grapple while staying standing (not being forced into a crouch).",
"Then X-ray climb 1 screen to get up to the door transition, without needing to open the door."
]
},
{
"id": 30,
"link": [
2,
1
],
"name": "Grapple Teleport X-Ray Climb (2 Screens)",
"entranceCondition": {
"comeInWithGrappleTeleport": {
"blockPositions": [
[
2,
34
]
]
}
},
"requires": [
"canLongXRayClimb"
],
"bypassesDoorShell": "yes",
"flashSuitChecked": true,
"blueSuitChecked": true,
"note": [
"Exit the previous room with Samus in a standing pose (while grappled).",
"After teleporting, press right to release Grapple while staying standing (not being forced into a crouch).",
"Then X-ray climb 2 screens to get up to the door transition, without needing to open the door."
]
},
{
"id": 32,
"link": [
2,
2
],
"name": "R-Mode Spark Interrupt",
"entranceCondition": {
"comeInWithRMode": {}
},
"requires": [
{
"or": [
"canCameraManip",
{
"enemyDamage": {
"enemy": "Sciser",
"type": "contact",
"hits": 1
}
}
]
},
{
"or": [
"h_CrystalFlashForReserveEnergy",
{
"and": [
"h_RModeCanRefillReserves",
{
"resourceMissingAtMost": [
{
"type": "PowerBomb",
"count": 0
}
]
},
{
"partialRefill": {
"type": "ReserveEnergy",
"limit": 20
}
}
]
}
]
},
{
"canShineCharge": {
"usedTiles": 33,
"steepUpTiles": 2,
"steepDownTiles": 5,
"openEnd": 0
}
},
{
"autoReserveTrigger": {
"maxReserveEnergy": 95
}
},
"canRModeSparkInterrupt"
],
"flashSuitChecked": true,
"blueSuitChecked": true,
"note": [
"Farm two Scisers in the bottom section (manipulate camera to see where they are) and left Kihunter.",
"Shinecharge and get interrupted by the right Kihunter."
]
},
{
"id": 10,
"link": [
2,
2
],
"name": "Leave with Runway",
"requires": [],
"exitCondition": {
"leaveWithRunway": {
"length": 4,
"openEnd": 1
}
},
"flashSuitChecked": true,
"blueSuitChecked": true
},
{
"id": 11,
"link": [
2,
2
],
"name": "Leave Shinecharged",
"requires": [
"canShinechargeMovement",
{
"canShineCharge": {
"usedTiles": 33,
"steepUpTiles": 2,
"steepDownTiles": 5,
"openEnd": 0
}
},
{
"shineChargeFrames": 115
}
],
"exitCondition": {
"leaveShinecharged": {}
},
"flashSuitChecked": true,
"blueSuitChecked": true
},
{
"id": 12,
"link": [
2,
2
],
"name": "Leave Spinning",
"requires": [],
"exitCondition": {
"leaveSpinning": {
"remoteRunway": {
"length": 32,
"openEnd": 1,
"gentleUpTiles": 2,
"steepDownTiles": 4
},
"minExtraRunSpeed": "$3.E"
}
},
"flashSuitChecked": true,
"blueSuitChecked": true
},
{
"id": 13,
"link": [
2,
2
],
"name": "Leave With Mockball",
"requires": [],
"exitCondition": {
"leaveWithMockball": {
"remoteRunway": {
"length": 32,
"openEnd": 1,
"gentleUpTiles": 2,
"steepDownTiles": 4
},
"landingRunway": {
"length": 4,
"openEnd": 1
},
"minExtraRunSpeed": "$0.8"
}
},
"flashSuitChecked": true,
"blueSuitChecked": true
},
{
"id": 14,
"link": [
2,
2
],
"name": "Leave With Spring Ball Bounce",
"requires": [],
"exitCondition": {
"leaveWithSpringBallBounce": {
"remoteRunway": {
"length": 30,
"openEnd": 1,
"gentleUpTiles": 2,
"steepDownTiles": 4
},
"landingRunway": {
"length": 1,
"openEnd": 1
},
"minExtraRunSpeed": "$1.9",
"movementType": "uncontrolled"
}
},
"flashSuitChecked": true,
"blueSuitChecked": true
},
{
"id": 15,
"link": [
2,
2
],
"name": "Leave Space Jumping",
"requires": [],
"exitCondition": {
"leaveSpaceJumping": {
"remoteRunway": {
"length": 25,
"openEnd": 1,
"gentleUpTiles": 2,
"steepDownTiles": 2
}
}
},
"flashSuitChecked": true,
"blueSuitChecked": true,
"devNote": [
"FIXME: A longer runway could be used if getting blue speed."
]
},
{
"id": 16,
"link": [
2,
2
],
"name": "Leave With Temporary Blue",
"requires": [
{
"canShineCharge": {
"usedTiles": 33,
"steepUpTiles": 2,
"steepDownTiles": 5,
"openEnd": 0
}
},
"canChainTemporaryBlue"
],
"exitCondition": {
"leaveWithTemporaryBlue": {}
},
"flashSuitChecked": true,
"blueSuitChecked": true
},
{
"id": 17,
"link": [
2,
2
],
"name": "Sciser and Kihunter Farm",
"requires": [
{
"or": [
{
"and": [
{
"resetRoom": {
"nodes": [
1,
2
]
}
},
"canCameraManip"
]
},
{
"resetRoom": {
"nodes": [
3
]
}
}
]
},
{
"or": [
{
"and": [
"canDash",
{
"or": [
{
"and": [
"ScrewAttack",
{
"cycleFrames": 720
}
]
},
{
"and": [
"Plasma",
{
"cycleFrames": 770
}
]
},
{
"and": [
"canPseudoScrew",
{
"cycleFrames": 1000
}
]
},
{
"and": [
"canUseGrapple",
{
"cycleFrames": 1020
}
]
},
{
"and": [
"Wave",
{
"cycleFrames": 1050
}
]
},
{
"and": [
"Spazer",
{
"cycleFrames": 1080
}
]
},
{
"and": [
"Ice",
{
"cycleFrames": 1170
}
]
},
{
"and": [
"canDodgeWhileShooting",
{
"cycleFrames": 1440
}
]
}
]
}
]
},
{
"and": [
{
"haveBlueSuit": {}
},
{
"cycleFrames": 1010
}
]
}
]
}
],
"farmCycleDrops": [
{
"enemy": "Sciser",
"count": 2
},
{
"enemy": "Kihunter (green)",
"count": 2
}
],
"flashSuitChecked": true,
"blueSuitChecked": true
},
{
"id": 18,
"link": [
2,
2
],
"name": "G-Mode Setup - Get Hit by Kihunter",
"requires": [],
"exitCondition": {
"leaveWithGModeSetup": {}
},
"flashSuitChecked": true,
"blueSuitChecked": true
},
{
"id": 19,
"link": [
2,
2
],
"name": "G-Mode Regain Mobility",
"requires": [
{
"enemyDamage": {
"enemy": "Kihunter (green)",
"type": "contact",
"hits": 1
}
}
],
"gModeRegainMobility": {},
"flashSuitChecked": true,
"blueSuitChecked": true
},
{
"id": 20,
"link": [
2,
3
],
"name": "Base",
"requires": [
{
  "or": [
    "canCameraManip",
    "h_usePowerBomb",
    {
      "enemyDamage": {
        "enemy": "Sciser",
        "type": "contact",
        "hits": 1
      }
    }
  ]
}
],
"flashSuitChecked": true,
"blueSuitChecked": true,
"note": [
"Jump and aim down to lower the camera to see where the crabs are.",
"Alternatively use a Power Bomb to kill them or risk tanking a hit."
]
},
{
"id": 33,
"link": [
3,
2
],
"name": "R-Mode Spark Interrupt",
"entranceCondition": {
"comeInWithRMode": {},
"comesThroughToilet": "no"
},
"requires": [
{
"or": [
"h_CrystalFlashForReserveEnergy",
{
"and": [
"h_RModeCanRefillReserves",
{
"resourceMissingAtMost": [
{
"type": "PowerBomb",
"count": 0
}
]
},
{
"partialRefill": {
"type": "ReserveEnergy",
"limit": 20
}
}
]
}
]
},
{
"canShineCharge": {
"usedTiles": 33,
"steepUpTiles": 2,
"steepDownTiles": 5,
"openEnd": 0
}
},
{
"autoReserveTrigger": {
"maxReserveEnergy": 95
}
},
"canRModeSparkInterrupt"
],
"flashSuitChecked": true,
"blueSuitChecked": true,
"note": [
"Farm two Scisers in the bottom section and left Kihunter.",
"Shinecharge and get interrupted by the right Kihunter."
]
},
{
"id": 21,
"link": [
3,
2
],
"name": "Base",
"requires": [],
"flashSuitChecked": true,
"blueSuitChecked": true
},
{
"id": 23,
"link": [
3,
3
],
"name": "Leave With Temporary Blue",
"requires": [
{
"canShineCharge": {
"usedTiles": 33,
"steepUpTiles": 2,
"steepDownTiles": 5,
"openEnd": 0
}
},
"canLongChainTemporaryBlue",
"canXRayTurnaround"
],
"exitCondition": {
"leaveWithTemporaryBlue": {
"direction": "any"
}
},
"flashSuitChecked": true,
"blueSuitChecked": true
},
{
"id": 24,
"link": [
3,
3
],
"name": "Ice Moonfall Door Lock Skip",
"requires": [
{
"notable": "Ice Moonfall Door Lock Skip"
},
"canEnemyStuckMoonfall",
"canFreeFallClip",
"canTrickyUseFrozenEnemies"
],
"bypassesDoorShell": "yes",
"flashSuitChecked": true,
"blueSuitChecked": true,
"note": [
"Freeze the two Scisers to set up a moonfall between them, and aim down.",
"Hold left to move to the right at the correct time, which will set up an automatic turn-around, allowing Samus to clip past the floating platform below, past the door shell, and through the transition.",
"The amount of speed required is highly precise."
]
},
{
"id": 25,
"link": [
3,
3
],
"name": "Shinespark",
"entranceCondition": {
"comeInWithSpark": {},
"comesThroughToilet": "any"
},
"requires": [
{
  "shinespark": {
    "frames": 2,
    "excessFrames": 2
  }
}
],
"flashSuitChecked": true,
"blueSuitChecked": true,
"note": "Enter on the right side of the doorway to reduce the amount of energy used.",
"devNote": "This strat is not useful in-room, but can satisfy a strat in the room before with an exit shinespark."
},
{
"id": 26,
"link": [
3,
3
],
"name": "Crystal Flash",
"requires": [
"h_CrystalFlash"
],
"flashSuitChecked": true,
"blueSuitChecked": true
},
{
"id": 27,
"link": [
3,
3
],
"name": "G-Mode Setup - Get Hit by Thawing Sciser",
"requires": [
"canWallIceClip",
"canDownwardGModeSetup",
{
"ammo": {
"type": "Super",
"count": 1
}
}
],
"exitCondition": {
"leaveWithGModeSetup": {}
},
"flashSuitChecked": true,
"blueSuitChecked": true,
"note": [
"Run from the ledge into the open doorway while hitting the frozen crab and the door transition simultaneously, just as the crab thaws and touches Samus during the transition.",
"Note that this requires a precise freeze (2 pixel window), a small pixel starting window (approximately 2 pixel window), precise thaw timing, and a 50% success rate due to collision oscillation.",
"The positioning of the crab is where its hitbox is one or two pixels away from the edge of the door frame, so that Samus can clip into the wall and stand as she touches the transition."
]
},
{
"id": 29,
"link": [
3,
3
],
"name": "G-Mode Regain Mobility",
"requires": [
{
"enemyDamage": {
"enemy": "Sciser",
"type": "contact",
"hits": 1
}
},
"h_ZebesIsAwake",
{
"ammo": {
"type": "Super",
"count": 2
}
}
],
"gModeRegainMobility": {},
"flashSuitChecked": true,
"blueSuitChecked": true,
"note": [
"Shoot a Super at the wall, while the Sciser is directly above Samus.",
"If Samus is on the right side of the door, it will require two Supers, one to knock it down to the platform above her, then another to drop it on her."
],
"devNote": "This is just requiring 2 Supers, since the horizontal positioning of Samus is not modeled."
}
],
"notables": [
{
"id": 1,
"name": "Ice Moonfall Door Lock Skip",
"note": [
"Freeze the two Scisers to set up a moonfall between them, and aim down.",
"Hold left to move to the right at the correct time, which will set up an automatic turn-around, allowing Samus to clip past the floating platform below, past the door shell, and through the transition.",
"The amount of speed required is highly precise."
]
}
],
"nextStratId": 36,
"nextNotableId": 2
}