Lava Dive Room
Room ID: 115
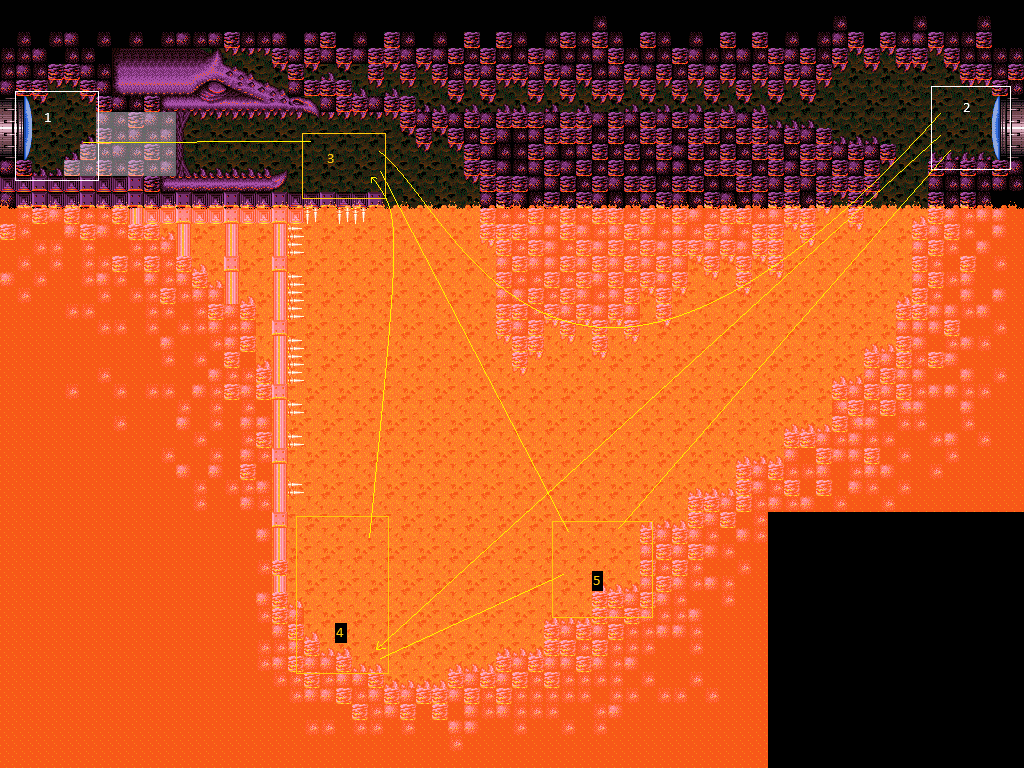
|
Exit condition: "leaveWithRunway": {
"length": 1,
"openEnd": 1
} |
|
Requires: {"heatFrames": 250}Exit condition: "leaveSpinning": {
"remoteRunway": {
"length": 14,
"openEnd": 1
}
} |
|
Requires: {"heatFrames": 250}Exit condition: "leaveWithMockball": {
"remoteRunway": {
"length": 13,
"openEnd": 1
},
"landingRunway": {
"length": 1,
"openEnd": 1
}
} |
|
Requires: {"heatFrames": 250}Exit condition: "leaveWithSpringBallBounce": {
"remoteRunway": {
"length": 11,
"openEnd": 1
},
"landingRunway": {
"length": 1,
"openEnd": 1
},
"movementType": "uncontrolled"
} |
|
Requires: {"heatFrames": 250}Exit condition: "leaveSpaceJumping": {
"remoteRunway": {
"length": 3,
"openEnd": 0
}
}Dev note: The heatFrames here could be cut by more than half, but extra lenience is given because of the difficulty, due to poor visibility and the awkward low ceiling corner. |
|


Requires: {"heatFrames": 250}Exit condition: "leaveWithSidePlatform": {
"height": 1,
"runway": {
"length": 16,
"openEnd": 1
},
"obstruction": [1, 0]
}Dev note: Max extra run speed $3.9 |
|


Requires: {"canShineCharge": {"usedTiles": 16, "openEnd": 1}},
{"heatFrames": 225},
{"shineChargeFrames": 40}Exit condition: "leaveShinecharged": {} |
|
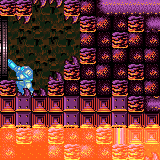

Requires: {"canShineCharge": {"usedTiles": 16, "openEnd": 0}},
{"heatFrames": 250},
{"or": [
"canXRayCancelShinecharge",
{"heatFrames": 160}
]}Exit condition: "leaveWithTemporaryBlue": {} |
|
Requires: "h_heatedCrystalFlash" |
|
Requires: {"canShineCharge": {"usedTiles": 16, "openEnd": 1}},
"h_heatedCrystalSpark" |
|
Entrance condition: "comeInWithGMode": {
"mode": "any",
"morphed": false
}Requires: "canSuitlessLavaDive", {"lavaFrames": 370}, {"or": [ "HiJump", {"lavaFrames": 25} ]}, {"or": [ "SpaceJump", "canSpringBallJumpMidAir", "canWallJump", {"and": [ "HiJump", {"lavaFrames": 10} ]}, {"and": [ "canBombJumpWaterEscape", {"lavaFrames": 30} ]} ]}, "h_heatedGModeOpenDifferentDoor" Dev note: Artificial morph jump into Crystal Flash clip doesn't seem to be possible. More testing could help. FIXME: The thread the needle strats could be added to save a small amount of Energy, but may not be reasonable. |
|
Entrance condition: "comeInWithGMode": {
"mode": "any",
"morphed": false
}Requires: "Gravity",
{"or": [
{"lavaFrames": 280},
{"and": [
"SpaceJump",
{"lavaFrames": 240}
]}
]},
{"or": [
{"and": [
"canDash",
{"disableEquipment": "SpeedBooster"},
{"or": [
{"notable": "Thread the Needle Entry"},
{"heatFrames": 20}
]}
]},
{"lavaFrames": 100}
]},
"h_heatedGModeOpenDifferentDoor" |
|


Perform a Crystal Flash in order to refill reserves. Position Samus below the 2-tile space of the ceiling Morph tunnel. Jump as Samus reaches 4 Energy, and mid-air morph, timed so that reserves trigger while Samus still has upward momentum just before Samus would hit the ceiling. If done properly, the R-mode standup will cause Samus to clip into the ceiling Morph tunnel. If successful, Samus will end up crouched in the tunnel; press down to morph, then roll out to the right to exit the room. With a mid-air morph, this has a 4-frame window for the jump. It is also an option to pause abuse: instead of jumping at a precise Energy value, set reserves to manual, wait until Samus is close to zero Energy, then press pause and wait a moment before jumping (firing a shot when pausing may help create a visual cue), so that Samus is at 0 Energy and in position just below the ceiling when the pause hits. Then set reserves to auto (and re-equip Varia if available) and unpause. Entrance condition: "comeInWithRMode": {}Requires: "h_heatedCrystalFlash", "canRModeStandupClip", "canInsaneJump", {"heatFrames": 140}, {"disableEquipment": "Varia"}, {"autoReserveTrigger": {}}, {"heatFrames": 275}, {"or": [ "canDash", {"heatFrames": 15} ]} Dev note: Jumping using Spring Ball is also possible, which simplifies the movement by avoiding the need for a mid-air morph; it still has a 4-frame window for the jump timing. Jumping and aiming down is also possible but only gives a 2-frame window for the jump. |
|
Requires: {"heatFrames": 90},
{"or": [
"canDash",
{"heatFrames": 50}
]} |
|


Requires: "h_heatProof", "h_lavaProof", "Gravity", {"canShineCharge": {"usedTiles": 16, "openEnd": 1}}, {"spikeHits": 1}, "canRiskySpikeSuit", {"shinespark": {"frames": 14}}, {"spikeHits": 1} Dev note: FIXME: Add options to retry / without varia etc. |
|

Gain a specifc amount of speed by running from a standstill, starting slightly more than 3 tiles from the edge of the Ridley statue jaw. Jump on the last possible frame (second-to-last frame may also work, depending on subpixels). If successful, Samus will avoid bonking the wall and will land directly in front of the Namihe. Requires: {"notable": "Thread the Needle Entry"},
{"or": [
"canSuitlessLavaDive",
"Gravity"
]},
"canDash",
"canInsaneJump",
{"heatFrames": 200},
{"lavaFrames": 60}Dev note: Starting horizontal positions between $F2 and $FB will work consistently with a last-frame jump. Positions further left can also work but may require an earlier jump. Gravity only makes about 1 or 2 frames of difference here, which we ignore. |
|
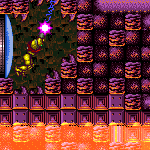
Entrance condition: "comeInWithGrappleTeleport": {
"blockPositions": [[5, 3], [7, 2]]
}Requires: {"heatFrames": 60} |
|
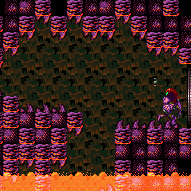

Entrance condition: "comeInWithGrappleTeleport": {
"blockPositions": [[3, 12], [3, 13]]
}Bypasses door shell: true |
|
Entrance condition: "comeInWithGrappleTeleport": {
"blockPositions": [[3, 12]]
}Exit condition: "leaveWithGrappleTeleport": {
"blockPositions": [[3, 12]]
}Bypasses door shell: true |
From: 2
Right Door
To: 1
Left Door
Entrance condition: "comeInWithGrappleTeleport": {
"blockPositions": [[3, 13]]
}Exit condition: "leaveWithGrappleTeleport": {
"blockPositions": [[3, 13]]
}Bypasses door shell: true |
|


Exit the previous room with Samus in a standing pose (while grappled). After teleporting, press right to release Grapple while staying standing (not being forced into a crouch). Then X-ray climb 1 screen to get up to the door transition, without needing to open the door. Entrance condition: "comeInWithGrappleTeleport": {
"blockPositions": [[2, 18], [2, 19], [2, 28], [2, 29]]
}Requires: "canXRayClimb", {"heatFrames": 1600}, {"lavaFrames": 1300} Bypasses door shell: true |
From: 2
Right Door
To: 1
Left Door
Exit the previous room with Samus in a standing pose (while grappled). After teleporting, press right to release Grapple while staying standing (not being forced into a crouch). Then X-ray climb 2 screens to get up to the door transition, without needing to open the door. Entrance condition: "comeInWithGrappleTeleport": {
"blockPositions": [[2, 34]]
}Requires: "canLongXRayClimb", {"heatFrames": 2800}, {"lavaFrames": 2500} Bypasses door shell: true |
|


Entrance condition: "comeInWithGMode": {
"mode": "any",
"morphed": false
}Requires: "Gravity",
"SpaceJump",
{"lavaFrames": 280},
{"or": [
{"and": [
{"disableEquipment": "SpeedBooster"},
"canDash"
]},
{"lavaFrames": 80}
]},
"h_heatedGModeOpenDifferentDoor"Dev note: FIXME: GT Max Suitless climb could be added, but is likely not reasonable. |
|


Wall jump off of the Upper-Left Namihe and then Spring Ball jump up and out of the Lava. Pausing early in order to get more horizontal distance by equiping Spring Ball may help. Entrance condition: "comeInWithGMode": {
"mode": "any",
"morphed": false
}Requires: {"notable": "HiJump"},
"Gravity",
"canSpringwall",
"HiJump",
"canUseEnemies",
{"lavaFrames": 390},
{"or": [
{"and": [
"canDash",
{"disableEquipment": "SpeedBooster"}
]},
{"lavaFrames": 150}
]},
"h_heatedGModeOpenDifferentDoor"Dev note: This strat is not useful unless Samus has lava proof but not heat proof. Otherwise, the non-G-mode variant can be used. FIXME: These lava frames are lenient, they are what it would take without Gravity (the non-G-mode variant also doesnt account for Gravity). |
|


Entrance condition: "comeInWithGMode": {
"mode": "any",
"morphed": false
}Requires: {"lavaFrames": 210},
{"or": [
{"and": [
"canDash",
{"disableEquipment": "SpeedBooster"}
]},
{"lavaFrames": 60}
]},
"canSuitlessLavaDive",
"canGravityJump",
{"or": [
{"and": [
"HiJump",
{"gravitylessLavaFrames": 115}
]},
{"and": [
"canTrickyWallJump",
"canTrickyJump",
{"gravitylessLavaFrames": 175}
]}
]},
"h_heatedGModeOpenDifferentDoor"Dev note: FIXME: Many strats without Gravity have been skipped for now. |
|


The Namihe fireballs don't move while in G-mode, making it safe to IBJ straight up and out of the lava. Entrance condition: "comeInWithGMode": {
"mode": "any",
"morphed": true
}Requires: "h_lavaProof", "Gravity", "h_artificialMorphLongIBJ", "h_heatedGModeOpenDifferentDoor" |
From: 2
Right Door
To: 1
Left Door
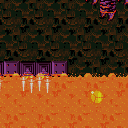

Triple Spring Ball jump through the Lava Dive. Delay the second jump as much as possible, and get all of the pauses close to as early as possible. Entrance condition: "comeInWithGMode": {
"mode": "any",
"morphed": true
}Requires: {"notable": "Artificial Morph, Triple Spring Ball Jump"},
"canTrickyGMode",
"h_artificialMorphDoubleSpringBallJump",
"canInsaneJump",
{"gravitylessLavaFrames": 640},
"h_heatedGModeOpenDifferentDoor" |
From: 2
Right Door
To: 1
Left Door


Triple Spring Ball jump through the Lava Dive. Start with a Gravity jump, then delay the second jump as much as possible, and get all of the pauses close to as early as possible. Entrance condition: "comeInWithGMode": {
"mode": "any",
"morphed": true
}Requires: {"notable": "Artificial Morph, Triple Spring Ball Jump"},
"canTrickyGMode",
"canGravityJump",
{"tech": "canDoubleSpringBallJumpMidAir"},
"h_artificialMorphSpringBall",
"canInsaneJump",
{"lavaFrames": 275},
{"gravitylessLavaFrames": 200},
"h_heatedGModeOpenDifferentDoor" |
|
Exit condition: "leaveWithRunway": {
"length": 5,
"openEnd": 1
} |
|
Requires: "h_heatedCrystalFlash" |
|
Entrance condition: "comeInShinecharging": {
"length": 4,
"openEnd": 0
}Requires: "h_heatedCrystalSpark" |
|
Samus will be slowed by lava if Speed Booster is equipped, even with Gravity. Requires: {"or": [
"h_lavaProof",
"canSuitlessLavaDive"
]},
"Gravity",
"SpaceJump",
{"heatFrames": 340},
{"lavaFrames": 280},
{"or": [
{"and": [
{"disableEquipment": "SpeedBooster"},
"canDash"
]},
{"and": [
{"heatFrames": 120},
{"lavaFrames": 120}
]}
]} |
|
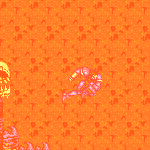

Store the shinespark on the last possible pixels of runway. Quickly drop to the nearby Namihe and damage boost using its flame. Hold the damage boost until just before being below the above platform and spark upwards Entrance condition: "comeInShinecharging": {
"length": 4,
"openEnd": 1
}Requires: {"notable": "Damage Boost Shinespark"},
"Gravity",
{"or": [
"h_lavaProof",
"canSuitlessLavaDive"
]},
"canShinechargeMovementTricky",
"canHorizontalDamageBoost",
{"shinespark": {"frames": 33}},
{"heatFrames": 320},
{"lavaFrames": 155},
{"enemyDamage": {"enemy": "Namihe", "type": "fireball", "hits": 1}} |
|


Use the platform above the third Namihe to run and jump into a diagonal spark. Requires: "Gravity",
{"or": [
"h_lavaProof",
"canSuitlessLavaDive"
]},
"canDash",
{"disableEquipment": "SpeedBooster"},
{"useFlashSuit": {}},
{"shinespark": {"frames": 23}},
{"heatFrames": 425},
{"lavaFrames": 275}Dev note: FIXME: a version with SpeedBooster equipped is possible, with more energy usage. |
From: 2
Right Door
To: 3
Above Lava Junction


Use a flash suit to shinespark out of the lava. A diagonal spark is slightly better though Samus will barely move horizontally. Requires: "canSuitlessLavaDive", "canDash", {"disableEquipment": "SpeedBooster"}, {"useFlashSuit": {}}, {"or": [ {"and": [ "canBounceBall", {"lavaFrames": 270}, {"shinespark": {"frames": 32}}, {"heatFrames": 420} ]}, {"and": [ {"lavaFrames": 375}, {"shinespark": {"frames": 27}}, {"heatFrames": 525} ]} ]} |
From: 2
Right Door
To: 3
Above Lava Junction
Use a blue suit to shinespark out of the lava. A diagonal spark is slightly better though Samus will barely move horizontally. Requires: "canSuitlessLavaDive", {"blueSuitShinecharge": {}}, {"lavaFrames": 425}, {"shinespark": {"frames": 27}}, {"heatFrames": 590} |
From: 2
Right Door
To: 3
Above Lava Junction
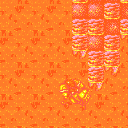

Bounceball into the Lava, unmorphing with good timing to sink faster and drift efficiently towards the bottom right Namihe. Wall jump at about eye height (4 pixel window) to gain enough height to reach the center portion of ceiling. While rising, wiggle to shrink Samus' hitbox. Some walljump positions will not need to wiggle, when wall jumping far away from the Namihe. Jumping, from the wall, around the next lowest overhang is very precise and taking any extra time to position will increase the amount of lava damage being taken. It may help to disable Hi-Jump for this part. Then wall jump again to exit the lava and reach the left ledge. Requires: {"notable": "GT Max Suitless Right Side Climb"},
"canSuitlessLavaDive",
"canUseEnemies",
"HiJump",
"canBounceBall",
"canMidairWiggle",
"canConsecutiveWallJump",
"canInsaneWallJump",
{"gravitylessLavaFrames": 392},
{"heatFrames": 515}Dev note: FIXME: a dashless version could be added. |
From: 2
Right Door
To: 4
Lava, Left Wall
Build up a little run speed and do a small jump into the lava. Morph before reaching the lava, Bounce, and Unmorph shortly after sink slightly before floating down to the stairs. Requires: {"or": [
"h_lavaProof",
"canSuitlessLavaDive"
]},
"canTrickyJump",
"canBounceBall",
{"heatFrames": 365},
{"lavaFrames": 305} |
From: 2
Right Door
To: 4
Lava, Left Wall
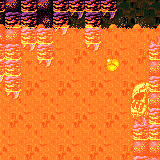
Jump into the door frame so that Samus is falling when entering this room. Morph before reaching the lava and Bounce down to the bottom. Entrance condition: "comeInJumping": {
"speedBooster": "no",
"minTiles": 4
}Requires: {"or": [
"h_lavaProof",
"canSuitlessLavaDive"
]},
"canCarefulJump",
"canBounceBall",
{"heatFrames": 330},
{"lavaFrames": 290}Dev note: 4 Tile jump entry is the Normalized Kronic Boost room setup. |
|
Samus will be slowed by lava if Speed Booster is equipped, even with Gravity. Requires: {"or": [
"h_lavaProof",
"canSuitlessLavaDive"
]},
"Gravity",
{"heatFrames": 250},
{"lavaFrames": 190},
{"or": [
{"and": [
{"disableEquipment": "SpeedBooster"},
"canDash"
]},
{"and": [
{"heatFrames": 50},
{"lavaFrames": 50}
]}
]} |
|
Requires: {"or": [
"h_lavaProof",
"canSuitlessLavaDive"
]},
{"heatFrames": 330},
{"lavaFrames": 270} |
From: 2
Right Door
To: 5
Lava, Center Namihe
Build up a little run speed and do a small jump into the lava. Morph before reaching the lava, Bounce, and Unmorph shortly after sink slightly before floating down to the stairs. Requires: {"or": [
"h_lavaProof",
"canSuitlessLavaDive"
]},
"canTrickyJump",
"canBounceBall",
{"heatFrames": 260},
{"lavaFrames": 200} |
From: 2
Right Door
To: 5
Lava, Center Namihe
Jump into the door frame so that Samus is falling when entering this room. Morph before reaching the lava, Bounce, and Unmorph shortly after sink slightly before floating down to the stairs. Entrance condition: "comeInJumping": {
"speedBooster": "no",
"minTiles": 4
}Requires: {"or": [
"h_lavaProof",
"canSuitlessLavaDive"
]},
"canCarefulJump",
"canBounceBall",
{"heatFrames": 230},
{"lavaFrames": 190}Dev note: 4 Tile jump entry is the Normalized Kronic Boost room setup. |
|
Requires: {"heatFrames": 104},
{"or": [
"canDash",
{"heatFrames": 50}
]}Unlocks doors: {
"types": ["missiles"],
"requires": [{"heatFrames": 10}]
} |
|
Requires: {"canShineCharge": {"usedTiles": 16, "openEnd": 1}},
{"heatFrames": 115},
{"shineChargeFrames": 40}Exit condition: "leaveShinecharged": {}Unlocks doors: {"types": ["super"], "requires": []},
{"types": ["missiles", "powerbomb"], "requires": ["never"]} |
|
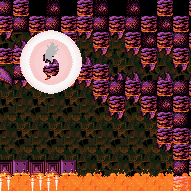

Use a Crystal Flash to clip through the ceiling, where there is one solid tile with 2 empty tiles above it. Use Grapple as the Crystal Flash is ending to be forced above the solid tile. Requires: "h_heatProof", "h_jumpIntoCrystalFlashClip", "Grapple" |
|
Requires: "h_heatedCrystalFlash" |
From: 3
Above Lava Junction
To: 5
Lava, Center Namihe
Requires: {"or": [
"h_lavaProof",
"canSuitlessLavaDive"
]},
{"heatFrames": 130},
{"lavaFrames": 80},
{"or": [
"Gravity",
{"and": [
{"heatFrames": 20},
{"lavaFrames": 20}
]}
]} |
From: 4
Lava, Left Wall
To: 3
Above Lava Junction
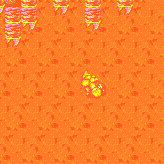

Wall jump off of the lower half of the upper-left Namihe to cross to the right side wall. Continue wall jumping up from there, waiting for the above flame to pass if it is in the way. Requires: {"notable": "HiJump"},
"HiJump",
"canSuitlessLavaDive",
"canUseEnemies",
"canTrickyWallJump",
{"heatFrames": 270},
{"gravitylessLavaFrames": 240} |
|
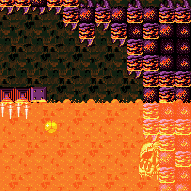

Wall jump off of the upper-left Namihe and then Spring Ball jump up and out of the lava. Delay the pause until in position to perform the Spring Ball jump because lava physics will reduce Samus' horizontal momentum. It may help to also delay the Morph. Requires: {"notable": "HiJump"},
{"or": [
"h_lavaProof",
"canSuitlessLavaDive"
]},
"canSpringwall",
"HiJump",
"canUseEnemies",
{"heatFrames": 195},
{"lavaFrames": 180}Dev note: Works with or without Gravity This Springwall is easier than regular SpringWalls because the lava slows down the required inputs. |
From: 4
Lava, Left Wall
To: 3
Above Lava Junction
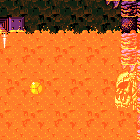

Double springball jump out of a walljump starting from the top of the left wall Namihe. Requires: {"notable": "HiJumpless Suitless Double Springball Jump"},
"canSuitlessLavaDive",
"canUseEnemies",
"canDoubleSpringBallJumpMidAir",
"canSpringwall",
"canPreciseWallJump",
{"heatFrames": 270},
{"gravitylessLavaFrames": 240} |
From: 4
Lava, Left Wall
To: 3
Above Lava Junction
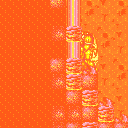

Enter the bottom-left Namihe by kagoing inside of it. Wait for a second hit to gain i-frames and then very quickly walljump up the spikes and across to the right side wall. Requires: {"notable": "HiJumpless Nahime Morph Kago"},
{"noBlueSuit": {}},
"canSuitlessLavaDive",
"canInsaneWallJump",
"canInsaneJump",
"canUseIFrames",
"canTrickyWallJump",
"canFastWallJumpClimb",
"canUseEnemies",
"canKago",
{"heatFrames": 510},
{"gravitylessLavaFrames": 480},
{"enemyDamage": {"enemy": "Namihe", "type": "kago", "hits": 2}} |
|
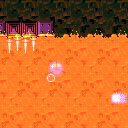

Begin on top of the lower left Namihe Jump into a double IBJ with such timing that Samus passes above the fired flame and such a way that there is no horizontal speed. A forward jump with run not held will work. Begin diagonal bomb jumping once past the start of the 2nd spike group from the top. Requires: {"notable": "Diagonal Bomb Jump"},
"h_heatProof",
"Gravity",
{"or": [
"h_lavaProof",
"canSuitlessLavaDive"
]},
"canJumpIntoIBJ",
"canLongIBJ",
"canDoubleBombJump",
"canDiagonalBombJump",
"canStaggeredIBJ",
"canInsaneJump",
{"heatFrames": 1560},
{"lavaFrames": 1520}Dev note: heatProof because each attempt at this strat costs so many heat frames and its hard enough already. |
|
Requires: "h_heatedLavaCrystalFlash" |
|
Samus will be slowed by lava if SpeedBooster is equipped, even with Gravity. Requires: {"or": [
{"and": [
"Gravity",
{"heatFrames": 180},
{"lavaFrames": 180}
]},
{"and": [
"Gravity",
{"disableEquipment": "SpeedBooster"},
"canDash",
{"heatFrames": 140},
{"lavaFrames": 140}
]},
{"and": [
{"heatFrames": 210},
{"lavaFrames": 210}
]}
]} |
|
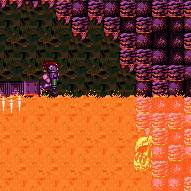

Samus will be slowed by lava if SpeedBooster is equipped, even with Gravity. Requires: "Gravity",
{"or": [
"h_lavaProof",
"canSuitlessLavaDive"
]},
{"or": [
{"and": [
"canDash",
{"disableEquipment": "SpeedBooster"},
{"heatFrames": 270},
{"lavaFrames": 220}
]},
{"and": [
"canDash",
{"disableEquipment": "SpeedBooster"},
"SpaceJump",
"canCarefulJump",
{"heatFrames": 225},
{"lavaFrames": 180}
]},
{"and": [
{"heatFrames": 330},
{"lavaFrames": 300}
]}
]} |
|
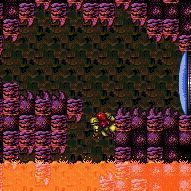

Samus will be slowed by lava if SpeedBooster is equipped, even with Gravity. Requires: {"or": [
"h_lavaProof",
"canSuitlessLavaDive"
]},
{"or": [
{"and": [
"HiJump",
{"heatFrames": 270},
{"lavaFrames": 270}
]},
{"and": [
{"heatFrames": 295},
{"lavaFrames": 295}
]}
]},
{"or": [
"canTrickyJump",
{"and": [
{"heatFrames": 60},
{"lavaFrames": 60}
]}
]},
{"or": [
{"and": [
"SpaceJump",
"canCarefulJump",
{"heatFrames": 100}
]},
{"and": [
"canWallJump",
{"heatFrames": 60}
]},
{"and": [
"canSpringBallJumpMidAir",
{"heatFrames": 100}
]},
{"and": [
"canBombJumpWaterEscape",
{"heatFrames": 180},
{"lavaFrames": 30}
]},
{"and": [
"HiJump",
{"heatFrames": 60},
{"lavaFrames": 10}
]}
]}Dev note: Varia no etanks is barely possible with vanilla Varia. Assumes waiting for the first namihe fireball if you are not practiced with the room. |
From: 5
Lava, Center Namihe
To: 3
Above Lava Junction


Gravity jump from below the Lowest-Right Namihe. Walljump using the right side wall to reach the top of the lava, avoiding the Namihe fireball. Turning Gravity Suit back on can reduce lava damage, but may make the walljumps more difficult. Requires: "canSuitlessLavaDive", "canGravityJump", "canTrickyWallJump", "canTrickyJump", {"heatFrames": 290}, {"gravitylessLavaFrames": 230}, {"lavaFrames": 20} Dev note: Assumes Gravity is not reenabled until after the strat is complete. A left wall gravity jump would save a small number of gravityless lava frames at the cost of more heat and lava frames. |
From: 5
Lava, Center Namihe
To: 3
Above Lava Junction
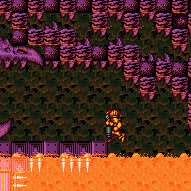

Gravity jump from below the Lowest-Right Namihe. A crouch jump or walljump can help exit the lava in one jump, but are not required. Requires: "canSuitlessLavaDive", "canGravityJump", "HiJump", {"heatFrames": 155}, {"gravitylessLavaFrames": 125}, {"lavaFrames": 20} |
|
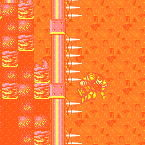

Use the bottom-most right-side Namihe to generate a flame and walk with it to the bottom-most left Namihe head. Use a turnaround animation as Samus is hit by the flame to cancel out knockback frames. While invulnerability frames are active, walljump up the spikes either 2 or 3 times and jump accross to catch the middle wall and climb from there. Requires: {"notable": "HiJumpless Dive"},
{"noBlueSuit": {}},
"canSuitlessLavaDive",
"canUseIFrames",
"canTrickyWallJump",
"canFastWallJumpClimb",
"canUseEnemies",
"canCameraManip",
{"heatFrames": 600},
{"gravitylessLavaFrames": 500},
{"enemyDamage": {"enemy": "Namihe", "type": "fireball", "hits": 1}} |
From: 5
Lava, Center Namihe
To: 3
Above Lava Junction
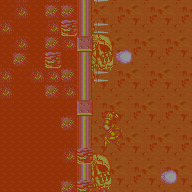

Use the bottom-most right-side Namihe to generate a flame and walk with it to the bottommost left Namihe head. Pause and use a turnaround animation as Samus is hit by the flame to cancel out knockback frames. Manually refill energy from reserves. While invulnerability frames are active, wall jump up the spikes either 2 or 3 times and jump accross to catch the middle wall and climb from there. Requires: {"notable": "HiJumpless Dive"},
{"noBlueSuit": {}},
"canSuitlessLavaDive",
"canUseIFrames",
"canTrickyWallJump",
"canFastWallJumpClimb",
"canUseEnemies",
"canCameraManip",
{"heatFrames": 175},
{"gravitylessLavaFrames": 175},
"h_pauseAbuseMinimalReserveRefill",
{"heatFrames": 375},
{"gravitylessLavaFrames": 300} |
From: 5
Lava, Center Namihe
To: 3
Above Lava Junction
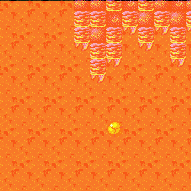

Double Spring Ball Jump from below the lowest-right Namihe. Double Spring Ball Jumps are easier in Lava than in Water. Requires: "canSuitlessLavaDive", "h_doubleSpringBallJumpWithHiJump", {"heatFrames": 255}, {"gravitylessLavaFrames": 225} |
From: 5
Lava, Center Namihe
To: 3
Above Lava Junction


Gravity jump from two platforms below the lowest-right Namihe. Double Spring Ball Jump out of the lava without HiJump. Requires: "canSuitlessLavaDive", "canGravityJump", "canDoubleSpringBallJumpMidAir", {"heatFrames": 400}, {"lavaFrames": 100}, {"gravitylessLavaFrames": 200} |
From: 5
Lava, Center Namihe
To: 3
Above Lava Junction
Align with the above platform and scroll the camera left by walking into the left side of the bottom-most tiles. Freeze both left side Namihes and begin bomb jumping Requires: "Gravity",
{"or": [
"h_lavaProof",
"canSuitlessLavaDive"
]},
"canJumpIntoIBJ",
"canLongIBJ",
"canDoubleBombJump",
"Plasma",
"Ice",
"canCameraManip",
{"heatFrames": 1040},
{"lavaFrames": 1020} |
|
Samus will be slowed by lava if SpeedBooster is equipped, even with Gravity. Requires: {"or": [
{"and": [
"Gravity",
{"heatFrames": 195},
{"lavaFrames": 195}
]},
{"and": [
"Gravity",
"canDash",
{"disableEquipment": "SpeedBooster"},
{"heatFrames": 150},
{"lavaFrames": 150}
]},
{"and": [
{"heatFrames": 200},
{"lavaFrames": 200}
]}
]} |
|


Requires: "h_heatedLavaCrystalFlash" |