Purple Shaft
Room ID: 95
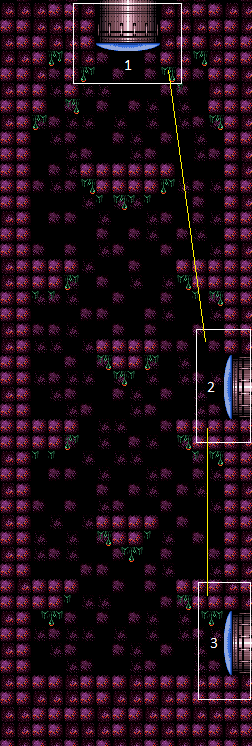
|
Requires: {"heatFrames": 10},
"h_heatedCrystalFlash",
{"heatFrames": 40}Dev note: The extra heat frames are for moving between the door and the platform. |
|
Requires: {"heatFrames": 80}Exit condition: "leaveWithDoorFrameBelow": {
"height": 3
} |
|
Requires: {"heatFrames": 80}Exit condition: "leaveWithPlatformBelow": {
"height": 9,
"leftPosition": -3.5,
"rightPosition": 3.5
} |
|
Entrance condition: "comeInWithGMode": {
"mode": "direct",
"morphed": false
},
"comesThroughToilet": "any"Exit condition: "leaveWithGMode": {
"morphed": false
} |
|
Entrance condition: "comeInWithGMode": {
"mode": "direct",
"morphed": true
},
"comesThroughToilet": "any"Requires: {"or": [
"h_artificialMorphIBJ",
"h_artificialMorphSpringBallBombJump",
{"and": [
"HiJump",
"h_artificialMorphSpringBall"
]}
]}Exit condition: "leaveWithGMode": {
"morphed": true
} |
|
Requires: {"heatFrames": 115},
{"or": [
"canDash",
{"heatFrames": 5}
]}Unlocks doors: {
"types": ["powerbomb"],
"requires": [{"heatFrames": 60}]
} |
|
Requires: "canDash", {"heatFrames": 105} Exit condition: "leaveWithRunway": {
"length": 4,
"openEnd": 1
}Unlocks doors: {
"types": ["missiles"],
"requires": [{"heatFrames": 50}]
},
{"types": ["super"], "requires": []},
{
"types": ["powerbomb"],
"requires": [{"heatFrames": 60}]
} |
|


Entrance condition: "comeInShinecharged": {},
"comesThroughToilet": "any"Requires: {"shineChargeFrames": 115},
"canShinechargeMovementComplex",
{"heatFrames": 115}Exit condition: "leaveShinecharged": {}Unlocks doors: {"types": ["super"], "requires": []},
{"types": ["missiles", "powerbomb"], "requires": ["never"]} |
From: 1
Top Door
To: 2
Top Right Door


Entrance condition: "comeInShinecharged": {},
"comesThroughToilet": "any"Requires: {"shineChargeFrames": 100},
"canShinechargeMovementComplex",
{"heatFrames": 120},
{"shinespark": {"frames": 5, "excessFrames": 0}}Exit condition: "leaveWithSpark": {}Unlocks doors: {"types": ["super"], "requires": []},
{"types": ["missiles", "powerbomb"], "requires": ["never"]} |
|
Entrance condition: "comeInWithGMode": {
"mode": "any",
"morphed": false
},
"comesThroughToilet": "any"Requires: "h_heatedGModeOffCameraDoor" |
|
Requires: {"heatFrames": 165},
{"or": [
"canMoonfall",
{"heatFrames": 15}
]} |
From: 1
Top Door
To: 3
Bottom Right Door
Entrance condition: "comeInShinecharged": {},
"comesThroughToilet": "any"Requires: "canShinechargeMovementTricky", {"shineChargeFrames": 150}, {"heatFrames": 185}, {"shinespark": {"frames": 9, "excessFrames": 0}} Exit condition: "leaveWithSpark": {}Unlocks doors: {"types": ["super"], "requires": []},
{"types": ["missiles", "powerbomb"], "requires": ["never"]} |
|
Crystal Flash, then shinecharge at the bottom. Use heat damage to interrupt. Entrance condition: "comeInWithRMode": {},
"comesThroughToilet": "no"Requires: "h_heatedCrystalFlashForReserveEnergy", {"heatFrames": 280}, {"or": [ {"canShineCharge": {"usedTiles": 12, "openEnd": 0}}, {"and": [ {"doorUnlockedAtNode": 3}, {"canShineCharge": {"usedTiles": 13, "openEnd": 0}} ]} ]}, "h_heatTriggerRModeSparkInterrupt" Unlocks doors: {"nodeId": 3, "types": ["ammo"], "requires": []} |
|
Entrance condition: "comeInWithGMode": {
"mode": "any",
"morphed": false
},
"comesThroughToilet": "any"Requires: "h_heatedGModeOffCameraDoor" |
|
Requires: {"heatFrames": 160},
{"or": [
"canDash",
{"heatFrames": 10}
]} |
|
Requires: {"heatFrames": 135},
"HiJump",
{"or": [
"canDash",
{"heatFrames": 5}
]} |
|
Requires: {"heatFrames": 160},
{"or": [
"canDash",
{"heatFrames": 10}
]}Exit condition: "leaveWithDoorFrameBelow": {
"height": 3
}Unlocks doors: {
"types": ["missiles"],
"requires": [{"heatFrames": 50}]
},
{"types": ["super"], "requires": []},
{
"types": ["powerbomb"],
"requires": [{"heatFrames": 110}]
} |
|
Requires: {"heatFrames": 160},
{"or": [
"canDash",
{"heatFrames": 10}
]}Exit condition: "leaveWithPlatformBelow": {
"height": 9,
"leftPosition": 0,
"rightPosition": 2
}Unlocks doors: {
"types": ["missiles"],
"requires": [{"heatFrames": 50}]
},
{"types": ["super"], "requires": []},
{
"types": ["powerbomb"],
"requires": [{"heatFrames": 110}]
} |
|
Requires: {"heatFrames": 135},
"HiJump",
{"or": [
"canDash",
{"heatFrames": 5}
]}Exit condition: "leaveWithPlatformBelow": {
"height": 9,
"leftPosition": 0,
"rightPosition": 2
}Unlocks doors: {
"types": ["missiles"],
"requires": [{"heatFrames": 50}]
},
{"types": ["super"], "requires": []},
{
"types": ["powerbomb"],
"requires": [{"heatFrames": 110}]
} |
|
Entrance condition: "comeInShinecharged": {}Requires: {"shineChargeFrames": 135},
"canShinechargeMovementComplex",
"HiJump",
{"heatFrames": 135}Exit condition: "leaveShinecharged": {}Unlocks doors: {"types": ["super"], "requires": []},
{"types": ["missiles", "powerbomb"], "requires": ["never"]} |
|


Entrance condition: "comeInShinecharging": {
"length": 3,
"openEnd": 0
}Requires: "canShinechargeMovementComplex", "HiJump", {"heatFrames": 140}, {"shineChargeFrames": 140} Exit condition: "leaveShinecharged": {}Unlocks doors: {"types": ["super"], "requires": []},
{"types": ["missiles", "powerbomb"], "requires": ["never"]} |
|


Entrance condition: "comeInShinecharging": {
"length": 3,
"openEnd": 0
}Requires: "canShinechargeMovementComplex", {"heatFrames": 175}, {"shinespark": {"frames": 8, "excessFrames": 0}} Exit condition: "leaveWithSpark": {}Unlocks doors: {"types": ["super"], "requires": []},
{"types": ["missiles", "powerbomb"], "requires": ["never"]} |
From: 2
Top Right Door
To: 1
Top Door
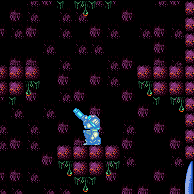

Entrance condition: "comeInShinecharging": {
"length": 3,
"openEnd": 0
}Requires: "canChainTemporaryBlue", "canXRayTurnaround", {"heatFrames": 360}, {"or": [ "canXRayCancelShinecharge", {"heatFrames": 160} ]} Exit condition: "leaveWithTemporaryBlue": {
"direction": "any"
}Unlocks doors: {"types": ["super", "powerbomb"], "requires": []},
{
"types": ["missiles"],
"requires": [{"heatFrames": 50}]
} |
|
Entrance condition: "comeInWithGMode": {
"mode": "any",
"morphed": false
}Requires: "h_heatedGMode", {"heatFrames": 40} |
From: 2
Top Right Door
To: 1
Top Door
After teleporting, briefly press down to extend Grapple, then press up to retract it again. Release Grapple to fall onto the platform below the door. Entrance condition: "comeInWithGrappleTeleport": {
"blockPositions": [[5, 3]]
}Requires: {"heatFrames": 100},
{"or": [
"canOffScreenMovement",
{"heatFrames": 80}
]},
{"doorUnlockedAtNode": 1}Unlocks doors: {
"types": ["powerbomb"],
"requires": [{"heatFrames": 110}]
},
{"types": ["missiles", "super"], "requires": ["never"]} |
|
Entrance condition: "comeInWithGrappleTeleport": {
"blockPositions": [[7, 2]]
}Requires: {"heatFrames": 75},
{"doorUnlockedAtNode": 1}Unlocks doors: {
"types": ["powerbomb"],
"requires": [{"heatFrames": 110}]
},
{"types": ["missiles", "super"], "requires": ["never"]} |
|


Perform a Crystal Flash in order to put energy into reserves. Position below the door, jump when Samus reaches 7 Energy, and mid-air morph. If done properly, Samus will clip past the door shell. With a mid-air morph, this has a 5-frame window for the jump. If Spring Ball is available, jumping in Spring Ball increases the window to 6 frames. In either case it may help to pause abuse: instead of jumping at a precise Energy value, set reserves to manual, wait until Samus is close to zero Energy, and press pause a moment before jumping, so that Samus is at 0 energy and in position just below the door when the pause hits. Then set reserves to auto (and re-equip Varia if available) and unpause. Entrance condition: "comeInWithRMode": {}Requires: "h_heatedCrystalFlash", "canRModeStandupClip", "canInsaneJump", {"heatFrames": 170}, {"disableEquipment": "Varia"}, {"autoReserveTrigger": {}} Bypasses door shell: true |
|
Exit condition: "leaveWithRunway": {
"length": 4,
"openEnd": 1
} |
|
Requires: "h_heatedCrystalFlash" |
From: 2
Top Right Door
To: 2
Top Right Door
Entrance condition: "comeInShinecharging": {
"length": 3,
"openEnd": 0
}Requires: "h_heatedCrystalSpark" |
|
Requires: {"heatFrames": 115},
{"or": [
"canDash",
{"heatFrames": 10}
]}Unlocks doors: {
"types": ["powerbomb"],
"requires": [{"heatFrames": 60}]
} |
|
Requires: "canDash", {"heatFrames": 125} Exit condition: "leaveWithRunway": {
"length": 13,
"openEnd": 0
}Unlocks doors: {
"types": ["missiles"],
"requires": [{"heatFrames": 50}]
},
{"types": ["super"], "requires": []},
{
"types": ["powerbomb"],
"requires": [{"heatFrames": 60}]
} |
|


Entrance condition: "comeInShinecharged": {}Requires: {"shineChargeFrames": 115},
{"heatFrames": 115}Exit condition: "leaveShinecharged": {}Unlocks doors: {"types": ["super"], "requires": []},
{"types": ["missiles", "powerbomb"], "requires": ["never"]} |
From: 2
Top Right Door
To: 3
Bottom Right Door


Entrance condition: "comeInShinecharging": {
"length": 3,
"openEnd": 1
}Requires: {"heatFrames": 105},
{"shineChargeFrames": 105}Exit condition: "leaveShinecharged": {}Unlocks doors: {"types": ["super"], "requires": []},
{"types": ["missiles", "powerbomb"], "requires": ["never"]} |
From: 2
Top Right Door
To: 3
Bottom Right Door
Entrance condition: "comeInShinecharged": {}Requires: {"shineChargeFrames": 85},
{"shinespark": {"frames": 8, "excessFrames": 0}},
{"heatFrames": 120}Exit condition: "leaveWithSpark": {}Unlocks doors: {"types": ["super"], "requires": []},
{"types": ["missiles", "powerbomb"], "requires": ["never"]} |
From: 2
Top Right Door
To: 3
Bottom Right Door

Entrance condition: "comeInShinecharging": {
"length": 3,
"openEnd": 0
}Requires: "canChainTemporaryBlue", "canXRayTurnaround", {"heatFrames": 290}, {"or": [ "canXRayCancelShinecharge", {"heatFrames": 160} ]} Exit condition: "leaveWithTemporaryBlue": {}Unlocks doors: {"types": ["super", "powerbomb"], "requires": []},
{
"types": ["missiles"],
"requires": [{"heatFrames": 50}]
} |
|
Crystal Flash, then shinecharge at the bottom. Use heat damage to interrupt. Entrance condition: "comeInWithRMode": {}Requires: "h_heatedCrystalFlashForReserveEnergy", {"heatFrames": 280}, {"or": [ {"canShineCharge": {"usedTiles": 12, "openEnd": 0}}, {"and": [ {"doorUnlockedAtNode": 3}, {"canShineCharge": {"usedTiles": 13, "openEnd": 0}} ]} ]}, "h_heatTriggerRModeSparkInterrupt" Unlocks doors: {"nodeId": 3, "types": ["ammo"], "requires": []} |
|
Entrance condition: "comeInWithGMode": {
"mode": "any",
"morphed": false
}Requires: "h_heatedGModeOpenDifferentDoor" |
|
Requires: {"or": [
{"heatFrames": 280},
{"and": [
"HiJump",
{"heatFrames": 220}
]}
]},
{"or": [
"canDash",
{"heatFrames": 5}
]} |
From: 3
Bottom Right Door
To: 1
Top Door
Entrance condition: "comeInShinecharging": {
"length": 8,
"openEnd": 1
}Requires: "canLongChainTemporaryBlue", "canXRayTurnaround", {"heatFrames": 590}, {"or": [ "canXRayCancelShinecharge", {"heatFrames": 160} ]} Exit condition: "leaveWithTemporaryBlue": {
"direction": "any"
}Unlocks doors: {"types": ["super", "powerbomb"], "requires": []},
{
"types": ["missiles"],
"requires": [{"heatFrames": 50}]
} |
From: 3
Bottom Right Door
To: 1
Top Door


Entrance condition: "comeInShinecharging": {
"length": 11,
"openEnd": 1
}Requires: "canLongChainTemporaryBlue", "canXRayTurnaround", {"heatFrames": 710}, {"or": [ "canXRayCancelShinecharge", {"heatFrames": 160} ]} Exit condition: "leaveWithTemporaryBlue": {
"direction": "any"
}Unlocks doors: {"types": ["super", "powerbomb"], "requires": []},
{
"types": ["missiles"],
"requires": [{"heatFrames": 50}]
} |
|
Entrance condition: "comeInWithGMode": {
"mode": "any",
"morphed": false
}Requires: "h_heatedGMode", {"heatFrames": 40} |
From: 3
Bottom Right Door
To: 1
Top Door
After teleporting, briefly press down to extend Grapple, then press up to retract it again. Release Grapple to fall onto the platform below the door. Entrance condition: "comeInWithGrappleTeleport": {
"blockPositions": [[5, 3]]
}Requires: {"heatFrames": 100},
"canOffScreenMovement",
{"doorUnlockedAtNode": 1}Unlocks doors: {
"types": ["powerbomb"],
"requires": [{"heatFrames": 110}]
},
{"types": ["missiles", "super"], "requires": ["never"]} |
|
Entrance condition: "comeInWithGrappleTeleport": {
"blockPositions": [[7, 2]]
}Requires: {"heatFrames": 75},
{"doorUnlockedAtNode": 1}Unlocks doors: {
"types": ["powerbomb"],
"requires": [{"heatFrames": 110}]
},
{"types": ["missiles", "super"], "requires": ["never"]} |
From: 3
Bottom Right Door
To: 1
Top Door
Perform a Crystal Flash in order to put energy into reserves. Position below the door, jump when Samus reaches 7 Energy, and mid-air morph, timed so that reserves trigger while Samus still has upward momentum just before Samus would hit the door. If done properly, the R-mode standup will cause Samus to clip past the door shell. With a mid-air morph, this has a 5-frame window for the jump. If Spring Ball is available, jumping in Spring Ball increases the window to 6 frames. In either case it may help to pause abuse: instead of jumping at a precise Energy value, set reserves to manual, wait until Samus is close to zero Energy, and press pause a moment before jumping, so that Samus is at 0 energy and in position just below the door when the pause hits. Then set reserves to auto (and re-equip Varia if available) and unpause. Entrance condition: "comeInWithRMode": {}Requires: "h_heatedCrystalFlash", "canRModeStandupClip", "canInsaneJump", {"heatFrames": 280}, {"disableEquipment": "Varia"}, {"autoReserveTrigger": {}}, {"heatFrames": 5} Bypasses door shell: true |
|
Requires: {"heatFrames": 135},
{"or": [
"canDash",
{"heatFrames": 5}
]}Unlocks doors: {
"types": ["powerbomb"],
"requires": [{"heatFrames": 60}]
} |
|
Requires: "HiJump",
{"heatFrames": 115},
{"or": [
  "canDash",
  {"heatFrames": 5}
]}
Unlocks doors: {
"types": ["powerbomb"],
"requires": [{"heatFrames": 60}]
} |
|
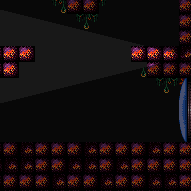
Enter with G-mode direct, back up to between 1 and 6 pixels from the door transition, and activate X-ray to get very deep stuck in the door. Climb up 1 screen, and perform a turnaround buffered spin-jump away from the door to trigger the transition, bypassing any lock on the door. Entrance condition: "comeInWithGMode": {
"mode": "direct",
"morphed": false
}Requires: "canGModeXRayClimb", "h_heatProof" Bypasses door shell: true |
|
Requires: "canDash", {"heatFrames": 120} Exit condition: "leaveWithRunway": {
"length": 4,
"openEnd": 1
}Unlocks doors: {
"types": ["missiles"],
"requires": [{"heatFrames": 50}]
},
{"types": ["super"], "requires": []},
{
  "types": ["powerbomb"],
  "requires": [{"heatFrames": 60}]
} |
|


Entrance condition: "comeInShinecharged": {}Requires: {"shineChargeFrames": 115},
"HiJump",
"canShinechargeMovementComplex",
{"heatFrames": 115}Exit condition: "leaveShinecharged": {}Unlocks doors: {"types": ["super"], "requires": []},
{"types": ["missiles", "powerbomb"], "requires": ["never"]} |
|


Entrance condition: "comeInShinecharged": {}Requires: {"shineChargeFrames": 135},
"canShinechargeMovementComplex",
{"heatFrames": 135}Exit condition: "leaveShinecharged": {}Unlocks doors: {"types": ["super"], "requires": []},
{"types": ["missiles", "powerbomb"], "requires": ["never"]} |
From: 3
Bottom Right Door
To: 2
Top Right Door
Entrance condition: "comeInShinecharged": {}Requires: {"shineChargeFrames": 90},
"HiJump",
"canShinechargeMovementComplex",
{"heatFrames": 120},
{"shinespark": {"frames": 7, "excessFrames": 0}}Exit condition: "leaveWithSpark": {}Unlocks doors: {"types": ["super"], "requires": []},
{"types": ["missiles", "powerbomb"], "requires": ["never"]} |
From: 3
Bottom Right Door
To: 2
Top Right Door
Entrance condition: "comeInShinecharged": {}Requires: {"shineChargeFrames": 115},
"canShinechargeMovementComplex",
{"heatFrames": 145},
{"shinespark": {"frames": 6, "excessFrames": 0}}Exit condition: "leaveWithSpark": {}Unlocks doors: {"types": ["super"], "requires": []},
{"types": ["missiles", "powerbomb"], "requires": ["never"]} |
From: 3
Bottom Right Door
To: 2
Top Right Door
Entrance condition: "comeInShinecharging": {
"length": 12,
"openEnd": 0
}Requires: "canShinechargeMovementComplex", {"heatFrames": 135}, {"shineChargeFrames": 135} Exit condition: "leaveShinecharged": {}Unlocks doors: {"types": ["super"], "requires": []},
{"types": ["missiles", "powerbomb"], "requires": ["never"]} |
From: 3
Bottom Right Door
To: 2
Top Right Door
Entrance condition: "comeInShinecharging": {
"length": 8,
"openEnd": 0
}Requires: "canShinechargeMovementComplex", {"heatFrames": 115}, {"shineChargeFrames": 115} Exit condition: "leaveShinecharged": {}Unlocks doors: {"types": ["super"], "requires": []},
{"types": ["missiles", "powerbomb"], "requires": ["never"]} |
From: 3
Bottom Right Door
To: 2
Top Right Door


Entrance condition: "comeInShinecharging": {
"length": 3,
"openEnd": 1
}Requires: "canShinechargeMovementComplex", {"heatFrames": 105}, {"shineChargeFrames": 105} Exit condition: "leaveShinecharged": {}Unlocks doors: {"types": ["super"], "requires": []},
{"types": ["missiles", "powerbomb"], "requires": ["never"]} |
From: 3
Bottom Right Door
To: 2
Top Right Door
Entrance condition: "comeInShinecharging": {
"length": 12,
"openEnd": 0
}Requires: "canShinechargeMovementTricky", {"heatFrames": 165}, {"shineChargeFrames": 165} Exit condition: "leaveShinecharged": {}Unlocks doors: {"types": ["super"], "requires": []},
{"types": ["missiles", "powerbomb"], "requires": ["never"]} |
From: 3
Bottom Right Door
To: 2
Top Right Door
Entrance condition: "comeInShinecharging": {
"length": 8,
"openEnd": 0
}Requires: "canShinechargeMovementComplex", {"heatFrames": 145}, {"shineChargeFrames": 145} Exit condition: "leaveShinecharged": {}Unlocks doors: {"types": ["super"], "requires": []},
{"types": ["missiles", "powerbomb"], "requires": ["never"]} |
From: 3
Bottom Right Door
To: 2
Top Right Door


Entrance condition: "comeInShinecharging": {
"length": 3,
"openEnd": 1
}Requires: "canShinechargeMovementComplex", {"heatFrames": 135}, {"shineChargeFrames": 135} Exit condition: "leaveShinecharged": {}Unlocks doors: {"types": ["super"], "requires": []},
{"types": ["missiles", "powerbomb"], "requires": ["never"]} |
From: 3
Bottom Right Door
To: 2
Top Right Door
Entrance condition: "comeInShinecharging": {
"length": 12,
"openEnd": 0
}Requires: "canShinechargeMovementComplex", {"heatFrames": 170}, {"shinespark": {"frames": 9, "excessFrames": 0}} Exit condition: "leaveWithSpark": {}Unlocks doors: {"types": ["super"], "requires": []},
{"types": ["missiles", "powerbomb"], "requires": ["never"]}Dev note: This Leave With Spark variation is included since leaving with frames remaining is tight. For shorter runway uses (or with HiJump), a spark variation is not needed as you can leave with plenty of frames. |
From: 3
Bottom Right Door
To: 2
Top Right Door

Entrance condition: "comeInShinecharging": {
"length": 8,
"openEnd": 1
}Requires: "canChainTemporaryBlue", "canXRayTurnaround", {"heatFrames": 390}, {"or": [ "canXRayCancelShinecharge", {"heatFrames": 160} ]} Exit condition: "leaveWithTemporaryBlue": {}Unlocks doors: {"types": ["super", "powerbomb"], "requires": []},
{
"types": ["missiles"],
"requires": [{"heatFrames": 50}]
} |
From: 3
Bottom Right Door
To: 2
Top Right Door

Entrance condition: "comeInShinecharging": {
"length": 11,
"openEnd": 1
}Requires: "canChainTemporaryBlue", "canXRayTurnaround", {"heatFrames": 490}, {"or": [ "canXRayCancelShinecharge", {"heatFrames": 160} ]} Exit condition: "leaveWithTemporaryBlue": {}Unlocks doors: {"types": ["super", "powerbomb"], "requires": []},
{
"types": ["missiles"],
"requires": [{"heatFrames": 50}]
} |
|
Entrance condition: "comeInWithGMode": {
"mode": "any",
"morphed": false
}Requires: "h_heatedGModeOpenDifferentDoor" |
|
Exit condition: "leaveWithRunway": {
"length": 13,
"openEnd": 0
} |
|
Crystal Flash, then shinecharge at the bottom. Use heat damage to interrupt. Entrance condition: "comeInWithRMode": {}Requires: "h_heatedCrystalFlashForReserveEnergy", {"heatFrames": 280}, {"or": [ {"canShineCharge": {"usedTiles": 12, "openEnd": 0}}, {"and": [ {"doorUnlockedAtNode": 3}, {"canShineCharge": {"usedTiles": 13, "openEnd": 0}} ]} ]}, "h_heatTriggerRModeSparkInterrupt" Unlocks doors: {"nodeId": 3, "types": ["ammo"], "requires": []} |
|
Requires: "h_heatedCrystalFlash" |
From: 3
Bottom Right Door
To: 3
Bottom Right Door
Entrance condition: "comeInShinecharging": {
"length": 12,
"openEnd": 0
}Requires: "h_heatedCrystalSpark" |