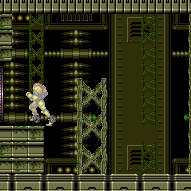
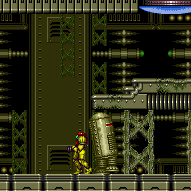
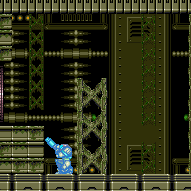
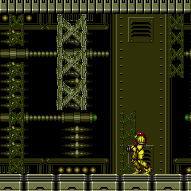
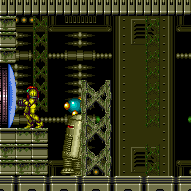
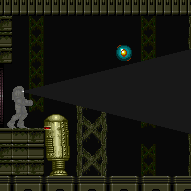
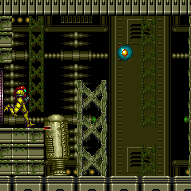
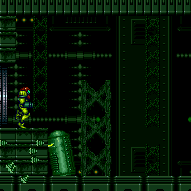
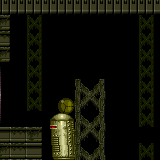
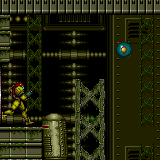
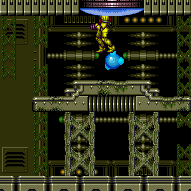
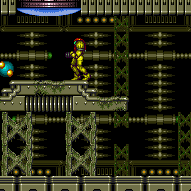
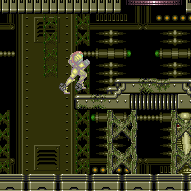
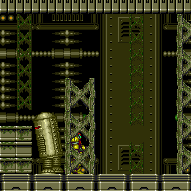
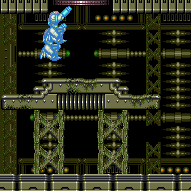
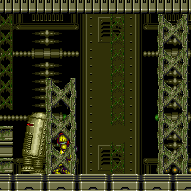
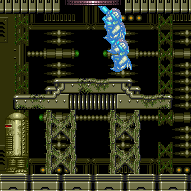
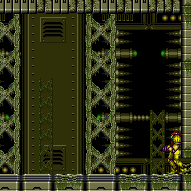
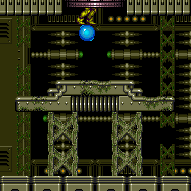
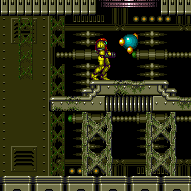
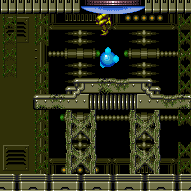
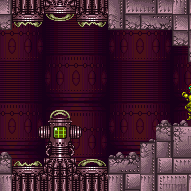
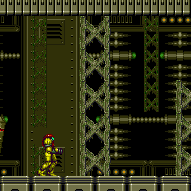
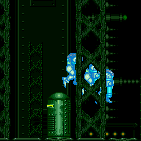
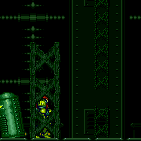
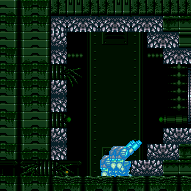
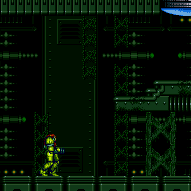
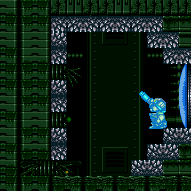
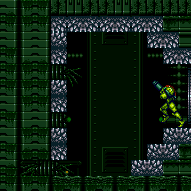
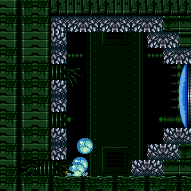
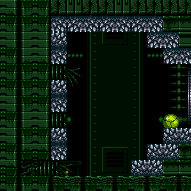
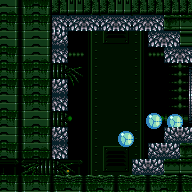
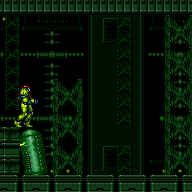
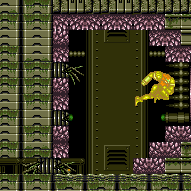
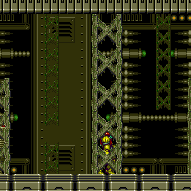
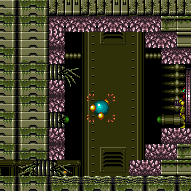
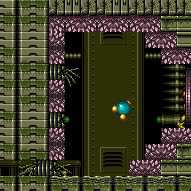
Basement
Room ID: 156

|
Exit condition: {
"leaveWithRunway": {
"length": 3,
"openEnd": 1
}
} |
|
Requires: {
"not": "f_DefeatedPhantoon"
}
"canRiskPermanentLossOfAccess"Exit condition: {
"leaveWithRunway": {
"length": 5,
"openEnd": 0
}
}Dev note: The length is more similar to 5 with 0 open end, than 4 with 1. |
|
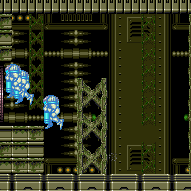
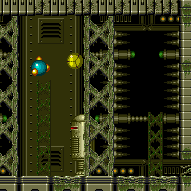
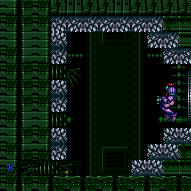
One way to position the Atomic is to lure it to the right by standing on the ground, then jump over it and freeze it while standing in the corner on the ground once it is just under 2 tiles away from the ledge. Stand on the ledge and freeze it again once it is in position, maintaining a half-tile gap between the Atomic and the runway to extend it as much as possible. Requires: "h_frozenEnemyRunway" Exit condition: {
"leaveWithRunway": {
"length": 5,
"openEnd": 0
}
}Dev note: This does not require Phantoon to be killed, as the broken workrobot is there otherwise. |
|
Requires: "f_DefeatedPhantoon"
"h_speedJump"
{
"or": [
"canMomentumConservingMorph",
{
"and": [
"canMomentumConservingTurnaround",
"canInsaneJump"
]
}
]
}Exit condition: {
"leaveWithSidePlatform": {
"height": 3,
"runway": {
"length": 45,
"openEnd": 1
},
"obstruction": [
3,
0
]
}
}Dev note: Max extra run speed $7.0. |
|
Requires: {
"not": "f_DefeatedPhantoon"
}
"h_speedJump"
"canInsaneJump"
"canMomentumConservingMorph"
"canInsaneMidAirMorph"Exit condition: {
"leaveWithSidePlatform": {
"height": 3,
"runway": {
"length": 45,
"openEnd": 1
},
"obstruction": [
5,
0
]
}
}Dev note: Max extra run speed $7.0. The obstruction (from the Workrobot) actually extends between 4 and 5 tiles. |
|
Requires: "canShinechargeMovement"
"h_shinechargeMaxRunway"
{
"shineChargeFrames": 45
}Exit condition: {
"leaveShinecharged": {}
} |
|
Exit condition: {
"leaveSpinning": {
"remoteRunway": {
"length": 45,
"openEnd": 1
}
}
} |
|
Exit condition: {
"leaveWithMockball": {
"remoteRunway": {
"length": 45,
"openEnd": 1
},
"landingRunway": {
"length": 3,
"openEnd": 1
}
}
} |
|
Exit condition: {
"leaveWithSpringBallBounce": {
"remoteRunway": {
"length": 45,
"openEnd": 1
},
"landingRunway": {
"length": 1,
"openEnd": 1
},
"movementType": "uncontrolled"
}
} |
|
Exit condition: {
"leaveSpaceJumping": {
"remoteRunway": {
"length": 38,
"openEnd": 0
}
}
}Dev note: FIXME: Slightly longer runway can be used with power on; it's not clear yet if there's any application where this matters. |
|
Requires: {
"canShineCharge": {
"usedTiles": 45,
"openEnd": 1
}
}
"canChainTemporaryBlue"Exit condition: {
"leaveWithTemporaryBlue": {}
} |
|
Requires: "h_CrystalFlash" Clears obstacles: A |
|
Requires: "f_DefeatedPhantoon" Exit condition: {
"leaveWithGModeSetup": {}
} |
|
Requires: {
"enemyDamage": {
"enemy": "Atomic",
"type": "contact",
"hits": 1
}
}
"f_DefeatedPhantoon" |
From: 1
Left Door
To: 1
Left Door
Entrance condition: {
"comeInWithRMode": {}
}Requires: "f_DefeatedPhantoon"
{
"or": [
{
"and": [
{
"disableEquipment": "ETank"
},
{
"resourceAvailable": [
{
"type": "Energy",
"count": 80
}
]
}
]
},
"h_CrystalFlash"
]
}
{
"canShineCharge": {
"usedTiles": 38,
"openEnd": 1
}
}
"h_RModeKnockbackSpark" |
|
|
|
Entrance condition: {
"comeInWithRMode": {}
}Requires: "f_DefeatedPhantoon"
{
"or": [
"h_CrystalFlashForReserveEnergy",
{
"and": [
"h_RModeCanRefillReserves",
{
"partialRefill": {
"type": "ReserveEnergy",
"limit": 20
}
}
]
}
]
}
"h_shinechargeMaxRunway"
{
"autoReserveTrigger": {
"maxReserveEnergy": 95
}
}
"canRModeSparkInterrupt" |
|
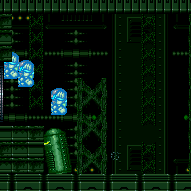
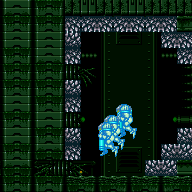
Freeze an Atomic at a precise distance below the door in order to jump up and clip through the door shell. Freezing it while it is moving horizontally and Samus is standing works as a trivial setup. Be careful to avoid the Workrobot's invisible, stationary lasers. Entrance condition: {
"comeInWithGMode": {
"mode": "any",
"morphed": false
}
}Requires: "canComplexGMode"
"f_DefeatedPhantoon"
{
"or": [
"h_preciseIceClip",
"h_highPixelIceClip"
]
}Exit condition: {
"leaveWithGMode": {
"morphed": false
}
}Bypasses door shell: true |
|
Use the camera scroll blocks just left of the bomb blocks, in order to overload PLMs and go through them. Entrance condition: {
"comeInWithGMode": {
"mode": "any",
"morphed": true
}
}Requires: "h_artificialMorphMovement" |
|
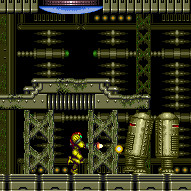
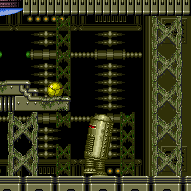
On room entry, place a Power Bomb to kill the Atomic and land on the Workrobot. Wait for the Workrobot to move across the room until it meets with a second robot. Depending on where the robots place their invisible, stationary lasers, either roll off and quickly roll under the Atomic, stay on for a second to try to lure the Atomic left a bit, or use a Power Bomb to kill it. Be sure to watch and listen for where the robots are placing their lasers; they occupy a 24x24 pixel space and are typically placed with only 1-2 tiles of space between them. Fall off the workrobots without any horizontal movement to decrease the chance of touching a laser. Note that the majority of the lasers that the workrobots place only deal 4 damage and can be tanked with a suit's damage reduction or an immobile entrance. Avoid placing a Power Bombs too close to the right wall or it will hit the bomb block and it will no longer be passable. Quickly use the camera scroll blocks just left of the bomb blocks, in order to overload PLMs and go through them before the Atomic hits Samus. Entrance condition: {
"comeInWithGMode": {
"mode": "any",
"morphed": true
}
}Requires: {
"notable": "G-Mode Morph Workrobot Ride"
}
"canComplexGMode"
"f_DefeatedPhantoon"
"canBePatient"
"h_artificialMorphPowerBomb"
{
"or": [
"canTrickyGMode",
{
"enemyDamage": {
"enemy": "Workrobot",
"type": "ring-side",
"hits": 1
}
}
]
}
{
"or": [
"canTrickyJump",
"h_artificialMorphPowerBomb",
{
"enemyDamage": {
"enemy": "Atomic",
"type": "contact",
"hits": 1
}
}
]
} |
|
Wait for the Atomic to hit Samus, then use it to force her way through the first Workrobot. Move partway across the room and keep the Atomic just off screen, which is where Samus can see approximately one full tile of the vertical doorshell. Wait for the Workrobot to appear, then hold right as it enters the screen to get hit by the Atomic and kago through the Workrobot. Quickly use the camera scroll blocks just left of the bomb blocks, in order to overload PLMs and go through them before the Atomic hits Samus. Entrance condition: {
"comeInWithGMode": {
"mode": "direct",
"morphed": true,
"mobility": "immobile"
}
}Requires: "canComplexGMode"
"f_DefeatedPhantoon"
"canKago"
{
"enemyDamage": {
"enemy": "Atomic",
"type": "contact",
"hits": 1
}
}Dev note: The first Atomic hit is accounted through the regain mobility strat. |
|
Delay getting hit by the Atomic for as long as possible, then fall off the ledge and clip through the first Workrobot. Move partway across the room and keep the Atomic just off screen, which is where Samus can see approximately one full tile of the vertical doorshell. Wait for the Workrobot to appear, then hold right as it enters the screen to get hit by the Atomic and kago through the Workrobot. Quickly use the camera scroll blocks just left of the bomb blocks, in order to overload PLMs and go through them before the Atomic hits Samus. Entrance condition: {
"comeInWithGMode": {
"mode": "any",
"morphed": true
}
}Requires: "canComplexGMode"
"f_DefeatedPhantoon"
"canKago"
{
"enemyDamage": {
"enemy": "Atomic",
"type": "contact",
"hits": 2
}
} |
|
|
|
Freeze an Atomic at a precise distance below the door in order to jump up and clip through the door shell. Freezing it while it is moving horizontally and Samus is standing works as a trivial setup. Requires: "f_DefeatedPhantoon" "h_iceClip" Bypasses door shell: true |
|
Requires: "canShinechargeMovement"
"h_shinechargeMaxRunway"
{
"shineChargeFrames": 70
}Exit condition: {
"leaveShinecharged": {}
} |
|
Requires: {
"canShineCharge": {
"usedTiles": 28,
"openEnd": 0
}
}
"canChainTemporaryBlue"Exit condition: {
"leaveWithTemporaryBlue": {
"direction": "right"
}
}Dev note: A couple more tiles can be used if power is on, but this doesn't seem worth modeling. |
|
Requires: {
"or": [
{
"and": [
"f_DefeatedPhantoon",
{
"canShineCharge": {
"usedTiles": 16,
"openEnd": 0
}
}
]
},
{
"and": [
{
"canShineCharge": {
"usedTiles": 28,
"openEnd": 0
}
},
"canXRayTurnaround"
]
}
]
}
"canChainTemporaryBlue"Exit condition: {
"leaveWithTemporaryBlue": {
"direction": "left"
}
} |
|
Requires: "f_DefeatedPhantoon"
{
"or": [
{
"and": [
{
"resetRoom": {
"nodes": [
1
]
}
},
{
"cycleFrames": 510
}
]
},
{
"and": [
{
"resetRoom": {
"nodes": [
2
]
}
},
{
"cycleFrames": 555
}
]
},
{
"and": [
"h_useMorphBombs",
{
"resetRoom": {
"nodes": [
3
]
}
},
{
"cycleFrames": 800
}
]
}
]
}
{
"or": [
"ScrewAttack",
{
"haveBlueSuit": {}
},
"Plasma",
{
"and": [
{
"or": [
"Spazer",
"Wave"
]
},
{
"cycleFrames": 240
}
]
},
{
"cycleFrames": 515
}
]
}
{
"or": [
"canDash",
{
"cycleFrames": 200
}
]
}Resets obstacles: A Farm cycle drops: 3 Atomic |
|
Exit condition: {
"leaveWithDoorFrameBelow": {
"height": 2
}
} |
|
Exit condition: {
"leaveWithPlatformBelow": {
"height": 6,
"leftPosition": -5.5,
"rightPosition": 5.5
}
}Dev note: We could add another jumpway (or two) for the long platform below but it does not yet seem to have an application. |
|
Requires: "h_shinechargeMaxRunway" "h_CrystalSpark" |
|
Entrance condition: {
"comeInWithRMode": {},
"comesThroughToilet": "no"
}Requires: "f_DefeatedPhantoon"
{
"or": [
"h_CrystalFlashForReserveEnergy",
{
"and": [
"h_RModeCanRefillReserves",
{
"partialRefill": {
"type": "ReserveEnergy",
"limit": 20
}
}
]
}
]
}
"h_shinechargeMaxRunway"
{
"autoReserveTrigger": {
"maxReserveEnergy": 95
}
}
"canRModeSparkInterrupt" |
|
Bring two atomics to the doorway. Stand on one frozen Atomic to freeze a second Atomic at the correct height to use as a platform. Requires: "canUpwardGModeSetup" "canTrickyUseFrozenEnemies" "f_DefeatedPhantoon" Exit condition: {
"leaveWithGModeSetup": {}
} |
|
Requires: {
"enemyDamage": {
"enemy": "Atomic",
"type": "contact",
"hits": 1
}
}
"f_DefeatedPhantoon" |
|
Entrance condition: {
"comeInWithGMode": {
"mode": "direct",
"morphed": false
},
"comesThroughToilet": "any"
}Exit condition: {
"leaveWithGMode": {
"morphed": false
}
} |
|
With Bombs, it may be helpful to roll off the platform and kill the Atomics before safely leaving the room. Entrance condition: {
"comeInWithGMode": {
"mode": "direct",
"morphed": true
},
"comesThroughToilet": "any"
}Requires: "h_artificialMorphMovement" Exit condition: {
"leaveWithGMode": {
"morphed": true
}
} |
|
Freeze an Atomic at a precise distance below the door in order to jump up and clip through the door shell. Freezing it while it is moving horizontally and Samus is standing works as a trivial setup. Entrance condition: {
"comeInWithGMode": {
"mode": "indirect",
"morphed": false
},
"comesThroughToilet": "any"
}Requires: "canComplexGMode"
"f_DefeatedPhantoon"
{
"or": [
"h_preciseIceClip",
"h_highPixelIceClip"
]
}Exit condition: {
"leaveWithGMode": {
"morphed": false
}
}Bypasses door shell: true Dev note: This is only for indirect G-Mode, because it is trivial while in direct, and would use a different strat. |
|
Entrance condition: {
"comeInWithRMode": {},
"comesThroughToilet": "any"
}Requires: "f_DefeatedPhantoon"
{
"or": [
{
"and": [
{
"disableEquipment": "ETank"
},
{
"resourceAvailable": [
{
"type": "Energy",
"count": 80
}
]
}
]
},
"h_CrystalFlash"
]
}
{
"canShineCharge": {
"usedTiles": 38,
"openEnd": 1
}
}
"h_RModeKnockbackSpark" |
|
Requires: {
"or": [
"h_bombThings",
{
"and": [
"Morph",
{
"obstaclesCleared": [
"A"
]
}
]
}
]
}Clears obstacles: A |
|
Requires: {
"haveBlueSuit": {}
}
"Morph" |
|
This speedball is easier with Phantoon dead, since you can push the robots all the way left. It's even possible to setup the short hop mockball by bonking the center platform. Requires: "h_getBlueSpeedMaxRunway" "canSpeedball" "f_DefeatedPhantoon" Clears obstacles: A |
|
This speedball is harder with Phantoon alive and has a shorter runway because of the robot standing in the way. Requires: {
"getBlueSpeed": {
"usedTiles": 22,
"openEnd": 0
}
}
"canSpeedball"Clears obstacles: A |
|
Requires: {
"obstaclesCleared": [
"A"
]
}Exit condition: {
"leaveWithSpringBallBounce": {
"remoteRunway": {
"length": 45,
"openEnd": 1
},
"landingRunway": {
"length": 2,
"openEnd": 1
},
"maxExtraRunSpeed": "$3.C",
"movementType": "controlled"
}
}Unlocks doors: {"types":["ammo"],"requires":[]}Dev note: Higher run speed can be used, especially if power is on, but it is more difficult and not clear yet if it's worth modeling. |
|
Requires: {
"getBlueSpeed": {
"usedTiles": 22,
"openEnd": 0
}
}
"canSpeedball"
"canChainTemporaryBlue"Exit condition: {
"leaveWithTemporaryBlue": {}
}Unlocks doors: {"types":["ammo"],"requires":[]} |
|
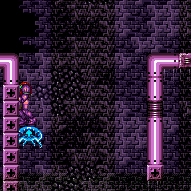
Use the camera scroll blocks just left of the bomb blocks, in order to overload PLMs and go through them. Entrance condition: {
"comeInWithGMode": {
"mode": "any",
"morphed": true
},
"comesThroughToilet": "any"
}Requires: "h_artificialMorphMovement" |
From: 2
Top Door
To: 3
Right Door
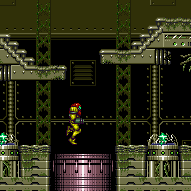
On room entry, dodge the Atomic and quickly place a Power Bomb to kill both Atomics. It is tricky but possible to kill them both with a single Power Bomb placed on the right half of the platform. Wait for the Workrobot to pass, then roll off to the right of it or use a Power Bomb to boost over any stationary, invisible lasers. Be sure to watch and listen for where the robots are placing their lasers; they occupy a 24x24 pixel space and are typically placed with only 1-2 tiles of space between them. Fall without any horizontal movement to decrease the chance of touching a laser. Note that the majority of the lasers that the workrobots place only deal 4 damage and can be tanked with a suit's damage reduction or an immobile entrance. Use the camera scroll blocks just left of the bomb blocks, in order to overload PLMs and go through them. Entrance condition: {
"comeInWithGMode": {
"mode": "any",
"morphed": true
},
"comesThroughToilet": "any"
}Requires: "canComplexGMode"
"f_DefeatedPhantoon"
"h_artificialMorphPowerBomb"
{
"or": [
"canTrickyDodgeEnemies",
"h_artificialMorphPowerBomb"
]
}
"h_artificialMorphPowerBomb"
{
"or": [
"canInsaneJump",
{
"enemyDamage": {
"enemy": "Workrobot",
"type": "ring-side",
"hits": 1
}
}
]
} |
From: 2
Top Door
To: 3
Right Door
On room entry, kill the Atomics with blue suit without falling off of the platform. Wait for the Workrobot to pass, then roll off to the right of it while avoiding any stationary, invisible lasers. Be sure to watch and listen for where the robots are placing their lasers; they occupy a 24x24 pixel space and are typically placed with only 1-2 tiles of space between them. Fall without any horizontal movement to decrease the chance of touching a laser. Note that the majority of the lasers that the workrobots place only deal 4 damage and can be tanked with a suit's damage reduction or an immobile entrance. Entrance condition: {
"comeInWithGMode": {
"mode": "any",
"morphed": true
},
"comesThroughToilet": "any"
}Requires: "h_blueSuitGMode"
"canComplexGMode"
"f_DefeatedPhantoon"
{
"or": [
"canInsaneJump",
{
"enemyDamage": {
"enemy": "Workrobot",
"type": "ring-side",
"hits": 1
}
}
]
} |
|
Entrance condition: {
"comeInWithGrappleTeleport": {
"blockPositions": [
[
7,
2
]
]
}
} |
|
Entrance condition: {
"comeInWithGrappleTeleport": {
"blockPositions": [
[
3,
12
],
[
3,
13
]
]
}
}Bypasses door shell: true |
|
Entrance condition: {
"comeInWithGrappleTeleport": {
"blockPositions": [
[
3,
12
]
]
}
}Exit condition: {
"leaveWithGrappleTeleport": {
"blockPositions": [
[
3,
12
]
]
}
}Bypasses door shell: true |
|
Entrance condition: {
"comeInWithGrappleTeleport": {
"blockPositions": [
[
3,
13
]
]
}
}Exit condition: {
"leaveWithGrappleTeleport": {
"blockPositions": [
[
3,
13
]
]
}
}Bypasses door shell: true |
|
Requires: {
"or": [
"h_bombThings",
{
"and": [
"Morph",
{
"obstaclesCleared": [
"A"
]
}
]
}
]
}Clears obstacles: A |
|
Requires: {
"haveBlueSuit": {}
}
"Morph" |
|
Entrance condition: {
"comeInBlueSpinning": {
"maxExtraRunSpeed": "$2.8",
"unusableTiles": 1
}
}Requires: "canSpeedball" "canCarefulJump" "canSlowShortCharge" Clears obstacles: A |
From: 3
Right Door
To: 2
Top Door
Entrance condition: {
"comeInShinecharging": {
"length": 1,
"openEnd": 0
}
}Requires: "canChainTemporaryBlue" "canSpringBallBounce" Clears obstacles: A |
From: 3
Right Door
To: 2
Top Door
Entrance condition: {
"comeInWithTemporaryBlue": {}
}Requires: "canChainTemporaryBlue" "canSpringBallBounce" Clears obstacles: A |
|
Entrance condition: {
"comeInWithBlueSpringBallBounce": {
"movementType": "controlled",
"maxExtraRunSpeed": "$1.A",
"minLandingTiles": 2
}
}Requires: "canTrickySpringBallBounce" "canInsaneJump" Clears obstacles: A |
|
Farm atomics and push the robots apart to open up the runway. Use an Atomic to interrupt. Entrance condition: {
"comeInWithRMode": {}
}Requires: "f_DefeatedPhantoon"
{
"or": [
"h_CrystalFlashForReserveEnergy",
{
"and": [
"h_bombThings",
"h_RModeCanRefillReserves",
{
"partialRefill": {
"type": "ReserveEnergy",
"limit": 20
}
}
]
}
]
}
"h_shinechargeMaxRunway"
{
"autoReserveTrigger": {
"maxReserveEnergy": 95
}
}
"canRModeSparkInterrupt"Clears obstacles: A |
|
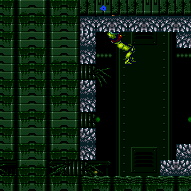
Use the camera scroll blocks just right of the bomb blocks, in order to overload PLMs and go through them. Cancel g-mode and return into the morph tunnel to fix the camera. Entrance condition: {
"comeInWithGMode": {
"mode": "any",
"morphed": false
}
}Requires: "Morph" |
|
Use the camera scroll blocks just right of the bomb blocks, in order to overload PLMs and go through them. Dodge the enemies while getting to the door. Entrance condition: {
"comeInWithGMode": {
"mode": "any",
"morphed": true
}
}Requires: "canOffScreenMovement" |
|
Exit condition: {
"leaveWithRunway": {
"length": 2,
"openEnd": 1
}
} |
|
Lure an Atomic from the left half of the room. Morph in the corner against the top stair and wait for the Atomic to approach. Quickly unmorph just before and freeze the Atomic just after it hits Samus. Requires: "f_DefeatedPhantoon"
{
  "or": [
    "h_bombThings",
    {
      "and": [
        "Morph",
        {
          "obstaclesCleared": [
            "A"
          ]
        }
      ]
    }
  ]
}
"h_frozenEnemyRunway"
{
"or": [
{
"enemyDamage": {
"enemy": "Atomic",
"type": "contact",
"hits": 1
}
},
"h_pauseAbuseMinimalReserveRefill"
]
}Exit condition: {
"leaveWithRunway": {
"length": 4,
"openEnd": 0
}
} |
From: 3
Right Door
To: 3
Right Door
Requires: {
"obstaclesCleared": [
"A"
]
}
"canTrickyJump"Exit condition: {
"leaveWithSpringBallBounce": {
"remoteRunway": {
"length": 35,
"openEnd": 1
},
"landingRunway": {
"length": 2,
"openEnd": 1
},
"maxExtraRunSpeed": "$2.C",
"blue": "any",
"movementType": "controlled"
}
} |
From: 3
Right Door
To: 3
Right Door
If power is off, kago inside the left Workrobot, gaining speed at the start of the run by running in place. For extra run speeds between $5.9 and $5.C, Samus can jump over the island; For extra run speeds of $5.8 or lower, Samus can run under the island and jump over the Workrobot (only required if power is off). Higher speeds than $5.C could be obtained with the power on but with greater difficulty. Requires: {
"obstaclesCleared": [
"A"
]
}
{
"or": [
"canKago",
"f_DefeatedPhantoon"
]
}
"canTrickySpringBallBounce"
"canInsaneJump"Exit condition: {
"leaveWithSpringBallBounce": {
"remoteRunway": {
"length": 35,
"openEnd": 1
},
"landingRunway": {
"length": 1,
"openEnd": 1
},
"maxExtraRunSpeed": "$5.C",
"blue": "any",
"movementType": "controlled"
}
}Dev note: One tile of landing runway is considered unusable because at higher speeds it may not be possible to land far from the door. |
|
Requires: "h_speedJump" Exit condition: {
"leaveWithSidePlatform": {
"height": 3,
"runway": {
"length": 5,
"openEnd": 0
},
"obstruction": [
4,
2
]
}
}Dev note: Max extra run speed $1.3. This strat is included for completeness, though it apparently doesn't have any applications. |
|
Requires: "h_shinechargeMaxRunway"
"canShinechargeMovementTricky"
"canMockball"
{
  "obstaclesCleared": [
    "A"
  ]
}
{
"shinespark": {
"frames": 3,
"excessFrames": 0
}
}Exit condition: {
"leaveWithSpark": {}
} |
|
Requires: "f_DefeatedPhantoon"
"h_shinechargeMaxRunway"
"canShinechargeMovementComplex"
"Morph"
{
"obstaclesCleared": [
"A"
]
}
{
"shineChargeFrames": 130
}Exit condition: {
"leaveShinecharged": {}
} |
|
Requires: "h_CrystalFlash" Clears obstacles: A Dev note: The Gadora won't attack if you position all the way to the left. |
From: 3
Right Door
To: 3
Right Door
Requires: "f_DefeatedPhantoon"
{
  "or": [
    "h_bombThings",
    {
      "and": [
        "Morph",
        {
          "obstaclesCleared": [
            "A"
          ]
        }
      ]
    }
  ]
}Exit condition: {
"leaveWithGModeSetup": {}
} |
From: 3
Right Door
To: 3
Right Door
Entrance condition: {
"comeInWithRMode": {}
}Requires: "f_DefeatedPhantoon"
{
"or": [
{
"and": [
{
"disableEquipment": "ETank"
},
{
"resourceAvailable": [
{
"type": "Energy",
"count": 80
}
]
}
]
},
"h_CrystalFlash"
]
}
"h_bombThings"
{
"canShineCharge": {
"usedTiles": 38,
"openEnd": 1
}
}
"h_RModeKnockbackSpark" |
{
"$schema": "../../../schema/m3-room.schema.json",
"id": 156,
"name": "Basement",
"area": "Wrecked Ship",
"subarea": "Main",
"roomAddress": "0x7CC6F",
"roomEnvironments": [
{
"heated": false
}
],
"mapTileMask": [
[
1,
1,
1,
1,
1
]
],
"nodes": [
{
"id": 1,
"name": "Left Door",
"nodeType": "door",
"nodeSubType": "blue",
"nodeAddress": "0x001a2a0",
"doorOrientation": "left",
"doorEnvironments": [
{
"physics": "air"
}
],
"mapTileMask": [
[
2,
1,
1,
1,
1
]
]
},
{
"id": 2,
"name": "Top Door",
"nodeType": "door",
"nodeSubType": "blue",
"nodeAddress": "0x001a294",
"doorOrientation": "up",
"doorEnvironments": [
{
"physics": "air"
}
],
"mapTileMask": [
[
1,
2,
2,
2,
1
]
]
},
{
"id": 3,
"name": "Right Door",
"nodeType": "door",
"nodeSubType": "eye",
"nodeAddress": "0x001a2ac",
"doorOrientation": "right",
"doorEnvironments": [
{
"physics": "air"
}
],
"mapTileMask": [
[
1,
1,
1,
1,
2
]
]
}
],
"obstacles": [
{
"id": "A",
"name": "Right Bomb Blocks",
"obstacleType": "inanimate",
"note": "The bomb blocks that separate the right door from the main section"
}
],
"enemies": [
{
"id": "e1",
"groupName": "Basement Atomics",
"enemyName": "Atomic",
"quantity": 3,
"homeNodes": [
1,
2
],
"spawn": [
"f_DefeatedPhantoon"
]
},
{
"id": "e2",
"groupName": "Basement Workrobots",
"enemyName": "Workrobot",
"quantity": 2,
"homeNodes": [
1,
2
],
"spawn": [
"f_DefeatedPhantoon"
]
}
],
"strats": [
{
"link": [
1,
1
],
"name": "Base (Unlock Door)",
"requires": [],
"unlocksDoors": [
{
"types": [
"ammo"
],
"requires": []
}
],
"flashSuitChecked": true,
"blueSuitChecked": true
},
{
"link": [
1,
1
],
"name": "Base (Come In Normally)",
"entranceCondition": {
"comeInNormally": {}
},
"requires": [],
"flashSuitChecked": true,
"blueSuitChecked": true
},
{
"link": [
1,
1
],
"name": "Base (Come In With Mockball)",
"entranceCondition": {
"comeInWithMockball": {
"adjacentMinTiles": 0,
"remoteAndLandingMinTiles": [
[
0,
0
]
],
"speedBooster": "any"
}
},
"requires": [],
"flashSuitChecked": true,
"blueSuitChecked": true
},
{
"link": [
2,
2
],
"name": "Base (Unlock Door)",
"requires": [],
"unlocksDoors": [
{
"types": [
"ammo"
],
"requires": []
}
],
"flashSuitChecked": true,
"blueSuitChecked": true
},
{
"link": [
2,
2
],
"name": "Base (Come In Normally)",
"entranceCondition": {
"comeInNormally": {}
},
"requires": [],
"flashSuitChecked": true,
"blueSuitChecked": true
},
{
"link": [
3,
3
],
"name": "Base (Unlock Door)",
"requires": [],
"unlocksDoors": [
{
"types": [
"ammo"
],
"requires": []
}
],
"flashSuitChecked": true,
"blueSuitChecked": true
},
{
"link": [
3,
3
],
"name": "Base (Come In Normally)",
"entranceCondition": {
"comeInNormally": {}
},
"requires": [],
"flashSuitChecked": true,
"blueSuitChecked": true
},
{
"link": [
3,
3
],
"name": "Base (Come In With Mockball)",
"entranceCondition": {
"comeInWithMockball": {
"adjacentMinTiles": 0,
"remoteAndLandingMinTiles": [
[
0,
0
]
],
"speedBooster": "any"
}
},
"requires": [],
"flashSuitChecked": true,
"blueSuitChecked": true
},
{
"id": 1,
"link": [
1,
1
],
"name": "Leave with Runway",
"requires": [],
"exitCondition": {
"leaveWithRunway": {
"length": 3,
"openEnd": 1
}
},
"flashSuitChecked": true,
"blueSuitChecked": true
},
{
"id": 2,
"link": [
1,
1
],
"name": "Leave with Runway - Phantoon Alive",
"requires": [
{
"not": "f_DefeatedPhantoon"
},
"canRiskPermanentLossOfAccess"
],
"exitCondition": {
"leaveWithRunway": {
"length": 5,
"openEnd": 0
}
},
"flashSuitChecked": true,
"blueSuitChecked": true,
"devNote": "The length is more similar to 5 with 0 open end, than 4 with 1."
},
{
"id": 3,
"link": [
1,
1
],
"name": "Leave With Runway - Frozen Atomic",
"requires": [
"h_frozenEnemyRunway"
],
"exitCondition": {
"leaveWithRunway": {
"length": 5,
"openEnd": 0
}
},
"flashSuitChecked": true,
"blueSuitChecked": true,
"note": [
"One way to position the Atomic is to lure it to the right by standing on the ground,",
"then jump over it and freeze it while standing in the corner on the ground once it is just under 2 tiles away from the ledge.",
"Stand on the ledge and freeze it again once it is in position, maintaining a half-tile gap between the Atomic and the runway to extend it as much as possible."
],
"devNote": "This does not require Phantoon to be killed, as the broken workrobot is there otherwise."
},
{
"id": 52,
"link": [
1,
1
],
"name": "Leave With Side Platform (Power On)",
"requires": [
"f_DefeatedPhantoon",
"h_speedJump",
{
"or": [
"canMomentumConservingMorph",
{
"and": [
"canMomentumConservingTurnaround",
"canInsaneJump"
]
}
]
}
],
"exitCondition": {
"leaveWithSidePlatform": {
"height": 3,
"runway": {
"length": 45,
"openEnd": 1
},
"obstruction": [
3,
0
]
}
},
"flashSuitChecked": true,
"blueSuitChecked": true,
"devNote": [
"Max extra run speed $7.0."
]
},
{
"id": 53,
"link": [
1,
1
],
"name": "Leave With Side Platform (Power Off)",
"requires": [
{
"not": "f_DefeatedPhantoon"
},
"h_speedJump",
"canInsaneJump",
"canMomentumConservingMorph",
"canInsaneMidAirMorph"
],
"exitCondition": {
"leaveWithSidePlatform": {
"height": 3,
"runway": {
"length": 45,
"openEnd": 1
},
"obstruction": [
5,
0
]
}
},
"flashSuitChecked": true,
"blueSuitChecked": true,
"devNote": [
"Max extra run speed $7.0.",
"The obstruction (from the Workrobot) actually extends between 4 and 5 tiles."
]
},
{
"id": 4,
"link": [
1,
1
],
"name": "Leave Shinecharged",
"requires": [
"canShinechargeMovement",
"h_shinechargeMaxRunway",
{
"shineChargeFrames": 45
}
],
"exitCondition": {
"leaveShinecharged": {}
},
"flashSuitChecked": true,
"blueSuitChecked": true
},
{
"id": 5,
"link": [
1,
1
],
"name": "Leave Spinning",
"requires": [],
"exitCondition": {
"leaveSpinning": {
"remoteRunway": {
"length": 45,
"openEnd": 1
}
}
},
"flashSuitChecked": true,
"blueSuitChecked": true
},
{
"id": 6,
"link": [
1,
1
],
"name": "Leave With Mockball",
"requires": [],
"exitCondition": {
"leaveWithMockball": {
"remoteRunway": {
"length": 45,
"openEnd": 1
},
"landingRunway": {
"length": 3,
"openEnd": 1
}
}
},
"flashSuitChecked": true,
"blueSuitChecked": true
},
{
"id": 7,
"link": [
1,
1
],
"name": "Leave With Spring Ball Bounce",
"requires": [],
"exitCondition": {
"leaveWithSpringBallBounce": {
"remoteRunway": {
"length": 45,
"openEnd": 1
},
"landingRunway": {
"length": 1,
"openEnd": 1
},
"movementType": "uncontrolled"
}
},
"flashSuitChecked": true,
"blueSuitChecked": true
},
{
"id": 8,
"link": [
1,
1
],
"name": "Leave Space Jumping",
"requires": [],
"exitCondition": {
"leaveSpaceJumping": {
"remoteRunway": {
"length": 38,
"openEnd": 0
}
}
},
"flashSuitChecked": true,
"blueSuitChecked": true,
"devNote": "FIXME: Slightly longer runway can be used with power on; it's not clear yet if there's any application where this matters."
},
{
"id": 9,
"link": [
1,
1
],
"name": "Leave With Temporary Blue",
"requires": [
{
"canShineCharge": {
"usedTiles": 45,
"openEnd": 1
}
},
"canChainTemporaryBlue"
],
"exitCondition": {
"leaveWithTemporaryBlue": {}
},
"flashSuitChecked": true,
"blueSuitChecked": true
},
{
"id": 10,
"link": [
1,
1
],
"name": "Crystal Flash",
"requires": [
"h_CrystalFlash"
],
"clearsObstacles": [
"A"
],
"flashSuitChecked": true,
"blueSuitChecked": true
},
{
"id": 11,
"link": [
1,
1
],
"name": "G-Mode Setup - Get Hit By Atomic",
"requires": [
"f_DefeatedPhantoon"
],
"exitCondition": {
"leaveWithGModeSetup": {}
},
"flashSuitChecked": true,
"blueSuitChecked": true
},
{
"id": 12,
"link": [
1,
1
],
"name": "G-Mode Regain Mobility",
"requires": [
{
"enemyDamage": {
"enemy": "Atomic",
"type": "contact",
"hits": 1
}
},
"f_DefeatedPhantoon"
],
"gModeRegainMobility": {},
"flashSuitChecked": true,
"blueSuitChecked": true
},
{
"id": 61,
"link": [
1,
1
],
"name": "Gain Flash Suit (Atomic R-Mode Knockback Spark)",
"entranceCondition": {
"comeInWithRMode": {}
},
"requires": [
"f_DefeatedPhantoon",
{
"or": [
{
"and": [
{
"disableEquipment": "ETank"
},
{
"resourceAvailable": [
{
"type": "Energy",
"count": 80
}
]
}
]
},
"h_CrystalFlash"
]
},
{
"canShineCharge": {
"usedTiles": 38,
"openEnd": 1
}
},
"h_RModeKnockbackSpark"
],
"flashSuitChecked": true,
"blueSuitChecked": true
},
{
"id": 13,
"link": [
1,
2
],
"name": "Base",
"requires": [],
"flashSuitChecked": true,
"blueSuitChecked": true
},
{
"id": 64,
"link": [
1,
2
],
"name": "R-Mode Spark Interrupt",
"entranceCondition": {
"comeInWithRMode": {}
},
"requires": [
"f_DefeatedPhantoon",
{
"or": [
"h_CrystalFlashForReserveEnergy",
{
"and": [
"h_RModeCanRefillReserves",
{
"partialRefill": {
"type": "ReserveEnergy",
"limit": 20
}
}
]
}
]
},
"h_shinechargeMaxRunway",
{
"autoReserveTrigger": {
"maxReserveEnergy": 95
}
},
"canRModeSparkInterrupt"
],
"flashSuitChecked": true,
"blueSuitChecked": true,
"note": [
"Farm atomics and push the robots apart to open up the runway. Use an Atomic to interrupt."
]
},
{
"id": 55,
"link": [
1,
2
],
"name": "G-Mode Atomic Ice Clip, Door Lock Skip",
"entranceCondition": {
"comeInWithGMode": {
"mode": "any",
"morphed": false
}
},
"requires": [
"canComplexGMode",
"f_DefeatedPhantoon",
{
"or": [
"h_preciseIceClip",
"h_highPixelIceClip"
]
}
],
"exitCondition": {
"leaveWithGMode": {
"morphed": false
}
},
"bypassesDoorShell": "yes",
"flashSuitChecked": true,
"blueSuitChecked": true,
"note": [
"Freeze an Atomic at a precise distance below the door in order to jump up and clip through the door shell.",
"Freezing it while it is moving horizontally and Samus is standing works as a trivial setup.",
"Be careful to avoid the Workrobot's invisible, stationary lasers."
]
},
{
"id": 14,
"link": [
1,
3
],
"name": "G-Mode Morph",
"entranceCondition": {
"comeInWithGMode": {
"mode": "any",
"morphed": true
}
},
"requires": [
"h_artificialMorphMovement"
],
"flashSuitChecked": true,
"blueSuitChecked": true,
"note": "Use the camera scroll blocks just left of the bomb blocks, in order to overload PLMs and go through them."
},
{
"id": 15,
"link": [
1,
3
],
"name": "G-Mode Morph Workrobot Ride",
"entranceCondition": {
"comeInWithGMode": {
"mode": "any",
"morphed": true
}
},
"requires": [
{
"notable": "G-Mode Morph Workrobot Ride"
},
"canComplexGMode",
"f_DefeatedPhantoon",
"canBePatient",
"h_artificialMorphPowerBomb",
{
"or": [
"canTrickyGMode",
{
"enemyDamage": {
"enemy": "Workrobot",
"type": "ring-side",
"hits": 1
}
}
]
},
{
"or": [
"canTrickyJump",
"h_artificialMorphPowerBomb",
{
"enemyDamage": {
"enemy": "Atomic",
"type": "contact",
"hits": 1
}
}
]
}
],
"flashSuitChecked": true,
"blueSuitChecked": true,
"note": [
"On room entry, place a Power Bomb to kill the Atomic and land on the Workrobot.",
"Wait for the Workrobot to move across the room until it meets with a second robot.",
"Depending on where the robots place their invisible, stationary lasers, either roll off and quickly roll under the Atomic,",
"stay on for a second to try to lure the Atomic left a bit, or use a Power Bomb to kill it.",
"Be sure to watch and listen for where the robots are placing their lasers; they occupy a 24x24 pixel space and are typically placed with only 1-2 tiles of space between them.",
"Fall off the workrobots without any horizontal movement to decrease the chance of touching a laser.",
"Note that the majority of the lasers that the workrobots place only deal 4 damage and can be tanked with a suit's damage reduction or an immobile entrance.",
"Avoid placing a Power Bombs too close to the right wall or it will hit the bomb block and it will no longer be passable.",
"Quickly use the camera scroll blocks just left of the bomb blocks, in order to overload PLMs and go through them before the Atomic hits Samus."
]
},
{
"id": 59,
"link": [
1,
3
],
"name": "Immobile G-Mode Morph Workrobot Kago",
"entranceCondition": {
"comeInWithGMode": {
"mode": "direct",
"morphed": true,
"mobility": "immobile"
}
},
"requires": [
"canComplexGMode",
"f_DefeatedPhantoon",
"canKago",
{
"enemyDamage": {
"enemy": "Atomic",
"type": "contact",
"hits": 1
}
}
],
"flashSuitChecked": true,
"blueSuitChecked": true,
"note": [
"Wait for the Atomic to hit Samus, then use it to force her way through the first Workrobot.",
"Move partway across the room and keep the Atomic just off screen, which is where Samus can see approximately one full tile of the vertical doorshell.",
"Wait for the Workrobot to appear, then hold right as it enters the screen to get hit by the Atomic and kago through the Workrobot.",
"Quickly use the camera scroll blocks just left of the bomb blocks, in order to overload PLMs and go through them before the Atomic hits Samus."
],
"devNote": "The first Atomic hit is accounted through the regain mobility strat."
},
{
"id": 60,
"link": [
1,
3
],
"name": "G-Mode Morph Workrobot Kago",
"entranceCondition": {
"comeInWithGMode": {
"mode": "any",
"morphed": true
}
},
"requires": [
"canComplexGMode",
"f_DefeatedPhantoon",
"canKago",
{
"enemyDamage": {
"enemy": "Atomic",
"type": "contact",
"hits": 2
}
}
],
"flashSuitChecked": true,
"blueSuitChecked": true,
"note": [
"Delay getting hit by the Atomic for as long as possible, then fall off the ledge and clip through the first Workrobot.",
"Move partway across the room and keep the Atomic just off screen, which is where Samus can see approximately one full tile of the vertical doorshell.",
"Wait for the Workrobot to appear, then hold right as it enters the screen to get hit by the Atomic and kago through the Workrobot.",
"Quickly use the camera scroll blocks just left of the bomb blocks, in order to overload PLMs and go through them before the Atomic hits Samus."
]
},
{
"id": 16,
"link": [
2,
1
],
"name": "Base",
"requires": [],
"flashSuitChecked": true,
"blueSuitChecked": true
},
{
"id": 17,
"link": [
2,
2
],
"name": "Atomic Ice Clip Door Lock Skip",
"requires": [
"f_DefeatedPhantoon",
"h_iceClip"
],
"bypassesDoorShell": "yes",
"flashSuitChecked": true,
"blueSuitChecked": true,
"note": [
"Freeze an Atomic at a precise distance below the door in order to jump up and clip through the door shell.",
"Freezing it while it is moving horizontally and Samus is standing works as a trivial setup."
]
},
{
"id": 18,
"link": [
2,
2
],
"name": "Leave Shinecharged",
"requires": [
"canShinechargeMovement",
"h_shinechargeMaxRunway",
{
"shineChargeFrames": 70
}
],
"exitCondition": {
"leaveShinecharged": {}
},
"flashSuitChecked": true,
"blueSuitChecked": true
},
{
"id": 19,
"link": [
2,
2
],
"name": "Leave With Temporary Blue (Facing Right)",
"requires": [
{
"canShineCharge": {
"usedTiles": 28,
"openEnd": 0
}
},
"canChainTemporaryBlue"
],
"exitCondition": {
"leaveWithTemporaryBlue": {
"direction": "right"
}
},
"flashSuitChecked": true,
"blueSuitChecked": true,
"devNote": "A couple more tiles can be used if power is on, but this doesn't seem worth modeling."
},
{
"id": 20,
"link": [
2,
2
],
"name": "Leave With Temporary Blue (Facing Left)",
"requires": [
{
"or": [
{
"and": [
"f_DefeatedPhantoon",
{
"canShineCharge": {
"usedTiles": 16,
"openEnd": 0
}
}
]
},
{
"and": [
{
"canShineCharge": {
"usedTiles": 28,
"openEnd": 0
}
},
"canXRayTurnaround"
]
}
]
},
"canChainTemporaryBlue"
],
"exitCondition": {
"leaveWithTemporaryBlue": {
"direction": "left"
}
},
"flashSuitChecked": true,
"blueSuitChecked": true
},
{
"id": 21,
"link": [
2,
2
],
"name": "Atomic Farm",
"requires": [
"f_DefeatedPhantoon",
{
"or": [
{
"and": [
{
"resetRoom": {
"nodes": [
1
]
}
},
{
"cycleFrames": 510
}
]
},
{
"and": [
{
"resetRoom": {
"nodes": [
2
]
}
},
{
"cycleFrames": 555
}
]
},
{
"and": [
"h_useMorphBombs",
{
"resetRoom": {
"nodes": [
3
]
}
},
{
"cycleFrames": 800
}
]
}
]
},
{
"or": [
"ScrewAttack",
{
"haveBlueSuit": {}
},
"Plasma",
{
"and": [
{
"or": [
"Spazer",
"Wave"
]
},
{
"cycleFrames": 240
}
]
},
{
"cycleFrames": 515
}
]
},
{
"or": [
"canDash",
{
"cycleFrames": 200
}
]
}
],
"resetsObstacles": [
"A"
],
"farmCycleDrops": [
{
"enemy": "Atomic",
"count": 3
}
],
"flashSuitChecked": true,
"blueSuitChecked": true
},
{
"id": 22,
"link": [
2,
2
],
"name": "Leave With Door Frame Below",
"requires": [],
"exitCondition": {
"leaveWithDoorFrameBelow": {
"height": 2
}
},
"flashSuitChecked": true,
"blueSuitChecked": true
},
{
"id": 23,
"link": [
2,
2
],
"name": "Leave With Platform Below",
"requires": [],
"exitCondition": {
"leaveWithPlatformBelow": {
"height": 6,
"leftPosition": -5.5,
"rightPosition": 5.5
}
},
"flashSuitChecked": true,
"blueSuitChecked": true,
"devNote": "We could add another jumpway (or two) for the long platform below but it does not yet seem to have an application."
},
{
"id": 70,
"link": [
2,
2
],
"name": "Crystal Spark",
"requires": [
"h_shinechargeMaxRunway",
"h_CrystalSpark"
],
"flashSuitChecked": true,
"blueSuitChecked": true
},
{
"id": 65,
"link": [
2,
2
],
"name": "R-Mode Spark Interrupt",
"entranceCondition": {
"comeInWithRMode": {},
"comesThroughToilet": "no"
},
"requires": [
"f_DefeatedPhantoon",
{
"or": [
"h_CrystalFlashForReserveEnergy",
{
"and": [
"h_RModeCanRefillReserves",
{
"partialRefill": {
"type": "ReserveEnergy",
"limit": 20
}
}
]
}
]
},
"h_shinechargeMaxRunway",
{
"autoReserveTrigger": {
"maxReserveEnergy": 95
}
},
"canRModeSparkInterrupt"
],
"flashSuitChecked": true,
"blueSuitChecked": true,
"note": [
"Farm atomics and push the robots apart to open up the runway. Use an Atomic to interrupt."
]
},
{
"id": 24,
"link": [
2,
2
],
"name": "G-Mode Setup - Frozen Atomic",
"requires": [
"canUpwardGModeSetup",
"canTrickyUseFrozenEnemies",
"f_DefeatedPhantoon"
],
"exitCondition": {
"leaveWithGModeSetup": {}
},
"flashSuitChecked": true,
"blueSuitChecked": true,
"note": [
"Bring two atomics to the doorway.",
"Stand on one frozen Atomic to freeze a second Atomic at the correct height to use as a platform."
]
},
{
"id": 25,
"link": [
2,
2
],
"name": "G-Mode Regain Mobility",
"requires": [
{
"enemyDamage": {
"enemy": "Atomic",
"type": "contact",
"hits": 1
}
},
"f_DefeatedPhantoon"
],
"gModeRegainMobility": {},
"flashSuitChecked": true,
"blueSuitChecked": true
},
{
"id": 26,
"link": [
2,
2
],
"name": "Carry G-Mode Back Up",
"entranceCondition": {
"comeInWithGMode": {
"mode": "direct",
"morphed": false
},
"comesThroughToilet": "any"
},
"requires": [],
"exitCondition": {
"leaveWithGMode": {
"morphed": false
}
},
"bypassesDoorShell": "free",
"flashSuitChecked": true,
"blueSuitChecked": true
},
{
"id": 27,
"link": [
2,
2
],
"name": "Carry G-Mode Morph Back Up",
"entranceCondition": {
"comeInWithGMode": {
"mode": "direct",
"morphed": true
},
"comesThroughToilet": "any"
},
"requires": [
"h_artificialMorphMovement"
],
"exitCondition": {
"leaveWithGMode": {
"morphed": true
}
},
"bypassesDoorShell": "free",
"flashSuitChecked": true,
"blueSuitChecked": true,
"note": "With Bombs, it may be helpful to roll off the platform and kill the Atomics before safely leaving the room."
},
{
"id": 56,
"link": [
2,
2
],
"name": "G-Mode Atomic Ice Clip, Door Lock Skip",
"entranceCondition": {
"comeInWithGMode": {
"mode": "indirect",
"morphed": false
},
"comesThroughToilet": "any"
},
"requires": [
"canComplexGMode",
"f_DefeatedPhantoon",
{
"or": [
"h_preciseIceClip",
"h_highPixelIceClip"
]
}
],
"exitCondition": {
"leaveWithGMode": {
"morphed": false
}
},
"bypassesDoorShell": "yes",
"flashSuitChecked": true,
"blueSuitChecked": true,
"note": [
"Freeze an Atomic at a precise distance below the door in order to jump up and clip through the door shell.",
"Freezing it while it is moving horizontally and Samus is standing works as a trivial setup."
],
"devNote": "This is only for indirect G-Mode, because it is trivial while in direct, and would use a different strat."
},
{
"id": 62,
"link": [
2,
2
],
"name": "Gain Flash Suit (Atomic R-Mode Knockback Spark)",
"entranceCondition": {
"comeInWithRMode": {},
"comesThroughToilet": "any"
},
"requires": [
"f_DefeatedPhantoon",
{
"or": [
{
"and": [
{
"disableEquipment": "ETank"
},
{
"resourceAvailable": [
{
"type": "Energy",
"count": 80
}
]
}
]
},
"h_CrystalFlash"
]
},
{
"canShineCharge": {
"usedTiles": 38,
"openEnd": 1
}
},
"h_RModeKnockbackSpark"
],
"flashSuitChecked": true,
"blueSuitChecked": true
},
{
"id": 28,
"link": [
2,
3
],
"name": "Base",
"requires": [
{
"or": [
"h_bombThings",
{
"and": [
"Morph",
{
"obstaclesCleared": [
"A"
]
}
]
}
]
}
],
"clearsObstacles": [
"A"
],
"flashSuitChecked": true,
"blueSuitChecked": true
},
{
"id": 67,
"link": [
2,
3
],
"name": "Blue Suit",
"requires": [
{
"haveBlueSuit": {}
},
"Morph"
],
"flashSuitChecked": true,
"blueSuitChecked": true
},
{
"id": 29,
"link": [
2,
3
],
"name": "Speedball (Phantoon Dead)",
"requires": [
"h_getBlueSpeedMaxRunway",
"canSpeedball",
"f_DefeatedPhantoon"
],
"clearsObstacles": [
"A"
],
"flashSuitChecked": true,
"blueSuitChecked": true,
"note": [
"This speedball is easier with Phantoon dead, since you can push the robots all the way left.",
"It's even possible to setup the short hop mockball by bonking the center platform."
]
},
{
"id": 30,
"link": [
2,
3
],
"name": "Speedball (Phantoon Alive)",
"requires": [
{
"getBlueSpeed": {
"usedTiles": 22,
"openEnd": 0
}
},
"canSpeedball"
],
"clearsObstacles": [
"A"
],
"flashSuitChecked": true,
"blueSuitChecked": true,
"note": "This speedball is harder with Phantoon alive and has a shorter runway because of the robot standing in the way."
},
{
"id": 31,
"link": [
2,
3
],
"name": "Leave With Spring Ball Bounce",
"requires": [
{
"obstaclesCleared": [
"A"
]
}
],
"exitCondition": {
"leaveWithSpringBallBounce": {
"remoteRunway": {
"length": 45,
"openEnd": 1
},
"landingRunway": {
"length": 2,
"openEnd": 1
},
"maxExtraRunSpeed": "$3.C",
"movementType": "controlled"
}
},
"unlocksDoors": [
{
"types": [
"ammo"
],
"requires": []
}
],
"flashSuitChecked": true,
"blueSuitChecked": true,
"devNote": "Higher run speed can be used, especially if power is on, but it is more difficult and not clear yet if it's worth modeling."
},
{
"id": 32,
"link": [
2,
3
],
"name": "Leave With Temporary Blue",
"requires": [
{
"getBlueSpeed": {
"usedTiles": 22,
"openEnd": 0
}
},
"canSpeedball",
"canChainTemporaryBlue"
],
"exitCondition": {
"leaveWithTemporaryBlue": {}
},
"unlocksDoors": [
{
"types": [
"ammo"
],
"requires": []
}
],
"flashSuitChecked": true,
"blueSuitChecked": true
},
{
"id": 33,
"link": [
2,
3
],
"name": "G-Mode Morph",
"entranceCondition": {
"comeInWithGMode": {
"mode": "any",
"morphed": true
},
"comesThroughToilet": "any"
},
"requires": [
"h_artificialMorphMovement"
],
"flashSuitChecked": true,
"blueSuitChecked": true,
"note": "Use the camera scroll blocks just left of the bomb blocks, in order to overload PLMs and go through them."
},
{
"id": 34,
"link": [
2,
3
],
"name": "G-Mode Morph Power Bombs, Wait for the Workrobot",
"entranceCondition": {
"comeInWithGMode": {
"mode": "any",
"morphed": true
},
"comesThroughToilet": "any"
},
"requires": [
"canComplexGMode",
"f_DefeatedPhantoon",
"h_artificialMorphPowerBomb",
{
"or": [
"canTrickyDodgeEnemies",
"h_artificialMorphPowerBomb"
]
},
"h_artificialMorphPowerBomb",
{
"or": [
"canInsaneJump",
{
"enemyDamage": {
"enemy": "Workrobot",
"type": "ring-side",
"hits": 1
}
}
]
}
],
"flashSuitChecked": true,
"blueSuitChecked": true,
"note": [
"On room entry, dodge the Atomic and quickly place a Power Bomb to kill both Atomics.",
"It is tricky but possible to kill them both with a single Power Bomb placed on the right half of the platform.",
"Wait for the Workrobot to pass, then roll off to the right of it or use a Power Bomb to boost over any stationary, invisible lasers.",
"Be sure to watch and listen for where the robots are placing their lasers; they occupy a 24x24 pixel space and are typically placed with only 1-2 tiles of space between them.",
"Fall without any horizontal movement to decrease the chance of touching a laser.",
"Note that the majority of the lasers that the workrobots place only deal 4 damage and can be tanked with a suit's damage reduction or an immobile entrance.",
"Use the camera scroll blocks just left of the bomb blocks, in order to overload PLMs and go through them."
]
},
{
"id": 69,
"link": [
2,
3
],
"name": "G-Mode Morph, Wait for the Workrobot, Blue Suit",
"entranceCondition": {
"comeInWithGMode": {
"mode": "any",
"morphed": true
},
"comesThroughToilet": "any"
},
"requires": [
"h_blueSuitGMode",
"canComplexGMode",
"f_DefeatedPhantoon",
{
"or": [
"canInsaneJump",
{
"enemyDamage": {
"enemy": "Workrobot",
"type": "ring-side",
"hits": 1
}
}
]
}
],
"flashSuitChecked": true,
"blueSuitChecked": true,
"note": [
"On room entry, kill the Atomics with blue suit without falling off of the platform.",
"Wait for the Workrobot to pass, then roll off to the right of it while avoiding any stationary, invisible lasers.",
"Be sure to watch and listen for where the robots are placing their lasers; they occupy a 24x24 pixel space and are typically placed with only 1-2 tiles of space between them.",
"Fall without any horizontal movement to decrease the chance of touching a laser.",
"Note that the majority of the lasers that the workrobots place only deal 4 damage and can be tanked with a suit's damage reduction or an immobile entrance."
]
},
{
"id": 35,
"link": [
3,
1
],
"name": "Grapple Teleport",
"entranceCondition": {
"comeInWithGrappleTeleport": {
"blockPositions": [
[
7,
2
]
]
}
},
"requires": [],
"flashSuitChecked": true,
"blueSuitChecked": true
},
{
"id": 36,
"link": [
3,
1
],
"name": "Grapple Teleport Door Lock Skip",
"entranceCondition": {
"comeInWithGrappleTeleport": {
"blockPositions": [
[
3,
12
],
[
3,
13
]
]
}
},
"requires": [],
"bypassesDoorShell": "yes",
"flashSuitChecked": true,
"blueSuitChecked": true
},
{
"id": 37,
"link": [
3,
1
],
"name": "Carry Grapple Teleport (Top Position)",
"entranceCondition": {
"comeInWithGrappleTeleport": {
"blockPositions": [
[
3,
12
]
]
}
},
"requires": [],
"exitCondition": {
"leaveWithGrappleTeleport": {
"blockPositions": [
[
3,
12
]
]
}
},
"bypassesDoorShell": "yes",
"flashSuitChecked": true,
"blueSuitChecked": true
},
{
"id": 38,
"link": [
3,
1
],
"name": "Carry Grapple Teleport (Bottom Position)",
"entranceCondition": {
"comeInWithGrappleTeleport": {
"blockPositions": [
[
3,
13
]
]
}
},
"requires": [],
"exitCondition": {
"leaveWithGrappleTeleport": {
"blockPositions": [
[
3,
13
]
]
}
},
"bypassesDoorShell": "yes",
"flashSuitChecked": true,
"blueSuitChecked": true
},
{
"id": 39,
"link": [
3,
2
],
"name": "Base",
"requires": [
{
"or": [
"h_bombThings",
{
"and": [
"Morph",
{
"obstaclesCleared": [
"A"
]
}
]
}
]
}
],
"clearsObstacles": [
"A"
],
"flashSuitChecked": true,
"blueSuitChecked": true
},
{
"id": 68,
"link": [
3,
2
],
"name": "Blue Suit",
"requires": [
{
"haveBlueSuit": {}
},
"Morph"
],
"flashSuitChecked": true,
"blueSuitChecked": true
},
{
"id": 40,
"link": [
3,
2
],
"name": "Speedball",
"entranceCondition": {
"comeInBlueSpinning": {
"maxExtraRunSpeed": "$2.8",
"unusableTiles": 1
}
},
"requires": [
"canSpeedball",
"canCarefulJump",
"canSlowShortCharge"
],
"clearsObstacles": [
"A"
],
"flashSuitChecked": true,
"blueSuitChecked": true
},
{
"id": 41,
"link": [
3,
2
],
"name": "Temporary Blue Spring Ball Bounce (Come in Shinecharging)",
"entranceCondition": {
"comeInShinecharging": {
"length": 1,
"openEnd": 0
}
},
"requires": [
"canChainTemporaryBlue",
"canSpringBallBounce"
],
"clearsObstacles": [
"A"
],
"flashSuitChecked": true,
"blueSuitChecked": true
},
{
"id": 42,
"link": [
3,
2
],
"name": "Temporary Blue Spring Ball Bounce (Come in With Temporary Blue)",
"entranceCondition": {
"comeInWithTemporaryBlue": {}
},
"requires": [
"canChainTemporaryBlue",
"canSpringBallBounce"
],
"clearsObstacles": [
"A"
],
"flashSuitChecked": true,
"blueSuitChecked": true
},
{
"id": 43,
"link": [
3,
2
],
"name": "Blue Spring Ball Bounce",
"entranceCondition": {
"comeInWithBlueSpringBallBounce": {
"movementType": "controlled",
"maxExtraRunSpeed": "$1.A",
"minLandingTiles": 2
}
},
"requires": [
"canTrickySpringBallBounce",
"canInsaneJump"
],
"clearsObstacles": [
"A"
],
"flashSuitChecked": true,
"blueSuitChecked": true,
"note": [
"Bounce directly into the morph tunnel."
],
"detailNote": [
"This version allows preserving a flash suit."
]
},
{
"id": 66,
"link": [
3,
2
],
"name": "R-Mode Spark Interrupt",
"entranceCondition": {
"comeInWithRMode": {}
},
"requires": [
"f_DefeatedPhantoon",
{
"or": [
"h_CrystalFlashForReserveEnergy",
{
"and": [
"h_bombThings",
"h_RModeCanRefillReserves",
{
"partialRefill": {
"type": "ReserveEnergy",
"limit": 20
}
}
]
}
]
},
"h_shinechargeMaxRunway",
{
"autoReserveTrigger": {
"maxReserveEnergy": 95
}
},
"canRModeSparkInterrupt"
],
"clearsObstacles": [
"A"
],
"flashSuitChecked": true,
"blueSuitChecked": true,
"note": [
"Farm atomics and push the robots apart to open up the runway. Use an Atomic to interrupt."
]
},
{
"id": 44,
"link": [
3,
2
],
"name": "G-Mode, Camera Fix",
"entranceCondition": {
"comeInWithGMode": {
"mode": "any",
"morphed": false
}
},
"requires": [
"Morph"
],
"flashSuitChecked": true,
"blueSuitChecked": true,
"note": "Use the camera scroll blocks just right of the bomb blocks, in order to overload PLMs and go through them. Cancel g-mode and return into the morph tunnel to fix the camera."
},
{
"id": 45,
"link": [
3,
2
],
"name": "G-Mode Morph While Blind",
"entranceCondition": {
"comeInWithGMode": {
"mode": "any",
"morphed": true
}
},
"requires": [
"canOffScreenMovement"
],
"flashSuitChecked": true,
"blueSuitChecked": true,
"note": "Use the camera scroll blocks just right of the bomb blocks, in order to overload PLMs and go through them. Dodge the enemies while getting to the door."
},
{
"id": 46,
"link": [
3,
3
],
"name": "Leave with Runway",
"requires": [],
"exitCondition": {
"leaveWithRunway": {
"length": 2,
"openEnd": 1
}
},
"flashSuitChecked": true,
"blueSuitChecked": true
},
{
"id": 47,
"link": [
3,
3
],
"name": "Leave With Runway - Frozen Atomic",
"requires": [
"f_DefeatedPhantoon",
{
"or": [
"h_bombThings",
{
"and": [
"Morph",
{
"obstaclesCleared": [
"A"
]
}
]
}
]
},
"h_frozenEnemyRunway",
{
"or": [
{
"enemyDamage": {
"enemy": "Atomic",
"type": "contact",
"hits": 1
}
},
"h_pauseAbuseMinimalReserveRefill"
]
}
],
"exitCondition": {
"leaveWithRunway": {
"length": 4,
"openEnd": 0
}
},
"flashSuitChecked": true,
"blueSuitChecked": true,
"note": [
"Lure an Atomic from the left half of the room. Morph in the corner against the top stair and wait for the Atomic to approach.",
"Quickly unmorph just before and freeze the Atomic just after it hits Samus."
]
},
{
"id": 57,
"link": [
3,
3
],
"name": "Leave With Controlled Spring Ball Bounce (Lower Speed)",
"requires": [
{
"obstaclesCleared": [
"A"
]
},
"canTrickyJump"
],
"exitCondition": {
"leaveWithSpringBallBounce": {
"remoteRunway": {
"length": 35,
"openEnd": 1
},
"landingRunway": {
"length": 2,
"openEnd": 1
},
"maxExtraRunSpeed": "$2.C",
"blue": "any",
"movementType": "controlled"
}
},
"flashSuitChecked": true,
"blueSuitChecked": true
},
{
"id": 58,
"link": [
3,
3
],
"name": "Leave With Controlled Spring Ball Bounce (Higher Speed)",
"requires": [
{
"obstaclesCleared": [
"A"
]
},
{
"or": [
"canKago",
"f_DefeatedPhantoon"
]
},
"canTrickySpringBallBounce",
"canInsaneJump"
],
"exitCondition": {
"leaveWithSpringBallBounce": {
"remoteRunway": {
"length": 35,
"openEnd": 1
},
"landingRunway": {
"length": 1,
"openEnd": 1
},
"maxExtraRunSpeed": "$5.C",
"blue": "any",
"movementType": "controlled"
}
},
"flashSuitChecked": true,
"blueSuitChecked": true,
"note": [
"If power is off, kago inside the left Workrobot, gaining speed at the start of the run by running in place."
],
"detailNote": [
"For extra run speeds between $5.9 and $5.C, Samus can jump over the island;",
"For extra run speeds of $5.8 or lower, Samus can run under the island and jump over the Workrobot (only required if power is off).",
"Higher speeds than $5.C could be obtained with the power on but with greater difficulty."
],
"devNote": [
"One tile of landing runway is considered unusable because at higher speeds it may not be possible to land far from the door."
]
},
{
"id": 54,
"link": [
3,
3
],
"name": "Leave With Side Platform",
"requires": [
"h_speedJump"
],
"exitCondition": {
"leaveWithSidePlatform": {
"height": 3,
"runway": {
"length": 5,
"openEnd": 0
},
"obstruction": [
4,
2
]
}
},
"flashSuitChecked": true,
"blueSuitChecked": true,
"devNote": [
"Max extra run speed $1.3.",
"This strat is included for completeness, though it apparently doesn't have any applications."
]
},
{
"id": 48,
"link": [
3,
3
],
"name": "Leave With Spark",
"requires": [
"h_shinechargeMaxRunway",
"canShinechargeMovementTricky",
"canMockball",
{
"obstaclesCleared": [
"A"
]
},
{
"shinespark": {
"frames": 3,
"excessFrames": 0
}
}
],
"exitCondition": {
"leaveWithSpark": {}
},
"flashSuitChecked": true,
"blueSuitChecked": true
},
{
"id": 49,
"link": [
3,
3
],
"name": "Leave Shinecharged",
"requires": [
"f_DefeatedPhantoon",
"h_shinechargeMaxRunway",
"canShinechargeMovementComplex",
"Morph",
{
"obstaclesCleared": [
"A"
]
},
{
"shineChargeFrames": 130
}
],
"exitCondition": {
"leaveShinecharged": {}
},
"flashSuitChecked": true,
"blueSuitChecked": true
},
{
"id": 50,
"link": [
3,
3
],
"name": "Crystal Flash",
"requires": [
"h_CrystalFlash"
],
"clearsObstacles": [
"A"
],
"flashSuitChecked": true,
"blueSuitChecked": true,
"devNote": "The Gadora won't attack if you position all the way to the left."
},
{
"id": 51,
"link": [
3,
3
],
"name": "G-Mode Setup - Get Hit By Atomic, Lured from the Left",
"requires": [
"f_DefeatedPhantoon",
{
"or": [
"h_bombThings",
{
"and": [
"Morph",
{
"obstaclesCleared": [
"A"
]
}
]
}
]
}
],
"exitCondition": {
"leaveWithGModeSetup": {}
},
"flashSuitChecked": true,
"blueSuitChecked": true
},
{
"id": 63,
"link": [
3,
3
],
"name": "Gain Flash Suit (Atomic R-Mode Knockback Spark)",
"entranceCondition": {
"comeInWithRMode": {}
},
"requires": [
"f_DefeatedPhantoon",
{
"or": [
{
"and": [
{
"disableEquipment": "ETank"
},
{
"resourceAvailable": [
{
"type": "Energy",
"count": 80
}
]
}
]
},
"h_CrystalFlash"
]
},
"h_bombThings",
{
"canShineCharge": {
"usedTiles": 38,
"openEnd": 1
}
},
"h_RModeKnockbackSpark"
],
"flashSuitChecked": true,
"blueSuitChecked": true
}
],
"notables": [
{
"id": 1,
"name": "G-Mode Morph Workrobot Ride",
"note": [
"On room entry, place a Power Bomb to kill the Atomic and land on the Workrobot.",
"Wait for the Workrobot to move across the room until it meets with a second robot.",
"Depending on where the robots place their invisible, stationary lasers, either roll off and quickly roll under the Atomic,",
"stay on for a second to try to lure the Atomic left a bit, or use a Power Bomb to kill it.",
"Be sure to watch and listen for where the robots are placing their lasers; they occupy a 24x24 pixel space and are typically placed with only 1-2 tiles of space between them.",
"Fall off the workrobots without any horizontal movement to decrease the chance of touching a laser.",
"Avoid placing a Power Bombs too close to the right wall or it will hit the bomb block and it will no longer be passable.",
"Quickly use the camera scroll blocks just left of the bomb blocks, in order to overload PLMs and go through them before the Atomic hits Samus."
]
}
],
"nextStratId": 71,
"nextNotableId": 2
}


