Plowerhouse Room
Room ID: 140
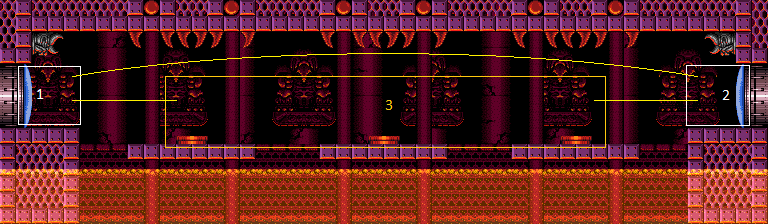
|
This partial runway does not require taking care of the Holtzes. Exit condition: "leaveWithRunway": {
"length": 2,
"openEnd": 0
} |
|
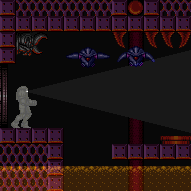

Requires: {"enemyDamage": {"enemy": "Holtz", "type": "contact", "hits": 1}} |
|
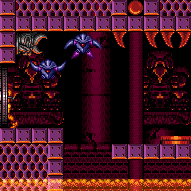

Entrance condition: "comeInNormally": {}Requires: {"heatFrames": 110}Exit condition: "leaveWithDamage": {
"enemy": "Holtz"
}Unlocks doors: {"types": ["missiles", "super"], "requires": []},
{"types": ["powerbomb"], "requires": ["never"]}Dev note: FIXME: Could maybe reduce the heat frames if coming from the farm or the right. FIXME: A Power Bomb can be used, but it's complex enough to be a separate strat. |
|
Requires: "canDash", {"heatFrames": 500}, {"enemyDamage": {"enemy": "Holtz", "type": "contact", "hits": 2}}, {"enemyDamage": {"enemy": "Zebbo", "type": "contact", "hits": 1}} |
|
Requires: {"haveBlueSuit": {}},
{"heatFrames": 480} |
|
Requires: "canDash", {"or": [ {"and": [ "h_speedDash", {"heatFrames": 265}, {"acidFrames": 112} ]}, {"and": [ {"heatFrames": 300}, {"acidFrames": 145} ]} ]}, "Gravity", "canSuitlessLavaDive" |
|
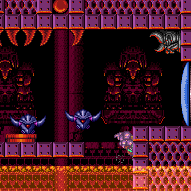

Requires: {"canShineCharge": {"usedTiles": 38, "openEnd": 0}},
{"heatFrames": 300},
{"acidFrames": 133},
"Gravity",
"canSuitlessLavaDive",
"canShinechargeMovementComplex",
{"shineChargeFrames": 75}Exit condition: "leaveShinecharged": {}Unlocks doors: {"nodeId": 2, "types": ["super"], "requires": []},
{"nodeId": 2, "types": ["missiles", "powerbomb"], "requires": ["never"]} |
|
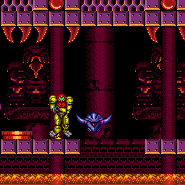

Turn back to the left after entering the room then run under the Holtzes. Damage from a Zebbo from the right farm to gain invulnerability frames, then jump through the last two Holtzes. Requires: "canDash", "canTrickyJump", "canHorizontalDamageBoost", {"enemyDamage": {"enemy": "Zebbo", "type": "contact", "hits": 1}}, {"heatFrames": 390} |
|
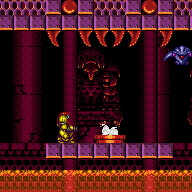
Requires: "canDash", "canFarmWhileShooting", {"or": [ {"and": [ {"heatFramesWithEnergyDrops": { "frames": 120, "drops": [{"enemy": "Zebbo", "count": 1}] }}, {"heatFramesWithEnergyDrops": { "frames": 130, "drops": [{"enemy": "Zebbo", "count": 1}] }}, {"heatFramesWithEnergyDrops": { "frames": 140, "drops": [{"enemy": "Zebbo", "count": 1}] }}, {"heatFrames": 100} ]}, {"and": [ {"or": [ "Spazer", "Wave", "Plasma" ]}, {"heatFramesWithEnergyDrops": { "frames": 100, "drops": [{"enemy": "Zebbo", "count": 1}] }}, {"heatFramesWithEnergyDrops": { "frames": 100, "drops": [{"enemy": "Zebbo", "count": 1}] }}, {"heatFramesWithEnergyDrops": { "frames": 130, "drops": [{"enemy": "Zebbo", "count": 1}] }}, {"heatFrames": 100} ]} ]} |
|
Requires: "canDash", "ScrewAttack", "canFarmWhileShooting", {"heatFramesWithEnergyDrops": { "frames": 80, "drops": [{"enemy": "Holtz", "count": 1}] }}, {"heatFramesWithEnergyDrops": { "frames": 45, "drops": [{"enemy": "Zebbo", "count": 1}] }}, {"heatFramesWithEnergyDrops": { "frames": 60, "drops": [{"enemy": "Holtz", "count": 1}] }}, {"heatFramesWithEnergyDrops": { "frames": 100, "drops": [{"enemy": "Zebbo", "count": 1}] }}, {"heatFramesWithEnergyDrops": { "frames": 60, "drops": [{"enemy": "Holtz", "count": 1}] }}, {"heatFramesWithEnergyDrops": { "frames": 100, "drops": [ {"enemy": "Zebbo", "count": 1}, {"enemy": "Holtz", "count": 1} ] }}, {"heatFramesWithEnergyDrops": { "frames": 45, "drops": [{"enemy": "Holtz", "count": 1}] }}, {"heatFrames": 60} |
|
Requires: {"haveBlueSuit": {}},
"canFarmWhileShooting",
{"heatFramesWithEnergyDrops": {
"frames": 90,
"drops": [{"enemy": "Holtz", "count": 1}]
}},
{"heatFramesWithEnergyDrops": {
"frames": 70,
"drops": [{"enemy": "Zebbo", "count": 1}]
}},
{"heatFramesWithEnergyDrops": {
"frames": 60,
"drops": [{"enemy": "Holtz", "count": 1}]
}},
{"heatFramesWithEnergyDrops": {
"frames": 130,
"drops": [{"enemy": "Zebbo", "count": 1}]
}},
{"heatFramesWithEnergyDrops": {
"frames": 40,
"drops": [{"enemy": "Holtz", "count": 1}]
}},
{"heatFramesWithEnergyDrops": {
"frames": 130,
"drops": [
{"enemy": "Zebbo", "count": 1},
{"enemy": "Holtz", "count": 1}
]
}},
{"heatFramesWithEnergyDrops": {
"frames": 50,
"drops": [{"enemy": "Holtz", "count": 1}]
}},
{"heatFrames": 70} |
|
Requires: "canDash", "SpaceJump", "ScrewAttack", {"heatFrames": 320} |
From: 1
Left Door
To: 2
Right Door
Entrance condition: "comeInRunning": {
"speedBooster": "any",
"minTiles": 3
}Requires: "SpaceJump",
"ScrewAttack",
{"heatFrames": 230} |
|
Entrance condition: "comeInGettingBlueSpeed": {
"length": 3,
"openEnd": 1,
"minExtraRunSpeed": "$1.C"
}Requires: "h_blueJump", "SpaceJump", "canCarefulJump", {"heatFrames": 220} |
|
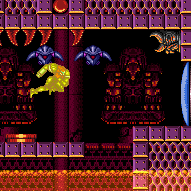

Entrance condition: "comeInWithSpark": {}Requires: {"heatFrames": 65},
{"shinespark": {"frames": 61, "excessFrames": 4}},
{"heatFrames": 95} |
From: 1
Left Door
To: 2
Right Door
Entrance condition: "comeInRunning": {
"speedBooster": "any",
"minTiles": 2
}Requires: "h_heatedRemoteRunwayPreciseSpaceJump", "ScrewAttack", {"heatFrames": 240} Exit condition: "leaveWithMockball": {
"remoteRunway": {
"length": 5,
"openEnd": 1
},
"landingRunway": {
"length": 3,
"openEnd": 1
}
}Unlocks doors: {"types": ["super"], "requires": []},
{"types": ["missiles", "powerbomb"], "requires": ["never"]}Dev note: FIXME: other leaveWithMockball variants are possible, e.g. comeInSpinning or in-room acid run. |
From: 1
Left Door
To: 2
Right Door
Entrance condition: "comeInSpinning": {
"speedBooster": "any",
"unusableTiles": 0,
"minExtraRunSpeed": "$1.A"
}Requires: "h_heatedRemoteRunwayPreciseSpaceJump", "ScrewAttack", {"heatFrames": 240} Exit condition: "leaveWithMockball": {
"remoteRunway": {
"length": 5,
"openEnd": 1
},
"landingRunway": {
"length": 3,
"openEnd": 1
}
}Unlocks doors: {"types": ["super"], "requires": []},
{"types": ["missiles", "powerbomb"], "requires": ["never"]}Dev note: FIXME: other leaveWithMockball variants are possible, e.g. comeInSpinning or in-room acid run. |
|
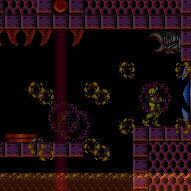

Kill or dodge the Holtz while crossing the room. With Plasma and Wave or Ice, it is possible to quickly kill the Holtz while at the left door. Otherwise, in direct G-mode, jump immediately on entry while Samus still has i-frames to get to the left of the first Zebbo and kill it, and in indirect G-mode, move to the left then run under the Holtzes. Carefully cross the room while killing the Holtz without luring them, or dodge them. It is possible to kill a Zebbo by the door and pause abuse to grab its Energy drop on G-mode exit, which requires not killing the right Zebbo until it is in location. Entrance condition: "comeInWithGMode": {
"mode": "any",
"morphed": false
}Requires: {"or": [
"ScrewAttack",
{"haveBlueSuit": {}},
"canInsaneJump",
{"and": [
"canTrickyDodgeEnemies",
"Plasma"
]},
{"enemyDamage": {"enemy": "Holtz", "type": "contact", "hits": 1}}
]},
{"or": [
"h_heatedGModePauseAbuse",
"h_heatedGModeOpenDifferentDoor"
]} |
|


Clear the two Holtzes that greet you and collect their drops. With heat protection, you can farm up at a Zebbo pipe. Run across the acid then jump up to a Zebbo pipe for the interrupt. Entrance condition: "comeInWithRMode": {}Requires: "Gravity",
{"or": [
{"and": [
"canDodgeWhileShooting",
{"or": [
"Plasma",
{"and": [
"Ice",
"Wave",
"Spazer"
]}
]},
{"heatFrames": 550}
]},
{"and": [
{"enemyKill": {
"enemies": [["Holtz", "Holtz"]],
"explicitWeapons": ["ScrewAttack", "Ice+Wave+Plasma"]
}},
{"heatFrames": 100}
]},
{"and": [
"canDodgeWhileShooting",
{"enemyKill": {
"enemies": [["Holtz", "Holtz"]],
"explicitWeapons": ["Super"]
}},
{"heatFrames": 300}
]},
{"and": [
"canTrickyJump",
{"enemyKill": {
"enemies": [["Holtz", "Holtz"]],
"explicitWeapons": ["PowerBomb"]
}},
{"heatFrames": 600}
]}
]},
{"or": [
"h_heatedCrystalFlashForReserveEnergy",
{"and": [
"h_heatProof",
"h_RModeCanRefillReserves",
{"resourceMissingAtMost": [{"type": "Missile", "count": 0}]},
{"resourceMissingAtMost": [{"type": "PowerBomb", "count": 0}]},
{"resourceMissingAtMost": [{"type": "Super", "count": 0}]},
{"refill": ["Energy"]}
]}
]},
{"canShineCharge": {"usedTiles": 38, "openEnd": 0}},
{"heatFrames": 390},
{"acidFrames": 133},
{"autoReserveTrigger": {"maxReserveEnergy": 95}},
"canRModeSparkInterrupt",
{"heatFrames": 80} |
|
Clear the two Holtzes at the door, then Crystal Flash. Avoid killilng all the Zebbos as they don't respawn during G-Mode. Entrance condition: "comeInWithGMode": {
"mode": "direct",
"morphed": false
}Requires: "Gravity",
{"or": [
"canTrickyDodgeEnemies",
{"enemyKill": {
"enemies": [["Holtz", "Holtz"]],
"explicitWeapons": ["ScrewAttack", "Plasma", "Super", "Ice+Wave+Spazer"]
}}
]},
"h_CrystalFlashForReserveEnergy",
{"canShineCharge": {"usedTiles": 38, "openEnd": 0}},
{"acidFrames": 115},
{"autoReserveTrigger": {"maxReserveEnergy": 95}},
"canRModeSparkInterrupt",
{"heatFrames": 80} |
|
Requires: "canDash", {"or": [ "Plasma", {"and": [ "Ice", "Wave", "Spazer" ]} ]}, {"enemyDamage": {"enemy": "Holtz", "type": "contact", "hits": 1}}, {"heatFrames": 350} |
From: 1
Left Door
To: 3
Farm Junction Free of Holtzes
Turn back to the left after entering the room then run under the Holtzes. Avoid the third Holtz, then kill the fourth to clear the middle Zebbo farm. Requires: "canDash", "canDodgeWhileShooting", {"or": [ "Plasma", {"and": [ "Ice", "Wave", "Spazer" ]} ]}, {"heatFrames": 550} |
|
Requires: {"or": [
"ScrewAttack",
{"and": [
"Plasma",
"Ice",
"Wave"
]},
{"haveBlueSuit": {}}
]},
{"heatFrames": 100},
{"or": [
"canDash",
{"heatFrames": 20}
]} |
|
Requires: "canDash", {"or": [ "canDodgeWhileShooting", {"enemyDamage": {"enemy": "Holtz", "type": "contact", "hits": 1}} ]}, {"enemyKill": { "enemies": [["Holtz", "Holtz"]], "explicitWeapons": ["Super"] }}, {"heatFrames": 300} |
|
Requires: "canDash", {"enemyKill": { "enemies": [["Holtz", "Holtz"]], "explicitWeapons": ["PowerBomb"] }}, {"enemyDamage": {"enemy": "Holtz", "type": "contact", "hits": 2}}, {"heatFrames": 450} |
From: 1
Left Door
To: 3
Farm Junction Free of Holtzes
Place a power bomb near the door, then move right and jump under the Holtzes to the first platform. Continue placing power bombs while avoiding the Holtzes and avoiding luring the third one to the right. Requires: "canDash", "canTrickyJump", {"enemyKill": { "enemies": [["Holtz", "Holtz"]], "explicitWeapons": ["PowerBomb"] }}, {"heatFrames": 600} |
|


Clear the two Holtzes that greet you and collect their drops. With heat protection, you can farm up at a Zebbo pipe. Run across the acid then jump up to a Zebbo pipe for the interrupt. Entrance condition: "comeInWithRMode": {}Requires: "Gravity",
{"or": [
{"and": [
"canBePatient",
"canDodgeWhileShooting",
{"heatFrames": 2400}
]},
{"and": [
{"or": [
"Wave",
"Spazer"
]},
{"heatFrames": 950}
]},
{"and": [
{"or": [
"Plasma",
{"and": [
"Ice",
"Wave",
"Spazer"
]}
]},
{"heatFrames": 500}
]},
{"and": [
{"enemyKill": {
"enemies": [["Holtz", "Holtz"]],
"explicitWeapons": ["ScrewAttack", "Ice+Wave+Plasma"]
}},
{"heatFrames": 100}
]},
{"and": [
"canDodgeWhileShooting",
{"enemyKill": {
"enemies": [["Holtz", "Holtz"]],
"explicitWeapons": ["Super", "PowerBomb"]
}},
{"heatFrames": 550}
]}
]},
{"or": [
"h_heatedCrystalFlashForReserveEnergy",
{"and": [
"h_RModeCanRefillReserves",
{"resourceMissingAtMost": [{"type": "Missile", "count": 0}]},
{"resourceMissingAtMost": [{"type": "PowerBomb", "count": 0}]},
{"resourceMissingAtMost": [{"type": "Super", "count": 0}]},
{"or": [
{"partialRefill": {"type": "ReserveEnergy", "limit": 40}},
{"and": [
"h_heatProof",
{"refill": ["Energy"]}
]}
]}
]}
]},
{"canShineCharge": {"usedTiles": 38, "openEnd": 0}},
{"heatFrames": 390},
{"acidFrames": 133},
{"autoReserveTrigger": {"maxReserveEnergy": 95}},
"canRModeSparkInterrupt",
{"heatFrames": 80} |
|
Clear the two Holtzes at the door and Crystal Flash. Avoid killing all the Zebbos as they do not respawn in G-Mode. Run across the acid then jump up to a Zebbo pipe for the interrupt. Entrance condition: "comeInWithGMode": {
"mode": "direct",
"morphed": false
}Requires: {"disableEquipment": "ETank"},
"Gravity",
"h_CrystalFlashForReserveEnergy",
{"canShineCharge": {"usedTiles": 38, "openEnd": 0}},
{"acidFrames": 115},
{"autoReserveTrigger": {"maxReserveEnergy": 95}},
"canRModeSparkInterrupt",
{"heatFrames": 80} |
|
Requires: "canDash", {"enemyDamage": {"enemy": "Holtz", "type": "contact", "hits": 2}}, {"heatFrames": 420} |
|
Requires: {"haveBlueSuit": {}},
{"heatFrames": 480} |
|
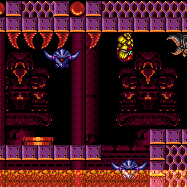

Requires: "canDash", "canTrickyJump", "canHorizontalDamageBoost", {"enemyDamage": {"enemy": "Zebbo", "type": "contact", "hits": 1}}, {"heatFrames": 315} |
|
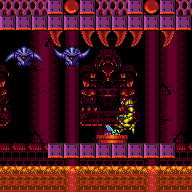

Requires: "canDash", "canTrickyDodgeEnemies", {"or": [ "canInsaneJump", "canPreciseWallJump" ]}, {"heatFrames": 310} |
|
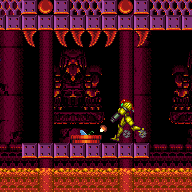

Requires: "canDash", "canFarmWhileShooting", {"heatFramesWithEnergyDrops": { "frames": 100, "drops": [{"enemy": "Zebbo", "count": 1}] }}, {"heatFramesWithEnergyDrops": { "frames": 125, "drops": [{"enemy": "Zebbo", "count": 1}] }}, {"heatFramesWithEnergyDrops": { "frames": 125, "drops": [{"enemy": "Zebbo", "count": 1}] }}, {"heatFrames": 130} |
|
Requires: "canDash", "ScrewAttack", "canFarmWhileShooting", {"heatFramesWithEnergyDrops": { "frames": 80, "drops": [{"enemy": "Holtz", "count": 1}] }}, {"heatFramesWithEnergyDrops": { "frames": 20, "drops": [{"enemy": "Zebbo", "count": 1}] }}, {"heatFramesWithEnergyDrops": { "frames": 150, "drops": [{"enemy": "Zebbo", "count": 1}] }}, {"heatFramesWithEnergyDrops": { "frames": 200, "drops": [ {"enemy": "Zebbo", "count": 1}, {"enemy": "Holtz", "count": 2} ] }}, {"heatFrames": 60} |
|
Requires: {"haveBlueSuit": {}},
"canFarmWhileShooting",
{"heatFramesWithEnergyDrops": {
"frames": 120,
"drops": [{"enemy": "Holtz", "count": 1}]
}},
{"heatFramesWithEnergyDrops": {
"frames": 60,
"drops": [{"enemy": "Zebbo", "count": 1}]
}},
{"heatFramesWithEnergyDrops": {
"frames": 150,
"drops": [{"enemy": "Zebbo", "count": 1}]
}},
{"heatFramesWithEnergyDrops": {
"frames": 230,
"drops": [
{"enemy": "Zebbo", "count": 1},
{"enemy": "Holtz", "count": 2}
]
}},
{"heatFrames": 75} |
|
Requires: "canDash", "SpaceJump", "ScrewAttack", {"heatFrames": 295} |
From: 2
Right Door
To: 1
Left Door
Entrance condition: "comeInRunning": {
"speedBooster": "any",
"minTiles": 3
}Requires: "SpaceJump",
"ScrewAttack",
{"heatFrames": 230} |
|
Entrance condition: "comeInGettingBlueSpeed": {
"length": 3,
"openEnd": 1,
"minExtraRunSpeed": "$1.C"
}Requires: "h_blueJump", "SpaceJump", "canCarefulJump", {"heatFrames": 220} |
|
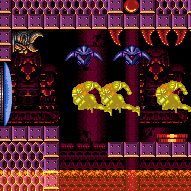

Entrance condition: "comeInWithSpark": {}Requires: {"heatFrames": 65},
{"shinespark": {"frames": 60, "excessFrames": 4}},
{"heatFrames": 95} |
|
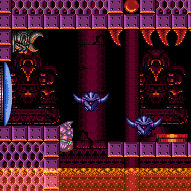

Requires: {"canShineCharge": {"usedTiles": 38, "openEnd": 0}},
{"heatFrames": 390},
{"acidFrames": 133},
"Gravity",
"canSuitlessLavaDive",
"canShinechargeMovementComplex",
{"shineChargeFrames": 75}Exit condition: "leaveShinecharged": {}Unlocks doors: {"nodeId": 1, "types": ["super"], "requires": []},
{"nodeId": 1, "types": ["missiles", "powerbomb"], "requires": ["never"]} |
|
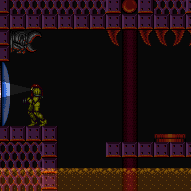

Kill or dodge the Holtz while crossing the room. It's possible to kill the Holtz while staying safe; some of them can also be lured under platforms and out of the way. Entrance condition: "comeInWithGMode": {
"mode": "any",
"morphed": false
}Requires: {"or": [
"canTrickyDodgeEnemies",
"ScrewAttack",
{"haveBlueSuit": {}},
"Plasma",
{"enemyDamage": {"enemy": "Zebbo", "type": "contact", "hits": 1}}
]},
"h_heatedGModeOpenDifferentDoor" |
|
Kill or dodge the Holtz while crossing the room. It's possible to kill the Holtz while staying safe; some of them can also be lured under platforms and out of the way. It is possible to kill a Zebbo by the door and pause abuse to grab its Energy drop on G-mode exit, which requires manipulating or killing the Holtz while not killing the left Zebbo until it is in location. Entrance condition: "comeInWithGMode": {
"mode": "any",
"morphed": false
}Requires: {"or": [
"ScrewAttack",
{"haveBlueSuit": {}},
"canBeVeryPatient",
{"and": [
"canBePatient",
{"or": [
"Ice",
"Wave",
"Spazer"
]}
]},
"Plasma",
"canInsaneJump",
{"enemyDamage": {"enemy": "Zebbo", "type": "contact", "hits": 1}}
]},
"h_heatedGModePauseAbuse" |
|
Entrance condition: "comeInWithGrappleTeleport": {
"blockPositions": [[5, 3], [7, 2]]
}Requires: {"heatFrames": 45} |
|
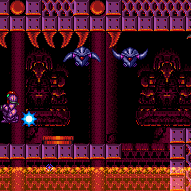

Entrance condition: "comeInWithGrappleTeleport": {
"blockPositions": [[3, 12], [3, 13]]
}Bypasses door shell: true |
|
Entrance condition: "comeInWithGrappleTeleport": {
"blockPositions": [[3, 12]]
}Exit condition: "leaveWithGrappleTeleport": {
"blockPositions": [[3, 12]]
}Bypasses door shell: true |
From: 2
Right Door
To: 1
Left Door
Entrance condition: "comeInWithGrappleTeleport": {
"blockPositions": [[3, 13]]
}Exit condition: "leaveWithGrappleTeleport": {
"blockPositions": [[3, 13]]
}Bypasses door shell: true |
|
Exit condition: "leaveWithRunway": {
"length": 4,
"openEnd": 1
} |
|


On entry lure both Holtz. Kill one and freeze the other in position. Requires: "h_trickyFrozenEnemyRunway", {"heatFrames": 800}, {"or": [ {"and": [ "Wave", {"heatFrames": 500} ]}, {"and": [ "Spazer", {"heatFrames": 500} ]}, {"and": [ "Plasma", {"heatFrames": 200} ]} ]} Exit condition: "leaveWithRunway": {
"length": 7,
"openEnd": 0
}Dev note: FIXME: These heatFrames can likely be tightened. |
|
Requires: "h_heatedCrystalFlash" |
|
Entrance condition: "comeInShinecharging": {
"length": 3,
"openEnd": 0
}Requires: "h_heatedCrystalSpark" |
|
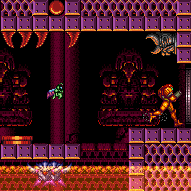

Immeidately jump over both Holtz and get back to the door quickly. Alternatively it is possible to wait by the door then time the lure of the second Holtz to sync the two together. Entrance condition: "comeInNormally": {}Requires: {"heatFrames": 150},
"canTrickyJump",
{"or": [
"canDash",
{"and": [
{"haveBlueSuit": {}},
{"heatFrames": 40}
]}
]}Exit condition: "leaveWithDamage": {
"enemy": "Zebbo"
}Unlocks doors: {"types": ["super"], "requires": []},
{
"types": ["missiles"],
"requires": [{"heatFrames": 225}]
},
{
"types": ["powerbomb"],
"requires": [{"heatFrames": 650}]
}Dev note: FIXME: Could probably reduce the heat frames if coming from the farm or the left. |
|
Requires: "canDash", {"or": [ "canBePatient", "canDodgeWhileShooting" ]}, {"heatFrames": 2400} Dev note: This strat is below the normal threshold for canBePatient, but it is particularly tedious. |
From: 2
Right Door
To: 3
Farm Junction Free of Holtzes
Requires: "canDash", {"or": [ "Wave", "Spazer" ]}, {"heatFrames": 950} |
|
Requires: "canDash", {"or": [ "Plasma", {"and": [ "Ice", "Wave", "Spazer" ]} ]}, {"heatFrames": 500} |
|
Requires: {"or": [
"ScrewAttack",
{"and": [
"Plasma",
"Ice",
"Wave"
]},
{"haveBlueSuit": {}}
]},
{"heatFrames": 100},
{"or": [
"canDash",
{"heatFrames": 20}
]} |
|
Requires: "canDash", {"enemyKill": { "enemies": [["Holtz", "Holtz"]], "explicitWeapons": ["Super", "PowerBomb"] }}, {"heatFrames": 550} |
From: 2
Right Door
To: 3
Farm Junction Free of Holtzes
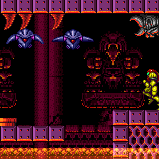

One easy way to do this is by waiting for the first Holtz to go under the first platform. Immediately when it hits the platform, move forward to lure the second Holtz. When they start going down, jump over them and quickly get to the left side of the first Zebbo farm, trapping 3 Holtzes underneath. Requires: "canDash", "canTrickyJump", {"heatFrames": 400} |
From: 3
Farm Junction Free of Holtzes
To: 1
Left Door
Requires: "canDash", "h_heatResistant", {"heatFrames": 100} Exit condition: "leaveWithRunway": {
"length": 4,
"openEnd": 1
}Unlocks doors: {
"types": ["missiles"],
"requires": [{"heatFrames": 50}]
},
{"types": ["super"], "requires": []},
{
"types": ["powerbomb"],
"requires": [{"heatFrames": 60}]
}Dev note: FIXME: Add way to use the full runway without heat resistance. |
|
Leaving from the farm node assumes killing all the Holtzes and farming to full before exiting. Gaining Energy from the farm requires some sort of heat reduction. Requires: "h_heatResistant", {"heatFrames": 100} |
From: 3
Farm Junction Free of Holtzes
To: 1
Left Door


Assumes killing all the Holtzes except for one that can be frozen to extend the runway. Get the Holtz stuck under the platform then farming to full before freezing it to extend the runway. Gaining Energy from the farm requires some sort of heat reduction. Requires: "canDash", "h_heatResistant", "h_trickyFrozenEnemyRunway", {"heatFrames": 300} Exit condition: "leaveWithRunway": {
"length": 7,
"openEnd": 0
}Unlocks doors: {"types": ["ammo"], "requires": []}Dev note: FIXME: Another strat could be added without the farm or heat resistance. |
From: 3
Farm Junction Free of Holtzes
To: 1
Left Door


Assumes killing all the Holtzes then farming to full. Morph on the ground near the Zebbo spawner then quickly unmorph and shoot as it starts to move horizontally. While on the runway near the door, freeze the Zebbo again while maintaining a half-tile gap between it and the runway to extend it as much as possible. Gaining Energy from the farm requires some sort of heat reduction. Requires: "canDash", "h_heatResistant", "h_frozenEnemyRunway", "Morph", {"heatFrames": 500} Exit condition: "leaveWithRunway": {
"length": 6,
"openEnd": 0
}Unlocks doors: {"types": ["ammo"], "requires": []}Dev note: FIXME: Another strat could be added without the farm or heat resistance. |
|
Leaving from the farm node assumes killing all the Holtzes and farming to full before exiting. Gaining Energy from the farm requires some sort of heat reduction. Requires: "h_heatResistant", {"heatFrames": 100} |
From: 3
Farm Junction Free of Holtzes
To: 2
Right Door
Assumes killing all the Holtzes except for one that can be frozen to extend the runway. Get the Holtz stuck under the platform then farming to full before freezing it to extend the runway. Gaining Energy from the farm requires some sort of heat reduction. Requires: "canDash", "h_heatResistant", "h_trickyFrozenEnemyRunway", {"heatFrames": 300} Exit condition: "leaveWithRunway": {
"length": 7,
"openEnd": 0
}Unlocks doors: {"types": ["ammo"], "requires": []}Dev note: FIXME: Another strat could be added without the farm or heat resistance. |
From: 3
Farm Junction Free of Holtzes
To: 2
Right Door


Assumes killing all the Holtzes then farming to full. Morph on the ground near the Zebbo spawner then quickly unmorph and shoot as it starts to move horizontally. While on the runway near the door, freeze the Zebbo again while maintaining a half-tile gap between it and the runway to extend it as much as possible. Gaining Energy from the farm requires some sort of heat reduction. Requires: "canDash", "h_heatResistant", "h_frozenEnemyRunway", "Morph", {"heatFrames": 500} Exit condition: "leaveWithRunway": {
"length": 6,
"openEnd": 0
}Unlocks doors: {"types": ["ammo"], "requires": []}Dev note: FIXME: Another strat could be added without the farm or heat resistance. |
From: 3
Farm Junction Free of Holtzes
To: 3
Farm Junction Free of Holtzes
Requires: "h_heatProof", {"simpleCycleFrames": 100}, {"cycleFrames": 20} Farm cycle drops: 1 Zebbo |
From: 3
Farm Junction Free of Holtzes
To: 3
Farm Junction Free of Holtzes
Requires: "h_heatProof", {"or": [ {"and": [ {"resetRoom": {"nodes": [1]}}, {"cycleFrames": 120} ]}, {"and": [ {"resetRoom": {"nodes": [2]}}, {"cycleFrames": 260} ]} ]}, {"or": [ "ScrewAttack", {"and": [ "Plasma", "Wave", {"cycleFrames": 60} ]}, {"and": [ {"haveBlueSuit": {}}, {"cycleFrames": 30} ]} ]} Farm cycle drops: 2 Holtz |
From: 3
Farm Junction Free of Holtzes
To: 3
Farm Junction Free of Holtzes
Crystal Flash to the left of the pipe to avoid the Holtzes. Requires: "h_heatedCrystalFlash" |