Amphitheatre
Room ID: 136
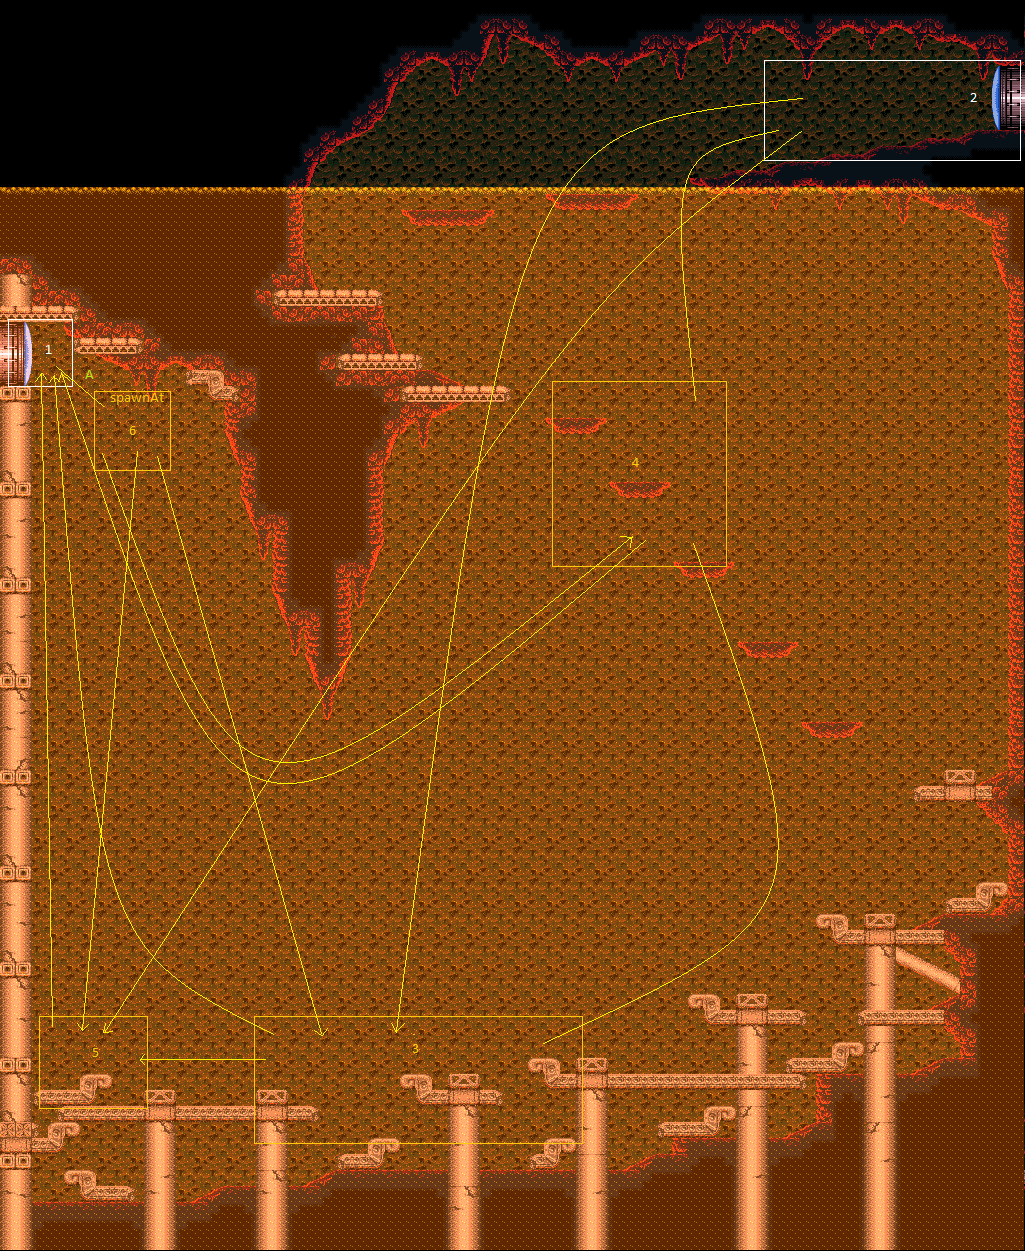
|
Requires: {"obstaclesCleared": ["A"]}Exit condition: "leaveWithRunway": {
"length": 1,
"openEnd": 1
}Unlocks doors: {"types": ["super"], "requires": []},
{"types": ["missiles", "powerbomb"], "requires": ["never"]}Dev note: FIXME: Add acid-filled version of the runway, and requirements to unlock the door with Missiles and Power Bombs. |
|
Entrance condition: "comeInNormally": {}Requires: "canPrepareForNextRoom", "canInsaneJump", {"heatFrames": 55}, {"doorUnlockedAtNode": 1} Unlocks doors: {"types": ["super"], "requires": []},
{"types": ["missiles", "powerbomb"], "requires": ["never"]}Dev note: This would technically clear A, but depending on what is being done here, there will likely be too much acid to cross the room. |
|
Entrance condition: "comeInWithDoorStuckSetup": {}Requires: "canPrepareForNextRoom", {"heatFrames": 55}, {"doorUnlockedAtNode": 1} Unlocks doors: {"types": ["ammo"], "requires": []}Dev note: This would technically clear A, but depending on what is being done here, there will likely be too much acid to cross the room. |
|
Requires: "canPrepareForNextRoom", {"or": [ "SpaceJump", "canWallJump" ]}, {"heatFrames": 80}, {"doorUnlockedAtNode": 1} Unlocks doors: {"types": ["super"], "requires": []},
{"types": ["missiles", "powerbomb"], "requires": ["never"]}Dev note: This would technically clear A, but depending on what is being done here, there will likely be too much acid to cross the room. |
|
Requires: {"obstaclesCleared": ["A"]},
{"obstaclesNotCleared": ["R-Mode"]},
"h_heatedCrystalFlash"Resets obstacles: A Unlocks doors: {"types": ["super"], "requires": []},
{"types": ["missiles", "powerbomb"], "requires": ["never"]}Dev note: FIXME: Add acid-filled version of the Crystal Flash, and requirements to unlock the door with Missiles and Power Bombs. |
|
Entrance condition: "comeInWithGMode": {
"mode": "direct",
"morphed": false
}Requires: {"or": [
"SpaceJump",
"canConsecutiveWallJump",
{"and": [
"canJumpIntoIBJ",
"canLongIBJ",
"canDoubleBombJump",
"canInsaneJump"
]}
]}Exit condition: "leaveWithGMode": {
"morphed": false
} |
|
Entrance condition: "comeInWithGMode": {
"mode": "direct",
"morphed": true
}Requires: "canArtificialMorph" Exit condition: "leaveWithGMode": {
"morphed": true
}Dev note: Artificial morph will allow Samus not to fall; real Morph is not sufficient. |
From: 1
Left Door
To: 2
Right Door


Gain run speed using 4 tiles, and jump on the last frame through the transition. Frame-perfectly activate a diagonal spark just below the tip of the stalactite. If successful, Samus will clip through the slope at the end of the ledge and make it to the top of the room. Entrance condition: "comeInJumping": {
"speedBooster": "any",
"minTiles": 4
}Requires: "canShinechargeMovementTricky", {"notable": "Thread the Needle Shinespark"}, {"useFlashSuit": {}}, {"shinespark": {"frames": 49, "excessFrames": 8}}, {"heatFrames": 315} Clears obstacles: A |
|
Cross the room while avoiding the pirate's stationary invisible lasers. On entry, fall to the right to land past the first pirate, then run and jump over the next pirate and continue to the top door. It is possible but precise to cross the room without any items or a wall jump by jumping from the slightly raised platform on the right. Entrance condition: "comeInWithGMode": {
"mode": "any",
"morphed": false
}Requires: "canDash", {"or": [ "canWallJump", "HiJump", "SpaceJump", "canSpringBallJumpMidAir", "canInsaneJump", {"and": [ "Charge", "canTrickyUseFrozenEnemies", "Plasma", "canTrickyJump" ]} ]}, "h_heatedGModeOpenDifferentDoor" Clears obstacles: A Dev note: FIXME: Some dashless options can be possible here. |
From: 1
Left Door
To: 2
Right Door
Cross the room while avoiding the pirate's stationary invisible lasers. On entry, fall to the right to land past the first pirate, then run and jump over the next pirate and continue to the top door. It is possible but precise to cross the room without any items or a wall jump by jumping from the slightly raised platform on the right. At the top, wait on the left platform to the pirate's right side - shoot to make it face Samus - and let it spawn invisible lasers to overload them. This will prevent the runway pirate from being able to create any, making it easy to kill while keeping the runway clear. Crystal Flash, drain in the acid if needed, then shinecharge. Stand in the acid, at the shallowest point. Crouch and jump into windup at low energy to interrupt. Buffer X-Ray and hold right during reserve refill and then leave the room. Entrance condition: "comeInWithGMode": {
"mode": "direct",
"morphed": false
}Requires: "canDash", {"or": [ "canWallJump", "HiJump", "SpaceJump", "canTrickySpringBallJump", "canInsaneJump", {"and": [ "Charge", "canTrickyUseFrozenEnemies", "Plasma", "canTrickyJump" ]} ]}, {"disableEquipment": "ETank"}, "h_CrystalFlashForReserveEnergy", {"or": [ {"enemyKill": { "enemies": [["Yellow Space Pirate (standing)"]] }}, {"getBlueSpeed": {"usedTiles": 17, "gentleDownTiles": 6, "openEnd": 0}} ]}, {"canShineCharge": {"usedTiles": 19, "gentleDownTiles": 6, "openEnd": 1}}, {"acidFrames": 4}, {"or": [ {"and": [ "canReserveTriggerBufferXRay", {"autoReserveTrigger": {"implicitHeatFrames": "no"}} ]}, {"autoReserveTrigger": {}} ]}, "canRModeSparkInterrupt", {"heatFrames": 116} Clears obstacles: A |
|
Entrance condition: "comeInWithRMode": {}Requires: "canDash", {"heatFrames": 270} Clears obstacles: R-Mode, A |
|
Falling into the room while holding right is safe at low horizontal speed. Pirates can be shot with any weapon to prevent them from firing. Entrance condition: "comeInNormally": {}Requires: {"or": [
{"and": [
"canDash",
{"heatFrames": 270}
]},
{"heatFrames": 355}
]}Clears obstacles: A |
|
Entering with between 3.5 and 4 tiles of run speed allows Samus to pass under the ceiling and over the bottom center pirate. With 4 tiles of run speed, Samus would overshoot landing on the platform unless forward momentum is cancelled. Entrance condition: "comeInRunning": {
"speedBooster": "any",
"minTiles": 3.4375
}Requires: "canTrickyJump", {"heatFrames": 195} Clears obstacles: A |
|
Entrance condition: "comeInWithMockball": {
"speedBooster": "any",
"adjacentMinTiles": 0,
"remoteAndLandingMinTiles": [[0, 0]]
}Requires: {"heatFrames": 280}Clears obstacles: A |
|
Entrance condition: "comeInNormally": {}Requires: "canPrepareForNextRoom", "SpaceJump", {"heatFrames": 430} Clears obstacles: A |
From: 1
Left Door
To: 4
Center Floating Platforms Junction


Spark diagonally to bonk the underside of the top floating platform, far enough right to be able to land on the next platform over. Entrance condition: "comeInShinecharged": {}Requires: "canShinechargeMovementTricky", "canInsaneJump", {"shineChargeFrames": 145}, {"shinespark": {"frames": 37, "excessFrames": 0}}, "canDash", {"heatFrames": 280} Clears obstacles: A Dev note: This assumes a worst-case entry, e.g. from water physics. FIXME: add other variants with different amounts of momentum, once this is able to be represented. |
From: 1
Left Door
To: 4
Center Floating Platforms Junction


Spark diagonally to bonk the underside of the top floating platform, far enough right to be able to land on the next platform over. Entrance condition: "comeInJumping": {
"speedBooster": "any",
"minTiles": 3
}Requires: "canShinechargeMovementTricky", {"useFlashSuit": {}}, {"shinespark": {"frames": 27, "excessFrames": 0}}, {"heatFrames": 235} Clears obstacles: A |
From: 1
Left Door
To: 4
Center Floating Platforms Junction


Spark diagonally to bonk the underside of the top floating platform, far enough right to be able to land on the next platform over. Entrance condition: "comeInJumping": {
"speedBooster": "any",
"minTiles": 1
}Requires: "canShinechargeMovementTricky", {"useFlashSuit": {}}, {"shinespark": {"frames": 31, "excessFrames": 0}}, {"heatFrames": 250} Clears obstacles: A |
|
Entrance condition: "comeInNormally": {}Requires: {"heatFrames": 180}Clears obstacles: A |
|
Entrance condition: "comeInWithMockball": {
"speedBooster": "any",
"adjacentMinTiles": 0,
"remoteAndLandingMinTiles": [[0, 0]]
}Requires: {"heatFrames": 180}Clears obstacles: A |
|


Dive into the acid to the left of the first floating platform to quickly drop down the room, holding left. Use a flash suit to activate a diagonal shinespark after falling just far enough to clear the large stalactite. Requires: "canDash", {"notable": "Reverse Acid Dive"}, {"obstaclesNotCleared": ["A"]}, "Gravity", {"heatFrames": 405}, {"acidFrames": 280}, {"useFlashSuit": {}}, {"shinespark": {"frames": 38, "excessFrames": 0}} Unlocks doors: {"types": ["super"], "requires": []},
{"types": ["missiles", "powerbomb"], "requires": ["never"]} |
|


Dive into the acid to the left of the first floating platform to quickly drop down the room, holding left. Breaking spin may make the entry a bit easier to control; maintaining spin allows taking slightly less damage, because Samus reaches higher horizontal base speed when spinning. Use a flash suit to activate a diagonal shinespark after falling almost a screen below the large stalactite; Samus must spark relatively low because the acid physics makes the spark happens at a steeper angle. Requires: "canDash", {"notable": "Reverse Acid Dive"}, {"obstaclesNotCleared": ["A"]}, "canSuitlessLavaDive", {"heatFrames": 415}, {"acidFrames": 290}, {"useFlashSuit": {}}, {"shinespark": {"frames": 41, "excessFrames": 0}} Unlocks doors: {"types": ["super"], "requires": []},
{"types": ["missiles", "powerbomb"], "requires": ["never"]} |
|
Entrance condition: "comeInWithGrappleTeleport": {
"blockPositions": [[2, 18], [2, 19]]
}Bypasses door shell: true |
|
Entrance condition: "comeInWithGrappleTeleport": {
"blockPositions": [[2, 18]]
}Exit condition: "leaveWithGrappleTeleport": {
"blockPositions": [[2, 18]]
}Bypasses door shell: true |
|
Entrance condition: "comeInWithGrappleTeleport": {
"blockPositions": [[2, 19]]
}Exit condition: "leaveWithGrappleTeleport": {
"blockPositions": [[2, 19]]
}Bypasses door shell: true |
|
Exit condition: "leaveWithRunway": {
"length": 16,
"openEnd": 0,
"gentleUpTiles": 5
} |
|
Requires: "h_heatProof", {"enemyKill": { "enemies": [["Yellow Space Pirate (standing)"]], "excludedWeapons": ["Bombs"] }} Exit condition: "leaveWithRunway": {
"length": 20,
"openEnd": 1,
"gentleUpTiles": 6
} |
From: 2
Right Door
To: 2
Right Door
Requires: {"heatFrames": 220},
{"enemyKill": {
"enemies": [["Yellow Space Pirate (standing)"]],
"explicitWeapons": ["Super", "ScrewAttack"]
}}Exit condition: "leaveWithRunway": {
"length": 20,
"openEnd": 1,
"gentleUpTiles": 6
} |
From: 2
Right Door
To: 2
Right Door
Requires: {"heatFrames": 450},
{"enemyKill": {
"enemies": [["Yellow Space Pirate (standing)"]],
"explicitWeapons": ["Missile", "Charge+Plasma"]
}}Exit condition: "leaveWithRunway": {
"length": 20,
"openEnd": 1,
"gentleUpTiles": 6
} |
|
Requires: "h_heatProof", {"resetRoom": {"nodes": [2]}}, {"or": [ {"and": [ "Charge", "Plasma", {"cycleFrames": 230} ]}, {"and": [ "ScrewAttack", {"cycleFrames": 185} ]} ]} Resets obstacles: A, R-Mode Farm cycle drops: 1 Yellow Space Pirate (standing) |
|
Requires: {"obstaclesNotCleared": ["R-Mode"]},
"h_heatedCrystalFlash" |
|
Shinecharge on the flat portion before the third downward slope in order to fully avoid the pirate. Entrance condition: "comeInShinecharging": {
"length": 7,
"openEnd": 0
}Requires: "h_heatedCrystalSpark" |
|
Requires: {"or": [
{"enemyKill": {
"enemies": [["Yellow Space Pirate (standing)"]],
"excludedWeapons": ["Bombs"]
}},
{"getBlueSpeed": {"usedTiles": 17, "gentleDownTiles": 6, "openEnd": 1}},
{"and": [
{"getBlueSpeed": {"usedTiles": 18, "gentleDownTiles": 6, "openEnd": 1}},
{"doorUnlockedAtNode": 2}
]}
]},
{"or": [
{"canShineCharge": {"usedTiles": 19, "gentleDownTiles": 6, "openEnd": 0}},
{"and": [
{"canShineCharge": {"usedTiles": 20, "gentleDownTiles": 6, "openEnd": 0}},
{"doorUnlockedAtNode": 2}
]}
]},
"h_heatedCrystalSpark"Unlocks doors: {"types": ["ammo"], "requires": []}Dev note: FIXME: The pirate could be an obstacle and more complex methods of killing it could be in logic. |
From: 2
Right Door
To: 2
Right Door


If you're fast, you can find enough time to kill a Yellow Pirate on the way up: Supers, Screw Attack, or charged Microwave are fast enough to do this. Either way, kill the pirate at the top, Crystal Flash if you need it, and get the shinecharge. If you're heat-proof, wait for the acid to finish rising and you can interrupt in the small bit that reaches the runway. Otherwise, use heat to interrupt. Requires: {"obstaclesCleared": ["R-Mode"]},
{"obstaclesCleared": ["A"]},
{"or": [
"h_heatedCrystalFlashForReserveEnergy",
{"and": [
{"or": [
"ScrewAttack",
{"and": [
"Charge",
"Plasma",
"canXRayWaitForIFrames"
]},
{"enemyKill": {
"enemies": [["Yellow Space Pirate (standing)"]],
"explicitWeapons": ["Super"]
}}
]},
"h_RModeCanRefillReserves",
{"resourceMissingAtMost": [{"type": "Missile", "count": 0}]},
{"partialRefill": {"type": "ReserveEnergy", "limit": 20}}
]}
]},
{"enemyKill": {
"enemies": [["Yellow Space Pirate (standing)"]]
}},
{"canShineCharge": {"usedTiles": 20, "gentleDownTiles": 6, "openEnd": 1}},
{"or": [
"h_heatTriggerRModeSparkInterrupt",
{"and": [
"h_heatProof",
{"autoReserveTrigger": {}},
"canRModeSparkInterrupt",
{"acidFrames": 32}
]}
]}Resets obstacles: R-Mode, A |
From: 2
Right Door
To: 2
Right Door


Kill the runway pirate for a drop and Crystal Flash if needed. To interrupt, you can either use heat, or stand in the acid at the very end of the runway. Acid damage does not accumulate during reserve trigger as heat does, so escape quickly to minimize exposure. Entrance condition: "comeInWithRMode": {}Requires: {"or": [
"h_heatedCrystalFlashForReserveEnergy",
{"and": [
"h_RModeCanRefillReserves",
{"enemyKill": {
"enemies": [["Yellow Space Pirate (standing)"]]
}},
{"resourceMissingAtMost": [{"type": "Missile", "count": 0}]},
{"partialRefill": {"type": "ReserveEnergy", "limit": 20}}
]}
]},
{"canShineCharge": {"usedTiles": 20, "gentleDownTiles": 6, "openEnd": 1}},
{"or": [
"h_heatTriggerRModeSparkInterrupt",
{"and": [
{"autoReserveTrigger": {}},
"canRModeSparkInterrupt",
{"acidFrames": 32},
{"heatFrames": 32}
]}
]} |
From: 2
Right Door
To: 2
Right Door
Kill the runway pirate and then Crystal Flash. Jump while shooting to prevent any invisible lasers from being created, or use a pause abuse and minimal reserve refill to clear them. Drain in the acid to low energy if needed, then shinecharge: wait for the high peak to descend before running. Windup just before the acid touches Samus to shinespark interrupt using the acid. Buffer X-Ray and hold right during reserve refill and then leave the room. Entrance condition: "comeInWithGMode": {
"mode": "direct",
"morphed": false
}Requires: {"disableEquipment": "ETank"},
"h_CrystalFlashForReserveEnergy",
{"or": [
{"enemyKill": {
"enemies": [["Yellow Space Pirate (standing)"]],
"excludedWeapons": ["Bombs"]
}},
{"and": [
{"getBlueSpeed": {"usedTiles": 18, "gentleDownTiles": 6, "openEnd": 0}},
"canComplexGMode"
]}
]},
{"canShineCharge": {"usedTiles": 20, "gentleDownTiles": 6, "openEnd": 1}},
{"acidFrames": 4},
{"or": [
{"and": [
"canReserveTriggerBufferXRay",
{"autoReserveTrigger": {"implicitHeatFrames": "no"}}
]},
{"autoReserveTrigger": {}}
]},
"canRModeSparkInterrupt",
{"heatFrames": 116} |
|


Dive into the acid to the left of the first floating platform to quickly sink to the bottom of the room. It is possible to jump directly over the pirate at the bottom of the ramp directly to the gap between platforms. Falling in this way will land between the platforms at the bottom of the room. Requires: {"notable": "Reverse Acid Dive"},
{"obstaclesNotCleared": ["A"]},
"canSuitlessLavaDive",
{"or": [
"SpaceJump",
"canTrickyJump",
{"and": [
"canLateralMidAirMorph",
"canCarefulJump"
]},
{"and": [
"ScrewAttack",
"canCarefulJump"
]},
{"and": [
"h_heatProof",
{"enemyKill": {
"enemies": [["Yellow Space Pirate (standing)"]]
}},
"canCarefulJump"
]}
]},
{"or": [
{"and": [
"canDash",
{"heatFrames": 320},
{"acidFrames": 195}
]},
{"and": [
"canPreciseWallJump",
{"heatFrames": 480},
{"acidFrames": 250}
]},
{"and": [
"SpaceJump",
{"heatFrames": 470},
{"acidFrames": 210}
]},
{"and": [
{"heatFrames": 460},
{"acidFrames": 315}
]}
]}Dev note: It is faster to fall all the way to the bottom and then jump onto the platform to the left, than to morph/unmorph to reset fall speed to reach it directly. |
From: 2
Right Door
To: 4
Center Floating Platforms Junction

Jump over the pirate and fall straight down to land on an upper-middle floating platform. Requires: {"notable": "Reverse Acid Dive"},
{"obstaclesNotCleared": ["A"]},
"canSuitlessLavaDive",
{"or": [
{"and": [
"canDash",
{"heatFrames": 180},
{"acidFrames": 80}
]},
{"and": [
{"heatFrames": 210},
{"acidFrames": 110}
]}
]} |
From: 2
Right Door
To: 5
Below Left Door Junction

Begin running from the top of the second slope and jump at the bottom of the third slope, bonking the large stalagtite in the ceiling. Kill the first pirate with Screw Attack (or ahead of time with Charge+Plasma), and pass through the second pirate using a charged plasma shot. Enter the acid while aiming down to shrink Samus' hitbox. This strat works with all combinations of movement items and suits. Requires: "canDash", {"notable": "Reverse Acid Dive"}, {"notable": "Reverse Thread the Needle"}, {"obstaclesNotCleared": ["A"]}, "canInsaneJump", "canSuitlessLavaDive", "Charge", "Plasma", "canHitbox", {"or": [ "ScrewAttack", {"heatFrames": 210} ]}, {"heatFrames": 330}, {"acidFrames": 210} |
From: 2
Right Door
To: 5
Below Left Door Junction


Enter the room blue with very low run speed (e.g. with a 4-tap). Use a precisely timed jump to bonk the large stalagtite in the ceiling and fall through both pirates, killing them with the blue speed. Enter the acid while aiming down to shrink Samus' hitbox. This strat works with all combinations of movement items and suits. Entrance condition: "comeInGettingBlueSpeed": {
"length": 9,
"openEnd": 1,
"gentleDownTiles": 4
}Requires: {"notable": "Reverse Acid Dive"},
{"notable": "Reverse Thread the Needle"},
{"obstaclesNotCleared": ["A"]},
"h_blueJump",
"canInsaneJump",
"canSuitlessLavaDive",
"canSlowShortCharge",
{"heatFrames": 330},
{"acidFrames": 210} |
|
SpaceJump diagonally towards the door through the acid. Requires: {"notable": "Reverse Acid Dive"},
{"obstaclesNotCleared": ["A"]},
"canSuitlessLavaDive",
"Gravity",
"SpaceJump",
{"or": [
{"and": [
{"heatFrames": 280},
{"acidFrames": 280}
]},
{"and": [
"HiJump",
{"heatFrames": 250},
{"acidFrames": 250}
]},
{"and": [
"HiJump",
"canDash",
{"heatFrames": 220},
{"acidFrames": 220}
]}
]}Unlocks doors: {"types": ["super"], "requires": []},
{"types": ["missiles", "powerbomb"], "requires": ["never"]}Dev note: FIXME: Add requirements to unlock the door with Missiles and Power Bombs. |
|
There is just enough runway below the left door to build a shinespark. Requires: {"notable": "Reverse Acid Dive"},
{"obstaclesNotCleared": ["A"]},
"h_heatProof",
"Gravity",
"canSuitlessLavaDive",
{"canShineCharge": {"usedTiles": 13, "openEnd": 1}},
{"shinespark": {"frames": 55, "excessFrames": 0}},
{"acidFrames": 600}Unlocks doors: {"types": ["super"], "requires": []},
{"types": ["missiles", "powerbomb"], "requires": ["never"]}Dev note: This strat is only used to avoid walljumping. |
|

Clear the runway by killing the pirate. Then Gravity jump after building as much run speed as possible. Requires: {"notable": "Reverse Acid Dive"},
{"obstaclesNotCleared": ["A"]},
"HiJump",
"canTrickyDashJump",
"canGravityJump",
{"enemyKill": {
"enemies": [["Yellow Space Pirate (standing)"]],
"explicitWeapons": ["ScrewAttack", "Super", "Charge+Plasma"]
}},
{"heatFrames": 240},
{"acidFrames": 240},
{"gravitylessHeatFrames": 150},
{"gravitylessAcidFrames": 150}Unlocks doors: {"types": ["super"], "requires": []},
{"types": ["missiles", "powerbomb"], "requires": ["never"]}Dev note: This strat is only used to avoid walljumping. |
From: 3
Bottom Platform Junction
To: 3
Bottom Platform Junction


Requires: {"obstaclesNotCleared": ["A"]},
{"obstaclesNotCleared": ["R-Mode"]},
{"heatFrames": 170},
{"acidFrames": 170},
"canHeatedCrystalFlash",
"h_heatedAcidCrystalFlashRefill",
{"heatFrames": 20},
{"acidFrames": 20},
{"or": [
"Gravity",
{"and": [
{"heatFrames": 5},
{"acidFrames": 5}
]}
]}Dev note: We list the requirements explicitly rather than using the helper `h_heatedAcidCrystalFlash` to reflect that it's possible to save some heat/acid frames with a soft morph while landing; this makes the difference in being able to make the CF with 3 tanks with Gravity. |
From: 3
Bottom Platform Junction
To: 4
Center Floating Platforms Junction
Requires: {"obstaclesCleared": ["A"]},
"SpaceJump",
{"heatFrames": 420} |
|
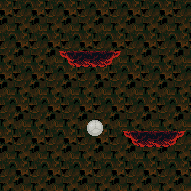

Requires: "canDash", {"obstaclesCleared": ["A"]}, {"or": [ "canDodgeWhileShooting", "ScrewAttack", {"enemyDamage": { "enemy": "Yellow Space Pirate (standing)", "type": "laser", "hits": 1 }} ]}, {"or": [ {"and": [ "canWallJump", {"heatFrames": 345} ]}, {"and": [ "HiJump", {"heatFrames": 345} ]}, {"and": [ "canWallJump", "HiJump", {"heatFrames": 300} ]}, {"and": [ "canTrickySpringBallJump", {"heatFrames": 345} ]}, {"and": [ "canJumpIntoIBJ", "canTrickyJump", {"heatFrames": 500} ]} ]} |
From: 3
Bottom Platform Junction
To: 4
Center Floating Platforms Junction


Between the two pirates there is a short runway that can be used to jump to the higher platform. Requires: "canDash", {"obstaclesCleared": ["A"]}, "canInsaneJump", {"heatFrames": 480} |
From: 3
Bottom Platform Junction
To: 4
Center Floating Platforms Junction
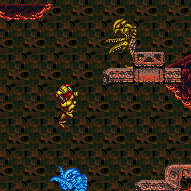

Freeze a pirate to use as a platform. A very strong beam is required to stay out of the acid. Shooting the Pirate with two diagonal shots can help prevent it from being killed as it is frozen. Requires: "canDash", {"obstaclesCleared": ["A"]}, "Charge", "canTrickyUseFrozenEnemies", "Plasma", "canTrickyJump", {"heatFrames": 440} |
From: 3
Bottom Platform Junction
To: 4
Center Floating Platforms Junction


Precise jumps are needed to avoid both the Pirates and the acid. Requires: "canInsaneJump", {"or": [ {"and": [ "canWallJump", {"heatFrames": 460} ]}, {"and": [ "HiJump", {"heatFrames": 490} ]}, {"and": [ "canJumpIntoIBJ", {"heatFrames": 600} ]}, {"and": [ "canSpringBallJumpMidAir", {"heatFrames": 460} ]}, {"and": [ "Charge", "canTrickyUseFrozenEnemies", "Plasma", {"heatFrames": 545} ]} ]} |
|


Avoid the pirate while moving through the acid to get closer to the wall. Requires: {"notable": "Reverse Acid Dive"},
{"obstaclesNotCleared": ["A"]},
"canSuitlessLavaDive",
{"or": [
{"and": [
"Gravity",
"canDash",
{"heatFrames": 105},
{"acidFrames": 105}
]},
{"and": [
{"heatFrames": 170},
{"acidFrames": 170}
]}
]} |
From: 3
Bottom Platform Junction
To: 5
Below Left Door Junction


Kill the Pirate and perform a Crystal Flash. Requires: {"notable": "Reverse Acid Dive"},
{"obstaclesNotCleared": ["A"]},
{"obstaclesNotCleared": ["R-Mode"]},
"canSuitlessLavaDive",
{"or": [
{"and": [
"canTrickyDodgeEnemies",
{"enemyKill": {
"enemies": [["Yellow Space Pirate (standing)"]],
"explicitWeapons": ["Super", "Charge+Plasma"]
}}
]},
{"enemyKill": {
"enemies": [["Yellow Space Pirate (standing)"]],
"explicitWeapons": ["Charge+Ice+Wave+Plasma"]
}},
{"and": [
"Gravity",
{"enemyKill": {
"enemies": [["Yellow Space Pirate (standing)"]],
"explicitWeapons": ["ScrewAttack"]
}}
]}
]},
{"or": [
{"and": [
"Gravity",
"canDash",
{"heatFrames": 80},
{"acidFrames": 80}
]},
{"and": [
{"heatFrames": 130},
{"acidFrames": 130}
]}
]},
"h_heatedAcidCrystalFlash",
{"heatFrames": 35},
{"acidFrames": 35} |
From: 4
Center Floating Platforms Junction
To: 1
Left Door
Land on the fourth platform from the top and build some speed to spacejump across straight to the door. The optimal platform can be hit by simpily holding right when entering the acid. Requires: {"notable": "Reverse Acid Dive"},
{"obstaclesNotCleared": ["A"]},
"Gravity",
"SpaceJump",
{"or": [
{"and": [
"canDash",
{"heatFrames": 360},
{"acidFrames": 360}
]},
{"and": [
{"heatFrames": 460},
{"acidFrames": 460}
]}
]}Unlocks doors: {"types": ["super"], "requires": []},
{"types": ["missiles", "powerbomb"], "requires": ["never"]}Dev note: Includes a little bit extra frame count to drop down two platforms first. FIXME: this lower platform could be modeled more cleanly as a separate junction node; it would be useful as another place to Crystal Flash when traversing the room left-to-right. |
|
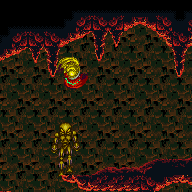

Jump over or kill the final pirate in front of the door. Requires: "canDash", {"obstaclesCleared": ["A"]}, {"or": [ "canCarefulJump", "canPreciseWallJump", "ScrewAttack", "canSpringBallJumpMidAir", "SpaceJump", {"enemyDamage": { "enemy": "Yellow Space Pirate (standing)", "type": "contact", "hits": 2 }} ]}, {"heatFrames": 420} |
|


Requires: "canDash", {"obstaclesCleared": ["A"]}, "HiJump", {"or": [ "canSpeedyJump", {"heatFrames": 90} ]}, {"heatFrames": 270}, {"or": [ "canCarefulJump", "canLateralMidAirMorph", "ScrewAttack", {"and": [ {"enemyKill": { "enemies": [["Yellow Space Pirate (standing)"]], "explicitWeapons": ["Charge+Ice+Wave+Spazer"] }}, {"heatFrames": 240} ]}, {"and": [ {"enemyKill": { "enemies": [["Yellow Space Pirate (standing)"]], "explicitWeapons": ["Missile", "Charge+Plasma"] }}, {"heatFrames": 120} ]}, {"and": [ {"enemyKill": { "enemies": [["Yellow Space Pirate (standing)"]], "explicitWeapons": ["Super"] }}, {"heatFrames": 60} ]} ]} |
|
Requires: "canDash", {"obstaclesCleared": ["A"]}, {"or": [ {"and": [ {"enemyKill": { "enemies": [ ["Yellow Space Pirate (standing)", "Yellow Space Pirate (standing)"], ["Yellow Space Pirate (standing)"] ], "explicitWeapons": ["Charge+Ice+Wave+Spazer", "Missile"] }}, {"heatFrames": 900} ]}, {"and": [ {"enemyKill": { "enemies": [ ["Yellow Space Pirate (standing)", "Yellow Space Pirate (standing)"], ["Yellow Space Pirate (standing)"] ], "explicitWeapons": ["Super", "Charge+Plasma"] }}, {"heatFrames": 660} ]} ]} |
|
Requires: {"haveBlueSuit": {}},
{"or": [
{"heatFrames": 500},
{"and": [
"HiJump",
"canWallJump",
{"heatFrames": 390}
]},
{"and": [
"canSpringBallJumpMidAir",
{"heatFrames": 375}
]},
{"and": [
"SpaceJump",
{"heatFrames": 335}
]},
{"and": [
"SpaceJump",
"HiJump",
{"heatFrames": 280}
]}
]} |
From: 4
Center Floating Platforms Junction
To: 3
Bottom Platform Junction
Jump off the platform to the left with low horizontal speed and hold left to avoid landing on any pirates. Requires: {"notable": "Reverse Acid Dive"},
{"obstaclesNotCleared": ["A"]},
{"or": [
{"and": [
"Gravity",
"canDash",
{"heatFrames": 180},
{"acidFrames": 180}
]},
{"and": [
{"heatFrames": 240},
{"acidFrames": 240}
]}
]} |
From: 4
Center Floating Platforms Junction
To: 4
Center Floating Platforms Junction
Requires: {"obstaclesCleared": ["A"]},
{"obstaclesNotCleared": ["R-Mode"]},
"h_heatedCrystalFlash"Dev note: This requires acting quickly enough that the acid does not catch Samus, but this is not difficult to do. A Crystal Flash could also be performed in acid here, while traversing the room right-to-left, but it would have no benefit compared to Crystal Flashing on room entry and taking the 2->3 path. FIXME: add another Crystal Flash strat at a junction two platforms lower, which has a more significant movement requirement to avoid getting caught by the acid. |
From: 5
Below Left Door Junction
To: 1
Left Door


Climb to the top left door while in Acid. Requires: {"notable": "Reverse Acid Dive"},
{"obstaclesNotCleared": ["A"]},
"Gravity",
{"or": [
{"and": [
"HiJump",
"canConsecutiveWallJump",
{"heatFrames": 150},
{"acidFrames": 150}
]},
{"and": [
"canConsecutiveWallJump",
{"heatFrames": 210},
{"acidFrames": 210}
]}
]}Unlocks doors: {"types": ["super"], "requires": []},
{"types": ["missiles", "powerbomb"], "requires": ["never"]} |
From: 5
Below Left Door Junction
To: 1
Left Door


It is possible to walljump in acid without Gravity Suit. Requires: {"notable": "Reverse Acid Dive"},
{"obstaclesNotCleared": ["A"]},
"canConsecutiveWallJump",
{"or": [
{"and": [
"HiJump",
{"heatFrames": 280},
{"acidFrames": 280}
]},
{"and": [
{"heatFrames": 400},
{"acidFrames": 400}
]}
]}Unlocks doors: {"types": ["super"], "requires": []},
{"types": ["missiles", "powerbomb"], "requires": ["never"]} |
|
Requires: {"obstaclesCleared": ["A"]},
{"or": [
{"and": [
"canConsecutiveWallJump",
{"heatFrames": 300}
]},
{"and": [
"canConsecutiveWallJump",
"HiJump",
{"heatFrames": 240}
]},
{"and": [
"SpaceJump",
{"heatFrames": 600}
]},
{"and": [
"SpaceJump",
"HiJump",
{"heatFrames": 390}
]}
]}Unlocks doors: {"types": ["super"], "requires": []},
{"types": ["missiles", "powerbomb"], "requires": ["never"]} |
|
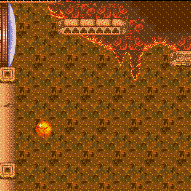

Acid allows for more time than water to perform Spring Ball jumps. This gives just barely enough time to fit in three spring ball jumps. Requires: {"notable": "Reverse Acid Dive"},
{"obstaclesNotCleared": ["A"]},
"h_heatProof",
"canSuitlessLavaDive",
"h_doubleSpringBallJumpWithHiJump",
"canTrickyJump",
{"acidFrames": 375},
{"or": [
"canInsaneJump",
{"acidFrames": 450}
]}Unlocks doors: {"types": ["super"], "requires": []},
{"types": ["missiles", "powerbomb"], "requires": ["never"]}Dev note: A crouch jump is not required. The leniency frames are worst-case scenario of not having enough time for the last jump, which is the most common way to fail. |
From: 5
Below Left Door Junction
To: 1
Left Door
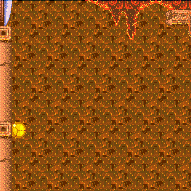

Perform a gravity jump followed by a springball jump to reach the left side door. The gravity jump will only get high enough if it is within the last two frames, and the Spring Ball jump must be delayed and near the peak of the jump. Requires: {"notable": "Reverse Acid Dive"},
{"obstaclesNotCleared": ["A"]},
"HiJump",
"canTrickyJump",
"canGravityJump",
{"or": [
"h_crouchJumpDownGrab",
{"and": [
"canTrickyCarryFlashSuit",
"canDownGrab"
]}
]},
"canSpringBallJumpMidAir",
{"heatFrames": 50},
{"acidFrames": 50},
{"gravitylessHeatFrames": 300},
{"gravitylessAcidFrames": 300}Unlocks doors: {"types": ["super"], "requires": []},
{"types": ["missiles", "powerbomb"], "requires": ["never"]}Dev note: It is possible to do this with a flash suit, and no crouch jump, but it requires a frame perfect jump and then a Spring Ball jump within 3 pixels of its peak. |
From: 5
Below Left Door Junction
To: 5
Below Left Door Junction
Requires: "h_heatProof", {"resetRoom": {"nodes": [1]}}, {"obstaclesCleared": ["A"]}, "canTrickyJump", {"cycleFrames": 145}, {"or": [ "ScrewAttack", {"and": [ "Charge", "Plasma", "Wave", {"cycleFrames": 60}, "canFarmWhileShooting" ]} ]}, {"or": [ "canMoonfall", {"cycleFrames": 60} ]}, {"or": [ {"and": [ "canConsecutiveWallJump", {"cycleFrames": 280} ]}, {"and": [ "canConsecutiveWallJump", "HiJump", {"cycleFrames": 220} ]}, {"and": [ "SpaceJump", {"cycleFrames": 580} ]}, {"and": [ "SpaceJump", "HiJump", {"cycleFrames": 370} ]} ]} Clears obstacles: A Resets obstacles: R-Mode Farm cycle drops: 1 Yellow Space Pirate (standing) |