Hi Jump Energy Tank Room
Room ID: 88
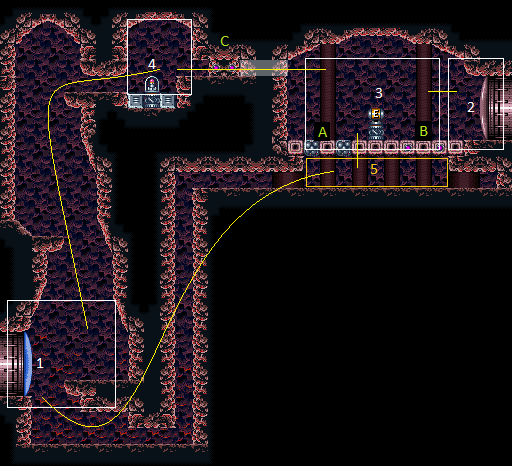
|
Exit condition: "leaveWithRunway": {
"length": 1,
"openEnd": 1
} |
|
Requires: "canTrickyJump" Exit condition: "leaveWithMockball": {
"remoteRunway": {
"length": 3,
"openEnd": 1
},
"landingRunway": {
"length": 1,
"openEnd": 0
}
} |
From: 1
Left Door
To: 1
Left Door
Requires: "canTrickyJump" Exit condition: "leaveWithSpringBallBounce": {
"remoteRunway": {
"length": 3,
"openEnd": 1
},
"landingRunway": {
"length": 1,
"openEnd": 0
},
"movementType": "uncontrolled"
} |
|


Exit condition: "leaveWithSidePlatform": {
"height": 3,
"runway": {
"length": 3,
"openEnd": 0
},
"obstruction": [1, 0]
}Dev note: Max extra run speed $0.B. This strat is included for completeness, though it apparently doesn't have any applications. |
|
Requires: "h_CrystalFlash" |
|
Requires: {"resetRoom": {"nodes": [1]}},
{"or": [
{"and": [
"Grapple",
{"cycleFrames": 460}
]},
{"and": [
"Morph",
{"cycleFrames": 420}
]},
{"cycleFrames": 530}
]}Resets obstacles: A, B, C, D Farm cycle drops: 1 Sova |
|


Note that breaking the left bomb blocks and either the crumble blocks or the other bomb blocks could make the Sova go in a loop without ever getting to the door (unless using a Super). Because of this it is advised not to break the bomb blocks. But if breaking them is necessary, it is possible to do so, even with a Power Bomb. Place the Power Bomb while the Sova is in the bottom left section of the room, while it is moving counter-clockwise. Exit condition: "leaveWithDamage": {
"enemy": "Sova"
} |
|


It takes the Sova about 25 seconds to hit Samus. Requires: {"enemyDamage": {"enemy": "Sova", "type": "contact", "hits": 1}} |
From: 1
Left Door
To: 1
Left Door
Get to the item with two Spring Ball bomb jumps and remote acquire the item back by the left door. Entrance condition: "comeInWithGMode": {
"mode": "direct",
"morphed": true
}Requires: "canRemoteAcquire", "h_artificialMorphSpringBallBombJump", "h_additionalBomb" Collects items: 4 Dev note: The Power Bombs will solidify the bomb block, preventing remote acquiring on the right. The Power Bombs are not going to overload many PLMs. |
From: 1
Left Door
To: 1
Left Door


A Blue Suit allows Samus to pass through the morph tunnel bomb blocks without overloading PLMS and be able to collect the right item. With Hi-Jump and SpringBall or IBJ, reach the top left item, quickly roll through it and the morph tunnel to reach the right item. After returning to the door, exiting G-Mode will collect both Items. Entrance condition: "comeInWithGMode": {
"mode": "direct",
"morphed": true
}Requires: "h_blueSuitGMode", {"or": [ "h_artificialMorphIBJ", {"and": [ "HiJump", "h_artificialMorphSpringBall" ]} ]}, "canRemoteAcquire" Collects items: 3, 4 |
From: 1
Left Door
To: 3
Top Right Item


Roll through the camera scroll block in the morph tunnel at the bottom of the room to overload PLMs, then get to the right side through the crumble blocks or bomb blocks near the left item. This can be done with an IBJ or two Spring Ball Bomb Jumps. Entrance condition: "comeInWithGMode": {
"mode": "any",
"morphed": true
}Requires: {"or": [
"h_artificialMorphIBJ",
{"and": [
"h_artificialMorphSpringBallBombJump",
"h_additionalBomb"
]},
{"and": [
"HiJump",
"h_artificialMorphSpringBall"
]},
{"and": [
"Morph",
{"or": [
"HiJump",
"canWallJump",
"canSpringBallJumpMidAir",
"SpaceJump"
]}
]}
]} |
From: 1
Left Door
To: 3
Top Right Item
After teleporting, hold left and release Grapple to remain in a standing pose (and not be force crouched). X-ray climb a specific distance, performing exactly 15 X-Ray stand-ups. Then morph and roll out to the right. If Bombs, Power Bombs, or Screw Attack are available, this can allow more lenience in how far to climb. Entrance condition: "comeInWithGrappleTeleport": {
"blockPositions": [[12, 13]]
}Requires: "canXRayClimb", "Morph", "canOffScreenMovement" |
|
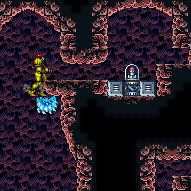

Requires: "Morph",
{"or": [
"canWallJump",
"HiJump",
"SpaceJump",
"canIBJ",
"canUseFrozenEnemies",
"canSpringBallJumpMidAir"
]} |
|
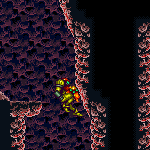

Crouch jump and let the Sova move into Samus from the right, to get a upward boost, then hold left to boost horizontally to the ledge. Then crouch jump from the slope on the left, and morph into a neutral damage boost. Requires: {"notable": "Sova Boost"},
"Morph",
"canCrouchJump",
"canTrickyJump",
{"or": [
"canInsaneMidAirMorph",
"canHorizontalDamageBoost"
]},
"h_midAirMorphDamageBoost",
{"enemyDamage": {"enemy": "Sova", "type": "contact", "hits": 2}} |
|
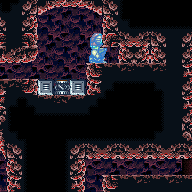

Entrance condition: "comeInWithTemporaryBlue": {}Requires: "canLongChainTemporaryBlue", "canXRayTurnaround", "canTrickySpringBallBounce" Clears obstacles: C |
|
Artificial morph IBJ or use two bomb boost spring ball jumps. Entrance condition: "comeInWithGMode": {
"mode": "any",
"morphed": true
}Requires: {"or": [
"h_artificialMorphIBJ",
{"and": [
"h_artificialMorphSpringBallBombJump",
"h_additionalBomb"
]},
{"and": [
"HiJump",
"h_artificialMorphSpringBall"
]}
]}Dev note: This is only useful if the item is Morph. |
From: 1
Left Door
To: 4
Top Left Item
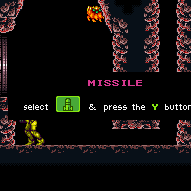

Get to the item without overloading PLMs by avoiding entering the morph tunnel at the bottom of the room. Entrance condition: "comeInWithGMode": {
"mode": "direct",
"morphed": true
}Requires: "canRemoteAcquire", {"or": [ "h_artificialMorphIBJ", {"and": [ "HiJump", "h_artificialMorphSpringBall" ]}, {"and": [ "Morph", {"or": [ "HiJump", "canWallJump", "canSpringBallJumpMidAir", "SpaceJump" ]} ]} ]} Clears obstacles: D |
|
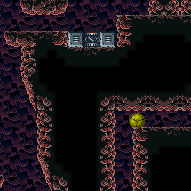

Requires: {"or": [
"canLongIBJ",
"canJumpIntoIBJ",
{"and": [
"canMidAirMorph",
{"or": [
"canWallJump",
"SpaceJump",
"canUseFrozenEnemies"
]}
]},
{"and": [
"canUseFrozenEnemies",
"h_useSpringBall"
]},
{"and": [
"HiJump",
"canSpringBallJumpMidAir"
]}
]} |
|
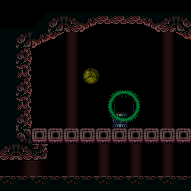

Overload PLMs using the camera scroll blocks in the morph tunnel. Samus can fix the camera after exiting G-mode on the left. It is possible to wait for the Sova to appear on screen before going to the left, in order to ensure Samus won't touch it. Entrance condition: "comeInWithGMode": {
"mode": "any",
"morphed": true
}Requires: "h_artificialMorphMovement" |
From: 2
Right Door
To: 1
Left Door
Placing a Power Bomb a 0.5 to 1 tile away from the item plinth to bounce Samus onto it (where the right item usually is) while also overloading PLMs as the explosion hits the left item. Wait for the explosion to completely finish before touching the crumble blocks or they will remain solid. The camera will not scroll to the left side of the room, but it is possible to kill the Sova with the Power Bomb boost. Entrance condition: "comeInWithGMode": {
"mode": "direct",
"morphed": true
}Requires: "canPowerBombItemOverloadPLMs", {"itemNotCollectedAtNode": 4}, "canRiskPermanentLossOfAccess", "h_artificialMorphPowerBomb" Collects items: 3 Dev note: FIXME: It is possible to avoid collecting 3 by using a second Power Bomb to boost through the item after PLMs are overloaded. |
From: 2
Right Door
To: 1
Left Door
Touch both the item and the camera scroll blocks in the morph tunnel before PLMs are overloaded, then use either to finish overloading them. This will make it so that Samus can fix the camera after exiting G-mode on the left. It is possible to wait for the Sova to appear on screen before going to the left, in order to ensure Samus won't touch it. With only a Power Bomb boost to touch the item, it is not possible to fix the camera, but it is possible to kill the Sova. Entrance condition: "comeInWithGMode": {
"mode": "direct",
"morphed": true
}Requires: "canRemoteAcquire", {"itemNotCollectedAtNode": 3}, "canRiskPermanentLossOfAccess", {"or": [ "h_artificialMorphMovement", "h_artificialMorphPowerBomb" ]} Collects items: 3 Dev note: The only loss of access here is the camera fix, but there is another strat that can be used without. |
From: 2
Right Door
To: 1
Left Door
IBJ or SpringBall jump into the morph tunnel and quickly roll thorough to avoid overloading PLMS and making remote acquisition impossible. Touch the item, and continue to the left side of the room before exiting G-mode to collect the item. Entrance condition: "comeInWithGMode": {
"mode": "direct",
"morphed": true
}Requires: "h_blueSuitGMode", {"or": [ "h_artificialMorphSpringBall", "h_artificialMorphIBJ" ]}, "canRemoteAcquire" Collects items: 4 |
|
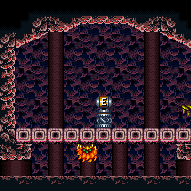

Entrance condition: "comeInWithGrappleTeleport": {
"blockPositions": [[5, 3], [7, 2]]
} |
From: 2
Right Door
To: 1
Left Door


Entrance condition: "comeInWithGrappleTeleport": {
"blockPositions": [[2, 18], [2, 19], [2, 29]]
}Bypasses door shell: true |
From: 2
Right Door
To: 1
Left Door
Entrance condition: "comeInWithGrappleTeleport": {
"blockPositions": [[2, 18]]
}Exit condition: "leaveWithGrappleTeleport": {
"blockPositions": [[2, 18]]
}Bypasses door shell: true |
From: 2
Right Door
To: 1
Left Door
Entrance condition: "comeInWithGrappleTeleport": {
"blockPositions": [[2, 19]]
}Exit condition: "leaveWithGrappleTeleport": {
"blockPositions": [[2, 19]]
}Bypasses door shell: true |
From: 2
Right Door
To: 1
Left Door
Entrance condition: "comeInWithGrappleTeleport": {
"blockPositions": [[2, 29]]
}Exit condition: "leaveWithGrappleTeleport": {
"blockPositions": [[2, 29]]
}Bypasses door shell: true |
From: 2
Right Door
To: 2
Right Door


Avoid the right item if it is uncollected as it will overload PLMS if touched too many times in G-Mode. Either IBJ or SpringBall jump into the morph tunnel and quickly roll thorough to avoid overloading PLMS. The camera will not follow Samus through the tunnel so the collection is done blind. Due to the effects of Blue Suit, right direction must be pressed after the bomb explodes when returning. Entrance condition: "comeInWithGMode": {
"mode": "direct",
"morphed": true
}Requires: "h_blueSuitGMode", {"or": [ "h_artificialMorphSpringBall", "h_artificialMorphIBJ" ]}, "canRemoteAcquire" Collects items: 4 |
From: 2
Right Door
To: 2
Right Door
Requires: {"obstaclesNotCleared": ["B"]}Exit condition: "leaveWithRunway": {
"length": 7,
"openEnd": 0
} |
From: 2
Right Door
To: 2
Right Door
Requires: {"obstaclesCleared": ["B"]}Exit condition: "leaveWithRunway": {
"length": 3,
"openEnd": 1
}Dev note: This runway could be extended with a frozen Sova. |
|
Requires: "h_CrystalFlash" |
|
Requires: {"resetRoom": {"nodes": [2]}},
{"or": [
"canQuickDrop",
{"cycleFrames": 30}
]},
{"or": [
{"and": [
"Wave",
{"cycleFrames": 120}
]},
{"and": [
"Grapple",
"canDodgeWhileShooting",
{"cycleFrames": 240}
]},
{"and": [
"Morph",
"canTrickyJump",
{"cycleFrames": 300}
]},
{"and": [
"canTrivialMidAirMorph",
"Bombs",
{"cycleFrames": 1100}
]},
{"and": [
"Morph",
{"or": [
{"notable": "Return Through Crumble Blocks"},
"Bombs"
]},
{"or": [
"canWallJump",
{"and": [
"HiJump",
"canSpringBallJumpMidAir",
"h_doubleEquipmentScreenCycleFrames"
]},
"SpaceJump"
]},
{"cycleFrames": 510}
]},
{"cycleFrames": 2160}
]},
{"or": [
"canDash",
{"cycleFrames": 90}
]}Resets obstacles: A, B, C, D Farm cycle drops: 1 Sova |
|


Release the Sova by breaking the crumble blocks. The Sova will then take 40 seconds to get to the door. Note that breaking the left bomb blocks and either the crumble blocks or the other bomb blocks could make the Sova go in a loop without ever getting to the door (unless using a Super). Because of this it is advised not to break the bomb blocks. But if breaking them is necessary, it is possible to do so, even with a Power Bomb. Place the Power Bomb while the Sova is in the bottom left section of the room, while it is moving counter-clockwise. Exit condition: "leaveWithDamage": {
"enemy": "Sova"
} |
|
|
From: 2
Right Door
To: 4
Top Left Item
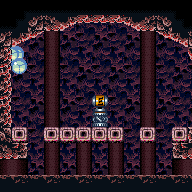

Entrance condition: "comeInShinecharging": {
"length": 2,
"openEnd": 0
}Requires: "canChainTemporaryBlue", "can4HighMidAirMorph", "canSpringBallBounce" Clears obstacles: B, C |
From: 2
Right Door
To: 4
Top Left Item
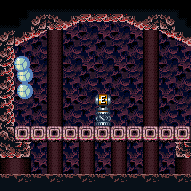

Entrance condition: "comeInWithTemporaryBlue": {}Requires: "canChainTemporaryBlue", "can4HighMidAirMorph", "canSpringBallBounce" Clears obstacles: C |
From: 2
Right Door
To: 4
Top Left Item
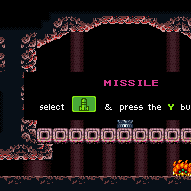

Overload PLMs using the camera scroll blocks in the morph tunnel. Samus can fix the camera after exiting G-mode on the left. It is possible to wait for the Sova to appear on screen before going to the left, in order to ensure Samus won't touch it. Entrance condition: "comeInWithGMode": {
"mode": "any",
"morphed": true
}Requires: "h_artificialMorphMovement" Dev note: This is only useful if the item is Morph or if Samus has Morph but no way up to this item location. |
From: 2
Right Door
To: 4
Top Left Item


Touch both the item and the camera scroll blocks in the morph tunnel before PLMs are overloaded, then use either to finish overloading them. This will make it so that Samus can fix the camera after exiting G-mode on the left. It is possible to wait for the Sova to appear on screen before going to the left, in order to ensure Samus won't touch it. Entrance condition: "comeInWithGMode": {
"mode": "direct",
"morphed": true
}Requires: "canRemoteAcquire", "h_artificialMorphMovement" Collects items: 3 Dev note: This is only useful if the item is Morph or if Samus has Morph but no way up to this item location. |
|
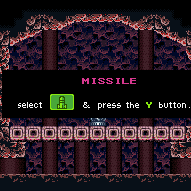

Entrance condition: "comeInWithGrappleTeleport": {
"blockPositions": [[5, 3], [7, 2]]
}Requires: "Morph" |
|
|
|


Requires: {"or": [
"h_bombThings",
{"obstaclesCleared": ["C"]}
]},
{"or": [
"canMidAirMorph",
"h_useSpringBall",
"canIBJ"
]}Clears obstacles: C |
|
Requires: {"haveBlueSuit": {}},
"Morph"Clears obstacles: C |
|
Clears obstacles: A |
|
Requires: "Morph" |
|
Requires: "canRemoteAcquire", {"obstaclesCleared": ["D"]} Collects items: 4 |
|
Requires: "Morph",
{"or": [
"h_bombThings",
{"obstaclesCleared": ["C"]}
]}Clears obstacles: C |
|
Requires: {"haveBlueSuit": {}},
"Morph"Clears obstacles: C |
|
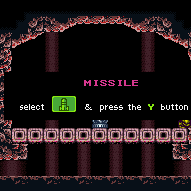

Overload PLMs by rolling through the item, then go through the bomb block and exit G-Mode to obtain the item. Requires: "canRemoteAcquire", {"obstaclesCleared": ["D"]} Collects items: 4 Dev note: This does not include canRiskPermanentLossOfAccess as every strat that gets here could instead overload PLMs in the bottom morph tunnel. |
|
Requires: "Morph" |
|
Requires: {"or": [
"h_bombThings",
{"obstaclesCleared": ["B"]}
]}Clears obstacles: B |
From: 5
Junction Below Right Item
To: 3
Top Right Item


The crumble blocks do not respawn, so it is possible to enter from the right, obtain the left item and return, without needing to break the bomb blocks. Requires: {"notable": "Return Through Crumble Blocks"},
{"obstaclesCleared": ["A"]} |
|
Requires: {"haveBlueSuit": {}}Clears obstacles: B |
From: 5
Junction Below Right Item
To: 3
Top Right Item


Requires: "Morph", "canXRayStandUp", "canPartialFloorClip", "canCeilingClip" |
From: 5
Junction Below Right Item
To: 3
Top Right Item
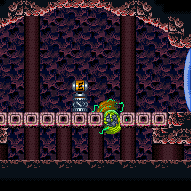

Roll under the right-most single tile ceiling, X-Ray standup, then turnaround spin jump to break the Bomb block. Requires: "Morph", "canXRayStandUp", "ScrewAttack" |