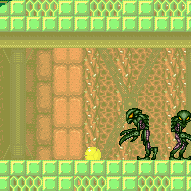
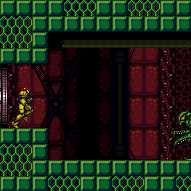
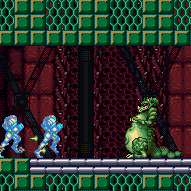
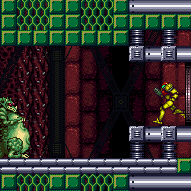
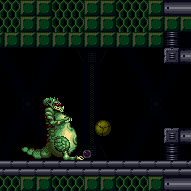
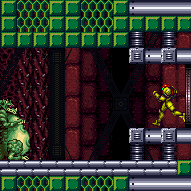
Baby Kraid Room
Room ID: 82

|
Exit condition: {
"leaveWithRunway": {
"length": 3,
"openEnd": 1
}
} |
|
Leaving with upward momentum is possible in three ways: 1) Most easily, with a momentum-conserving morph against the ceiling through the transition, 2) With a momentum-conserving turnaround through the transition, or 3) Jumping specifically with a extra run speed $5.2 or $5.3 and aiming down through the transition. For the first two methods, avoid backing into the corner at the start of runway; instead press against it and turn around, to put Samus into a better position. Requires: {
"obstaclesCleared": [
"A"
]
}
"h_speedJump"
{
"or": [
"canMomentumConservingMorph",
"canInsaneJump"
]
}Exit condition: {
"leaveWithSidePlatform": {
"height": 2,
"runway": {
"length": 45,
"openEnd": 1
},
"obstruction": [
3,
0
]
}
}Dev note: Max extra run speed $7.0. Using the full runway, there is a 4-frame window for the jump, then between a 1-frame and 4-frame window for the morph depending on the jump (with later jumps giving more frames for the morph). If there is a solid tile on the ceiling in the next room past the door frame, then the windows for the jump and morph are tighter. The momentum-conserving turnaround has a 3-frame window for the jump, and between a 1-frame or 4-frame for the turnaround (with later jumps giving a larger window for the turnaround); again the windows can be more narrow depending on what is required in the next room. |
|
Shoot the pirates with Power Beam to prevent their lasers and jump over them. Build up to blue speed to skip past Mini-Kraid's spikes and destroy Mini Kraid which will drop multiple Large Energy. If you're missing some Supers, quickly grab the four supers that drop so that the 5th drop can be Large Energy. Ceiling thorns, lingering Mini-Kraid Spikes, or Pirates can be used at-will to damage down. Go back to the right side, full-speed into a shinecharge, then got shot by a pirate for Spark Interrupt. Entrance condition: {
"comeInWithRMode": {}
}Requires: {
"or": [
"canTrickyJump",
{
"and": [
"canCarefulJump",
{
"enemyKill": {
"enemies": [
[
"Green Space Pirate (standing)",
"Green Space Pirate (standing)"
]
],
"explicitWeapons": [
"Missile",
"Super",
"Plasma"
]
}
}
]
},
{
"and": [
"canDodgeWhileShooting",
{
"enemyKill": {
"enemies": [
[
"Green Space Pirate (standing)",
"Green Space Pirate (standing)"
]
],
"excludedWeapons": [
"Bombs",
"PowerBomb"
]
}
}
]
},
"ScrewAttack"
]
}
{
"or": [
{
"getBlueSpeed": {
"usedTiles": 29,
"openEnd": 2
}
},
"ScrewAttack",
{
"and": [
{
"or": [
"canDodgeWhileShooting",
{
"enemyDamage": {
"enemy": "Mini-Kraid",
"type": "spike",
"hits": 1
}
}
]
},
{
"or": [
{
"enemyKill": {
"enemies": [
[
"Mini-Kraid"
]
],
"excludedWeapons": [
"PowerBeam",
"Ice",
"Wave",
"Spazer",
"Bombs",
"Charge"
]
}
},
{
"and": [
{
"enemyKill": {
"enemies": [
[
"Mini-Kraid"
]
]
}
},
{
"enemyDamage": {
"enemy": "Mini-Kraid",
"type": "spike",
"hits": 3
}
}
]
}
]
}
]
}
]
}
{
"or": [
"h_CrystalFlashForReserveEnergy",
{
"and": [
"h_RModeCanRefillReserves",
{
"or": [
{
"and": [
{
"resourceMissingAtMost": [
{
"type": "Super",
"count": 0
}
]
},
{
"partialRefill": {
"type": "ReserveEnergy",
"limit": 100
}
}
]
},
{
"and": [
{
"resourceMissingAtMost": [
{
"type": "Super",
"count": 4
}
]
},
{
"partialRefill": {
"type": "ReserveEnergy",
"limit": 20
}
}
]
}
]
}
]
}
]
}
"h_shinechargeMaxRunway"
{
"autoReserveTrigger": {
"maxReserveEnergy": 95
}
}
"canRModeSparkInterrupt"Clears obstacles: A, door_1 |
|
Requires: "h_shinechargeMaxRunway"
"canShinechargeMovement"
{
  "obstaclesCleared": [
    "A"
  ]
}
{
"shineChargeFrames": 40
}Exit condition: {
"leaveShinecharged": {}
} |
|
Requires: {
"obstaclesCleared": [
"A"
]
}Exit condition: {
"leaveSpinning": {
"remoteRunway": {
"length": 45,
"openEnd": 1
},
"minExtraRunSpeed": "$1.3"
}
} |
|
Requires: {
"obstaclesCleared": [
"A"
]
}Exit condition: {
"leaveWithMockball": {
"remoteRunway": {
"length": 45,
"openEnd": 1
},
"landingRunway": {
"length": 3,
"openEnd": 1
}
}
} |
|
Requires: {
"obstaclesCleared": [
"A"
]
}Exit condition: {
"leaveWithSpringBallBounce": {
"remoteRunway": {
"length": 45,
"openEnd": 1
},
"landingRunway": {
"length": 3,
"openEnd": 1
},
"movementType": "uncontrolled"
}
} |
|
Requires: {
"obstaclesCleared": [
"A"
]
}Exit condition: {
"leaveSpaceJumping": {
"remoteRunway": {
"length": 45,
"openEnd": 1
}
}
} |
|
Requires: {
"obstaclesCleared": [
"A"
]
}
"h_shinechargeMaxRunway"
"canChainTemporaryBlue"Exit condition: {
"leaveWithTemporaryBlue": {}
} |
|
Requires: {
"resetRoom": {
"nodes": [
1
]
}
}
{
"or": [
{
"and": [
"canDash",
{
"or": [
{
"and": [
"Plasma",
{
"cycleFrames": 255
}
]
},
{
"and": [
"Wave",
{
"cycleFrames": 280
}
]
},
{
"and": [
"ScrewAttack",
{
"cycleFrames": 300
}
]
},
{
"and": [
"Spazer",
{
"cycleFrames": 315
}
]
},
{
"and": [
"Ice",
{
"cycleFrames": 400
}
]
},
{
"and": [
"canPseudoScrew",
{
"cycleFrames": 450
}
]
},
{
"and": [
"Charge",
"canDodgeWhileShooting",
{
"cycleFrames": 600
}
]
},
{
"and": [
"h_useMorphBombs",
"canTrickyDodgeEnemies",
{
"cycleFrames": 620
}
]
}
]
}
]
},
{
"and": [
{
"haveBlueSuit": {}
},
{
"cycleFrames": 400
}
]
}
]
}Resets obstacles: A Farm cycle drops: 3 Green Space Pirate (standing) |
|
Requires: {
"resetRoom": {
"nodes": [
1
]
}
}
{
"enemyDamage": {
"enemy": "Green Space Pirate (standing)",
"type": "contact",
"hits": 1
}
}
{
"enemyDamage": {
"enemy": "Mini-Kraid",
"type": "spike",
"hits": 1
}
}
"canUseIFrames"
"h_getBlueSpeedMaxRunway"
{
"cycleFrames": 720
}Clears obstacles: A Farm cycle drops: 3 Green Space Pirate (standing), 1 Mini-Kraid |
|
Requires: "h_CrystalFlash" |
|
Requires: "h_shinechargeMaxRunway" "h_CrystalSpark" |
|
Requires: {
"obstaclesCleared": [
"A"
]
} |
|
Requires: "canDash"
{
"enemyKill": {
"enemies": [
[
"Green Space Pirate (standing)",
"Green Space Pirate (standing)",
"Green Space Pirate (standing)"
]
],
"excludedWeapons": [
"Bombs"
]
}
}
{
"or": [
"canDodgeWhileShooting",
"ScrewAttack",
{
"enemyDamage": {
"enemy": "Mini-Kraid",
"type": "spike",
"hits": 1
}
}
]
}
{
"or": [
{
"enemyKill": {
"enemies": [
[
"Mini-Kraid"
]
],
"excludedWeapons": [
"PowerBeam",
"Bombs",
"Charge",
"Ice",
"Wave",
"Spazer"
]
}
},
{
"enemyDamage": {
"enemy": "Mini-Kraid",
"type": "spike",
"hits": 3
}
},
{
"and": [
{
"enemyKill": {
"enemies": [
[
"Mini-Kraid"
]
],
"explicitWeapons": [
"Wave",
"Spazer"
]
}
},
{
"enemyDamage": {
"enemy": "Mini-Kraid",
"type": "spike",
"hits": 2
}
}
]
},
"canInsaneJump"
]
}
{
"or": [
"h_complexToCarryFlashSuit",
{
"enemyDamage": {
"enemy": "Mini-Kraid",
"type": "spike",
"hits": 3
}
}
]
}Clears obstacles: A Dev note: FIXME: Collecting the drops from the pirates could make the Mini-Kraid spike hits not matter much. |
|
Kill the pirates by placing Bombs next to them without touching them. With low Energy, it is possible to jump over the pirates and kill Mini-Kraid first, but it is difficult to do so damageless. Requires: "canDash"
"canDodgeWhileShooting"
{
"enemyKill": {
"enemies": [
[
"Green Space Pirate (standing)",
"Green Space Pirate (standing)",
"Green Space Pirate (standing)"
]
],
"explicitWeapons": [
"Bombs"
]
}
}
{
"or": [
"canTrickyJump",
{
"enemyDamage": {
"enemy": "Green Space Pirate (standing)",
"type": "contact",
"hits": 1
}
}
]
}
{
"or": [
"canInsaneJump",
{
"enemyDamage": {
"enemy": "Mini-Kraid",
"type": "spike",
"hits": 4
}
}
]
}
{
"or": [
"h_complexToCarryFlashSuit",
{
"enemyDamage": {
"enemy": "Mini-Kraid",
"type": "spike",
"hits": 3
}
}
]
}Clears obstacles: A Dev note: FIXME: Collecting the drops from the pirates could make the Mini-Kraid spike hits not matter much. |
|
Requires: {
"haveBlueSuit": {}
}Clears obstacles: A |
|
Quickly run through to tank the Pirate (or its laser) and one of Mini-Kraid's spikes. Requires: "canDash"
{
"enemyDamage": {
"enemy": "Green Space Pirate (standing)",
"type": "contact",
"hits": 1
}
}
{
"enemyDamage": {
"enemy": "Mini-Kraid",
"type": "spike",
"hits": 1
}
} |
|
Shoot the pirates to prevent their lasers, then jump over them to get to the runway. Mini-Kraid spikes will block the runway fairly quickly; a shortcharge can allow for more run space but isn't required. Requires: "canDodgeWhileShooting"
{
"getBlueSpeed": {
"usedTiles": 29,
"openEnd": 2
}
}Clears obstacles: A Dev note: Moving somewhat quickly is required in order to not need a shortcharge. |
|
Requires: "h_getBlueSpeedMaxRunway"
{
"enemyDamage": {
"enemy": "Green Space Pirate (standing)",
"type": "contact",
"hits": 1
}
}Clears obstacles: A |
|
Shoot the pirates to prevent their lasers, then jump over them. Tank one Mini-Kraid spike. Requires: "canDodgeWhileShooting"
{
"enemyDamage": {
"enemy": "Mini-Kraid",
"type": "spike",
"hits": 1
}
} |
|
Requires: "canDash"
"SpaceJump"
{
"or": [
"canDodgeWhileShooting",
{
"enemyDamage": {
"enemy": "Mini-Kraid",
"type": "spike",
"hits": 1
}
}
]
} |
|
Wait for the pirates to move as far right as possible in order to kill them all with a single Power Bomb. Unmorph and kill Baby Kraid before exiting G-Mode. Run away, exit G-Mode, then jump over the spike projectiles. Entrance condition: {
"comeInWithGMode": {
"mode": "any",
"morphed": true
}
}Requires: "h_artificialMorphBombThings" Clears obstacles: door_1 |
From: 1
Left Door
To: 2
Right Door
Wait for the pirates to move as far right as possible in order to kill them all with a single Power Bomb. Jump over Baby Kraid by pausing and holding jump and forward just before the pause fully triggers, then remove Spring Ball. After it starts moving to the left, move in to where it was, then Crystal Flash so that it will walk back into Samus and trigger reserves. Entrance condition: {
"comeInWithGMode": {
"mode": "direct",
"morphed": true
}
}Requires: "h_artificialMorphBombThings"
"h_artificialMorphSpringFling"
"h_artificialMorphTrickyRModeCrystalFlashInterrupt"
{
"ammo": {
"type": "Missile",
"count": 10
}
}
{
"ammo": {
"type": "Super",
"count": 5
}
}
{
"or": [
"h_fullEnemyDamageReduction",
{
"and": [
"h_partialEnemyDamageReduction",
{
"resourceAtMost": [
{
"type": "RegularEnergy",
"count": 49
}
]
}
]
},
{
"and": [
{
"resourceCapacity": [
{
"type": "RegularEnergy",
"count": 199
}
]
},
{
"resourceCapacity": [
{
"type": "ReserveEnergy",
"count": 199
}
]
}
]
}
]
}Clears obstacles: door_1 |
|
Requires: {
"obstaclesCleared": [
"A"
]
} |
|
Kill Mini-Kraid after entry which will drop multiple Large Energy. If you're missing some Supers, quickly grab the four supers that drop so that the 5th drop can be Large Energy. Ceiling thorns, lingering Mini-Kraid Spikes, or Pirates can be used at-will to damage down. Go back to the right side, full-speed into a shinecharge, then got shot by a pirate for Spark Interrupt. Entrance condition: {
"comeInWithRMode": {}
}Requires: {
"or": [
{
"enemyKill": {
"enemies": [
[
"Mini-Kraid"
]
],
"excludedWeapons": [
"PowerBeam",
"Ice",
"Wave",
"Spazer",
"Bombs",
"Charge"
]
}
},
{
"and": [
{
"enemyKill": {
"enemies": [
[
"Mini-Kraid"
]
]
}
},
{
"or": [
"canDodgeWhileShooting",
{
"enemyDamage": {
"enemy": "Mini-Kraid",
"type": "stone",
"hits": 1
}
}
]
}
]
}
]
}
{
"or": [
"h_CrystalFlashForReserveEnergy",
{
"and": [
"h_RModeCanRefillReserves",
{
"or": [
{
"and": [
{
"resourceMissingAtMost": [
{
"type": "Super",
"count": 0
}
]
},
{
"partialRefill": {
"type": "ReserveEnergy",
"limit": 100
}
}
]
},
{
"and": [
{
"resourceMissingAtMost": [
{
"type": "Super",
"count": 4
}
]
},
{
"partialRefill": {
"type": "ReserveEnergy",
"limit": 20
}
}
]
}
]
}
]
}
]
}
"h_shinechargeMaxRunway"
{
"autoReserveTrigger": {
"maxReserveEnergy": 95
}
}
"canRModeSparkInterrupt"Clears obstacles: A, door_2 |
|
Fight Mini-Kraid from the doorway in order to be somewhat protected from the stone projectiles, which do the most damage. Requires: {
"or": [
{
"enemyKill": {
"enemies": [
[
"Green Space Pirate (standing)",
"Green Space Pirate (standing)",
"Green Space Pirate (standing)"
]
],
"excludedWeapons": [
"Bombs"
]
}
},
{
"and": [
"h_useMorphBombs",
{
"or": [
"canDodgeWhileShooting",
{
"enemyDamage": {
"enemy": "Green Space Pirate (standing)",
"type": "contact",
"hits": 1
}
}
]
}
]
}
]
}
{
"or": [
{
"enemyKill": {
"enemies": [
[
"Mini-Kraid"
]
],
"excludedWeapons": [
"PowerBeam",
"Ice",
"Bombs",
"Charge"
]
}
},
"canDodgeWhileShooting",
{
"enemyDamage": {
"enemy": "Mini-Kraid",
"type": "stone",
"hits": 1
}
}
]
}Clears obstacles: A |
|
Requires: {
"haveBlueSuit": {}
}Clears obstacles: A |
|
Gain i-frames by taking damage then run left to create enough space to run back to the right with speedbooster. Requires: "h_getBlueSpeedMaxRunway"
"canUseIFrames"
{
"enemyDamage": {
"enemy": "Mini-Kraid",
"type": "spike",
"hits": 1
}
}Clears obstacles: A |
|
Wait to hit one of Mini-Kraid's spikes, then run through. Requires: "canDash"
{
"or": [
"canCarefulJump",
{
"enemyDamage": {
"enemy": "Green Space Pirate (standing)",
"type": "contact",
"hits": 1
}
}
]
}
{
"or": [
"canTrickyJump",
{
"enemyDamage": {
"enemy": "Mini-Kraid",
"type": "spike",
"hits": 1
}
}
]
} |
|
Kill all of the enemies with Bombs. Samus will take a Baby Kraid spike hit while rolling through the invisible projectiles. It is not too difficult to IBJ and then bomb horizontally over the cluster of invisible spikes, but there is some risk because they are invisible. They occupy a slightly smaller space than what Baby Kraid was occupying. Entrance condition: {
"comeInWithGMode": {
"mode": "any",
"morphed": true
}
}Requires: "h_artificialMorphBombs"
{
"or": [
{
"and": [
"h_artificialMorphIBJ",
"h_artificialMorphBombHorizontally",
"canTrickyDodgeEnemies"
]
},
{
"enemyDamage": {
"enemy": "Mini-Kraid",
"type": "spike",
"hits": 1
}
}
]
}Clears obstacles: A, door_2 |
|
Wait on the right side of Baby Kraid for about 10 seconds so that he shoots the maximum amount of projectiles which will move to the right after exiting G-Mode. Jump over Baby Kraid by pausing and holding jump and forward just before the pause fully triggers, then remove Spring Ball. Alternatively, when it is as far left as possible, use a Power Bomb to boost up and hit the stationary, invisible spikes, then roll to the left and kill the pirates with another Power Bomb. To save a Power Bomb and take a bit more damage, roll through Baby Kraid then kill the left pirates with a Power Bomb. Only one is necessary when placing it next to the pirate when it is as far to the left as possible. Unmorph, freely kill Baby Kraid, then exit G-Mode. His projectiles should all shoot to the right. Entrance condition: {
"comeInWithGMode": {
"mode": "any",
"morphed": true
}
}Requires: {
"or": [
"h_artificialMorphSpringFling",
{
"enemyDamage": {
"enemy": "Mini-Kraid",
"type": "contact",
"hits": 1
}
},
{
"and": [
{
"or": [
"h_artificialMorphSpringBall",
"h_artificialMorphPowerBomb"
]
},
{
"enemyDamage": {
"enemy": "Mini-Kraid",
"type": "spike",
"hits": 10
}
}
]
}
]
}
"h_artificialMorphPowerBomb"Clears obstacles: A, door_2 |
|
Entrance condition: {
"comeInWithGrappleTeleport": {
"blockPositions": [
[
3,
12
],
[
3,
13
]
]
}
}Clears obstacles: door_2 Bypasses door shell: true |
|
Entrance condition: {
"comeInWithGrappleTeleport": {
"blockPositions": [
[
3,
12
]
]
}
}Exit condition: {
"leaveWithGrappleTeleport": {
"blockPositions": [
[
3,
12
]
]
}
}Clears obstacles: door_2 Bypasses door shell: true |
From: 2
Right Door
To: 1
Left Door
Entrance condition: {
"comeInWithGrappleTeleport": {
"blockPositions": [
[
3,
13
]
]
}
}Exit condition: {
"leaveWithGrappleTeleport": {
"blockPositions": [
[
3,
13
]
]
}
}Clears obstacles: door_2 Bypasses door shell: true |
|
Requires: {
"resetRoom": {
"nodes": [
2
]
}
}
{
"or": [
{
"and": [
"canDash",
{
"or": [
{
"and": [
{
"or": [
"Plasma",
"ScrewAttack",
{
"ammo": {
"type": "Super",
"count": 1
}
}
]
},
{
"cycleFrames": 225
}
]
},
{
"and": [
"Wave",
{
"cycleFrames": 310
}
]
},
{
"and": [
"Spazer",
{
"cycleFrames": 330
}
]
},
{
"and": [
"Ice",
{
"cycleFrames": 440
}
]
},
{
"cycleFrames": 600
}
]
}
]
},
{
"and": [
{
"haveBlueSuit": {}
},
{
"cycleFrames": 275
}
]
}
]
}
{
"or": [
{
"enemyDamage": {
"enemy": "Mini-Kraid",
"type": "stone",
"hits": 1
}
},
"Plasma",
"ScrewAttack",
{
"haveBlueSuit": {}
},
{
"and": [
"Ice",
"Wave",
"Spazer"
]
},
{
"and": [
"canDodgeWhileShooting",
{
"or": [
"Ice",
"Wave",
"Spazer"
]
}
]
},
"canTrickyDodgeEnemies"
]
}Resets obstacles: A Farm cycle drops: 1 Mini-Kraid |
|
Requires: {
"resetRoom": {
"nodes": [
1,
2
]
}
}
{
"or": [
"ScrewAttack",
{
"ammo": {
"type": "Super",
"count": 1
}
},
"Plasma",
{
"and": [
{
"or": [
"Ice",
"Wave",
"Spazer",
"h_getBlueSpeedMaxRunway"
]
},
{
"or": [
"canCarefulJump",
{
"enemyDamage": {
"enemy": "Mini-Kraid",
"type": "stone",
"hits": 1
}
}
]
}
]
}
]
}
{
"refill": [
"Energy",
"Missile",
"Super"
]
}Clears obstacles: A Dev note: These two farms are combined, to allow an option of using using Supers farmed from Mini-Kraid to kill the Pirates. FIXME: convert this to use farmCycleDrops. |
|
Exit condition: {
"leaveWithRunway": {
"length": 4,
"openEnd": 1
}
} |
|
Requires: {
"obstaclesCleared": [
"A"
]
}
"h_speedJump"
"canInsaneJump"
"canMomentumConservingMorph"Exit condition: {
"leaveWithSidePlatform": {
"height": 2,
"runway": {
"length": 45,
"openEnd": 1
},
"obstruction": [
4,
0
]
}
}Dev note: Max extra run speed $7.0. Press against the overhang left of the ceiling spikes, then perform 4 arm pumps to advance 8 pixels while running. There is a 2-frame window for the jump and a 2-frame window for the morph. These windows can be more narrow depending on what is required in the next room. |
|
Requires: "h_shinechargeMaxRunway"
"canShinechargeMovement"
{
  "obstaclesCleared": [
    "A"
  ]
}
{
"shineChargeFrames": 45
}Exit condition: {
"leaveShinecharged": {}
} |
|
Requires: {
"obstaclesCleared": [
"A"
]
}Exit condition: {
"leaveSpinning": {
"remoteRunway": {
"length": 45,
"openEnd": 1
},
"minExtraRunSpeed": "$1.6"
}
}Dev note: FIXME: This only needs Mini-Kraid to be defeated in order to use a shorter runway. |
|
Requires: {
"obstaclesCleared": [
"A"
]
}Exit condition: {
"leaveWithMockball": {
"remoteRunway": {
"length": 45,
"openEnd": 1
},
"landingRunway": {
"length": 4,
"openEnd": 1
}
}
}Dev note: FIXME: This only needs Mini-Kraid to be defeated in order to use a shorter runway. |
|
Requires: {
"obstaclesCleared": [
"A"
]
}Exit condition: {
"leaveWithSpringBallBounce": {
"remoteRunway": {
"length": 45,
"openEnd": 1
},
"landingRunway": {
"length": 4,
"openEnd": 1
},
"movementType": "uncontrolled"
}
}Dev note: FIXME: This only needs Mini-Kraid to be defeated in order to use a shorter runway. |
|
Requires: {
"obstaclesCleared": [
"A"
]
}Exit condition: {
"leaveSpaceJumping": {
"remoteRunway": {
"length": 45,
"openEnd": 1
}
}
}Dev note: FIXME: This only needs Mini-Kraid to be defeated in order to use a shorter runway. |
|
Requires: {
"obstaclesCleared": [
"A"
]
}
"h_shinechargeMaxRunway"
"canChainTemporaryBlue"Exit condition: {
"leaveWithTemporaryBlue": {}
} |
|
Requires: "h_CrystalFlash" |
|
Requires: {
"obstaclesCleared": [
"A"
]
}
"h_shinechargeMaxRunway"
"canSpikeSuit"
{
"thornHits": 1
}
{
"or": [
{
"thornHits": "n_spikeSuitLenience"
},
{
"resetRoom": {
"nodes": [
1,
2
]
}
}
]
}
{
"shinespark": {
"frames": 1,
"excessFrames": 1
}
}Clears obstacles: A Dev note: Assuming the room can be reset, leniency is not included because a farm is available. |
From: 2
Right Door
To: 2
Right Door
Wait on the right side of Baby Kraid for about 10 seconds so that he shoots the maximum amount of projectiles. Jump over Baby Kraid by pausing and holding jump and forward just before the pause fully triggers, then remove Spring Ball. After it starts moving to the right, move in to where it was, then Crystal Flash so that it will walk back into Samus and trigger reserves. Entrance condition: {
"comeInWithGMode": {
"mode": "direct",
"morphed": true
}
}Requires: "h_artificialMorphSpringFling"
"h_artificialMorphTrickyRModeCrystalFlashInterrupt"
{
"ammo": {
"type": "Missile",
"count": 10
}
}
{
"ammo": {
"type": "Super",
"count": 5
}
}
{
"or": [
"h_fullEnemyDamageReduction",
{
"and": [
"h_partialEnemyDamageReduction",
{
"resourceAtMost": [
{
"type": "RegularEnergy",
"count": 49
}
]
}
]
},
{
"and": [
{
"resourceCapacity": [
{
"type": "RegularEnergy",
"count": 199
}
]
},
{
"resourceCapacity": [
{
"type": "ReserveEnergy",
"count": 199
}
]
}
]
}
]
}Clears obstacles: door_2 |
{
"$schema": "../../../schema/m3-room.schema.json",
"id": 82,
"name": "Baby Kraid Room",
"area": "Brinstar",
"subarea": "Kraid",
"roomAddress": "0x7A521",
"roomEnvironments": [
{
"heated": false
}
],
"mapTileMask": [
[
1,
1,
1,
1,
1,
1
]
],
"nodes": [
{
"id": 1,
"name": "Left Door",
"nodeType": "door",
"nodeSubType": "gray",
"nodeAddress": "0x0019192",
"doorOrientation": "left",
"doorEnvironments": [
{
"physics": "air"
}
],
"locks": [
{
"name": "Baby Kraid Left Gray Lock (to Kihunters)",
"lockType": "killEnemies",
"unlockStrats": [
{
"name": "Base",
"requires": [
{
"or": [
{
  "obstaclesCleared": [
    "A"
  ]
},
"f_ClearedBabyKraidRoom"
]
}
],
"flashSuitChecked": true,
"blueSuitChecked": true,
"note": "Enemies can be killed by going between nodes 1 and 2."
}
],
"yields": [
"f_ZebesAwake",
"f_ClearedBabyKraidRoom"
]
}
],
"mapTileMask": [
[
2,
2,
2,
1,
1,
1
]
]
},
{
"id": 2,
"name": "Right Door",
"nodeType": "door",
"nodeSubType": "gray",
"nodeAddress": "0x001919e",
"doorOrientation": "right",
"doorEnvironments": [
{
"physics": "air"
}
],
"locks": [
{
"name": "Baby Kraid Right Gray Lock (to Eye Room)",
"lockType": "killEnemies",
"unlockStrats": [
{
"name": "Base",
"requires": [
{
"or": [
{
  "obstaclesCleared": [
    "A"
  ]
},
"f_ClearedBabyKraidRoom"
]
}
],
"flashSuitChecked": true,
"blueSuitChecked": true,
"note": "Enemies can be killed by going between nodes 1 and 2."
}
],
"yields": [
"f_ZebesAwake",
"f_ClearedBabyKraidRoom"
]
}
],
"mapTileMask": [
[
1,
1,
1,
2,
2,
2
]
]
}
],
"obstacles": [
{
"id": "A",
"name": "Pirates & Mini Kraid",
"obstacleType": "enemies"
},
{
"id": "door_1",
"name": "door_1"
},
{
"id": "door_2",
"name": "door_2"
}
],
"enemies": [
{
"id": "e1",
"groupName": "Baby Kraid Pirates",
"enemyName": "Green Space Pirate (standing)",
"quantity": 3,
"homeNodes": [
1
]
},
{
"id": "e2",
"groupName": "Mini-Kraid",
"enemyName": "Mini-Kraid",
"quantity": 1,
"homeNodes": [
2
]
}
],
"strats": [
{
"link": [
1,
1
],
"name": "Base (Unlock Door)",
"requires": [],
"unlocksDoors": [
{
"types": [
"ammo"
],
"requires": []
}
],
"flashSuitChecked": true,
"blueSuitChecked": true
},
{
"link": [
1,
1
],
"name": "Base (Come In Normally)",
"entranceCondition": {
"comeInNormally": {}
},
"requires": [],
"flashSuitChecked": true,
"blueSuitChecked": true,
"clearsObstacles": [
"door_1"
]
},
{
"link": [
1,
1
],
"name": "Base (Come In With Mockball)",
"entranceCondition": {
"comeInWithMockball": {
"adjacentMinTiles": 0,
"remoteAndLandingMinTiles": [
[
0,
0
]
],
"speedBooster": "any"
}
},
"requires": [],
"flashSuitChecked": true,
"blueSuitChecked": true,
"clearsObstacles": [
"door_1"
]
},
{
"link": [
2,
2
],
"name": "Base (Unlock Door)",
"requires": [],
"unlocksDoors": [
{
"types": [
"ammo"
],
"requires": []
}
],
"flashSuitChecked": true,
"blueSuitChecked": true
},
{
"link": [
2,
2
],
"name": "Base (Come In Normally)",
"entranceCondition": {
"comeInNormally": {}
},
"requires": [],
"flashSuitChecked": true,
"blueSuitChecked": true,
"clearsObstacles": [
"door_2"
]
},
{
"link": [
2,
2
],
"name": "Base (Come In With Mockball)",
"entranceCondition": {
"comeInWithMockball": {
"adjacentMinTiles": 0,
"remoteAndLandingMinTiles": [
[
0,
0
]
],
"speedBooster": "any"
}
},
"requires": [],
"flashSuitChecked": true,
"blueSuitChecked": true,
"clearsObstacles": [
"door_2"
]
},
{
"name": "Base",
"requires": [
{
"or": [
{
  "obstaclesCleared": [
    "A"
  ]
},
"f_ClearedBabyKraidRoom"
]
}
],
"flashSuitChecked": true,
"blueSuitChecked": true,
"note": "Enemies can be killed by going between nodes 1 and 2.",
"link": [
2,
2
],
"setsFlags": [
"f_ZebesAwake",
"f_ClearedBabyKraidRoom"
]
},
{
"id": 1,
"link": [
1,
1
],
"name": "Leave With Runway",
"requires": [],
"exitCondition": {
"leaveWithRunway": {
"length": 3,
"openEnd": 1
}
},
"flashSuitChecked": true,
"blueSuitChecked": true
},
{
"id": 35,
"link": [
1,
1
],
"name": "Leave With Side Platform",
"requires": [
{
"obstaclesCleared": [
"A"
]
},
"h_speedJump",
{
"or": [
"canMomentumConservingMorph",
"canInsaneJump"
]
}
],
"exitCondition": {
"leaveWithSidePlatform": {
"height": 2,
"runway": {
"length": 45,
"openEnd": 1
},
"obstruction": [
3,
0
]
}
},
"flashSuitChecked": true,
"blueSuitChecked": true,
"note": [
"Leaving with upward momentum is possible in three ways:",
"1) Most easily, with a momentum-conserving morph against the ceiling through the transition,",
"2) With a momentum-conserving turnaround through the transition, or",
"3) Jumping specifically with a extra run speed $5.2 or $5.3 and aiming down through the transition.",
"For the first two methods, avoid backing into the corner at the start of runway;",
"instead press against it and turn around, to put Samus into a better position."
],
"devNote": [
"Max extra run speed $7.0.",
"Using the full runway, there is a 4-frame window for the jump,",
"then between a 1-frame and 4-frame window for the morph depending on the jump (with later jumps giving more frames for the morph).",
"If there is a solid tile on the ceiling in the next room past the door frame, then the windows for the jump and morph are tighter.",
"The momentum-conserving turnaround has a 3-frame window for the jump,",
"and between a 1-frame or 4-frame for the turnaround (with later jumps giving a larger window for the turnaround);",
"again the windows can be more narrow depending on what is required in the next room."
]
},
{
"id": 41,
"link": [
1,
1
],
"name": "R-Mode Spark Interrupt",
"entranceCondition": {
"comeInWithRMode": {}
},
"requires": [
{
"or": [
"canTrickyJump",
{
"and": [
"canCarefulJump",
{
"enemyKill": {
"enemies": [
[
"Green Space Pirate (standing)",
"Green Space Pirate (standing)"
]
],
"explicitWeapons": [
"Missile",
"Super",
"Plasma"
]
}
}
]
},
{
"and": [
"canDodgeWhileShooting",
{
"enemyKill": {
"enemies": [
[
"Green Space Pirate (standing)",
"Green Space Pirate (standing)"
]
],
"excludedWeapons": [
"Bombs",
"PowerBomb"
]
}
}
]
},
"ScrewAttack"
]
},
{
"or": [
{
"getBlueSpeed": {
"usedTiles": 29,
"openEnd": 2
}
},
"ScrewAttack",
{
"and": [
{
"or": [
"canDodgeWhileShooting",
{
"enemyDamage": {
"enemy": "Mini-Kraid",
"type": "spike",
"hits": 1
}
}
]
},
{
"or": [
{
"enemyKill": {
"enemies": [
[
"Mini-Kraid"
]
],
"excludedWeapons": [
"PowerBeam",
"Ice",
"Wave",
"Spazer",
"Bombs",
"Charge"
]
}
},
{
"and": [
{
"enemyKill": {
"enemies": [
[
"Mini-Kraid"
]
]
}
},
{
"enemyDamage": {
"enemy": "Mini-Kraid",
"type": "spike",
"hits": 3
}
}
]
}
]
}
]
}
]
},
{
"or": [
"h_CrystalFlashForReserveEnergy",
{
"and": [
"h_RModeCanRefillReserves",
{
"or": [
{
"and": [
{
"resourceMissingAtMost": [
{
"type": "Super",
"count": 0
}
]
},
{
"partialRefill": {
"type": "ReserveEnergy",
"limit": 100
}
}
]
},
{
"and": [
{
"resourceMissingAtMost": [
{
"type": "Super",
"count": 4
}
]
},
{
"partialRefill": {
"type": "ReserveEnergy",
"limit": 20
}
}
]
}
]
}
]
}
]
},
"h_shinechargeMaxRunway",
{
"autoReserveTrigger": {
"maxReserveEnergy": 95
}
},
"canRModeSparkInterrupt"
],
"clearsObstacles": [
"A",
"door_1"
],
"flashSuitChecked": true,
"blueSuitChecked": true,
"note": [
"Shoot the pirates with Power Beam to prevent their lasers and jump over them. Build up to blue speed to skip past Mini-Kraid's spikes and destroy",
"Mini Kraid which will drop multiple Large Energy. If you're missing some Supers, quickly grab the four supers that drop so that the 5th drop can be",
"Large Energy. Ceiling thorns, lingering Mini-Kraid Spikes, or Pirates can be used at-will to damage down. Go back to the right side, full-speed",
"into a shinecharge, then got shot by a pirate for Spark Interrupt."
]
},
{
"id": 2,
"link": [
1,
1
],
"name": "Leave Shinecharged",
"requires": [
"h_shinechargeMaxRunway",
"canShinechargeMovement",
{
"obstaclesCleared": [
"A"
]
},
{
"shineChargeFrames": 40
}
],
"exitCondition": {
"leaveShinecharged": {}
},
"flashSuitChecked": true,
"blueSuitChecked": true
},
{
"id": 3,
"link": [
1,
1
],
"name": "Leave Spinning",
"requires": [
{
"obstaclesCleared": [
"A"
]
}
],
"exitCondition": {
"leaveSpinning": {
"remoteRunway": {
"length": 45,
"openEnd": 1
},
"minExtraRunSpeed": "$1.3"
}
},
"flashSuitChecked": true,
"blueSuitChecked": true
},
{
"id": 4,
"link": [
1,
1
],
"name": "Leave With Mockball",
"requires": [
{
"obstaclesCleared": [
"A"
]
}
],
"exitCondition": {
"leaveWithMockball": {
"remoteRunway": {
"length": 45,
"openEnd": 1
},
"landingRunway": {
"length": 3,
"openEnd": 1
}
}
},
"flashSuitChecked": true,
"blueSuitChecked": true
},
{
"id": 5,
"link": [
1,
1
],
"name": "Leave With Spring Ball Bounce",
"requires": [
{
"obstaclesCleared": [
"A"
]
}
],
"exitCondition": {
"leaveWithSpringBallBounce": {
"remoteRunway": {
"length": 45,
"openEnd": 1
},
"landingRunway": {
"length": 3,
"openEnd": 1
},
"movementType": "uncontrolled"
}
},
"flashSuitChecked": true,
"blueSuitChecked": true
},
{
"id": 6,
"link": [
1,
1
],
"name": "Leave Space Jumping",
"requires": [
{
"obstaclesCleared": [
"A"
]
}
],
"exitCondition": {
"leaveSpaceJumping": {
"remoteRunway": {
"length": 45,
"openEnd": 1
}
}
},
"flashSuitChecked": true,
"blueSuitChecked": true
},
{
"id": 7,
"link": [
1,
1
],
"name": "Leave With Temporary Blue",
"requires": [
{
"obstaclesCleared": [
"A"
]
},
"h_shinechargeMaxRunway",
"canChainTemporaryBlue"
],
"exitCondition": {
"leaveWithTemporaryBlue": {}
},
"flashSuitChecked": true,
"blueSuitChecked": true
},
{
"id": 38,
"link": [
1,
1
],
"name": "Pirate Farm",
"requires": [
{
"resetRoom": {
"nodes": [
1
]
}
},
{
"or": [
{
"and": [
"canDash",
{
"or": [
{
"and": [
"Plasma",
{
"cycleFrames": 255
}
]
},
{
"and": [
"Wave",
{
"cycleFrames": 280
}
]
},
{
"and": [
"ScrewAttack",
{
"cycleFrames": 300
}
]
},
{
"and": [
"Spazer",
{
"cycleFrames": 315
}
]
},
{
"and": [
"Ice",
{
"cycleFrames": 400
}
]
},
{
"and": [
"canPseudoScrew",
{
"cycleFrames": 450
}
]
},
{
"and": [
"Charge",
"canDodgeWhileShooting",
{
"cycleFrames": 600
}
]
},
{
"and": [
"h_useMorphBombs",
"canTrickyDodgeEnemies",
{
"cycleFrames": 620
}
]
}
]
}
]
},
{
"and": [
{
  "haveBlueSuit": {}
},
{
"cycleFrames": 400
}
]
}
]
}
],
"resetsObstacles": [
"A"
],
"farmCycleDrops": [
{
"enemy": "Green Space Pirate (standing)",
"count": 3
}
],
"flashSuitChecked": true,
"blueSuitChecked": false
},
{
"id": 39,
"link": [
1,
1
],
"name": "Pirate and Mini-Kraid Farm (Blue Speed)",
"requires": [
{
"resetRoom": {
"nodes": [
1
]
}
},
{
"enemyDamage": {
"enemy": "Green Space Pirate (standing)",
"type": "contact",
"hits": 1
}
},
{
"enemyDamage": {
"enemy": "Mini-Kraid",
"type": "spike",
"hits": 1
}
},
"canUseIFrames",
"h_getBlueSpeedMaxRunway",
{
"cycleFrames": 720
}
],
"clearsObstacles": [
"A"
],
"farmCycleDrops": [
{
"enemy": "Green Space Pirate (standing)",
"count": 3
},
{
"enemy": "Mini-Kraid",
"count": 1
}
],
"flashSuitChecked": true,
"blueSuitChecked": true
},
{
"id": 8,
"link": [
1,
1
],
"name": "Crystal Flash",
"requires": [
"h_CrystalFlash"
],
"flashSuitChecked": true,
"blueSuitChecked": true
},
{
"id": 47,
"link": [
1,
1
],
"name": "Crystal Spark",
"requires": [
"h_shinechargeMaxRunway",
"h_CrystalSpark"
],
"flashSuitChecked": true,
"blueSuitChecked": true
},
{
"id": 9,
"link": [
1,
2
],
"name": "Enemies Already Killed",
"requires": [
{
  "obstaclesCleared": [
    "A"
  ]
}
],
"flashSuitChecked": true,
"blueSuitChecked": true
},
{
"id": 10,
"link": [
1,
2
],
"name": "Kill the Enemies",
"requires": [
"canDash",
{
"enemyKill": {
"enemies": [
[
"Green Space Pirate (standing)",
"Green Space Pirate (standing)",
"Green Space Pirate (standing)"
]
],
"excludedWeapons": [
"Bombs"
]
}
},
{
"or": [
"canDodgeWhileShooting",
"ScrewAttack",
{
"enemyDamage": {
"enemy": "Mini-Kraid",
"type": "spike",
"hits": 1
}
}
]
},
{
"or": [
{
"enemyKill": {
"enemies": [
[
"Mini-Kraid"
]
],
"excludedWeapons": [
"PowerBeam",
"Bombs",
"Charge",
"Ice",
"Wave",
"Spazer"
]
}
},
{
"enemyDamage": {
"enemy": "Mini-Kraid",
"type": "spike",
"hits": 3
}
},
{
"and": [
{
"enemyKill": {
"enemies": [
[
"Mini-Kraid"
]
],
"explicitWeapons": [
"Wave",
"Spazer"
]
}
},
{
"enemyDamage": {
"enemy": "Mini-Kraid",
"type": "spike",
"hits": 2
}
}
]
},
"canInsaneJump"
]
},
{
"or": [
"h_complexToCarryFlashSuit",
{
"enemyDamage": {
"enemy": "Mini-Kraid",
"type": "spike",
"hits": 3
}
}
]
}
],
"clearsObstacles": [
"A"
],
"flashSuitChecked": true,
"blueSuitChecked": true,
"devNote": [
"FIXME: Collecting the drops from the pirates could make the Mini-Kraid spike hits not matter much."
]
},
{
"id": 48,
"link": [
1,
2
],
"name": "Kill the Enemies with Bombs",
"requires": [
"canDash",
"canDodgeWhileShooting",
{
"enemyKill": {
"enemies": [
[
"Green Space Pirate (standing)",
"Green Space Pirate (standing)",
"Green Space Pirate (standing)"
]
],
"explicitWeapons": [
"Bombs"
]
}
},
{
"or": [
"canTrickyJump",
{
"enemyDamage": {
"enemy": "Green Space Pirate (standing)",
"type": "contact",
"hits": 1
}
}
]
},
{
"or": [
"canInsaneJump",
{
"enemyDamage": {
"enemy": "Mini-Kraid",
"type": "spike",
"hits": 4
}
}
]
},
{
"or": [
"h_complexToCarryFlashSuit",
{
"enemyDamage": {
"enemy": "Mini-Kraid",
"type": "spike",
"hits": 3
}
}
]
}
],
"clearsObstacles": [
"A"
],
"flashSuitChecked": true,
"blueSuitChecked": true,
"note": [
"Kill the pirates by placing Bombs next to them without touching them.",
"With low Energy, it is possible to jump over the pirates and kill Mini-Kraid first, but it is difficult to do so damageless."
],
"devNote": "FIXME: Collecting the drops from the pirates could make the Mini-Kraid spike hits not matter much."
},
{
"id": 45,
"link": [
1,
2
],
"name": "Blue Suit Kill",
"requires": [
{
  "haveBlueSuit": {}
}
],
"clearsObstacles": [
"A"
],
"flashSuitChecked": true,
"blueSuitChecked": true
},
{
"id": 11,
"link": [
1,
2
],
"name": "Tank the Damage",
"requires": [
"canDash",
{
"enemyDamage": {
"enemy": "Green Space Pirate (standing)",
"type": "contact",
"hits": 1
}
},
{
"enemyDamage": {
"enemy": "Mini-Kraid",
"type": "spike",
"hits": 1
}
}
],
"flashSuitChecked": true,
"blueSuitChecked": true,
"note": "Quickly run through to tank the Pirate (or its laser) and one of Mini-Kraid's spikes."
},
{
"id": 12,
"link": [
1,
2
],
"name": "Speed Booster Dodge Kill",
"requires": [
"canDodgeWhileShooting",
{
"getBlueSpeed": {
"usedTiles": 29,
"openEnd": 2
}
}
],
"clearsObstacles": [
"A"
],
"flashSuitChecked": true,
"blueSuitChecked": true,
"note": [
"Shoot the pirates to prevent their lasers, then jump over them to get to the runway.",
"Mini-Kraid spikes will block the runway fairly quickly; a shortcharge can allow for more run space but isn't required."
],
"devNote": "Moving somewhat quickly is required in order to not need a shortcharge."
},
{
"id": 13,
"link": [
1,
2
],
"name": "Speed Booster Tank Kill",
"requires": [
"h_getBlueSpeedMaxRunway",
{
"enemyDamage": {
"enemy": "Green Space Pirate (standing)",
"type": "contact",
"hits": 1
}
}
],
"clearsObstacles": [
"A"
],
"flashSuitChecked": true,
"blueSuitChecked": true
},
{
"id": 14,
"link": [
1,
2
],
"name": "Dodge",
"requires": [
"canDodgeWhileShooting",
{
"enemyDamage": {
"enemy": "Mini-Kraid",
"type": "spike",
"hits": 1
}
}
],
"flashSuitChecked": true,
"blueSuitChecked": true,
"note": "Shoot the pirates to prevent their lasers, then jump over them. Tank one Mini-Kraid spike."
},
{
"id": 15,
"link": [
1,
2
],
"name": "Space Jump",
"requires": [
"canDash",
"SpaceJump",
{
"or": [
"canDodgeWhileShooting",
{
"enemyDamage": {
"enemy": "Mini-Kraid",
"type": "spike",
"hits": 1
}
}
]
}
],
"flashSuitChecked": true,
"blueSuitChecked": true
},
{
"id": 16,
"link": [
1,
2
],
"name": "G-Mode Morph Bomb or Power Bomb Kill",
"entranceCondition": {
"comeInWithGMode": {
"mode": "any",
"morphed": true
}
},
"requires": [
"h_artificialMorphBombThings"
],
"flashSuitChecked": true,
"blueSuitChecked": true,
"note": [
"Wait for the pirates to move as far right as possible in order to kill them all with a single Power Bomb.",
"Unmorph and kill Baby Kraid before exiting G-Mode. Run away, exit G-Mode, then jump over the spike projectiles."
],
"clearsObstacles": [
"door_1"
]
},
{
"id": 43,
"link": [
1,
2
],
"name": "Direct G-Mode Morph, Crystal Flash Interrupt",
"entranceCondition": {
"comeInWithGMode": {
"mode": "direct",
"morphed": true
}
},
"requires": [
"h_artificialMorphBombThings",
"h_artificialMorphSpringFling",
"h_artificialMorphTrickyRModeCrystalFlashInterrupt",
{
"ammo": {
"type": "Missile",
"count": 10
}
},
{
"ammo": {
"type": "Super",
"count": 5
}
},
{
"or": [
"h_fullEnemyDamageReduction",
{
"and": [
"h_partialEnemyDamageReduction",
{
"resourceAtMost": [
{
"type": "RegularEnergy",
"count": 49
}
]
}
]
},
{
"and": [
{
"resourceCapacity": [
{
"type": "RegularEnergy",
"count": 199
}
]
},
{
"resourceCapacity": [
{
"type": "ReserveEnergy",
"count": 199
}
]
}
]
}
]
}
],
"flashSuitChecked": true,
"blueSuitChecked": true,
"note": [
"Wait for the pirates to move as far right as possible in order to kill them all with a single Power Bomb.",
"Jump over Baby Kraid by pausing and holding jump and forward just before the pause fully triggers, then remove Spring Ball.",
"After it starts moving to the left, move in to where it was, then Crystal Flash so that it will walk back into Samus and trigger reserves."
],
"clearsObstacles": [
"door_1"
]
},
{
"id": 17,
"link": [
2,
1
],
"name": "Enemies Already Killed",
"requires": [
{
  "obstaclesCleared": [
    "A"
  ]
}
],
"flashSuitChecked": true,
"blueSuitChecked": true
},
{
"id": 42,
"link": [
2,
1
],
"name": "R-Mode Spark Interrupt",
"entranceCondition": {
"comeInWithRMode": {}
},
"requires": [
{
"or": [
{
"enemyKill": {
"enemies": [
[
"Mini-Kraid"
]
],
"excludedWeapons": [
"PowerBeam",
"Ice",
"Wave",
"Spazer",
"Bombs",
"Charge"
]
}
},
{
"and": [
{
"enemyKill": {
"enemies": [
[
"Mini-Kraid"
]
]
}
},
{
"or": [
"canDodgeWhileShooting",
{
"enemyDamage": {
"enemy": "Mini-Kraid",
"type": "stone",
"hits": 1
}
}
]
}
]
}
]
},
{
"or": [
"h_CrystalFlashForReserveEnergy",
{
"and": [
"h_RModeCanRefillReserves",
{
"or": [
{
"and": [
{
"resourceMissingAtMost": [
{
"type": "Super",
"count": 0
}
]
},
{
"partialRefill": {
"type": "ReserveEnergy",
"limit": 100
}
}
]
},
{
"and": [
{
"resourceMissingAtMost": [
{
"type": "Super",
"count": 4
}
]
},
{
"partialRefill": {
"type": "ReserveEnergy",
"limit": 20
}
}
]
}
]
}
]
}
]
},
"h_shinechargeMaxRunway",
{
"autoReserveTrigger": {
"maxReserveEnergy": 95
}
},
"canRModeSparkInterrupt"
],
"clearsObstacles": [
"A",
"door_2"
],
"flashSuitChecked": true,
"blueSuitChecked": true,
"note": [
"Kill Mini-Kraid after entry which will drop multiple Large Energy. If you're missing some Supers, quickly grab the four supers that drop",
"so that the 5th drop can be Large Energy. Ceiling thorns, lingering Mini-Kraid Spikes, or Pirates can be used at-will to damage down.",
"Go back to the right side, full-speed into a shinecharge, then got shot by a pirate for Spark Interrupt."
]
},
{
"id": 18,
"link": [
2,
1
],
"name": "Kill the Enemies",
"requires": [
{
"or": [
{
"enemyKill": {
"enemies": [
[
"Green Space Pirate (standing)",
"Green Space Pirate (standing)",
"Green Space Pirate (standing)"
]
],
"excludedWeapons": [
"Bombs"
]
}
},
{
"and": [
"h_useMorphBombs",
{
"or": [
"canDodgeWhileShooting",
{
"enemyDamage": {
"enemy": "Green Space Pirate (standing)",
"type": "contact",
"hits": 1
}
}
]
}
]
}
]
},
{
"or": [
{
"enemyKill": {
"enemies": [
[
"Mini-Kraid"
]
],
"excludedWeapons": [
"PowerBeam",
"Ice",
"Bombs",
"Charge"
]
}
},
"canDodgeWhileShooting",
{
"enemyDamage": {
"enemy": "Mini-Kraid",
"type": "stone",
"hits": 1
}
}
]
}
],
"clearsObstacles": [
"A"
],
"flashSuitChecked": true,
"blueSuitChecked": true,
"note": "Fight Mini-Kraid from the doorway in order to be somewhat protected from the stone projectiles, which do the most damage."
},
{
"id": 46,
"link": [
2,
1
],
"name": "Blue Suit Kill",
"requires": [
{
"haveBlueSuit": {}
}
],
"clearsObstacles": [
"A"
],
"flashSuitChecked": true,
"blueSuitChecked": true
},
{
"id": 19,
"link": [
2,
1
],
"name": "Speed Kill",
"requires": [
"h_getBlueSpeedMaxRunway",
"canUseIFrames",
{
"enemyDamage": {
"enemy": "Mini-Kraid",
"type": "spike",
"hits": 1
}
}
],
"clearsObstacles": [
"A"
],
"flashSuitChecked": true,
"blueSuitChecked": true,
"note": "Gain i-frames by taking damage then run left to create enough space to run back to the right with speedbooster."
},
{
"id": 20,
"link": [
2,
1
],
"name": "Pacifist",
"requires": [
"canDash",
{
"or": [
"canCarefulJump",
{
"enemyDamage": {
"enemy": "Green Space Pirate (standing)",
"type": "contact",
"hits": 1
}
}
]
},
{
"or": [
"canTrickyJump",
{
"enemyDamage": {
"enemy": "Mini-Kraid",
"type": "spike",
"hits": 1
}
}
]
}
],
"flashSuitChecked": true,
"blueSuitChecked": true,
"note": "Wait to hit one of Mini-Kraid's spikes, then run through."
},
{
"id": 21,
"link": [
2,
1
],
"name": "G-Mode Morph Bomb Kill",
"entranceCondition": {
"comeInWithGMode": {
"mode": "any",
"morphed": true
}
},
"requires": [
"h_artificialMorphBombs",
{
"or": [
{
"and": [
"h_artificialMorphIBJ",
"h_artificialMorphBombHorizontally",
"canTrickyDodgeEnemies"
]
},
{
"enemyDamage": {
"enemy": "Mini-Kraid",
"type": "spike",
"hits": 1
}
}
]
}
],
"clearsObstacles": [
"A",
"door_2"
],
"flashSuitChecked": true,
"blueSuitChecked": true,
"note": [
"Kill all of the enemies with Bombs. Samus will take a Baby Kraid spike hit while rolling through the invisible projectiles.",
"It is not too difficult to IBJ and then bomb horizontally over the cluster of invisible spikes, but there is some risk because they are invisible.",
"They occupy a slightly smaller space than what Baby Kraid was occupying."
]
},
{
"id": 22,
"link": [
2,
1
],
"name": "G-Mode Morph Power Bomb Kill",
"entranceCondition": {
"comeInWithGMode": {
"mode": "any",
"morphed": true
}
},
"requires": [
{
"or": [
"h_artificialMorphSpringFling",
{
"enemyDamage": {
"enemy": "Mini-Kraid",
"type": "contact",
"hits": 1
}
},
{
"and": [
{
"or": [
"h_artificialMorphSpringBall",
"h_artificialMorphPowerBomb"
]
},
{
"enemyDamage": {
"enemy": "Mini-Kraid",
"type": "spike",
"hits": 10
}
}
]
}
]
},
"h_artificialMorphPowerBomb"
],
"clearsObstacles": [
"A",
"door_2"
],
"flashSuitChecked": true,
"blueSuitChecked": true,
"note": [
"Wait on the right side of Baby Kraid for about 10 seconds so that he shoots the maximum amount of projectiles which will move to the right after exiting G-Mode.",
"Jump over Baby Kraid by pausing and holding jump and forward just before the pause fully triggers, then remove Spring Ball.",
"Alternatively, when it is as far left as possible, use a Power Bomb to boost up and hit the stationary, invisible spikes, then roll to the left and kill the pirates with another Power Bomb.",
"To save a Power Bomb and take a bit more damage, roll through Baby Kraid then kill the left pirates with a Power Bomb. Only one is necessary when placing it next to the pirate when it is as far to the left as possible.",
"Unmorph, freely kill Baby Kraid, then exit G-Mode. His projectiles should all shoot to the right."
]
},
{
"id": 23,
"link": [
2,
1
],
"name": "Grapple Teleport Door Lock Skip",
"entranceCondition": {
"comeInWithGrappleTeleport": {
"blockPositions": [
[
3,
12
],
[
3,
13
]
]
}
},
"requires": [],
"bypassesDoorShell": "yes",
"flashSuitChecked": true,
"blueSuitChecked": true,
"clearsObstacles": [
"door_2"
]
},
{
"id": 24,
"link": [
2,
1
],
"name": "Carry Grapple Teleport (Top Position)",
"entranceCondition": {
"comeInWithGrappleTeleport": {
"blockPositions": [
[
3,
12
]
]
}
},
"requires": [],
"exitCondition": {
"leaveWithGrappleTeleport": {
"blockPositions": [
[
3,
12
]
]
}
},
"bypassesDoorShell": "yes",
"flashSuitChecked": true,
"blueSuitChecked": true,
"clearsObstacles": [
"door_2"
]
},
{
"id": 25,
"link": [
2,
1
],
"name": "Carry Grapple Teleport (Bottom Position)",
"entranceCondition": {
"comeInWithGrappleTeleport": {
"blockPositions": [
[
3,
13
]
]
}
},
"requires": [],
"exitCondition": {
"leaveWithGrappleTeleport": {
"blockPositions": [
[
3,
13
]
]
}
},
"bypassesDoorShell": "yes",
"flashSuitChecked": true,
"blueSuitChecked": true,
"clearsObstacles": [
"door_2"
]
},
{
"id": 40,
"link": [
2,
2
],
"name": "Mini-Kraid Farm",
"requires": [
{
"resetRoom": {
"nodes": [
2
]
}
},
{
"or": [
{
"and": [
"canDash",
{
"or": [
{
"and": [
{
"or": [
"Plasma",
"ScrewAttack",
{
"ammo": {
"type": "Super",
"count": 1
}
}
]
},
{
"cycleFrames": 225
}
]
},
{
"and": [
"Wave",
{
"cycleFrames": 310
}
]
},
{
"and": [
"Spazer",
{
"cycleFrames": 330
}
]
},
{
"and": [
"Ice",
{
"cycleFrames": 440
}
]
},
{
"cycleFrames": 600
}
]
}
]
},
{
"and": [
{
"haveBlueSuit": {}
},
{
"cycleFrames": 275
}
]
}
]
},
{
"or": [
{
"enemyDamage": {
"enemy": "Mini-Kraid",
"type": "stone",
"hits": 1
}
},
"Plasma",
"ScrewAttack",
{
"haveBlueSuit": {}
},
{
"and": [
"Ice",
"Wave",
"Spazer"
]
},
{
"and": [
"canDodgeWhileShooting",
{
"or": [
"Ice",
"Wave",
"Spazer"
]
}
]
},
"canTrickyDodgeEnemies"
]
}
],
"resetsObstacles": [
"A"
],
"farmCycleDrops": [
{
"enemy": "Mini-Kraid",
"count": 1
}
],
"flashSuitChecked": true,
"blueSuitChecked": false
},
{
"id": 26,
"link": [
2,
2
],
"name": "Green Pirates and Mini-Kraid Farm",
"requires": [
{
"resetRoom": {
"nodes": [
1,
2
]
}
},
{
"or": [
"ScrewAttack",
{
"ammo": {
"type": "Super",
"count": 1
}
},
"Plasma",
{
"and": [
{
"or": [
"Ice",
"Wave",
"Spazer",
"h_getBlueSpeedMaxRunway"
]
},
{
"or": [
"canCarefulJump",
{
"enemyDamage": {
"enemy": "Mini-Kraid",
"type": "stone",
"hits": 1
}
}
]
}
]
}
]
},
{
"refill": [
"Energy",
"Missile",
"Super"
]
}
],
"clearsObstacles": [
"A"
],
"flashSuitChecked": true,
"blueSuitChecked": false,
"devNote": [
"These two farms are combined, to allow an option of using using Supers farmed from Mini-Kraid to kill the Pirates.",
"FIXME: convert this to use farmCycleDrops."
]
},
{
"id": 27,
"link": [
2,
2
],
"name": "Leave With Runway",
"requires": [],
"exitCondition": {
"leaveWithRunway": {
"length": 4,
"openEnd": 1
}
},
"flashSuitChecked": true,
"blueSuitChecked": true
},
{
"id": 36,
"link": [
2,
2
],
"name": "Leave With Side Platform",
"requires": [
{
  "obstaclesCleared": [
    "A"
  ]
},
"h_speedJump",
"canInsaneJump",
"canMomentumConservingMorph"
],
"exitCondition": {
"leaveWithSidePlatform": {
"height": 2,
"runway": {
"length": 45,
"openEnd": 1
},
"obstruction": [
4,
0
]
}
},
"flashSuitChecked": true,
"blueSuitChecked": true,
"devNote": [
"Max extra run speed $7.0.",
"Press against the overhang left of the ceiling spikes,",
"then perform 4 arm pumps to advance 8 pixels while running.",
"There is a 2-frame window for the jump and a 2-frame window for the morph.",
"These windows can be more narrow depending on what is required in the next room."
]
},
{
"id": 28,
"link": [
2,
2
],
"name": "Leave Shinecharged",
"requires": [
"h_shinechargeMaxRunway",
"canShinechargeMovement",
{
  "obstaclesCleared": [
    "A"
  ]
},
{
"shineChargeFrames": 45
}
],
"exitCondition": {
"leaveShinecharged": {}
},
"flashSuitChecked": true,
"blueSuitChecked": true
},
{
"id": 29,
"link": [
2,
2
],
"name": "Leave Spinning",
"requires": [
{
  "obstaclesCleared": [
    "A"
  ]
}
],
"exitCondition": {
"leaveSpinning": {
"remoteRunway": {
"length": 45,
"openEnd": 1
},
"minExtraRunSpeed": "$1.6"
}
},
"flashSuitChecked": true,
"blueSuitChecked": true,
"devNote": "FIXME: This only needs Mini-Kraid to be defeated in order to use a shorter runway."
},
{
"id": 30,
"link": [
2,
2
],
"name": "Leave With Mockball",
"requires": [
{
"obstaclesCleared": [
"A"
]
}
],
"exitCondition": {
"leaveWithMockball": {
"remoteRunway": {
"length": 45,
"openEnd": 1
},
"landingRunway": {
"length": 4,
"openEnd": 1
}
}
},
"flashSuitChecked": true,
"blueSuitChecked": true,
"devNote": "FIXME: This only needs Mini-Kraid to be defeated in order to use a shorter runway."
},
{
"id": 31,
"link": [
2,
2
],
"name": "Leave With Spring Ball Bounce",
"requires": [
{
"obstaclesCleared": [
"A"
]
}
],
"exitCondition": {
"leaveWithSpringBallBounce": {
"remoteRunway": {
"length": 45,
"openEnd": 1
},
"landingRunway": {
"length": 4,
"openEnd": 1
},
"movementType": "uncontrolled"
}
},
"flashSuitChecked": true,
"blueSuitChecked": true,
"devNote": "FIXME: This only needs Mini-Kraid to be defeated in order to use a shorter runway."
},
{
"id": 32,
"link": [
2,
2
],
"name": "Leave Space Jumping",
"requires": [
{
"obstaclesCleared": [
"A"
]
}
],
"exitCondition": {
"leaveSpaceJumping": {
"remoteRunway": {
"length": 45,
"openEnd": 1
}
}
},
"flashSuitChecked": true,
"blueSuitChecked": true,
"devNote": "FIXME: This only needs Mini-Kraid to be defeated in order to use a shorter runway."
},
{
"id": 33,
"link": [
2,
2
],
"name": "Leave With Temporary Blue",
"requires": [
{
"obstaclesCleared": [
"A"
]
},
"h_shinechargeMaxRunway",
"canChainTemporaryBlue"
],
"exitCondition": {
"leaveWithTemporaryBlue": {}
},
"flashSuitChecked": true,
"blueSuitChecked": true
},
{
"id": 34,
"link": [
2,
2
],
"name": "Crystal Flash",
"requires": [
"h_CrystalFlash"
],
"flashSuitChecked": true,
"blueSuitChecked": true
},
{
"id": 37,
"link": [
2,
2
],
"name": "Gain Flash Suit (Spikesuit)",
"requires": [
{
"obstaclesCleared": [
"A"
]
},
"h_shinechargeMaxRunway",
"canSpikeSuit",
{
"thornHits": 1
},
{
"or": [
{
"thornHits": "n_spikeSuitLenience"
},
{
"resetRoom": {
"nodes": [
1,
2
]
}
}
]
},
{
"shinespark": {
"frames": 1,
"excessFrames": 1
}
}
],
"clearsObstacles": [
"A"
],
"flashSuitChecked": true,
"blueSuitChecked": true,
"devNote": [
"Assuming the room can be reset, leniency is not included because a farm is available."
]
},
{
"id": 44,
"link": [
2,
2
],
"name": "Direct G-Mode Morph, Crystal Flash Interrupt",
"entranceCondition": {
"comeInWithGMode": {
"mode": "direct",
"morphed": true
}
},
"requires": [
"h_artificialMorphSpringFling",
"h_artificialMorphTrickyRModeCrystalFlashInterrupt",
{
"ammo": {
"type": "Missile",
"count": 10
}
},
{
"ammo": {
"type": "Super",
"count": 5
}
},
{
"or": [
"h_fullEnemyDamageReduction",
{
"and": [
"h_partialEnemyDamageReduction",
{
"resourceAtMost": [
{
"type": "RegularEnergy",
"count": 49
}
]
}
]
},
{
"and": [
{
"resourceCapacity": [
{
"type": "RegularEnergy",
"count": 199
}
]
},
{
"resourceCapacity": [
{
"type": "ReserveEnergy",
"count": 199
}
]
}
]
}
]
}
],
"flashSuitChecked": true,
"blueSuitChecked": true,
"note": [
"Wait on the right side of Baby Kraid for about 10 seconds so that he shoots the maximum amount of projectiles.",
"Jump over Baby Kraid by pausing and holding jump and forward just before the pause fully triggers, then remove Spring Ball.",
"After it starts moving to the right, move in to where it was, then Crystal Flash so that it will walk back into Samus and trigger reserves."
],
"clearsObstacles": [
"door_2"
]
}
],
"notables": [],
"nextStratId": 49,
"nextNotableId": 1,
"devNote": [
"FIXME: Power Bombs only sometimes work on Mini-Kraid: Samus has to have i-frames and be moving to the left when Mini-Kraid is hit by the explosion."
]
}


