
Green Brinstar Beetom Room
Room ID: 50
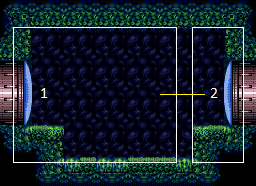
From: 1
Left Door
To: 1
Left Door
Requires: {"obstaclesCleared": ["A"]}Exit condition: "leaveWithRunway": {
"length": 3,
"openEnd": 1
} |
From: 1
Left Door
To: 1
Left Door
Requires: {"enemyDamage": {"enemy": "Beetom", "type": "contact", "hits": 4}}Exit condition: "leaveWithRunway": {
"length": 3,
"openEnd": 1
} |
From: 1
Left Door
To: 1
Left Door


Let a Beetom attach to Samus, then freeze it by shooting upwards. Keep a half tile gap between the Beetom and ground to have as long of a runway as possible. Requires: "h_frozenEnemyRunway", {"enemyDamage": {"enemy": "Beetom", "type": "contact", "hits": 1}} Exit condition: "leaveWithRunway": {
"length": 5,
"openEnd": 0
} |
From: 1
Left Door
To: 1
Left Door


Stand in the pit and freeze the Beetoms by shooting up. Keep them all separated and equally spaced apart to maximize the length of the runway. Freeze the Beetoms that aren't currently in use to avoid them from attaching to Samus and stacking together. Requires: {"notable": "Frozen Beetom Bridge"},
"canTrickyJump",
"h_frozenEnemyRunway",
{"enemyDamage": {"enemy": "Beetom", "type": "contact", "hits": 2}}Exit condition: "leaveWithRunway": {
"length": 8,
"openEnd": 1
} |
|
Requires: {"obstaclesCleared": ["A"]}Exit condition: "leaveSpinning": {
"remoteRunway": {
"length": 6,
"openEnd": 0
}
} |
|
Requires: {"obstaclesCleared": ["A"]}Exit condition: "leaveWithMockball": {
"remoteRunway": {
"length": 5,
"openEnd": 1
},
"landingRunway": {
"length": 3,
"openEnd": 1
}
} |
|
Kill the Beetoms with Screw Attack or by freezing them and using Bombs or Power Bombs. Requires: {"resetRoom": {"nodes": [1, 2]}},
{"or": [
{"and": [
{"haveBlueSuit": {}},
{"cycleFrames": 130}
]},
{"and": [
"ScrewAttack",
{"cycleFrames": 180}
]},
{"and": [
"Ice",
"h_useMorphBombs",
{"cycleFrames": 300}
]},
{"and": [
{"or": [
"Ice",
"canTrickyDodgeEnemies",
{"enemyDamage": {"enemy": "Beetom", "type": "contact", "hits": 1}}
]},
{"or": [
{"resourceAvailable": [{"type": "Energy", "count": 50}]},
{"resourceAvailable": [{"type": "PowerBomb", "count": 4}]}
]},
"h_usePowerBomb",
{"cycleFrames": 210}
]}
]}Clears obstacles: A Farm cycle drops: 4 Beetom Dev note: Using an adjacent 2-tile runway doesn't seem workable since heat frames may be too much to maintain energy. We can't use Missiles for the farm since the Beetoms don't drop Missiles. Potentially there could be some other way to dodge the Beetoms, to kill them without Ice or Screw FIXME: Using a Missile, Super, or Power Bomb at the start could be added to the logic to get the first Power Bombs to use for further farming, but this needs a way to express that we're not in health-bomb energy range. |
From: 1
Left Door
To: 1
Left Door


Set up three frozen Beetoms, in a such a way that Samus can perform a moonfall between the two upper ones and land on the bottom one, then leave the room with stored fall speed. The bottom one should be frozen flush with the ledge, by shooting it while it is attached to Samus, standing on the lower floor. The top one should be frozen close to the ceiling. Because of an asymmetry in where Samus' shot spawns when facing left vs. right, moonfalling to the left has an advantage in that it allows refreezing both the lower two Beetoms while building up speed. Damage from attached Beetoms occurs once every 64 frames, based on the enemy's frame counter, which increments whenever the enemy is active regardless of whether it is attached to Samus; therefore, it is possible to avoid damage by not having a Beetom attached at these specific times. Requires: {"notable": "Ice Moonfall Leave with Stored Fall Speed"},
{"noBlueSuit": {}},
"canEnemyStuckMoonfall",
"canTrickyUseFrozenEnemies",
{"or": [
"canTrickyDodgeEnemies",
{"enemyDamage": {"enemy": "Beetom", "type": "contact", "hits": 2}}
]}Exit condition: "leaveWithStoredFallSpeed": {
"fallSpeedInTiles": 1
}Dev note: The fall speed stored is between 1 and 2 tiles. |
|
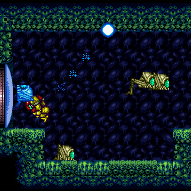

Freeze a Beetom at head height where Samus can Spinjump into it and begin Moondancing. Requires: {"noBlueSuit": {}},
"canMoondance",
"canCount",
"canTrickyUseFrozenEnemies",
{"enemyDamage": {"enemy": "Beetom", "type": "contact", "hits": 2}},
{"or": [
{"enemyDamage": {"enemy": "Beetom", "type": "contact", "hits": 4}},
{"ammo": {"type": "Missile", "count": 1}},
{"ammo": {"type": "Super", "count": 1}}
]}Exit condition: "leaveWithStoredFallSpeed": {
"fallSpeedInTiles": 1
} |
From: 1
Left Door
To: 1
Left Door
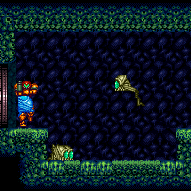

Freeze a Beetom at head height where Samus can Spinjump into it and begin Moondancing. After 175 moonfalls, reposition the Beetom to chest height, then continue dancing. Requires: {"noBlueSuit": {}},
"canExtendedMoondance",
"canTrickyUseFrozenEnemies",
{"enemyDamage": {"enemy": "Beetom", "type": "contact", "hits": 2}},
"h_extendedMoondanceBeetomLeniency",
{"or": [
{"enemyDamage": {"enemy": "Beetom", "type": "contact", "hits": 8}},
{"ammo": {"type": "Missile", "count": 1}},
{"ammo": {"type": "Super", "count": 1}}
]}Exit condition: "leaveWithStoredFallSpeed": {
"fallSpeedInTiles": 2
} |
|
Requires: {"or": [
{"obstaclesCleared": ["A"]},
{"enemyDamage": {"enemy": "Beetom", "type": "contact", "hits": 1}}
]},
"h_CrystalFlash" |
|


Requires: {"resetRoom": {"nodes": [1, 2]}},
{"or": [
{"obstaclesCleared": ["A"]},
{"enemyDamage": {"enemy": "Beetom", "type": "contact", "hits": 1}}
]},
"h_10PowerBombCrystalFlash"Clears obstacles: A Dev note: The resetRoom requirement is in case you need to farm a bit to get above health-bomb energy |
|
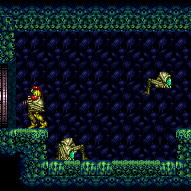
Requires: "h_complexToCarryBlueSuit" Exit condition: "leaveWithDamage": {
"enemy": "Beetom",
"knockback": false
} |
|
Requires: {"or": [
{"enemyKill": {
"enemies": [["Beetom", "Beetom", "Beetom", "Beetom"]],
"excludedWeapons": ["Bombs", "PowerBomb"]
}},
{"haveBlueSuit": {}}
]}Clears obstacles: A |
|
You typically need to place two bombs to kill them. Place the second shortly after the first and it will kill the Beetom on your way down. The remaining Beetoms can be safely killed from the ledge. Requires: {"enemyKill": {
"enemies": [["Beetom", "Beetom", "Beetom", "Beetom"]],
"explicitWeapons": ["Bombs", "PowerBomb"]
}},
{"enemyDamage": {"enemy": "Beetom", "type": "contact", "hits": 2}}Clears obstacles: A |
|
Run into the room and off the ledge with blue speed, killing any Beetoms in your path. Entrance condition: "comeInGettingBlueSpeed": {
"length": 2,
"openEnd": 1
}Requires: "h_blueJump" Dev note: This does not clear the obstacle since it does not kill all the Beetoms. |
|
Requires: "Ice" Clears obstacles: A Dev note: This doesn't kill the Beetoms, but clears them as an obstacle. |
|
Requires: {"enemyDamage": {"enemy": "Beetom", "type": "contact", "hits": 5}} |
|


Jump on the first possible frame. Can be buffered to extend the window to 7 frames. Or jump just before the transition. Entrance condition: "comeInJumping": {
"speedBooster": "any",
"minTiles": 3
}Requires: "canInsaneJump" |
|
Entrance condition: "comeInJumping": {
"speedBooster": "any",
"minTiles": 0.4375
}Requires: "SpaceJump", "canPrepareForNextRoom" |
From: 1
Left Door
To: 2
Right Door


Entrance condition: "comeInShinecharging": {
"length": 2,
"openEnd": 1
}Requires: "canShinechargeMovementComplex", {"or": [ {"enemyDamage": {"enemy": "Beetom", "type": "contact", "hits": 4}}, {"and": [ "ScrewAttack", {"enemyDamage": {"enemy": "Beetom", "type": "contact", "hits": 2}} ]} ]}, {"shineChargeFrames": 85} Exit condition: "leaveShinecharged": {}Unlocks doors: {"types": ["super"], "requires": []},
{"types": ["missiles", "powerbomb"], "requires": ["never"]} |
|
Entrance condition: "comeInShinecharged": {}Requires: {"shineChargeFrames": 90},
"canShinechargeMovementComplex",
{"or": [
{"enemyDamage": {"enemy": "Beetom", "type": "contact", "hits": 6}},
{"and": [
"ScrewAttack",
{"enemyDamage": {"enemy": "Beetom", "type": "contact", "hits": 3}}
]}
]}Exit condition: "leaveShinecharged": {}Unlocks doors: {"types": ["super"], "requires": []},
{"types": ["missiles", "powerbomb"], "requires": ["never"]} |
From: 1
Left Door
To: 2
Right Door
Depending on Samus' momentum when entering the room, it may be necessary to make a small jump before shooting open the door, to avoid a Beetom from blocking the shot. Entrance condition: "comeInShinecharged": {}Requires: {"shineChargeFrames": 30},
"canShinechargeMovementComplex",
{"shinespark": {"frames": 16, "excessFrames": 0}}Exit condition: "leaveWithSpark": {}Unlocks doors: {"types": ["super"], "requires": []},
{"types": ["missiles", "powerbomb"], "requires": ["never"]} |
From: 1
Left Door
To: 2
Right Door


Run and jump across the room, destroying any Beetoms in the way with blue speed, morphing mid-air and unmorphing to chain temporary blue. Entrance condition: "comeInGettingBlueSpeed": {
"length": 2,
"openEnd": 1
}Requires: "canChainTemporaryBlue" Exit condition: "leaveWithTemporaryBlue": {}Unlocks doors: {"types": ["ammo"], "requires": []} |
From: 1
Left Door
To: 2
Right Door
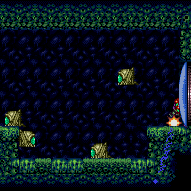

Entrance condition: "comeInWithGrappleTeleport": {
"blockPositions": [[12, 12], [12, 13]]
}Bypasses door shell: true |
From: 1
Left Door
To: 2
Right Door
Entrance condition: "comeInWithGrappleTeleport": {
"blockPositions": [[12, 12]]
}Exit condition: "leaveWithGrappleTeleport": {
"blockPositions": [[12, 12]]
}Bypasses door shell: true |
From: 1
Left Door
To: 2
Right Door
Entrance condition: "comeInWithGrappleTeleport": {
"blockPositions": [[12, 13]]
}Exit condition: "leaveWithGrappleTeleport": {
"blockPositions": [[12, 13]]
}Bypasses door shell: true |
|
Requires: {"or": [
{"enemyKill": {
"enemies": [["Beetom", "Beetom", "Beetom", "Beetom"]],
"excludedWeapons": ["Bombs", "PowerBomb"]
}},
{"haveBlueSuit": {}}
]}Clears obstacles: A |
|
You typically need to place two bombs to kill them. Place the second shortly after the first and it will kill the Beetom on your way down. The remaining Beetoms can be safely killed from the ledge. Requires: {"enemyKill": {
"enemies": [["Beetom", "Beetom", "Beetom", "Beetom"]],
"explicitWeapons": ["Bombs", "PowerBomb"]
}},
{"enemyDamage": {"enemy": "Beetom", "type": "contact", "hits": 2}}Clears obstacles: A |
|
Run into the room and off the ledge with blue speed, killing any Beetoms in your path. Entrance condition: "comeInGettingBlueSpeed": {
"length": 2,
"openEnd": 1
}Requires: "h_blueJump" Dev note: This does not clear the obstacle since it does not kill all the Beetoms. |
|
Requires: "Ice" Clears obstacles: A Dev note: This doesn't kill the Beetoms, but clears them as an obstacle. |
|
Requires: {"enemyDamage": {"enemy": "Beetom", "type": "contact", "hits": 5}} |
|


Jump on the first possible frame. Can be buffered to extend the window to 7 frames. Or jump just before the transition. Entrance condition: "comeInJumping": {
"speedBooster": "any",
"minTiles": 3
}Requires: "canInsaneJump" |
|
Entrance condition: "comeInJumping": {
"speedBooster": "any",
"minTiles": 0.4375
}Requires: "SpaceJump", "canPrepareForNextRoom" |
From: 2
Right Door
To: 1
Left Door


Entrance condition: "comeInShinecharging": {
"length": 2,
"openEnd": 1
}Requires: "canShinechargeMovementComplex", {"or": [ {"enemyDamage": {"enemy": "Beetom", "type": "contact", "hits": 4}}, {"and": [ "ScrewAttack", {"enemyDamage": {"enemy": "Beetom", "type": "contact", "hits": 2}} ]} ]}, {"shineChargeFrames": 80} Exit condition: "leaveShinecharged": {}Unlocks doors: {"types": ["super"], "requires": []},
{"types": ["missiles", "powerbomb"], "requires": ["never"]} |
|
Entrance condition: "comeInShinecharged": {}Requires: {"shineChargeFrames": 90},
"canShinechargeMovementComplex",
{"or": [
{"enemyDamage": {"enemy": "Beetom", "type": "contact", "hits": 6}},
{"and": [
"ScrewAttack",
{"enemyDamage": {"enemy": "Beetom", "type": "contact", "hits": 3}}
]}
]}Exit condition: "leaveShinecharged": {}Unlocks doors: {"types": ["super"], "requires": []},
{"types": ["missiles", "powerbomb"], "requires": ["never"]} |
From: 2
Right Door
To: 1
Left Door
Depending on Samus' momentum when entering the room, it may be necessary to make a small jump before shooting open the door, to avoid a Beetom from blocking the shot. Entrance condition: "comeInShinecharged": {}Requires: {"shineChargeFrames": 30},
"canShinechargeMovementComplex",
{"shinespark": {"frames": 16, "excessFrames": 0}}Exit condition: "leaveWithSpark": {}Unlocks doors: {"types": ["super"], "requires": []},
{"types": ["missiles", "powerbomb"], "requires": ["never"]} |
From: 2
Right Door
To: 1
Left Door


Run and jump across the room, destroying any Beetoms in the way with blue speed, morphing mid-air and unmorphing to chain temporary blue. Entrance condition: "comeInGettingBlueSpeed": {
"length": 2,
"openEnd": 1
}Requires: "canChainTemporaryBlue" Exit condition: "leaveWithTemporaryBlue": {}Unlocks doors: {"types": ["ammo"], "requires": []} |
From: 2
Right Door
To: 1
Left Door


Entrance condition: "comeInWithGrappleTeleport": {
"blockPositions": [[3, 12], [3, 13]]
}Bypasses door shell: true |
From: 2
Right Door
To: 1
Left Door
Entrance condition: "comeInWithGrappleTeleport": {
"blockPositions": [[3, 12]]
}Exit condition: "leaveWithGrappleTeleport": {
"blockPositions": [[3, 12]]
}Bypasses door shell: true |
From: 2
Right Door
To: 1
Left Door
Entrance condition: "comeInWithGrappleTeleport": {
"blockPositions": [[3, 13]]
}Exit condition: "leaveWithGrappleTeleport": {
"blockPositions": [[3, 13]]
}Bypasses door shell: true |
From: 2
Right Door
To: 2
Right Door
Requires: {"obstaclesCleared": ["A"]}Exit condition: "leaveWithRunway": {
"length": 3,
"openEnd": 1
} |
From: 2
Right Door
To: 2
Right Door
Requires: {"enemyDamage": {"enemy": "Beetom", "type": "contact", "hits": 2}}Exit condition: "leaveWithRunway": {
"length": 3,
"openEnd": 1
} |
From: 2
Right Door
To: 2
Right Door


Let a Beetom attach to Samus, then freeze it by shooting upwards. Keep a half tile gap between the Beetom and ground to have as long of a runway as possible. Requires: "h_frozenEnemyRunway", {"enemyDamage": {"enemy": "Beetom", "type": "contact", "hits": 1}} Exit condition: "leaveWithRunway": {
"length": 5,
"openEnd": 0
} |
From: 2
Right Door
To: 2
Right Door


Stand in the pit and freeze the Beetoms by shooting up. Keep them all separated and equally spaced apart to maximize the length of the runway. Freeze the Beetoms that aren't currently in use to avoid them from attaching to Samus and stacking together. Requires: {"notable": "Frozen Beetom Bridge"},
"canTrickyJump",
"h_frozenEnemyRunway",
{"enemyDamage": {"enemy": "Beetom", "type": "contact", "hits": 2}}Exit condition: "leaveWithRunway": {
"length": 8,
"openEnd": 1
} |
|
Requires: {"obstaclesCleared": ["A"]}Exit condition: "leaveSpinning": {
"remoteRunway": {
"length": 6,
"openEnd": 0
}
} |
|
Requires: {"obstaclesCleared": ["A"]}Exit condition: "leaveWithMockball": {
"remoteRunway": {
"length": 5,
"openEnd": 1
},
"landingRunway": {
"length": 3,
"openEnd": 1
}
} |
From: 2
Right Door
To: 2
Right Door
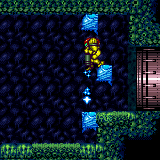

Set up three frozen Beetoms, in a such a way that Samus can perform a moonfall between the two upper ones and land on the bottom one, then leave the room with stored fall speed. The bottom one should be frozen flush with the ledge, by shooting it while it is attached to Samus, standing on the lower floor. The top one should be frozen close to the ceiling. Because of an asymmetry in where Samus' shot spawns when facing left vs. right, moonfalling to the left has an advantage in that it allows refreezing both the lower two Beetoms while building up speed. Damage from attached Beetoms occurs once every 64 frames, based on the enemy's frame counter, which increments whenever the enemy is active regardless of whether it is attached to Samus; therefore, it is possible to avoid damage by not having a Beetom attached at these specific times. Requires: {"notable": "Ice Moonfall Leave with Stored Fall Speed"},
{"noBlueSuit": {}},
"canEnemyStuckMoonfall",
"canTrickyUseFrozenEnemies",
{"or": [
"canTrickyDodgeEnemies",
{"enemyDamage": {"enemy": "Beetom", "type": "contact", "hits": 2}}
]}Exit condition: "leaveWithStoredFallSpeed": {
"fallSpeedInTiles": 1
}Dev note: The fall speed stored is between 1 and 2 tiles. |
|
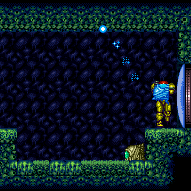

Freeze a Beetom at head height where Samus can Spinjump into it and begin Moondancing. Requires: {"noBlueSuit": {}},
"canMoondance",
"canCount",
"canTrickyUseFrozenEnemies",
{"enemyDamage": {"enemy": "Beetom", "type": "contact", "hits": 2}},
{"or": [
{"enemyDamage": {"enemy": "Beetom", "type": "contact", "hits": 4}},
{"ammo": {"type": "Missile", "count": 1}},
{"ammo": {"type": "Super", "count": 1}}
]}Exit condition: "leaveWithStoredFallSpeed": {
"fallSpeedInTiles": 1
} |
From: 2
Right Door
To: 2
Right Door
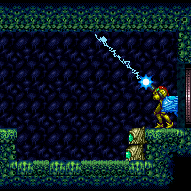

Freeze a Beetom at head height where Samus can Spinjump into it and begin Moondancing. After 175 moonfalls, reposition the Beetom to chest height, then continue dancing. Requires: {"noBlueSuit": {}},
"canExtendedMoondance",
"canTrickyUseFrozenEnemies",
{"enemyDamage": {"enemy": "Beetom", "type": "contact", "hits": 2}},
"h_extendedMoondanceBeetomLeniency",
{"or": [
{"enemyDamage": {"enemy": "Beetom", "type": "contact", "hits": 8}},
{"ammo": {"type": "Missile", "count": 1}},
{"ammo": {"type": "Super", "count": 1}}
]}Exit condition: "leaveWithStoredFallSpeed": {
"fallSpeedInTiles": 2
} |
|
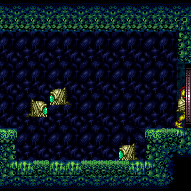
Requires: "h_complexToCarryBlueSuit" Exit condition: "leaveWithDamage": {
"enemy": "Beetom",
"knockback": false
} |