Red Brinstar Fireflea Room: Damage Boost Speed Jump
Room ID: 67
|


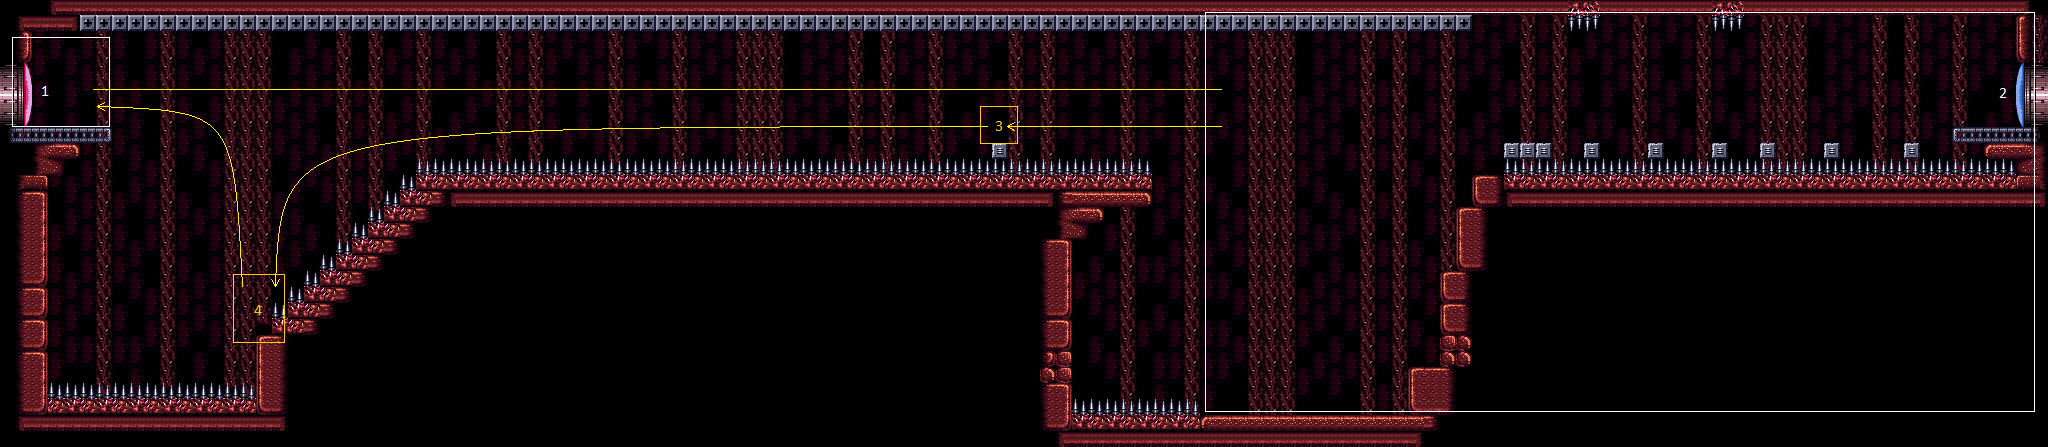
Use a Fireflea (or two) to quickly boost to the left, to be able to catch the Waver and boost off it on its first cycle, to cross the first gap. Take one or two more hits from the Wavers for i-frames; take the last hit close to the ground while holding forward. Then gain speed using Speed Booster to jump across the second gap. If the jump is slightly short, a wall jump can be used to get up. Using the second Waver cycle leads to a bad pattern at the end, where the path of the speedy jump will be blocked by a Waver, which can still be avoided but only with great difficulty. Requires: "canHorizontalDamageBoost"
"canTrickyJump"
"canUseIFrames"
"h_speedJump"
{
"or": [
"canInsaneJump",
{
"and": [
"canTrickyDodgeEnemies",
{
"enemyDamage": {
"enemy": "Fireflea",
"type": "contact",
"hits": 1
}
}
]
},
{
"enemyDamage": {
"enemy": "Fireflea",
"type": "contact",
"hits": 2
}
}
]
}
{
"or": [
{
"and": [
"canInsaneJump",
{
"enemyDamage": {
"enemy": "Waver",
"type": "contact",
"hits": 2
}
}
]
},
{
"enemyDamage": {
"enemy": "Waver",
"type": "contact",
"hits": 3
}
}
]
}
{
"or": [
"canWallJump",
"canTrickyDodgeEnemies"
]
}Dev note: FIXME: Patiently waiting for a different Waver cycle could be another way to avoid Fireflea damage. FIXME: gaining a shinecharge on the spikes (and hero shot sparking out the left door) is possible though extremely precise. |