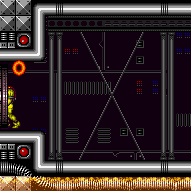
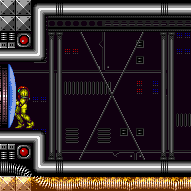
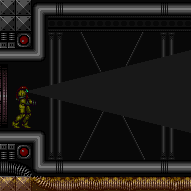
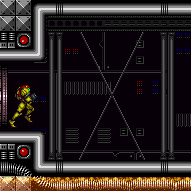
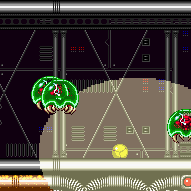
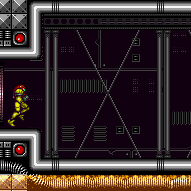
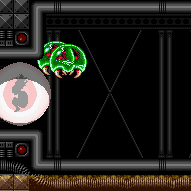
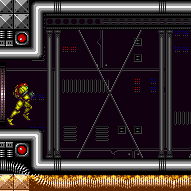
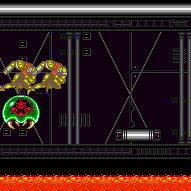
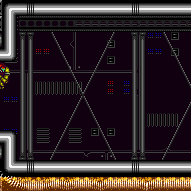
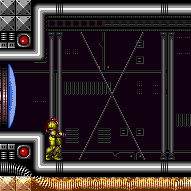
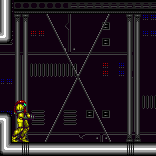
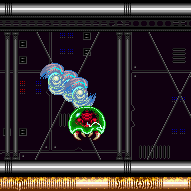
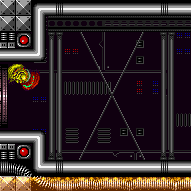
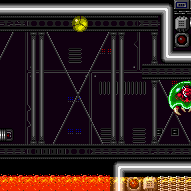
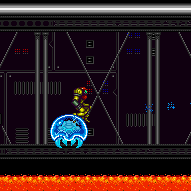
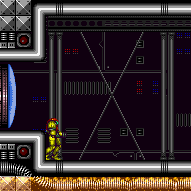
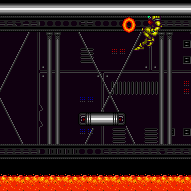
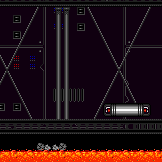
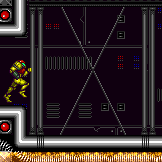
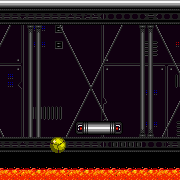
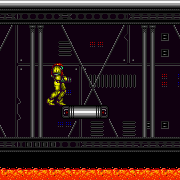
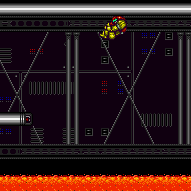
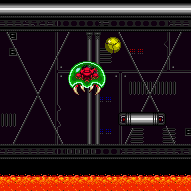
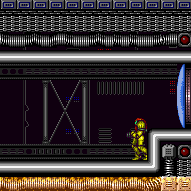
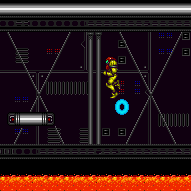
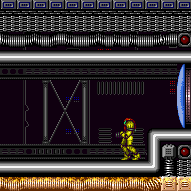
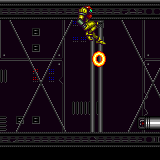
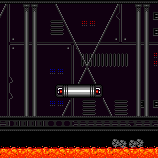
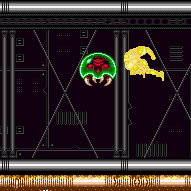
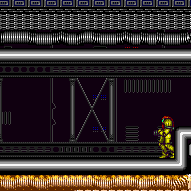
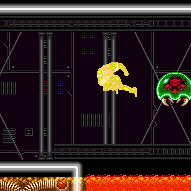
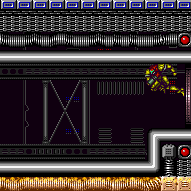
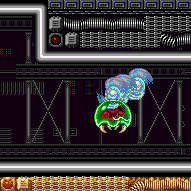
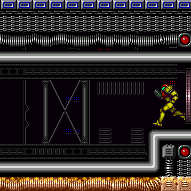
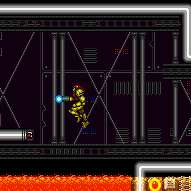
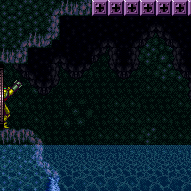
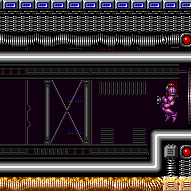
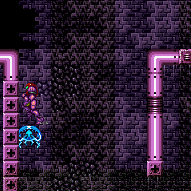
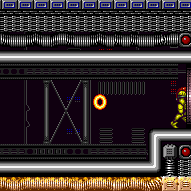
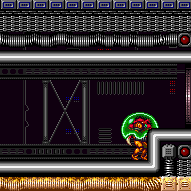
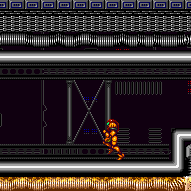
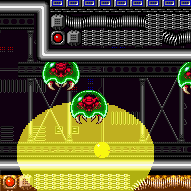
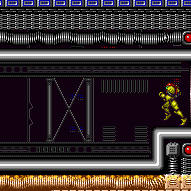
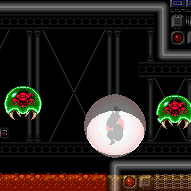
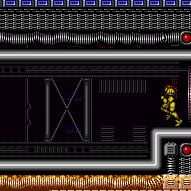
Metroid Room 1
Room ID: 226

|
Requires: {
"or": [
{
"or": [
"f_KilledMetroidRoom1",
{
"obstaclesCleared": [
"f_KilledMetroidRoom1"
]
}
]
},
{
"obstaclesCleared": [
"A",
"B"
]
}
]
}Clears obstacles: A, B, f_KilledMetroidRoom1 Sets flags: f_KilledMetroidRoom1 |
|
Exit condition: {
"leaveWithRunway": {
"length": 3,
"openEnd": 1
}
} |
|
Stand a bit more than a tile away from the ledge and wait for the Rinka to start moving. Freeze the Rinka at the correct height while maintaining a half-tile gap between the Rinka and the runway to extend it as much as possible. Requires: "h_frozenEnemyRunway" Exit condition: {
"leaveWithRunway": {
"length": 5,
"openEnd": 0
}
} |
|
It is best to start 4 or 5 pixels from the end of the runway; equivalently, start at the end of the runway and use arm pumps to advance 4 or 5 pixels while running. Requires: "h_speedJump"
{
"or": [
"canMetroidAvoid",
"Ice",
{
"obstaclesCleared": [
"A"
]
}
]
}
{
"or": [
"canMomentumConservingMorph",
{
"and": [
"canMomentumConservingTurnaround",
"canInsaneJump"
]
}
]
}Exit condition: {
"leaveWithSidePlatform": {
"height": 2,
"runway": {
"length": 31,
"openEnd": 1
},
"obstruction": [
3,
0
]
}
}Dev note: Max extra run speed $5.7. |
|
Requires: {
"or": [
"canMetroidAvoid",
"Ice",
{
"obstaclesCleared": [
"A"
]
}
]
}
"canShinechargeMovement"
{
"canShineCharge": {
"usedTiles": 31,
"openEnd": 1
}
}
{
"shineChargeFrames": 40
}Exit condition: {
"leaveShinecharged": {}
} |
|
Requires: {
"or": [
"canMetroidAvoid",
"Ice",
{
"obstaclesCleared": [
"A"
]
}
]
}Exit condition: {
"leaveSpinning": {
"remoteRunway": {
"length": 29,
"openEnd": 1
}
}
} |
|
Requires: {
"or": [
"canMetroidAvoid",
"Ice",
{
"obstaclesCleared": [
"A"
]
}
]
}Exit condition: {
"leaveWithMockball": {
"remoteRunway": {
"length": 28,
"openEnd": 1
},
"landingRunway": {
"length": 3,
"openEnd": 1
}
}
} |
|
Requires: {
"or": [
"canMetroidAvoid",
"Ice",
{
"obstaclesCleared": [
"A"
]
}
]
}Exit condition: {
"leaveWithSpringBallBounce": {
"remoteRunway": {
"length": 25,
"openEnd": 1
},
"landingRunway": {
"length": 3,
"openEnd": 1
},
"movementType": "uncontrolled"
}
} |
|
Requires: {
"or": [
"canMetroidAvoid",
"Ice",
{
"obstaclesCleared": [
"A"
]
}
]
}Exit condition: {
"leaveSpaceJumping": {
"remoteRunway": {
"length": 22,
"openEnd": 0
}
}
} |
|
If it not possible to freeze or kill the Metroids, then move quickly enough that they get stuck off-camera to the right, and gain the shinecharge in a position where Samus can angle up and shoot the Rinka while waiting for the shinecharge timer to run out. Requires: {
"or": [
"canMetroidAvoid",
"Ice",
{
"obstaclesCleared": [
"A"
]
}
]
}
{
"canShineCharge": {
"usedTiles": 30,
"openEnd": 1
}
}
"canChainTemporaryBlue"Exit condition: {
"leaveWithTemporaryBlue": {}
} |
|
Be sure to be at a safe distance from Rinkas before performing the Crystal Flash. Requires: {
"obstaclesCleared": [
"A"
]
}
"h_CrystalFlash"
{
"obstaclesNotCleared": [
"R-Mode"
]
} |
|
Place Power Bombs to kill the Metroids. By hitting the first Rinka, all of the Metroids (on a similar vertical height to the Power Bomb) will be damaged. Requires: {
"enemyKill": {
"enemies": [
[
"Metroid",
"Metroid",
"Metroid",
"Metroid"
]
],
"explicitWeapons": [
"PowerBombPeriphery"
]
}
}
{
"or": [
"canTrickyJump",
{
"ammo": {
"type": "PowerBomb",
"count": 2
}
}
]
}
{
"metroidFrames": 330
}Clears obstacles: A, B, f_KilledMetroidRoom1 Sets flags: f_KilledMetroidRoom1 Dev note: Using 1 pack of PBs isn't intuitive as a way to kill 4 metroids without grouping them. |
|
Group all of the Metroids by hitting the first Rinka with a Power Bomb. Once grouped, use two more Power Bombs to finish them off. Requires: {
"enemyKill": {
"enemies": [
[
"Metroid",
"Metroid",
"Metroid",
"Metroid"
]
],
"explicitWeapons": [
"PowerBomb"
]
}
}
"canMetroidAvoid"
"canHitbox"
{
"or": [
{
"ammo": {
"type": "PowerBomb",
"count": 1
}
},
"canInsaneJump",
{
"metroidFrames": 100
}
]
}Clears obstacles: A, B, f_KilledMetroidRoom1 Sets flags: f_KilledMetroidRoom1 |
|
Requires: {
"obstaclesCleared": [
"A"
]
}
{
"canShineCharge": {
"usedTiles": 23,
"openEnd": 1
}
}
"h_CrystalSpark"Dev note: FIXME: This may be possible with the Metroids alive, but is probably not worth considering. |
|
Exit condition: {
"leaveWithGModeSetup": {}
} |
|
Requires: {
"enemyDamage": {
"enemy": "Rinka",
"type": "contact",
"hits": 1
}
} |
|
Kill the Metroids while artificially morphed with just Spring Ball to avoid them. A Rinka must killed whith a Power Bomb while a Metroid is completely on screen in order for it to lure the other Metroids. Because of this, with extra ammo, it is possible to kill one or two of them before luring the rest. In general, this seems to be easiest by minimizing Samus's horizontal movement as much as possible and getting the Metroids in sync with each other while circling around her. While moving horizontally, their movement is less predictable and harder to sync. Note that it is necessary to exit G-Mode before exiting the room in order for the Metroids to remain killed. With only 3 Power Bombs, bring the left two Metroids to the edge of the acid before using Power Bombs to lure them all. Entrance condition: {
"comeInWithGMode": {
"mode": "any",
"morphed": true
}
}Requires: "canMetroidAvoid"
"canInsaneJump"
"h_artificialMorphSpringBall"
{
"ammo": {
"type": "PowerBomb",
"count": 3
}
}
{
"or": [
"canTrickyGMode",
{
"ammo": {
"type": "PowerBomb",
"count": 1
}
}
]
}Clears obstacles: A, B, f_KilledMetroidRoom1 Sets flags: f_KilledMetroidRoom1 Dev note: The rules for luring the Metroids are not completely clear, but this method works somewhat reliably here. |
|
Entrance condition: {
"comeInWithRMode": {}
}Clears obstacles: R-Mode |
|
On entry, kill or dodge the first Rinkas then Crystal Flash directly above or below a Rinka Spawner. Requires: {
"obstaclesCleared": [
"R-Mode"
]
}
{
"obstaclesCleared": [
"A"
]
}
"canRModeCrystalFlashInterrupt"
{
"ammo": {
"type": "Missile",
"count": 10
}
}
{
"ammo": {
"type": "Super",
"count": 10
}
}Resets obstacles: R-Mode Dev note: There could be a variant with the Metroids alive, but they will all lure to Samus and the light orb will disappear, so she will take heavy damage. This is not possible in G-mode, because the Power Bomb will kill the Rinka and prevent more from spawning. |
From: 1
Left Door
To: 1
Left Door
On entry, kill or dodge the first Rinkas then Crystal Flash. While in the light orb, Samus will be almost immune and the Metroids will take damage. Requires: {
"obstaclesCleared": [
"R-Mode"
]
}
"canComplexGMode"
"h_CrystalFlash"Clears obstacles: A, B, f_KilledMetroidRoom1 Resets obstacles: R-Mode Sets flags: f_KilledMetroidRoom1 |
From: 1
Left Door
To: 1
Left Door
On entry, kill or dodge the first Rinkas then Crystal Flash. While in the light orb, Samus will be almost immune and the Metroids will take damage. Note that it is necessary to exit G-Mode before exiting the room in order for the Metroids to remain killed. To do this, trigger Reserves in the acid or on a Rinka. To minimize damage taken, lure a Rinka away from its spawner before touching it to prevent multiple hits during the auto Reserve trigger. Entrance condition: {
"comeInWithGMode": {
"mode": "direct",
"morphed": true
}
}Requires: "canComplexGMode"
"h_artificialMorphCrystalFlash"
{
"autoReserveTrigger": {}
}Clears obstacles: A, B, f_KilledMetroidRoom1 Sets flags: f_KilledMetroidRoom1 Dev note: FIXME: Before reserve triggering, Samus could cross the acid pit. |
|
Requires: "Ice"
{
"enemyKill": {
"enemies": [
[
"Metroid",
"Metroid"
]
],
"explicitWeapons": [
"Super",
"Missile"
]
}
}Clears obstacles: A |
|
Entrance condition: {
"comeInWithSpark": {
"position": "top"
}
}Requires: {
"shinespark": {
"frames": 112,
"excessFrames": 16
}
}Dev note: FIXME: Add strats that come in charged and spark to save energy. |
|
Requires: {
"obstaclesCleared": [
"A",
"B"
]
}
{
"canShineCharge": {
"usedTiles": 31,
"openEnd": 0
}
}
"canHorizontalMidairShinespark"
{
"or": [
{
"shinespark": {
"frames": 37,
"excessFrames": 7
}
},
{
"and": [
"canControlShinesparkEnd",
{
"shinespark": {
"frames": 37,
"excessFrames": 22
}
}
]
}
]
} |
|
Shinecharge just before the second Metroid comes on camera, jump over it and spark against the ceiling to avoid the rest of them. Sparking lower will likely get Samus grabbed by the right-most Metroid. Requires: {
"canShineCharge": {
"usedTiles": 26,
"openEnd": 0
}
}
"canHorizontalMidairShinespark"
{
"or": [
{
"and": [
"canMetroidAvoid",
{
"shinespark": {
"frames": 50,
"excessFrames": 5
}
}
]
},
{
"and": [
{
"shinespark": {
"frames": 54,
"excessFrames": 0
}
},
{
"metroidFrames": 300
}
]
}
]
} |
|
Align with the wall below the door while facing left. Hold dash, turn around, start running and arm pump once. Jump from the rightmost 'X' in the background. Release forward at some point while airborne, but repress it again before the CWJ. Immediately after the CWJ, shoot the Metroid to avoid getting grabbed. Requires: {
"notable": "Acid Skip CWJ"
}
"canCWJ"
"canInsaneWalljump"
{
"or": [
{
"obstaclesCleared": [
"A",
"B"
]
},
"canDodgeWhileShooting"
]
} |
|
Requires: {
"getBlueSpeed": {
"usedTiles": 31,
"openEnd": 1
}
}
"h_blueJump"
"canCarefulJump"
{
"or": [
{
"obstaclesCleared": [
"A",
"B"
]
},
"Ice",
"ScrewAttack",
"canPseudoScrew",
"canMetroidAvoid",
{
"metroidFrames": 130
}
]
} |
|
Requires: "SpaceJump"
{
"or": [
{
"obstaclesCleared": [
"A",
"B"
]
},
"Ice",
"ScrewAttack",
"canPseudoScrew",
{
"haveBlueSuit": {}
},
"canMetroidAvoid",
{
"metroidFrames": 270
}
]
} |
|
Requires: {
"getBlueSpeed": {
"usedTiles": 31,
"openEnd": 1
}
}
"canBlueSpaceJump" |
|
Entrance condition: {
"comeInGettingBlueSpeed": {
"length": 1,
"openEnd": 1
}
}Requires: "canBlueSpaceJump" Dev note: There is 1 unusable tile in this runway. |
|
At max run speed without SpeedBooster, you can bounce on both platforms and avoid all acid. Jump from the center of the rightmost X in the background. Bounce again on the second platform to avoid any Metroid or Rinkas. Requires: "canSpringBallBounce"
"canCarefulJump"
{
"or": [
{
"obstaclesCleared": [
"A",
"B"
]
},
"canMetroidAvoid",
{
"metroidFrames": 200
}
]
}Dev note: Just doing the strat avoids almost all damage, so metroidframes values are mostly artificial. |
|
Freeze the middle Metroid as soon as it comes on screen to use as a platform to cross over the acid. If no Metroids are alive, the far left Rinka can be used instead, at a high angle. The left Rinka can also just be used to setup an angle with the Rinka near the left edge of the pool. Requires: "canTrickyUseFrozenEnemies"
"canTrickyJump"
"canCameraManip"
{
"or": [
"canInsaneJump",
{
"and": [
{
"not": "f_KilledMetroidRoom1"
},
"canRiskPermanentLossOfAccess"
]
}
]
} |
|
Aim the leftmost Rinka to travel horizontally across the top of the room and use it to damage boost between the two floating platforms. Killing the Rinka will normalize it's respawn timer, which may help in setting up the correct angle. Let the Rinka stay far enough ahead of Samus that she can jump the full distance to the first platform without hitting it. And then once it has reached the right edge of the platform, use it to damage boost. Requires: {
"notable": "Rinka Damage Boost"
}
{
"enemyDamage": {
"enemy": "Rinka",
"type": "contact",
"hits": 1
}
}
"canDash"
"canTrickyJump"
"canHorizontalDamageBoost"
"canCameraManip"
{
"or": [
{
"obstaclesCleared": [
"A",
"B"
]
},
"canMetroidAvoid"
]
} |
|
Requires: "canDash"
{
"or": [
{
"and": [
"Gravity",
{
"acidFrames": 10
}
]
},
{
"and": [
{
"or": [
"canWalljump",
"HiJump"
]
},
{
"acidFrames": 20
}
]
}
]
}
{
"or": [
{
"obstaclesCleared": [
"A",
"B"
]
},
"Ice",
"ScrewAttack",
{
"and": [
"canPseudoScrew",
{
"or": [
"canTrickyJump",
"canWalljumpWithCharge",
"HiJump",
"Gravity"
]
}
]
},
"canMetroidAvoid",
{
"metroidFrames": 150
}
]
} |
|
Requires: {
"haveBlueSuit": {}
}
{
"or": [
{
"and": [
"Gravity",
{
"acidFrames": 30
}
]
},
{
"and": [
"canPreciseWalljump",
{
"acidFrames": 60
}
]
},
{
"and": [
"HiJump",
{
"acidFrames": 130
}
]
},
{
"acidFrames": 140
}
]
} |
|
Requires: {
"haveBlueSuit": {}
}
"canSpringFling"
{
"or": [
{
"and": [
"Gravity",
{
"acidFrames": 15
}
]
},
{
"and": [
"canWalljump",
{
"acidFrames": 20
}
]
},
{
"and": [
"HiJump",
{
"disableEquipment": "HiJump"
},
{
"acidFrames": 20
}
]
},
{
"acidFrames": 75
}
]
} |
From: 1
Left Door
To: 2
Right Door
Requires: {
"haveBlueSuit": {}
}
"canSpringBallBombJump"
"canInsaneJump"
{
"or": [
{
"and": [
"Gravity",
{
"acidFrames": 15
}
]
},
{
"and": [
"canWalljump",
{
"acidFrames": 20
}
]
},
{
"and": [
"HiJump",
{
"disableEquipment": "HiJump"
},
{
"acidFrames": 20
}
]
},
{
"acidFrames": 75
}
]
} |
|
Spin jump often to reduce the amount of time spent in the acid. Requires: "canDash"
{
"acidFrames": 65
}
{
"or": [
{
"obstaclesCleared": [
"A",
"B"
]
},
{
"and": [
"canMetroidAvoid",
"canInsaneJump"
]
},
"ScrewAttack",
{
"and": [
"canPseudoScrew",
"canTrickyJump"
]
},
{
"metroidFrames": 150
}
]
}
{
"or": [
"canTrickyJump",
{
"enemyDamage": {
"enemy": "Rinka",
"type": "contact",
"hits": 1
}
}
]
} |
|
Jump from the left platform and mid air morph to bounce through the lava quickly. This is only useful when morphing before reaching the ceiling. Requires: {
"acidFrames": 45
}
"canBounceBall"
"canLateralMidAirMorph"
"can4HighMidAirMorph"
{
"or": [
{
"obstaclesCleared": [
"A",
"B"
]
},
{
"and": [
"canTrickyDodgeEnemies",
"canMetroidAvoid",
{
"acidFrames": 5
}
]
}
]
}Dev note: Freezing a Metroid while exiting the acid is difficult but manageable. |
|
Bomb Jump between the two floating platforms. Requires: "canDash"
{
"or": [
{
"obstaclesCleared": [
"A"
]
},
{
"and": [
"canCameraManip",
"canMetroidAvoid"
]
}
]
}
{
"or": [
{
"and": [
"canHBJ",
"canResetFallSpeed"
]
},
{
"and": [
{
"obstaclesCleared": [
"A"
]
},
"canDiagonalBombJump"
]
},
"canCeilingBombJump"
]
}Dev note: FIXME: This is probably possible dashless. |
|
Entrance condition: {
"comeInWithGMode": {
"mode": "any",
"morphed": true
}
}Requires: {
"or": [
"f_KilledMetroidRoom1",
{
"obstaclesCleared": [
"f_KilledMetroidRoom1"
]
}
]
}
"h_artificialMorphLongCeilingBombJump"
"canBePatient" |
|
Requires: {
"or": [
{
"obstaclesCleared": [
"A",
"B"
]
},
"canMetroidAvoid"
]
}
"h_storedSpark"
"canDash"
{
"shinespark": {
"frames": 4,
"excessFrames": 2
}
} |
|
Requires: {
"or": [
"canTrickyDodgeEnemies",
{
"and": [
"canMetroidAvoid",
"Ice"
]
},
"ScrewAttack",
"canPseudoScrew",
{
"obstaclesCleared": [
"A",
"B"
]
}
]
}
"canTrickyJump"
"SpaceJump"Exit condition: {
"leaveSpinning": {
"remoteRunway": {
"length": 31,
"openEnd": 1
}
}
}Unlocks doors: {"types":["ammo"],"requires":[]}Dev note: Requires preopening the door, so this is more difficult than a normal MetroidAvoid. FIXME: Blue speed can be used to protect against metroid damage, in the canTrickyDodgeEnemies case; but could there be a scenario where having blue speed is incompatible for what is needed in the next room? We made the 'blue' property for this kind of thing; the trouble is that the entrance conditions are written for either blue or not-blue, not either. |
|
Requires: {
"or": [
"canTrickyDodgeEnemies",
{
"and": [
"canMetroidAvoid",
"Ice"
]
},
"ScrewAttack",
"canPseudoScrew",
{
"obstaclesCleared": [
"A",
"B"
]
}
]
}
"canPreciseSpaceJump"Exit condition: {
"leaveWithMockball": {
"remoteRunway": {
"length": 31,
"openEnd": 1
},
"landingRunway": {
"length": 3,
"openEnd": 1
}
}
}Unlocks doors: {"types":["ammo"],"requires":[]}Dev note: It is possible to open the door with ammo and mockball out in one motion. But the timing makes it harder than crossing the room multiple times. |
From: 1
Left Door
To: 2
Right Door
Requires: {
"or": [
"canTrickyDodgeEnemies",
{
"and": [
"canMetroidAvoid",
"Ice"
]
},
"ScrewAttack",
"canPseudoScrew",
{
"obstaclesCleared": [
"A",
"B"
]
}
]
}
"canTrickyJump"
"canPreciseSpaceJump"Exit condition: {
"leaveWithSpringBallBounce": {
"remoteRunway": {
"length": 31,
"openEnd": 1
},
"landingRunway": {
"length": 3,
"openEnd": 1
},
"movementType": "uncontrolled"
}
}Unlocks doors: {"types":["ammo"],"requires":[]} |
|
Requires: {
"or": [
"canTrickyDodgeEnemies",
{
"and": [
"canMetroidAvoid",
"Ice"
]
},
"ScrewAttack",
"canPseudoScrew",
{
"obstaclesCleared": [
"A",
"B"
]
}
]
}
"canTrickySpringBallBounce"Exit condition: {
"leaveWithSpringBallBounce": {
"remoteRunway": {
"length": 31,
"openEnd": 1
},
"landingRunway": {
"length": 3,
"openEnd": 1
},
"minExtraRunSpeed": "$1.3",
"movementType": "controlled"
}
}Unlocks doors: {"types":["ammo"],"requires":[]}Dev note: FIXME: It is possible to open the door and leave with a controlled bounce in one motion. But then avoiding damage becomes unreliable. |
|
Requires: {
"or": [
"canTrickyDodgeEnemies",
{
"and": [
"canMetroidAvoid",
"Ice"
]
},
"ScrewAttack",
"canPseudoScrew",
{
"obstaclesCleared": [
"A",
"B"
]
}
]
}
"canPreciseSpaceJump"Exit condition: {
"leaveSpaceJumping": {
"remoteRunway": {
"length": 31,
"openEnd": 1
}
}
}Unlocks doors: {"types":["ammo"],"requires":[]} |
|
Requires: "SpaceJump"
{
"or": [
{
"obstaclesCleared": [
"B"
]
},
"ScrewAttack",
"canPseudoScrew",
{
"haveBlueSuit": {}
},
"Ice",
"canMetroidAvoid",
{
"metroidFrames": 420
}
]
} |
|
Requires: "h_speedJump"
"canCarefulJump"
{
"or": [
"canPreciseWalljump",
"canTrickyJump"
]
}
{
"or": [
{
"obstaclesCleared": [
"A",
"B"
]
},
"Ice",
"canMetroidAvoid",
{
"metroidFrames": 200
}
]
}
{
"or": [
"canTrickyJump",
{
"acidFrames": 27
},
{
"and": [
{
"acidFrames": 16
},
"canPreciseWalljump"
]
},
{
"and": [
{
"acidFrames": 16
},
"Gravity"
]
}
]
} |
|
At max non-speed run speed, Spring Ball bounce on both platforms and avoid all acid. Land on the right side of the first platform to avoid the second Metroid. Bouncing on the second platform will usually avoid the third Metroid. Requires: "canSpringBallBounce"
"canCarefulJump"
{
"or": [
{
"obstaclesCleared": [
"A",
"B"
]
},
{
"and": [
"canTrickyJump",
"canMetroidAvoid",
"canTrickyDodgeEnemies"
]
},
{
"metroidFrames": 270
}
]
} |
|
Use the lower Rinka as a platform to setup the angle for the top Rinka. Then use the frozen Rinka to cross the acid. Alternatively, if the Metroids are alive, the second one can be frozen immediately once it is on camera to use as a platform. Requires: "canTrickyUseFrozenEnemies"
"canTrickyJump"
"canCameraManip"
{
"or": [
"canDash",
"canInsaneJump"
]
} |
|
Aim the ceiling Rinka to travel horizontally across the top of the room and use it to damage boost between the two floating platforms. Killing the lower Rinka shortly before killing the higher Rinka will synchronize their respawn timers so that Samus can jump when the lower Rinka reappears in order to get a good angle on the higher Rinka. Jump to the floating platform ahead of the high Rinka, jumping extra high to lead the Metroid out of the way if it is alive. Jump into the Rinka once it reaches the left edge of the platform to reach the next platform. Then use i-frames to pass through the Metroid if it is still alive. Requires: {
"notable": "Rinka Damage Boost"
}
{
"enemyDamage": {
"enemy": "Rinka",
"type": "contact",
"hits": 1
}
}
"canDash"
"canTrickyJump"
"canHorizontalDamageBoost"
"canCameraManip"
{
"or": [
{
"obstaclesCleared": [
"A",
"B"
]
},
{
"and": [
"canMetroidAvoid",
"canUseIFrames"
]
}
]
}
{
"or": [
"canInsaneJump",
{
"enemyDamage": {
"enemy": "Rinka",
"type": "contact",
"hits": 1
}
},
{
"and": [
"canTrickyJump",
"canLateralMidAirMorph"
]
},
{
"and": [
"Gravity",
{
"acidFrames": 16
}
]
},
{
"acidFrames": 27
}
]
} |
|
Requires: {
"or": [
{
"and": [
"canTrickyWalljump",
{
"acidFrames": 20
}
]
},
{
"and": [
"HiJump",
"canWalljump",
{
"acidFrames": 50
}
]
},
{
"and": [
"HiJump",
"canPreciseWalljump",
{
"acidFrames": 20
}
]
},
{
"and": [
"Gravity",
{
"acidFrames": 10
}
]
}
]
}
{
"or": [
{
"obstaclesCleared": [
"A",
"B"
]
},
"Ice",
"ScrewAttack",
"canMetroidAvoid",
{
"and": [
"canPseudoScrew",
"canTrickyJump"
]
},
{
"metroidFrames": 420
}
]
}
{
"or": [
"canInsaneJump",
{
"and": [
"canTrickyJump",
"canLateralMidAirMorph"
]
},
{
"and": [
"canTrickyJump",
"canPreciseWalljump",
{
"acidFrames": 16
}
]
},
{
"and": [
"Gravity",
{
"acidFrames": 16
}
]
},
{
"acidFrames": 27
}
]
}Dev note: 1) Jump from the acid to the floating platform. 2) Deal with the Metroid. 3) Jump from the platform to the ledge, potentially falling in acid. |
|
Requires: {
"haveBlueSuit": {}
}
{
"or": [
{
"and": [
"Gravity",
{
"acidFrames": 30
}
]
},
{
"and": [
"canWalljump",
{
"acidFrames": 40
}
]
},
{
"acidFrames": 80
}
]
} |
|
Requires: {
"haveBlueSuit": {}
}
"canSpringFling"
{
"acidFrames": 65
} |
|
Requires: "canDash"
"canCarefulJump"
{
"acidFrames": 65
}
{
"or": [
{
"obstaclesCleared": [
"A",
"B"
]
},
"Ice",
"ScrewAttack",
{
"and": [
"canPseudoScrew",
"canDodgeWhileShooting"
]
},
{
"and": [
"canInsaneJump",
"canMetroidAvoid"
]
},
{
"metroidFrames": 670
}
]
} |
|
Requires: {
"getBlueSpeed": {
"usedTiles": 22,
"openEnd": 1
}
}
"canBlueSpaceJump"
{
"metroidFrames": 67
} |
|
Requires: {
"obstaclesCleared": [
"A",
"B"
]
}
"canHorizontalMidairShinespark"
{
"canShineCharge": {
"usedTiles": 23,
"openEnd": 0
}
}
{
"or": [
{
"shinespark": {
"frames": 80,
"excessFrames": 48
}
},
{
"and": [
"canShinechargeMovementComplex",
{
"shinespark": {
"frames": 68,
"excessFrames": 38
}
}
]
}
]
} |
From: 2
Right Door
To: 1
Left Door
Requires: {
"obstaclesCleared": [
"A",
"B"
]
}
{
"canShineCharge": {
"usedTiles": 23,
"openEnd": 0
}
}
"canShinechargeMovementComplex"
{
"shinespark": {
"frames": 7,
"excessFrames": 2
}
}
{
"or": [
"canInsaneJump",
{
"and": [
"canTrickyJump",
"canLateralMidAirMorph"
]
},
{
"and": [
"canTrickyJump",
"canPreciseWalljump",
{
"acidFrames": 16
}
]
},
{
"and": [
"Gravity",
{
"acidFrames": 16
}
]
},
{
"acidFrames": 27
}
]
}Dev note: This strat only makes sense without canSpeedyJump. |
|
Requires: "canHorizontalMidairShinespark"
{
"canShineCharge": {
"usedTiles": 23,
"openEnd": 0
}
}
{
"or": [
"Ice",
{
"and": [
"canDodgeWhileShooting",
"ScrewAttack"
]
},
{
"and": [
"canDodgeWhileShooting",
"canPseudoScrew"
]
},
"canMetroidAvoid",
{
"metroidFrames": 200
}
]
}
{
"shinespark": {
"frames": 80,
"excessFrames": 5
}
} |
|
Bomb Jump between the two floating platforms. Requires: {
"obstaclesCleared": [
"A",
"B"
]
}
{
"or": [
"canCeilingBombJump",
"canDiagonalBombJump"
]
} |
|
While on the first platform, perform a long jump to the left then diagonally spark low into the side of the next platform. This will put Samus into a position where the Metroid will swoop underneath her. Requires: "canMetroidAvoid"
"h_storedSpark"
"canDash"
{
"shinespark": {
"frames": 8,
"excessFrames": 1
}
}
{
"or": [
"canInsaneJump",
{
"and": [
"canTrickyJump",
"canLateralMidAirMorph"
]
},
{
"and": [
"canTrickyJump",
"canPreciseWalljump",
{
"acidFrames": 16
}
]
},
{
"and": [
"Gravity",
{
"acidFrames": 16
}
]
},
{
"acidFrames": 27
}
]
}Dev note: This is only useful with a flash suit without Speed Booster. |
|
Requires: {
"obstaclesCleared": [
"A",
"B"
]
}
"h_storedSpark"
"canDash"
{
"shinespark": {
"frames": 4,
"excessFrames": 2
}
}
{
"or": [
"canInsaneJump",
{
"and": [
"canTrickyJump",
"canLateralMidAirMorph"
]
},
{
"and": [
"canTrickyJump",
"canPreciseWalljump",
{
"acidFrames": 16
}
]
},
{
"and": [
"Gravity",
{
"acidFrames": 16
}
]
},
{
"acidFrames": 27
}
]
} |
|
Entrance condition: {
"comeInWithSpark": {
"position": "top"
}
}Requires: {
"shinespark": {
"frames": 112,
"excessFrames": 35
}
}Dev note: FIXME: Add strats that come in charged and spark to save energy. |
|
Entrance condition: {
"comeInGettingBlueSpeed": {
"length": 1,
"openEnd": 1
}
}Requires: "canBlueSpaceJump" Dev note: There is 1 unusable tile in this runway. |
|
Entrance condition: {
"comeInWithGMode": {
"mode": "any",
"morphed": true
}
}Requires: {
"or": [
"f_KilledMetroidRoom1",
{
"obstaclesCleared": [
"f_KilledMetroidRoom1"
]
}
]
}
"h_artificialMorphCeilingBombJump" |
|
Entrance condition: {
"comeInWithGrappleTeleport": {
"blockPositions": [
[
7,
2
]
]
}
} |
|
Entrance condition: {
"comeInWithGrappleTeleport": {
"blockPositions": [
[
3,
12
],
[
3,
13
]
]
}
}Bypasses door shell: true |
|
Entrance condition: {
"comeInWithGrappleTeleport": {
"blockPositions": [
[
3,
12
]
]
}
}Exit condition: {
"leaveWithGrappleTeleport": {
"blockPositions": [
[
3,
12
]
]
}
}Bypasses door shell: true |
From: 2
Right Door
To: 1
Left Door
Entrance condition: {
"comeInWithGrappleTeleport": {
"blockPositions": [
[
3,
13
]
]
}
}Exit condition: {
"leaveWithGrappleTeleport": {
"blockPositions": [
[
3,
13
]
]
}
}Bypasses door shell: true |
|
Requires: "Ice"
{
"enemyKill": {
"enemies": [
[
"Metroid",
"Metroid"
]
],
"explicitWeapons": [
"Super",
"Missile"
]
}
}Clears obstacles: B |
|
Requires: {
"or": [
{
"or": [
"f_KilledMetroidRoom1",
{
"obstaclesCleared": [
"f_KilledMetroidRoom1"
]
}
]
},
{
"obstaclesCleared": [
"A",
"B"
]
}
]
}Clears obstacles: A, B, f_KilledMetroidRoom1 Sets flags: f_KilledMetroidRoom1 |
|
Exit condition: {
"leaveWithRunway": {
"length": 3,
"openEnd": 1
}
} |
From: 2
Right Door
To: 2
Right Door
Use a frozen Metroid or a Rinka from the left to extend the length of the runway. Luring a Rinka is easiest with Morph - While morphed, barely move the bottom Rinka spawner on camera in order to have it shoot at a usable angle. Without Morph, use the top Rinka spawner and jump just before the Rinka starts moving to get a usable angle. Requires: {
"or": [
"h_trickyFrozenEnemyRunway",
{
"and": [
"h_frozenEnemyRunway",
{
"not": "f_KilledMetroidRoom1"
},
"canRiskPermanentLossOfAccess"
]
}
]
}Exit condition: {
"leaveWithRunway": {
"length": 4,
"openEnd": 1
}
} |
|
Requires: "h_speedJump"
{
"or": [
"canMetroidAvoid",
{
"obstaclesCleared": [
"B"
]
}
]
}
{
"or": [
"canMomentumConservingMorph",
{
"and": [
"canMomentumConservingTurnaround",
"canInsaneJump"
]
}
]
}Exit condition: {
"leaveWithSidePlatform": {
"height": 2,
"runway": {
"length": 23,
"openEnd": 1
},
"obstruction": [
3,
0
]
}
}Dev note: Max extra run speed $4.7. Using almost the full runway (between 3 and 6 pixels from the edge), the momentum conserving turnaround has a 2-frame window for the jump, and a 1-frame or 3-frame window for the turnaround, depending on the jump (with a last-frame jump giving the larger window). |
|
Requires: {
"or": [
"canMetroidAvoid",
"Ice",
{
"obstaclesCleared": [
"B"
]
}
]
}
"canShinechargeMovement"
{
"canShineCharge": {
"usedTiles": 23,
"openEnd": 1
}
}
{
"shineChargeFrames": 40
}Exit condition: {
"leaveShinecharged": {}
} |
|
Requires: {
"or": [
"canMetroidAvoid",
"Ice",
{
"obstaclesCleared": [
"B"
]
}
]
}Exit condition: {
"leaveSpinning": {
"remoteRunway": {
"length": 21,
"openEnd": 1
}
}
} |
|
Requires: {
"or": [
"canMetroidAvoid",
"Ice",
{
"obstaclesCleared": [
"B"
]
}
]
}Exit condition: {
"leaveWithMockball": {
"remoteRunway": {
"length": 21,
"openEnd": 0
},
"landingRunway": {
"length": 3,
"openEnd": 1
}
}
} |
|
Requires: {
"or": [
"canMetroidAvoid",
"Ice",
{
"obstaclesCleared": [
"B"
]
}
]
}Exit condition: {
"leaveWithSpringBallBounce": {
"remoteRunway": {
"length": 18,
"openEnd": 0
},
"landingRunway": {
"length": 1,
"openEnd": 1
},
"movementType": "uncontrolled"
}
} |
|
Requires: {
"or": [
"canMetroidAvoid",
"Ice",
{
"obstaclesCleared": [
"B"
]
}
]
}Exit condition: {
"leaveSpaceJumping": {
"remoteRunway": {
"length": 15,
"openEnd": 0
}
}
} |
|
Requires: {
"or": [
"canMetroidAvoid",
"Ice",
{
"obstaclesCleared": [
"B"
]
}
]
}
{
"canShineCharge": {
"usedTiles": 22,
"openEnd": 0
}
}
"canChainTemporaryBlue"Exit condition: {
"leaveWithTemporaryBlue": {}
} |
|
Requires: "h_CrystalFlash"
{
"obstaclesNotCleared": [
"R-Mode"
]
} |
|
Place Power Bombs to kill the Metroids. By hitting the first Rinka, all of the Metroids (on a similar vertical height to the Power Bomb) will be damaged. Requires: {
"enemyKill": {
"enemies": [
[
"Metroid",
"Metroid",
"Metroid",
"Metroid"
]
],
"explicitWeapons": [
"PowerBombPeriphery"
]
}
}
{
"or": [
"canTrickyJump",
{
"ammo": {
"type": "PowerBomb",
"count": 2
}
}
]
}
{
"metroidFrames": 170
}Clears obstacles: A, B, f_KilledMetroidRoom1 Sets flags: f_KilledMetroidRoom1 Dev note: Using 1 pack of PBs isn't intuitive as a way to kill 4 metroids without grouping them. |
|
Group all of the Metroids by hitting the first Rinka with a Power Bomb. Once grouped, use two more Power Bombs to finish them off. Requires: {
"notable": "Power Bomb Dodge Kill (Right to Left)"
}
{
"enemyKill": {
"enemies": [
[
"Metroid",
"Metroid",
"Metroid",
"Metroid"
]
],
"explicitWeapons": [
"PowerBomb"
]
}
}
"canMetroidAvoid"Clears obstacles: A, B, f_KilledMetroidRoom1 Sets flags: f_KilledMetroidRoom1 |
|
Requires: {
"obstaclesCleared": [
"B"
]
}
{
"canShineCharge": {
"usedTiles": 31,
"openEnd": 1
}
}
"h_CrystalSpark"Dev note: FIXME: This may be possible with the Metroids alive, but is probably not worth considering. |
|
Do not kill all four Metroids, or else they cannot be farmed again, leaving only Crystal Flash as an option. Shinecharge at the left door, and then use a Rinka or the acid to interrupt. Requires: {
"obstaclesCleared": [
"R-Mode"
]
}
{
"or": [
{
"and": [
"h_CrystalFlashForReserveEnergy",
{
"or": [
"canInsaneJump",
{
"obstaclesCleared": [
"B"
]
}
]
}
]
},
{
"and": [
"canRiskPermanentLossOfAccess",
{
"not": "f_KilledMetroidRoom1"
},
"h_RModeCanRefillReserves",
"Ice",
{
"enemyKill": {
"enemies": [
[
"Metroid"
],
[
"Metroid"
],
[
"Metroid"
]
],
"explicitWeapons": [
"Missile",
"Super"
]
}
},
{
"partialRefill": {
"type": "ReserveEnergy",
"limit": 40
}
}
]
}
]
}
{
"or": [
{
"obstaclesCleared": [
"B"
]
},
"canMetroidAvoid",
"Ice"
]
}
{
"canShineCharge": {
"usedTiles": 29,
"openEnd": 1
}
}
{
"autoReserveTrigger": {
"maxReserveEnergy": 95
}
}
"canRModeSparkInterrupt"Resets obstacles: R-Mode |
|
Wait for the Rinka to spawn, then jump, so the trajectory is as high as possible. Space jump makes this a bit easier. If the Metroids are alive, lure them off screen to the left. Requires: {
"or": [
"canTrickyJump",
"SpaceJump"
]
}
{
"or": [
"canMetroidAvoid",
"canUseFrozenEnemies",
"ScrewAttack",
{
"obstaclesCleared": [
"B"
]
}
]
}Exit condition: {
"leaveWithGModeSetup": {}
} |
|
Requires: {
"not": "f_KilledMetroidRoom1"
}
"canRiskPermanentLossOfAccess"Exit condition: {
"leaveWithGModeSetup": {
"knockback": false
}
} |
|
Kill the Metroids while artificially morphed with just Spring Ball to avoid them. A Rinka must killed whith a Power Bomb while a Metroid is completely on screen in order for it to lure the other Metroids. Because of this, with extra ammo, it is possible to kill one or two of them before luring the rest. In general, this seems to be easiest by minimizing Samus's horizontal movement as much as possible and getting the Metroids in sync with each other while circling around her. While moving horizontally, their movement is less predictable and harder to sync. Note that it is necessary to exit G-Mode before exiting the room in order for the Metroids to remain killed. Entrance condition: {
"comeInWithGMode": {
"mode": "any",
"morphed": true
}
}Requires: "canMetroidAvoid"
"canInsaneJump"
"h_artificialMorphSpringBall"
{
"ammo": {
"type": "PowerBomb",
"count": 4
}
}Clears obstacles: A, B, f_KilledMetroidRoom1 Sets flags: f_KilledMetroidRoom1 Dev note: The rules for luring the Metroids are not completely clear, but this method works somwehat reliably here. This is possible with 3 Power Bombs, but it seems to infrequently work. |
|
Entrance condition: {
"comeInWithRMode": {}
}Clears obstacles: R-Mode |
|
On entry, kill or dodge the first Rinkas then Crystal Flash directly above or below a Rinka Spawner. Requires: {
"obstaclesCleared": [
"R-Mode"
]
}
{
"obstaclesCleared": [
"B"
]
}
"canRModeCrystalFlashInterrupt"
{
"ammo": {
"type": "Missile",
"count": 10
}
}
{
"ammo": {
"type": "Super",
"count": 10
}
}Resets obstacles: R-Mode Dev note: There could be a variant with the Metroids alive, but they will all lure to Samus and the light orb will disappear, so she will take heavy damage. This is not possible in G-mode, because the Power Bomb will kill the Rinka and prevent more from spawning. |
From: 2
Right Door
To: 2
Right Door
On entry, kill or dodge the first Rinkas then Crystal Flash. While in the light orb, Samus will be almost immune and the Metroids will take damage. Requires: {
"obstaclesCleared": [
"R-Mode"
]
}
"canComplexGMode"
"h_CrystalFlash"Clears obstacles: A, B, f_KilledMetroidRoom1 Resets obstacles: R-Mode Sets flags: f_KilledMetroidRoom1 |
From: 2
Right Door
To: 2
Right Door
On entry, kill or dodge the first Rinkas then Crystal Flash. While in the light orb, Samus will be almost immune and the Metroids will take damage. Note that it is necessary to exit G-Mode before exiting the room in order for the Metroids to remain killed. To do this, trigger Reserves in the acid or on a Rinka. To minimize damage taken, lure a Rinka away from its spawner before touching it to prevent multiple hits during the auto Reserve trigger. Entrance condition: {
"comeInWithGMode": {
"mode": "direct",
"morphed": true
}
}Requires: "canComplexGMode"
"h_artificialMorphCrystalFlash"
{
"autoReserveTrigger": {}
}Clears obstacles: A, B, f_KilledMetroidRoom1 Sets flags: f_KilledMetroidRoom1 Dev note: FIXME: Before reserve triggering, Samus could cross the acid pit. |
{
"$schema": "../../../schema/m3-room.schema.json",
"id": 226,
"name": "Metroid Room 1",
"area": "Tourian",
"subarea": "Main",
"roomAddress": "0x7DAE1",
"roomEnvironments": [
{
"heated": false
}
],
"mapTileMask": [
[
1,
1,
1,
1,
1,
1
]
],
"nodes": [
{
"id": 1,
"name": "Left Door",
"nodeType": "door",
"nodeSubType": "gray",
"nodeAddress": "0x001a9b4",
"doorOrientation": "left",
"doorEnvironments": [
{
"physics": "air"
}
],
"locks": [
{
"name": "Metroid Room 1 Gray Lock (to Metroid Room 2)",
"lockType": "killEnemies",
"unlockStrats": [
{
"name": "Base",
"requires": [
{
"obstaclesCleared": [
"A",
"B"
]
}
],
"flashSuitChecked": true,
"blueSuitChecked": true
}
],
"yields": [
"f_KilledMetroidRoom1"
]
}
],
"mapTileMask": [
[
2,
2,
2,
1,
1,
1
]
],
"devNote": [
"FIXME: Add doorunlock requirements on strats that get grabbed by metroids."
]
},
{
"id": 2,
"name": "Right Door",
"nodeType": "door",
"nodeSubType": "blue",
"nodeAddress": "0x001a9a8",
"doorOrientation": "right",
"doorEnvironments": [
{
"physics": "air"
}
],
"mapTileMask": [
[
1,
1,
1,
2,
2,
2
]
],
"devNote": [
"FIXME: Add doorunlock requirements on strats that get grabbed by metroids."
]
}
],
"obstacles": [
{
"id": "R-Mode",
"name": "Entered with R-Mode",
"obstacleType": "abstract"
},
{
"id": "A",
"name": "Left Two Metroids",
"obstacleType": "enemies"
},
{
"id": "B",
"name": "Right Two Metroids",
"obstacleType": "enemies"
},
{
"id": "f_KilledMetroidRoom1",
"name": "f_KilledMetroidRoom1"
}
],
"enemies": [
{
"id": "e1",
"groupName": "Metroid Room 1 Left Metroids",
"enemyName": "Metroid",
"quantity": 2,
"homeNodes": [
1
],
"stopSpawn": [
"f_KilledMetroidRoom1"
]
},
{
"id": "e2",
"groupName": "Metroid Room 1 Right Metroid",
"enemyName": "Metroid",
"quantity": 1,
"homeNodes": [
2
],
"stopSpawn": [
"f_KilledMetroidRoom1"
]
},
{
"id": "e3",
"groupName": "Metroid Room 1 Middle Metroid",
"enemyName": "Metroid",
"quantity": 1,
"homeNodes": [
2
],
"stopSpawn": [
"f_KilledMetroidRoom1"
]
},
{
"id": "e4",
"groupName": "Metroid Room 1 Left Rinkas",
"enemyName": "Rinka",
"quantity": 1,
"homeNodes": [
1
]
},
{
"id": "e5",
"groupName": "Metroid Room 1 Right Rinkas",
"enemyName": "Rinka",
"quantity": 2,
"homeNodes": [
2
]
}
],
"strats": [
{
"link": [
1,
1
],
"name": "Base (Unlock Door)",
"requires": [],
"unlocksDoors": [
{
"types": [
"ammo"
],
"requires": []
}
],
"flashSuitChecked": true,
"blueSuitChecked": true
},
{
"link": [
1,
1
],
"name": "Base (Come In Normally)",
"entranceCondition": {
"comeInNormally": {}
},
"requires": [],
"flashSuitChecked": true,
"blueSuitChecked": true
},
{
"link": [
1,
1
],
"name": "Base (Come In With Mockball)",
"entranceCondition": {
"comeInWithMockball": {
"adjacentMinTiles": 0,
"remoteAndLandingMinTiles": [
[
0,
0
]
],
"speedBooster": "any"
}
},
"requires": [],
"flashSuitChecked": true,
"blueSuitChecked": true
},
{
"name": "Base",
"requires": [
{
"obstaclesCleared": [
"A",
"B"
]
}
],
"flashSuitChecked": true,
"blueSuitChecked": true,
"link": [
1,
1
],
"setsFlags": [
"f_KilledMetroidRoom1"
],
"clearsObstacles": [
"f_KilledMetroidRoom1"
]
},
{
"link": [
2,
2
],
"name": "Base (Unlock Door)",
"requires": [],
"unlocksDoors": [
{
"types": [
"ammo"
],
"requires": []
}
],
"flashSuitChecked": true,
"blueSuitChecked": true
},
{
"link": [
2,
2
],
"name": "Base (Come In Normally)",
"entranceCondition": {
"comeInNormally": {}
},
"requires": [],
"flashSuitChecked": true,
"blueSuitChecked": true
},
{
"link": [
2,
2
],
"name": "Base (Come In With Mockball)",
"entranceCondition": {
"comeInWithMockball": {
"adjacentMinTiles": 0,
"remoteAndLandingMinTiles": [
[
0,
0
]
],
"speedBooster": "any"
}
},
"requires": [],
"flashSuitChecked": true,
"blueSuitChecked": true
},
{
"id": 93,
"link": [
1,
1
],
"name": "Metroids Dead",
"requires": [
{
  "or": [
    {
      "or": [
        "f_KilledMetroidRoom1",
        {
          "obstaclesCleared": [
            "f_KilledMetroidRoom1"
          ]
        }
      ]
    },
    {
      "obstaclesCleared": [
        "A",
        "B"
      ]
    }
  ]
}
],
"clearsObstacles": [
"A",
"B",
"f_KilledMetroidRoom1"
],
"setsFlags": [
"f_KilledMetroidRoom1"
],
"flashSuitChecked": true,
"blueSuitChecked": true
},
{
"id": 1,
"link": [
1,
1
],
"name": "Leave with Runway",
"requires": [],
"exitCondition": {
"leaveWithRunway": {
"length": 3,
"openEnd": 1
}
},
"flashSuitChecked": true,
"blueSuitChecked": true
},
{
"id": 2,
"link": [
1,
1
],
"name": "Leave With Runway - Frozen Rinka",
"requires": [
"h_frozenEnemyRunway"
],
"exitCondition": {
"leaveWithRunway": {
"length": 5,
"openEnd": 0
}
},
"flashSuitChecked": true,
"blueSuitChecked": true,
"note": [
"Stand a bit more than a tile away from the ledge and wait for the Rinka to start moving.",
"Freeze the Rinka at the correct height while maintaining a half-tile gap between the Rinka and the runway to extend it as much as possible."
]
},
{
"id": 77,
"link": [
1,
1
],
"name": "Leave With Side Platform",
"requires": [
"h_speedJump",
{
  "or": [
    "canMetroidAvoid",
    "Ice",
    {
      "obstaclesCleared": [
        "A"
      ]
    }
  ]
},
{
"or": [
"canMomentumConservingMorph",
{
"and": [
"canMomentumConservingTurnaround",
"canInsaneJump"
]
}
]
}
],
"exitCondition": {
"leaveWithSidePlatform": {
"height": 2,
"runway": {
"length": 31,
"openEnd": 1
},
"obstruction": [
3,
0
]
}
},
"flashSuitChecked": true,
"blueSuitChecked": true,
"note": [
"It is best to start 4 or 5 pixels from the end of the runway;",
"equivalently, start at the end of the runway and use arm pumps to advance 4 or 5 pixels while running."
],
"devNote": "Max extra run speed $5.7."
},
{
"id": 3,
"link": [
1,
1
],
"name": "Leave Shinecharged",
"requires": [
{
  "or": [
    "canMetroidAvoid",
    "Ice",
    {
      "obstaclesCleared": [
        "A"
      ]
    }
  ]
},
"canShinechargeMovement",
{
"canShineCharge": {
"usedTiles": 31,
"openEnd": 1
}
},
{
"shineChargeFrames": 40
}
],
"exitCondition": {
"leaveShinecharged": {}
},
"flashSuitChecked": true,
"blueSuitChecked": true
},
{
"id": 4,
"link": [
1,
1
],
"name": "Leave Spinning",
"requires": [
{
  "or": [
    "canMetroidAvoid",
    "Ice",
    {
      "obstaclesCleared": [
        "A"
      ]
    }
  ]
}
],
"exitCondition": {
"leaveSpinning": {
"remoteRunway": {
"length": 29,
"openEnd": 1
}
}
},
"flashSuitChecked": true,
"blueSuitChecked": true
},
{
"id": 5,
"link": [
1,
1
],
"name": "Leave With Mockball",
"requires": [
{
  "or": [
    "canMetroidAvoid",
    "Ice",
    {
      "obstaclesCleared": [
        "A"
      ]
    }
  ]
}
],
"exitCondition": {
"leaveWithMockball": {
"remoteRunway": {
"length": 28,
"openEnd": 1
},
"landingRunway": {
"length": 3,
"openEnd": 1
}
}
},
"flashSuitChecked": true,
"blueSuitChecked": true
},
{
"id": 6,
"link": [
1,
1
],
"name": "Leave With Spring Ball Bounce",
"requires": [
{
"or": [
"canMetroidAvoid",
"Ice",
{
"obstaclesCleared": [
"A"
]
}
]
}
],
"exitCondition": {
"leaveWithSpringBallBounce": {
"remoteRunway": {
"length": 25,
"openEnd": 1
},
"landingRunway": {
"length": 3,
"openEnd": 1
},
"movementType": "uncontrolled"
}
},
"flashSuitChecked": true,
"blueSuitChecked": true
},
{
"id": 7,
"link": [
1,
1
],
"name": "Leave Space Jumping",
"requires": [
{
"or": [
"canMetroidAvoid",
"Ice",
{
"obstaclesCleared": [
"A"
]
}
]
}
],
"exitCondition": {
"leaveSpaceJumping": {
"remoteRunway": {
"length": 22,
"openEnd": 0
}
}
},
"flashSuitChecked": true,
"blueSuitChecked": true
},
{
"id": 8,
"link": [
1,
1
],
"name": "Leave With Temporary Blue",
"requires": [
{
"or": [
"canMetroidAvoid",
"Ice",
{
"obstaclesCleared": [
"A"
]
}
]
},
{
"canShineCharge": {
"usedTiles": 30,
"openEnd": 1
}
},
"canChainTemporaryBlue"
],
"exitCondition": {
"leaveWithTemporaryBlue": {}
},
"flashSuitChecked": true,
"blueSuitChecked": true,
"note": "If it not possible to freeze or kill the Metroids, then move quickly enough that they get stuck off-camera to the right, and gain the shinecharge in a position where Samus can angle up and shoot the Rinka while waiting for the shinecharge timer to run out."
},
{
"id": 9,
"link": [
1,
1
],
"name": "Crystal Flash",
"requires": [
{
"obstaclesCleared": [
"A"
]
},
"h_CrystalFlash",
{
"obstaclesNotCleared": [
"R-Mode"
]
}
],
"flashSuitChecked": true,
"blueSuitChecked": true,
"note": [
"Be sure to be at a safe distance from Rinkas before performing the Crystal Flash."
]
},
{
"id": 10,
"link": [
1,
1
],
"name": "Tank and PB Kill",
"requires": [
{
"enemyKill": {
"enemies": [
[
"Metroid",
"Metroid",
"Metroid",
"Metroid"
]
],
"explicitWeapons": [
"PowerBombPeriphery"
]
}
},
{
"or": [
"canTrickyJump",
{
"ammo": {
"type": "PowerBomb",
"count": 2
}
}
]
},
{
"metroidFrames": 330
}
],
"clearsObstacles": [
"A",
"B",
"f_KilledMetroidRoom1"
],
"setsFlags": [
"f_KilledMetroidRoom1"
],
"flashSuitChecked": true,
"blueSuitChecked": true,
"note": [
"Place Power Bombs to kill the Metroids.",
"By hitting the first Rinka, all of the Metroids (on a similar vertical height to the Power Bomb) will be damaged."
],
"devNote": "Using 1 pack of PBs isn't intuitive as a way to kill 4 metroids without grouping them."
},
{
"id": 11,
"link": [
1,
1
],
"name": "PB Dodge Kill",
"requires": [
{
"enemyKill": {
"enemies": [
[
"Metroid",
"Metroid",
"Metroid",
"Metroid"
]
],
"explicitWeapons": [
"PowerBomb"
]
}
},
"canMetroidAvoid",
"canHitbox",
{
"or": [
{
"ammo": {
"type": "PowerBomb",
"count": 1
}
},
"canInsaneJump",
{
"metroidFrames": 100
}
]
}
],
"clearsObstacles": [
"A",
"B",
"f_KilledMetroidRoom1"
],
"setsFlags": [
"f_KilledMetroidRoom1"
],
"flashSuitChecked": true,
"blueSuitChecked": true,
"note": [
"Group all of the Metroids by hitting the first Rinka with a Power Bomb.",
"Once grouped, use two more Power Bombs to finish them off."
]
},
{
"id": 88,
"link": [
1,
1
],
"name": "Crystal Spark",
"requires": [
{
"obstaclesCleared": [
"A"
]
},
{
"canShineCharge": {
"usedTiles": 23,
"openEnd": 1
}
},
"h_CrystalSpark"
],
"flashSuitChecked": true,
"blueSuitChecked": true,
"devNote": "FIXME: This may be possible with the Metroids alive, but is probably not worth considering."
},
{
"id": 12,
"link": [
1,
1
],
"name": "G-Mode Setup - Get Hit By Rinka",
"requires": [],
"exitCondition": {
"leaveWithGModeSetup": {}
},
"flashSuitChecked": true,
"blueSuitChecked": true
},
{
"id": 13,
"link": [
1,
1
],
"name": "G-Mode Regain Mobility",
"requires": [
{
  "enemyDamage": {
    "enemy": "Rinka",
    "type": "contact",
    "hits": 1
  }
}
],
"gModeRegainMobility": {},
"flashSuitChecked": true,
"blueSuitChecked": true
},
{
"id": 14,
"link": [
1,
1
],
"name": "G-Mode Morph Power Bomb Metroid Kill",
"entranceCondition": {
"comeInWithGMode": {
"mode": "any",
"morphed": true
}
},
"requires": [
"canMetroidAvoid",
"canInsaneJump",
"h_artificialMorphSpringBall",
{
"ammo": {
"type": "PowerBomb",
"count": 3
}
},
{
"or": [
"canTrickyGMode",
{
"ammo": {
"type": "PowerBomb",
"count": 1
}
}
]
}
],
"clearsObstacles": [
"A",
"B",
"f_KilledMetroidRoom1"
],
"setsFlags": [
"f_KilledMetroidRoom1"
],
"flashSuitChecked": true,
"blueSuitChecked": true,
"note": [
"Kill the Metroids while artificially morphed with just Spring Ball to avoid them.",
"A Rinka must killed whith a Power Bomb while a Metroid is completely on screen in order for it to lure the other Metroids.",
"Because of this, with extra ammo, it is possible to kill one or two of them before luring the rest.",
"In general, this seems to be easiest by minimizing Samus's horizontal movement as much as possible and getting the Metroids in sync with each other while circling around her.",
"While moving horizontally, their movement is less predictable and harder to sync.",
"Note that it is necessary to exit G-Mode before exiting the room in order for the Metroids to remain killed.",
"With only 3 Power Bombs, bring the left two Metroids to the edge of the acid before using Power Bombs to lure them all."
],
"devNote": "The rules for luring the Metroids are not completely clear, but this method works somewhat reliably here."
},
{
"id": 81,
"link": [
1,
1
],
"name": "R-Mode Entry",
"entranceCondition": {
"comeInWithRMode": {}
},
"requires": [],
"clearsObstacles": [
"R-Mode"
],
"flashSuitChecked": true,
"blueSuitChecked": true
},
{
"id": 82,
"link": [
1,
1
],
"name": "R-Mode Crystal Flash Interrupt",
"requires": [
{
"obstaclesCleared": [
"R-Mode"
]
},
{
"obstaclesCleared": [
"A"
]
},
"canRModeCrystalFlashInterrupt",
{
"ammo": {
"type": "Missile",
"count": 10
}
},
{
"ammo": {
"type": "Super",
"count": 10
}
}
],
"resetsObstacles": [
"R-Mode"
],
"flashSuitChecked": true,
"blueSuitChecked": true,
"note": [
"On entry, kill or dodge the first Rinkas then Crystal Flash directly above or below a Rinka Spawner."
],
"devNote": [
"There could be a variant with the Metroids alive, but they will all lure to Samus and the light orb will disappear, so she will take heavy damage.",
"This is not possible in G-mode, because the Power Bomb will kill the Rinka and prevent more from spawning."
]
},
{
"id": 83,
"link": [
1,
1
],
"name": "R-Mode Crystal Flash Light Orb Metroid Kill",
"requires": [
{
"obstaclesCleared": [
"R-Mode"
]
},
"canComplexGMode",
"h_CrystalFlash"
],
"clearsObstacles": [
"A",
"B",
"f_KilledMetroidRoom1"
],
"resetsObstacles": [
"R-Mode"
],
"setsFlags": [
"f_KilledMetroidRoom1"
],
"flashSuitChecked": true,
"blueSuitChecked": true,
"note": [
"On entry, kill or dodge the first Rinkas then Crystal Flash. While in the light orb, Samus will be almost immune and the Metroids will take damage."
]
},
{
"id": 79,
"link": [
1,
1
],
"name": "Direct G-Mode Morph Crystal Flash Light Orb Metroid Kill",
"entranceCondition": {
"comeInWithGMode": {
"mode": "direct",
"morphed": true
}
},
"requires": [
"canComplexGMode",
"h_artificialMorphCrystalFlash",
{
"autoReserveTrigger": {}
}
],
"clearsObstacles": [
"A",
"B",
"f_KilledMetroidRoom1"
],
"setsFlags": [
"f_KilledMetroidRoom1"
],
"flashSuitChecked": true,
"blueSuitChecked": true,
"note": [
"On entry, kill or dodge the first Rinkas then Crystal Flash. While in the light orb, Samus will be almost immune and the Metroids will take damage.",
"Note that it is necessary to exit G-Mode before exiting the room in order for the Metroids to remain killed. To do this, trigger Reserves in the acid or on a Rinka.",
"To minimize damage taken, lure a Rinka away from its spawner before touching it to prevent multiple hits during the auto Reserve trigger."
],
"devNote": "FIXME: Before reserve triggering, Samus could cross the acid pit."
},
{
"id": 27,
"link": [
1,
1
],
"name": "Ammo Kill",
"requires": [
"Ice",
{
"enemyKill": {
"enemies": [
[
"Metroid",
"Metroid"
]
],
"explicitWeapons": [
"Super",
"Missile"
]
}
}
],
"clearsObstacles": [
"A"
],
"flashSuitChecked": true,
"blueSuitChecked": true
},
{
"id": 15,
"link": [
1,
2
],
"name": "Come In With Spark",
"entranceCondition": {
"comeInWithSpark": {
"position": "top"
}
},
"requires": [
{
  "shinespark": {
    "frames": 112,
    "excessFrames": 16
  }
}
],
"flashSuitChecked": true,
"blueSuitChecked": true,
"note": "Spark through the top of the door to avoid the platforms.",
"devNote": "FIXME: Add strats that come in charged and spark to save energy."
},
{
"id": 55,
"link": [
1,
2
],
"name": "Shinespark (Metroids Dead)",
"requires": [
{
"obstaclesCleared": [
"A",
"B"
]
},
{
"canShineCharge": {
"usedTiles": 31,
"openEnd": 0
}
},
"canHorizontalMidairShinespark",
{
"or": [
{
"shinespark": {
"frames": 37,
"excessFrames": 7
}
},
{
"and": [
"canControlShinesparkEnd",
{
"shinespark": {
"frames": 37,
"excessFrames": 22
}
}
]
}
]
}
],
"flashSuitChecked": true,
"blueSuitChecked": true
},
{
"id": 90,
"link": [
1,
2
],
"name": "Shinespark (Metroids Alive)",
"requires": [
{
"canShineCharge": {
"usedTiles": 26,
"openEnd": 0
}
},
"canHorizontalMidairShinespark",
{
"or": [
{
"and": [
"canMetroidAvoid",
{
"shinespark": {
"frames": 50,
"excessFrames": 5
}
}
]
},
{
"and": [
{
"shinespark": {
"frames": 54,
"excessFrames": 0
}
},
{
"metroidFrames": 300
}
]
}
]
}
],
"flashSuitChecked": true,
"blueSuitChecked": true,
"note": [
"Shinecharge just before the second Metroid comes on camera, jump over it and spark against the ceiling to avoid the rest of them.",
"Sparking lower will likely get Samus grabbed by the right-most Metroid."
]
},
{
"id": 16,
"link": [
1,
2
],
"name": "Acid Skip CWJ",
"requires": [
{
"notable": "Acid Skip CWJ"
},
"canCWJ",
"canInsaneWalljump",
{
"or": [
{
"obstaclesCleared": [
"A",
"B"
]
},
"canDodgeWhileShooting"
]
}
],
"flashSuitChecked": true,
"blueSuitChecked": true,
"note": [
"Align with the wall below the door while facing left.",
"Hold dash, turn around, start running and arm pump once.",
"Jump from the rightmost 'X' in the background.",
"Release forward at some point while airborne, but repress it again before the CWJ.",
"Immediately after the CWJ, shoot the Metroid to avoid getting grabbed."
]
},
{
"id": 54,
"link": [
1,
2
],
"name": "Speed Jump",
"requires": [
{
"getBlueSpeed": {
"usedTiles": 31,
"openEnd": 1
}
},
"h_blueJump",
"canCarefulJump",
{
"or": [
{
"obstaclesCleared": [
"A",
"B"
]
},
"Ice",
"ScrewAttack",
"canPseudoScrew",
"canMetroidAvoid",
{
"metroidFrames": 130
}
]
}
],
"flashSuitChecked": true,
"blueSuitChecked": true,
"note": "Use the full runway to gain blue speed and enough speed to reach the far platform."
},
{
"id": 53,
"link": [
1,
2
],
"name": "Space Jump",
"requires": [
"SpaceJump",
{
"or": [
{
"obstaclesCleared": [
"A",
"B"
]
},
"Ice",
"ScrewAttack",
"canPseudoScrew",
{
"haveBlueSuit": {}
},
"canMetroidAvoid",
{
"metroidFrames": 270
}
]
}
],
"flashSuitChecked": true,
"blueSuitChecked": true
},
{
"id": 17,
"link": [
1,
2
],
"name": "Blue Space Jump",
"requires": [
{
"getBlueSpeed": {
"usedTiles": 31,
"openEnd": 1
}
},
"canBlueSpaceJump"
],
"flashSuitChecked": true,
"blueSuitChecked": true
},
{
"id": 18,
"link": [
1,
2
],
"name": "Blue Space Jump, Into the Room",
"entranceCondition": {
"comeInGettingBlueSpeed": {
"length": 1,
"openEnd": 1
}
},
"requires": [
"canBlueSpaceJump"
],
"flashSuitChecked": true,
"blueSuitChecked": true,
"note": "Jump Immediately upon entry, or before the transition.",
"devNote": "There is 1 unusable tile in this runway."
},
{
"id": 56,
"link": [
1,
2
],
"name": "Spring Ball Bounce",
"requires": [
"canSpringBallBounce",
"canCarefulJump",
{
"or": [
{
"obstaclesCleared": [
"A",
"B"
]
},
"canMetroidAvoid",
{
"metroidFrames": 200
}
]
}
],
"flashSuitChecked": true,
"blueSuitChecked": true,
"note": [
"At max run speed without SpeedBooster, you can bounce on both platforms and avoid all acid.",
"Jump from the center of the rightmost X in the background.",
"Bounce again on the second platform to avoid any Metroid or Rinkas."
],
"devNote": "Just doing the strat avoids almost all damage, so metroidframes values are mostly artificial."
},
{
"id": 57,
"link": [
1,
2
],
"name": "Frozen Enemy",
"requires": [
"canTrickyUseFrozenEnemies",
"canTrickyJump",
"canCameraManip",
{
"or": [
"canInsaneJump",
{
"and": [
{
"not": "f_KilledMetroidRoom1"
},
"canRiskPermanentLossOfAccess"
]
}
]
}
],
"flashSuitChecked": true,
"blueSuitChecked": true,
"note": [
"Freeze the middle Metroid as soon as it comes on screen to use as a platform to cross over the acid.",
"If no Metroids are alive, the far left Rinka can be used instead, at a high angle.",
"The left Rinka can also just be used to setup an angle with the Rinka near the left edge of the pool."
]
},
{
"id": 58,
"link": [
1,
2
],
"name": "Rinka Damage Boost",
"requires": [
{
"notable": "Rinka Damage Boost"
},
{
"enemyDamage": {
"enemy": "Rinka",
"type": "contact",
"hits": 1
}
},
"canDash",
"canTrickyJump",
"canHorizontalDamageBoost",
"canCameraManip",
{
"or": [
{
"obstaclesCleared": [
"A",
"B"
]
},
"canMetroidAvoid"
]
}
],
"flashSuitChecked": true,
"blueSuitChecked": true,
"note": [
"Aim the leftmost Rinka to travel horizontally across the top of the room and use it to damage boost between the two floating platforms.",
"Killing the Rinka will normalize it's respawn timer, which may help in setting up the correct angle.",
"Let the Rinka stay far enough ahead of Samus that she can jump the full distance to the first platform without hitting it.",
"And then once it has reached the right edge of the platform, use it to damage boost."
]
},
{
"id": 59,
"link": [
1,
2
],
"name": "Acid Dip",
"requires": [
"canDash",
{
"or": [
{
"and": [
"Gravity",
{
"acidFrames": 10
}
]
},
{
"and": [
{
"or": [
"canWalljump",
"HiJump"
]
},
{
"acidFrames": 20
}
]
}
]
},
{
"or": [
{
"obstaclesCleared": [
"A",
"B"
]
},
"Ice",
"ScrewAttack",
{
"and": [
"canPseudoScrew",
{
"or": [
"canTrickyJump",
"canWalljumpWithCharge",
"HiJump",
"Gravity"
]
}
]
},
"canMetroidAvoid",
{
"metroidFrames": 150
}
]
}
],
"flashSuitChecked": true,
"blueSuitChecked": true
},
{
"id": 94,
"link": [
1,
2
],
"name": "Blue Suit Acid Dip",
"requires": [
{
"haveBlueSuit": {}
},
{
"or": [
{
"and": [
"Gravity",
{
"acidFrames": 30
}
]
},
{
"and": [
"canPreciseWalljump",
{
"acidFrames": 60
}
]
},
{
"and": [
"HiJump",
{
"acidFrames": 130
}
]
},
{
"acidFrames": 140
}
]
}
],
"flashSuitChecked": true,
"blueSuitChecked": true
},
{
"id": 95,
"link": [
1,
2
],
"name": "Blue Suit Spring Fling Acid Dip",
"requires": [
{
"haveBlueSuit": {}
},
"canSpringFling",
{
"or": [
{
"and": [
"Gravity",
{
"acidFrames": 15
}
]
},
{
"and": [
"canWalljump",
{
"acidFrames": 20
}
]
},
{
"and": [
"HiJump",
{
"disableEquipment": "HiJump"
},
{
"acidFrames": 20
}
]
},
{
"acidFrames": 75
}
]
}
],
"flashSuitChecked": true,
"blueSuitChecked": true
},
{
"id": 96,
"link": [
1,
2
],
"name": "Blue Suit Spring Ball Bomb Jump Acid Dip",
"requires": [
{
"haveBlueSuit": {}
},
"canSpringBallBombJump",
"canInsaneJump",
{
"or": [
{
"and": [
"Gravity",
{
"acidFrames": 15
}
]
},
{
"and": [
"canWalljump",
{
"acidFrames": 20
}
]
},
{
"and": [
"HiJump",
{
"disableEquipment": "HiJump"
},
{
"acidFrames": 20
}
]
},
{
"acidFrames": 75
}
]
}
],
"flashSuitChecked": true,
"blueSuitChecked": true
},
{
"id": 60,
"link": [
1,
2
],
"name": "Acid Run",
"requires": [
"canDash",
{
"acidFrames": 65
},
{
"or": [
{
"obstaclesCleared": [
"A",
"B"
]
},
{
"and": [
"canMetroidAvoid",
"canInsaneJump"
]
},
"ScrewAttack",
{
"and": [
"canPseudoScrew",
"canTrickyJump"
]
},
{
"metroidFrames": 150
}
]
},
{
"or": [
"canTrickyJump",
{
"enemyDamage": {
"enemy": "Rinka",
"type": "contact",
"hits": 1
}
}
]
}
],
"flashSuitChecked": true,
"blueSuitChecked": true,
"note": "Spin jump often to reduce the amount of time spent in the acid."
},
{
"id": 61,
"link": [
1,
2
],
"name": "Acid Bounce Ball",
"requires": [
{
"acidFrames": 45
},
"canBounceBall",
"canLateralMidAirMorph",
"can4HighMidAirMorph",
{
"or": [
{
"obstaclesCleared": [
"A",
"B"
]
},
{
"and": [
"canTrickyDodgeEnemies",
"canMetroidAvoid",
{
"acidFrames": 5
}
]
}
]
}
],
"flashSuitChecked": true,
"blueSuitChecked": true,
"note": [
"Jump from the left platform and mid air morph to bounce through the lava quickly.",
"This is only useful when morphing before reaching the ceiling."
],
"devNote": "Freezing a Metroid while exiting the acid is difficult but manageable."
},
{
"id": 62,
"link": [
1,
2
],
"name": "Bomb Jump",
"requires": [
"canDash",
{
"or": [
{
"obstaclesCleared": [
"A"
]
},
{
"and": [
"canCameraManip",
"canMetroidAvoid"
]
}
]
},
{
"or": [
{
"and": [
"canHBJ",
"canResetFallSpeed"
]
},
{
"and": [
{
"obstaclesCleared": [
"A"
]
},
"canDiagonalBombJump"
]
},
"canCeilingBombJump"
]
}
],
"flashSuitChecked": true,
"blueSuitChecked": true,
"note": "Bomb Jump between the two floating platforms.",
"devNote": [
"FIXME: This is probably possible dashless."
]
},
{
"id": 19,
"link": [
1,
2
],
"name": "G-Mode Morph Ceiling Bomb Jump",
"entranceCondition": {
"comeInWithGMode": {
"mode": "any",
"morphed": true
}
},
"requires": [
{
"or": [
"f_KilledMetroidRoom1",
{
"obstaclesCleared": [
"f_KilledMetroidRoom1"
]
}
]
},
"h_artificialMorphLongCeilingBombJump",
"canBePatient"
],
"flashSuitChecked": true,
"blueSuitChecked": true
},
{
"id": 74,
"link": [
1,
2
],
"name": "Use Stored Spark",
"requires": [
{
"or": [
{
"obstaclesCleared": [
"A",
"B"
]
},
"canMetroidAvoid"
]
},
"h_storedSpark",
"canDash",
{
"shinespark": {
"frames": 4,
"excessFrames": 2
}
}
],
"flashSuitChecked": true,
"blueSuitChecked": true
},
{
"id": 20,
"link": [
1,
2
],
"name": "Leave Spinning (Space Jump)",
"requires": [
{
"or": [
"canTrickyDodgeEnemies",
{
"and": [
"canMetroidAvoid",
"Ice"
]
},
"ScrewAttack",
"canPseudoScrew",
{
"obstaclesCleared": [
"A",
"B"
]
}
]
},
"canTrickyJump",
"SpaceJump"
],
"exitCondition": {
"leaveSpinning": {
"remoteRunway": {
"length": 31,
"openEnd": 1
}
}
},
"unlocksDoors": [
{
"types": [
"ammo"
],
"requires": []
}
],
"flashSuitChecked": true,
"blueSuitChecked": true,
"devNote": [
"Requires preopening the door, so this is more difficult than a normal MetroidAvoid.",
"FIXME: Blue speed can be used to protect against metroid damage, in the canTrickyDodgeEnemies case;",
"but could there be a scenario where having blue speed is incompatible for what is needed in the next room?",
"We made the 'blue' property for this kind of thing; the trouble is that the entrance conditions are written for either blue or not-blue, not either."
]
},
{
"id": 21,
"link": [
1,
2
],
"name": "Leave With Mockball (Space Jump)",
"requires": [
{
"or": [
"canTrickyDodgeEnemies",
{
"and": [
"canMetroidAvoid",
"Ice"
]
},
"ScrewAttack",
"canPseudoScrew",
{
"obstaclesCleared": [
"A",
"B"
]
}
]
},
"canPreciseSpaceJump"
],
"exitCondition": {
"leaveWithMockball": {
"remoteRunway": {
"length": 31,
"openEnd": 1
},
"landingRunway": {
"length": 3,
"openEnd": 1
}
}
},
"unlocksDoors": [
{
"types": [
"ammo"
],
"requires": []
}
],
"flashSuitChecked": true,
"blueSuitChecked": true,
"devNote": [
"It is possible to open the door with ammo and mockball out in one motion.",
"But the timing makes it harder than crossing the room multiple times."
]
},
{
"id": 22,
"link": [
1,
2
],
"name": "Leave With Spring Ball Bounce (Space Jump)",
"requires": [
{
"or": [
"canTrickyDodgeEnemies",
{
"and": [
"canMetroidAvoid",
"Ice"
]
},
"ScrewAttack",
"canPseudoScrew",
{
"obstaclesCleared": [
"A",
"B"
]
}
]
},
"canTrickyJump",
"canPreciseSpaceJump"
],
"exitCondition": {
"leaveWithSpringBallBounce": {
"remoteRunway": {
"length": 31,
"openEnd": 1
},
"landingRunway": {
"length": 3,
"openEnd": 1
},
"movementType": "uncontrolled"
}
},
"unlocksDoors": [
{
"types": [
"ammo"
],
"requires": []
}
],
"flashSuitChecked": true,
"blueSuitChecked": true
},
{
"id": 23,
"link": [
1,
2
],
"name": "Leave With Controlled Spring Ball Bounce",
"requires": [
{
"or": [
"canTrickyDodgeEnemies",
{
"and": [
"canMetroidAvoid",
"Ice"
]
},
"ScrewAttack",
"canPseudoScrew",
{
"obstaclesCleared": [
"A",
"B"
]
}
]
},
"canTrickySpringBallBounce"
],
"exitCondition": {
"leaveWithSpringBallBounce": {
"remoteRunway": {
"length": 31,
"openEnd": 1
},
"landingRunway": {
"length": 3,
"openEnd": 1
},
"minExtraRunSpeed": "$1.3",
"movementType": "controlled"
}
},
"unlocksDoors": [
{
"types": [
"ammo"
],
"requires": []
}
],
"flashSuitChecked": true,
"blueSuitChecked": true,
"devNote": [
"FIXME: It is possible to open the door and leave with a controlled bounce in one motion.",
"But then avoiding damage becomes unreliable."
]
},
{
"id": 24,
"link": [
1,
2
],
"name": "Leave Space Jumping",
"requires": [
{
"or": [
"canTrickyDodgeEnemies",
{
"and": [
"canMetroidAvoid",
"Ice"
]
},
"ScrewAttack",
"canPseudoScrew",
{
"obstaclesCleared": [
"A",
"B"
]
}
]
},
"canPreciseSpaceJump"
],
"exitCondition": {
"leaveSpaceJumping": {
"remoteRunway": {
"length": 31,
"openEnd": 1
}
}
},
"unlocksDoors": [
{
"types": [
"ammo"
],
"requires": []
}
],
"flashSuitChecked": true,
"blueSuitChecked": true
},
{
"id": 63,
"link": [
2,
1
],
"name": "Space Jump",
"requires": [
"SpaceJump",
{
"or": [
{
"obstaclesCleared": [
"B"
]
},
"ScrewAttack",
"canPseudoScrew",
{
"haveBlueSuit": {}
},
"Ice",
"canMetroidAvoid",
{
"metroidFrames": 420
}
]
}
],
"flashSuitChecked": true,
"blueSuitChecked": true
},
{
"id": 64,
"link": [
2,
1
],
"name": "Speed Jump",
"requires": [
"h_speedJump",
"canCarefulJump",
{
"or": [
"canPreciseWalljump",
"canTrickyJump"
]
},
{
"or": [
{
"obstaclesCleared": [
"A",
"B"
]
},
"Ice",
"canMetroidAvoid",
{
"metroidFrames": 200
}
]
},
{
"or": [
"canTrickyJump",
{
"acidFrames": 27
},
{
"and": [
{
"acidFrames": 16
},
"canPreciseWalljump"
]
},
{
"and": [
{
"acidFrames": 16
},
"Gravity"
]
}
]
}
],
"flashSuitChecked": true,
"blueSuitChecked": true
},
{
"id": 65,
"link": [
2,
1
],
"name": "Spring Ball Bounce",
"requires": [
"canSpringBallBounce",
"canCarefulJump",
{
"or": [
{
"obstaclesCleared": [
"A",
"B"
]
},
{
"and": [
"canTrickyJump",
"canMetroidAvoid",
"canTrickyDodgeEnemies"
]
},
{
"metroidFrames": 270
}
]
}
],
"flashSuitChecked": true,
"blueSuitChecked": true,
"note": [
"At max non-speed run speed, Spring Ball bounce on both platforms and avoid all acid.",
"Land on the right side of the first platform to avoid the second Metroid.",
"Bouncing on the second platform will usually avoid the third Metroid."
]
},
{
"id": 66,
"link": [
2,
1
],
"name": "Frozen Rinka or Metroid",
"requires": [
"canTrickyUseFrozenEnemies",
"canTrickyJump",
"canCameraManip",
{
"or": [
"canDash",
"canInsaneJump"
]
}
],
"flashSuitChecked": true,
"blueSuitChecked": true,
"note": [
"Use the lower Rinka as a platform to setup the angle for the top Rinka.",
"Then use the frozen Rinka to cross the acid.",
"Alternatively, if the Metroids are alive, the second one can be frozen immediately once it is on camera to use as a platform."
]
},
{
"id": 67,
"link": [
2,
1
],
"name": "Rinka Damage Boost",
"requires": [
{
"notable": "Rinka Damage Boost"
},
{
"enemyDamage": {
"enemy": "Rinka",
"type": "contact",
"hits": 1
}
},
"canDash",
"canTrickyJump",
"canHorizontalDamageBoost",
"canCameraManip",
{
"or": [
{
"obstaclesCleared": [
"A",
"B"
]
},
{
"and": [
"canMetroidAvoid",
"canUseIFrames"
]
}
]
},
{
"or": [
"canInsaneJump",
{
"enemyDamage": {
"enemy": "Rinka",
"type": "contact",
"hits": 1
}
},
{
"and": [
"canTrickyJump",
"canLateralMidAirMorph"
]
},
{
"and": [
"Gravity",
{
"acidFrames": 16
}
]
},
{
"acidFrames": 27
}
]
}
],
"flashSuitChecked": true,
"blueSuitChecked": true,
"note": [
"Aim the ceiling Rinka to travel horizontally across the top of the room and use it to damage boost between the two floating platforms.",
"Killing the lower Rinka shortly before killing the higher Rinka will synchronize their respawn timers so that Samus can jump when the lower Rinka reappears in order to get a good angle on the higher Rinka.",
"Jump to the floating platform ahead of the high Rinka, jumping extra high to lead the Metroid out of the way if it is alive.",
"Jump into the Rinka once it reaches the left edge of the platform to reach the next platform.",
"Then use i-frames to pass through the Metroid if it is still alive."
]
},
{
"id": 68,
"link": [
2,
1
],
"name": "Acid Dip",
"requires": [
{
"or": [
{
"and": [
"canTrickyWalljump",
{
"acidFrames": 20
}
]
},
{
"and": [
"HiJump",
"canWalljump",
{
"acidFrames": 50
}
]
},
{
"and": [
"HiJump",
"canPreciseWalljump",
{
"acidFrames": 20
}
]
},
{
"and": [
"Gravity",
{
"acidFrames": 10
}
]
}
]
},
{
"or": [
{
"obstaclesCleared": [
"A",
"B"
]
},
"Ice",
"ScrewAttack",
"canMetroidAvoid",
{
"and": [
"canPseudoScrew",
"canTrickyJump"
]
},
{
"metroidFrames": 420
}
]
},
{
"or": [
"canInsaneJump",
{
"and": [
"canTrickyJump",
"canLateralMidAirMorph"
]
},
{
"and": [
"canTrickyJump",
"canPreciseWalljump",
{
"acidFrames": 16
}
]
},
{
"and": [
"Gravity",
{
"acidFrames": 16
}
]
},
{
"acidFrames": 27
}
]
}
],
"flashSuitChecked": true,
"blueSuitChecked": true,
"devNote": [
"1) Jump from the acid to the floating platform.",
"2) Deal with the Metroid.",
"3) Jump from the platform to the ledge, potentially falling in acid."
]
},
{
"id": 97,
"link": [
2,
1
],
"name": "Blue Suit Acid Dip",
"requires": [
{
"haveBlueSuit": {}
},
{
"or": [
{
"and": [
"Gravity",
{
"acidFrames": 30
}
]
},
{
"and": [
"canWalljump",
{
"acidFrames": 40
}
]
},
{
"acidFrames": 80
}
]
}
],
"flashSuitChecked": true,
"blueSuitChecked": true
},
{
"id": 98,
"link": [
2,
1
],
"name": "Blue Suit Spring Fling Acid Dip",
"requires": [
{
"haveBlueSuit": {}
},
"canSpringFling",
{
"acidFrames": 65
}
],
"flashSuitChecked": true,
"blueSuitChecked": true
},
{
"id": 69,
"link": [
2,
1
],
"name": "Acid Run",
"requires": [
"canDash",
"canCarefulJump",
{
"acidFrames": 65
},
{
"or": [
{
"obstaclesCleared": [
"A",
"B"
]
},
"Ice",
"ScrewAttack",
{
"and": [
"canPseudoScrew",
"canDodgeWhileShooting"
]
},
{
"and": [
"canInsaneJump",
"canMetroidAvoid"
]
},
{
"metroidFrames": 670
}
]
}
],
"flashSuitChecked": true,
"blueSuitChecked": true
},
{
"id": 70,
"link": [
2,
1
],
"name": "Blue Space Jump",
"requires": [
{
"getBlueSpeed": {
"usedTiles": 22,
"openEnd": 1
}
},
"canBlueSpaceJump",
{
"metroidFrames": 67
}
],
"flashSuitChecked": true,
"blueSuitChecked": true
},
{
"id": 71,
"link": [
2,
1
],
"name": "Shinespark (Metroids Dead)",
"requires": [
{
"obstaclesCleared": [
"A",
"B"
]
},
"canHorizontalMidairShinespark",
{
"canShineCharge": {
"usedTiles": 23,
"openEnd": 0
}
},
{
"or": [
{
"shinespark": {
"frames": 80,
"excessFrames": 48
}
},
{
"and": [
"canShinechargeMovementComplex",
{
"shinespark": {
"frames": 68,
"excessFrames": 38
}
}
]
}
]
}
],
"flashSuitChecked": true,
"blueSuitChecked": true
},
{
"id": 91,
"link": [
2,
1
],
"name": "Shinespark (Metroids Dead, Diagonal Spark)",
"requires": [
{
"obstaclesCleared": [
"A",
"B"
]
},
{
"canShineCharge": {
"usedTiles": 23,
"openEnd": 0
}
},
"canShinechargeMovementComplex",
{
"shinespark": {
"frames": 7,
"excessFrames": 2
}
},
{
"or": [
"canInsaneJump",
{
"and": [
"canTrickyJump",
"canLateralMidAirMorph"
]
},
{
"and": [
"canTrickyJump",
"canPreciseWalljump",
{
"acidFrames": 16
}
]
},
{
"and": [
"Gravity",
{
"acidFrames": 16
}
]
},
{
"acidFrames": 27
}
]
}
],
"flashSuitChecked": true,
"blueSuitChecked": true,
"devNote": "This strat only makes sense without canSpeedyJump."
},
{
"id": 92,
"link": [
2,
1
],
"name": "Shinespark (Metroids Alive)",
"requires": [
"canHorizontalMidairShinespark",
{
"canShineCharge": {
"usedTiles": 23,
"openEnd": 0
}
},
{
"or": [
"Ice",
{
"and": [
"canDodgeWhileShooting",
"ScrewAttack"
]
},
{
"and": [
"canDodgeWhileShooting",
"canPseudoScrew"
]
},
"canMetroidAvoid",
{
"metroidFrames": 200
}
]
},
{
"shinespark": {
"frames": 80,
"excessFrames": 5
}
}
],
"flashSuitChecked": true,
"blueSuitChecked": true
},
{
"id": 72,
"link": [
2,
1
],
"name": "Infinite Bomb Jump",
"requires": [
{
"obstaclesCleared": [
"A",
"B"
]
},
{
"or": [
"canCeilingBombJump",
"canDiagonalBombJump"
]
}
],
"flashSuitChecked": true,
"blueSuitChecked": true,
"note": "Bomb Jump between the two floating platforms."
},
{
"id": 75,
"link": [
2,
1
],
"name": "Use Stored Spark",
"requires": [
"canMetroidAvoid",
"h_storedSpark",
"canDash",
{
"shinespark": {
"frames": 8,
"excessFrames": 1
}
},
{
"or": [
"canInsaneJump",
{
"and": [
"canTrickyJump",
"canLateralMidAirMorph"
]
},
{
"and": [
"canTrickyJump",
"canPreciseWalljump",
{
"acidFrames": 16
}
]
},
{
"and": [
"Gravity",
{
"acidFrames": 16
}
]
},
{
"acidFrames": 27
}
]
}
],
"flashSuitChecked": true,
"blueSuitChecked": true,
"note": [
"While on the first platform, perform a long jump to the left then diagonally spark low into the side of the next platform.",
"This will put Samus into a position where the Metroid will swoop underneath her."
],
"devNote": "This is only useful with a flash suit without Speed Booster."
},
{
"id": 76,
"link": [
2,
1
],
"name": "Use Stored Spark, Metroids Cleared",
"requires": [
{
"obstaclesCleared": [
"A",
"B"
]
},
"h_storedSpark",
"canDash",
{
"shinespark": {
"frames": 4,
"excessFrames": 2
}
},
{
"or": [
"canInsaneJump",
{
"and": [
"canTrickyJump",
"canLateralMidAirMorph"
]
},
{
"and": [
"canTrickyJump",
"canPreciseWalljump",
{
"acidFrames": 16
}
]
},
{
"and": [
"Gravity",
{
"acidFrames": 16
}
]
},
{
"acidFrames": 27
}
]
}
],
"flashSuitChecked": true,
"blueSuitChecked": true
},
{
"id": 28,
"link": [
2,
1
],
"name": "Come In With Spark",
"entranceCondition": {
"comeInWithSpark": {
"position": "top"
}
},
"requires": [
{
  "shinespark": {
    "frames": 112,
    "excessFrames": 35
  }
}
],
"flashSuitChecked": true,
"blueSuitChecked": true,
"note": "Spark through the top of the door to avoid the platforms.",
"devNote": "FIXME: Add strats that come in charged and spark to save energy."
},
{
"id": 29,
"link": [
2,
1
],
"name": "Blue Space Jump, Into the Room",
"entranceCondition": {
"comeInGettingBlueSpeed": {
"length": 1,
"openEnd": 1
}
},
"requires": [
"canBlueSpaceJump"
],
"flashSuitChecked": true,
"blueSuitChecked": true,
"note": "Jump Immediately upon entry, or before the transition.",
"devNote": "There is 1 unusable tile in this runway."
},
{
"id": 30,
"link": [
2,
1
],
"name": "G-Mode Morph Ceiling Bomb Jump",
"entranceCondition": {
"comeInWithGMode": {
"mode": "any",
"morphed": true
}
},
"requires": [
{
"or": [
"f_KilledMetroidRoom1",
{
"obstaclesCleared": [
"f_KilledMetroidRoom1"
]
}
]
},
"h_artificialMorphCeilingBombJump"
],
"flashSuitChecked": true,
"blueSuitChecked": true
},
{
"id": 31,
"link": [
2,
1
],
"name": "Grapple Teleport",
"entranceCondition": {
"comeInWithGrappleTeleport": {
"blockPositions": [
[
7,
2
]
]
}
},
"requires": [],
"flashSuitChecked": true,
"blueSuitChecked": true
},
{
"id": 32,
"link": [
2,
1
],
"name": "Grapple Teleport Door Lock Skip",
"entranceCondition": {
"comeInWithGrappleTeleport": {
"blockPositions": [
[
3,
12
],
[
3,
13
]
]
}
},
"requires": [],
"bypassesDoorShell": "yes",
"flashSuitChecked": true,
"blueSuitChecked": true
},
{
"id": 33,
"link": [
2,
1
],
"name": "Carry Grapple Teleport (Top Position)",
"entranceCondition": {
"comeInWithGrappleTeleport": {
"blockPositions": [
[
3,
12
]
]
}
},
"requires": [],
"exitCondition": {
"leaveWithGrappleTeleport": {
"blockPositions": [
[
3,
12
]
]
}
},
"bypassesDoorShell": "yes",
"flashSuitChecked": true,
"blueSuitChecked": true
},
{
"id": 34,
"link": [
2,
1
],
"name": "Carry Grapple Teleport (Bottom Position)",
"entranceCondition": {
"comeInWithGrappleTeleport": {
"blockPositions": [
[
3,
13
]
]
}
},
"requires": [],
"exitCondition": {
"leaveWithGrappleTeleport": {
"blockPositions": [
[
3,
13
]
]
}
},
"bypassesDoorShell": "yes",
"flashSuitChecked": true,
"blueSuitChecked": true
},
{
"id": 51,
"link": [
2,
2
],
"name": "Ammo Kill",
"requires": [
"Ice",
{
"enemyKill": {
"enemies": [
[
"Metroid",
"Metroid"
]
],
"explicitWeapons": [
"Super",
"Missile"
]
}
}
],
"clearsObstacles": [
"B"
],
"flashSuitChecked": true,
"blueSuitChecked": true
},
{
"id": 99,
"link": [
2,
2
],
"name": "Metroids Dead",
"requires": [
{
  "or": [
    {
      "or": [
        "f_KilledMetroidRoom1",
        {
          "obstaclesCleared": [
            "f_KilledMetroidRoom1"
          ]
        }
      ]
    },
    {
      "obstaclesCleared": [
        "A",
        "B"
      ]
    }
  ]
}
],
"clearsObstacles": [
"A",
"B",
"f_KilledMetroidRoom1"
],
"setsFlags": [
"f_KilledMetroidRoom1"
],
"flashSuitChecked": true,
"blueSuitChecked": true
},
{
"id": 35,
"link": [
2,
2
],
"name": "Leave with Runway",
"requires": [],
"exitCondition": {
"leaveWithRunway": {
"length": 3,
"openEnd": 1
}
},
"flashSuitChecked": true,
"blueSuitChecked": true
},
{
"id": 36,
"link": [
2,
2
],
"name": "Leave With Runway - Frozen Rinka or Metroid",
"requires": [
{
  "or": [
    "h_trickyFrozenEnemyRunway",
    {
      "and": [
        "h_frozenEnemyRunway",
        {
          "not": "f_KilledMetroidRoom1"
        },
        "canRiskPermanentLossOfAccess"
      ]
    }
  ]
}
],
"exitCondition": {
"leaveWithRunway": {
"length": 4,
"openEnd": 1
}
},
"flashSuitChecked": true,
"blueSuitChecked": true,
"note": [
"Use a frozen Metroid or a Rinka from the left to extend the length of the runway.",
"Luring a Rinka is easiest with Morph - While morphed, barely move the bottom Rinka spawner on camera in order to have it shoot at a usable angle.",
"Without Morph, use the top Rinka spawner and jump just before the Rinka starts moving to get a usable angle."
]
},
{
"id": 78,
"link": [
2,
2
],
"name": "Leave With Side Platform",
"requires": [
"h_speedJump",
{
"or": [
"canMetroidAvoid",
{
"obstaclesCleared": [
"B"
]
}
]
},
{
"or": [
"canMomentumConservingMorph",
{
"and": [
"canMomentumConservingTurnaround",
"canInsaneJump"
]
}
]
}
],
"exitCondition": {
"leaveWithSidePlatform": {
"height": 2,
"runway": {
"length": 23,
"openEnd": 1
},
"obstruction": [
3,
0
]
}
},
"flashSuitChecked": true,
"blueSuitChecked": true,
"devNote": [
"Max extra run speed $4.7.",
"Using almost the full runway (between 3 and 6 pixels from the edge), the momentum conserving turnaround has a 2-frame window for the jump,",
"and a 1-frame or 3-frame window for the turnaround, depending on the jump (with a last-frame jump giving the larger window)."
]
},
{
"id": 37,
"link": [
2,
2
],
"name": "Leave Shinecharged",
"requires": [
{
  "or": [
    "canMetroidAvoid",
    "Ice",
    {
      "obstaclesCleared": [
        "B"
      ]
    }
  ]
},
"canShinechargeMovement",
{
"canShineCharge": {
"usedTiles": 23,
"openEnd": 1
}
},
{
"shineChargeFrames": 40
}
],
"exitCondition": {
"leaveShinecharged": {}
},
"flashSuitChecked": true,
"blueSuitChecked": true
},
{
"id": 38,
"link": [
2,
2
],
"name": "Leave Spinning",
"requires": [
{
  "or": [
    "canMetroidAvoid",
    "Ice",
    {
      "obstaclesCleared": [
        "B"
      ]
    }
  ]
}
],
"exitCondition": {
"leaveSpinning": {
"remoteRunway": {
"length": 21,
"openEnd": 1
}
}
},
"flashSuitChecked": true,
"blueSuitChecked": true
},
{
"id": 39,
"link": [
2,
2
],
"name": "Leave With Mockball",
"requires": [
{
  "or": [
    "canMetroidAvoid",
    "Ice",
    {
      "obstaclesCleared": [
        "B"
      ]
    }
  ]
}
],
"exitCondition": {
"leaveWithMockball": {
"remoteRunway": {
"length": 21,
"openEnd": 0
},
"landingRunway": {
"length": 3,
"openEnd": 1
}
}
},
"flashSuitChecked": true,
"blueSuitChecked": true
},
{
"id": 40,
"link": [
2,
2
],
"name": "Leave With Spring Ball Bounce",
"requires": [
{
  "or": [
    "canMetroidAvoid",
    "Ice",
    {
      "obstaclesCleared": [
        "B"
      ]
    }
  ]
}
],
"exitCondition": {
"leaveWithSpringBallBounce": {
"remoteRunway": {
"length": 18,
"openEnd": 0
},
"landingRunway": {
"length": 1,
"openEnd": 1
},
"movementType": "uncontrolled"
}
},
"flashSuitChecked": true,
"blueSuitChecked": true
},
{
"id": 41,
"link": [
2,
2
],
"name": "Leave Space Jumping",
"requires": [
{
"or": [
"canMetroidAvoid",
"Ice",
{
"obstaclesCleared": [
"B"
]
}
]
}
],
"exitCondition": {
"leaveSpaceJumping": {
"remoteRunway": {
"length": 15,
"openEnd": 0
}
}
},
"flashSuitChecked": true,
"blueSuitChecked": true
},
{
"id": 42,
"link": [
2,
2
],
"name": "Leave With Temporary Blue",
"requires": [
{
"or": [
"canMetroidAvoid",
"Ice",
{
"obstaclesCleared": [
"B"
]
}
]
},
{
"canShineCharge": {
"usedTiles": 22,
"openEnd": 0
}
},
"canChainTemporaryBlue"
],
"exitCondition": {
"leaveWithTemporaryBlue": {}
},
"flashSuitChecked": true,
"blueSuitChecked": true
},
{
"id": 43,
"link": [
2,
2
],
"name": "Crystal Flash",
"requires": [
"h_CrystalFlash",
{
"obstaclesNotCleared": [
"R-Mode"
]
}
],
"flashSuitChecked": true,
"blueSuitChecked": true
},
{
"id": 44,
"link": [
2,
2
],
"name": "Tank and PB Kill",
"requires": [
{
"enemyKill": {
"enemies": [
[
"Metroid",
"Metroid",
"Metroid",
"Metroid"
]
],
"explicitWeapons": [
"PowerBombPeriphery"
]
}
},
{
"or": [
"canTrickyJump",
{
"ammo": {
"type": "PowerBomb",
"count": 2
}
}
]
},
{
"metroidFrames": 170
}
],
"clearsObstacles": [
"A",
"B",
"f_KilledMetroidRoom1"
],
"setsFlags": [
"f_KilledMetroidRoom1"
],
"flashSuitChecked": true,
"blueSuitChecked": true,
"note": [
"Place Power Bombs to kill the Metroids.",
"By hitting the first Rinka, all of the Metroids (on a similar vertical height to the Power Bomb) will be damaged."
],
"devNote": "Using 1 pack of PBs isn't intuitive as a way to kill 4 metroids without grouping them."
},
{
"id": 45,
"link": [
2,
2
],
"name": "Power Bomb Dodge Kill (Right to Left)",
"requires": [
{
"notable": "Power Bomb Dodge Kill (Right to Left)"
},
{
"enemyKill": {
"enemies": [
[
"Metroid",
"Metroid",
"Metroid",
"Metroid"
]
],
"explicitWeapons": [
"PowerBomb"
]
}
},
"canMetroidAvoid"
],
"clearsObstacles": [
"A",
"B",
"f_KilledMetroidRoom1"
],
"setsFlags": [
"f_KilledMetroidRoom1"
],
"flashSuitChecked": true,
"blueSuitChecked": true,
"note": [
"Group all of the Metroids by hitting the first Rinka with a Power Bomb.",
"Once grouped, use two more Power Bombs to finish them off."
]
},
{
"id": 89,
"link": [
2,
2
],
"name": "Crystal Spark",
"requires": [
{
"obstaclesCleared": [
"B"
]
},
{
"canShineCharge": {
"usedTiles": 31,
"openEnd": 1
}
},
"h_CrystalSpark"
],
"flashSuitChecked": true,
"blueSuitChecked": true,
"devNote": "FIXME: This may be possible with the Metroids alive, but is probably not worth considering."
},
{
"id": 84,
"link": [
2,
2
],
"name": "R-Mode Spark Interrupt",
"requires": [
{
"obstaclesCleared": [
"R-Mode"
]
},
{
"or": [
{
"and": [
"h_CrystalFlashForReserveEnergy",
{
"or": [
"canInsaneJump",
{
"obstaclesCleared": [
"B"
]
}
]
}
]
},
{
"and": [
"canRiskPermanentLossOfAccess",
{
"not": "f_KilledMetroidRoom1"
},
"h_RModeCanRefillReserves",
"Ice",
{
"enemyKill": {
"enemies": [
[
"Metroid"
],
[
"Metroid"
],
[
"Metroid"
]
],
"explicitWeapons": [
"Missile",
"Super"
]
}
},
{
"partialRefill": {
"type": "ReserveEnergy",
"limit": 40
}
}
]
}
]
},
{
"or": [
{
"obstaclesCleared": [
"B"
]
},
"canMetroidAvoid",
"Ice"
]
},
{
"canShineCharge": {
"usedTiles": 29,
"openEnd": 1
}
},
{
"autoReserveTrigger": {
"maxReserveEnergy": 95
}
},
"canRModeSparkInterrupt"
],
"resetsObstacles": [
"R-Mode"
],
"flashSuitChecked": true,
"blueSuitChecked": true,
"note": [
"Do not kill all four Metroids, or else they cannot be farmed again, leaving only Crystal Flash as an option.",
"Shinecharge at the left door, and then use a Rinka or the acid to interrupt."
]
},
{
"id": 46,
"link": [
2,
2
],
"name": "G-Mode Setup - Get Hit By Rinka",
"requires": [
{
"or": [
"canTrickyJump",
"SpaceJump"
]
},
{
"or": [
"canMetroidAvoid",
"canUseFrozenEnemies",
"ScrewAttack",
{
"obstaclesCleared": [
"B"
]
}
]
}
],
"exitCondition": {
"leaveWithGModeSetup": {}
},
"flashSuitChecked": true,
"blueSuitChecked": true,
"note": [
"Wait for the Rinka to spawn, then jump, so the trajectory is as high as possible. Space jump makes this a bit easier.",
"If the Metroids are alive, lure them off screen to the left."
]
},
{
"id": 47,
"link": [
2,
2
],
"name": "G-Mode Setup - Get Hit By Metroid",
"requires": [
{
"not": "f_KilledMetroidRoom1"
},
"canRiskPermanentLossOfAccess"
],
"exitCondition": {
"leaveWithGModeSetup": {
"knockback": false
}
},
"flashSuitChecked": true,
"blueSuitChecked": true
},
{
"id": 48,
"link": [
2,
2
],
"name": "G-Mode Morph Power Bomb Metroid Kill",
"entranceCondition": {
"comeInWithGMode": {
"mode": "any",
"morphed": true
}
},
"requires": [
"canMetroidAvoid",
"canInsaneJump",
"h_artificialMorphSpringBall",
{
"ammo": {
"type": "PowerBomb",
"count": 4
}
}
],
"clearsObstacles": [
"A",
"B",
"f_KilledMetroidRoom1"
],
"setsFlags": [
"f_KilledMetroidRoom1"
],
"flashSuitChecked": true,
"blueSuitChecked": true,
"note": [
"Kill the Metroids while artificially morphed with just Spring Ball to avoid them.",
"A Rinka must killed whith a Power Bomb while a Metroid is completely on screen in order for it to lure the other Metroids.",
"Because of this, with extra ammo, it is possible to kill one or two of them before luring the rest.",
"In general, this seems to be easiest by minimizing Samus's horizontal movement as much as possible and getting the Metroids in sync with each other while circling around her.",
"While moving horizontally, their movement is less predictable and harder to sync.",
"Note that it is necessary to exit G-Mode before exiting the room in order for the Metroids to remain killed."
],
"devNote": [
"The rules for luring the Metroids are not completely clear, but this method works somwehat reliably here.",
"This is possible with 3 Power Bombs, but it seems to infrequently work."
]
},
{
"id": 85,
"link": [
2,
2
],
"name": "R-Mode Entry",
"entranceCondition": {
"comeInWithRMode": {}
},
"requires": [],
"clearsObstacles": [
"R-Mode"
],
"flashSuitChecked": true,
"blueSuitChecked": true
},
{
"id": 86,
"link": [
2,
2
],
"name": "R-Mode Crystal Flash Interrupt",
"requires": [
{
"obstaclesCleared": [
"R-Mode"
]
},
{
"obstaclesCleared": [
"B"
]
},
"canRModeCrystalFlashInterrupt",
{
"ammo": {
"type": "Missile",
"count": 10
}
},
{
"ammo": {
"type": "Super",
"count": 10
}
}
],
"resetsObstacles": [
"R-Mode"
],
"flashSuitChecked": true,
"blueSuitChecked": true,
"note": [
"On entry, kill or dodge the first Rinkas then Crystal Flash directly above or below a Rinka Spawner."
],
"devNote": [
"There could be a variant with the Metroids alive, but they will all lure to Samus and the light orb will disappear, so she will take heavy damage.",
"This is not possible in G-mode, because the Power Bomb will kill the Rinka and prevent more from spawning."
]
},
{
"id": 87,
"link": [
2,
2
],
"name": "R-Mode Crystal Flash Light Orb Metroid Kill",
"requires": [
{
"obstaclesCleared": [
"R-Mode"
]
},
"canComplexGMode",
"h_CrystalFlash"
],
"clearsObstacles": [
"A",
"B",
"f_KilledMetroidRoom1"
],
"resetsObstacles": [
"R-Mode"
],
"setsFlags": [
"f_KilledMetroidRoom1"
],
"flashSuitChecked": true,
"blueSuitChecked": true,
"note": [
"On entry, kill or dodge the first Rinkas then Crystal Flash. While in the light orb, Samus will be almost immune and the Metroids will take damage."
]
},
{
"id": 80,
"link": [
2,
2
],
"name": "Direct G-Mode Morph Crystal Flash Light Orb Metroid Kill",
"entranceCondition": {
"comeInWithGMode": {
"mode": "direct",
"morphed": true
}
},
"requires": [
"canComplexGMode",
"h_artificialMorphCrystalFlash",
{
"autoReserveTrigger": {}
}
],
"clearsObstacles": [
"A",
"B",
"f_KilledMetroidRoom1"
],
"setsFlags": [
"f_KilledMetroidRoom1"
],
"flashSuitChecked": true,
"blueSuitChecked": true,
"note": [
"On entry, kill or dodge the first Rinkas then Crystal Flash. While in the light orb, Samus will be almost immune and the Metroids will take damage.",
"Note that it is necessary to exit G-Mode before exiting the room in order for the Metroids to remain killed. To do this, trigger Reserves in the acid or on a Rinka.",
"To minimize damage taken, lure a Rinka away from its spawner before touching it to prevent multiple hits during the auto Reserve trigger."
],
"devNote": "FIXME: Before reserve triggering, Samus could cross the acid pit."
}
],
"notables": [
{
"id": 1,
"name": "Rinka Damage Boost",
"note": [
"Aim a Rinka to travel horizontally across the top of the room and use it to damage boost between the two floating platforms."
]
},
{
"id": 2,
"name": "Acid Skip CWJ",
"note": [
"Align with the wall below the door while facing left.",
"Hold dash, turn around, start running and arm pump once.",
"Jump from the rightmost 'X' in the background.",
"Release forward at some point while airborne, but repress it again before the CWJ.",
"Immediately after the CWJ, shoot the Metroid to avoid getting grabbed."
]
},
{
"id": 3,
"name": "Power Bomb Dodge Kill (Right to Left)",
"note": [
"Group all of the Metroids by hitting the first Rinka with a Power Bomb.",
"Once grouped, use two more Power Bombs to finish them off."
]
}
],
"nextStratId": 100,
"nextNotableId": 4
}


