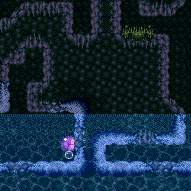
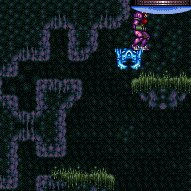
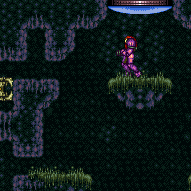
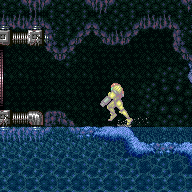
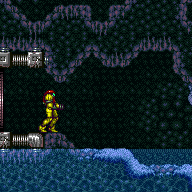
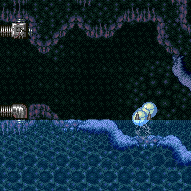
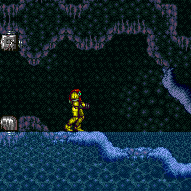
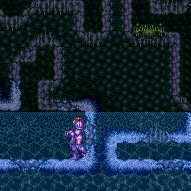
Crab Maze
Room ID: 36
|
Shoot a Super as a Sciser crawls near the top door, then freeze it mid-air and use it to clip up past the door shell. If you don't have Morph and X-Ray, you must shoot the Super while the Sciser is on the slope near the door, not on the door itself. Because of the shot firing rate, it can help to crouch and shoot the Super to the side to give it a bit more time to knock the crab off. Requires: {
"ammo": {
"type": "Super",
"count": 1
}
}
{
"or": [
"h_XRayMorphIceClip",
"h_preciseIceClip"
]
}Bypasses door shell: true |
|


Shoot a Super as a Sciser crawls near the top door, then freeze it mid-air and use it to clip up past the door shell. This requires knocking off the Sciser frame-pefrectly, then freezing it frame-perfectly in position. The Super should knock off the crab when it is barely centered on the slope, 2 pixels away from the edge of the doorframe. Because of the shot firing rate, it can help to crouch and shoot the Super to the side to give it a bit more time to knock the crab off. Requires: {
"ammo": {
"type": "Super",
"count": 1
}
}
"h_highPixelIceClip"Bypasses door shell: true |
|
Requires: {
"resetRoom": {
"nodes": [
1
]
}
}
{
"cycleFrames": 1080
}Farm cycle drops: 1 Sciser |
|
Requires: "Morph"
{
"resetRoom": {
"nodes": [
1
]
}
}
{
"cycleFrames": 2700
}
{
"or": [
"Gravity",
{
"cycleFrames": 700
}
]
}
{
"or": [
{
"haveBlueSuit": {}
},
"Wave",
"Spazer",
"Plasma",
"canUseGrapple",
{
"and": [
"Ice",
{
"cycleFrames": 560
}
]
},
{
"cycleFrames": 1550
}
]
}Farm cycle drops: 8 Sciser |
|
Requires: "h_CrystalFlash" |
|
Exit condition: {
"leaveWithDoorFrameBelow": {
"height": 2
}
} |
|
Exit condition: {
"leaveWithPlatformBelow": {
"height": 6,
"leftPosition": -2.5,
"rightPosition": 2.5
}
} |
|


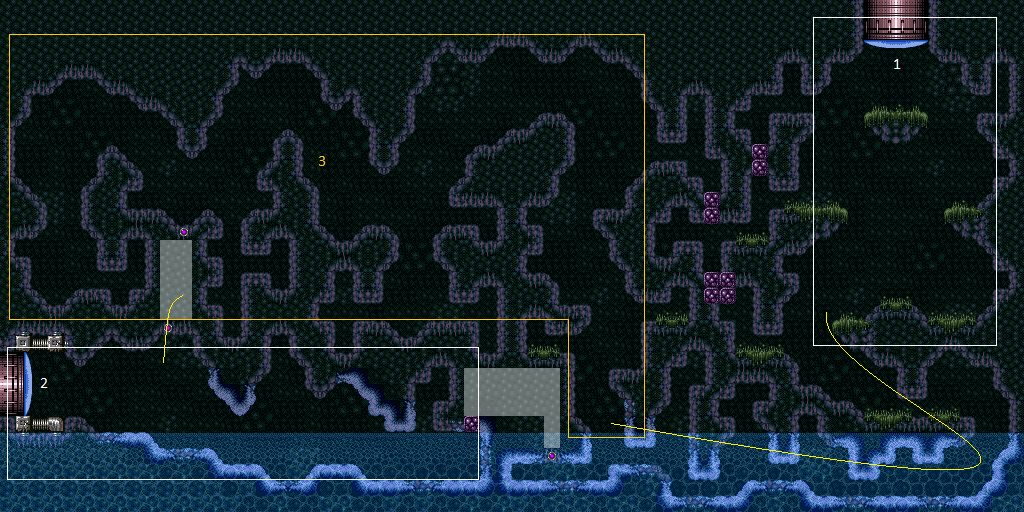
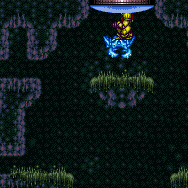
The nearby Global crab can be used to exit on the left side of the door. Exiting on the right will require travelling the Morph maze to find a local crab or two from the far left side of the room. Without Spring Ball, freeze the crab as low as possible to where Samus can still spin jump onto it. land on the edge of it, X-Ray turnaround or crouch, then press forward when it is about to thaw to trigger the transition. Requires: "Morph" "canCameraManip" "canUpwardGModeSetup" "canTrickyUseFrozenEnemies" "canBeVeryPatient" Exit condition: {
"leaveWithGModeSetup": {}
}Dev note: Global Crab (left side) takes 40 seconds, local crab (Right side) is 140. Finding two left side crabs to use together is faster. FIXME: Adding a variant that can only be done on the left side of the door would remove many of these requirements. |
|
Requires: {
"enemyDamage": {
"enemy": "Sciser",
"type": "contact",
"hits": 1
}
} |
|
Entrance condition: {
"comeInWithGMode": {
"mode": "direct",
"morphed": false
},
"comesThroughToilet": "any"
}Exit condition: {
"leaveWithGMode": {
"morphed": false
}
} |
|
Entrance condition: {
"comeInWithGMode": {
"mode": "direct",
"morphed": true
},
"comesThroughToilet": "any"
}Requires: "h_artificialMorphMovement" Exit condition: {
"leaveWithGMode": {
"morphed": true
}
} |
|
Wait for a crab to come to this door and shoot a Super to knock it off, then quickly freeze it at the right height and use it to clip up past the door shell. Knock the crab while it is on the sloped tiles near the top door, not on the door itself, otherwise it will never be in the correct height. Because of the shot firing rate, it can help to crouch and shoot the Super to the side to give it a bit more time to knock the crab off. Entrance condition: {
"comeInWithGMode": {
"mode": "indirect",
"morphed": false
},
"comesThroughToilet": "any"
}Requires: "canTrickyGMode"
"h_preciseIceClip"
{
"ammo": {
"type": "Super",
"count": 1
}
}Exit condition: {
"leaveWithGMode": {
"morphed": false
}
}Bypasses door shell: true Dev note: This is only for indirect G-Mode, because it is trivial while in direct, and would use a different strat. |
|
Seven Scisers can be farmed. Use the 8th (a bottom left one) to interrupt spark. Leave the slower, local Sciser alive to use for the Shinespark interrupt. Position it in the ceiling cubby hole to safely perform the Shinecharge and jump into the Sciser as it walks back down. Entrance condition: {
"comeInWithRMode": {},
"comesThroughToilet": "no"
}Requires: "Morph"
{
"or": [
"h_CrystalFlashForReserveEnergy",
{
"and": [
"h_RModeCanRefillReserves",
{
"or": [
{
"and": [
{
"resourceMissingAtMost": [
{
"type": "PowerBomb",
"count": 0
}
]
},
{
"partialRefill": {
"type": "ReserveEnergy",
"limit": 100
}
}
]
},
{
"and": [
{
"resourceMissingAtMost": [
{
"type": "PowerBomb",
"count": 6
}
]
},
{
"partialRefill": {
"type": "ReserveEnergy",
"limit": 20
}
}
]
}
]
}
]
}
]
}
"canWaterShineCharge"
{
"canShineCharge": {
"usedTiles": 20,
"openEnd": 0
}
}
{
"autoReserveTrigger": {}
}
"canRModeSparkInterrupt" |
From: 1
Top Door
To: 2
Left Door
Without Springball or Gravity, it is possible to overload PLMs with the crumble blocks with bombs. Take the first left above the waterline. Place bombs in the single tile nook on the left. The Sciser that starts inside the Morph maze area will move off-screen: wait for it to come back out. Once outside of the Morph tunnel area, use X-Ray until the beam reaches full width to exit G-Mode and remain in R-Mode, then collect drops. Farm the rest of the Scisers, keeping the slower local Sciser at the bottom left corner to use for the interrupt. Position it in the ceiling cubby hole to safely perform the Shinecharge and jump into the Sciser as it walks back down. Entrance condition: {
"comeInWithGMode": {
"mode": "direct",
"morphed": true
},
"comesThroughToilet": "no"
}Requires: {
"or": [
"h_artificialMorphSpringBall",
{
"and": [
"h_artificialMorphBombThings",
"Gravity"
]
},
"h_artificialMorphIBJ"
]
}
{
"resourceMissingAtMost": [
{
"type": "PowerBomb",
"count": 0
}
]
}
{
"or": [
{
"and": [
{
"disableEquipment": "ETank"
},
{
"partialRefill": {
"type": "ReserveEnergy",
"limit": 40
}
}
]
},
{
"and": [
"canRiskPermanentLossOfAccess",
{
"resourceMissingAtMost": [
{
"type": "RegularEnergy",
"count": 120
}
]
},
{
"partialRefill": {
"type": "ReserveEnergy",
"limit": 20
}
}
]
},
{
"and": [
"canRiskPermanentLossOfAccess",
{
"resourceMissingAtMost": [
{
"type": "RegularEnergy",
"count": 0
}
]
},
{
"partialRefill": {
"type": "ReserveEnergy",
"limit": 100
}
}
]
}
]
}
{
"or": [
"canWaterShineCharge",
"Gravity"
]
}
{
"canShineCharge": {
"usedTiles": 20,
"openEnd": 0
}
}
{
"autoReserveTrigger": {}
}
"canRModeSparkInterrupt" |
From: 1
Top Door
To: 2
Left Door
Take the first left above the waterline. Place bombs in the single tile nook on the left to overload PLMs. Evade the Sciser and either go through the rest of the Morph maze or an overloaded crumble block, and navigate to the bomb block shortcut tunnel. Crystal Flash under the bomb block; Samus can then no longer use X-Ray. Jump through, and drop through to the other side. Avoid the Scisers, and manipulate one to the far right. Shinecharge and windup near the Sciser to interrupt. Entrance condition: {
"comeInWithGMode": {
"mode": "direct",
"morphed": true
},
"comesThroughToilet": "no"
}Requires: "h_artificialMorphBombs"
"h_artificialMorphMovement"
"h_artificialMorphCrystalFlash"
{
"or": [
{
"and": [
{
"or": [
"HiJump",
"canSunkenTileWideWallClimb"
]
},
"canWaterShineCharge"
]
},
"Gravity"
]
}
{
"canShineCharge": {
"usedTiles": 20,
"openEnd": 0
}
}
{
"autoReserveTrigger": {}
}
"canRModeSparkInterrupt"
{
"partialRefill": {
"type": "Energy",
"limit": 65
}
}Dev note: Also possible to escape with Space Jump + frame perfect downgrab |
|
It is required to avoid hitting the Sciser with the Power Bomb, and to position the Crystal Flash so that the Sciser can hit Samus from above so it avoids the light orb. Using the global counter-clockwise crab, the only spot in the room that is usable is the spot with the two shot blocks by the left door. Break the two shot blocks, then wait below them for nearly two minutes, until the crab is visible in the visible spot, four tiles right of the bottom shot block. Wait approximately two more seconds before laying the Power Bomb to Crystal Flash, while Samus below or a bit to the left of the low pointy ceiling. Entrance condition: {
"comeInWithRMode": {},
"comesThroughToilet": "no"
}Requires: "canBeVeryPatient"
"canComplexRModeCrystalFlashInterrupt"
{
"ammo": {
"type": "Missile",
"count": 10
}
}
{
"ammo": {
"type": "Super",
"count": 10
}
}
{
"ammo": {
"type": "PowerBomb",
"count": 5
}
}
{
"or": [
"h_fullEnemyDamageReduction",
{
"and": [
"h_partialEnemyDamageReduction",
{
"resourceAtMost": [
{
"type": "RegularEnergy",
"count": 39
}
]
}
]
},
{
"and": [
{
"resourceCapacity": [
{
"type": "RegularEnergy",
"count": 199
}
]
},
{
"resourceCapacity": [
{
"type": "ReserveEnergy",
"count": 199
}
]
}
]
}
]
}Dev note: The clockwise global crab may also be usable, but it is more difficult to set free. Neither crab is usable in G-mode, because the blocks are not breakable. |
|
Requires: "Morph" |
|

Without Springball or Gravity, it is possible to overload PLMs with the crumble blocks with bombs. Take the first left above the waterline. Place bombs in the single tile nook on the left. Entrance condition: {
"comeInWithGMode": {
"mode": "any",
"morphed": true
},
"comesThroughToilet": "any"
}Requires: {
"or": [
"h_artificialMorphSpringBall",
{
"and": [
"h_artificialMorphBombThings",
"Gravity"
]
},
"h_artificialMorphIBJ"
]
} |
|


Wait for the global crab to traverse the room and boost Samus up the ledge. It takes just over a minute for the crab to get there. Entrance condition: {
"comeInWithGMode": {
"mode": "any",
"morphed": true
},
"comesThroughToilet": "any"
}Requires: "Gravity"
"canBePatient"
"h_stationaryNeutralDamageBoost"
{
  "enemyDamage": {
    "enemy": "Sciser",
    "type": "contact",
    "hits": 1
  }
} |
From: 2
Left Door
To: 1
Top Door

Overload PLMs by placing Bombs at the far right, against the bottom of the crumble block, at the right of the low underwater ceiling. To safely bomb the fast crab, wait just left of where it falls. Entrance condition: {
"comeInWithGMode": {
"mode": "any",
"morphed": true
}
}Requires: {
"or": [
{
"and": [
"Gravity",
"h_artificialMorphIBJ"
]
},
{
"and": [
"h_artificialMorphSpringBall",
"HiJump",
"h_artificialMorphBombs"
]
}
]
} |
|
Overload PLMs by placing Bombs at the far right, against the bottom of the crumble block, at the right of the low underwater ceiling. It is okay to kill the fast crab, and leave another crab alive, off camera. After PLMs are overloaded, lure a crab and take a hit when it is near the bottom right corner then another at the top of Samus' jump at the crumble block to boost to the right. This requires carefully timing the first hit and jump so that Samus can get hit at the peak of her jump. Entrance condition: {
"comeInWithGMode": {
"mode": "any",
"morphed": true
}
}Requires: "canComplexGMode"
"h_artificialMorphSpringBall"
"h_artificialMorphBombs"
"canUseIFrames"
"canNeutralDamageBoost"
{
"enemyDamage": {
"enemy": "Sciser",
"type": "contact",
"hits": 2
}
} |
|
Overload PLMs by placing Bombs at the far right, against the bottom of the crumble block, at the right of the low underwater ceiling. With artificial morph, safely bomb the fast crab by waiting just left of where it falls. Lure a crab to the top door or wait for the global crab to come back around, which can take up to 2.5 minutes. Shoot a Super to knock the crab off, then quickly freeze it at the right height and use it to clip up past the door shell. Knock it off while it is on the sloped tiles near the top door, not on the door itself, otherwise it will never be in the correct height. Because of the shot firing rate, it can help to crouch and shoot the Super to the side to give it a bit more time to knock the crab off. Entrance condition: {
"comeInWithGMode": {
"mode": "any",
"morphed": true
}
}Requires: "canBeVeryPatient"
"canTrickyGMode"
"h_artificialMorphBombs"
{
"or": [
{
"and": [
"Morph",
{
"or": [
"HiJump",
"canSpringBallJumpMidAir",
"canSunkenTileWideWallClimb"
]
}
]
},
{
"and": [
"Gravity",
"h_artificialMorphIBJ"
]
},
{
"and": [
"h_artificialMorphSpringBall",
"HiJump"
]
}
]
}
"h_preciseIceClip"
{
"ammo": {
"type": "Super",
"count": 1
}
}Exit condition: {
"leaveWithGMode": {
"morphed": false
}
}Bypasses door shell: true |
|
Exit condition: {
"leaveWithRunway": {
"length": 8,
"openEnd": 0,
"steepUpTiles": 1
}
}Dev note: Because the next tile is a slope into the water, it behaves like no open end. |
|
Requires: "Gravity" Exit condition: {
"leaveWithRunway": {
"length": 29,
"openEnd": 0,
"steepUpTiles": 5,
"steepDownTiles": 1
}
} |
|


Six Scisers can be farmed from the left side without needing Morph. Leave the slower, local Sciser alive to use for the Shinespark interrupt. Position it in the ceiling cubby hole to safely perform the Shinecharge and jump into the Sciser as it walks back down. Entrance condition: {
"comeInWithRMode": {}
}Requires: {
"or": [
"h_CrystalFlashForReserveEnergy",
{
"and": [
"h_RModeCanRefillReserves",
{
"or": [
{
"and": [
{
"resourceMissingAtMost": [
{
"type": "PowerBomb",
"count": 0
}
]
},
{
"partialRefill": {
"type": "ReserveEnergy",
"limit": 100
}
}
]
},
{
"and": [
{
"resourceMissingAtMost": [
{
"type": "PowerBomb",
"count": 6
}
]
},
{
"partialRefill": {
"type": "ReserveEnergy",
"limit": 20
}
}
]
}
]
}
]
}
]
}
"canWaterShineCharge"
{
"canShineCharge": {
"usedTiles": 20,
"openEnd": 0
}
}
{
"autoReserveTrigger": {}
}
"canRModeSparkInterrupt" |
|


Requires: "canWaterShineCharge"
{
"canShineCharge": {
"usedTiles": 20,
"openEnd": 1
}
}
{
"or": [
{
"shinespark": {
"frames": 53,
"excessFrames": 0
}
},
{
"and": [
"canShinechargeMovementComplex",
{
"shinespark": {
"frames": 30,
"excessFrames": 0
}
}
]
}
]
}Exit condition: {
"leaveWithSpark": {
"position": "bottom"
}
} |
From: 2
Left Door
To: 2
Left Door
The ideal setup begins by standing 5 tiles away from the water, at the top of the slope. Run toward the water, releasing forward for 5 frames before re-pressing it on the last possible frame before entering the water. Other positions and timings can work but will gain the shinecharge further from the door. Requires: "canPreciseStutterWaterShineCharge"
"canShinechargeMovementTricky"
"canInsaneJump"
{
"shineChargeFrames": 155
}
{
"or": [
"canBeVeryPatient",
{
"shineChargeFrames": 15
}
]
}Exit condition: {
"leaveShinecharged": {}
} |
|
Requires: "canWaterShineCharge"
{
"canShineCharge": {
"usedTiles": 20,
"openEnd": 1
}
}
"canLongChainTemporaryBlue"
"canXRayTurnaround"
"can4HighMidAirMorph"Exit condition: {
"leaveWithTemporaryBlue": {}
} |
|
Requires: {
"resetRoom": {
"nodes": [
2
]
}
}
{
"cycleFrames": 270
}
{
"or": [
{
"and": [
"Gravity",
{
"or": [
"canDash",
{
"cycleFrames": 175
}
]
}
]
},
{
"cycleFrames": 270
}
]
}
{
"or": [
"Grapple",
{
"and": [
"Wave",
{
"cycleFrames": 50
}
]
},
{
"and": [
"Plasma",
{
"cycleFrames": 50
}
]
},
{
"and": [
"ScrewAttack",
{
"cycleFrames": 80
}
]
},
{
"and": [
"Spazer",
{
"cycleFrames": 150
}
]
},
{
"and": [
"canPseudoScrew",
{
"cycleFrames": 180
}
]
},
{
"and": [
"Ice",
{
"cycleFrames": 270
}
]
},
{
"cycleFrames": 420
}
]
}Farm cycle drops: 3 Sciser |
|

Requires: "Gravity"
{
"canShineCharge": {
"usedTiles": 20,
"steepUpTiles": 3,
"steepDownTiles": 1,
"openEnd": 0
}
}
{
"enemyDamage": {
"enemy": "Sciser",
"type": "contact",
"hits": 1
}
}
"canSlopeSpark"
"h_XModeSpikeHitLeniency"
{
"shinespark": {
"frames": 5,
"excessFrames": 5
}
}Dev note: FIXME: implement numeric enemy damage |
|


Requires: "Gravity"
{
"canShineCharge": {
"usedTiles": 20,
"steepUpTiles": 3,
"steepDownTiles": 1,
"openEnd": 0
}
}
{
"enemyDamage": {
"enemy": "Sciser",
"type": "contact",
"hits": 1
}
}
"canSlopeXMode"
"h_XModeSpikeHitLeniency"
{
"shinespark": {
"frames": 0
}
}
{
"gainBlueSuit": {}
} |
|
Requires: "Gravity"
{
"canShineCharge": {
"usedTiles": 29,
"steepUpTiles": 5,
"steepDownTiles": 1,
"openEnd": 0
}
}
{
"or": [
{
"and": [
"h_enemyDrops",
"h_CrystalSparkWithoutLenience"
]
},
"h_CrystalSpark"
]
}Dev note: No lenience, because Power Bombs can be farmed from the Scisers. |
|


Requires: "canWaterShineCharge"
{
"canShineCharge": {
"usedTiles": 20,
"openEnd": 1
}
}
{
"or": [
{
"and": [
"h_enemyDrops",
"h_underwaterCrystalSparkWithoutLenience"
]
},
"h_underwaterCrystalSpark"
]
}Dev note: No lenience, because Power Bombs can be farmed from the Scisers. |
|
Entrance condition: {
"comeInShinecharging": {
"length": 7,
"openEnd": 0,
"steepDownTiles": 1
},
"comesInHeated": "no"
}Requires: "h_CrystalSpark" |
|

Exit condition: {
"leaveWithGModeSetup": {}
} |
|
It is required to avoid hitting the Sciser with the Power Bomb, and to position the Crystal Flash so that the Sciser can hit Samus from above so it avoids the light orb. Using the global counter-clockwise crab, the only spot in the room that is usable is the spot with the two shot blocks by the left door. Break the two shot blocks, then wait below them for nearly two minutes, until the crab is visible in the visible spot, four tiles right of the bottom shot block and at the same height. Wait approximately two more seconds before laying the Power Bomb to Crystal Flash, while Samus below or a bit to the left of the low pointy ceiling just below the visible spot, below and right of the shot block. Entrance condition: {
"comeInWithRMode": {}
}Requires: "canBeVeryPatient"
"canComplexRModeCrystalFlashInterrupt"
{
"ammo": {
"type": "Missile",
"count": 10
}
}
{
"ammo": {
"type": "Super",
"count": 10
}
}
{
"ammo": {
"type": "PowerBomb",
"count": 5
}
}
{
"or": [
"h_fullEnemyDamageReduction",
{
"and": [
"h_partialEnemyDamageReduction",
{
"resourceAtMost": [
{
"type": "RegularEnergy",
"count": 39
}
]
}
]
},
{
"and": [
{
"resourceCapacity": [
{
"type": "RegularEnergy",
"count": 199
}
]
},
{
"resourceCapacity": [
{
"type": "ReserveEnergy",
"count": 199
}
]
}
]
}
]
}Dev note: The clockwise global crab may also be usable, but it is more difficult to set free. Neither crab is usable in G-mode, because the blocks are not breakable. |
|

Requires: {
"or": [
"canCarefulJump",
"canUseFrozenEnemies",
"SpaceJump",
{
"and": [
"Gravity",
{
"or": [
"HiJump",
"canWallJump",
"h_crouchJumpDownGrab",
"canIBJ",
"canSpringBallJumpMidAir"
]
}
]
}
]
} |
|
Requires: "Morph" |
|


|
{
"$schema": "../../../schema/m3-room.schema.json",
"id": 36,
"name": "Crab Maze",
"area": "Crateria",
"subarea": "East",
"roomAddress": "0x7957D",
"roomEnvironments": [
{
"heated": false
}
],
"mapTileMask": [
[
1,
1,
1,
1
],
[
1,
1,
1,
1
]
],
"nodes": [
{
"id": 1,
"name": "Top Door",
"nodeType": "door",
"nodeSubType": "blue",
"nodeAddress": "0x0018a96",
"doorOrientation": "up",
"doorEnvironments": [
{
"physics": "air"
}
],
"mapTileMask": [
[
1,
1,
1,
2
],
[
1,
1,
1,
2
]
]
},
{
"id": 2,
"name": "Left Door",
"nodeType": "door",
"nodeSubType": "blue",
"nodeAddress": "0x0018aae",
"doorOrientation": "left",
"doorEnvironments": [
{
"physics": "air"
}
],
"mapTileMask": [
[
1,
1,
1,
1
],
[
2,
2,
1,
1
]
]
},
{
"id": 3,
"name": "Crab Maze Middle Junction",
"nodeType": "junction",
"nodeSubType": "junction",
"mapTileMask": [
[
2,
2,
2,
1
],
[
1,
1,
2,
1
]
]
}
],
"enemies": [
{
"id": "e1",
"groupName": "Crab Maze Top Right Sciser",
"enemyName": "Sciser",
"quantity": 1,
"homeNodes": [
1
]
},
{
"id": "e2",
"groupName": "Crab Maze Bottom Left Scisers",
"enemyName": "Sciser",
"quantity": 3,
"homeNodes": [
2
]
},
{
"id": "e3",
"groupName": "Crab Maze Top Left Scisers",
"enemyName": "Sciser",
"quantity": 4,
"homeNodes": [
3
]
}
],
"strats": [
{
"link": [
1,
1
],
"name": "Base (Unlock Door)",
"requires": [],
"unlocksDoors": [
{
"types": [
"ammo"
],
"requires": []
}
],
"flashSuitChecked": true,
"blueSuitChecked": true
},
{
"link": [
1,
1
],
"name": "Base (Come In Normally)",
"entranceCondition": {
"comeInNormally": {}
},
"requires": [],
"flashSuitChecked": true,
"blueSuitChecked": true
},
{
"link": [
2,
2
],
"name": "Base (Unlock Door)",
"requires": [],
"unlocksDoors": [
{
"types": [
"ammo"
],
"requires": []
}
],
"flashSuitChecked": true,
"blueSuitChecked": true
},
{
"link": [
2,
2
],
"name": "Base (Come In Normally)",
"entranceCondition": {
"comeInNormally": {}
},
"requires": [],
"flashSuitChecked": true,
"blueSuitChecked": true
},
{
"link": [
2,
2
],
"name": "Base (Come In With Mockball)",
"entranceCondition": {
"comeInWithMockball": {
"adjacentMinTiles": 0,
"remoteAndLandingMinTiles": [
[
0,
0
]
],
"speedBooster": "any"
}
},
"requires": [],
"flashSuitChecked": true,
"blueSuitChecked": true
},
{
"id": 1,
"link": [
1,
1
],
"name": "Sciser Ice Clip Door Lock Skip",
"requires": [
{
"ammo": {
"type": "Super",
"count": 1
}
},
{
"or": [
"h_XRayMorphIceClip",
"h_preciseIceClip"
]
}
],
"bypassesDoorShell": "yes",
"flashSuitChecked": true,
"blueSuitChecked": true,
"note": [
"Shoot a Super as a Sciser crawls near the top door, then freeze it mid-air and use it to clip up past the door shell.",
"If you don't have Morph and X-Ray, you must shoot the Super while the Sciser is on the slope near the door, not on the door itself.",
"Because of the shot firing rate, it can help to crouch and shoot the Super to the side to give it a bit more time to knock the crab off."
]
},
{
"id": 22,
"link": [
1,
1
],
"name": "Sciser High Pixel Ice Clip Door Lock Skip",
"requires": [
{
"ammo": {
"type": "Super",
"count": 1
}
},
"h_highPixelIceClip"
],
"bypassesDoorShell": "yes",
"flashSuitChecked": true,
"blueSuitChecked": true,
"note": [
"Shoot a Super as a Sciser crawls near the top door, then freeze it mid-air and use it to clip up past the door shell.",
"This requires knocking off the Sciser frame-pefrectly, then freezing it frame-perfectly in position.",
"The Super should knock off the crab when it is barely centered on the slope, 2 pixels away from the edge of the doorframe.",
"Because of the shot firing rate, it can help to crouch and shoot the Super to the side to give it a bit more time to knock the crab off."
]
},
{
"id": 26,
"link": [
1,
1
],
"name": "Sciser Farm (One Sciser)",
"requires": [
{
"resetRoom": {
"nodes": [
1
]
}
},
{
"cycleFrames": 1080
}
],
"farmCycleDrops": [
{
"enemy": "Sciser",
"count": 1
}
],
"flashSuitChecked": true,
"blueSuitChecked": true
},
{
"id": 27,
"link": [
1,
1
],
"name": "Sciser Farm (Full Clear)",
"requires": [
"Morph",
{
"resetRoom": {
"nodes": [
1
]
}
},
{
"cycleFrames": 2700
},
{
"or": [
"Gravity",
{
"cycleFrames": 700
}
]
},
{
"or": [
{
"haveBlueSuit": {}
},
"Wave",
"Spazer",
"Plasma",
"canUseGrapple",
{
"and": [
"Ice",
{
"cycleFrames": 560
}
]
},
{
"cycleFrames": 1550
}
]
}
],
"farmCycleDrops": [
{
"enemy": "Sciser",
"count": 8
}
],
"flashSuitChecked": true,
"blueSuitChecked": true
},
{
"id": 3,
"link": [
1,
1
],
"name": "Crystal Flash",
"requires": [
"h_CrystalFlash"
],
"flashSuitChecked": true,
"blueSuitChecked": true
},
{
"id": 4,
"link": [
1,
1
],
"name": "Leave With Door Frame Below",
"requires": [],
"exitCondition": {
"leaveWithDoorFrameBelow": {
"height": 2
}
},
"flashSuitChecked": true,
"blueSuitChecked": true
},
{
"id": 5,
"link": [
1,
1
],
"name": "Leave With Platform Below",
"requires": [],
"exitCondition": {
"leaveWithPlatformBelow": {
"height": 6,
"leftPosition": -2.5,
"rightPosition": 2.5
}
},
"flashSuitChecked": true,
"blueSuitChecked": true
},
{
"id": 6,
"link": [
1,
1
],
"name": "G-Mode Setup - Frozen Sciser",
"requires": [
"Morph",
"canCameraManip",
"canUpwardGModeSetup",
"canTrickyUseFrozenEnemies",
"canBeVeryPatient"
],
"exitCondition": {
"leaveWithGModeSetup": {}
},
"flashSuitChecked": true,
"blueSuitChecked": true,
"note": [
"The nearby Global crab can be used to exit on the left side of the door.",
"Exiting on the right will require travelling the Morph maze to find a local crab or two from the far left side of the room.",
"Without Spring Ball, freeze the crab as low as possible to where Samus can still spin jump onto it.",
"land on the edge of it, X-Ray turnaround or crouch, then press forward when it is about to thaw to trigger the transition."
],
"devNote": [
"Global Crab (left side) takes 40 seconds, local crab (Right side) is 140. Finding two left side crabs to use together is faster.",
"FIXME: Adding a variant that can only be done on the left side of the door would remove many of these requirements."
]
},
{
"id": 7,
"link": [
1,
1
],
"name": "G-Mode Regain Mobility",
"requires": [
{
"enemyDamage": {
"enemy": "Sciser",
"type": "contact",
"hits": 1
}
}
],
"gModeRegainMobility": {},
"flashSuitChecked": true,
"blueSuitChecked": true
},
{
"id": 8,
"link": [
1,
1
],
"name": "Carry G-Mode Back Up",
"entranceCondition": {
"comeInWithGMode": {
"mode": "direct",
"morphed": false
},
"comesThroughToilet": "any"
},
"requires": [],
"exitCondition": {
"leaveWithGMode": {
"morphed": false
}
},
"bypassesDoorShell": "free",
"flashSuitChecked": true,
"blueSuitChecked": true
},
{
"id": 9,
"link": [
1,
1
],
"name": "Carry G-Mode Morph Back Up",
"entranceCondition": {
"comeInWithGMode": {
"mode": "direct",
"morphed": true
},
"comesThroughToilet": "any"
},
"requires": [
"h_artificialMorphMovement"
],
"exitCondition": {
"leaveWithGMode": {
"morphed": true
}
},
"bypassesDoorShell": "free",
"flashSuitChecked": true,
"blueSuitChecked": true
},
{
"id": 23,
"link": [
1,
1
],
"name": "G-Mode Ice Clip, Door Lock Skip",
"entranceCondition": {
"comeInWithGMode": {
"mode": "indirect",
"morphed": false
},
"comesThroughToilet": "any"
},
"requires": [
"canTrickyGMode",
"h_preciseIceClip",
{
"ammo": {
"type": "Super",
"count": 1
}
}
],
"exitCondition": {
"leaveWithGMode": {
"morphed": false
}
},
"bypassesDoorShell": "yes",
"flashSuitChecked": true,
"blueSuitChecked": true,
"note": [
"Wait for a crab to come to this door and shoot a Super to knock it off, then quickly freeze it at the right height and use it to clip up past the door shell.",
"Knock the crab while it is on the sloped tiles near the top door, not on the door itself, otherwise it will never be in the correct height.",
"Because of the shot firing rate, it can help to crouch and shoot the Super to the side to give it a bit more time to knock the crab off."
],
"devNote": "This is only for indirect G-Mode, because it is trivial while in direct, and would use a different strat."
},
{
"id": 30,
"link": [
1,
2
],
"name": "R-Mode Spark Interrupt",
"entranceCondition": {
"comeInWithRMode": {},
"comesThroughToilet": "no"
},
"requires": [
"Morph",
{
"or": [
"h_CrystalFlashForReserveEnergy",
{
"and": [
"h_RModeCanRefillReserves",
{
"or": [
{
"and": [
{
"resourceMissingAtMost": [
{
"type": "PowerBomb",
"count": 0
}
]
},
{
"partialRefill": {
"type": "ReserveEnergy",
"limit": 100
}
}
]
},
{
"and": [
{
"resourceMissingAtMost": [
{
"type": "PowerBomb",
"count": 6
}
]
},
{
"partialRefill": {
"type": "ReserveEnergy",
"limit": 20
}
}
]
}
]
}
]
}
]
},
"canWaterShineCharge",
{
"canShineCharge": {
"usedTiles": 20,
"openEnd": 0
}
},
{
"autoReserveTrigger": {}
},
"canRModeSparkInterrupt"
],
"flashSuitChecked": true,
"blueSuitChecked": true,
"note": [
"Seven Scisers can be farmed. Use the 8th (a bottom left one) to interrupt spark.",
"Leave the slower, local Sciser alive to use for the Shinespark interrupt.",
"Position it in the ceiling cubby hole to safely perform the Shinecharge and jump into the Sciser as it walks back down."
]
},
{
"id": 36,
"link": [
1,
2
],
"name": "Direct G-Mode Morph Spark Interrupt (Farm Crabs)",
"entranceCondition": {
"comeInWithGMode": {
"mode": "direct",
"morphed": true
},
"comesThroughToilet": "no"
},
"requires": [
{
  "or": [
    "h_artificialMorphSpringBall",
    {
      "and": [
        "h_artificialMorphBombThings",
        "Gravity"
      ]
    },
    "h_artificialMorphIBJ"
  ]
},
{
"resourceMissingAtMost": [
{
"type": "PowerBomb",
"count": 0
}
]
},
{
"or": [
{
"and": [
{
"disableEquipment": "ETank"
},
{
"partialRefill": {
"type": "ReserveEnergy",
"limit": 40
}
}
]
},
{
"and": [
"canRiskPermanentLossOfAccess",
{
"resourceMissingAtMost": [
{
"type": "RegularEnergy",
"count": 120
}
]
},
{
"partialRefill": {
"type": "ReserveEnergy",
"limit": 20
}
}
]
},
{
"and": [
"canRiskPermanentLossOfAccess",
{
"resourceMissingAtMost": [
{
"type": "RegularEnergy",
"count": 0
}
]
},
{
"partialRefill": {
"type": "ReserveEnergy",
"limit": 100
}
}
]
}
]
},
{
"or": [
"canWaterShineCharge",
"Gravity"
]
},
{
"canShineCharge": {
"usedTiles": 20,
"openEnd": 0
}
},
{
"autoReserveTrigger": {}
},
"canRModeSparkInterrupt"
],
"flashSuitChecked": true,
"blueSuitChecked": true,
"note": [
"Without Springball or Gravity, it is possible to overload PLMs with the crumble blocks with bombs.",
"Take the first left above the waterline. Place bombs in the single tile nook on the left.",
"The Sciser that starts inside the Morph maze area will move off-screen: wait for it to come back out.",
"Once outside of the Morph tunnel area, use X-Ray until the beam reaches full width to exit G-Mode and remain in R-Mode, then collect drops.",
"Farm the rest of the Scisers, keeping the slower local Sciser at the bottom left corner to use for the interrupt.",
"Position it in the ceiling cubby hole to safely perform the Shinecharge and jump into the Sciser as it walks back down."
]
},
{
"id": 37,
"link": [
1,
2
],
"name": "Direct G-Mode Morph Spark Interrupt (Crystal Flash)",
"entranceCondition": {
"comeInWithGMode": {
"mode": "direct",
"morphed": true
},
"comesThroughToilet": "no"
},
"requires": [
"h_artificialMorphBombs",
"h_artificialMorphMovement",
"h_artificialMorphCrystalFlash",
{
"or": [
{
"and": [
{
"or": [
"HiJump",
"canSunkenTileWideWallClimb"
]
},
"canWaterShineCharge"
]
},
"Gravity"
]
},
{
"canShineCharge": {
"usedTiles": 20,
"openEnd": 0
}
},
{
"autoReserveTrigger": {}
},
"canRModeSparkInterrupt",
{
"partialRefill": {
"type": "Energy",
"limit": 65
}
}
],
"flashSuitChecked": true,
"blueSuitChecked": true,
"note": [
"Take the first left above the waterline. Place bombs in the single tile nook on the left to overload PLMs.",
"Evade the Sciser and either go through the rest of the Morph maze or an overloaded crumble block, and navigate to the bomb block shortcut tunnel.",
"Crystal Flash under the bomb block; Samus can then no longer use X-Ray.",
"Jump through, and drop through to the other side. Avoid the Scisers, and manipulate one to the far right.",
"Shinecharge and windup near the Sciser to interrupt."
],
"devNote": "Also possible to escape with Space Jump + frame perfect downgrab"
},
{
"id": 34,
"link": [
1,
2
],
"name": "R-Mode Crystal Flash Interrupt",
"entranceCondition": {
"comeInWithRMode": {},
"comesThroughToilet": "no"
},
"requires": [
"canBeVeryPatient",
"canComplexRModeCrystalFlashInterrupt",
{
"ammo": {
"type": "Missile",
"count": 10
}
},
{
"ammo": {
"type": "Super",
"count": 10
}
},
{
"ammo": {
"type": "PowerBomb",
"count": 5
}
},
{
"or": [
"h_fullEnemyDamageReduction",
{
"and": [
"h_partialEnemyDamageReduction",
{
"resourceAtMost": [
{
"type": "RegularEnergy",
"count": 39
}
]
}
]
},
{
"and": [
{
"resourceCapacity": [
{
"type": "RegularEnergy",
"count": 199
}
]
},
{
"resourceCapacity": [
{
"type": "ReserveEnergy",
"count": 199
}
]
}
]
}
]
}
],
"flashSuitChecked": true,
"blueSuitChecked": true,
"note": [
"It is required to avoid hitting the Sciser with the Power Bomb, and to position the Crystal Flash so that the Sciser can hit Samus from above so it avoids the light orb.",
"Using the global counter-clockwise crab, the only spot in the room that is usable is the spot with the two shot blocks by the left door.",
"Break the two shot blocks, then wait below them for nearly two minutes, until the crab is visible in the visible spot, four tiles right of the bottom shot block.",
"Wait approximately two more seconds before laying the Power Bomb to Crystal Flash, while Samus below or a bit to the left of the low pointy ceiling."
],
"devNote": [
"The clockwise global crab may also be usable, but it is more difficult to set free.",
"Neither crab is usable in G-mode, because the blocks are not breakable."
]
},
{
"id": 10,
"link": [
1,
3
],
"name": "Base",
"requires": [
"Morph"
],
"flashSuitChecked": true,
"blueSuitChecked": true
},
{
"id": 11,
"link": [
1,
3
],
"name": "G-Mode Morph",
"entranceCondition": {
"comeInWithGMode": {
"mode": "any",
"morphed": true
},
"comesThroughToilet": "any"
},
"requires": [
{
"or": [
"h_artificialMorphSpringBall",
{
"and": [
"h_artificialMorphBombThings",
"Gravity"
]
},
"h_artificialMorphIBJ"
]
}
],
"flashSuitChecked": true,
"blueSuitChecked": true,
"note": [
"Without Springball or Gravity, it is possible to overload PLMs with the crumble blocks with bombs.",
"Take the first left above the waterline. Place bombs in the single tile nook on the left."
]
},
{
"id": 28,
"link": [
1,
3
],
"name": "G-Mode Morph, Crab Boost",
"entranceCondition": {
"comeInWithGMode": {
"mode": "any",
"morphed": true
},
"comesThroughToilet": "any"
},
"requires": [
"Gravity",
"canBePatient",
"h_stationaryNeutralDamageBoost",
{
"enemyDamage": {
"enemy": "Sciser",
"type": "contact",
"hits": 1
}
}
],
"flashSuitChecked": true,
"blueSuitChecked": true,
"note": [
"Wait for the global crab to traverse the room and boost Samus up the ledge.",
"It takes just over a minute for the crab to get there."
]
},
{
"id": 12,
"link": [
2,
1
],
"name": "G-Mode Morph, Overload PLMs, Through the Crumble Block",
"entranceCondition": {
"comeInWithGMode": {
"mode": "any",
"morphed": true
}
},
"requires": [
{
  "or": [
    {
      "and": [
        "Gravity",
        "h_artificialMorphIBJ"
      ]
    },
    {
      "and": [
        "h_artificialMorphSpringBall",
        "HiJump",
        "h_artificialMorphBombs"
      ]
    }
  ]
}
],
"flashSuitChecked": true,
"blueSuitChecked": true,
"note": [
"Overload PLMs by placing Bombs at the far right, against the bottom of the crumble block, at the right of the low underwater ceiling.",
"To safely bomb the fast crab, wait just left of where it falls."
]
},
{
"id": 29,
"link": [
2,
1
],
"name": "G-Mode Morph, Crab Boost",
"entranceCondition": {
"comeInWithGMode": {
"mode": "any",
"morphed": true
}
},
"requires": [
"canComplexGMode",
"h_artificialMorphSpringBall",
"h_artificialMorphBombs",
"canUseIFrames",
"canNeutralDamageBoost",
{
"enemyDamage": {
"enemy": "Sciser",
"type": "contact",
"hits": 2
}
}
],
"flashSuitChecked": true,
"blueSuitChecked": true,
"note": [
"Overload PLMs by placing Bombs at the far right, against the bottom of the crumble block, at the right of the low underwater ceiling.",
"It is okay to kill the fast crab, and leave another crab alive, off camera.",
"After PLMs are overloaded, lure a crab and take a hit when it is near the bottom right corner then another at the top of Samus' jump at the crumble block to boost to the right.",
"This requires carefully timing the first hit and jump so that Samus can get hit at the peak of her jump."
]
},
{
"id": 24,
"link": [
2,
1
],
"name": "G-Mode Morph Ice Clip, Door Lock Skip",
"entranceCondition": {
"comeInWithGMode": {
"mode": "any",
"morphed": true
}
},
"requires": [
"canBeVeryPatient",
"canTrickyGMode",
"h_artificialMorphBombs",
{
"or": [
{
"and": [
"Morph",
{
"or": [
"HiJump",
"canSpringBallJumpMidAir",
"canSunkenTileWideWallClimb"
]
}
]
},
{
"and": [
"Gravity",
"h_artificialMorphIBJ"
]
},
{
"and": [
"h_artificialMorphSpringBall",
"HiJump"
]
}
]
},
"h_preciseIceClip",
{
"ammo": {
"type": "Super",
"count": 1
}
}
],
"exitCondition": {
"leaveWithGMode": {
"morphed": false
}
},
"bypassesDoorShell": "yes",
"flashSuitChecked": true,
"blueSuitChecked": true,
"note": [
"Overload PLMs by placing Bombs at the far right, against the bottom of the crumble block, at the right of the low underwater ceiling.",
"With artificial morph, safely bomb the fast crab by waiting just left of where it falls.",
"Lure a crab to the top door or wait for the global crab to come back around, which can take up to 2.5 minutes.",
"Shoot a Super to knock the crab off, then quickly freeze it at the right height and use it to clip up past the door shell.",
"Knock it off while it is on the sloped tiles near the top door, not on the door itself, otherwise it will never be in the correct height.",
"Because of the shot firing rate, it can help to crouch and shoot the Super to the side to give it a bit more time to knock the crab off."
]
},
{
"id": 13,
"link": [
2,
2
],
"name": "Leave with Runway",
"requires": [],
"exitCondition": {
"leaveWithRunway": {
"length": 8,
"openEnd": 0,
"steepUpTiles": 1
}
},
"flashSuitChecked": true,
"blueSuitChecked": true,
"devNote": "Because the next tile is a slope into the water, it behaves like no open end."
},
{
"id": 14,
"link": [
2,
2
],
"name": "Leave with Runway, With Gravity",
"requires": [
"Gravity"
],
"exitCondition": {
"leaveWithRunway": {
"length": 29,
"openEnd": 0,
"steepUpTiles": 5,
"steepDownTiles": 1
}
},
"flashSuitChecked": true,
"blueSuitChecked": true
},
{
"id": 31,
"link": [
2,
2
],
"name": "R-Mode Spark Interrupt",
"entranceCondition": {
"comeInWithRMode": {}
},
"requires": [
{
"or": [
"h_CrystalFlashForReserveEnergy",
{
"and": [
"h_RModeCanRefillReserves",
{
"or": [
{
"and": [
{
"resourceMissingAtMost": [
{
"type": "PowerBomb",
"count": 0
}
]
},
{
"partialRefill": {
"type": "ReserveEnergy",
"limit": 100
}
}
]
},
{
"and": [
{
"resourceMissingAtMost": [
{
"type": "PowerBomb",
"count": 6
}
]
},
{
"partialRefill": {
"type": "ReserveEnergy",
"limit": 20
}
}
]
}
]
}
]
}
]
},
"canWaterShineCharge",
{
"canShineCharge": {
"usedTiles": 20,
"openEnd": 0
}
},
{
"autoReserveTrigger": {}
},
"canRModeSparkInterrupt"
],
"flashSuitChecked": true,
"blueSuitChecked": true,
"note": [
"Six Scisers can be farmed from the left side without needing Morph.",
"Leave the slower, local Sciser alive to use for the Shinespark interrupt.",
"Position it in the ceiling cubby hole to safely perform the Shinecharge and jump into the Sciser as it walks back down."
]
},
{
"id": 15,
"link": [
2,
2
],
"name": "Leave with Spark (Water Shinecharge)",
"requires": [
"canWaterShineCharge",
{
"canShineCharge": {
"usedTiles": 20,
"openEnd": 1
}
},
{
"or": [
{
"shinespark": {
"frames": 53,
"excessFrames": 0
}
},
{
"and": [
"canShinechargeMovementComplex",
{
"shinespark": {
"frames": 30,
"excessFrames": 0
}
}
]
}
]
}
],
"exitCondition": {
"leaveWithSpark": {
"position": "bottom"
}
},
"flashSuitChecked": true,
"blueSuitChecked": true
},
{
"id": 25,
"link": [
2,
2
],
"name": "Leave Shinecharged (Precise Stutter Shinecharge)",
"requires": [
"canPreciseStutterWaterShineCharge",
"canShinechargeMovementTricky",
"canInsaneJump",
{
"shineChargeFrames": 155
},
{
"or": [
"canBeVeryPatient",
{
"shineChargeFrames": 15
}
]
}
],
"exitCondition": {
"leaveShinecharged": {}
},
"flashSuitChecked": true,
"blueSuitChecked": true,
"note": [
"The ideal setup begins by standing 5 tiles away from the water, at the top of the slope.",
"Run toward the water, releasing forward for 5 frames before re-pressing it on the last possible frame before entering the water.",
"Other positions and timings can work but will gain the shinecharge further from the door."
]
},
{
"id": 16,
"link": [
2,
2
],
"name": "Leave With Temporary Blue",
"requires": [
"canWaterShineCharge",
{
"canShineCharge": {
"usedTiles": 20,
"openEnd": 1
}
},
"canLongChainTemporaryBlue",
"canXRayTurnaround",
"can4HighMidAirMorph"
],
"exitCondition": {
"leaveWithTemporaryBlue": {}
},
"flashSuitChecked": true,
"blueSuitChecked": true
},
{
"id": 17,
"link": [
2,
2
],
"name": "Sciser Farm",
"requires": [
{
"resetRoom": {
"nodes": [
2
]
}
},
{
"cycleFrames": 270
},
{
"or": [
{
"and": [
"Gravity",
{
"or": [
"canDash",
{
"cycleFrames": 175
}
]
}
]
},
{
"cycleFrames": 270
}
]
},
{
"or": [
"Grapple",
{
"and": [
"Wave",
{
"cycleFrames": 50
}
]
},
{
"and": [
"Plasma",
{
"cycleFrames": 50
}
]
},
{
"and": [
"ScrewAttack",
{
"cycleFrames": 80
}
]
},
{
"and": [
"Spazer",
{
"cycleFrames": 150
}
]
},
{
"and": [
"canPseudoScrew",
{
"cycleFrames": 180
}
]
},
{
"and": [
"Ice",
{
"cycleFrames": 270
}
]
},
{
"cycleFrames": 420
}
]
}
],
"farmCycleDrops": [
{
"enemy": "Sciser",
"count": 3
}
],
"flashSuitChecked": true,
"blueSuitChecked": true
},
{
"id": 38,
"link": [
2,
2
],
"name": "Gain Flash Suit (Slopespark)",
"requires": [
"Gravity",
{
"canShineCharge": {
"usedTiles": 20,
"steepUpTiles": 3,
"steepDownTiles": 1,
"openEnd": 0
}
},
{
"enemyDamage": {
"enemy": "Sciser",
"type": "contact",
"hits": 1
}
},
"canSlopeSpark",
"h_XModeSpikeHitLeniency",
{
"shinespark": {
"frames": 5,
"excessFrames": 5
}
}
],
"flashSuitChecked": true,
"blueSuitChecked": true,
"devNote": "FIXME: implement numeric enemy damage"
},
{
"id": 39,
"link": [
2,
2
],
"name": "Gain Blue Suit (Slope X-Mode)",
"requires": [
"Gravity",
{
"canShineCharge": {
"usedTiles": 20,
"steepUpTiles": 3,
"steepDownTiles": 1,
"openEnd": 0
}
},
{
"enemyDamage": {
"enemy": "Sciser",
"type": "contact",
"hits": 1
}
},
"canSlopeXMode",
"h_XModeSpikeHitLeniency",
{
"shinespark": {
"frames": 0
}
},
{
"gainBlueSuit": {}
}
],
"flashSuitChecked": true,
"blueSuitChecked": true
},
{
"id": 32,
"link": [
2,
2
],
"name": "In-Room Crystal Spark, Gravity",
"requires": [
"Gravity",
{
"canShineCharge": {
"usedTiles": 29,
"steepUpTiles": 5,
"steepDownTiles": 1,
"openEnd": 0
}
},
{
"or": [
{
"and": [
"h_enemyDrops",
"h_CrystalSparkWithoutLenience"
]
},
"h_CrystalSpark"
]
}
],
"flashSuitChecked": true,
"blueSuitChecked": true,
"devNote": [
"No lenience, because Power Bombs can be farmed from the Scisers."
]
},
{
"id": 33,
"link": [
2,
2
],
"name": "In-Room Crystal Spark, Suitless",
"requires": [
"canWaterShineCharge",
{
"canShineCharge": {
"usedTiles": 20,
"openEnd": 1
}
},
{
"or": [
{
"and": [
"h_enemyDrops",
"h_underwaterCrystalSparkWithoutLenience"
]
},
"h_underwaterCrystalSpark"
]
}
],
"flashSuitChecked": true,
"blueSuitChecked": true,
"devNote": [
"No lenience, because Power Bombs can be farmed from the Scisers."
]
},
{
"id": 40,
"link": [
2,
2
],
"name": "Come in Shinecharging, Crystal Spark",
"entranceCondition": {
"comeInShinecharging": {
"length": 7,
"openEnd": 0,
"steepDownTiles": 1
},
"comesInHeated": "no"
},
"requires": [
"h_CrystalSpark"
],
"flashSuitChecked": true,
"blueSuitChecked": true
},
{
"id": 18,
"link": [
2,
2
],
"name": "G-Mode Setup - Getting hit by Sciser",
"requires": [],
"exitCondition": {
"leaveWithGModeSetup": {}
},
"flashSuitChecked": true,
"blueSuitChecked": true
},
{
"id": 35,
"link": [
2,
2
],
"name": "R-Mode Crystal Flash Interrupt",
"entranceCondition": {
"comeInWithRMode": {}
},
"requires": [
"canBeVeryPatient",
"canComplexRModeCrystalFlashInterrupt",
{
"ammo": {
"type": "Missile",
"count": 10
}
},
{
"ammo": {
"type": "Super",
"count": 10
}
},
{
"ammo": {
"type": "PowerBomb",
"count": 5
}
},
{
"or": [
"h_fullEnemyDamageReduction",
{
"and": [
"h_partialEnemyDamageReduction",
{
"resourceAtMost": [
{
"type": "RegularEnergy",
"count": 39
}
]
}
]
},
{
"and": [
{
"resourceCapacity": [
{
"type": "RegularEnergy",
"count": 199
}
]
},
{
"resourceCapacity": [
{
"type": "ReserveEnergy",
"count": 199
}
]
}
]
}
]
}
],
"flashSuitChecked": true,
"blueSuitChecked": true,
"note": [
"It is required to avoid hitting the Sciser with the Power Bomb, and to position the Crystal Flash so that the Sciser can hit Samus from above so it avoids the light orb.",
"Using the global counter-clockwise crab, the only spot in the room that is usable is the spot with the two shot blocks by the left door.",
"Break the two shot blocks, then wait below them for nearly two minutes, until the crab is visible in the visible spot, four tiles right of the bottom shot block and at the same height.",
"Wait approximately two more seconds before laying the Power Bomb to Crystal Flash, while Samus below or a bit to the left of the low pointy ceiling just below the visible spot, below and right of the shot block."
],
"devNote": [
"The clockwise global crab may also be usable, but it is more difficult to set free.",
"Neither crab is usable in G-mode, because the blocks are not breakable."
]
},
{
"id": 19,
"link": [
2,
3
],
"name": "Base",
"requires": [
{
  "or": [
    "canCarefulJump",
    "canUseFrozenEnemies",
    "SpaceJump",
    {
      "and": [
        "Gravity",
        {
          "or": [
            "HiJump",
            "canWallJump",
            "h_crouchJumpDownGrab",
            "canIBJ",
            "canSpringBallJumpMidAir"
          ]
        }
      ]
    }
  ]
}
],
"flashSuitChecked": true,
"blueSuitChecked": true
},
{
"id": 20,
"link": [
3,
1
],
"name": "Base",
"requires": [
"Morph"
],
"flashSuitChecked": true,
"blueSuitChecked": true
},
{
"id": 21,
"link": [
3,
2
],
"name": "Base",
"requires": [],
"flashSuitChecked": true,
"blueSuitChecked": true
}
],
"notables": [],
"nextStratId": 41,
"nextNotableId": 1
}