Early Supers Room
Room ID: 45
|
Exit condition: "leaveWithRunway": {
"length": 1,
"openEnd": 1
} |
|

Use a Frozen Zeb to extend the runway. The bug's height when standing next to the pipe is optimal. Requires: "h_frozenEnemyRunway", {"or": [ "Morph", "canTwoTileSqueeze", {"enemyDamage": {"enemy": "Zeb", "type": "contact", "hits": 1}} ]} Exit condition: "leaveWithRunway": {
"length": 3,
"openEnd": 0
} |
|


Exit condition: "leaveWithSidePlatform": {
"height": 2,
"runway": {
"length": 6,
"openEnd": 0
},
"obstruction": [1, 0]
}Dev note: Max extra run speed $1.8. |
|
Exit condition: "leaveWithMockball": {
"remoteRunway": {
"length": 5,
"openEnd": 1
},
"landingRunway": {
"length": 1,
"openEnd": 1
}
} |
|
Exit condition: "leaveWithSpringBallBounce": {
"remoteRunway": {
"length": 5,
"openEnd": 1
},
"landingRunway": {
"length": 1,
"openEnd": 1
},
"movementType": "uncontrolled"
} |
|
Exit condition: "leaveSpaceJumping": {
"remoteRunway": {
"length": 5,
"openEnd": 1
}
} |
|
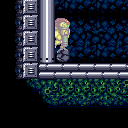

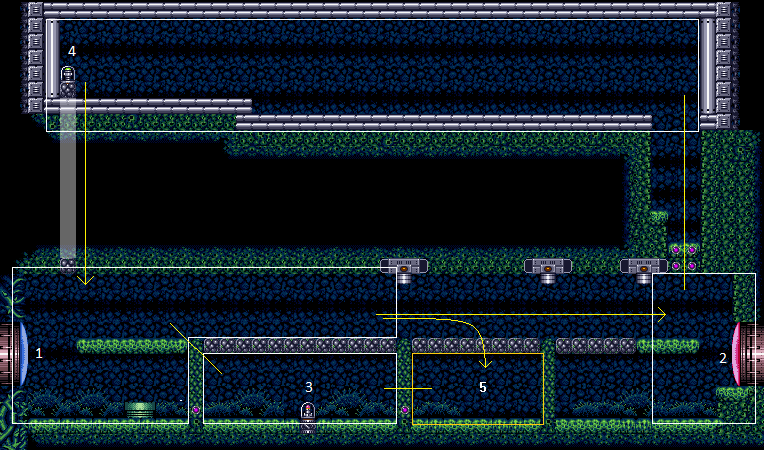
Gain a shinecharge on the long, lower platform in the screen above, then carry it left and down. Use crumble quick drops, land on the floor at the bottom, spin jump left into the doorway, and activate the spark. The required movement here is very precise, as the 180 shinecharge frames is only barely enough. Requires: {"obstaclesNotCleared": ["A"]},
"h_crouchJumpDownGrab",
{"canShineCharge": {"usedTiles": 17, "openEnd": 0}},
"canShinechargeMovementTricky",
"canQuickDrop",
{"shineChargeFrames": 175},
{"shinespark": {"frames": 1, "excessFrames": 0}}Exit condition: "leaveWithSpark": {}Dev note: This starts at node 1 to be able to unlock the door first if needed. Getting up to the platform above is possible by running to the right and crouch-jumping up. |
|
Requires: {"simpleCycleFrames": 85},
{"cycleFrames": 20}Farm cycle drops: 1 Zeb |
|
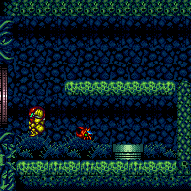

Exit condition: "leaveWithDamage": {
"enemy": "Zeb"
} |
From: 1
Left Door
To: 1
Left Door


Entrance condition: "comeInWithGMode": {
"mode": "any",
"morphed": false
}Requires: "canComplexGMode", {"or": [ "canWallJump", "SpaceJump", {"and": [ "HiJump", "canTrickyUseFrozenEnemies" ]}, {"and": [ "HiJump", "canSpringBallJumpMidAir" ]}, {"and": [ {"blueSuitShinecharge": {}}, {"or": [ {"shinespark": {"frames": 13, "excessFrames": 4}}, {"and": [ "HiJump", {"shinespark": {"frames": 9, "excessFrames": 4}} ]} ]} ]} ]} Collects items: 4 |
From: 1
Left Door
To: 1
Left Door


Entrance condition: "comeInWithGMode": {
"mode": "any",
"morphed": true
}Requires: "canComplexGMode", "h_artificialMorphIBJ", "canOffScreenMovement" Collects items: 4 |
|
Requires: {"obstaclesNotCleared": ["A"]},
"h_speedDash"Clears obstacles: A |
|
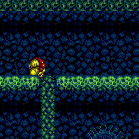

Mockball to roll over the crumble blocks without falling down, and under the gate before it closes. Requires: {"notable": "Mockball"},
{"obstaclesNotCleared": ["A"]},
"canMockball"Clears obstacles: A |
|


Run then do a very small spin jump to clip into the left side of the first gate. While inside the gate, back up to get the maximum run distance using either Moonwalk or X-Ray Turnaround and repeat for the next gate. It is also possible to clip into the gates by aiming down while in the spin jump. A down-back is also possible for clipping into the first gate, but it is generally harder. Requires: {"obstaclesNotCleared": ["A"]},
"canDash",
"canCrouchGateClip",
{"or": [
"canXRayTurnaround",
"canMoonwalk"
]}Clears obstacles: A |
|
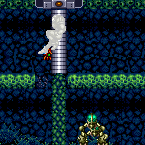

Spawn a Zeb, stand at the edge of the crumbles, and spin jump to the right a moment after it begins moving toward Samus; turn left just before landing, then do a delayed damage boost to make it under the first gate. Face left again, quickly lose i-frames using either X-Ray or a blue suit, then damage boost again to get under the second gate. Both boosts must be performed on the last two frames of knockback, to ensure Samus is high enough to reach the gate. For the first boost, jump can be held the entire time. For the second boost, unless X-Ray is available, there is not much time to set up a buffered jump input, so it may be easier to aim to press jump and right simultaneously after being hit. Requires: {"notable": "Crouch Gate Clip Damage Boost"},
{"obstaclesNotCleared": ["A"]},
"canCrouchGateClip",
"canCameraManip",
{"tech": "canHorizontalDamageBoost"},
{"enemyDamage": {"enemy": "Zeb", "type": "contact", "hits": 2}},
{"or": [
"canXRayWaitForIFrames",
{"haveBlueSuit": {}}
]}Clears obstacles: A Dev note: This strat avoids the need to dash. |
|


Freeze a Zeb inside the pillar below the gate. The Zeb's face should stick out slightly if it's frozen in the correct position. Run or walk into the pillar to clip into it. Press Down to crouch, then X-Ray climb to clip into the gate and walk through it. Walking into the pillar is possible but is more precise and may require several tries. Requires: "canWallIceClip", {"or": [ "h_useMorphBombs", {"and": [ "Morph", {"haveBlueSuit": {}} ]} ]}, "canXRayClimb" Clears obstacles: A Dev note: This strat avoids the need to dash. |
|
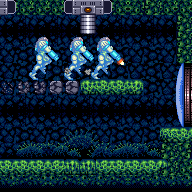

Requires: {"obstaclesNotCleared": ["A"]},
{"canShineCharge": {"usedTiles": 39, "openEnd": 2}},
"canShinechargeMovementComplex",
{"shineChargeFrames": 35}Exit condition: "leaveShinecharged": {}Unlocks doors: {"types": ["super"], "requires": []},
{
"types": ["missiles", "powerbomb"],
"requires": [
{"or": [
"canWallJump",
"HiJump",
"SpaceJump",
"canIBJ",
"canSpringBallJumpMidAir",
"h_crouchJumpDownGrab"
]},
{"resetRoom": {"nodes": [1]}}
]
} |
|
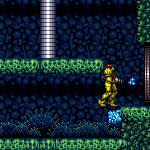

Stand to the right of the Zeb farm and freeze the Zeb as it starts moving horizontally. get onto the platform above the Zeb and wait for the Zeb to thaw and make it close to the right edge of the screen. Use a mockball to get to the right side of the room, ending it as quickly as possible at the end to prevent the Zeb going off screen. Freeze the Zeb adjacent to the right runway in order to extend it by a short distance. Requires: {"obstaclesNotCleared": ["A"]},
"h_trickyFrozenEnemyRunway",
"canMockball",
"canTrickyJump"Exit condition: "leaveWithRunway": {
"length": 3,
"openEnd": 0
}Unlocks doors: {"types": ["missiles", "super"], "requires": []},
{
"types": ["powerbomb"],
"requires": [
{"or": [
"canWallJump",
"HiJump",
"SpaceJump",
"canIBJ",
"canSpringBallJumpMidAir",
"h_crouchJumpDownGrab"
]},
{"resetRoom": {"nodes": [1]}}
]
} |
|
Requires: "h_storedSpark", "canHorizontalShinespark", {"shinespark": {"frames": 49, "excessFrames": 16}} Dev note: The shinespark frames could be lowered by sparking from the crumble blocks, but there is a farm before and after. |
|


The only way the Wavers will get to the door is if the right crumble blocks are all broken. This assumes that Samus comes from the left with Speed, a mockball, or a crouch gate clip. After the crumbles are broken, shoot the ceiling block and wait by the door for the Waver to come. Note that if Samus takes more than 35 seconds after entering the room, before shooting the ceiling, the Waver will not come down. Requires: {"obstaclesNotCleared": ["A"]},
{"or": [
"h_speedDash",
"canMockball",
{"and": [
"canDash",
"canCrouchGateClip",
{"or": [
"canXRayTurnaround",
"canMoonwalk"
]}
]},
{"and": [
{"notable": "Crouch Gate Clip Damage Boost"},
"canHorizontalDamageBoost",
"canCrouchGateClip",
{"enemyDamage": {"enemy": "Zeb", "type": "contact", "hits": 2}},
{"or": [
"canXRayWaitForIFrames",
{"haveBlueSuit": {}}
]}
]}
]}Exit condition: "leaveWithDamage": {
"enemy": "Waver"
}Unlocks doors: {"types": ["ammo"], "requires": []} |
|
Use the respawning Zeb to set up with reserves and enough energy to tank one Small Sidehopper hit without triggering Reserves then perform a 'slow short-charge' across the speedway: you must hold run at least until you have enough speed to get under the shutters. 1-tap shinecharge is used to shinecharge over the Small Sidehopper Pit, before passing the 2nd to last shutter. Fall in, take a hit for i-frames so you can land and be ready to wind up before you get hit again. Once you have blue suit you can simply Morph and roll through the bomb blocks to escape. Entrance condition: "comeInWithRMode": {}Requires: "Morph",
{"refill": ["Energy"]},
{"canShineCharge": {"usedTiles": 30, "openEnd": 1}},
{"autoReserveTrigger": {}},
"canRModeSparkInterrupt"Clears obstacles: A |
|
This has no requirements, but getting back out does. Clears obstacles: A |
|
Crouch on top of the right side of the Zeb spawning pipe. While holding down, let it hit Samus, then Freeze it immediately. Requires: "canTrickyUseFrozenEnemies" Clears obstacles: A, B Dev note: This setup takes damage, but you can farm before and after. |
From: 1
Left Door
To: 4
Top Left Item
Climbing the room and remaining at the top has a very high risk of getting hit by a Waver. Quickly move to the right and exit G-mode to fix the camera. It is possible to kill the Wavers off-screen with one or two Power Bombs or a blue suit; Screw Attack is also relatively safe. With Morph alone, it is possible to cross but requires some luck. Entrance condition: "comeInWithGMode": {
"mode": "any",
"morphed": false
}Requires: "canOffScreenMovement", "canComplexGMode", {"or": [ "canWallJump", "SpaceJump", {"and": [ "HiJump", "canTrickyUseFrozenEnemies" ]}, {"and": [ "HiJump", "canSpringBallJumpMidAir" ]}, {"and": [ {"blueSuitShinecharge": {}}, {"or": [ {"shinespark": {"frames": 13, "excessFrames": 4}}, {"and": [ "HiJump", {"shinespark": {"frames": 9, "excessFrames": 4}} ]} ]} ]} ]}, {"or": [ "ScrewAttack", "h_usePowerBomb", {"and": [ "canBeLucky", "Morph" ]}, {"haveBlueSuit": {}}, {"enemyDamage": {"enemy": "Waver", "type": "contact", "hits": 1}} ]} |
From: 1
Left Door
To: 4
Top Left Item
Climbing the room and remaining at the top has a very high risk of getting hit by a Waver. Quickly move to the right and exit G-mode to fix the camera. It is possible to kill the Wavers off-screen with one or two Power Bombs or a blue suit; Screw Attack is also relatively safe. Without any of those, it is best to roll to the right without unmorphing, and requires a bit of luck. Entrance condition: "comeInWithGMode": {
"mode": "any",
"morphed": true
}Requires: "canOffScreenMovement", "canComplexGMode", "h_artificialMorphIBJ", {"or": [ "ScrewAttack", "h_artificialMorphPowerBomb", "canBeLucky", {"haveBlueSuit": {}}, {"enemyDamage": {"enemy": "Waver", "type": "contact", "hits": 1}} ]} |
|


Before running across the speedway, use the Zeb spawner to get enough Reserves. Use the runway on the upper screen. There are many enemies up there to clear out of the way, but leave one alive. Entrance condition: "comeInWithRMode": {}Requires: {"refill": ["Energy"]},
{"or": [
"canWallJump",
"HiJump",
"SpaceJump",
"canIBJ",
"canSpringBallJumpMidAir",
"h_crouchJumpDownGrab"
]},
{"canShineCharge": {"usedTiles": 25, "openEnd": 1}},
{"autoReserveTrigger": {"maxReserveEnergy": 95}},
"canRModeSparkInterrupt"Clears obstacles: A |
|
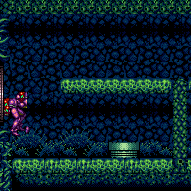

Entrance condition: "comeInWithGrappleTeleport": {
"blockPositions": [[12, 12], [12, 13]]
} |
|
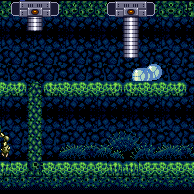
Gain blue speed in the other room, jump through the transition, then speedball under the shutters. Entrance condition: "comeInGettingBlueSpeed": {
"length": 0,
"openEnd": 1,
"minExtraRunSpeed": "$0.E",
"maxExtraRunSpeed": "$1.D"
}Requires: "canSpeedball", "canChainTemporaryBlue", "canInsaneJump" Exit condition: "leaveWithTemporaryBlue": {}Unlocks doors: {"types": ["ammo"], "requires": []}Dev note: Slightly higher run speeds can work but with greater difficulty. FIXME: comeInGettingBlueSpeed is not technically the right entrance condition, since the jump needs to happen in the other room; we ignore this for now since it makes less than a tile of difference to the runway in the other room. |
From: 2
Right Door
To: 1
Left Door
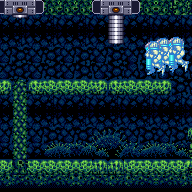

Gain blue speed in the other room, Space Jump through the transition, then speedball under the shutters. Entrance condition: "comeInBlueSpaceJumping": {
"minExtraRunSpeed": "$0.E",
"maxExtraRunSpeed": "$2.1"
}Requires: "canSpeedball", "canChainTemporaryBlue", "canInsaneJump" Exit condition: "leaveWithTemporaryBlue": {}Unlocks doors: {"types": ["ammo"], "requires": []} |
From: 2
Right Door
To: 1
Left Door
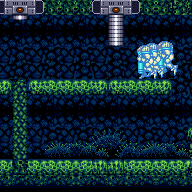

Gain blue speed in the other room, jump through the transition, then speedball under the shutters. Entrance condition: "comeInWithSidePlatform": {
"platforms": [
{
"minHeight": 1,
"maxHeight": 1,
"minTiles": 16,
"speedBooster": "yes",
"obstructions": [[1, 0]],
"note": ["This applies to Lava Dive."]
},
{
"minHeight": 2,
"maxHeight": 2,
"minTiles": 27.4375,
"speedBooster": "yes",
"obstructions": [[1, 0]],
"note": ["This applies to Dust Torizo Room and Noob Bridge."]
},
{
"minHeight": 3,
"maxHeight": 3,
"minTiles": 15.4375,
"speedBooster": "yes",
"obstructions": [[1, 0]],
"requires": [
"HiJump",
{"getBlueSpeed": {"usedTiles": 14, "openEnd": 1}}
],
"note": ["This applies to Botwoon's Room."]
},
{
"minHeight": 3,
"maxHeight": 3,
"minTiles": 28.2472,
"speedBooster": "yes",
"obstructions": [[1, 0]],
"note": ["This applies to Double Chamber."]
}
]
}Requires: {"getBlueSpeed": {"usedTiles": 15, "openEnd": 1}},
"canSpeedball",
"canChainTemporaryBlue",
"canInsaneJump"
Exit condition: "leaveWithTemporaryBlue": {}Unlocks doors: {"types": ["ammo"], "requires": []} |
|
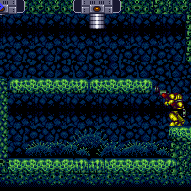

Entrance condition: "comeInWithGrappleTeleport": {
"blockPositions": [[2, 18], [2, 28], [2, 29]]
}Bypasses door shell: true |
From: 2
Right Door
To: 1
Left Door
Entrance condition: "comeInWithGrappleTeleport": {
"blockPositions": [[2, 18]]
}Exit condition: "leaveWithGrappleTeleport": {
"blockPositions": [[2, 18]]
}Bypasses door shell: true |
From: 2
Right Door
To: 1
Left Door
Entrance condition: "comeInWithGrappleTeleport": {
"blockPositions": [[2, 28]]
}Exit condition: "leaveWithGrappleTeleport": {
"blockPositions": [[2, 28]]
}Bypasses door shell: true |
From: 2
Right Door
To: 1
Left Door
Entrance condition: "comeInWithGrappleTeleport": {
"blockPositions": [[2, 29]]
}Exit condition: "leaveWithGrappleTeleport": {
"blockPositions": [[2, 29]]
}Bypasses door shell: true |
|
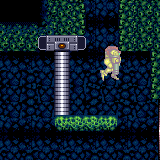

Use the runway on the screen above to gain a shinecharge near the edge of the runway. Requires: {"or": [
"canWallJump",
"HiJump",
"SpaceJump",
"canIBJ",
"canSpringBallJumpMidAir",
"h_crouchJumpDownGrab"
]},
{"canShineCharge": {"usedTiles": 25, "openEnd": 1}},
"canShinechargeMovement",
{"shineChargeFrames": 95}Exit condition: "leaveShinecharged": {}Unlocks doors: {"types": ["ammo"], "requires": []} |
|
Exit condition: "leaveWithRunway": {
"length": 2,
"openEnd": 1
} |
|


Requires: "canTrickyJump", {"or": [ "canLateralMidAirMorph", {"and": [ "canMomentumConservingTurnaround", "canInsaneJump" ]} ]} Exit condition: "leaveWithSidePlatform": {
"height": 2,
"runway": {
"length": 10,
"openEnd": 0
},
"obstruction": [2, 0]
}Dev note: Max extra run speed $2.5. |
|
Use the runway below the crumbles at the right side of the room. Exit condition: "leaveWithMockball": {
"remoteRunway": {
"length": 7,
"openEnd": 1
},
"landingRunway": {
"length": 2,
"openEnd": 1
}
} |
|
Requires: {"or": [
{"canShineCharge": {"usedTiles": 25, "openEnd": 1}},
{"getBlueSpeed": {"usedTiles": 17, "openEnd": 1}}
]},
"canChainTemporaryBlue"Exit condition: "leaveWithTemporaryBlue": {} |
|
Requires: {"resetRoom": {"nodes": [2]}},
{"or": [
"canWallJump",
{"and": [
"canCrouchJump",
{"or": [
{"noBlueSuit": {}},
{"cycleFrames": 300}
]}
]}
]},
{"or": [
{"and": [
"Plasma",
{"cycleFrames": 600}
]},
{"and": [
"ScrewAttack",
{"cycleFrames": 700}
]},
{"and": [
{"haveBlueSuit": {}},
{"cycleFrames": 700}
]},
{"and": [
{"or": [
"Wave",
"Spazer"
]},
{"cycleFrames": 750}
]},
{"and": [
"canDodgeWhileShooting",
{"cycleFrames": 1050}
]}
]}Clears obstacles: A Resets obstacles: B Farm cycle drops: 4 Waver, 3 Sm. Sidehopper |
|
Requires: "h_CrystalFlash" |
From: 2
Right Door
To: 2
Right Door


Jump into the room and aim down to get under the first shutter, then break the crumble blocks to the left. This is the only way for the Wavers to reach the door. After the crumbles are broken, shoot the ceiling block and wait by the door for the Waver to come. Entrance condition: "comeInJumping": {
"speedBooster": "no",
"minTiles": 4
}Requires: "canCrouchGateClip", "canComplexGMode" Exit condition: "leaveWithDamage": {
"enemy": "Waver"
}Unlocks doors: {"types": ["ammo"], "requires": []} |
From: 2
Right Door
To: 2
Right Door


Jump into the room and mockball to get under the first shutter, to break the crumble blocks to the left. Stop before passing under the second shutter. Breaking these crumble blocks is the only way for the Wavers to reach the door. After the crumbles are broken, shoot the ceiling block and wait by the door for the Waver to come. Entrance condition: "comeInJumping": {
"speedBooster": "any",
"minTiles": 1
}Requires: "can4HighMidAirMorph", "canMockball", "canComplexGMode" Exit condition: "leaveWithDamage": {
"enemy": "Waver"
}Unlocks doors: {"types": ["ammo"], "requires": []} |
From: 2
Right Door
To: 2
Right Door


Space Jump into the room and aim down to get under the first shutter, then break the crumble blocks to the left. This is the only way for the Wavers to reach the door. After the crumbles are broken, shoot the ceiling block and wait by the door for the Waver to come. Entrance condition: "comeInSpaceJumping": {
"speedBooster": "no",
"minTiles": 4
}Requires: "canCrouchGateClip", "canComplexGMode" Exit condition: "leaveWithDamage": {
"enemy": "Waver"
}Unlocks doors: {"types": ["ammo"], "requires": []} |
From: 2
Right Door
To: 2
Right Door


Jump into the room and aim down to get under the first shutter, then break the crumble blocks to the left. This is the only way for the Wavers to reach the door. After the crumbles are broken, shoot the ceiling block and wait by the door for the Waver to come. Entrance condition: "comeInWithSidePlatform": {
"platforms": [
{
"minHeight": 1,
"maxHeight": 2,
"minTiles": 4,
"speedBooster": "no",
"obstructions": [[1, 0]],
"note": [
"Skree Boost Room and Butterfly Room are minimal-runway examples that this applies to."
]
},
{
"minHeight": 3,
"maxHeight": 3,
"minTiles": 5,
"speedBooster": "no",
"obstructions": [[1, 0]],
"note": ["Bomb Torizo Room is a minimal-runway example that this applies to."]
}
]
}Requires: "canCrouchGateClip", "canComplexGMode" Exit condition: "leaveWithDamage": {
"enemy": "Waver"
}Unlocks doors: {"types": ["ammo"], "requires": []} |
|
Use the runway on the upper screen. There are many enemies up there to clear out of the way and will helpfully provide Reserves. Or else Crystal Flash. Leave one waver or small hopper alive. You can farm the rest for drops. Entrance condition: "comeInWithRMode": {}Requires: {"or": [
"canWallJump",
"HiJump",
"SpaceJump",
"canIBJ",
"canSpringBallJumpMidAir",
"h_crouchJumpDownGrab"
]},
{"or": [
"h_CrystalFlashForReserveEnergy",
{"and": [
{"disableEquipment": "ETank"},
{"resourceAvailable": [{"type": "Energy", "count": 80}]},
{"resourceMissingAtMost": [{"type": "Missile", "count": 0}]},
{"resourceMissingAtMost": [{"type": "Super", "count": 0}]},
{"partialRefill": {"type": "ReserveEnergy", "limit": 1}}
]}
]},
{"canShineCharge": {"usedTiles": 25, "openEnd": 1}},
{"autoReserveTrigger": {"maxReserveEnergy": 95}},
"canRModeSparkInterrupt"Clears obstacles: A |
|


Requires: {"or": [
"canWallJump",
"HiJump",
"SpaceJump",
"canIBJ",
"canSpringBallJumpMidAir"
]}Clears obstacles: A |
|
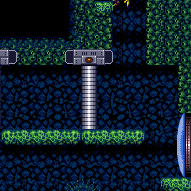

Requires: "h_crouchJumpDownGrab" Clears obstacles: A |
|
Entrance condition: "comeInWithGrappleTeleport": {
"blockPositions": [[7, 2]]
} |
|
Requires: "h_bombThings" |
|
Requires: "Morph",
{"haveBlueSuit": {}} |
|
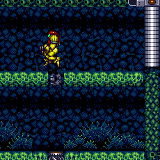

It is possible to do a quick crumble escape twice, requiring no other items or tech. It is easier to escape by doing a quick crumble escape, followed by a crumble block jump or using spring ball or space jump. Requires: "canQuickDrop" |
|
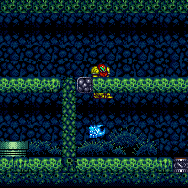

Prepare a pipe bug to Ice clip through the crumble blocks, using Morph and X-Ray. It can be tested on the solid blocks directly above the pipe spawner. Climb onto the frozen bug by rolling under it and jumping while holding down. Requires: {"obstaclesCleared": ["B"]},
"h_XRayMorphIceClip" |
|
Collects items: 4 |
|
|
|
Requires: {"canShineCharge": {"usedTiles": 25, "openEnd": 1}},
"h_CrystalSpark"Dev note: FIXME: There could be a variant with a max runway that uses the bottom runway, but it can only be used once and would be slow to retry. |