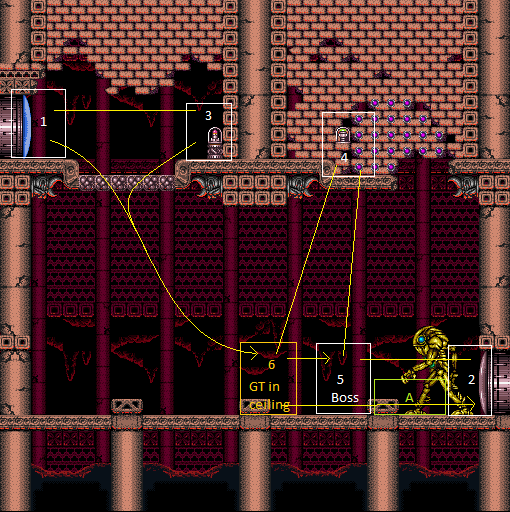
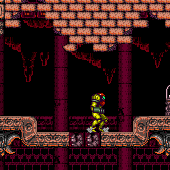
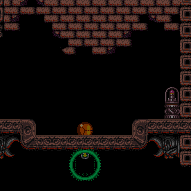
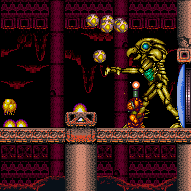
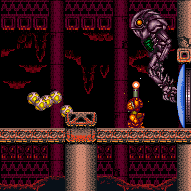
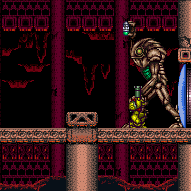
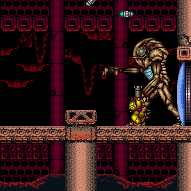
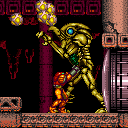
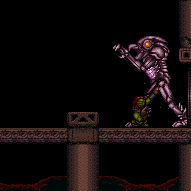
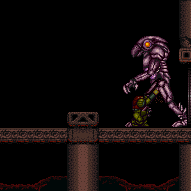
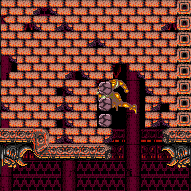
Golden Torizo's Room
Room ID: 150
|
Exit condition: {
"leaveWithRunway": {
"length": 4,
"openEnd": 1
}
} |
|
Requires: "h_heatedCrystalFlash" |
From: 1
Left Door
To: 1
Left Door
Entrance condition: {
"comeInShinecharging": {
"length": 3,
"openEnd": 0
}
}Requires: "h_heatedCrystalSpark" |
|
Entrance condition: {
"comeInWithGMode": {
"mode": "direct",
"morphed": false
}
}Requires: "canRemoteAcquire" "h_heatedDirectGModeLeaveSameDoor" Collects items: 3 |
|
Requires: {
"heatFrames": 170
}
{
"or": [
"canDash",
{
"heatFrames": 45
}
]
} |
|
Requires: "canDash"
{
"heatFrames": 120
}Exit condition: {
"leaveWithRunway": {
"length": 29,
"openEnd": 0
}
}Unlocks doors: {"types":["gray","super"],"requires":[]}
{"types":["missiles","powerbomb"],"requires":["never"]} |
From: 1
Left Door
To: 2
Right Door


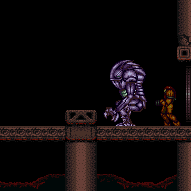
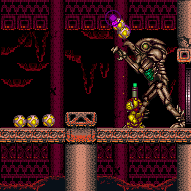
Manipulate into the GT Safe Spot and farm for energy. Keep your Missiles below 30 to force the attack pattern that has drops. Taking damage to get ready for the interrupt may require leaving the safe spot. Leave enough to survive one hit from GT. Push GT back into the corner, run into and through to get your shinecharge. Come back and interrupt using whatever attack pattern is happening. After you gain blue suit, you'll need to use any standard kill strategy. Blue suit will not help with defeating GT except for invulnerability. Entrance condition: {
"comeInWithRMode": {}
}Requires: {
"not": "f_DefeatedGoldenTorizo"
}
"canRiskPermanentLossOfAccess"
{
"heatFrames": 700
}
{
"notable": "Safe Spot Kill"
}
{
"or": [
"h_heatProof",
{
"and": [
"Plasma",
{
"resourceMaxCapacity": [
{
"type": "Missile",
"count": 30
}
]
},
{
"resourceMaxCapacity": [
{
"type": "RegularEnergy",
"count": 99
}
]
}
]
}
]
}
{
"refill": [
"ReserveEnergy"
]
}
{
"enemyDamage": {
"enemy": "Golden Torizo",
"type": "contact",
"hits": 1
}
}
"canUseIFrames"
{
"canShineCharge": {
"usedTiles": 28,
"openEnd": 0
}
}
{
"autoReserveTrigger": {
"maxReserveEnergy": 95
}
}
"canRModeSparkInterrupt" |
From: 1
Left Door
To: 2
Right Door
At any point during the fight, use a Crystal Flash. Then damage down enough to survive one hit. Run into and through GT, turn around, and start down the runway. Get shinecharged, come back and interrupt using whatever attack pattern is ongoing. Then finish the fight. Blue suit will give invulnerability but otherwise does not help to defeat Golden Torizo. Entrance condition: {
"comeInWithRMode": {}
}Requires: "h_heatProof"
{
"not": "f_DefeatedGoldenTorizo"
}
"canRiskPermanentLossOfAccess"
{
"notable": "Crystal Flash During Fight"
}
"h_heatedCrystalFlashForReserveEnergy"
{
"enemyDamage": {
"enemy": "Golden Torizo",
"type": "contact",
"hits": 1
}
}
"canUseIFrames"
{
"canShineCharge": {
"usedTiles": 28,
"openEnd": 0
}
}
{
"autoReserveTrigger": {
"maxReserveEnergy": 95
}
}
"canRModeSparkInterrupt"Clears obstacles: f_DefeatedGoldenTorizo Sets flags: f_DefeatedGoldenTorizo |
|
Crystal Flash, then drop into GT's arena for the runway. With no enemies to take damage from, you must interrupt using heat damage. Entrance condition: {
"comeInWithRMode": {}
}Requires: {
"or": [
"f_DefeatedGoldenTorizo",
{
"obstaclesCleared": [
"f_DefeatedGoldenTorizo"
]
}
]
}
"h_heatedCrystalFlashForReserveEnergy"
{
"heatFrames": 300
}
{
"canShineCharge": {
"usedTiles": 28,
"openEnd": 0
}
}
"h_heatTriggerRModeSparkInterrupt" |
From: 1
Left Door
To: 2
Right Door
Avoid stepping on all three crumble blocks. Use many bomb spreads to place bombs on them and overload PLMs before going through. After dropping below, move to the door quickly in order to prevent GT falling on Samus. Entrance condition: {
"comeInWithGMode": {
"mode": "any",
"morphed": false
}
}Requires: "canComplexGMode" "Charge" "h_useMorphBombs" "h_heatedGModeOffCameraDoor" Exit condition: {
"leaveNormally": {}
}Unlocks doors: {"types":["missiles"],"requires":[{"heatFrames":50}]}
{"types":["super"],"requires":[]}
{"types":["powerbomb"],"requires":[{"heatFrames":110}]}Dev note: This strat forces Samus to leave the room because the camera is stuck at the top left of the room. FIXME: It is possible to get to the top right item, but its not easy or too useful. It is possible to use the item to break the Bomb blocks and escape. Fighting GT while blind is unreasonable. |
|
Avoid stepping on all three crumble blocks before moving through the item to overload PLMs, then go through the crumble blocks. After dropping below, move to the door quickly in order to prevent GT falling on Samus. Note that if the item is not there, it is still possible to overload PLMs by using bomb spreads on crumble blocks that have never been stepped on. Entrance condition: {
"comeInWithGMode": {
"mode": "direct",
"morphed": false
}
}Requires: "canRemoteAcquire"
{
"or": [
{
"and": [
{
"itemNotCollectedAtNode": 3
},
"canRiskPermanentLossOfAccess"
]
},
{
"and": [
"Charge",
"h_useMorphBombs"
]
}
]
}
"h_heatedGModeOffCameraDoor"Exit condition: {
"leaveNormally": {}
}Collects items: 3 Unlocks doors: {"types":["missiles"],"requires":[{"heatFrames":50}]}
{"types":["super"],"requires":[]}
{"types":["powerbomb"],"requires":[{"heatFrames":110}]}Dev note: This strat forces Samus to leave the room because the camera is stuck at the top left of the room. FIXME: It is possible to get to the top right item, but its not easy or too useful. It is possible to use the item to break the Bomb blocks and escape. Fighting GT while blind is unreasonable. |
|

Jump on the crumble blocks before they break to reach the item, at the risk on falling through. Requires: {
"notable": "Crumble Jump"
}
"canCrumbleJump"
{
"heatFrames": 80
}
{
"or": [
"canDash",
{
"heatFrames": 30
}
]
} |
|

Uses a single bomb blast to just barely get propelled over the crumble pit. Requires: {
"notable": "Horizontal Bomb Jump"
}
"canBombHorizontally"
{
"heatFrames": 160
} |
|
Requires: "h_useSpringBall"
{
"heatFrames": 140
} |
|
Requires: "SpaceJump"
{
"heatFrames": 70
}
{
"or": [
"canDash",
{
"heatFrames": 40
}
]
} |
|

Entrance condition: {
"comeInWithSpark": {
"position": "bottom"
}
}Requires: {
"shinespark": {
"frames": 18,
"excessFrames": 5
}
}
{
"heatFrames": 100
}Dev note: Sparking in from the bottom position requires fewer heat frames, as you bonk the side of the item pedestal. FIXME: The heat frames for the crash animation occur after the item collection, which could matter if the item is an ETank. Likewise, one shinespark frame of damage occurs after the item collection (assuming not stopping early). |
|
Entrance condition: {
"comeInWithSpark": {
"position": "top"
}
}Requires: "h_navigateHeatRooms"
{
"shinespark": {
"frames": 19,
"excessFrames": 8
}
}
{
"heatFrames": 120
}Dev note: Sparking in from the top position requires more heat frames, because you end up on top of the item pedestal and need to move off of it. FIXME: The heat frames for the crash animation (and for moving off the pedestal) occur after the item collection, which could matter if the item is an ETank. Likewise, 3 shinespark frames of damage occur after the item collection (assuming not stopping early). |
|
Using momentum from the previous room, run and jump over the crumble blocks to reach the item. Entrance condition: {
"comeInRunning": {
"speedBooster": "any",
"minTiles": 1
}
}Requires: "canInsaneJump"
{
"heatFrames": 60
} |
|
Using momentum from the previous room, run and jump over the crumble blocks to reach the item. Entrance condition: {
"comeInRunning": {
"speedBooster": "any",
"minTiles": 4
}
}Requires: "canTrickyJump"
{
  "heatFrames": 50
} |
|
Entrance condition: {
"comeInWithGMode": {
"mode": "any",
"morphed": false
}
}Requires: "h_heatedGMode"
{
"heatFrames": 0
} |
|

Entrance condition: {
"comeInWithGrappleTeleport": {
"blockPositions": [
[
5,
3
],
[
7,
2
]
]
}
}Requires: {
"heatFrames": 50
}Clears obstacles: door_2 |
|
Entrance condition: {
"comeInWithGrappleTeleport": {
"blockPositions": [
[
3,
12
]
]
}
}Requires: {
"or": [
"h_heatedGrappleTeleportWallEscape",
{
"and": [
{
"doorUnlockedAtNode": 1
},
{
"heatFrames": 20
}
]
}
]
}
"canOffScreenMovement"Clears obstacles: door_2 Unlocks doors: {"types":["ammo"],"requires":[]} |
|

Entrance condition: {
"comeInWithGrappleTeleport": {
"blockPositions": [
[
3,
12
]
]
}
}Clears obstacles: door_2 Bypasses door shell: true |
|
Entrance condition: {
"comeInWithGrappleTeleport": {
"blockPositions": [
[
3,
12
]
]
}
}Exit condition: {
"leaveWithGrappleTeleport": {
"blockPositions": [
[
3,
12
]
]
}
}Clears obstacles: door_2 Bypasses door shell: true |
|
Exit the previous room with Samus in a standing pose (while grappled). After teleporting, press right to release Grapple while staying standing (not being forced into a crouch). Then X-ray climb to get up to the door transition, without needing to open the door. Samus will not be visible during the climb. If Golden Torizo is alive, the fight will be triggered but does not create any risk of damage. Entrance condition: {
"comeInWithGrappleTeleport": {
"blockPositions": [
[
2,
28
],
[
2,
29
]
]
}
}Requires: "canXRayClimb"
{
"heatFrames": 1600
}Clears obstacles: door_2 Bypasses door shell: true |
|


Use a Crystal Flash to refill reserve energy. If Golden Torizo is alive, perform the Crystal Flash in the left corner of the room; otherwise it can be done near the door. Then use heat damage to trigger an R-mode forced standup near the crumble blocks with upward momentum, in order to clip up through them. Several different combinations of items and techniques can make this possible: 1) Space Jump, with a mid-air morph (not required but makes it easier), 2) HiJump and a mid-air Spring Ball jump, most easily by equipping both HiJump and SpringBall during the pause, 3) A walljump into Spring Ball jump, equipping Spring Ball soon after the wall jump into order to gain horizontal speed before the mid-air jump. 4) HiJump and Speedbooster, running and jumping into a mid-air morph, In every case, precise timing is needed to be in the correct location when reserves trigger, just below the crumbles but without bonking them. Having less upward momentum can provide more lenience for timing the forced standup clip, though if Samus' momentum is not enough to make it onto the ledge then a crumble jump may also be required. Entrance condition: {
"comeInWithRMode": {}
}Requires: {
"notable": "R-Mode Forced Standup Clip"
}
"canRModeStandupClip"
{
"or": [
{
  "or": [
    "f_DefeatedGoldenTorizo",
    {
      "obstaclesCleared": [
        "f_DefeatedGoldenTorizo"
      ]
    }
  ]
},
{
"heatFrames": 100
}
]
}
"h_heatedCrystalFlash"
{
"or": [
{
"and": [
"SpaceJump",
"can4HighMidAirMorph"
]
},
{
"and": [
"HiJump",
"canSpringBallJumpMidAir"
]
},
{
"and": [
"HiJump",
"canSpeedyJump",
"canMidAirMorph",
"canCrumbleJump"
]
},
{
"and": [
"h_trickySpringwall",
"canCrumbleJump"
]
}
]
}
{
"resourceCapacity": [
{
"type": "RegularEnergy",
"count": 99
}
]
}
{
"autoReserveTrigger": {}
}
{
"heatFrames": 100
}Clears obstacles: door_2 Dev note: FIXME: A variant of this strat could go to the item node instead of the door, possibly with slightly different heat frames at the end. FIXME: As an alternative to doing a Crystal Flash, Golden Torizo could be used as a farm, with canRiskPermanentLossOfAccess. |
|
Quickly roll to the left side of the room and IBJ through the crumble blocks before GT gets there, if it is alive. Starting from a jump or with a double bomb jump can help speed this up and make it much easier, but Samus needs to bomb slowly near the top to prevent hitting the crumble blocks before PLMs are overloaded. Otherwise, it can help to IBJ through the left-most crumble block, as GT will often jump away when first reaching Samus. The left-most crumble block is the 4th tile away from the wall. With a failed IBJ start, GT often times won't touch Samus if she is Morphed on the ground, and can jump away, giving another chance to IBJ. Entrance condition: {
"comeInWithGMode": {
"mode": "any",
"morphed": true
}
}Requires: "h_artificialMorphLongIBJ"
{
"or": [
{
"or": [
"f_DefeatedGoldenTorizo",
{
"obstaclesCleared": [
"f_DefeatedGoldenTorizo"
]
}
]
},
{
"and": [
"canTrickyDodgeEnemies",
{
"or": [
"h_artificialMorphJumpIntoIBJ",
"h_artificialMorphDoubleBombJump",
"canInsaneJump"
]
}
]
}
]
}
"h_heatedGModeOpenDifferentDoor"Clears obstacles: door_2 |
|
Requires: {
"or": [
"f_DefeatedGoldenTorizo",
{
"obstaclesCleared": [
"f_DefeatedGoldenTorizo"
]
}
]
}Exit condition: {
"leaveWithRunway": {
"length": 29,
"openEnd": 0
}
} |
|
Wait to run under Golden Torizo as it jumps. Entrance condition: {
"comeInNormally": {}
}Requires: {
"heatFrames": 415
}Exit condition: {
"leaveWithRunway": {
"length": 29,
"openEnd": 0
}
}Clears obstacles: door_2 Unlocks doors: {"types":["ammo"],"requires":[]} |
|
If entering from the right door with Golden Torizo not yet defeated, come in already morphed, Crystal Flash immediately, then morph and roll under Golden Torizo. Requires: {
"or": [
"canPrepareForNextRoom",
{
"or": [
"f_DefeatedGoldenTorizo",
{
"obstaclesCleared": [
"f_DefeatedGoldenTorizo"
]
}
]
}
]
}
"h_heatedCrystalFlash" |
|
Requires: {
"or": [
"f_DefeatedGoldenTorizo",
{
"obstaclesCleared": [
"f_DefeatedGoldenTorizo"
]
}
]
}
{
"canShineCharge": {
"usedTiles": 28,
"openEnd": 0
}
}
"h_heatedCrystalSpark"Dev note: FIXME: This could be done with Golden Torizo alive, but it may attack Samus in the process of the Crystal Spark. |
|


Crystal Flash and use the runway. With no enemies to take damage from, you must interrupt using heat damage. Entrance condition: {
"comeInWithRMode": {}
}Requires: {
"or": [
"f_DefeatedGoldenTorizo",
{
"obstaclesCleared": [
"f_DefeatedGoldenTorizo"
]
}
]
}
"h_heatedCrystalFlashForReserveEnergy"
{
"heatFrames": 300
}
{
"canShineCharge": {
"usedTiles": 28,
"openEnd": 0
}
}
"h_heatTriggerRModeSparkInterrupt"Clears obstacles: door_2 |
|
Requires: {
"not": "f_DefeatedGoldenTorizo"
}
"canRiskPermanentLossOfAccess"
{
"enemyDamage": {
"enemy": "Golden Torizo",
"type": "contact",
"hits": 1
}
} |
|


Farm supers to use throughout the fight. Requires: {
"notable": "Safe Spot Kill"
}
"h_heatProof"
"Super"Clears obstacles: f_DefeatedGoldenTorizo Sets flags: f_DefeatedGoldenTorizo Dev note: Supers are farmable here, so no ammo requirement. |
|
Stand in the safe spot and fire Charge shots into GT. Requires: {
"or": [
{
"notable": "Safe Spot Kill"
},
{
"and": [
{
"notable": "Safe Spot Kill (Lenient)"
},
{
"resourceAtMost": [
{
"type": "Missile",
"count": 31
}
]
},
{
"enemyDamage": {
"enemy": "Golden Torizo",
"type": "contact",
"hits": 1
}
}
]
}
]
}
"h_heatProof"
"Charge"
"canBeVeryPatient"Clears obstacles: f_DefeatedGoldenTorizo Sets flags: f_DefeatedGoldenTorizo |
|
This strat is assuming no farming. It requires 30 supers, but can be done with 29. This requires a very steady fire rate so that for every Super Missile caught by GT, the next 4 Supers do damage. Requires: {
"notable": "Safe Spot Kill"
}
"h_navigateHeatRooms"
{
"heatFrames": 1200
}
{
"ammo": {
"type": "Super",
"count": 30
}
}Clears obstacles: f_DefeatedGoldenTorizo Sets flags: f_DefeatedGoldenTorizo Dev note: No farming expected because that would change the heat frames. Supers count hard-coded because of GT's inherent 'dodging' ability. We could use an enemyKill if this were integrated into the enemy definition. It actually takes 29 supers but giving 1 extra in leniency since it's easy to miss. |
|


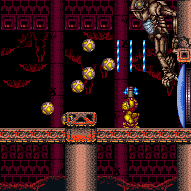
This strat requires some farming. It assumes starting with 15 supers for one session of farming. A safe farming method is to face left while standing in the safe spot. Then fire straight up to shoot the orbs as they appear. Jump up while GT's beak is not open to collect the drops. Plasma allows all of the orbs to be broken at once. Grapple allows for more drops to be collected by shooting diagonally, and collecting the items using Grapple. Keep the number of current Missiles below 31 so that GT will be guaranteed to use the attack which creates drops. Firing Supers requires a very steady fire rate so that for every Super Missile caught by GT, the next 4 Supers do damage. Requires: {
"notable": "Safe Spot Kill"
}
"h_navigateHeatRooms"
"canTrickyJump"
{
"ammo": {
"type": "Super",
"count": 15
}
}
{
"or": [
{
"and": [
"Plasma",
{
"heatFrames": 2700
}
]
},
{
"and": [
"canPreciseGrapple",
{
"heatFrames": 2700
}
]
},
{
"heatFrames": 3200
}
]
}Clears obstacles: f_DefeatedGoldenTorizo Sets flags: f_DefeatedGoldenTorizo Dev note: Listed Heat frames have been reduced by accounting for health drops. |
From: 2
Right Door
To: 2
Right Door
This strat requires much farming. It assumes a capacity of and starting with only 5 supers for five sessions of farming. A safe farming method is to face left while standing in the safe spot. Then fire straight up to shoot the orbs as they appear. Jump up while GT's beak is not open to collect the drops. Plasma allows all of the orbs to be broken at once. Grapple allows for more drops to be collected by shooting diagonally, and collecting the items using Grapple. Keep the number of current Missiles below 31 so that GT will be guaranteed to use the attack which creates drops. Firing Supers requires a very steady fire rate so that for every Super Missile caught by GT, the next 4 Supers do damage. Requires: {
"notable": "Safe Spot Kill"
}
"h_navigateHeatRooms"
"canTrickyJump"
"canBePatient"
{
"ammo": {
"type": "Super",
"count": 5
}
}
{
"or": [
{
"and": [
"Plasma",
{
"heatFrames": 3100
}
]
},
{
"and": [
"canPreciseGrapple",
{
"heatFrames": 3200
}
]
},
{
"heatFrames": 4500
}
]
}Clears obstacles: f_DefeatedGoldenTorizo Sets flags: f_DefeatedGoldenTorizo Dev note: Listed Heat frames have been reduced by accounting for health drops. |
|
Midway through the fight, use a Crystal Flash to refill Samus' energy. Crystal Flashing while standing in the safe spot at GT's feet is safe. Requires: {
"notable": "Crystal Flash During Fight"
}
"h_navigateHeatRooms"
{
"or": [
{
"ammo": {
"type": "Super",
"count": 30
}
},
{
"and": [
"Charge",
"Ice",
"Wave",
"Plasma"
]
}
]
}
{
"heatFrames": 800
}
"h_heatedCrystalFlash"
{
"heatFrames": 800
}Clears obstacles: f_DefeatedGoldenTorizo Sets flags: f_DefeatedGoldenTorizo Dev note: FIXME: Other resource combinations can work; fewer supers + farm, weaker beam + more health, 2nd crystal flash. FIXME: Add heavy pause abuse strats for GT. |
|

Stand in the safe spot and fire Charge shots into GT. Requires: {
"or": [
{
"notable": "Safe Spot Kill"
},
{
"and": [
{
"notable": "Safe Spot Kill (Lenient)"
},
{
"resourceAtMost": [
{
"type": "Missile",
"count": 31
}
]
},
{
"enemyDamage": {
"enemy": "Golden Torizo",
"type": "contact",
"hits": 1
}
}
]
}
]
}
"Charge"
"Ice"
"Wave"
"Plasma"
{
"heatFrames": 1250
}Clears obstacles: f_DefeatedGoldenTorizo Sets flags: f_DefeatedGoldenTorizo |
|
Stand in the safe spot and fire Charge shots into GT. Requires: {
"or": [
{
"notable": "Safe Spot Kill"
},
{
"and": [
{
"notable": "Safe Spot Kill (Lenient)"
},
{
"resourceAtMost": [
{
"type": "Missile",
"count": 31
}
]
},
{
"enemyDamage": {
"enemy": "Golden Torizo",
"type": "contact",
"hits": 1
}
}
]
}
]
}
"Charge"
"Wave"
"Plasma"
{
"heatFrames": 1400
}Clears obstacles: f_DefeatedGoldenTorizo Sets flags: f_DefeatedGoldenTorizo |
|
Stand in the safe spot and fire Charge shots into GT. Requires: {
"or": [
{
"notable": "Safe Spot Kill"
},
{
"and": [
{
"notable": "Safe Spot Kill (Lenient)"
},
{
"resourceAtMost": [
{
"type": "Missile",
"count": 31
}
]
},
{
"enemyDamage": {
"enemy": "Golden Torizo",
"type": "contact",
"hits": 1
}
}
]
}
]
}
"Charge"
"Plasma"
{
"heatFrames": 2000
}Clears obstacles: f_DefeatedGoldenTorizo Sets flags: f_DefeatedGoldenTorizo |
|
Stand in the safe spot and fire Charge shots into GT. Requires: {
"or": [
{
"notable": "Safe Spot Kill"
},
{
"and": [
{
"notable": "Safe Spot Kill (Lenient)"
},
{
"resourceAtMost": [
{
"type": "Missile",
"count": 31
}
]
},
{
"enemyDamage": {
"enemy": "Golden Torizo",
"type": "contact",
"hits": 1
}
}
]
}
]
}
"Charge"
"Ice"
"Wave"
"Spazer"
{
"heatFrames": 4000
}Clears obstacles: f_DefeatedGoldenTorizo Sets flags: f_DefeatedGoldenTorizo |
|
Stand in the safe spot and fire Charge shots into GT. Requires: {
"or": [
{
"notable": "Safe Spot Kill"
},
{
"and": [
{
"notable": "Safe Spot Kill (Lenient)"
},
{
"resourceAtMost": [
{
"type": "Missile",
"count": 31
}
]
},
{
"enemyDamage": {
"enemy": "Golden Torizo",
"type": "contact",
"hits": 1
}
}
]
}
]
}
"Charge"
{
"heatFrames": 6500
}
{
"or": [
{
"and": [
"Ice",
"Wave"
]
},
{
"and": [
"Ice",
"Spazer"
]
},
{
"and": [
"Wave",
"Spazer"
]
}
]
}Clears obstacles: f_DefeatedGoldenTorizo Sets flags: f_DefeatedGoldenTorizo |
|
Requires: "h_navigateHeatRooms"
{
"heatFrames": 1200
}
{
"ammo": {
"type": "Super",
"count": 30
}
}
{
"enemyDamage": {
"enemy": "Golden Torizo",
"type": "super",
"hits": 4
}
}
{
"or": [
"canDodgeWhileShooting",
{
"ammo": {
"type": "Super",
"count": 5
}
},
{
"and": [
{
"enemyDamage": {
"enemy": "Golden Torizo",
"type": "super",
"hits": 2
}
},
{
"heatFrames": 200
}
]
}
]
}Clears obstacles: f_DefeatedGoldenTorizo Sets flags: f_DefeatedGoldenTorizo Dev note: No farming expected because that would change the heat frames. Supers count hard-coded because of GT's inherent 'dodging' ability. We could use an enemyKill if this were integrated into the enemy definition. It actually takes 29 supers but giving 1 extra in leniency since it's easy to miss |
|
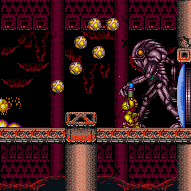
Killing Golden Torizo only with missiles using enemy state manipulation to get missiles to connect. This can be done by rolling under GT, triggering the sit attack, and then shooting missiles during the stand up animation. By pushing GT to the door and rolling into the door during a jump back, the sit can reliably be manipulated. But this setup is subpixel dependant and harder to setup again if GT moves unexpectidly. Use of the safe spot is expected. Keep missiles below 31 to control the fight. This fight takes multiple minutes. Requires: {
"notable": "Safe Spot Kill"
}
{
"notable": "Missiles Only Kill"
}
"h_heatProof"
"Morph"
{
"resourceCapacity": [
{
"type": "Missile",
"count": 15
}
]
}
{
"or": [
{
"resourceCapacity": [
{
"type": "RegularEnergy",
"count": 199
}
]
},
{
"resourceCapacity": [
{
"type": "ReserveEnergy",
"count": 100
}
]
}
]
}
"canBeVeryPatient"Clears obstacles: f_DefeatedGoldenTorizo Sets flags: f_DefeatedGoldenTorizo Dev note: It is easy to make mistakes with this strat, so some capacity is given for leniency. You can farm up resources readily enough. |
|
Stand a specific distance away from Golden Torizo so that it takes a step before jumping backwards. When it uses the eye lazer attack, it will not be able to avoid missiles. Farm drops following every jump backwards. At low health Golden Torizo will do a bird attack and that must be interuppted preemptively because it is difficult to dodge. Requires: {
"notable": "Safe Spot Kill"
}
{
"notable": "Missiles Only Kill"
}
"h_heatProof"
{
"resourceCapacity": [
{
"type": "Missile",
"count": 5
}
]
}
"canBeExtremelyPatient"Clears obstacles: f_DefeatedGoldenTorizo Sets flags: f_DefeatedGoldenTorizo |
|
This is an estimate of the net damage taken, including farmed energy. Requires: "h_navigateHeatRooms"
{
"heatFrames": 1800
}
"Charge"
"Ice"
"Wave"
"Plasma"
{
"enemyDamage": {
"enemy": "Golden Torizo",
"type": "contact",
"hits": 1
}
}
{
"or": [
{
"enemyDamage": {
"enemy": "Golden Torizo",
"type": "contact",
"hits": 3
}
},
{
"and": [
"canDodgeWhileShooting",
{
"or": [
"ScrewAttack",
"Morph"
]
}
]
}
]
}Clears obstacles: f_DefeatedGoldenTorizo Sets flags: f_DefeatedGoldenTorizo |
From: 2
Right Door
To: 2
Right Door
This is an estimate of the net damage taken, including farmed energy. Requires: "h_navigateHeatRooms"
{
"heatFrames": 2150
}
"Charge"
"Wave"
"Plasma"
{
"enemyDamage": {
"enemy": "Golden Torizo",
"type": "contact",
"hits": 2
}
}
{
"or": [
{
"enemyDamage": {
"enemy": "Golden Torizo",
"type": "contact",
"hits": 3
}
},
{
"and": [
"canDodgeWhileShooting",
{
"or": [
"ScrewAttack",
"Morph"
]
}
]
}
]
}Clears obstacles: f_DefeatedGoldenTorizo Sets flags: f_DefeatedGoldenTorizo |
From: 2
Right Door
To: 2
Right Door
This is an estimate of the net damage taken, including farmed energy. Requires: "h_navigateHeatRooms"
{
"heatFrames": 3600
}
"Charge"
"Plasma"
{
"enemyDamage": {
"enemy": "Golden Torizo",
"type": "contact",
"hits": 2
}
}
{
"or": [
{
"enemyDamage": {
"enemy": "Golden Torizo",
"type": "contact",
"hits": 6
}
},
{
"and": [
"canDodgeWhileShooting",
{
"or": [
"ScrewAttack",
"Morph"
]
}
]
}
]
}Clears obstacles: f_DefeatedGoldenTorizo Sets flags: f_DefeatedGoldenTorizo |
|
This is an estimate of the net damage taken, including farmed energy. Requires: "h_heatProof"
"Charge"
"Ice"
"Wave"
"Spazer"
{
"enemyDamage": {
"enemy": "Golden Torizo",
"type": "contact",
"hits": 4
}
}
{
"or": [
{
"and": [
"canDodgeWhileShooting",
{
"or": [
"Morph",
"ScrewAttack",
{
"enemyDamage": {
"enemy": "Golden Torizo",
"type": "contact",
"hits": 6
}
}
]
}
]
},
{
"enemyDamage": {
"enemy": "Golden Torizo",
"type": "contact",
"hits": 13
}
}
]
}Clears obstacles: f_DefeatedGoldenTorizo Sets flags: f_DefeatedGoldenTorizo |
From: 2
Right Door
To: 2
Right Door
Start the fight with 31 Missiles or fewer in order to prevent GT from using its laser attack, which will enable Samus to stand next to it. With more than 31 Missiles, Samus will have a 2 pixel window in which she must quickly get into to prevent touching GT or his lasers. Wait long enough for the flag to be set, then Samus can then leave the room without exiting G-mode. Entrance condition: {
"comeInWithGMode": {
"mode": "direct",
"morphed": false
}
}Requires: "h_heatedGMode"
{
"notable": "Safe Spot Kill"
}
{
"or": [
{
"resourceAtMost": [
{
"type": "Missile",
"count": 31
}
]
},
"canComplexGMode"
]
}
{
"or": [
{
"ammo": {
"type": "Super",
"count": 30
}
},
{
"and": [
"Charge",
{
"or": [
"canBeVeryPatient",
{
"and": [
"canBePatient",
"Wave"
]
},
{
"and": [
"canBePatient",
"Spazer"
]
},
"Plasma",
{
"and": [
"canBePatient",
{
"ammo": {
"type": "Super",
"count": 15
}
}
]
}
]
}
]
}
]
}
{
"heatFrames": 0
}Exit condition: {
"leaveWithGMode": {
"morphed": false
}
}Clears obstacles: f_DefeatedGoldenTorizo, door_2 Sets flags: f_DefeatedGoldenTorizo |
From: 2
Right Door
To: 2
Right Door
Start the fight with 31 Missiles or fewer in order to prevent GT from using its laser attack, which will enable Samus to stand next to it. Having GT start with his Chozo Ball attack also will make it so there are drops which can be collected at the end of the fight, otherwise they will have been overloaded. Pause abuse and jump to collect the drops on G-mode exit. Entrance condition: {
"comeInWithGMode": {
"mode": "indirect",
"morphed": false
}
}Requires: {
"notable": "Safe Spot Kill"
}
{
"resourceAtMost": [
{
"type": "Missile",
"count": 31
}
]
}
{
"or": [
{
"ammo": {
"type": "Super",
"count": 30
}
},
{
"and": [
"Charge",
{
"or": [
"canBeVeryPatient",
{
"and": [
"canBePatient",
"Wave"
]
},
{
"and": [
"canBePatient",
"Spazer"
]
},
"Plasma",
{
"and": [
"canBePatient",
{
"ammo": {
"type": "Super",
"count": 15
}
}
]
}
]
}
]
}
]
}
{
"or": [
"h_heatedIndirectGModeOpenSameDoor",
"h_heatedGModePauseAbuse"
]
}Clears obstacles: f_DefeatedGoldenTorizo, door_2 Sets flags: f_DefeatedGoldenTorizo |
From: 2
Right Door
To: 2
Right Door
With more than 31 Missiles, Samus will have a 2 pixel window in which she must quickly get into to prevent touching GT or his lasers. Having GT start with his laser attack will also make it so there are no drops which can be collected at the end of the fight. Entrance condition: {
"comeInWithGMode": {
"mode": "indirect",
"morphed": false
}
}Requires: {
"notable": "Safe Spot Kill"
}
"canComplexGMode"
{
"or": [
{
"ammo": {
"type": "Super",
"count": 30
}
},
{
"and": [
"Charge",
{
"or": [
"canBeVeryPatient",
{
"and": [
"canBePatient",
"Wave"
]
},
{
"and": [
"canBePatient",
"Spazer"
]
},
"Plasma",
{
"and": [
"canBePatient",
{
"ammo": {
"type": "Super",
"count": 15
}
}
]
}
]
}
]
}
]
}
"h_heatedIndirectGModeOpenSameDoor"Clears obstacles: f_DefeatedGoldenTorizo, door_2 Sets flags: f_DefeatedGoldenTorizo |
From: 2
Right Door
To: 2
Right Door
Manipulate into the GT Safe Spot and farm for energy. Keep your Missiles below 30 to force the attack pattern that has drops. Taking damage to get ready for the interrupt may require leaving the safe spot. Leave enough to survive one hit from GT. Push GT back into the corner, run into and through to get your shinecharge. Come back and interrupt using whatever attack pattern is happening. After you gain blue suit, you'll need to use any standard kill strategy. Blue suit will not help with defeating GT except for invulnerability. Entrance condition: {
"comeInWithRMode": {}
}Requires: {
"not": "f_DefeatedGoldenTorizo"
}
"canRiskPermanentLossOfAccess"
{
"heatFrames": 540
}
{
"notable": "Safe Spot Kill"
}
{
"or": [
"h_heatProof",
{
"resourceMaxCapacity": [
{
"type": "Missile",
"count": 30
}
]
}
]
}
{
"refill": [
"Energy"
]
}
{
"enemyDamage": {
"enemy": "Golden Torizo",
"type": "contact",
"hits": 1
}
}
"canUseIFrames"
{
"canShineCharge": {
"usedTiles": 28,
"openEnd": 0
}
}
{
"autoReserveTrigger": {
"maxReserveEnergy": 95
}
}
"canRModeSparkInterrupt"Clears obstacles: door_2 |
From: 2
Right Door
To: 2
Right Door
At any point during the fight, use a Crystal Flash. Then damage down enough to survive one hit. Run into and through GT, turn around, and start down the runway. Get shinecharged, come back and interrupt using whatever attack pattern is ongoing. Then finish the fight. Blue suit will give invulnerability but otherwise does not help to defeat Golden Torizo. Entrance condition: {
"comeInWithRMode": {}
}Requires: "h_heatProof"
{
"not": "f_DefeatedGoldenTorizo"
}
"canRiskPermanentLossOfAccess"
{
"notable": "Crystal Flash During Fight"
}
"h_heatedCrystalFlashForReserveEnergy"
{
"enemyDamage": {
"enemy": "Golden Torizo",
"type": "contact",
"hits": 1
}
}
"canUseIFrames"
{
"canShineCharge": {
"usedTiles": 28,
"openEnd": 0
}
}
{
"autoReserveTrigger": {
"maxReserveEnergy": 95
}
}
"canRModeSparkInterrupt"Clears obstacles: f_DefeatedGoldenTorizo, door_2 Sets flags: f_DefeatedGoldenTorizo Dev note: FIXME: Evaluate heated fight options. |
|
Quickly roll to the left side of the room and IBJ through the crumble blocks before GT gets there, if it is alive. Starting from a jump or with a double bomb jump can help speed this up and make it much easier, but Samus needs to bomb slowly near the top to prevent hitting the crumble blocks before PLMs are overloaded. Otherwise, it can help to IBJ through the left-most crumble block, as GT will often jump away when first reaching Samus. The left-most crumble block is the 4th tile away from the wall. With a failed IBJ start, GT often times won't touch Samus if she is Morphed on the ground, and can jump away, giving another chance to IBJ. Entrance condition: {
"comeInWithGMode": {
"mode": "any",
"morphed": true
}
}Requires: "h_heatedGMode"
"h_artificialMorphLongIBJ"
{
"or": [
{
"or": [
"f_DefeatedGoldenTorizo",
{
"obstaclesCleared": [
"f_DefeatedGoldenTorizo"
]
}
]
},
{
"and": [
"canTrickyDodgeEnemies",
{
"or": [
"h_artificialMorphJumpIntoIBJ",
"h_artificialMorphDoubleBombJump",
"canInsaneJump"
]
}
]
}
]
}
{
"heatFrames": 0
}Clears obstacles: door_2 |
|
Requires: "h_usePowerBomb"
{
"or": [
"canTrivialMidAirMorph",
"h_useSpringBall"
]
}
{
"or": [
{
"and": [
"canPreciseWallJump",
{
"heatFrames": 230
}
]
},
{
"and": [
"SpaceJump",
{
"heatFrames": 310
}
]
},
{
"and": [
"HiJump",
"canSpeedyJump",
{
"heatFrames": 320
}
]
},
{
"and": [
"HiJump",
"SpaceJump",
{
"heatFrames": 200
}
]
},
{
"and": [
"HiJump",
"canWallJump",
{
"heatFrames": 200
}
]
},
{
"and": [
"HiJump",
"canSpringBallJumpMidAir",
{
"heatFrames": 340
}
]
}
]
} |
|
Requires: "SpaceJump"
"ScrewAttack"
{
"or": [
{
"heatFrames": 200
},
{
"and": [
"HiJump",
{
"heatFrames": 150
}
]
}
]
} |
|

Build run speed for a jump straight into the destructible blocks. Requires: "HiJump"
"canSpeedyJump"
"ScrewAttack"
{
"heatFrames": 200
} |
|


This is kind of tricky because Screw off a walljump can only break bomb blocks if you change directions before bonking. Requires: "ScrewAttack"
"canPreciseWallJump"
"canMidairWiggle"
{
"heatFrames": 160
}
{
"or": [
"canInsaneJump",
"h_heatProof"
]
} |
|
Requires: {
"haveBlueSuit": {}
}
{
"or": [
{
"and": [
"canPreciseWallJump",
{
"heatFrames": 150
}
]
},
{
"and": [
"SpaceJump",
{
"heatFrames": 200
}
]
},
{
"and": [
"HiJump",
"SpaceJump",
{
"heatFrames": 150
}
]
},
{
"and": [
"HiJump",
"canWallJump",
{
"heatFrames": 125
}
]
},
{
"and": [
"HiJump",
"canSpringBallJumpMidAir",
{
"heatFrames": 150
}
]
}
]
} |
From: 2
Right Door
To: 4
Hidden Right Item
One vertical spark is needed to open up the area directly above. Then, a second horizontal spark is performed where those blocks were cleared. Try to aim for the seam between tiles to break more blocks. And the left side of the opening may be slightly easier. Requires: {
"notable": "Right Item Double Shinespark"
}
{
"or": [
"f_DefeatedGoldenTorizo",
{
"obstaclesCleared": [
"f_DefeatedGoldenTorizo"
]
}
]
}
"canShinechargeMovementComplex"
"canPreciseWallJump"
"canConsecutiveWallJump"
{
"canShineCharge": {
"usedTiles": 28,
"openEnd": 0
}
}
{
"heatFrames": 900
}
{
"shinespark": {
"frames": 12,
"excessFrames": 2
}
} |
From: 2
Right Door
To: 4
Hidden Right Item


One vertical spark is needed to open up the area directly above. A running jump is used to jump high enough into the revealed hole for a horizontal spark. Requires: {
"notable": "Right Item Double Shinespark"
}
{
"or": [
"f_DefeatedGoldenTorizo",
{
"obstaclesCleared": [
"f_DefeatedGoldenTorizo"
]
}
]
}
"canShinechargeMovementComplex"
"HiJump"
"canSpeedyJump"
{
"canShineCharge": {
"usedTiles": 28,
"openEnd": 0
}
}
{
"heatFrames": 900
}
{
"shinespark": {
"frames": 11,
"excessFrames": 3
}
} |
|
Requires: {
"or": [
"f_DefeatedGoldenTorizo",
{
"obstaclesCleared": [
"f_DefeatedGoldenTorizo"
]
}
]
}
{
"or": [
{
"and": [
"canLongIBJ",
{
"heatFrames": 3000
}
]
},
{
"and": [
"canJumpIntoIBJ",
{
"heatFrames": 1860
}
]
},
{
"and": [
"HiJump",
"canJumpIntoIBJ",
{
"heatFrames": 1300
}
]
},
{
"and": [
"canJumpIntoIBJ",
"canDoubleBombJump",
{
"heatFrames": 1180
}
]
},
{
"and": [
"HiJump",
"canJumpIntoIBJ",
"canDoubleBombJump",
{
"heatFrames": 900
}
]
},
{
"and": [
"canJumpIntoIBJ",
"canDoubleBombJump",
"canBombAboveIBJ",
{
"heatFrames": 890
}
]
},
{
"and": [
"HiJump",
"canJumpIntoIBJ",
"canDoubleBombJump",
"canBombAboveIBJ",
{
"heatFrames": 700
}
]
}
]
} |
|
Requires: {
"or": [
"f_DefeatedGoldenTorizo",
{
"obstaclesCleared": [
"f_DefeatedGoldenTorizo"
]
}
]
}
{
"haveBlueSuit": {}
}
{
"or": [
{
"and": [
"canJumpIntoIBJ",
{
"heatFrames": 690
}
]
},
{
"and": [
"HiJump",
"canJumpIntoIBJ",
{
"heatFrames": 500
}
]
},
{
"and": [
"canJumpIntoIBJ",
"canDoubleBombJump",
{
"heatFrames": 450
}
]
},
{
"and": [
"HiJump",
"canJumpIntoIBJ",
"canDoubleBombJump",
{
"heatFrames": 315
}
]
}
]
} |
From: 2
Right Door
To: 4
Hidden Right Item
Walljump up to reach the left ledge below the bomb blocks then perform an instant morph to place a bomb. Walljump up a second time and again instant morph off that left ledge to enter the 1 tile hole created by the bomb. Requires: "h_useMorphBombs"
"can3HighWallMidAirMorph"
"canConsecutiveWallJump"
{
"heatFrames": 650
} |
|
Uses a Springwall to put a bomb on the left corner bomb block, then a second one to get in there. Then clears the rest of the bomb blocks normally. It winds up costing less heat frames than IBJ, if you fall. Requires: "h_useMorphBombs"
"h_heatedSpringwall"
{
"heatFrames": 630
} |
From: 2
Right Door
To: 4
Hidden Right Item

Perform a momentum conserving morph through the transition. After the transition, quickly unmorph and continue holding up to retain temporary blue and break the bomb blocks. It may help (but is not required) to pause buffer the morph input. Entrance condition: {
"comeInWithSidePlatform": {
"platforms": [
{
"minHeight": 2,
"maxHeight": 2,
"minTiles": 27.4375,
"speedBooster": "yes",
"obstructions": [
[
1,
0
]
],
"note": [
"This applies to Dust Torizo Room and Noob Bridge."
]
},
{
"minHeight": 3,
"maxHeight": 3,
"minTiles": 28.2472,
"speedBooster": "yes",
"obstructions": [
[
1,
0
]
],
"note": [
"This applies to Double Chamber."
]
},
{
"minHeight": 1,
"maxHeight": 1,
"minTiles": 28.2472,
"speedBooster": "yes",
"obstructions": [
[
3,
0
]
],
"environment": "water",
"requires": [
"canGravityJump"
],
"note": [
"This applies to Below Botwoon Energy Tank and Botwoon Energy Tank Room."
]
},
{
"minHeight": 2,
"maxHeight": 2,
"minTiles": 31,
"speedBooster": "yes",
"obstructions": [
[
3,
0
]
],
"requires": [
"canInsaneMidAirMorph"
],
"note": [
"This applies to Metroid Room 1, Statues Hallway, and Baby Kraid Room."
]
},
{
"minHeight": 3,
"maxHeight": 3,
"minTiles": 41.4375,
"speedBooster": "yes",
"obstructions": [
[
3,
0
]
],
"requires": [
"canInsaneMidAirMorph"
],
"note": [
"This applies to Blue Brinstar Energy Tank Room (Power Bomb blocks broken), Bowling Alley (middle, power off), and Basement (power on)."
]
},
{
"minHeight": 3,
"maxHeight": 3,
"minTiles": 39.4375,
"speedBooster": "yes",
"obstructions": [
[
3,
2
]
],
"note": [
"This applies to Metal Pirates Room."
]
},
{
"minHeight": 3,
"maxHeight": 3,
"minTiles": 37.4375,
"speedBooster": "yes",
"obstructions": [
[
5,
2
]
],
"requires": [
"canInsaneMidAirMorph"
],
"note": [
"This applies to Flyway."
]
}
]
}
}Requires: {
"or": [
"f_DefeatedGoldenTorizo",
{
"obstaclesCleared": [
"f_DefeatedGoldenTorizo"
]
}
]
}
"HiJump"
{
"getBlueSpeed": {
"usedTiles": 24,
"openEnd": 1
}
}
"h_blueJump"
"canMomentumConservingMorph"
"canInsaneJump"
{
"heatFrames": 120
}Clears obstacles: door_2 Dev note: FIXME: This could maybe be possible without HiJump? If so, it would be significantly more difficult. The getBlueSpeed requirement could be refined to vary by platform geometry. |
|
Quickly roll to the left side of the room and IBJ through the crumble blocks before GT gets there, if it is alive. Starting from a jump or with a double bomb jump can help speed this up and make it much easier, but Samus needs to bomb slowly near the top to prevent hitting the crumble blocks before PLMs are overloaded. Get GT to jump away then again jump into IBJ and climb to the right item. Note that Samus can roll under GT, but when it attacks, it places stationary invisible projectiles, which may block Samus' path. Place a Power Bomb then quickly exit G-mode to quickly clear all of the bomb blocks, otherwise it is possible to get out with a few Bombs or Screw Attack. Entrance condition: {
"comeInWithGMode": {
"mode": "any",
"morphed": true
}
}Requires: "h_heatedGMode"
"h_artificialMorphLongIBJ"
{
"or": [
{
"or": [
"f_DefeatedGoldenTorizo",
{
"obstaclesCleared": [
"f_DefeatedGoldenTorizo"
]
}
]
},
{
"and": [
"canInsaneJump",
"h_artificialMorphJumpIntoIBJ"
]
},
{
"and": [
"canTrickyGMode",
"h_artificialMorphDoubleBombJump"
]
}
]
}
{
"or": [
{
"and": [
"h_artificialMorphPowerBomb",
{
"heatFrames": 70
}
]
},
{
"and": [
"h_useMorphBombs",
{
"heatFrames": 250
}
]
},
{
"and": [
"ScrewAttack",
{
"heatFrames": 50
}
]
}
]
}Clears obstacles: door_2 |
|
Entrance condition: {
"comeInWithGMode": {
"mode": "any",
"morphed": false
}
}Requires: {
"heatFrames": 0
}Clears obstacles: door_2 |
From: 2
Right Door
To: 7
G-Mode Junction (Bottom of Room)
Start the fight with 31 Missiles or fewer in order to prevent GT from using its laser attack, which will enable Samus to stand next to it. Having GT start with his Chozo Ball attack also will make it so there are drops which can be collected at the end of the fight, otherwise they will have been overloaded. With more than 31 Missiles, Samus will have a 2 pixel window in which she must quickly get into to prevent touching GT or his lasers. If GT starts with his laser attack, be sure to carefully jump over them before doing something else in the room. Entrance condition: {
"comeInWithGMode": {
"mode": "any",
"morphed": false
}
}Requires: {
"notable": "Safe Spot Kill"
}
{
"or": [
{
"resourceAtMost": [
{
"type": "Missile",
"count": 31
}
]
},
"canComplexGMode"
]
}
{
"or": [
{
"ammo": {
"type": "Super",
"count": 30
}
},
{
"and": [
"Charge",
{
"or": [
"canBeVeryPatient",
{
"and": [
"canBePatient",
"Wave"
]
},
{
"and": [
"canBePatient",
"Spazer"
]
},
"Plasma",
{
"and": [
"canBePatient",
{
"ammo": {
"type": "Super",
"count": 15
}
}
]
}
]
}
]
}
]
}
{
"heatFrames": 0
}Clears obstacles: f_DefeatedGoldenTorizo, door_2 Sets flags: f_DefeatedGoldenTorizo Dev note: This exists because Samus can kill GT and stay in G-mode to then do something else in the room. |
|
It takes a short hop to avoid hitting the ceiling to do this with only one crumble jump. Requires: {
"notable": "Crumble Jump"
}
"canCrumbleJump"
{
"heatFrames": 100
}
{
"or": [
"canDash",
{
"heatFrames": 30
}
]
} |
|

Use a single bomb blast to just barely get propelled over the crumble pit. Requires: {
"notable": "Horizontal Bomb Jump"
}
"canBombHorizontally"
{
"heatFrames": 190
} |
|
Requires: "h_useSpringBall"
{
"heatFrames": 140
} |
|
Requires: "SpaceJump"
{
"heatFrames": 90
}
{
"or": [
"canDash",
{
"heatFrames": 30
}
]
} |
|
Requires: {
"heatFrames": 170
}
{
"or": [
"canDash",
{
"heatFrames": 30
}
]
} |
|
Requires: "canDash"
{
"heatFrames": 140
}Exit condition: {
"leaveWithRunway": {
"length": 29,
"openEnd": 0
}
}Unlocks doors: {"types":["gray","super"],"requires":[]}
{"types":["missiles","powerbomb"],"requires":["never"]} |
|
Requires: "h_heatedCrystalFlash" |
|
Requires: {
"heatFrames": 120
} |
|
Requires: "h_heatedCrystalFlash" |
From: 7
G-Mode Junction (Bottom of Room)
To: 1
Left Door

Use the camera scroll blocks below the crumble blocks to overload PLMs and go through the crumble blocks. A good jumping through them a single time is enough to overload them for the next jump. This can be done while dodging GT. With a speedy jump, it is possible to overload PLMs and run back to GT before it stands up, get into the safe spot location to get him to jump back, and use the runway again. With shinesparks, diagonally spark into the crumble blocks and hold forward three times, then spark through. Note that when GT attacks, it will place stationary invisible projectiles, so it is much more difficult if not getting up quickly. Requires: "h_heatedGMode"
{
"or": [
{
"or": [
"f_DefeatedGoldenTorizo",
{
"obstaclesCleared": [
"f_DefeatedGoldenTorizo"
]
}
]
},
"canTrickyDodgeEnemies"
]
}
{
"or": [
"SpaceJump",
{
"and": [
"HiJump",
{
"or": [
"canTrickyWallJump",
"canSpringBallJumpMidAir",
"canSpeedyJump"
]
}
]
},
{
"and": [
"canSpringBallJumpMidAir",
"canSpeedyJump",
{
"or": [
{
"or": [
"f_DefeatedGoldenTorizo",
{
"obstaclesCleared": [
"f_DefeatedGoldenTorizo"
]
}
]
},
"canInsaneJump"
]
}
]
},
{
"and": [
{
"or": [
"f_DefeatedGoldenTorizo",
{
"obstaclesCleared": [
"f_DefeatedGoldenTorizo"
]
}
]
},
"canTrickyDashJump",
"canWallJump"
]
},
{
"and": [
{
"or": [
"f_DefeatedGoldenTorizo",
{
"obstaclesCleared": [
"f_DefeatedGoldenTorizo"
]
}
]
},
"canConsecutiveWallJump",
"canInsaneWallJump"
]
},
{
"and": [
{
"or": [
"f_DefeatedGoldenTorizo",
{
"obstaclesCleared": [
"f_DefeatedGoldenTorizo"
]
}
]
},
{
"canShineCharge": {
"usedTiles": 28,
"openEnd": 0
}
},
{
"or": [
{
"and": [
"canWallJump",
{
"shinespark": {
"frames": 9,
"excessFrames": 4
}
}
]
},
{
"and": [
"canSpeedyJump",
{
"shinespark": {
"frames": 9,
"excessFrames": 4
}
}
]
},
{
"shinespark": {
"frames": 32,
"excessFrames": 4
}
}
]
}
]
}
]
}
"h_heatedGModeOpenDifferentDoor" |
From: 7
G-Mode Junction (Bottom of Room)
To: 3
Top Left Item
Use the camera scroll blocks below the crumble blocks to overload PLMs and go through the crumble blocks. A good jumping through them a single time is enough to overload them for the next jump. This can be done while dodging GT. With a speedy jump, it is possible to overload PLMs and run back to GT before it stands up, get into the safe spot location to get him to jump back, and use the runway again. With shinesparks, diagonally spark into the crumble blocks and hold forward three times, then spark through. Note that when GT attacks, it will place stationary invisible projectiles, so it is much more difficult if not getting up quickly. Requires: "h_heatedGMode"
{
"or": [
{
"or": [
"f_DefeatedGoldenTorizo",
{
"obstaclesCleared": [
"f_DefeatedGoldenTorizo"
]
}
]
},
"canTrickyDodgeEnemies"
]
}
{
"or": [
"SpaceJump",
{
"and": [
"HiJump",
{
"or": [
"canTrickyWallJump",
"canSpringBallJumpMidAir",
"canSpeedyJump"
]
}
]
},
{
"and": [
"canSpringBallJumpMidAir",
"canSpeedyJump",
{
"or": [
{
"or": [
"f_DefeatedGoldenTorizo",
{
"obstaclesCleared": [
"f_DefeatedGoldenTorizo"
]
}
]
},
"canInsaneJump"
]
}
]
},
{
"and": [
{
"or": [
"f_DefeatedGoldenTorizo",
{
"obstaclesCleared": [
"f_DefeatedGoldenTorizo"
]
}
]
},
"canTrickyDashJump",
"canWallJump"
]
},
{
"and": [
{
"or": [
"f_DefeatedGoldenTorizo",
{
"obstaclesCleared": [
"f_DefeatedGoldenTorizo"
]
}
]
},
"canConsecutiveWallJump",
"canInsaneWallJump"
]
},
{
"and": [
{
"or": [
"f_DefeatedGoldenTorizo",
{
"obstaclesCleared": [
"f_DefeatedGoldenTorizo"
]
}
]
},
{
"canShineCharge": {
"usedTiles": 28,
"openEnd": 0
}
},
{
"or": [
{
"and": [
"canWallJump",
{
"shinespark": {
"frames": 9,
"excessFrames": 4
}
}
]
},
{
"and": [
"canSpeedyJump",
{
"shinespark": {
"frames": 9,
"excessFrames": 4
}
}
]
},
{
"shinespark": {
"frames": 32,
"excessFrames": 4
}
}
]
}
]
}
]
}
{
"heatFrames": 0
} |
From: 7
G-Mode Junction (Bottom of Room)
To: 4
Hidden Right Item
Use the camera scroll blocks below the crumble blocks to overload PLMs and go through the bomb blocks near the right item. A good jumping through them a single time is enough to overload PLMs. This can be done while dodging GT. With a speedy jump, it is possible to overload PLMs and run back to GT before it stands up, get into the safe spot location to get him to jump back, and use the runway again. With shinesparks, diagonally spark into the crumble blocks and hold forward three times, to overload PLMs as much as possible. Note that when GT attacks, it will place stationary invisible projectiles, so it is much more difficult if not getting up quickly. Place a Power Bomb then quickly exit G-mode to quickly clear all of the bomb blocks, otherwise it is possible to get out with a few Bombs or Screw Attack. Requires: "h_heatedGMode"
{
"or": [
{
"or": [
"f_DefeatedGoldenTorizo",
{
"obstaclesCleared": [
"f_DefeatedGoldenTorizo"
]
}
]
},
"canTrickyDodgeEnemies"
]
}
{
"or": [
"SpaceJump",
{
"and": [
"HiJump",
{
"or": [
"canWallJump",
"canSpringBallJumpMidAir",
"canSpeedyJump"
]
}
]
},
{
"and": [
"canSpringBallJumpMidAir",
"canSpeedyJump",
{
"or": [
{
"or": [
"f_DefeatedGoldenTorizo",
{
"obstaclesCleared": [
"f_DefeatedGoldenTorizo"
]
}
]
},
"canInsaneJump"
]
}
]
},
{
"and": [
{
"or": [
"f_DefeatedGoldenTorizo",
{
"obstaclesCleared": [
"f_DefeatedGoldenTorizo"
]
}
]
},
"canTrickyDashJump",
"canWallJump"
]
},
{
"and": [
{
"or": [
"f_DefeatedGoldenTorizo",
{
"obstaclesCleared": [
"f_DefeatedGoldenTorizo"
]
}
]
},
"canPreciseWallJump"
]
},
{
"and": [
{
"or": [
"f_DefeatedGoldenTorizo",
{
"obstaclesCleared": [
"f_DefeatedGoldenTorizo"
]
}
]
},
{
"canShineCharge": {
"usedTiles": 28,
"openEnd": 0
}
},
{
"or": [
{
"and": [
"canSpeedyJump",
{
"shinespark": {
"frames": 7,
"excessFrames": 4
}
}
]
},
{
"shinespark": {
"frames": 30,
"excessFrames": 4
}
}
]
}
]
}
]
}
{
"or": [
{
"and": [
"h_usePowerBomb",
{
"heatFrames": 70
}
]
},
{
"and": [
"h_useMorphBombs",
{
"heatFrames": 250
}
]
},
{
"and": [
"ScrewAttack",
{
"heatFrames": 50
}
]
}
]
} |
{
"$schema": "../../../schema/m3-room.schema.json",
"id": 150,
"name": "Golden Torizo's Room",
"area": "Norfair",
"subarea": "Lower",
"subsubarea": "West",
"roomAddress": "0x7B283",
"roomEnvironments": [
{
"heated": true
}
],
"mapTileMask": [
[
1,
1
],
[
1,
1
]
],
"nodes": [
{
"id": 1,
"name": "Left Door",
"nodeType": "door",
"nodeSubType": "blue",
"nodeAddress": "0x0019876",
"doorOrientation": "left",
"doorEnvironments": [
{
"physics": "air"
}
],
"mapTileMask": [
[
2,
1
],
[
1,
1
]
]
},
{
"id": 2,
"name": "Right Door",
"nodeType": "door",
"nodeSubType": "gray",
"nodeAddress": "0x0019882",
"doorOrientation": "right",
"doorEnvironments": [
{
"physics": "air"
}
],
"locks": [
{
"name": "Golden Torizo Room Gray Lock (to Screw Attack)",
"lockType": "gameFlag",
"unlockStrats": [
{
"name": "Base",
"requires": [
{
"or": [
"f_DefeatedGoldenTorizo",
{
"obstaclesCleared": [
"f_DefeatedGoldenTorizo"
]
}
]
}
],
"flashSuitChecked": true,
"blueSuitChecked": true
}
]
}
],
"mapTileMask": [
[
1,
1
],
[
1,
2
]
]
},
{
"id": 3,
"name": "Top Left Item",
"nodeType": "item",
"nodeSubType": "visible",
"nodeItem": "Missile",
"nodeAddress": "0x78E6E",
"mapTileMask": [
[
2,
1
],
[
1,
1
]
],
"locks": [
{
"name": "Dummy Item Lock",
"lockType": "gameFlag",
"unlockStrats": [
{
"name": "Base (Collect Item)",
"notable": false,
"requires": [],
"flashSuitChecked": true,
"blueSuitChecked": true
}
]
}
]
},
{
"id": 4,
"name": "Hidden Right Item",
"nodeType": "item",
"nodeSubType": "hidden",
"nodeItem": "Super",
"nodeAddress": "0x78E74",
"mapTileMask": [
[
1,
2
],
[
1,
1
]
],
"locks": [
{
"name": "Dummy Item Lock",
"lockType": "gameFlag",
"unlockStrats": [
{
"name": "Base (Collect Item)",
"notable": false,
"requires": [],
"flashSuitChecked": true,
"blueSuitChecked": true
}
]
}
]
},
{
"id": 7,
"name": "G-Mode Junction (Bottom of Room)",
"nodeType": "junction",
"nodeSubType": "g-mode",
"mapTileMask": [
[
1,
1
],
[
2,
2
]
],
"note": "Represents being at the bottom of the room with G-Mode"
}
],
"enemies": [
{
"id": "e1",
"groupName": "Golden Torizo",
"enemyName": "Golden Torizo",
"quantity": 1,
"homeNodes": [
2
],
"stopSpawn": [
"f_DefeatedGoldenTorizo"
]
}
],
"strats": [
{
"link": [
1,
1
],
"name": "Base (Unlock Door)",
"requires": [],
"unlocksDoors": [
{
"types": [
"missiles"
],
"requires": [
{
"heatFrames": 50
}
]
},
{
"types": [
"super"
],
"requires": []
},
{
"types": [
"powerbomb"
],
"requires": [
{
"heatFrames": 110
}
]
}
],
"flashSuitChecked": true,
"blueSuitChecked": true
},
{
"link": [
1,
1
],
"name": "Base (Come In Normally)",
"entranceCondition": {
"comeInNormally": {}
},
"requires": [],
"flashSuitChecked": true,
"blueSuitChecked": true
},
{
"link": [
1,
1
],
"name": "Base (Come In With Mockball)",
"entranceCondition": {
"comeInWithMockball": {
"adjacentMinTiles": 0,
"remoteAndLandingMinTiles": [
[
0,
0
]
],
"speedBooster": "any"
}
},
"requires": [
{
"heatFrames": 10
}
],
"flashSuitChecked": true,
"blueSuitChecked": true
},
{
"link": [
2,
2
],
"name": "Base (Unlock Door)",
"requires": [],
"unlocksDoors": [
{
"types": [
"missiles"
],
"requires": [
{
"heatFrames": 50
}
]
},
{
"types": [
"super"
],
"requires": []
},
{
"types": [
"powerbomb"
],
"requires": [
{
"heatFrames": 110
}
]
}
],
"flashSuitChecked": true,
"blueSuitChecked": true
},
{
"link": [
2,
2
],
"name": "Base (Come In Normally)",
"entranceCondition": {
"comeInNormally": {}
},
"requires": [],
"flashSuitChecked": true,
"blueSuitChecked": true,
"clearsObstacles": [
"door_2"
]
},
{
"link": [
2,
2
],
"name": "Base (Come In With Mockball)",
"entranceCondition": {
"comeInWithMockball": {
"adjacentMinTiles": 0,
"remoteAndLandingMinTiles": [
[
0,
0
]
],
"speedBooster": "any"
}
},
"requires": [
{
"heatFrames": 10
}
],
"flashSuitChecked": true,
"blueSuitChecked": true,
"clearsObstacles": [
"door_2"
]
},
{
"name": "Base (Collect Item)",
"notable": false,
"requires": [],
"flashSuitChecked": true,
"blueSuitChecked": true,
"link": [
3,
3
],
"collectsItems": [
3
],
"resetsObstacles": [
"door_2"
]
},
{
"name": "Base (Collect Item)",
"notable": false,
"requires": [],
"flashSuitChecked": true,
"blueSuitChecked": true,
"link": [
4,
4
],
"collectsItems": [
4
],
"resetsObstacles": [
"door_2"
]
},
{
"id": 1,
"link": [
1,
1
],
"name": "Leave With Runway",
"requires": [],
"exitCondition": {
"leaveWithRunway": {
"length": 4,
"openEnd": 1
}
},
"flashSuitChecked": true,
"blueSuitChecked": true
},
{
"id": 2,
"link": [
1,
1
],
"name": "Crystal Flash",
"requires": [
"h_heatedCrystalFlash"
],
"flashSuitChecked": true,
"blueSuitChecked": true
},
{
"id": 91,
"link": [
1,
1
],
"name": "Come in Shinecharging, Crystal Spark",
"entranceCondition": {
"comeInShinecharging": {
"length": 3,
"openEnd": 0
}
},
"requires": [
"h_heatedCrystalSpark"
],
"flashSuitChecked": true,
"blueSuitChecked": true
},
{
"id": 64,
"link": [
1,
1
],
"name": "Direct G-Mode, Remote Acquire",
"entranceCondition": {
"comeInWithGMode": {
"mode": "direct",
"morphed": false
}
},
"requires": [
"canRemoteAcquire",
"h_heatedDirectGModeLeaveSameDoor"
],
"collectsItems": [
3
],
"flashSuitChecked": true,
"blueSuitChecked": true
},
{
"id": 11,
"link": [
1,
2
],
"name": "Base",
"requires": [
{
"heatFrames": 170
},
{
"or": [
"canDash",
{
"heatFrames": 45
}
]
}
],
"flashSuitChecked": true,
"blueSuitChecked": true
},
{
"id": 87,
"link": [
1,
2
],
"name": "Leave With Runway",
"requires": [
"canDash",
{
"heatFrames": 120
}
],
"exitCondition": {
"leaveWithRunway": {
"length": 29,
"openEnd": 0
}
},
"unlocksDoors": [
{
"types": [
"gray",
"super"
],
"requires": []
},
{
"types": [
"missiles",
"powerbomb"
],
"requires": [
"never"
]
}
],
"flashSuitChecked": true,
"blueSuitChecked": true
},
{
"id": 82,
"link": [
1,
2
],
"name": "Farm Golden Torizo, R-Mode Spark Interrupt",
"entranceCondition": {
"comeInWithRMode": {}
},
"requires": [
{
"not": "f_DefeatedGoldenTorizo"
},
"canRiskPermanentLossOfAccess",
{
"heatFrames": 700
},
{
"notable": "Safe Spot Kill"
},
{
"or": [
"h_heatProof",
{
"and": [
"Plasma",
{
"resourceMaxCapacity": [
{
"type": "Missile",
"count": 30
}
]
},
{
"resourceMaxCapacity": [
{
"type": "RegularEnergy",
"count": 99
}
]
}
]
}
]
},
{
"refill": [
"ReserveEnergy"
]
},
{
"enemyDamage": {
"enemy": "Golden Torizo",
"type": "contact",
"hits": 1
}
},
"canUseIFrames",
{
"canShineCharge": {
"usedTiles": 28,
"openEnd": 0
}
},
{
"autoReserveTrigger": {
"maxReserveEnergy": 95
}
},
"canRModeSparkInterrupt"
],
"flashSuitChecked": true,
"blueSuitChecked": true,
"note": [
"Manipulate into the GT Safe Spot and farm for energy. Keep your Missiles below 30 to force the",
"attack pattern that has drops. Taking damage to get ready for the interrupt may require",
"leaving the safe spot. Leave enough to survive one hit from GT. Push GT back into the corner, run into",
"and through to get your shinecharge. Come back and interrupt using whatever attack pattern is happening.",
"After you gain blue suit, you'll need to use any standard kill strategy. Blue suit will not help with",
"defeating GT except for invulnerability."
]
},
{
"id": 83,
"link": [
1,
2
],
"name": "Crystal Flash During Fight, R-Mode Spark Interrupt",
"entranceCondition": {
"comeInWithRMode": {}
},
"requires": [
"h_heatProof",
{
"not": "f_DefeatedGoldenTorizo"
},
"canRiskPermanentLossOfAccess",
{
"notable": "Crystal Flash During Fight"
},
"h_heatedCrystalFlashForReserveEnergy",
{
"enemyDamage": {
"enemy": "Golden Torizo",
"type": "contact",
"hits": 1
}
},
"canUseIFrames",
{
"canShineCharge": {
"usedTiles": 28,
"openEnd": 0
}
},
{
"autoReserveTrigger": {
"maxReserveEnergy": 95
}
},
"canRModeSparkInterrupt"
],
"setsFlags": [
"f_DefeatedGoldenTorizo"
],
"flashSuitChecked": true,
"blueSuitChecked": true,
"note": [
"At any point during the fight, use a Crystal Flash. Then damage down enough to survive one hit.",
"Run into and through GT, turn around, and start down the runway. Get shinecharged, come back and",
"interrupt using whatever attack pattern is ongoing. Then finish the fight. Blue suit will give",
"invulnerability but otherwise does not help to defeat Golden Torizo."
],
"clearsObstacles": [
"f_DefeatedGoldenTorizo"
]
},
{
"id": 81,
"link": [
1,
2
],
"name": "R-Mode Spark Interrupt",
"entranceCondition": {
"comeInWithRMode": {}
},
"requires": [
{
"or": [
"f_DefeatedGoldenTorizo",
{
"obstaclesCleared": [
"f_DefeatedGoldenTorizo"
]
}
]
},
"h_heatedCrystalFlashForReserveEnergy",
{
"heatFrames": 300
},
{
"canShineCharge": {
"usedTiles": 28,
"openEnd": 0
}
},
"h_heatTriggerRModeSparkInterrupt"
],
"flashSuitChecked": true,
"blueSuitChecked": true,
"note": [
"Crystal Flash, then drop into GT's arena for the runway. With no enemies to take",
"damage from, you must interrupt using heat damage."
]
},
{
"id": 65,
"link": [
1,
2
],
"name": "G-Mode, Bomb Spread to Overload PLMs",
"entranceCondition": {
"comeInWithGMode": {
"mode": "any",
"morphed": false
}
},
"requires": [
"canComplexGMode",
"Charge",
"h_useMorphBombs",
"h_heatedGModeOffCameraDoor"
],
"exitCondition": {
"leaveNormally": {}
},
"unlocksDoors": [
{
"types": [
"missiles"
],
"requires": [
{
"heatFrames": 50
}
]
},
{
"types": [
"super"
],
"requires": []
},
{
"types": [
"powerbomb"
],
"requires": [
{
"heatFrames": 110
}
]
}
],
"flashSuitChecked": true,
"blueSuitChecked": true,
"note": [
"Avoid stepping on all three crumble blocks. Use many bomb spreads to place bombs on them and overload PLMs before going through.",
"After dropping below, move to the door quickly in order to prevent GT falling on Samus."
],
"devNote": [
"This strat forces Samus to leave the room because the camera is stuck at the top left of the room.",
"FIXME: It is possible to get to the top right item, but its not easy or too useful. It is possible to use the item to break the Bomb blocks and escape.",
"Fighting GT while blind is unreasonable."
]
},
{
"id": 66,
"link": [
1,
2
],
"name": "Direct G-Mode, Grab the Item",
"entranceCondition": {
"comeInWithGMode": {
"mode": "direct",
"morphed": false
}
},
"requires": [
"canRemoteAcquire",
{
"or": [
{
"and": [
{
"itemNotCollectedAtNode": 3
},
"canRiskPermanentLossOfAccess"
]
},
{
"and": [
"Charge",
"h_useMorphBombs"
]
}
]
},
"h_heatedGModeOffCameraDoor"
],
"exitCondition": {
"leaveNormally": {}
},
"unlocksDoors": [
{
"types": [
"missiles"
],
"requires": [
{
"heatFrames": 50
}
]
},
{
"types": [
"super"
],
"requires": []
},
{
"types": [
"powerbomb"
],
"requires": [
{
"heatFrames": 110
}
]
}
],
"collectsItems": [
3
],
"flashSuitChecked": true,
"blueSuitChecked": true,
"note": [
"Avoid stepping on all three crumble blocks before moving through the item to overload PLMs, then go through the crumble blocks.",
"After dropping below, move to the door quickly in order to prevent GT falling on Samus.",
"Note that if the item is not there, it is still possible to overload PLMs by using bomb spreads on crumble blocks that have never been stepped on."
],
"devNote": [
"This strat forces Samus to leave the room because the camera is stuck at the top left of the room.",
"FIXME: It is possible to get to the top right item, but its not easy or too useful. It is possible to use the item to break the Bomb blocks and escape.",
"Fighting GT while blind is unreasonable."
]
},
{
"id": 3,
"link": [
1,
3
],
"name": "Crumble Jump to Left Item",
"requires": [
{
"notable": "Crumble Jump"
},
"canCrumbleJump",
{
"heatFrames": 80
},
{
"or": [
"canDash",
{
"heatFrames": 30
}
]
}
],
"flashSuitChecked": true,
"blueSuitChecked": true,
"note": "Jump on the crumble blocks before they break to reach the item, at the risk on falling through."
},
{
"id": 4,
"link": [
1,
3
],
"name": "Bomb Boost to Left Item",
"requires": [
{
"notable": "Horizontal Bomb Jump"
},
"canBombHorizontally",
{
"heatFrames": 160
}
],
"flashSuitChecked": true,
"blueSuitChecked": true,
"note": "Uses a single bomb blast to just barely get propelled over the crumble pit."
},
{
"id": 5,
"link": [
1,
3
],
"name": "Spring Ball",
"requires": [
"h_useSpringBall",
{
"heatFrames": 140
}
],
"flashSuitChecked": true,
"blueSuitChecked": true
},
{
"id": 6,
"link": [
1,
3
],
"name": "Space Jump",
"requires": [
"SpaceJump",
{
"heatFrames": 70
},
{
"or": [
"canDash",
{
"heatFrames": 40
}
]
}
],
"flashSuitChecked": true,
"blueSuitChecked": true
},
{
"id": 7,
"link": [
1,
3
],
"name": "Shinespark (Bottom)",
"entranceCondition": {
"comeInWithSpark": {
"position": "bottom"
}
},
"requires": [
{
"shinespark": {
"frames": 18,
"excessFrames": 5
}
},
{
"heatFrames": 100
}
],
"flashSuitChecked": true,
"blueSuitChecked": true,
"devNote": [
"Sparking in from the bottom position requires fewer heat frames, as you bonk the side of the item pedestal.",
"FIXME: The heat frames for the crash animation occur after the item collection, which could matter if the item is an ETank.",
"Likewise, one shinespark frame of damage occurs after the item collection (assuming not stopping early)."
]
},
{
"id": 8,
"link": [
1,
3
],
"name": "Shinespark (Top)",
"entranceCondition": {
"comeInWithSpark": {
"position": "top"
}
},
"requires": [
"h_navigateHeatRooms",
{
"shinespark": {
"frames": 19,
"excessFrames": 8
}
},
{
"heatFrames": 120
}
],
"flashSuitChecked": true,
"blueSuitChecked": true,
"devNote": [
"Sparking in from the top position requires more heat frames, because you end up on top of the item pedestal and need to move off of it.",
"FIXME: The heat frames for the crash animation (and for moving off the pedestal) occur after the item collection, which could matter if the item is an ETank.",
"Likewise, 3 shinespark frames of damage occur after the item collection (assuming not stopping early)."
]
},
{
"id": 9,
"link": [
1,
3
],
"name": "Running Jump (Short Runway)",
"entranceCondition": {
"comeInRunning": {
"speedBooster": "any",
"minTiles": 1
}
},
"requires": [
"canInsaneJump",
{
"heatFrames": 60
}
],
"flashSuitChecked": true,
"blueSuitChecked": true,
"note": "Using momentum from the previous room, run and jump over the crumble blocks to reach the item."
},
{
"id": 10,
"link": [
1,
3
],
"name": "Running Jump (Longer Runway)",
"entranceCondition": {
"comeInRunning": {
"speedBooster": "any",
"minTiles": 4
}
},
"requires": [
"canTrickyJump",
{
"heatFrames": 50
}
],
"flashSuitChecked": true,
"blueSuitChecked": true,
"note": "Using momentum from the previous room, run and jump over the crumble blocks to reach the item."
},
{
"id": 67,
"link": [
1,
3
],
"name": "G-Mode",
"entranceCondition": {
"comeInWithGMode": {
"mode": "any",
"morphed": false
}
},
"requires": [
"h_heatedGMode",
{
"heatFrames": 0
}
],
"flashSuitChecked": true,
"blueSuitChecked": true
},
{
"id": 12,
"link": [
2,
1
],
"name": "Grapple Teleport",
"entranceCondition": {
"comeInWithGrappleTeleport": {
"blockPositions": [
[
5,
3
],
[
7,
2
]
]
}
},
"requires": [
{
"heatFrames": 50
}
],
"flashSuitChecked": true,
"blueSuitChecked": true,
"clearsObstacles": [
"door_2"
]
},
{
"id": 80,
"link": [
2,
1
],
"name": "Grapple Teleport Door Escape",
"entranceCondition": {
"comeInWithGrappleTeleport": {
"blockPositions": [
[
3,
12
]
]
}
},
"requires": [
{
"or": [
"h_heatedGrappleTeleportWallEscape",
{
"and": [
{
"doorUnlockedAtNode": 1
},
{
"heatFrames": 20
}
]
}
]
},
"canOffScreenMovement"
],
"unlocksDoors": [
{
"types": [
"ammo"
],
"requires": []
}
],
"flashSuitChecked": true,
"blueSuitChecked": true,
"clearsObstacles": [
"door_2"
]
},
{
"id": 13,
"link": [
2,
1
],
"name": "Grapple Teleport Door Lock Skip",
"entranceCondition": {
"comeInWithGrappleTeleport": {
"blockPositions": [
[
3,
12
]
]
}
},
"requires": [],
"bypassesDoorShell": "yes",
"flashSuitChecked": true,
"blueSuitChecked": true,
"clearsObstacles": [
"door_2"
]
},
{
"id": 14,
"link": [
2,
1
],
"name": "Carry Grapple Teleport",
"entranceCondition": {
"comeInWithGrappleTeleport": {
"blockPositions": [
[
3,
12
]
]
}
},
"requires": [],
"exitCondition": {
"leaveWithGrappleTeleport": {
"blockPositions": [
[
3,
12
]
]
}
},
"bypassesDoorShell": "yes",
"flashSuitChecked": true,
"blueSuitChecked": true,
"clearsObstacles": [
"door_2"
]
},
{
"id": 15,
"link": [
2,
1
],
"name": "Grapple Teleport X-Ray Climb",
"entranceCondition": {
"comeInWithGrappleTeleport": {
"blockPositions": [
[
2,
28
],
[
2,
29
]
]
}
},
"requires": [
"canXRayClimb",
{
"heatFrames": 1600
}
],
"bypassesDoorShell": "yes",
"flashSuitChecked": true,
"blueSuitChecked": true,
"note": [
"Exit the previous room with Samus in a standing pose (while grappled).",
"After teleporting, press right to release Grapple while staying standing (not being forced into a crouch).",
"Then X-ray climb to get up to the door transition, without needing to open the door.",
"Samus will not be visible during the climb.",
"If Golden Torizo is alive, the fight will be triggered but does not create any risk of damage."
],
"clearsObstacles": [
"door_2"
]
},
{
"id": 63,
"link": [
2,
1
],
"name": "R-Mode Forced Standup Clip",
"entranceCondition": {
"comeInWithRMode": {}
},
"requires": [
{
"notable": "R-Mode Forced Standup Clip"
},
"canRModeStandupClip",
{
"or": [
{
"or": [
"f_DefeatedGoldenTorizo",
{
"obstaclesCleared": [
"f_DefeatedGoldenTorizo"
]
}
]
},
{
"heatFrames": 100
}
]
},
"h_heatedCrystalFlash",
{
"or": [
{
"and": [
"SpaceJump",
"can4HighMidAirMorph"
]
},
{
"and": [
"HiJump",
"canSpringBallJumpMidAir"
]
},
{
"and": [
"HiJump",
"canSpeedyJump",
"canMidAirMorph",
"canCrumbleJump"
]
},
{
"and": [
"h_trickySpringwall",
"canCrumbleJump"
]
}
]
},
{
"resourceCapacity": [
{
"type": "RegularEnergy",
"count": 99
}
]
},
{
"autoReserveTrigger": {}
},
{
"heatFrames": 100
}
],
"flashSuitChecked": true,
"blueSuitChecked": true,
"note": [
"Use a Crystal Flash to refill reserve energy.",
"If Golden Torizo is alive, perform the Crystal Flash in the left corner of the room; otherwise it can be done near the door.",
"Then use heat damage to trigger an R-mode forced standup near the crumble blocks with upward momentum, in order to clip up through them.",
"Several different combinations of items and techniques can make this possible:",
"1) Space Jump, with a mid-air morph (not required but makes it easier),",
"2) HiJump and a mid-air Spring Ball jump, most easily by equipping both HiJump and SpringBall during the pause,",
"3) A walljump into Spring Ball jump, equipping Spring Ball soon after the wall jump into order to gain horizontal speed before the mid-air jump.",
"4) HiJump and Speedbooster, running and jumping into a mid-air morph,",
"In every case, precise timing is needed to be in the correct location when reserves trigger, just below the crumbles but without bonking them.",
"Having less upward momentum can provide more lenience for timing the forced standup clip,",
"though if Samus' momentum is not enough to make it onto the ledge then a crumble jump may also be required."
],
"devNote": [
"FIXME: A variant of this strat could go to the item node instead of the door, possibly with slightly different heat frames at the end.",
"FIXME: As an alternative to doing a Crystal Flash, Golden Torizo could be used as a farm, with canRiskPermanentLossOfAccess."
],
"clearsObstacles": [
"door_2"
]
},
{
"id": 68,
"link": [
2,
1
],
"name": "G-Mode Morph, IBJ",
"entranceCondition": {
"comeInWithGMode": {
"mode": "any",
"morphed": true
}
},
"requires": [
"h_artificialMorphLongIBJ",
{
"or": [
{
"or": [
"f_DefeatedGoldenTorizo",
{
"obstaclesCleared": [
"f_DefeatedGoldenTorizo"
]
}
]
},
{
"and": [
"canTrickyDodgeEnemies",
{
"or": [
"h_artificialMorphJumpIntoIBJ",
"h_artificialMorphDoubleBombJump",
"canInsaneJump"
]
}
]
}
]
},
"h_heatedGModeOpenDifferentDoor"
],
"flashSuitChecked": true,
"blueSuitChecked": true,
"note": [
"Quickly roll to the left side of the room and IBJ through the crumble blocks before GT gets there, if it is alive.",
"Starting from a jump or with a double bomb jump can help speed this up and make it much easier,",
"but Samus needs to bomb slowly near the top to prevent hitting the crumble blocks before PLMs are overloaded.",
"Otherwise, it can help to IBJ through the left-most crumble block, as GT will often jump away when first reaching Samus.",
"The left-most crumble block is the 4th tile away from the wall.",
"With a failed IBJ start, GT often times won't touch Samus if she is Morphed on the ground, and can jump away, giving another chance to IBJ."
],
"clearsObstacles": [
"door_2"
]
},
{
"id": 16,
"link": [
2,
2
],
"name": "Leave With Runway (GT Dead)",
"requires": [
{
"or": [
"f_DefeatedGoldenTorizo",
{
"obstaclesCleared": [
"f_DefeatedGoldenTorizo"
]
}
]
}
],
"exitCondition": {
"leaveWithRunway": {
"length": 29,
"openEnd": 0
}
},
"flashSuitChecked": true,
"blueSuitChecked": true
},
{
"id": 17,
"link": [
2,
2
],
"name": "Leave With Runway (GT Alive)",
"entranceCondition": {
"comeInNormally": {}
},
"requires": [
{
  "heatFrames": 415
}
],
"exitCondition": {
"leaveWithRunway": {
"length": 29,
"openEnd": 0
}
},
"unlocksDoors": [
{
"types": [
"ammo"
],
"requires": []
}
],
"flashSuitChecked": true,
"blueSuitChecked": true,
"note": "Wait to run under Golden Torizo as it jumps.",
"clearsObstacles": [
"door_2"
]
},
{
"id": 18,
"link": [
2,
2
],
"name": "Crystal Flash",
"requires": [
{
"or": [
"canPrepareForNextRoom",
{
"or": [
"f_DefeatedGoldenTorizo",
{
"obstaclesCleared": [
"f_DefeatedGoldenTorizo"
]
}
]
}
]
},
"h_heatedCrystalFlash"
],
"flashSuitChecked": true,
"blueSuitChecked": true,
"note": [
"If entering from the right door with Golden Torizo not yet defeated, come in already morphed, Crystal Flash immediately, then morph and roll under Golden Torizo."
]
},
{
"id": 92,
"link": [
2,
2
],
"name": "Crystal Spark",
"requires": [
{
"or": [
"f_DefeatedGoldenTorizo",
{
"obstaclesCleared": [
"f_DefeatedGoldenTorizo"
]
}
]
},
{
"canShineCharge": {
"usedTiles": 28,
"openEnd": 0
}
},
"h_heatedCrystalSpark"
],
"flashSuitChecked": true,
"blueSuitChecked": true,
"devNote": "FIXME: This could be done with Golden Torizo alive, but it may attack Samus in the process of the Crystal Spark."
},
{
"id": 84,
"link": [
2,
2
],
"name": "R-Mode Spark Interrupt",
"entranceCondition": {
"comeInWithRMode": {}
},
"requires": [
{
"or": [
"f_DefeatedGoldenTorizo",
{
"obstaclesCleared": [
"f_DefeatedGoldenTorizo"
]
}
]
},
"h_heatedCrystalFlashForReserveEnergy",
{
"heatFrames": 300
},
{
"canShineCharge": {
"usedTiles": 28,
"openEnd": 0
}
},
"h_heatTriggerRModeSparkInterrupt"
],
"flashSuitChecked": true,
"blueSuitChecked": true,
"note": [
"Crystal Flash and use the runway. With no enemies to take damage from, you must",
"interrupt using heat damage."
],
"clearsObstacles": [
"door_2"
]
},
{
"id": 19,
"link": [
2,
2
],
"name": "G-Mode Regain Mobility",
"requires": [
{
"not": "f_DefeatedGoldenTorizo"
},
"canRiskPermanentLossOfAccess",
{
"enemyDamage": {
"enemy": "Golden Torizo",
"type": "contact",
"hits": 1
}
}
],
"gModeRegainMobility": {},
"flashSuitChecked": true,
"blueSuitChecked": true
},
{
"id": 46,
"link": [
2,
2
],
"name": "Safe Spot Heatproof Supers",
"requires": [
{
"notable": "Safe Spot Kill"
},
"h_heatProof",
"Super"
],
"setsFlags": [
"f_DefeatedGoldenTorizo"
],
"flashSuitChecked": true,
"blueSuitChecked": true,
"note": "Farm supers to use throughout the fight.",
"devNote": "Supers are farmable here, so no ammo requirement.",
"clearsObstacles": [
"f_DefeatedGoldenTorizo"
]
},
{
"id": 47,
"link": [
2,
2
],
"name": "Safe Spot Heatproof Charge",
"requires": [
{
"or": [
{
"notable": "Safe Spot Kill"
},
{
"and": [
{
"notable": "Safe Spot Kill (Lenient)"
},
{
"resourceAtMost": [
{
"type": "Missile",
"count": 31
}
]
},
{
"enemyDamage": {
"enemy": "Golden Torizo",
"type": "contact",
"hits": 1
}
}
]
}
]
},
"h_heatProof",
"Charge",
"canBeVeryPatient"
],
"setsFlags": [
"f_DefeatedGoldenTorizo"
],
"flashSuitChecked": true,
"blueSuitChecked": true,
"note": "Stand in the safe spot and fire Charge shots into GT.",
"clearsObstacles": [
"f_DefeatedGoldenTorizo"
]
},
{
"id": 48,
"link": [
2,
2
],
"name": "Safe Spot Supers",
"requires": [
{
"notable": "Safe Spot Kill"
},
"h_navigateHeatRooms",
{
"heatFrames": 1200
},
{
"ammo": {
"type": "Super",
"count": 30
}
}
],
"setsFlags": [
"f_DefeatedGoldenTorizo"
],
"flashSuitChecked": true,
"blueSuitChecked": true,
"note": [
"This strat is assuming no farming. It requires 30 supers, but can be done with 29.",
"This requires a very steady fire rate so that for every Super Missile caught by GT, the next 4 Supers do damage."
],
"devNote": [
"No farming expected because that would change the heat frames.",
"Supers count hard-coded because of GT's inherent 'dodging' ability.",
"We could use an enemyKill if this were integrated into the enemy definition.",
"It actually takes 29 supers but giving 1 extra in leniency since it's easy to miss."
],
"clearsObstacles": [
"f_DefeatedGoldenTorizo"
]
},
{
"id": 49,
"link": [
2,
2
],
"name": "Safe Spot Supers (Farming)",
"requires": [
{
"notable": "Safe Spot Kill"
},
"h_navigateHeatRooms",
"canTrickyJump",
{
"ammo": {
"type": "Super",
"count": 15
}
},
{
"or": [
{
"and": [
"Plasma",
{
"heatFrames": 2700
}
]
},
{
"and": [
"canPreciseGrapple",
{
"heatFrames": 2700
}
]
},
{
"heatFrames": 3200
}
]
}
],
"setsFlags": [
"f_DefeatedGoldenTorizo"
],
"flashSuitChecked": true,
"blueSuitChecked": true,
"note": [
"This strat requires some farming. It assumes starting with 15 supers for one session of farming.",
"A safe farming method is to face left while standing in the safe spot. Then fire straight up to shoot the orbs as they appear.",
"Jump up while GT's beak is not open to collect the drops.",
"Plasma allows all of the orbs to be broken at once.",
"Grapple allows for more drops to be collected by shooting diagonally, and collecting the items using Grapple.",
"Keep the number of current Missiles below 31 so that GT will be guaranteed to use the attack which creates drops.",
"Firing Supers requires a very steady fire rate so that for every Super Missile caught by GT, the next 4 Supers do damage."
],
"devNote": "Listed Heat frames have been reduced by accounting for health drops.",
"clearsObstacles": [
"f_DefeatedGoldenTorizo"
]
},
{
"id": 50,
"link": [
2,
2
],
"name": "Safe Spot Supers (Farming, Few Supers)",
"requires": [
{
"notable": "Safe Spot Kill"
},
"h_navigateHeatRooms",
"canTrickyJump",
"canBePatient",
{
"ammo": {
"type": "Super",
"count": 5
}
},
{
"or": [
{
"and": [
"Plasma",
{
"heatFrames": 3100
}
]
},
{
"and": [
"canPreciseGrapple",
{
"heatFrames": 3200
}
]
},
{
"heatFrames": 4500
}
]
}
],
"setsFlags": [
"f_DefeatedGoldenTorizo"
],
"flashSuitChecked": true,
"blueSuitChecked": true,
"note": [
"This strat requires much farming. It assumes a capacity of and starting with only 5 supers for five sessions of farming.",
"A safe farming method is to face left while standing in the safe spot. Then fire straight up to shoot the orbs as they appear.",
"Jump up while GT's beak is not open to collect the drops.",
"Plasma allows all of the orbs to be broken at once.",
"Grapple allows for more drops to be collected by shooting diagonally, and collecting the items using Grapple.",
"Keep the number of current Missiles below 31 so that GT will be guaranteed to use the attack which creates drops.",
"Firing Supers requires a very steady fire rate so that for every Super Missile caught by GT, the next 4 Supers do damage."
],
"devNote": "Listed Heat frames have been reduced by accounting for health drops.",
"clearsObstacles": [
"f_DefeatedGoldenTorizo"
]
},
{
"id": 51,
"link": [
2,
2
],
"name": "Crystal Flash During Fight",
"requires": [
{
"notable": "Crystal Flash During Fight"
},
"h_navigateHeatRooms",
{
"or": [
{
"ammo": {
"type": "Super",
"count": 30
}
},
{
"and": [
"Charge",
"Ice",
"Wave",
"Plasma"
]
}
]
},
{
"heatFrames": 800
},
"h_heatedCrystalFlash",
{
"heatFrames": 800
}
],
"setsFlags": [
"f_DefeatedGoldenTorizo"
],
"flashSuitChecked": true,
"blueSuitChecked": true,
"note": [
"Midway through the fight, use a Crystal Flash to refill Samus' energy.",
"Crystal Flashing while standing in the safe spot at GT's feet is safe."
],
"devNote": [
"FIXME: Other resource combinations can work; fewer supers + farm, weaker beam + more health, 2nd crystal flash.",
"FIXME: Add heavy pause abuse strats for GT."
],
"clearsObstacles": [
"f_DefeatedGoldenTorizo"
]
},
{
"id": 52,
"link": [
2,
2
],
"name": "Safe Spot Full Combo",
"requires": [
{
"or": [
{
"notable": "Safe Spot Kill"
},
{
"and": [
{
"notable": "Safe Spot Kill (Lenient)"
},
{
"resourceAtMost": [
{
"type": "Missile",
"count": 31
}
]
},
{
"enemyDamage": {
"enemy": "Golden Torizo",
"type": "contact",
"hits": 1
}
}
]
}
]
},
"Charge",
"Ice",
"Wave",
"Plasma",
{
"heatFrames": 1250
}
],
"setsFlags": [
"f_DefeatedGoldenTorizo"
],
"flashSuitChecked": true,
"blueSuitChecked": true,
"note": "Stand in the safe spot and fire Charge shots into GT.",
"clearsObstacles": [
"f_DefeatedGoldenTorizo"
]
},
{
"id": 53,
"link": [
2,
2
],
"name": "Safe Spot Almost Full Combo",
"requires": [
{
"or": [
{
"notable": "Safe Spot Kill"
},
{
"and": [
{
"notable": "Safe Spot Kill (Lenient)"
},
{
"resourceAtMost": [
{
"type": "Missile",
"count": 31
}
]
},
{
"enemyDamage": {
"enemy": "Golden Torizo",
"type": "contact",
"hits": 1
}
}
]
}
]
},
"Charge",
"Wave",
"Plasma",
{
"heatFrames": 1400
}
],
"setsFlags": [
"f_DefeatedGoldenTorizo"
],
"flashSuitChecked": true,
"blueSuitChecked": true,
"note": "Stand in the safe spot and fire Charge shots into GT.",
"clearsObstacles": [
"f_DefeatedGoldenTorizo"
]
},
{
"id": 54,
"link": [
2,
2
],
"name": "Safe Spot Charge Plasma",
"requires": [
{
"or": [
{
"notable": "Safe Spot Kill"
},
{
"and": [
{
"notable": "Safe Spot Kill (Lenient)"
},
{
"resourceAtMost": [
{
"type": "Missile",
"count": 31
}
]
},
{
"enemyDamage": {
"enemy": "Golden Torizo",
"type": "contact",
"hits": 1
}
}
]
}
]
},
"Charge",
"Plasma",
{
"heatFrames": 2000
}
],
"setsFlags": [
"f_DefeatedGoldenTorizo"
],
"flashSuitChecked": true,
"blueSuitChecked": true,
"note": "Stand in the safe spot and fire Charge shots into GT.",
"clearsObstacles": [
"f_DefeatedGoldenTorizo"
]
},
{
"id": 55,
"link": [
2,
2
],
"name": "Safe Spot Full Spazer",
"requires": [
{
"or": [
{
"notable": "Safe Spot Kill"
},
{
"and": [
{
"notable": "Safe Spot Kill (Lenient)"
},
{
"resourceAtMost": [
{
"type": "Missile",
"count": 31
}
]
},
{
"enemyDamage": {
"enemy": "Golden Torizo",
"type": "contact",
"hits": 1
}
}
]
}
]
},
"Charge",
"Ice",
"Wave",
"Spazer",
{
"heatFrames": 4000
}
],
"setsFlags": [
"f_DefeatedGoldenTorizo"
],
"flashSuitChecked": true,
"blueSuitChecked": true,
"note": "Stand in the safe spot and fire Charge shots into GT.",
"clearsObstacles": [
"f_DefeatedGoldenTorizo"
]
},
{
"id": 56,
"link": [
2,
2
],
"name": "Safe Spot Two Beam Charge",
"requires": [
{
"or": [
{
"notable": "Safe Spot Kill"
},
{
"and": [
{
"notable": "Safe Spot Kill (Lenient)"
},
{
"resourceAtMost": [
{
"type": "Missile",
"count": 31
}
]
},
{
"enemyDamage": {
"enemy": "Golden Torizo",
"type": "contact",
"hits": 1
}
}
]
}
]
},
"Charge",
{
"heatFrames": 6500
},
{
"or": [
{
"and": [
"Ice",
"Wave"
]
},
{
"and": [
"Ice",
"Spazer"
]
},
{
"and": [
"Wave",
"Spazer"
]
}
]
}
],
"setsFlags": [
"f_DefeatedGoldenTorizo"
],
"flashSuitChecked": true,
"blueSuitChecked": true,
"note": "Stand in the safe spot and fire Charge shots into GT.",
"clearsObstacles": [
"f_DefeatedGoldenTorizo"
]
},
{
"id": 57,
"link": [
2,
2
],
"name": "Golden Torizo Fight (Supers)",
"requires": [
"h_navigateHeatRooms",
{
"heatFrames": 1200
},
{
"ammo": {
"type": "Super",
"count": 30
}
},
{
"enemyDamage": {
"enemy": "Golden Torizo",
"type": "super",
"hits": 4
}
},
{
"or": [
"canDodgeWhileShooting",
{
"ammo": {
"type": "Super",
"count": 5
}
},
{
"and": [
{
"enemyDamage": {
"enemy": "Golden Torizo",
"type": "super",
"hits": 2
}
},
{
"heatFrames": 200
}
]
}
]
}
],
"setsFlags": [
"f_DefeatedGoldenTorizo"
],
"flashSuitChecked": true,
"blueSuitChecked": true,
"devNote": [
"No farming expected because that would change the heat frames.",
"Supers count hard-coded because of GT's inherent 'dodging' ability.",
"We could use an enemyKill if this were integrated into the enemy definition.",
"It actually takes 29 supers but giving 1 extra in leniency since it's easy to miss"
],
"clearsObstacles": [
"f_DefeatedGoldenTorizo"
]
},
{
"id": 58,
"link": [
2,
2
],
"name": "Missiles Only Kill (Morph)",
"requires": [
{
"notable": "Safe Spot Kill"
},
{
"notable": "Missiles Only Kill"
},
"h_heatProof",
"Morph",
{
"resourceCapacity": [
{
"type": "Missile",
"count": 15
}
]
},
{
"or": [
{
"resourceCapacity": [
{
"type": "RegularEnergy",
"count": 199
}
]
},
{
"resourceCapacity": [
{
"type": "ReserveEnergy",
"count": 100
}
]
}
]
},
"canBeVeryPatient"
],
"setsFlags": [
"f_DefeatedGoldenTorizo"
],
"flashSuitChecked": true,
"blueSuitChecked": true,
"note": [
"Killing Golden Torizo only with missiles using enemy state manipulation to get missiles to connect.",
"This can be done by rolling under GT, triggering the sit attack, and then shooting missiles during the stand up animation.",
"By pushing GT to the door and rolling into the door during a jump back, the sit can reliably be manipulated.",
"But this setup is subpixel dependant and harder to setup again if GT moves unexpectidly.",
"Use of the safe spot is expected. Keep missiles below 31 to control the fight. This fight takes multiple minutes."
],
"devNote": [
"It is easy to make mistakes with this strat, so some capacity is given for leniency. You can farm up resources readily enough."
],
"clearsObstacles": [
"f_DefeatedGoldenTorizo"
]
},
{
"id": 93,
"link": [
2,
2
],
"name": "Missiles Only Kill",
"requires": [
{
"notable": "Safe Spot Kill"
},
{
"notable": "Missiles Only Kill"
},
"h_heatProof",
{
"resourceCapacity": [
{
"type": "Missile",
"count": 5
}
]
},
"canBeExtremelyPatient"
],
"setsFlags": [
"f_DefeatedGoldenTorizo"
],
"flashSuitChecked": true,
"blueSuitChecked": true,
"note": [
"Stand a specific distance away from Golden Torizo so that it takes a step before jumping backwards.",
"When it uses the eye lazer attack, it will not be able to avoid missiles.",
"Farm drops following every jump backwards.",
"At low health Golden Torizo will do a bird attack and that must be interuppted preemptively because it is difficult to dodge."
],
"clearsObstacles": [
"f_DefeatedGoldenTorizo"
]
},
{
"id": 59,
"link": [
2,
2
],
"name": "Golden Torizo Fight (Full Combo)",
"requires": [
"h_navigateHeatRooms",
{
"heatFrames": 1800
},
"Charge",
"Ice",
"Wave",
"Plasma",
{
"enemyDamage": {
"enemy": "Golden Torizo",
"type": "contact",
"hits": 1
}
},
{
"or": [
{
"enemyDamage": {
"enemy": "Golden Torizo",
"type": "contact",
"hits": 3
}
},
{
"and": [
"canDodgeWhileShooting",
{
"or": [
"ScrewAttack",
"Morph"
]
}
]
}
]
}
],
"setsFlags": [
"f_DefeatedGoldenTorizo"
],
"flashSuitChecked": true,
"blueSuitChecked": true,
"note": "This is an estimate of the net damage taken, including farmed energy.",
"clearsObstacles": [
"f_DefeatedGoldenTorizo"
]
},
{
"id": 60,
"link": [
2,
2
],
"name": "Golden Torizo Fight (Almost Full Combo)",
"requires": [
"h_navigateHeatRooms",
{
"heatFrames": 2150
},
"Charge",
"Wave",
"Plasma",
{
"enemyDamage": {
"enemy": "Golden Torizo",
"type": "contact",
"hits": 2
}
},
{
"or": [
{
"enemyDamage": {
"enemy": "Golden Torizo",
"type": "contact",
"hits": 3
}
},
{
"and": [
"canDodgeWhileShooting",
{
"or": [
"ScrewAttack",
"Morph"
]
}
]
}
]
}
],
"setsFlags": [
"f_DefeatedGoldenTorizo"
],
"flashSuitChecked": true,
"blueSuitChecked": true,
"note": "This is an estimate of the net damage taken, including farmed energy.",
"clearsObstacles": [
"f_DefeatedGoldenTorizo"
]
},
{
"id": 61,
"link": [
2,
2
],
"name": "Golden Torizo Fight (Charge Plasma)",
"requires": [
"h_navigateHeatRooms",
{
"heatFrames": 3600
},
"Charge",
"Plasma",
{
"enemyDamage": {
"enemy": "Golden Torizo",
"type": "contact",
"hits": 2
}
},
{
"or": [
{
"enemyDamage": {
"enemy": "Golden Torizo",
"type": "contact",
"hits": 6
}
},
{
"and": [
"canDodgeWhileShooting",
{
"or": [
"ScrewAttack",
"Morph"
]
}
]
}
]
}
],
"setsFlags": [
"f_DefeatedGoldenTorizo"
],
"flashSuitChecked": true,
"blueSuitChecked": true,
"note": "This is an estimate of the net damage taken, including farmed energy.",
"clearsObstacles": [
"f_DefeatedGoldenTorizo"
]
},
{
"id": 62,
"link": [
2,
2
],
"name": "Golden Torizo Fight (Full Spazer)",
"requires": [
"h_heatProof",
"Charge",
"Ice",
"Wave",
"Spazer",
{
"enemyDamage": {
"enemy": "Golden Torizo",
"type": "contact",
"hits": 4
}
},
{
"or": [
{
"and": [
"canDodgeWhileShooting",
{
"or": [
"Morph",
"ScrewAttack",
{
"enemyDamage": {
"enemy": "Golden Torizo",
"type": "contact",
"hits": 6
}
}
]
}
]
},
{
"enemyDamage": {
"enemy": "Golden Torizo",
"type": "contact",
"hits": 13
}
}
]
}
],
"setsFlags": [
"f_DefeatedGoldenTorizo"
],
"flashSuitChecked": true,
"blueSuitChecked": true,
"note": "This is an estimate of the net damage taken, including farmed energy.",
"clearsObstacles": [
"f_DefeatedGoldenTorizo"
]
},
{
"id": 69,
"link": [
2,
2
],
"name": "Direct G-Mode, GT Kill, Leave Through Open Door",
"entranceCondition": {
"comeInWithGMode": {
"mode": "direct",
"morphed": false
}
},
"requires": [
"h_heatedGMode",
{
"notable": "Safe Spot Kill"
},
{
"or": [
{
"resourceAtMost": [
{
"type": "Missile",
"count": 31
}
]
},
"canComplexGMode"
]
},
{
"or": [
{
"ammo": {
"type": "Super",
"count": 30
}
},
{
"and": [
"Charge",
{
"or": [
"canBeVeryPatient",
{
"and": [
"canBePatient",
"Wave"
]
},
{
"and": [
"canBePatient",
"Spazer"
]
},
"Plasma",
{
"and": [
"canBePatient",
{
"ammo": {
"type": "Super",
"count": 15
}
}
]
}
]
}
]
}
]
},
{
  "heatFrames": 0
}
],
"exitCondition": {
"leaveWithGMode": {
"morphed": false
}
},
"bypassesDoorShell": "free",
"setsFlags": [
"f_DefeatedGoldenTorizo"
],
"flashSuitChecked": true,
"blueSuitChecked": true,
"note": [
"Start the fight with 31 Missiles or fewer in order to prevent GT from using its laser attack, which will enable Samus to stand next to it.",
"With more than 31 Missiles, Samus will have a 2 pixel window in which she must quickly get into to prevent touching GT or his lasers.",
"Wait long enough for the flag to be set, then Samus can then leave the room without exiting G-mode."
],
"clearsObstacles": [
"f_DefeatedGoldenTorizo",
"door_2"
]
},
{
"id": 70,
"link": [
2,
2
],
"name": "Indirect G-Mode, GT Kill, 31 Missiles or Fewer",
"entranceCondition": {
"comeInWithGMode": {
"mode": "indirect",
"morphed": false
}
},
"requires": [
{
"notable": "Safe Spot Kill"
},
{
"resourceAtMost": [
{
"type": "Missile",
"count": 31
}
]
},
{
"or": [
{
"ammo": {
"type": "Super",
"count": 30
}
},
{
"and": [
"Charge",
{
"or": [
"canBeVeryPatient",
{
"and": [
"canBePatient",
"Wave"
]
},
{
"and": [
"canBePatient",
"Spazer"
]
},
"Plasma",
{
"and": [
"canBePatient",
{
"ammo": {
"type": "Super",
"count": 15
}
}
]
}
]
}
]
}
]
},
{
"or": [
"h_heatedIndirectGModeOpenSameDoor",
"h_heatedGModePauseAbuse"
]
}
],
"setsFlags": [
"f_DefeatedGoldenTorizo"
],
"flashSuitChecked": true,
"blueSuitChecked": true,
"note": [
"Start the fight with 31 Missiles or fewer in order to prevent GT from using its laser attack, which will enable Samus to stand next to it.",
"Having GT start with his Chozo Ball attack also will make it so there are drops which can be collected at the end of the fight,",
"otherwise they will have been overloaded. Pause abuse and jump to collect the drops on G-mode exit."
],
"clearsObstacles": [
"f_DefeatedGoldenTorizo",
"door_2"
]
},
{
"id": 71,
"link": [
2,
2
],
"name": "Indirect G-Mode, GT Kill, Too Many Missiles",
"entranceCondition": {
"comeInWithGMode": {
"mode": "indirect",
"morphed": false
}
},
"requires": [
{
"notable": "Safe Spot Kill"
},
"canComplexGMode",
{
"or": [
{
"ammo": {
"type": "Super",
"count": 30
}
},
{
"and": [
"Charge",
{
"or": [
"canBeVeryPatient",
{
"and": [
"canBePatient",
"Wave"
]
},
{
"and": [
"canBePatient",
"Spazer"
]
},
"Plasma",
{
"and": [
"canBePatient",
{
"ammo": {
"type": "Super",
"count": 15
}
}
]
}
]
}
]
}
]
},
"h_heatedIndirectGModeOpenSameDoor"
],
"setsFlags": [
"f_DefeatedGoldenTorizo"
],
"flashSuitChecked": true,
"blueSuitChecked": true,
"note": [
"With more than 31 Missiles, Samus will have a 2 pixel window in which she must quickly get into to prevent touching GT or his lasers.",
"Having GT start with his laser attack will also make it so there are no drops which can be collected at the end of the fight."
],
"clearsObstacles": [
"f_DefeatedGoldenTorizo",
"door_2"
]
},
{
"id": 85,
"link": [
2,
2
],
"name": "Farm Golden Torizo, R-Mode Spark Interrupt",
"entranceCondition": {
"comeInWithRMode": {}
},
"requires": [
{
"not": "f_DefeatedGoldenTorizo"
},
"canRiskPermanentLossOfAccess",
{
"heatFrames": 540
},
{
"notable": "Safe Spot Kill"
},
{
"or": [
"h_heatProof",
{
"resourceMaxCapacity": [
{
"type": "Missile",
"count": 30
}
]
}
]
},
{
"refill": [
"Energy"
]
},
{
"enemyDamage": {
"enemy": "Golden Torizo",
"type": "contact",
"hits": 1
}
},
"canUseIFrames",
{
"canShineCharge": {
"usedTiles": 28,
"openEnd": 0
}
},
{
"autoReserveTrigger": {
"maxReserveEnergy": 95
}
},
"canRModeSparkInterrupt"
],
"flashSuitChecked": true,
"blueSuitChecked": true,
"note": [
"Manipulate into the GT Safe Spot and farm for energy. Keep your Missiles below 30 to force the",
"attack pattern that has drops. Taking damage to get ready for the interrupt may require",
"leaving the safe spot. Leave enough to survive one hit from GT. Push GT back into the corner, run into",
"and through to get your shinecharge. Come back and interrupt using whatever attack pattern is happening.",
"After you gain blue suit, you'll need to use any standard kill strategy. Blue suit will not help with",
"defeating GT except for invulnerability."
],
"clearsObstacles": [
"door_2"
]
},
{
"id": 86,
"link": [
2,
2
],
"name": "Crystal Flash During Fight, R-Mode Spark Interrupt",
"entranceCondition": {
"comeInWithRMode": {}
},
"requires": [
"h_heatProof",
{
"not": "f_DefeatedGoldenTorizo"
},
"canRiskPermanentLossOfAccess",
{
"notable": "Crystal Flash During Fight"
},
"h_heatedCrystalFlashForReserveEnergy",
{
"enemyDamage": {
"enemy": "Golden Torizo",
"type": "contact",
"hits": 1
}
},
"canUseIFrames",
{
"canShineCharge": {
"usedTiles": 28,
"openEnd": 0
}
},
{
"autoReserveTrigger": {
"maxReserveEnergy": 95
}
},
"canRModeSparkInterrupt"
],
"setsFlags": [
"f_DefeatedGoldenTorizo"
],
"flashSuitChecked": true,
"blueSuitChecked": true,
"note": [
"At any point during the fight, use a Crystal Flash. Then damage down enough to survive one hit.",
"Run into and through GT, turn around, and start down the runway. Get shinecharged, come back and",
"interrupt using whatever attack pattern is ongoing. Then finish the fight. Blue suit will give",
"invulnerability but otherwise does not help to defeat Golden Torizo."
],
"devNote": "FIXME: Evaluate heated fight options.",
"clearsObstacles": [
"f_DefeatedGoldenTorizo",
"door_2"
]
},
{
"id": 72,
"link": [
2,
3
],
"name": "G-Mode Morph, IBJ",
"entranceCondition": {
"comeInWithGMode": {
"mode": "any",
"morphed": true
}
},
"requires": [
"h_heatedGMode",
"h_artificialMorphLongIBJ",
{
"or": [
{
"or": [
"f_DefeatedGoldenTorizo",
{
"obstaclesCleared": [
"f_DefeatedGoldenTorizo"
]
}
]
},
{
"and": [
"canTrickyDodgeEnemies",
{
"or": [
"h_artificialMorphJumpIntoIBJ",
"h_artificialMorphDoubleBombJump",
"canInsaneJump"
]
}
]
}
]
},
{
"heatFrames": 0
}
],
"flashSuitChecked": true,
"blueSuitChecked": true,
"note": [
"Quickly roll to the left side of the room and IBJ through the crumble blocks before GT gets there, if it is alive.",
"Starting from a jump or with a double bomb jump can help speed this up and make it much easier,",
"but Samus needs to bomb slowly near the top to prevent hitting the crumble blocks before PLMs are overloaded.",
"Otherwise, it can help to IBJ through the left-most crumble block, as GT will often jump away when first reaching Samus.",
"The left-most crumble block is the 4th tile away from the wall.",
"With a failed IBJ start, GT often times won't touch Samus if she is Morphed on the ground, and can jump away, giving another chance to IBJ."
],
"clearsObstacles": [
"door_2"
]
},
{
"id": 31,
"link": [
2,
4
],
"name": "Power Bombs",
"requires": [
"h_usePowerBomb",
{
"or": [
"canTrivialMidAirMorph",
"h_useSpringBall"
]
},
{
"or": [
{
"and": [
"canPreciseWallJump",
{
"heatFrames": 230
}
]
},
{
"and": [
"SpaceJump",
{
"heatFrames": 310
}
]
},
{
"and": [
"HiJump",
"canSpeedyJump",
{
"heatFrames": 320
}
]
},
{
"and": [
"HiJump",
"SpaceJump",
{
"heatFrames": 200
}
]
},
{
"and": [
"HiJump",
"canWallJump",
{
"heatFrames": 200
}
]
},
{
"and": [
"HiJump",
"canSpringBallJumpMidAir",
{
"heatFrames": 340
}
]
}
]
}
],
"flashSuitChecked": true,
"blueSuitChecked": true
},
{
"id": 32,
"link": [
2,
4
],
"name": "Space Screw",
"requires": [
"SpaceJump",
"ScrewAttack",
{
"or": [
{
"heatFrames": 200
},
{
"and": [
"HiJump",
{
"heatFrames": 150
}
]
}
]
}
],
"flashSuitChecked": true,
"blueSuitChecked": true
},
{
"id": 33,
"link": [
2,
4
],
"name": "Speed HiJump Screw",
"requires": [
"HiJump",
"canSpeedyJump",
"ScrewAttack",
{
"heatFrames": 200
}
],
"flashSuitChecked": true,
"blueSuitChecked": true,
"note": "Build run speed for a jump straight into the destructible blocks."
},
{
"id": 34,
"link": [
2,
4
],
"name": "Screw Walljump Wiggle",
"requires": [
"ScrewAttack",
"canPreciseWallJump",
"canMidairWiggle",
{
"heatFrames": 160
},
{
"or": [
"canInsaneJump",
"h_heatProof"
]
}
],
"flashSuitChecked": true,
"blueSuitChecked": true,
"note": "This is kind of tricky because Screw off a walljump can only break bomb blocks if you change directions before bonking."
},
{
"id": 88,
"link": [
2,
4
],
"name": "Blue Suit",
"requires": [
{
"haveBlueSuit": {}
},
{
"or": [
{
"and": [
"canPreciseWallJump",
{
"heatFrames": 150
}
]
},
{
"and": [
"SpaceJump",
{
"heatFrames": 200
}
]
},
{
"and": [
"HiJump",
"SpaceJump",
{
"heatFrames": 150
}
]
},
{
"and": [
"HiJump",
"canWallJump",
{
"heatFrames": 125
}
]
},
{
"and": [
"HiJump",
"canSpringBallJumpMidAir",
{
"heatFrames": 150
}
]
}
]
}
],
"flashSuitChecked": true,
"blueSuitChecked": true
},
{
"id": 35,
"link": [
2,
4
],
"name": "Right Item Wall Jump Into Double Shinespark",
"requires": [
{
"notable": "Right Item Double Shinespark"
},
{
"or": [
"f_DefeatedGoldenTorizo",
{
"obstaclesCleared": [
"f_DefeatedGoldenTorizo"
]
}
]
},
"canShinechargeMovementComplex",
"canPreciseWallJump",
"canConsecutiveWallJump",
{
"canShineCharge": {
"usedTiles": 28,
"openEnd": 0
}
},
{
"heatFrames": 900
},
{
"shinespark": {
"frames": 12,
"excessFrames": 2
}
}
],
"flashSuitChecked": true,
"blueSuitChecked": true,
"note": [
"One vertical spark is needed to open up the area directly above.",
"Then, a second horizontal spark is performed where those blocks were cleared.",
"Try to aim for the seam between tiles to break more blocks. And the left side of the opening may be slightly easier."
]
},
{
"id": 36,
"link": [
2,
4
],
"name": "Right Item Double Shinespark With HiJump",
"requires": [
{
"notable": "Right Item Double Shinespark"
},
{
"or": [
"f_DefeatedGoldenTorizo",
{
"obstaclesCleared": [
"f_DefeatedGoldenTorizo"
]
}
]
},
"canShinechargeMovementComplex",
"HiJump",
"canSpeedyJump",
{
"canShineCharge": {
"usedTiles": 28,
"openEnd": 0
}
},
{
"heatFrames": 900
},
{
"shinespark": {
"frames": 11,
"excessFrames": 3
}
}
],
"flashSuitChecked": true,
"blueSuitChecked": true,
"note": [
"One vertical spark is needed to open up the area directly above.",
"A running jump is used to jump high enough into the revealed hole for a horizontal spark."
]
},
{
"id": 37,
"link": [
2,
4
],
"name": "IBJ",
"requires": [
{
"or": [
"f_DefeatedGoldenTorizo",
{
"obstaclesCleared": [
"f_DefeatedGoldenTorizo"
]
}
]
},
{
"or": [
{
"and": [
"canLongIBJ",
{
"heatFrames": 3000
}
]
},
{
"and": [
"canJumpIntoIBJ",
{
"heatFrames": 1860
}
]
},
{
"and": [
"HiJump",
"canJumpIntoIBJ",
{
"heatFrames": 1300
}
]
},
{
"and": [
"canJumpIntoIBJ",
"canDoubleBombJump",
{
"heatFrames": 1180
}
]
},
{
"and": [
"HiJump",
"canJumpIntoIBJ",
"canDoubleBombJump",
{
"heatFrames": 900
}
]
},
{
"and": [
"canJumpIntoIBJ",
"canDoubleBombJump",
"canBombAboveIBJ",
{
"heatFrames": 890
}
]
},
{
"and": [
"HiJump",
"canJumpIntoIBJ",
"canDoubleBombJump",
"canBombAboveIBJ",
{
"heatFrames": 700
}
]
}
]
}
],
"flashSuitChecked": true,
"blueSuitChecked": true
},
{
"id": 89,
"link": [
2,
4
],
"name": "IBJ with Blue Suit",
"requires": [
{
"or": [
"f_DefeatedGoldenTorizo",
{
"obstaclesCleared": [
"f_DefeatedGoldenTorizo"
]
}
]
},
{
"haveBlueSuit": {}
},
{
"or": [
{
"and": [
"canJumpIntoIBJ",
{
"heatFrames": 690
}
]
},
{
"and": [
"HiJump",
"canJumpIntoIBJ",
{
"heatFrames": 500
}
]
},
{
"and": [
"canJumpIntoIBJ",
"canDoubleBombJump",
{
"heatFrames": 450
}
]
},
{
"and": [
"HiJump",
"canJumpIntoIBJ",
"canDoubleBombJump",
{
"heatFrames": 315
}
]
}
]
}
],
"flashSuitChecked": true,
"blueSuitChecked": true
},
{
"id": 38,
"link": [
2,
4
],
"name": "Wall Jump Instant Morph Bomb Placement",
"requires": [
"h_useMorphBombs",
"can3HighWallMidAirMorph",
"canConsecutiveWallJump",
{
"heatFrames": 650
}
],
"flashSuitChecked": true,
"blueSuitChecked": true,
"note": [
"Walljump up to reach the left ledge below the bomb blocks then perform an instant morph to place a bomb.",
"Walljump up a second time and again instant morph off that left ledge to enter the 1 tile hole created by the bomb."
]
},
{
"id": 39,
"link": [
2,
4
],
"name": "Springwall with Bombs",
"requires": [
"h_useMorphBombs",
"h_heatedSpringwall",
{
"heatFrames": 630
}
],
"flashSuitChecked": true,
"blueSuitChecked": true,
"note": [
"Uses a Springwall to put a bomb on the left corner bomb block, then a second one to get in there.",
"Then clears the rest of the bomb blocks normally.",
"It winds up costing less heat frames than IBJ, if you fall."
]
},
{
"id": 79,
"link": [
2,
4
],
"name": "Side Platform Cross Room Jump",
"entranceCondition": {
"comeInWithSidePlatform": {
"platforms": [
{
"minHeight": 2,
"maxHeight": 2,
"minTiles": 27.4375,
"speedBooster": "yes",
"obstructions": [
[
1,
0
]
],
"note": [
"This applies to Dust Torizo Room and Noob Bridge."
]
},
{
"minHeight": 3,
"maxHeight": 3,
"minTiles": 28.2472,
"speedBooster": "yes",
"obstructions": [
[
1,
0
]
],
"note": [
"This applies to Double Chamber."
]
},
{
"minHeight": 1,
"maxHeight": 1,
"minTiles": 28.2472,
"speedBooster": "yes",
"obstructions": [
[
3,
0
]
],
"environment": "water",
"requires": [
"canGravityJump"
],
"note": [
"This applies to Below Botwoon Energy Tank and Botwoon Energy Tank Room."
]
},
{
"minHeight": 2,
"maxHeight": 2,
"minTiles": 31,
"speedBooster": "yes",
"obstructions": [
[
3,
0
]
],
"requires": [
"canInsaneMidAirMorph"
],
"note": [
"This applies to Metroid Room 1, Statues Hallway, and Baby Kraid Room."
]
},
{
"minHeight": 3,
"maxHeight": 3,
"minTiles": 41.4375,
"speedBooster": "yes",
"obstructions": [
[
3,
0
]
],
"requires": [
"canInsaneMidAirMorph"
],
"note": [
"This applies to Blue Brinstar Energy Tank Room (Power Bomb blocks broken), Bowling Alley (middle, power off), and Basement (power on)."
]
},
{
"minHeight": 3,
"maxHeight": 3,
"minTiles": 39.4375,
"speedBooster": "yes",
"obstructions": [
[
3,
2
]
],
"note": [
"This applies to Metal Pirates Room."
]
},
{
"minHeight": 3,
"maxHeight": 3,
"minTiles": 37.4375,
"speedBooster": "yes",
"obstructions": [
[
5,
2
]
],
"requires": [
"canInsaneMidAirMorph"
],
"note": [
"This applies to Flyway."
]
}
]
}
},
"requires": [
{
"or": [
"f_DefeatedGoldenTorizo",
{
"obstaclesCleared": [
"f_DefeatedGoldenTorizo"
]
}
]
},
"HiJump",
{
"getBlueSpeed": {
"usedTiles": 24,
"openEnd": 1
}
},
"h_blueJump",
"canMomentumConservingMorph",
"canInsaneJump",
{
  "heatFrames": 120
}
],
"flashSuitChecked": true,
"blueSuitChecked": true,
"note": [
"Perform a momentum conserving morph through the transition.",
"After the transition, quickly unmorph and continue holding up to retain temporary blue and break the bomb blocks."
],
"detailNote": [
"It may help (but is not required) to pause buffer the morph input."
],
"devNote": [
"FIXME: This could maybe be possible without HiJump? If so, it would be significantly more difficult.",
"The getBlueSpeed requirement could be refined to vary by platform geometry."
],
"clearsObstacles": [
"door_2"
]
},
{
"id": 73,
"link": [
2,
4
],
"name": "G-Mode Morph, IBJ",
"entranceCondition": {
"comeInWithGMode": {
"mode": "any",
"morphed": true
}
},
"requires": [
"h_heatedGMode",
"h_artificialMorphLongIBJ",
{
"or": [
{
"or": [
"f_DefeatedGoldenTorizo",
{
"obstaclesCleared": [
"f_DefeatedGoldenTorizo"
]
}
]
},
{
"and": [
"canInsaneJump",
"h_artificialMorphJumpIntoIBJ"
]
},
{
"and": [
"canTrickyGMode",
"h_artificialMorphDoubleBombJump"
]
}
]
},
{
"or": [
{
"and": [
"h_artificialMorphPowerBomb",
{
"heatFrames": 70
}
]
},
{
"and": [
"h_useMorphBombs",
{
"heatFrames": 250
}
]
},
{
"and": [
"ScrewAttack",
{
"heatFrames": 50
}
]
}
]
}
],
"flashSuitChecked": true,
"blueSuitChecked": true,
"note": [
"Quickly roll to the left side of the room and IBJ through the crumble blocks before GT gets there, if it is alive.",
"Starting from a jump or with a double bomb jump can help speed this up and make it much easier,",
"but Samus needs to bomb slowly near the top to prevent hitting the crumble blocks before PLMs are overloaded.",
"Get GT to jump away then again jump into IBJ and climb to the right item.",
"Note that Samus can roll under GT, but when it attacks, it places stationary invisible projectiles, which may block Samus' path.",
"Place a Power Bomb then quickly exit G-mode to quickly clear all of the bomb blocks, otherwise it is possible to get out with a few Bombs or Screw Attack."
],
"clearsObstacles": [
"door_2"
]
},
{
"id": 74,
"link": [
2,
7
],
"name": "G-Mode",
"entranceCondition": {
"comeInWithGMode": {
"mode": "any",
"morphed": false
}
},
"requires": [
{
"heatFrames": 0
}
],
"flashSuitChecked": true,
"blueSuitChecked": true,
"clearsObstacles": [
"door_2"
]
},
{
"id": 75,
"link": [
2,
7
],
"name": "G-Mode, GT Kill, Remain in G-Mode",
"entranceCondition": {
"comeInWithGMode": {
"mode": "any",
"morphed": false
}
},
"requires": [
{
"notable": "Safe Spot Kill"
},
{
"or": [
{
"resourceAtMost": [
{
"type": "Missile",
"count": 31
}
]
},
"canComplexGMode"
]
},
{
"or": [
{
"ammo": {
"type": "Super",
"count": 30
}
},
{
"and": [
"Charge",
{
"or": [
"canBeVeryPatient",
{
"and": [
"canBePatient",
"Wave"
]
},
{
"and": [
"canBePatient",
"Spazer"
]
},
"Plasma",
{
"and": [
"canBePatient",
{
"ammo": {
"type": "Super",
"count": 15
}
}
]
}
]
}
]
}
]
},
{
"heatFrames": 0
}
],
"setsFlags": [
"f_DefeatedGoldenTorizo"
],
"flashSuitChecked": true,
"blueSuitChecked": true,
"note": [
"Start the fight with 31 Missiles or fewer in order to prevent GT from using its laser attack, which will enable Samus to stand next to it.",
"Having GT start with his Chozo Ball attack also will make it so there are drops which can be collected at the end of the fight, otherwise they will have been overloaded.",
"With more than 31 Missiles, Samus will have a 2 pixel window in which she must quickly get into to prevent touching GT or his lasers.",
"If GT starts with his laser attack, be sure to carefully jump over them before doing something else in the room."
],
"devNote": "This exists because Samus can kill GT and stay in G-mode to then do something else in the room.",
"clearsObstacles": [
"f_DefeatedGoldenTorizo",
"door_2"
]
},
{
"id": 21,
"link": [
3,
1
],
"name": "Crumble Jump from Left Item",
"requires": [
{
"notable": "Crumble Jump"
},
"canCrumbleJump",
{
"heatFrames": 100
},
{
"or": [
"canDash",
{
"heatFrames": 30
}
]
}
],
"flashSuitChecked": true,
"blueSuitChecked": true,
"note": "It takes a short hop to avoid hitting the ceiling to do this with only one crumble jump."
},
{
"id": 22,
"link": [
3,
1
],
"name": "Bomb Boost from Left Item",
"requires": [
{
"notable": "Horizontal Bomb Jump"
},
"canBombHorizontally",
{
"heatFrames": 190
}
],
"flashSuitChecked": true,
"blueSuitChecked": true,
"note": "Use a single bomb blast to just barely get propelled over the crumble pit."
},
{
"id": 23,
"link": [
3,
1
],
"name": "Spring Ball",
"requires": [
"h_useSpringBall",
{
"heatFrames": 140
}
],
"flashSuitChecked": true,
"blueSuitChecked": true
},
{
"id": 24,
"link": [
3,
1
],
"name": "Space Jump",
"requires": [
"SpaceJump",
{
"heatFrames": 90
},
{
"or": [
"canDash",
{
"heatFrames": 30
}
]
}
],
"flashSuitChecked": true,
"blueSuitChecked": true
},
{
"id": 26,
"link": [
3,
2
],
"name": "Base",
"requires": [
{
"heatFrames": 170
},
{
"or": [
"canDash",
{
"heatFrames": 30
}
]
}
],
"flashSuitChecked": true,
"blueSuitChecked": true
},
{
"id": 90,
"link": [
3,
2
],
"name": "Leave With Runway",
"requires": [
"canDash",
{
"heatFrames": 140
}
],
"exitCondition": {
"leaveWithRunway": {
"length": 29,
"openEnd": 0
}
},
"unlocksDoors": [
{
"types": [
"gray",
"super"
],
"requires": []
},
{
"types": [
"missiles",
"powerbomb"
],
"requires": [
"never"
]
}
],
"flashSuitChecked": true,
"blueSuitChecked": true
},
{
"id": 25,
"link": [
3,
3
],
"name": "Crystal Flash",
"requires": [
"h_heatedCrystalFlash"
],
"flashSuitChecked": true,
"blueSuitChecked": true
},
{
"id": 28,
"link": [
4,
2
],
"name": "Base",
"requires": [
{
"heatFrames": 120
}
],
"flashSuitChecked": true,
"blueSuitChecked": true
},
{
"id": 27,
"link": [
4,
4
],
"name": "Crystal Flash",
"requires": [
"h_heatedCrystalFlash"
],
"flashSuitChecked": true,
"blueSuitChecked": true
},
{
"id": 76,
"link": [
7,
1
],
"name": "G-Mode, Through the Crumble Blocks",
"requires": [
"h_heatedGMode",
{
"or": [
{
"or": [
"f_DefeatedGoldenTorizo",
{
"obstaclesCleared": [
"f_DefeatedGoldenTorizo"
]
}
]
},
"canTrickyDodgeEnemies"
]
},
{
"or": [
"SpaceJump",
{
"and": [
"HiJump",
{
"or": [
"canTrickyWallJump",
"canSpringBallJumpMidAir",
"canSpeedyJump"
]
}
]
},
{
"and": [
"canSpringBallJumpMidAir",
"canSpeedyJump",
{
"or": [
{
"or": [
"f_DefeatedGoldenTorizo",
{
"obstaclesCleared": [
"f_DefeatedGoldenTorizo"
]
}
]
},
"canInsaneJump"
]
}
]
},
{
"and": [
{
"or": [
"f_DefeatedGoldenTorizo",
{
"obstaclesCleared": [
"f_DefeatedGoldenTorizo"
]
}
]
},
"canTrickyDashJump",
"canWallJump"
]
},
{
"and": [
{
"or": [
"f_DefeatedGoldenTorizo",
{
"obstaclesCleared": [
"f_DefeatedGoldenTorizo"
]
}
]
},
"canConsecutiveWallJump",
"canInsaneWallJump"
]
},
{
"and": [
{
"or": [
"f_DefeatedGoldenTorizo",
{
"obstaclesCleared": [
"f_DefeatedGoldenTorizo"
]
}
]
},
{
"canShineCharge": {
"usedTiles": 28,
"openEnd": 0
}
},
{
"or": [
{
"and": [
"canWallJump",
{
"shinespark": {
"frames": 9,
"excessFrames": 4
}
}
]
},
{
"and": [
"canSpeedyJump",
{
"shinespark": {
"frames": 9,
"excessFrames": 4
}
}
]
},
{
"shinespark": {
"frames": 32,
"excessFrames": 4
}
}
]
}
]
}
]
},
"h_heatedGModeOpenDifferentDoor"
],
"flashSuitChecked": true,
"blueSuitChecked": true,
"note": [
"Use the camera scroll blocks below the crumble blocks to overload PLMs and go through the crumble blocks.",
"A good jumping through them a single time is enough to overload them for the next jump. This can be done while dodging GT.",
"With a speedy jump, it is possible to overload PLMs and run back to GT before it stands up, get into the safe spot location to get him to jump back, and use the runway again.",
"With shinesparks, diagonally spark into the crumble blocks and hold forward three times, then spark through.",
"Note that when GT attacks, it will place stationary invisible projectiles, so it is much more difficult if not getting up quickly."
]
},
{
"id": 77,
"link": [
7,
3
],
"name": "G-Mode, Through the Crumble Blocks",
"requires": [
"h_heatedGMode",
{
"or": [
{
"or": [
"f_DefeatedGoldenTorizo",
{
"obstaclesCleared": [
"f_DefeatedGoldenTorizo"
]
}
]
},
"canTrickyDodgeEnemies"
]
},
{
"or": [
"SpaceJump",
{
"and": [
"HiJump",
{
"or": [
"canTrickyWallJump",
"canSpringBallJumpMidAir",
"canSpeedyJump"
]
}
]
},
{
"and": [
"canSpringBallJumpMidAir",
"canSpeedyJump",
{
"or": [
{
"or": [
"f_DefeatedGoldenTorizo",
{
"obstaclesCleared": [
"f_DefeatedGoldenTorizo"
]
}
]
},
"canInsaneJump"
]
}
]
},
{
"and": [
{
"or": [
"f_DefeatedGoldenTorizo",
{
"obstaclesCleared": [
"f_DefeatedGoldenTorizo"
]
}
]
},
"canTrickyDashJump",
"canWallJump"
]
},
{
"and": [
{
"or": [
"f_DefeatedGoldenTorizo",
{
"obstaclesCleared": [
"f_DefeatedGoldenTorizo"
]
}
]
},
"canConsecutiveWallJump",
"canInsaneWallJump"
]
},
{
"and": [
{
"or": [
"f_DefeatedGoldenTorizo",
{
"obstaclesCleared": [
"f_DefeatedGoldenTorizo"
]
}
]
},
{
"canShineCharge": {
"usedTiles": 28,
"openEnd": 0
}
},
{
"or": [
{
"and": [
"canWallJump",
{
"shinespark": {
"frames": 9,
"excessFrames": 4
}
}
]
},
{
"and": [
"canSpeedyJump",
{
"shinespark": {
"frames": 9,
"excessFrames": 4
}
}
]
},
{
"shinespark": {
"frames": 32,
"excessFrames": 4
}
}
]
}
]
}
]
},
{
"heatFrames": 0
}
],
"flashSuitChecked": true,
"blueSuitChecked": true,
"note": [
"Use the camera scroll blocks below the crumble blocks to overload PLMs and go through the crumble blocks.",
"A good jumping through them a single time is enough to overload them for the next jump. This can be done while dodging GT.",
"With a speedy jump, it is possible to overload PLMs and run back to GT before it stands up, get into the safe spot location to get him to jump back, and use the runway again.",
"With shinesparks, diagonally spark into the crumble blocks and hold forward three times, then spark through.",
"Note that when GT attacks, it will place stationary invisible projectiles, so it is much more difficult if not getting up quickly."
]
},
{
"id": 78,
"link": [
7,
4
],
"name": "G-Mode, Through the Crumble Blocks",
"requires": [
"h_heatedGMode",
{
"or": [
{
"or": [
"f_DefeatedGoldenTorizo",
{
"obstaclesCleared": [
"f_DefeatedGoldenTorizo"
]
}
]
},
"canTrickyDodgeEnemies"
]
},
{
"or": [
"SpaceJump",
{
"and": [
"HiJump",
{
"or": [
"canWallJump",
"canSpringBallJumpMidAir",
"canSpeedyJump"
]
}
]
},
{
"and": [
"canSpringBallJumpMidAir",
"canSpeedyJump",
{
"or": [
{
"or": [
"f_DefeatedGoldenTorizo",
{
"obstaclesCleared": [
"f_DefeatedGoldenTorizo"
]
}
]
},
"canInsaneJump"
]
}
]
},
{
"and": [
{
"or": [
"f_DefeatedGoldenTorizo",
{
"obstaclesCleared": [
"f_DefeatedGoldenTorizo"
]
}
]
},
"canTrickyDashJump",
"canWallJump"
]
},
{
"and": [
{
"or": [
"f_DefeatedGoldenTorizo",
{
"obstaclesCleared": [
"f_DefeatedGoldenTorizo"
]
}
]
},
"canPreciseWallJump"
]
},
{
"and": [
{
"or": [
"f_DefeatedGoldenTorizo",
{
"obstaclesCleared": [
"f_DefeatedGoldenTorizo"
]
}
]
},
{
"canShineCharge": {
"usedTiles": 28,
"openEnd": 0
}
},
{
"or": [
{
"and": [
"canSpeedyJump",
{
"shinespark": {
"frames": 7,
"excessFrames": 4
}
}
]
},
{
"shinespark": {
"frames": 30,
"excessFrames": 4
}
}
]
}
]
}
]
},
{
"or": [
{
"and": [
"h_usePowerBomb",
{
"heatFrames": 70
}
]
},
{
"and": [
"h_useMorphBombs",
{
"heatFrames": 250
}
]
},
{
"and": [
"ScrewAttack",
{
"heatFrames": 50
}
]
}
]
}
],
"flashSuitChecked": true,
"blueSuitChecked": true,
"note": [
"Use the camera scroll blocks below the crumble blocks to overload PLMs and go through the bomb blocks near the right item.",
"A good jumping through them a single time is enough to overload PLMs. This can be done while dodging GT.",
"With a speedy jump, it is possible to overload PLMs and run back to GT before it stands up, get into the safe spot location to get him to jump back, and use the runway again.",
"With shinesparks, diagonally spark into the crumble blocks and hold forward three times, to overload PLMs as much as possible.",
"Note that when GT attacks, it will place stationary invisible projectiles, so it is much more difficult if not getting up quickly.",
"Place a Power Bomb then quickly exit G-mode to quickly clear all of the bomb blocks, otherwise it is possible to get out with a few Bombs or Screw Attack."
]
}
],
"notables": [
{
"id": 1,
"name": "Right Item Double Shinespark",
"note": [
"One vertical spark is needed to open up the breakable blocks on the right ceiling.",
"Then, a second horizontal spark is performed where those blocks were cleared to reveal the item."
]
},
{
"id": 2,
"name": "Safe Spot Kill",
"note": [
"The ability to get into the safe spot in the Golden Torizo fight, where Samus can attack while being safe from GT's standard attacks.",
"To get into the safe spot near the door: Stand on the left side of the floor pillar for GT to jump back. Then stand to the right of the nearby background pillar.",
"Shoot Golden Torizo by facing right and firing up. Farm drops by turning around to face left and firing up with no wide beams equipped."
],
"devNote": "There is a 5 px window where Samus is safe from all of GT's attacks, including the thrown Super attack and the attack that only occurs when Samus has too many Missiles."
},
{
"id": 3,
"name": "Crumble Jump",
"note": "Jump on the crumble blocks to reach the Missile item location at the risk of falling through.",
"devNote": "It is possible to directly jump over the crumble blocks but the input timings and strat expectations resemble a crumble jump while just being harder."
},
{
"id": 4,
"name": "Horizontal Bomb Jump",
"note": "Use a bomb explosion to jump horizontally over the GT crumble blocks."
},
{
"id": 5,
"name": "Crystal Flash During Fight",
"note": [
"Midway through the fight, use a Crystal Flash to refill Samus' energy.",
"Crystal Flashing while standing in the safe spot at GT's feet is safe."
]
},
{
"id": 6,
"name": "Missiles Only Kill",
"note": [
"Killing Golden Torizo only with missiles using enemy state manipulation to get missiles to connect.",
"This can be done by rolling under GT, triggering the sit attack, and then shooting missiles during the stand up animation.",
"Or by standing far enough from GT to trigger the eye lazer attack and shooting missiles during that animation."
]
},
{
"id": 7,
"name": "R-Mode Forced Standup Clip",
"note": [
"Use heat damage to trigger an R-mode forced standup while near the crumble blocks with upward momentum, in order to clip up through them.",
"This can be done with Space Jump, a mid-air Spring Ball jump with HiJump, a spring wall, or a speedy jump with HiJump.",
"All of these cases can be done with Golden Torizo either alive or dead."
]
},
{
"id": 8,
"name": "Safe Spot Kill (Lenient)",
"note": [
"The ability to get into the safe spot in the Golden Torizo fight, where Samus can attack while being safe from most of GT's attacks.",
"Samus is not able to shoot GT with Supers in this lenient safe spot and she must have fewer than 32 Missiles at all times.",
"To get into the safe spot near the door: Stand on the left side of the floor pillar for GT to jump back. Then stand to the right of the nearby background pillar.",
"This safe spot expects getting hit by GT before it jumps back. The space includes the less lenient spot, and also extends left 9 extra pixels.",
"If Samus is in the far end of the safe spot away from Golden Torizo near the end of the fight, it is possible to get hit by his bird spawner attack.",
"This attack is unlikely to occur with a strong beam. It is possible to jump over all the birds with one jump without moving horizontally."
],
"devNote": "There is a 14 px window where Samus is safe from all of GT's attacks except the thrown Super attack and the attack that only occurs when Samus has too many Missiles."
}
],
"nextStratId": 94,
"nextNotableId": 9,
"obstacles": [
{
"id": "door_2",
"name": "door_2"
},
{
"id": "f_DefeatedGoldenTorizo",
"name": "f_DefeatedGoldenTorizo"
}
]
}