Pink Brinstar Wave Gate Room
Room ID: 61
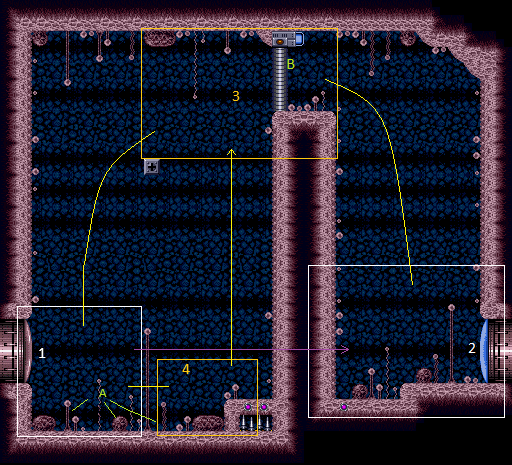
|
Requires: {"obstaclesCleared": ["A"]}Exit condition: "leaveWithRunway": {
"length": 1,
"openEnd": 1
} |
|
Entrance condition: "comeInWithRMode": {}Requires: {"enemyDamage": {"enemy": "Sm. Sidehopper", "type": "contact", "hits": 1}}Clears obstacles: R-Mode Dev note: FIXME: It is possible to avoid a forced Small Sidehopper hit by buffering an aim down as you release X-Ray. Evading further hits from that position would require more logic. |
From: 1
Left Door
To: 1
Left Door
Kill the hoppers. Use Spike X-Mode to gain shine charge, then use manual reserve and pause abuse on the spikes to interrupt the shinespark. Requires: {"obstaclesCleared": ["R-Mode"]},
{"obstaclesCleared": ["A"]},
{"or": [
{"and": [
"h_CrystalFlashForReserveEnergy",
"h_usePowerBomb",
"canOffScreenMovement"
]},
{"and": [
"h_RModeCanRefillReserves",
{"resourceMissingAtMost": [{"type": "Missile", "count": 0}]},
{"resourceMissingAtMost": [{"type": "Super", "count": 0}]},
{"or": [
{"and": [
"canBeLucky",
{"partialRefill": {"type": "ReserveEnergy", "limit": 5}}
]},
{"and": [
"canBeVeryLucky",
{"partialRefill": {"type": "ReserveEnergy", "limit": 20}}
]}
]}
]}
]},
"h_destroyBombWalls",
"h_spikeXModeShinecharge",
"canBeVeryPatient",
"canPauseAbuse",
{"autoReserveTrigger": {}},
"canRModeSparkInterrupt"Resets obstacles: R-Mode, C |
From: 1
Left Door
To: 1
Left Door
Requires: {"enemyDamage": {"enemy": "Sidehopper", "type": "contact", "hits": 1}},
"canUseIFrames"Exit condition: "leaveWithRunway": {
"length": 1,
"openEnd": 1
}Dev note: This is worst-case scenario. A strat that comes in and leaves with a single hit could be added. |
|


A very precise bounce is needed in order to enter X-mode with dash speed. Neutral knockback or a damage boost can be used to reach the door more quickly. Requires: {"obstaclesCleared": ["A"]},
"h_destroyBombWalls",
"h_spikeXModeShinecharge",
"canBeVeryPatient",
{"shineChargeFrames": 110}Exit condition: "leaveShinecharged": {} |
|
Requires: {"obstaclesCleared": ["A"]}Exit condition: "leaveWithSidePlatform": {
"height": 3,
"runway": {
"length": 12,
"openEnd": 0
},
"obstruction": [1, 0]
}Dev note: Max extra run speed $2.9. |
From: 1
Left Door
To: 1
Left Door
Entrance condition: "comeInNormally": {}Requires: {"enemyDamage": {"enemy": "Sm. Sidehopper", "type": "contact", "hits": 1}} |
|
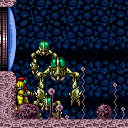

Requires: {"enemyDamage": {"enemy": "Sidehopper", "type": "contact", "hits": 3}}Clears obstacles: A Dev note: The Small Sidehoppers may deliver more of the hits, but this is an assumed worst case scenario |
|
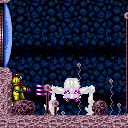

Requires: {"enemyDamage": {"enemy": "Sidehopper", "type": "contact", "hits": 1}},
{"or": [
"Spazer",
"Wave"
]}Clears obstacles: A |
|
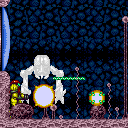

Requires: {"enemyKill": {
"enemies": [["Sidehopper", "Sm. Sidehopper", "Sm. Sidehopper"]],
"explicitWeapons": ["Missile", "Super", "PowerBomb", "ScrewAttack", "Plasma"]
}},
{"obstaclesNotCleared": ["C"]}Clears obstacles: A |
|
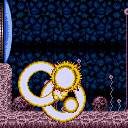

Weaken the big hopper with a Power Beam shot and then use one Super to hit all three enemies when they stack together. Entrance condition: "comeInNormally": {}Requires: {"enemyDamage": {"enemy": "Sm. Sidehopper", "type": "contact", "hits": 1}},
"canPrepareForNextRoom",
{"ammo": {"type": "Super", "count": 1}}Clears obstacles: A |
From: 1
Left Door
To: 1
Left Door
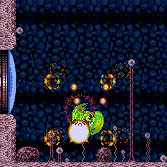
Entrance condition: "comeInNormally": {}Requires: "canPrepareForNextRoom", "ScrewAttack" Clears obstacles: A |
From: 1
Left Door
To: 1
Left Door
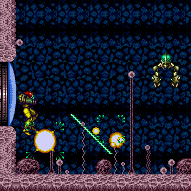

On entry, shoot diagonally downwards to kill the first two hoppers, then shoot the third. Entrance condition: "comeInNormally": {}Requires: "canPrepareForNextRoom", "Charge", "Plasma" Clears obstacles: A |
|
Entrance condition: "comeInNormally": {}Requires: {"haveBlueSuit": {}}Clears obstacles: A |
From: 1
Left Door
To: 1
Left Door
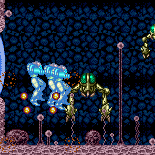

Entrance condition: "comeInGettingBlueSpeed": {
"length": 0,
"openEnd": 1
}Requires: "h_blueJump", "canPrepareForNextRoom" Clears obstacles: A |
From: 1
Left Door
To: 1
Left Door
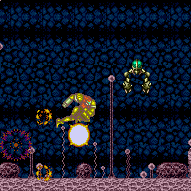

Entrance condition: "comeInWithSpark": {
"position": "bottom"
}Requires: "canPrepareForNextRoom", {"or": [ {"shinespark": {"frames": 24, "excessFrames": 10}}, {"and": [ {"shinespark": {"frames": 24, "excessFrames": 13}}, {"enemyDamage": {"enemy": "Sm. Sidehopper", "type": "contact", "hits": 1}} ]} ]} Clears obstacles: A |
From: 1
Left Door
To: 1
Left Door
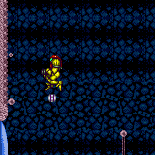

Bounce on the Power Bomb, then quickly kill the remaining Sidehopper with a strong beam, ammo, or pseudo-screw. If Samus has a weak beam, use the bomb to boost to the right to get the Sidehopper to jump to the right, then morph under it while killing it. Entrance condition: "comeInJumping": {
"speedBooster": "any",
"minTiles": 0.4375
}Requires: "canPrepareForNextRoom", {"tech": "canJumpIntoIBJ"}, "canResetFallSpeed", "h_usePowerBomb", "canHitbox", {"or": [ "canPseudoScrew", "Plasma", {"ammo": {"type": "Missile", "count": 2}}, {"ammo": {"type": "Super", "count": 1}}, {"and": [ "Ice", "Wave" ]}, {"and": [ "Ice", "Spazer" ]}, {"and": [ "Wave", "Spazer" ]}, {"and": [ "canTrickyJump", {"tech": "canBombHorizontally"} ]} ]} Clears obstacles: A Dev note: This is significantly easier than a typical canUnmorphBombBoost, so it is instead modeled with canJumpIntoIBJ and canResetFallSpeed. |
From: 1
Left Door
To: 1
Left Door
If coming from a water room, Samus' jump height will be much lower. With Screw Attack, it is important to turnaround before touching the hoppers. It can help to hold left through the transition and then buffer a right spin jump while landing. Requires: "canGMode", {"obstaclesCleared": ["C"]}, "canTrickyDodgeEnemies", {"or": [ "ScrewAttack", "Plasma" ]} Clears obstacles: A Dev note: FIXME: Assumes worst case scenario of it being a water connection. Add a way to check if this is an air connection. |
|


Jump straight up and shoot with the correct timing. This strat involves shooting a Super diagonally from the correct height while flush against the left wall. Its acceleration will cause it to clip into the blue gate off-screen. Requires: {"notable": "Reverse Gate Glitch"},
{"obstaclesCleared": ["A"]},
{"or": [
"canTrickyJump",
"h_backIntoCorner"
]},
"HiJump",
"canOffScreenSuperShot",
{"or": [
{"noFlashSuit": {}},
"h_useSpringBall"
]}Clears obstacles: B Dev note: Springball jumps didn't look possible but was close. IBJ didn't look possible. It is possible to do this with a flash suit and no Spring Ball, but is extremely precise. |
From: 1
Left Door
To: 1
Left Door
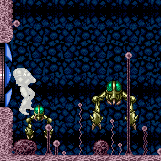

Use damage from the small sidehopper to align against the left wall. Jump straight up and shoot with the correct timing. This strat involves shooting a Super diagonally from the correct height while flush against the left wall. Its acceleration will cause it to clip into the blue gate off-screen. Requires: {"notable": "Reverse Gate Glitch"},
{"obstaclesNotCleared": ["A"]},
{"enemyDamage": {"enemy": "Sidehopper", "type": "contact", "hits": 1}},
"canTrickyJump",
"canNeutralDamageBoost",
"canUseIFrames",
"HiJump",
"canOffScreenSuperShot",
{"or": [
{"noFlashSuit": {}},
"h_useSpringBall"
]}Clears obstacles: B |
From: 1
Left Door
To: 1
Left Door
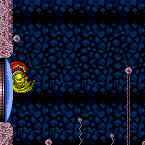

Use a stationary spinjump, or spinjump against the wall and turn around without moving; and shoot with the same correct timing. This strat involves shooting a Super diagonally from the correct height while flush against the left wall. Its acceleration will cause it to clip into the blue gate off-screen. Requires: {"notable": "Reverse Gate Glitch"},
{"obstaclesCleared": ["A"]},
{"or": [
"canTrickyJump",
"h_backIntoCorner"
]},
"canStationarySpinJump",
"SpaceJump",
"canOffScreenSuperShot"Clears obstacles: B |
From: 1
Left Door
To: 1
Left Door
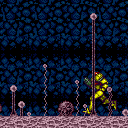

Build run speed and jump into the left wall, turning around without changing Samus' pixel position. This strat involves shooting a Super diagonally from the correct height while flush against the left wall. Its acceleration will cause it to clip into the blue gate off-screen. Requires: {"notable": "Reverse Gate Glitch"},
{"obstaclesCleared": ["A"]},
"canTrickyDashJump",
"canOffScreenSuperShot"Clears obstacles: B Dev note: The reverse gate glitch requires killing the enemies first, so it's required here. |
From: 1
Left Door
To: 1
Left Door
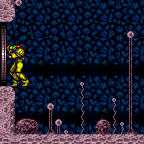

A consistent setup is to align with the wall below the door frame facing right. Jump and turn around to land on the door frame. Then jump and turn around again to return to being aligned with the wall but at the right height for shooting the Super. This strat involves shooting a Super diagonally from the correct height while flush against the left wall. Its acceleration will cause it to clip into the blue gate off-screen. Requires: {"notable": "Reverse Gate Glitch"},
{"obstaclesCleared": ["A"]},
{"obstaclesNotCleared": ["C"]},
{"doorUnlockedAtNode": 1},
"canTrickyJump",
"canOffScreenSuperShot",
{"noFlashSuit": {}}Clears obstacles: B Unlocks doors: {"types": ["ammo"], "requires": []}Dev note: The reverse gate glitch pretty much requires killing the enemies first, so it's required here. Direct GMode would have a usable door frame, but the gate can't be opened. |
From: 1
Left Door
To: 1
Left Door
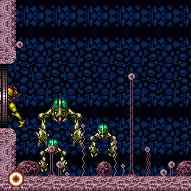
Entrance condition: "comeInWithGMode": {
"mode": "indirect",
"morphed": false
}Clears obstacles: B, C |
From: 1
Left Door
To: 1
Left Door
Kill the Sidehoppers with a Power Bomb upon entry. Entrance condition: "comeInWithGMode": {
"mode": "indirect",
"morphed": true
}Requires: {"enemyDamage": {"enemy": "Sm. Sidehopper", "type": "contact", "hits": 1}},
"h_artificialMorphPowerBomb"Clears obstacles: A, B, C |
From: 1
Left Door
To: 1
Left Door
Entrance condition: "comeInWithGMode": {
"mode": "indirect",
"morphed": false
}Requires: "h_blueSuitGMode" Clears obstacles: A, B, C |
|
Requires: "canPrepareForNextRoom", {"resetRoom": {"nodes": [1]}}, {"or": [ {"and": [ "canDash", "ScrewAttack", {"cycleFrames": 130} ]}, {"and": [ {"haveBlueSuit": {}}, {"cycleFrames": 140} ]}, {"and": [ "h_PlasmaHitbox", {"cycleFrames": 170} ]} ]} Clears obstacles: A Resets obstacles: B, C, R-Mode Farm cycle drops: 1 Sidehopper, 2 Sm. Sidehopper |
|
Requires: {"obstaclesCleared": ["A"]},
{"obstaclesNotCleared": ["R-Mode"]},
"h_CrystalFlash" |
|
Entrance condition: "comeInWithMockball": {
"speedBooster": "any",
"adjacentMinTiles": 0,
"remoteAndLandingMinTiles": [[0, 0]]
}Requires: {"enemyDamage": {"enemy": "Sm. Sidehopper", "type": "contact", "hits": 1}} |
From: 1
Left Door
To: 1
Left Door
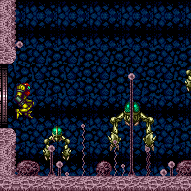

This is possible to do without taking a second hit: Enter the room in a jump, then shoot down to open the door and land in the doorsill. If the adjact room is water and Samus lacks Gravity suit, jumping high into the door and hold left before the transition, Shoot the door open when Samus is near the top of the door and land back in the frame, let the Hopper bounce twice. Entrance condition: "comeInJumping": {
"speedBooster": "any",
"minTiles": 0.4375
}Exit condition: "leaveWithDamage": {
"enemy": "Sidehopper"
}Unlocks doors: {"types": ["ammo"], "requires": ["never"]} |
From: 1
Left Door
To: 1
Left Door
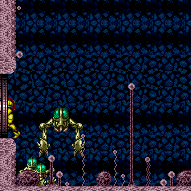

This is possible to do without taking a second hit: Enter the room in a jump, then shoot down to open the door and land in the doorsill. Requires: {"obstaclesNotCleared": ["A"]}Exit condition: "leaveWithDamage": {
"enemy": "Sidehopper"
}Unlocks doors: {"types": ["missiles", "super"], "requires": []},
{"types": ["powerbomb"], "requires": ["never"]}Dev note: Version for entering from the right, or if unable to enter jumping. A Power Bomb would kill the hoppers. |
|
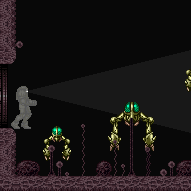

Requires: {"enemyDamage": {"enemy": "Sidehopper", "type": "contact", "hits": 1}} |
From: 1
Left Door
To: 1
Left Door


A one frame dash jump will give Samus 4 pixels of leniency for the bounce position, two frames is pixel perfect and more than two frames it doesn't work. Samus will jump approximately two tiles higher with a one frame jump compared to a two frame jump. Requires: {"obstaclesCleared": ["A"]},
{"or": [
"h_destroyBombWalls",
{"haveBlueSuit": {}}
]},
"canBeVeryPatient",
"h_spikeXModeSpikeSuit",
{"shinespark": {"frames": 3, "excessFrames": 3}}Resets obstacles: C |
From: 1
Left Door
To: 1
Left Door


A one frame dash jump will give Samus 4 pixels of leniency for the bounce position, two frames is pixel perfect and more than two frames it doesn't work. Samus will jump approximately two tiles higher with a one frame jump compared to a two frame jump. Requires: {"obstaclesCleared": ["A"]},
{"or": [
"h_destroyBombWalls",
{"haveBlueSuit": {}}
]},
"canBeVeryPatient",
"h_spikeXModeSpikeSuit",
"canUseFlashSuitInitialSpark",
{"shinespark": {"frames": 26, "excessFrames": 0}}Exit condition: "leaveWithSpark": {
"position": "top"
} |
From: 1
Left Door
To: 1
Left Door


A one frame dash jump will give Samus maximum leniancy for bouncing into the spikes without hitting the wall to build a shinecharge Requires: {"obstaclesCleared": ["A"]},
"h_destroyBombWalls",
"canBeVeryPatient",
"h_spikeDoubleXModeBlueSuit",
{"shinespark": {"frames": 1}}Resets obstacles: C |
|
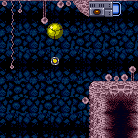

Requires: "canLongIBJ", {"obstaclesCleared": ["A"]}, {"or": [ "Wave", {"obstaclesCleared": ["B"]} ]} Dev note: IBJ requires the enemies to be killed The reverse gate glitch may be executed earlier from node 1 -> 1. |
From: 1
Left Door
To: 2
Right Door
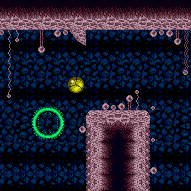

Kill the Sidehoppers with Bombs or a Power Bomb, then IBJ up onto the Grapple block. Entrance condition: "comeInWithGMode": {
"mode": "indirect",
"morphed": true
}Requires: "h_artificialMorphLongIBJ", {"enemyDamage": {"enemy": "Sm. Sidehopper", "type": "contact", "hits": 1}}, {"or": [ {"enemyDamage": {"enemy": "Sidehopper", "type": "contact", "hits": 3}}, "h_artificialMorphPowerBomb" ]} Clears obstacles: A, B |
From: 1
Left Door
To: 2
Right Door


Samus will take a hopper hit on entry if she rolls into the room, as she is vulnerable in the falling state. It is possible to enter the room jumping with Spring Ball to avoid the hit. Entrance condition: "comeInWithGMode": {
"mode": "indirect",
"morphed": true
}Requires: "h_blueSuitGMode", "h_artificialMorphLongIBJ", {"or": [ "h_artificialMorphSpringBall", {"enemyDamage": {"enemy": "Sm. Sidehopper", "type": "contact", "hits": 1}} ]} Clears obstacles: A, B |
|


Requires: {"or": [
{"obstaclesCleared": ["A"]},
{"enemyDamage": {"enemy": "Sm. Sidehopper", "type": "contact", "hits": 1}}
]},
{"or": [
"SpaceJump",
"canWallJump",
{"and": [
"Grapple",
"h_midAirShootUp",
{"obstaclesNotCleared": ["C"]}
]},
{"and": [
"HiJump",
"canSpringBallJumpMidAir"
]}
]}Dev note: The reverse gate glitch may be executed earlier from node 1 -> 1. |
|
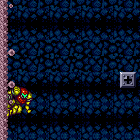

Entrance condition: "comeInJumping": {
"speedBooster": "any",
"minTiles": 1
}Requires: "canPrepareForNextRoom", {"or": [ "SpaceJump", "canWallJump", {"and": [ "Grapple", "h_midAirShootUp", {"obstaclesNotCleared": ["C"]} ]}, {"and": [ "HiJump", "canSpringBallJumpMidAir" ]} ]} |
From: 1
Left Door
To: 3
Top Junction
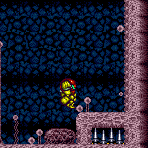

Run from the left side to the right, then jump just before or at the end of the runway to get up onto the Grapple block. Requires: "HiJump", "canTrickyJump", "canSpeedyJump", {"obstaclesCleared": ["A"]} |
From: 1
Left Door
To: 3
Top Junction
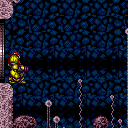

Perform a very precise Spring Ball jump from the door frame onto the Grapple block. It helps but is not required to use a running spin jump or crouch jump. Requires: {"doorUnlockedAtNode": 1},
"canTrickySpringBallJump",
"canTrickyJump",
{"obstaclesCleared": ["A"]},
{"obstaclesNotCleared": ["C"]}Dev note: FIXME: Direct G-Mode would have a usable door frame. |
|
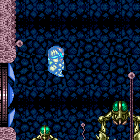

Jump into the room and onto the Grapple block. Entrance condition: "comeInJumping": {
"speedBooster": "yes",
"minTiles": 34.4375
}Requires: "canPrepareForNextRoom", "canSpeedyJump", "canTrickyJump" |
|
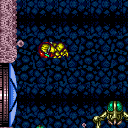
Jump into the room and onto the Grapple block. Entrance condition: "comeInJumping": {
"speedBooster": "yes",
"minTiles": 25
}Requires: "canPrepareForNextRoom", "canTrickyDashJump" |
|
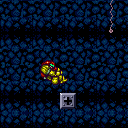
Jump into the room and onto the Grapple block. Entrance condition: "comeInJumping": {
"speedBooster": "yes",
"minTiles": 6.4375
}Requires: "canPrepareForNextRoom", "HiJump", "canSpeedyJump" |
|
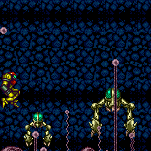

Jump into the room and onto the Grapple block. Requires a runway of only 2 tiles in the adjacent room. Entrance condition: "comeInJumping": {
"speedBooster": "yes",
"minTiles": 1.4375
}Requires: "canPrepareForNextRoom", "HiJump", "canTrickyDashJump" Dev note: It can be done with no open ends, but it's a fair bit tighter. |
From: 1
Left Door
To: 3
Top Junction
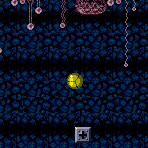

Perform a Spring Ball jump from a speedy jump in the previous room. Entrance condition: "comeInJumping": {
"speedBooster": "yes",
"minTiles": 7
}Requires: "canPrepareForNextRoom", "canTrickySpringBallJump", "canSpeedyJump" |
From: 1
Left Door
To: 3
Top Junction
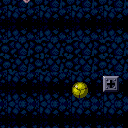

Perform a very precise Spring Ball jump through the transition and onto the Grapple block. A running spin jump or crouch jump can be used. Entrance condition: "comeInJumping": {
"speedBooster": "no",
"minTiles": 0.4375
}Requires: "canPrepareForNextRoom", "canTrickySpringBallJump", "canTrickyJump" |
|
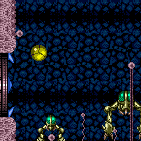
Come in with a spring ball bounce after gaining speed on a remote runway using at least 34 tiles. Entrance condition: "comeInWithSpringBallBounce": {
"speedBooster": "yes",
"movementType": "any",
"remoteAndLandingMinTiles": [[34, 1]]
}Dev note: This requires extra run speed of at least $6.0. |
From: 1
Left Door
To: 3
Top Junction
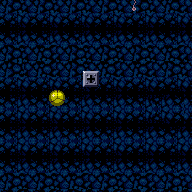

Entrance condition: "comeInWithSidePlatform": {
"platforms": [
{
"minHeight": 1,
"maxHeight": 1,
"minTiles": 17,
"speedBooster": "yes",
"obstructions": [[1, 0]],
"requires": [
"HiJump"
],
"note": ["This applies to Warehouse Entrance."]
},
{
"minHeight": 2,
"maxHeight": 2,
"minTiles": 11.4375,
"speedBooster": "yes",
"obstructions": [[1, 0]],
"requires": [
"HiJump"
],
"note": ["This applies to Ridley Tank Room, Dust Torizo Room, and Halfie Climb Room."],
"detailNote": [
"This has a 2-frame window for the jump.",
"Getting the jump on the last frame may requiring quickly aiming down (between 1 and 3 frames after the jump)."
]
},
{
"minHeight": 3,
"maxHeight": 3,
"minTiles": 11.4375,
"speedBooster": "yes",
"obstructions": [[1, 0]],
"requires": [
"HiJump",
"canTrickyJump"
],
"note": ["This applies to Mickey Mouse Room."],
"detailNote": [
"Avoid backing into the corner; press towards it and turn around.",
"It helps to advance 4 pixels by performing 2 arm pumps (press and release of an angle button) while running.",
"This will give a 2-frame window for the jump, while without the arm pumps the jump would be frame perfect.",
"Getting the jump on the last frame requires quickly aiming down (between 1 and 5 frames after the jump)."
]
},
{
"minHeight": 2,
"maxHeight": 2,
"minTiles": 45,
"speedBooster": "yes",
"obstructions": [[2, 0]],
"requires": [
{"or": [
"canMomentumConservingMorph",
"canInsaneJump"
]}
],
"note": ["This applies to Waterway Energy Tank Room."],
"devNote": [
"This can be done most easily with a ceiling mockball through the transition:",
"this has a 5-frame window for the jump, and between a 1-frame and 5-frame window for the morph,",
"with later jumps giving the larger windows for the morph.",
"Without Morph, it is possible to jump directly through the door with a last-frame jump."
]
},
{
"minHeight": 2,
"maxHeight": 2,
"minTiles": 45,
"speedBooster": "yes",
"obstructions": [[3, 0]],
"requires": [
{"or": [
"canMomentumConservingMorph",
{"and": [
"canInsaneJump",
"canMomentumConservingTurnaround"
]}
]}
],
"note": ["This applies to Statues Hallway."],
"detailNote": [
"The momentum-conserving turnaround version requires a last-frame jump, with a 3-frame window for the turnaround;",
"the first of the possible frames for the turnaround requires a precise down-grab onto the Grapple block (4-frame window)."
]
},
{
"minHeight": 3,
"maxHeight": 3,
"minTiles": 39.4375,
"speedBooster": "yes",
"obstructions": [[3, 0]],
"requires": [
"canMomentumConservingMorph"
],
"note": ["This applies to Flyway."]
},
{
"minHeight": 2,
"maxHeight": 2,
"minTiles": 45,
"speedBooster": "yes",
"obstructions": [[4, 0]],
"requires": [
"canMomentumConservingMorph",
"canInsaneJump",
"canInsaneMidAirMorph"
],
"note": ["This applies to Baby Kraid Room."]
},
{
"minHeight": 3,
"maxHeight": 3,
"minTiles": 39.4375,
"speedBooster": "yes",
"obstructions": [[3, 2]],
"requires": [
"canTrickyDashJump"
],
"note": ["This applies to Metal Pirates Room."]
}
]
}Dev note: Variations involving a spring ball jump are not included, since a spring ball jump can be done using a 1-tile runway connected to the door. Likewise, jumping up with HiJump and Speed Booster with a 2-tile runway is already covered. |
From: 1
Left Door
To: 3
Top Junction


A one frame dash jump will give Samus maximum leniency for bouncing into the spikes without hitting the wall to build a shinecharge Requires: "canSuperjump", {"obstaclesCleared": ["A"]}, {"obstaclesCleared": ["B"]}, "h_destroyBombWalls", "canBeVeryPatient", "h_spikeDoubleXModeBlueSuit", {"shinespark": {"frames": 2}} Resets obstacles: C |
From: 1
Left Door
To: 3
Top Junction
Jump into the room and spark up onto the grapple block. Entrance condition: "comeInJumping": {
"speedBooster": "any",
"minTiles": 0.4375
}Requires: {"useFlashSuit": {}},
{"or": [
{"shinespark": {"frames": 16, "excessFrames": 8}},
{"and": [
"HiJump",
{"shinespark": {"frames": 11, "excessFrames": 7}}
]},
{"and": [
"HiJump",
"canSpeedyJump",
{"shinespark": {"frames": 9, "excessFrames": 7}}
]}
]} |
From: 1
Left Door
To: 3
Top Junction
Jump into the room and spark up onto the grapple block. With low Energy, wiggle on entry then perform a diagonal spark. Entrance condition: "comeInNormally": {}Requires: "HiJump",
{"useFlashSuit": {}},
{"shinespark": {"frames": 20, "excessFrames": 6}}Dev note: The other strat should always be usable if there is air physics. |
|
Requires: {"obstaclesCleared": ["A"]},
"h_storedSpark",
{"or": [
{"shinespark": {"frames": 16, "excessFrames": 7}},
{"and": [
"HiJump",
{"shinespark": {"frames": 12, "excessFrames": 7}}
]}
]} |
|
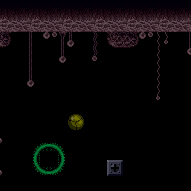

Kill the Sidehoppers with Bombs or a Power Bomb, then IBJ up onto the Grapple block. Use Wave to get through. Entrance condition: "comeInWithGMode": {
"mode": "any",
"morphed": true
}Requires: "h_artificialMorphLongIBJ", {"enemyDamage": {"enemy": "Sm. Sidehopper", "type": "contact", "hits": 1}}, {"or": [ {"enemyDamage": {"enemy": "Sidehopper", "type": "contact", "hits": 3}}, "h_artificialMorphPowerBomb" ]} Clears obstacles: A |
From: 1
Left Door
To: 3
Top Junction
Samus will have i-frames on entry and can roll around to kill the hoppers. Entrance condition: "comeInWithGMode": {
"mode": "direct",
"morphed": true
}Requires: "h_blueSuitGMode", "h_artificialMorphLongIBJ" Clears obstacles: A |
From: 1
Left Door
To: 3
Top Junction
Samus will take a hopper hit on entry if she rolls into the room, as she is vulnerable in the falling state. It is possible to enter the room jumping with Spring Ball to avoid the hit. Entrance condition: "comeInWithGMode": {
"mode": "indirect",
"morphed": true
}Requires: "h_blueSuitGMode", "h_artificialMorphLongIBJ", {"or": [ "h_artificialMorphSpringBall", {"enemyDamage": {"enemy": "Sm. Sidehopper", "type": "contact", "hits": 1}} ]} Clears obstacles: A, B, C |
|
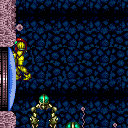

To minimize damage from the Hoppers, get stuck in the door relatively high and move quickly. Climb up somewhat less than 1 screen, until Samus' head appears between 1 and 3 tiles below the door. Then perform a turn-around spin jump to the right to get on top of the Grapple block. Entrance condition: "comeInWithDoorStuckSetup": {}Requires: {"notable": "Hopper X-Ray Climb"},
"canXRayClimb",
{"enemyDamage": {"enemy": "Sidehopper", "type": "contact", "hits": 2}}Dev note: It is possible to avoid all Hopper damage, but it is not clear if this can be done reliably. Two hits from the big Sidehopper appears to be a worst-case scenario. FIXME: a blue suit can be used to avoid damage, by turning around right to left as the Hoppers approach. |
From: 1
Left Door
To: 3
Top Junction


A one frame dash jump will give Samus 4 pixels of leniency for the bounce position, two frames is pixel perfect and more than two frames it doesn't work. Samus will jump approximately two tiles higher with a one frame jump compared to a two frame jump. Requires: {"or": [
"Wave",
{"obstaclesCleared": ["B"]}
]},
{"obstaclesCleared": ["A"]},
{"obstaclesNotCleared": ["C"]},
"canUseFlashSuitInitialSpark",
"h_destroyBombWalls",
"canBeVeryPatient",
"h_spikeXModeSpikeSuit",
{"shinespark": {"frames": 26}}Clears obstacles: B Resets obstacles: C |
|


A one frame dash jump will give Samus 4 pixels of leniency for the bounce position, two frames is pixel perfect and more than two frames it doesn't work. Samus will jump approximately two tiles higher with a one frame jump compared to a two frame jump. Requires: {"or": [
"Wave",
{"obstaclesCleared": ["B"]}
]},
{"obstaclesCleared": ["A"]},
{"obstaclesNotCleared": ["C"]},
"h_spikeXModeShinecharge",
"canBeVeryPatient",
{"shinespark": {"frames": 16}}Clears obstacles: B Resets obstacles: C |
From: 1
Left Door
To: 4
Frozen Hopper Junction
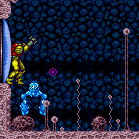
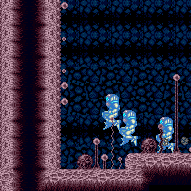
Carefully freeze the Hoppers without taking too much damage but also without accidently killing all of the enemies. Requires: {"obstaclesNotCleared": ["A"]},
"canTrickyUseFrozenEnemies",
"canTrickyJump",
{"enemyDamage": {"enemy": "Sidehopper", "type": "contact", "hits": 1}},
{"or": [
{"and": [
"Wave",
"Spazer"
]},
"Plasma",
{"enemyDamage": {"enemy": "Sidehopper", "type": "contact", "hits": 1}}
]}Dev note: The Small Sidehoppers may deliver more of the hits, but this is an assumed worst case scenario |
From: 2
Right Door
To: 1
Left Door
Entrance condition: "comeInWithGrappleTeleport": {
"blockPositions": [[2, 29]]
}Bypasses door shell: true |
|
Entrance condition: "comeInWithGrappleTeleport": {
"blockPositions": [[2, 29]]
}Exit condition: "leaveWithGrappleTeleport": {
"blockPositions": [[2, 29]]
}Bypasses door shell: true |
|
Entrance condition: "comeInWithRMode": {}Clears obstacles: R-Mode |
|
Exit condition: "leaveWithRunway": {
"length": 6,
"openEnd": 1
} |
|
Requires: "canWallJump", "canTrickyJump", {"resetRoom": {"nodes": [2]}}, {"or": [ {"and": [ "canDash", {"or": [ {"and": [ "ScrewAttack", {"cycleFrames": 600} ]}, {"and": [ "Plasma", {"cycleFrames": 690} ]}, {"and": [ "Wave", {"cycleFrames": 810} ]} ]} ]}, {"and": [ {"haveBlueSuit": {}}, {"cycleFrames": 630} ]} ]} Clears obstacles: A Resets obstacles: C, B, R-Mode Farm cycle drops: 1 Sidehopper, 2 Sm. Sidehopper |
|
Requires: {"obstaclesNotCleared": ["R-Mode"]},
"h_CrystalFlash"Clears obstacles: A |
|


Requires: "Charge", "Plasma", "canSpecialBeamAttack", {"ammo": {"type": "PowerBomb", "count": 1}} Clears obstacles: A Dev note: This also raises the elevator, but using this method to get up is a bit obscure and would use the notable from 2->3. |
From: 2
Right Door
To: 2
Right Door
Entrance condition: "comeInShinecharging": {
"length": 5,
"openEnd": 0
},
"comesInHeated": "no"Requires: "h_CrystalSpark" Clears obstacles: A |
|
Requires: {"or": [
"canWallJump",
"SpaceJump",
"canLongIBJ",
{"and": [
"HiJump",
"canSpringBallJumpMidAir"
]}
]}Clears obstacles: B |
|


The elevator can be raised by hitting below the shot block with a Bomb. Requires: "h_useMorphBombs" Clears obstacles: B |
From: 2
Right Door
To: 3
Top Junction


Use a Power Bomb against the left wall or Wave to kill the enemies and ride the elevator. Requires: {"or": [
"h_usePowerBomb",
"Wave"
]}Clears obstacles: A, B |
From: 2
Right Door
To: 3
Top Junction
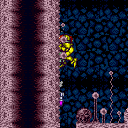

The elevator can be raised by clipping a shot into the floor, shot while falling with the right amount of vertical speed. This can be done with a Missile, Super, or charged Spazer or Plasma shot, a well positioned angle Spazer shot while crouched, or an or Ice SBA. Requires: {"notable": "Shot Clip to Ride the Elevator"},
{"or": [
{"ammo": {"type": "Missile", "count": 1}},
{"ammo": {"type": "Super", "count": 1}},
"Spazer",
{"and": [
"Charge",
"Plasma"
]},
{"and": [
"Charge",
"Ice",
"canSpecialBeamAttack",
{"ammo": {"type": "PowerBomb", "count": 1}}
]}
]}Clears obstacles: B Dev note: FIXME: Do we need leniency or another tech for this? |
|

Jump near the end of the runway in-room. Assumes there is a runway in the adjacent room of at least 37 tiles. Entrance condition: "comeInRunning": {
"speedBooster": "yes",
"minTiles": 37
}Requires: "canSpeedyJump" |
|


Entrance condition: "comeInRunning": {
"speedBooster": "yes",
"minTiles": 14
}Requires: "canSpeedyJump", "canTrickySpringBallJump" |
|
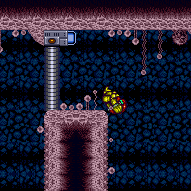
Jump at the end of the runway in-room. Assumes there is a runway in the adjacent room of at least 7 tiles. Entrance condition: "comeInRunning": {
"speedBooster": "yes",
"minTiles": 7
}Requires: "canSpeedyJump", "HiJump" |
|
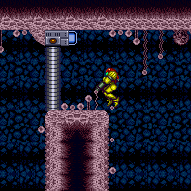

Jump at the end of the runway in-room. Assumes that a runway of exactly 29 tiles is used in the adjacent room. Entrance condition: "comeInRunning": {
"speedBooster": "yes",
"minTiles": 29
}Requires: "canTrickyDashJump" Dev note: This requires extra run speed of exactly $6.0 or $6.1 when jumping. |
|
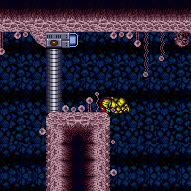

Jump at the very end of the runway in-room. Requires a runway in the adjacent room of at least 6 tiles. Entrance condition: "comeInRunning": {
"speedBooster": "yes",
"minTiles": 6
}Requires: "HiJump", "canSpeedyJump", "canTrickyJump" |
From: 2
Right Door
To: 3
Top Junction
Using exactly 2 runway tiles (with open end) in the other room, jump at the very end of the runway in-room. Entrance condition: "comeInRunning": {
"speedBooster": "yes",
"minTiles": 2
}Requires: "canTrickySpringBallJump", "canTrickyDashJump" |
From: 2
Right Door
To: 3
Top Junction
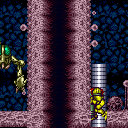

Start the elevator ride by using Screw Attack or Pseudo Screw in the hole, or by jumping in the hole with a blue suit. Kago the elevator to fall back in and hit the elevator again. This is much easier while the elevator is still rising, but can still be done with Morph afterwards. Without HiJump, this will need to be done once more to get high enough to get to the blue gate, and, without Morph, Samus will need to Kago the second elevator section first-try, without jumping out of the first section of elevator. After triggering the third section of elevator, move out, to the right, then jump onto the raised elevator before it is too tall. Requires: {"notable": "Kago to Ride the Elevator"},
"canKago",
{"or": [
"ScrewAttack",
"canPseudoScrew",
{"haveBlueSuit": {}}
]},
{"or": [
"Morph",
{"and": [
"HiJump",
"canTrickyJump",
{"or": [
"canCrouchJump",
"canDownGrab"
]}
]},
"canInsaneJump"
]}Clears obstacles: B |
From: 2
Right Door
To: 3
Top Junction

Entrance condition: "comeInShinecharging": {
"length": 5,
"openEnd": 1
}Requires: {"or": [
{"shinespark": {"frames": 22, "excessFrames": 4}},
{"and": [
"canMidairShinespark",
{"shinespark": {"frames": 15, "excessFrames": 3}}
]},
{"and": [
"canMidairShinespark",
"HiJump",
{"shinespark": {"frames": 12, "excessFrames": 4}}
]},
{"and": [
"canMidairShinespark",
"HiJump",
"canSpeedyJump",
{"shinespark": {"frames": 9, "excessFrames": 4}}
]}
]}Clears obstacles: B |
From: 2
Right Door
To: 3
Top Junction
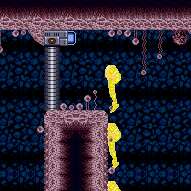
Entrance condition: "comeInShinecharged": {}Requires: {"shineChargeFrames": 1},
{"shinespark": {"frames": 22, "excessFrames": 4}}Clears obstacles: B |
|

Come in with a spring ball bounce after gaining speed on a remote runway using at least 42 tiles. Entrance condition: "comeInWithSpringBallBounce": {
"speedBooster": "yes",
"movementType": "any",
"remoteAndLandingMinTiles": [[42, 0]]
}Dev note: This requires extra run speed of at least $6.D. |
From: 2
Right Door
To: 3
Top Junction
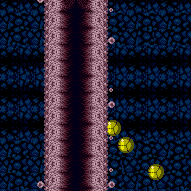

Come in with a spring ball bounce after gaining speed on a remote runway using exactly 32 tiles. Entrance condition: "comeInWithSpringBallBounce": {
"speedBooster": "yes",
"movementType": "any",
"remoteAndLandingMinTiles": [[32, 0]]
}Requires: "canTrickyDashJump", "canInsaneJump" Dev note: This requires extra run speed of either $6.0 or $6.1 |
From: 2
Right Door
To: 3
Top Junction
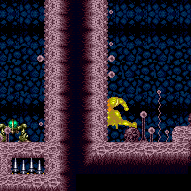

Shinesparking horizontally into the wall will trigger the elevator as Samus's echos hit it. Entrance condition: "comeInShinecharging": {
"length": 5,
"openEnd": 1
}Requires: {"notable": "Shinespark to Ride the Elevator"},
"canHorizontalShinespark",
"canUseSpeedEchoes",
{"shinespark": {"frames": 1, "excessFrames": 1}}Clears obstacles: B |
From: 2
Right Door
To: 3
Top Junction
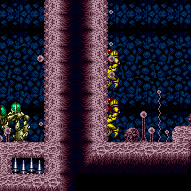

Shinesparking horizontally into the wall will trigger the elevator as Samus's echos hit it. Entrance condition: "comeInShinecharged": {}Requires: {"shineChargeFrames": 45},
{"notable": "Shinespark to Ride the Elevator"},
"canHorizontalShinespark",
"canUseSpeedEchoes",
{"shinespark": {"frames": 1, "excessFrames": 1}}Clears obstacles: B |
From: 2
Right Door
To: 3
Top Junction
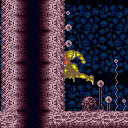

Shinesparking horizontally into the wall will trigger the elevator as Samus's echos hit it. Entrance condition: "comeInWithSpark": {}Requires: {"notable": "Shinespark to Ride the Elevator"},
"canUseSpeedEchoes",
{"shinespark": {"frames": 15, "excessFrames": 6}}Clears obstacles: B |
From: 2
Right Door
To: 3
Top Junction
Shinesparking horizontally into the wall will trigger the elevator as Samus's echos hit it. Requires: {"notable": "Shinespark to Ride the Elevator"},
"canHorizontalShinespark",
"canUseSpeedEchoes",
"h_storedSpark",
{"shinespark": {"frames": 1, "excessFrames": 1}}Clears obstacles: B |
From: 2
Right Door
To: 3
Top Junction
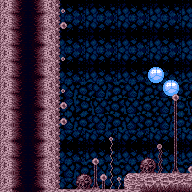

Entrance condition: "comeInWithSidePlatform": {
"platforms": [
{
"minHeight": 1,
"maxHeight": 1,
"minTiles": 36.3703,
"speedBooster": "yes",
"obstructions": [[3, 0]],
"environment": "water",
"requires": [
"canTrickyDashJump",
"canInsaneJump",
"canGravityJump",
"canMomentumConservingMorph"
],
"note": ["This applies to Botwoon Energy Tank Room"],
"detailNote": [
"This needs extra run speed of $6.0 or $6.1.",
"It is easier to do by timing a pause to hit just after jumping and aiming down,",
"then unequipping Gravity and holding down during the unpause black screen to buffer the morph."
]
}
]
}Clears obstacles: B |
From: 2
Right Door
To: 3
Top Junction
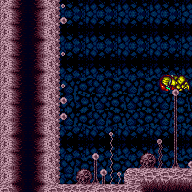

Entrance condition: "comeInWithSidePlatform": {
"platforms": [
{
"minHeight": 1,
"maxHeight": 1,
"minTiles": 16,
"speedBooster": "yes",
"obstructions": [[1, 0]],
"requires": [
"canTrickyDashJump"
],
"note": ["This applies to Lava Dive Room"],
"detailNote": ["This needs extra run speed between $2.C and $2.F."]
},
{
"minHeight": 2,
"maxHeight": 2,
"minTiles": 27.4375,
"speedBooster": "yes",
"obstructions": [[1, 0]],
"note": ["This applies to Dust Torizo Room and Noob Bridge"]
},
{
"minHeight": 3,
"maxHeight": 3,
"minTiles": 22,
"speedBooster": "yes",
"obstructions": [[1, 0]],
"requires": [
"canTrickyDashJump"
],
"note": ["This applies to Double Chamber"],
"detailNote": [
"Stand between about 1 and 7 tiles away from the runway end, to start running.",
"This is to avoid Samus having $5.0 or more extra run speed, where a dropoff in jump height occurs with Hi-Jump,"
]
},
{
"minHeight": 1,
"maxHeight": 1,
"minTiles": 23.8731,
"speedBooster": "yes",
"obstructions": [[3, 0]],
"environment": "water",
"requires": [
"canGravityJump",
"canMomentumConservingMorph"
],
"note": ["This applies to Below Botwoon Energy Tank and Botwoon Energy Tank Room."],
"detailNote": [
"Time a pause to hit just after jumping and aiming down,",
"then unequip Gravity and hold down during the unpause black screen to buffer the morph."
]
},
{
"minHeight": 2,
"maxHeight": 2,
"minTiles": 31,
"speedBooster": "yes",
"obstructions": [[3, 0]],
"requires": [
"canMomentumConservingMorph",
"canInsaneJump"
],
"note": ["This applies to Metroid Room 1, Statues Hallway, and Baby Kraid Room."]
},
{
"minHeight": 3,
"maxHeight": 3,
"minTiles": 41.4375,
"speedBooster": "yes",
"obstructions": [[3, 0]],
"requires": [
"canMomentumConservingMorph",
"canInsaneJump"
],
"note": [
"This applies to Blue Brinstar Energy Tank Room (Power Bomb blocks broken), Bowling Alley (middle, power off), Basement (power on)."
]
},
{
"minHeight": 3,
"maxHeight": 3,
"minTiles": 39.4375,
"speedBooster": "yes",
"obstructions": [[3, 2]],
"requires": [
"canInsaneJump"
],
"note": ["This applies to Metal Pirates Room."]
},
{
"minHeight": 3,
"maxHeight": 3,
"minTiles": 37.4375,
"speedBooster": "yes",
"obstructions": [[5, 2]],
"requires": [
"canMomentumConservingMorph",
"canInsaneJump"
],
"note": ["This applies to Flyway."]
}
]
}Requires: "HiJump", "canTrickyJump" Clears obstacles: B |
From: 2
Right Door
To: 3
Top Junction
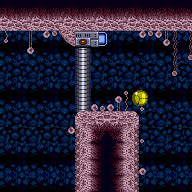

Entrance condition: "comeInWithSidePlatform": {
"platforms": [
{
"minHeight": 1,
"maxHeight": 1,
"minTiles": 16,
"speedBooster": "yes",
"obstructions": [[1, 0]],
"requires": [
"canTrickyDashJump"
],
"note": ["This applies to Lava Dive Room"],
"detailNote": [
"This needs extra run speed $2.0 or $2.1,",
"being sure to maintain forward momentum while performing the mid-air jump to boost its height."
]
},
{
"minHeight": 2,
"maxHeight": 2,
"minTiles": 9.4375,
"speedBooster": "yes",
"obstructions": [[1, 0]],
"requires": [
"canTrickyDashJump"
],
"note": [
"This applies to Shaktool Room, Tourian Hopper Room, and Bowling Alley (bottom)."
],
"detailNote": [
"This needs extra run speed $2.0 or $2.1,",
"being sure to maintain forward momentum while performing the mid-air jump to boost its height."
]
},
{
"minHeight": 2,
"maxHeight": 2,
"minTiles": 27.4375,
"speedBooster": "yes",
"obstructions": [[1, 0]],
"note": ["This applies to Dust Torizo Room and Noob Bridge."]
},
{
"minHeight": 3,
"maxHeight": 3,
"minTiles": 9.4375,
"speedBooster": "yes",
"obstructions": [[1, 0]],
"requires": [
"canTrickyDashJump"
],
"note": [
"This applies to Bomb Torizo Room, Pink Brinstar Wave Gate Room, Phantoon's Room, Fish Tank, Botwoon's Room, and Big Boy Room."
],
"detailNote": [
"This needs extra run speed $2.0 or $2.1,",
"being sure to maintain forward momentum while performing the mid-air jump to boost its height."
]
},
{
"minHeight": 3,
"maxHeight": 3,
"minTiles": 28.2472,
"speedBooster": "yes",
"obstructions": [[1, 0]],
"requires": [],
"note": ["This applies to Double Chamber."]
},
{
"minHeight": 1,
"maxHeight": 1,
"minTiles": 23.8731,
"speedBooster": "yes",
"obstructions": [[3, 0]],
"requires": [
"canMomentumConservingMorph"
],
"note": ["This applies to Below Botwoon Energy Tank and Botwoon Energy Tank Room."],
"detailNote": [
"This may be easier with a pause buffer and Gravity jump (though not required):",
"time a pause to hit just after jumping and aiming down,",
"then unequip Gravity and hold down during the unpause black screen to buffer the morph."
]
},
{
"minHeight": 2,
"maxHeight": 2,
"minTiles": 31,
"speedBooster": "yes",
"obstructions": [[3, 0]],
"requires": [
"canMomentumConservingMorph",
"canTrickyDashJump"
],
"note": ["This applies to Metroid Room 1, Statues Hallway, and Baby Kraid Room."],
"detailNote": [
"In Metroid Room 1, this requires extra run speed of $4.0 or $4.1;",
"in the other rooms, it is also possible to gain more speed."
]
},
{
"minHeight": 3,
"maxHeight": 3,
"minTiles": 21.4375,
"speedBooster": "yes",
"obstructions": [[3, 0]],
"requires": [
"canMomentumConservingMorph",
"canTrickyDashJump"
],
"note": [
"This applies to Draygon's Room, Blue Brinstar Energy Tank Room, Bowling Alley (middle, power off), and Basement (power on)."
],
"detailNote": [
"In Draygon's Room, this requires extra run speed of $4.0 or $4.1;",
"in the other rooms, it may also be possible to gain more speed."
]
},
{
"minHeight": 3,
"maxHeight": 3,
"minTiles": 39.4375,
"speedBooster": "yes",
"obstructions": [[3, 2]],
"note": ["This applies to Metal Pirates Room."]
},
{
"minHeight": 3,
"maxHeight": 3,
"minTiles": 45,
"speedBooster": "yes",
"obstructions": [[5, 0]],
"note": ["This applies to Basement."]
},
{
"minHeight": 3,
"maxHeight": 3,
"minTiles": 37.4375,
"speedBooster": "yes",
"obstructions": [[5, 2]],
"requires": [
"canMomentumConservingMorph"
],
"note": ["This applies to Flyway."]
}
]
}Requires: "canTrickySpringBallJump" Clears obstacles: B |
From: 2
Right Door
To: 3
Top Junction
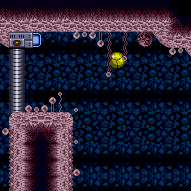

X-Ray climb until Samus is a little over halfway off screen; the position is not precise. Face right, then do a turnaround buffer spin jump into a Spring Ball jump to reach the ledge. The pause input can be pressed at the same time as the turnaround. It helps to do an airball to gain horizontal speed. The jump input after pausing should not be buffered, in order to allow a little time for the spring fling horizontal speed to take effect. Entrance condition: "comeInWithDoorStuckSetup": {}Requires: "canXRayClimb", "canTrickyJump", "canLateralMidAirMorph", "canTrickySpringBallJump", "canSpringFling" |
From: 2
Right Door
To: 3
Top Junction
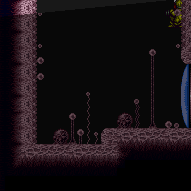

Get stuck 3 pixels inside the door, and X-ray climb to a precise height: after just one pixel of Samus' feet are visible while crouching facing left, perform exactly 7 more X-Ray stand-ups. Use X-ray to face left, then run and jump to barely make it onto the ledge. Entrance condition: "comeInWithDoorStuckSetup": {}Requires: "HiJump", "canXRayClimb", "canOffScreenMovement", "canInsaneJump" Dev note: 3 pixels stuck in the door is X position $1DE. |
From: 2
Right Door
To: 3
Top Junction
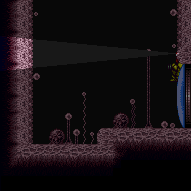

Enter with G-Mode and use X-Ray to get stuck 9 pixels inside the door. X-Ray climb to a relatively specific height: after just one pixel of Samus' feet are visible while crouching facing left, perform between 20 and 22 more X-Ray stand-ups (any of these work). Use X-ray to face left, then run and jump to barely make it onto the ledge. Entrance condition: "comeInWithGMode": {
"mode": "direct",
"morphed": false
}Requires: "canTrickyGMode", "canGModeXRayClimb", "canOffScreenMovement", "canInsaneJump", "canCount" Clears obstacles: R-Mode Dev note: 9 pixels stuck in the door is X position $1E4. The correct Y positions for the jump are $C1, $BC, and $BB FIXME: Some of the X position to the left ($1E2, $1E3) could also work; maybe investigate which vertical positions work for them? |
|
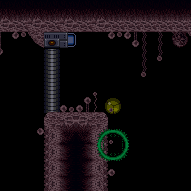

Entrance condition: "comeInWithGMode": {
"mode": "any",
"morphed": true
}Requires: "h_artificialMorphLongIBJ" Clears obstacles: B |
From: 2
Right Door
To: 3
Top Junction

Using a Power Bomb against the left wall will kill the enemies and trigger the elevator. Entrance condition: "comeInWithGMode": {
"mode": "any",
"morphed": true
}Requires: "h_artificialMorphPowerBomb" Clears obstacles: A, B |
|

Entrance condition: "comeInWithGrappleSwing": {
"blocks": [
{"position": [13, 5], "environment": "water", "note": "Mt. Everest"},
{"position": [7, 3], "note": "The Precious Room"},
{"position": [7, 2], "note": "The Moat"}
]
}Requires: "canPreciseGrappleJump" |
|
Entrance condition: "comeInWithGrappleSwing": {
"blocks": [
{"position": [8, 2], "note": "Bowling Alley"},
{
"position": [7, 3],
"obstructions": [[6, 10]],
"note": "Red Brinstar Firefleas Room"
}
]
}Requires: "canTrickyGrappleJump" Dev note: This appears not to be possible from Climb Supers Room? |
From: 2
Right Door
To: 3
Top Junction
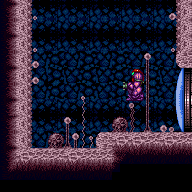
Entrance condition: "comeInWithGrappleSwing": {
"blocks": [{"position": [7, 3], "environment": "water", "note": "Pants Room"}]
}Requires: "Gravity", "canTrickyGrappleJump" |
|
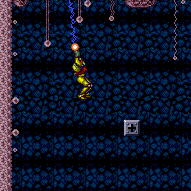

Entrance condition: "comeInWithGrappleTeleport": {
"blockPositions": [[5, 3], [7, 2]]
} |
|
Requires: {"obstaclesCleared": ["A"]} |
|
Jump far to the left in order to hit a small Sidehopper instead of a large one. Requires: {"or": [
{"enemyDamage": {"enemy": "Sidehopper", "type": "contact", "hits": 1}},
{"and": [
"canCarefulJump",
{"enemyDamage": {"enemy": "Sm. Sidehopper", "type": "contact", "hits": 1}}
]}
]} |
|
It is possible to kill the Sidehoppers damageless by jumping into the bottom left corner then quickly spin jumping again. Requires: "ScrewAttack",
{"or": [
"canCarefulJump",
{"enemyDamage": {"enemy": "Sm. Sidehopper", "type": "contact", "hits": 1}}
]}Clears obstacles: A |
|
Requires: {"haveBlueSuit": {}}Clears obstacles: A |
|
Requires: {"obstaclesCleared": ["B"]},
{"or": [
"canWallJump",
"SpaceJump",
"Grapple",
{"and": [
"canDash",
"canCarefulJump",
{"disableEquipment": "HiJump"}
]},
{"and": [
"canDash",
"canTrickyJump"
]}
]}Dev note: FIXME: There are other ways to avoid turning off HiJump, such as starting below with a Spring Ball jump or IBJ. |
|
Requires: "Wave" Clears obstacles: B |
|
Clears obstacles: A |
From: 4
Frozen Hopper Junction
To: 3
Top Junction
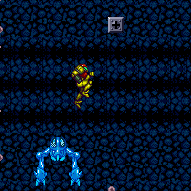

Use a Frozen Hopper as a platform to jump up to the Grapple Block with an additional movement item. Letting it jump from the spike ledge or the door frame will make the jump easier, but it is difficult to avoid Hopper damage when setting this up. Requires: {"obstaclesNotCleared": ["A"]},
"canTrickyUseFrozenEnemies",
"canTrickyJump",
{"or": [
"HiJump",
"canSpringBallJumpMidAir"
]}Dev note: FIXME: A big hopper doing a high jump from the door frame is enough to reach the grapple block without a movement item. This would need a full manip since it is hard to try to make happen. |
From: 4
Frozen Hopper Junction
To: 4
Frozen Hopper Junction
Freeze a small hopper to the side and kill the remaining Side Hoppers. Stand against the left wall (damage knockback will align Samus with the wall) and shoot up to freeze the hopper. Jump up to land on it, aligned with the wall. Alternatively, Jump and shoot down to freeze the hopper as a way to avoid damage. Fire a Super just above the door shell to hit the Gate. This strat involves shooting a Super diagonally from the correct height while flush against the left wall. Its acceleration will cause it to clip into the blue gate off-screen. Requires: {"notable": "Reverse Gate Glitch"},
{"obstaclesNotCleared": ["A"]},
"canTrickyUseFrozenEnemies",
"canTrickyJump",
"canOffScreenSuperShot",
{"or": [
"h_backIntoCorner",
{"and": [
{"enemyDamage": {"enemy": "Sidehopper", "type": "contact", "hits": 1}},
"canNeutralDamageBoost"
]}
]}Clears obstacles: B |