Speed Booster Hall
Room ID: 101

|
Exit condition: "leaveWithRunway": {
"length": 7,
"openEnd": 1
} |
|
Requires: "h_heatProof", {"resetRoom": {"nodes": [1]}}, {"or": [ {"and": [ "canDash", {"or": [ "h_speedDash", {"cycleFrames": 225} ]}, {"or": [ {"and": [ "Plasma", {"cycleFrames": 790} ]}, {"and": [ "Spazer", {"cycleFrames": 1020} ]}, {"and": [ "Wave", {"cycleFrames": 960} ]}, {"and": [ "Ice", {"cycleFrames": 930} ]}, {"and": [ "canPseudoScrew", {"cycleFrames": 930} ]}, {"and": [ "canDodgeWhileShooting", {"cycleFrames": 1350} ]} ]} ]}, {"and": [ {"haveBlueSuit": {}}, "canCrumbleJump", {"cycleFrames": 2160} ]} ]} Resets obstacles: A Farm cycle drops: 3 Geruta |
|
Requires: "canDash", "h_heatProof", {"resetRoom": {"nodes": [1]}}, "ScrewAttack", {"cycleFrames": 1140} Resets obstacles: A Farm cycle drops: 2 Metaree, 3 Geruta |
|
Requires: "h_heatedCrystalFlash" Dev note: FIXME: A Crystal Flash at node 2 could be added to logic, but would have to take into account the lava rising (if entering from the right door, with Speedbooster collected, without the lava having finished rising before). |
|
Requires: {"or": [
{"and": [
{"obstaclesNotCleared": ["A"]},
"h_shinechargeMaxRunway"
]},
{"canShineCharge": {"usedTiles": 18, "gentleUpTiles": 12, "openEnd": 1}}
]},
"h_heatedCrystalSpark"Clears obstacles: A Dev note: FIXME: This, and likely other strats in the room, need to be sure that the lava trap is not currently active. |
|
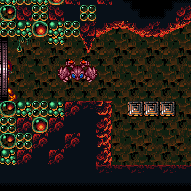

Free the Geruta and lure it to this door. To speed it up, it helps to prevent breaking most of the crumbles (no more than two consecutive) so the Geruta doesn't get stuck. Requires: "canComplexGMode", {"heatFrames": 2100}, {"or": [ "h_heatProof", "canCrumbleJump" ]}, {"or": [ "canDash", {"and": [ {"haveBlueSuit": {}}, {"heatFrames": 150} ]} ]} Exit condition: "leaveWithDamage": {
"enemy": "Geruta"
} |
|


Requires: "canDash", {"obstaclesNotCleared": ["A"]}, {"simpleHeatFrames": 560}, {"heatFrames": 60} Clears obstacles: A Unlocks doors: {
"types": ["missiles"],
"requires": [{"heatFrames": 20}]
} |
|
If Samus falls into the lava without Gravity, escape by spin jumping rather than jumping straight up. Also note that the spikes' hitbox is one tile higher than it appears. Requires: {"haveBlueSuit": {}},
"canCrumbleJump",
{"heatFrames": 1780},
{"or": [
"canInsaneJump",
{"and": [
{"enemyDamage": {"enemy": "Metaree", "type": "contact", "hits": 1}},
{"heatFrames": 350},
{"lavaFrames": 60}
]}
]}Clears obstacles: A Unlocks doors: {
"types": ["missiles"],
"requires": [{"heatFrames": 20}]
} |
|
Requires: "canDash", {"obstaclesNotCleared": ["A"]}, {"simpleHeatFrames": 535}, {"heatFrames": 60} Exit condition: "leaveWithRunway": {
"length": 8,
"openEnd": 1
}Unlocks doors: {
"types": ["missiles"],
"requires": [{"heatFrames": 50}]
},
{"types": ["super"], "requires": []},
{
"types": ["powerbomb"],
"requires": [{"heatFrames": 110}]
} |
|
Requires: {"obstaclesCleared": ["A"]},
"h_heatProof"Dev note: There is no reason to logically run back through the room this way. |
|
Requires: {"obstaclesNotCleared": ["A"]},
"h_speedDash",
{"simpleHeatFrames": 310},
{"heatFrames": 40}Clears obstacles: A |
|


Requires: "h_heatProof", {"or": [ {"and": [ "h_shinechargeMaxRunway", {"obstaclesNotCleared": ["A"]} ]}, {"canShineCharge": {"usedTiles": 14, "openEnd": 1}} ]}, {"or": [ {"and": [ "canComplexCarryFlashSuit", "can4HighMidAirMorph" ]}, "canWallJumpInstantMorph" ]}, {"spikeHits": 1}, "h_spikeSuitSpikeHitLeniency", "canSpikeSuit", {"shinespark": {"frames": 1, "excessFrames": 1}} Clears obstacles: A |
|
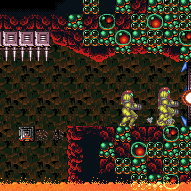

Requires: {"obstaclesNotCleared": ["A"]},
"h_shinechargeMaxRunway",
{"or": [
{"and": [
"h_speedDash",
{"simpleHeatFrames": 310},
{"heatFrames": 40}
]},
{"and": [
"h_speedButSlow",
{"simpleHeatFrames": 560},
{"heatFrames": 60}
]}
]},
{"shineChargeFrames": 35}Exit condition: "leaveShinecharged": {}Unlocks doors: {"types": ["super"], "requires": []},
{"types": ["missiles", "powerbomb"], "requires": ["never"]} |
|


Shoot from the middle of the second set of crumble blocks from the left. Requires: {"obstaclesNotCleared": ["A"]},
"canHeroShot",
"canShinechargeMovementTricky",
"h_speedDash",
{"simpleHeatFrames": 250},
{"heatFrames": 40}Exit condition: "leaveWithRunway": {
"length": 45,
"openEnd": 1
}Unlocks doors: {"types": ["super"], "requires": []},
{"types": ["missiles", "powerbomb"], "requires": ["never"]} |
|


Use a Crystal Flash after crossing 3 crumble block bridges, and a second Crystal Flash after crossing 3 more. In order to cross without tanks or Speed Booster, some arm pumping is helpful but not required. Requires: "canDash", {"simpleHeatFrames": 160}, {"heatFrames": 40}, "h_heatedCrystalFlash", {"simpleHeatFrames": 140}, {"heatFrames": 40}, "h_heatedCrystalFlash", {"simpleHeatFrames": 240}, {"heatFrames": 30} Dev note: FIXME: A dashless variant could be possible. |
|
Entrance condition: "comeInWithStoredFallSpeed": {
"fallSpeedInTiles": 1
}Requires: "canDash", {"or": [ {"and": [ {"simpleHeatFrames": 560}, {"heatFrames": 60} ]}, {"and": [ "h_speedDash", {"simpleHeatFrames": 310}, {"heatFrames": 40} ]} ]} Exit condition: "leaveWithStoredFallSpeed": {
"fallSpeedInTiles": 1
}Unlocks doors: {"types": ["missiles", "super"], "requires": []},
{"types": ["powerbomb"], "requires": ["never"]} |
From: 1
Left Door
To: 2
Right Door
Entrance condition: "comeInWithStoredFallSpeed": {
"fallSpeedInTiles": 2
}Requires: "canDash", {"or": [ {"and": [ {"simpleHeatFrames": 560}, {"heatFrames": 60} ]}, {"and": [ "h_speedDash", {"simpleHeatFrames": 310}, {"heatFrames": 40} ]} ]} Exit condition: "leaveWithStoredFallSpeed": {
"fallSpeedInTiles": 2
}Unlocks doors: {"types": ["missiles", "super"], "requires": []},
{"types": ["powerbomb"], "requires": ["never"]} |
|
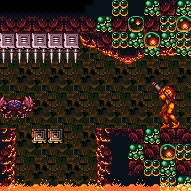

Free the Geruta and lure it to this door. To speed it up, it helps to prevent breaking most of the crumbles (no more than two consecutive) so the Geruta doesn't get stuck. Requires: "canComplexGMode", {"heatFrames": 2200}, {"or": [ "h_heatProof", "canCrumbleJump" ]}, {"or": [ "canDash", {"and": [ {"haveBlueSuit": {}}, {"heatFrames": 750} ]} ]} Exit condition: "leaveWithDamage": {
"enemy": "Geruta"
}Unlocks doors: {"types": ["missiles", "super"], "requires": []},
{"types": ["powerbomb"], "requires": ["h_heatProof"]} |
|


Farm the Metarees if able. Farm the Geruta while they are trapped. After the third Geruta, run toward the right door to shinecharge and use heat damage to interrupt. Entrance condition: "comeInWithRMode": {}Requires: {"or": [
"h_heatedCrystalFlashForReserveEnergy",
{"and": [
"h_RModeCanRefillReserves",
"h_heatProof",
{"or": [
{"enemyKill": {
"enemies": [["Metaree", "Metaree"]]
}},
{"resourceMissingAtMost": [{"type": "Missile", "count": 0}]}
]},
{"or": [
{"resourceMissingAtMost": [{"type": "Missile", "count": 0}]},
{"resourceMissingAtMost": [{"type": "Super", "count": 0}]}
]},
{"partialRefill": {"type": "ReserveEnergy", "limit": 20}}
]}
]},
{"or": [
{"and": [
"h_speedButSlow",
{"simpleHeatFrames": 560},
{"heatFrames": 60}
]},
{"and": [
"h_speedDash",
{"simpleHeatFrames": 310},
{"heatFrames": 40}
]}
]},
"h_shinechargeMaxRunway",
"h_heatTriggerRModeSparkInterrupt"Clears obstacles: A |
|
Entrance condition: "comeInWithGMode": {
"mode": "any",
"morphed": false
}Requires: "h_heatedGModeOpenDifferentDoor" Clears obstacles: A |
|
Entrance condition: "comeInWithGMode": {
"mode": "any",
"morphed": false
}Requires: "h_heatedGMode", {"heatFrames": 19} Clears obstacles: A |
|
Requires: "canDash", {"obstaclesNotCleared": ["A"]}, {"simpleHeatFrames": 560}, {"heatFrames": 60} Clears obstacles: A Unlocks doors: {
"types": ["missiles"],
"requires": [{"heatFrames": 20}]
} |
|
If Samus falls into the lava without Gravity, escape by spin jumping rather than jumping straight up. Also note that the spikes' hitbox is one tile higher than it appears. Requires: {"haveBlueSuit": {}},
{"heatFrames": 1760},
{"or": [
"canInsaneJump",
{"and": [
{"enemyDamage": {"enemy": "Metaree", "type": "contact", "hits": 1}},
{"heatFrames": 350},
{"lavaFrames": 60}
]}
]}Clears obstacles: A Unlocks doors: {
"types": ["missiles"],
"requires": [{"heatFrames": 20}]
} |
|
Requires: "canDash", {"obstaclesCleared": ["A"]}, {"or": [ "h_heatProof", {"and": [ {"heatFrames": 690}, {"or": [ {"ammo": {"type": "Super", "count": 3}}, {"ammo": {"type": "Missile", "count": 6}}, "ScrewAttack", "Plasma", "Spazer", "Wave" ]} ]} ]}, {"or": [ {"and": [ "canCarefulJump", {"heatFrames": 420} ]}, {"and": [ {"heatFrames": 720}, {"lavaFrames": 60} ]} ]} Unlocks doors: {
"types": ["missiles"],
"requires": [{"heatFrames": 20}]
}Dev note: This can be used for collecting the item without needing to reset the room. |
|
Requires: "canDash", {"obstaclesNotCleared": ["A"]}, {"simpleHeatFrames": 535}, {"heatFrames": 60} Exit condition: "leaveWithRunway": {
"length": 8,
"openEnd": 1
}Unlocks doors: {
"types": ["missiles"],
"requires": [{"heatFrames": 50}]
},
{"types": ["super"], "requires": []},
{
"types": ["powerbomb"],
"requires": [{"heatFrames": 110}]
} |
|
Requires: {"obstaclesNotCleared": ["A"]},
"h_speedDash",
{"simpleHeatFrames": 310},
{"heatFrames": 40}Clears obstacles: A |
|
Entrance condition: "comeInNormally": {}Requires: {"not": "f_ClearedSpeedBoosterLavaTrap"},
{"doorUnlockedAtNode": 1},
{"simpleHeatFrames": 310},
{"heatFrames": 40},
"h_speedDash"Exit condition: "leaveNormally": {}Sets flags: f_ClearedSpeedBoosterLavaTrap Unlocks doors: {"nodeId": 1, "types": ["missiles", "super"], "requires": []},
{
"nodeId": 1,
"types": ["powerbomb"],
"requires": [{"heatFrames": 120}]
} |
|
The three Gerutas can be farmed while trapped. Run the rest of the way to the left door and use heat damage to interrupt. Entrance condition: "comeInWithRMode": {}Requires: "f_ClearedSpeedBoosterLavaTrap",
{"or": [
"h_CrystalFlashForReserveEnergy",
{"and": [
"h_heatProof",
"h_RModeCanRefillReserves",
{"resourceMissingAtMost": [{"type": "Missile", "count": 0}]},
{"partialRefill": {"type": "ReserveEnergy", "limit": 20}}
]}
]},
{"or": [
{"and": [
"h_speedButSlow",
{"simpleHeatFrames": 560},
{"heatFrames": 60}
]},
{"and": [
"h_speedDash",
{"simpleHeatFrames": 310},
{"heatFrames": 40}
]}
]},
"h_shinechargeMaxRunway",
"h_heatTriggerRModeSparkInterrupt"Clears obstacles: A |
|
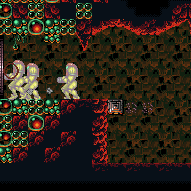

Requires: {"obstaclesNotCleared": ["A"]},
"h_shinechargeMaxRunway",
{"or": [
{"and": [
"h_speedButSlow",
{"simpleHeatFrames": 560},
{"heatFrames": 60}
]},
{"and": [
"h_speedDash",
{"simpleHeatFrames": 310},
{"heatFrames": 40}
]}
]},
{"shineChargeFrames": 35}Exit condition: "leaveShinecharged": {}Unlocks doors: {"types": ["super"], "requires": []},
{"types": ["missiles", "powerbomb"], "requires": ["never"]}Dev note: This assumes that in the h_speedButSlow case the lava will not be rising. |
|
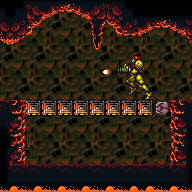

Shoot while climbing the highest ramp for the shot to open the door. Requires: {"obstaclesNotCleared": ["A"]},
"h_speedDash",
"canHeroShot",
"canShinechargeMovementComplex",
{"simpleHeatFrames": 250},
{"heatFrames": 40}Exit condition: "leaveWithRunway": {
"length": 45,
"openEnd": 1
}Unlocks doors: {"types": ["super"], "requires": []},
{"types": ["missiles", "powerbomb"], "requires": ["never"]} |
|
Align with the right side of a wall or door then turn around and shinespark in order to avoid colliding with a slope. Requires: {"obstaclesCleared": ["A"]},
"canShinechargeMovementTricky",
"h_shinechargeMaxRunway",
{"heatFrames": 335},
{"shinespark": {"frames": 221}}Dev note: There is enough time to visit 3 and return to 2 before performing this strat with the shinespark. The obstacle being broken means Samus has run far enough to charge a shinespark. |
|


Use a Crystal Flash after crossing 4 crumble block bridges, and a second Crystal Flash in the middle of the large ramp in the center of the room. This allows crossing the room without tanks or Speed Booster. Requires: "h_SpeedBoosterHallNoRisingLava", "canDash", {"obstaclesNotCleared": ["A"]}, {"simpleHeatFrames": 135}, {"heatFrames": 40}, "h_heatedCrystalFlash", {"simpleHeatFrames": 130}, {"heatFrames": 40}, "h_heatedCrystalFlash", {"simpleHeatFrames": 280}, {"heatFrames": 30} |
|


Shortcharging and stopping between the crumbles should allow for 3 attemps before the room needs to be reset or a shorter shortcharge is the only option. Requires: "h_SpeedBoosterHallNoRisingLava", "h_heatProof", {"obstaclesNotCleared": ["A"]}, {"canShineCharge": {"usedTiles": 17, "openEnd": 1}}, {"or": [ {"and": [ "canComplexCarryFlashSuit", "can4HighMidAirMorph" ]}, "canWallJumpInstantMorph" ]}, {"spikeHits": 1}, "h_spikeSuitSpikeHitLeniency", "canSpikeSuit", {"shinespark": {"frames": 1, "excessFrames": 1}} Clears obstacles: A |
|
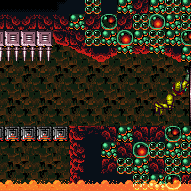

Entrance condition: "comeInWithGrappleTeleport": {
"blockPositions": [[5, 3], [7, 2]]
}Requires: {"heatFrames": 45} |
|
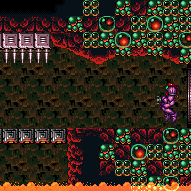

Entrance condition: "comeInWithGrappleTeleport": {
"blockPositions": [[3, 12], [3, 13]]
}Bypasses door shell: true |
From: 2
Right Door
To: 1
Left Door
Entrance condition: "comeInWithGrappleTeleport": {
"blockPositions": [[3, 12]]
}Exit condition: "leaveWithGrappleTeleport": {
"blockPositions": [[3, 12]]
}Bypasses door shell: true |
From: 2
Right Door
To: 1
Left Door
Entrance condition: "comeInWithGrappleTeleport": {
"blockPositions": [[3, 13]]
}Exit condition: "leaveWithGrappleTeleport": {
"blockPositions": [[3, 13]]
}Bypasses door shell: true |
|


Exit the previous room with Samus in a standing pose (while grappled). After teleporting, press right to release Grapple while staying standing (not being forced into a crouch). Then X-ray climb 1 screen to get up to the door transition, without needing to open the door. Entrance condition: "comeInWithGrappleTeleport": {
"blockPositions": [[2, 18], [2, 19], [2, 28], [2, 29]]
}Requires: "canXRayClimb", {"heatFrames": 1600}, {"or": [ "h_SpeedBoosterHallNoRisingLava", {"lavaFrames": 1600} ]} Bypasses door shell: true |
|
Entrance condition: "comeInWithStoredFallSpeed": {
"fallSpeedInTiles": 1
}Requires: "canDash", {"or": [ {"heatFrames": 650}, {"and": [ "h_speedDash", {"heatFrames": 360} ]} ]} Exit condition: "leaveWithStoredFallSpeed": {
"fallSpeedInTiles": 1
}Unlocks doors: {"types": ["missiles", "super"], "requires": []},
{"types": ["powerbomb"], "requires": ["never"]} |
From: 2
Right Door
To: 1
Left Door
Entrance condition: "comeInWithStoredFallSpeed": {
"fallSpeedInTiles": 2
}Requires: "canDash", {"or": [ {"heatFrames": 650}, {"and": [ "h_speedDash", {"heatFrames": 360} ]} ]} Exit condition: "leaveWithStoredFallSpeed": {
"fallSpeedInTiles": 2
}Unlocks doors: {"types": ["missiles", "super"], "requires": []},
{"types": ["powerbomb"], "requires": ["never"]} |
|
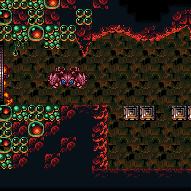

Free the Geruta and lure it to this door. To speed it up, it helps to prevent breaking most of the crumbles (no more than two consecutive) so the Geruta doesn't get stuck. Requires: "canDash", "h_SpeedBoosterHallNoRisingLava", "canComplexGMode", {"heatFrames": 2250}, {"or": [ "h_heatProof", "canCrumbleJump" ]} Exit condition: "leaveWithDamage": {
"enemy": "Geruta"
}Unlocks doors: {"types": ["missiles", "super"], "requires": []},
{"types": ["powerbomb"], "requires": ["h_heatProof"]}Dev note: FIXME: A dashless variant could be possible, either with very careful crumble block breaking, or with dipping in the lava. |
|
Entrance condition: "comeInWithGMode": {
"mode": "any",
"morphed": false
}Requires: "h_heatedGModeOpenDifferentDoor" Dev note: We do not need to worry about the rising lava trap here, because it relies on a PLM to trigger it, so it will not be active until after exiting G-mode. |
|
Exit condition: "leaveWithRunway": {
"length": 8,
"openEnd": 1
} |
|
Requires: "h_SpeedBoosterHallNoRisingLava", "canDash", "h_heatProof", {"resetRoom": {"nodes": [2]}}, {"or": [ "h_speedDash", {"cycleFrames": 170} ]}, {"or": [ {"and": [ "Plasma", {"cycleFrames": 790} ]}, {"and": [ "Spazer", {"cycleFrames": 1290} ]}, {"and": [ "Wave", {"cycleFrames": 1140} ]}, {"and": [ "Ice", {"cycleFrames": 1320} ]}, {"and": [ "ScrewAttack", {"cycleFrames": 1140} ]}, {"and": [ "canPseudoScrew", {"cycleFrames": 1200} ]}, {"and": [ "canDodgeWhileShooting", {"cycleFrames": 1500} ]} ]}, {"or": [ "canInsaneJump", {"and": [ "canTrickyJump", "canWallJump", {"cycleFrames": 60} ]}, {"and": [ "h_lavaProof", {"cycleFrames": 180} ]} ]} Resets obstacles: A Farm cycle drops: 3 Geruta Dev note: FIXME: Variants could be added for dashless and/or rising lava. |
|
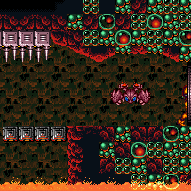

Free the Geruta and lure it to this door. To speed it up, it helps to prevent breaking most of the crumbles (no more than two consecutive) so the Geruta doesn't get stuck. Requires: {"or": [
"h_SpeedBoosterHallNoRisingLava",
"h_lavaProof"
]},
"canComplexGMode",
{"heatFrames": 2500},
{"or": [
"h_heatProof",
"canCrumbleJump"
]},
{"or": [
"canDash",
{"and": [
"h_lavaProof",
{"heatFrames": 1150}
]}
]}Exit condition: "leaveWithDamage": {
"enemy": "Geruta"
}Dev note: FIXME: A dashless variant without lava proof could be possible. |
From: 2
Right Door
To: 2
Right Door
Crystal Flash at the right door, then shinecharge across two sets of crumble blocks. Use heat damage to interrupt, then jump back across to the door. Entrance condition: "comeInWithRMode": {}Requires: "f_ClearedSpeedBoosterLavaTrap", "h_heatedCrystalFlashForReserveEnergy", {"heatFrames": 100}, {"canShineCharge": {"usedTiles": 27, "openEnd": 0}}, "h_heatTriggerRModeSparkInterrupt", {"heatFrames": 240}, {"lavaFrames": 20} |
From: 2
Right Door
To: 2
Right Door
Outrun the rising lava up to the highest ledge and shinecharge before touching the crumble blocks. Shinespark across to the door. Crystal Flash, then run back across the crumble blocks and shinecharge before entering the lava. Windup and interrupt using the heat damage. Then run back through the lava to the right door. Entrance condition: "comeInWithRMode": {}Requires: {"simpleHeatFrames": 310},
{"heatFrames": 40},
"h_shinechargeMaxRunway",
{"shinespark": {"frames": 49, "excessFrames": 10}},
"h_heatedCrystalFlashForReserveEnergy",
{"heatFrames": 100},
"h_shinechargeMaxRunway",
"h_heatTriggerRModeSparkInterrupt",
{"or": [
{"and": [
"f_ClearedSpeedBoosterLavaTrap",
{"heatFrames": 1250},
{"lavaFrames": 40}
]},
{"and": [
"h_heatedCrystalFlash",
{"heatFrames": 2060},
{"lavaFrames": 2060}
]},
{"and": [
"Gravity",
"h_heatedCrystalFlash",
{"heatFrames": 1250},
{"lavaFrames": 1250}
]},
{"and": [
"Gravity",
"h_heatProof",
"h_lavaProof"
]}
]}Exit condition: "leaveNormally": {}Unlocks doors: {"nodeId": 2, "types": ["ammo"], "requires": []} |
|


Requires: {"heatFrames": 40} |
|
Requires: {"heatFrames": 50} |