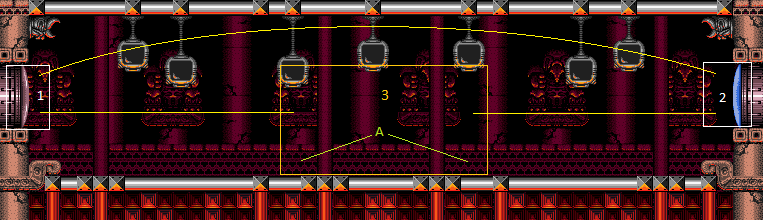
Metal Pirates Room
Room ID: 139
|
Exit condition: "leaveWithRunway": {
"length": 1,
"openEnd": 1
} |
From: 1
Left Door
To: 1
Left Door
Requires: {"heatFrames": 130}Exit condition: "leaveWithSidePlatform": {
"height": 2,
"runway": {
"length": 2,
"openEnd": 1
},
"obstruction": [1, 0]
}Dev note: Max extra run speed $0.B |
From: 1
Left Door
To: 1
Left Door


Requires: {"heatFrames": 280},
"canTrickyJump",
{"or": [
{"obstaclesCleared": ["A"]},
{"and": [
"canHitbox",
"canTrickyDodgeEnemies"
]}
]}Exit condition: "leaveWithSidePlatform": {
"height": 3,
"runway": {
"length": 40,
"openEnd": 0
},
"obstruction": [3, 2]
}Dev note: Max extra run speed $6.8. |
|
Requires: {"heatFrames": 10},
"h_heatedCrystalFlash",
{"heatFrames": 10} |
|
Requires: "canDash", {"heatFrames": 200}, {"obstaclesCleared": ["A"]} |
|
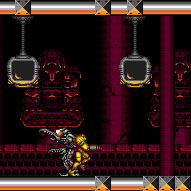

Requires: "canDash", "canHitbox", {"heatFrames": 200} |
|
Requires: {"haveBlueSuit": {}},
{"heatFrames": 290} |
|


FIXME: Shorter runway shinecharges could be added from 3. Requires: "h_shinechargeMaxRunway", "canShinechargeMovement", {"or": [ "canHitbox", {"obstaclesCleared": ["A"]} ]}, {"heatFrames": 180}, {"shineChargeFrames": 60} Exit condition: "leaveShinecharged": {}Unlocks doors: {
"types": ["missiles"],
"requires": [
{"obstaclesCleared": ["A"]},
{"heatFrames": 180}
]
},
{"types": ["super"], "requires": []},
{
"types": ["powerbomb"],
"requires": [
{"obstaclesCleared": ["A"]},
{"heatFrames": 150}
]
} |
From: 1
Left Door
To: 3
Metal Pirates Junction
If you can't kill the pirates, you can Crystal Flash, then run through with timed shots to get the shinecharge. Once shinecharged, let a pirate jump at you to interrupt. After spark interrupt, you'll need a way to leave the room. Entrance condition: "comeInWithRMode": {}Requires: "h_heatedCrystalFlashForReserveEnergy", "canHitbox", {"heatFrames": 180}, "h_shinechargeMaxRunway", {"autoReserveTrigger": {"maxReserveEnergy": 95}}, "canRModeSparkInterrupt" |
From: 1
Left Door
To: 3
Metal Pirates Junction


Kill both pirates with speed echoes. Collect their drops and use the heat to interrupt. Entrance condition: "comeInWithRMode": {}Requires: {"notable": "Speed Echoes Kill"},
"canUseSpeedEchoes",
"canHitbox",
{"canShineCharge": {"usedTiles": 38, "openEnd": 2}},
{"or": [
{"canShineCharge": {"usedTiles": 23, "openEnd": 2}},
{"heatFrames": 60}
]},
{"or": [
{"and": [
"HiJump",
{"shinespark": {"frames": 1}}
]},
{"shinespark": {"frames": 9}}
]},
{"heatFrames": 630},
{"or": [
"h_heatedCrystalFlashForReserveEnergy",
{"and": [
"h_RModeCanRefillReserves",
{"or": [
{"and": [
{"resourceMissingAtMost": [{"type": "Super", "count": 0}]},
{"partialRefill": {"type": "ReserveEnergy", "limit": 240}}
]},
{"partialRefill": {"type": "ReserveEnergy", "limit": 120}}
]}
]},
{"and": [
{"disableEquipment": "ETank"},
{"or": [
{"and": [
{"resourceMissingAtMost": [{"type": "Super", "count": 0}]},
{"partialRefill": {"type": "ReserveEnergy", "limit": 140}}
]},
{"partialRefill": {"type": "ReserveEnergy", "limit": 20}}
]}
]}
]},
"h_shinechargeMaxRunway",
{"disableEquipment": "Varia"},
{"disableEquipment": "Gravity"},
{"or": [
{"and": [
"canReserveTriggerBufferXRay",
{"autoReserveTrigger": {"implicitHeatFrames": "no"}},
"canRModeSparkInterrupt",
{"suitlessHeatFrames": 32}
]},
{"and": [
"h_heatProof",
{"autoReserveTrigger": {}},
"canRModePauseAbuseSparkInterrupt"
]},
{"and": [
{"autoReserveTrigger": {"implicitHeatFrames": "suitless"}},
"canRModeSparkInterrupt",
{"suitlessHeatFrames": 32}
]}
]}Clears obstacles: A |
From: 1
Left Door
To: 3
Metal Pirates Junction
Kill both pirates with ammo or beams. Collect their drops and use heat to interrupt. Or kill and farm one pirate, then hitbox the other and interrupt from it before killing it with ammo or beams. Blue suit doesn't damage the pirates, but keeps Samus invulnerable while moving. Entrance condition: "comeInWithRMode": {}Requires: {"heatFrames": 125},
{"or": [
{"and": [
"Charge",
"Plasma",
"canDodgeWhileShooting",
"canTrickyJump",
{"or": [
{"and": [
"Ice",
{"heatFrames": 700}
]},
{"and": [
"Wave",
{"heatFrames": 700}
]},
{"and": [
"canInsaneJump",
"Ice",
{"heatFrames": 520}
]},
{"and": [
"canInsaneJump",
"Wave",
{"heatFrames": 520}
]},
{"and": [
"Ice",
"Wave",
{"heatFrames": 400}
]},
{"heatFrames": 950},
{"and": [
"canInsaneJump",
{"heatFrames": 700}
]},
{"and": [
"canXRayWaitForIFrames",
{"heatFrames": 420}
]}
]}
]},
{"and": [
"Charge",
"Spazer",
"canDodgeWhileShooting",
{"or": [
{"heatFrames": 4400},
{"and": [
"Ice",
{"heatFrames": 3000}
]},
{"and": [
"Wave",
{"heatFrames": 2650}
]},
"Ice",
"Wave",
{"heatFrames": 1750}
]}
]},
{"and": [
"Plasma",
"canDodgeWhileShooting",
{"heatFrames": 2000}
]},
{"and": [
"h_heatProof",
"canDodgeWhileShooting",
{"or": [
{"and": [
"Charge",
"Wave"
]},
{"and": [
"Charge",
"Ice",
"canBePatient"
]},
{"and": [
"canBeVeryPatient",
{"or": [
"Charge",
"Spazer"
]}
]}
]}
]},
{"and": [
"canDodgeWhileShooting",
{"enemyKill": {
"enemies": [["Space Pirate (fighting)", "Space Pirate (fighting)"]],
"explicitWeapons": ["Super"]
}},
{"heatFrames": 450}
]},
{"and": [
"canDodgeWhileShooting",
{"enemyKill": {
"enemies": [["Space Pirate (fighting)", "Space Pirate (fighting)"]],
"explicitWeapons": ["Missile"]
}},
{"heatFrames": 2700}
]}
]},
{"or": [
"h_heatedCrystalFlashForReserveEnergy",
{"and": [
"h_RModeCanRefillReserves",
{"or": [
{"and": [
{"resourceMissingAtMost": [{"type": "Super", "count": 0}]},
{"partialRefill": {"type": "ReserveEnergy", "limit": 240}}
]},
{"partialRefill": {"type": "ReserveEnergy", "limit": 120}}
]}
]},
{"and": [
{"disableEquipment": "ETank"},
{"or": [
{"and": [
{"resourceMissingAtMost": [{"type": "Super", "count": 0}]},
{"partialRefill": {"type": "ReserveEnergy", "limit": 140}}
]},
{"partialRefill": {"type": "ReserveEnergy", "limit": 20}}
]}
]}
]},
"h_shinechargeMaxRunway",
{"disableEquipment": "Varia"},
{"disableEquipment": "Gravity"},
{"or": [
{"and": [
"canHitbox",
{"autoReserveTrigger": {"maxReserveEnergy": 95}},
"canRModeSparkInterrupt"
]},
{"and": [
"canReserveTriggerBufferXRay",
{"autoReserveTrigger": {"implicitHeatFrames": "no"}},
"canRModeSparkInterrupt",
{"suitlessHeatFrames": 32}
]},
{"and": [
"h_heatProof",
{"autoReserveTrigger": {}},
"canRModePauseAbuseSparkInterrupt"
]},
{"and": [
{"autoReserveTrigger": {"implicitHeatFrames": "suitless"}},
"canRModeSparkInterrupt",
{"suitlessHeatFrames": 32}
]}
]}Clears obstacles: A |
|
Requires: {"heatFrames": 125},
{"or": [
"canDash",
{"heatFrames": 20}
]} |
From: 1
Left Door
To: 3
Metal Pirates Junction
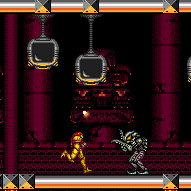

Shoot the Pirate twice to force it to block instead of kicking or shooting towards the door. Requires: "canDash", "canHitbox", "canInsaneJump", {"heatFrames": 100} |
From: 1
Left Door
To: 3
Metal Pirates Junction
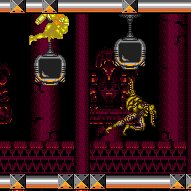

Use the Echoes created by shinesparking to defeat the Metal Pirates. This involves Shineparking into a precise point while also turning the Pirates vulnerable as the echoes reach them. Requires: {"notable": "Speed Echoes Kill"},
{"obstaclesNotCleared": ["A"]},
"canUseSpeedEchoes",
"canHitbox",
{"canShineCharge": {"usedTiles": 38, "openEnd": 2}},
{"or": [
{"canShineCharge": {"usedTiles": 23, "openEnd": 2}},
{"heatFrames": 60}
]},
{"or": [
{"and": [
"HiJump",
{"shinespark": {"frames": 1}},
{"shinespark": {"frames": 1}}
]},
{"and": [
"canTrickyJump",
{"shinespark": {"frames": 9}},
{"shinespark": {"frames": 9}}
]}
]},
{"or": [
{"heatFramesWithEnergyDrops": {
"frames": 630,
"drops": [{"enemy": "Space Pirate (fighting)", "count": 12}]
}},
{"and": [
"canFarmWhileShooting",
{"heatFramesWithEnergyDrops": {
"frames": 360,
"drops": [{"enemy": "Space Pirate (fighting)", "count": 6}]
}},
{"heatFramesWithEnergyDrops": {
"frames": 270,
"drops": [{"enemy": "Space Pirate (fighting)", "count": 6}]
}}
]}
]},
{"partialRefill": {"type": "Energy", "limit": 99}},
{"partialRefill": {"type": "Super", "limit": 1}}Clears obstacles: A Dev note: FIXME: It's possible to activate a spark on the ground at 27 energy and collect drops in time. The canFarmWhileShooting presumes spawning the drops on the ground where they can be collected while charging the next shinespark. |
|
Entrance condition: "comeInWithGMode": {
"mode": "any",
"morphed": false
}Requires: {"heatFrames": 0} |
|
Requires: "canDash", {"heatFrames": 200}, {"obstaclesCleared": ["A"]} |
|

Requires: "canDash", "canHitbox", {"heatFrames": 200} |
|
Requires: {"haveBlueSuit": {}},
{"heatFrames": 290} |
|


FIXME: Shorter runway shinecharges could be added from 3. Requires: "h_shinechargeMaxRunway", "canShinechargeMovement", {"or": [ "canHitbox", {"obstaclesCleared": ["A"]} ]}, {"heatFrames": 180}, {"shineChargeFrames": 60} Exit condition: "leaveShinecharged": {}Unlocks doors: {
"types": ["missiles"],
"requires": [
{"obstaclesCleared": ["A"]},
{"heatFrames": 180}
]
},
{"types": ["super"], "requires": []},
{
"types": ["powerbomb"],
"requires": [
{"obstaclesCleared": ["A"]},
{"heatFrames": 150}
]
} |
|
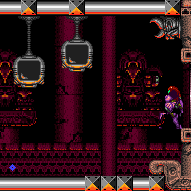

Entrance condition: "comeInWithGrappleTeleport": {
"blockPositions": [[3, 12], [3, 13]]
}Bypasses door shell: true |
From: 2
Right Door
To: 1
Left Door
Entrance condition: "comeInWithGrappleTeleport": {
"blockPositions": [[3, 12]]
}Exit condition: "leaveWithGrappleTeleport": {
"blockPositions": [[3, 12]]
}Bypasses door shell: true |
From: 2
Right Door
To: 1
Left Door
Entrance condition: "comeInWithGrappleTeleport": {
"blockPositions": [[3, 13]]
}Exit condition: "leaveWithGrappleTeleport": {
"blockPositions": [[3, 13]]
}Bypasses door shell: true |
|
Exit condition: "leaveWithRunway": {
"length": 1,
"openEnd": 1
} |
From: 2
Right Door
To: 2
Right Door
Requires: {"heatFrames": 130}Exit condition: "leaveWithSidePlatform": {
"height": 2,
"runway": {
"length": 2,
"openEnd": 1
},
"obstruction": [1, 0]
}Dev note: Max extra run speed $0.B |
From: 2
Right Door
To: 2
Right Door


Requires: {"heatFrames": 280},
"canTrickyJump",
{"or": [
{"obstaclesCleared": ["A"]},
{"and": [
"canHitbox",
"canTrickyDodgeEnemies"
]}
]}Exit condition: "leaveWithSidePlatform": {
"height": 3,
"runway": {
"length": 40,
"openEnd": 0
},
"obstruction": [3, 2]
}Dev note: Max extra run speed $6.8. |
|
Requires: "h_heatedRemoteRunway", {"heatFrames": 190}, "canHitbox", "canTrickyDodgeEnemies" Exit condition: "leaveWithMockball": {
"remoteRunway": {
"length": 10,
"openEnd": 1
},
"landingRunway": {
"length": 1,
"openEnd": 1
}
}Dev note: FIXME: Add more variants, from node 3 (Pirates cleared), and through node 1. |
|
Requires: "h_heatedRemoteRunwaySpringBall", {"heatFrames": 190}, "canHitbox", "canTrickyDodgeEnemies" Exit condition: "leaveWithSpringBallBounce": {
"remoteRunway": {
"length": 10,
"openEnd": 1
},
"landingRunway": {
"length": 1,
"openEnd": 1
},
"movementType": "uncontrolled"
} |
|
Requires: "h_heatedRemoteRunway", {"heatFrames": 190}, "canHitbox", "canTrickyDodgeEnemies" Exit condition: "leaveSpinning": {
"remoteRunway": {
"length": 10,
"openEnd": 1
}
} |
|
Requires: "h_heatedRemoteRunwayPreciseSpaceJump", {"heatFrames": 190}, "canHitbox", "canTrickyDodgeEnemies" Exit condition: "leaveSpaceJumping": {
"remoteRunway": {
"length": 10,
"openEnd": 1
}
} |
|
Requires: {"heatFrames": 10},
"h_heatedCrystalFlash",
{"heatFrames": 10} |
From: 2
Right Door
To: 3
Metal Pirates Junction
If you can't kill the pirates, you can Crystal Flash, then run through with timed shots to get the shinecharge. Once shinecharged, let a pirate jump at you to interrupt. After spark interrupt, you'll need a way to leave the room. Entrance condition: "comeInWithRMode": {}Requires: "h_heatedCrystalFlashForReserveEnergy", "canHitbox", {"heatFrames": 180}, "h_shinechargeMaxRunway", {"autoReserveTrigger": {}}, "canRModeSparkInterrupt" |
From: 2
Right Door
To: 3
Metal Pirates Junction


Kill both pirates with speed echoes. Collect their drops and use the heat to interrupt. Entrance condition: "comeInWithRMode": {}Requires: {"notable": "Speed Echoes Kill"},
"canUseSpeedEchoes",
"canHitbox",
{"canShineCharge": {"usedTiles": 38, "openEnd": 2}},
{"or": [
{"canShineCharge": {"usedTiles": 23, "openEnd": 2}},
{"heatFrames": 60}
]},
{"or": [
{"and": [
"HiJump",
{"shinespark": {"frames": 1}}
]},
{"shinespark": {"frames": 9}}
]},
{"heatFrames": 630},
{"or": [
"h_heatedCrystalFlashForReserveEnergy",
{"and": [
"h_RModeCanRefillReserves",
{"or": [
{"and": [
{"resourceMissingAtMost": [{"type": "Super", "count": 0}]},
{"partialRefill": {"type": "ReserveEnergy", "limit": 240}}
]},
{"partialRefill": {"type": "ReserveEnergy", "limit": 120}}
]}
]},
{"and": [
{"disableEquipment": "ETank"},
{"or": [
{"and": [
{"resourceMissingAtMost": [{"type": "Super", "count": 0}]},
{"partialRefill": {"type": "ReserveEnergy", "limit": 140}}
]},
{"partialRefill": {"type": "ReserveEnergy", "limit": 20}}
]}
]}
]},
"h_shinechargeMaxRunway",
"h_heatTriggerRModeSparkInterrupt"Clears obstacles: A |
From: 2
Right Door
To: 3
Metal Pirates Junction
Kill both pirates with ammo or beams. Collect their drops and use heat to interrupt. Or kill and farm one pirate, then hitbox the other and interrupt from it before killing it with ammo or beams. Blue suit doesn't damage the pirates, but keeps Samus invulnerable while moving. Entrance condition: "comeInWithRMode": {}Requires: {"heatFrames": 125},
{"or": [
{"and": [
"Charge",
"Plasma",
"canDodgeWhileShooting",
{"or": [
{"and": [
"Ice",
{"heatFrames": 700}
]},
{"and": [
"Wave",
{"heatFrames": 700}
]},
{"and": [
"Ice",
"Wave",
{"heatFrames": 450}
]},
{"heatFrames": 950},
{"and": [
"canXRayWaitForIFrames",
{"heatFrames": 420}
]},
{"and": [
"Ice",
"Wave",
"canTrickyJump",
{"heatFrames": 400}
]},
{"and": [
"Ice",
"canInsaneJump",
{"heatFrames": 520}
]},
{"and": [
"Wave",
"canInsaneJump",
{"heatFrames": 520}
]},
{"and": [
"canInsaneJump",
{"heatFrames": 700}
]}
]}
]},
{"and": [
"h_heatProof",
"canDodgeWhileShooting",
{"or": [
"Plasma",
{"and": [
"Charge",
"Wave"
]},
{"and": [
"Charge",
"Spazer",
"Ice",
"Wave"
]},
{"and": [
"Charge",
"Spazer",
"canBePatient"
]},
{"and": [
"Charge",
"Ice",
"canBePatient"
]},
{"and": [
"canBeVeryPatient",
{"or": [
"Charge",
"Spazer"
]}
]},
{"enemyKill": {
"enemies": [["Space Pirate (fighting)", "Space Pirate (fighting)"]],
"explicitWeapons": ["Missile"]
}}
]}
]},
{"and": [
"canDodgeWhileShooting",
{"enemyKill": {
"enemies": [["Space Pirate (fighting)", "Space Pirate (fighting)"]],
"explicitWeapons": ["Super"]
}},
{"heatFrames": 450}
]}
]},
{"or": [
"h_heatedCrystalFlashForReserveEnergy",
{"and": [
"h_RModeCanRefillReserves",
{"or": [
{"and": [
{"resourceMissingAtMost": [{"type": "Super", "count": 0}]},
{"partialRefill": {"type": "ReserveEnergy", "limit": 240}}
]},
{"partialRefill": {"type": "ReserveEnergy", "limit": 120}}
]}
]},
{"and": [
{"disableEquipment": "ETank"},
{"or": [
{"and": [
{"resourceMissingAtMost": [{"type": "Super", "count": 0}]},
{"partialRefill": {"type": "ReserveEnergy", "limit": 140}}
]},
{"partialRefill": {"type": "ReserveEnergy", "limit": 20}}
]}
]}
]},
{"heatFrames": 90},
"h_shinechargeMaxRunway",
{"or": [
{"and": [
"canHitbox",
{"autoReserveTrigger": {}},
"canRModeSparkInterrupt"
]},
"h_heatTriggerRModeSparkInterrupt"
]}Clears obstacles: A |
|
Requires: {"heatFrames": 125},
{"or": [
"canDash",
{"heatFrames": 20}
]} |
From: 2
Right Door
To: 3
Metal Pirates Junction
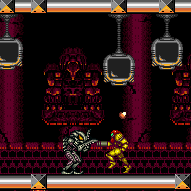

Shoot the Pirate twice to force it to block instead of kicking or shooting towards the door. Requires: "canDash", "canHitbox", "canInsaneJump", {"heatFrames": 100} |
From: 2
Right Door
To: 3
Metal Pirates Junction
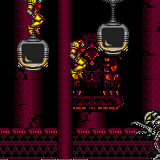

Use the Echoes created by shinesparking to defeat the Metal Pirates. This involves Shineparking into a precise point while also turning the Pirates vulnerable as the echoes reach them. Requires: {"notable": "Speed Echoes Kill"},
{"obstaclesNotCleared": ["A"]},
"canUseSpeedEchoes",
"canHitbox",
{"canShineCharge": {"usedTiles": 38, "openEnd": 2}},
{"or": [
{"canShineCharge": {"usedTiles": 23, "openEnd": 2}},
{"heatFrames": 60}
]},
{"or": [
{"and": [
"HiJump",
{"shinespark": {"frames": 1}},
{"shinespark": {"frames": 1}}
]},
{"and": [
"canTrickyJump",
{"shinespark": {"frames": 9}},
{"shinespark": {"frames": 9}}
]}
]},
{"or": [
{"heatFramesWithEnergyDrops": {
"frames": 630,
"drops": [{"enemy": "Space Pirate (fighting)", "count": 12}]
}},
{"and": [
"canFarmWhileShooting",
{"heatFramesWithEnergyDrops": {
"frames": 360,
"drops": [{"enemy": "Space Pirate (fighting)", "count": 6}]
}},
{"heatFramesWithEnergyDrops": {
"frames": 270,
"drops": [{"enemy": "Space Pirate (fighting)", "count": 6}]
}}
]}
]},
{"partialRefill": {"type": "Energy", "limit": 99}},
{"partialRefill": {"type": "Super", "limit": 1}}Clears obstacles: A Dev note: FIXME: It's possible to activate a spark on the ground at 27 energy and collect drops in time. The canFarmWhileShooting presumes spawning the drops on the ground where they can be collected while charging the next shinespark. |
|
Entrance condition: "comeInWithGMode": {
"mode": "any",
"morphed": false
}Requires: {"heatFrames": 0} |
|
Requires: {"heatFrames": 125},
{"or": [
"canDash",
{"heatFrames": 20}
]}Dev note: Timed from drop collection. FIXME: Samus will be closer to one door than the other. Drops will also spawn closer to a door which may or may not be the desired one. |
|
Requires: {"heatFrames": 125},
{"or": [
"canDash",
{"heatFrames": 20}
]}Dev note: Timed from drop collection. FIXME: Samus will be closer to one door than the other. Drops will also spawn closer to a door which may or may not be the desired one. |
From: 3
Metal Pirates Junction
To: 3
Metal Pirates Junction
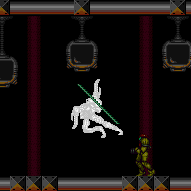

Requires: "Charge",
"Plasma",
{"or": [
{"and": [
{"or": [
"canDodgeWhileShooting",
{"enemyDamage": {
"enemy": "Space Pirate (fighting)",
"type": "contact",
"hits": 2
}}
]},
{"or": [
"Ice",
"Wave"
]},
{"heatFramesWithEnergyDrops": {
"frames": 700,
"drops": [{"enemy": "Space Pirate (fighting)", "count": 12}]
}}
]},
{"and": [
{"or": [
"canDodgeWhileShooting",
{"enemyDamage": {
"enemy": "Space Pirate (fighting)",
"type": "contact",
"hits": 2
}}
]},
"Ice",
"Wave",
{"heatFramesWithEnergyDrops": {
"frames": 450,
"drops": [{"enemy": "Space Pirate (fighting)", "count": 12}]
}}
]},
{"and": [
{"or": [
"canDodgeWhileShooting",
{"enemyDamage": {
"enemy": "Space Pirate (fighting)",
"type": "contact",
"hits": 2
}}
]},
{"heatFramesWithEnergyDrops": {
"frames": 950,
"drops": [{"enemy": "Space Pirate (fighting)", "count": 12}]
}}
]},
{"and": [
"canXRayWaitForIFrames",
{"heatFramesWithEnergyDrops": {
"frames": 210,
"drops": [{"enemy": "Space Pirate (fighting)", "count": 6}]
}},
{"heatFramesWithEnergyDrops": {
"frames": 210,
"drops": [{"enemy": "Space Pirate (fighting)", "count": 6}]
}}
]}
]},
{"partialRefill": {"type": "Energy", "limit": 99}},
{"partialRefill": {"type": "Super", "limit": 1}}Clears obstacles: A |
From: 3
Metal Pirates Junction
To: 3
Metal Pirates Junction
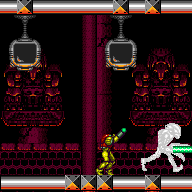

Stand under the Metal Pirate as it does a dive kick and fire the plasma shot so that it stays with the Pirate longer, hitting twice. Uncharged shots can finish off a Pirate if Ice or Wave is also equipped. Requires: "Charge", "Plasma", "canTrickyJump", {"or": [ {"and": [ "Wave", "Ice", {"heatFramesWithEnergyDrops": { "frames": 200, "drops": [{"enemy": "Space Pirate (fighting)", "count": 6}] }}, {"heatFramesWithEnergyDrops": { "frames": 200, "drops": [{"enemy": "Space Pirate (fighting)", "count": 6}] }} ]}, {"and": [ {"or": [ "Ice", "Wave" ]}, "canInsaneJump", {"heatFramesWithEnergyDrops": { "frames": 260, "drops": [{"enemy": "Space Pirate (fighting)", "count": 6}] }}, {"heatFramesWithEnergyDrops": { "frames": 260, "drops": [{"enemy": "Space Pirate (fighting)", "count": 6}] }} ]}, {"and": [ "canInsaneJump", {"heatFramesWithEnergyDrops": { "frames": 350, "drops": [{"enemy": "Space Pirate (fighting)", "count": 6}] }}, {"heatFramesWithEnergyDrops": { "frames": 350, "drops": [{"enemy": "Space Pirate (fighting)", "count": 6}] }} ]} ]}, {"partialRefill": {"type": "Energy", "limit": 99}}, {"partialRefill": {"type": "Super", "limit": 1}} Clears obstacles: A |
From: 3
Metal Pirates Junction
To: 3
Metal Pirates Junction
Requires: "canDodgeWhileShooting", "Charge", "Spazer", {"or": [ {"and": [ "canBePatient", {"heatFramesWithEnergyDrops": { "frames": 4400, "drops": [{"enemy": "Space Pirate (fighting)", "count": 12}] }} ]}, {"and": [ "Ice", {"heatFramesWithEnergyDrops": { "frames": 3000, "drops": [{"enemy": "Space Pirate (fighting)", "count": 12}] }} ]}, {"and": [ "Wave", {"heatFramesWithEnergyDrops": { "frames": 2650, "drops": [{"enemy": "Space Pirate (fighting)", "count": 12}] }} ]}, {"and": [ "Ice", "Wave", {"heatFramesWithEnergyDrops": { "frames": 1750, "drops": [{"enemy": "Space Pirate (fighting)", "count": 12}] }} ]} ]}, {"partialRefill": {"type": "Energy", "limit": 99}}, {"partialRefill": {"type": "Super", "limit": 1}} Clears obstacles: A |
|
Requires: {"or": [
"canDodgeWhileShooting",
{"enemyDamage": {
"enemy": "Space Pirate (fighting)",
"type": "contact",
"hits": 8
}}
]},
"Plasma",
{"heatFramesWithEnergyDrops": {
"frames": 2000,
"drops": [{"enemy": "Space Pirate (fighting)", "count": 12}]
}},
{"partialRefill": {"type": "Energy", "limit": 99}},
{"partialRefill": {"type": "Super", "limit": 1}}Clears obstacles: A |
|
Requires: "h_heatProof", "canDodgeWhileShooting", "Charge", "Wave", {"partialRefill": {"type": "Energy", "limit": 99}}, {"partialRefill": {"type": "Super", "limit": 1}} Clears obstacles: A |
From: 3
Metal Pirates Junction
To: 3
Metal Pirates Junction
Uncharged Spazer does half damage. Requires: "h_heatProof", "canDodgeWhileShooting", {"or": [ {"and": [ "Spazer", "canBeVeryPatient" ]}, {"and": [ "Charge", "canBeVeryPatient" ]}, {"and": [ "Charge", "Ice", "canBePatient" ]} ]}, {"partialRefill": {"type": "Energy", "limit": 99}}, {"partialRefill": {"type": "Super", "limit": 1}} Clears obstacles: A Dev note: This strat is only for uncharged spazer or charge with or without ice |
|
Requires: {"or": [
"canDodgeWhileShooting",
{"enemyDamage": {
"enemy": "Space Pirate (fighting)",
"type": "contact",
"hits": 2
}}
]},
{"enemyKill": {
"enemies": [["Space Pirate (fighting)", "Space Pirate (fighting)"]],
"explicitWeapons": ["Super"]
}},
{"heatFramesWithEnergyDrops": {
"frames": 450,
"drops": [{"enemy": "Space Pirate (fighting)", "count": 12}]
}},
{"partialRefill": {"type": "Energy", "limit": 99}},
{"partialRefill": {"type": "Super", "limit": 1}}Clears obstacles: A |
From: 3
Metal Pirates Junction
To: 3
Metal Pirates Junction
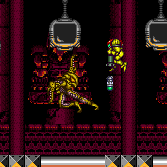

If energy would fall into Health Bomb range, immediately collect some health drops so that the second wave of drops (from a single pirate) will be able to spawn Supers. Requires: "canFarmWhileShooting", {"or": [ {"and": [ {"resourceAvailable": [{"type": "Energy", "count": 73}]}, {"ammo": {"type": "Super", "count": 4}} ]}, {"ammo": {"type": "Super", "count": 5}} ]}, {"heatFramesWithEnergyDrops": { "frames": 225, "drops": [{"enemy": "Space Pirate (fighting)", "count": 6}] }}, {"heatFramesWithEnergyDrops": { "frames": 225, "drops": [{"enemy": "Space Pirate (fighting)", "count": 6}] }}, {"partialRefill": {"type": "Energy", "limit": 119}} Clears obstacles: A Dev note: Collecting Super drops is shown by spending fewer to kill the pirates. |
|
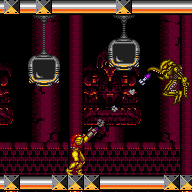

Requires: {"or": [
"canDodgeWhileShooting",
{"enemyDamage": {
"enemy": "Space Pirate (fighting)",
"type": "contact",
"hits": 6
}}
]},
{"enemyKill": {
"enemies": [["Space Pirate (fighting)", "Space Pirate (fighting)"]],
"explicitWeapons": ["Missile"]
}},
{"heatFramesWithEnergyDrops": {
"frames": 2700,
"drops": [{"enemy": "Space Pirate (fighting)", "count": 12}]
}},
{"partialRefill": {"type": "Energy", "limit": 99}},
{"partialRefill": {"type": "Super", "limit": 1}}Clears obstacles: A |
From: 3
Metal Pirates Junction
To: 3
Metal Pirates Junction
Requires: "h_heatProof", "canDodgeWhileShooting", {"resetRoom": {"nodes": [1, 2]}}, {"or": [ {"and": [ "Plasma", "Charge", "Wave", "Ice", {"cycleFrames": 720} ]}, {"and": [ "Plasma", {"or": [ "Charge", "Wave", "Ice" ]}, {"cycleFrames": 1110} ]}, {"and": [ "Plasma", {"cycleFrames": 1320} ]}, {"and": [ "Charge", "Ice", "Wave", "Spazer", {"cycleFrames": 1800} ]}, {"and": [ "Ice", "Wave", "Spazer", {"cycleFrames": 2700} ]} ]}, {"or": [ "canDash", {"cycleFrames": 40} ]} Clears obstacles: A Farm cycle drops: 2 Space Pirate (fighting) Dev note: FIXME: There are many more beam combinations that could be used. |
From: 3
Metal Pirates Junction
To: 3
Metal Pirates Junction
Use the Echoes created by shinesparking to defeat the Metal Pirates. This involves shineparking into a precise point while also turning the Pirates vulnerable as the echoes reach them. Requires: {"notable": "Speed Echoes Kill"},
"h_heatProof",
{"resetRoom": {"nodes": [1, 2]}},
"canFarmWhileShooting",
"canUseSpeedEchoes",
"canHitbox",
{"canShineCharge": {"usedTiles": 38, "openEnd": 2}},
{"shinespark": {"frames": 9}},
{"cycleFrames": 730}Clears obstacles: A Farm cycle drops: 2 Space Pirate (fighting) |
From: 3
Metal Pirates Junction
To: 3
Metal Pirates Junction
Requires: {"or": [
"canHitbox",
{"obstaclesCleared": ["A"]}
]},
"h_shinechargeMaxRunway",
"h_heatedCrystalSpark" |
|
Requires: "h_heatedGMode", {"heatFrames": 45} |
|
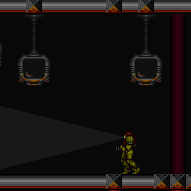

Be careful to avoid the stationary, invisible projectiles that the pirates spawn from where they jump. It is possible to exit G-mode and quicky pause abuse, to collect the pirates' drops and get to the door. Requires: "h_heatedGMode", {"or": [ {"ammo": {"type": "Super", "count": 6}}, {"ammo": {"type": "Missile", "count": 36}} ]}, {"or": [ {"heatFrames": 45}, "h_heatedGModePauseAbuse" ]} Clears obstacles: A Dev note: It is possible to enter the room in direct G-mode, kill the pirates, return to the open door, then exit G-mode and quickly touch the transition to awaken Zebes (but not get the metal pirates kill flag). This is not included, as it is a very niche knowledge check, and at that point, you might as well pause abuse to get the pirate drops and both flags. If Samus enters with 4 energy, it is also possible to collect the drops without pausing. FIXME: include a partialRefill to gain back energy from the drops (more with canDash than without). |
|
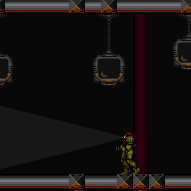

Be careful to avoid the stationary, invisible projectiles that the pirates spawn from where they jump. It is possible to exit G-mode and quicky pause abuse, to collect the pirates' drops and get to the door. Requires: "h_heatedGMode", {"or": [ "Plasma", {"and": [ "Charge", "Spazer" ]}, {"and": [ "Charge", "Wave" ]}, {"and": [ "Spazer", "Ice", "Wave" ]}, {"and": [ "canBePatient", {"or": [ {"and": [ "Charge", "Ice" ]}, {"and": [ "Spazer", "Ice" ]}, {"and": [ "Spazer", "Wave" ]} ]} ]}, {"and": [ "canBeVeryPatient", {"or": [ "Charge", "Spazer" ]} ]} ]}, {"or": [ {"heatFrames": 45}, "h_heatedGModePauseAbuse" ]} Clears obstacles: A Dev note: It is possible to enter the room in direct G-mode, kill the pirates, return to the open door, then exit G-mode and quickly touch the transition to awaken Zebes (but not get the metal pirates kill flag). This is not included, as it is a very niche knowledge check, and at that point, you might as well pause abuse to get the pirate drops and both flags. If Samus enters with 4 energy, it is also possible to collect the drops without pausing. FIXME: include a partialRefill to gain back energy from the drops (more with canDash than without). |
|
The pirates will place stationary, invisible projectiles when they jump or Samus runs through them, making that portion of the runway unusable without taking damage. To prevent this, it is important to shinecharge with only a small portion of the room to prevent the opposite pirate from placing a projectile. After shinecharging through the first pirate, stand between where it jumps, then near the end of the shinecharge timer, spark vertically with low energy to kill the pirate. It is possible to exit G-mode and quicky pause abuse, to collect the pirates' drops and get to the door. Requires: "h_heatedGMode", "canTrickyGMode", {"notable": "Speed Echoes Kill"}, {"canShineCharge": {"usedTiles": 18, "openEnd": 1}}, {"shinespark": {"frames": 9, "excessFrames": 9}}, {"shinespark": {"frames": 9, "excessFrames": 9}}, "canUseSpeedEchoes", {"or": [ {"heatFrames": 45}, "h_heatedGModePauseAbuse" ]} Clears obstacles: A Dev note: It is possible to enter the room in direct G-mode, kill the pirates, return to the open door, then exit G-mode and quickly touch the transition to awaken Zebes (but not get the metal pirates kill flag). This is not included, as it is a very niche knowledge check, and at that point, you might as well pause abuse to get the pirate drops and both flags. If Samus enters with 4 energy, it is also possible to collect the drops without pausing. FIXME: include a partialRefill to gain back energy from the drops (more with canDash than without). |
|
Requires: "h_heatedGMode", {"heatFrames": 45} |
|
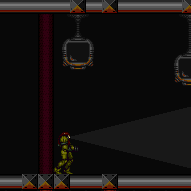

Be careful to avoid the stationary, invisible projectiles that the pirates spawn from where they jump. It is possible to exit G-mode and quicky pause abuse, to collect the pirates' drops and open the door and leave. Otherwise, it requires exiting G-mode at the left side of the room, shooting the door and returning to the right side of the room. Requires: "h_heatedGMode", {"or": [ {"ammo": {"type": "Super", "count": 6}}, {"ammo": {"type": "Missile", "count": 36}} ]}, {"or": [ {"heatFrames": 190}, "h_heatedGModePauseAbuse" ]} Clears obstacles: A Dev note: FIXME: These heat frames would be lower if both doors were locked and either could be used to set the metal pirates kill flag. It is possible to enter the room in direct G-mode, kill the pirates, return to the open door, then exit G-mode and quickly touch the transition to awaken Zebes (but not get the metal pirates kill flag). This is not included, as it is a very niche knowledge check, and at that point, you might as well pause abuse to get the pirate drops and both flags. If Samus enters with 4 energy, it is also possible to collect the drops without pausing. FIXME: include a partialRefill to gain back energy from the drops (more with canDash than without). |
|
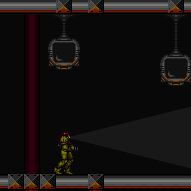

Be careful to avoid the stationary, invisible projectiles that the pirates spawn from where they jump. It is possible to exit G-mode and quicky pause abuse, to collect the pirates' drops and open the door and leave. Otherwise, it requires exiting G-mode at the left side of the room, shooting the door and returning to the right side of the room. Requires: "h_heatedGMode", {"or": [ "Plasma", {"and": [ "Charge", "Spazer" ]}, {"and": [ "Charge", "Wave" ]}, {"and": [ "Spazer", "Ice", "Wave" ]}, {"and": [ "canBePatient", {"or": [ {"and": [ "Charge", "Ice" ]}, {"and": [ "Spazer", "Ice" ]}, {"and": [ "Spazer", "Wave" ]} ]} ]}, {"and": [ "canBeVeryPatient", {"or": [ "Charge", "Spazer" ]} ]} ]}, {"or": [ {"heatFrames": 190}, "h_heatedGModePauseAbuse" ]} Clears obstacles: A Dev note: FIXME: These heat frames would be lower if both doors were locked and either could be used to set the metal pirates kill flag. It is possible to enter the room in direct G-mode, kill the pirates, return to the open door, then exit G-mode and quickly touch the transition to awaken Zebes (but not get the metal pirates kill flag). This is not included, as it is a very niche knowledge check, and at that point, you might as well pause abuse to get the pirate drops and both flags. If Samus enters with 4 energy, it is also possible to collect the drops without pausing. FIXME: include a partialRefill to gain back energy from the drops (more with canDash than without). |
|
The pirates will place stationary, invisible projectiles when they jump or Samus runs through them, making that portion of the runway unusable without taking damage. To prevent this, it is important to shinecharge with only a small portion of the room to prevent the opposite pirate from placing a projectile. After shinecharging through the first pirate, stand between where it jumps, then near the end of the shinecharge timer, spark vertically with low energy to kill the pirate. It is possible to exit G-mode and quicky pause abuse, to collect the pirates' drops and open the door and leave. Otherwise, it requires exiting G-mode at the left side of the room, shooting the door and returning to the right side of the room. Requires: "h_heatedGMode", "canTrickyGMode", {"notable": "Speed Echoes Kill"}, {"canShineCharge": {"usedTiles": 18, "openEnd": 1}}, {"shinespark": {"frames": 9, "excessFrames": 9}}, {"shinespark": {"frames": 9, "excessFrames": 9}}, "canUseSpeedEchoes", {"or": [ {"heatFrames": 190}, "h_heatedGModePauseAbuse" ]} Clears obstacles: A Dev note: FIXME: These heat frames would be lower if both doors were locked and either could be used to set the metal pirates kill flag. It is possible to enter the room in direct G-mode, kill the pirates, return to the open door, then exit G-mode and quickly touch the transition to awaken Zebes (but not get the metal pirates kill flag). This is not included, as it is a very niche knowledge check, and at that point, you might as well pause abuse to get the pirate drops and both flags. If Samus enters with 4 energy, it is also possible to collect the drops without pausing. FIXME: include a partialRefill to gain back energy from the drops (more with canDash than without). |